Magic Ring (Adjustable Ring)
The adjustable ring—also known as the magic ring—is one of the most popular ways to start a crochet project because it’s so easy to do. Want to know how it works? We’ll show you how, and with a little practice, it’ll be a breeze. The magic ring is especially great for projects worked in the round, like a hat.
As an alternative to the magic ring, beginners may want to start with the starting ring made from chain stitches.
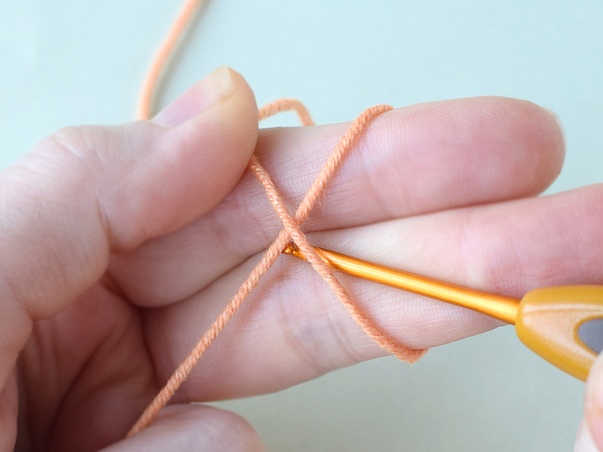
To start the magic ring, the yarn tail needs to point downward.
Next, wrap the yarn once around the index, middle, and ring fingers of your left hand to form a loop. Then slip all your fingers out of the loop.
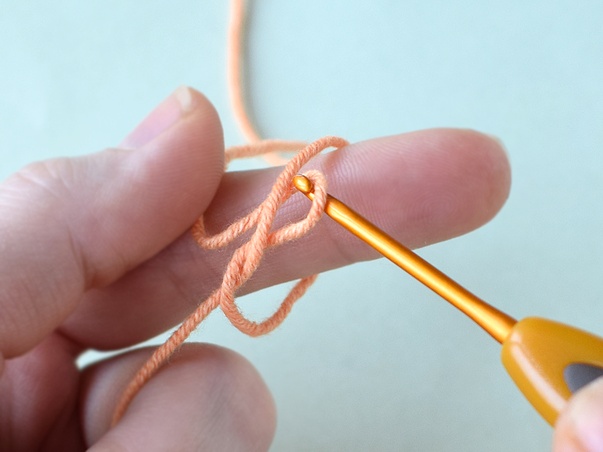

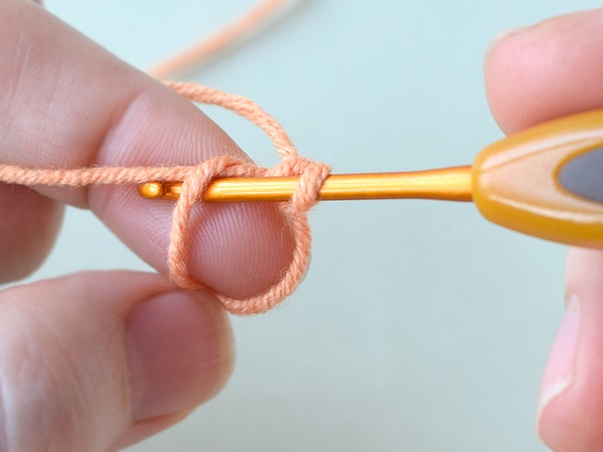
After you’ve pulled your fingers out of the loop, it’s important to hold the loop firmly between your thumb and index finger exactly at the spot where the strands cross. Now place the working yarn between your middle and ring fingers to hold it lightly in place.
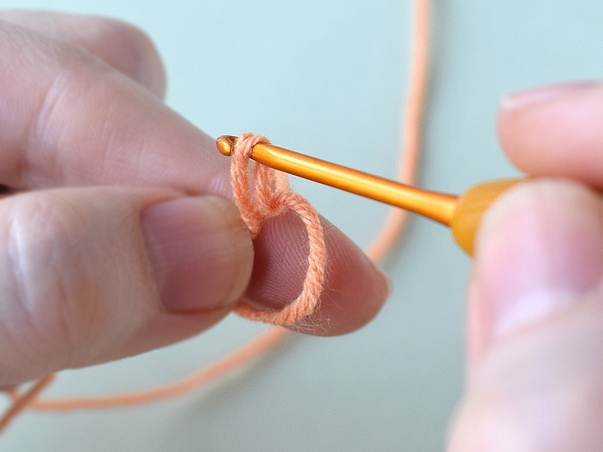

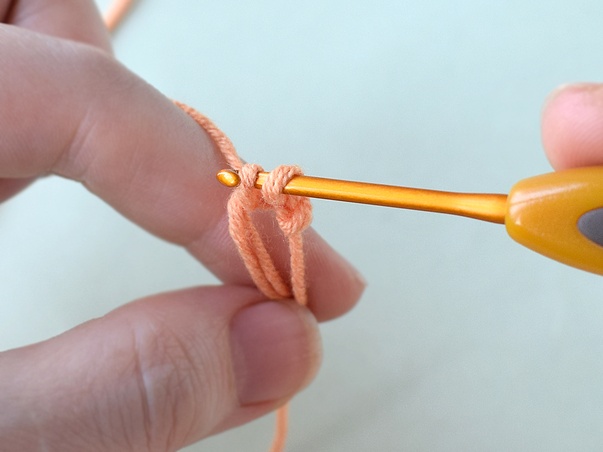
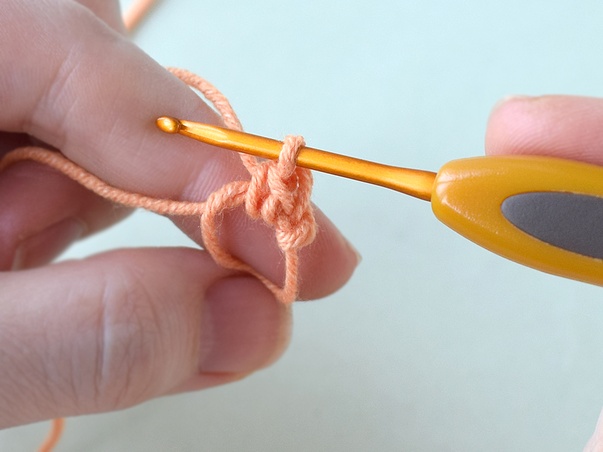
Next, insert your crochet hook into the first loop, yarn over, and pull up a loop, drawing it a bit larger.
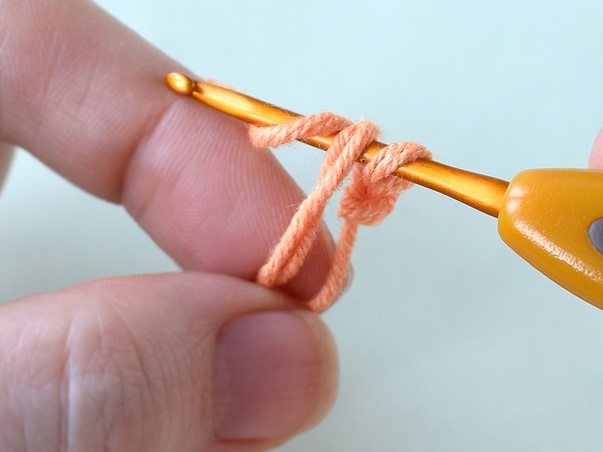
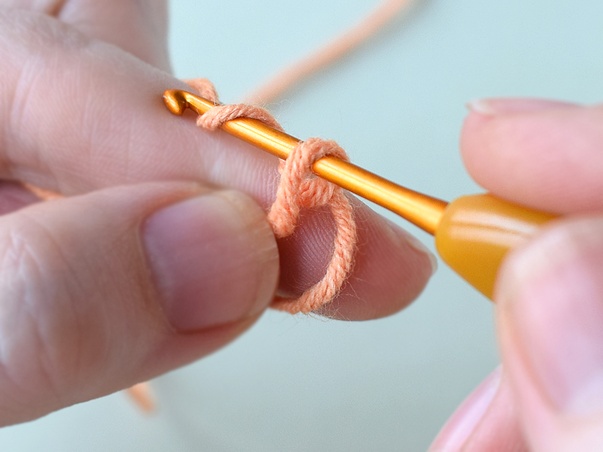
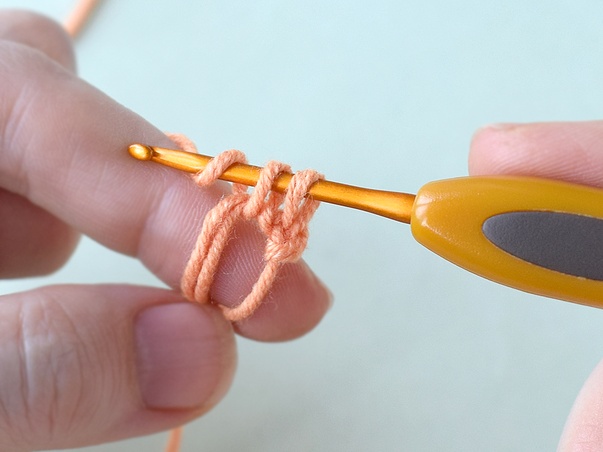
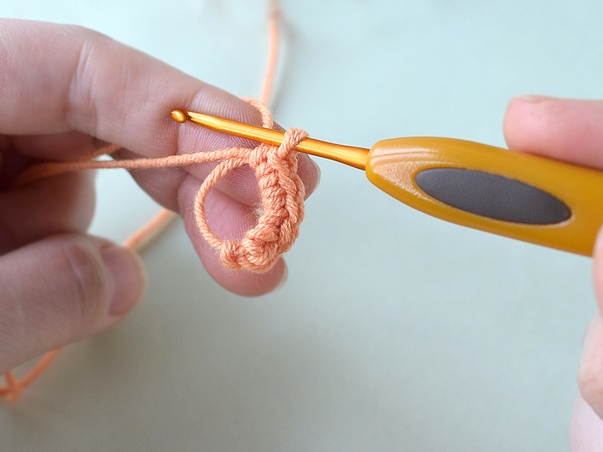
In the next step, yarn over again and pull it through the loop on the crochet hook to create the starting chain stitch. Now you can crochet your stitches as usual.
Once you’ve reached the required number of stitches, pull on the yarn tail to close the ring tightly.
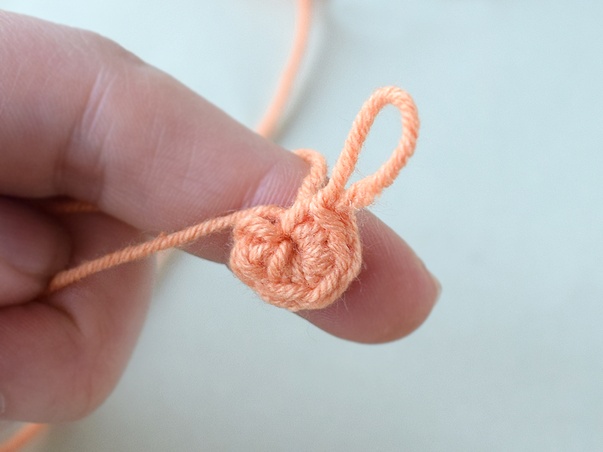
Now you just need to close the round as usual.