Small amigurumi projects are perfect when you want a cute result in a short amount of time. This crochet avocado keychain is not only adorable but also a fantastic scrap-yarn project. With its cheerful face and tiny limbs, the avocado comes to life and becomes a fun little companion for your keys or bag. It also makes a great handmade gift for friends, family members, or just for yourself.
Thanks to its compact size, you can easily finish this project on a single evening. It also requires only small amounts of yarn, making it perfect for using up leftover yarn from other crochet projects.
The pattern guides you step by step through all the parts: the hanging loop, arms, legs, and body. A particularly convenient feature is that the arms, legs, and the loop are crocheted directly onto the body, which means you won't have any sewing to do later.
Notes Before You Start
The pattern is mostly worked in continuous rounds unless stated otherwise. Using a stitch marker is highly recommended to keep track of the beginning of each round.
Using the materials listed, the finished avocado measures approximately 6 cm (about 2.4 inches) in height when sitting, not including the hanging loop. The final size may vary slightly depending on yarn choice, hook size, and individual tension.
Materials
- 2.5 mm crochet hook
- Cotton yarn (approx. 125 m / 50 g)
- approx. 10 g dark green (skin)
- approx. 5 g light green (flesh)
- approx. 5 g light brown (pit)
- small amounts of black and white yarn for embroidering the face
- Stitch marker
- Sewing pins for marking the positions for embroidering the face
- Scissors
- Yarn needle
- Fiberfill
Optional:
- Key ring for attaching the avocado to your keys.
Abbreviations (US Terms)
| Rnd | - | round |
| ch | - | chain |
| sc | - | single crochet |
| MR | - | magic ring |
| inc | - | increase (2 sc in 1 stitch) |
| dec | - | (invisible) decrease |
| FLO | - | only work into front loops |
| [...] xn | - | repeat instructions in brackets [ ] n times |
Instructions
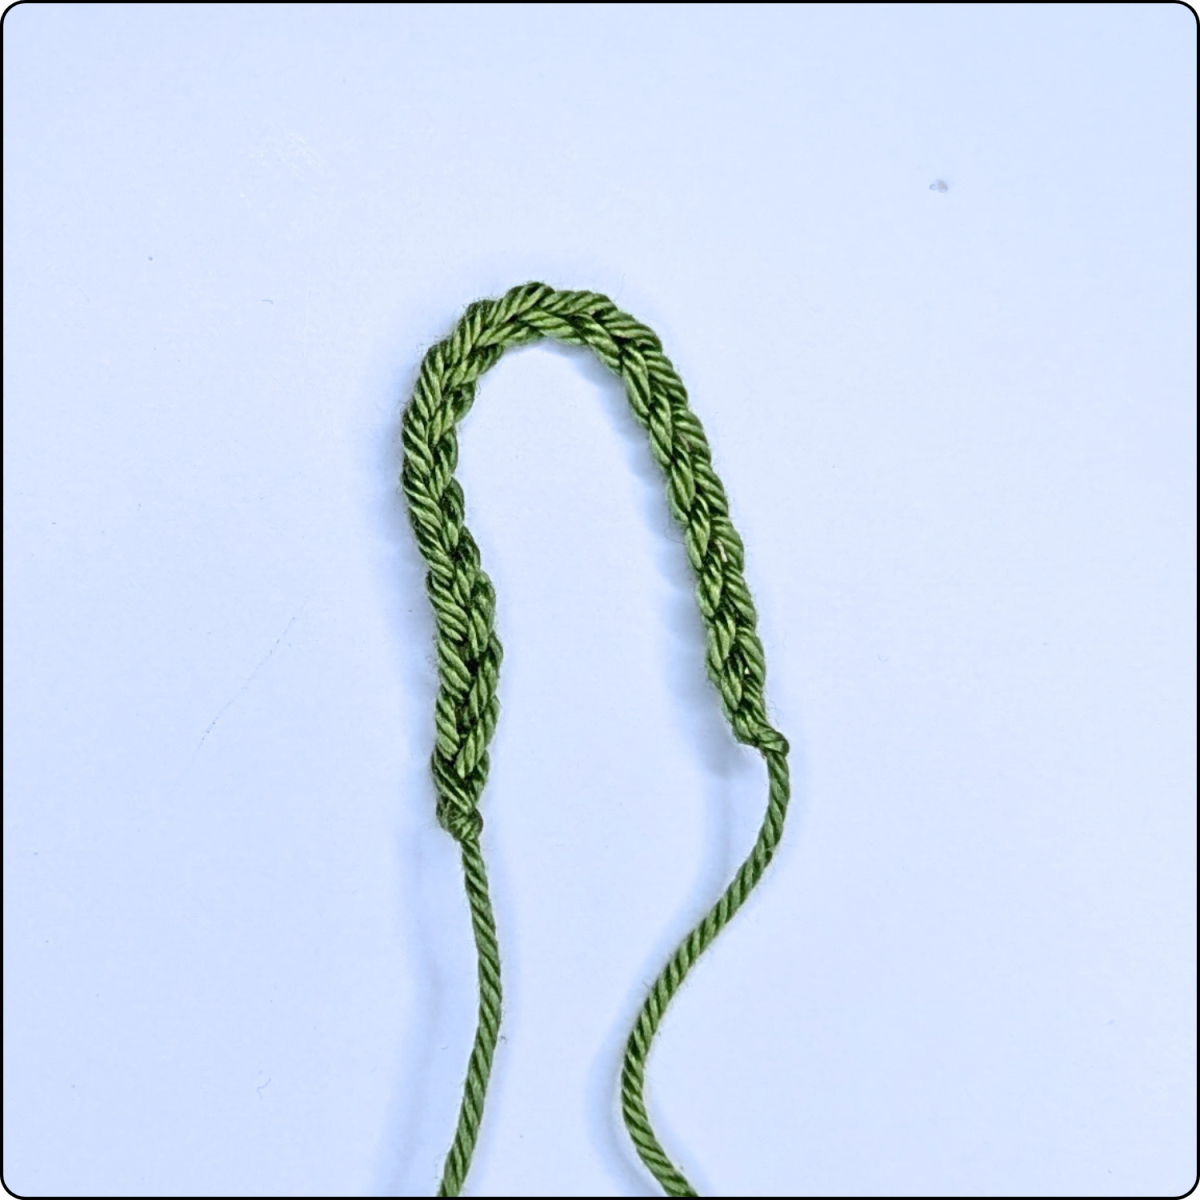
Hanging Loop
Start with dark green.
Ch 20. Fasten off and pull the yarn through the last stitch to secure.
Arms (make 2)
Start with dark green yarn and work in rows.
Ch 8. Then starting in the 2nd stitch from hook:
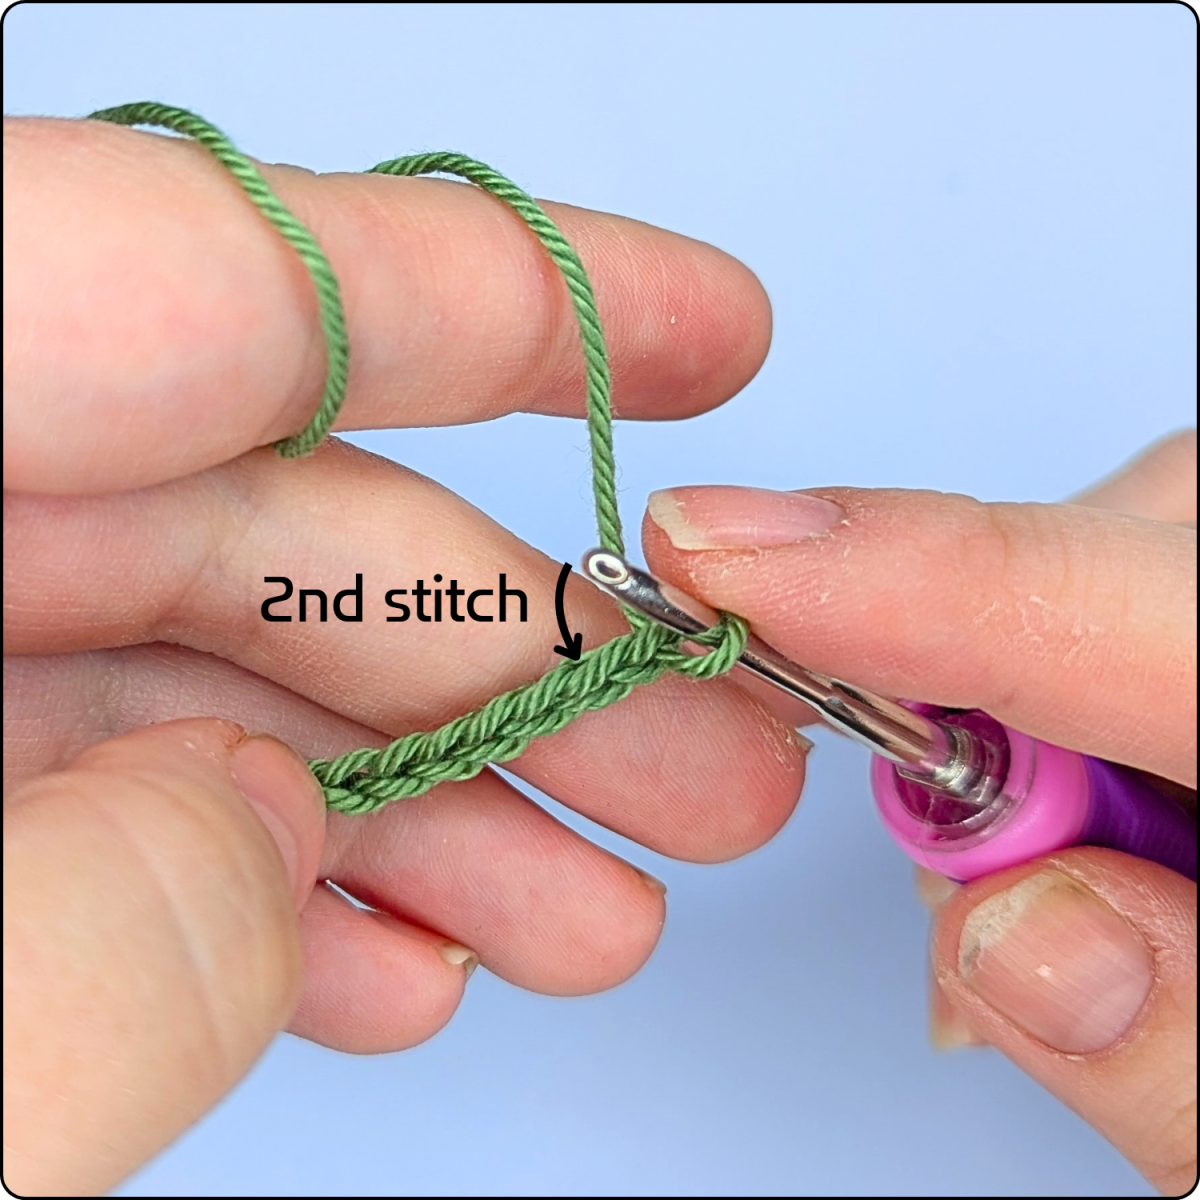
| Row 1: | 7 sc | (7) |
| Row 2: | ch 1, turn, 7 sc | (7) |
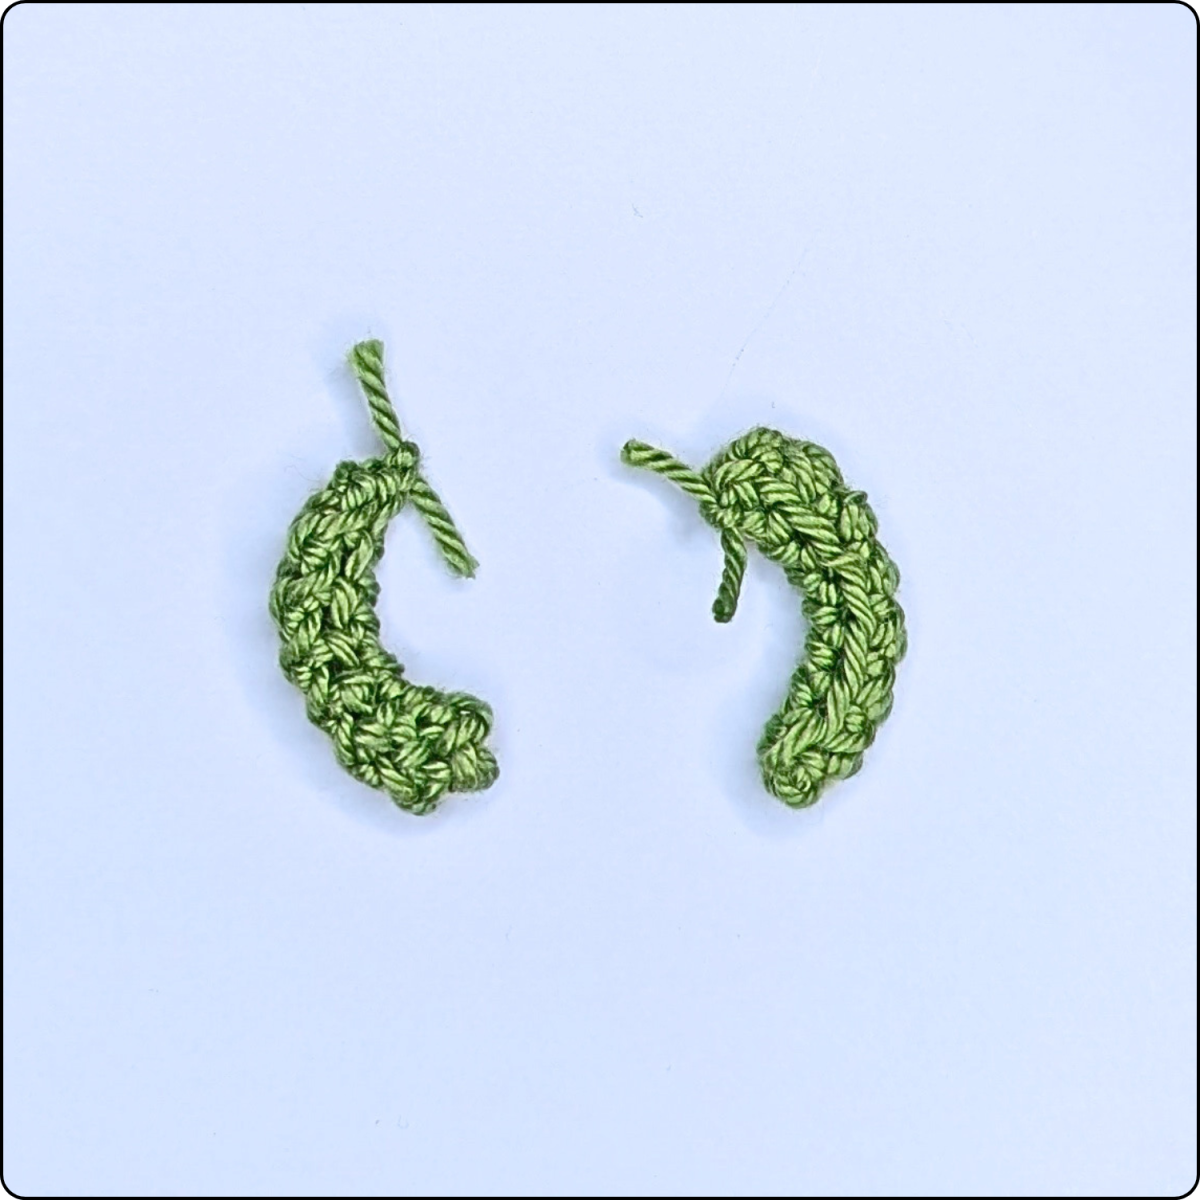
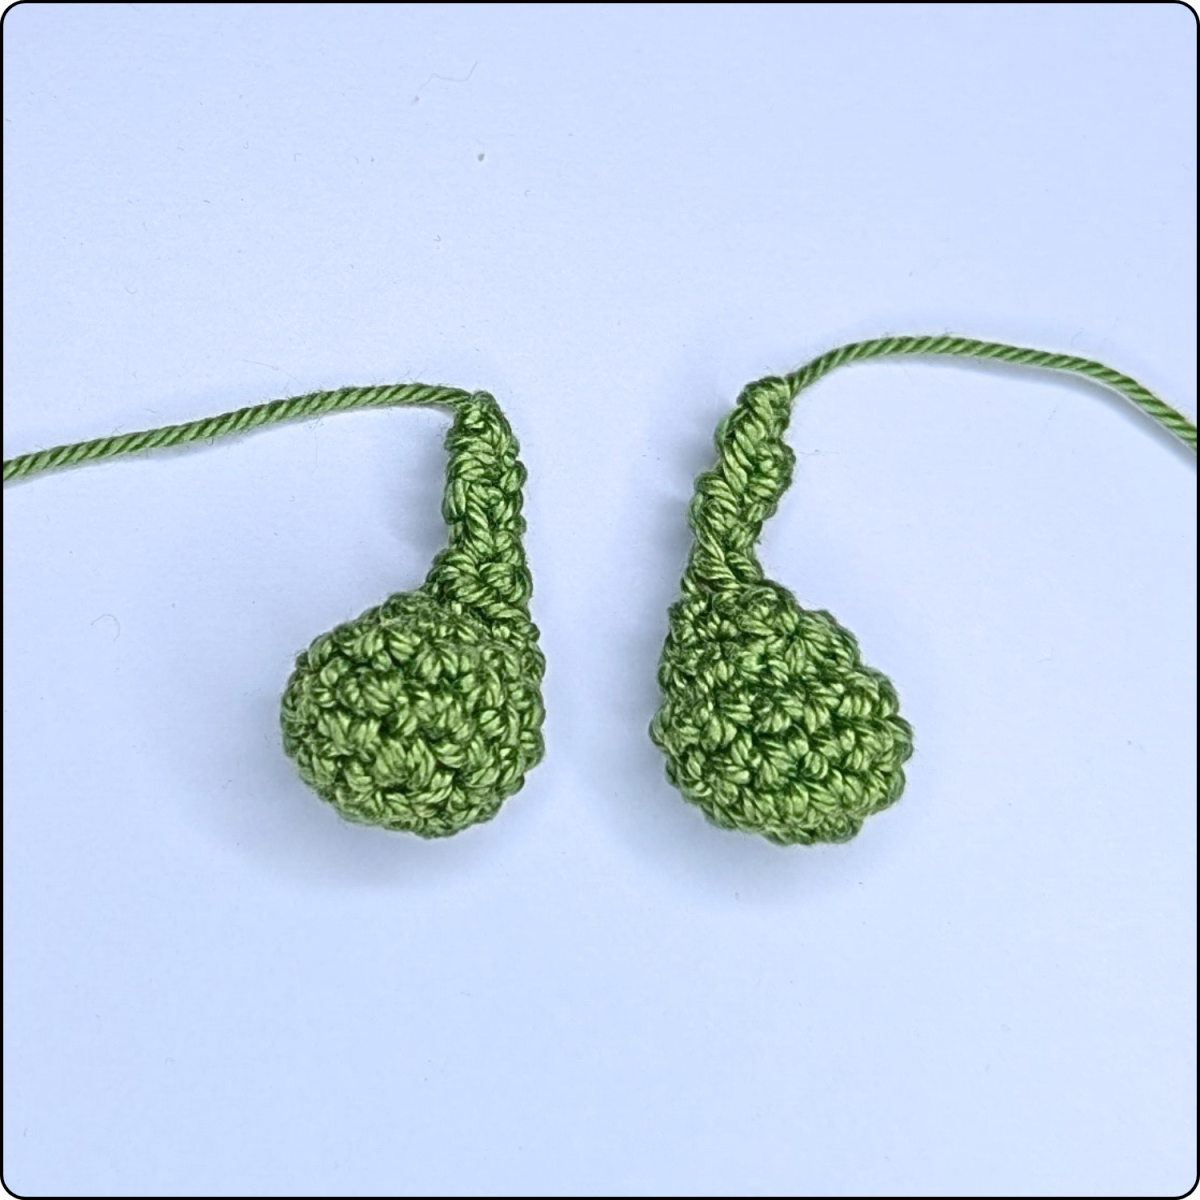
Fasten off leaving a long tail. Fold the arm lengthwise and sew it closed using the yarn tail. Tie the starting tail and ending tail together with a double knot and trim the yarn ends, leaving about 5 mm behind the knot.
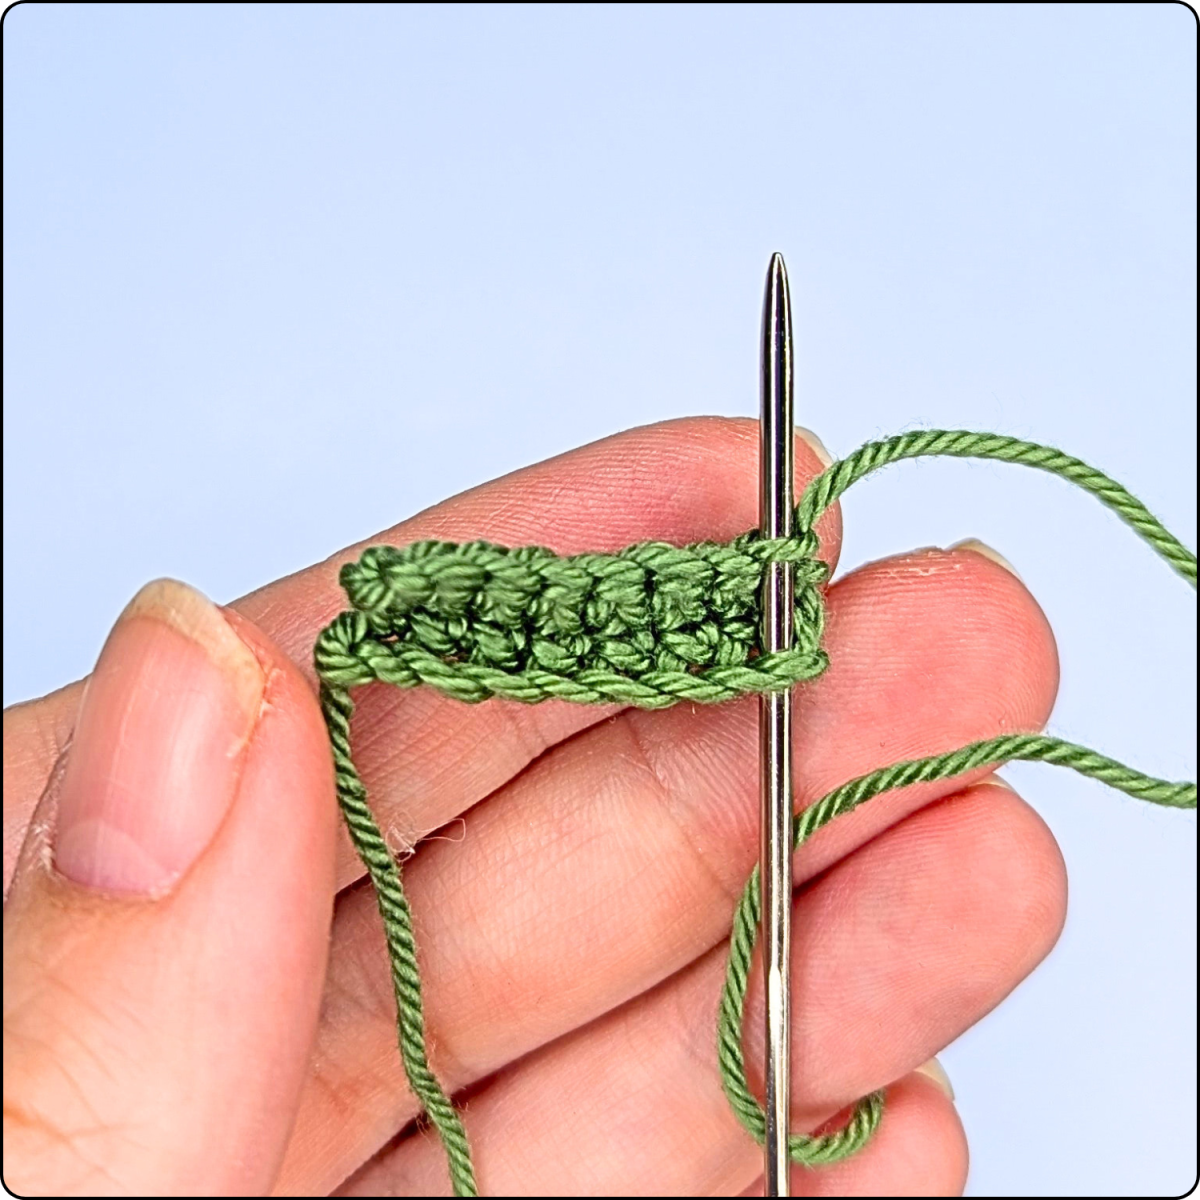

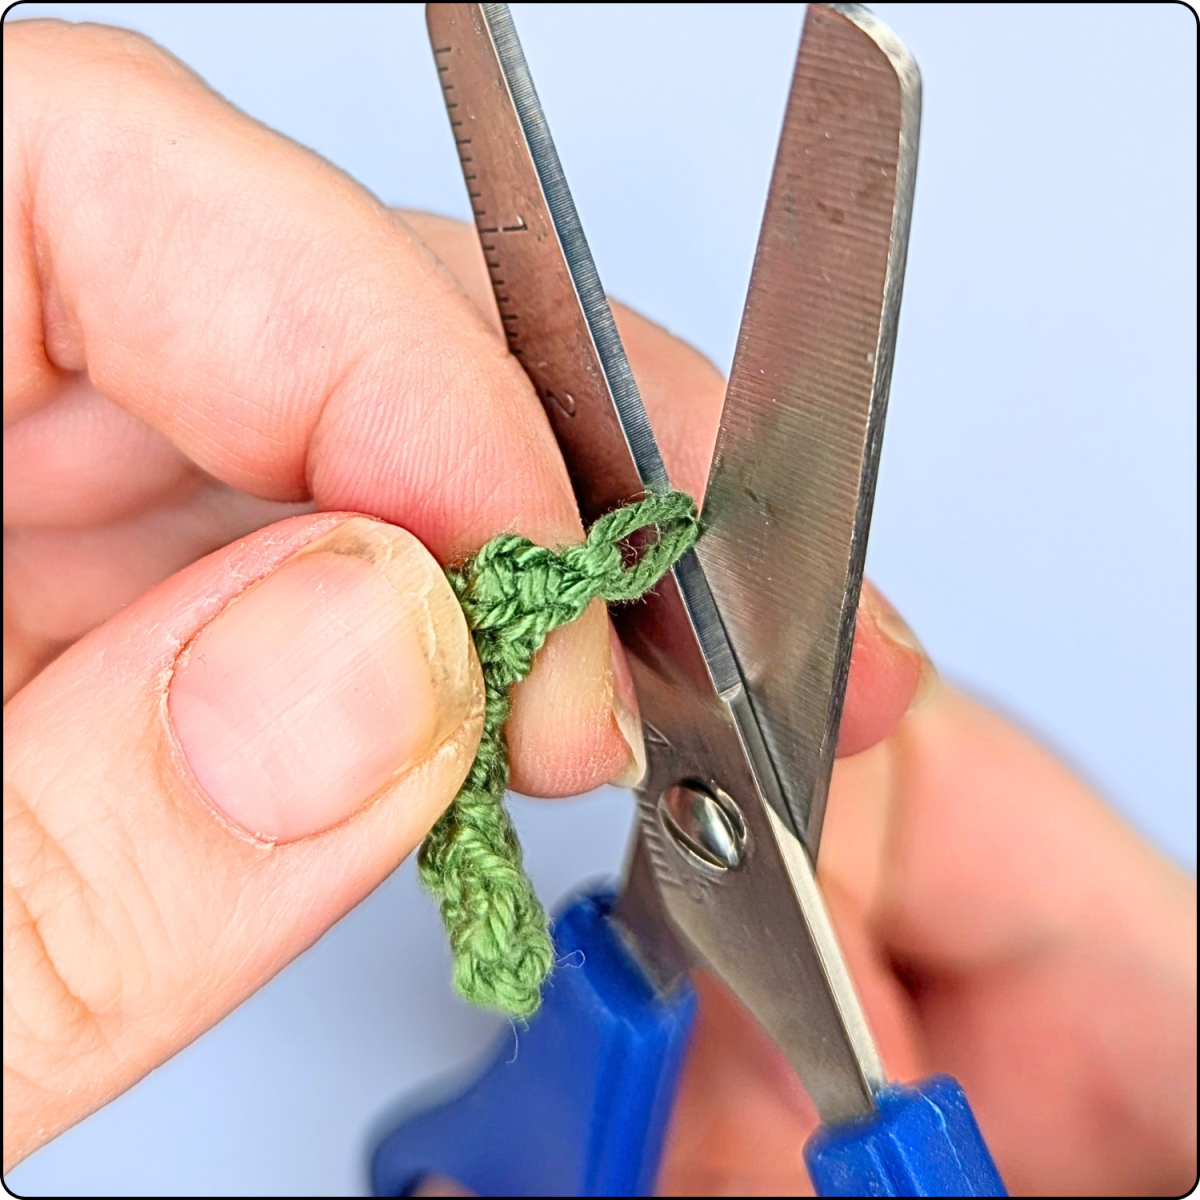
The finished arms should look like this:
Legs (make 2)
Start with dark green yarn.
| Rnd 1: | 6 sc in MR | (6) |
| Rnd 2: | 6 inc | (12) |
| Rnd 3-4: | 12 sc | (12) |
| Rnd 5: | 6 dec | (6) |
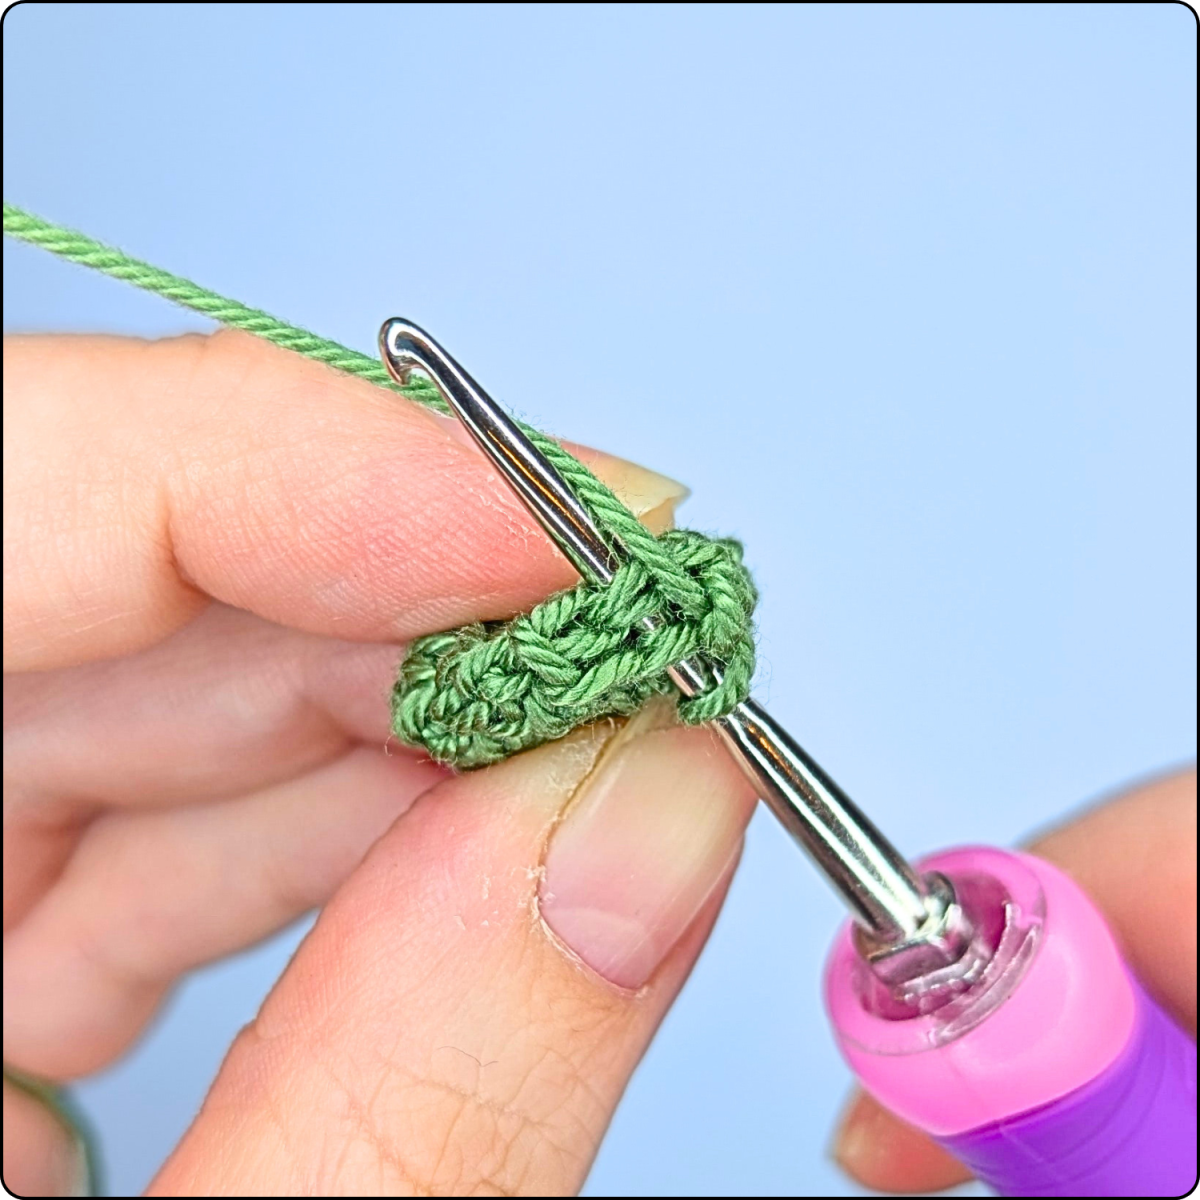
Do not stuff the foot. Hide the starting yarn tail inside the piece. Then flatten the top opening and close it with 2 sc through both layers:
Continue working in rows:
| Row 1: | ch 1, turn, dec | (1) |
| Row 2-4: | ch 1, turn, sc | (1) |
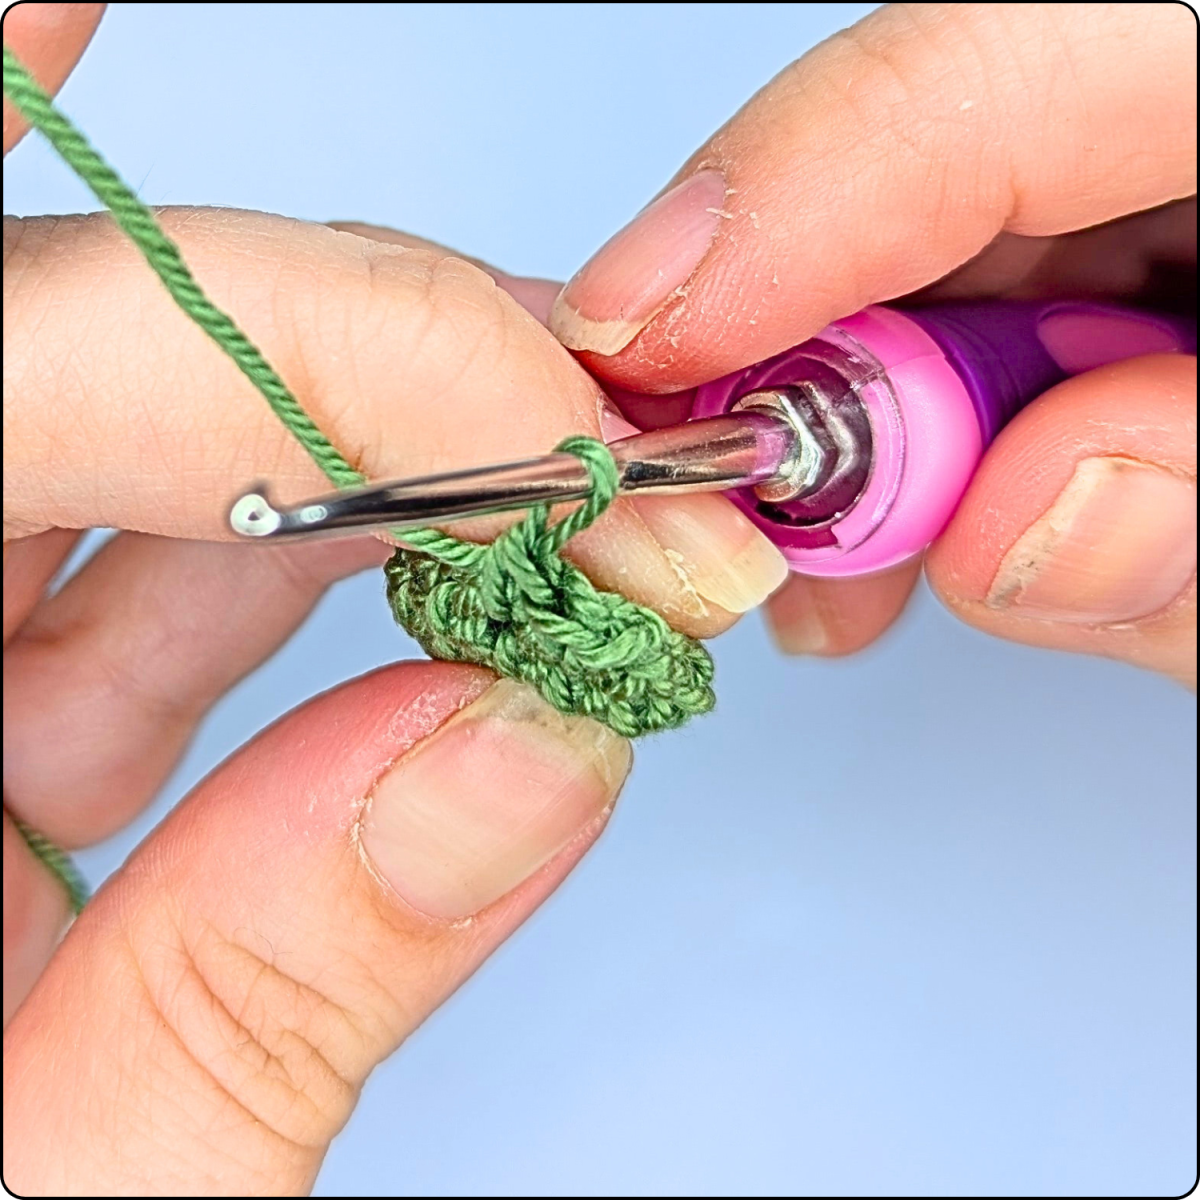
Fasten off, cut the yarn and pull it through the last stitch. Secure the yarn with a double knot:
The finished legs should look like this:
Body
Start with light brown yarn (avocado pit).
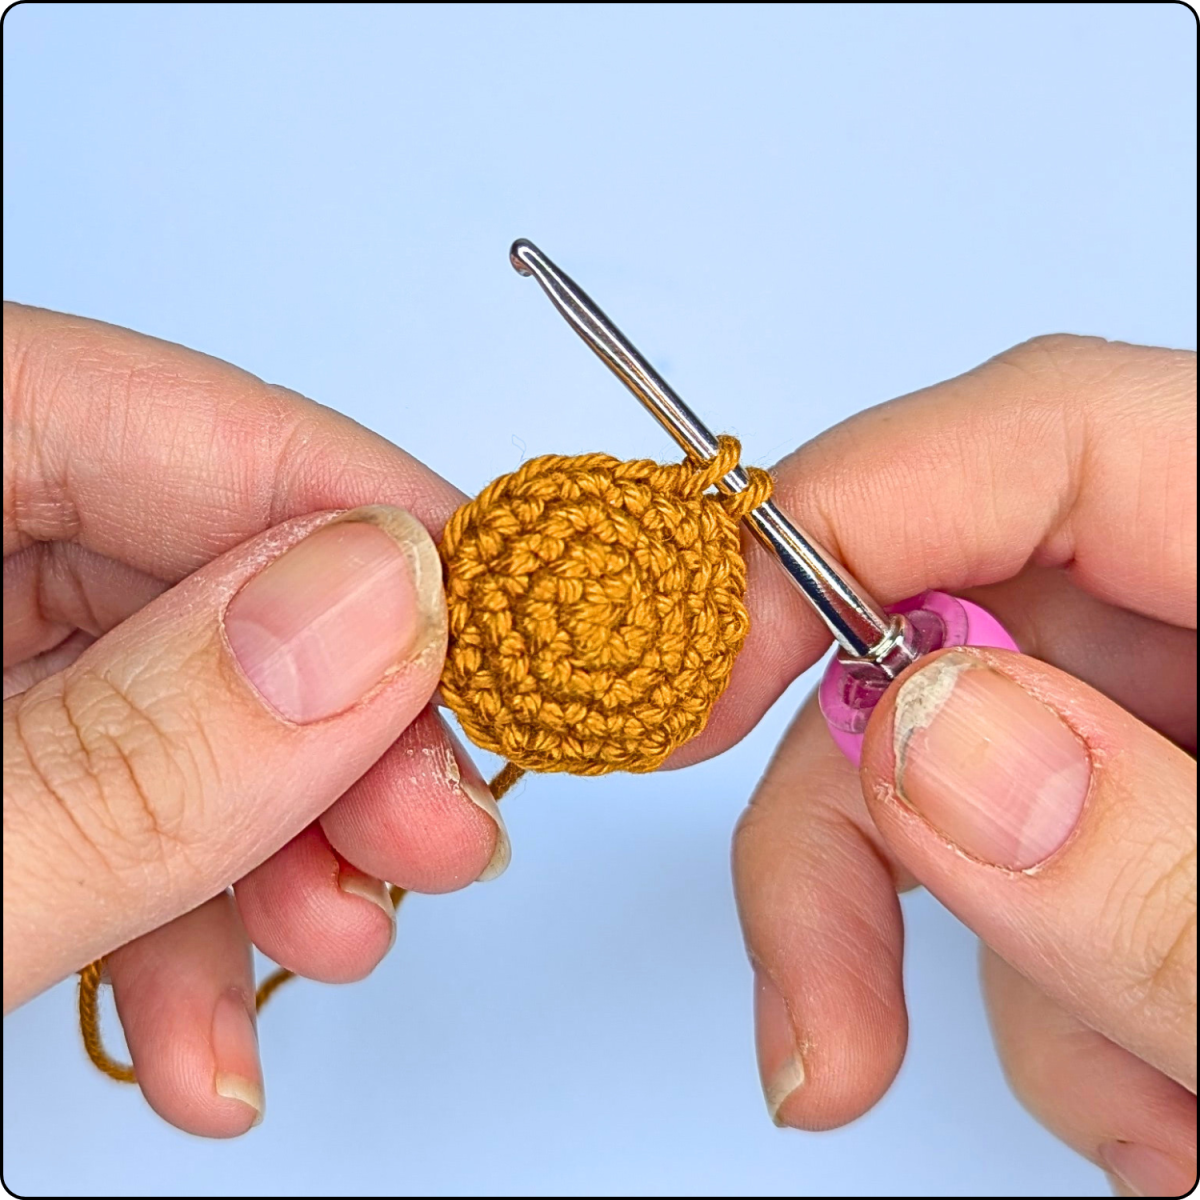
| Rnd 1: | 6 sc in MR | (6) |
| Rnd 2: | 6 inc | (12) |
| Rnd 3: | [sc, inc] x6 | (18) |
| Rnd 4: | 18 sc | (18) |
Change to light green yarn:
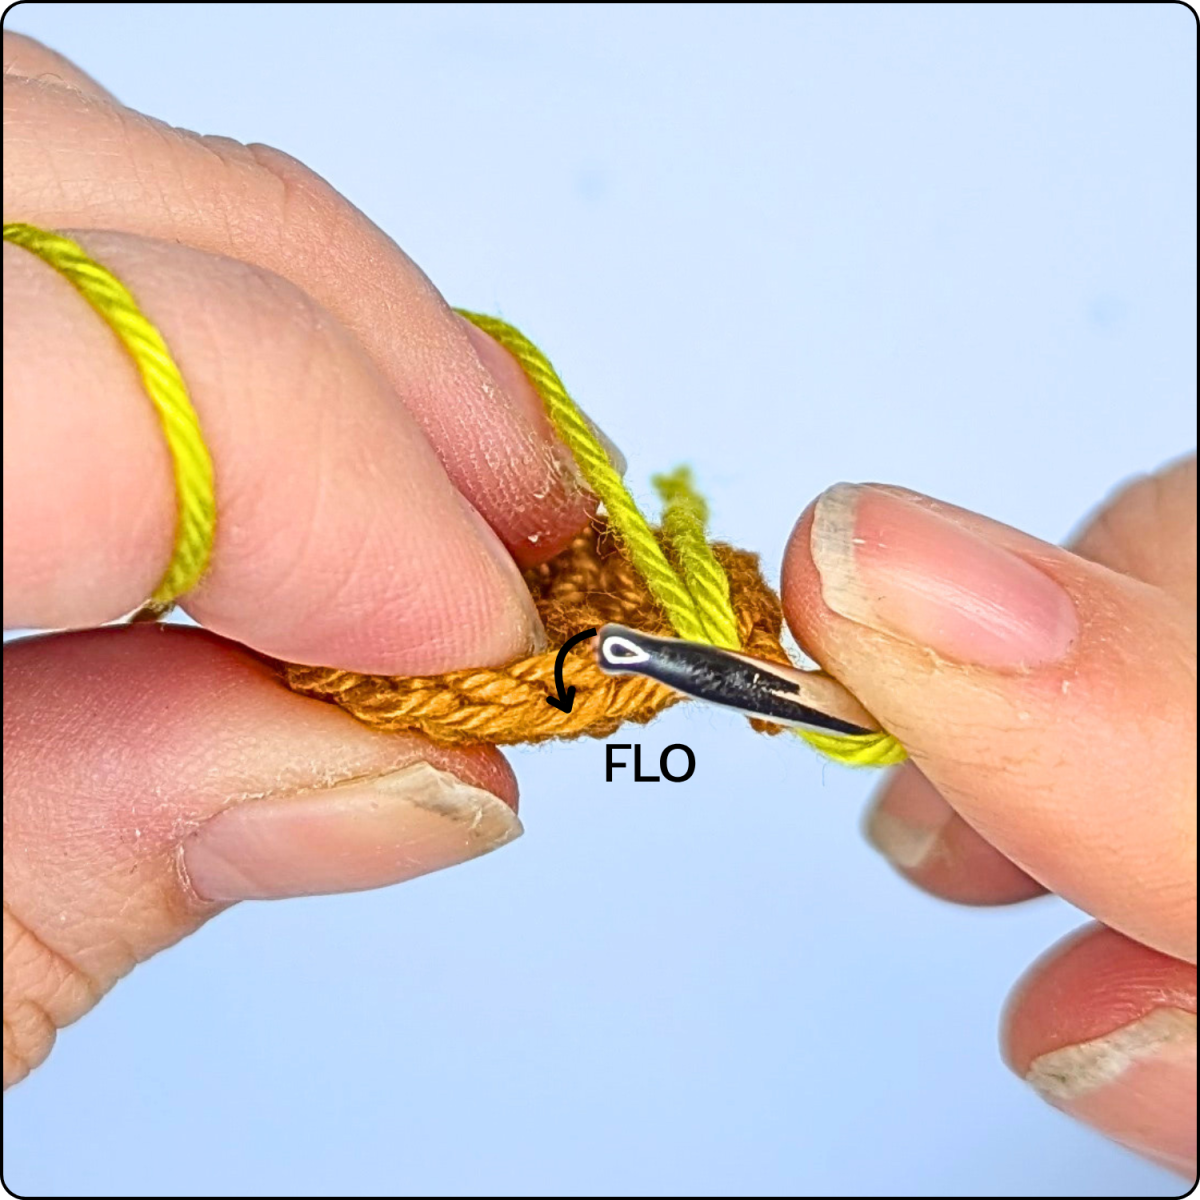
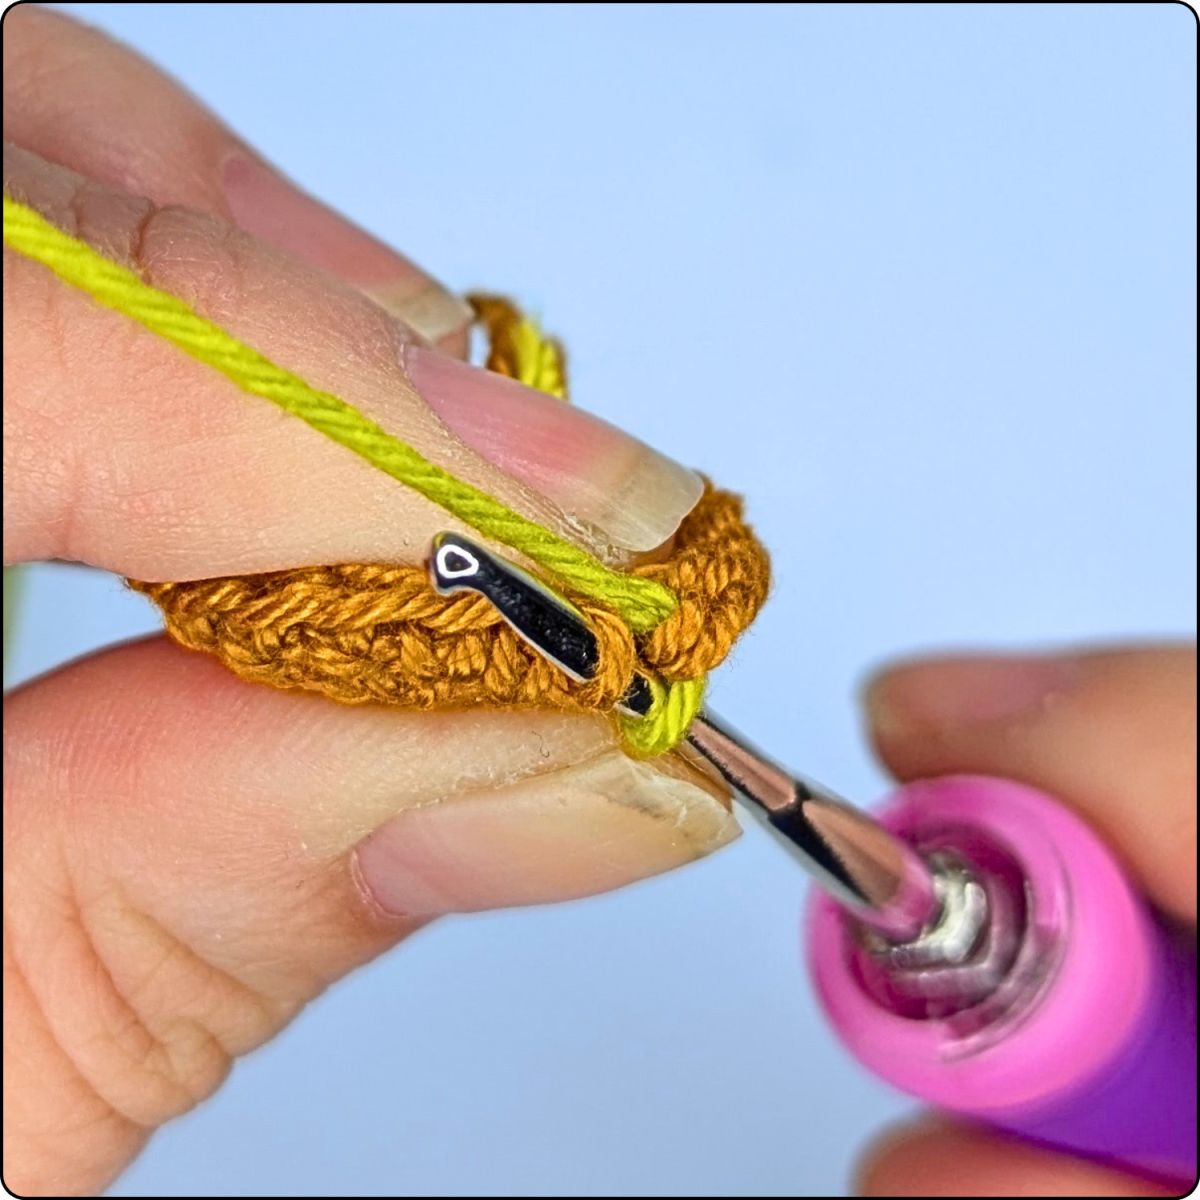
| Rnd 5: | FLO: [inc, 2 sc] x6 | (24) |
| Rnd 6: | [2 sc, inc] x8 | (32) |
To create the typical avocado shape, now you have to switch to working in rows:
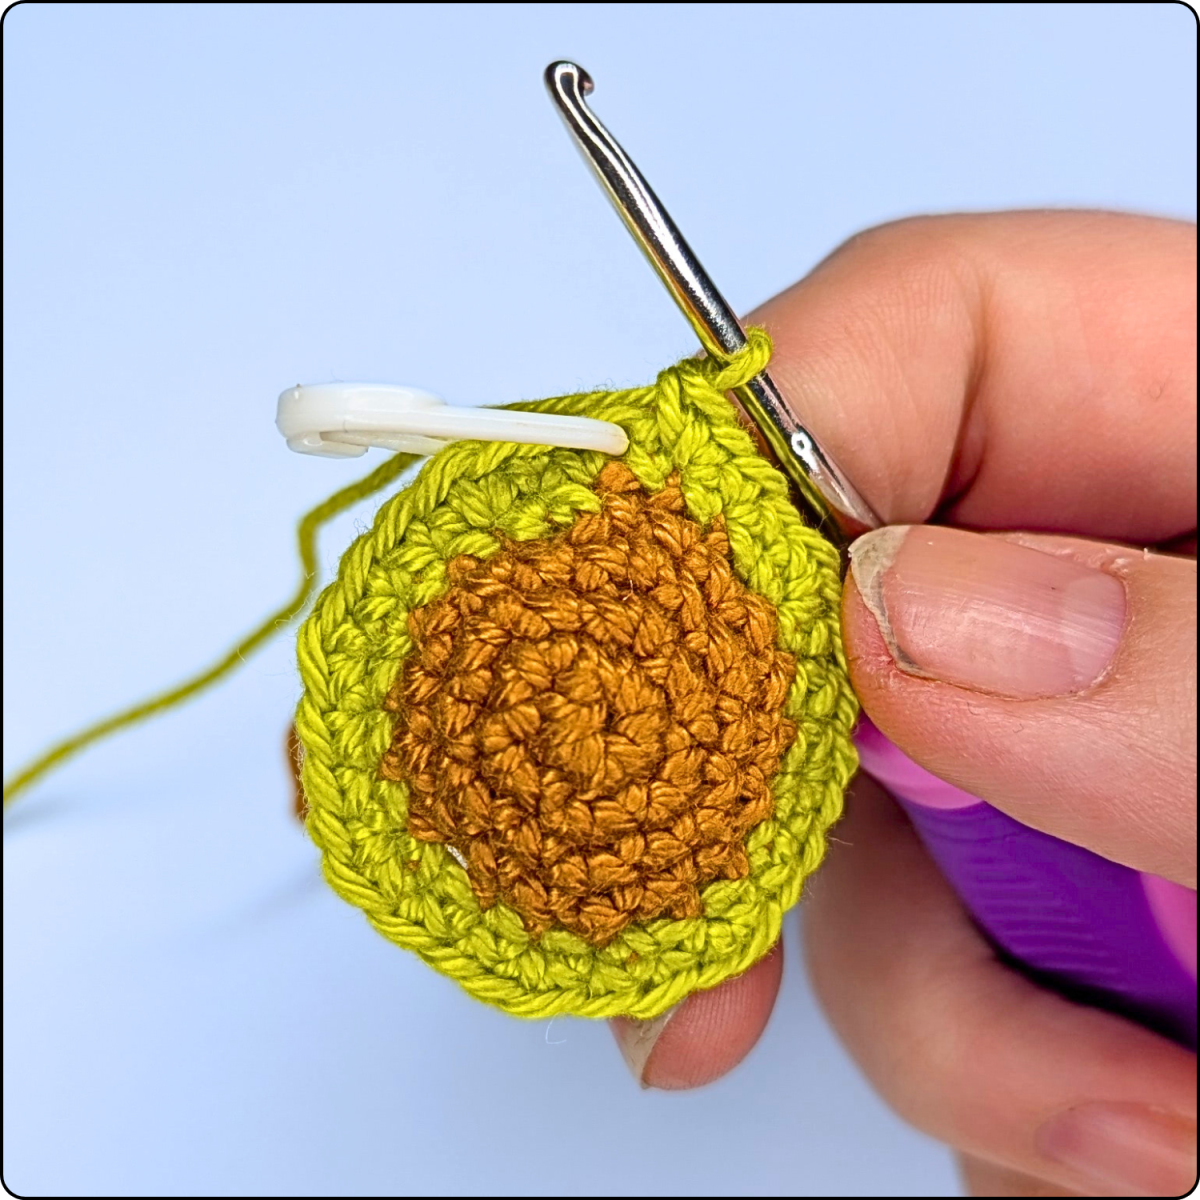
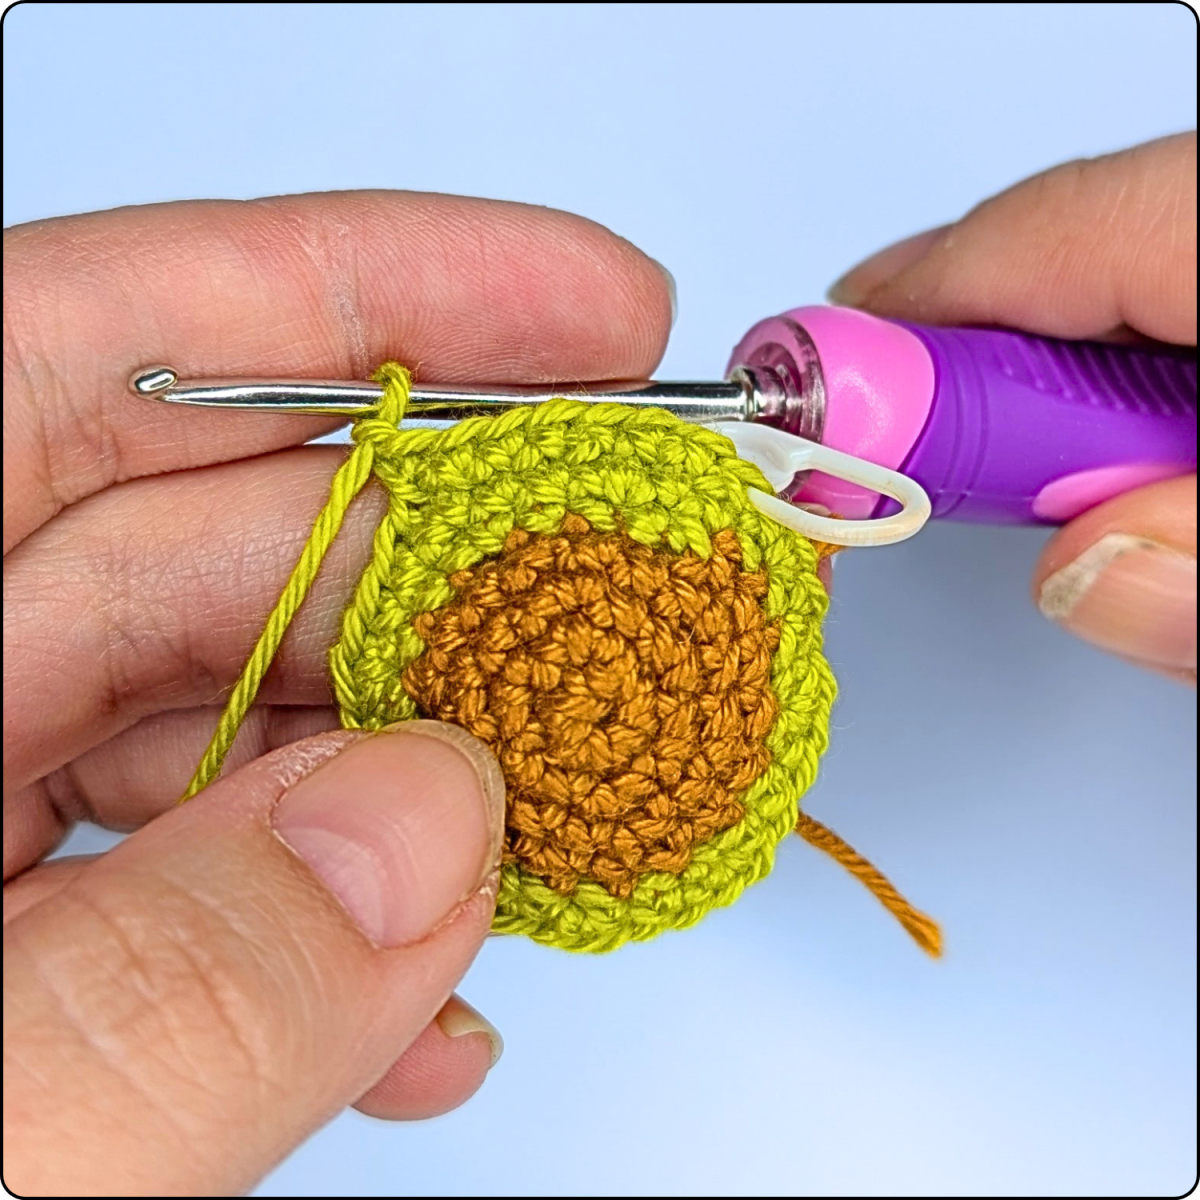

| Row 1: | 8 sc | (8) |
| Row 2: | ch 1, turn, 8 sc | (8) |
| Row 3: | ch 1, turn, dec, 4 sc, dec | (6) |
| Row 4: | ch 1, turn, 6 sc | (6) |
| Row 5: | ch 1, turn, dec, 2 sc, dec | (4) |
| Row 6: | ch 1, turn, 4 sc | (4) |
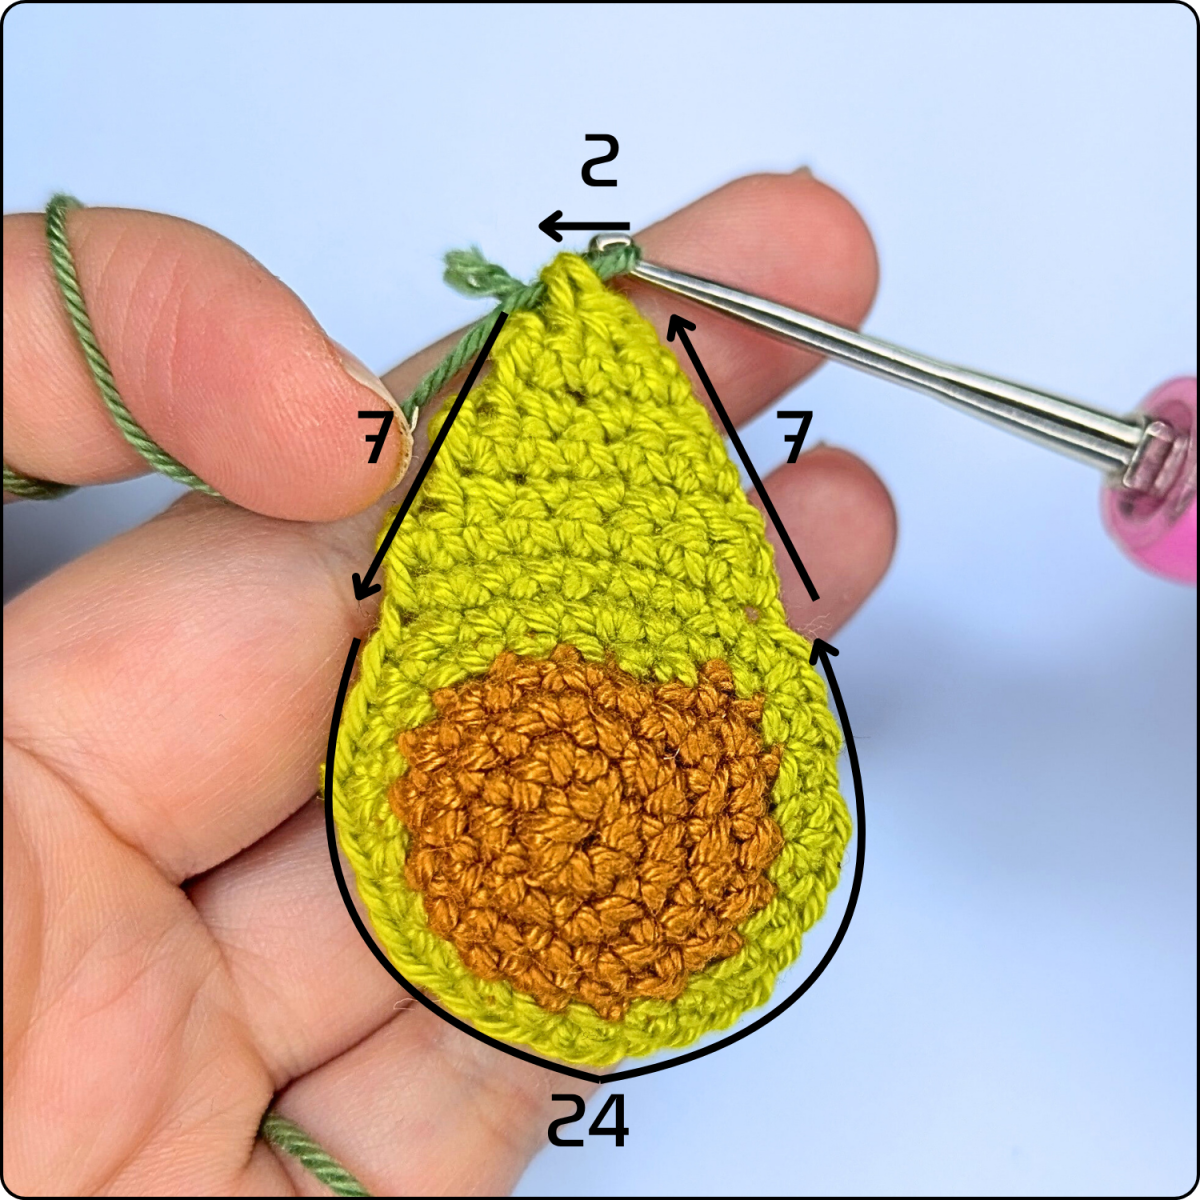
| Row 7: | ch 1, 2 dec | (2) |
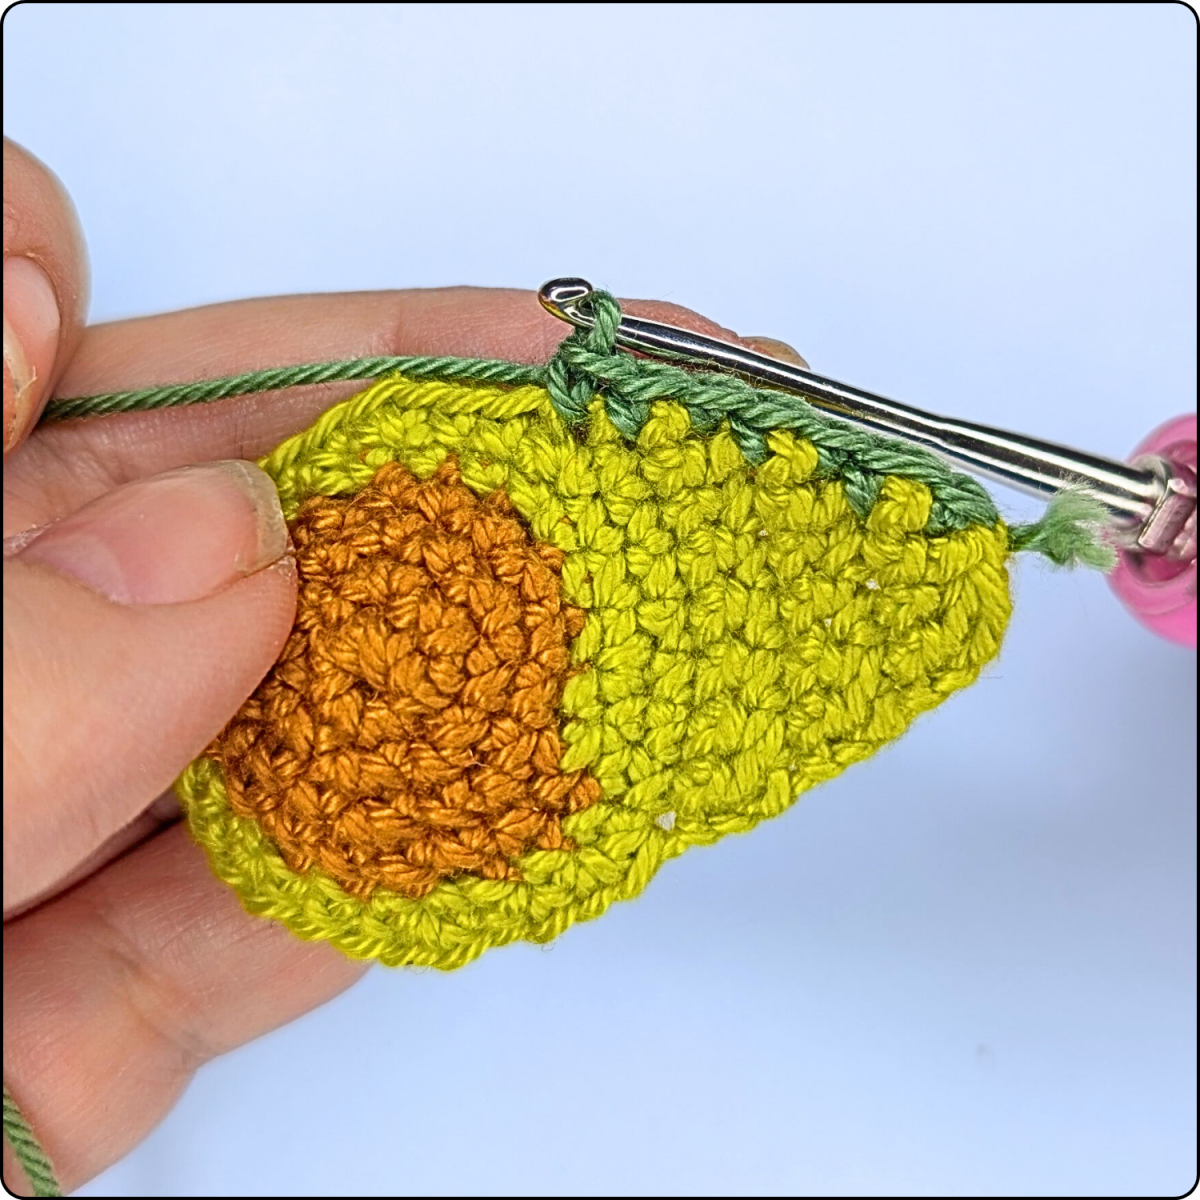
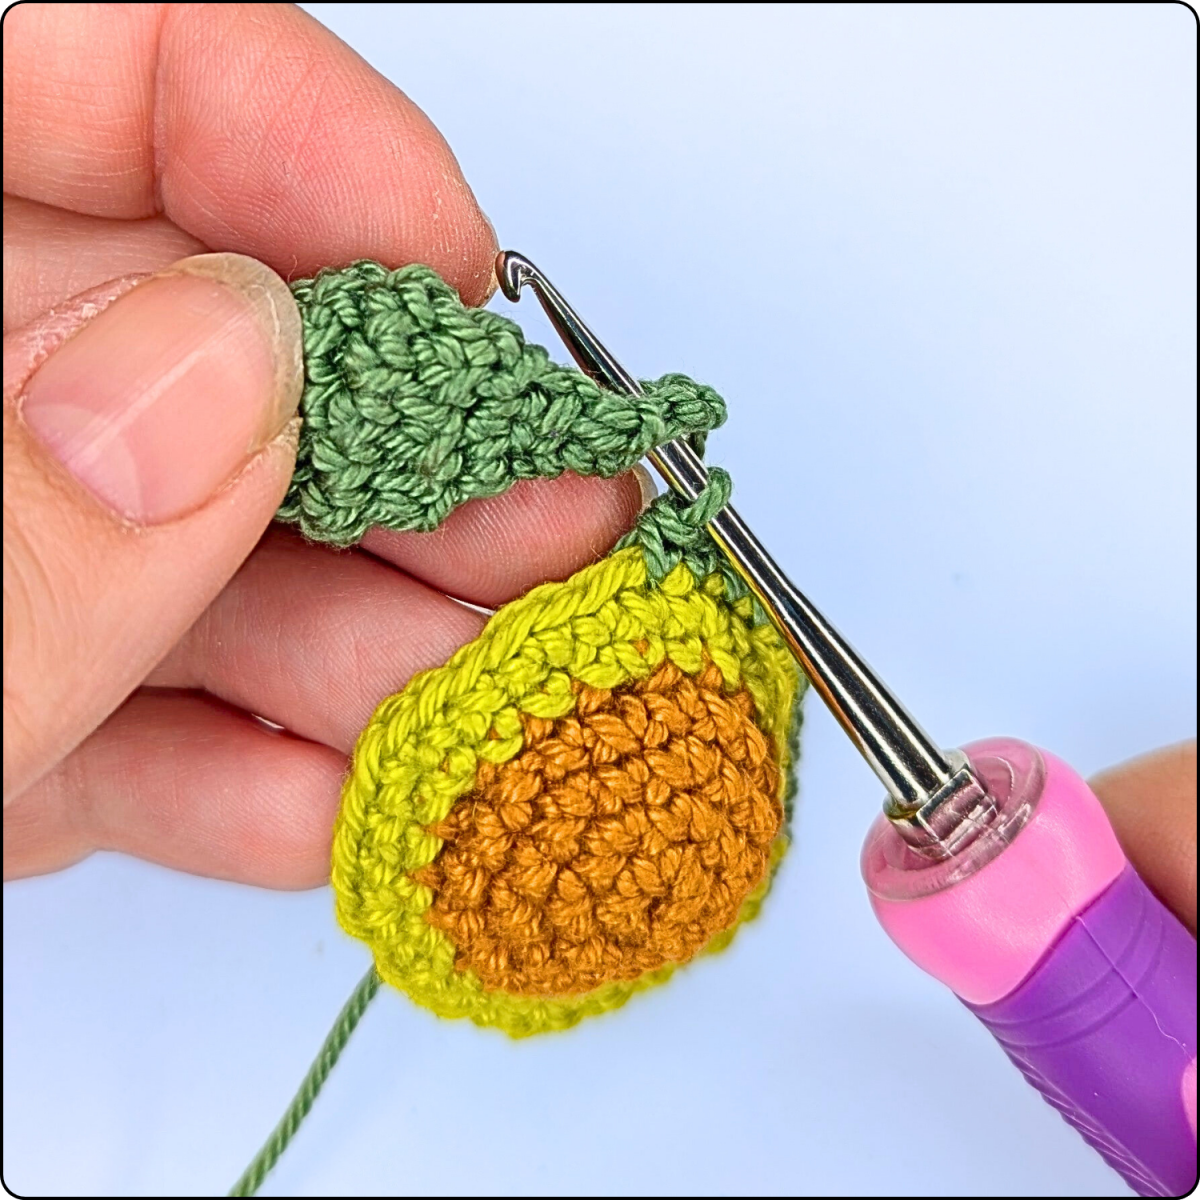
Change to dark green yarn, ch 1, and continue working in continuous rounds. The 40 stitches of the next round are distributed as follows:
In this round, the legs are crocheted directly onto the body. Therefore, insert the hook through the top edge of the leg, then through the next stitch of the body. Pull the yarn through both stitches and complete the single crochet as usual.
Please note: Due to individual factors such as personal tension, the exact positioning body parts may vary slightly. If necessary, adjust the placement accordingly. The same applies to the arms and the hanging loop that will be attached in the following rounds.
| Rnd 1: | 16 sc, sc with leg 1, 3 sc, sc with leg 2, 19 sc | (40) |
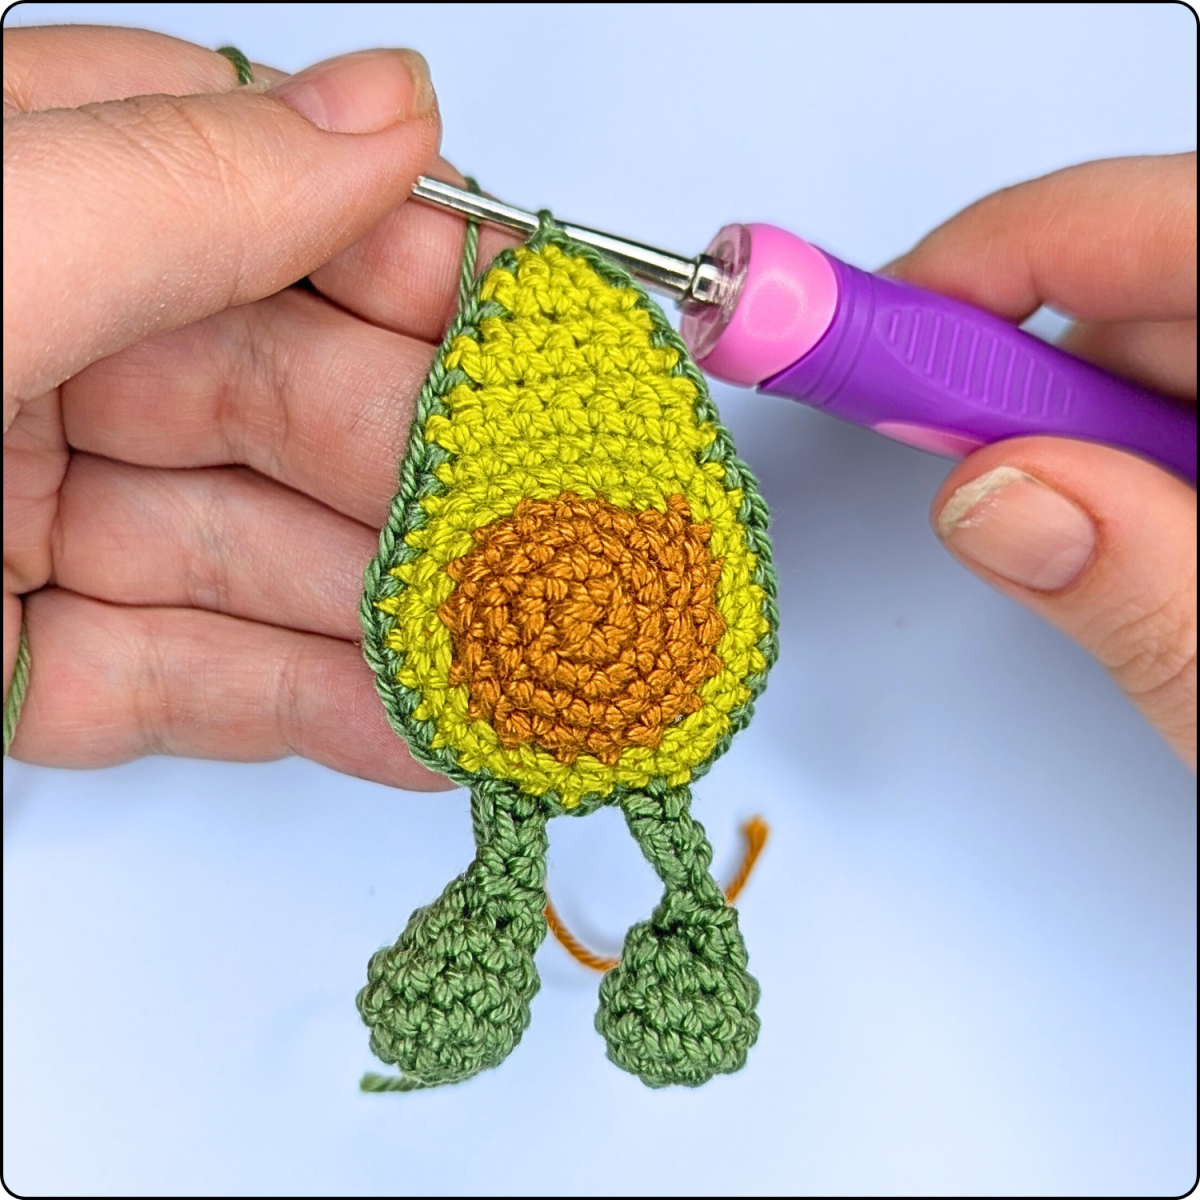
After this round your avocado should look like this:
| Rnd 2: | inc, 36, inc, 2 sc | (42) |
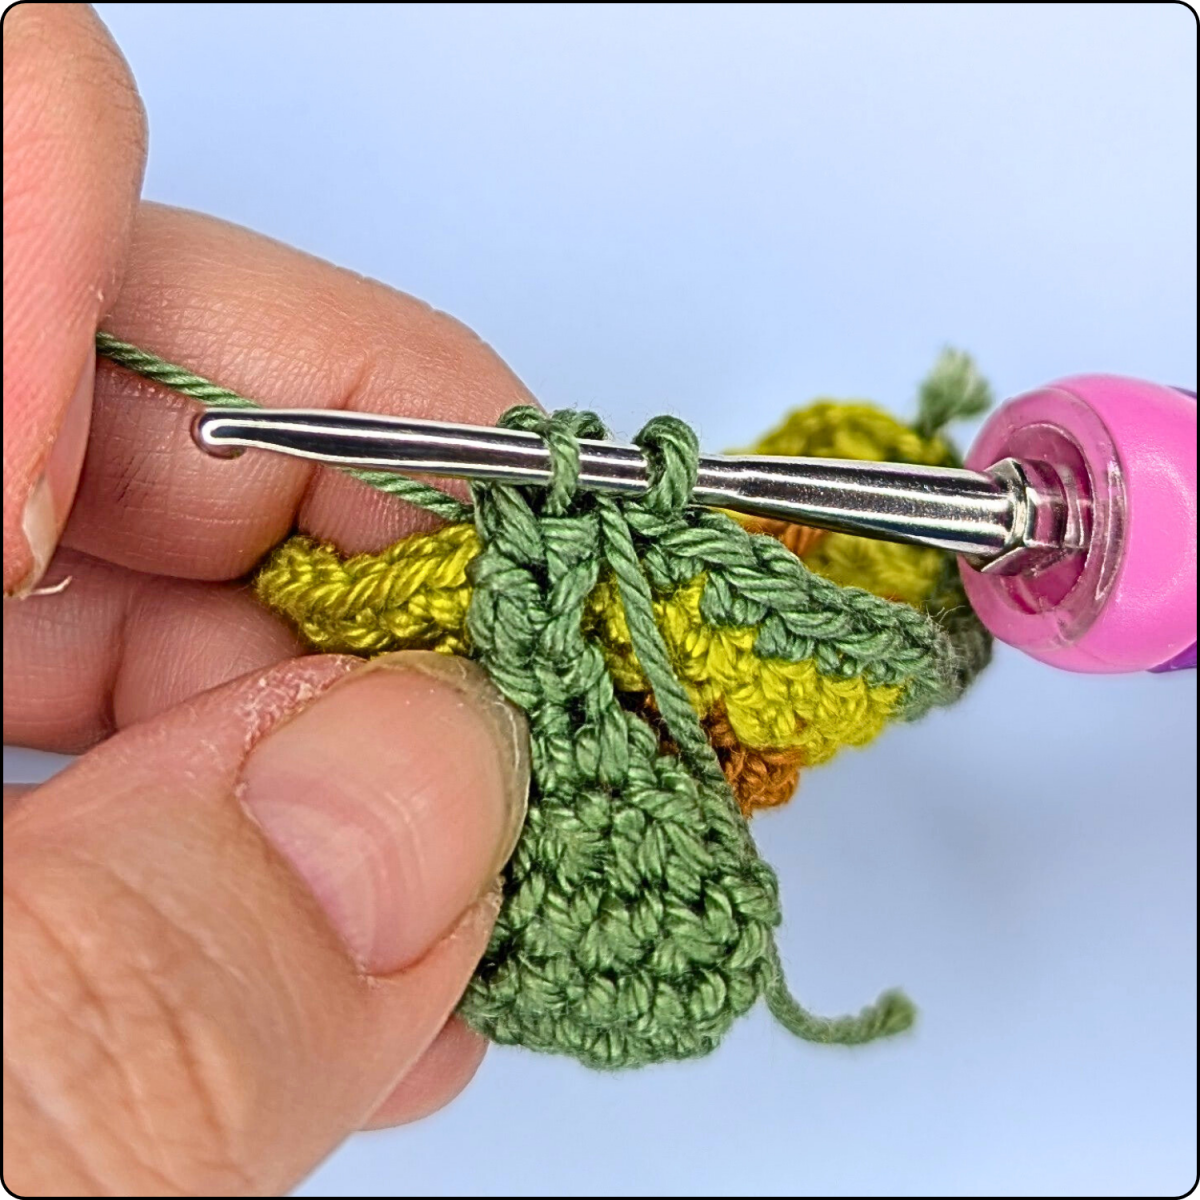
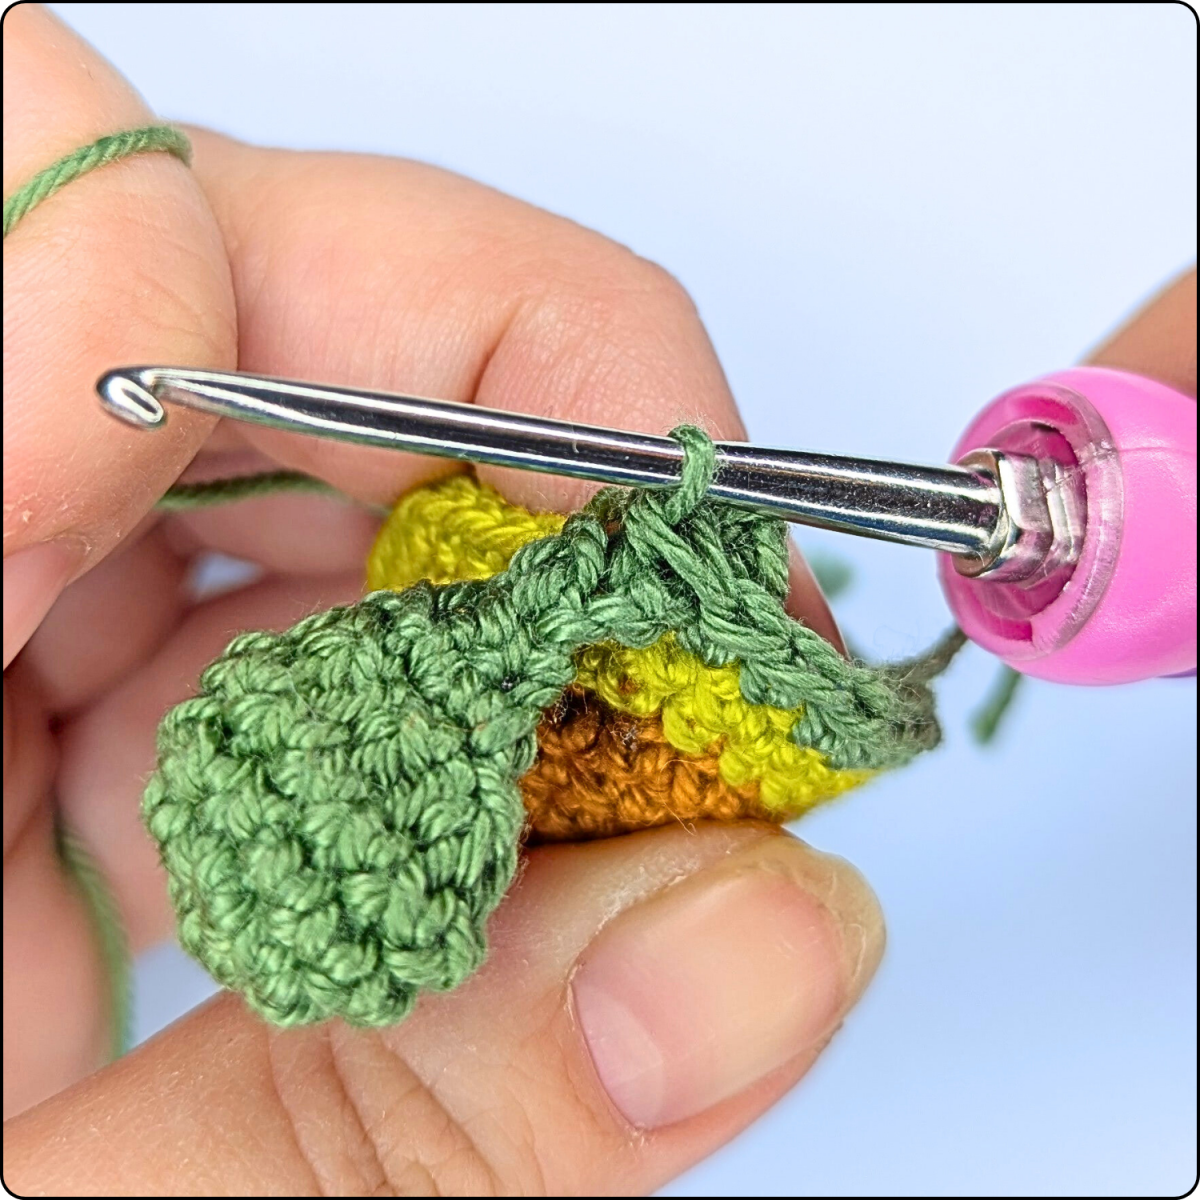
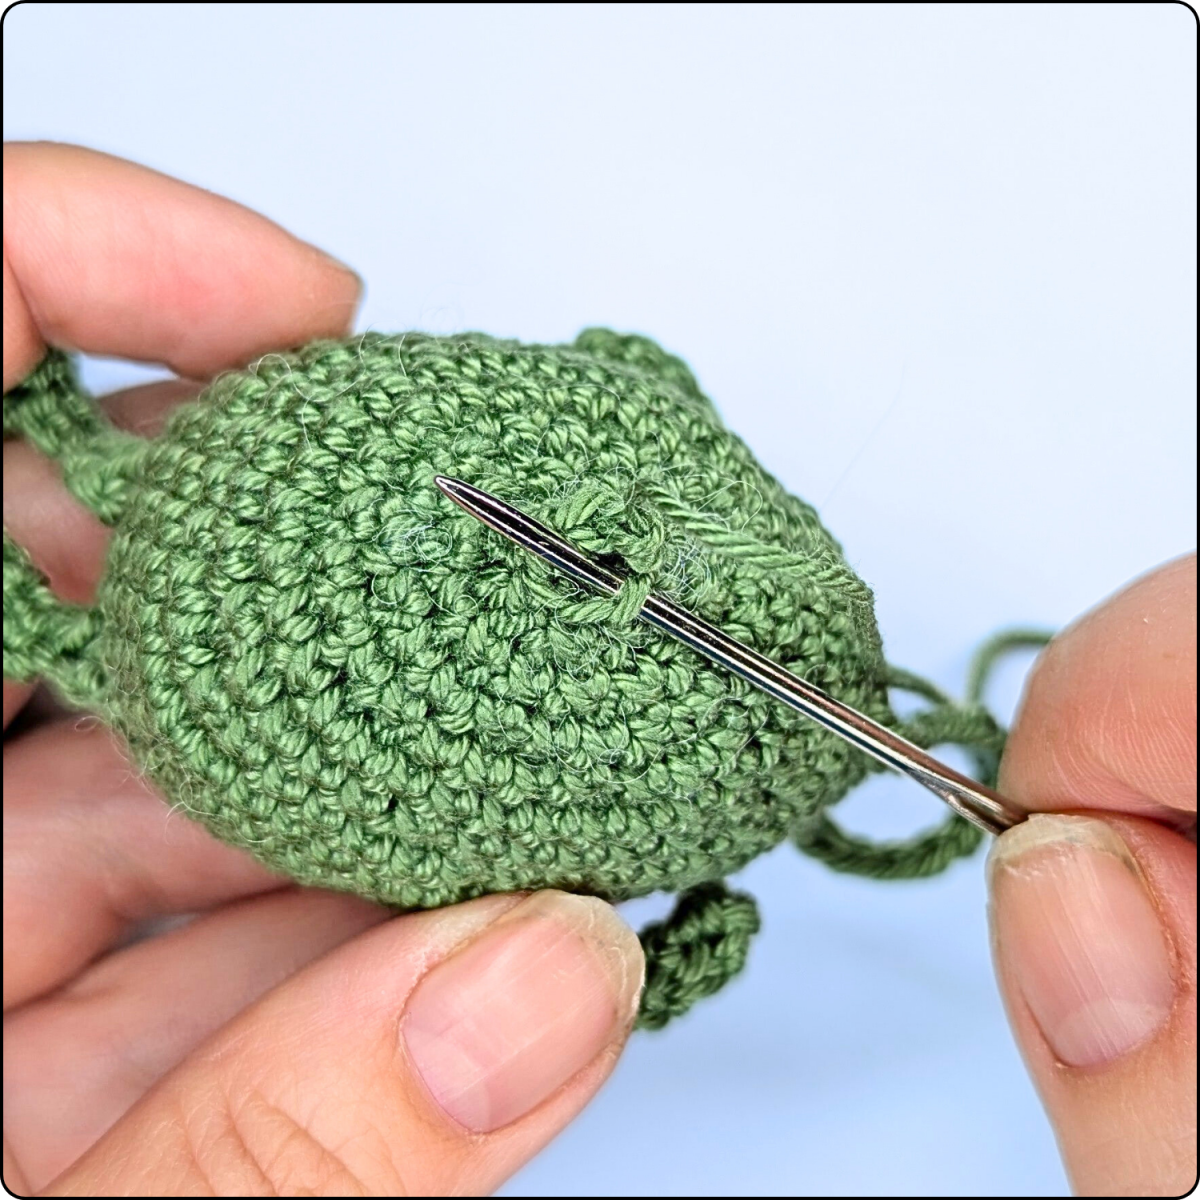
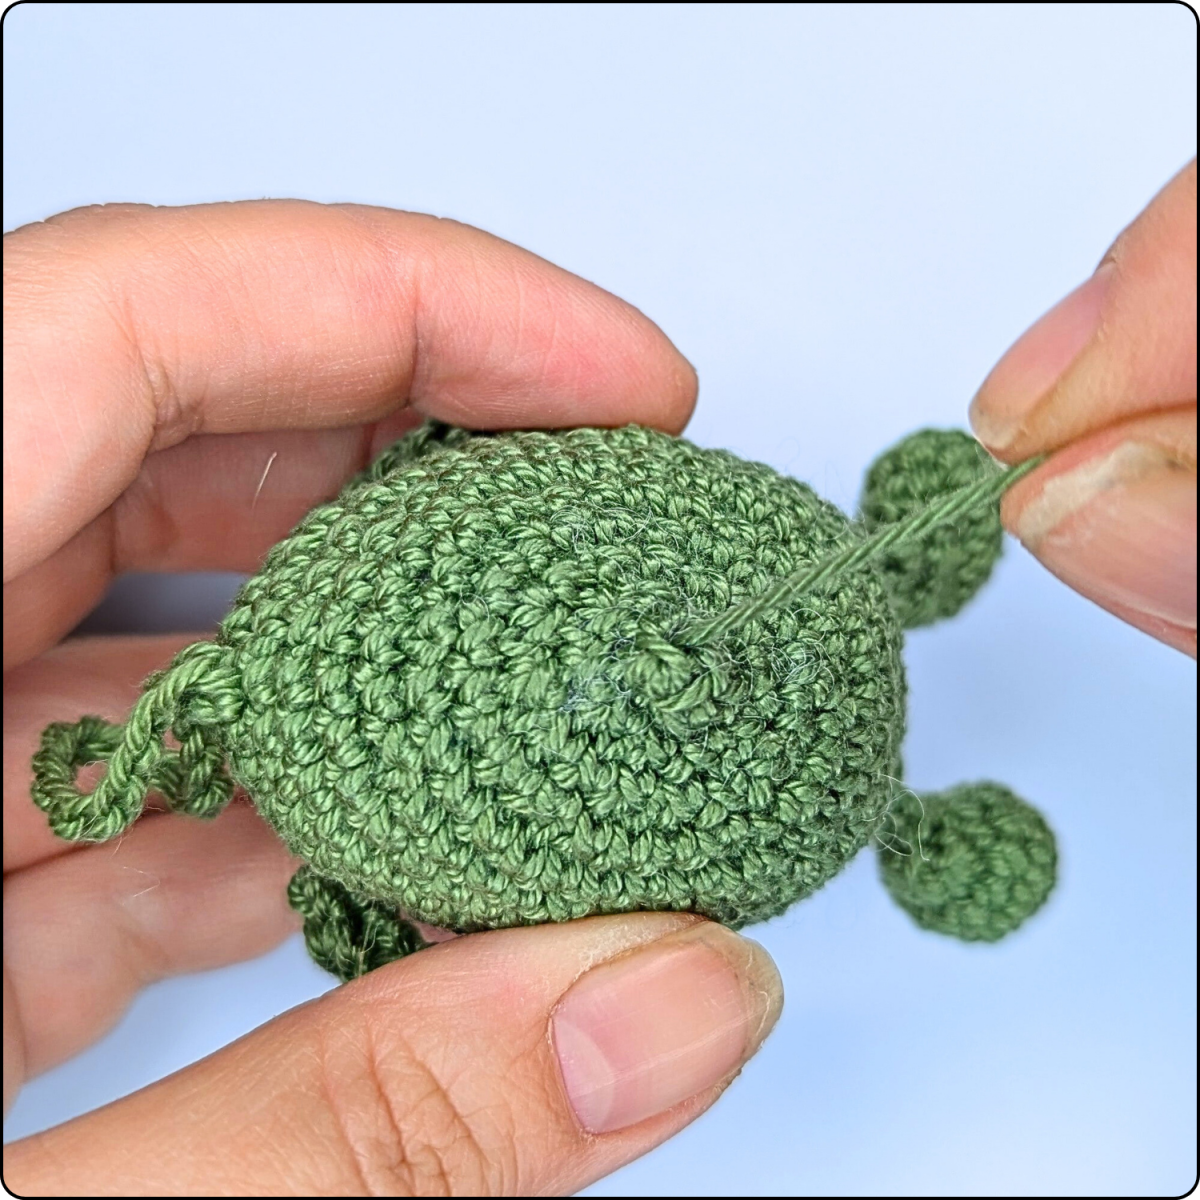
In the next round, arms are attached the same way as the legs. The following pictures show you where to insert the hook into in arm 1 and 2:
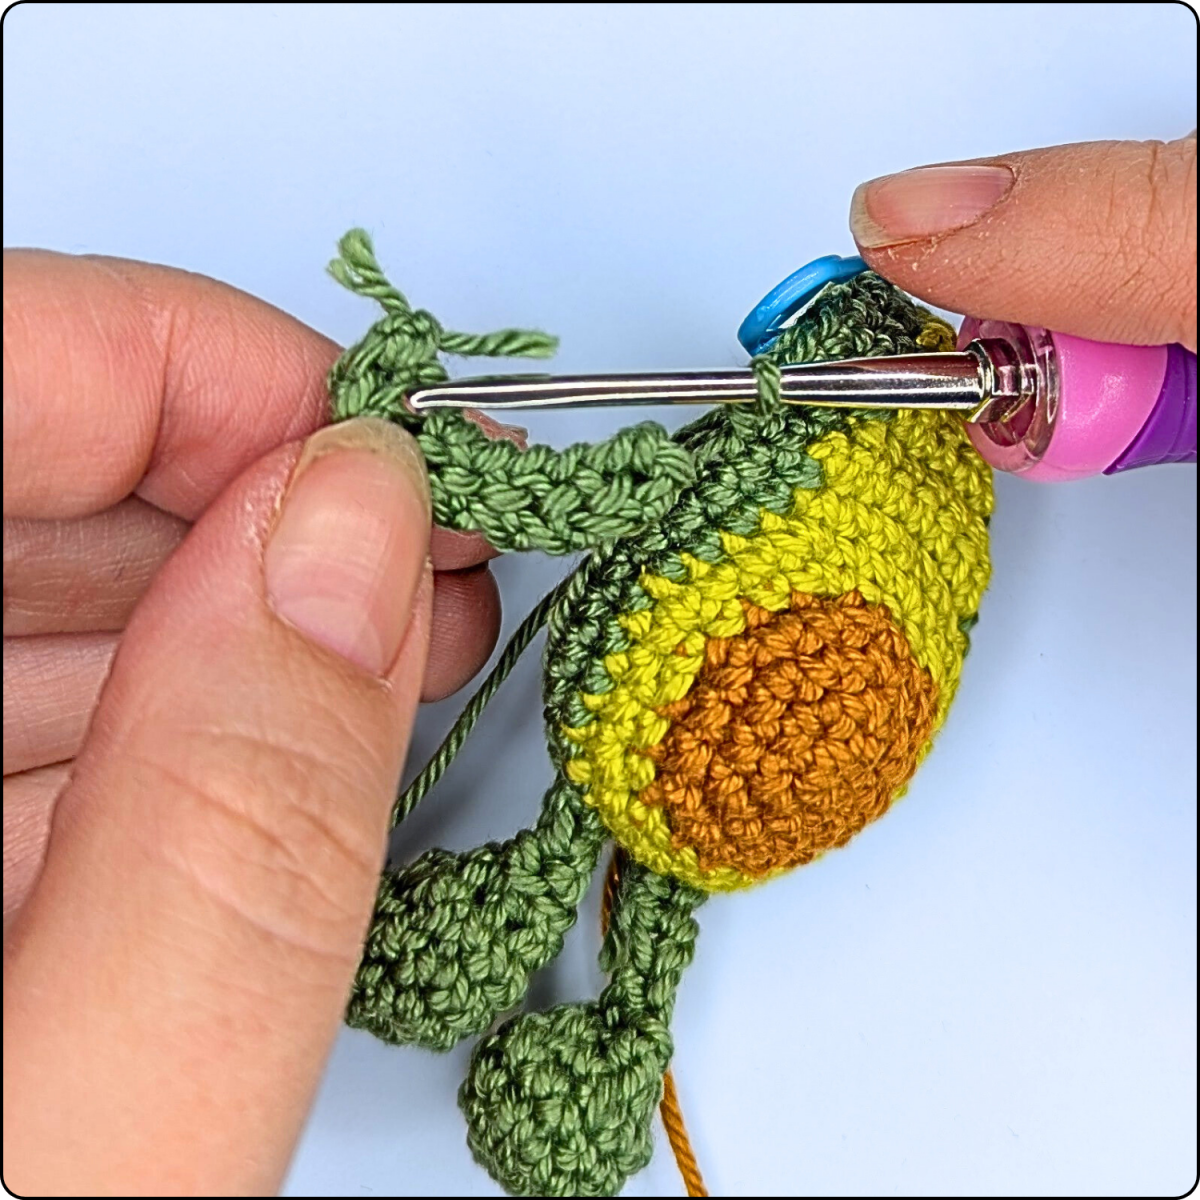
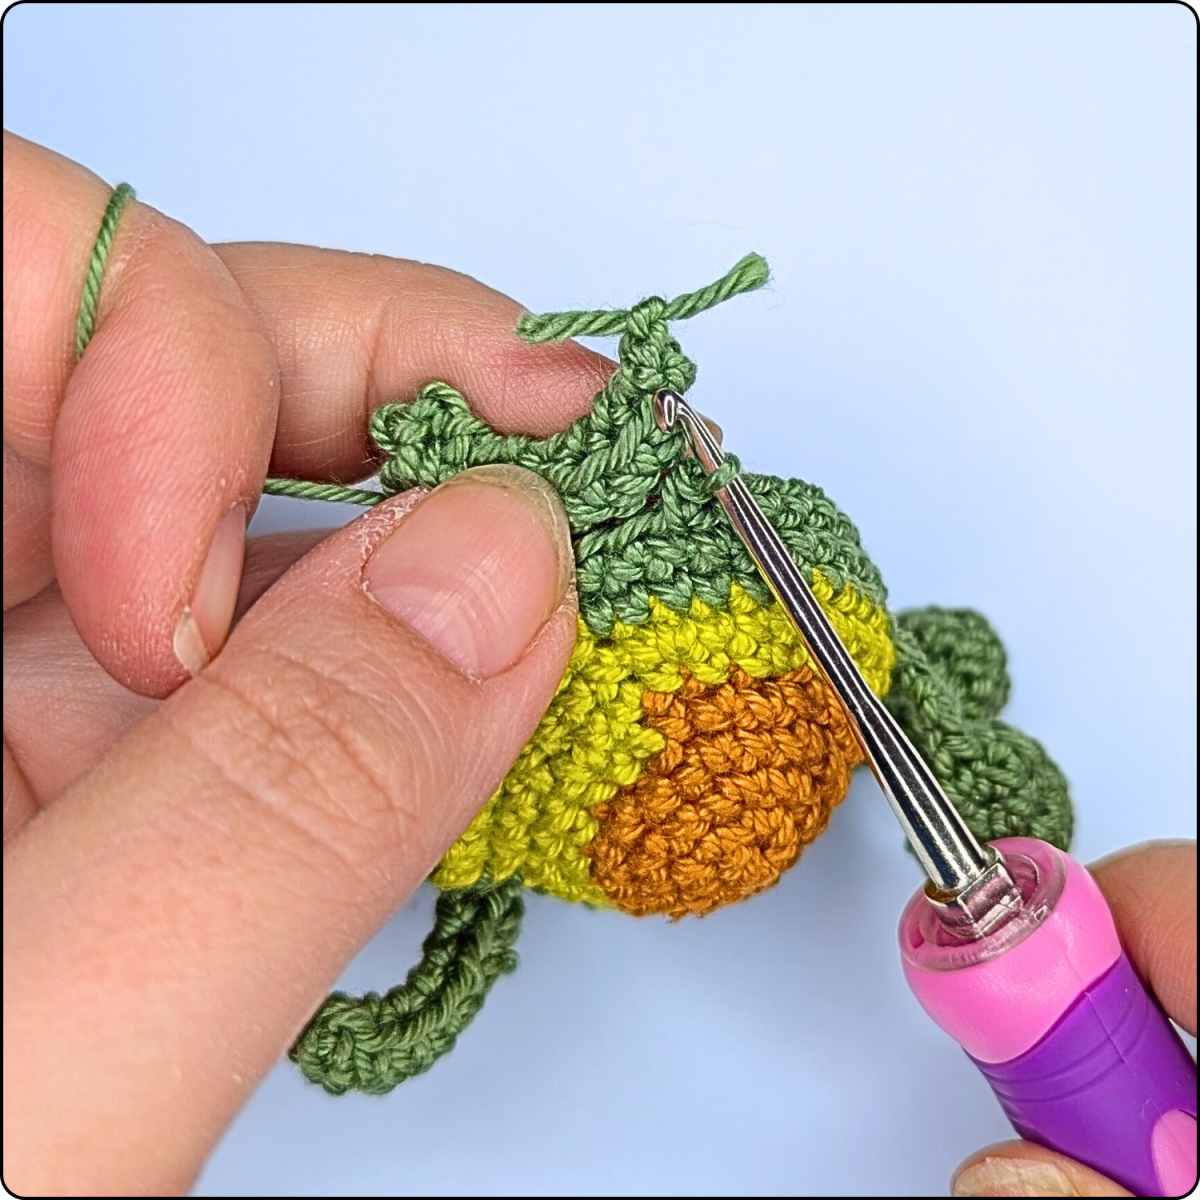
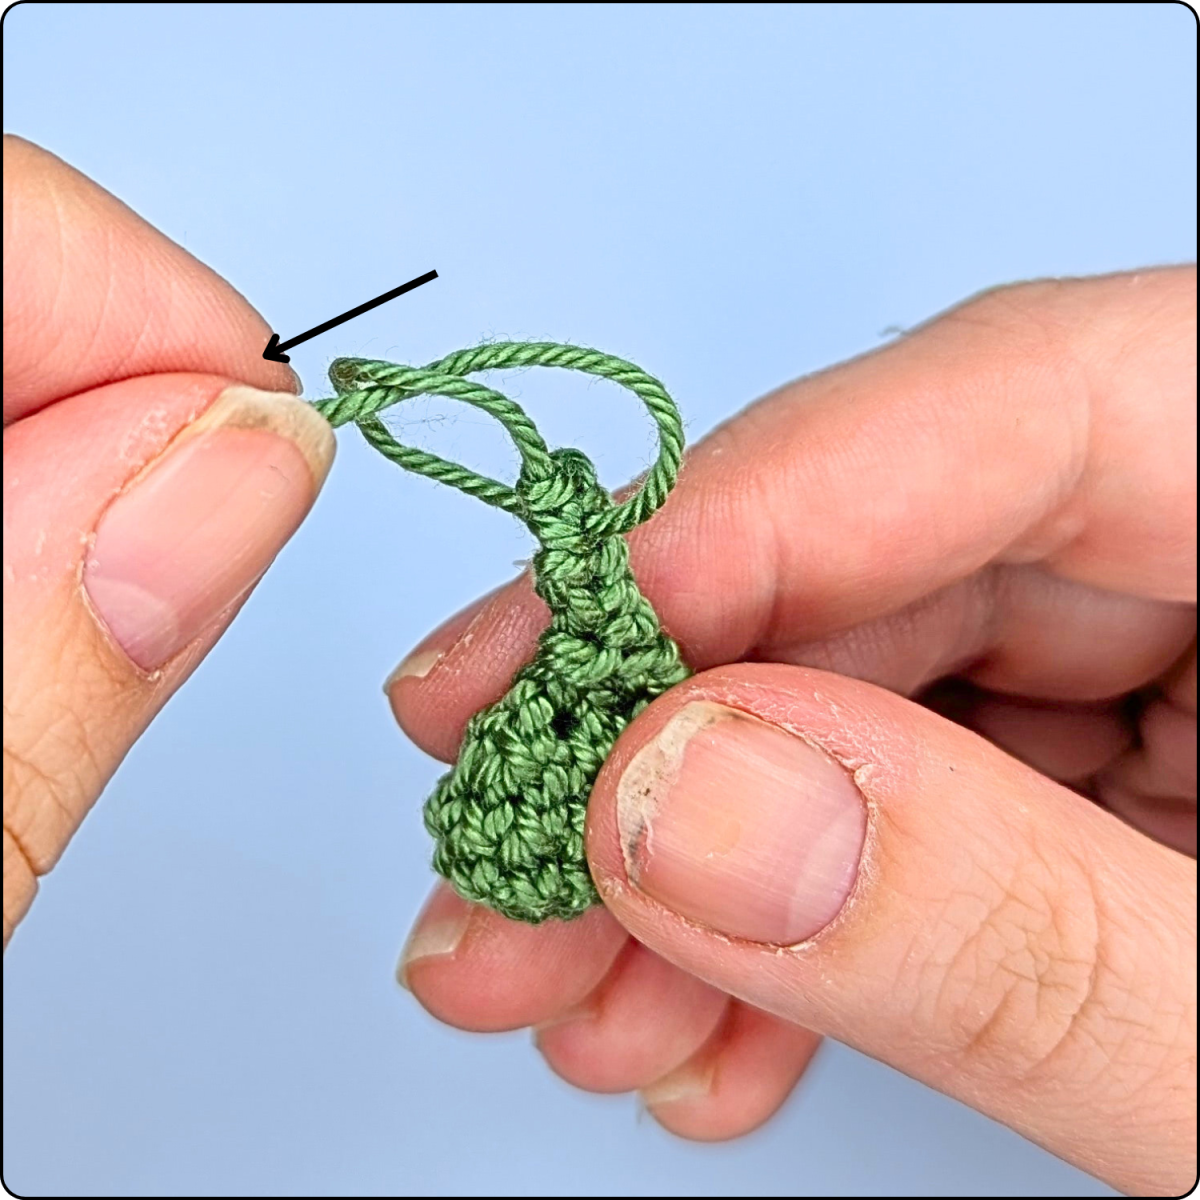
The hanging loop is also attached in the next round. Therefore, place the two ends of the chain on top of each other. Insert the hook through both chain stitches and then through the next stitch of the body. Pull the yarn through all stitches and complete the single crochet.
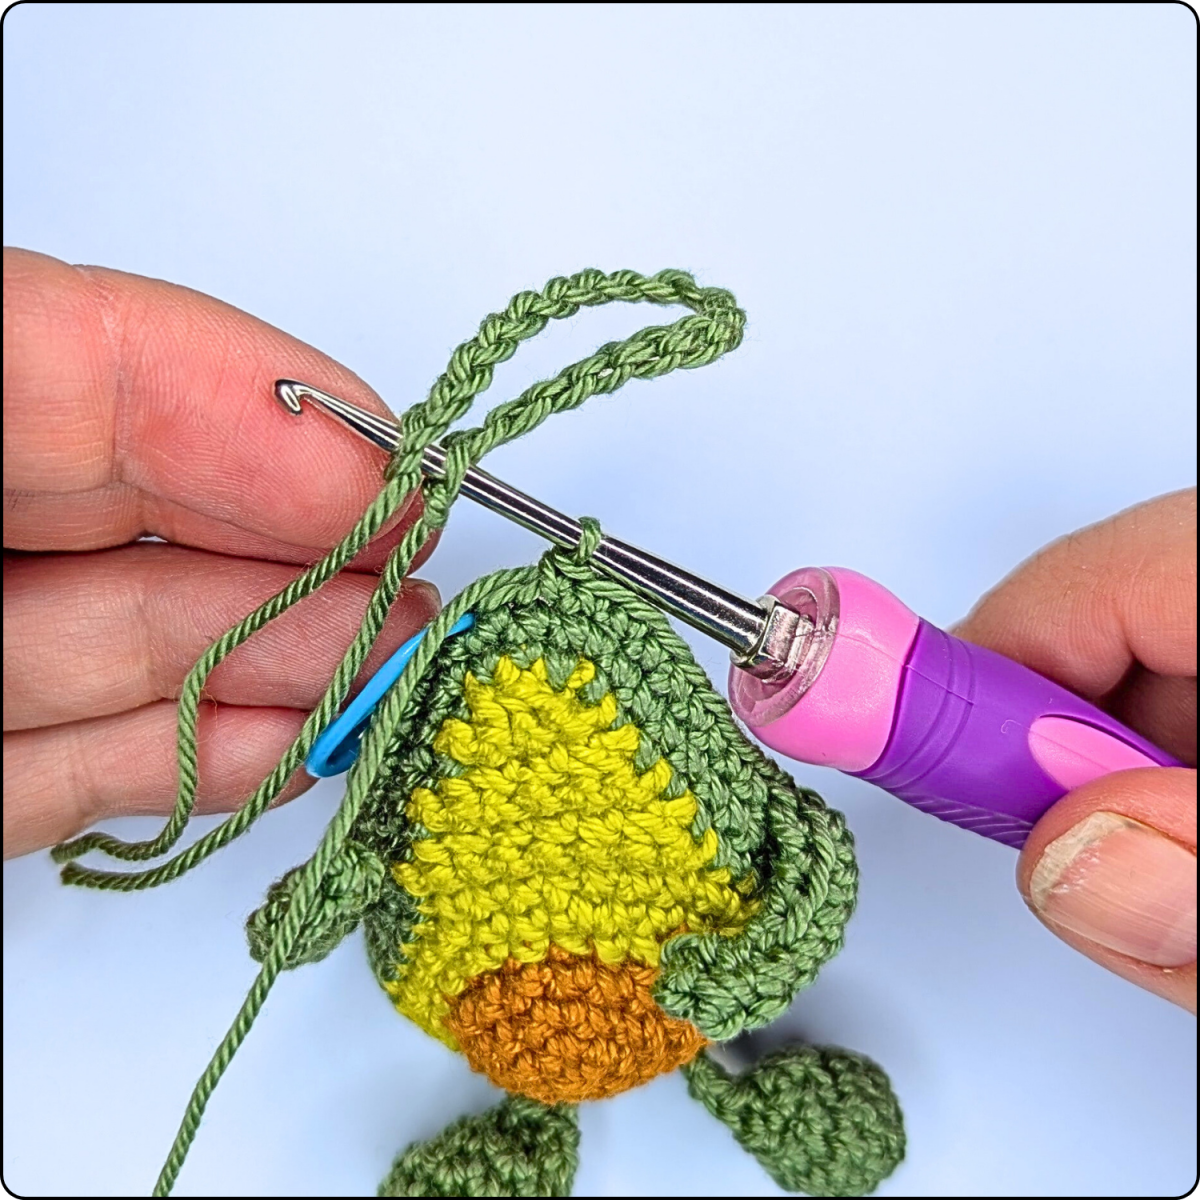
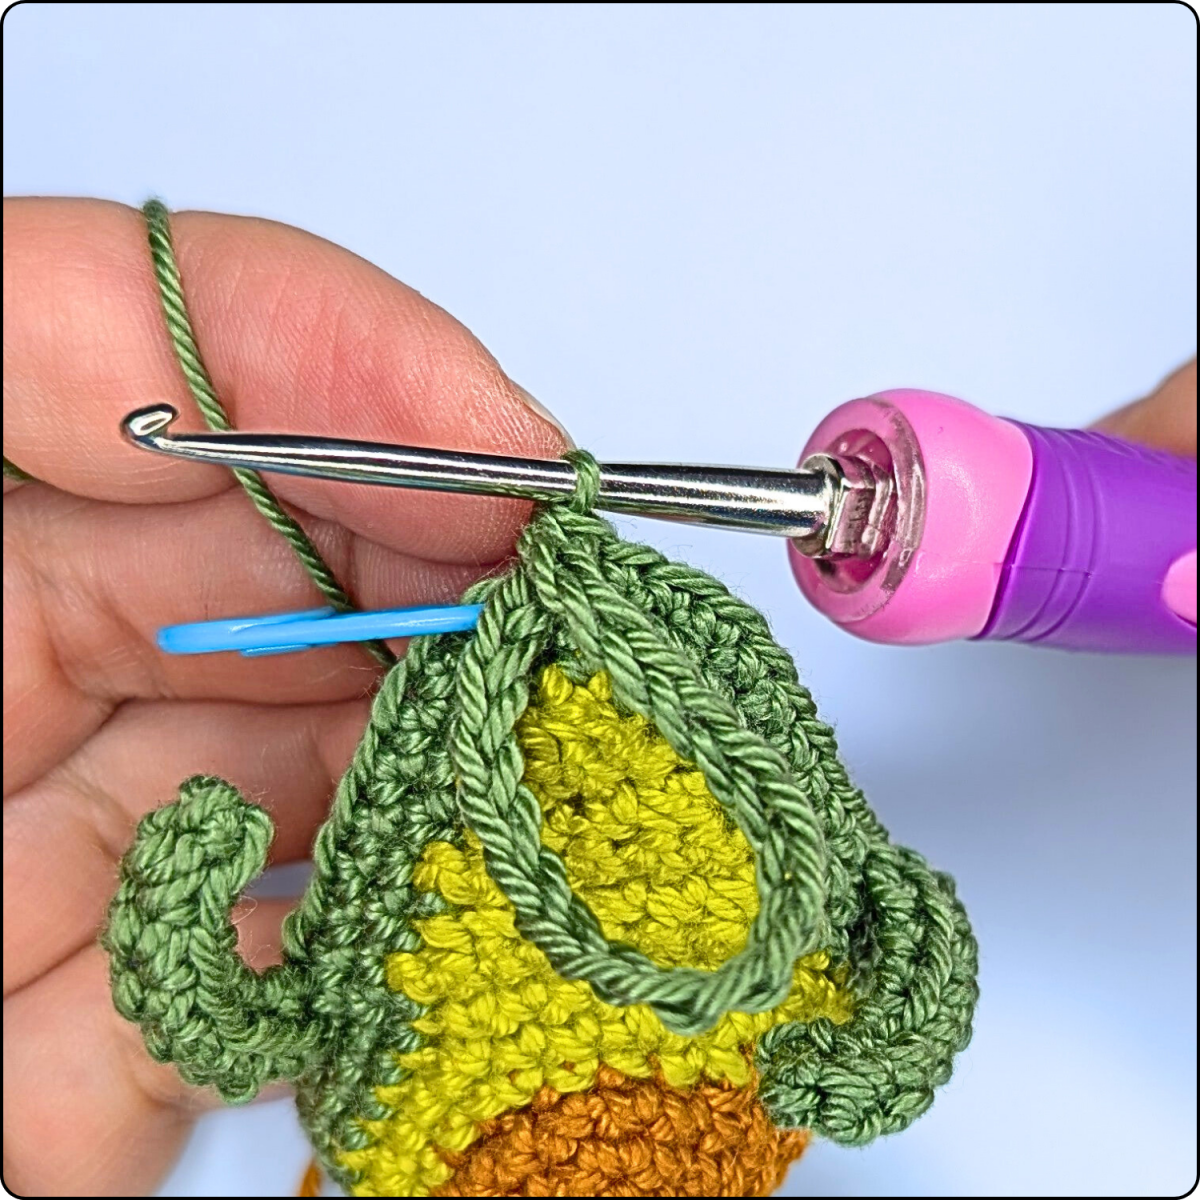
| Rnd 3: | 8 sc, sc with arm 1, 22 sc, sc with arm 2, 9 sc, sc with hanging loop | (42) |
| Rnd 4-5: | 42 sc | (42) |
| Rnd 6: | [2 sc, dec, 3 sc] x6 | (36) |
| Rnd 7: | [3 sc, dec, sc] x6 | (30) |
| Rnd 8: | 30 sc | (30) |
| Rnd 9: | [dec, 3 sc] x6 | (24) |
| Rnd 10: | [2 sc, dec] x6 | (18) |
Start lightly stuffing the body with fiberfill.
| Rnd 11: | [dec, sc] x6 | (12) |
Add more stuffing so the avocado keeps its shape.
| Rnd 12: | 6 dec | (6) |
Fasten off, thread the yarn through the remaining stitches and pull tight to close the hole. Weave in the yarn end securely.
Your avocado should now look like this:

Embroidering the Face
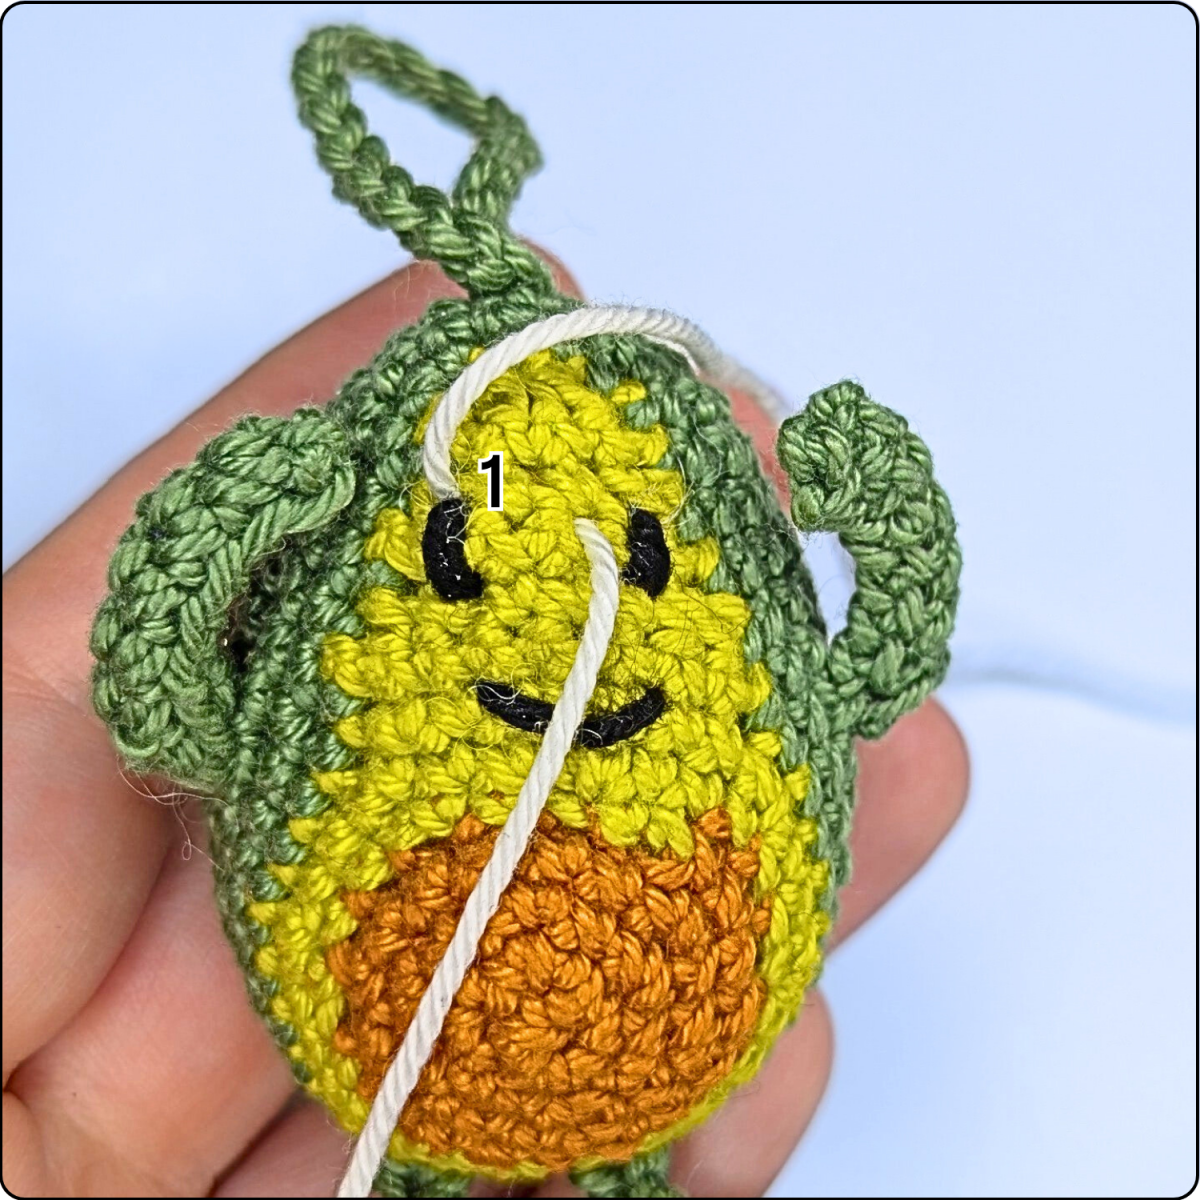
First, embroider the eyes and mouth using black cotton yarn.The stitch path follows several marked positions (1–7):
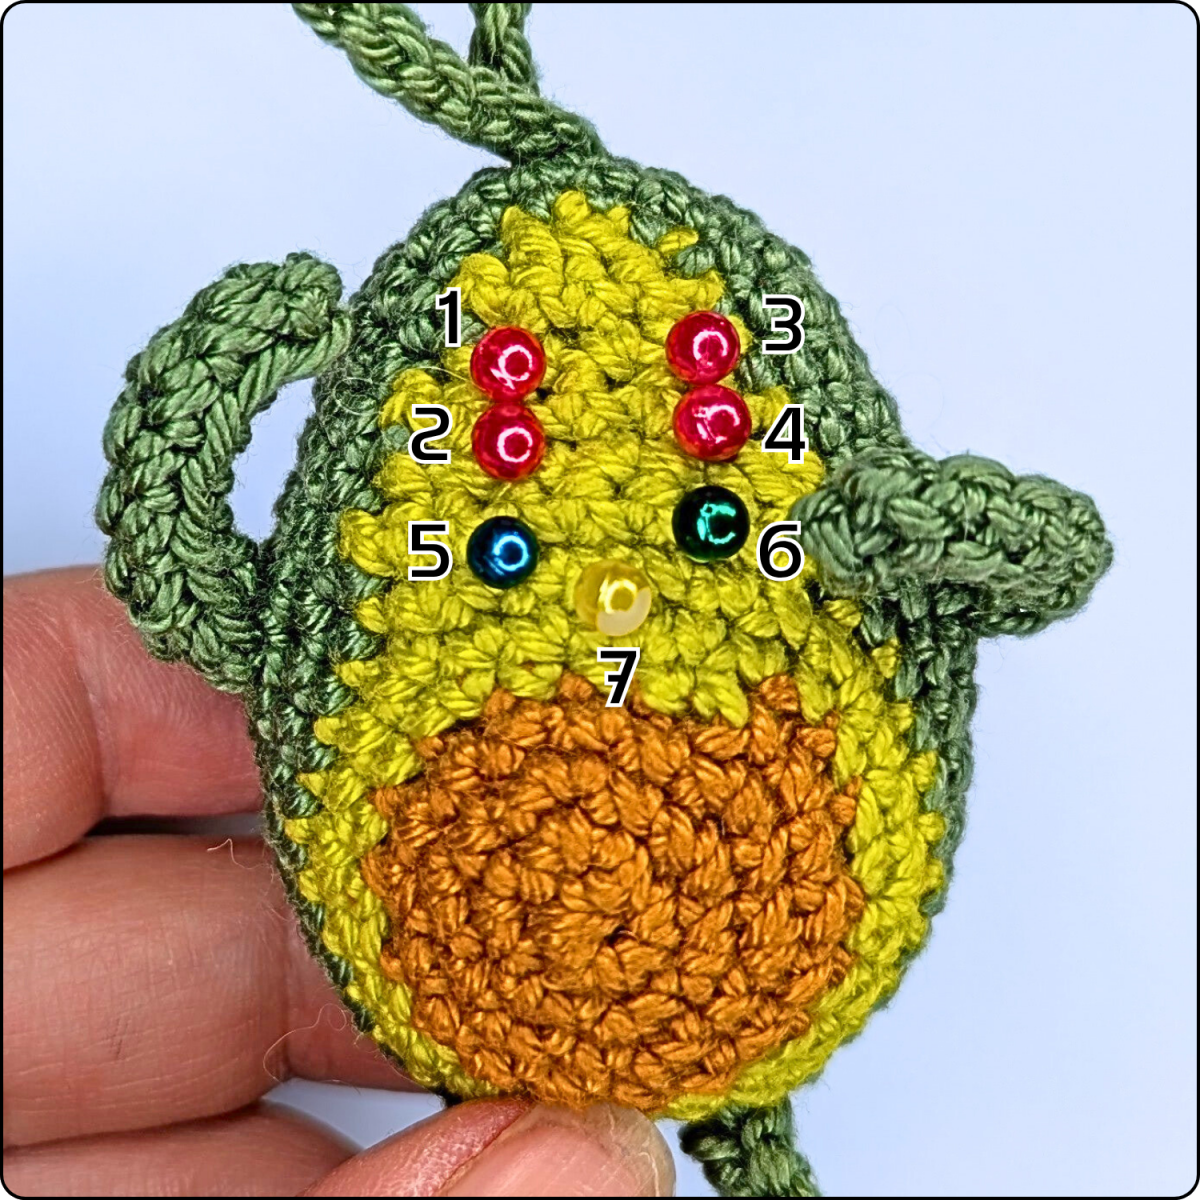
A piece of black cotton yarn approximately 25 cm (about 10 inches) long is inserted into the piece near the marked positions and brought out again at position 1. Leave about 4 cm (approx. 1.5 inches) of starting tail on the outside. Insert the needle at position 2 and bring it back out at position 1. Then insert the needle again at position 2. This creates a small embroidered eye.
.png)
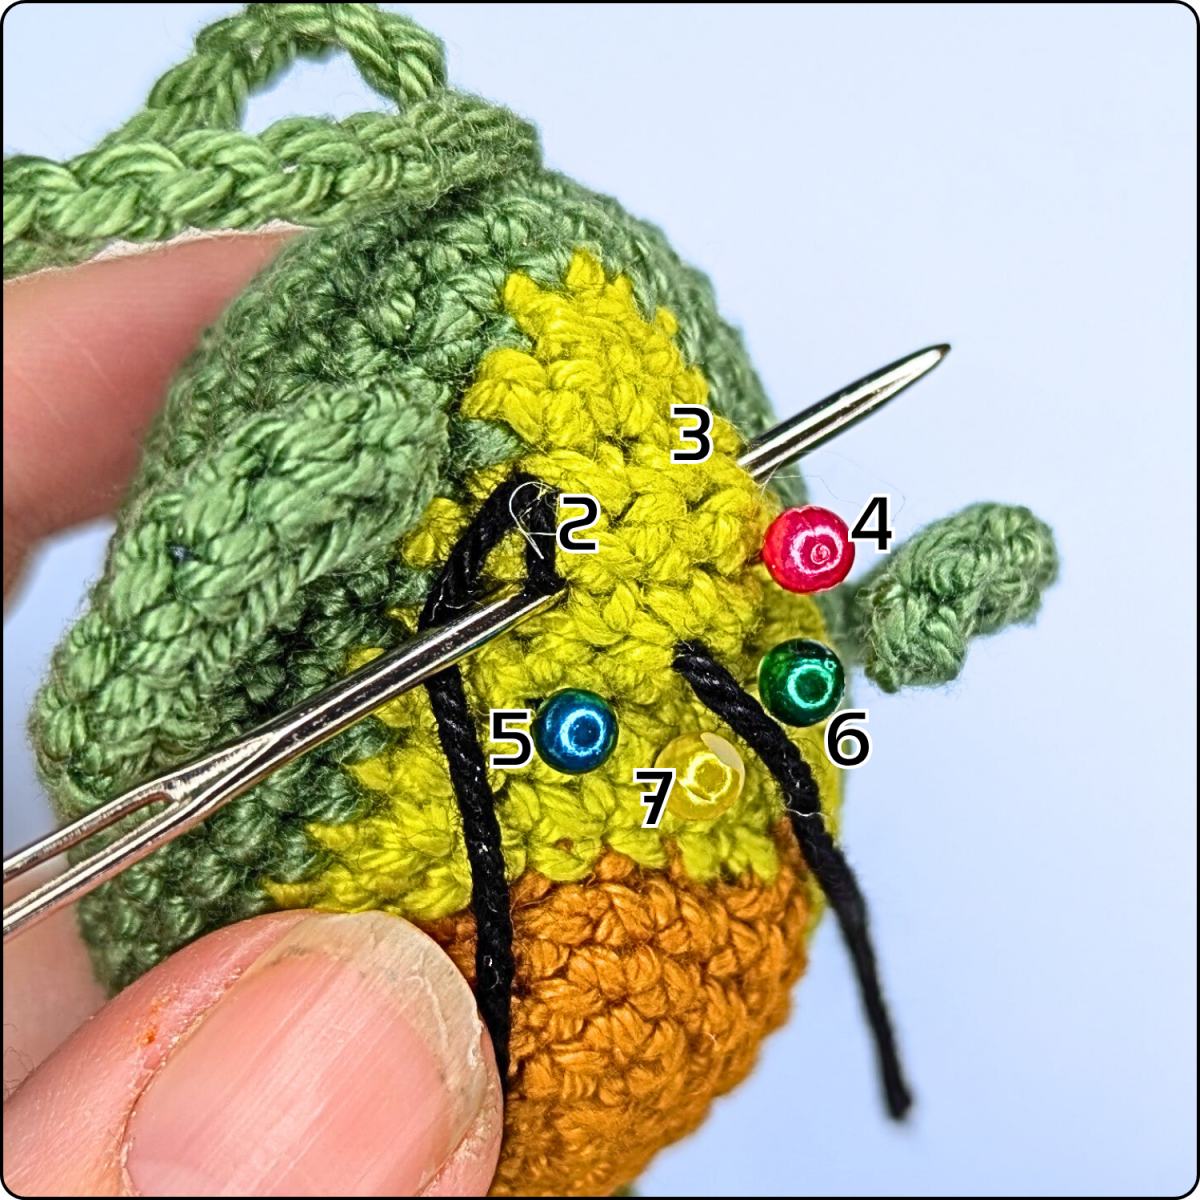
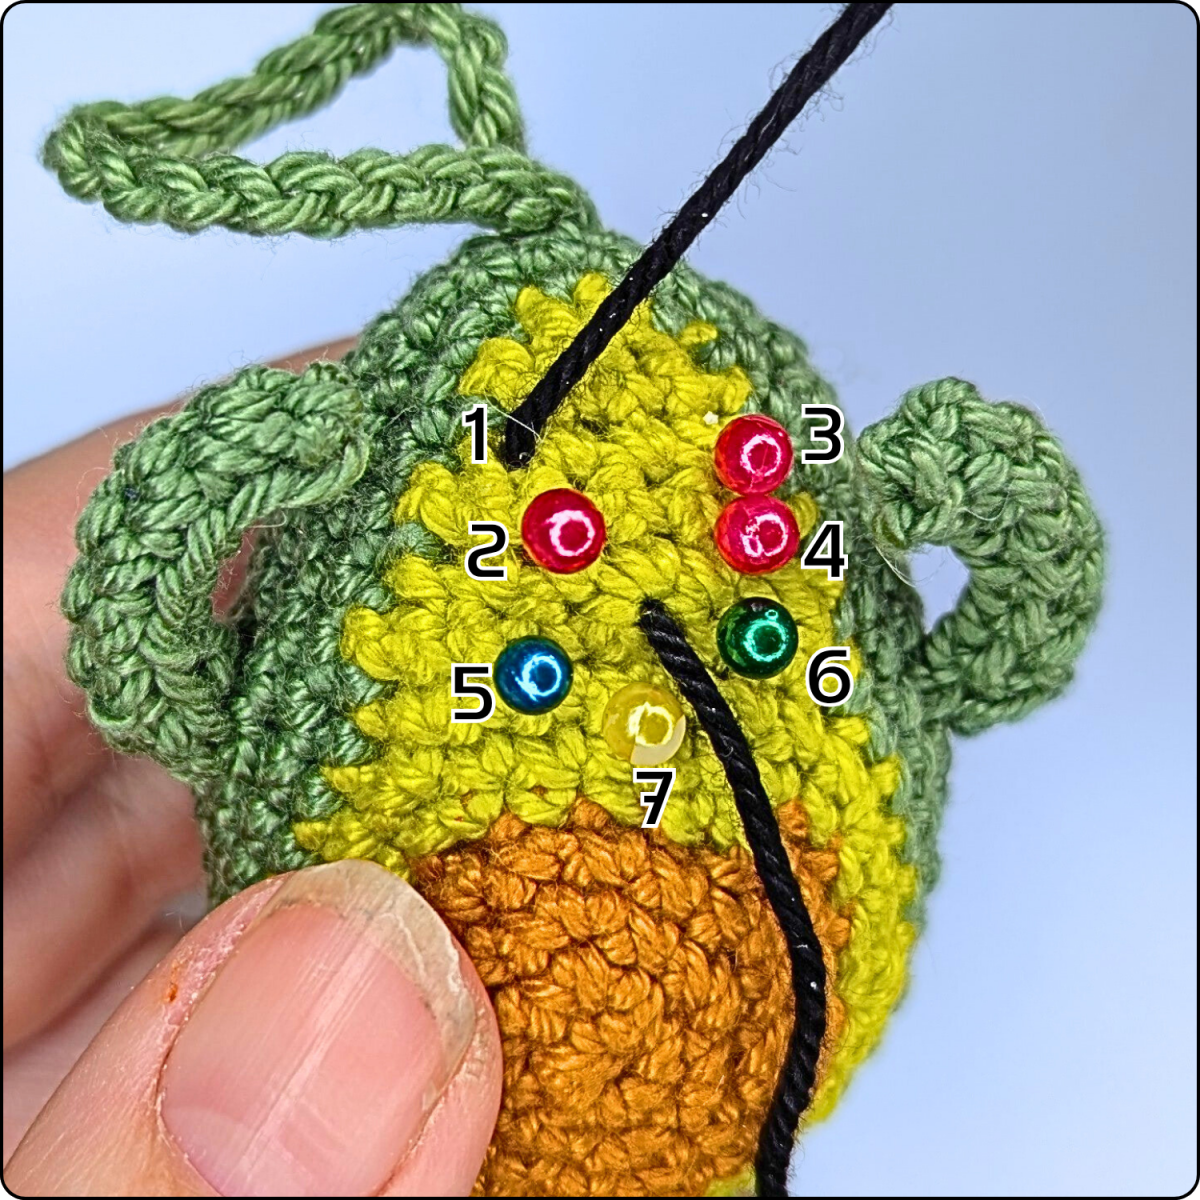
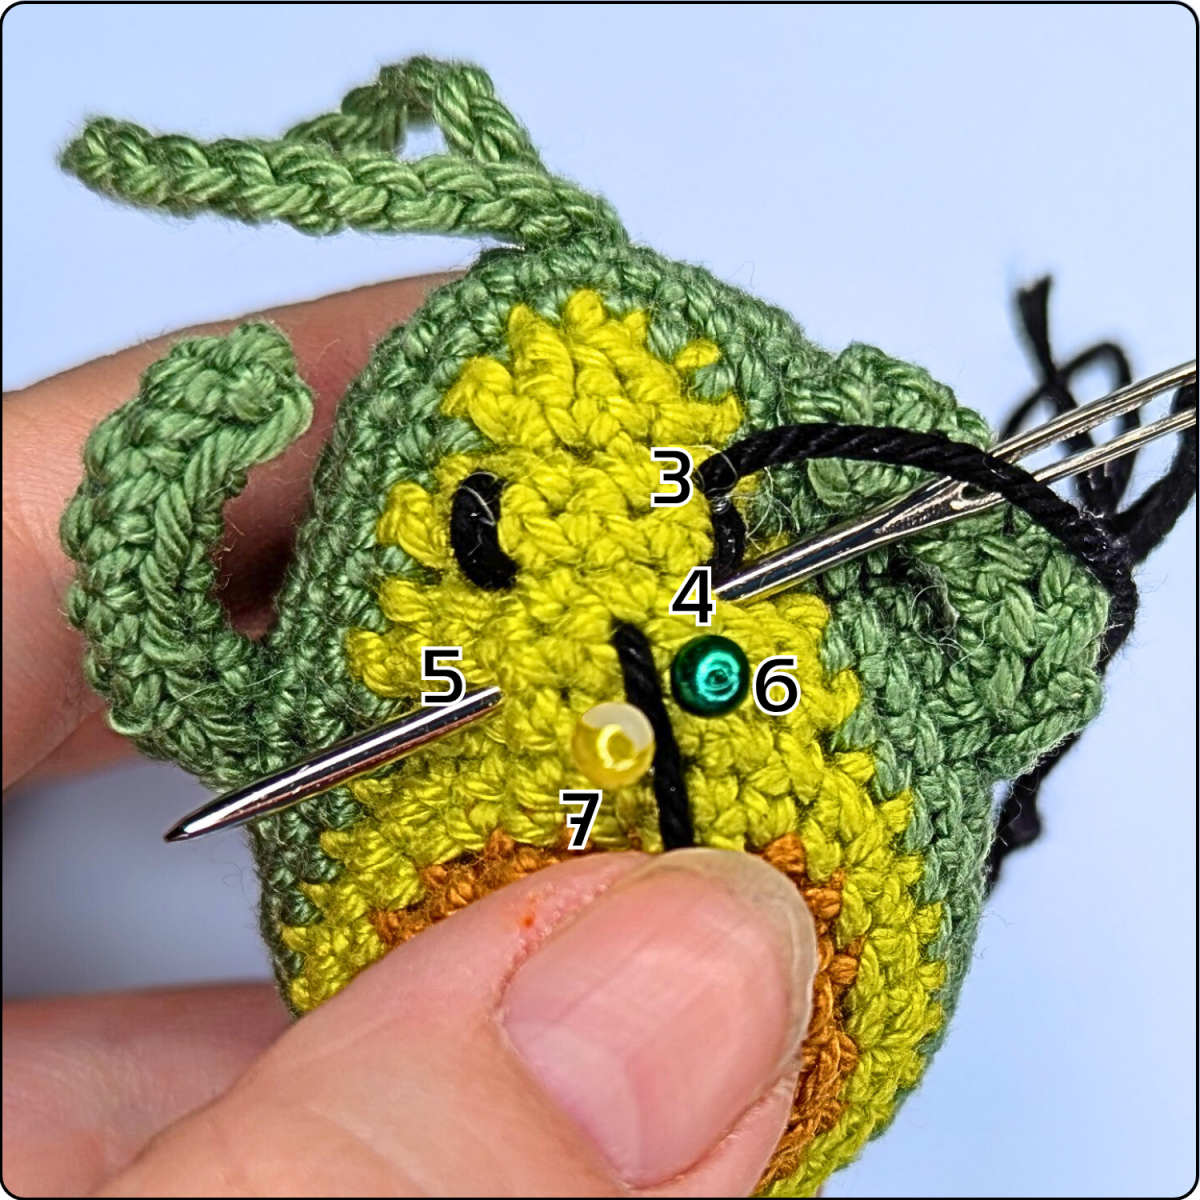
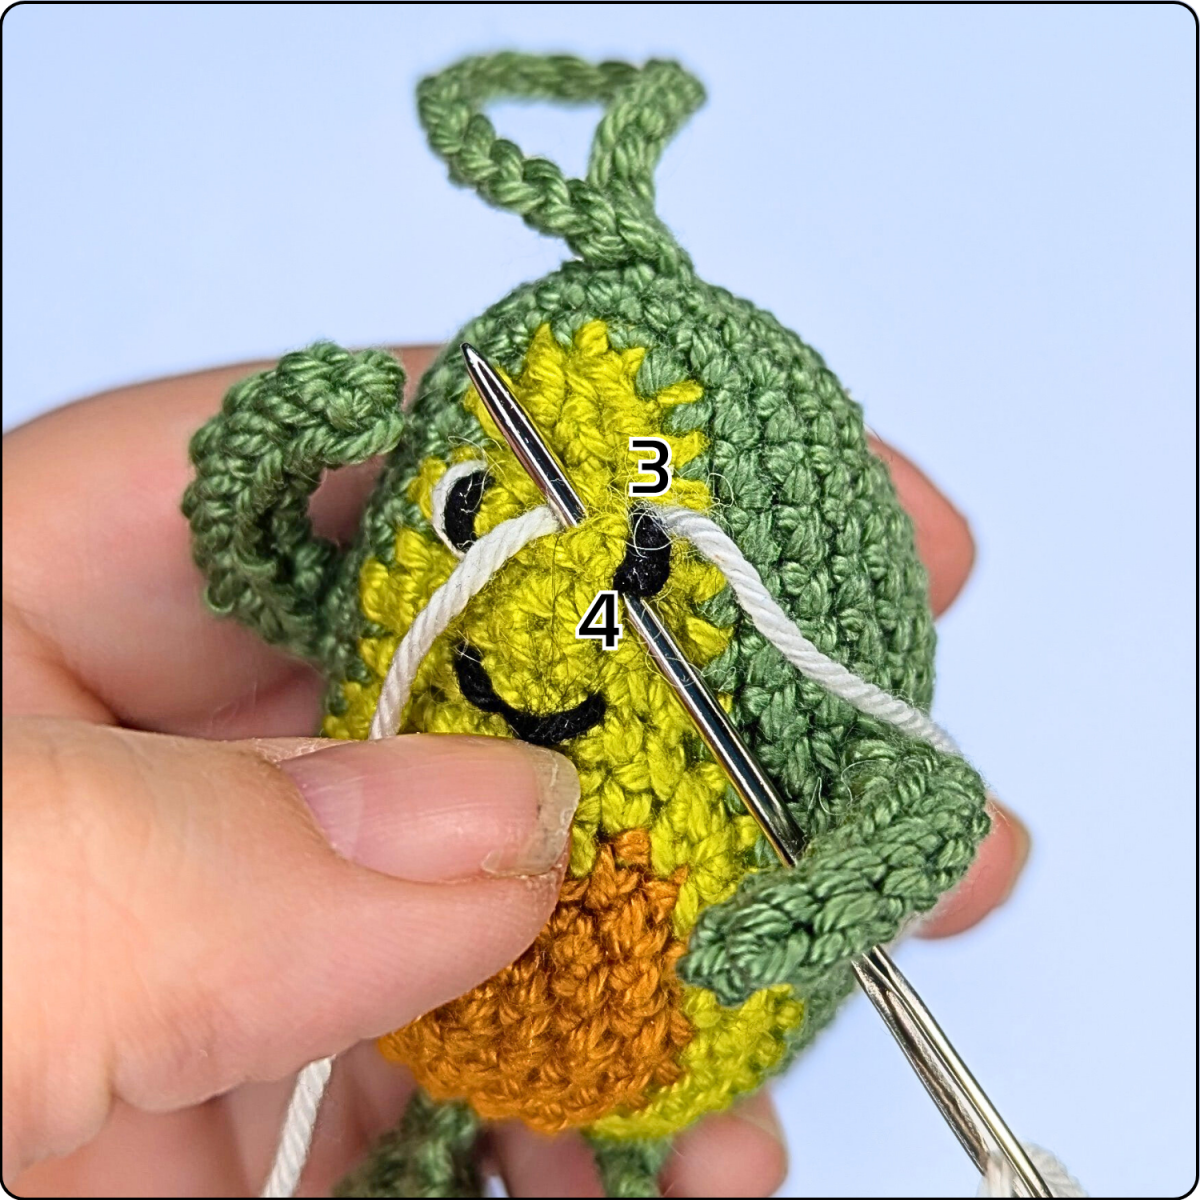
Next, bring the yarn across to the other side for the second eye. Bring the needle out again at position 3. Insert the needle at position 4 and bring it back out at position 3. Then insert the needle again at position 4 and bring it out at position 5. This completes the second eye.

Now work the mouth:
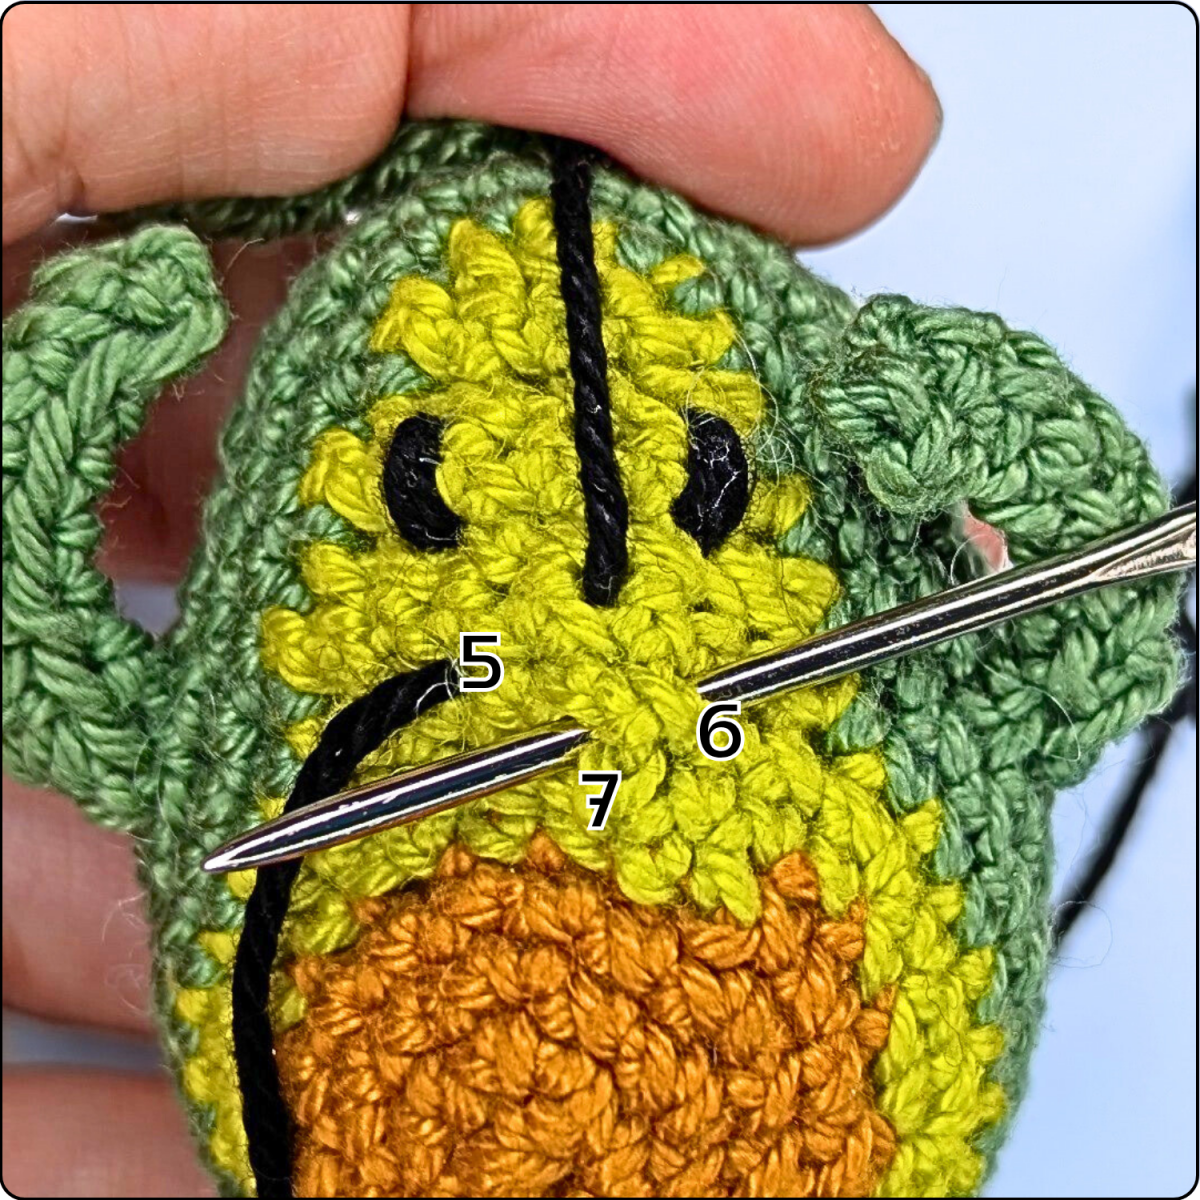
Insert the needle at position 6, but do not pull the yarn completely tight, so the mouth can keep its intended shape. Then bring the needle out again at position 7. To secure the mouth shape, pass the needle once around the strand of yarn running between positions 5 and 6. Then insert the needle back in at position 7. This fixes the slightly curved smile in place.
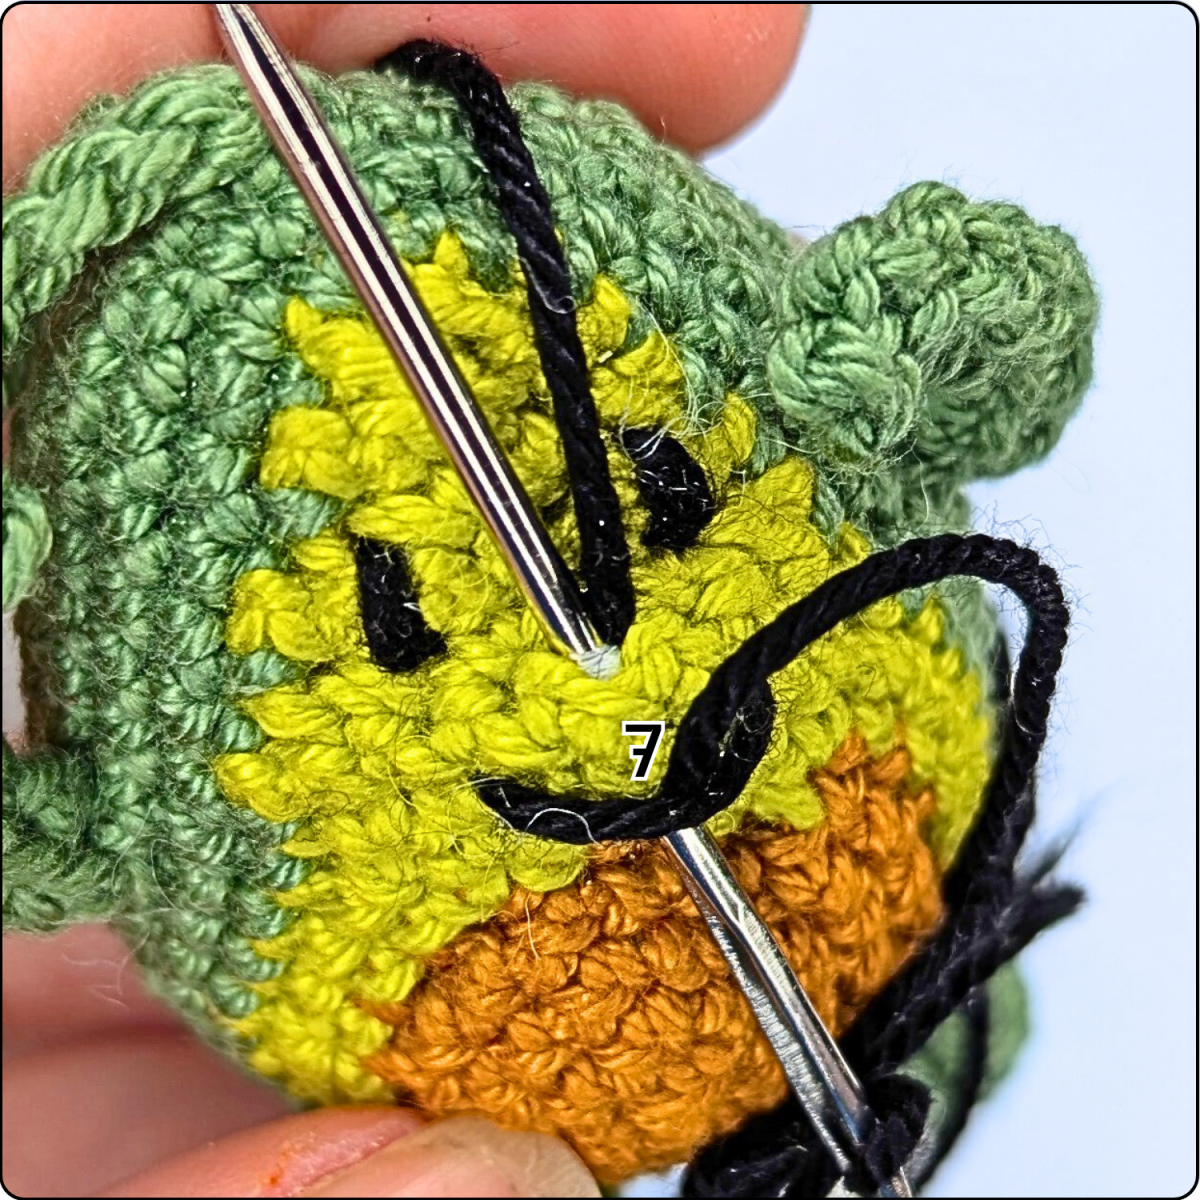
After that, bring the yarn tail back out on the back through the same hole as the starting tail. Tie both yarn ends together with a double knot and hide them, including the knot, inside the avocado.
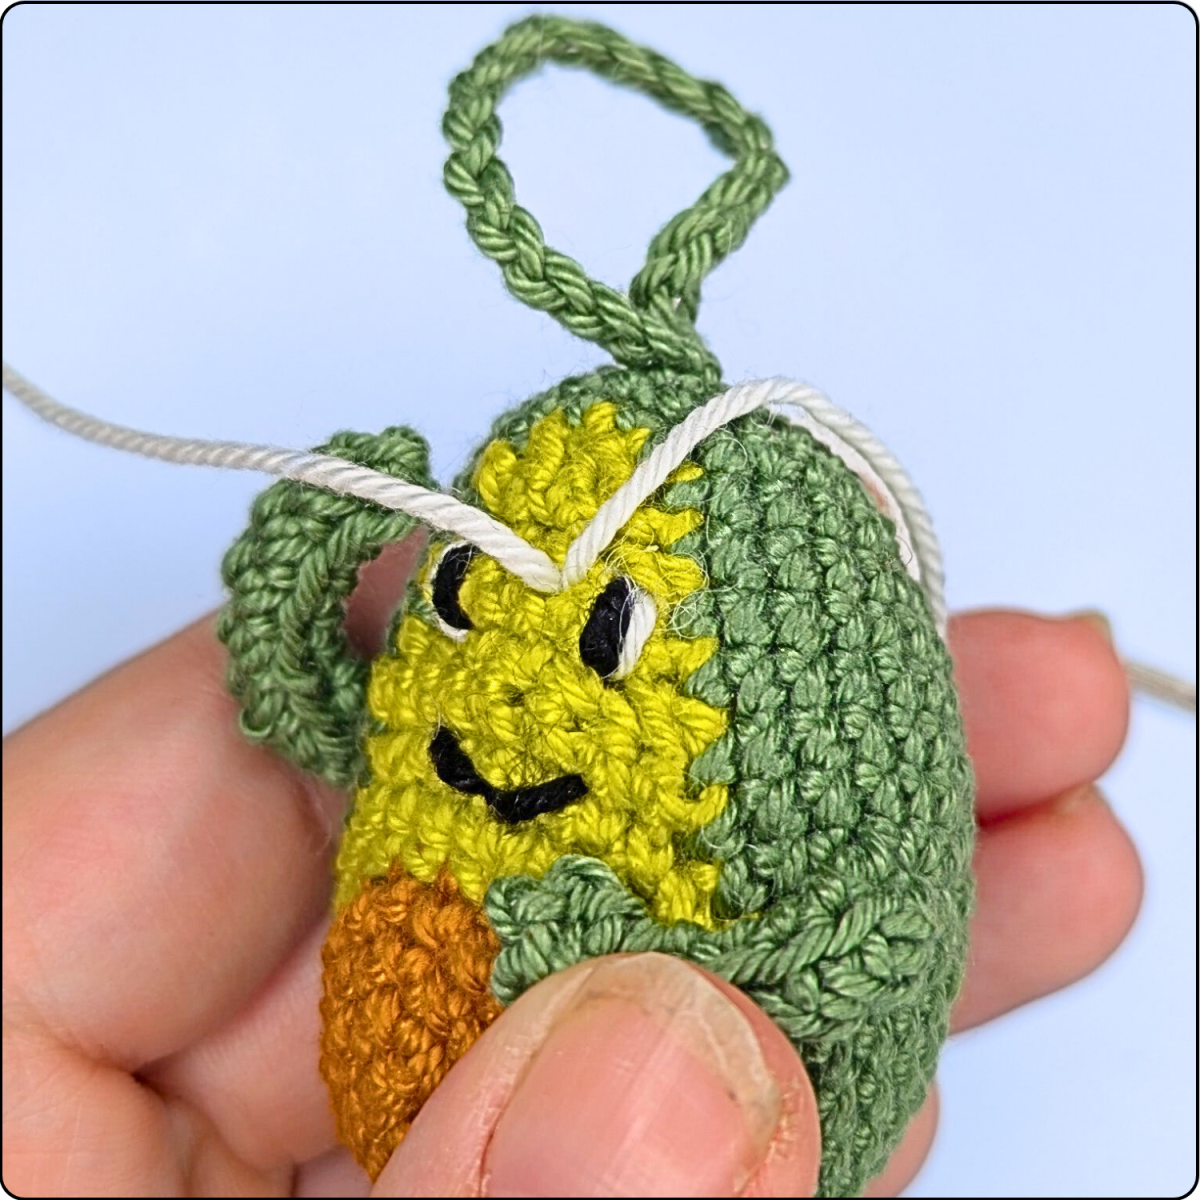
Next, add the eye details using white cotton yarn. Therefore insert the a piece of white yarn approximately 20 cm (about 8 inches) into the avocado between the two eyes and bring it out again at position 1. Leave about 4 cm / 1,5 inches of starting tail on the outside. Now place the yarn along the left side of the eye and insert the needle again at position 2. Then bring the needle back out at position 3.
.png)
Next, place the yarn along the right side of the second eye and insert the needle again at position 4. To finish, bring the yarn back out through the same hole where the starting tail is still showing. Tie both yarn ends together with a double knot and hide them inside the avocado.
Your adorable avocado keychain is now finished! 🥑
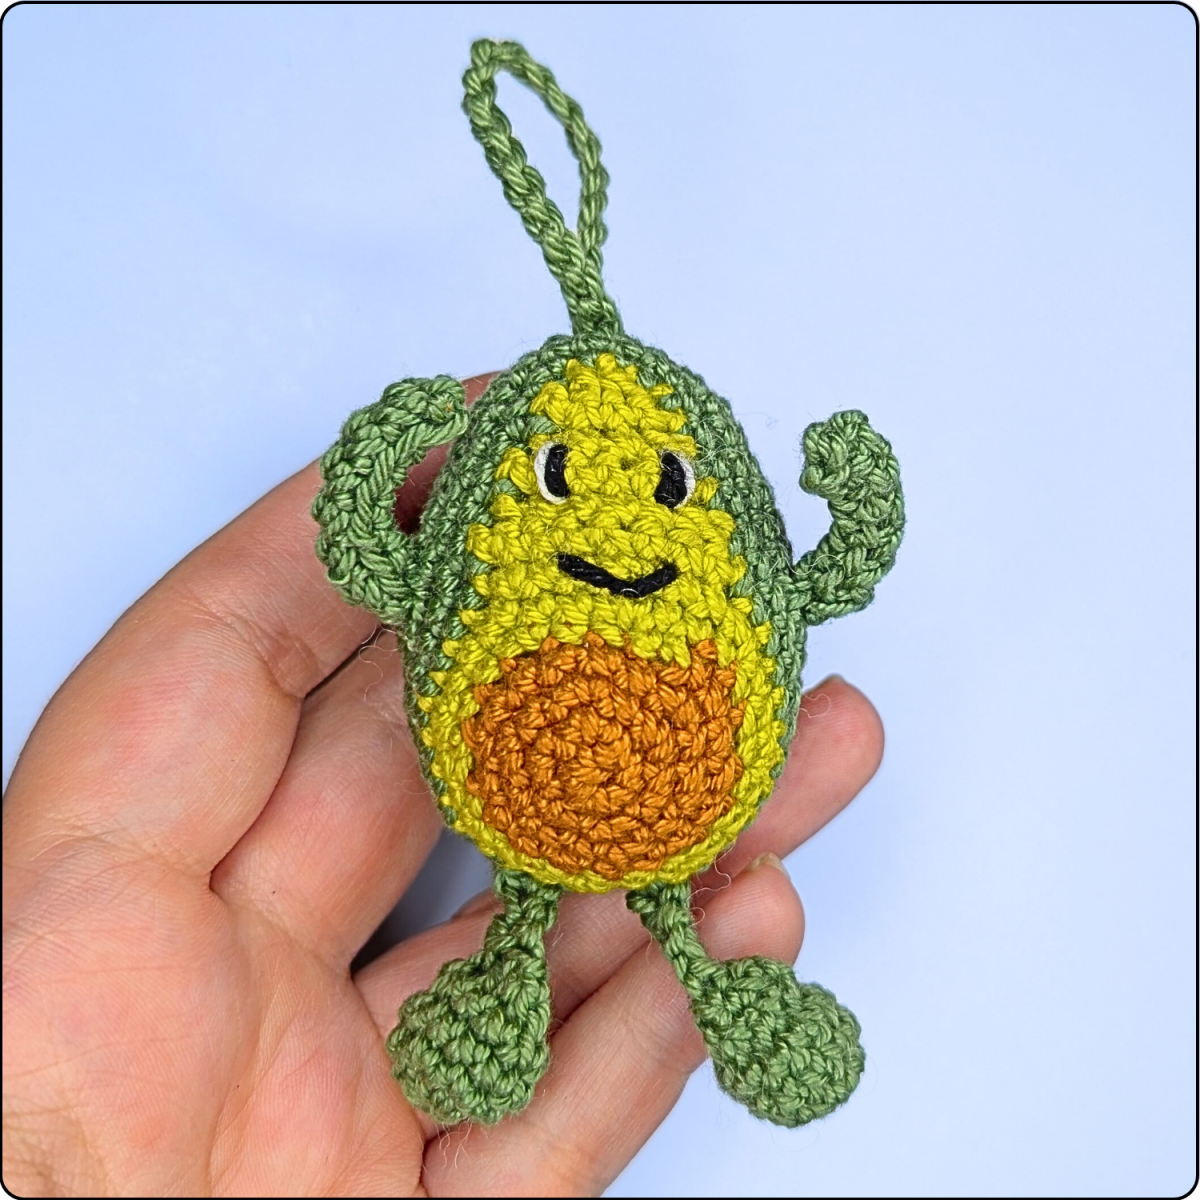
This tiny amigurumi is perfect as a quick handmade gift or as a fun accessory for your keys or bag. Thanks to the small yarn requirements, it's also a great way to use leftover yarn from other crochet projects.
If you enjoyed this pattern, be sure to check out my blog for more free crochet patterns and visit my pattern shop for additional designs.
Happy crocheting!


