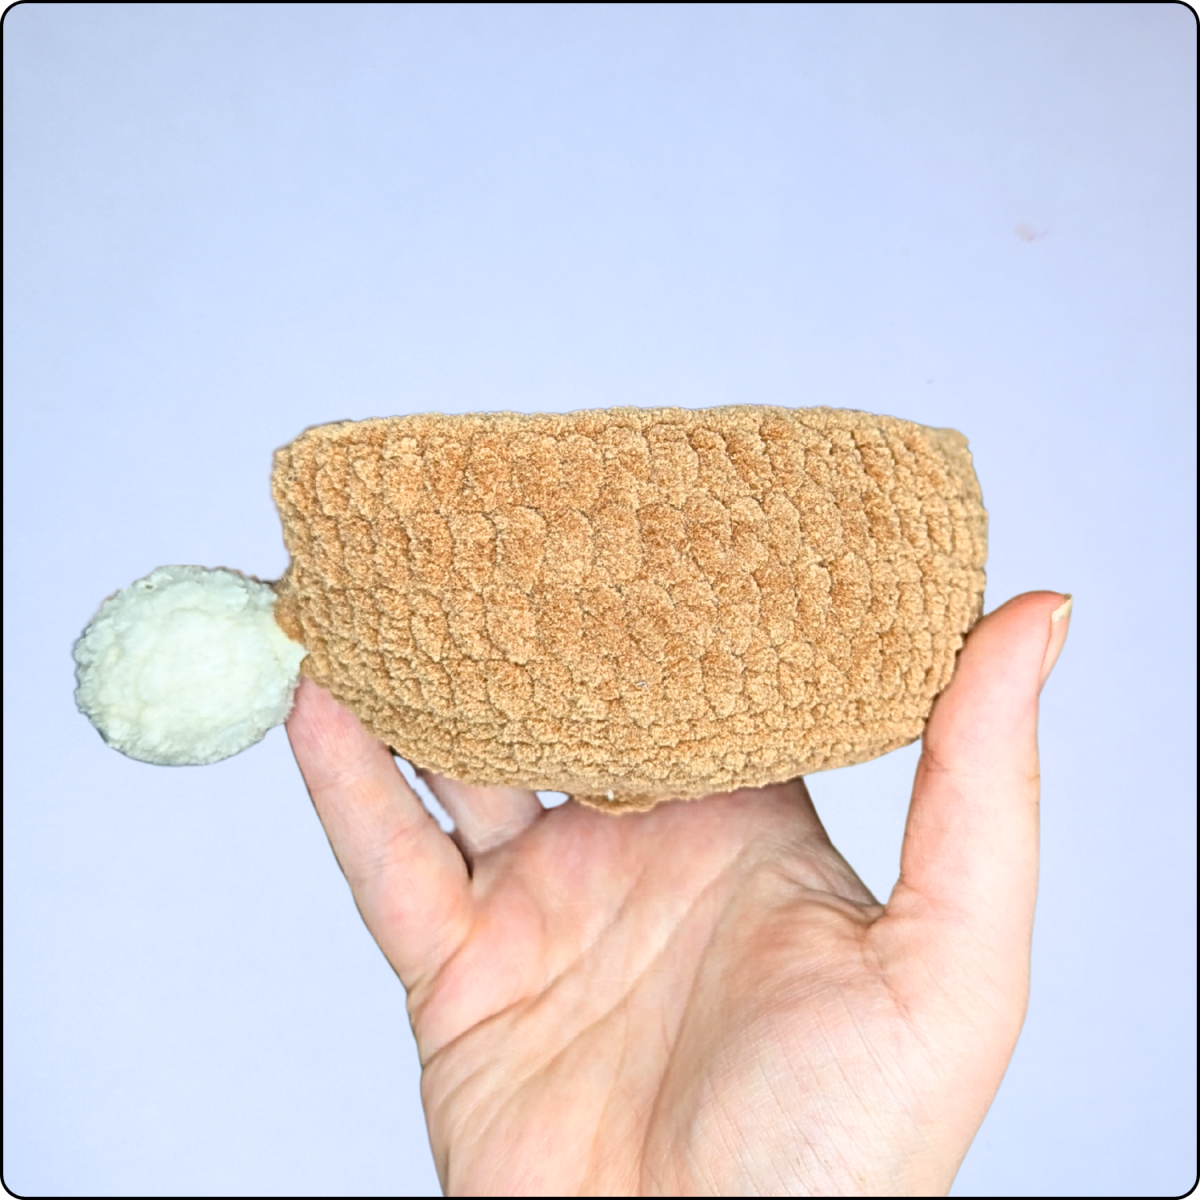
A handmade Easter basket adds a personal and heartfelt touch to your spring décor. This small bunny basket is not only practical but irresistibly cute. Made with plush chenille yarn, it has a soft texture that makes it especially appealing for children.
The little tail, floppy ears, and embroidered face transform a simple basket into an eye-catching Easter highlight.
Before You Start
The basket is worked in continuous rounds and through both loops unless otherwise stated. Use a stitch marker to keep track of your rounds.
The handle and ears are crocheted separately and sewn on later. The tail is attached while crocheting the basket to ensure extra stability.
Using the recommended yarn and crochet hook, the finished Easter basket will have a diameter of approximately 10 cm (about 4 inches). The actual size may vary slightly depending on your individual crochet tension.
Chenille yarn can be slippery, so make sure to weave in your ends securely.
Materials
You will need the following materials for crocheting the little Easter basket:
-
4.5 mm crochet hook
-
Chenille yarn (approx. 120 m / 100 g)
-
approx. 50 g brown (basket, ears, handle)
-
small amounts white (tail & eye detail)
-
small amount pink (nose)
-
small amount black (eyes)
-
-
Stitch marker
-
Scissors
-
blunt yarn needle
-
some fiberfill for the tail
-
Easter grass
Optional recommended:
-
Sewing pins for securing the handle and ears before sewing
Abbreviations (US Terms)
| Rnd | - | Round |
| MR | - | Magic Ring |
| ch | - | chain |
| sc | - | single crochet |
| dc | - | double crochet |
| sl st | - | slip stitch |
| inc | - | increase |
| dec | - | (invisible) decrease |
| BLO | - | only work into back loops |
| [...] xn | - | repeat instructions in brackets [ ] n times |
Instructions
Handle
Using brown chenille yarn, leave a long starting tail (approx. 12 inches) for sewing later. The handle is worked in rows.
Chain 25.
| Row 1: | Starting in the 2nd ch from hook, work 24 sc across. | (24) |
| Row 2-3: | Ch 1, turn. Work 24 sc across. | (24) |
Fold the piece lengthwise and single crochet through both layers across (24 sc) to join and create a sturdy handle. Fasten off, leaving a long tail (approx. 25 cm / 12 inches) for sewing.
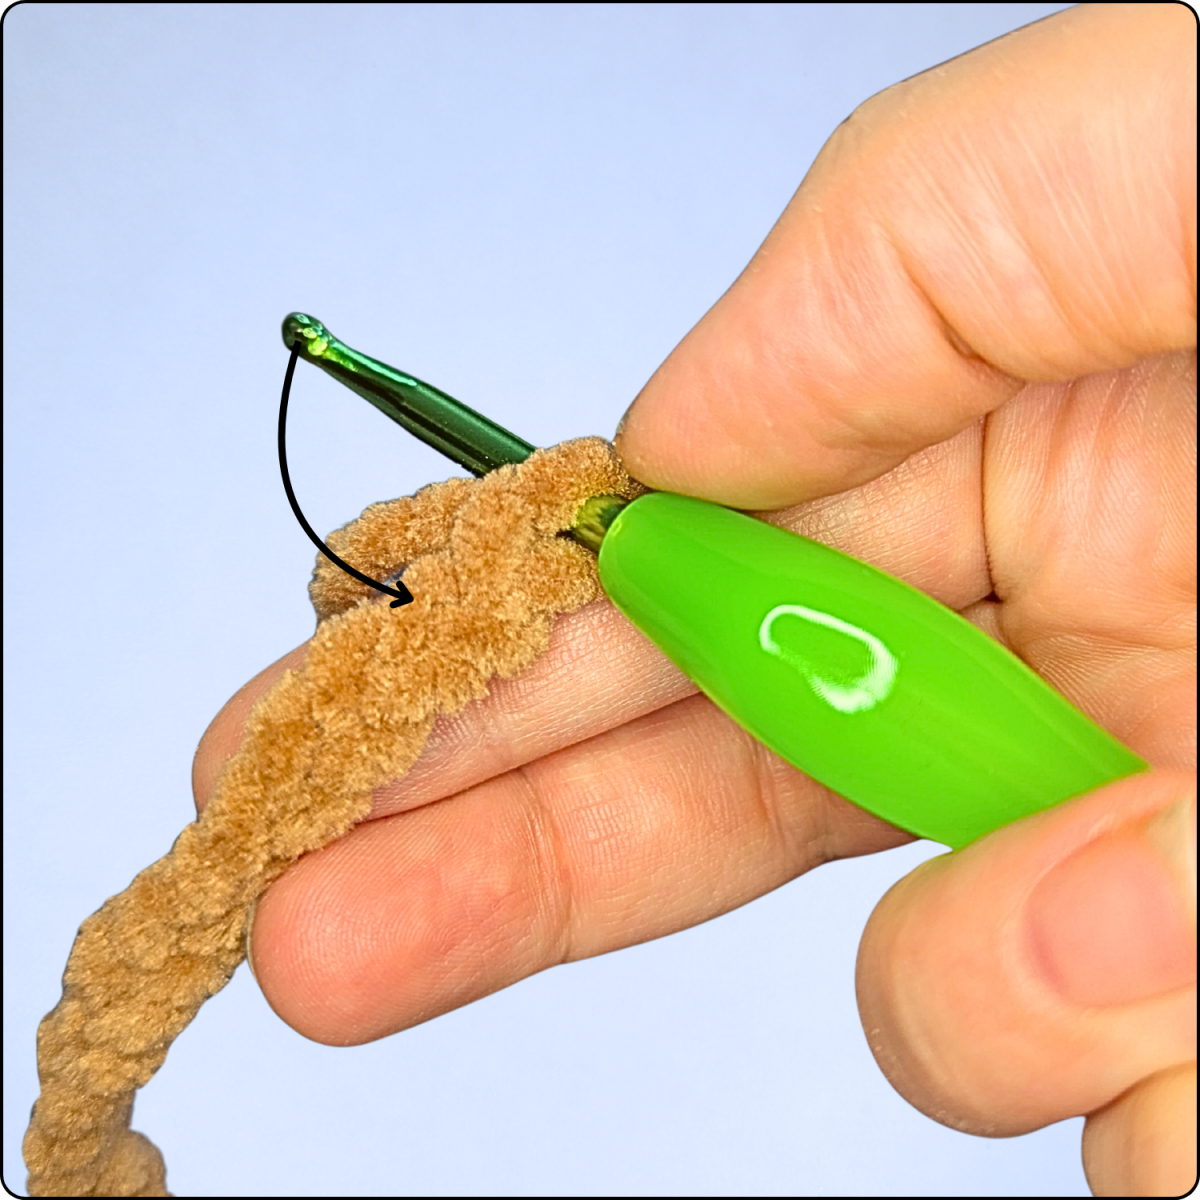
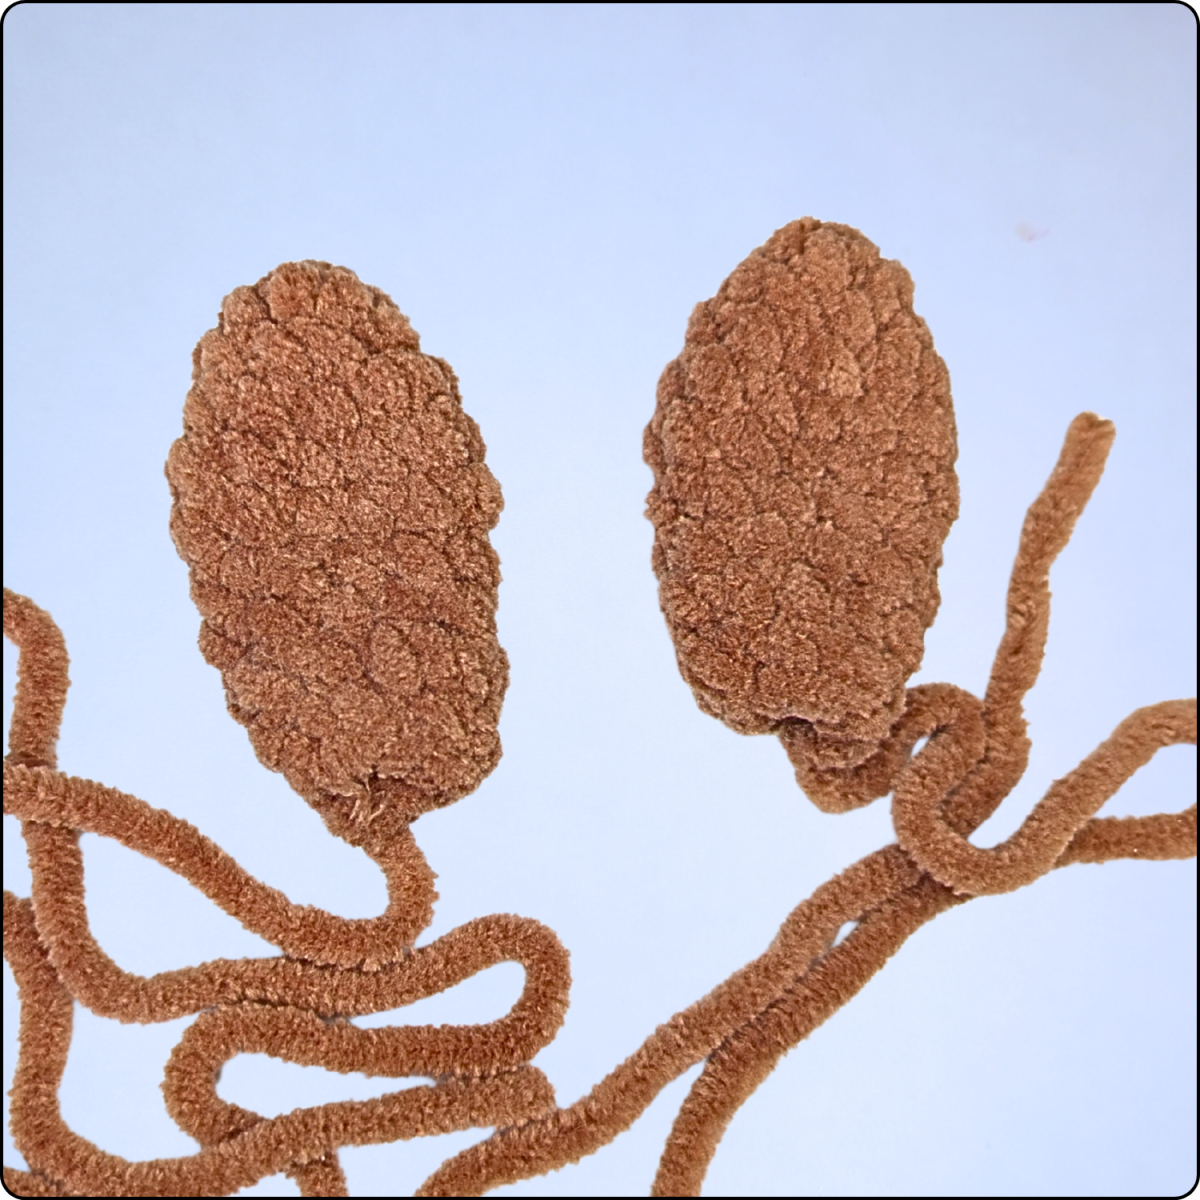
Ears (Make 2)
Using brown yarn:
| Rnd 1: | 4 sc in MR | (4) |
| Rnd 2: | [sc, inc] x2 | (6) |
| Rnd 3: | [inc, sc] x3 | (9) |
| Rnd 4: | [2 sc, inc] x3 | (12) |
| Rnd 5-6: | 12 sc | (12) |
| Rnd 7: | [dec, 2 sc] x3 | (9) |
| Rnd 8-9: | 9 sc | (9) |
| Rnd 10: | [sc, dec] x3 | (6) |
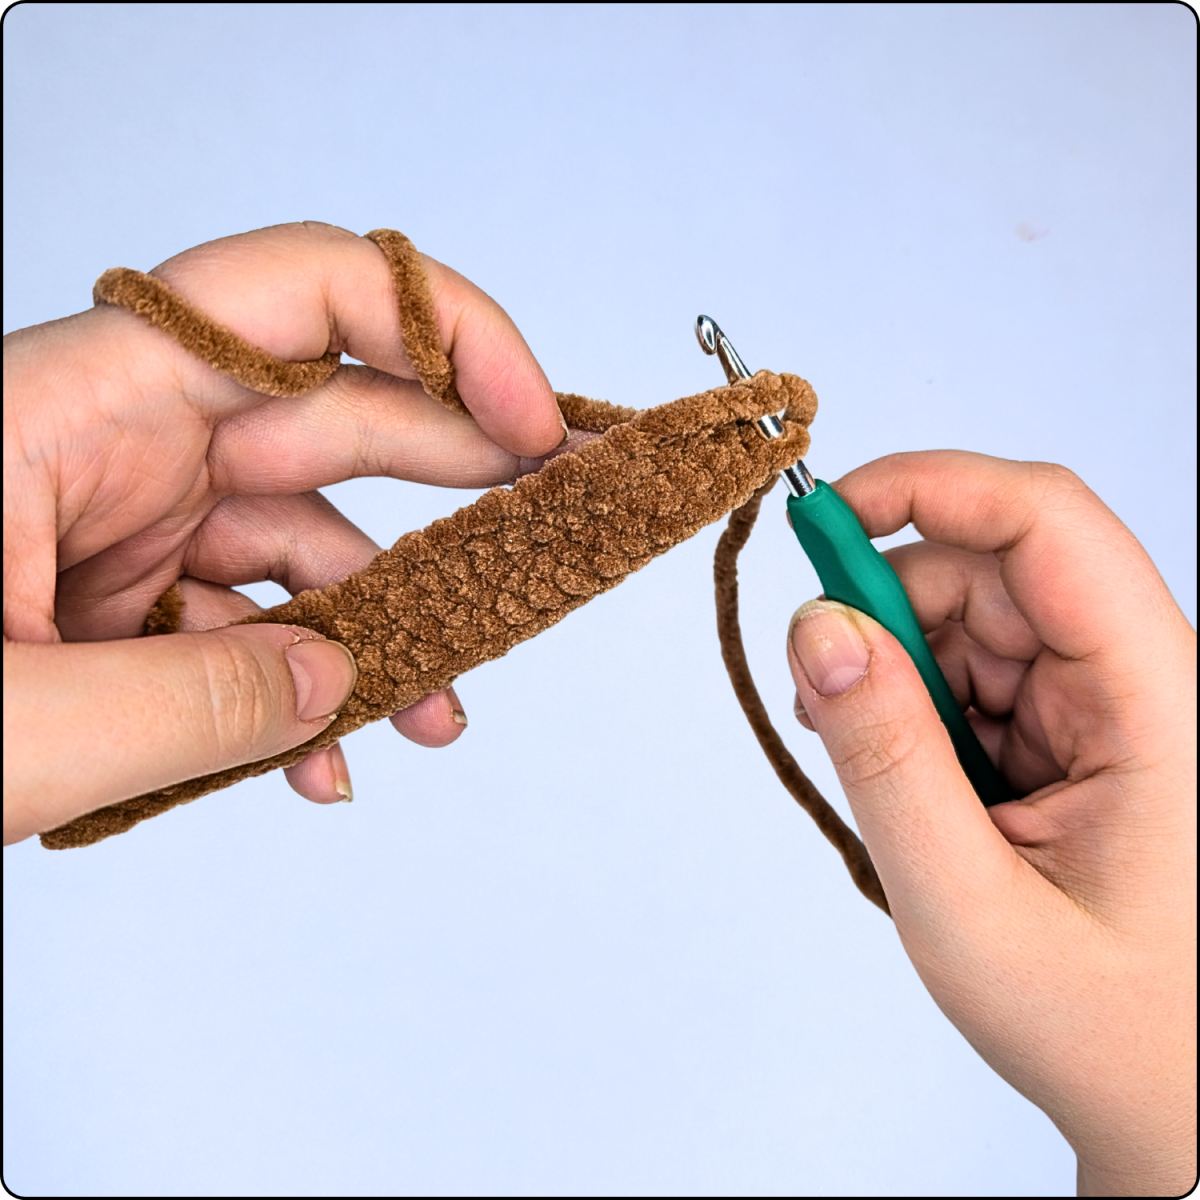
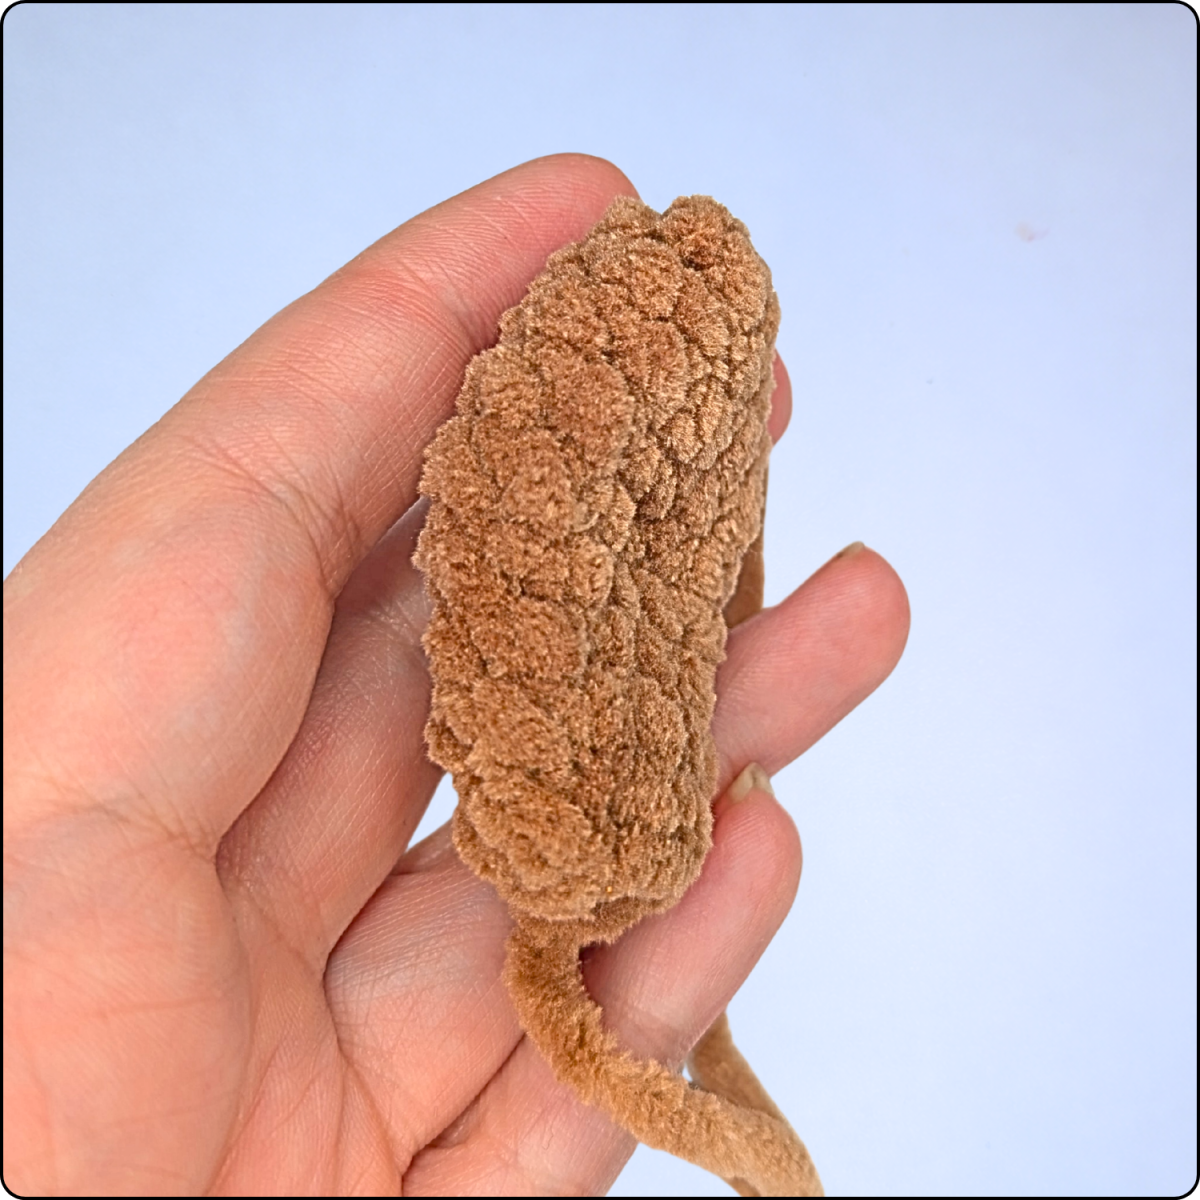
Fasten off, leaving a long tail for sewing. Hide the starting yarn tail inside the ear and gently flatten the crocheted piece to create the typical bunny-ear shape.

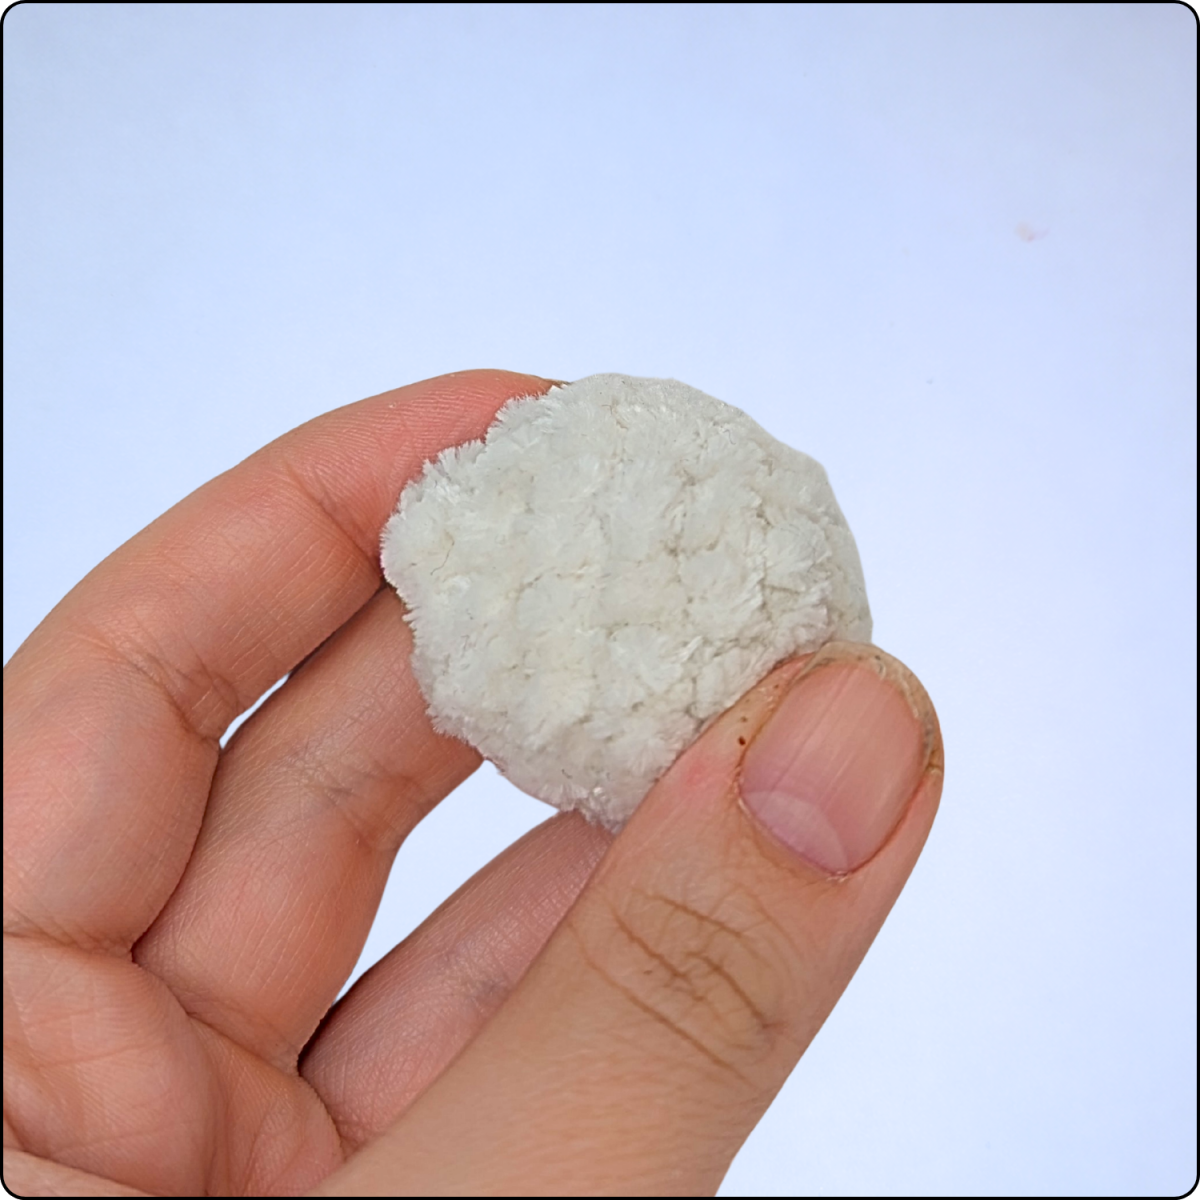
Tail
Using white yarn:
| Rnd 1: | 6 sc in MR | (6) |
| Rnd 2: | 6 inc | (12) |
| Rnd 3: | 12 sc | (12) |
| Rnd 4: | [inc, sc] x6 | (18) |
| Rnd 5: | 18 sc | (18) |
| Rnd 6: | [abn, sc] | (12) |
Stuff the tail lightly with polyester fiberfill.
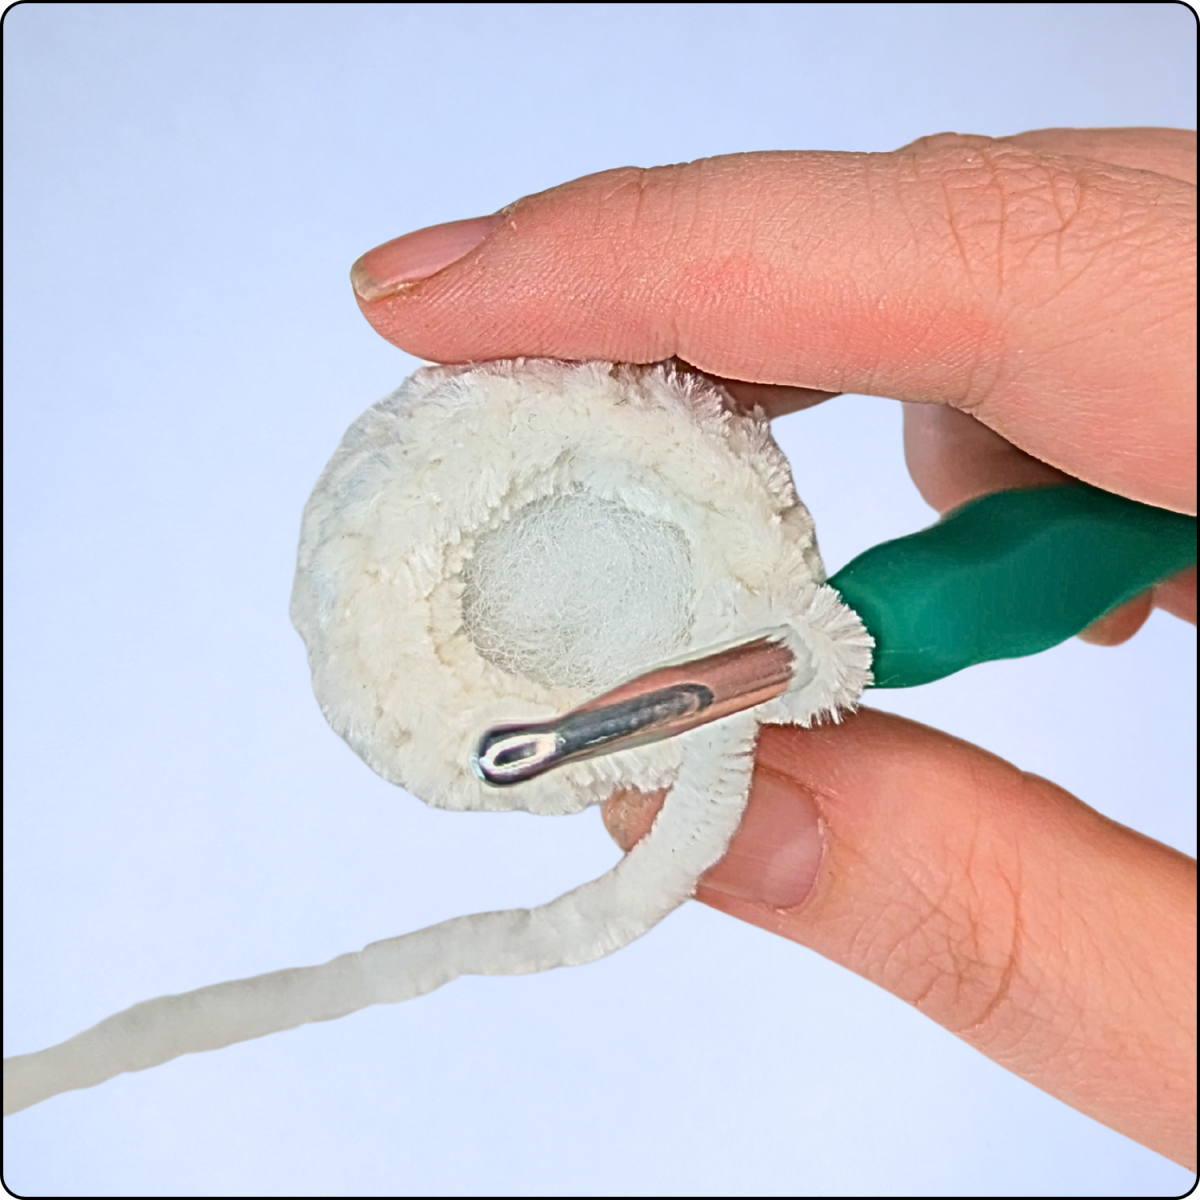
| Rnd 7: | 6 dec | (6) |
Fasten off and hide the yarn tail inside the crocheted bunny tail.
Basket
Using brown yarn:
| Rnd 1: | 6 sc in MR | (6) |
| Rnd 2: | 6 inc | (12) |
| Rnd 3: | [inc, sc] x6 | (18) |
| Rnd 4: | [2 sc, inc] x6 | (24) |
| Rnd 5: | [inc, 3 sc] x6 | (30) |
| Rnd 6: | [2 sc, inc, 2 sc] x6 | (36) |
| Rnd 7: | [4 sc, inc, sc] x6 | (42) |
| Rnd 8: | [6 sc, inc] x6 | (48) |
| Rnd 9: | [inc, 7 sc] x6 | (54) |
| Rnd 10: | Working in BLO, 54 dc | (54) |
In the next round, the tail will be crocheted directly onto the basket. This method secures the tail firmly in place so it does not need to be sewn on afterward.
Slightly flatten the end of the tail. For each double crochet that attaches the tail, follow these steps:
-
Yarn over.
-
Insert the hook first through the tail and then through the next stitch of the basket.
-
Yarn over and pull up a loop.
-
Yarn over and pull through the first loop, the tail, and the next loop on the hook (2 loops remain on the hook).
-
Finish the double crochet as usual by pulling the yarn through the remaining two loops.

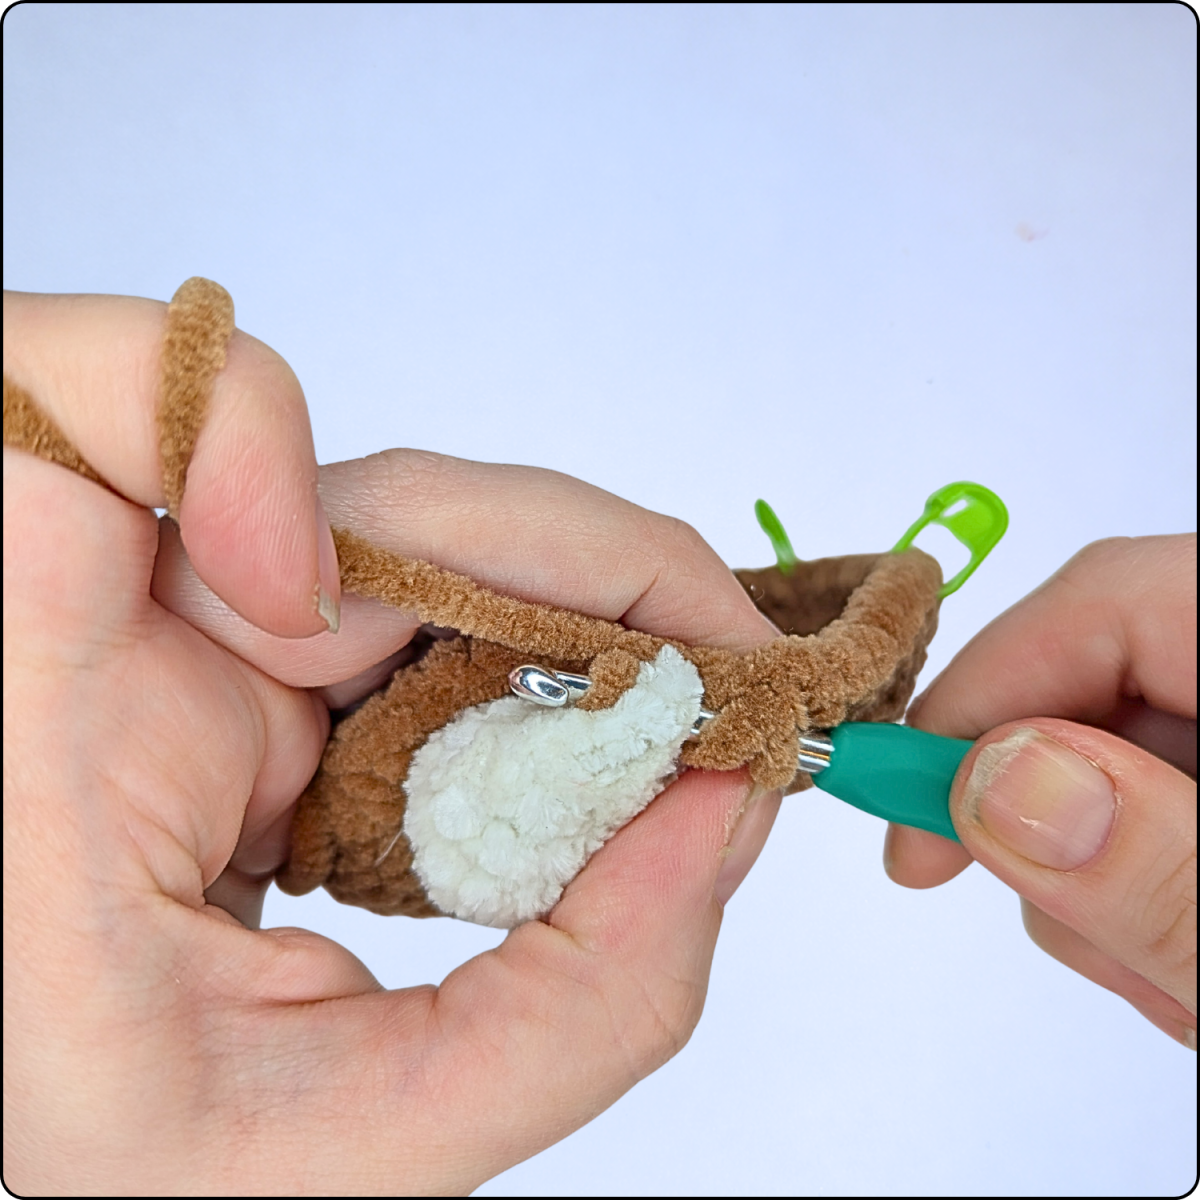
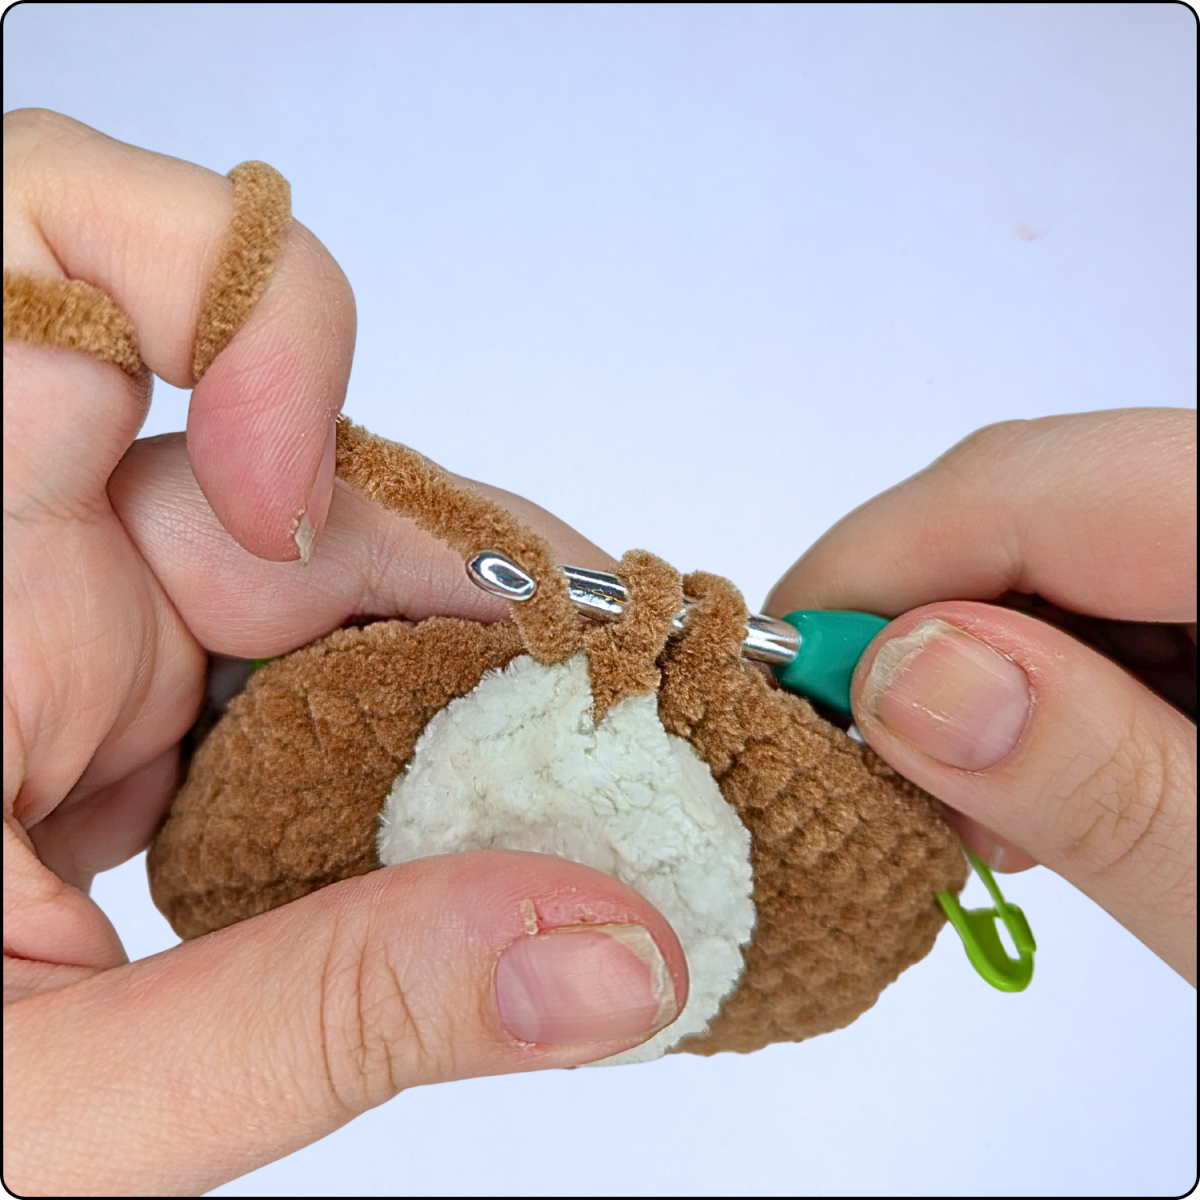
This technique secures the tail directly to the basket while crocheting.
| Rnd 11: | 3 dc with tail, 51 dc | (54) |
| Rnd 12-13: | 54 dc | (54) |
Slip stitch to the next stitch to finish. Fasten off and weave in all ends securely.
Assembly
Attaching the Handle
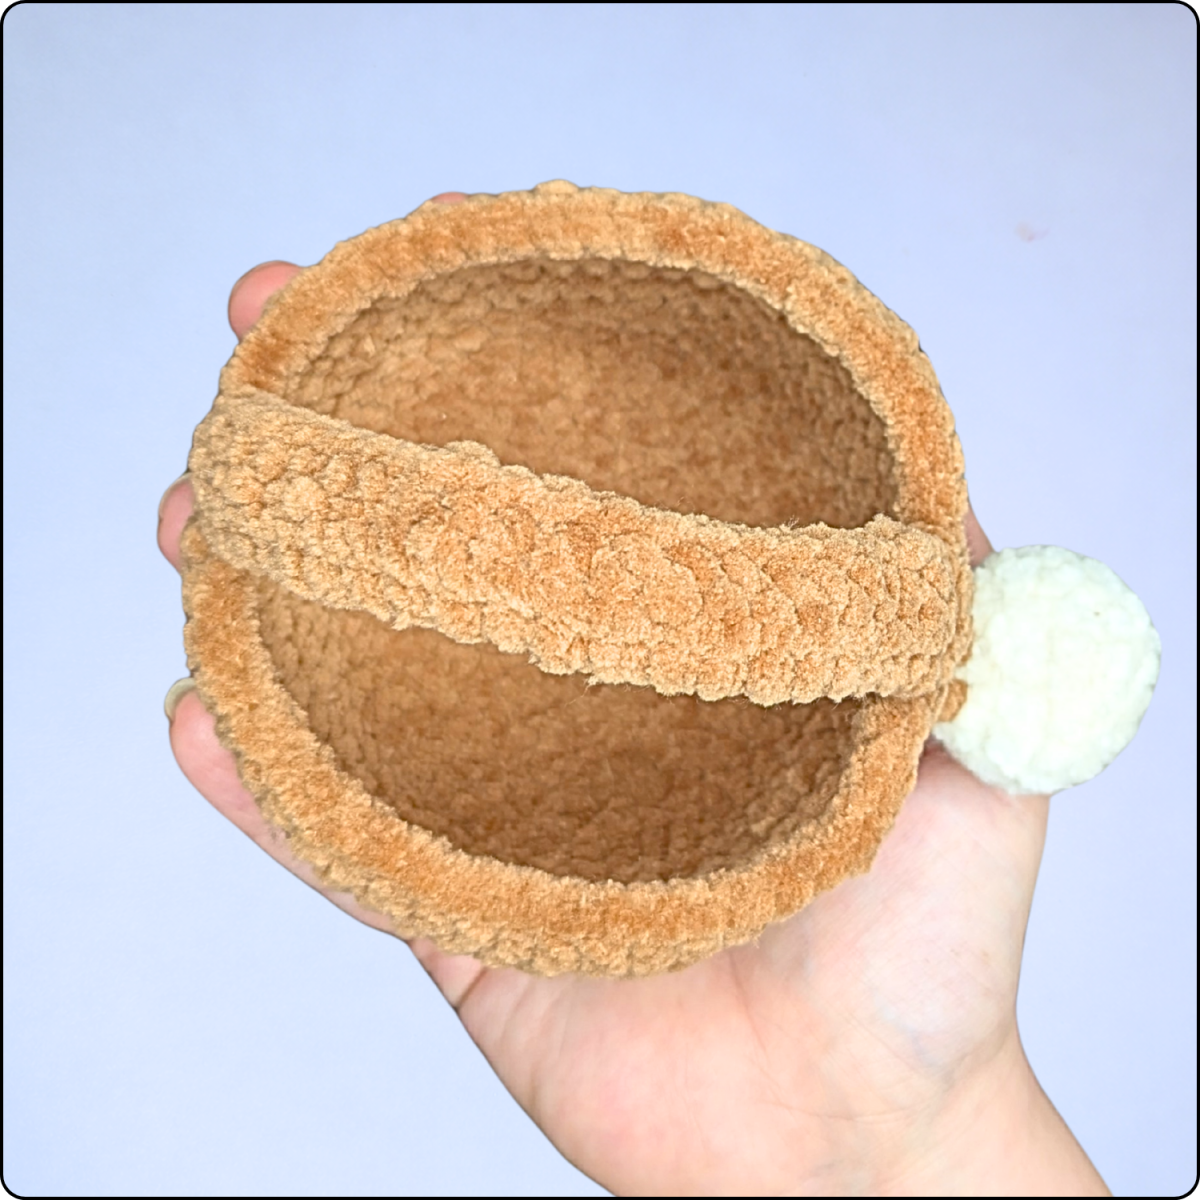
Place the handle on top of the basket so that it sits centered above the tail. The two ends of the handle should be attached to opposite sides of the basket.
First secure the handle in place with sewing pins. This helps keep the handle aligned while sewing. Using the yarn tails from the handle, sew each end firmly to the basket. Insert the needle several times through both the stitches of the basket and the stitches of the handle. This ensures the handle is securely attached and strong enough to hold small treats inside the basket.
When finished, weave the yarn tails neatly into the inside of the basket and trim any excess yarn.
Attaching the Ears
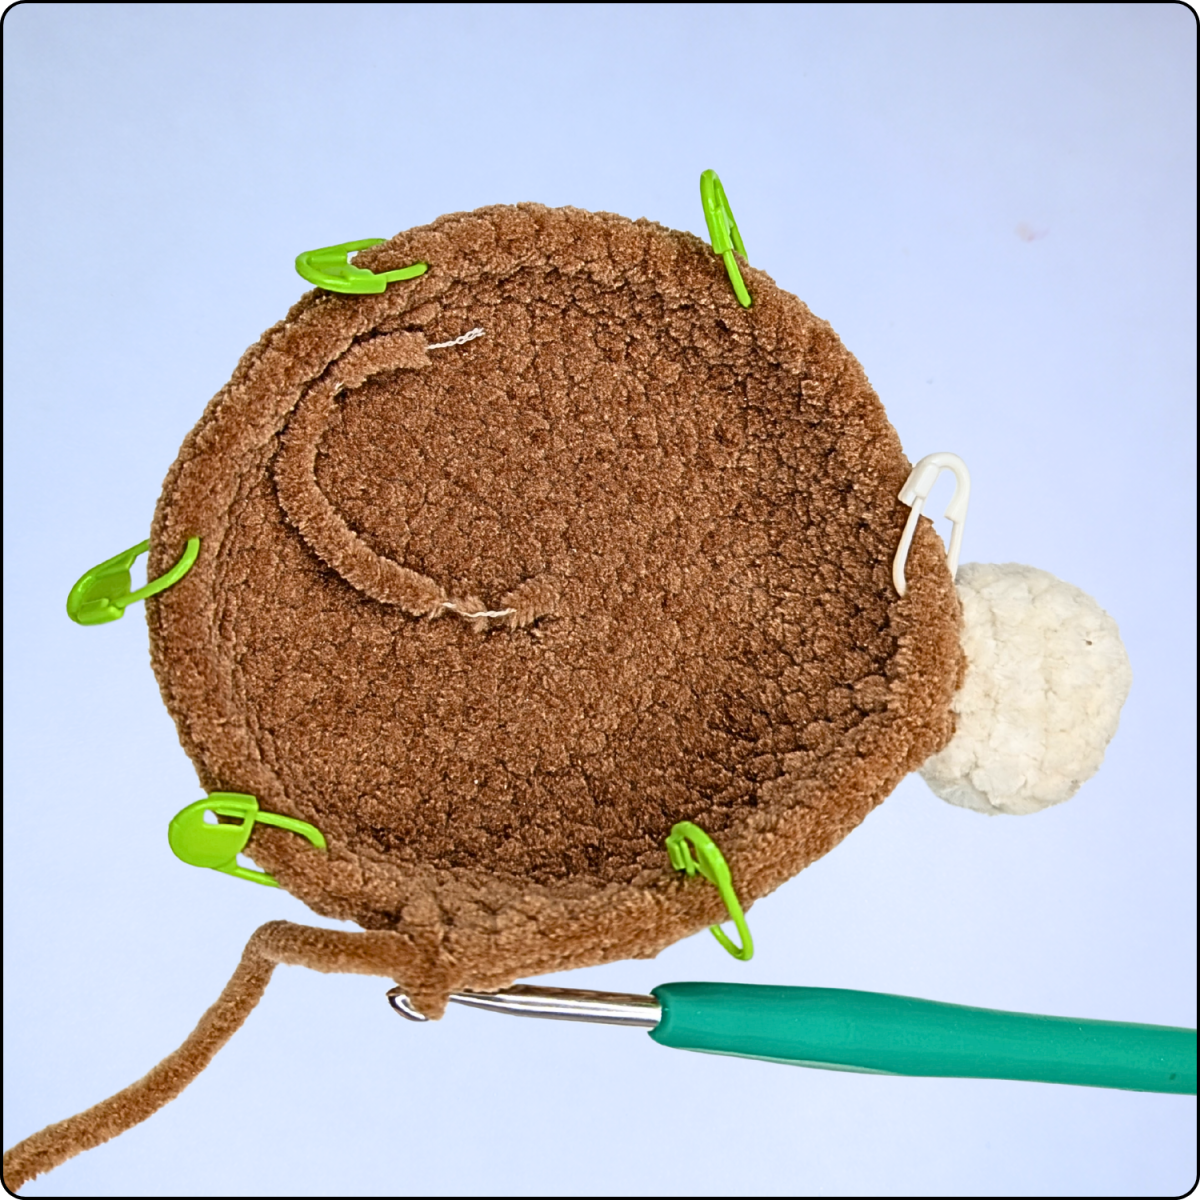
Position the ears on either side of the handle, leaving about two stitches of space between the handle and each ear.
Use sewing pins to temporarily secure the ears and check that they are evenly positioned. Once you are satisfied with the placement, sew the bottom edge of each ear to the basket using small stitches. Insert the needle through both the ear and the basket stitches so the seam stays as neat and invisible as possible.
.png)
.png)
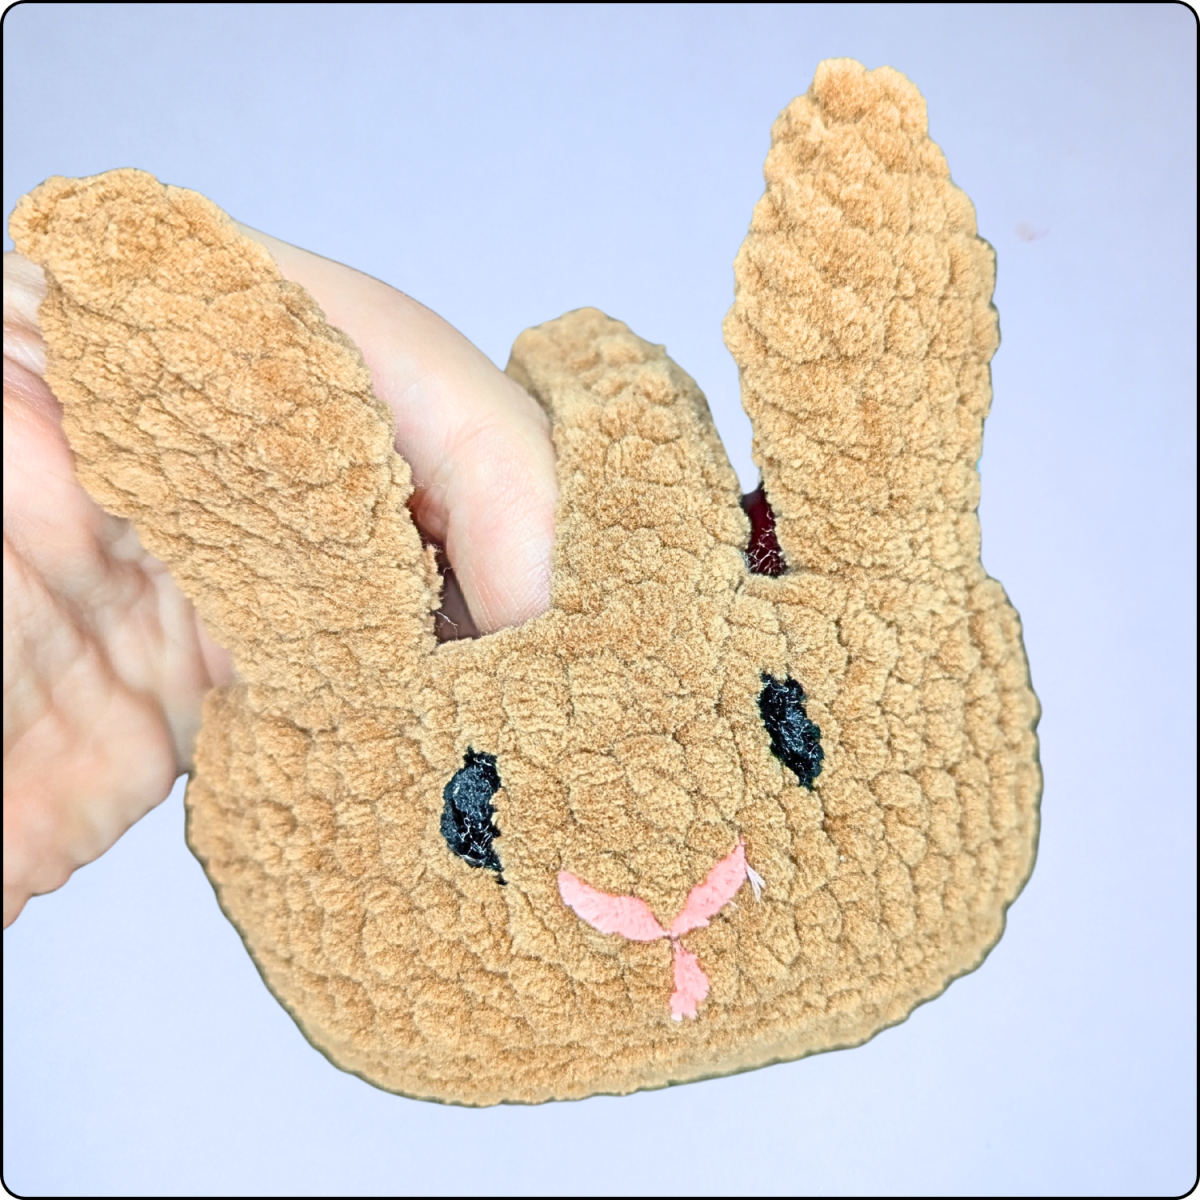
After both ears are attached, weave in the yarn ends securely on the inside of the basket.
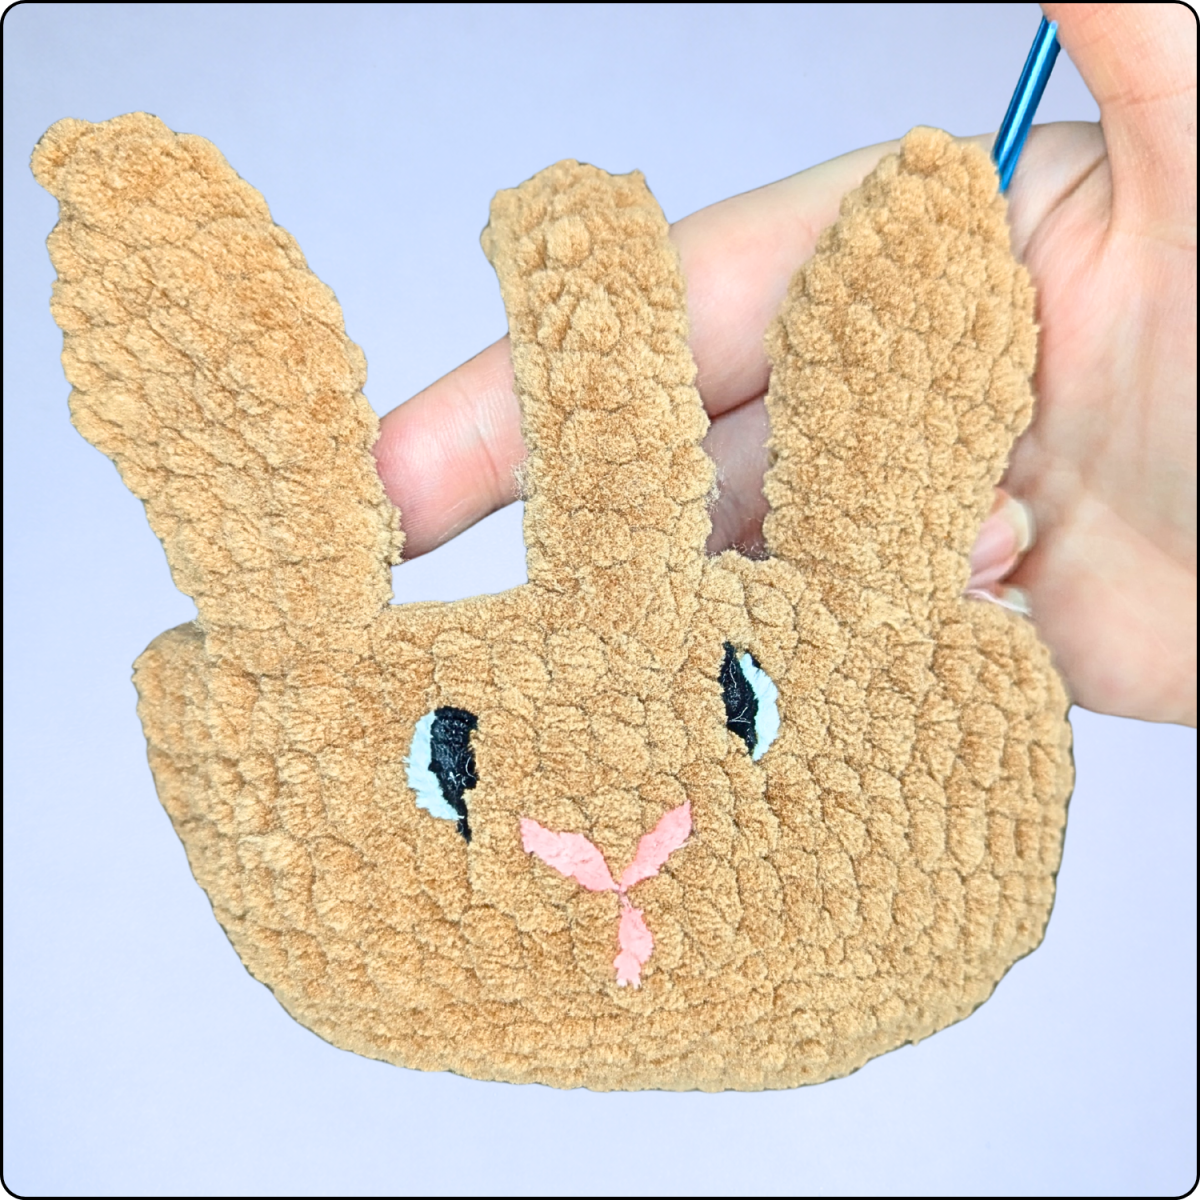
Embroidering the Face
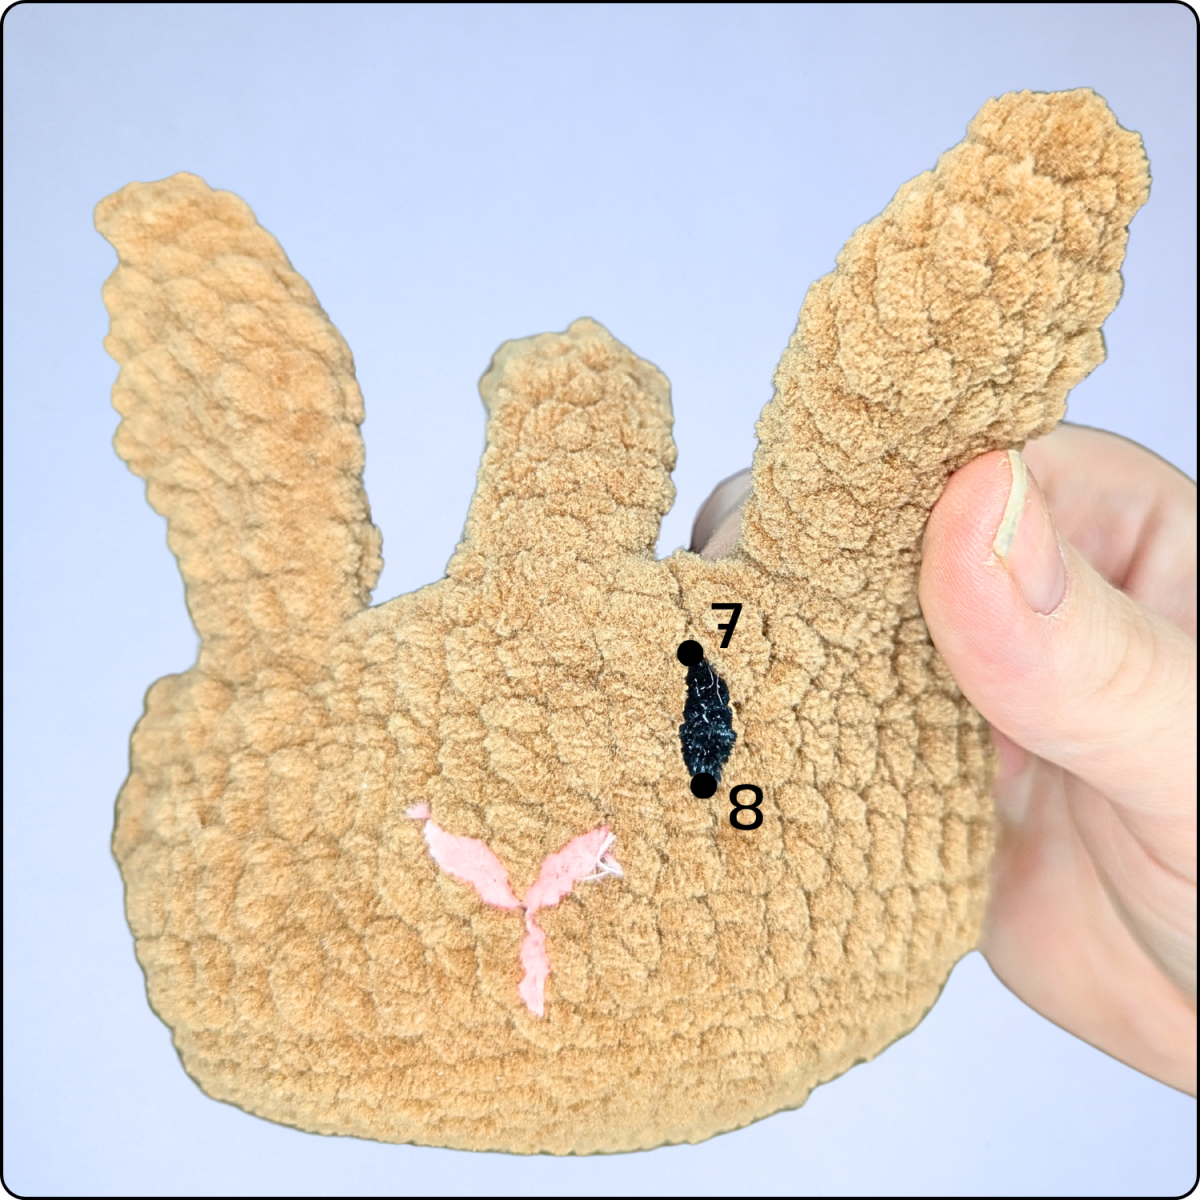
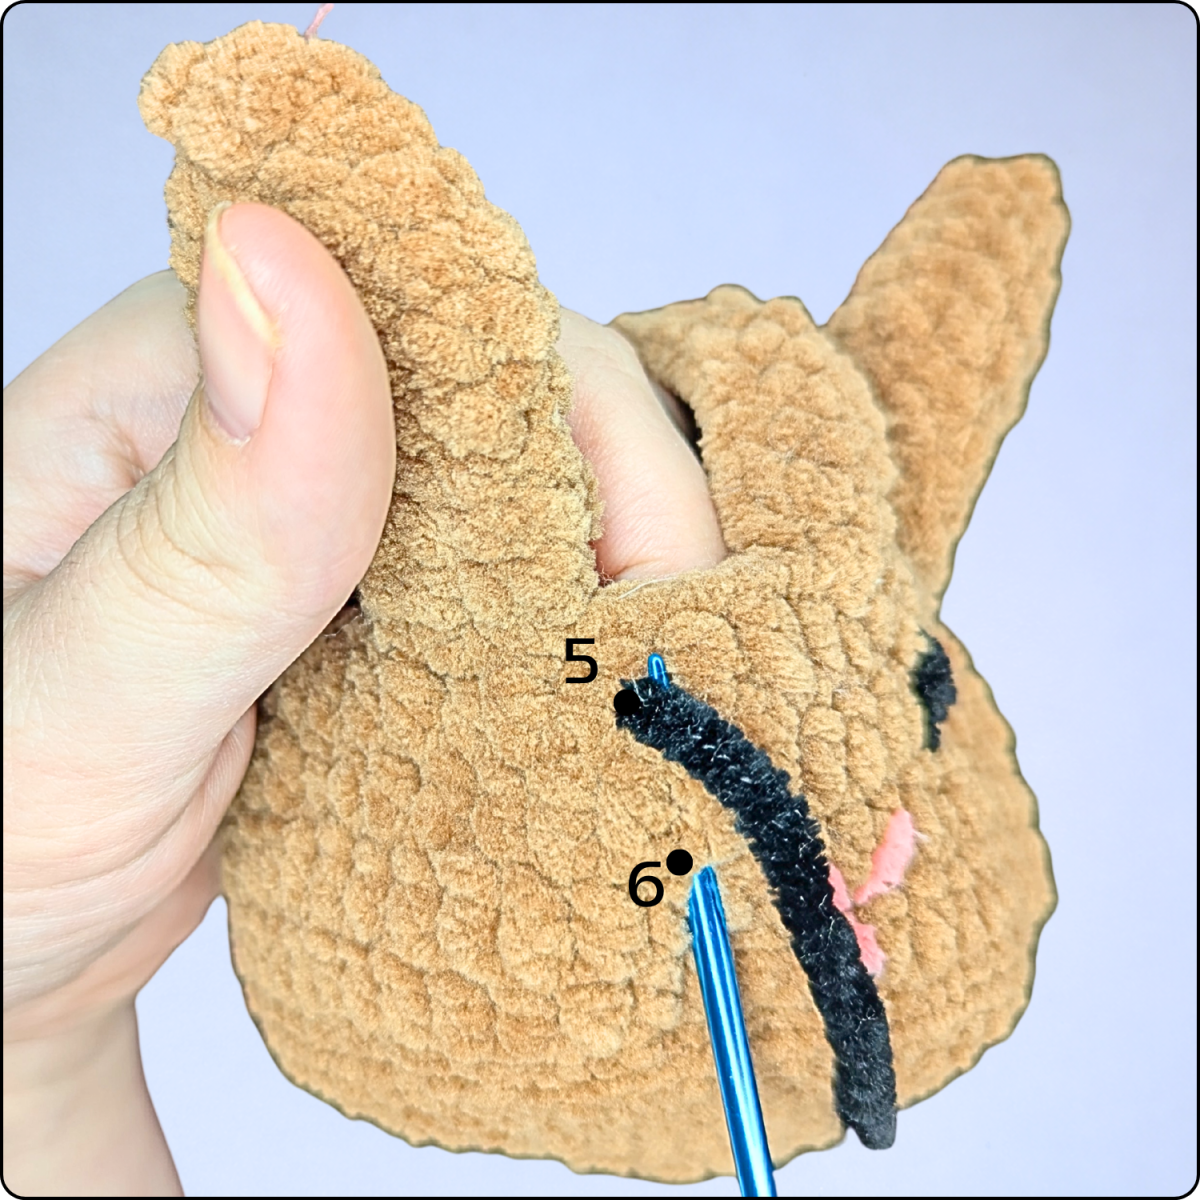
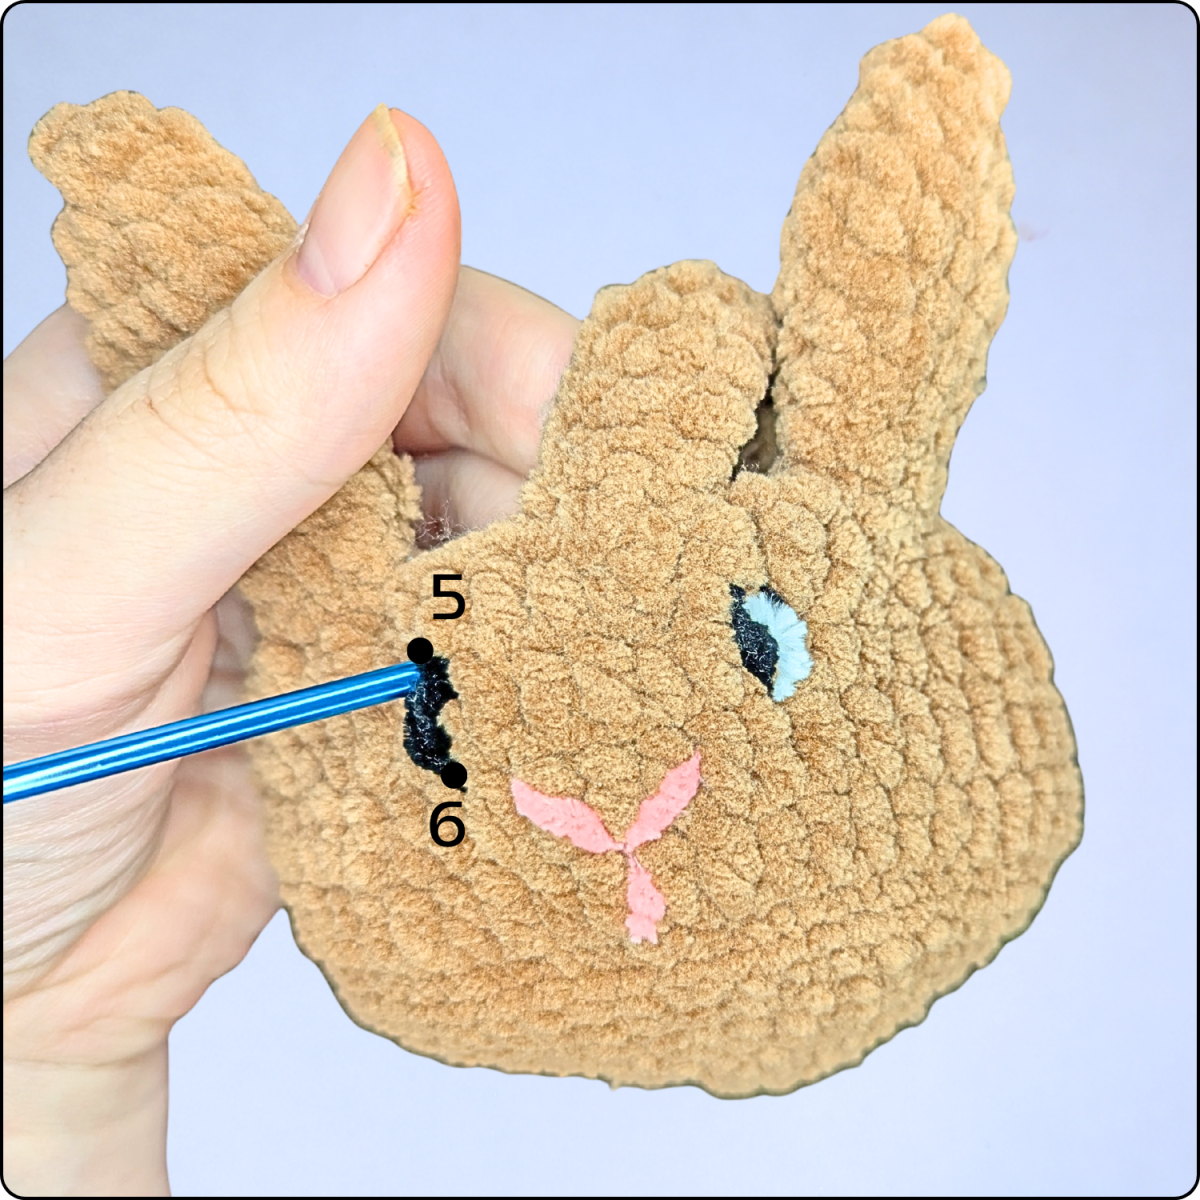
To give the basket its cute bunny look, the face is embroidered directly onto the basket. In the instructions below, several points are referenced as positions 1–8. These are marked accordingly in the photos to make the placement easier to follow.
Embroidering the Nose
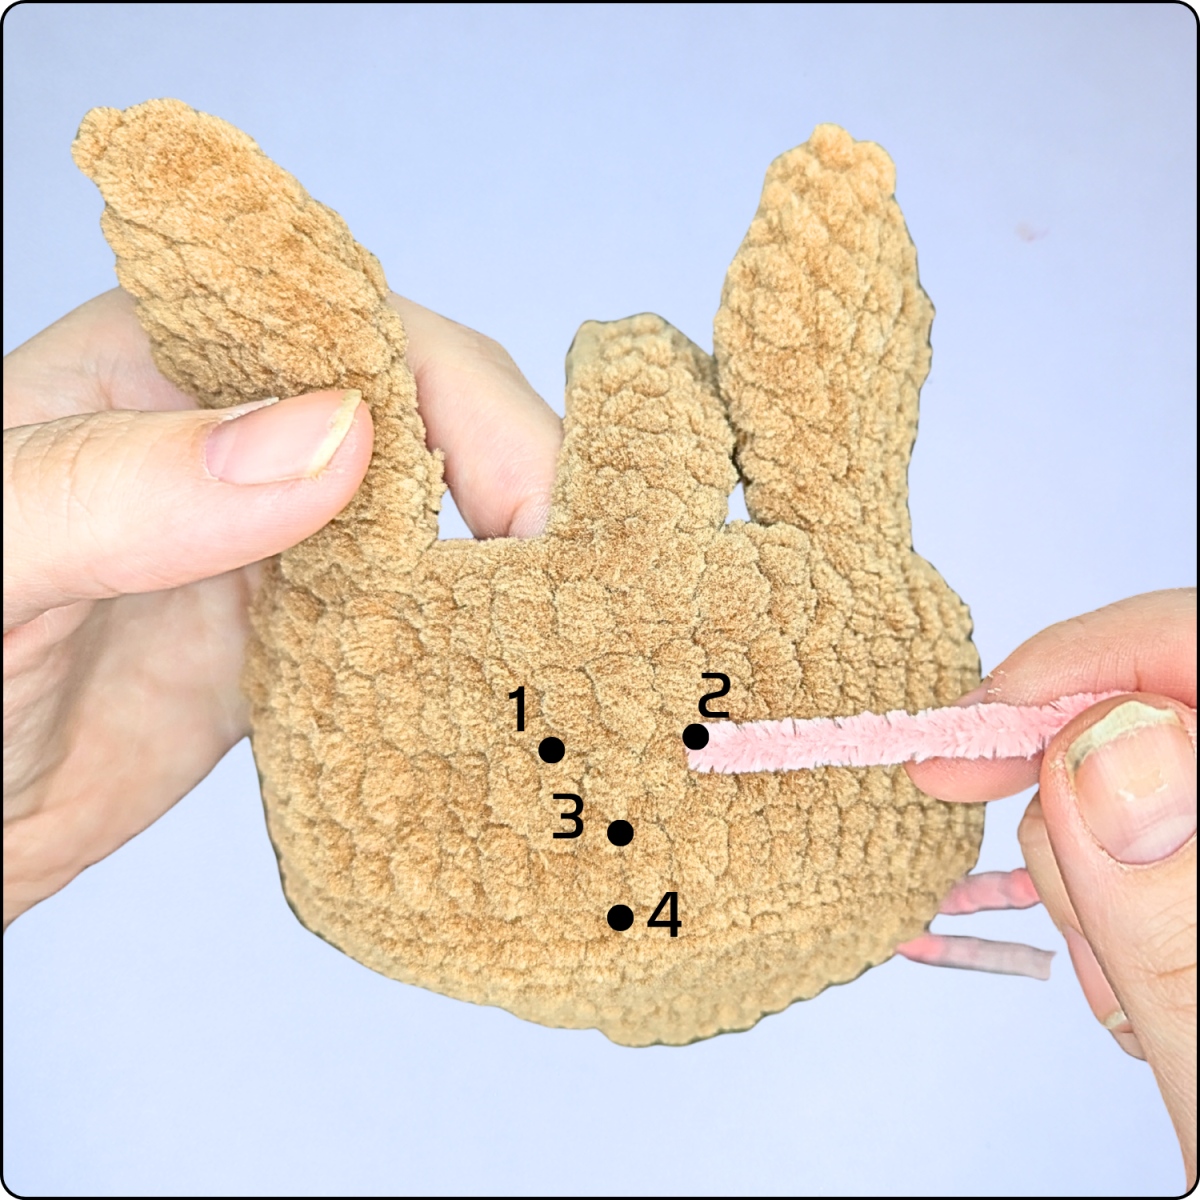
Start with the nose using pink Chenille yarn.
-
Insert the needle from the inside of the basket to the outside at position 2.
-
Insert the needle back into the basket at position 3, then bring it out again at position 1.
-
Insert the needle again at position 3 and bring it out at position 4.
-
Finally, insert the needle once more at position 3.
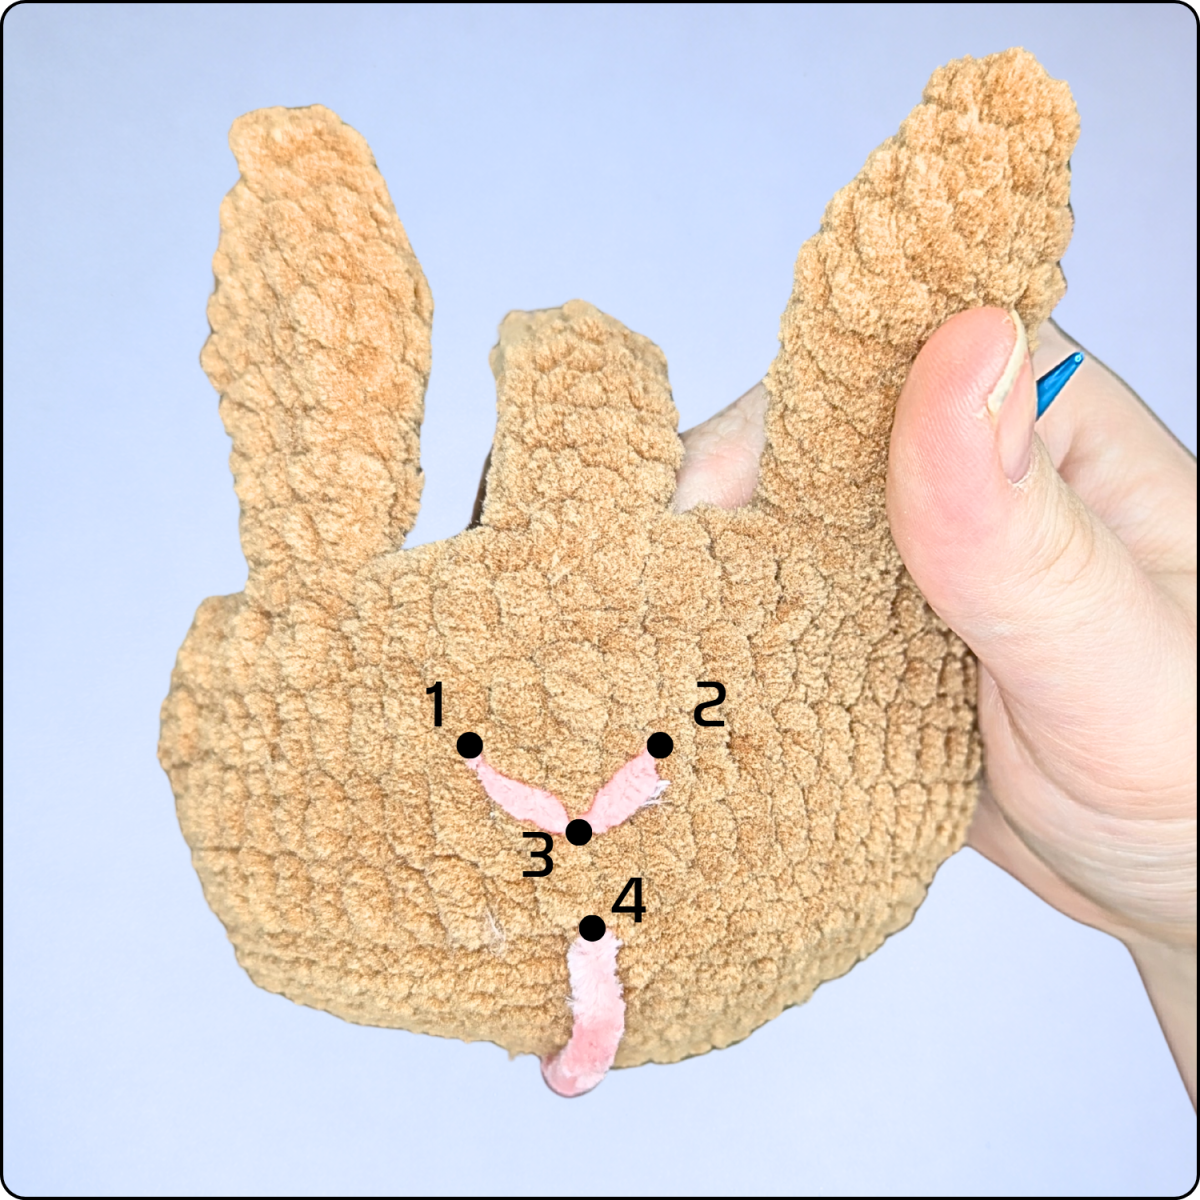
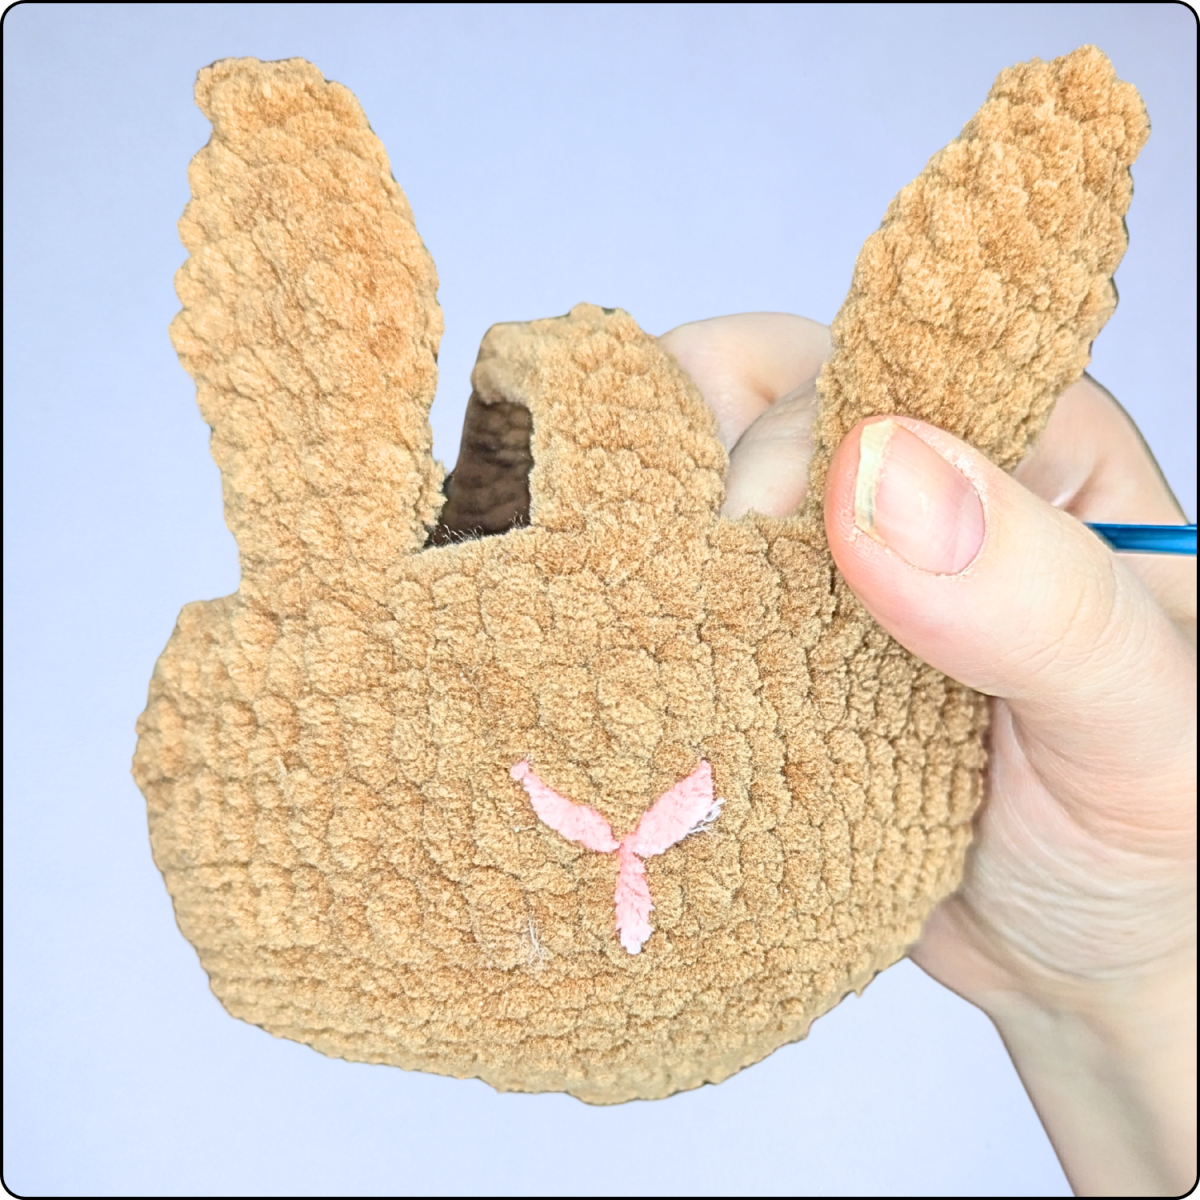
These stitches create a small triangular bunny nose. When finished, weave both pink yarn ends securely inside the basket so they are hidden from view.
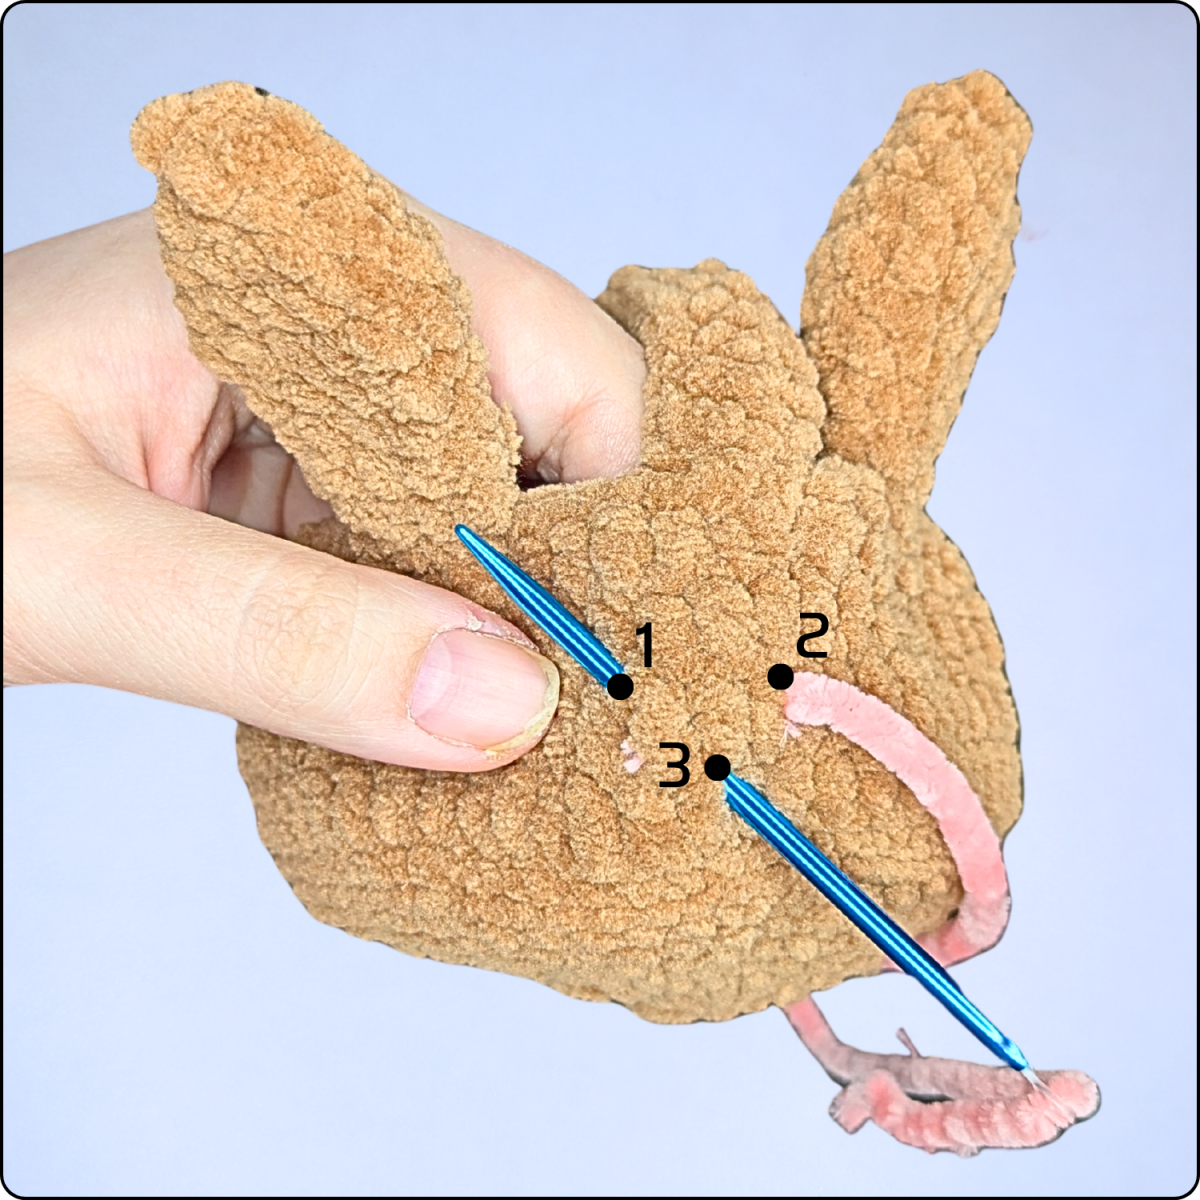
Embroidering the Eyes
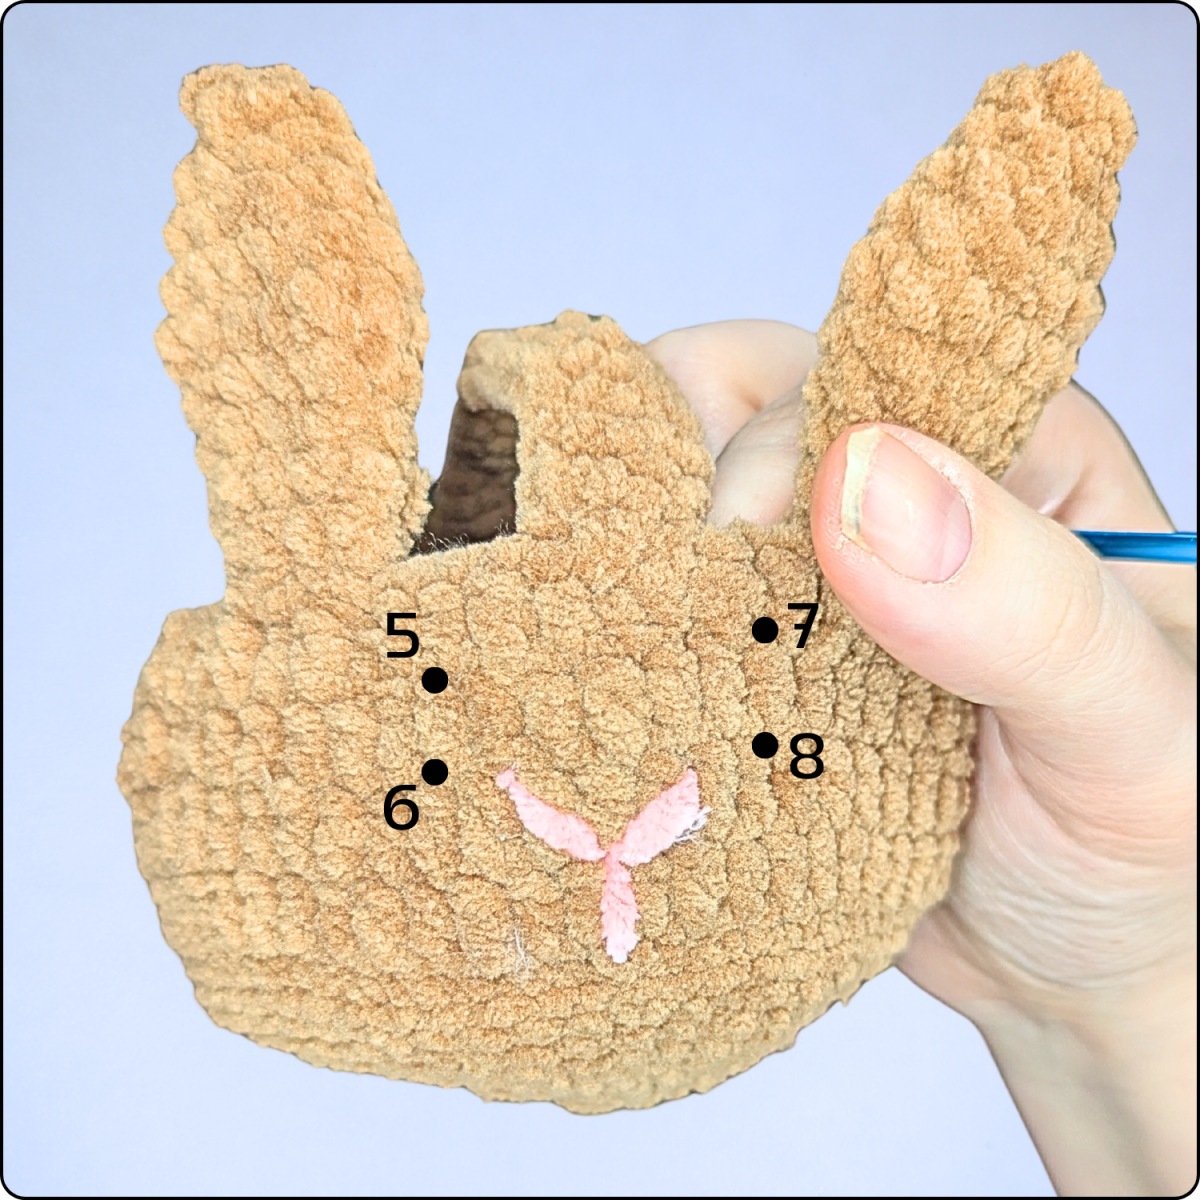
Next, embroider the eyes using black Chenille yarn.
-
Insert the needle from the inside to the outside at position 8.
-
Insert the needle back into the basket at position 7 and bring it out again at position 8.
-
Insert the needle once more at position 7.
Now move the yarn on the inside of the basket to the other side as invisibly as possible.
-
Bring the needle out at position 5.
-
Insert the needle at position 6 and bring it out again at position 5.
-
Finally, insert the needle once more at position 6.
Both eyes should now be completed. Secure the black yarn ends neatly inside the basket.
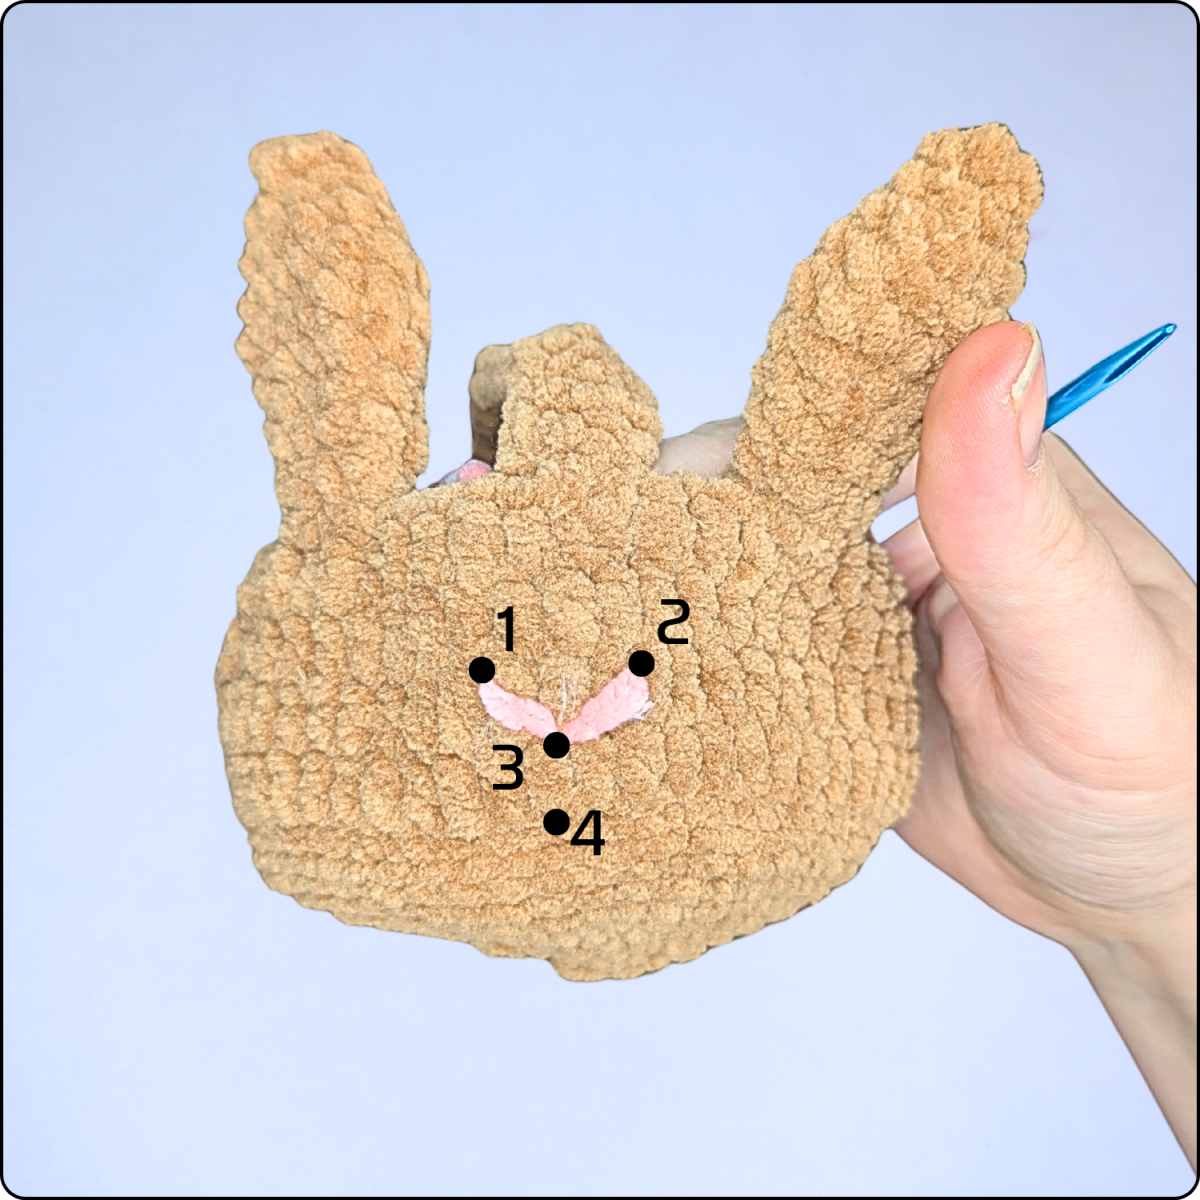
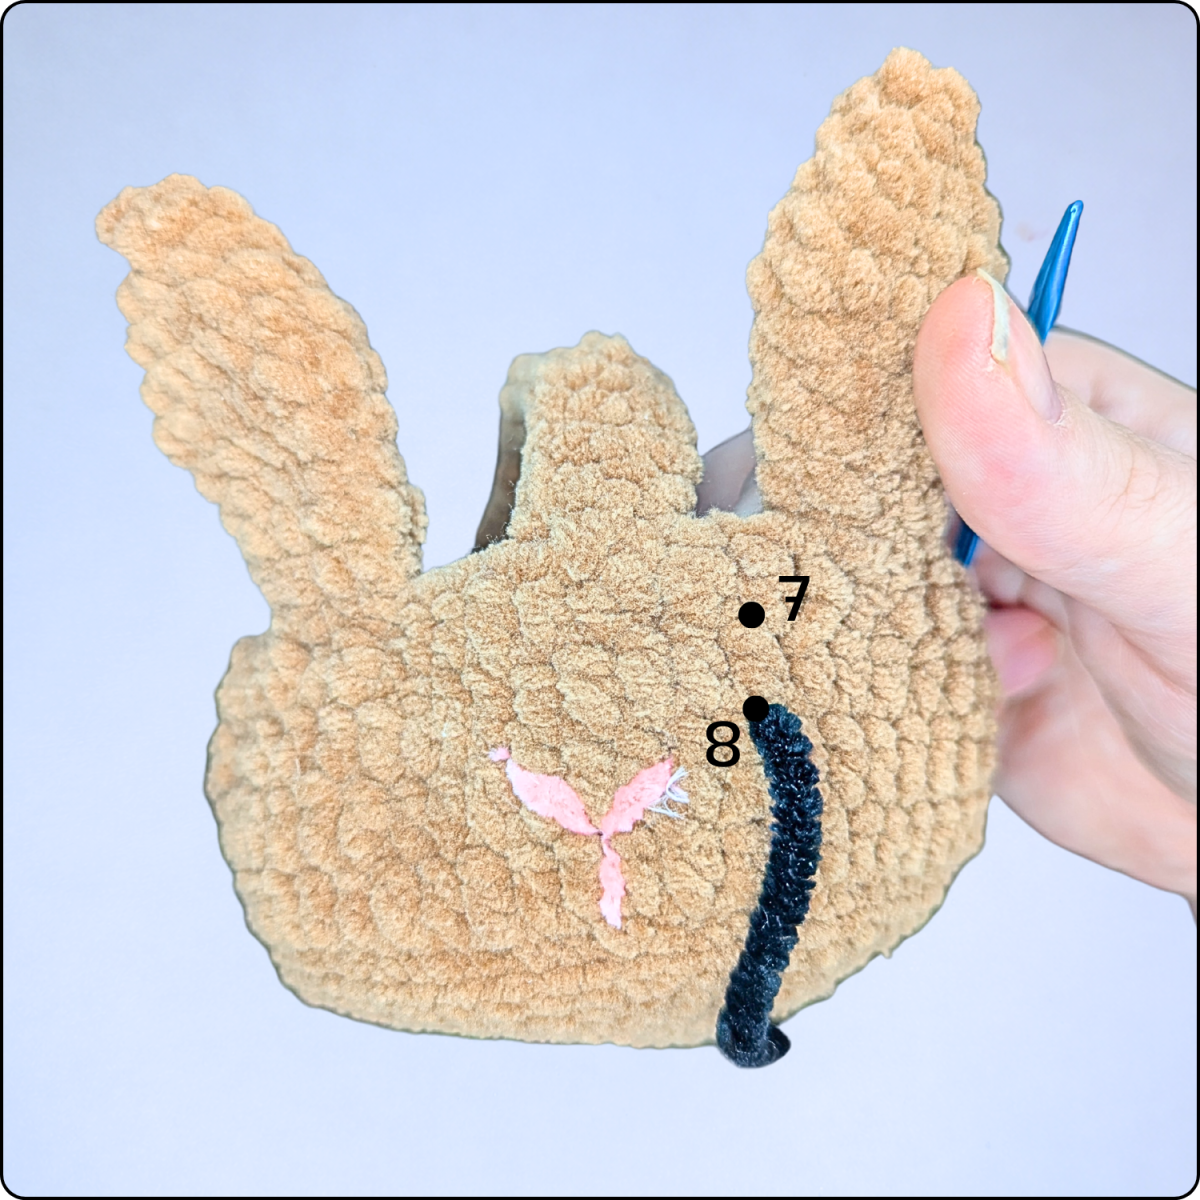
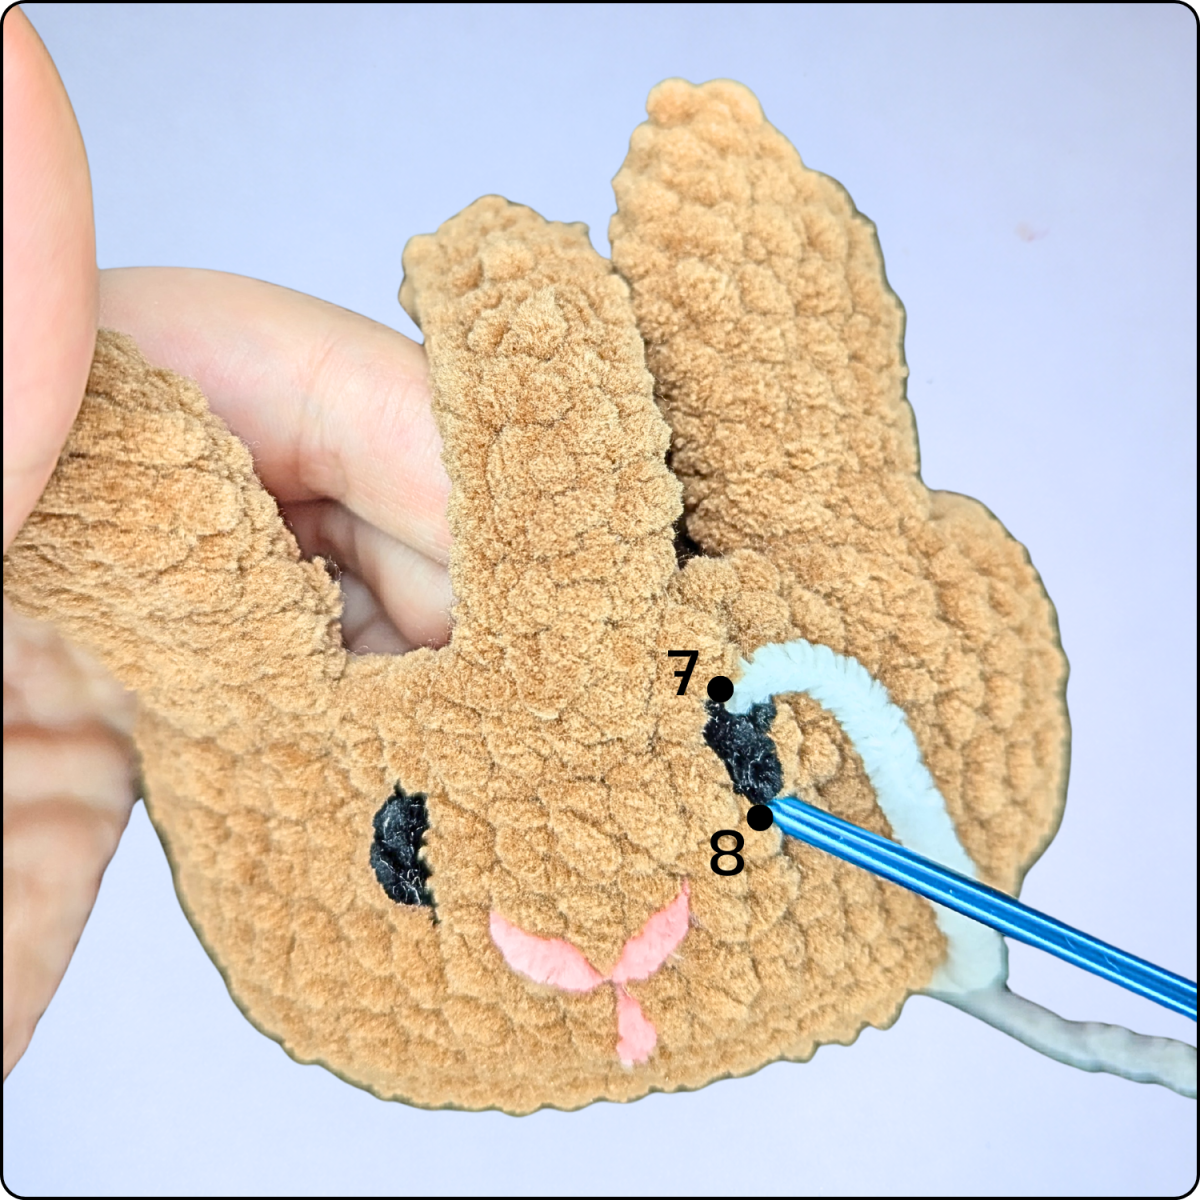
To make the eyes look more lively, small highlights are added using white Chenille yarn.
-
Insert the needle from the inside to the outside at position 7.
-
Insert the needle back into the basket at position 8.
Move the yarn invisibly across the inside of the basket.
-
Bring the needle out at position 5.
-
Insert the needle at position 6.
Finally, weave in the white yarn ends securely inside the basket.
Finishing the basket
To finish the basket, place a handful of Easter grass inside. This helps the basket keep its shape and creates the perfect base for small chocolate eggs, candy, or other Easter treats.
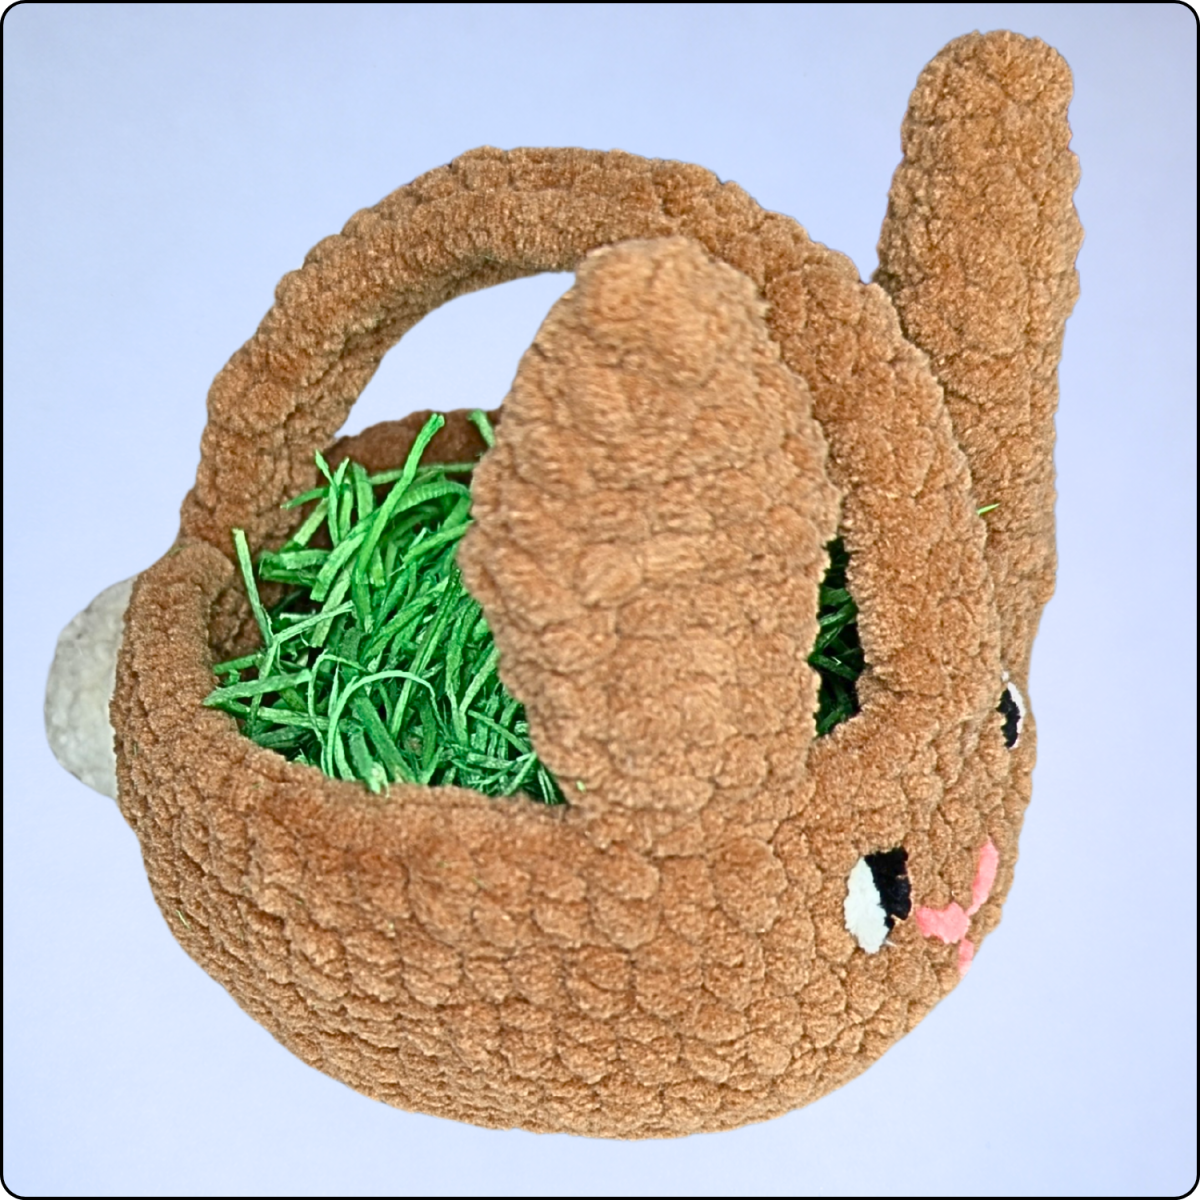
This bunny Easter basket is a quick and satisfying crochet project, perfect for spring crafting. Whether you use it as table décor, a gift basket, or a festive candy holder, it’s guaranteed to bring smiles.
If you enjoyed this pattern, feel free to follow my blog or take a look at my shop. At the moment, there is only a small selection of crochet patterns available, but I am actively working on adding new designs – so be sure to check back from time to time.
Happy crocheting and Happy Easter!


