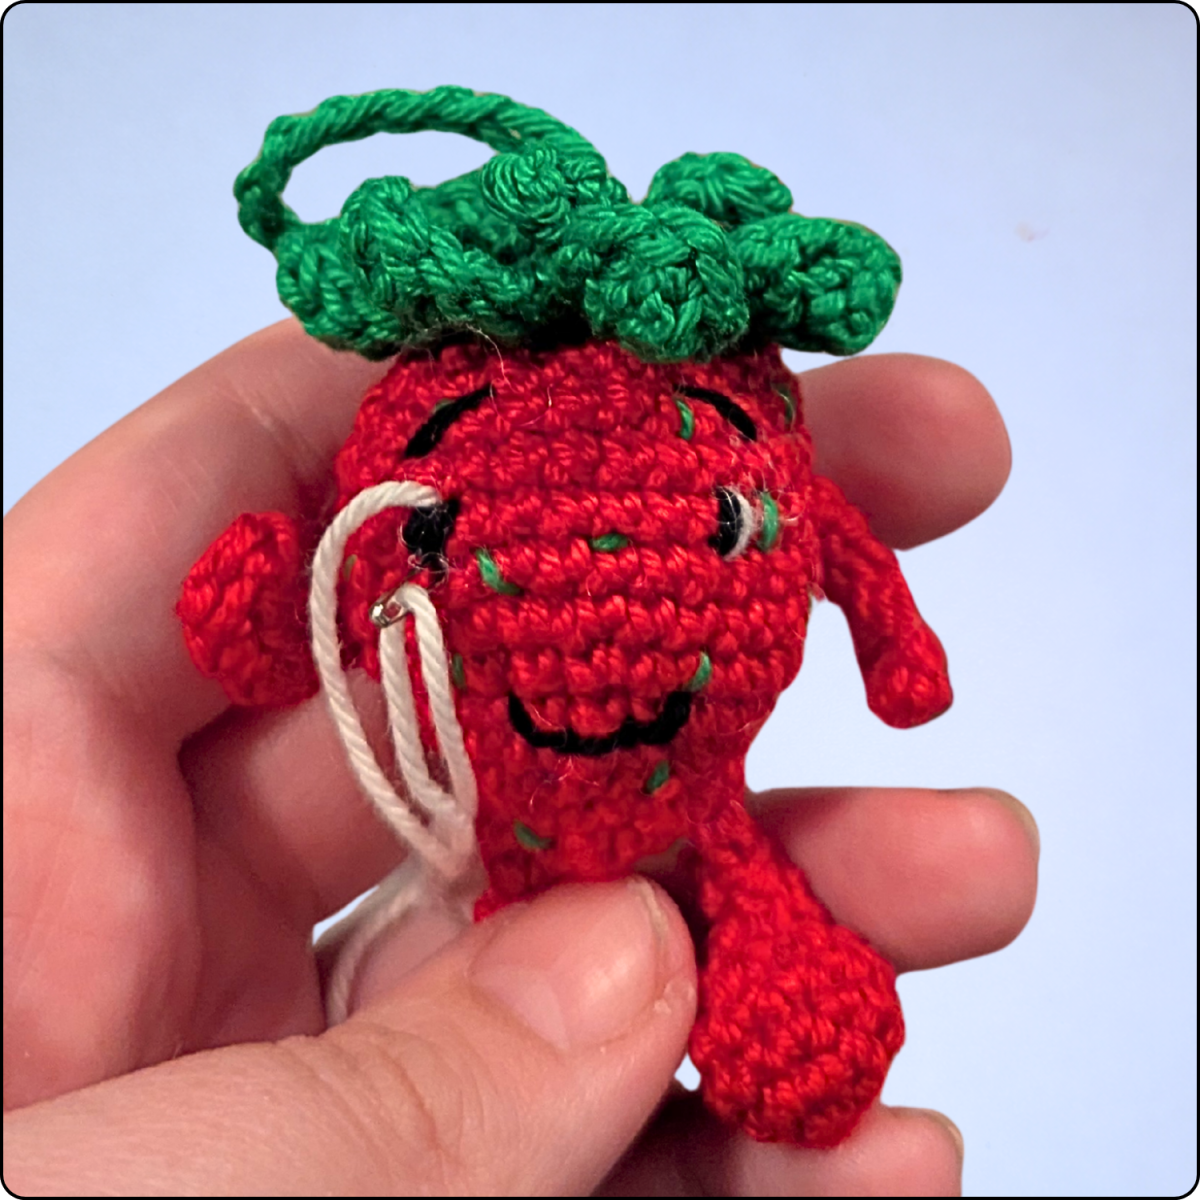
This free crochet pattern for a strawberry keychain is perfect for anyone who loves small amigurumi projects and is looking for a quick and creative crochet idea. Crocheted keychains have been trending for years, and fruity designs such as a crochet strawberry are especially popular thanks to their playful look and timeless appeal.
The crochet strawberry keychain makes a wonderful handmade gift, small present, or cute everyday accessory. Due to its compact size, only a small amount of yarn is required, making this project ideal for using up leftover yarn. The pattern is clearly structured and suitable for beginners with basic crochet skills as well as experienced crocheters who want to create a fast amigurumi project.
Using single crochet stitches, simple increases and decreases, and charming details like embroidered strawberry seeds and a cute face, this strawberry amigurumi comes together step by step. Whether used as a keychain, bag charm, or decorative accessory, this crocheted strawberry is sure to add a touch of summer to any crochet project.
Notes before you start
- This crochet strawberry keychain is worked in continuous spiral rounds unless stated otherwise. Do not join the rounds with a slip stitch.
- To keep track of the beginning of each round, it is highly recommended to use a stitch marker.
- Using the recommended yarn and crochet hook, the finished strawberry keychain will measure approximately 6 cm (about 2.4 inches) in height, excluding the loop. The final size may vary slightly depending on your individual tension and crochet style.
- For a neat and even result, crochet tightly and evenly, especially when working with amigurumi.
- Before sewing on the individual parts, it is helpful to pin them in place to check the positioning and overall look.
This pattern is written using standard US crochet terminology and is suitable for beginners with basic crochet knowledge.
Materials
To crochet the strawberry keychain, you will need the following materials:
-
2.5 mm crochet hook
-
Fiberfill stuffing
-
Cotton yarn with a yardage of approx. 125 m / 50 g (for example Schachenmayr Catania or a similar yarn) in the following colors:
-
Red (approx. 10 g)
-
Light green (approx. 5 g)
-
Black (small amount)
-
White (small amount)
-
-
Yarn needle (blunt tip)
-
Scissors
-
Stitch marker
-
optional: pins
Abbreviations
This pattern uses the following abbreviations:
| Rnd | - | Round |
| st | - | stitch |
| ch | - | chain |
| sl st | - | slip stitch |
| sc | - | single crochet |
| MR | - | Magic Ring |
| dc | - | double crochet |
| hdc | - | half double crochet |
| inc | - | increase (work 2 sc into the same st) |
| dec | - | invisible decrease |
| BLO | - | back loop only |
| FLO | - | front loop only |
| [...] xn | - | repeat the instructions in the brackets n times |
Instructions
Strawberry
Start in red.
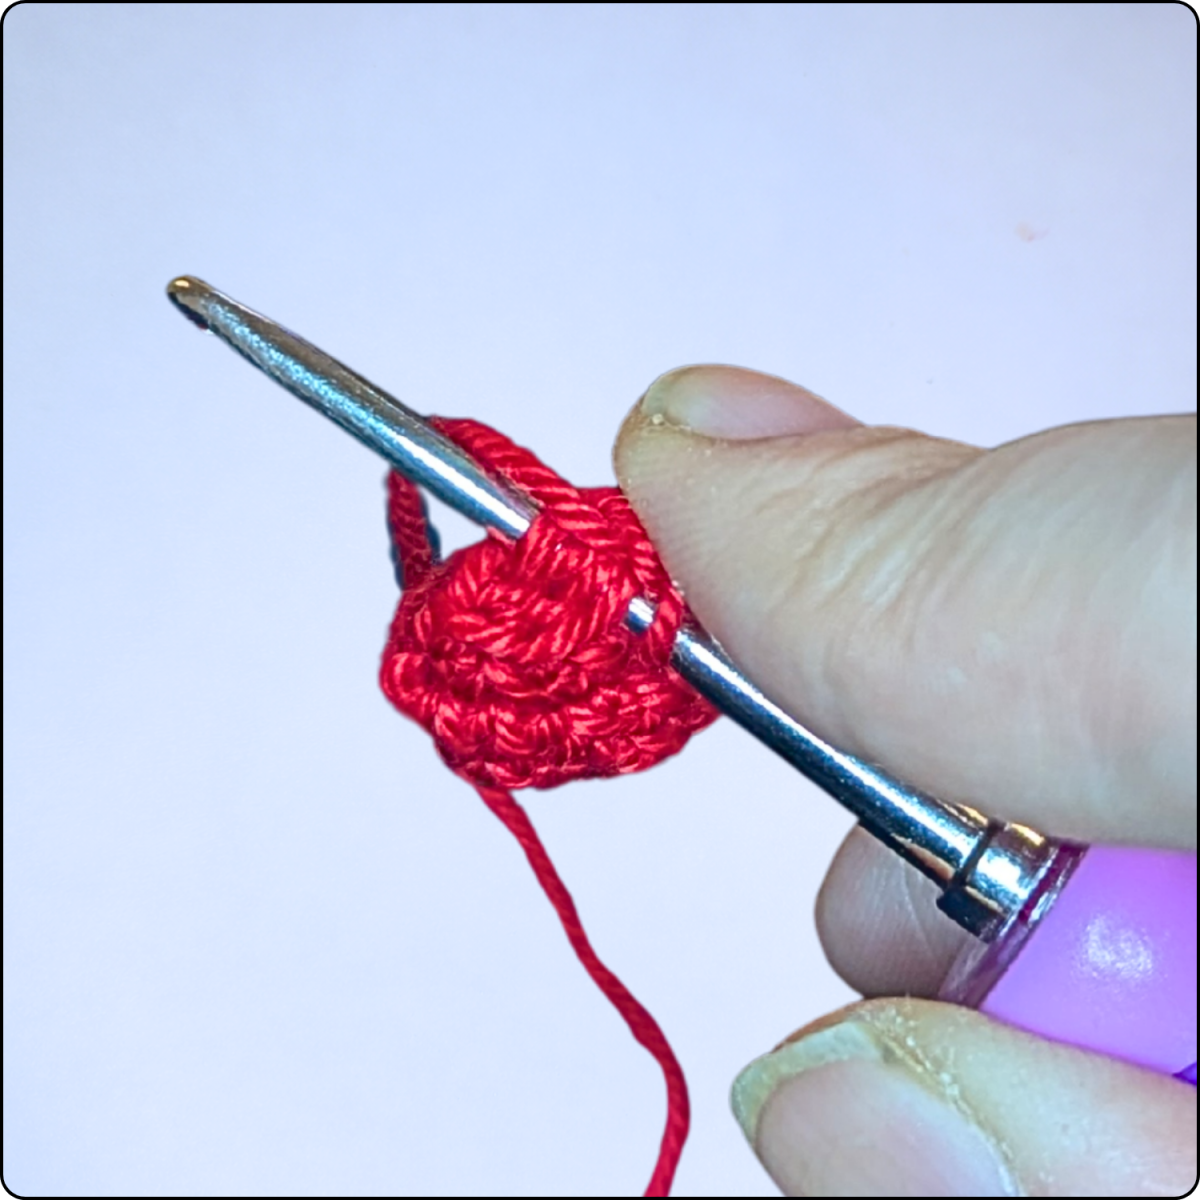
| Rnd 1: | 6 sc in MR | (6) |
| Rnd 2: | [sc, inc] x3 | (9) |
| Rnd 3: | [inc, 2 sc] x3 | (12) |
| Rnd 4: | [2 sc, inc, sc] x3 | (15) |
| Rnd 5: | [4 sc, inc] x3 | (18) |
| Rnd 6: | [inc, 5 sc] x3 | (21) |
| Rnd 7: | [2 sc, inc, 4 sc] x3 | (24) |
| Rnd 8: | [4 sc, inc, 3 sc] x3 | (27) |
| Rnd 9: | [6 sc, inc, 2 sc] x3 | (30) |
| Rnd 10: | 30 sc | (30) |
| Rnd 11: | [dec, 8 sc] x3 | (27) |
| Rnd 12: | [sc, dec, 6 sc] x3 | (24) |
| Rnd 13: | [2 sc, dec] x6 | (18) |
| Rnd 14: | [dec, sc] x6 | (12) |
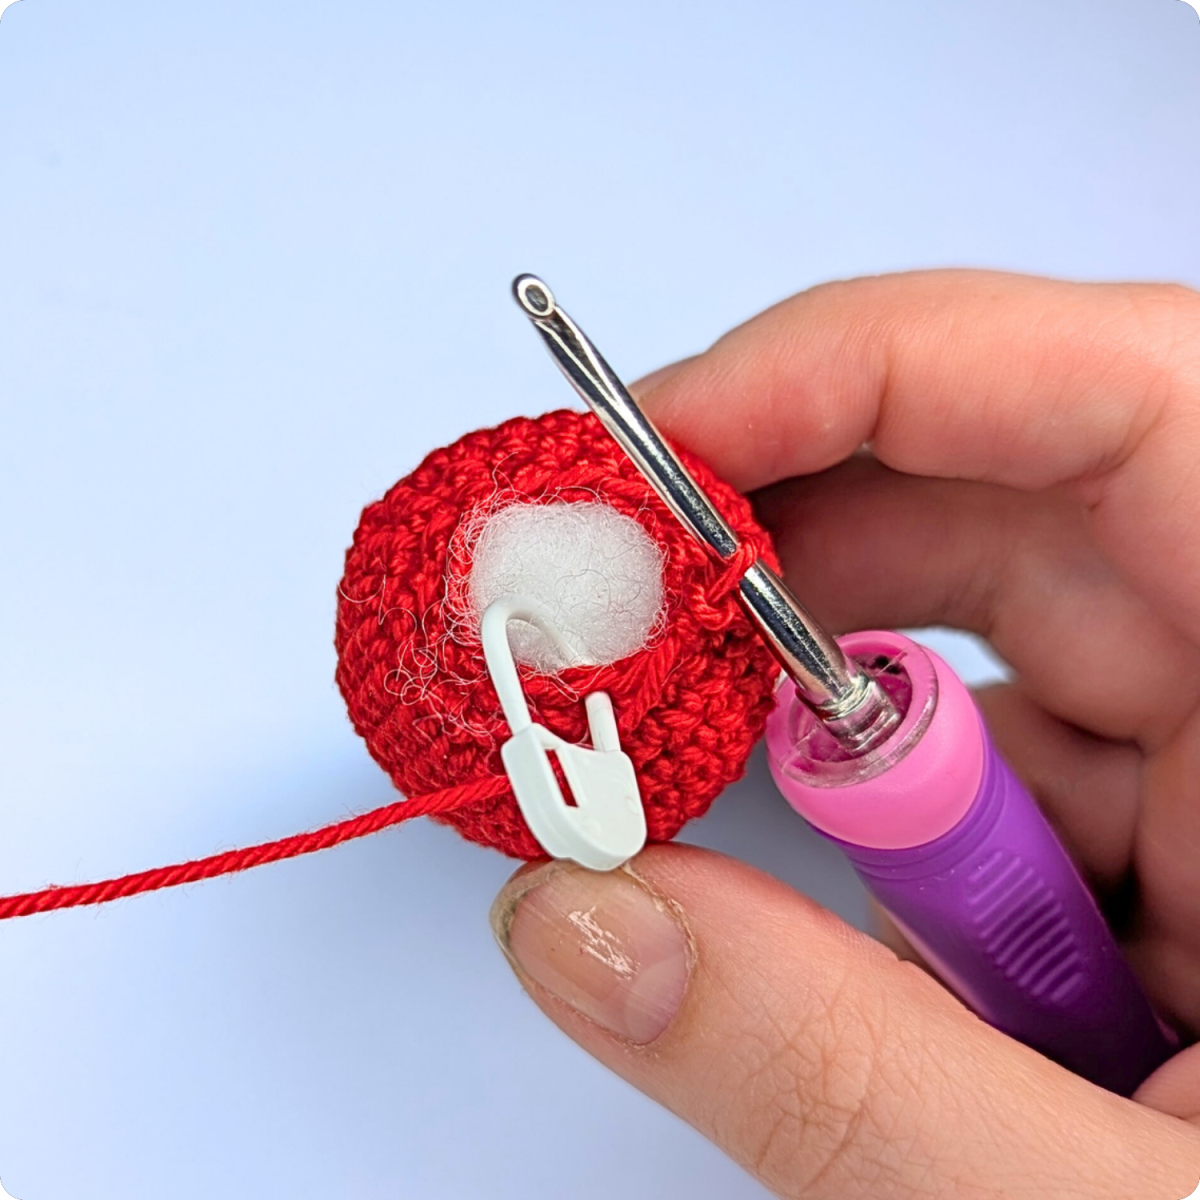
Before the last round, stuff the strawberry evenly with fiberfill.
| Rnd 15: | 6 dec | (6) |
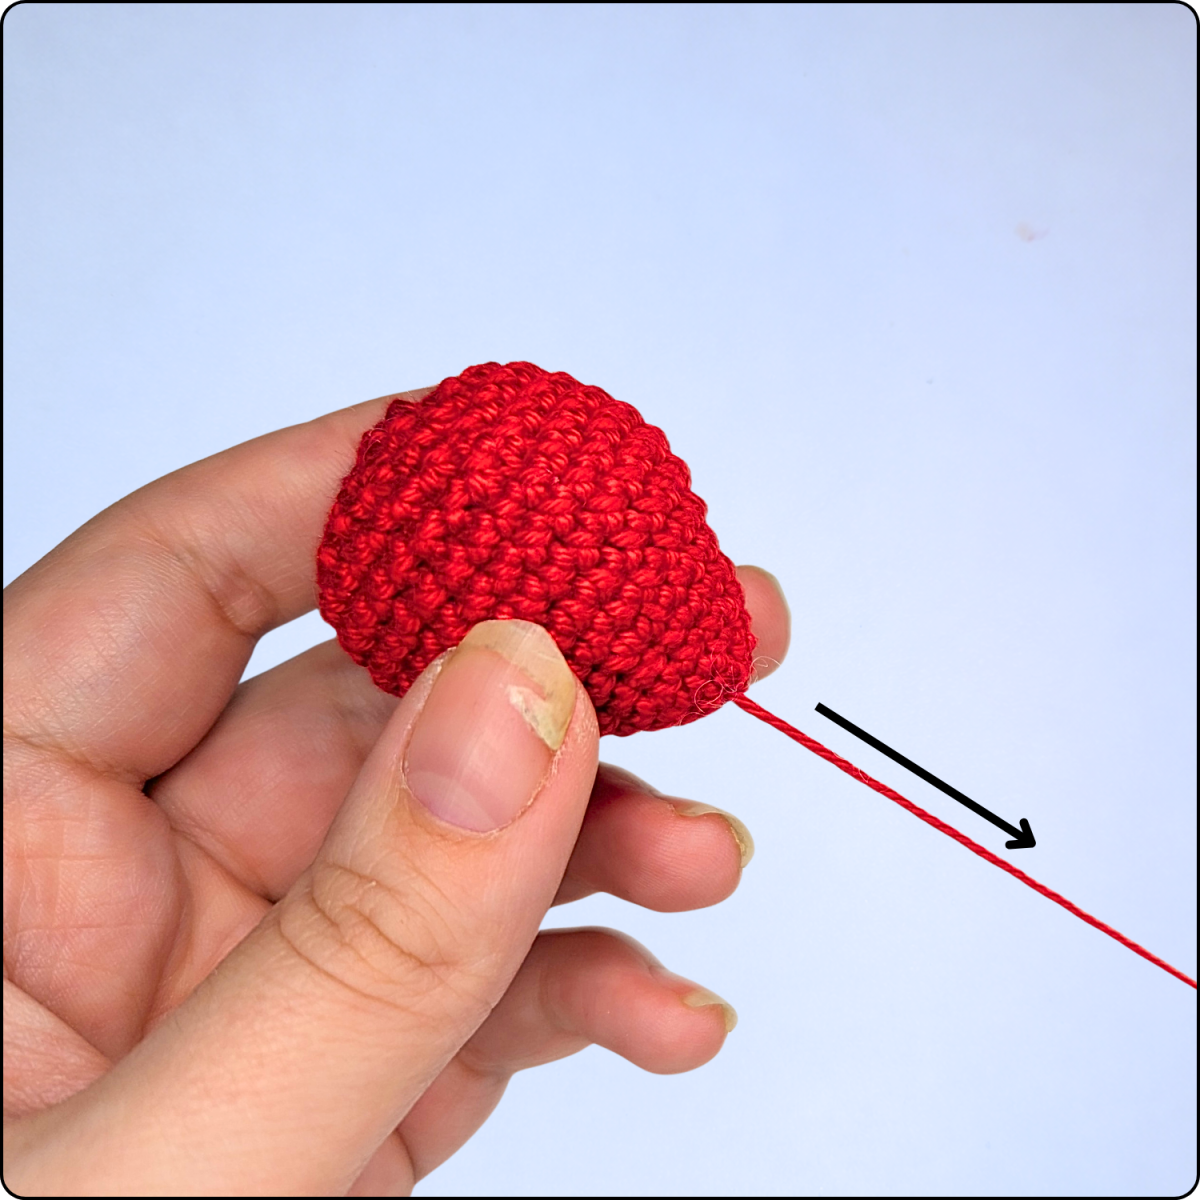
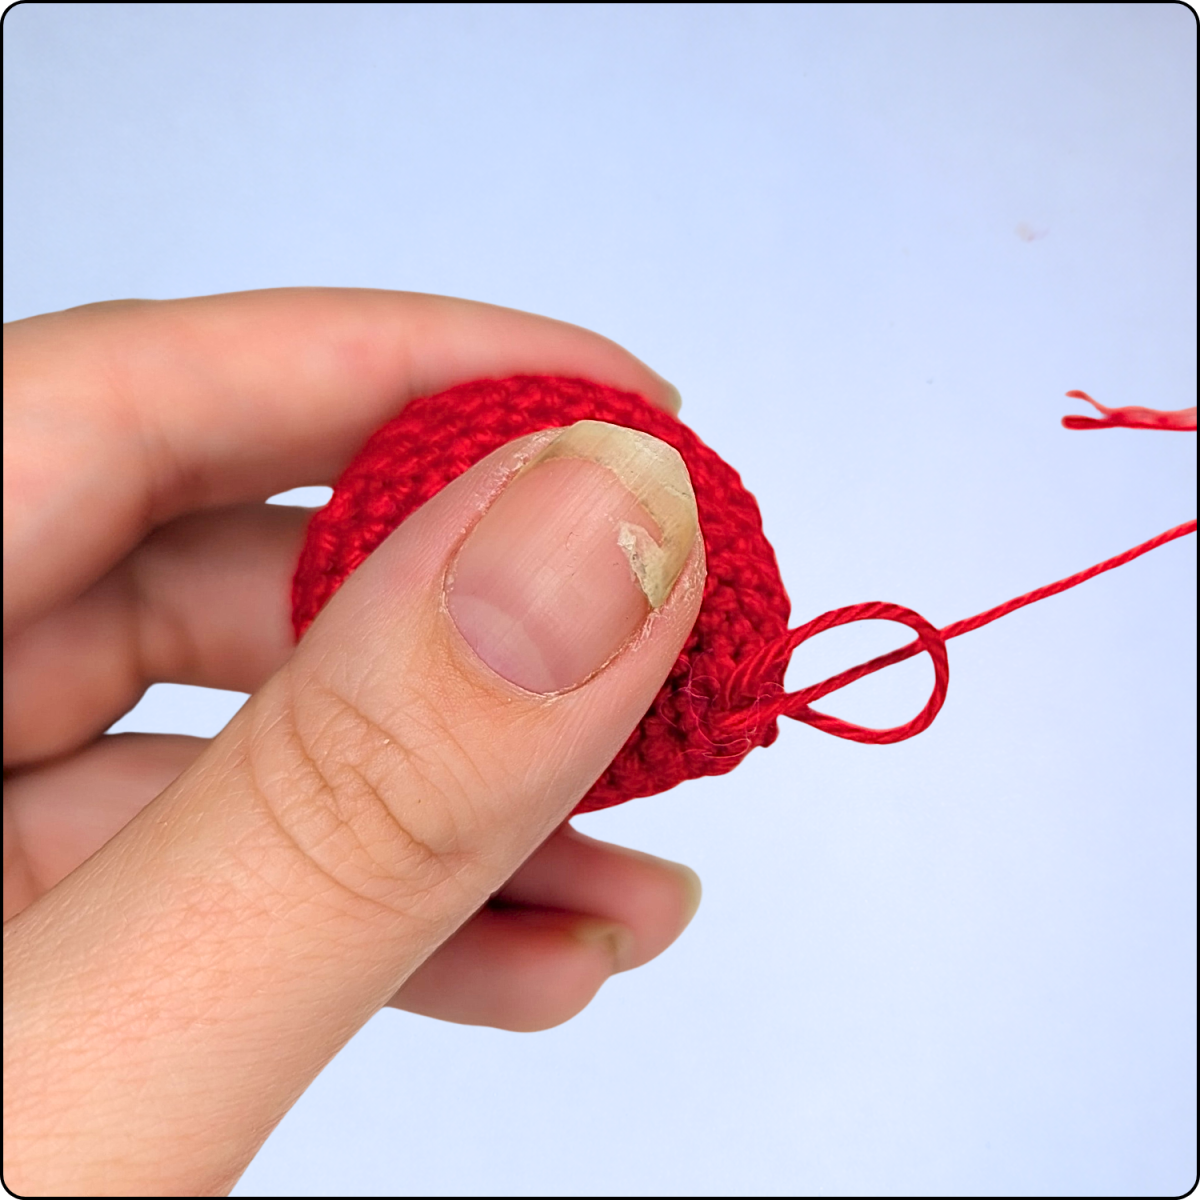
After completing the final round, fasten off, cut the yarn, and thread it through the remaining 6 stitches. Gently pull tight to close the opening.
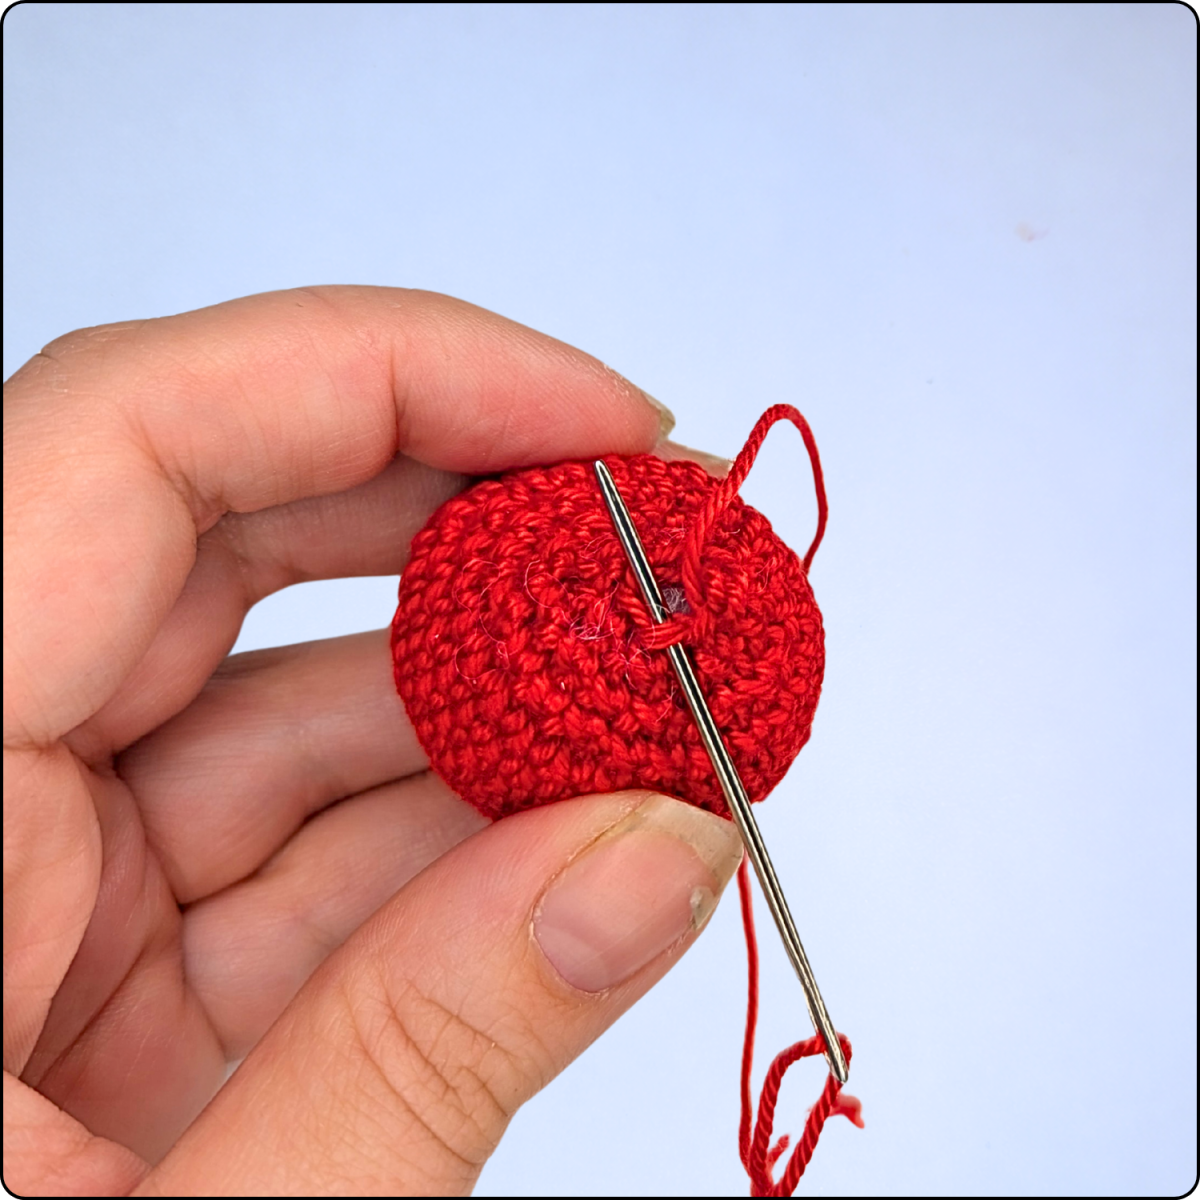
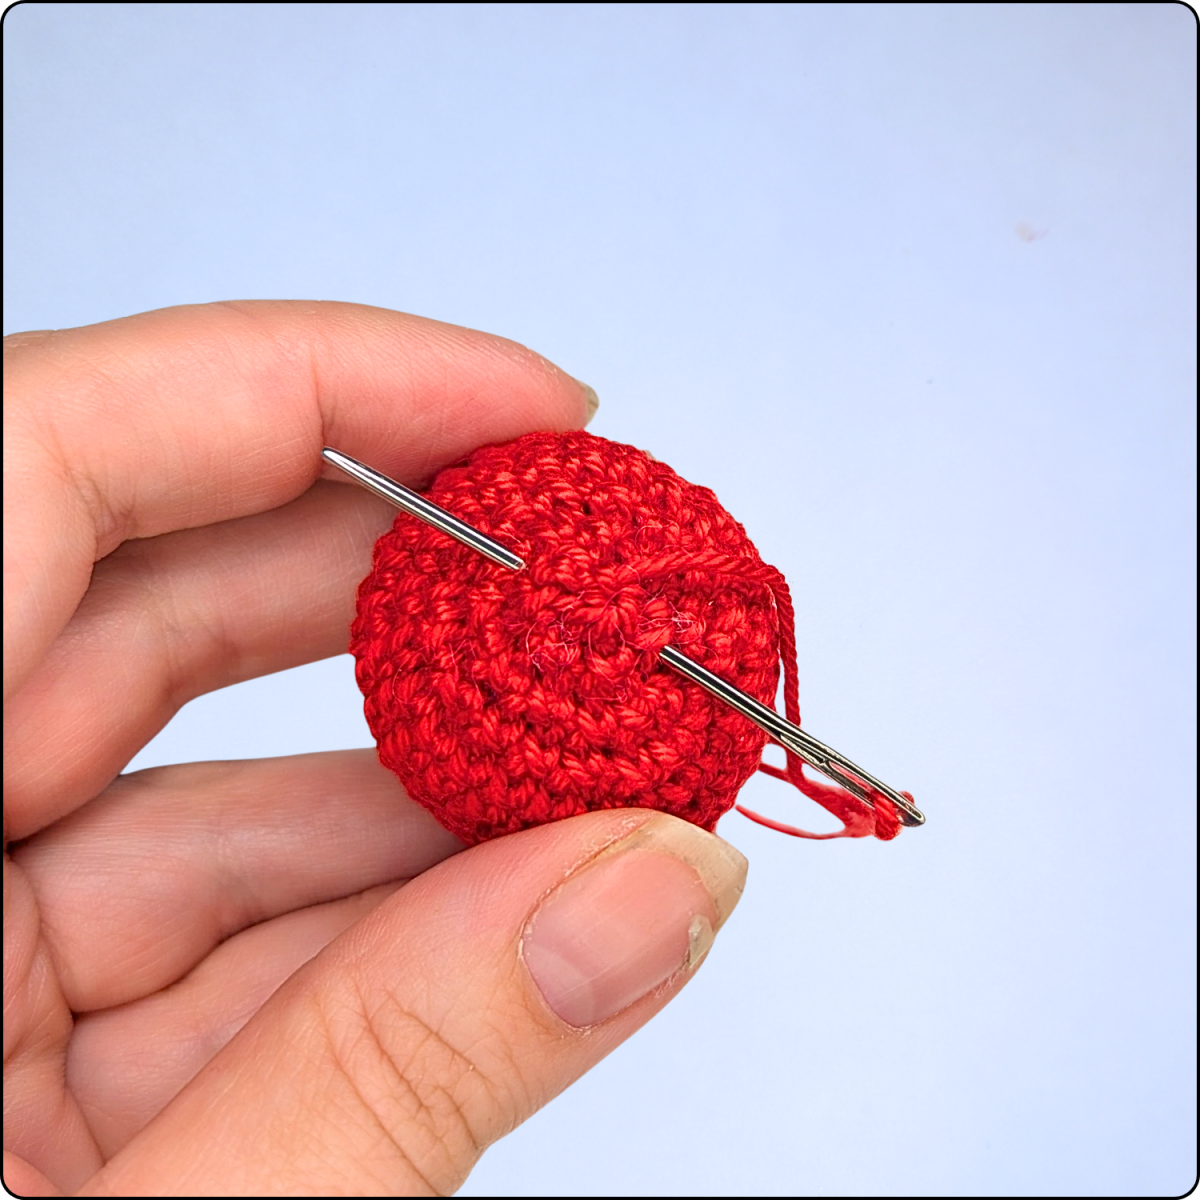
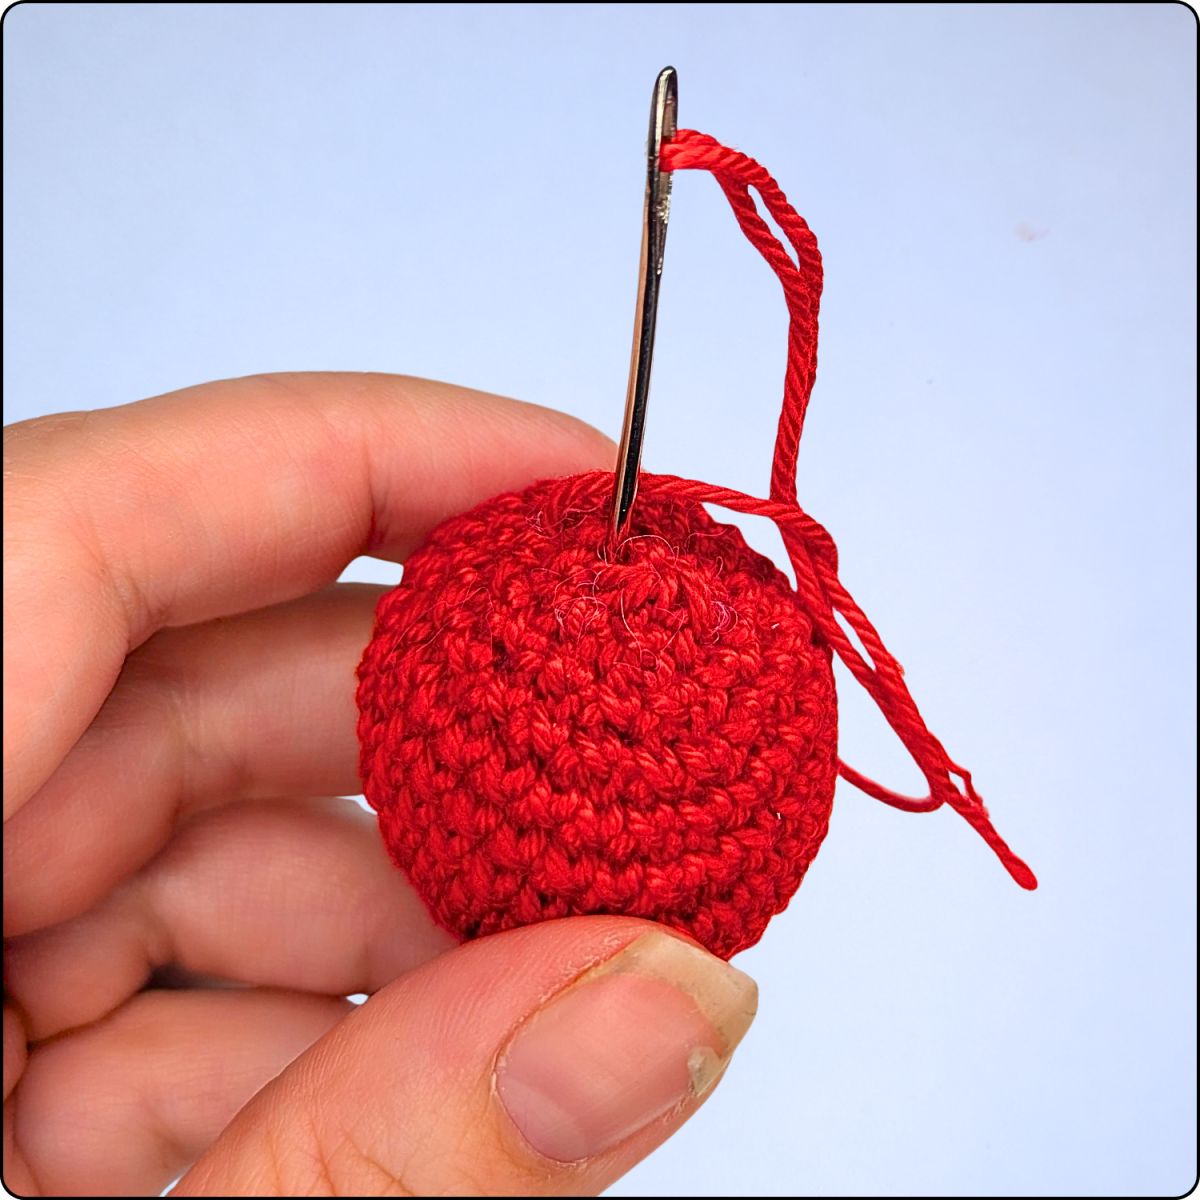
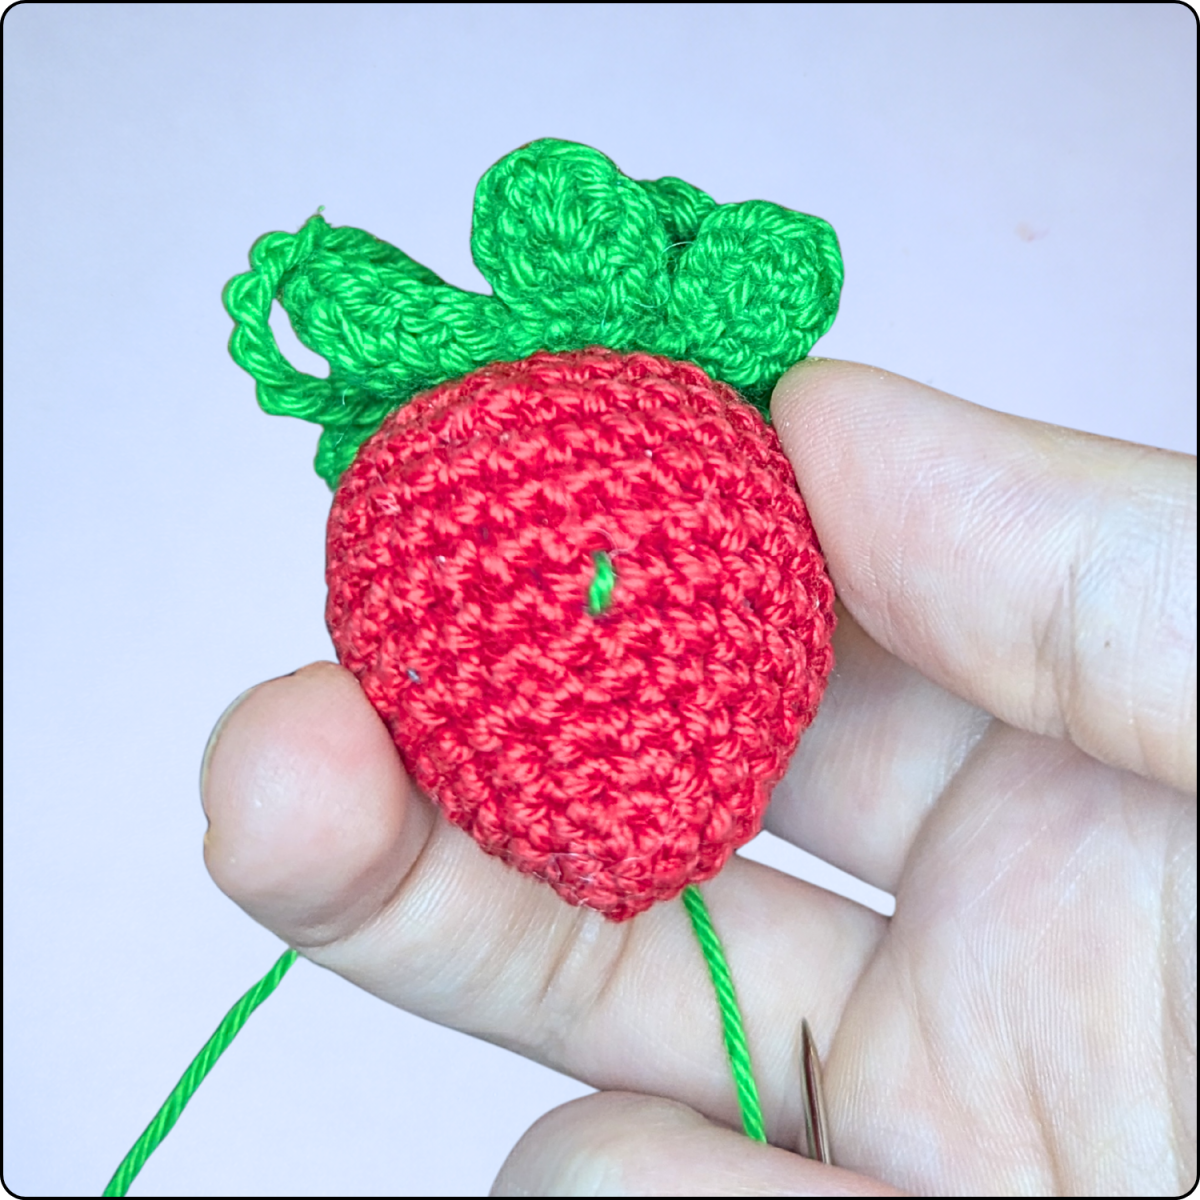
Use the same yarn tail to create the characteristic indentation at the top of the strawberry. First, pass the yarn horizontally through the upper part of the strawberry. Then insert the needle from the top center straight down through the body and gently pull the yarn to draw the top slightly inward. Finally, knot the yarn securely at the bottom and weave in the end neatly.
Leaves
Start in green.
| Rnd 1: | 6 sc in MR | (6) |
In the next round, work in back loops only, which creates the lower layer of leaves.
| Rnd 2: | BLO: 6 inc | (12) |
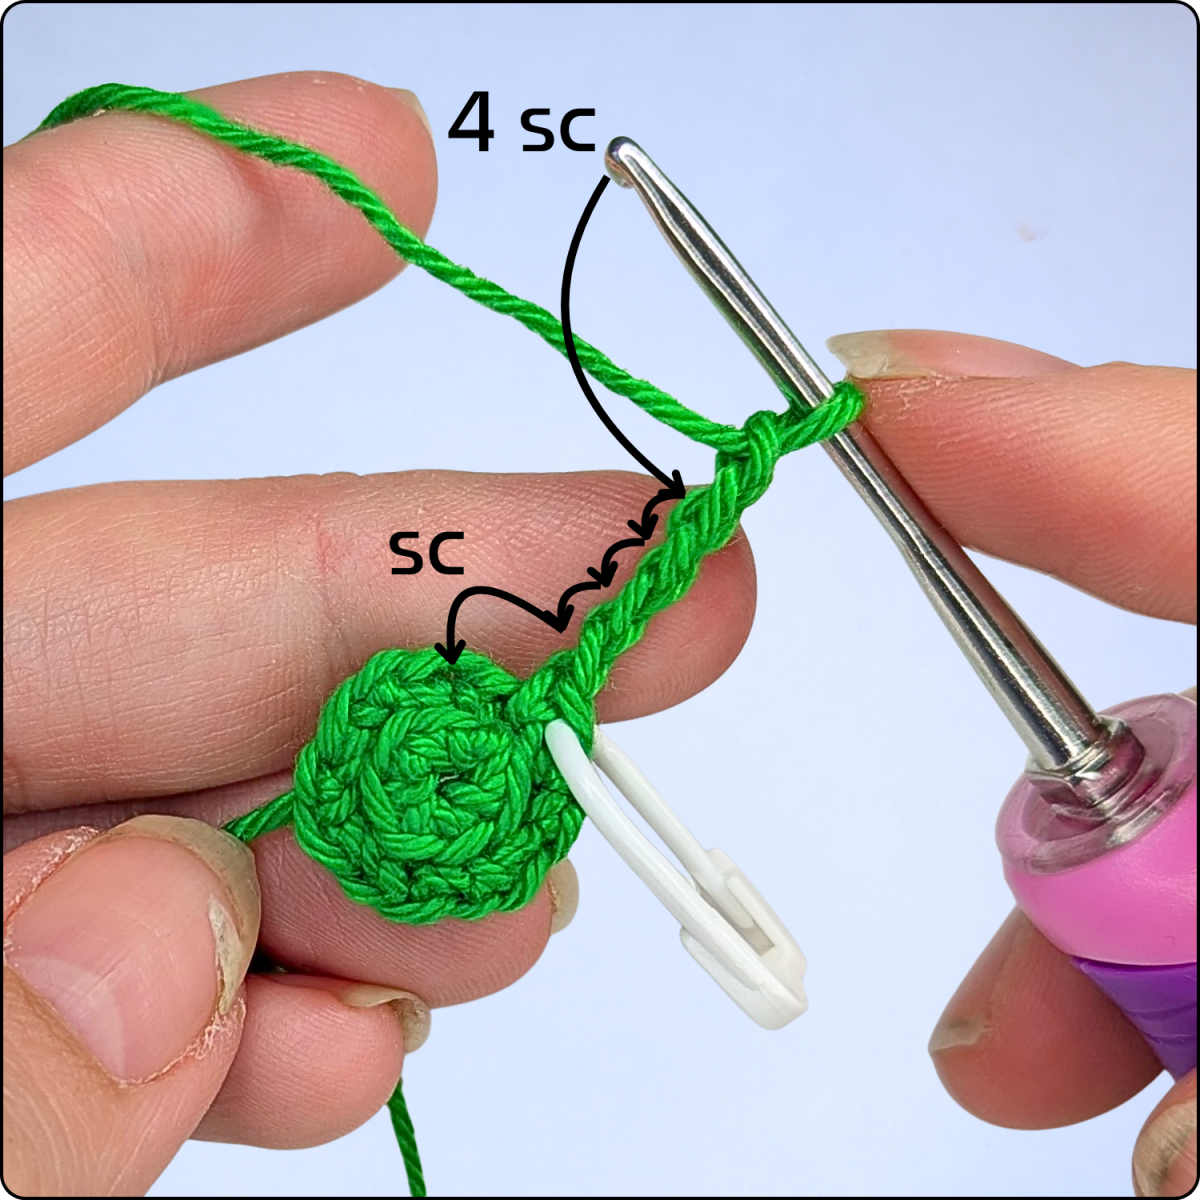
For each leaf, begin by crocheting a chain of stitches. Work single crochet stitches into this chain.
| Rnd 3: | [sc, ch 5, 4 sc into the chain, sc] x6 | (66) |
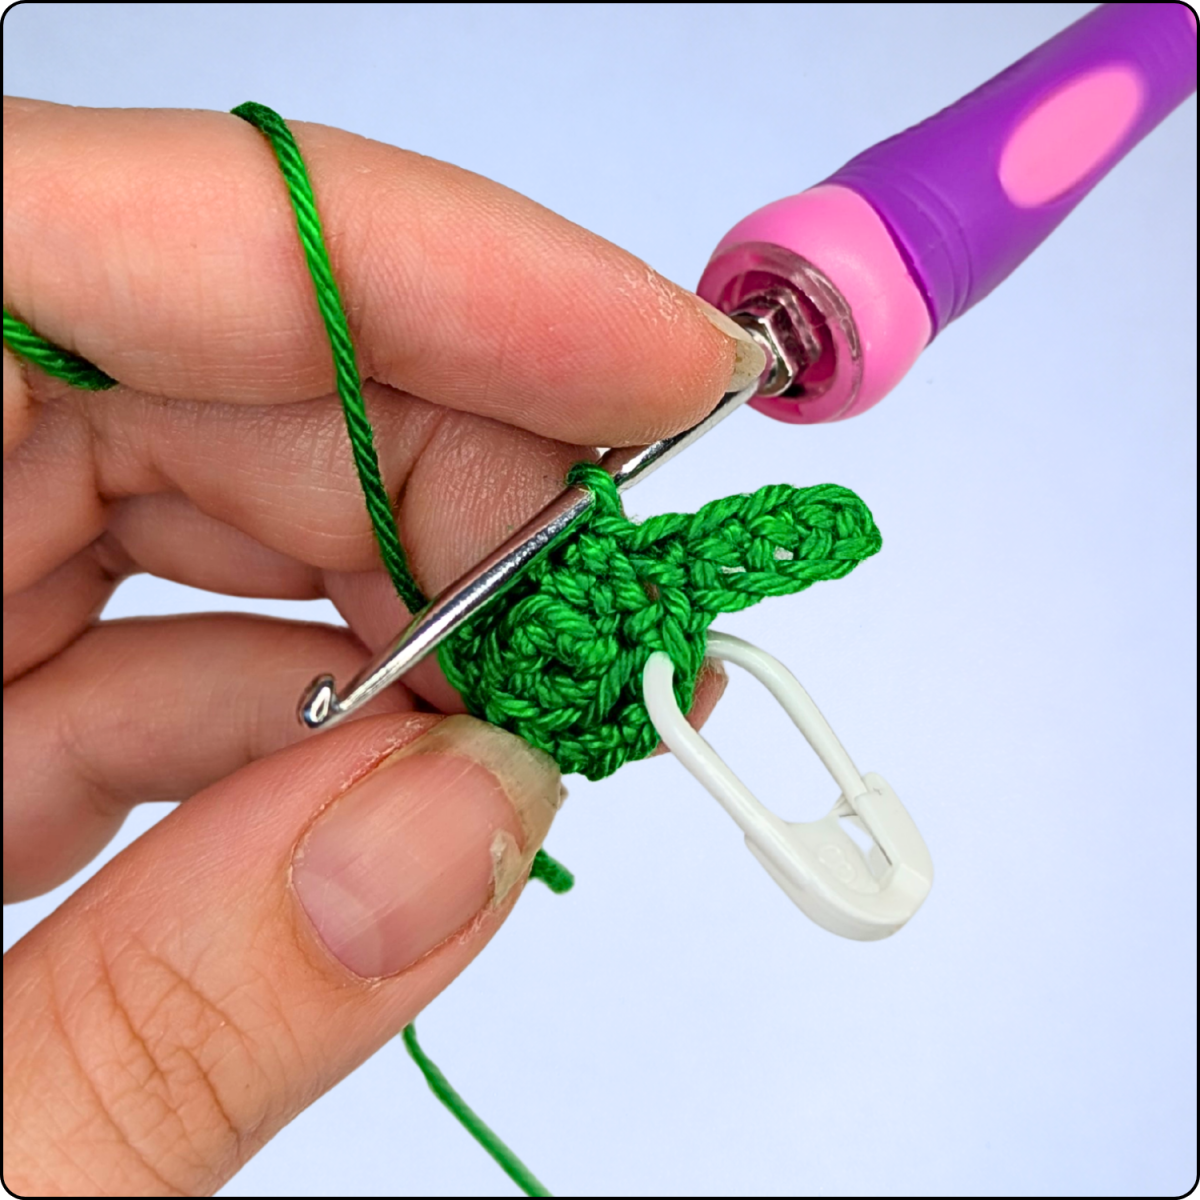
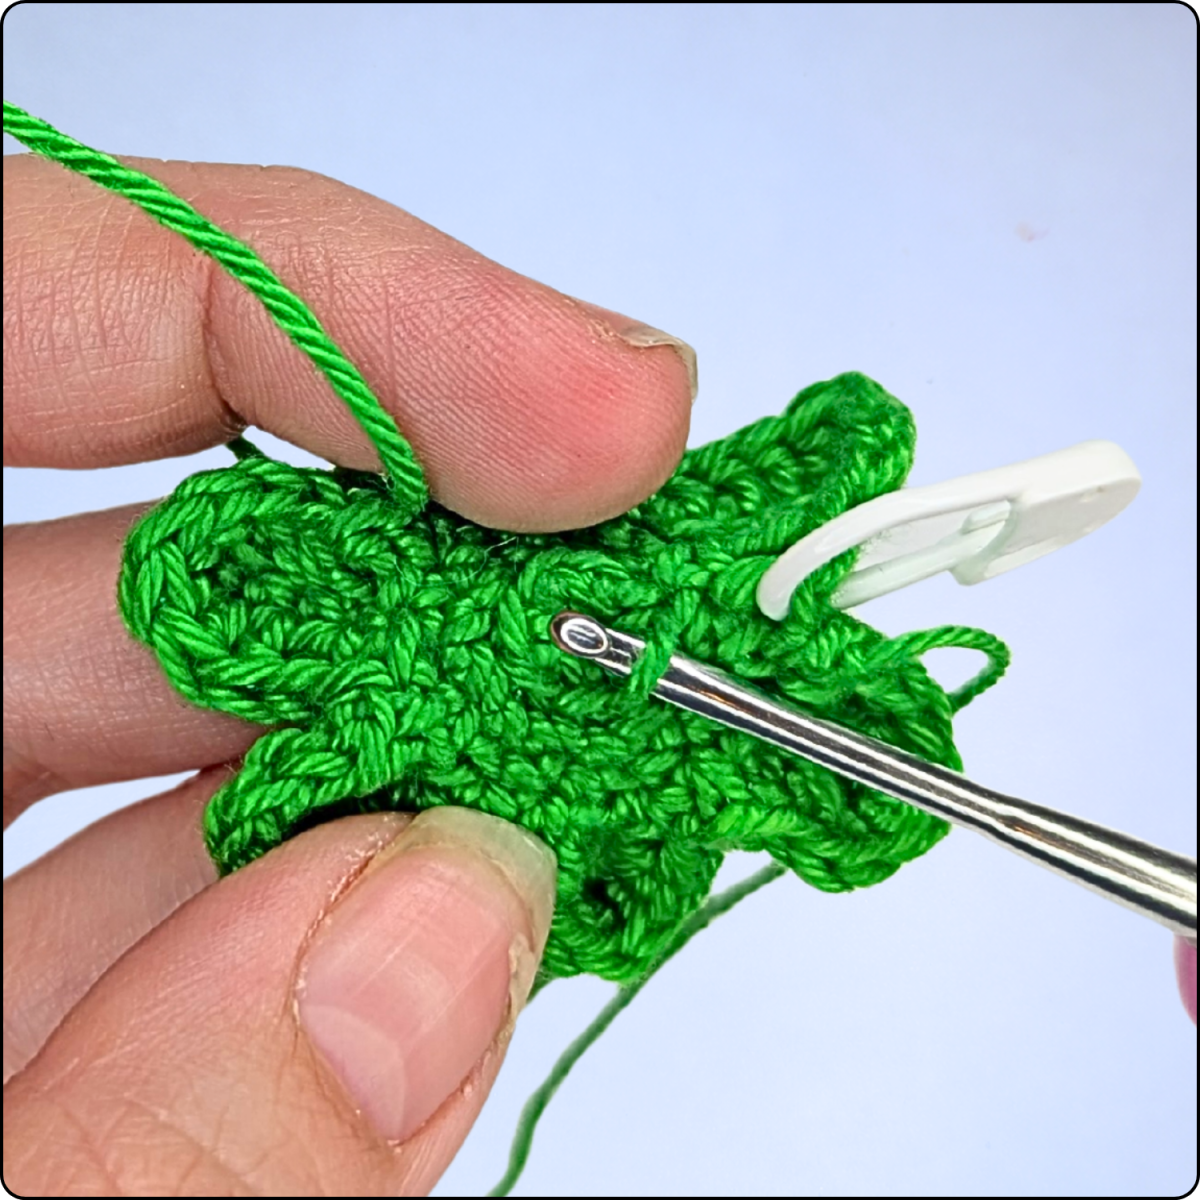
In the following round, each leaf is shaped into its characteristic form. Work into the previously unused side of the chain as well as into the single crochet stitches on the opposite side.
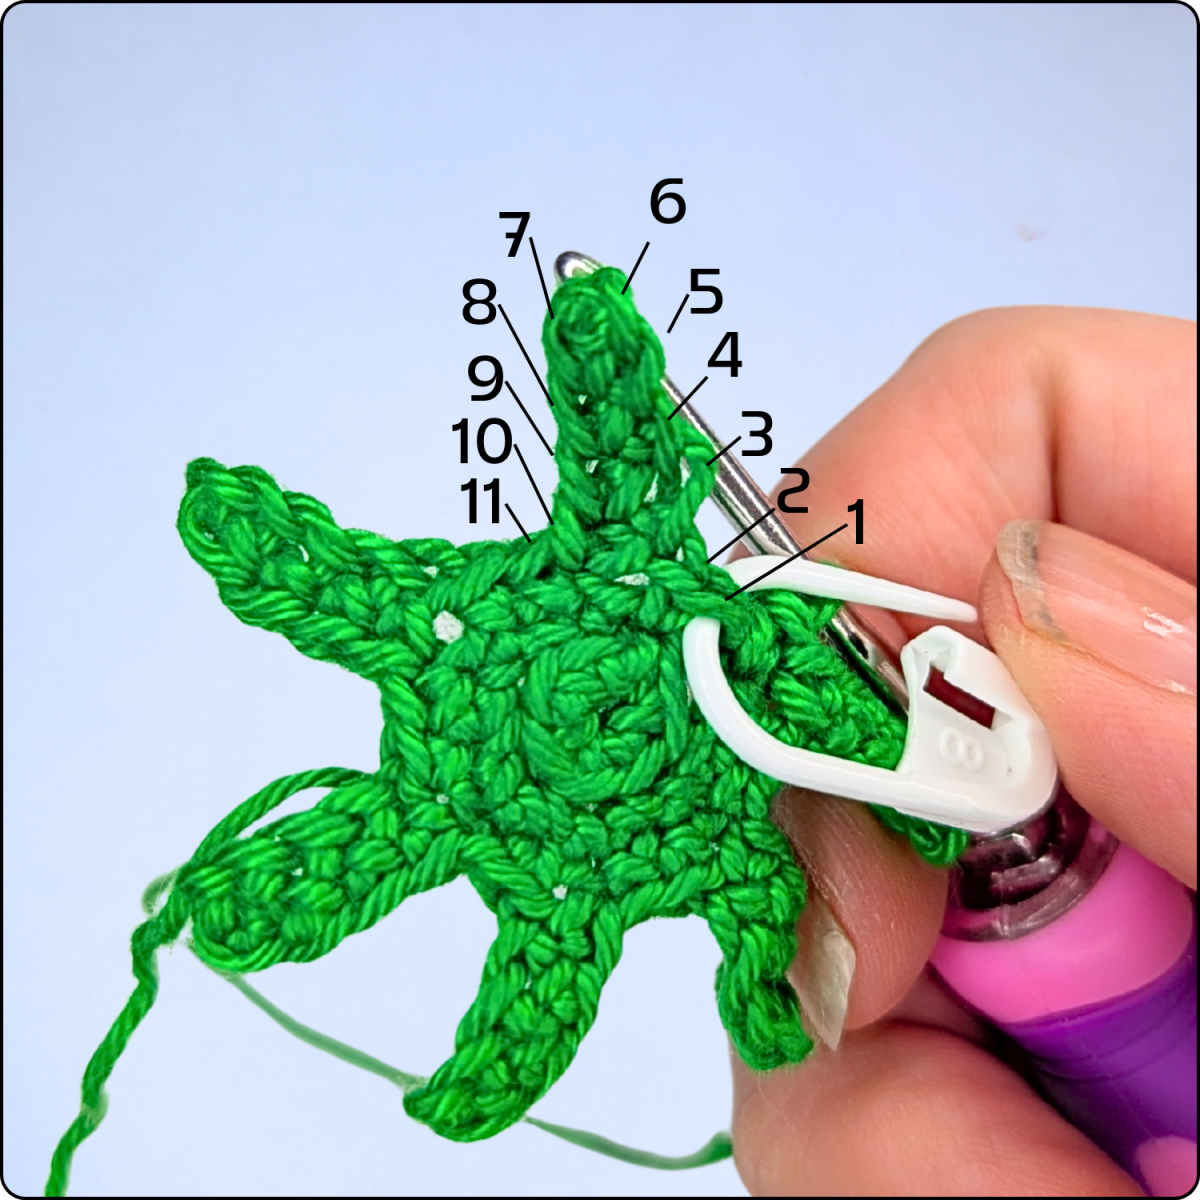
| Rnd 4: | [sc, hdc, 2 dc, hdc, dc, hdc, 2 dc, hdc, sc] x6 | (66) |
Now fasten off. Cut the yarn leaving a long tail of approximately 80 cm (31.5 inches) and pull it through the last loop. This long yarn tail will later be used to sew the leaves onto the strawberry and to embroider the strawberry seeds.
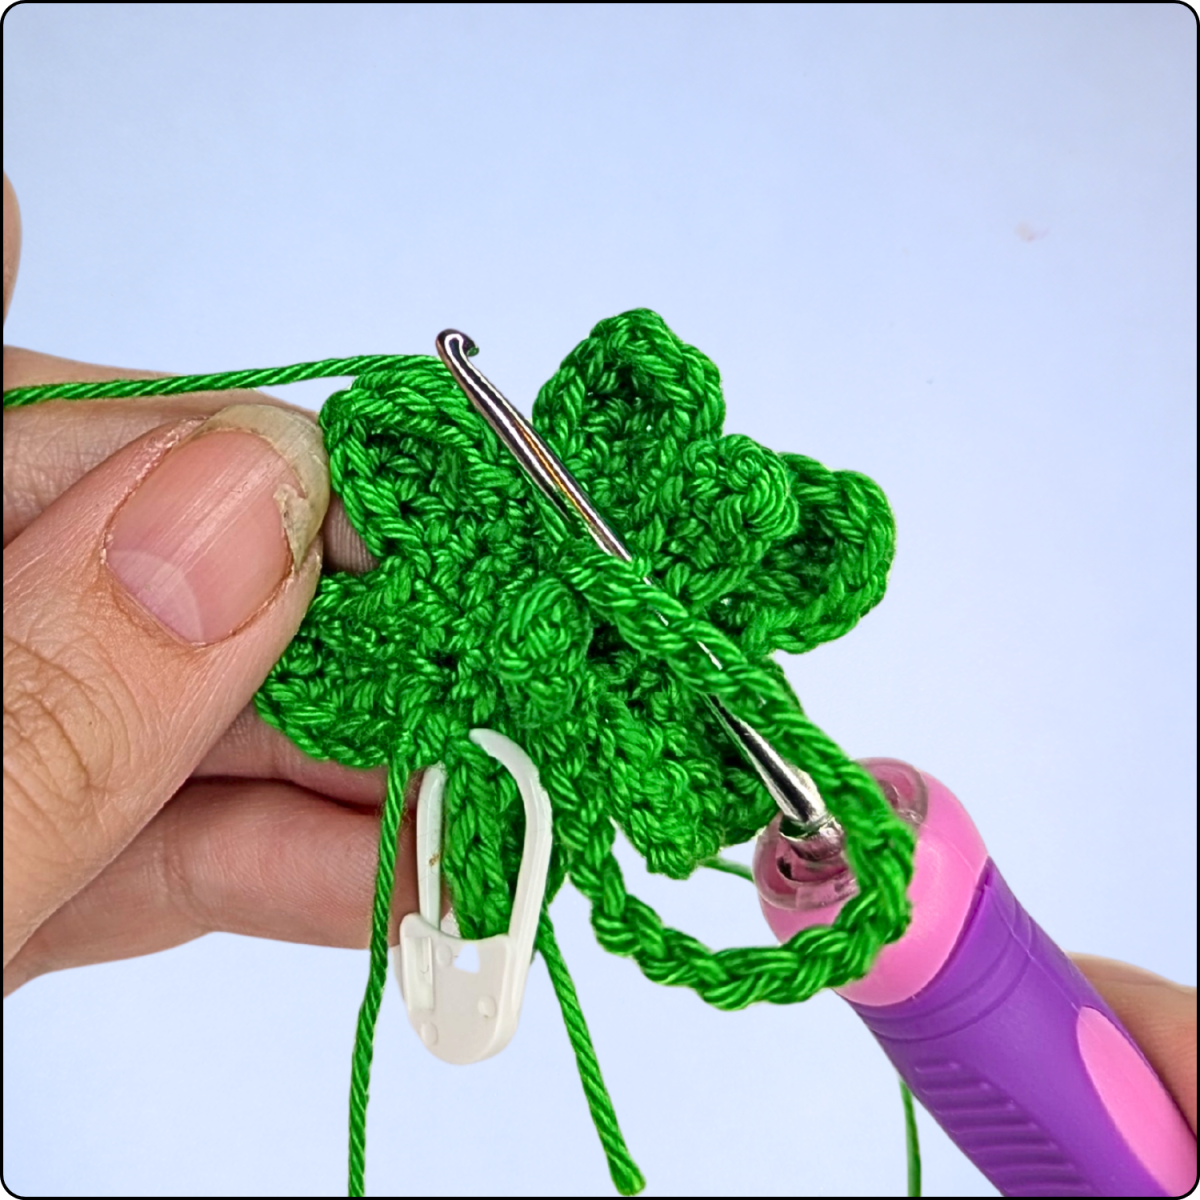
Next, attach a new yarn to the front loops of round 1. From here, crochet the upper layer of leaves. As before, work a separate chain for each leaf and continue crocheting directly into it, creating a second, staggered layer of leaves.
| Rnd 1: | [sc, ch 5, (hdc, 2 dc, hdc) into the chain, sc] x3 | (33) |
After completing this round, finish with 1 slip stitch into the next stitch and crochet a loop for hanging. To do this, chain 20 stitches and secure the loop on the opposite side with a slip stitch. Fasten off by cutting the yarn and pulling it through the final stitch.
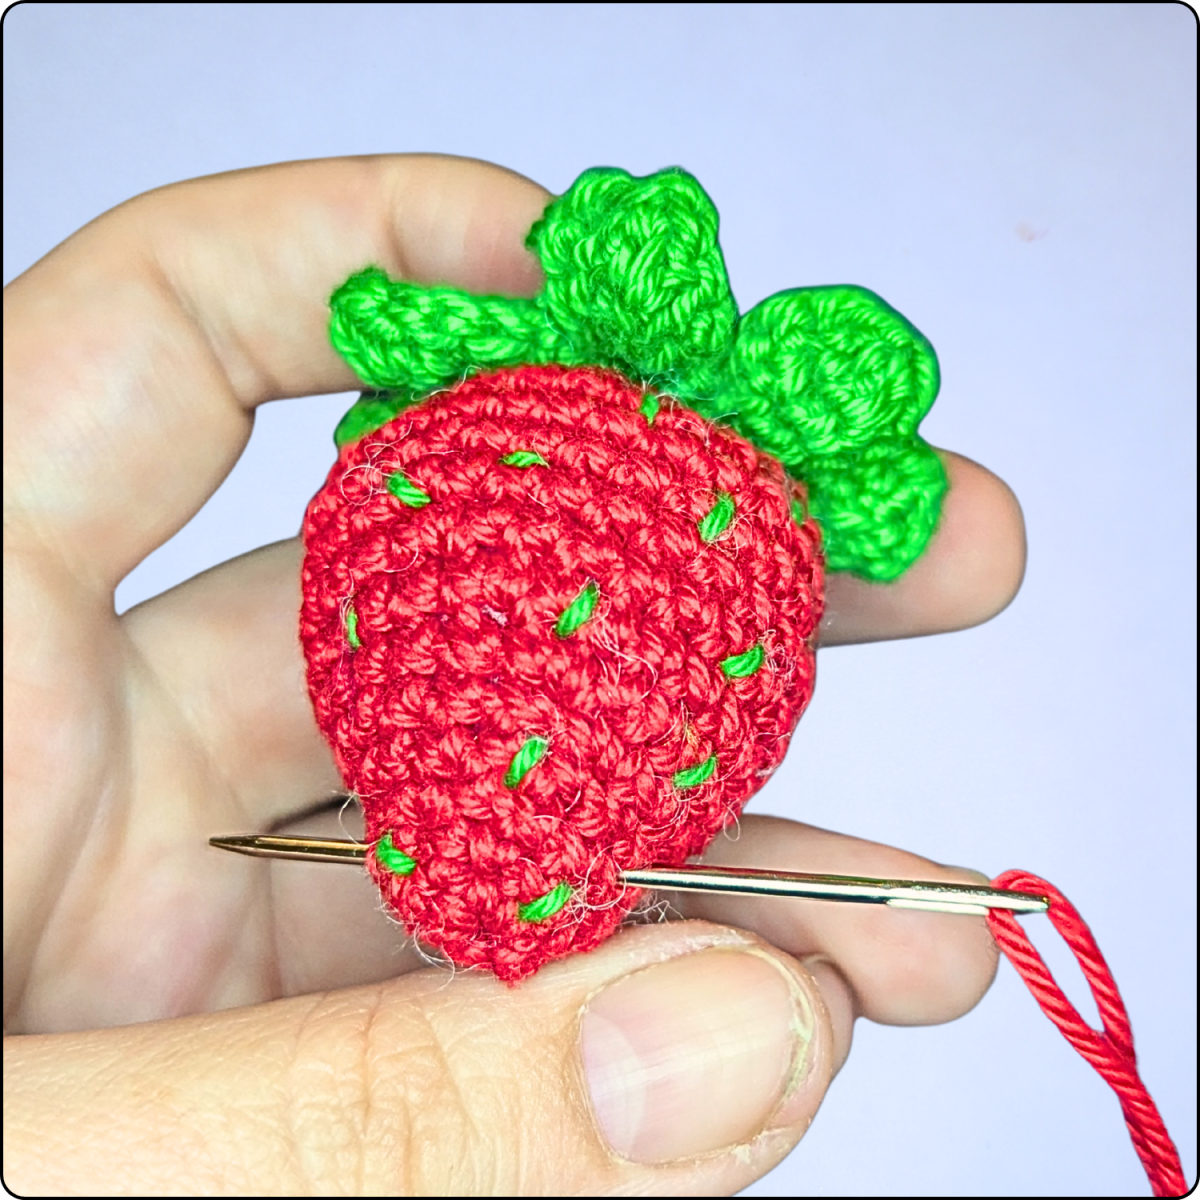
Sewing on the Leaves and Embroidering the Strawberry Seeds
Using the long light green yarn tail, sew the leaves securely to the top center of the strawberry, making sure they are evenly positioned and firmly attached.
Next, use the same yarn to embroider the characteristic strawberry seeds. Bring the yarn out at any point on the strawberry surface and insert the needle back in one stitch away. These small, evenly spaced stitches gradually create the classic strawberry texture. Repeat this process as often as desired until the strawberry is evenly covered with seeds and has its typical strawberry appearance.
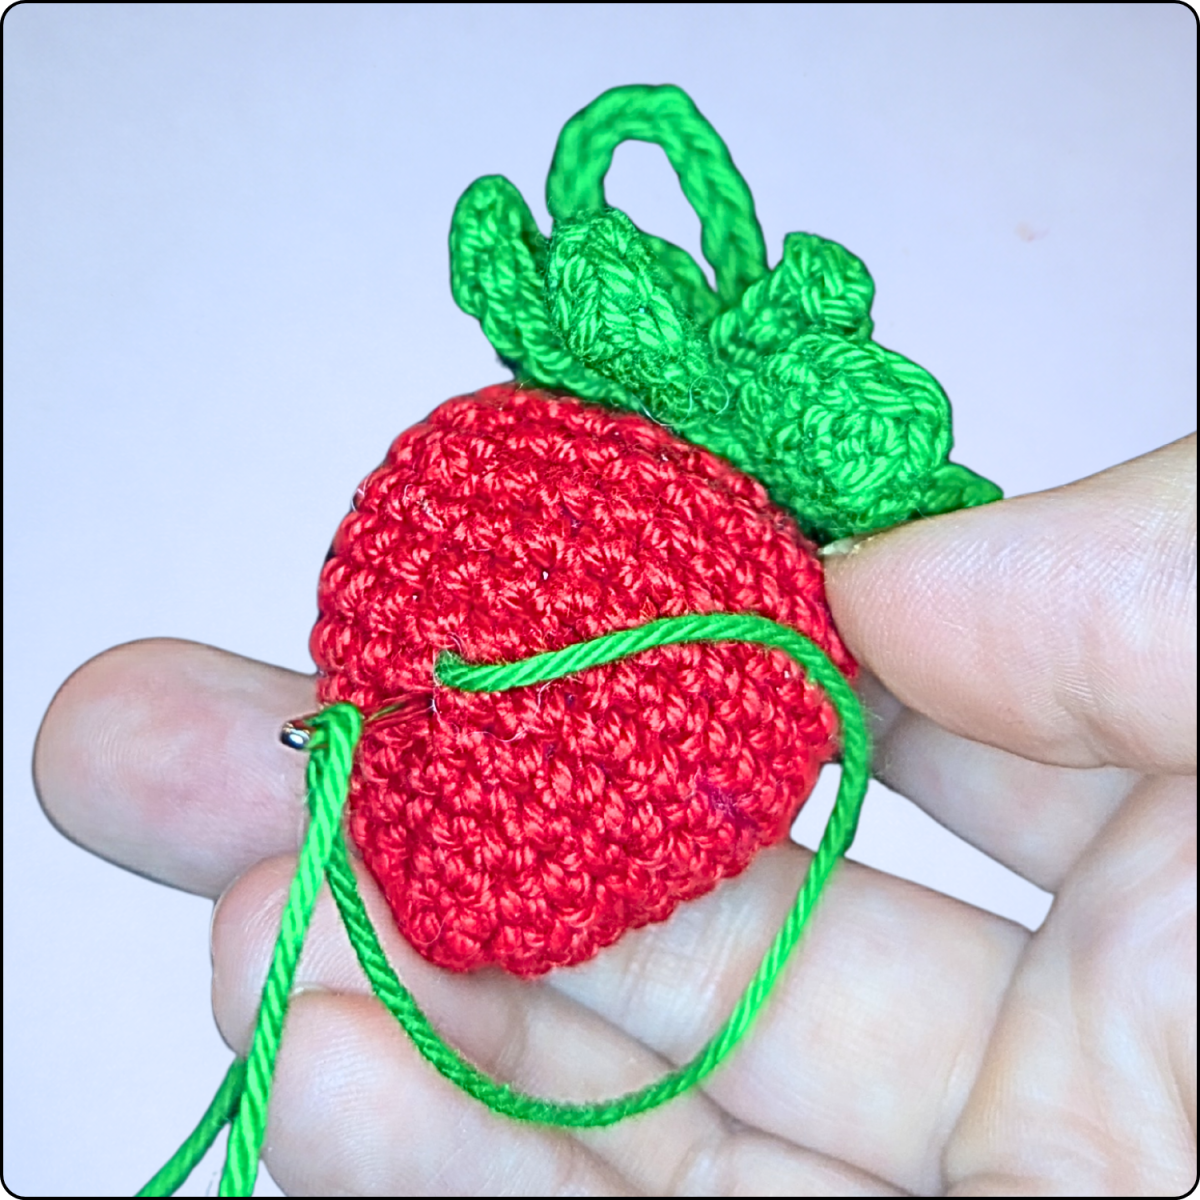
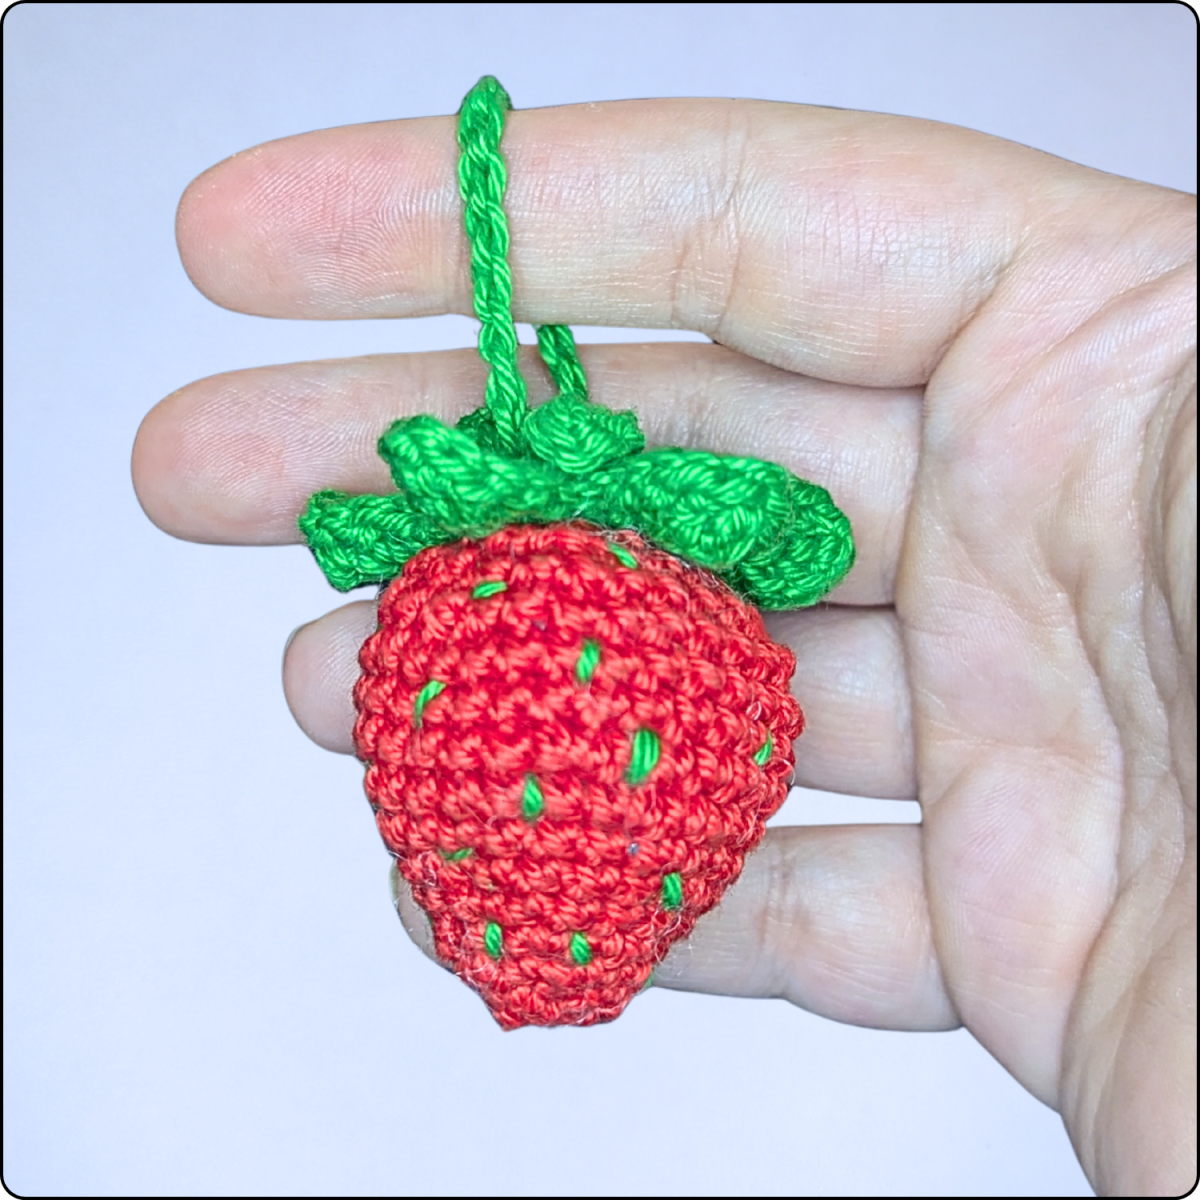
To finish, secure the remaining yarn tail as well as all other light green yarn ends and neatly weave them in, hiding them invisibly inside the strawberry.
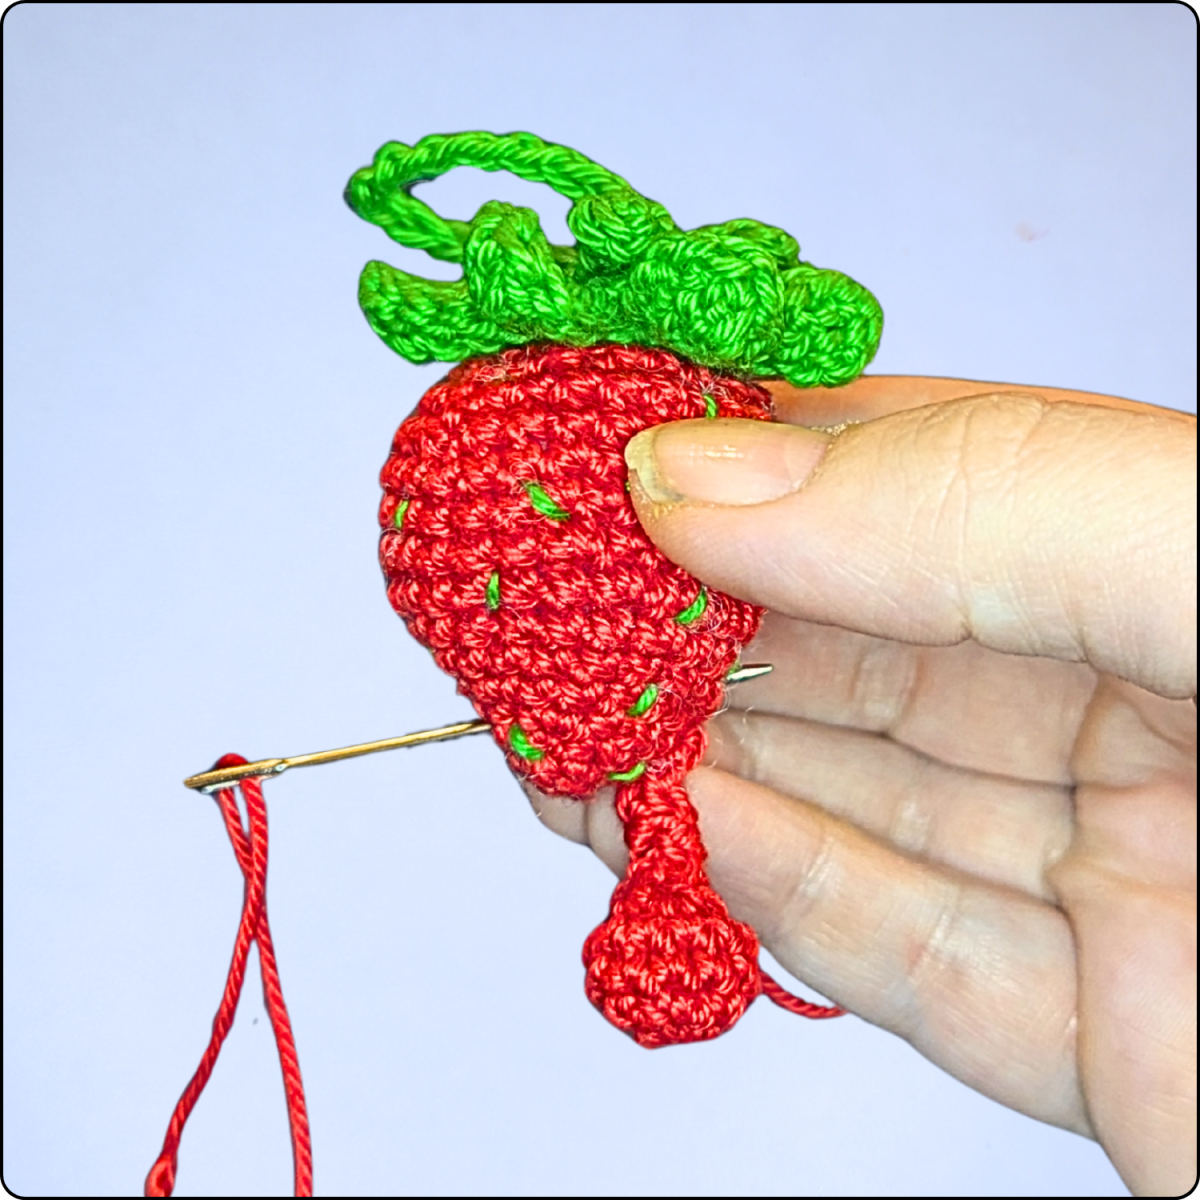
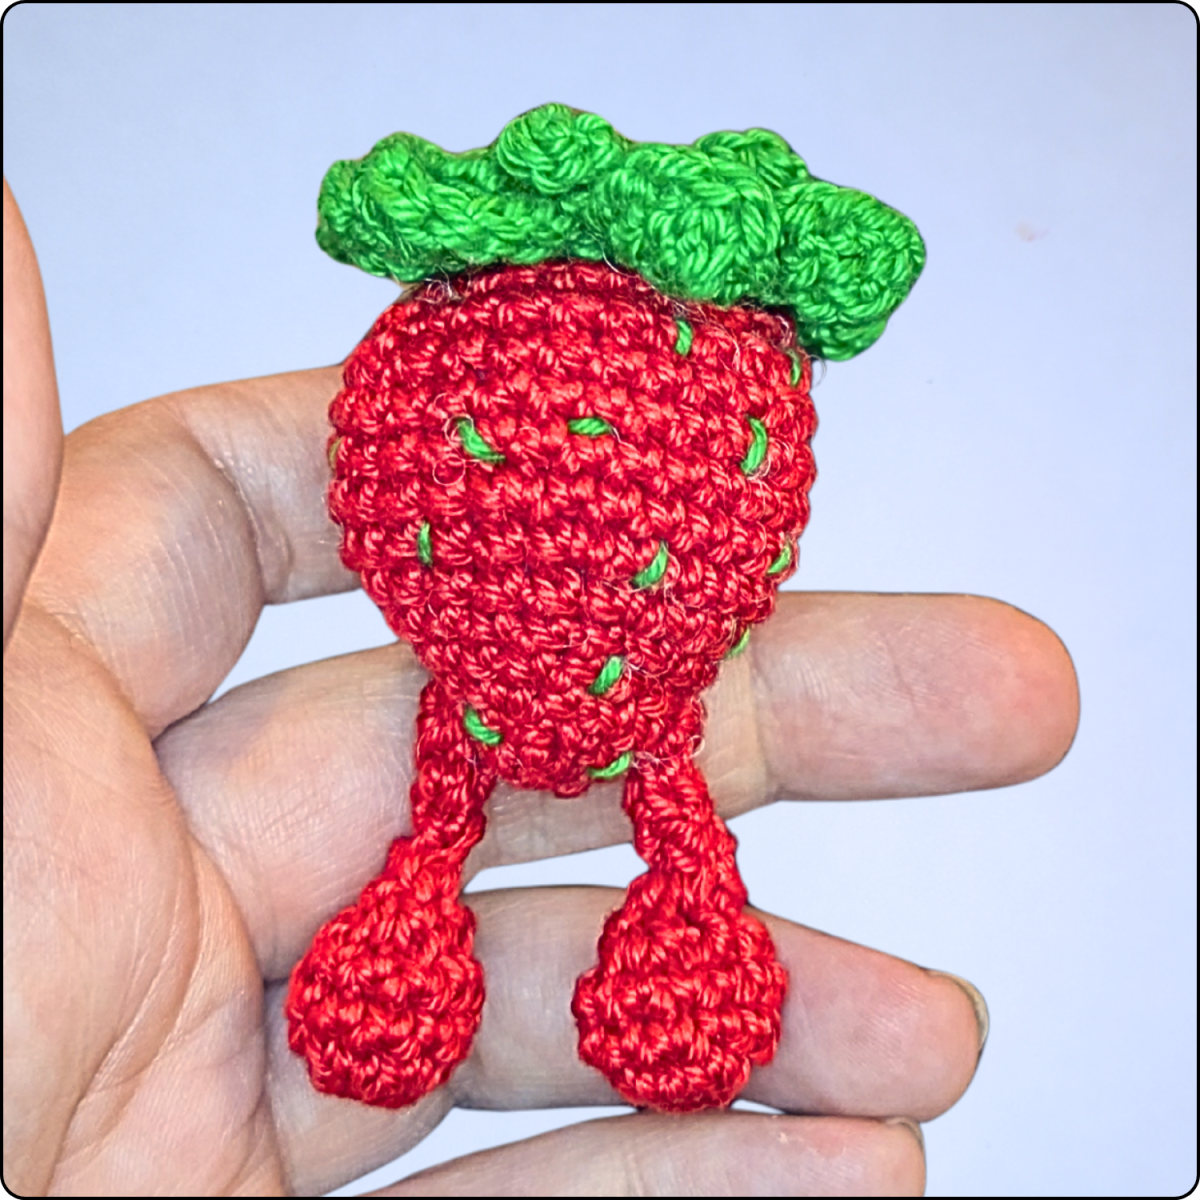
Legs (2x)
Start in red.
| Rnd 1: | 6 sc in MR | (6) |
| Rnd 2: | 6 inc | (12) |
| R3-4: | 12 sc | (12) |
| Rnd 5: | 6 dec | (6) |
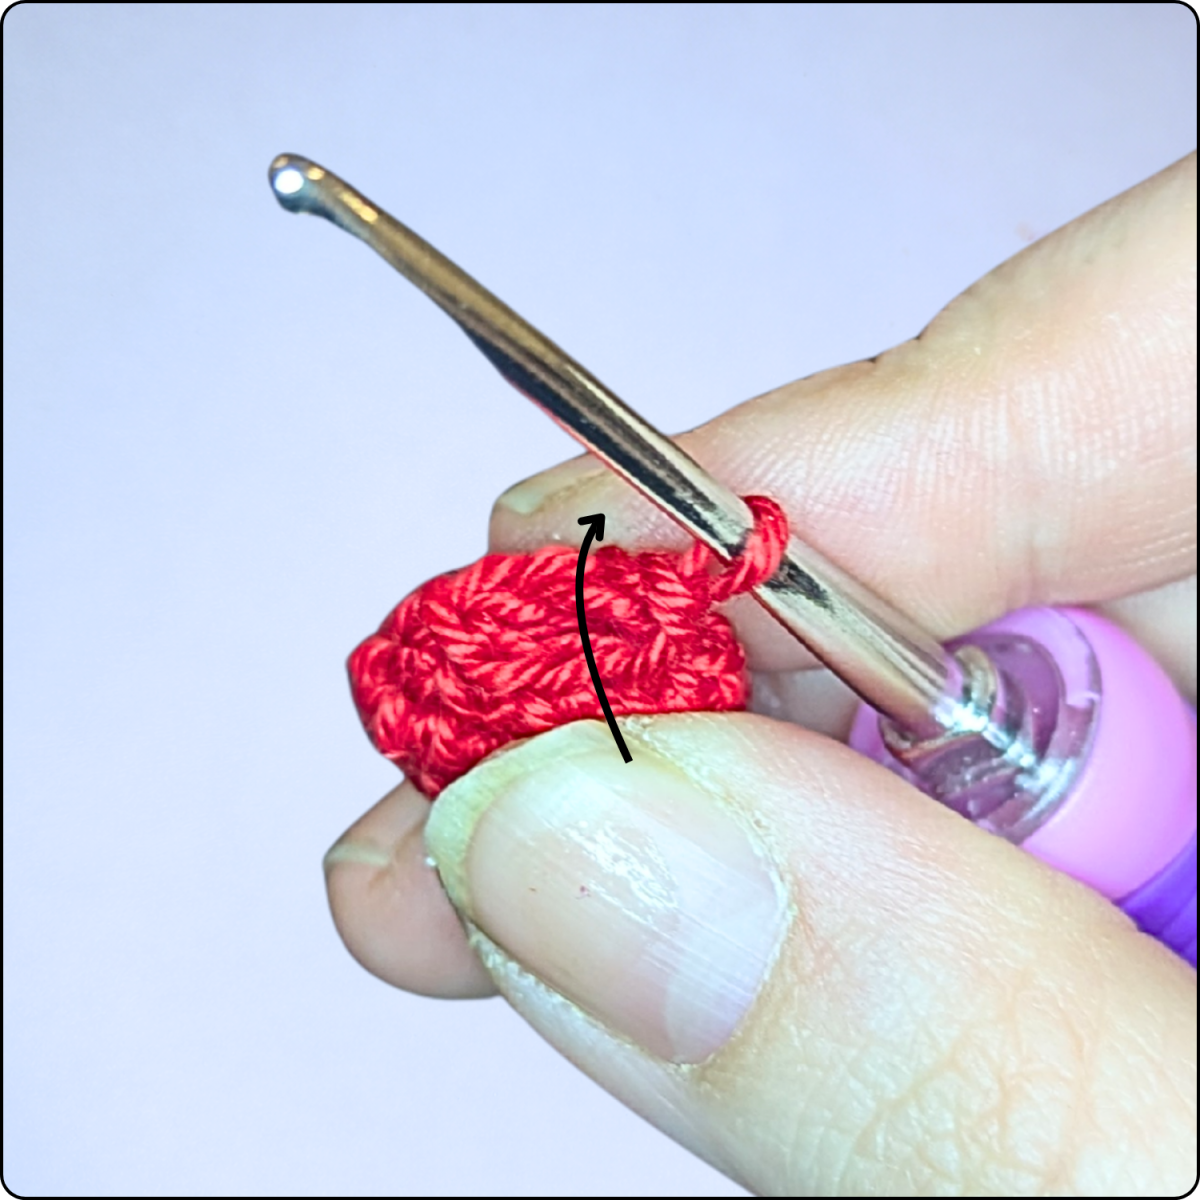
First, a small ball is created, which will later form the foot. Do not stuff this piece. Gently flatten it and close it by working one single crochet through both layers.
Next, crochet 4 chain stitches and work 3 single crochet stitches starting in the second chain from the hook. Attach this section back to the ball by working one single crochet through the next two overlapping stitches.
Then crochet 1 turning chain and work 3 single crochet stitches back along the leg. Cut the yarn, leaving a sufficiently long tail, and pull it through the last stitch. Sew the leg lengthwise back toward the foot to shape it neatly.
Next, guide the yarn tail up through the leg and use it to sew the leg onto the strawberry. Attach the finished leg between rounds 3 and 4 of the strawberry. Repeat the same steps for the second leg.
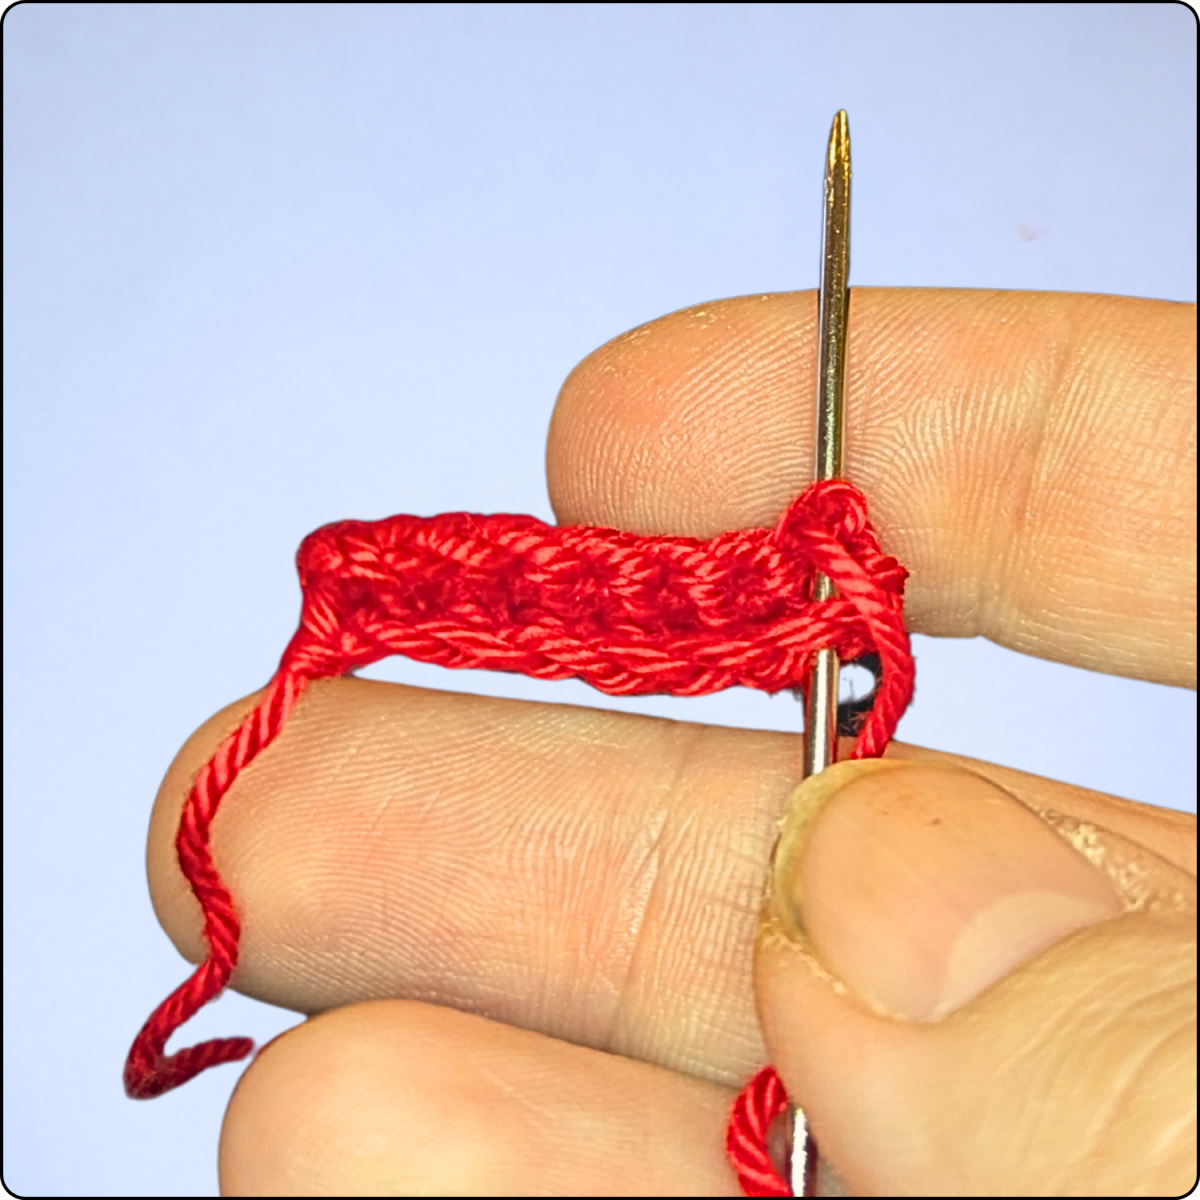
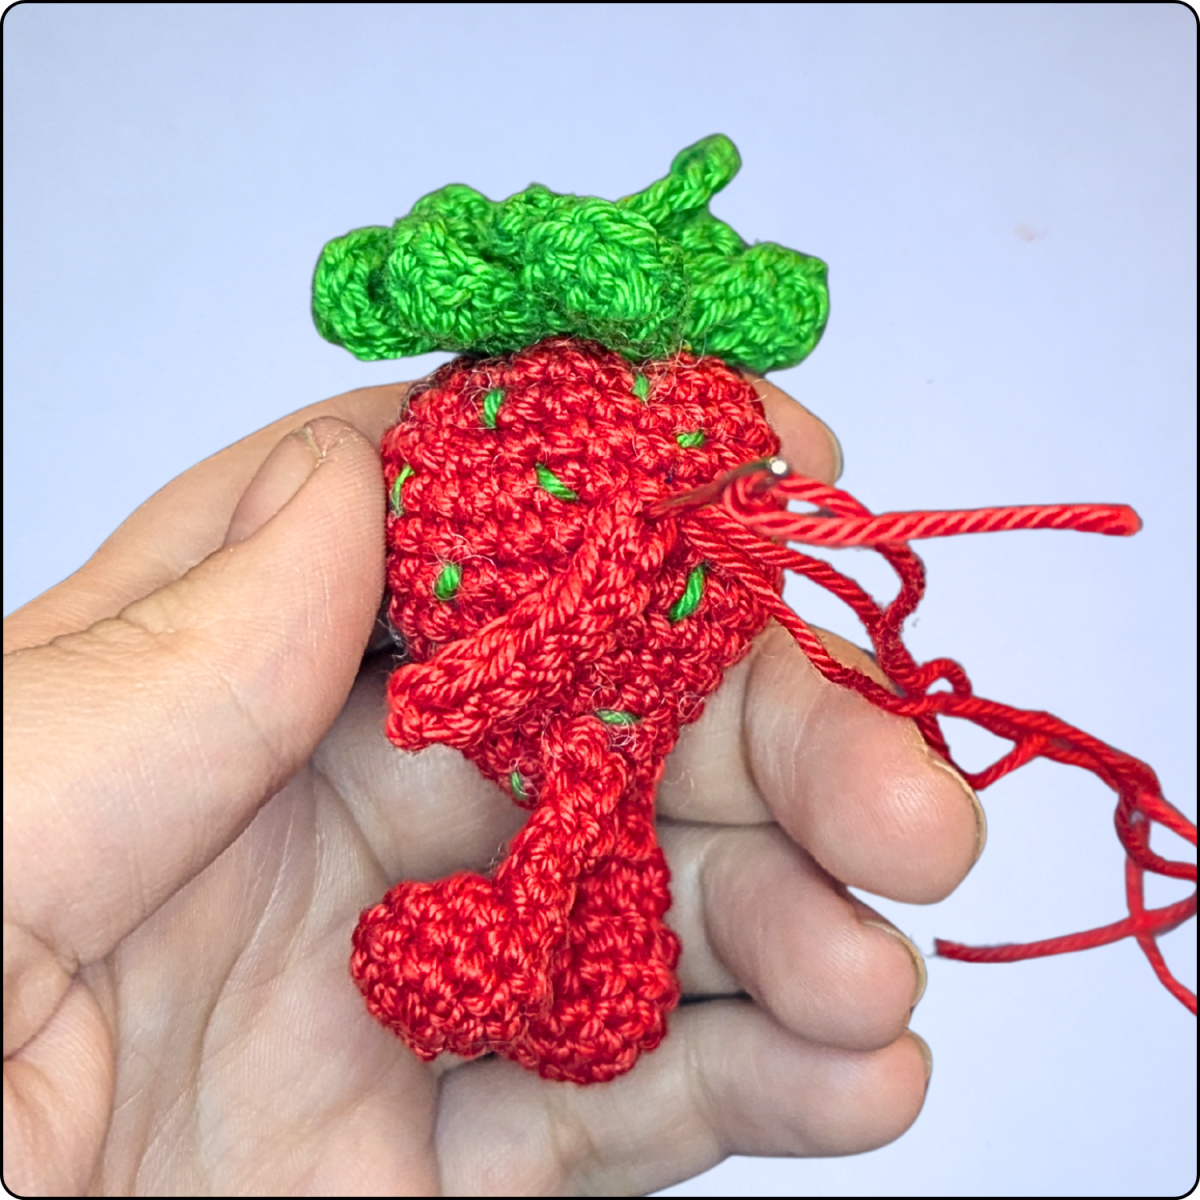
Arms (2x)
Start in red.
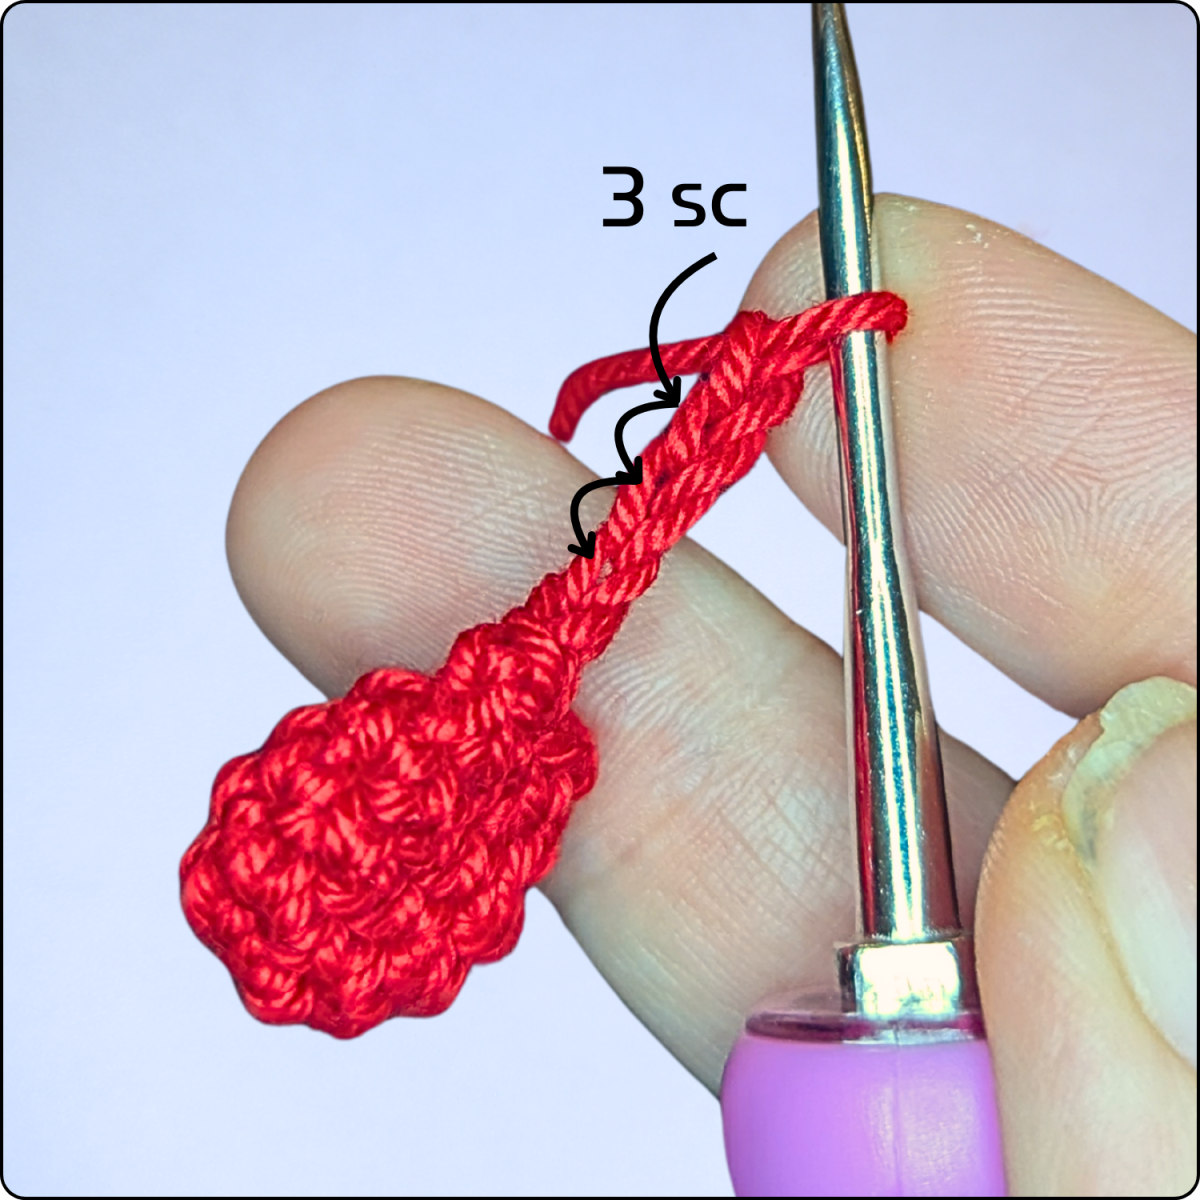
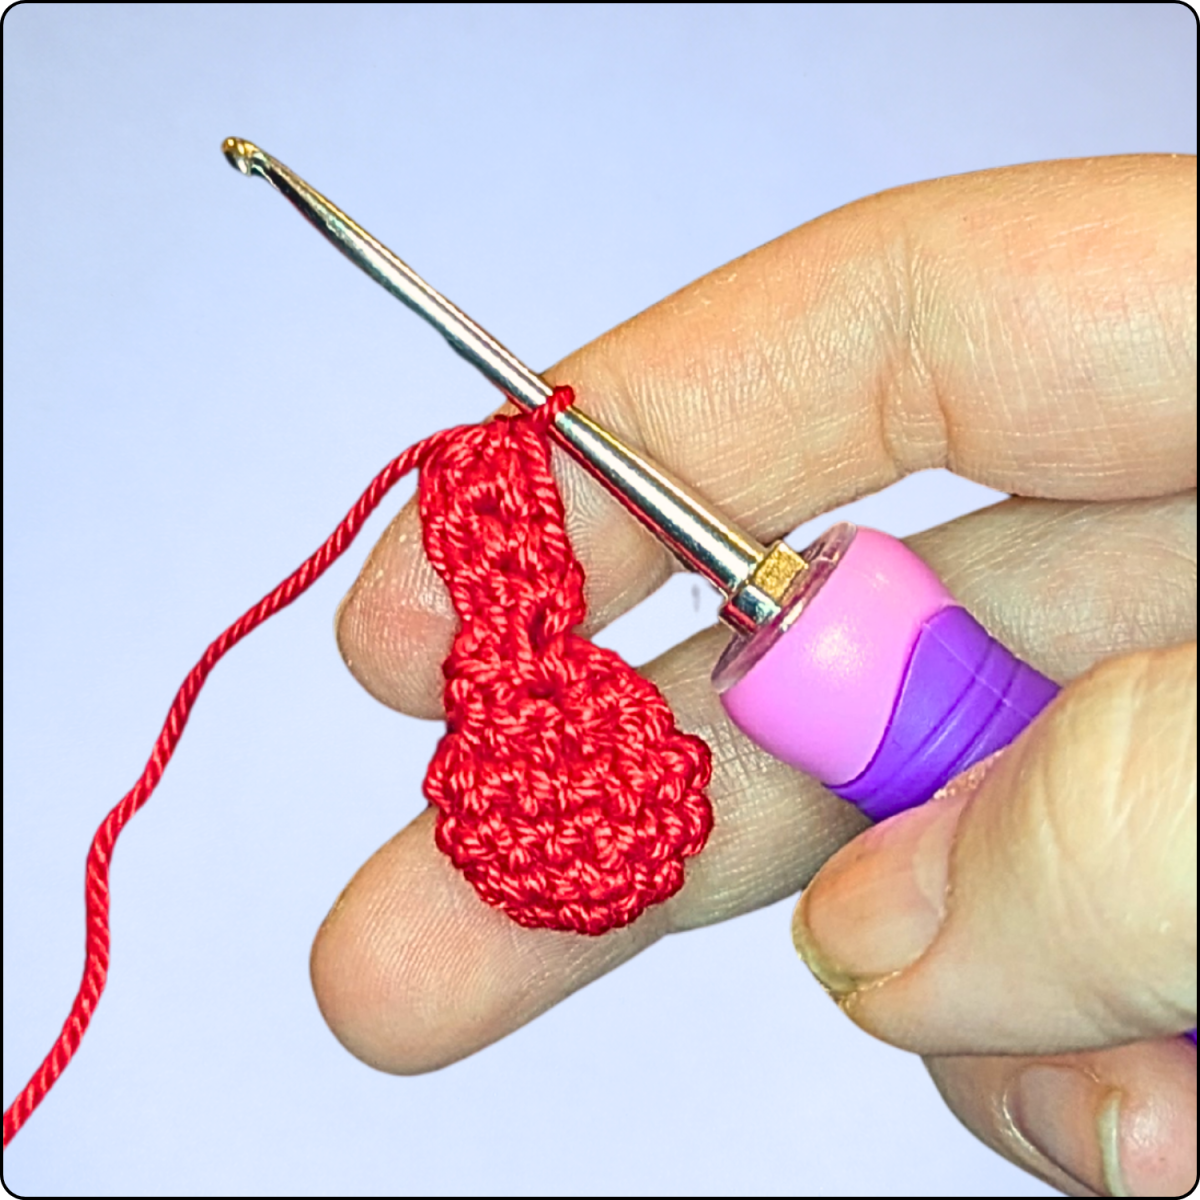
| Rnd 1: | ch 7 | (7) |
| Rnd 2-4: | ch 1, 7 fM | (7) |
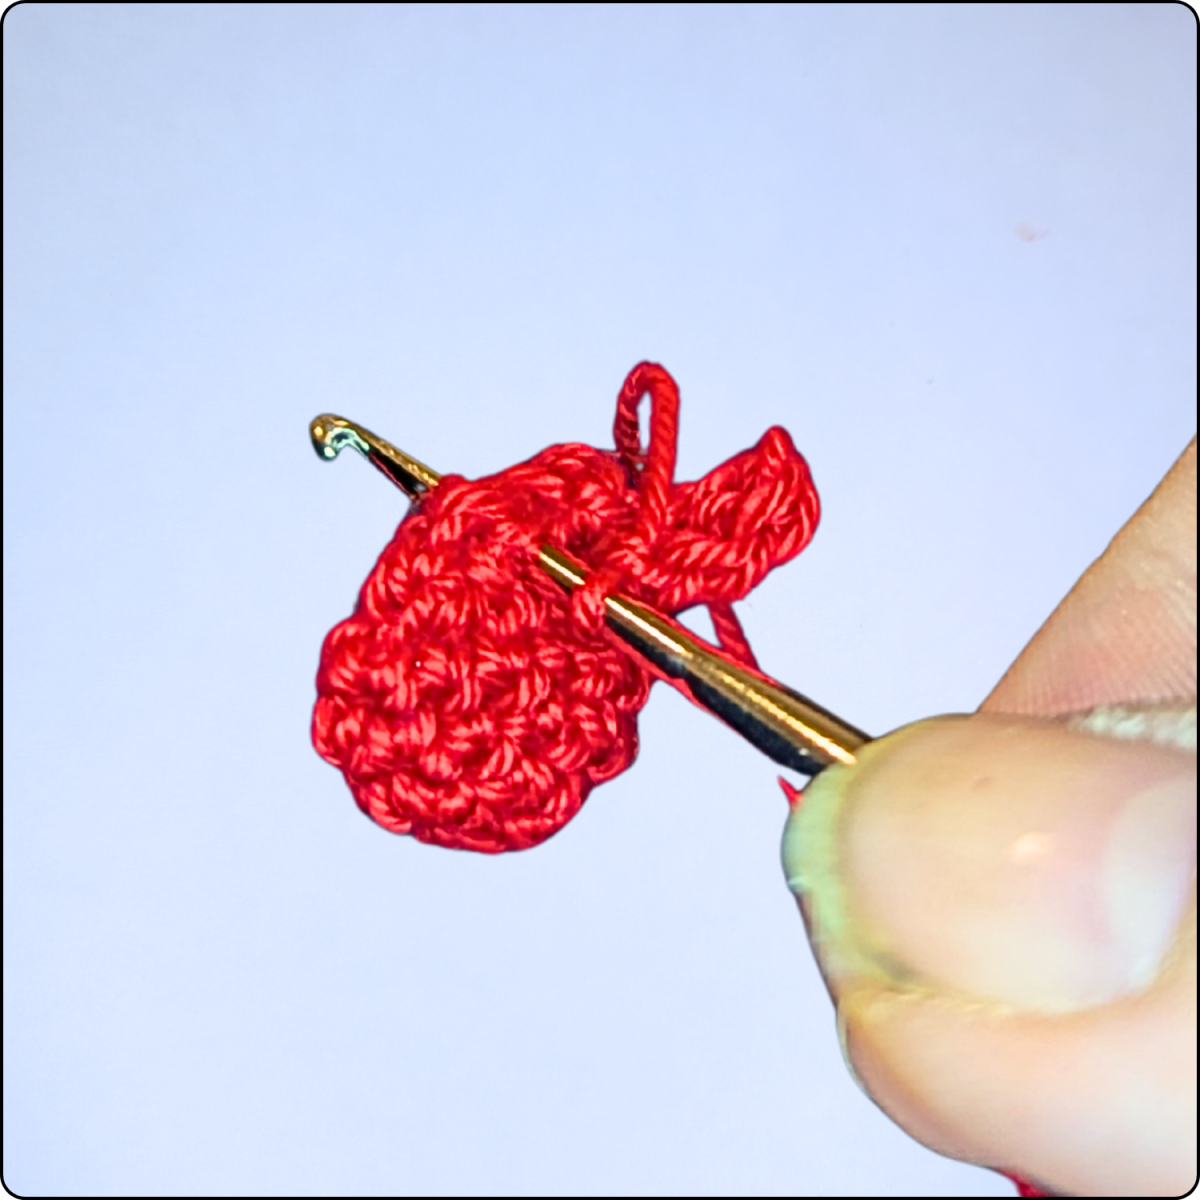
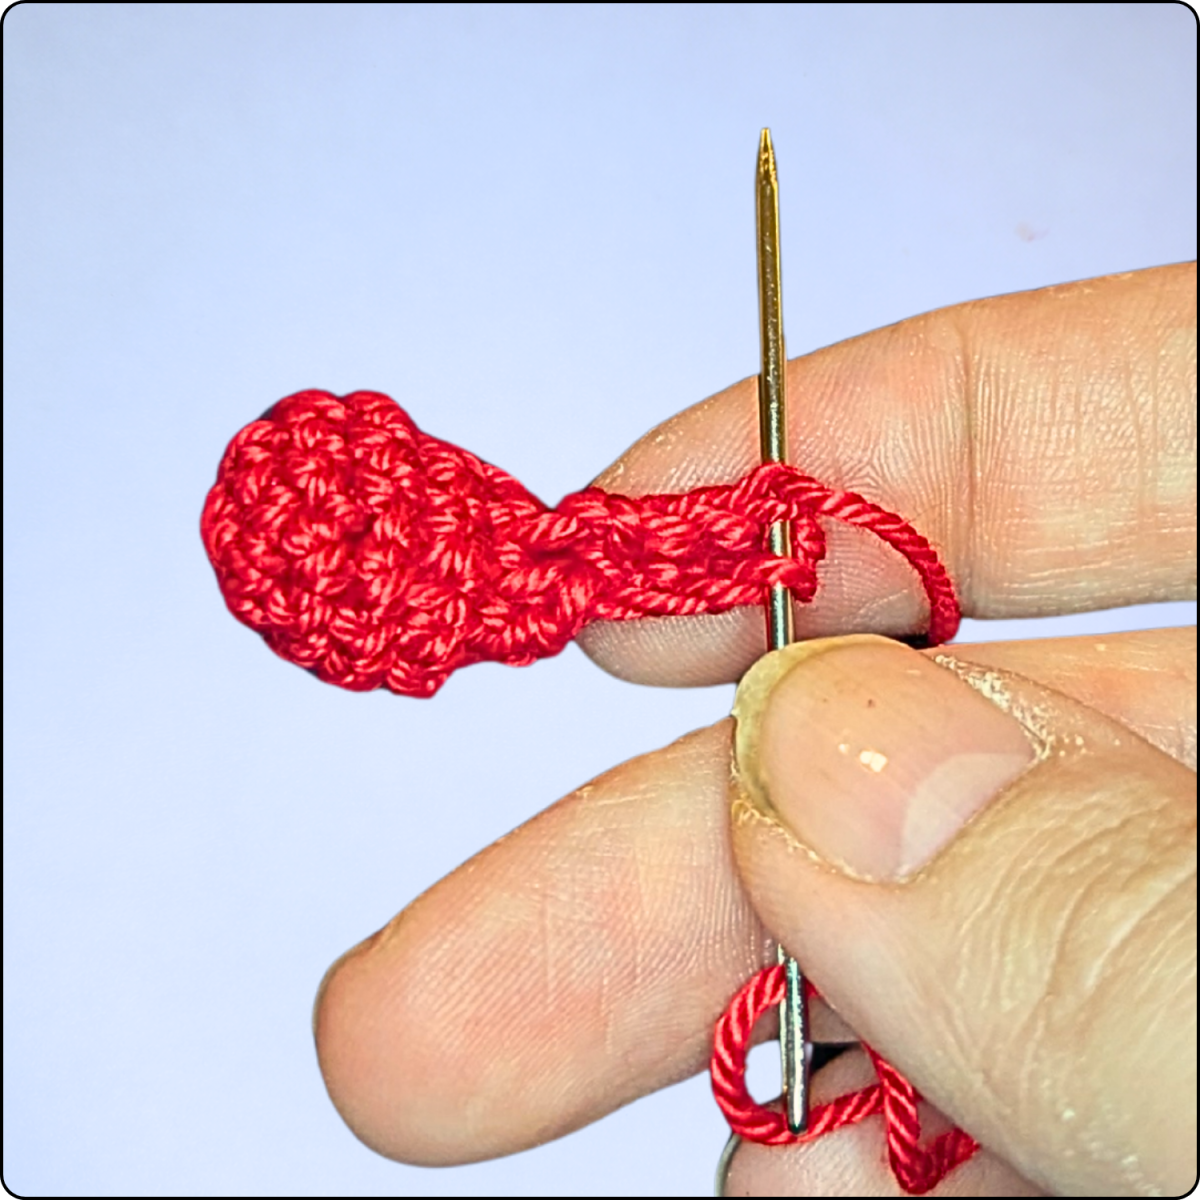
Fasten off and cut the yarn, leaving a long tail. Use this yarn tail to sew the arm lengthwise closed, then attach it to the body between rounds 9 and 10.
.png)
Secure the yarn neatly on the inside of the body. Work and attach the second arm in the same way as the first.
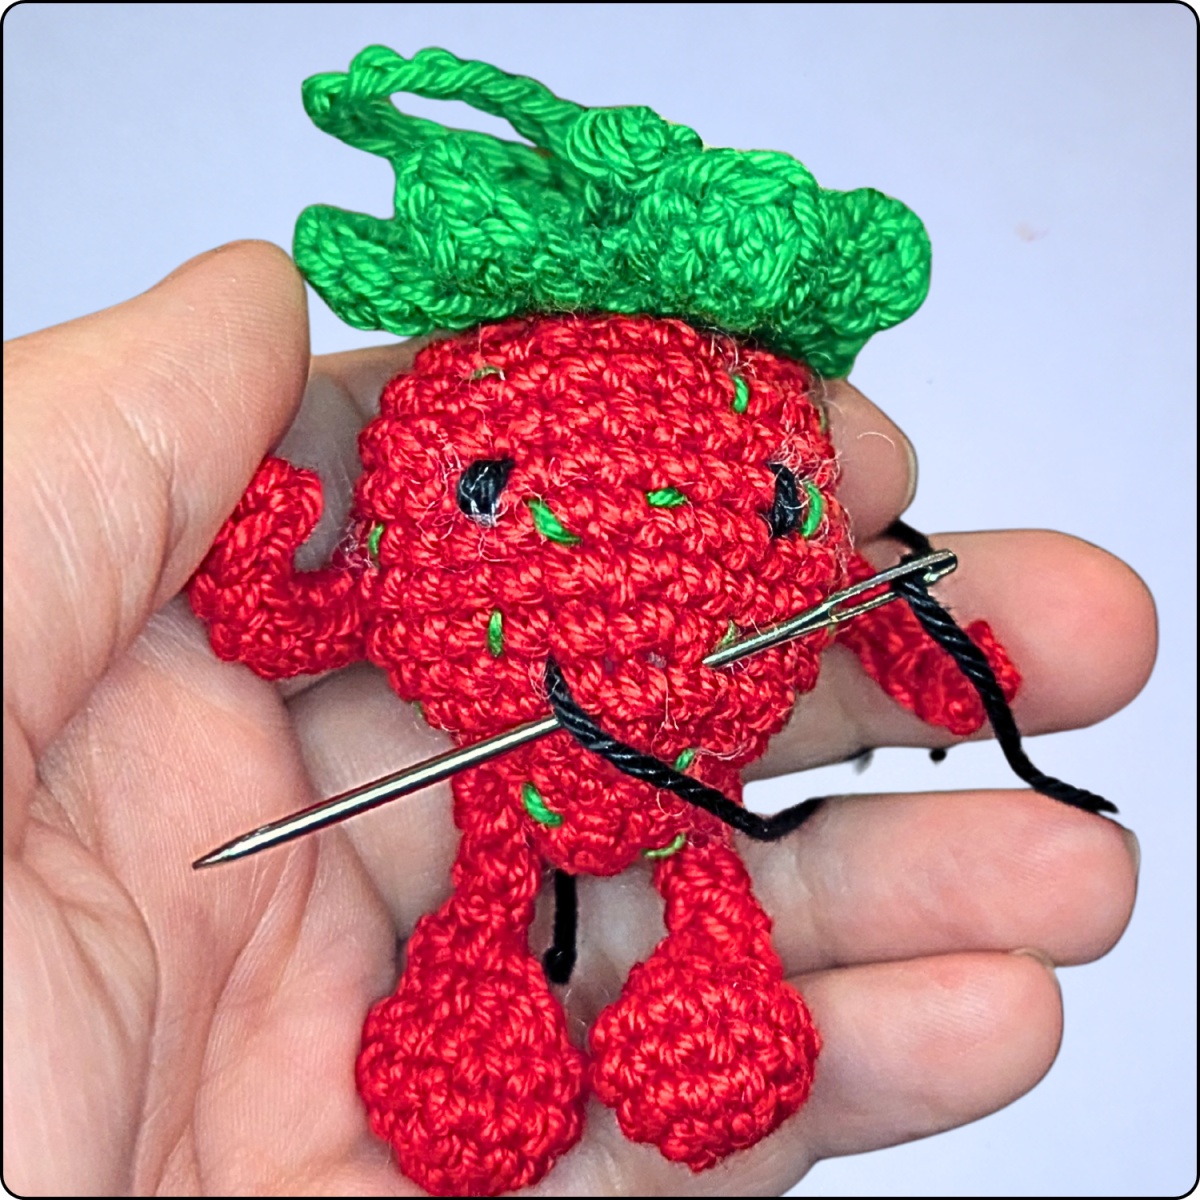
Embroidering the Face
The face is embroidered mainly using black cotton yarn, with a small amount of white cotton yarn for details. The steps are kept deliberately simple, making it easy for beginners to create a clean and expressive amigurumi face.
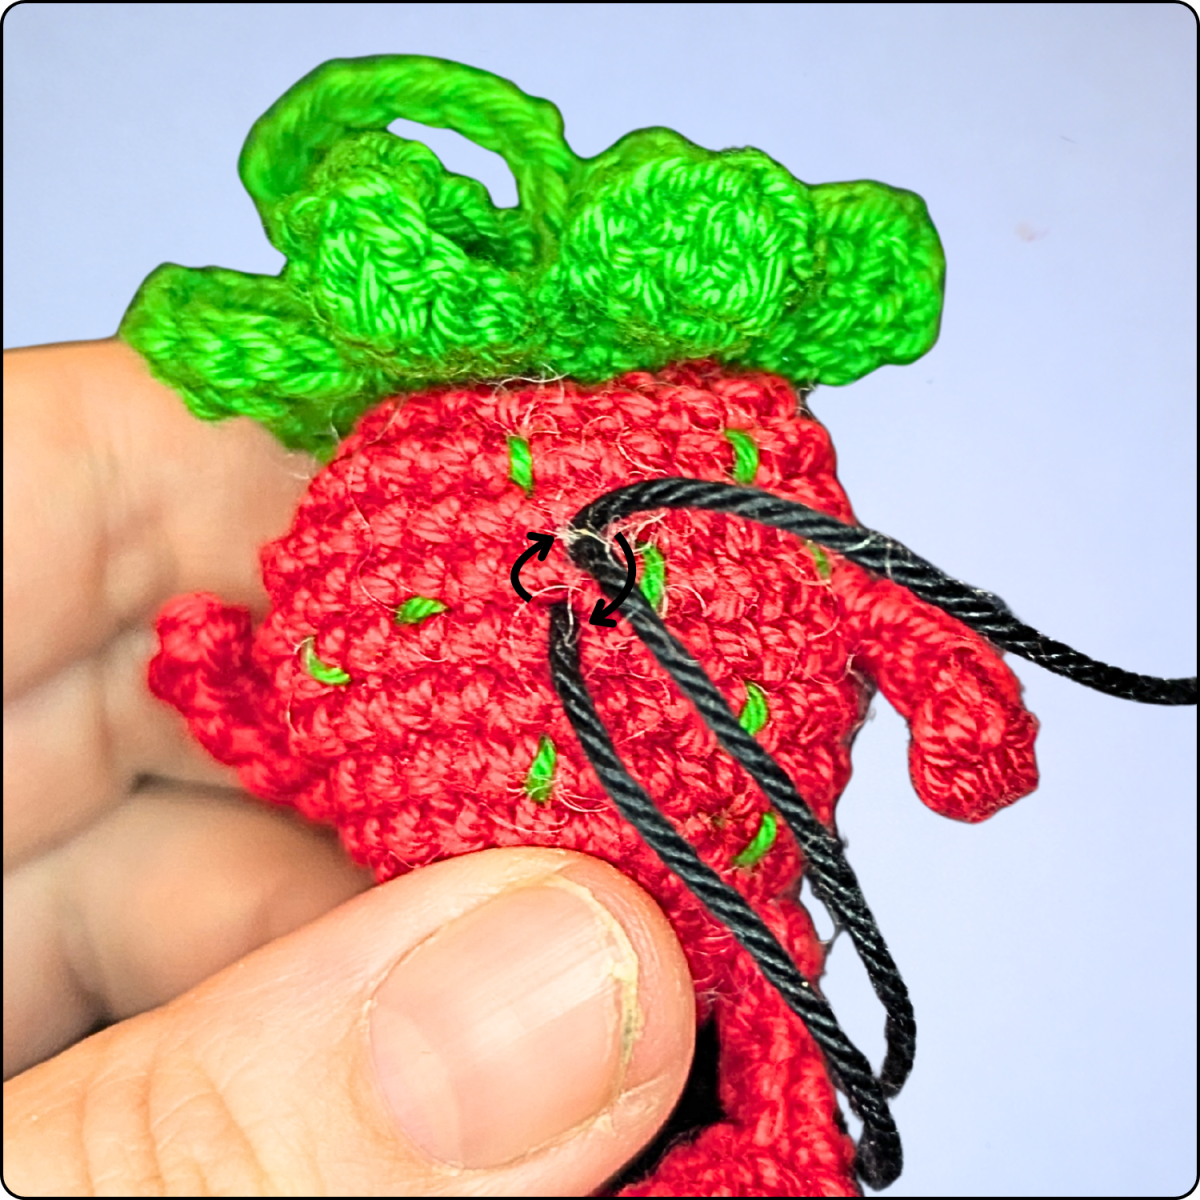
Embroidering the Mouth:
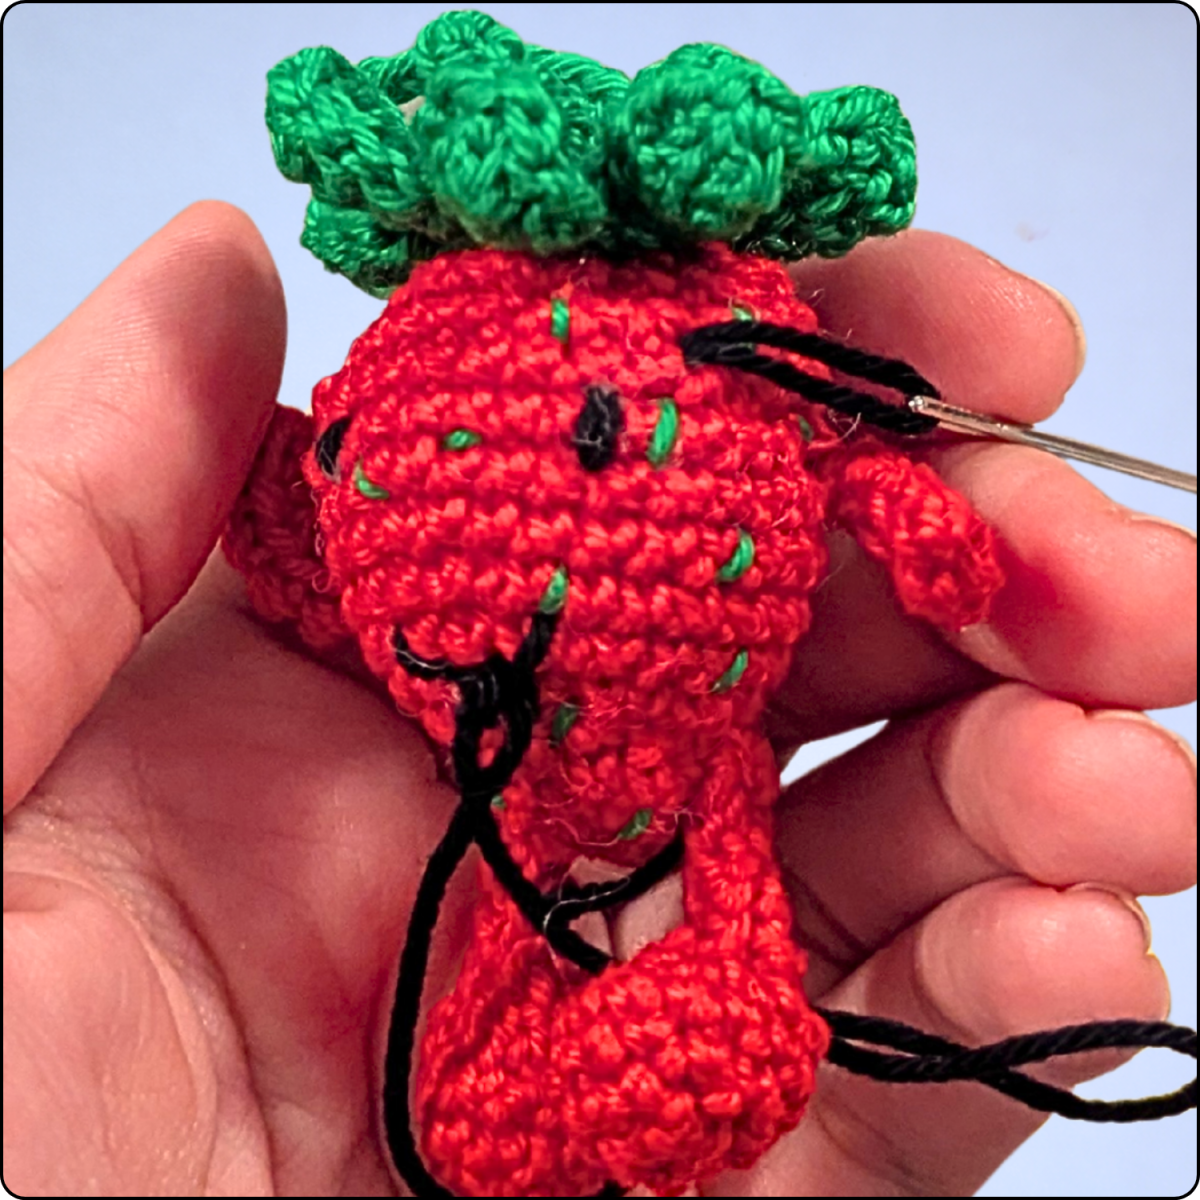
The mouth is worked between rounds 5 and 7. First, guide the yarn between rounds 6 and 7, starting one stitch to the left of the right eye and ending one stitch to the right of the left eye. Do not pull the yarn tight yet.
Next, bring the yarn out and back in between rounds 5 and 6, once one stitch to the right of the left mouth corner and once one stitch to the left of the right mouth corner. This secures the previously placed mouth strand and creates a smooth, even shape.
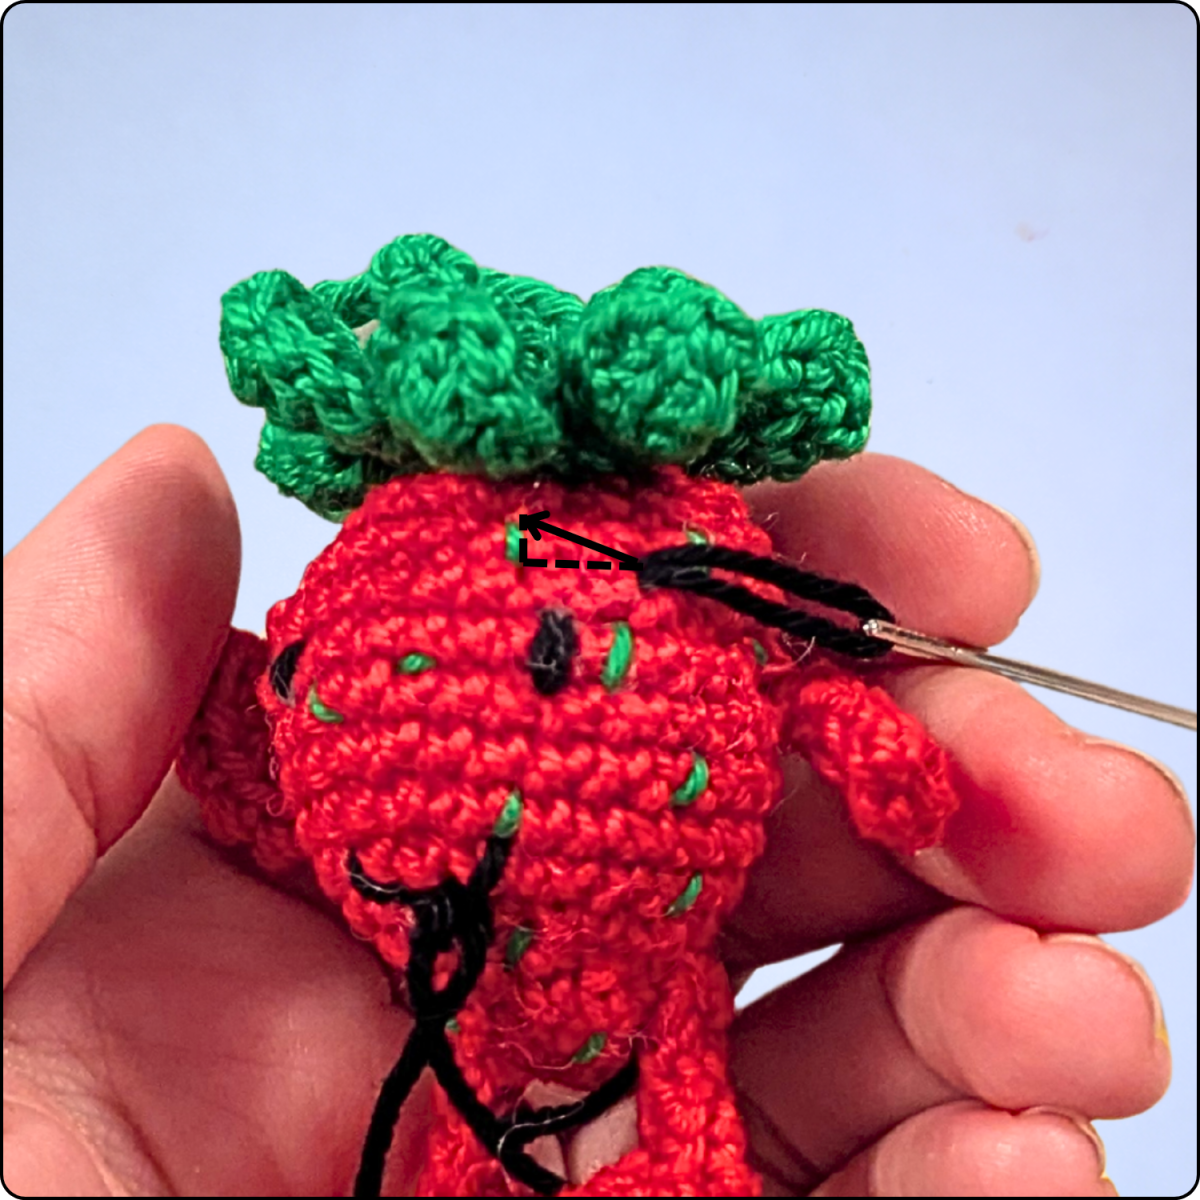
Embroidering the Eyebrows:
Now embroider the eyebrows using black yarn. Each eyebrow spans 2 stitches in width and 1 stitch in height. The placement starts one stitch above and one stitch to the outside of the eye, running diagonally inward to a point one stitch further inside and two stitches above the eye. Use a single long stitch for each eyebrow.
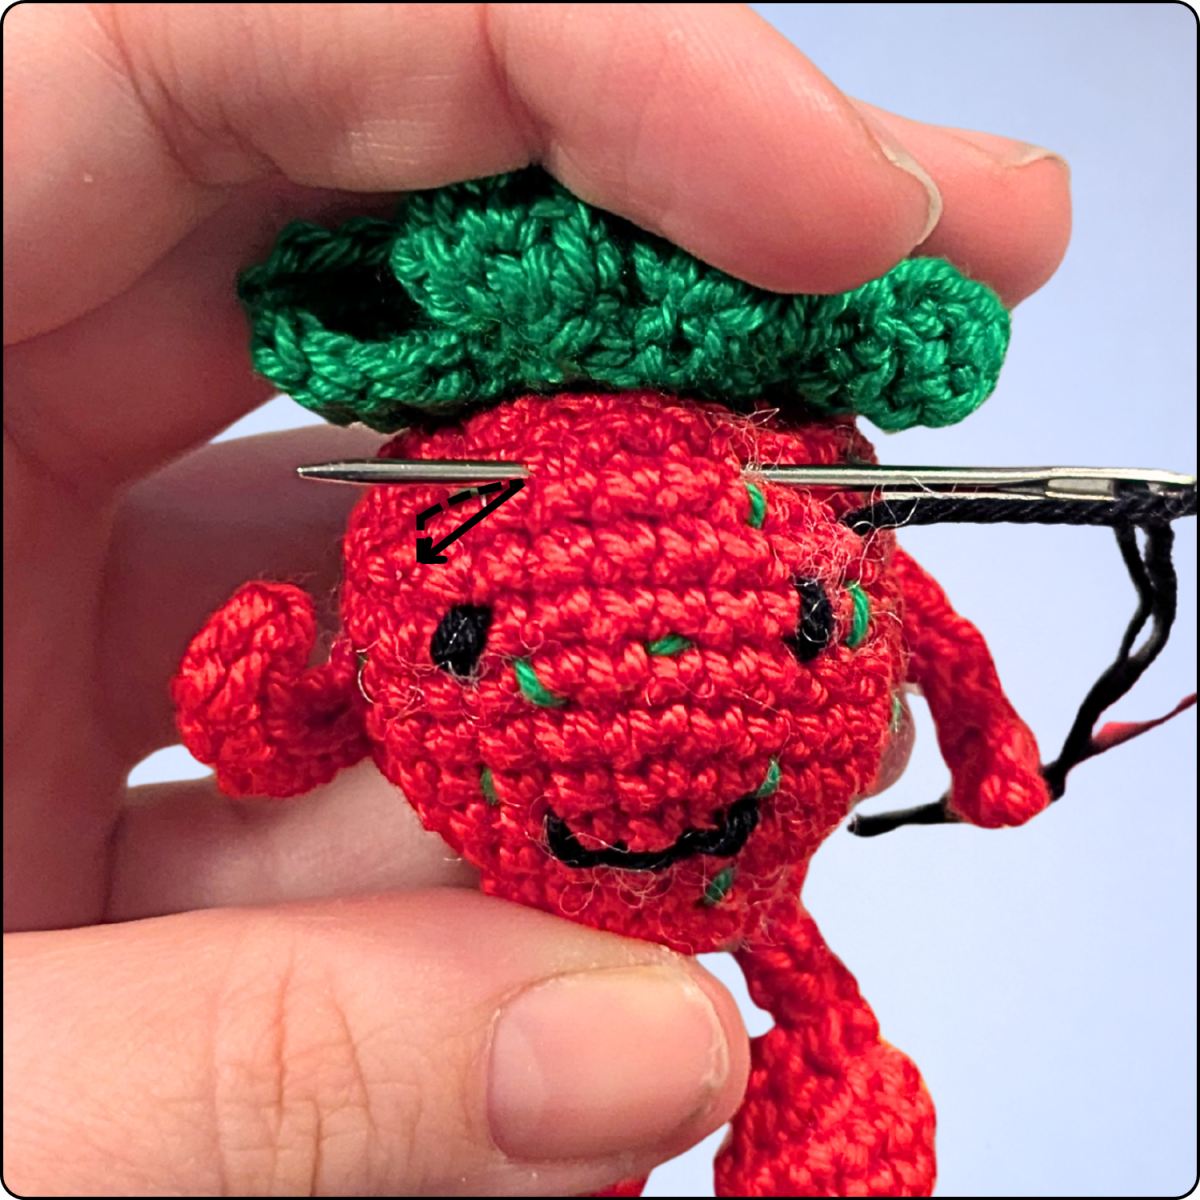
Securing the Yarn Tails:
After completing all black embroidery details, bring the black yarn out at the same exit point as the starting tail, knot both yarn tails together, and carefully weave them in inside the strawberry.
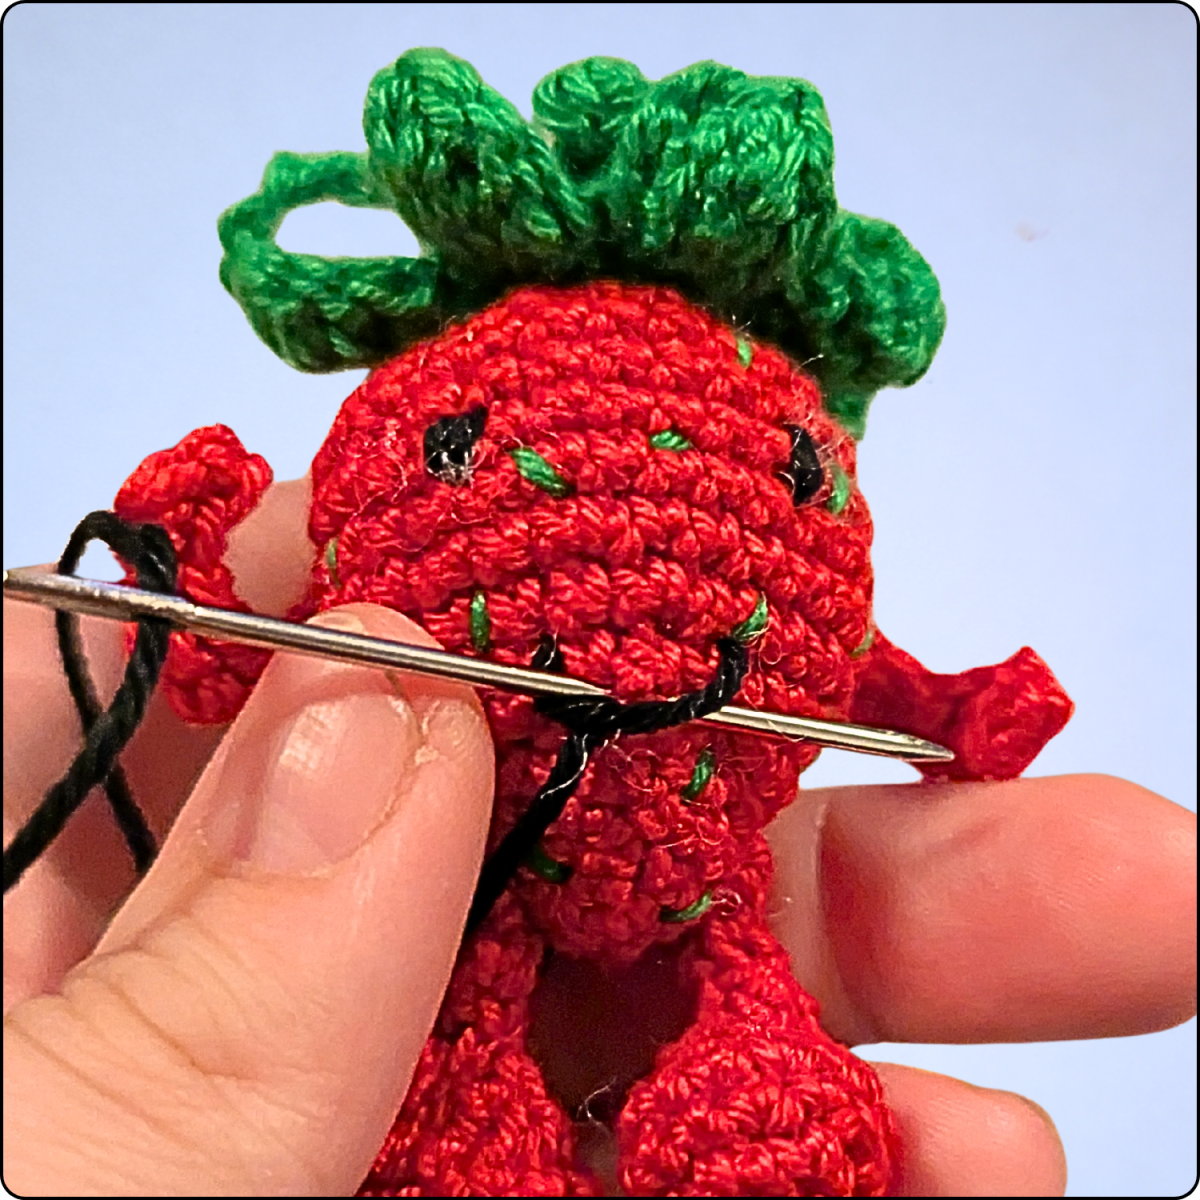
Refining the Eyes:
To refine the eyes, use white cotton yarn (approx. 15 cm / 6 inches). Again, leave a short starting tail outside the strawberry to secure the yarn later.
With the white yarn, place one short stitch on the outer edge of each eye. This stitch represents the white part of the eye and makes the eyes appear more defined, helping them stand out clearly from the red strawberry body.
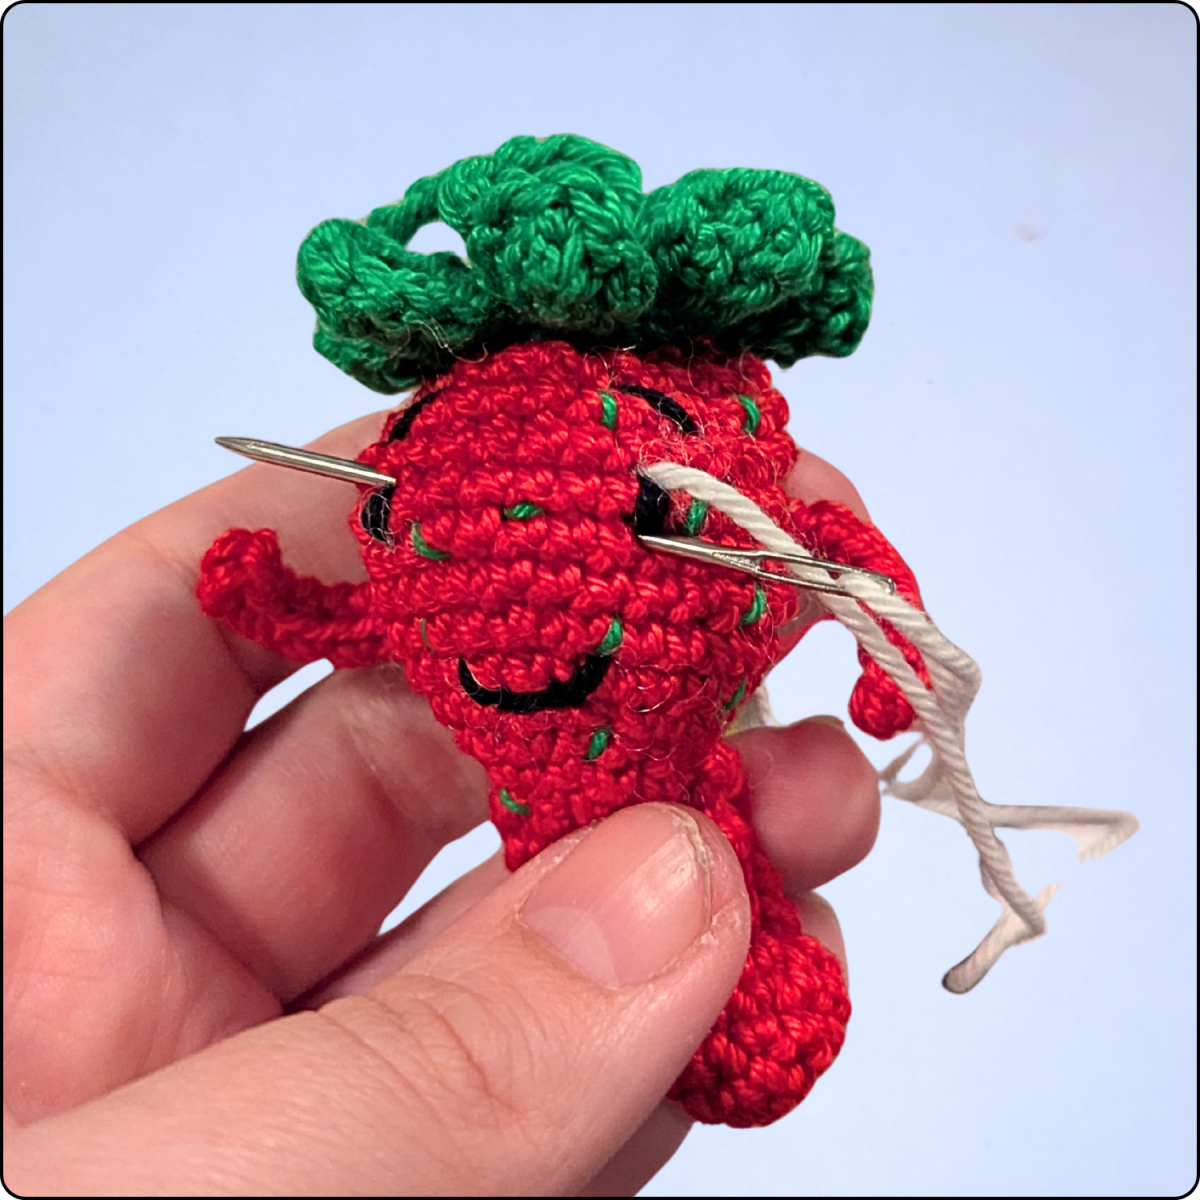
Finally, knot the white yarn together with the starting tail and neatly weave in the ends inside the strawberry.
Your crocheted strawberry keychain is now finished! 🎉
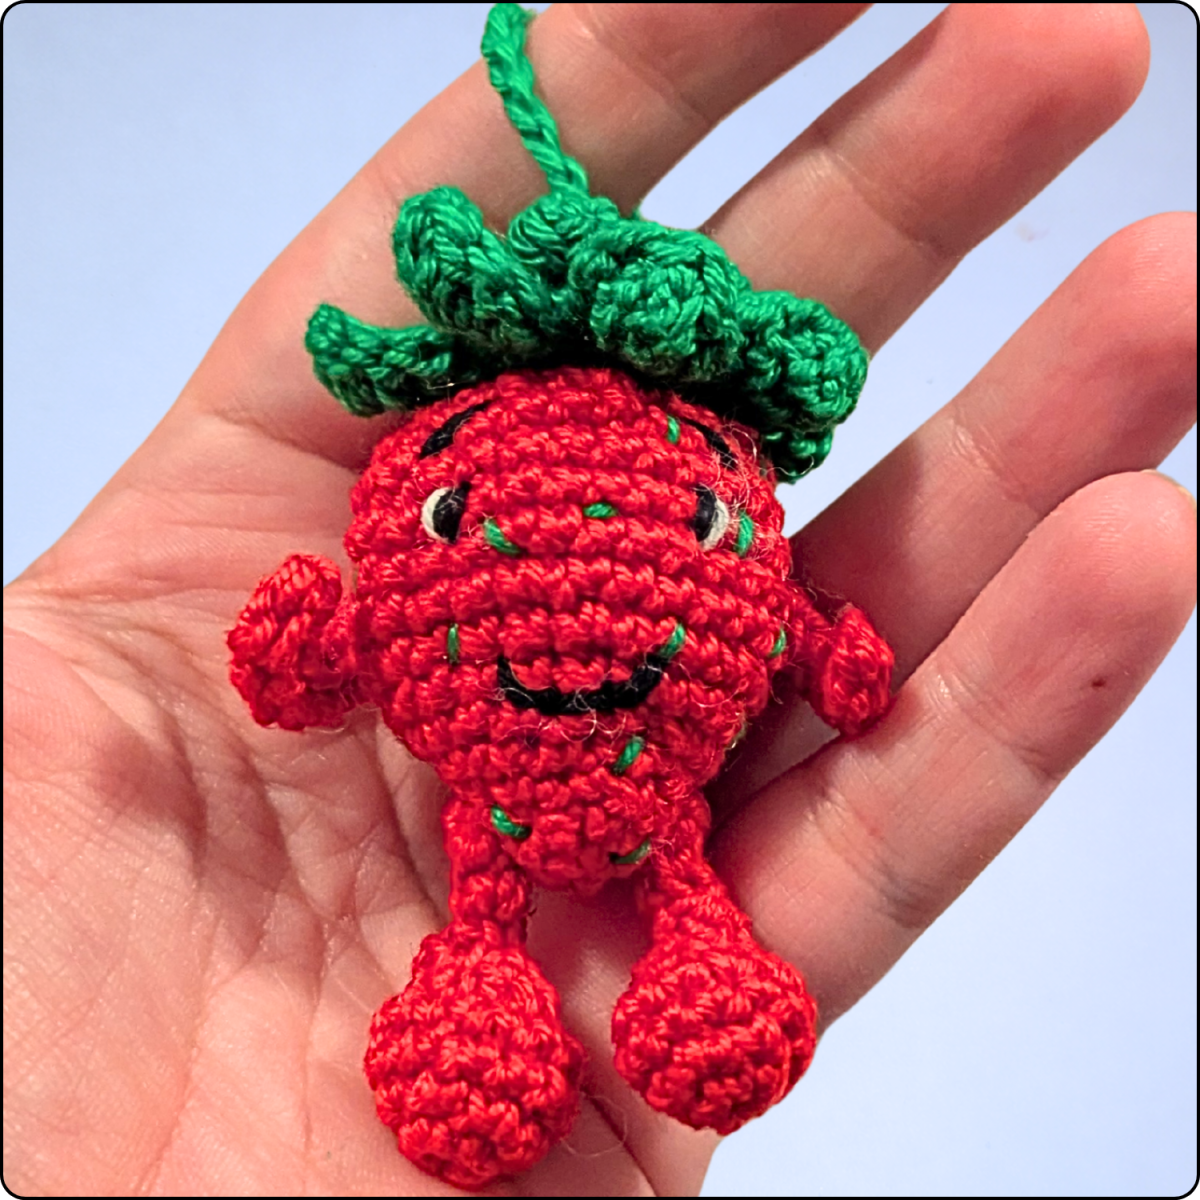
I hope you enjoyed making this cute little strawberry amigurumi and you had a few relaxing crochet moments along the way. Whether used as a keychain, bag charm, or small handmade gift, this crochet strawberry is a lovely and cheerful accessory.
If you enjoyed this pattern, feel free to follow my blog or take a look at my shop. At the moment, there is only a small selection of crochet patterns available, but I am actively working on adding new designs – so be sure to check back from time to time.


