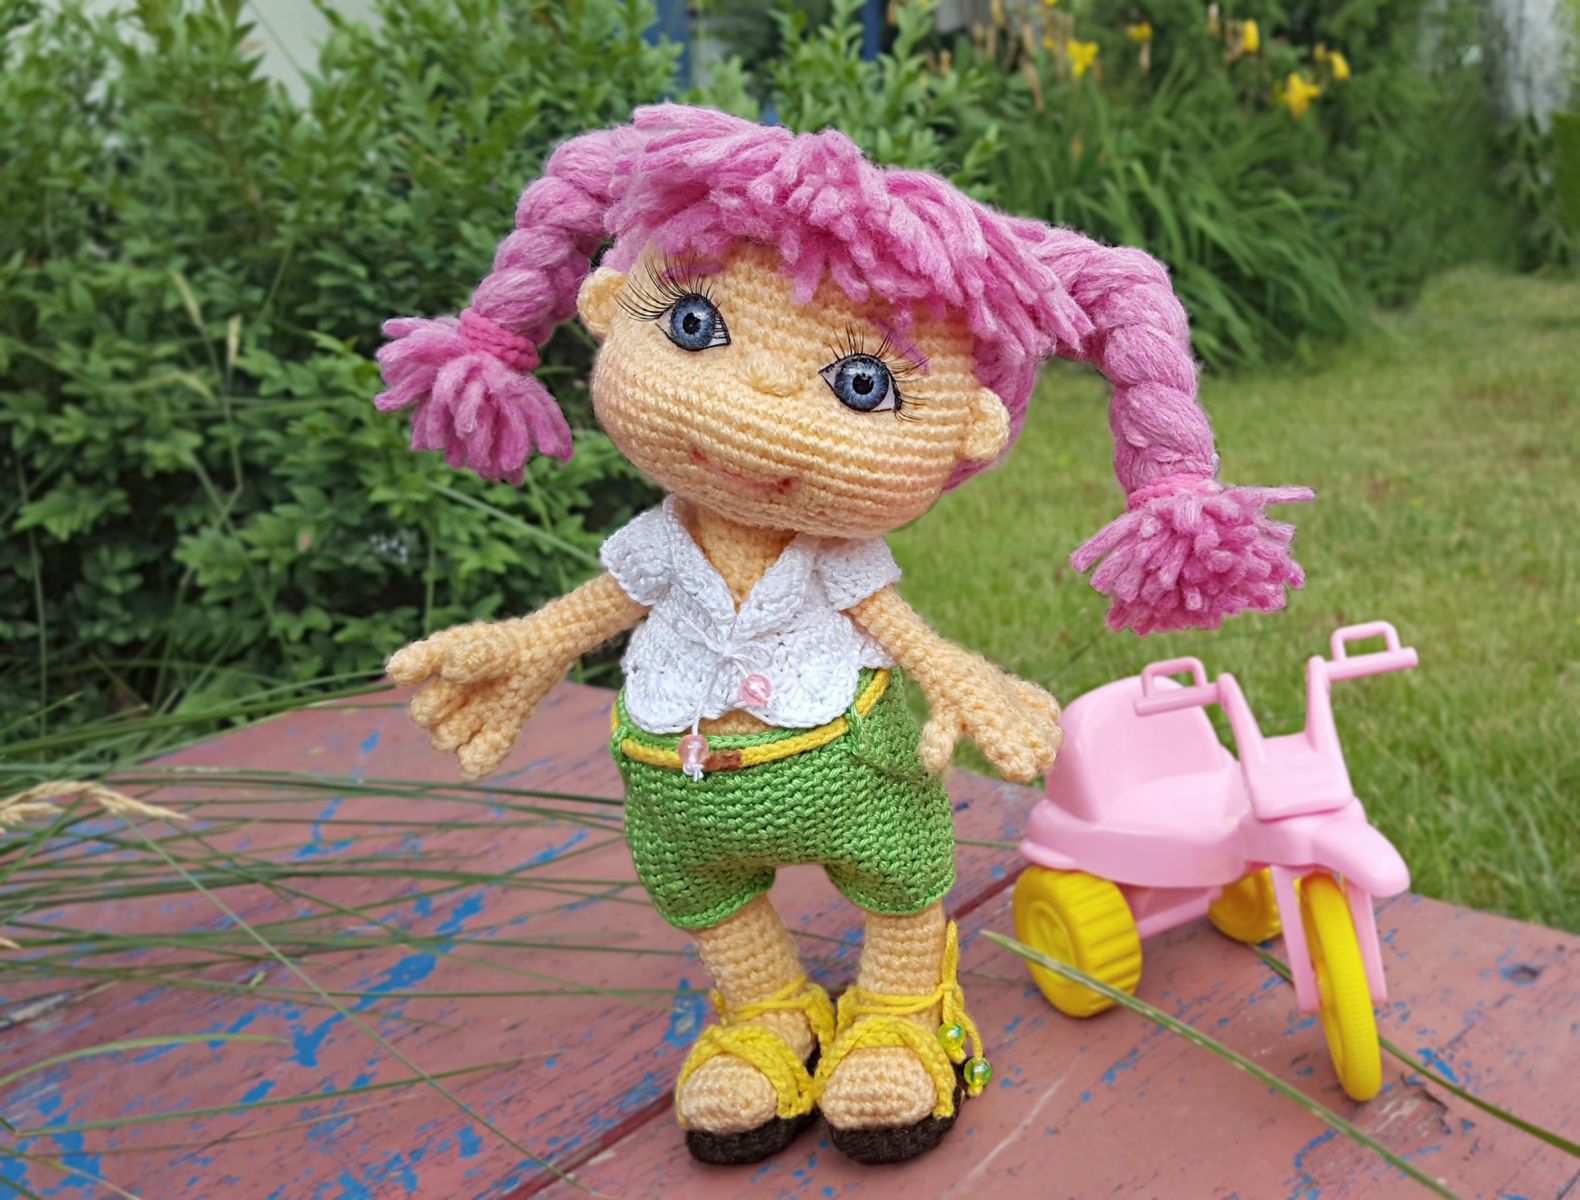
Crochet pattern The Doll

According to this crochet pattern you can crochet the doll depending on the yarn, you have chosen.
The size of the ready doll is 26 cm, if using the pointed materials.
He pattern does not contain basic course of crocheting – you should already have the basic knowledge.
Abbreviations: USA crochet terms
When crocheting the dolls I always use a smaller size hook than is suggested on the
yarn band. For example, if it is recommended to use a 3 mm hook I use a 1,5 mm hook. It keeps
the stitches tight and prevents the stuffing from showing through holes in the fabric.
The dolly will also be more accurate.
1. All details are crocheted in spiral rounds. This means that the round will NOT be
finished with a slst.
2. Use a stitch marker. A small thread (other colour then your working yarn) helps you
counting the rounds. Just place it at the start of a round on top of your working thread.
Materials:
- Yarn for the body 50 gr, 50 gr/160 m
- Yarn for clothes 140 m/50 g
- Any yarn for the hair
- Crochet hooks number 1,2
- Eyes 10 mm, felt, fake eyelashes.
- Glue.
- Fiberfill or polyfiber for stuffing.
- Long sewing needle (or a tapestry needle) for tightening.
Abbreviations:
- sc – single crochet
- st - stitch
- ch – chain
- inc. – increase (2 sc in 1 st)
- dec. – decrease (2 sc together)
- Inc3 –3 sc in one stitch
- 3sctog – 3 sc together
- X dec. – 2 sc together X- times
- X inc. – increase X- times
- (---)x – repeat x-times in brackets
- dc –double crochet
- FO – fasten off
- sl st – slip stitch
- hdc – half double crochet
- MR – magic ring, amigurumi ring
Head and body
The marker runs along the center back, keep it straight with shift stitches when needed.
The beginning of a row shifts t the right while crocheting in the spiral rows. You need to align the marker so that the proportions of a toy remain symmetrical, decreases and increases remain in their places.
You can read more about marker and shift stitch here:
https://www.crazypatterns.net/de/blog/2583/marker-and-shift-stitch
1. Crochet 6 sc in a magic ring (MR)
2. 6 mal inc = 12
3. (1 sc, 1 inc)х6 = 18
4. (2 sc, 1 inc)х6 = 24
5. (3 sc, 1 inc)х6 = 30
6. (4 sc, 1 inc)х6 = 36
7. (5 sc, 1 inc)х6 = 42
8. (6 sc, 1 inc)х6 = 48
9. (7 sc, 1 inc)х6 = 54
Do not forget to keep the marker straight, it goes along the middle of the back.
10-13. = 54 sc
14. 22 sc, place marker A, 10 sc, place marker B, 22 sc =54
15-16. = 54 sc
17. 20 sc, (1 sc, 1 inc)x3, 2 sc, (1 sc, 1 inc)x3, 20 sc = 60
18. 20 sc, (2 sc, 1 inc)x3, 2 sc, (2 sc, 1 inc)x3, 20 sc = 66
19-21. = 66 sc
22. 30 sc, place marker A , 6 sc, place marker B, 30 sc = 66
23. 66 sc
24. 20sc, (2 sc, 1 dec)x3, 2 sc, (2 sc, 1 dec)x3, 20 sc = 60
25. = 60 sc
26. 20 sc, (1 sc, 1 dec)x3, 2 sc, (1 sc, 1 dec)x3, 20sc = 54
27. (7 sc, 1 dec)x6 = 48
28. (6 sc, 1 dec)x6 = 42
29. (5 sc, 1 dec)x6 = 36
30. (4 sc, 1 dec)x6 = 30
31. (3 sc, 1 dec)x6 = 24 stuff
32. (2 sc, 1 dec)x6 = 18
33-34. = 18 sc
35. (2 sc, 1 inc)х6 = 24
36. (3 sc, 1 inc)х6 = 30
37. = 30 sc
38. (4 sc, 1 inc)х6 = 36
39-40. = 36 sc
41. (5 sc, 1 inc)x6= 42
42. (3 sc, 1 inc)x10 , 2 sc = 52
43-44. = 52 sc
45. (12 sc, 1 inc)x4 = 56
46-48.= 56 sc
50. (7 sc, 1 dec)x6 = 48
51. (6 sc, 1 dec)x6 = 42
52. (5 sc, 1 dec)x6 = 36
53. (4 sc, 1 dec)x6 = 30
54. (3 sc, 1 dec)x6 = 24
55. (2 sc, 1 dec)x6 = 18 stuff the body
56. (1 sc, 1 dec)x6 = 12
57. 6 dec
Sew the opening. Fasten off and hide all loose ends.
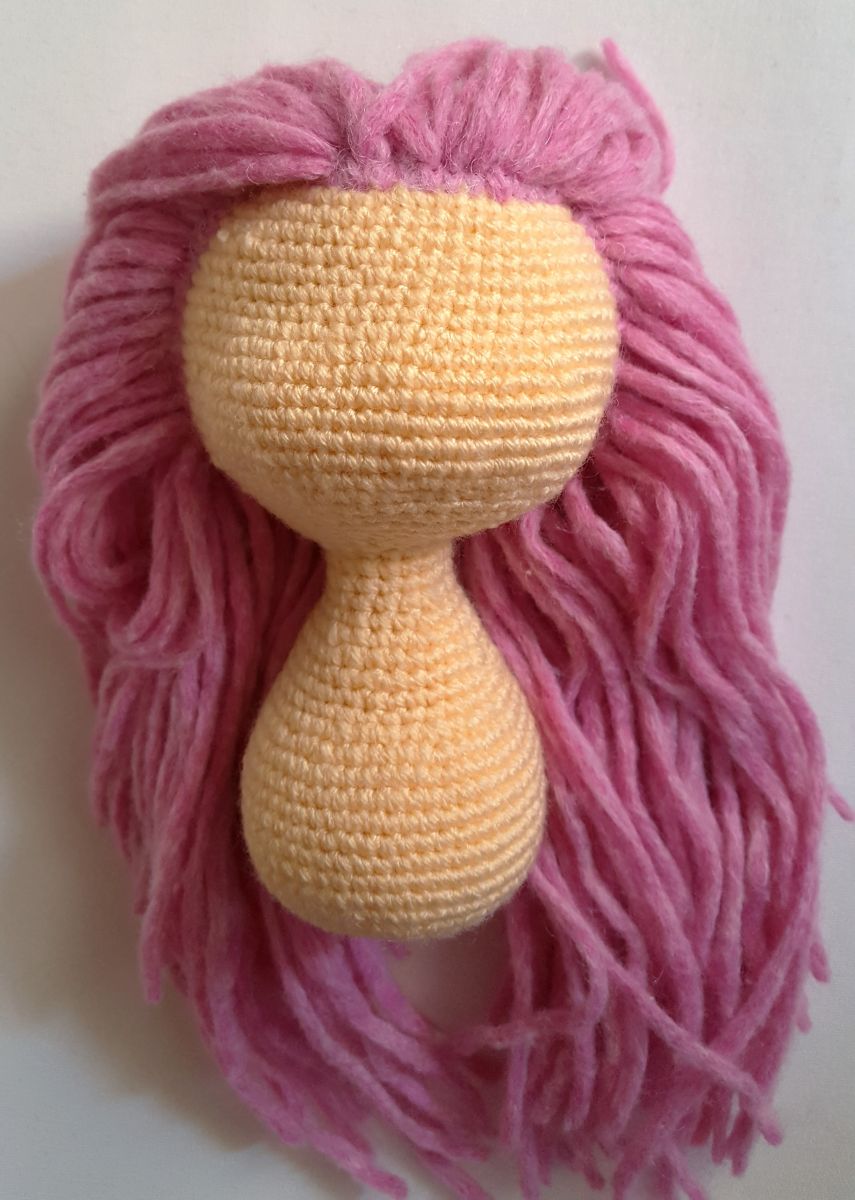
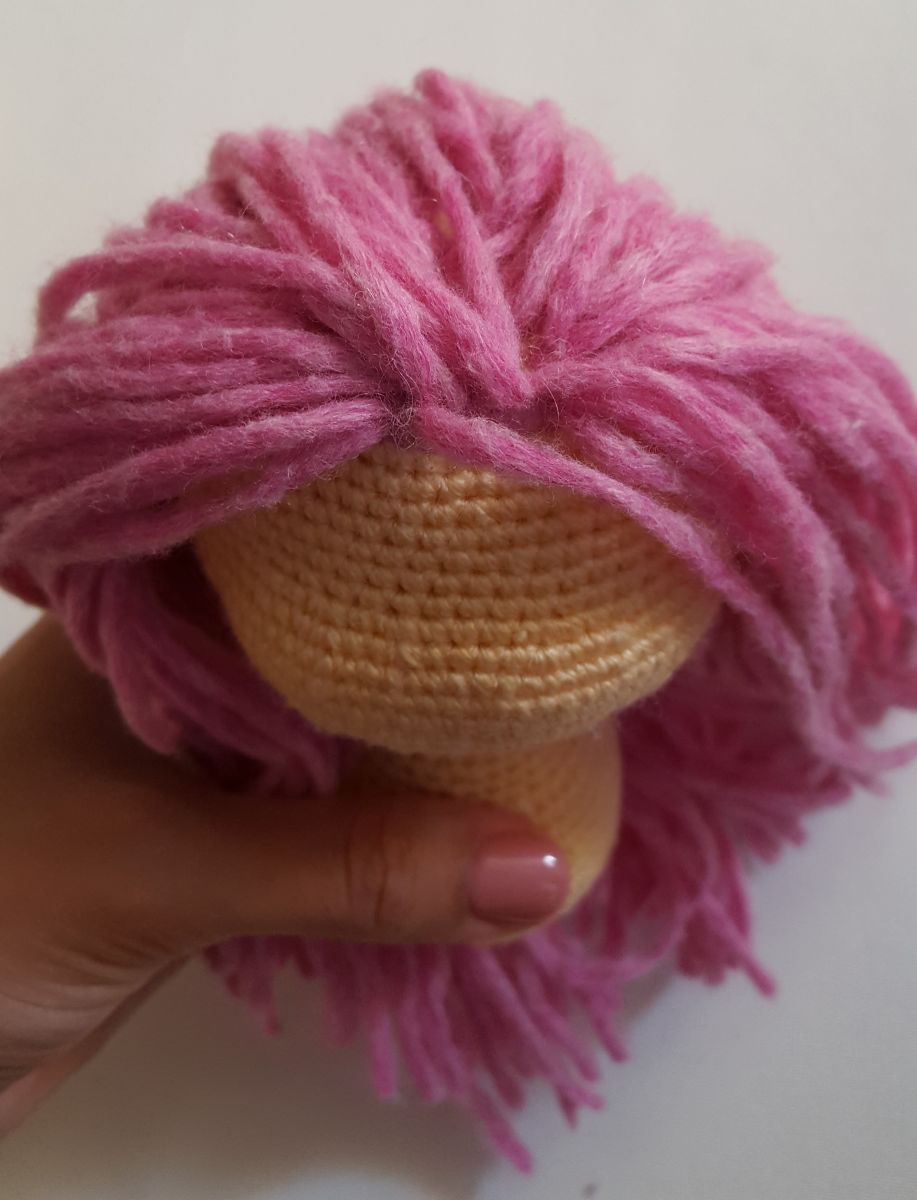
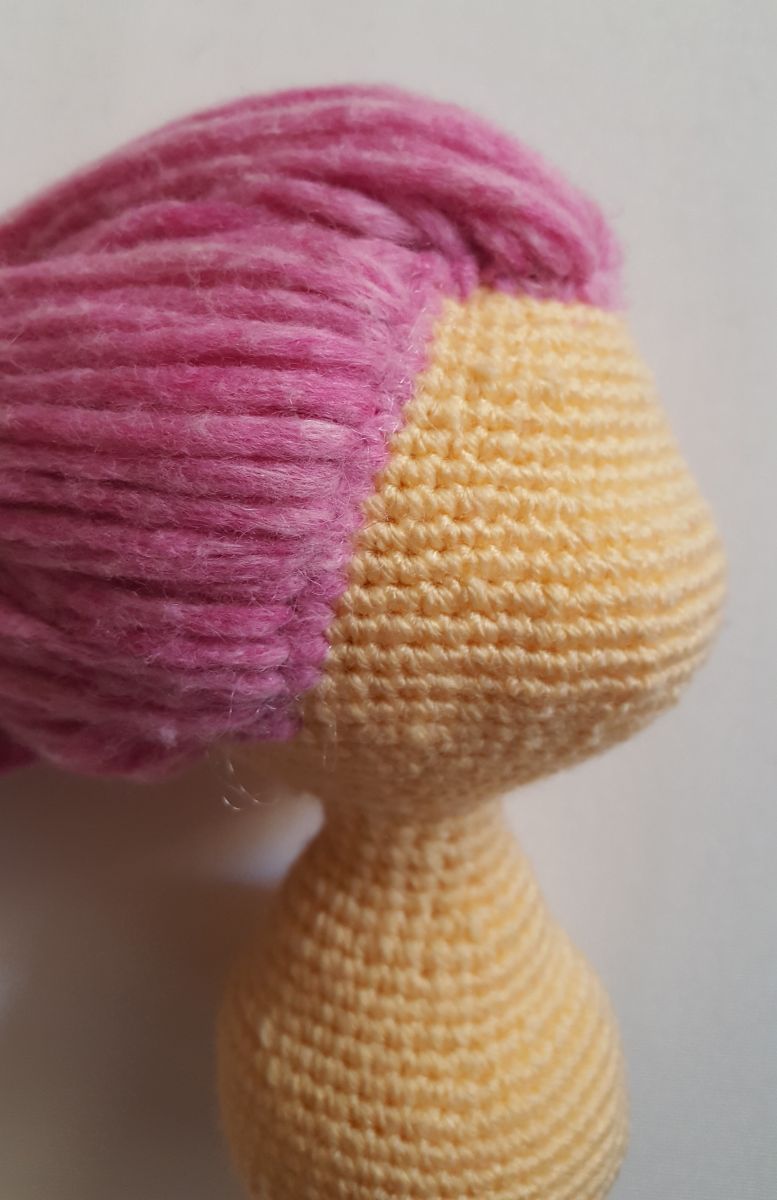
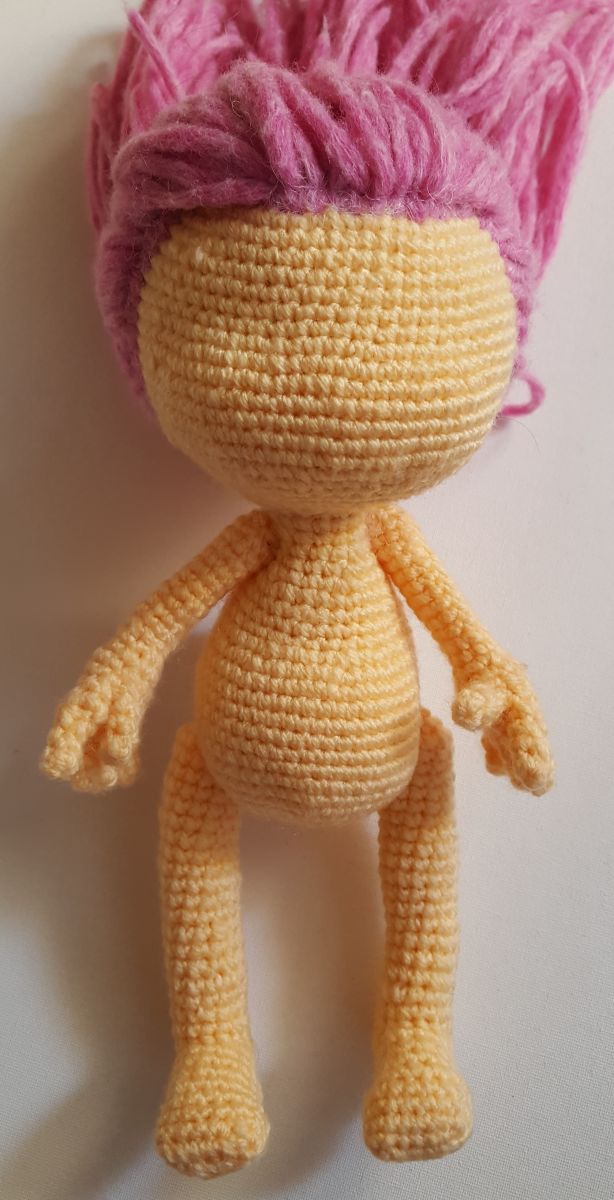
Hair
Attach the hair in your preferred way, I attach mine like a fringe. Cut the hair of the necessary length, approx. 40 cm and attach them around the head and at the top of the head. Divide the head down the center into two parts, attach the hair along the hair parting. With the same thread make some stitches over the head so that there are no bald places on the doll’s scalp. Make the ponytails.
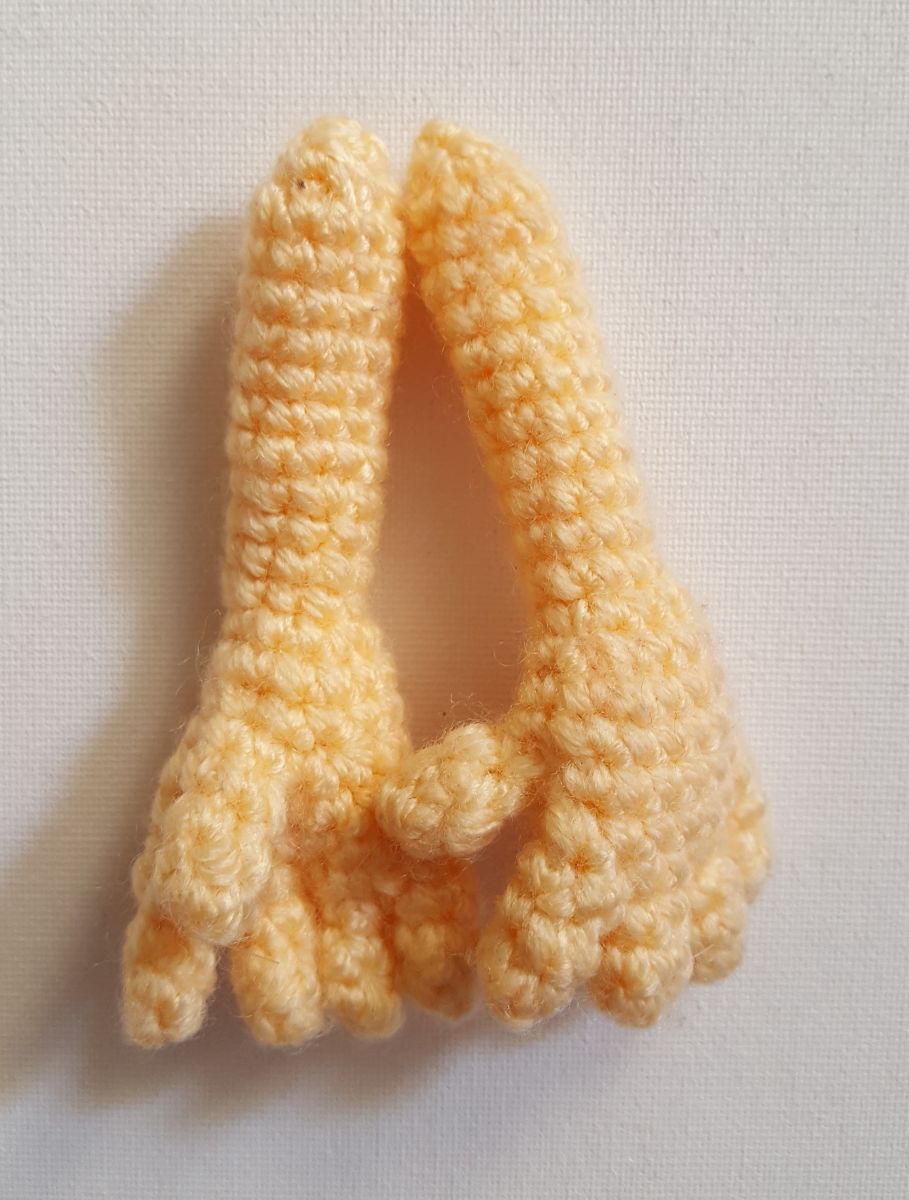
Hands
*While joining the fifth finger (thumb), it might appear in the center – just make one or two sc to the place you need it to be. Don’t forget to count in those sc afterwards.
We start with the fingers. To make your fingers thinner, you can either divide your yarn into two parts or take a smaller crochet hook.
Fingers (8)
1. Chain 2. Make 4 sc into the second chain from the hook.
2-4. 4 sc
5. 2 sc fasten of
Pinkie (2), don’t fasten off
1. Chain 2. Make 4 sc into he second chain from the hook.
2-4. 4 sc
.jpg)
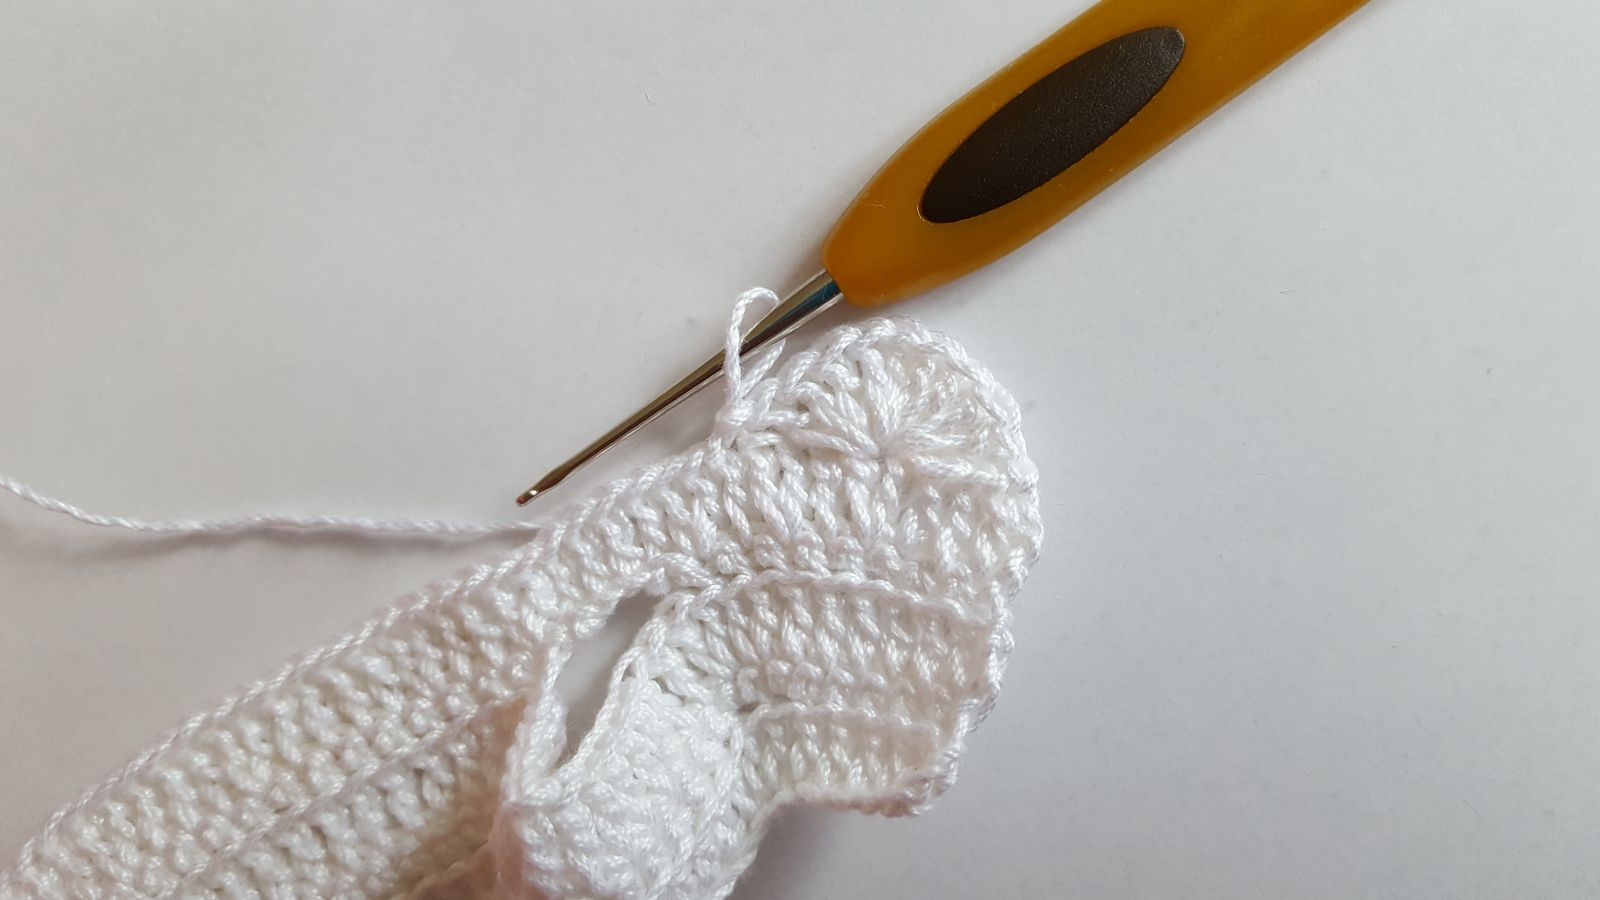
Palm
1. Join four fingers together in a circle, making 2 sc on every finger from each side (16 sc).
(2 sc on the first finger, 2 sc on the second finger, 2 sc on the third finger, 4 sc on the fourth, 2 sc on the third finger, 2 sc on the second finger, 2 sc on the first finger).
.jpg)
2. 1 dec, 6 sc, 1 dec, 6 sc = 14 sc
For the left hand:
3. dec, 7 sc, join the 5th finger - thumb (crochet 2 sc on the thumb together with the hand), 3 sc = 13 sc
4. 1 dec, 7 sc, 2 sc together with the thumb, 2 sc (12)
5. 12 sc
6. 1 dec, 4 sc, 1 dec, 4 sc = 10
7. 1 inc, 4 sc, 1 inc, 4 sc = 12
8- 18. 12 sc
stuff
6 dec. (6), fasten off, close opening and hide the end of the thread.
For the right hand:
3. dec, 10 sc, join the 5th finger - thumb (crochet 2 sc on the thumb together with the hand) = 13 sc
4. 1 dec, 9 sc, 2 sc together with the thumb (12)
5. 12 sc
6. 1 dec, 4 sc, 1 dec, 4 sc = 10
7. 1 inc, 4 sc, 1 inc, 4 sc = 12
8- 18. 12 sc
Stuff.
6 dec. (6), fasten off, close opening and hide the end of the thread.
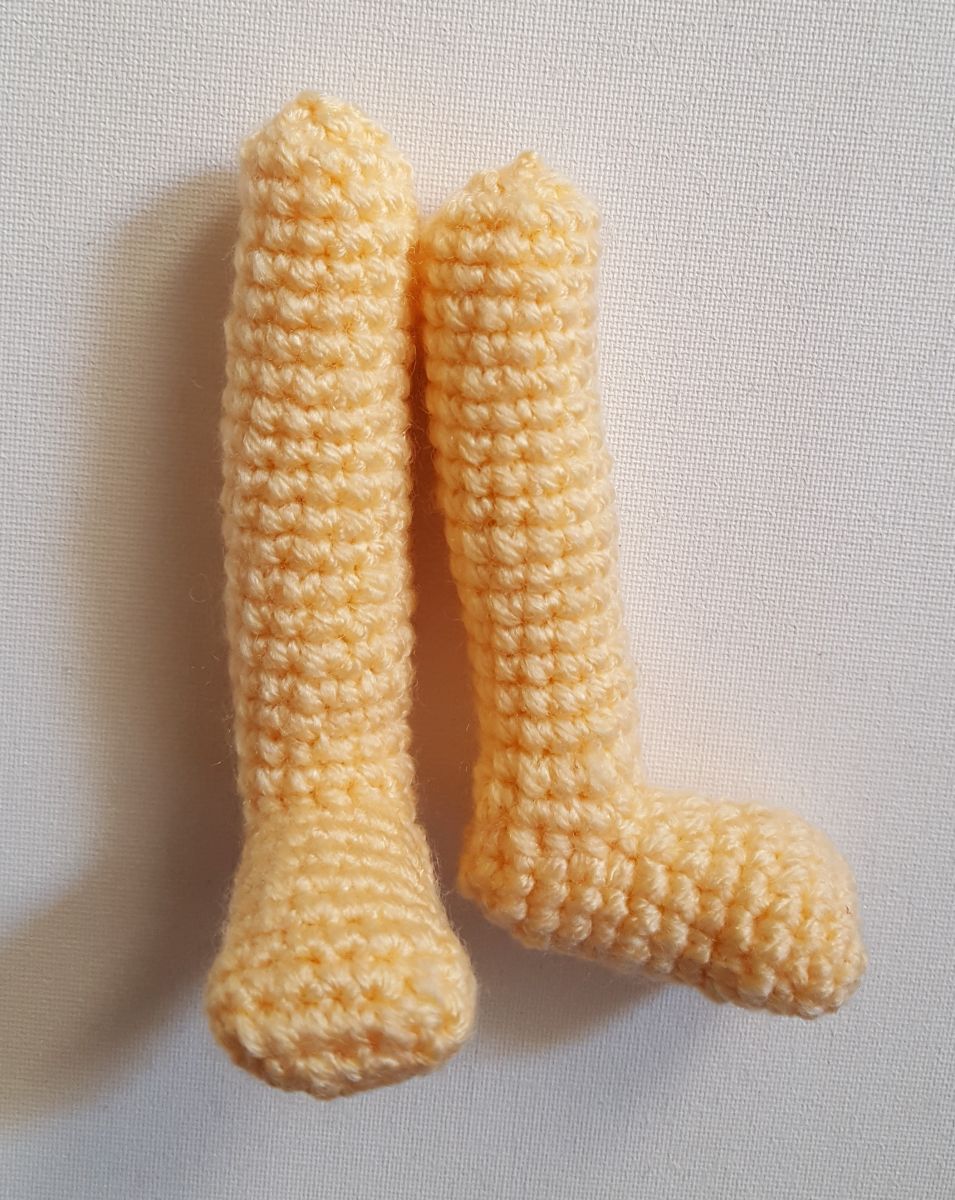
Legs
Begin crocheting from the foot.
Ch 6, beginning with the 2nd chain from the hook:
1. 4 sc, 3 sc in one stitch, 4 sc, 3 sc in one stitch = 14
2- 3. 14 sc
4. 5 sc, dec, 5 sc, 1 dec = 12
5-11.= 12 sc
Stuff
12. 6 dec = 6
fasten off, close opening and hide the end of the thread.
.jpg)
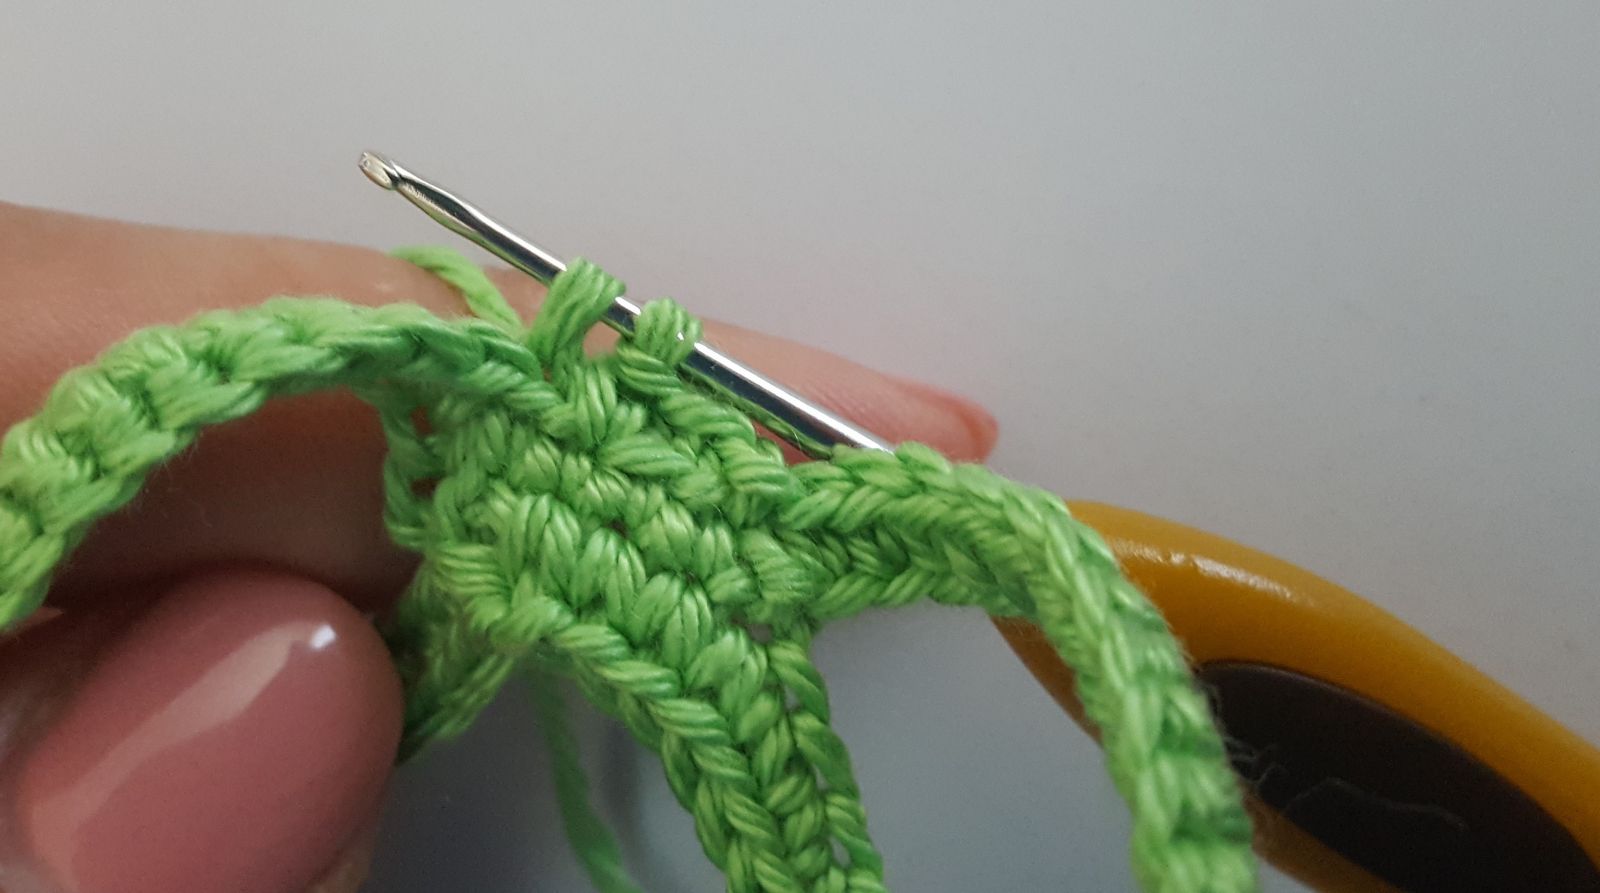
Now we crochet onto the foot to make the leg. Make a circle on the foot of 15 sc.
See picture for reference.
Variant 2: Further crochet the upper part of the leg. Crochet 15 ch and close in a circle. At the end sew the upper part of the leg to the foot.
1-17.15 sc stuff
18. 7 dec, 1 sc = 8
fasten off, close opening and hide the end of the thread.
After that we need to sew legs and arms.
Sew the arms between 33 and 34 rows.
Sew the legs between 48 and 49 rows.
Eyes
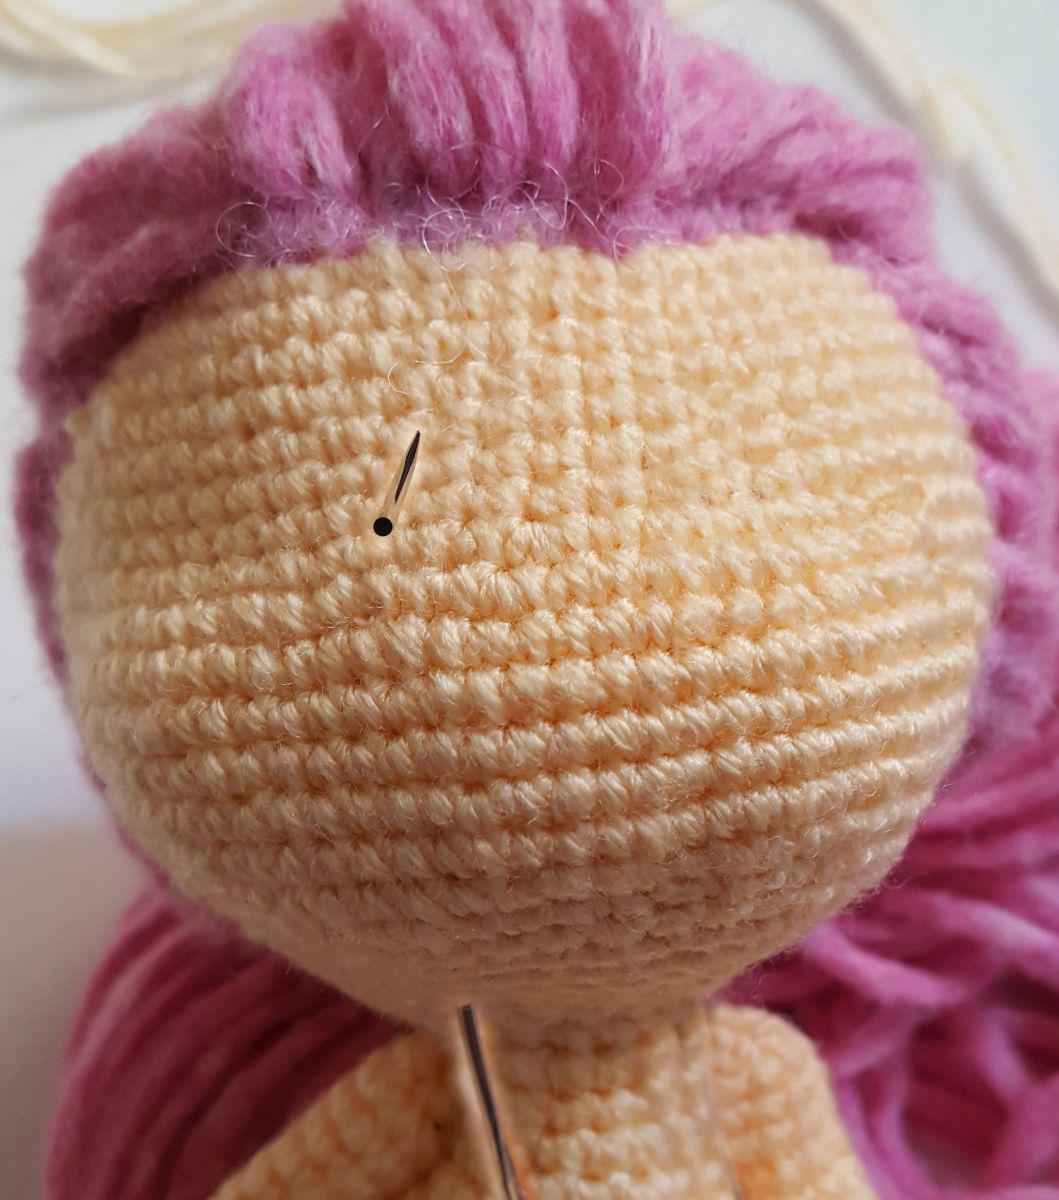
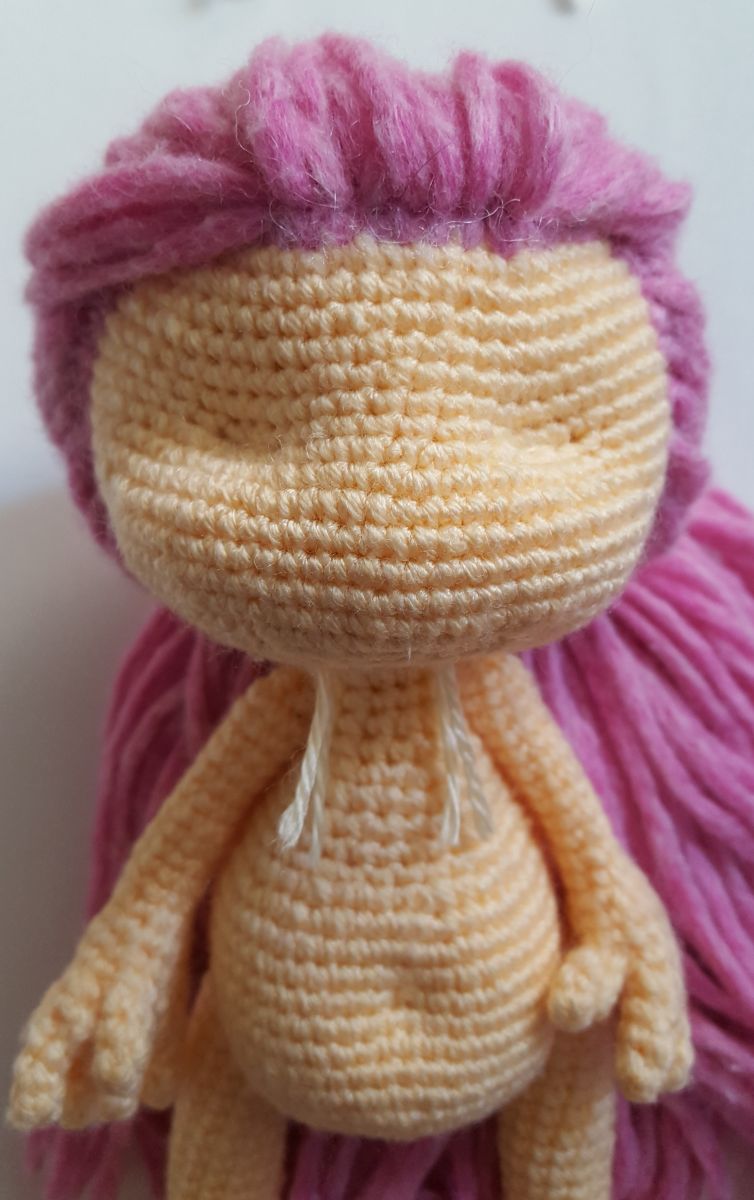
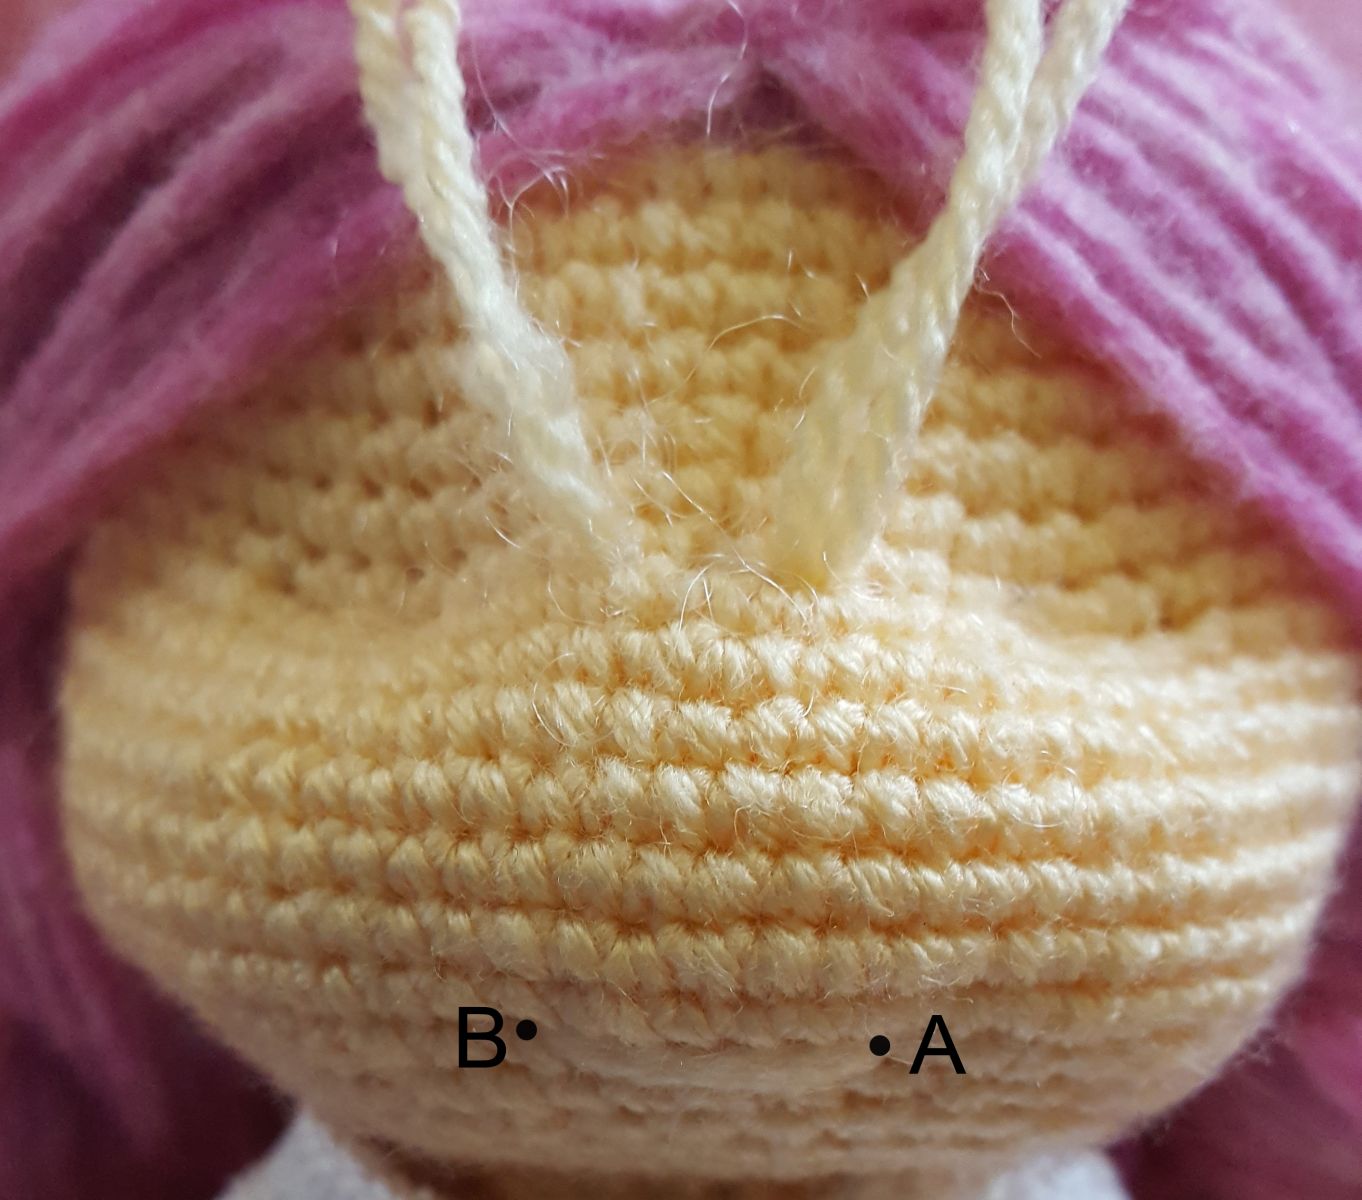
Proceed with needle sculpting the head. Begin with the tightening of the eye sockets between the 14-15 rounds. Use the two markers you placed in round 14. Make the tightenings between the 14th and 15th round.
Insert a needle near the chin from the bottom (for the right eye from the right side, for the left eye – from the left side) and take it out at marker A, step 2 stitches to the left, insert a needle in the same row and return back to the bottom. Make the tightening for the second eye socket the same way, insert a needle from the bottom and take it out at marker B, step 2 stitches to the right and take it out back at the bottom. Tighten the thread, make the knots, hide the ends.
.jpg)
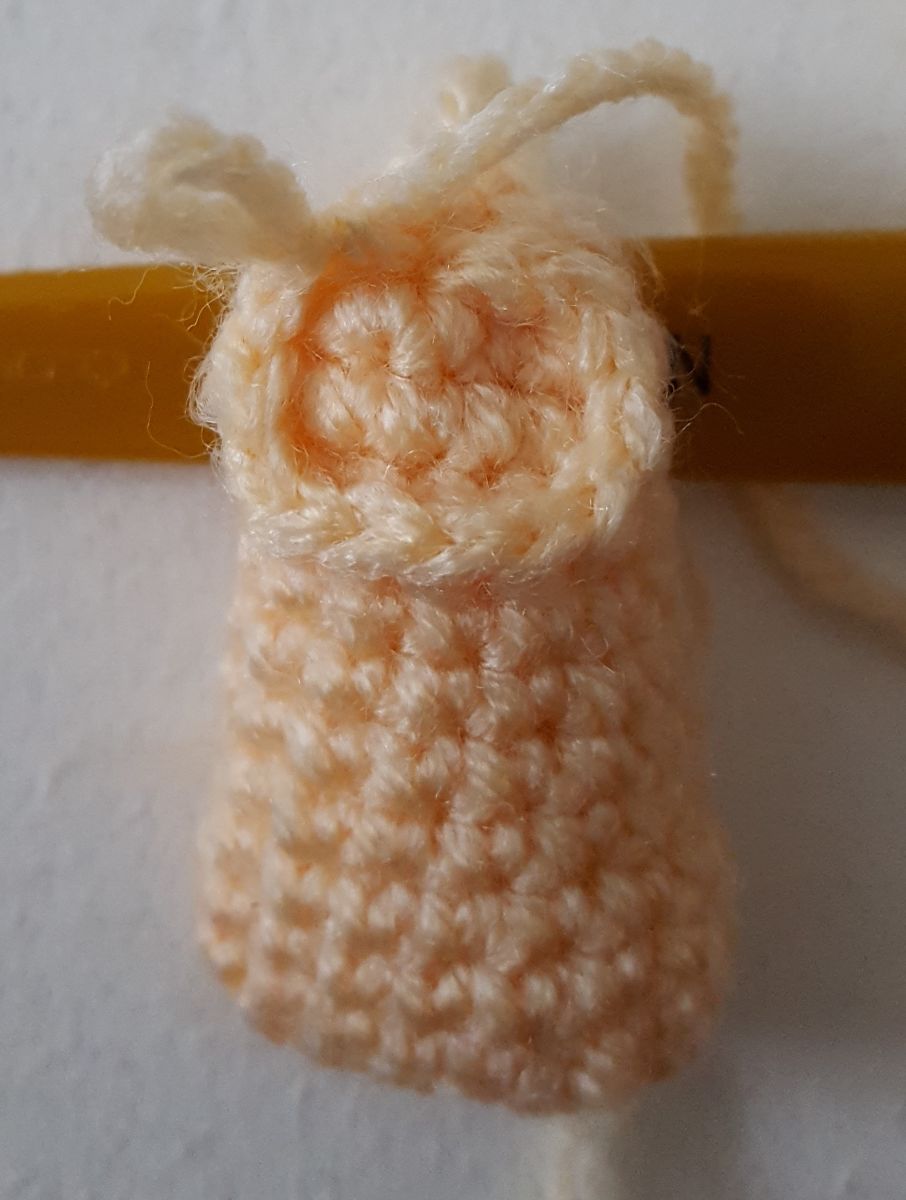
Nose and mouth
Our nose is in row 14-15, you can mark it with pins as in the picture. Insert the needle in row 15 (in the place of the first pin) and take it out in row 20, count two sc left or right (so it is right under the second pin), insert the needle and take it out at the second pin. Tighten the cheeks, tie the knot and hide all loose ends.
Now we can glue or sew the nose.
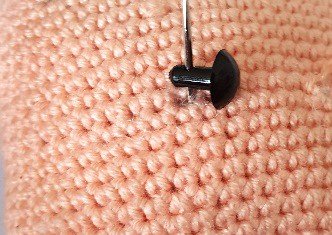
Nose: Chain 2. Make 1 puff stitch (out of 4 dc) into the second chain from the hook. Tighten the nose (joining two yarn ends) to make it the right shape.
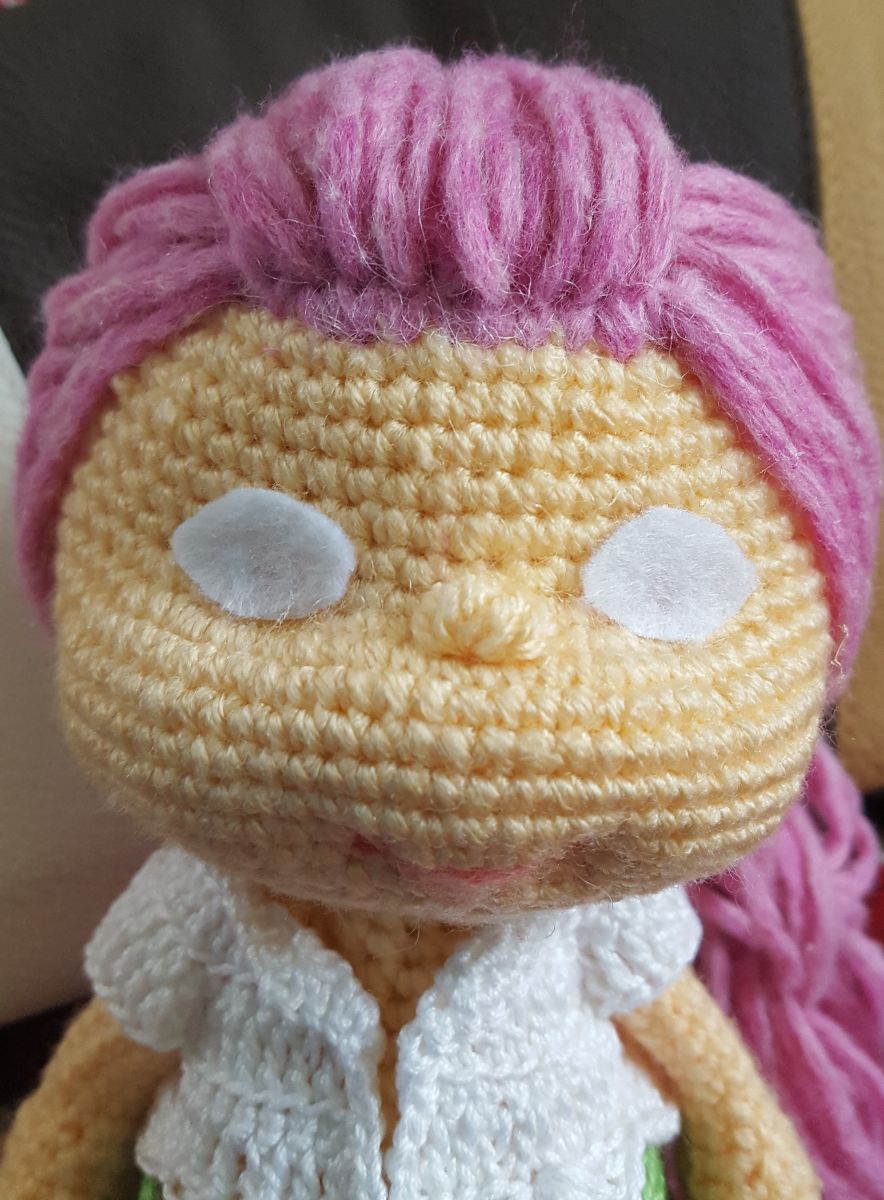
Glue eyes:
This variant is not suitable for toddlers. Caution!
Put some glue in the eye-pit, put felt above it, then add some more glue on the felt. Then add a little more glue and put an iris on it. If anything goes wrong – you can always move the parts (that’s why we need the glue, which doesn’t dry fast). After that, we can glue the eyelashes! Our eyes will be dry in 12 hours. Remember, felt must be saturated with glue for the best result.
.jpg)
.jpg)
For toddlers, please use the eyes to sew on.
Find the markers of the eyes. Insert a needle near the opening for the
neck (for the right eye from the right side, for the left eye from the left side) and take
it out near the first marker, take the eye, insert a needle in a hole for sewing and
return back to the neck. Make the same with the second eye. Tighten the threads,
the cheeks should become more visible. Make knots, hide the threads.

Ears
Chain 3 sc, make 6 hdc in the 3rd chain from the hook. Leave a tail for sewing. Sew the ears at eye level.
Clothes
Try all the clothes on the doll while crocheting.
Chain 40, starting in the 3 rd chain from the hook
1. 6 dc, 3 dc in one, 4 dc, 3 dc in one, 14 dc, 3 dc in one, 4 dc, 3 dc in one, 6 dc, turn (46)
2. chain 1, 7 sc, 1 inc, 6 sc, 1 inc,16 sc, 1 inc, 6 sc, 1 inc, 7 sc, turn (50)
3. chain 3, 7 dc, 1 inc, 8 dc, 1 inc,16 dc, 1 inc, 8 dc, 1 inc, 7 dc, turn (54)
4. chain 1, 8 sc, chain 6, skip 10 stitches for the sleeve, 1 dec, 14 sc, 1 dec, chain 6, skip 10 stitches for the sleeve, 8 sc, turn (44)
5. chain 3, 1 dc (6 dc, 1 inc)x6, 1 dc (50)
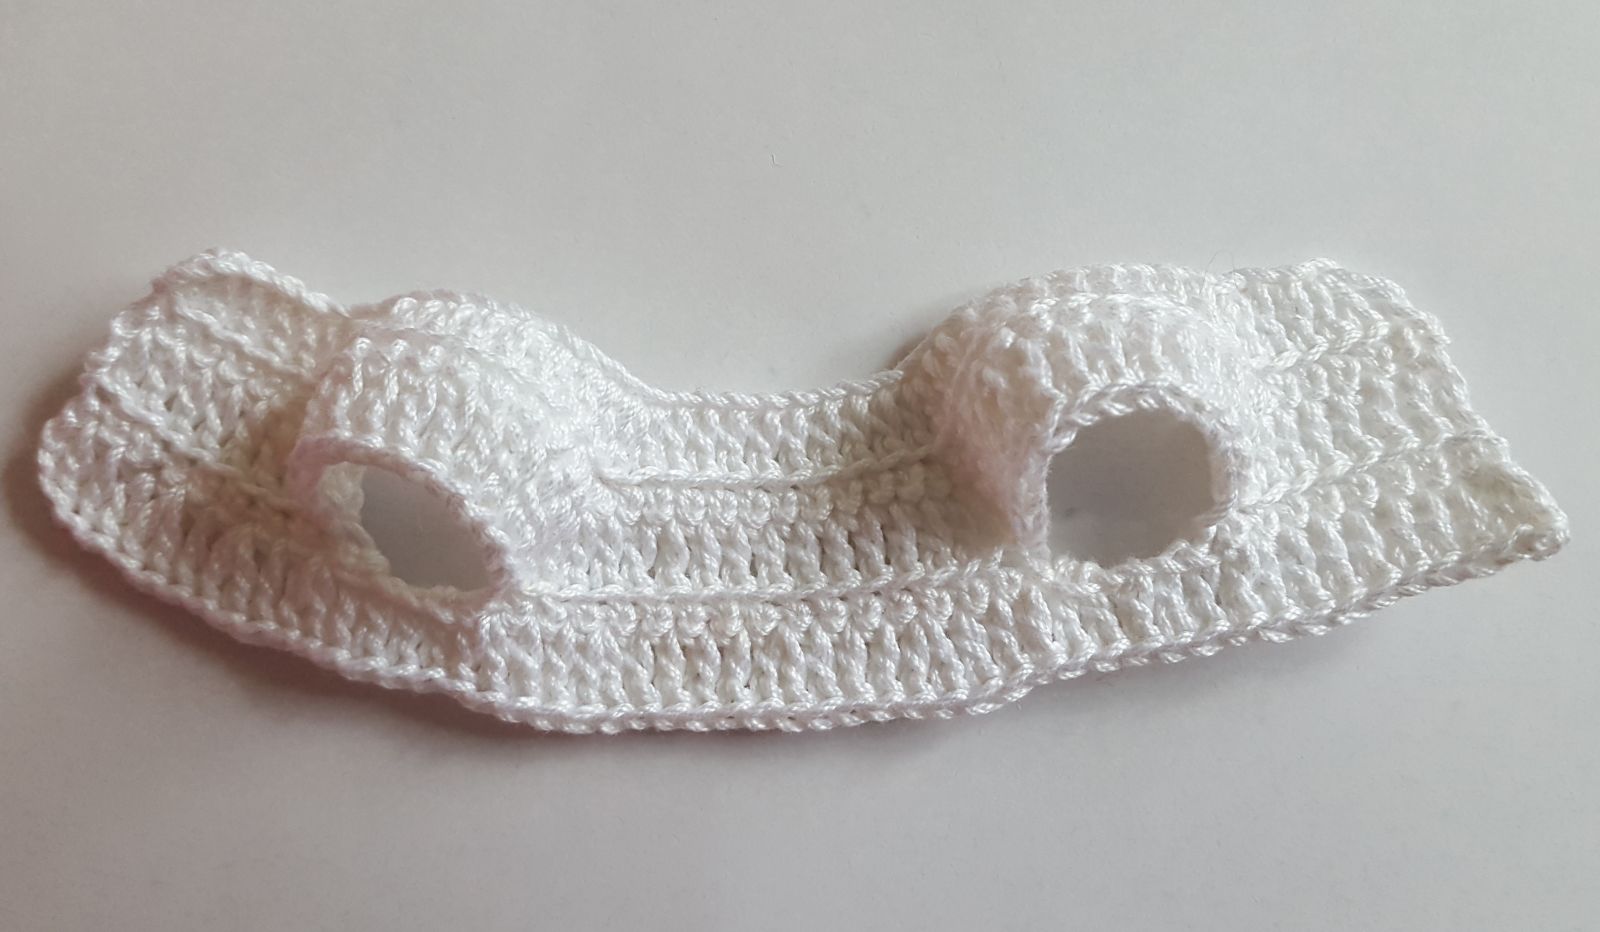
6. chain 1, 1 sc, (3 stitches skip into the 4th stitch you crochet 9 dc, 3 stitches skip into the 4th stitch 1sc) x5, 1sc.
.jpg)
Trousers
Each row begins with the ch and ends
with the sl st.
1. Crochet chain 27 ch, connect into the circle and crochet 27 sc
2 . Crochet chain 27 ch, connect into the circle and crochet 27 sc
Further crochet 1 sc and 1 sc for the back looponly.
From the 2nd trouser-leg crochet chain 3 ch and connect it with the 1st trouser-leg. Further crochet in the circular rounds alternating 1 sc and 1 sc for the back loop only.
1. 27 sc along the trouser-leg, 3 sc along the chain 3 ch, 27 sc along the 2nd trouser-leg, 3 sc along the chain 3 ch (60)
2-15. 60 sc alternating 1 sc and 1 sc for the back loop only.
Fasten off, cut the yarn and hide the end. Crochet 1 row of sc.
Fasten off.
For the belt, crochet 70 ch, make 2 loops for the belt on the pants, pull them through and fasten.
Shoes
Chain 8, starting in the 3 rd chain from the hook
1. 5 dc, 5 dc in one, 5 dc, 5 dc in one (20)
2. chain 3, 5 dc, 5 inc, 5 dc, 5 inc (30)
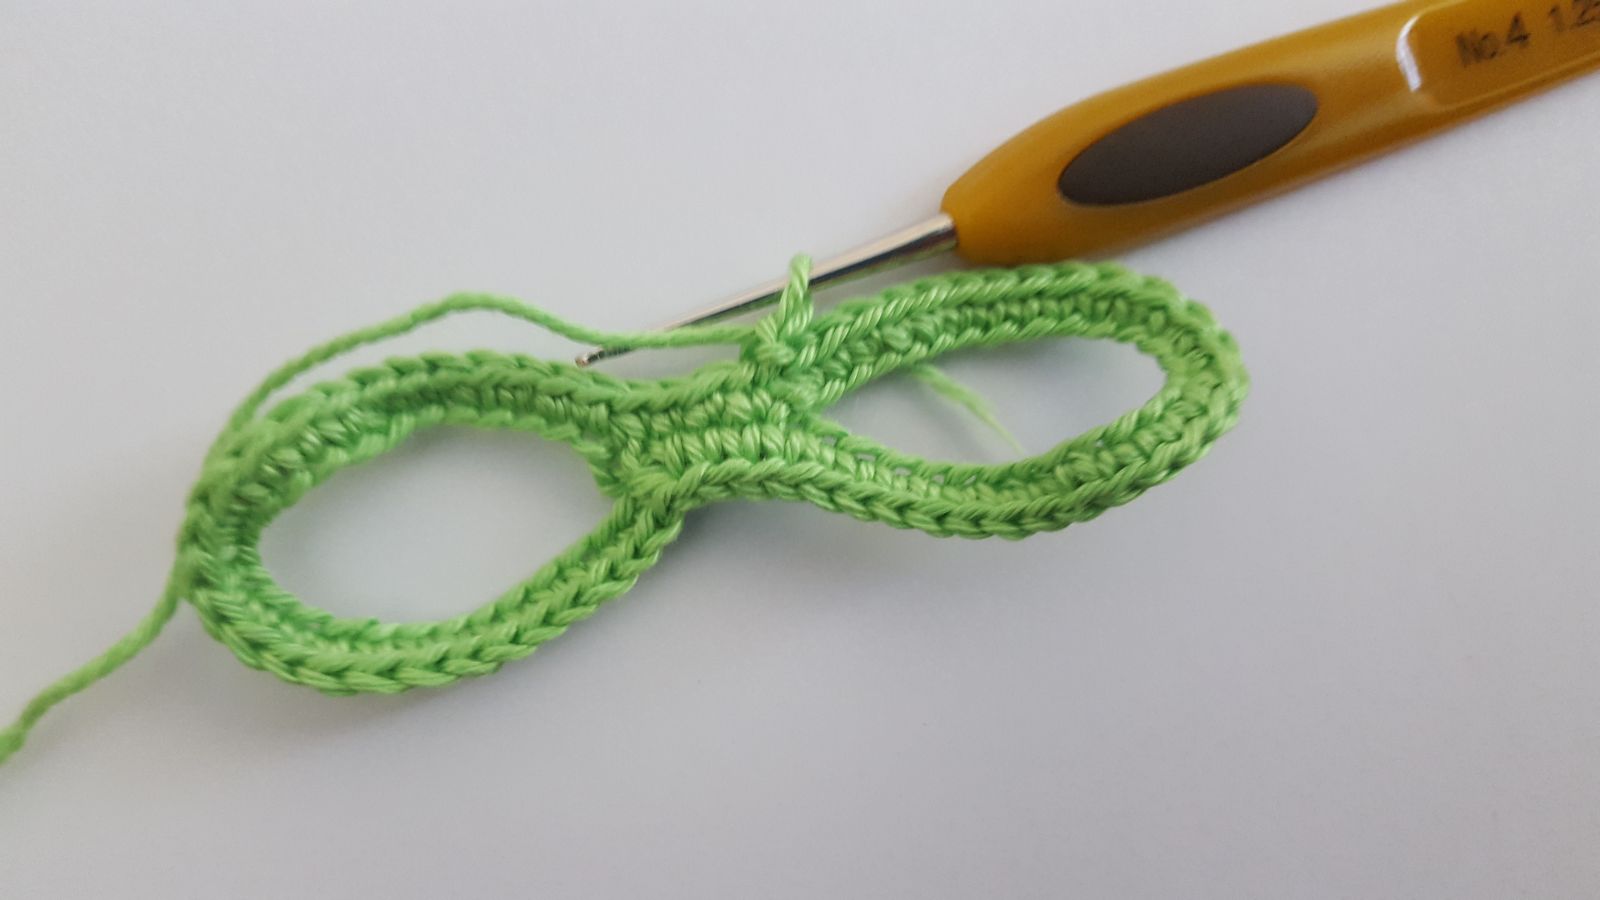
Front part
Crochet 3 chain stitches of 20 chain stitches each. Skip 5 stitches to the left and right of the middle. Sew chains of chain stitches and to the sole of the shoe. Keep a stitch distance in between.
.jpg)
Rear part
From the last chain of chain stitches, continue 3 stitches from the sole, in the 4th stitch crochet 3 ch and then crochet another 14 dc, turn the work
Chain 1, 14 sc, turn the work
Chain 3 , 14 dc
Leave 4 cm hanging from the thread. Sew another 4 cm long thread to the opposite side for knotting.
.jpg)