Palm leaf decoration
Minimalist, stylish, and surprisingly simple. With just a few materials - paper and a simple stick - you can create a beautiful decoration for your home or product photos in no time. No complicated crafting, no prior knowledge required: This tutorial is perfect for beginners and anyone who wants to achieve a great result with minimal effort. This project is also great to do with children.
The following step-by-step instructions guide you through the entire crafting process. With detailed explanations and clear pictures, crafting a palm leaf becomes a pleasure.
Below, I'll explain how to make a palm leaf in two different styles. By using colored paper or painting the palm leaf yourself, you can customize the decoration to your liking.
---
The instructions for this palm leaf decoration are for personal use only. They may not be sold, forwarded, reproduced, published, translated into other languages, exchanged with other instructions, or modified to be passed on or sold as your own instructions.
Thank you and have fun crafting!
---
This craft tutorial is suitable for: beginners and advanced crafters.
Materials needed:
- Kraft paper (or construction paper in your chosen color)
- Scissors
- Glue
- A dowel or thin stick
- Optional: Tape and/or string
- Optional: Paints (colored pencils, crayons, watercolors, etc.)
Preparation:
Cut a square out of the kraft paper (e.g., 15 x 15 cm for a palm leaf approximately 10 cm long).
Depending on the starting shape you use for your palm leaf, its final shape will vary. Therefore, below you will find instructions for a pointed palm leaf and a rounded palm leaf (further down).
Instructions for making a pointed palm leaf:
The square of paper must now be cut diagonally so that you get two triangles.
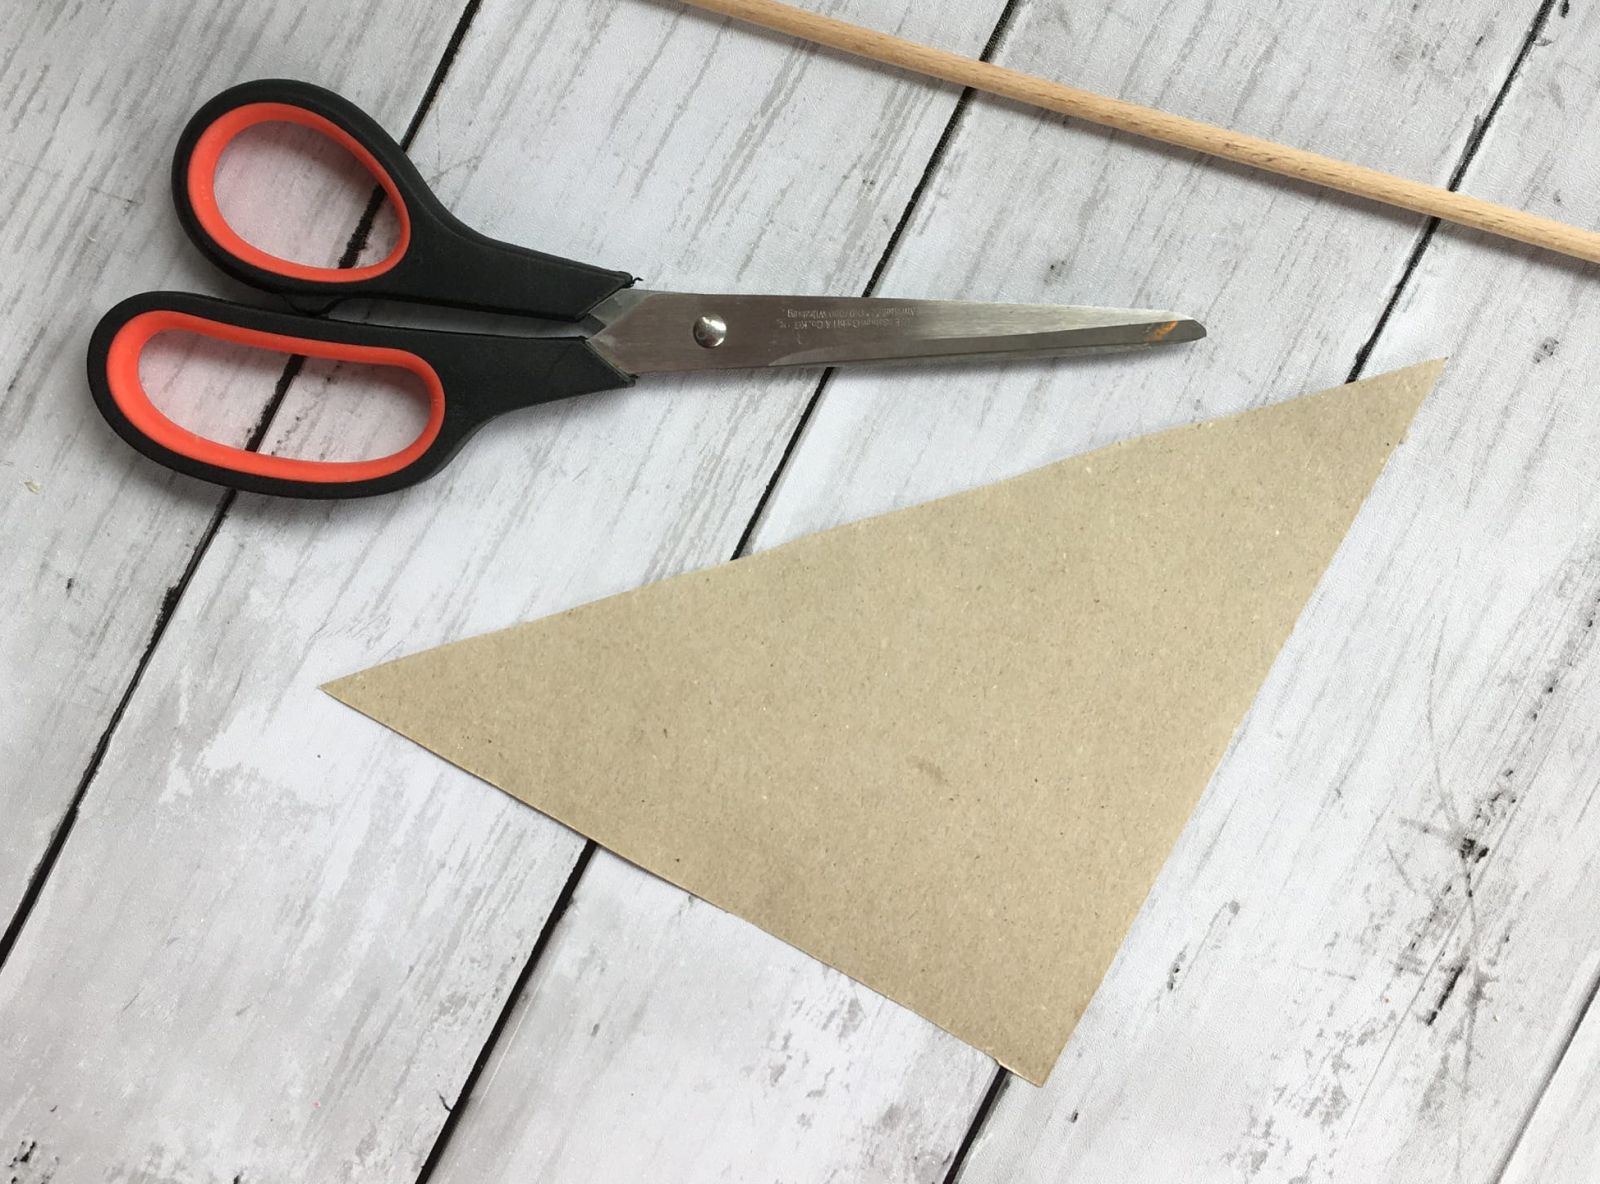
To make a palm leaf, you'll need a triangle. You can personalize it before folding by painting it. You can decorate it with dots or other patterns, or simply color the edge of the leaf to create a nice gradient (see my examples at the end of these instructions).
Start at the point of the triangle and fold the leaf accordion-style, alternating between forward and backward folds (don't unfold it yet – the photo is just to show you the basic principle).
Apply glue to the top long edge and fold your accordion leaf precisely in half so that the long ends meet at the top.

.jpeg)
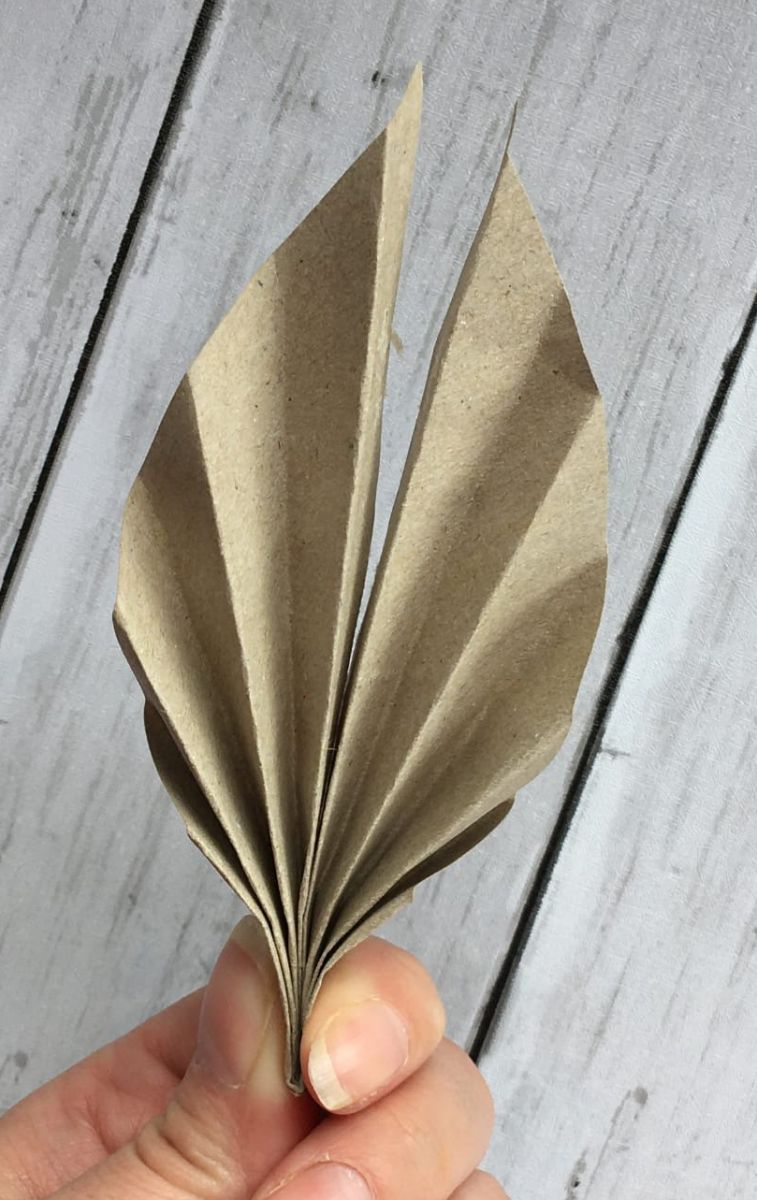
At the bottom end, you can wrap some tape or string around it to secure it. You can then attach the dowel directly to it, or glue it in place.
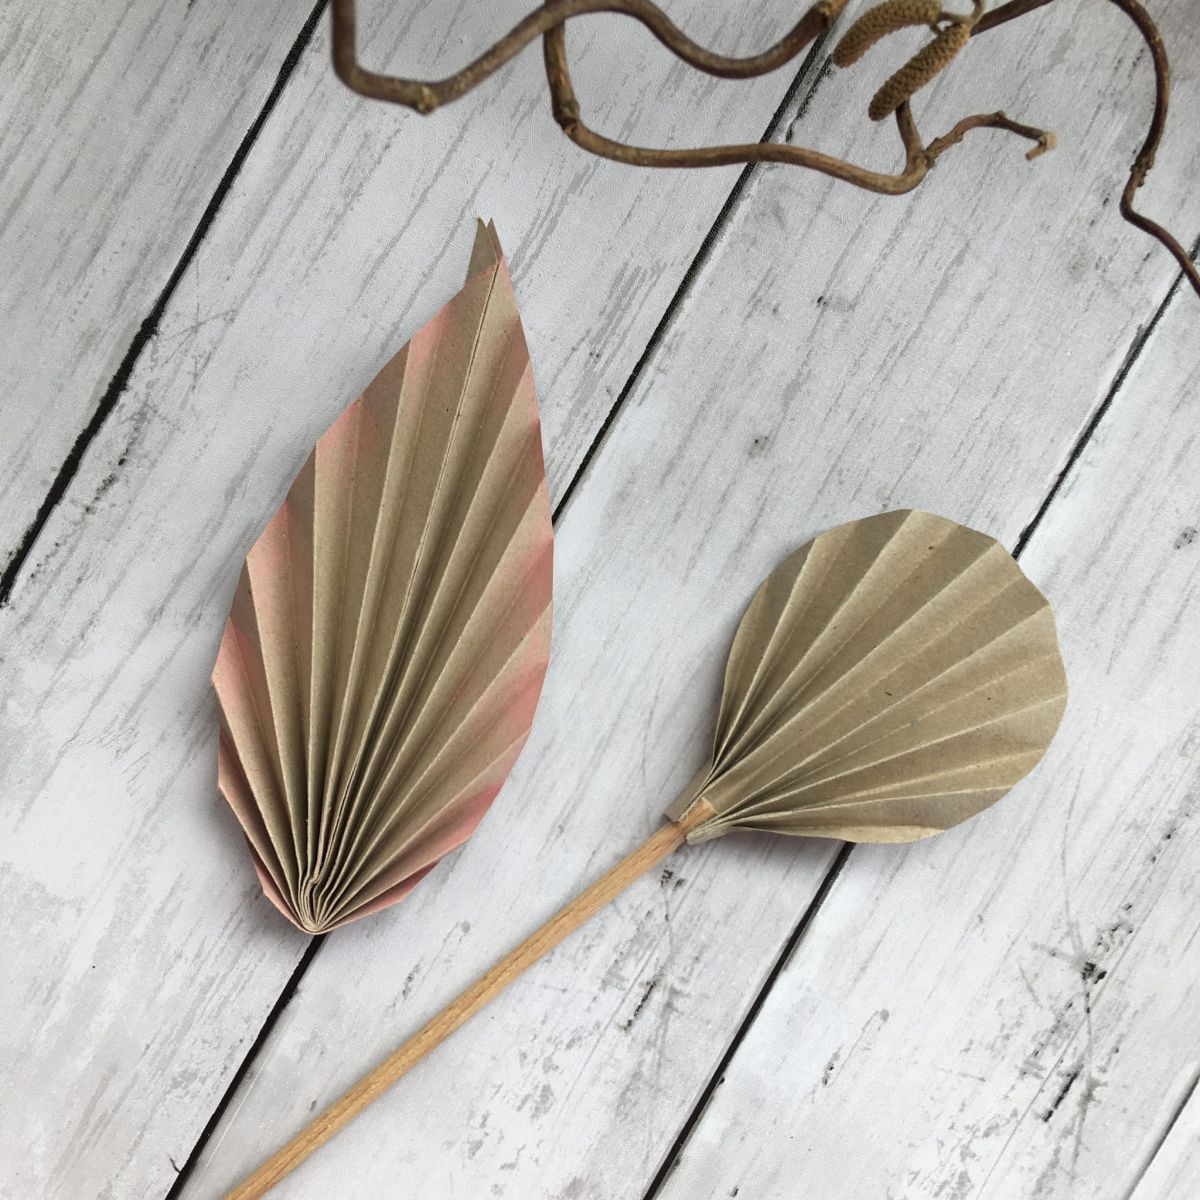
Your very own pointed palm leaf is now finished.
Instructions for a round palm leaf:
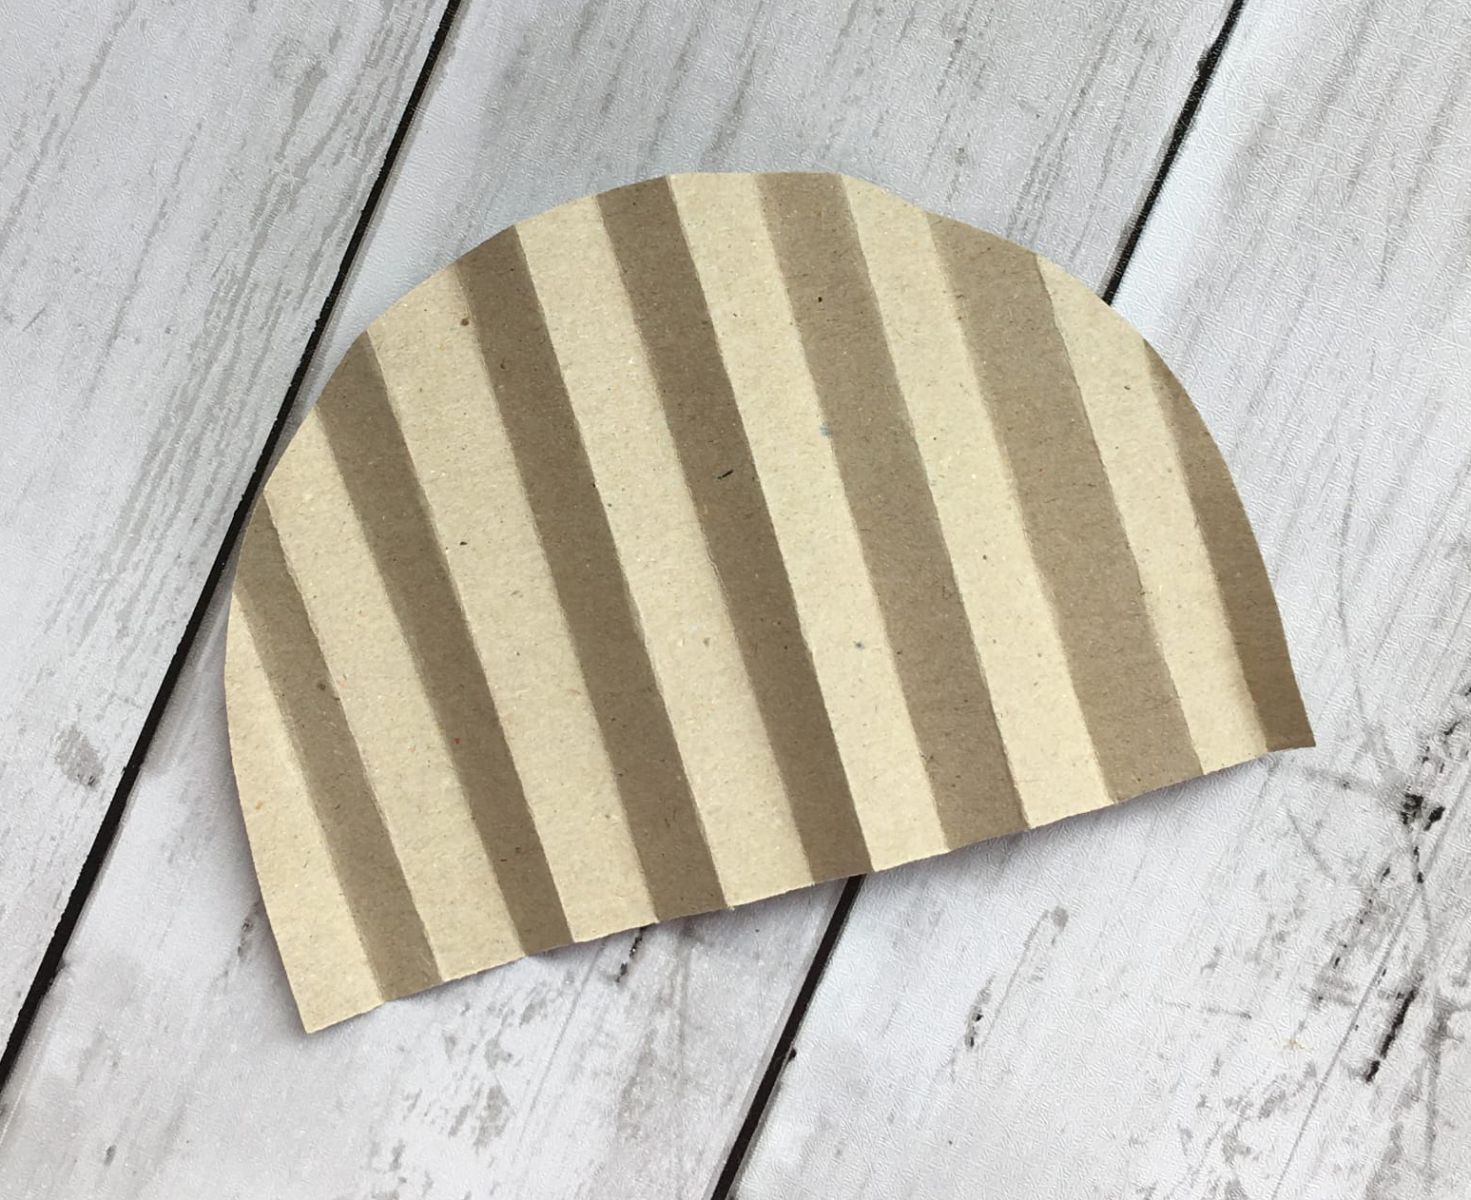
Cut a semicircle from the square of paper.
You can personalize this before folding by painting it. You can decorate it with dots or other patterns, or simply color the edge of the paper to create a nice gradient (see my examples at the end of these instructions).
Starting at the edge of the semicircle, fold the paper accordion-style, alternating between forward and backward folds (don't unfold it yet – the photo is just to show you the principle).
Seal the straight edge of the folded semicircle together with a small piece of tape or wrap it with some string to secure it. You can then attach the dowel directly to it or glue it in place.
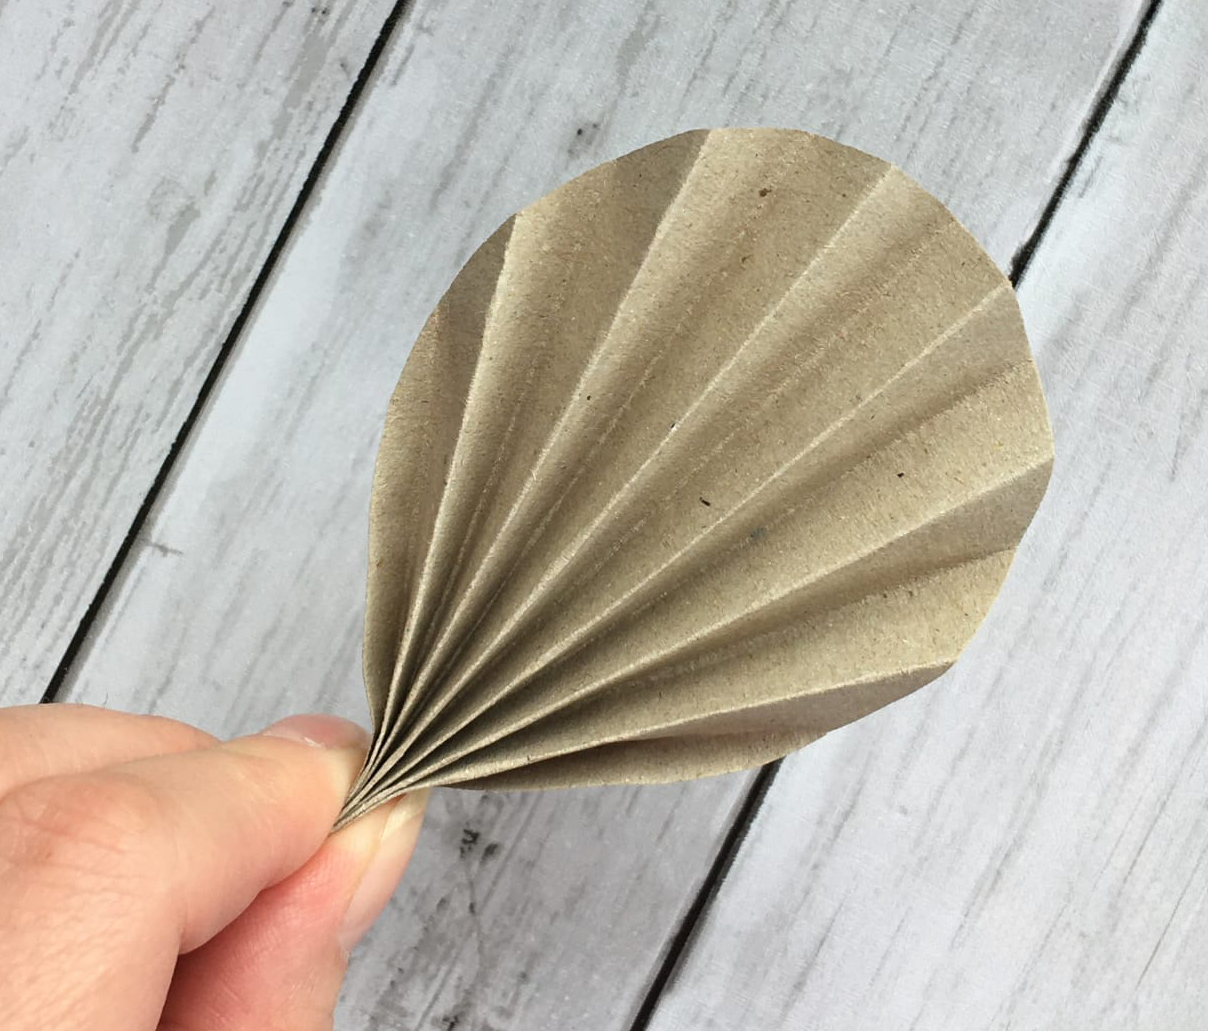
Your very own round palm leaf is finished!
You can also experiment with other shapes or cut the edges into waves or zigzags for even more amazing results. Why not try metallic spray paint or special effect paper? The possibilities are endless!
.jpeg)
I hope you had fun recreating this project.
You can also find some free crochet patterns on my blog here. I look forward to your visit!


