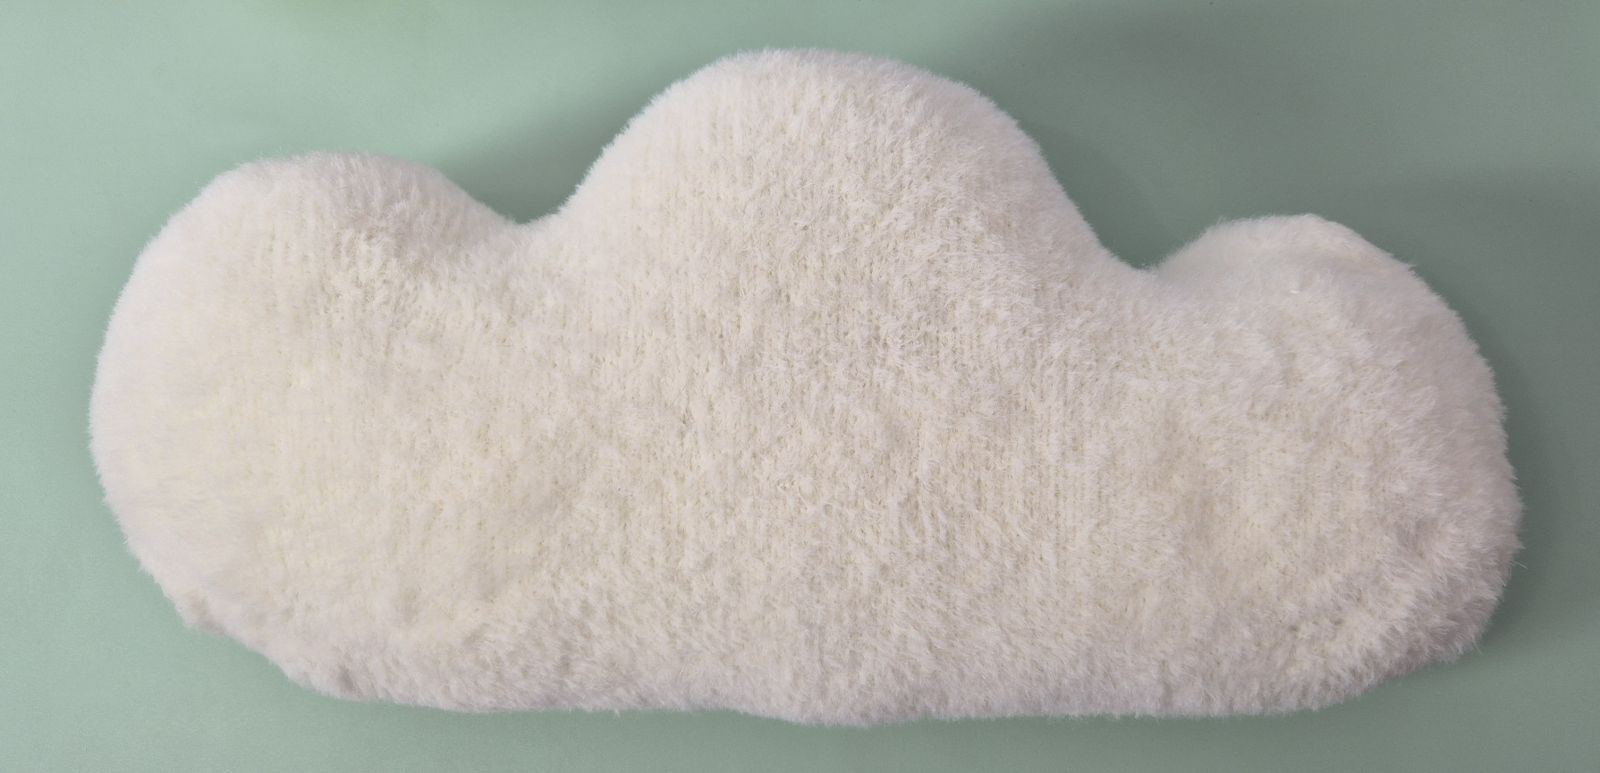
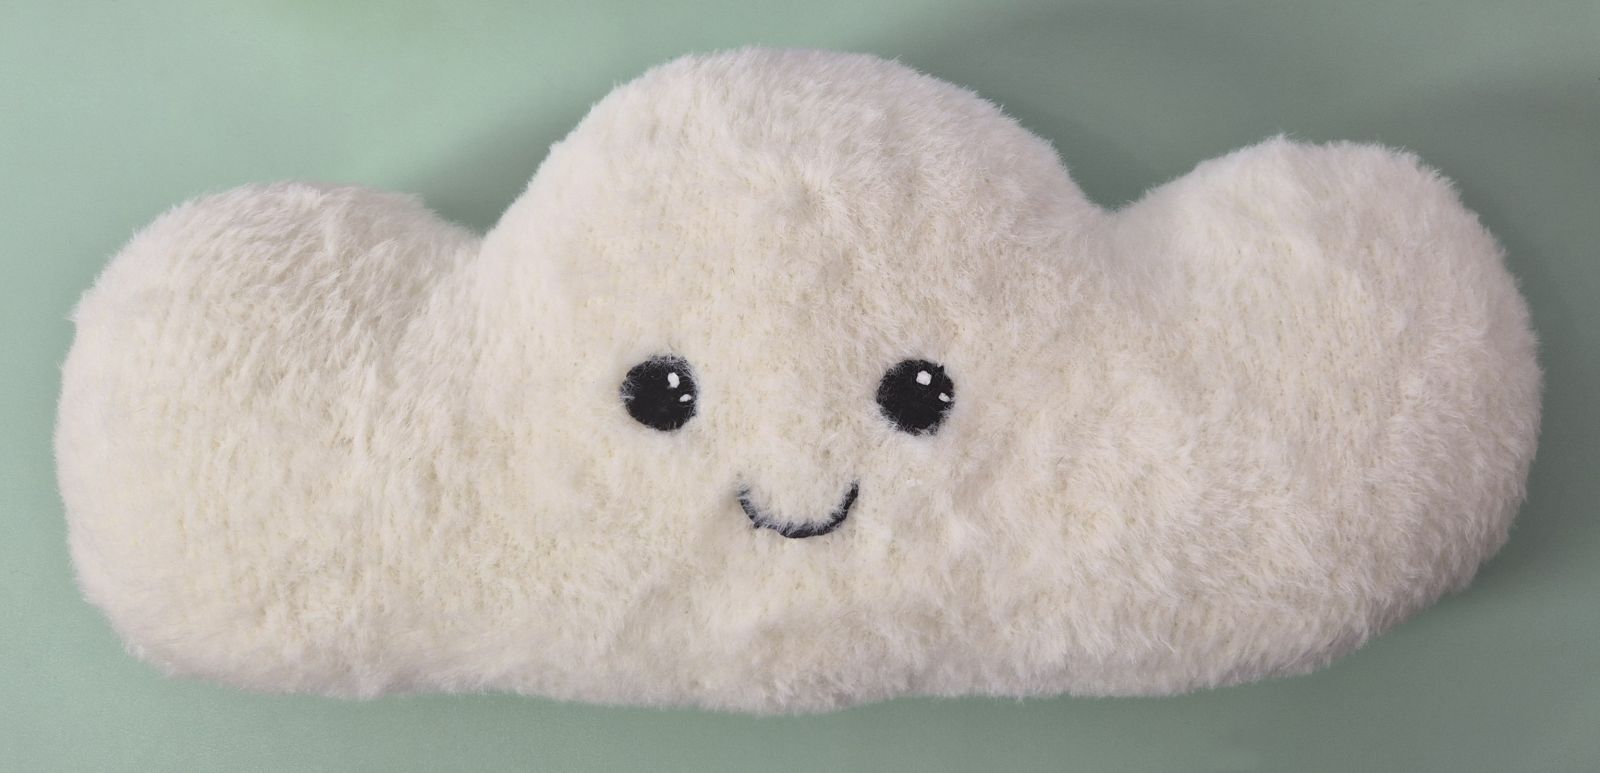
Cloud, the cuddly cushion.
.JPG)
A knitting pattern for a soft, fluffy cloud that works beautifully as a cushion or simply for snuggling and cuddling. For my cloud, I chose an especially fluffy yarn, which makes it even airier and cozier. Of course, you can also experiment and use chenille or cotton yarn, for example. Just choose the yarn and colors that suit your taste.
Size: approx. 50 cm long, approx. 24 cm high
Knitting Instructions:
All parts are crafted entirely with two knitting needles.
Follow these steps:
First Row - Purl Stitches Begin by knitting the first row entirely in purl stitches. These will form the back side of your project, creating a neat texture.
Second Row - Knit Stitches In the second row, knit every stitch. This will produce a smooth, even front for your piece.
Repeating the Pattern Continue alternating between purl stitches in the odd-numbered rows and knit stitches in the even-numbered rows:
- Odd-numbered rows (e.g., 1st, 3rd, 5th): Work in purl stitches.
- Even-numbered rows (e.g., 2nd, 4th, 6th): Work in knit stitches.
This straightforward pattern of alternating knit and purl rows is ideal for beginners, offering an easy yet satisfying introduction to the craft.
You will need:
✓ Yarn for the cloud: White, 100 g of Leami Brush for Plush (160 m / 100 g)
✓ Yarn for the legs: Grey, 30 g of YarnArt Dolce (120 m / 100 g)
✓ Knitting needles: 2.5 mm
Please note that yarn usage may vary depending on your knitting style — if you knit loosely, you will generally need a bit more yarn than someone who knits tightly.
✓ Yarn for the eyes: e.g. Ricorumi Nilli Nilli in black, crochet hook 2.5 mm
✓ Stuffing, stitch holders or a scrap piece of yarn, tapestry needle
Abbreviations:
CH – Chain(s)
inc – increase
dec – decrease
X dec – X- times decrease
X inc – X- times increase
ST – Stitch
P – purl
K– knit (garter stitch)
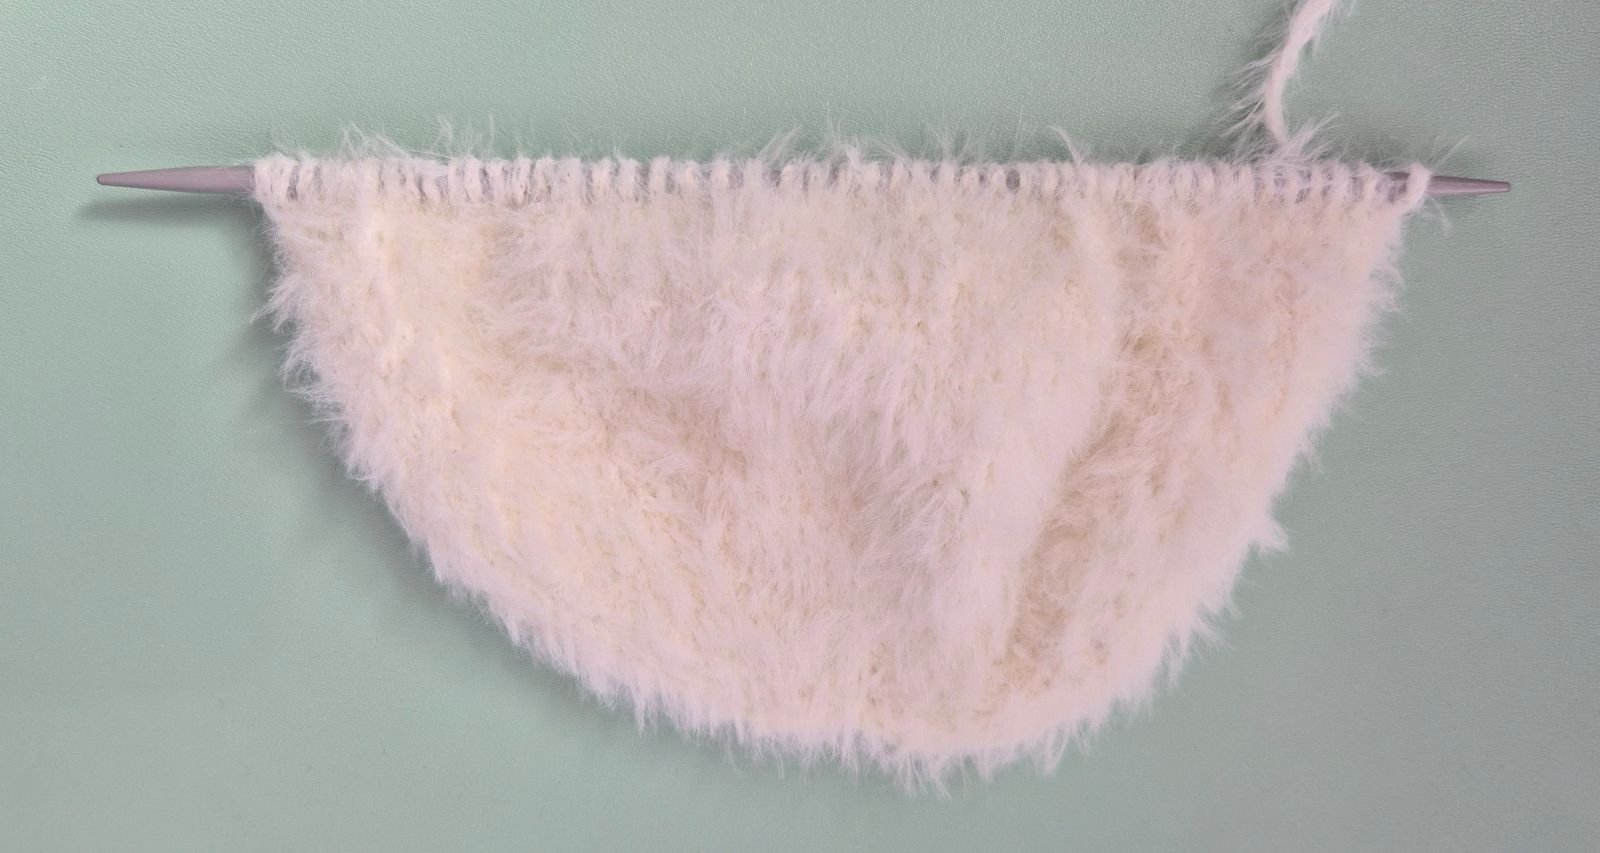
The cloud is knitted together from three parts.
Part 1
Cast on 6 stitches (ch) onto the knitting needle. Make sure the stitches are evenly stretched while knitting to ensure your knitted piece is nice and even.
1. 6 P (6)
2. 6 K inc. (12)
3. 12 P (12)
4. (1 K, 1 inc)x 6 (18)
5. 18 P
6. (2 K, 1 inc) x 6 (24)
7. 24 P
8. (3 K, 1 inc) x 6 (30)
9. 30 P
10. (4 K, 1 inc) x 6 (36)
11. 36 P
12. (5 K, 1 inc) x 6 (42)
13. 42 P
14. (6 K, 1 inc) x 6 (48)
Knit a total of 17 rows in stockinette stitch:
On the front side of the work, knit all stitches across the row.
On the back side of the work, purl all stitches across the row.
15. 17. 19. 21. 23. 25. 27.29. 31 - 48 P
16. 18. 20. 22. 24. 26. 28. 30.- 48 K
Cut the yarn. Do not bind off the stitches. If you have several needles in the same size, you can simply leave the piece on the needle and set it aside. If not, slip all stitches onto a spare needle or a piece of waste yarn and set the piece aside.
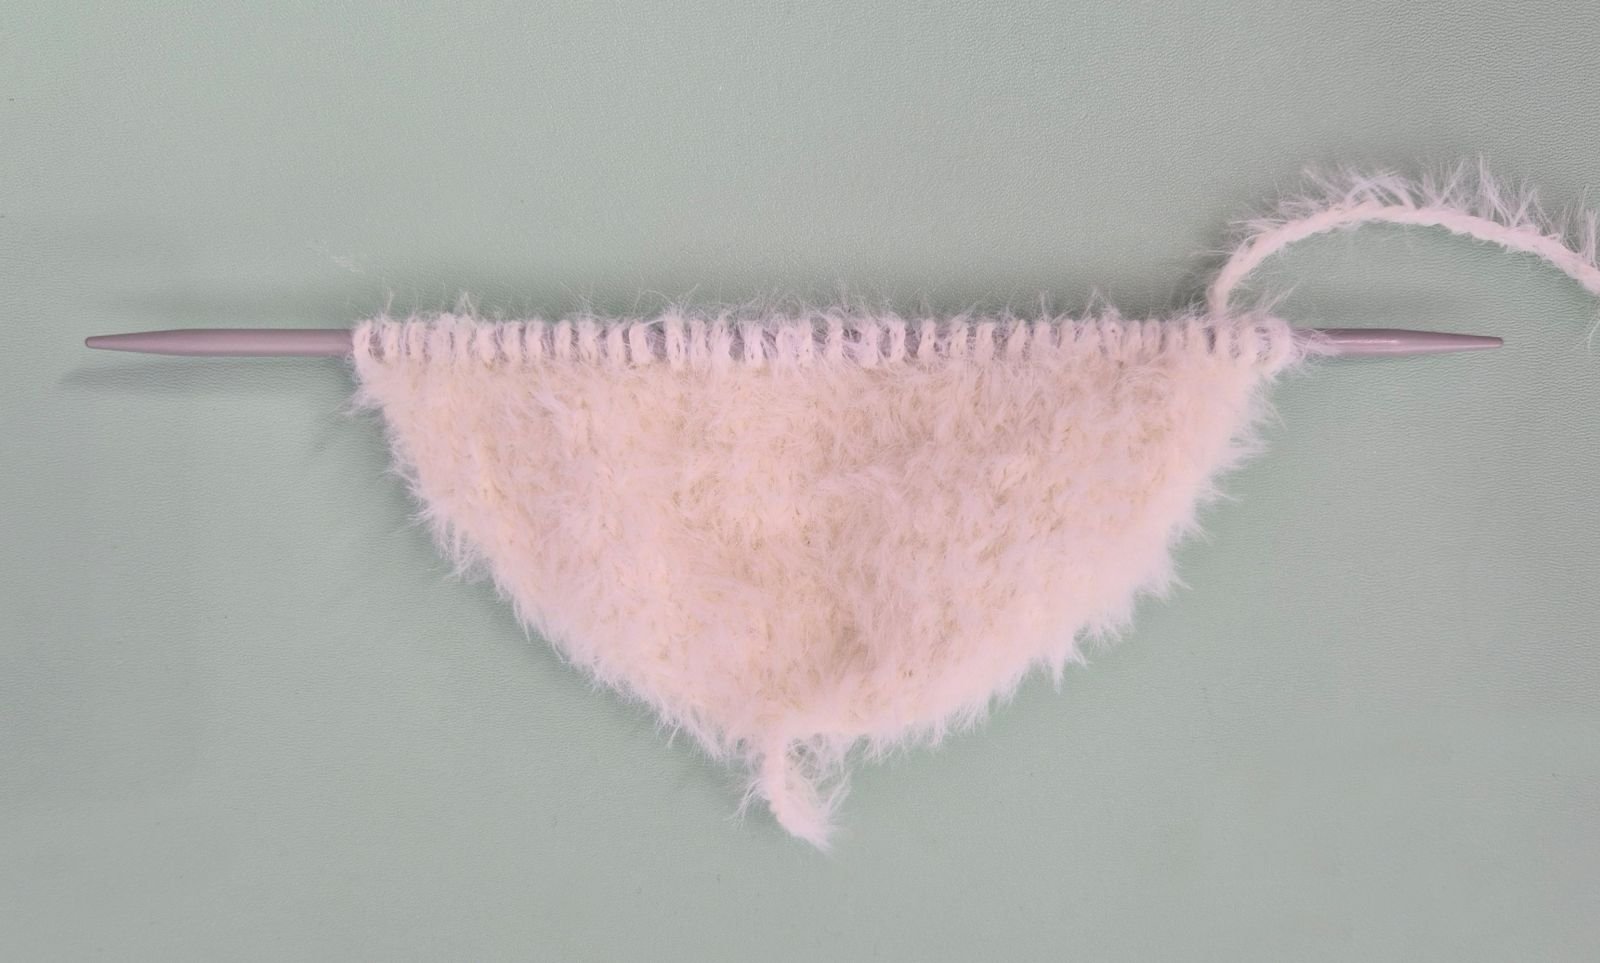
Part 2
Cast on 6 stitches (ch) onto the knitting needle. Make sure the stitches are evenly stretched while knitting to ensure your knitted piece is nice and even.
1. 6 P (6)
2. 6 K inc. (12)
3. 12 P (12)
4. (1 K, 1 inc)x 6 (18)
5. 18 P
6. (2 K, 1 inc) x 6 (24)
7. 24 P
8. (3 K, 1 inc) x 6 (30)
9. 30 P
10. (4 K, 1 inc) x 6 (36)
Knit a total of 9 rows in stockinette stitch:
On the front side of the work, knit all stitches across the row.
On the back side of the work, purl all stitches across the row.
11. 13. 15. 17. 19. - 36 P
12. 14. 16. 18.- 36 K
Just as in Part 1. Cut the yarn. Do not bind off the stitches. If you have several knitting needles in the same size, you can simply leave the piece on the needle and set it aside. If not, slip all stitches onto a spare needle or a piece of yarn and set the piece aside.
Then continue with Part 3.
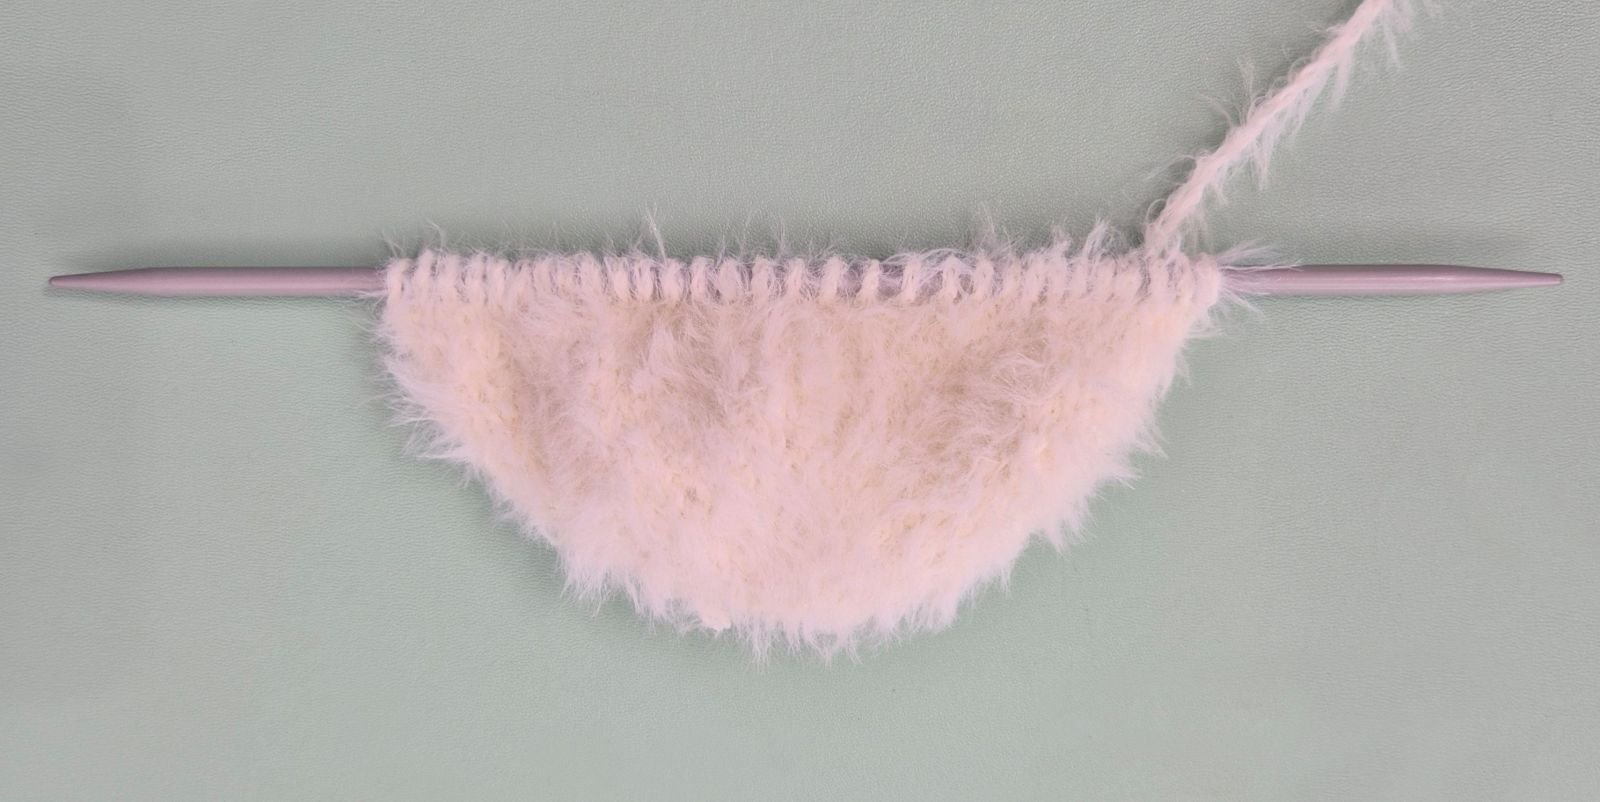
Part 3
Cast on 6 stitches (ch) onto the knitting needle. Make sure the stitches are evenly stretched while knitting to ensure your knitted piece is nice and even.
1. 6 P (6)
2. 6 K inc. (12)
3. 12 P (12)
4. (1 K, 1 inc)x 6 (18)
5. 18 P
6. (2 K, 1 inc) x 6 (24)
7. 24 P
8. (3 K, 1 inc) x 6 (30)
Knit a total of 7 rows in stockinette stitch:
On the front side of the work, knit all stitches across the row.
On the back side of the work, purl all stitches across the row.
9. 11. 13. 15. - 30 P
10. 12. 14. - 30 K
Do not cut the yarn.
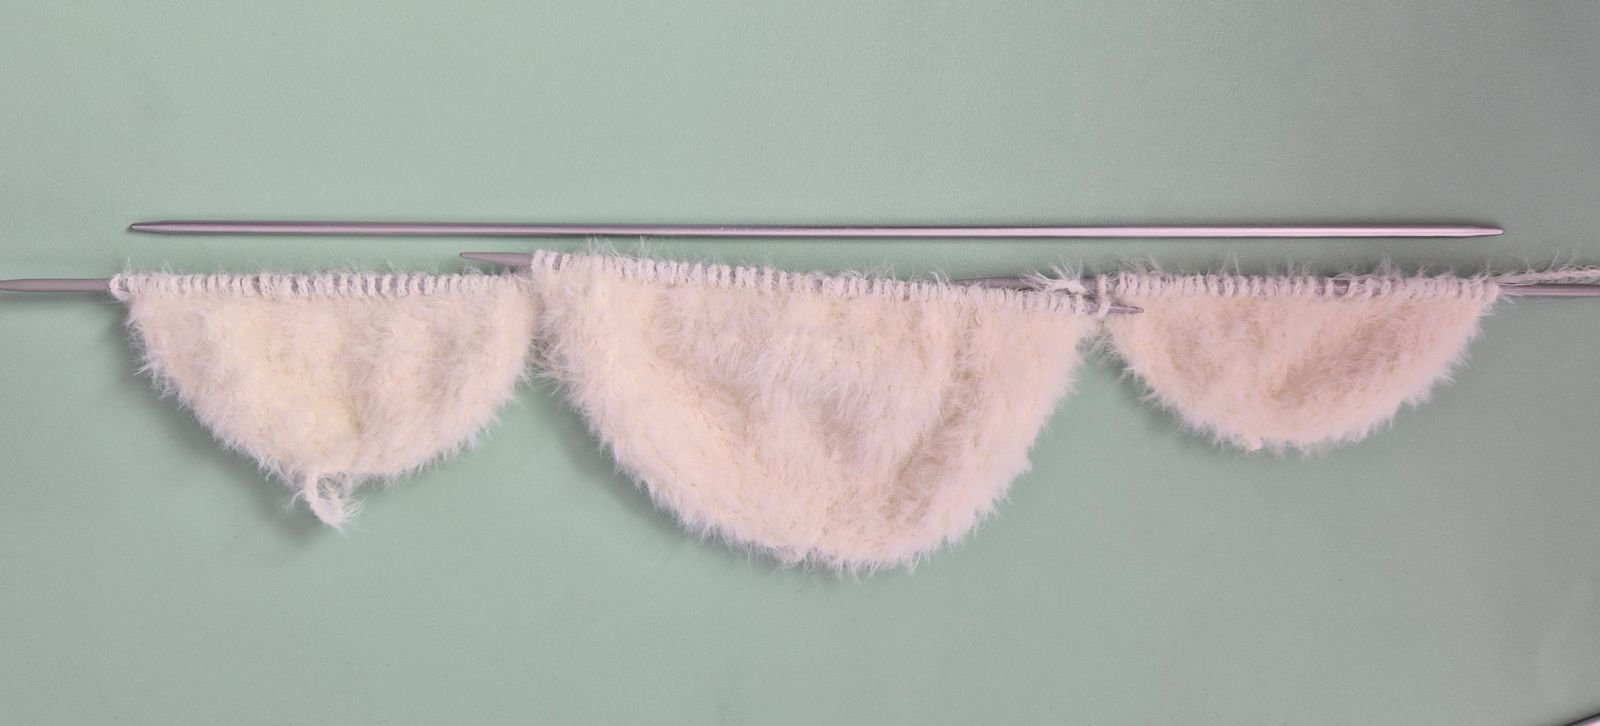
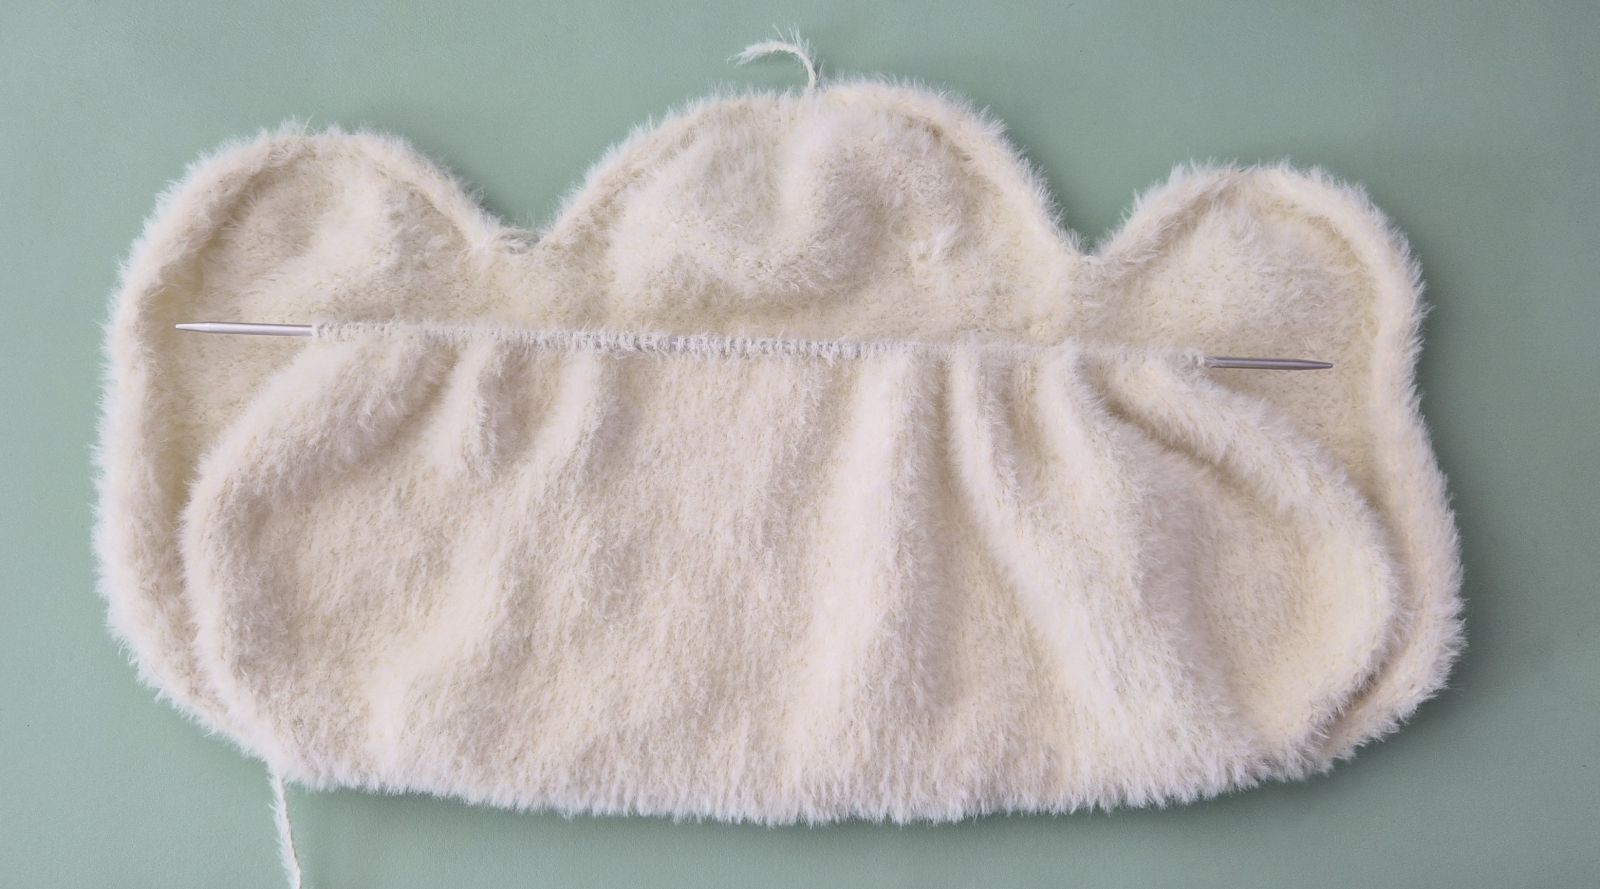
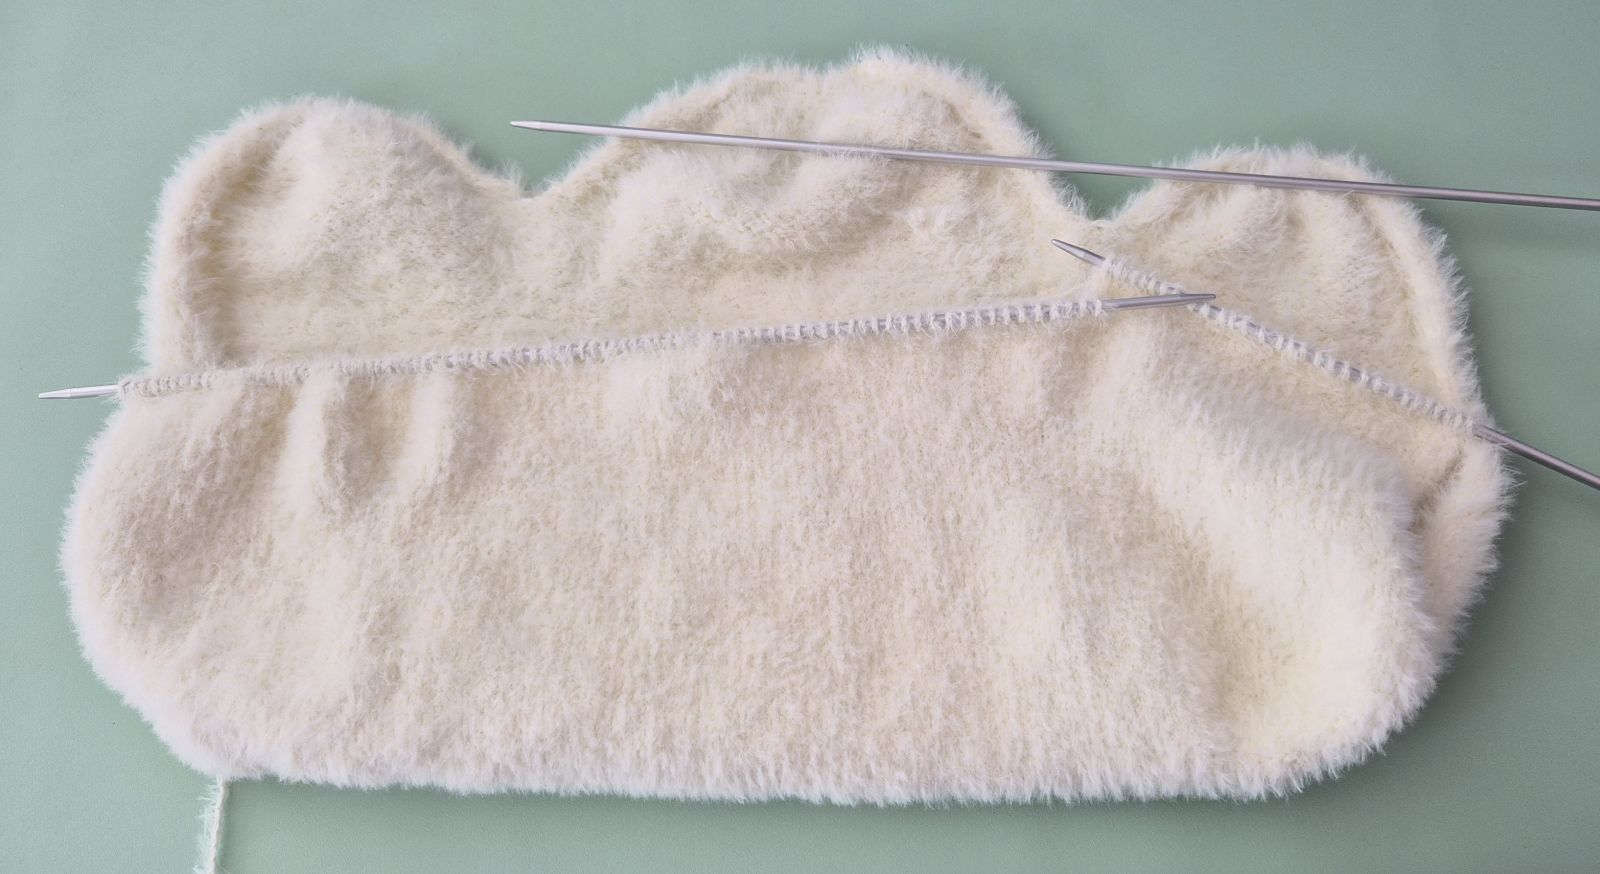
Since short knitting needles were used for all three pieces, switch to a long needle so that everything fits comfortably — the cloud cushion will be quite large.
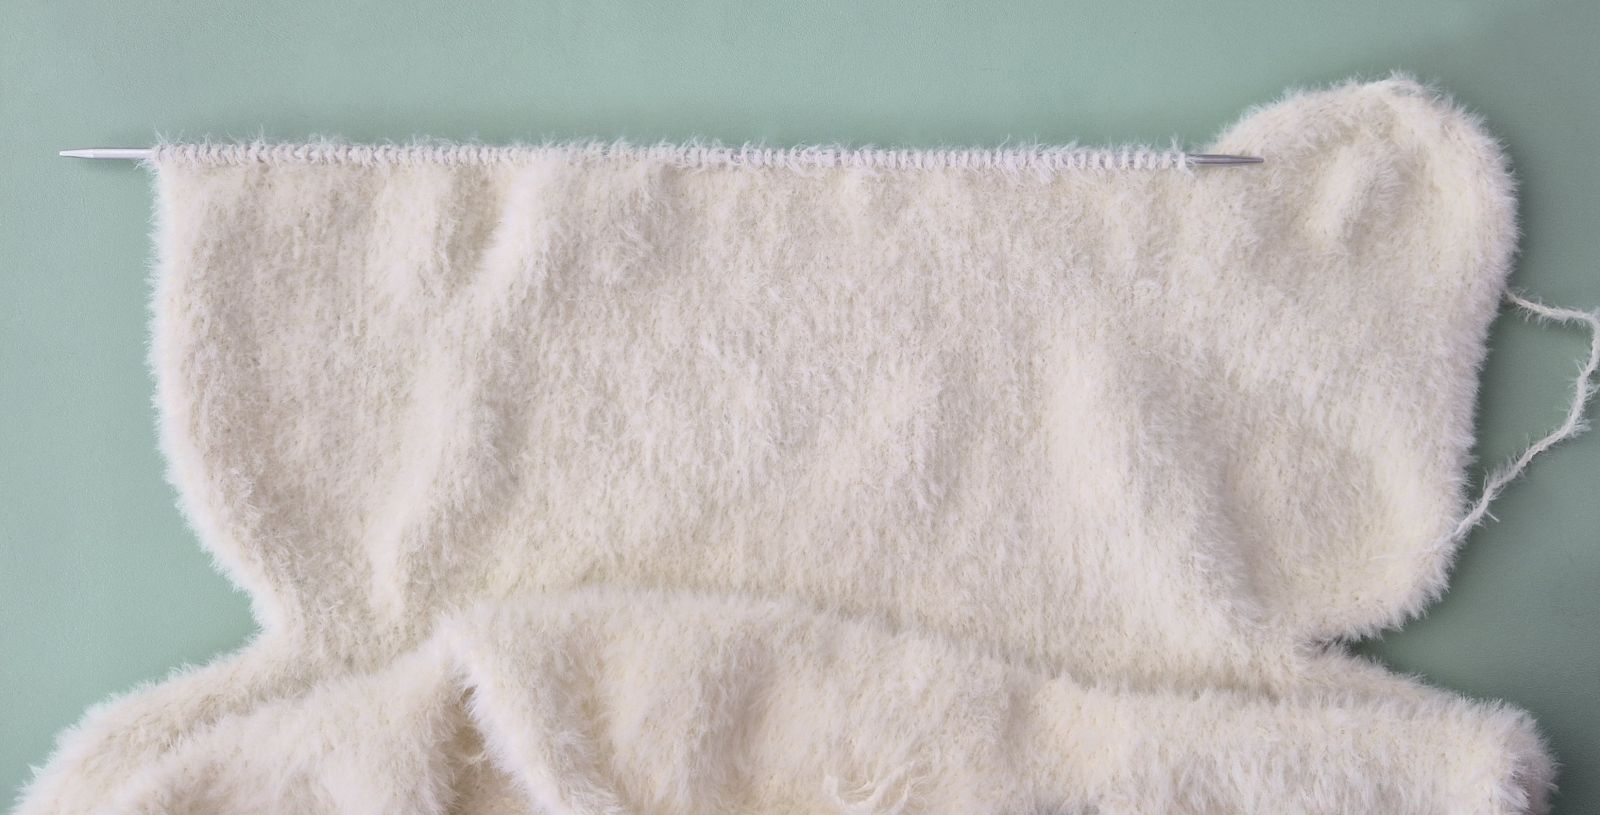
Now continue by knitting all three pieces together to form the cloud, which will greatly reduce the amount of seaming needed at the end.
Start with Piece 3, as the yarn is still attached. Turn the piece right side out.
Since you are restarting the row count but continuing to knit, please pay close attention to the correct row transitions. The first row is worked in knit stitches, and from there the pattern alternates regularly.
Row transitions: Knit all odd‑numbered rows, and purl all even‑numbered rows.
This means:
- Knit stitches: Row 1, Row 3, Row 5, etc. (all odd‑numbered rows)
- Purl stitches: Row 2, Row 4, Row 6, etc. (all even‑numbered rows)
This principle applies to the other two sections as well, all the way until the cloud is fully knitted.
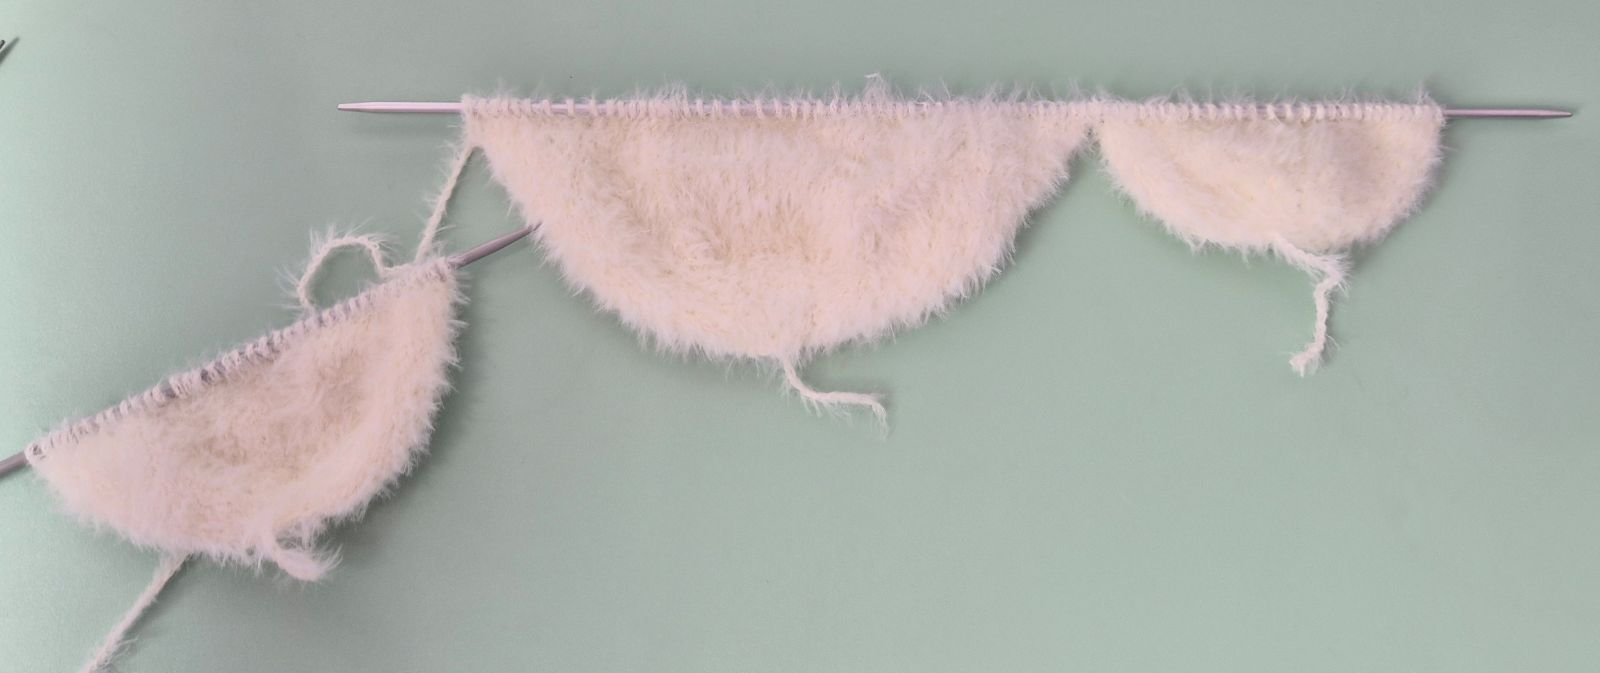
1.Knit 30 stitches from Part 3. Then take Part 1 and knit the next 48 stitches — you now have two pieces on the needle. Finally, take Part 2 and knit 36 stitches.
All stitches from all three parts are now on the long knitting needle. You should have a total of 114 stitches.
2. 114 P
3. 114 K
4. 114 P
5. 114 K
6. 114 P
7. 114 K
8. 114 P
9. 114 K
10. 114 P
11. 27 K, 4 dec, 44, 4 dec, 27 K (106)
4 dec = Knit 2 stitches together, repeat a total of 4 times.
12. 106 P
13. 106 K
14. 106 P
15. 106 K
16. 106 P
17. 3 K, 1 inc, 98 K, 1 inc, 3 K (108)
18. 108 P
19. 3 K, 1 inc, 100 K, 1 inc, 3 K (110)
20. 110 P
21. 3 K, 1 inc, 102 K, 1 inc, 3 K (112)
22. 112 P
Knit a total of 16 rows in stockinette stitch:
23. 25. 27.29. 31. 33. 35. 37. - 112 K
24. 26. 28. 30. 32. 34. 36. 38. - 112 P
39. 2 K, 1 dec, 2 K, 1 dec, 2 K, 1 dec, 88 K, 1 dec, 2 K, 1 dec, 2 K, 1 dec, 2 K (106)
40. 106 P
41. 2 K, 1 dec, 2 K, 1 dec, 2 K, 1 dec, 82 K, 1 dec, 2 K, 1 dec, 2 K, 1 dec, 2 K (100)
42. 100 P
43. 2 K, 1 dec, 2 K, 1 dec, 2 K, 1 dec, 76 K, 1 dec, 2 K, 1 dec, 2 K, 1 dec, 2 K (94)
44. 94 P
45. 2 K, 1 dec, 2 K, 1 dec, 2 K, 1 dec, 70 K, 1 dec, 2 K, 1 dec, 2 K, 1 dec, 2 K (88)
46. 88 P
47. 2 K, 1 dec, 2 K, 1 dec, 2 K, 1 dec, 64 K, 1 dec, 2 K, 1 dec, 2 K, 1 dec, 2 K (82)
48. 82 P
49. 2 K, 1 dec, 2 K, 1 dec, 2 K, 1 dec, 58 K, 1 dec, 2 K, 1 dec, 2 K, 1 dec, 2 K (76)
50. 76 P
51. 2 K, 1 dec, 2 K, 1 dec, 2 K, 1 dec, 52 K, 1 dec, 2 K, 1 dec, 2 K, 1 dec, 2 K (70)
52. 70 P
53. 70 K
54. 70 P
55. 2 K, 1 inc, 2 K, 1 inc, 2 K, 1 inc, 52 K, 1 inc, 2 K, 1 inc, 2 K, 1 inc, 2 K (76)
56. 76 P
57. 2 K, 1 inc, 2 K, 1 inc, 2 K, 1 inc, 58 K, 1 inc, 2 K, 1 inc, 2 K, 1 inc, 2 K (82)
58. 82 P
59. 2 K, 1 inc, 2 K, 1 inc, 2 K, 1 inc, 64 K, 1 inc, 2 K, 1 inc, 2 K, 1 inc, 2 K (88)
60. 88 K
61. 2 K, 1 inc, 2 K, 1 inc, 2 K, 1 inc, 70 K, 1 inc, 2 K, 1 inc, 2 K, 1 inc, 2 K (94)
62. 94 P
63. 2 K, 1 inc, 2 K, 1 inc, 2 K, 1 inc, 76 K, 1 inc, 2 K, 1 inc, 2 K, 1 inc, 2 K (100)
64. 100 P
65. 2 K, 1 inc, 2 K, 1 inc, 2 K, 1 inc, 82 K, 1 inc, 2 K, 1 inc, 2 K, 1 inc, 2 K (106)
66. 106 P
67. 2 K, 1 inc, 2 K, 1 inc, 2 K, 1 inc, 88 K, 1 inc, 2 K, 1 inc, 2 K, 1 inc, 2 K (112)
Knit a total of 17 rows in stockinette stitch:
68. 70. 72. 74. 76. 78. 80. 82. 84 - 112 P
69. 71. 73. 75. 77. 79. 81. 83 - 112 K
85. 3 K, 1 dec, 102 K, 1 dec, 3 K (110)
86. 110 P
87. 3 K, 1 dec, 100 K, 1 dec, 3 K (108)
88. 108 P
89. 3 K, 1 dec, 98 K, 1 dec, 3 K (106)
90. 106 P
91. 106 K
92. 106 P
93. 106 K
94. 106 P
95. 27 K, 4 inc, 44, 4 inc, 27 K (114)
96. 114 P
97. 114 K
98. 114 P
99. 114 K
100. 114 P
101. 114 K
102. 114 P
103. 114 K
104. 114 P
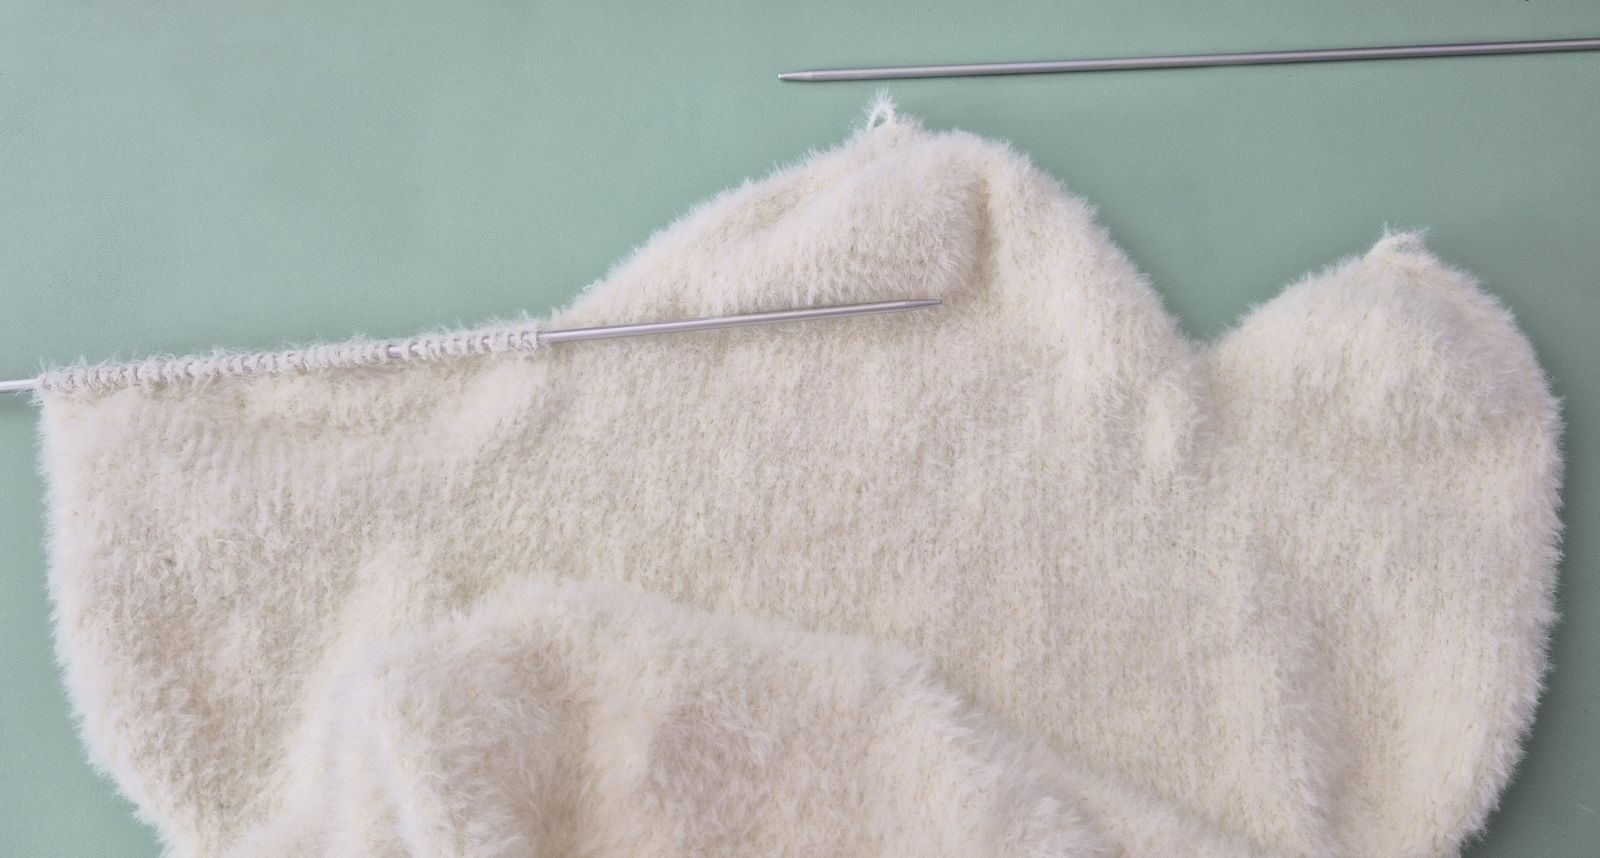
Now the cloud is divided into three parts again.
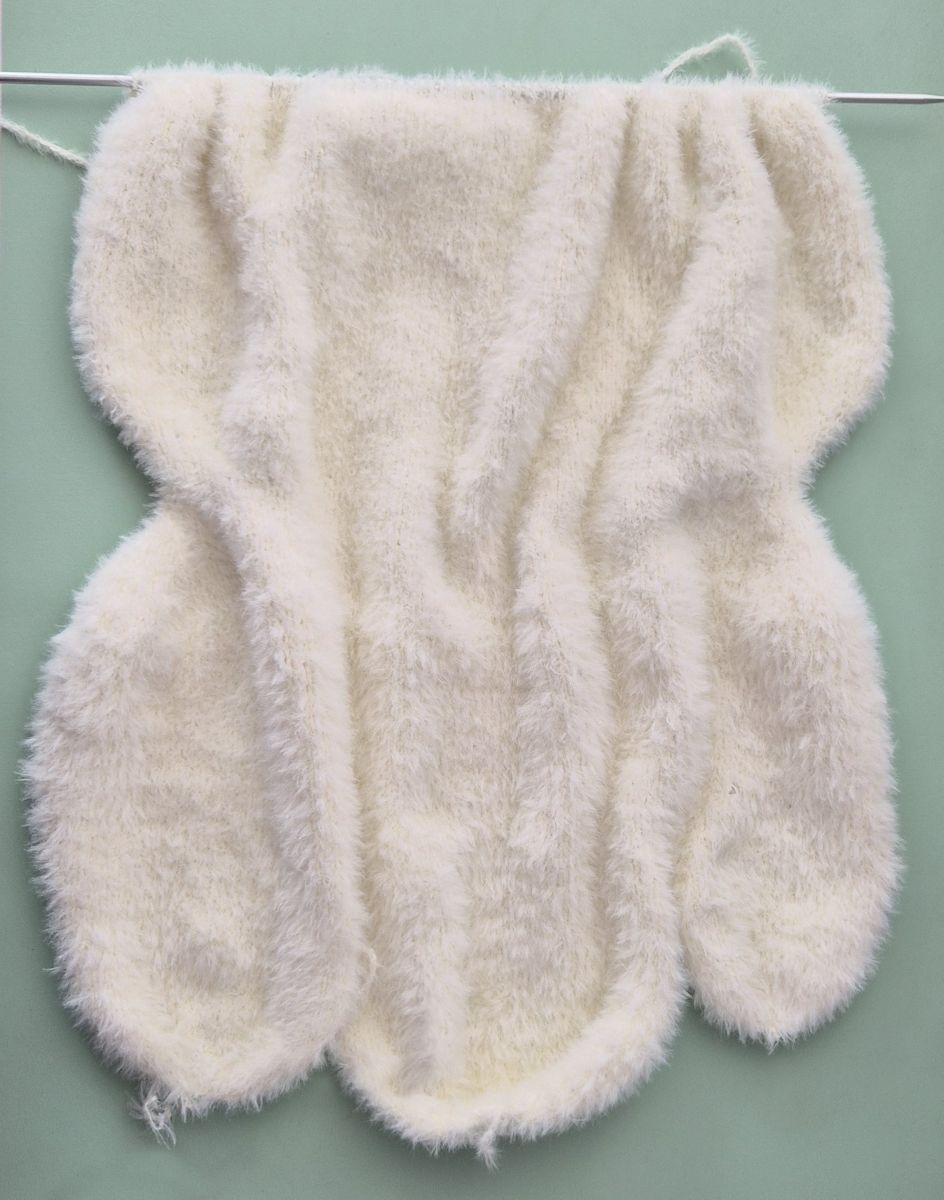
Begin with the smallest part, which has 30 stitches.
1. Knit 30 stitches, then turn your work and continue knitting using only these 30 stitches.
The remaining 84 stitches stay on the needle.
To continue working this part, take a second knitting needle of the same size.
2. 30 P
3. 30 K
4. 30 P
5. 30 K
6. 30 P
7. 30 K
8. 30 P
9. (3 K, 1 dec) x 6 (24)
10. 24 P
11. (2 K, 1 dec) x 6 (18)
12. 18 P
13. (1 K, 1 dec) x 6 (12)
14. 12 P
15. 6 dec
16. 6 P
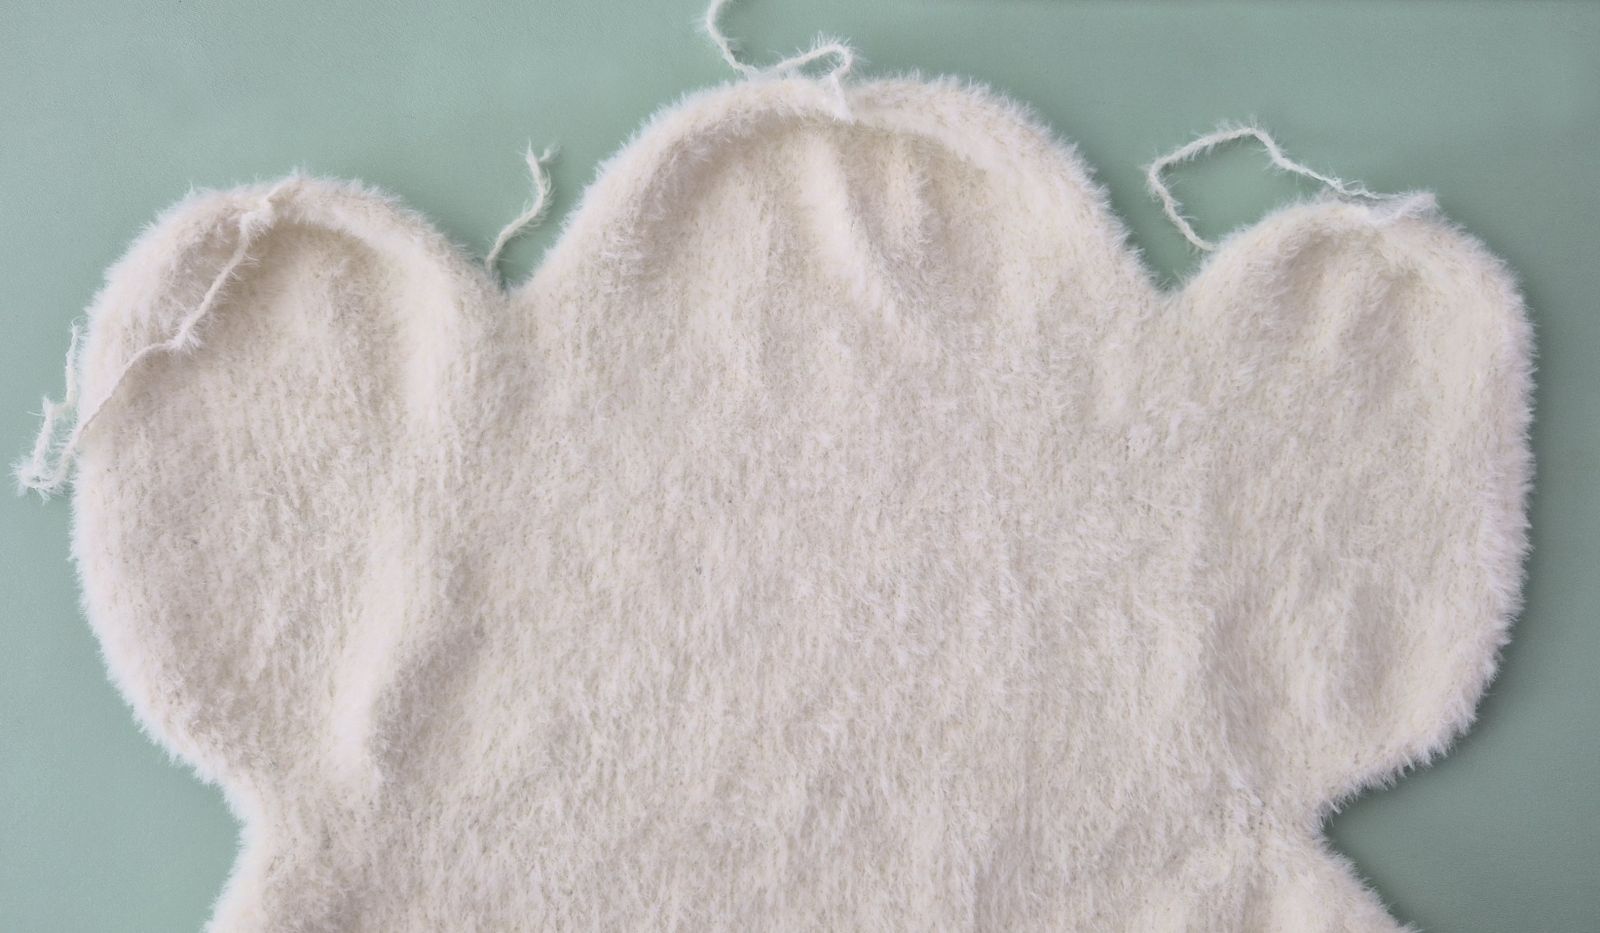
Finally, cast off the remaining stitches. Cut the yarn and secure it.
Return to Row 104, where the remaining 84 stitches are waiting. Reattach the yarn and knit 48 stitches, then continue working with only these 48 stitches.
1. 48 K
2. 48 P
3. 48 K
4. 48 P
5. 30 K
6. 48 P
7. 30 K
8. 48 P
9. 48 K
10. 48 P
11. 48 K
12. 48 P
13. 48 K
14. 48 P
15. 48 K
16. 48 P
17. 48 K
18. 48 P
19. (6 K, 1 dec) x 6 (42)
20. 42 P
21. (5 K, 1 dec) x 6 (36)
22. 36 P
23. (4 K, 1 dec) x 6 (30)
24. 30 P
25. (3 K, 1 dec) x 6 (24)
26. 24 P
27. (2 K, 1 dec) x 6 (18)
28. 18 P
29. (1 K, 1 dec) x 6 (12)
30. 12 P
31. 6 dec
32. 6 P
Finally, cast off the remaining stitches. Cut the yarn and secure it.
Return to Row 104, where the remaining 36 stitches are waiting. Reattach the yarn and knit all 36 stitches.
1. 36 K
2. 36 P
3. 36 K
4. 36 P
5. 36 K
6. 36 P
7. 36 K
8. 36 P
9. 36 K
10. 36 P
11. (4 K, 1 dec) x 6 (30)
12. 30 P
13. (3 K, 1 dec) x 6 (24)
10. 24 P
11. (2 K, 1 dec) x 6 (18)
12. 18 P
13. (1 K, 1 dec) x 6 (12)
14. 12 P
15. 6 dec
16. 6 P
Finally, cast off the remaining stitches.
Cut the yarn and secure it.
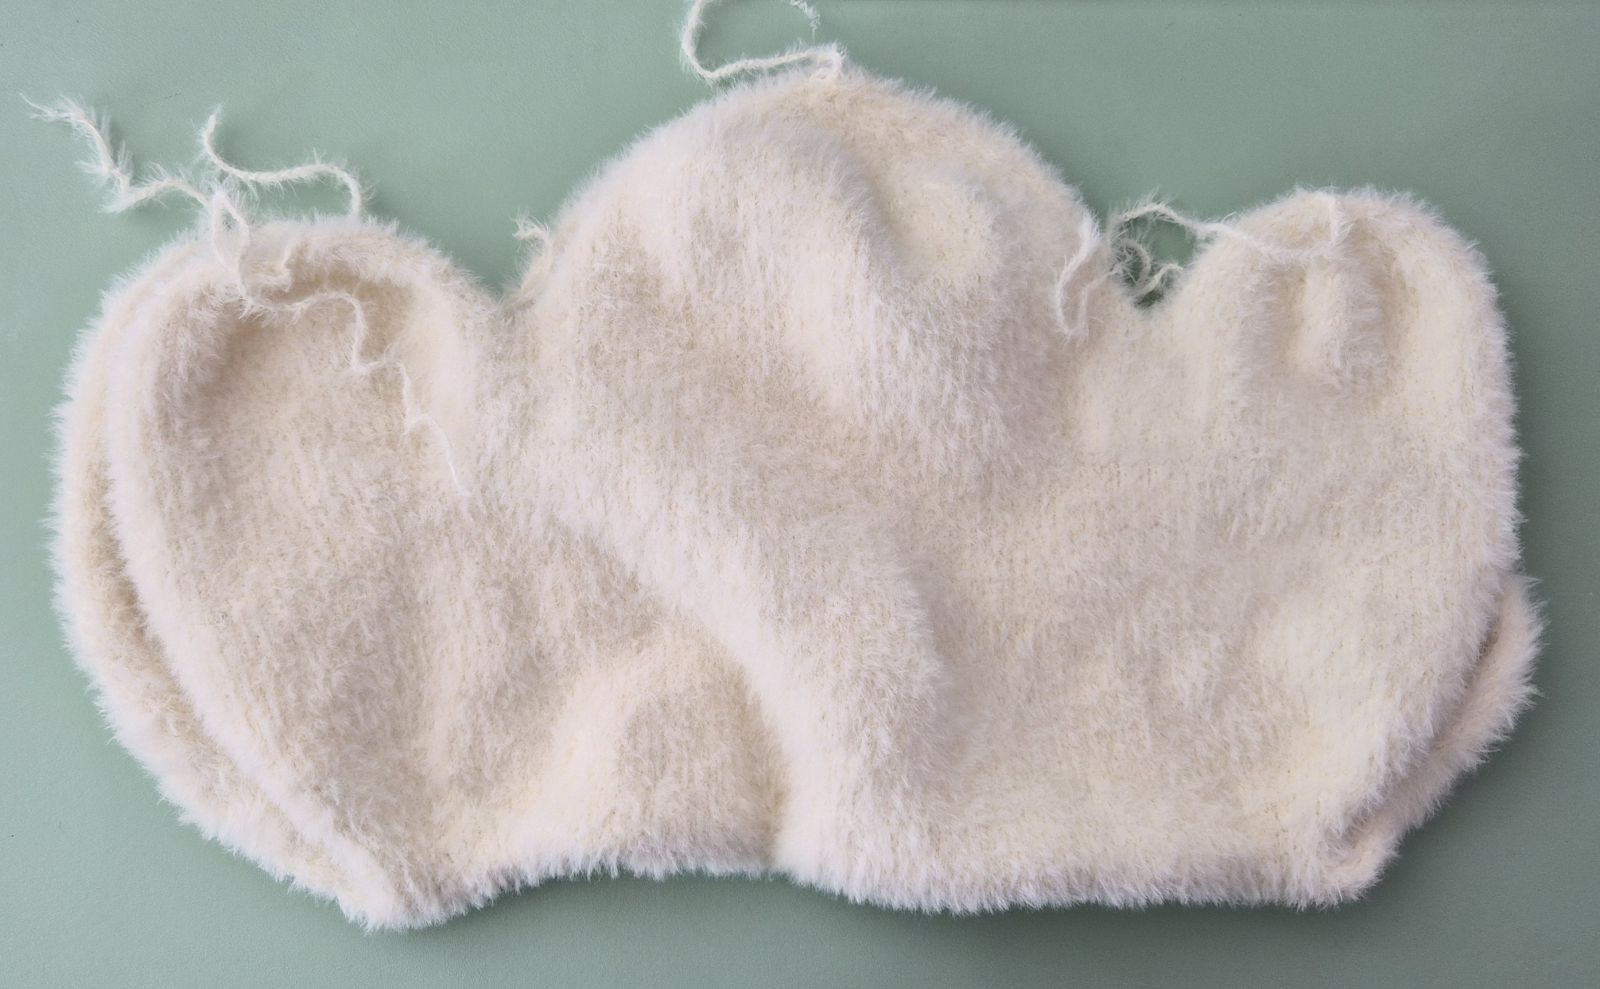
Fold the knitted piece in half and sew the edges together, stuffing the cloud as you go.
When adding the filling, distribute it evenly so the cloud keeps a nice, uniform shape.
If you want to use safety eyes, leave a small opening when sewing the pieces together so you can attach the eyes from the inside. Afterwards, carefully check that the eyes are securely fastened and cannot be pulled off or played with.
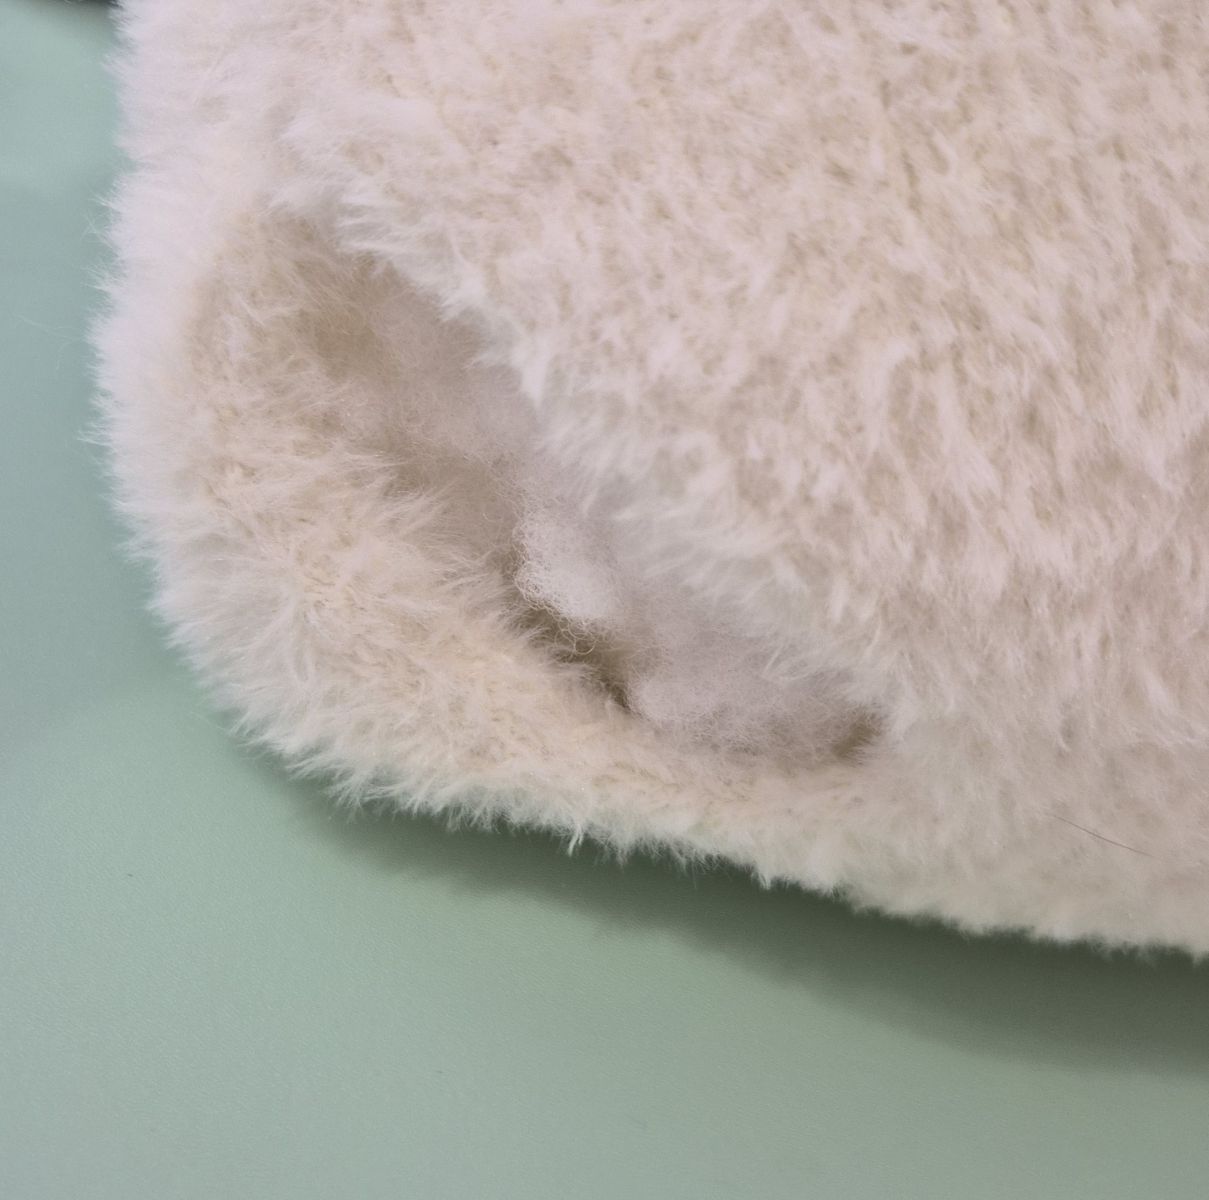
Alternatively, you can use sew‑in eyes. These are stitched directly onto the cloud with thread — ideally from the inside as well. Again, make sure the eyes are sewn on firmly and cannot be removed, especially if the toy is intended for small children. There is a risk of swallowing. You are solely responsible for ensuring that the eyes are securely attached.
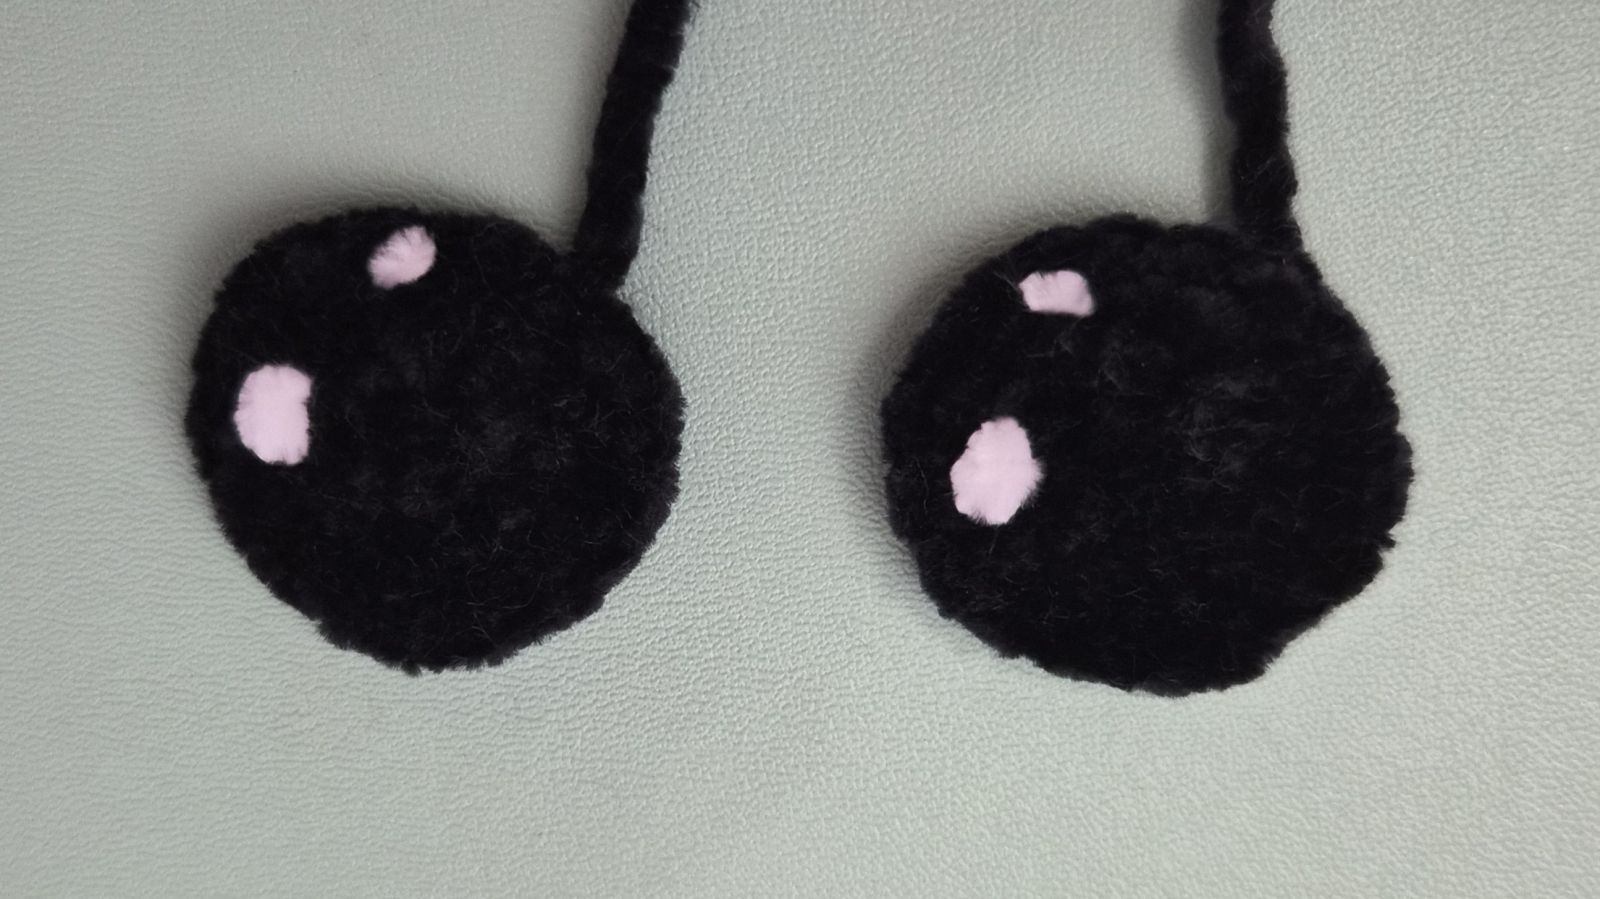
Since my cloud is intended for a small child, I chose crocheted eyes.
Or the eyes (black):
1. Crochet 6 single crochet stitches into a magic ring.
2. 6 inc (12)
3. (1 sc, 1 inc)x6 (18)
Secure the thread and leave a tail when cutting it so you can sew on the eyes. You can make the eyes look more expressive by adding small white embroidered highlights.
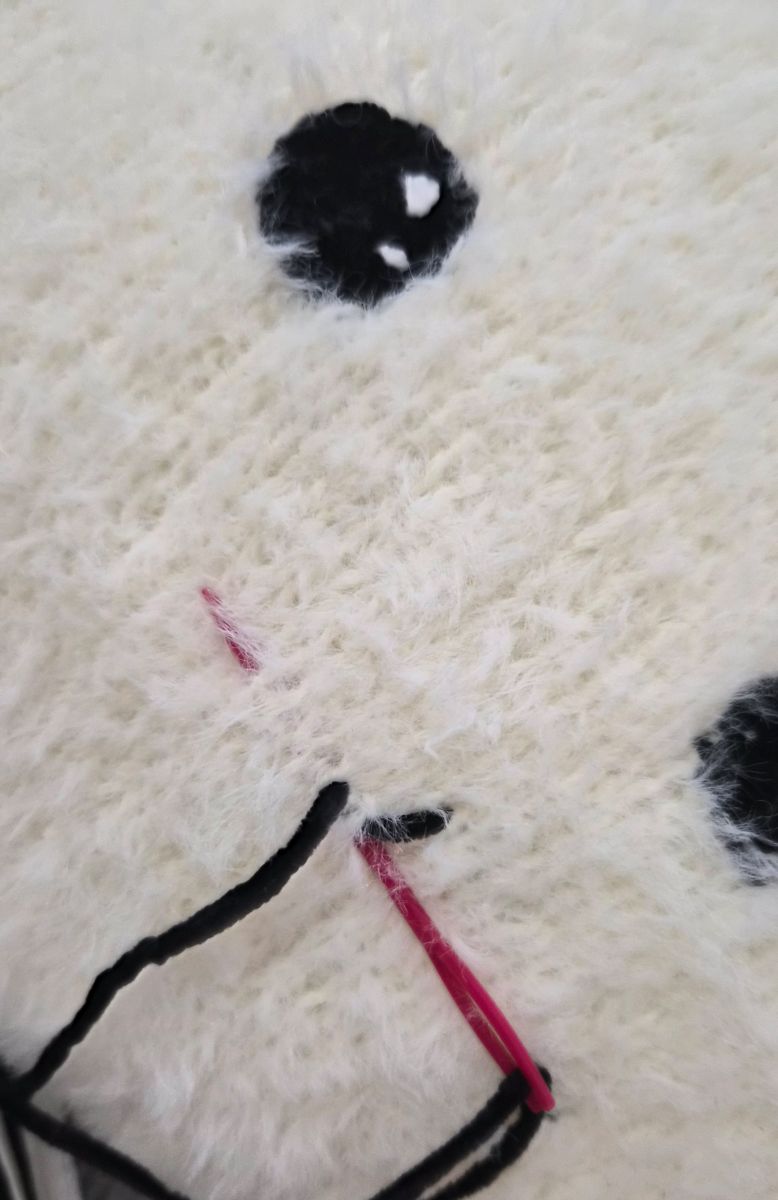
Position the eyes on the cloud and sew them on securely. Feel free to experiment with different placements.
After attaching the eyes, embroider a smile. I used black yarn for this, just as I did for the eyes.
Once the eyes and mouth are finished, close the opening.
Your cloud is now ready for the next step knitting the legs.
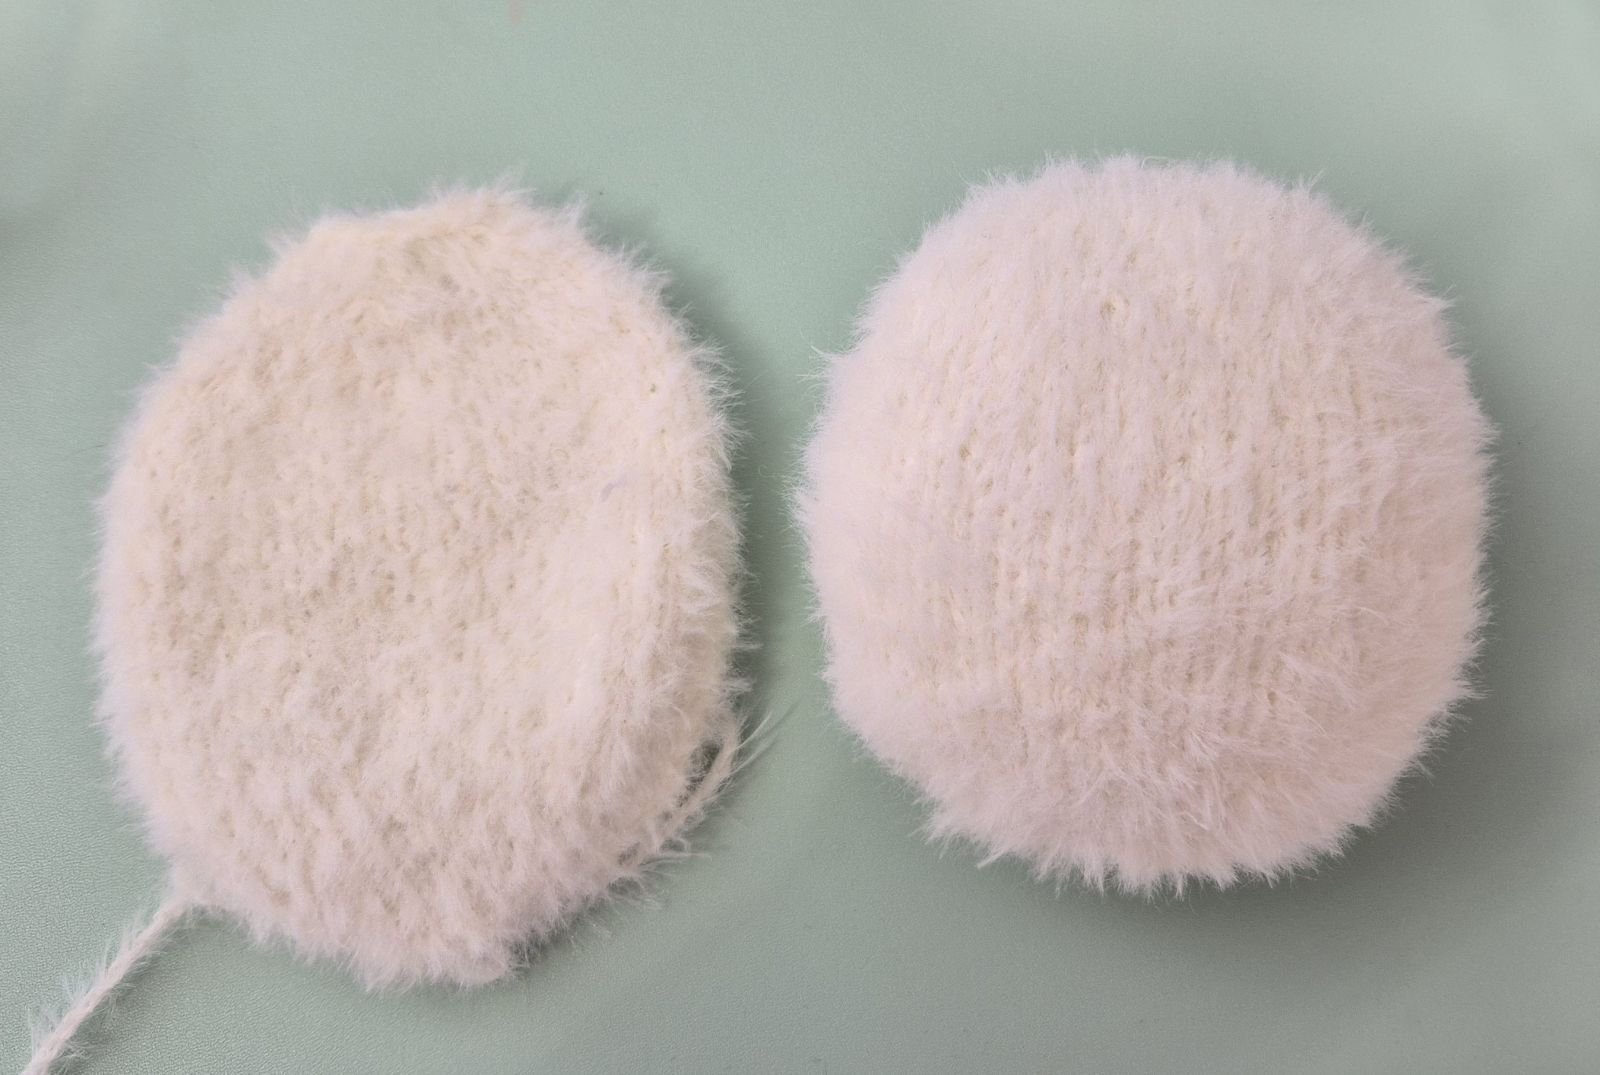
Lower part of the leg (foot)
Cast on 6 stitches (ch) onto the knitting needle. Make sure the stitches are evenly stretched while knitting to ensure your knitted piece is nice and even.
1. 6 P (6)
2. 6 K inc. (12)
3. 12 P (12)
4. (1 K, 1 inc)x 6 (18)
5. 18 P (18)
6. (2 K, 1 K inc)x 6 (24)
7. 24 P
8. (3 K, 1 K inc)x 6 (30)
9. 30 P
10. (4 K, 1 K inc)x 6 (36)
11. 36 P
12. (5 K, 1 K inc)x 6 (42)
13. 42 P
Knit a total of 18 rows in stockinette stitch:
14. 16. 18. 20. 22. 24. 26. 28. 30. – 42 K
15. 17. 19. 21. 23. 25. 27. 29. 31. – 42 P
32. (5 K, 1 dec)x 6 (36)
33. 36 P
34. (4 K, 1 dec)x 6 (30)
35. 30 P
36. (3 K, 1 dec)x 6 (24)
37. 24 P
38. (2 K, 1 dec)x 6 (18)
39. 18 P
Cast off the remaining 18 stitches, fold the piece in half, and sew the seams together, stuffing the leg as you go. Cut the yarn and weave in the ends.
I used thick chenille yarn for the legs. If you choose a different yarn, make sure the legs stay in proportion to the cloud and are not too small or too large.
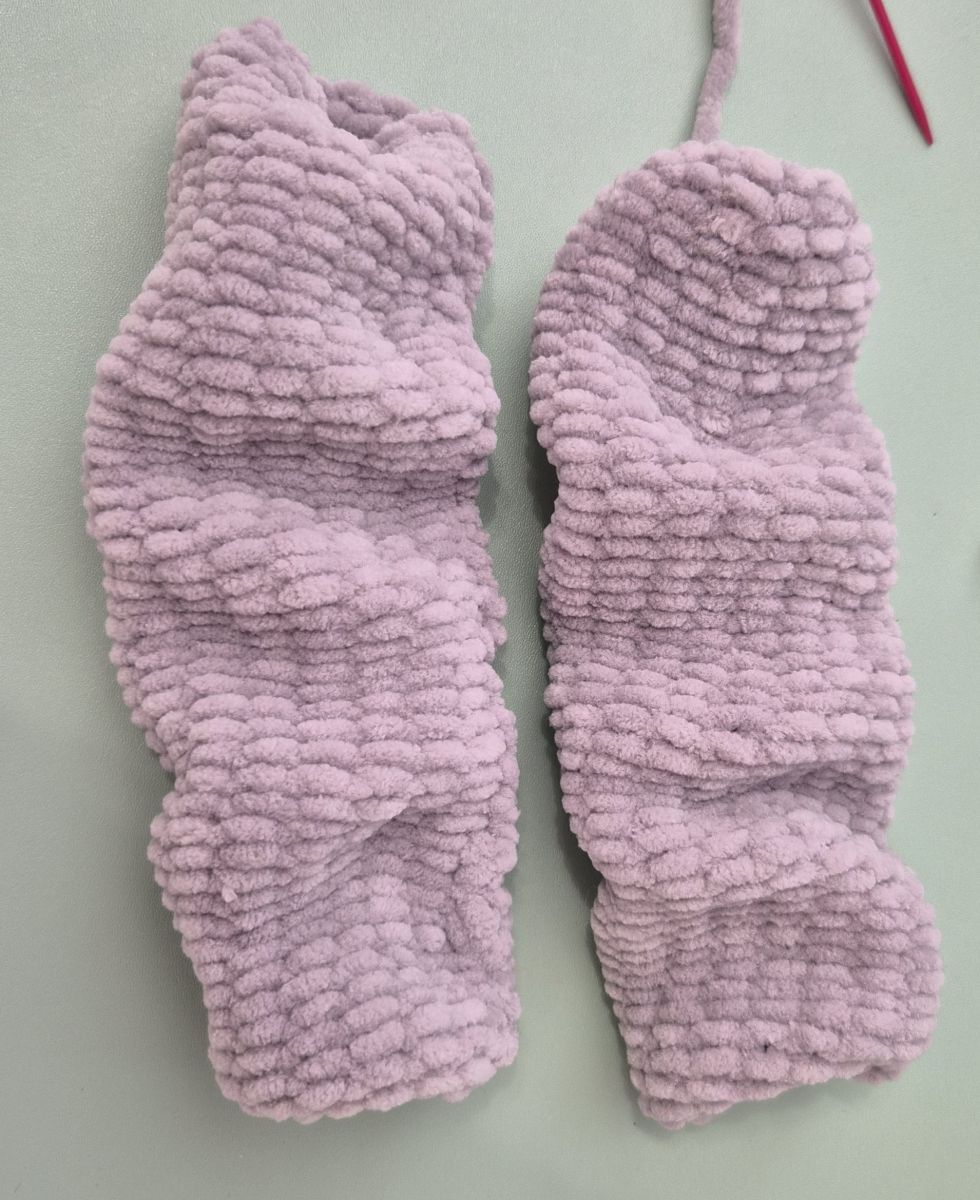
Legs (gray)
Cast on 6 stitches (ch) onto the knitting needle. Make sure the stitches are evenly stretched while knitting to ensure your knitted piece is nice and even.
1. 6 P (6)
2. 6 K inc. (12)
3. 12 P (12)
4. 2 K, 1 inc, 2 K, 1 inc, 2 K, 1 inc, 2 K, 1 inc (16)
5. 16 P
6. 16 K
7. 16 P
8. 16 K
9. 16 P
10. 16 K
11. 16 P
12. 16 K
13. 16 P
14. 16 K
15. 16 P
16. 16 K
17. 16 P
18. 16 K
19. 16 P
20. 16 K
21. 16 P
22. 16 K
23. 16 P
24. 16 K
25. 16 P
26. 16 K
27. 16 P
28. 16 K
29. 16 P
30. 16 K
31. 16 P
32. 16 K
33. 16 P
34. 16 K
35. 16 P
36. 16 K
37. 16 P
38. 16 K
39. 16 P
40. 16 K
41. 16 P
42. 16 K
43. 16 P
44. 16 K
45. 16 P
46. 16 K
47. 16 P
48. 16 K
49. 16 P
50. 16 K
51. 16 P
52. 16 K
53. 16 P
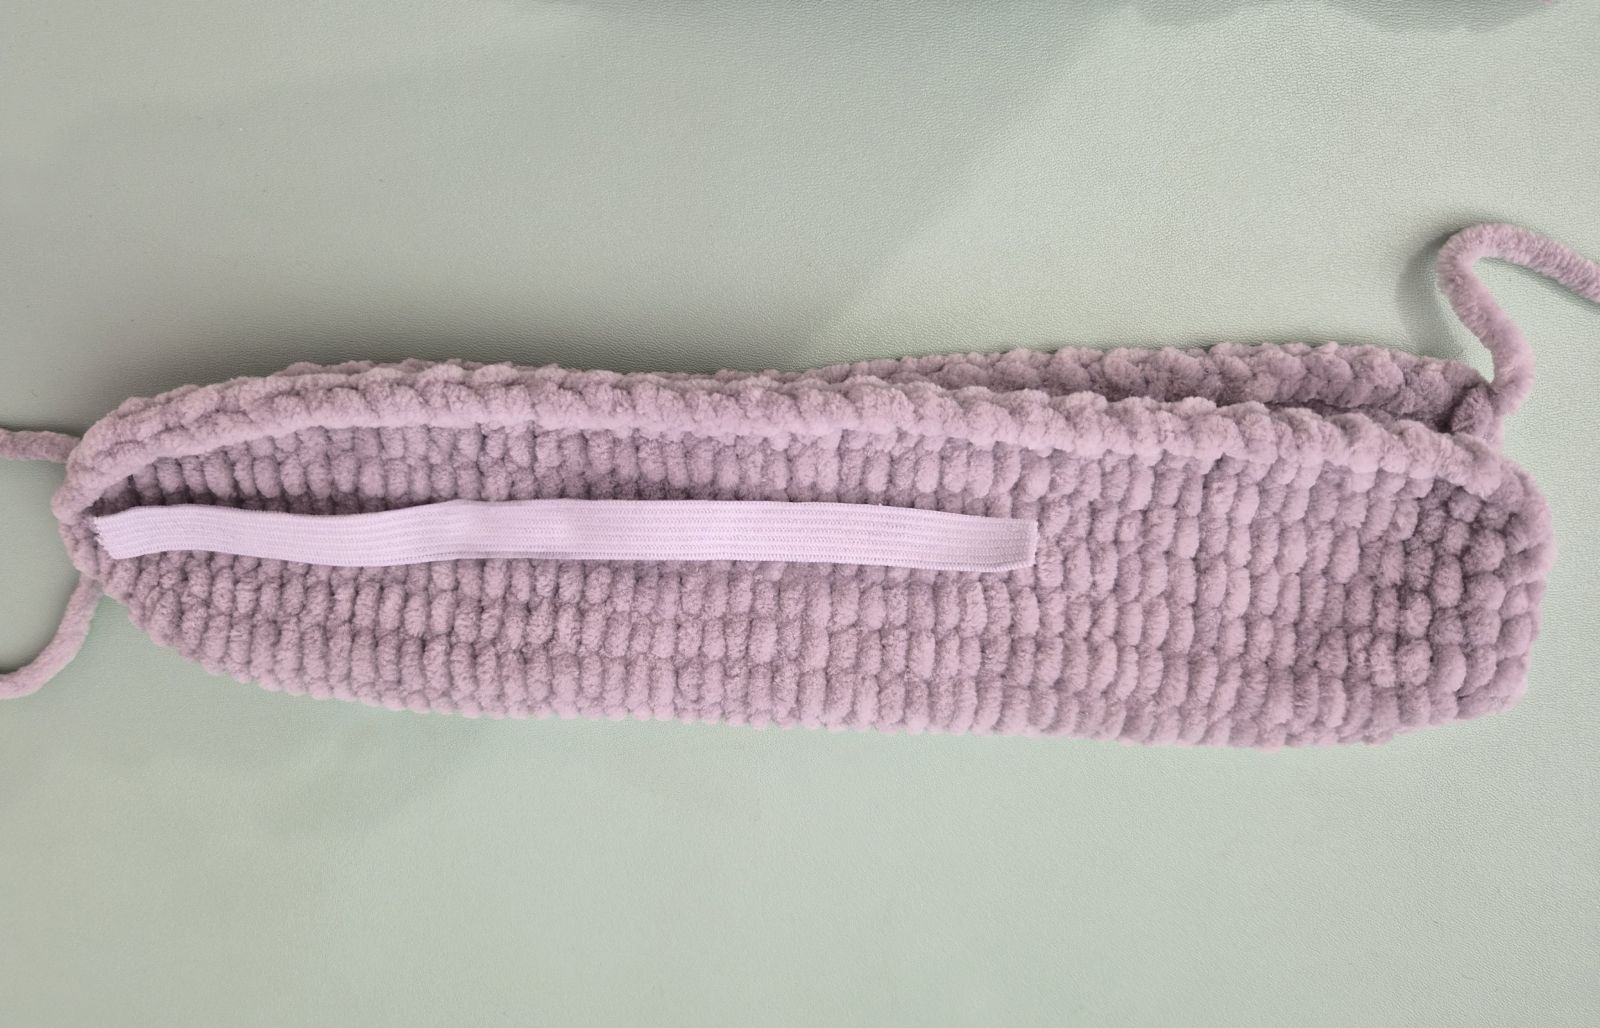
Cast off the remaining stitches, fold the piece in half, and sew it together. The legs are not stuffed.
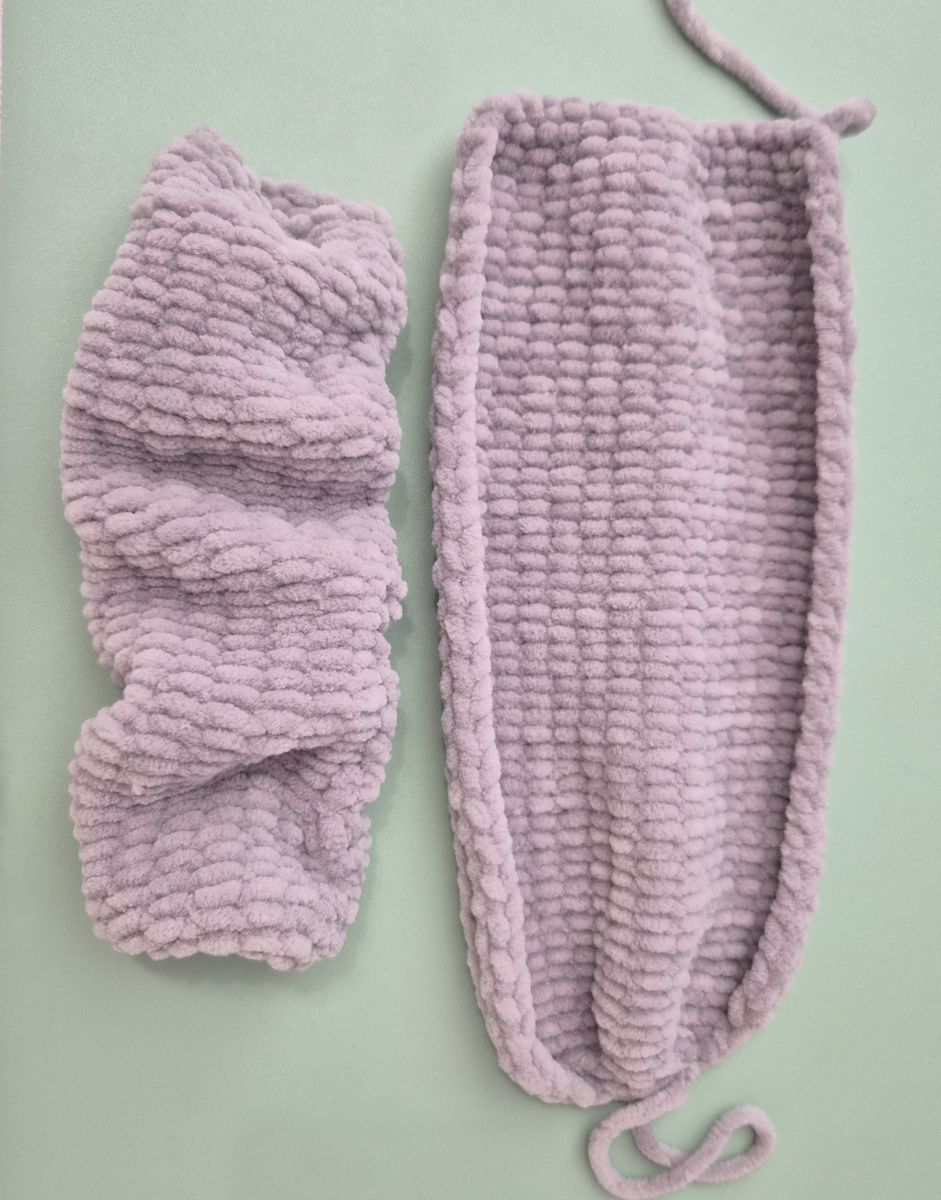
When sewing the pieces together, I used an elastic band to create gentle pleats and give the legs a gathered look. For a leg measuring 26 cm, I used an elastic band about 14 cm long. When sewing the top and bottom sections together, simply catch one end of the elastic band and secure it in place.
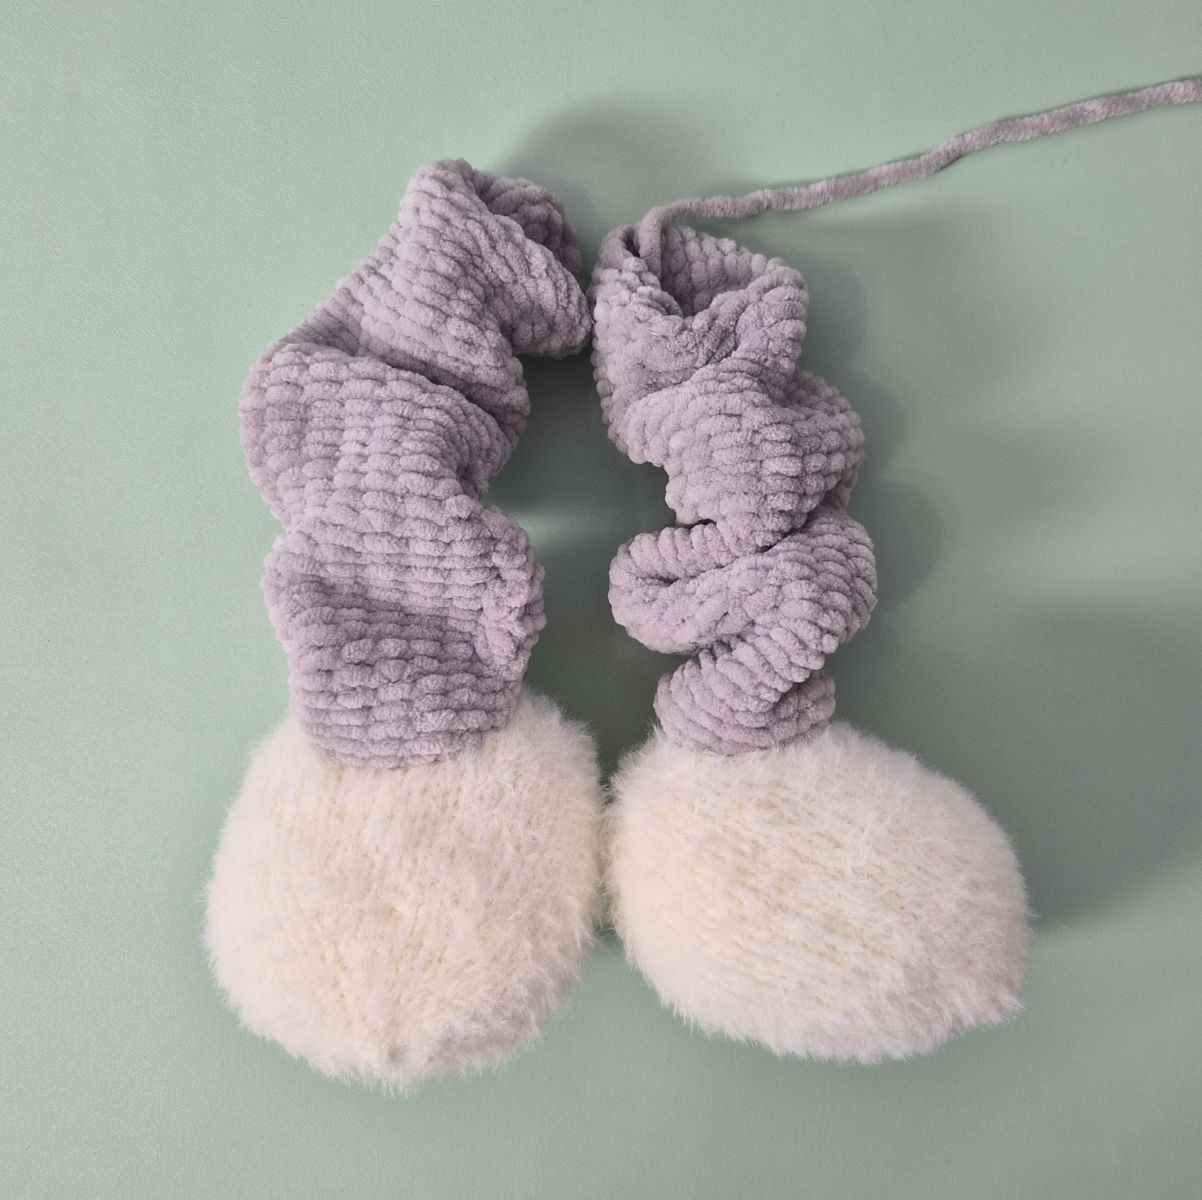
Sew the legs to the bottom of the cloud.


