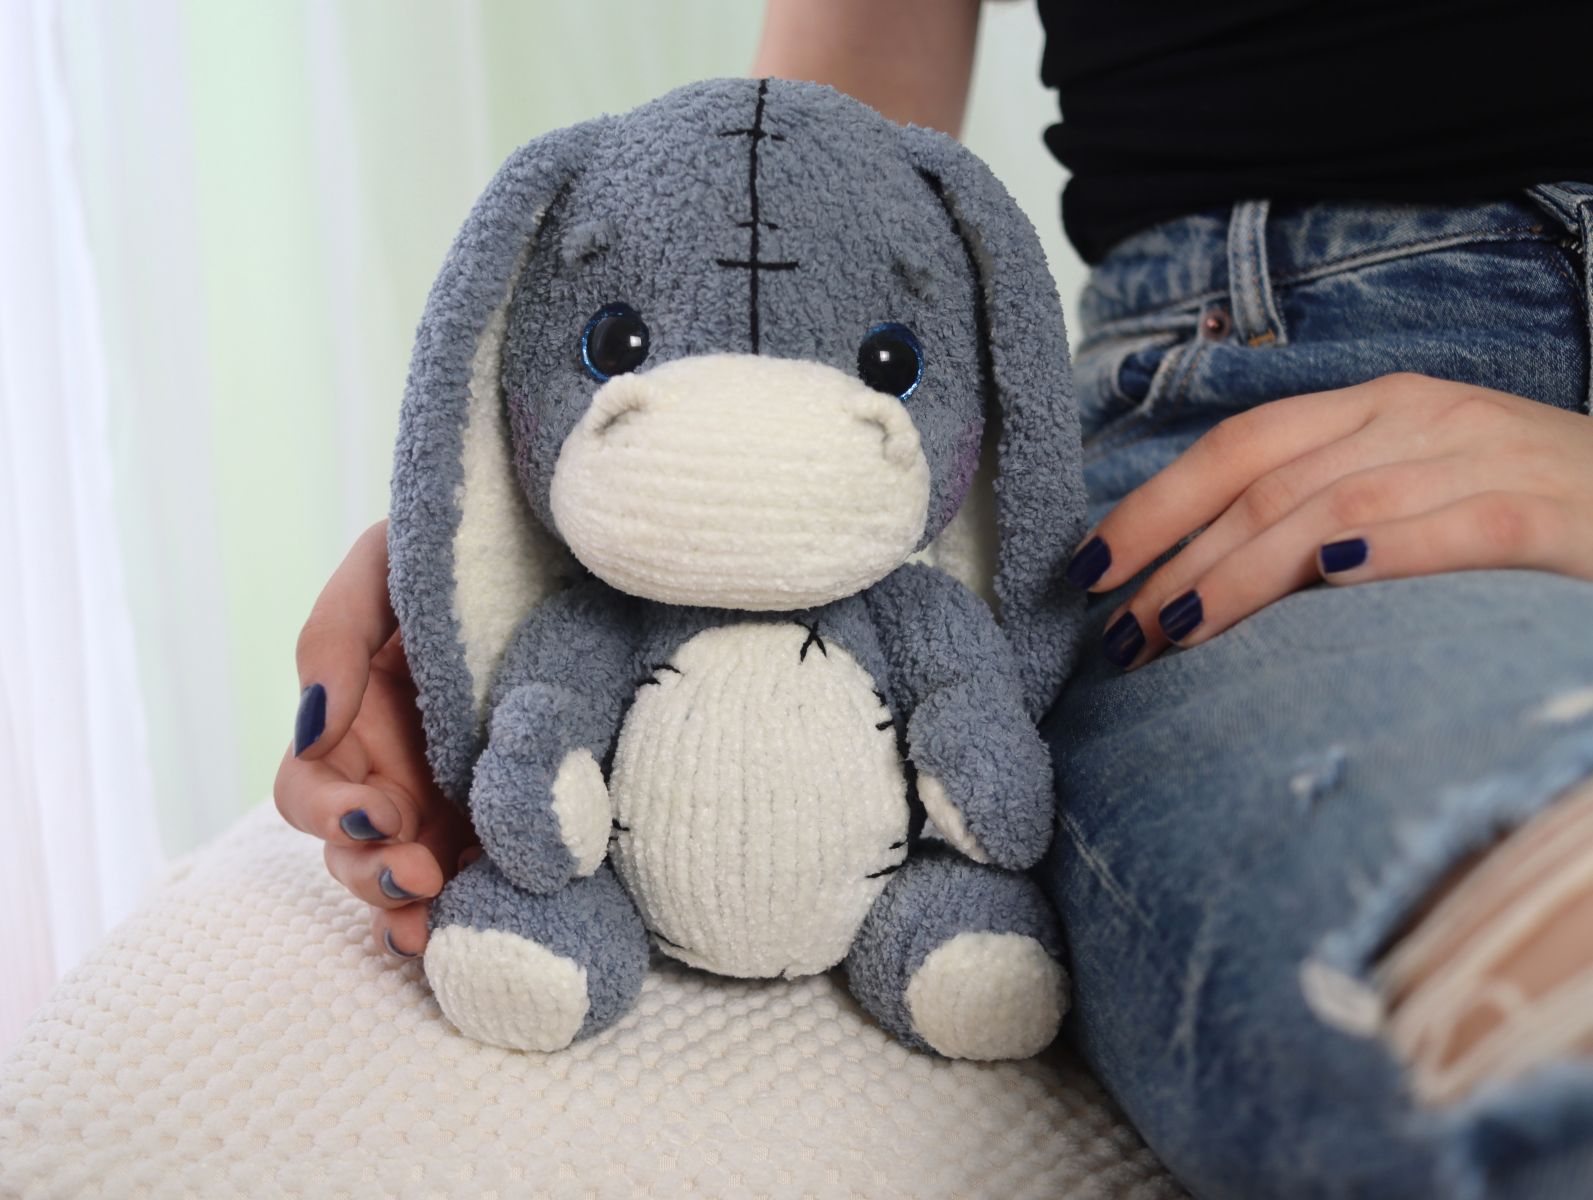
The donkey has always been a beloved toy for children, and its cuddly nature brings great joy. Today, I'd like to share my knitting pattern for a teddy-style donkey with you.
This little donkey is made from extra-soft wool, giving it an especially cozy and adorable look. I'm excited to guide you step by step through the pattern!
.JPG)
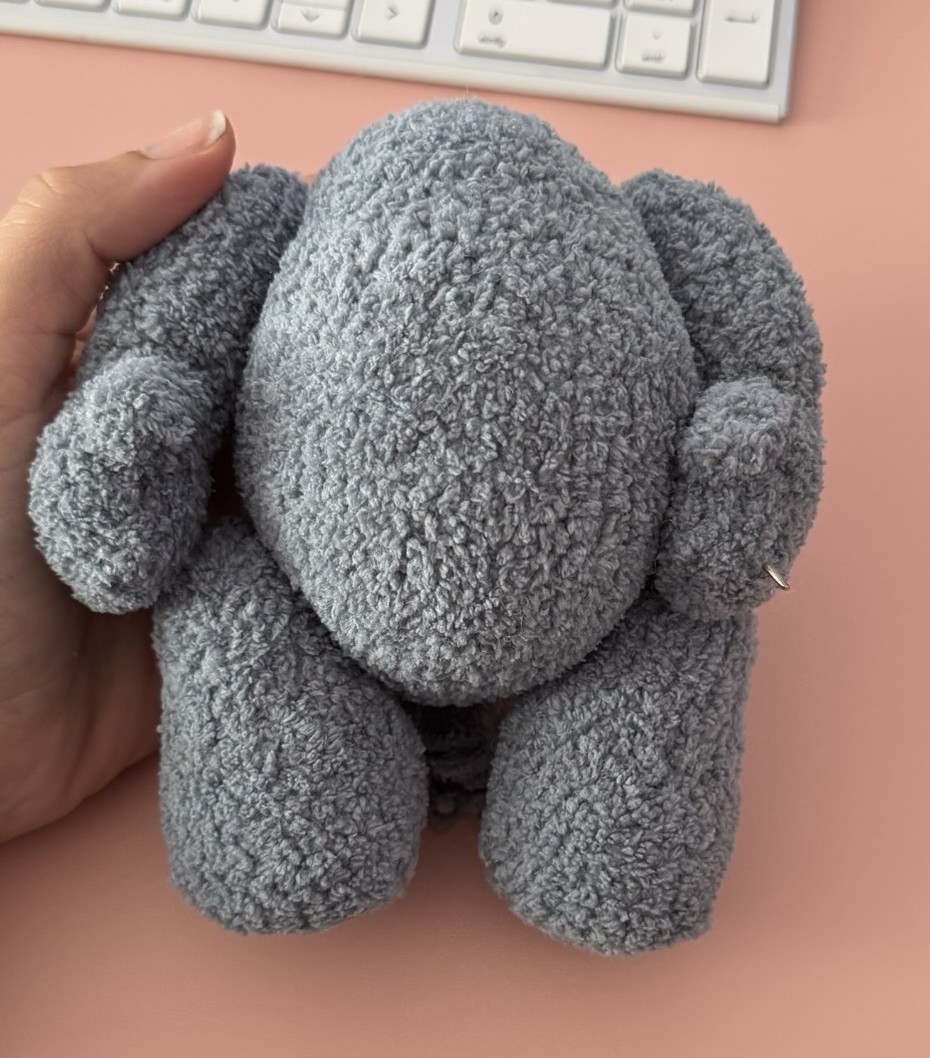
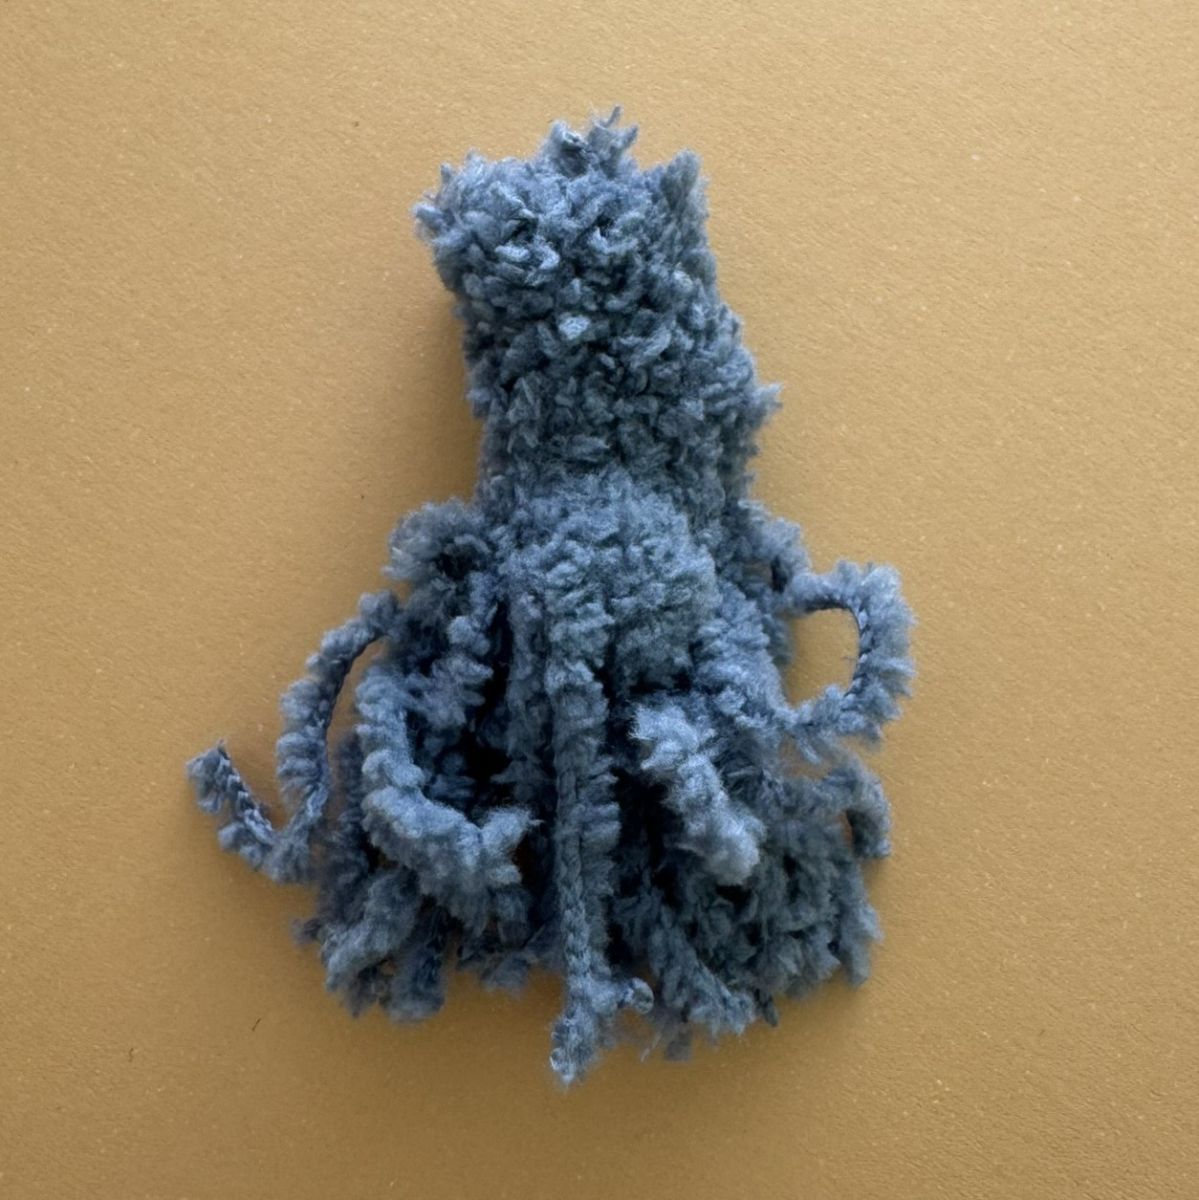
I knitted all the pieces using two knitting needles and then carefully sewed them together. The donkey cannot stand on its own and measures about 27 cm in height—though the final size may vary slightly depending on the thickness of the wool.
You have complete freedom in choosing the wool, knitting needles, and eyes, allowing you to personalize your donkey according to your taste and experience. Each one becomes a unique and lovable companion!
Materials:
✓ Knitting yarn gray 45 gr Alize Softy (115 m/ 50g).
✓ Knitting yarn white 15 gr Alize Softy (115 m/ 50g) .
✓ Knitting yarn white 15 gr Katia Velvet fine (160 m/ 50g) .
✓ Knitting needles No.2,5
✓ Fiberfill, Eyes 16 mm, 1 extra long sewing needle
Abbreviations:
CH – Chain(s)
inc – increase
dec – decrease
X dec – X- times decrease
X inc – X- times increase
ST – Stitch
P – purl
K– knit (garter stitch)
Knitting Instructions for all Pieces
All parts are crafted entirely with two knitting needles.
Follow these steps:
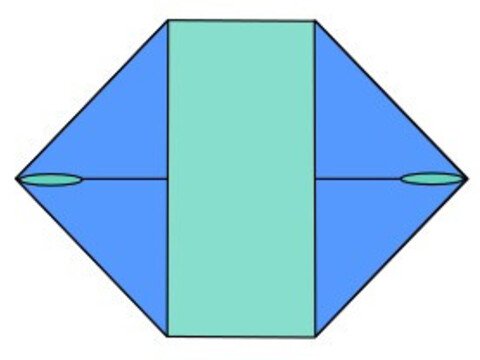
First Row - Purl Stitches Begin by knitting the first row entirely in purl stitches. These will form the back side of your project, creating a neat texture.
Second Row - Knit Stitches In the second row, knit every stitch. This will produce a smooth, even front for your piece.
Repeating the Pattern Continue alternating between purl stitches in the odd-numbered rows and knit stitches in the even-numbered rows:
- Odd-numbered rows (e.g., 1st, 3rd, 5th): Work in purl stitches.
- Even-numbered rows (e.g., 2nd, 4th, 6th): Work in knit stitches.
This straightforward pattern of alternating knit and purl rows is ideal for beginners, offering an easy yet satisfying introduction to the craft.
If you're knitting with three or four needles to avoid joining and creating a seam, this is certainly possible. In this case, all purl stitches are worked as knit stitches.
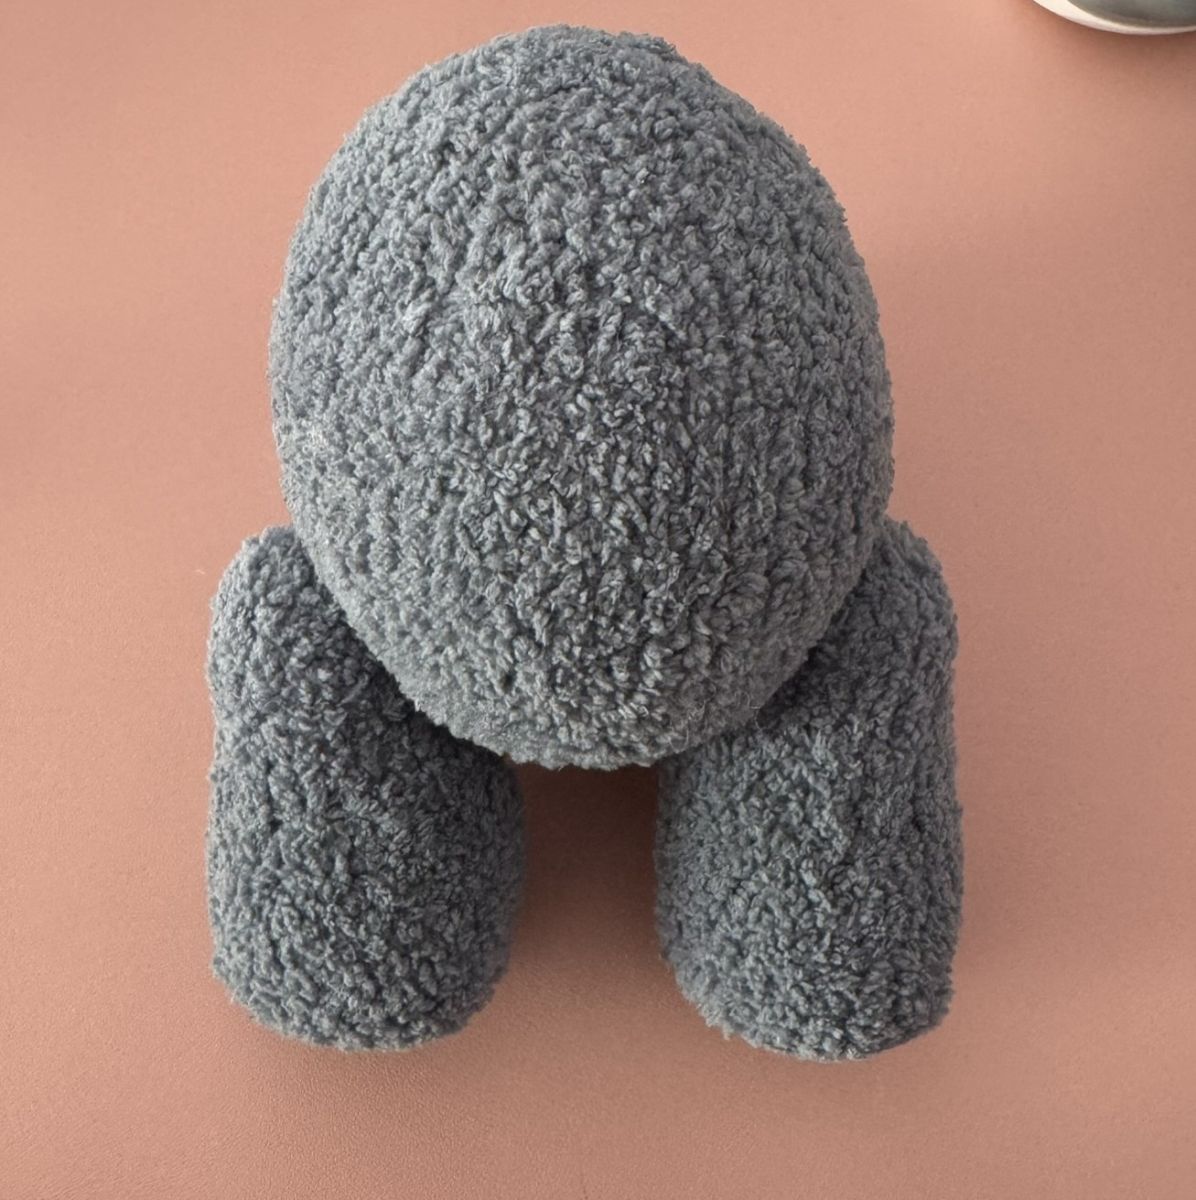
Body
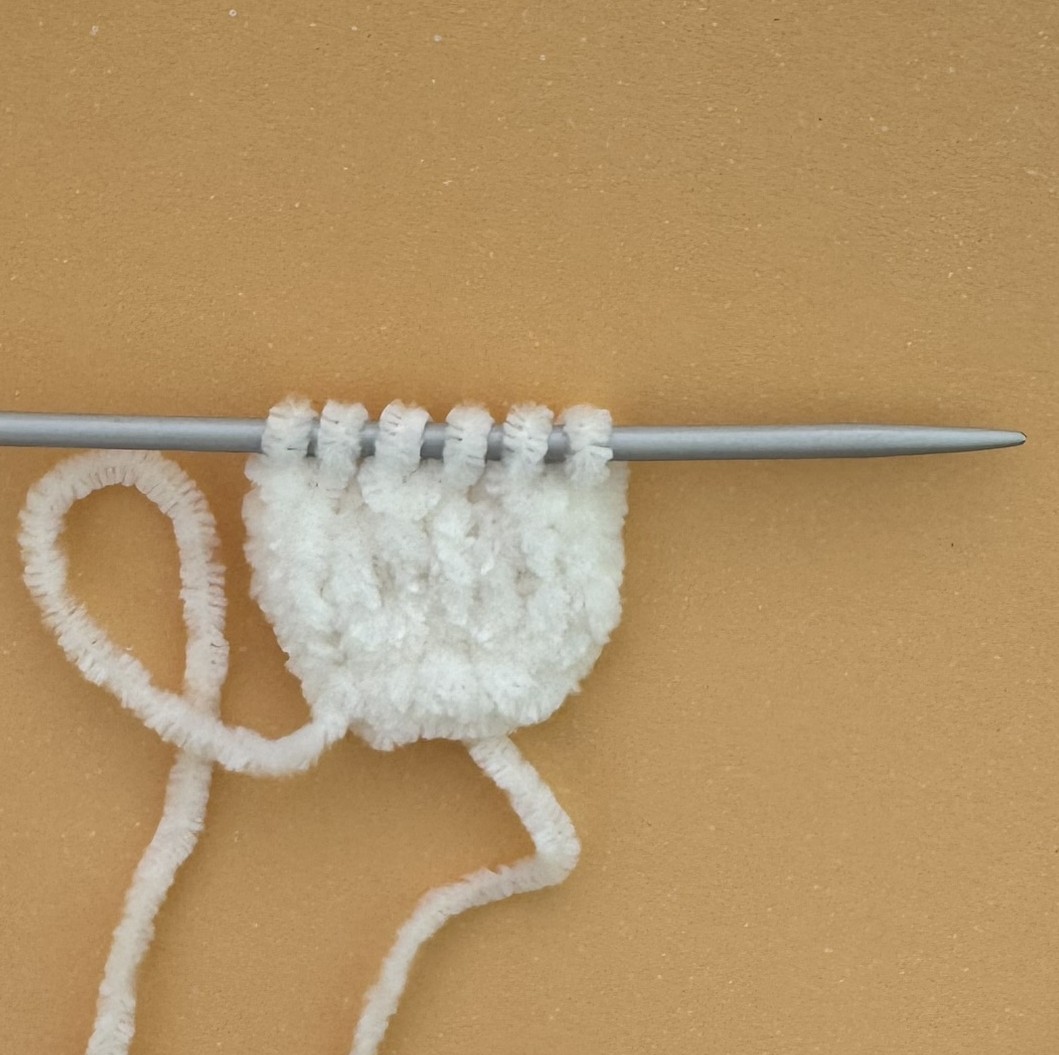
Cast-on: Cast on 6 stitches (ch) onto the knitting needle. Make sure the stitches are evenly stretched while knitting to ensure your knitted piece is nice and even.
1. 6 P (6)
2. 6 K inc. (12)
3. 12 P (12)
4. (1 K, 1 K inc)x 6 (18)
5. 18 P (18)
6. (2 K, 1 K inc)x 6 (24)
7. 24 P (24)
8. (3 K, 1 K inc)x 6 (30)
9. 30 P (30)
10. (4 K, 1 K inc)x 6 (36)
11. 36 P (36)
12. 12 K, (1 K, 1 K inc)x6, 12 K (42)
13. 42 P
14. 42 K
15. 42 P
16. 42 K
17. 42 P
18. 42 K
19. 42 P
20. 42 K
21. 42 P
22. 42 K
23. 42 P
24. 42 K
25. 42 P
26. 12 K, (1 K, 1 dec)x6, 12 K (36)
27. 36 P
28. 36 K
29. 10 K, 16 K, 10 K (36)
30. (7 K, 1 dec)x4 (32)
31. 32 P
32. 1 K, 1 dec, 26 K, 1 dec, 1 K (30)
33. 30 P
34. (3 K, 1 dec)x6 (24)
35. 24 P
36. 24 K
37. 24 P
38. (2 K, 1 dec)x6 (18)
39. 18 P
40. (1 K, 1 dec)x6 (12)
41. 12 P
42. 6 dec
Cast off the remaining stitches to finish the body.
Using a needle and matching yarn, carefully sew the body together. Pay attention to keeping the stitches even for a neat and tidy seam. If you’re using fluffy yarn, like I did, the seams will blend beautifully, making them almost invisible.
As you sew the body, gradually stuff it with fiberfill to shape and give it that soft, cuddly feel.
Legs
The leg begins at the foot. Knit the sole first.
Cast on 5 stitches (ch) onto the knitting needle.
1. 5 P
2. 5 K inc (10)
3. 10 P
4. 10 K
5. 10 P
6.10 K
7. 10 P
8. 10 K
9. 10 P
10. 1 dec, 3 K, 1 l dec, 3 K
11. 8 P
12. 8 P
13. 8 P
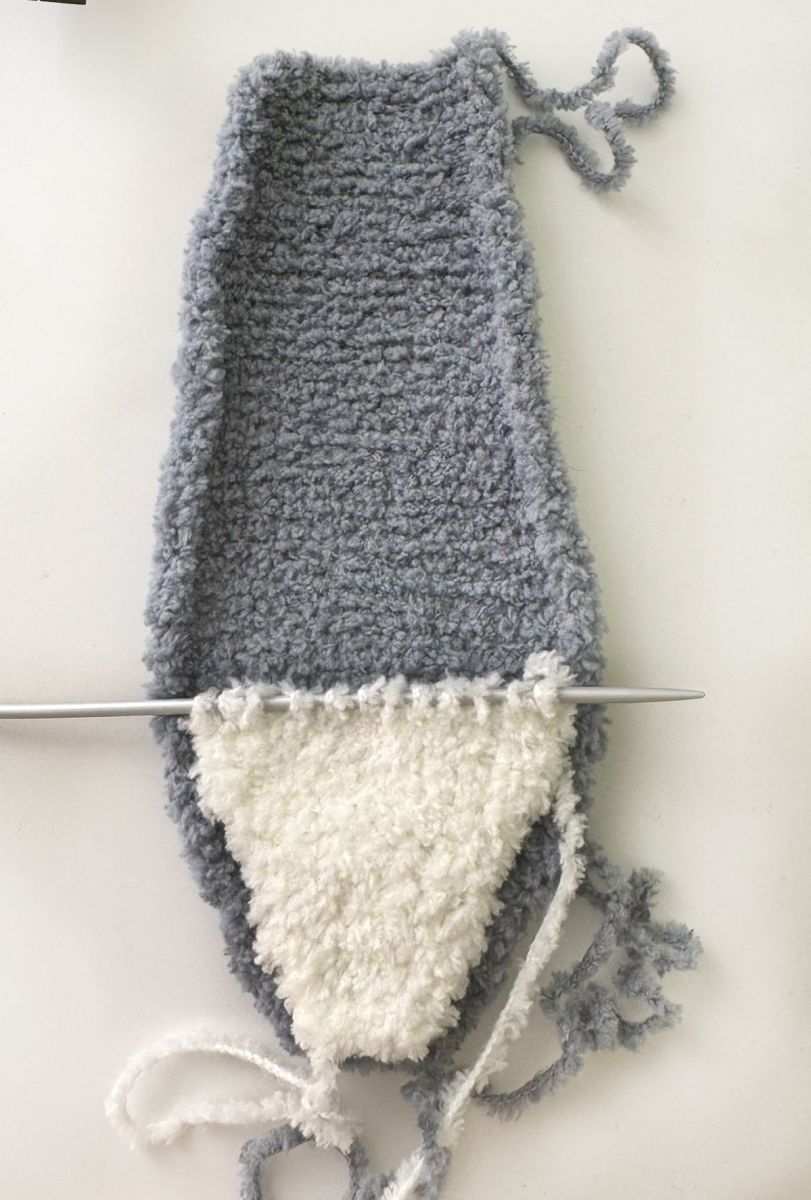
14. Cast on 10 chain stitches (ch) and add them to the 8 stitches you already have on your needle.
Knit the first 10 stitches, followed by the 8 existing stitches. Cast on an additional 10 chain stitches at the end.
This will give you a total of 28 stitches on your needle.
.jpg)
.jpg)
15. 28 P
16. 28 K
17. 28 P
18. 28 K
19. 28 P
20. 8 K, 6 dec, 8 K (22)
21. 22 P
22. 8 K, 3 dec, 8 K (19)
23. 19 P
24. 1 dec, 6 K, 1 dec, 7 K , 1 dec (16)
.jpg)
25. 16 P
26. 16 K
27. 16 P
28. 16 K
29. 16 P
30. 16 K
31. 16 P
32. 16 K
33. 16 P
34. 8 dec
Cast off the remaining stitches carefully.
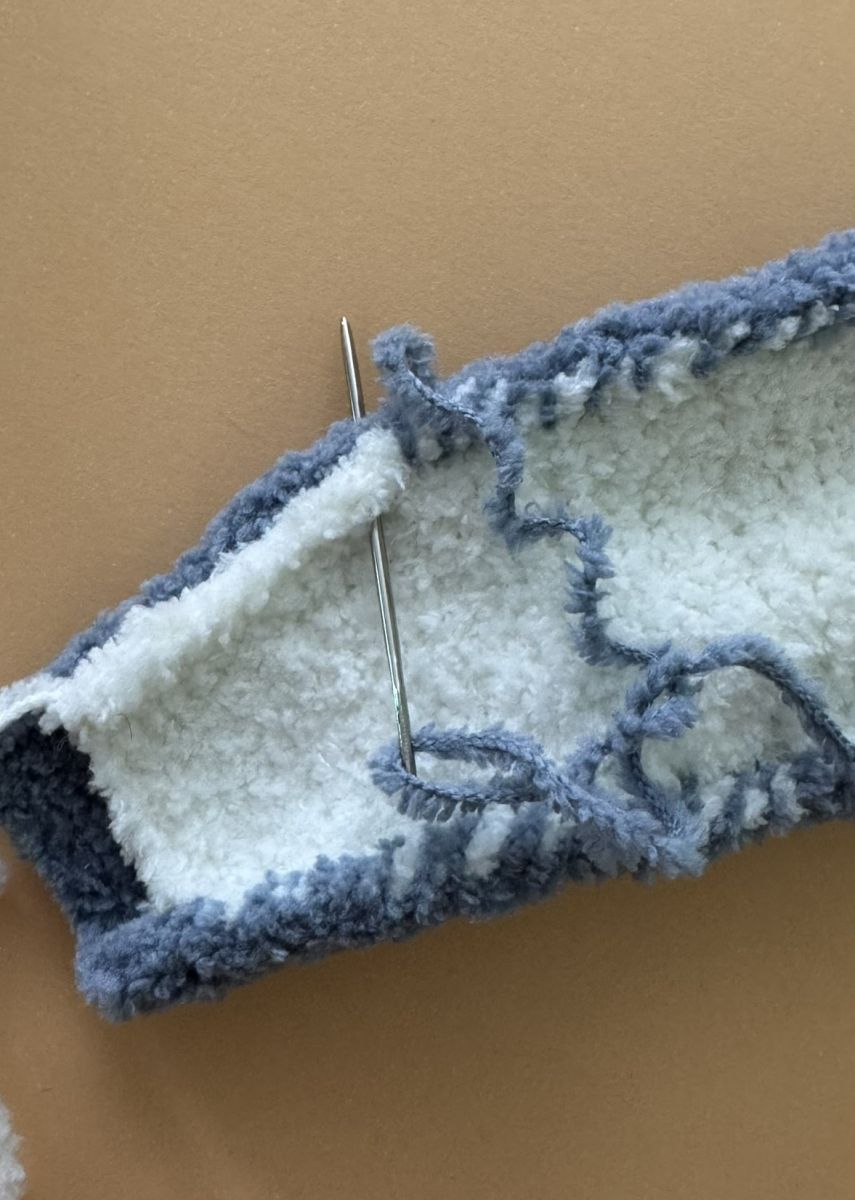
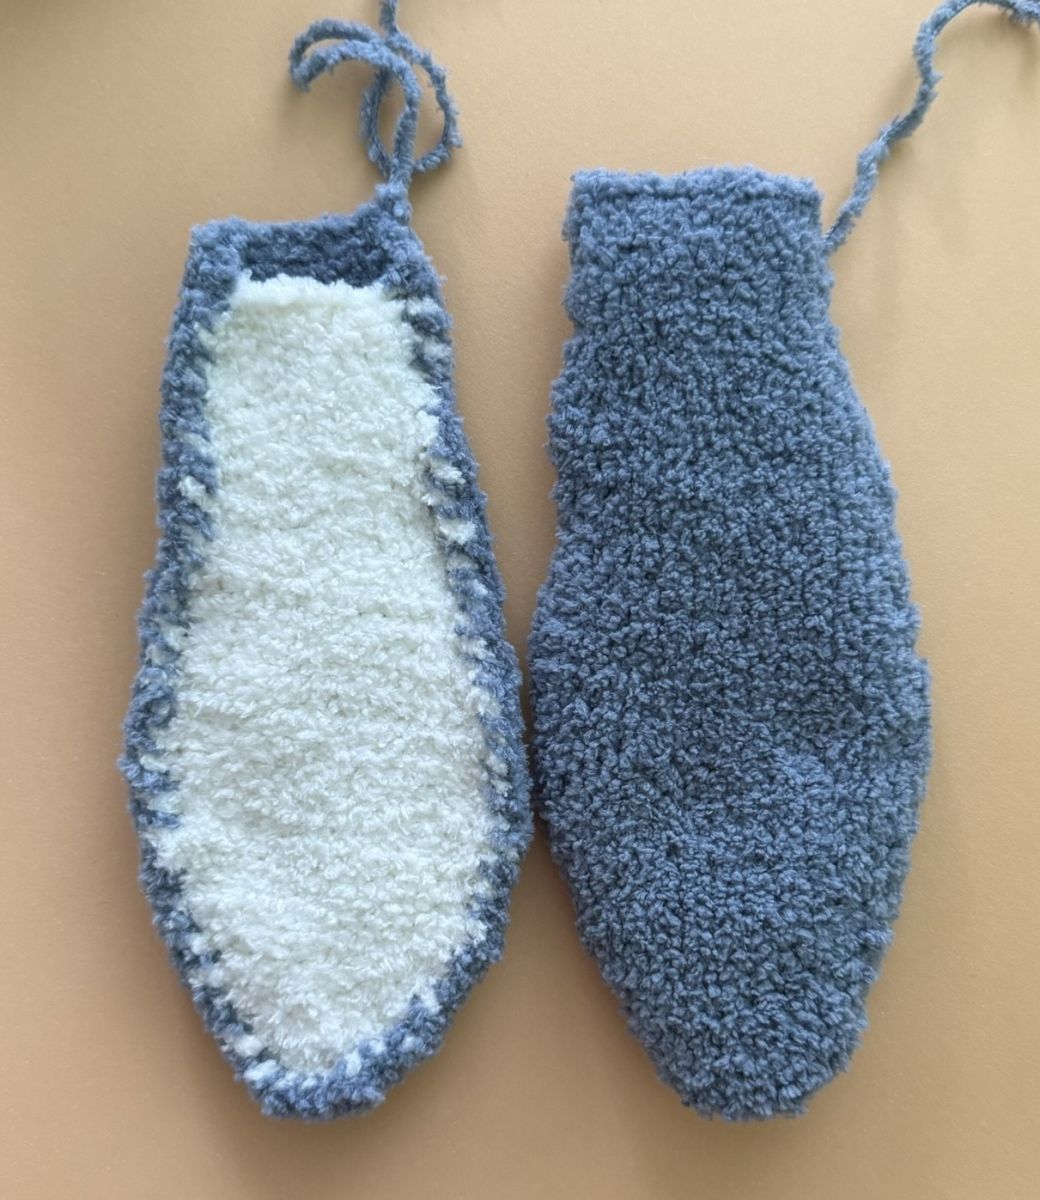
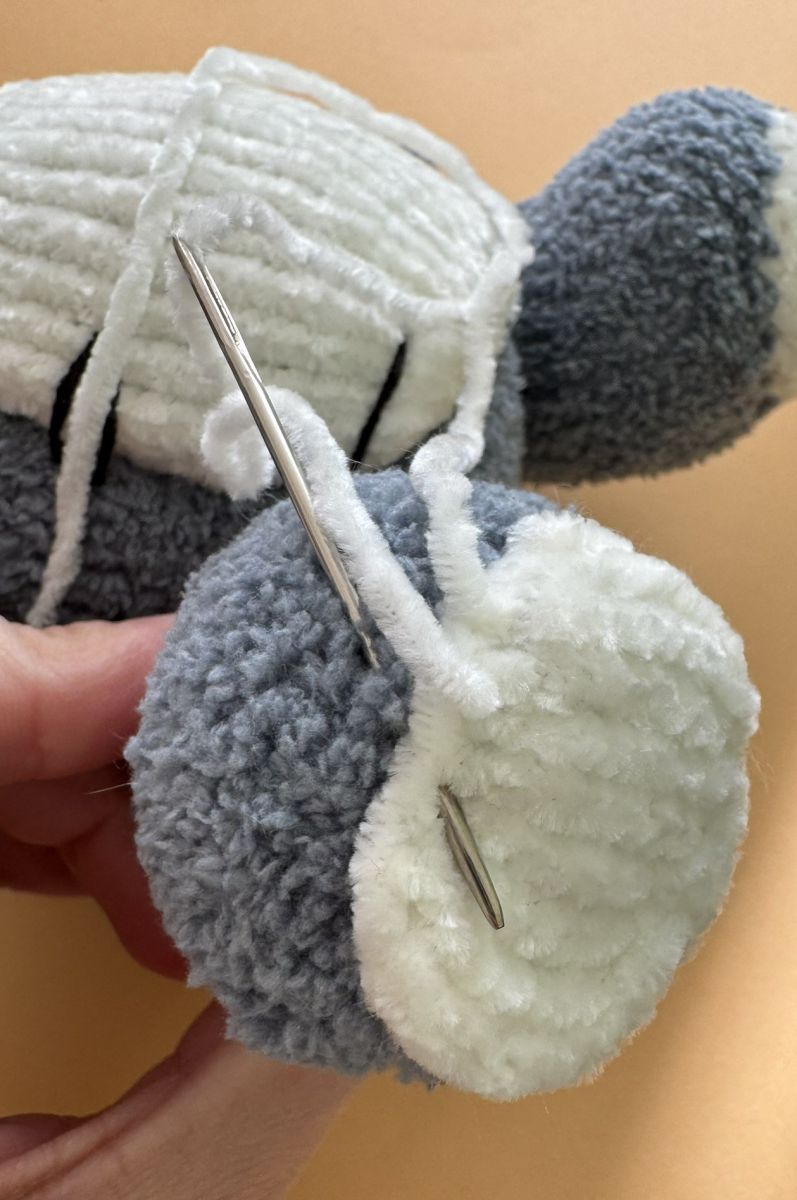
Using a wool needle and the same yarn, sew the legs together. Aim for even, consistent stitches to create a neat and polished seam.
Begin sewing at the foot, joining the right and left sides together. Gradually work your way up to the center of the leg.
Remember to stuff the knitted piece with fiberfill as you sew, shaping it to ensure a plump and even look
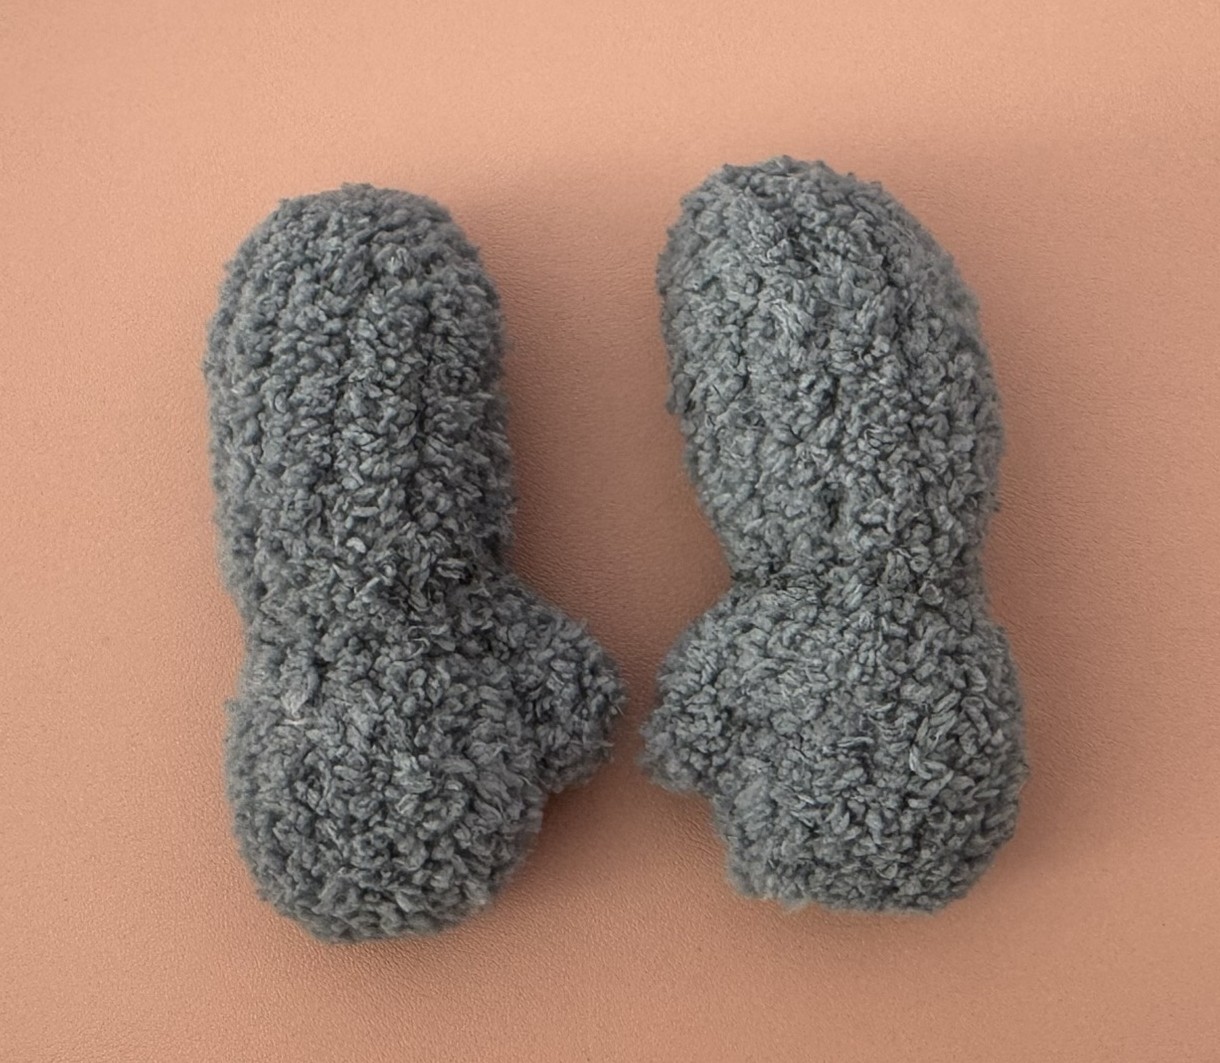
Arms
Cast on 6 stitches (ch) onto the knitting needle.
1. 6 P
2. 6 K inc (12)
3. 12 P
4. 12 K
5. 12 P
6. 12 K
7. 12 P
8. 12 K
9. 12 P
10. 12 K
11. 12 P
12. 12 K
13. 12 P
14. 12 K
15. 12 P
16. (1 dec, 1 K)x 4, (8)
17. 8 P
18. (1 inc , 1 K)x 4 (12)
19. 12 P
20. (1 inc , 2 K)x 4 (16)
21. 16 P
22. 16 K
23. 16 P
24. 16 K
25. 16 P
26. Place next 4 ST on to cable needle, 12 K (12)
27. 12 P
28. 12 K
29. 12 P
30. 12 K
31. 12 P
32 . 6 dec
Cast off the remaining stitches .
Thumb: 4 ST from cable needle + 2 ST
1. 6 K
2. 6 P
3. 6 K
Cast off the remaining stitches .
Sew the arms together using a wool needle and the same yarn. Maintain even and consistent stitches to ensure a neat and polished seam.
Start at the thumb and hand, carefully joining these sections first. Gradually sew along the length of the arm to complete the seam.
As you sew, remember to stuff the piece with fiberfill, shaping it evenly for a smooth and well-filled appearance.
Sew the legs and hands onto the body.
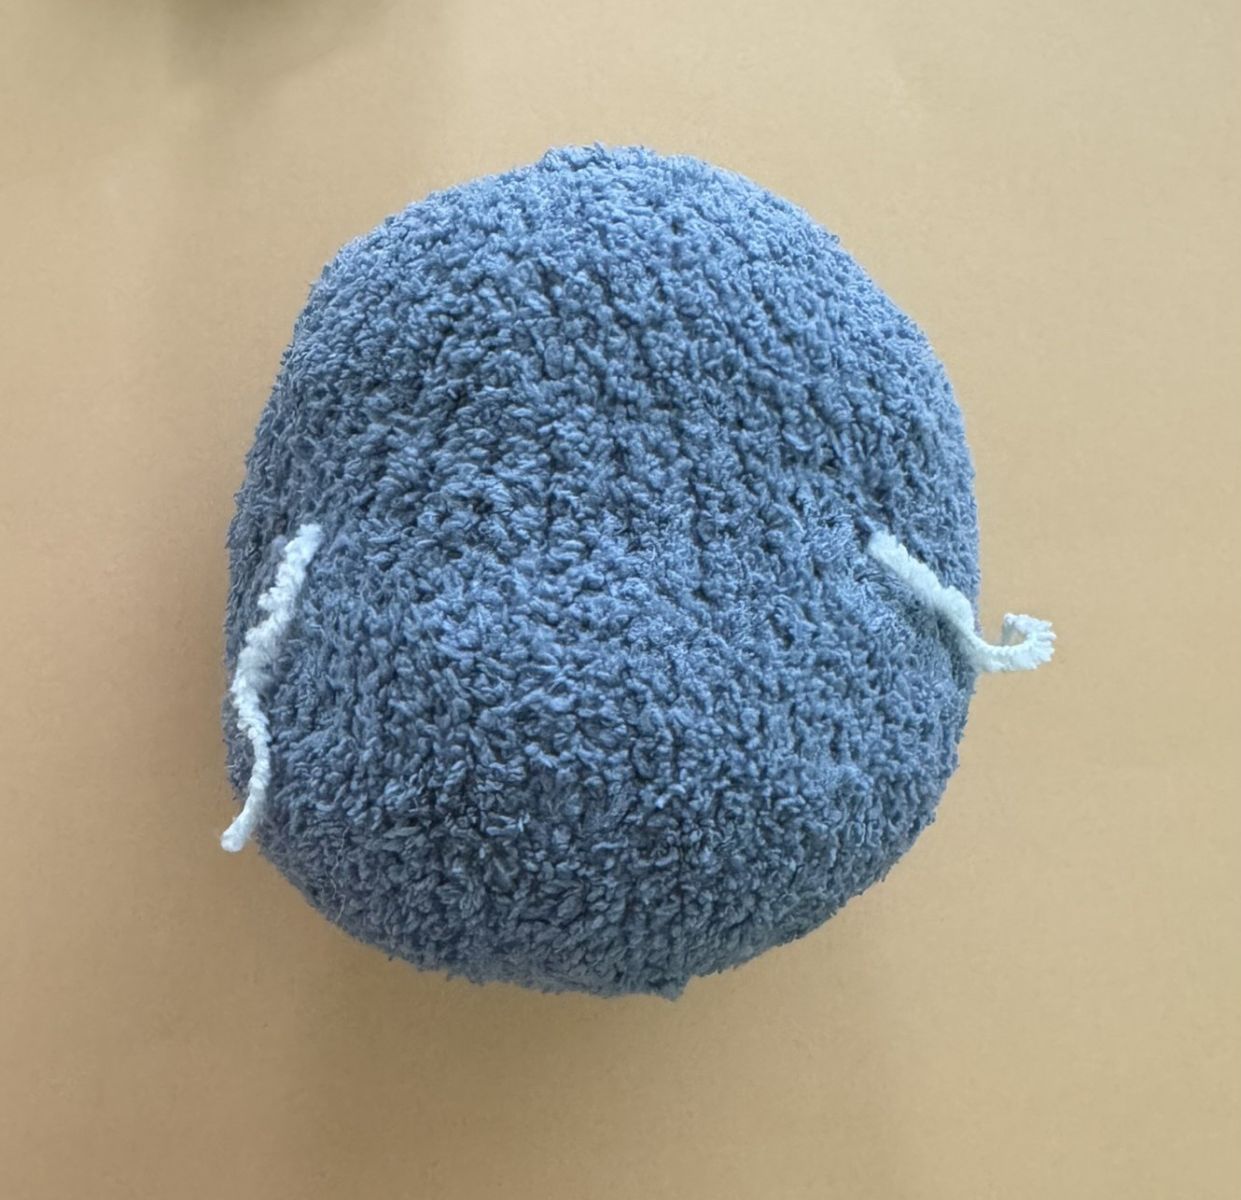
Head
Cast on 6 chain stitches (ch) onto your knitting needle.
Ensure the stitches are evenly tensioned as you knit. This helps create a smooth and symmetrical head shape.
1. 6 P (6)
2. 6 K inc. (12)
3. 12 P
4. (1 K, 1 K inc)x 6 (18)
5. 18 P
6. (2 K, 1 K inc)x 6 (24)
7. 24 P
8. (3 K, 1 K inc)x 6 (30)
9. 30 P
10. (4 K, 1 K inc)x 6 (36)
11. 36 P
12. (5 K, 1 K inc)x 6 (42)
13. 42 P
14. (6 K, 1 K inc)x 6 (48)
15. 48 P
16. 48 K
17. 48 P
18. 48 K
19. 48 P
20. 48 K
21. 48 P
22. 18 K, (1 K, 1 K inc) × 1, insert 1st marker, (1 K, 1 K inc) × 4, insert 2nd marker, (1 K, 1 K inc) × 1, 18 K (54).
In this case, the thread marker serves as a guide for positioning the eyes.
23. 54 P
24. 18 K, (2 K, 1 K inc)x 6, 18 K (60)
25. 60 P
26. 60 K
27. 60 P
28. 60 K
29. 60 P
30. 60 K
31. 60 P
32. 60 K
33. 60 P
34. 18 K, (2 K, 1 dec)x 6, 18 K (54)
35. 54 P
36. 18 K, (1 K, 1 dec)x 6, 18 K (48)
37. 48 P
38. 48 K
39. 48 P
40. (6 K, 1 dec)x 6 (42)
41. 42 P
42. (5 K, 1 dec)x 6 (36)
43. 36 P
44. (4 K, 1 dec)x 6 (30)
45. (3 K, 1 dec)x 6 (24)
46. (2 K, 1 dec)x 6 (18)
47. (1 K, 1 dec)x 6 (12)
48. 12 P
49. 6 dec
Cast off the remaining stitches with care.
Sew the head together neatly using a wool needle and the same yarn. Focus on creating even, consistent stitches to achieve a clean and professional seam.
Stuff the head with fiberfill as you sew, ensuring the stuffing is evenly distributed for a well-shaped appearance.
If you're using safety eyes, leave an opening in the center of the head to attach them securely. Safety eyes are a great choice, especially for toys intended for young children.
Alternatively, if you prefer sewing or crocheted eyes, you can sew the head entirely closed without leaving an opening.
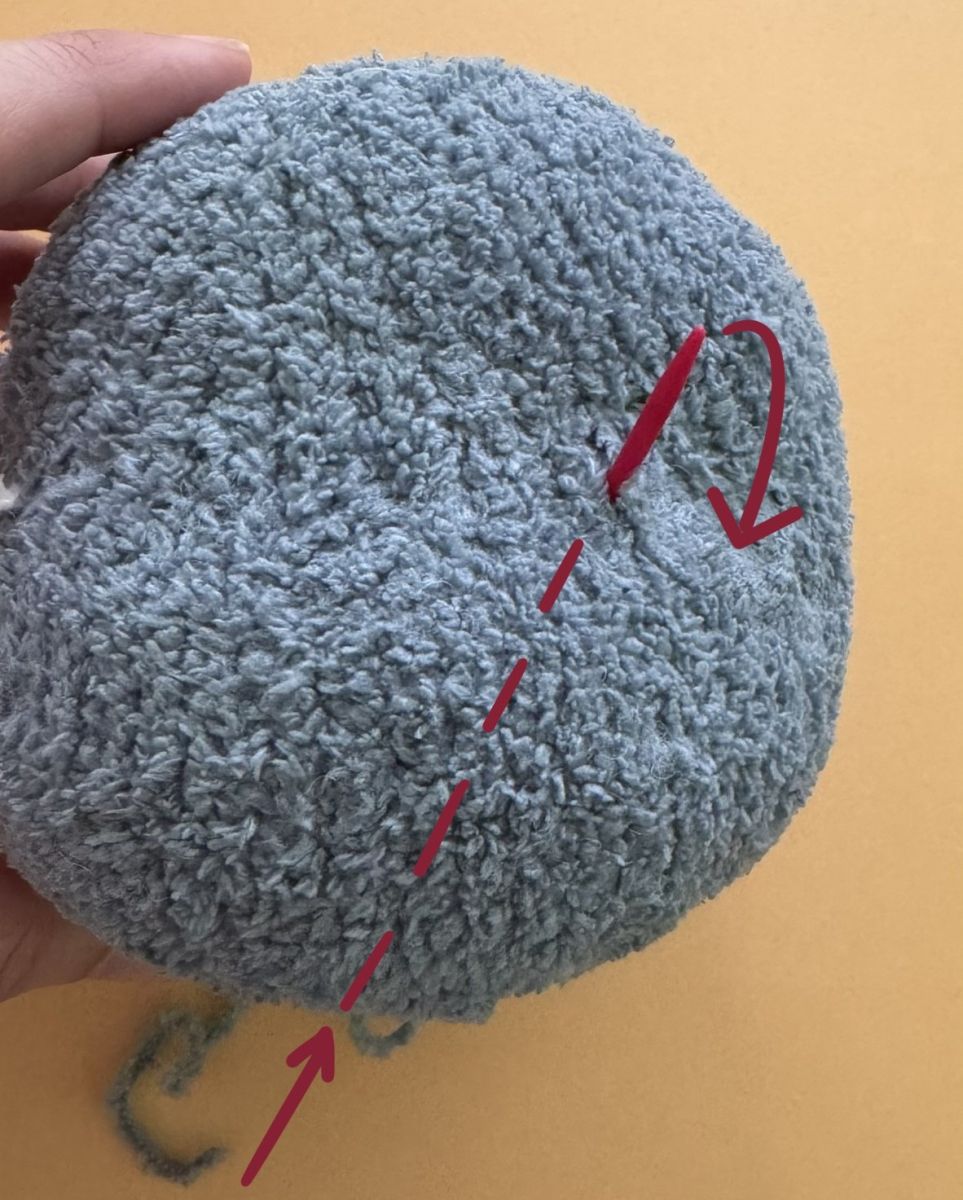
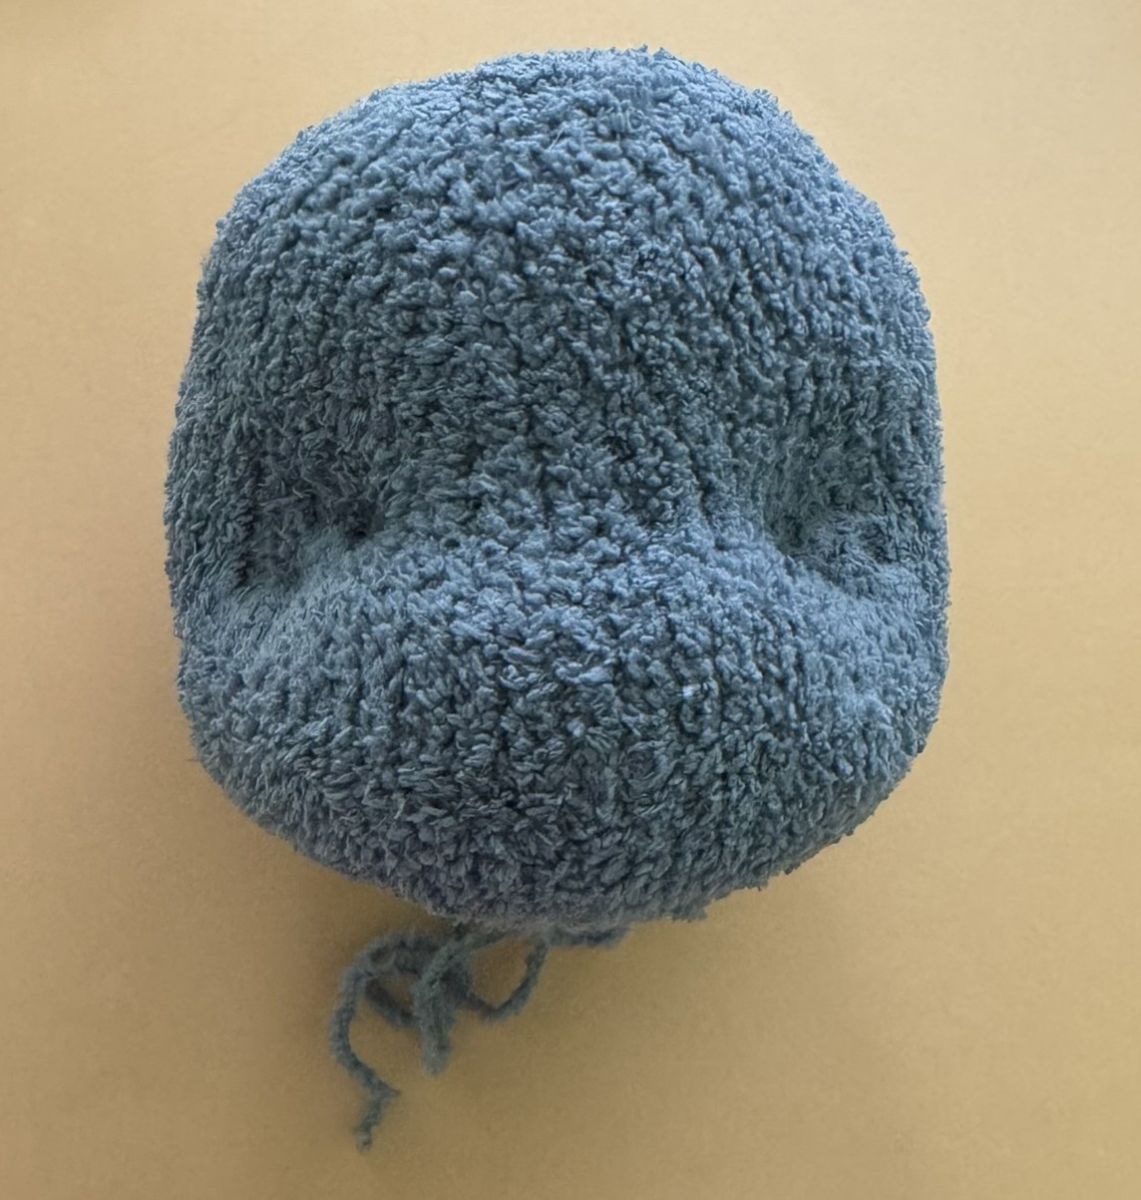
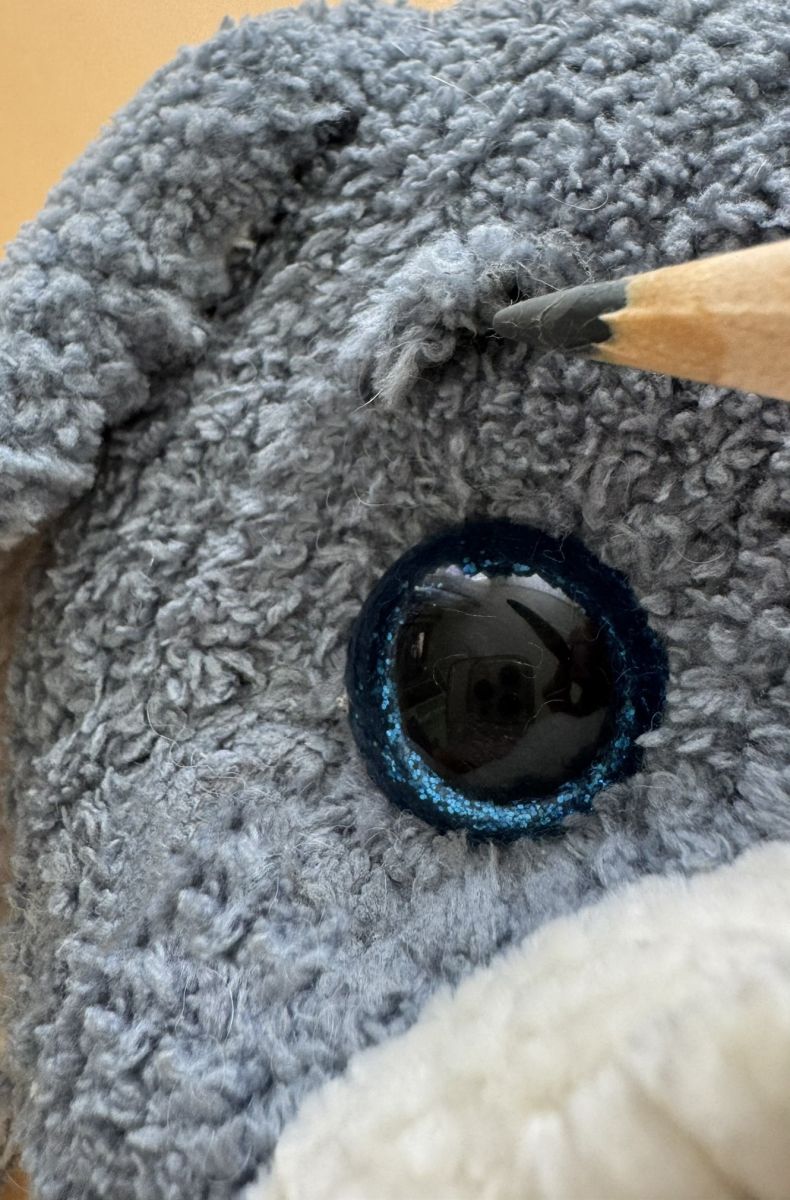
Deepening the eyelets:
In row 22, two yarn markers were placed—locate both. Insert the needle from below into marker 1 and knit three stitches to the right from the first marker. Then, insert the needle again and return to the bottom.
For better clarity, refer to the accompanying pictures.
Repeat the same process for the second eye: Insert the needle from below into marker 2 and knit three stitches to the left from the second marker. Insert the needle again and return to the bottom.
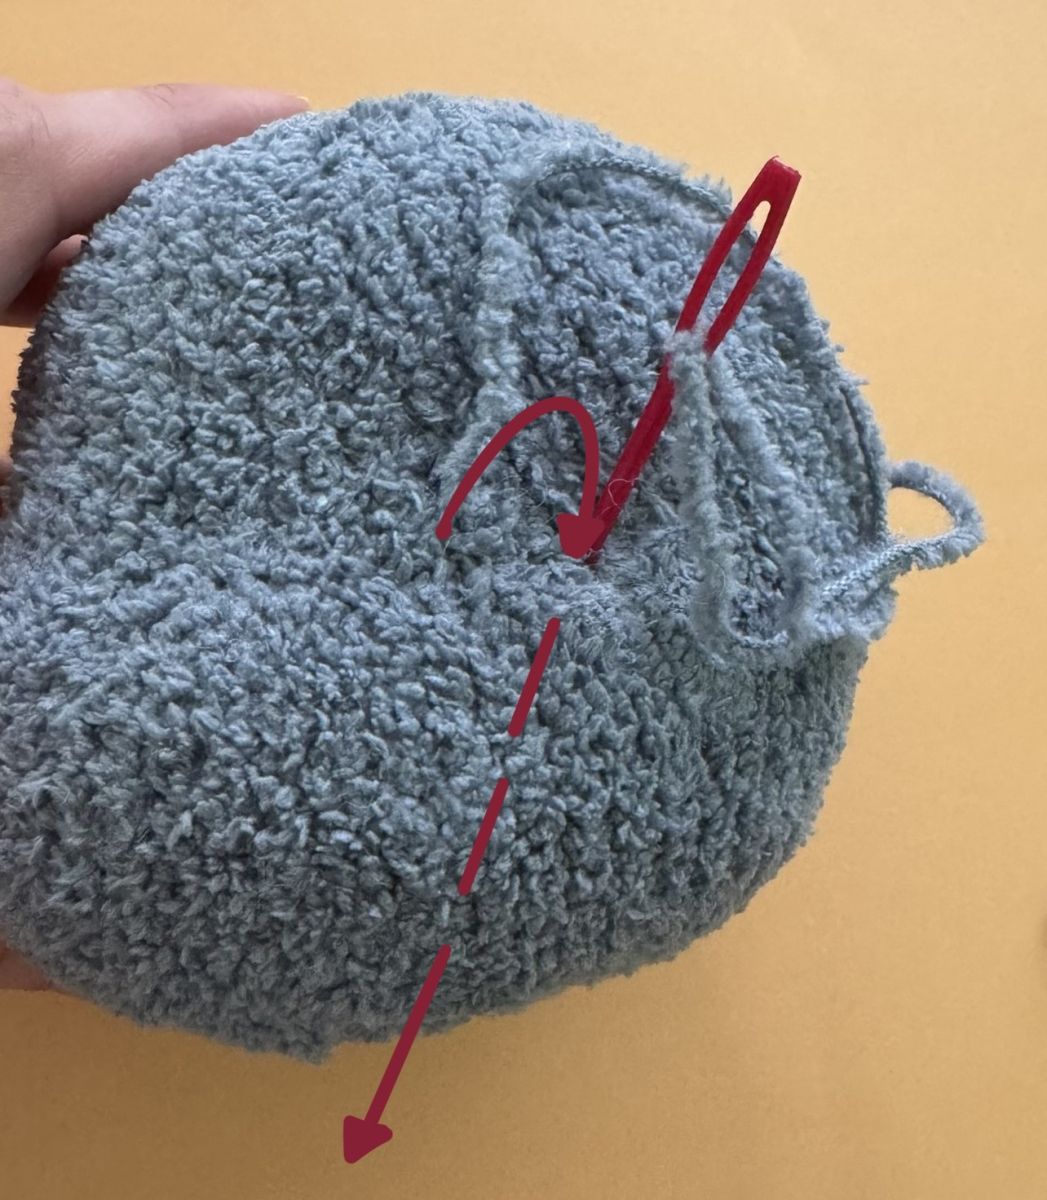
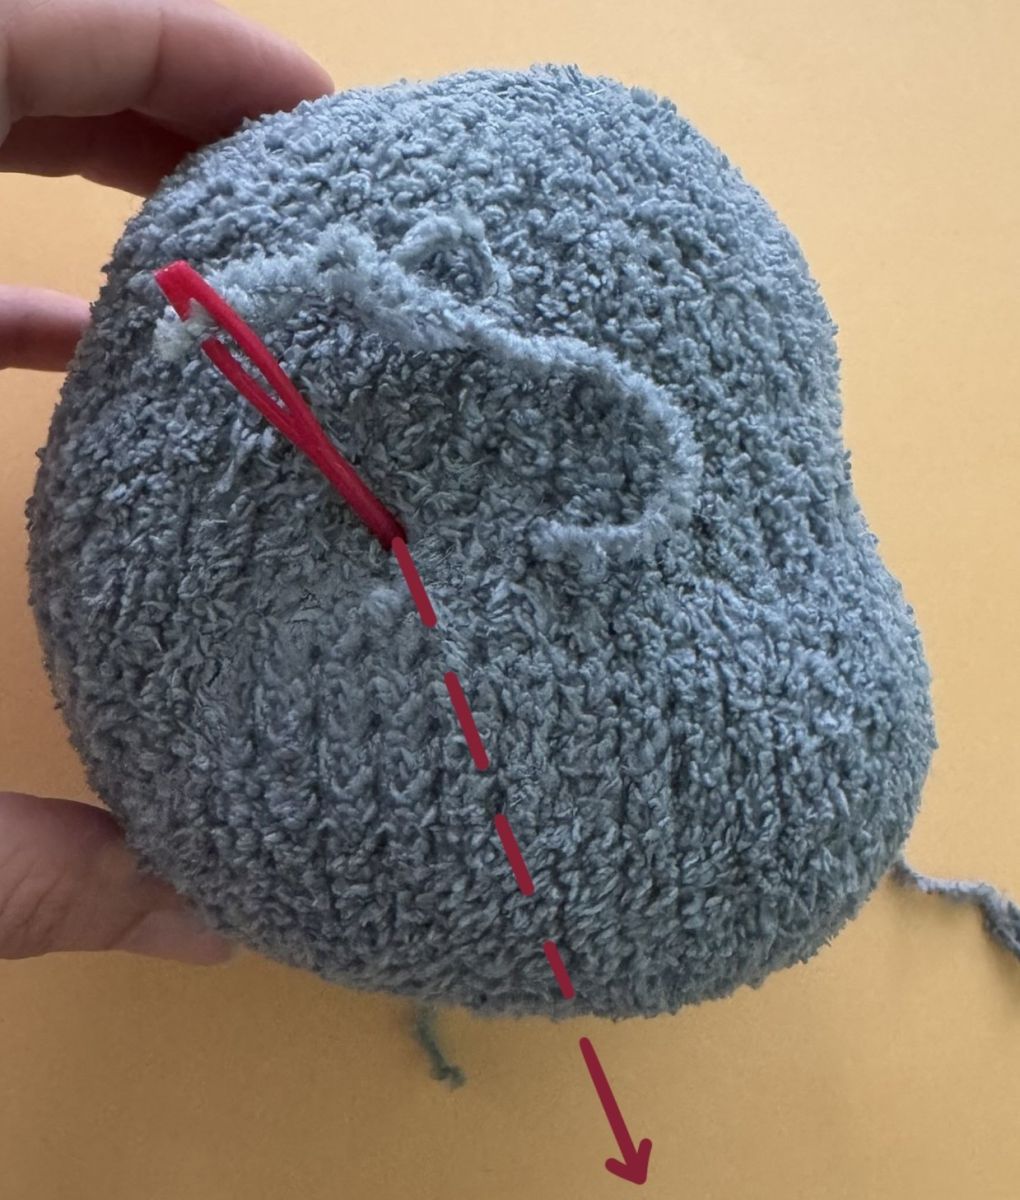
Finally, pull the threads together and tie a knot to secure them.
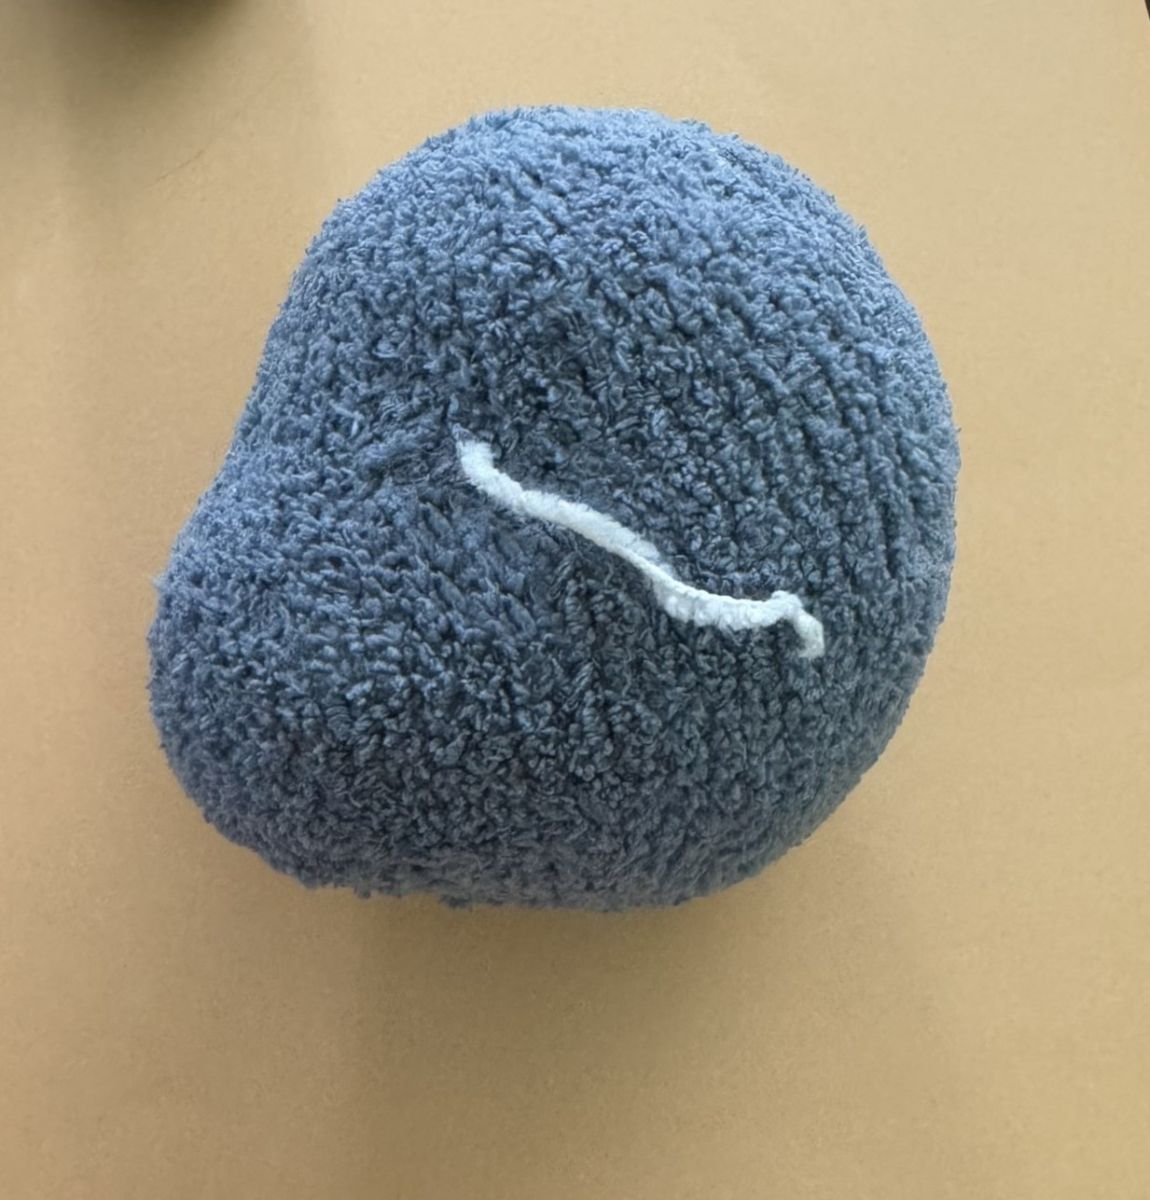
Mouth
Use white Katia Velvet fine wool to knit the mouth.
Cast on 12 chain stitches (ch) onto your knitting needle, ensuring that the tension remains even throughout for a smooth and uniform shape.
1. 12 P (12)
2. 12 K inc. (24)
3. 24 P
4. 24 K
5. 24 P
6. (1 K, 1 K inc)x 12 (36)
7. 36 P
8. 36 K
9. 36 P
10. 36 K
11. 36 P
12. 36 K
13. 36 P
14. 36 K
15. 36 P
16. 36 K
17. 36 P
18. 36 K
19. 36 P
20. 36 K
21. 36 P
22. 36 K
23. 36 P
24. 36 K
25. 36 P
26. (1 K, 1 dec)x 12 (24)
27. 24 P
28. 12 dec
29. 12 P
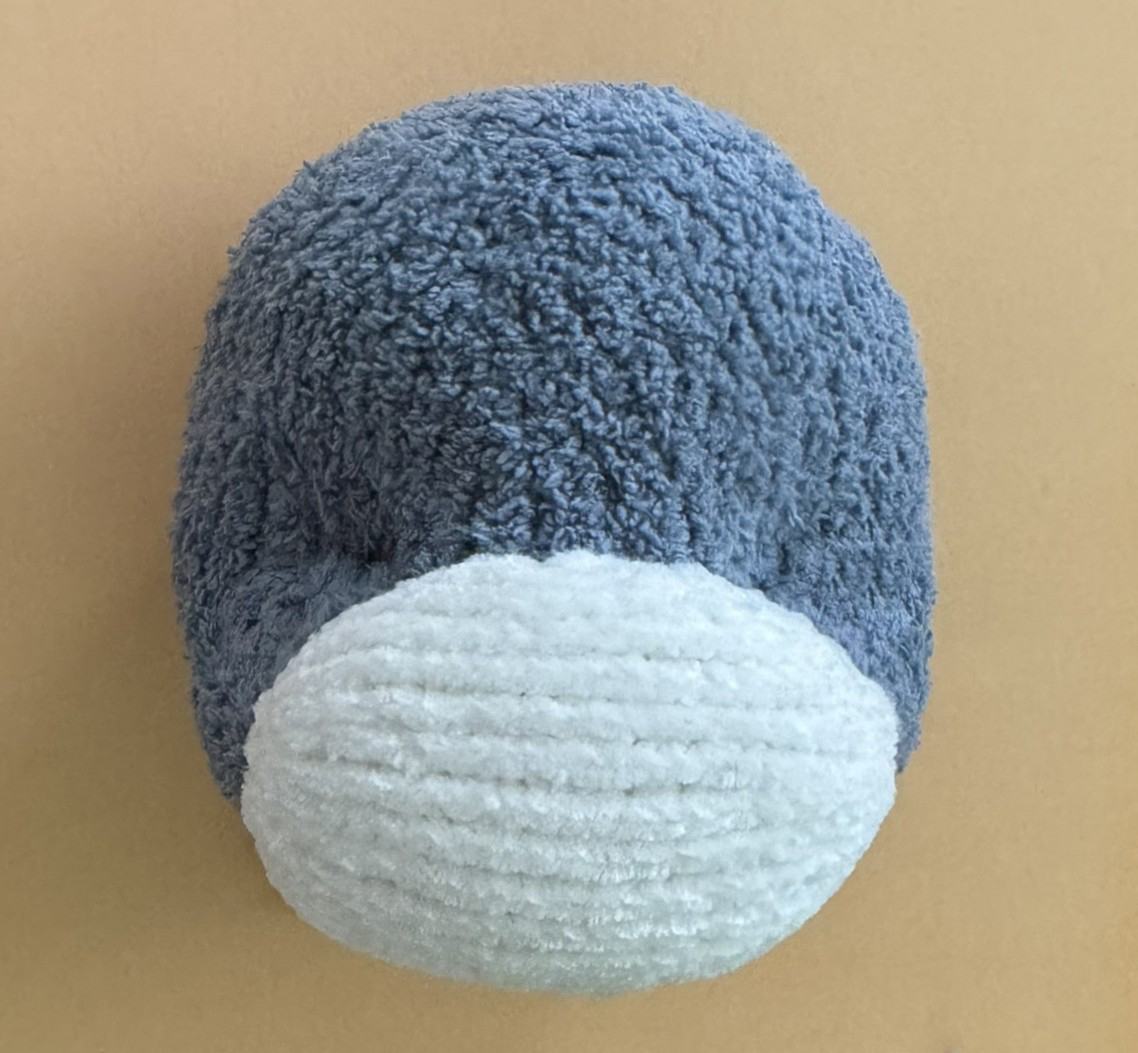
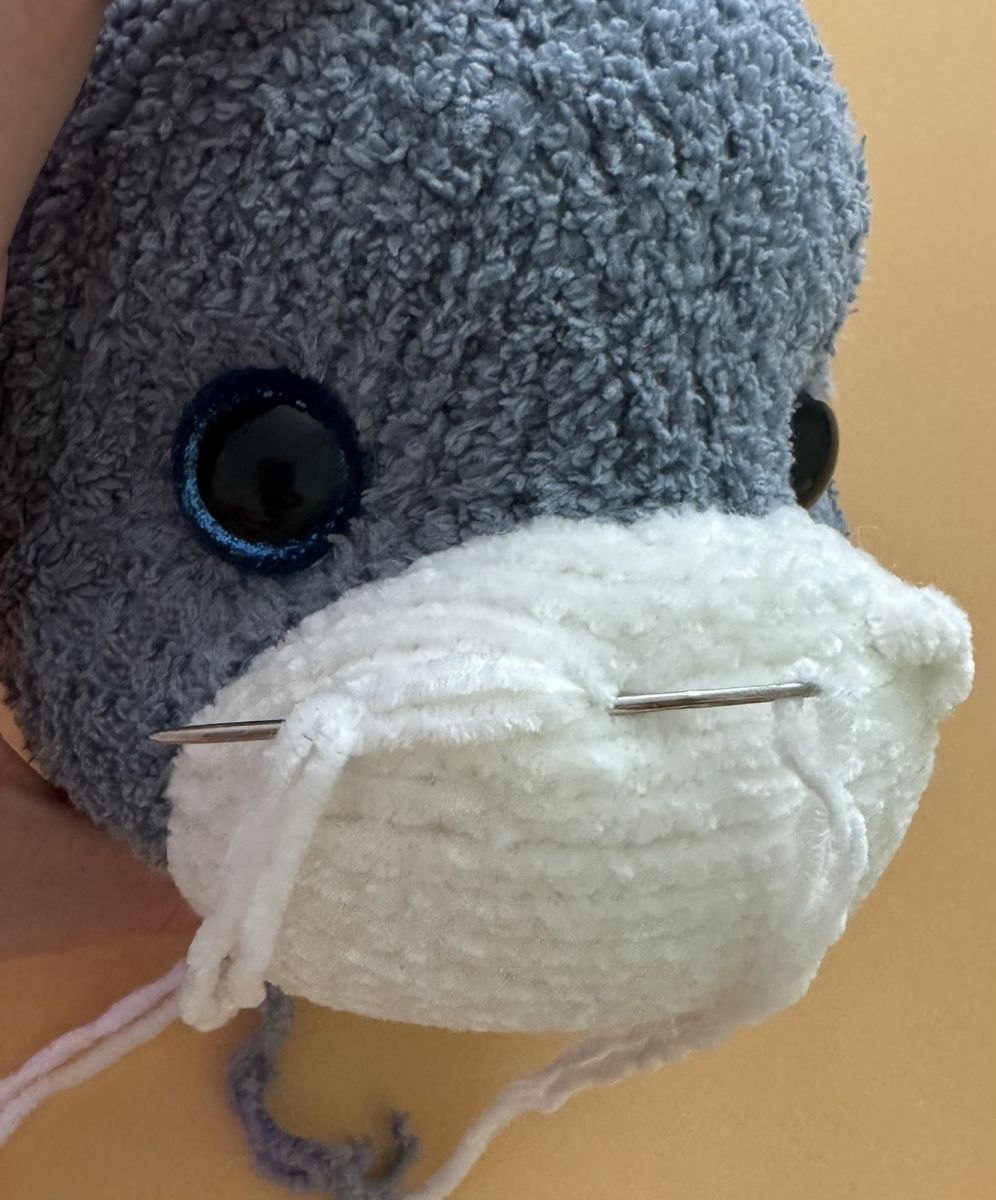
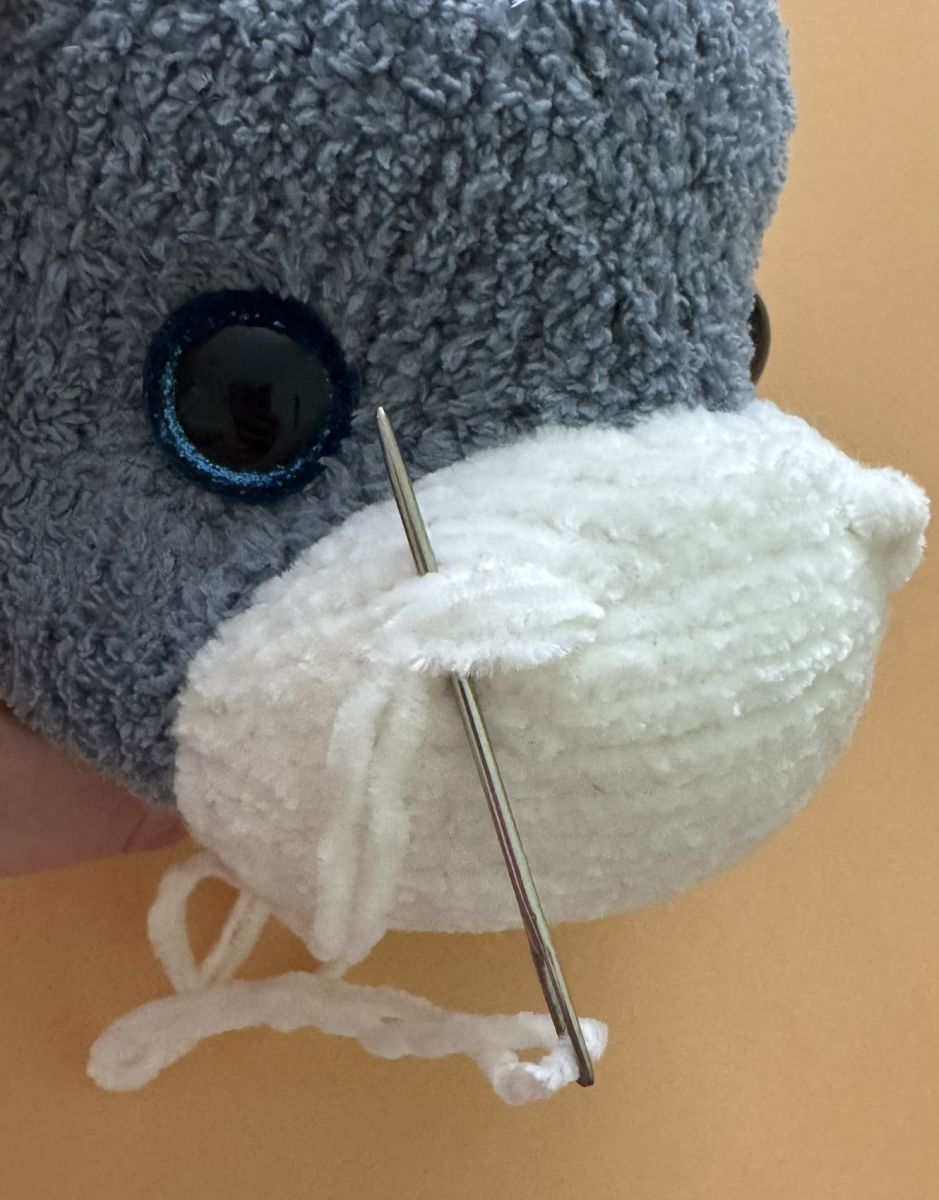
Bind off the remaining stitches, fold the mouth in half, and sew the edges together. Then, securely attach the mouth to the underside of the head. Take care not to add fiberfill while sewing to maintain the intended shape.

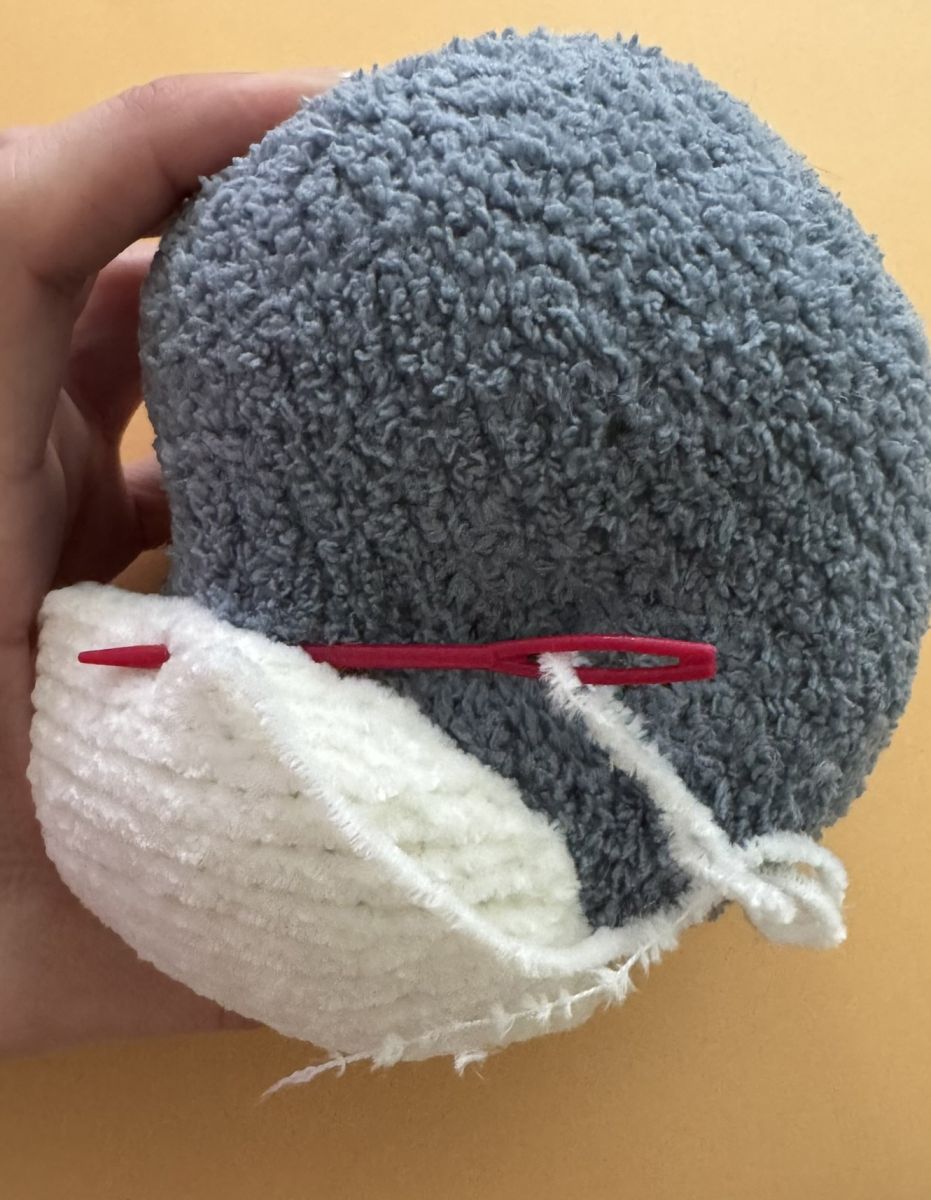
Adding the Safety Eyes. Thread the safety eyes carefully through the stitches and attach them securely inside the head. Sew the opening in the head shut for a clean finish.
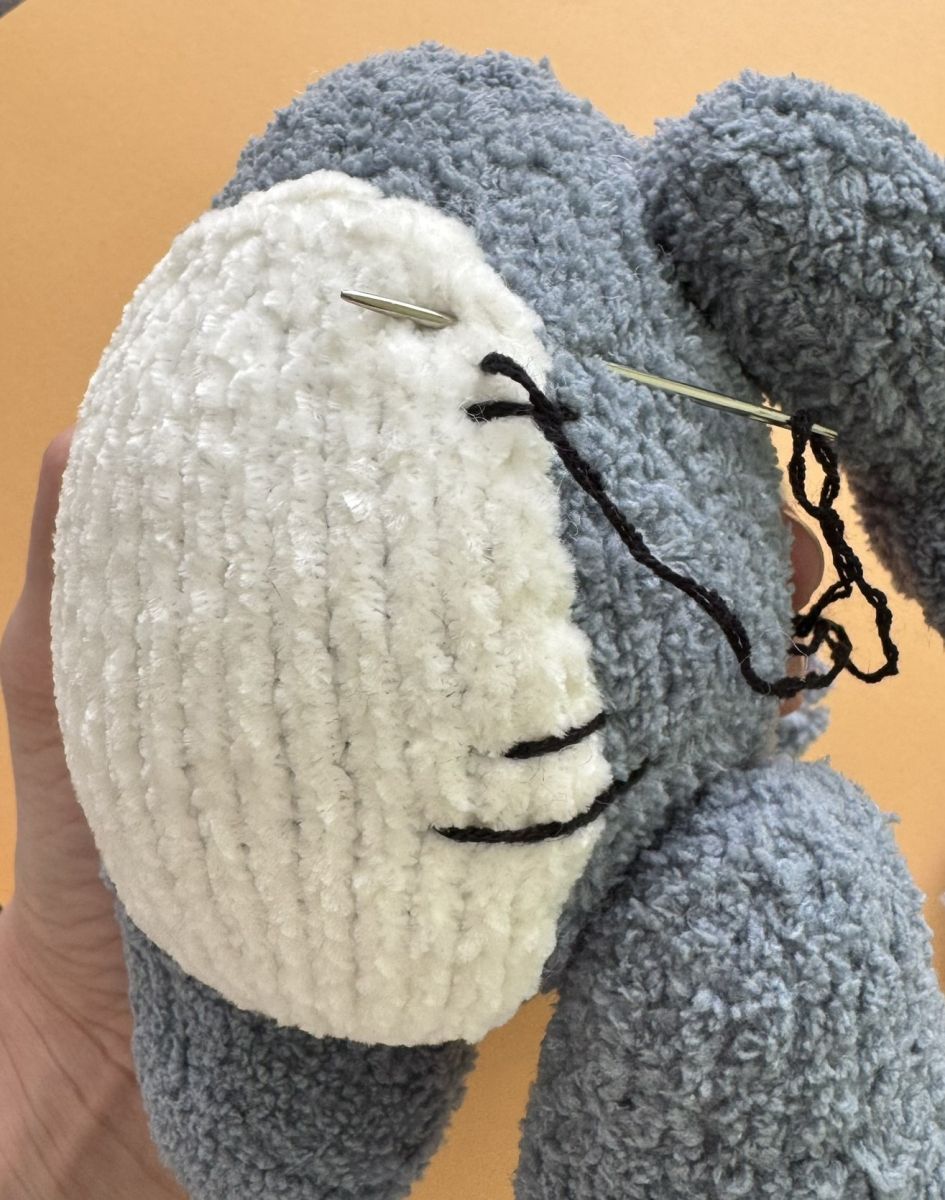
Next, sew on the nostrils by inserting the needle multiple times and stitching over the area (refer to the images below for guidance).

Ears
The ears are made using two different colors. Begin with Part 1 in gray, using a crochet technique to create two stitches.
Cast on 6 stitches (ch) onto the knitting needle. As you knit, ensure that the stitches are evenly stretched to maintain a consistent tension and shape.
1. 6 P (6)
2. 1 K, 1 K inc, 2 K, 1 K inc, 1 K (8)
3. 8 P
4. 1 K, 1 K inc, 4 K, 1 K inc, 1 K (10)
5. 10 P
6. 10 K
7. 10 P
8. 1 K, 1 K inc, 6 K, 1 K inc, 1 K (12)
9. 12 P
10. 1 K, 1 K inc, 8 K, 1 K inc, 1 K (14)
11. 14 P
12. 14 K
13. 14 P
14. 14 K
15. 14 P
16. 1 K, 1 K inc, 10 K, 1 K inc, 1 K (16)
Knit a total of 11 rows in stockinette stitch:
On the front side of the work, knit all stitches across the row.
On the back side of the work, purl all stitches across the row.
17. 19. 21. 23. 25. 27. 16 P
18. 20. 22. 24. 26. 16 K
28. 1 K, 1 dec, 10 K, 1 dec, 1 K (14)
Knit a total of 11 rows in stockinette stitch:
On the front side of the work, knit all stitches across the row.
On the back side of the work, purl all stitches across the row.
29. 31. 33. 35. 37. 39. 14 P
30. 32. 34. 36. 38. 14 K
40. 1 K, 1 dec, 8 K, 1 dec, 1 K (12)
Knit a total of 9 rows in stockinette stitch:
On the front side of the work, knit all stitches across the row.
On the back side of the work, purl all stitches across the row.
41. 43. 45. 47. 49. 12 P
42. 44. 46. 48. 12 K
Cast off the remaining stitches carefully.
Part 2 in white (crochet 2 stitches) This section is knitted using Alize Softy yarn—distinct from Katia Velvet Fine. Part 2 is slightly smaller than Part 1.
Cast on six stitches (ch) onto the knitting needle, ensuring an even tension while knitting for a smooth and consistent result.
1. 6 P
2. 6 K
3. 6 P
4. 1 K, 1 K inc, 2 K, 1 K inc, 1 K (8)
5. 8 P
6. 8 K
7. 8 P
8. 1 K, 1 K inc, 4 K, 1 K inc, 1 K (10)
9. 10 P
10. 1 K, 1 K inc, 6 K, 1 K inc, 1 K (12)
11. 12 P
12. 12 K
13. 12 P
14. 12 K
15. 12 P
16. 1 K, 1 K inc, 8 K, 1 K inc, 1 K (14)
Knit a total of 11 rows in stockinette stitch:
On the front side of the work, knit all stitches across the row.
On the back side of the work, purl all stitches across the row.
17. 19. 21. 23. 25. 27. 14 P
18. 20. 22. 24. 26. 14 K
28. 1 K, 1 dec, 8 K, 1 dec, 1 K (12)
Knit a total of 11 rows in stockinette stitch:
On the front side of the work, knit all stitches across the row.
On the back side of the work, purl all stitches across the row.
29. 31. 33. 35. 37. 39. 12 P
30. 32. 34. 36. 38. 12 K
40. 1 K, 1 dec, 6 K, 1 dec, 1 K (10)
Knit a total of 7 rows in stockinette stitch:
On the front side of the work, knit all stitches across the row.
On the back side of the work, purl all stitches across the row.
41. 43. 45. 47. 10 P
42. 44. 46. 10 K
Cast off the remaining stitches carefully.

Sew the ears together using a wool needle and gray yarn, ensuring even stitches for a clean and polished seam. Do not stuff the ears.
Once completed, securely attach them to the head.
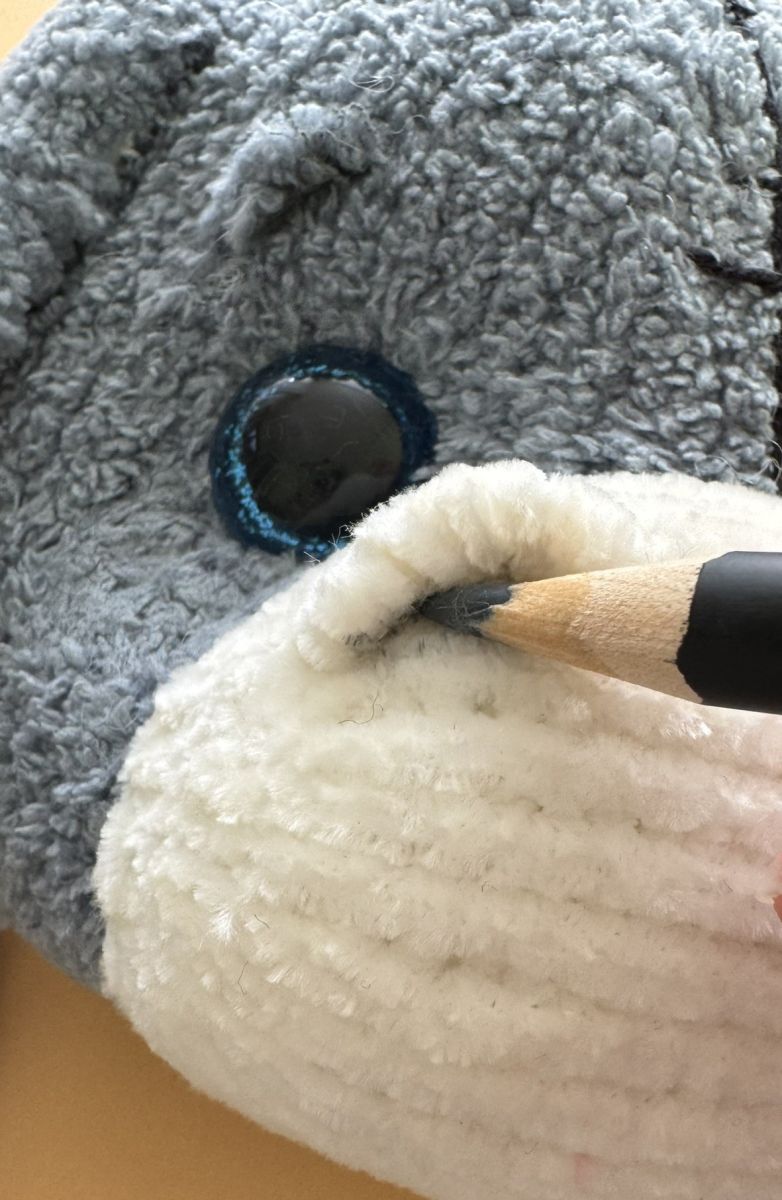
Embroider the eyebrows with thread.
Highlight the cheeks with pastel chalk.
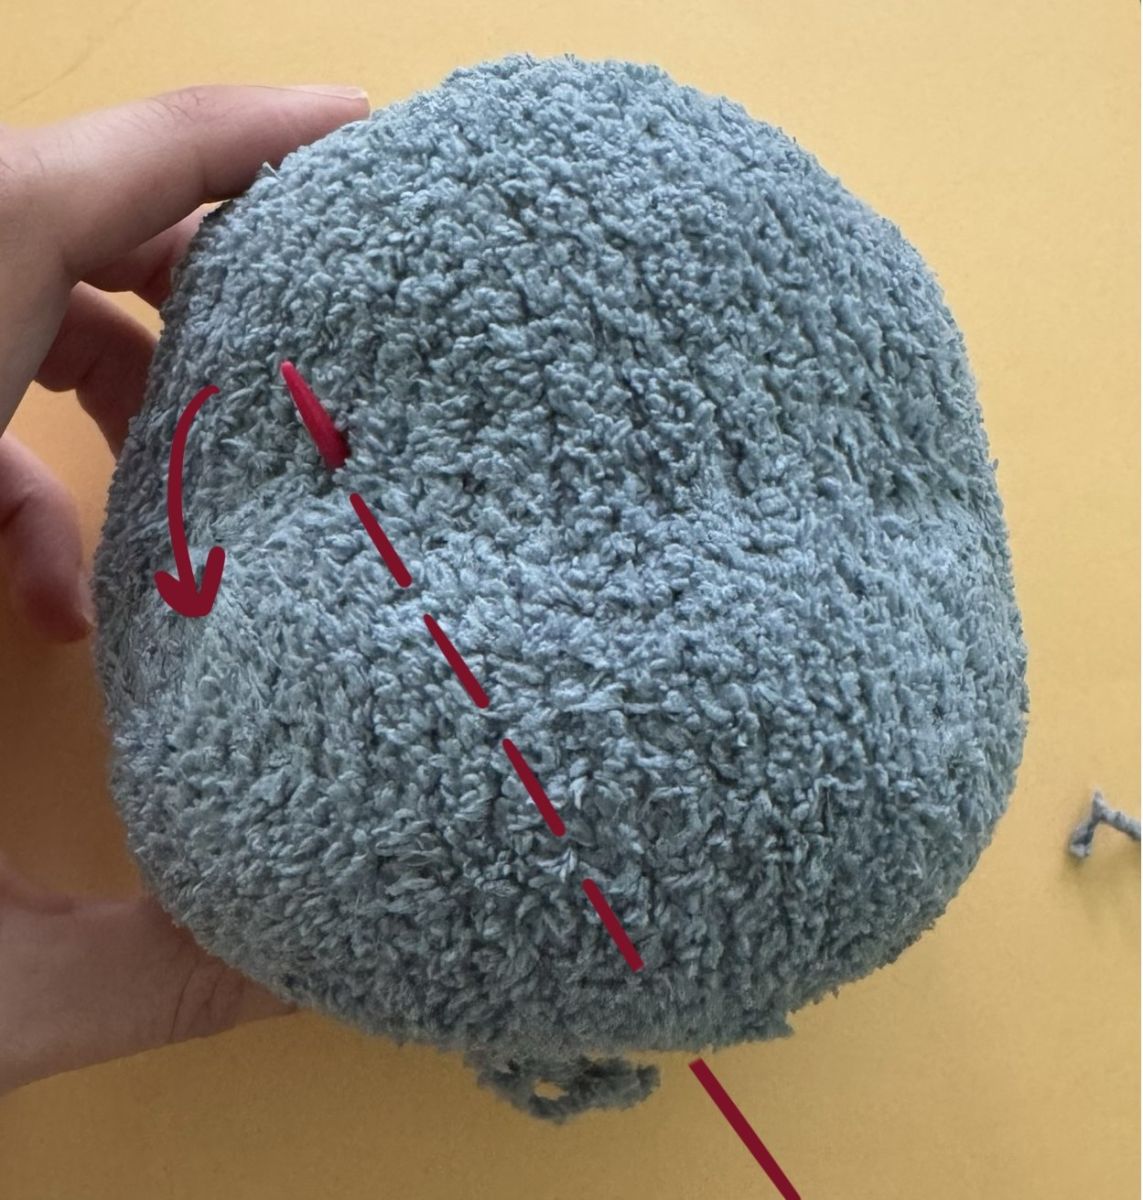
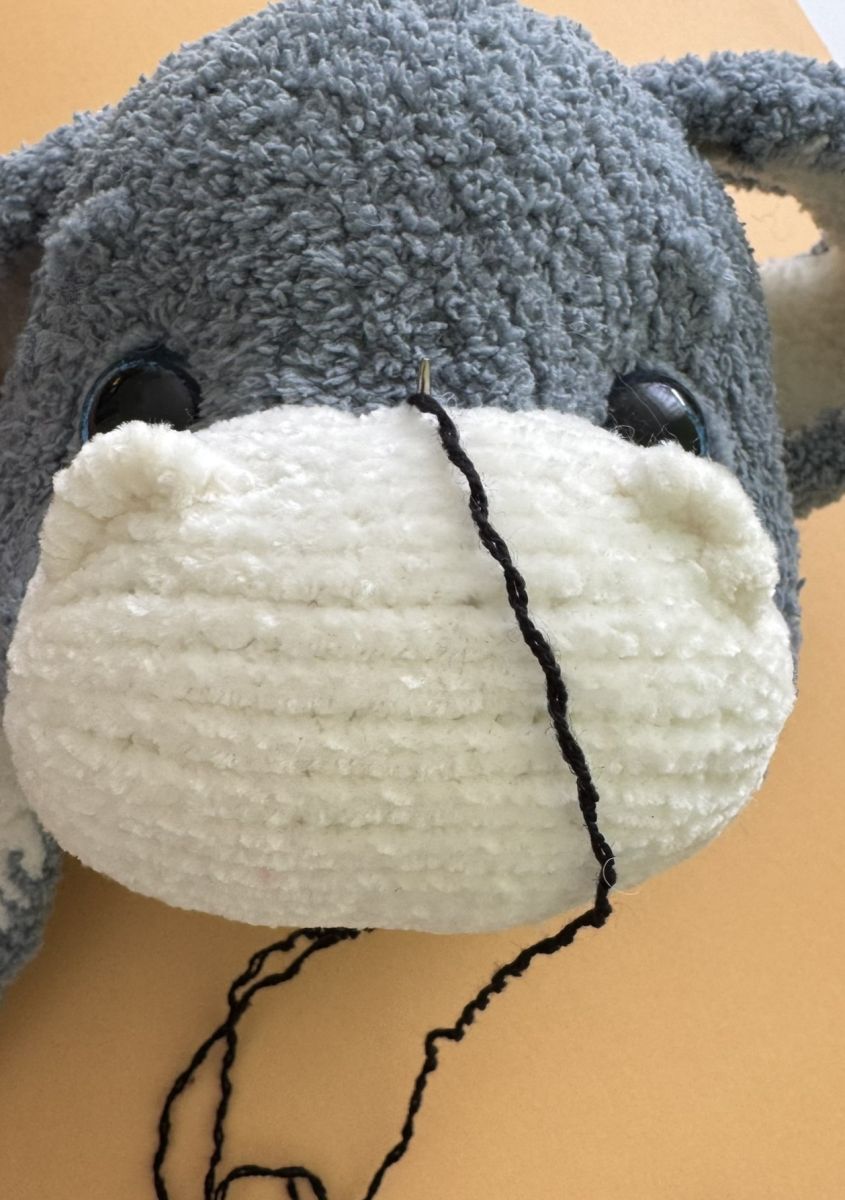
First, draw on the piece of paper, collect the grains, and carefully apply them with a brush. To enhance the donkey's expression, divide the head into two halves with black thread, carefully sewing the stitches so they appear even and precise.
Tummy
The tummy is knitted using white Katia yarn.
Cast on six stitches (ch) onto the knitting needle, making sure to maintain even tension while knitting for a consistent and well-formed result.
1. 6 P (6)
2. 6 K inc. (12)
3. 12 P
4. (1 inc , 1 K)x6 (18)
5. 18 P
6. 18 K
7. 18 P
8. 18 K
9. 18 P
10. 18 K
11. 18 P
12. 18 K
13. 18 P
14. 18 K
15. 18 P
16. 18 K
17. 18 P
18. 18 K
19. 18 P
20. 18 K
21. 18 P
22. (1 dec , 1 K)x6 (12)
23. 12 P
24. 12 K
25. 12 P
26. 6 dec
Cast off the remaining stitches and sew the Belly.
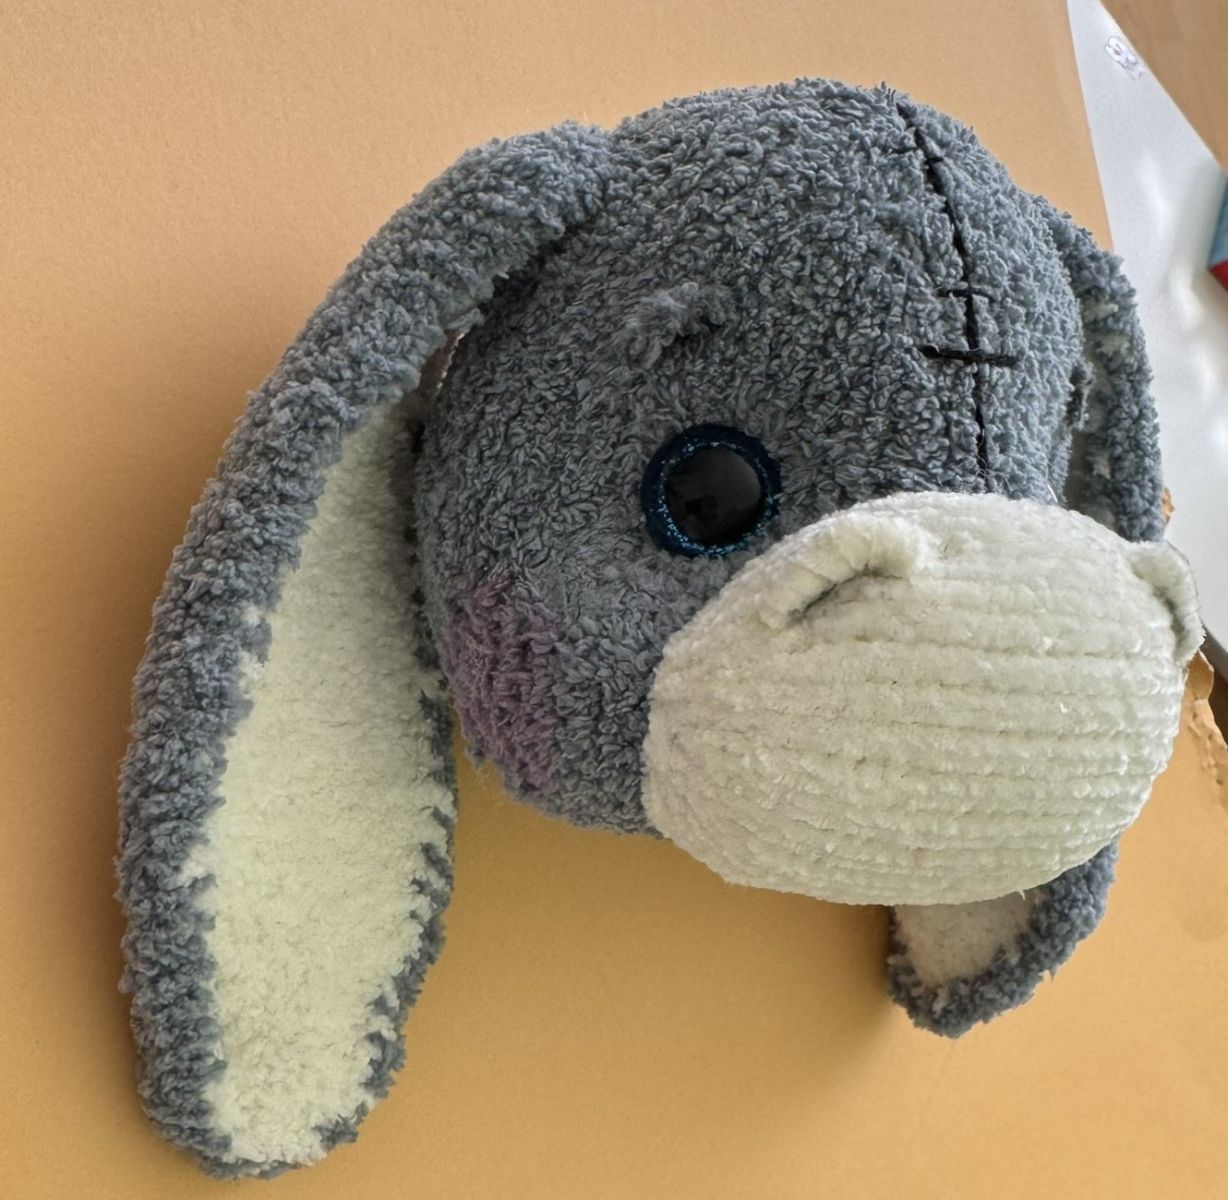
With the head finished, it is now ready to be sewn onto the body.
If desired, you can use black thread to create fine stitches on the belly.

Tail
Cast on 12 stitches (ch) onto the knitting needle.
- Rows 1, 3, 5, 7: Work 12 purl stitches.
- Rows 2, 4, 6: Work 12 knitt stitches.
Knit 7 rows in stockinette stitch—knitting all stitches on the front side and purling all stitches on the back side.
Bind off the stitches and sew the sides together.
Cut the yarn to approximately 5 cm in length, carefully thread it through the tail, and secure it to create a snug, even finish.
Finally, sew the tail onto the back of the body.
For Hands 2 P (Kaktia Velvet fine white)
Cast on 6 stitches (ch) onto the knitting needle.
1. 6 P
2. 1 K, 1 inc, 1 K, 1 inc, 1 K, 1 inc (9)
3. 9 P
4. 9 K
5. 9 P
6. 1 K, 1 dec, 1 K, 1 dec, 1 K, 1 dec (6)
Cast off the stitches and sew them to the hand.
For Legs 2 P (Kaktia Velvet fine white)
Cast on 6 stitches (ch) onto the knitting needle.
1. 6 P (6)
2. 6 K inc. (12)
3. 12 P
4. 12 K
5. 12 P
6. 6 dec
Bind off the stitches and sew them onto the leg. Use pastel chalk to add subtle highlights for extra detail.
The donkey is ready!
.JPG)