Free Crochet Pattern Gloves
.png)
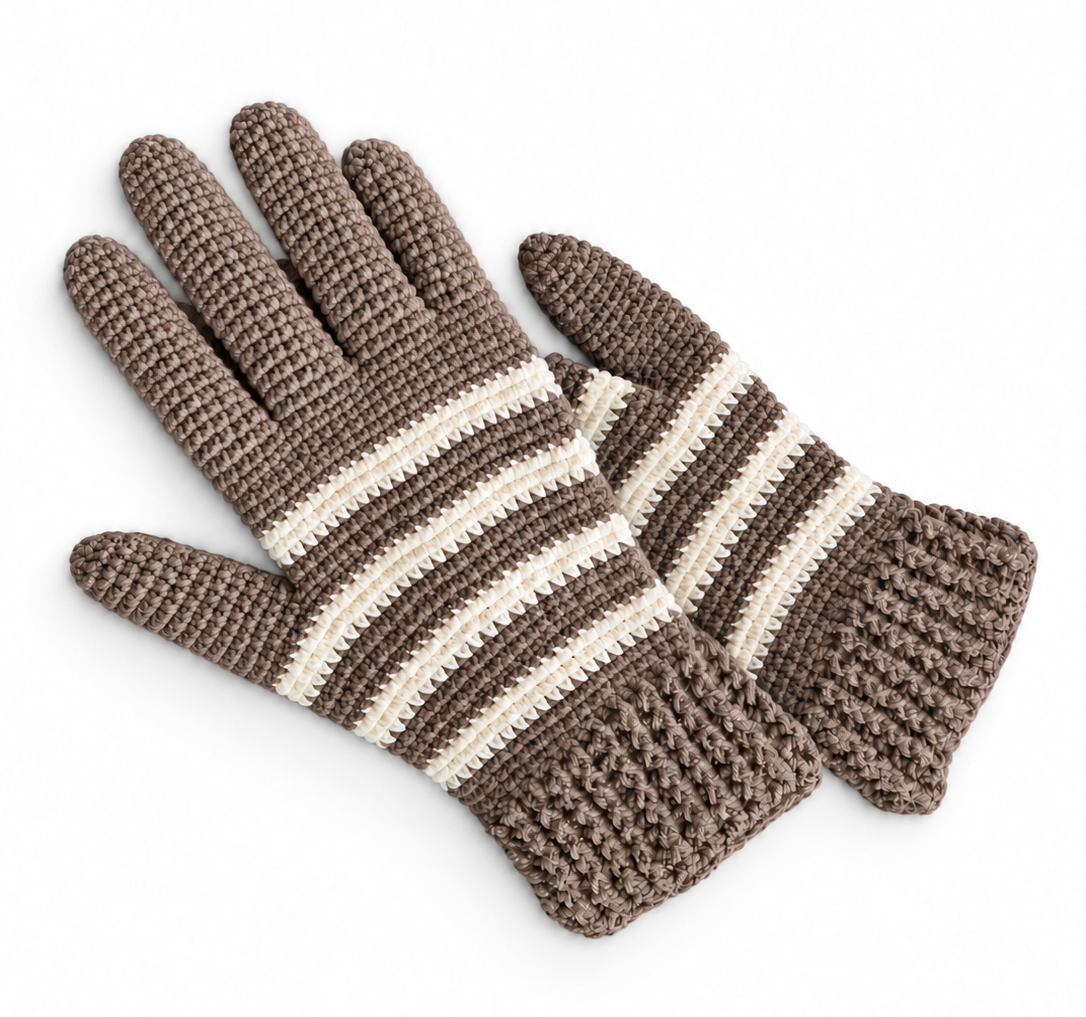
I love autumn – it’s finally time for cozy sweaters, scarves and, of course, gloves. For this pattern, I chose a pair of gloves that will keep your hands warm without feeling too thick or bulky.
When it comes to colors, just choose whatever you like best. Small projects like this are perfect for playing around with different yarns and color combinations.
And if a stitch here and there isn’t quite perfect, don’t worry. Handmade doesn’t have to look like it came from a factory – those little differences are what make each piece unique.
Let’s get started!
Materials:
-
2.5 mm crochet hook
-
YarnArt Jeans (50 g = 160 m) in beige and brown
Tip: Choose a yarn that feels comfortable against the skin and has a little stretch. If you use a different yarn, the number of stitches you need may vary.
Abbreviations:
ch = chain
sc = single crochet
dc = double crochet
tr = treble crochet
sl st = slip stitch
We start with a foundation chain. Chain enough stitches for the chain to fit comfortably around your wrist. Since the yarn has a good amount of stretch, make sure the chain isn’t too loose.
I chained 42 stitches. The first chain is skipped, and we start crocheting into the 2nd chain from the hook, so this gives us 41 single crochet stitches.
Important: The right and left gloves are crocheted exactly the same way.
Round 1
Starting in the 2nd chain from the hook, work 1 sc into each chain across. You should now have 41 sc if you started with 42 ch.
Join the first and last sc with 1 sl st to form a round.
Cuff
Round 2
Ch 3, then work 1 dc into each stitch around. Join the round with 1 sl st.
Round 3
Alternate 1 front post double crochet (FPdc) and 1 back post double crochet (BPdc) around. Join the round with 1 sl st.
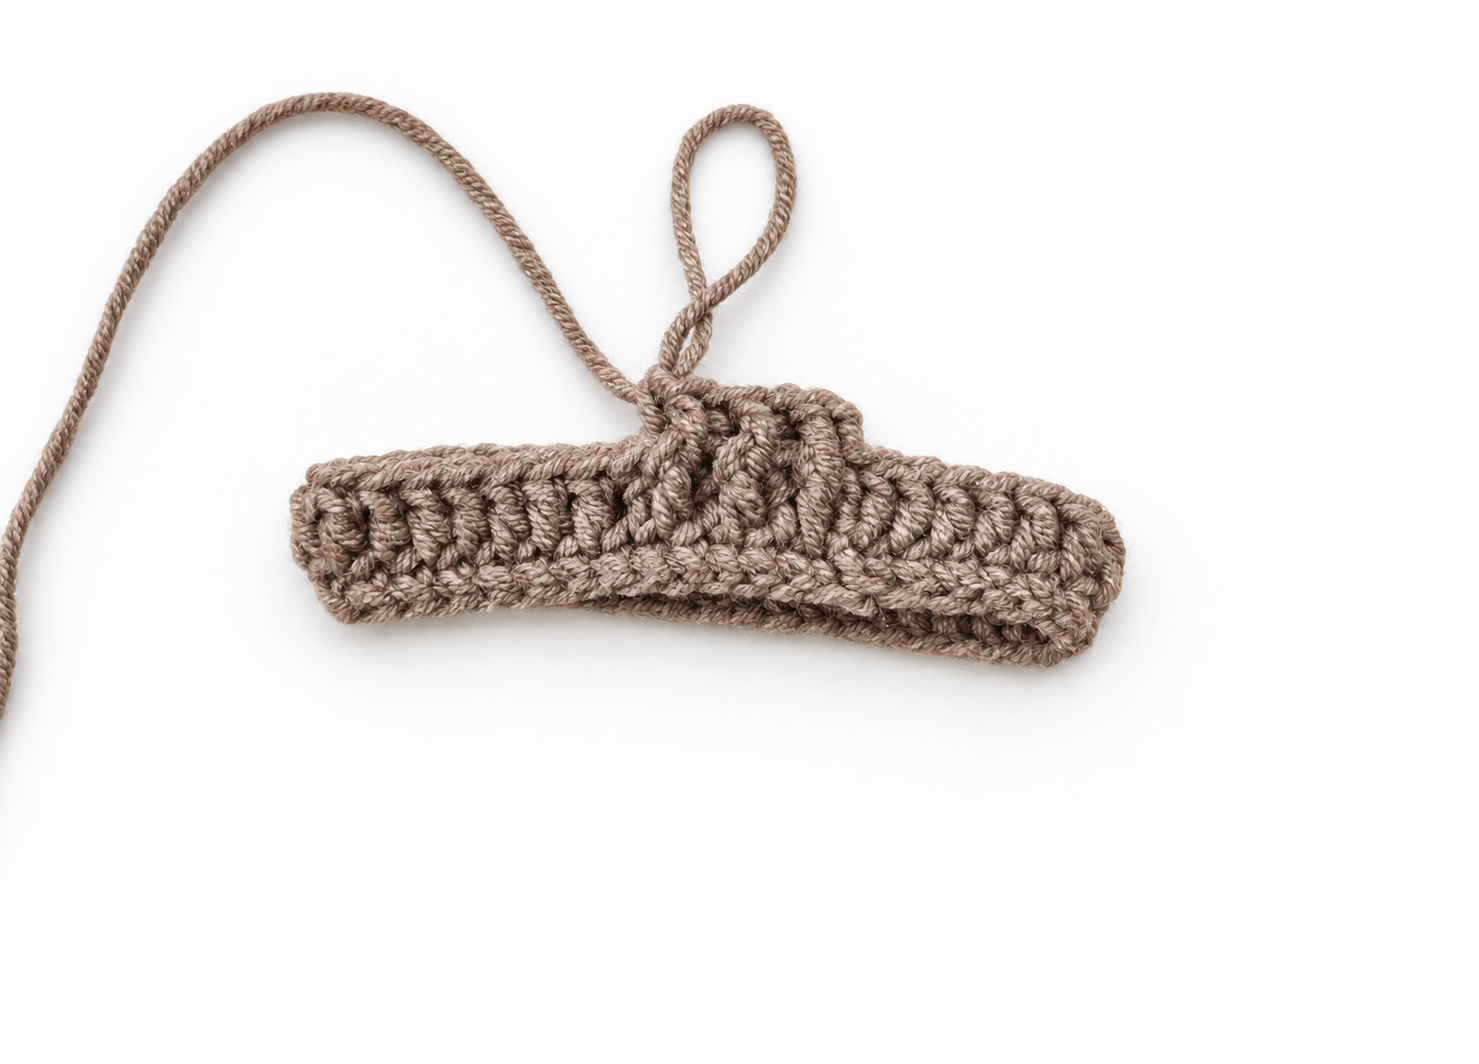
Rounds 4–9
Continue in the established pattern, alternating 1 front post double crochet (FPdc) and 1 back post double crochet (BPdc). Join each round with 1 sl st.
I crocheted a total of 8 rounds for the cuff. You can easily adjust the length to your liking – simply add a few more rounds for a longer cuff or work fewer rounds if you prefer it shorter.
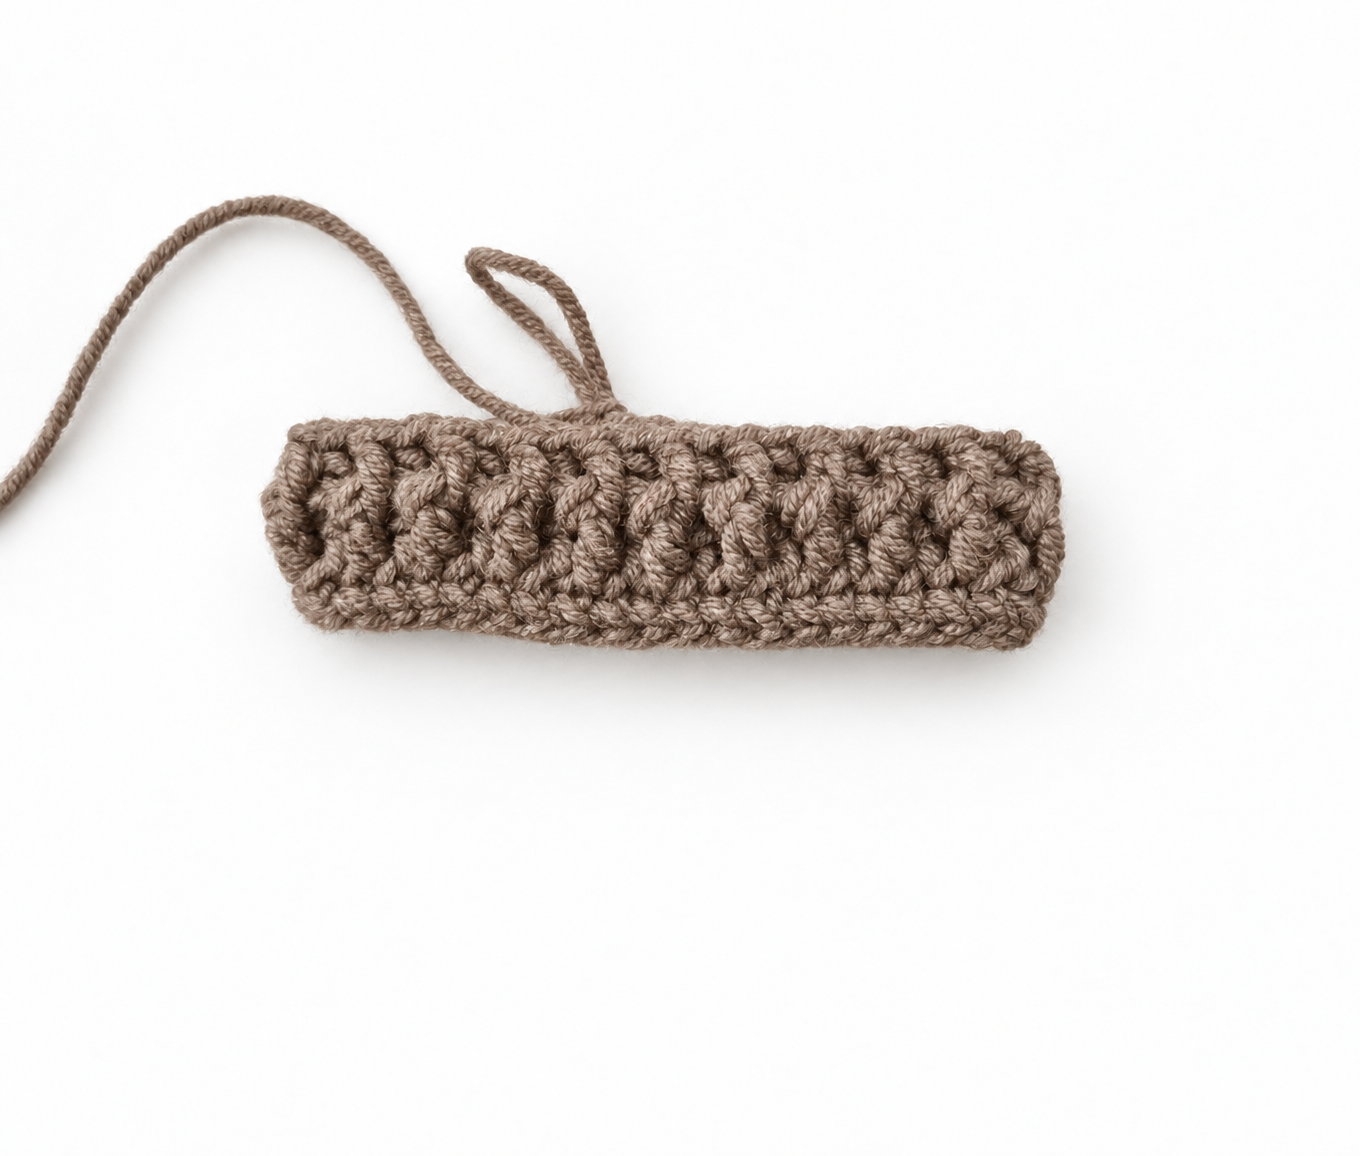
Rounds 10–12
Ch 1, then work 1 sc into each stitch around. Join the round with 1 sl st.
Repeat this for a total of 3 rounds.
Rounds 13–15
Change to beige.
Ch 1, then work 1 sc into each stitch around. Join the round with 1 sl st.
Repeat this for a total of 3 rounds in beige.
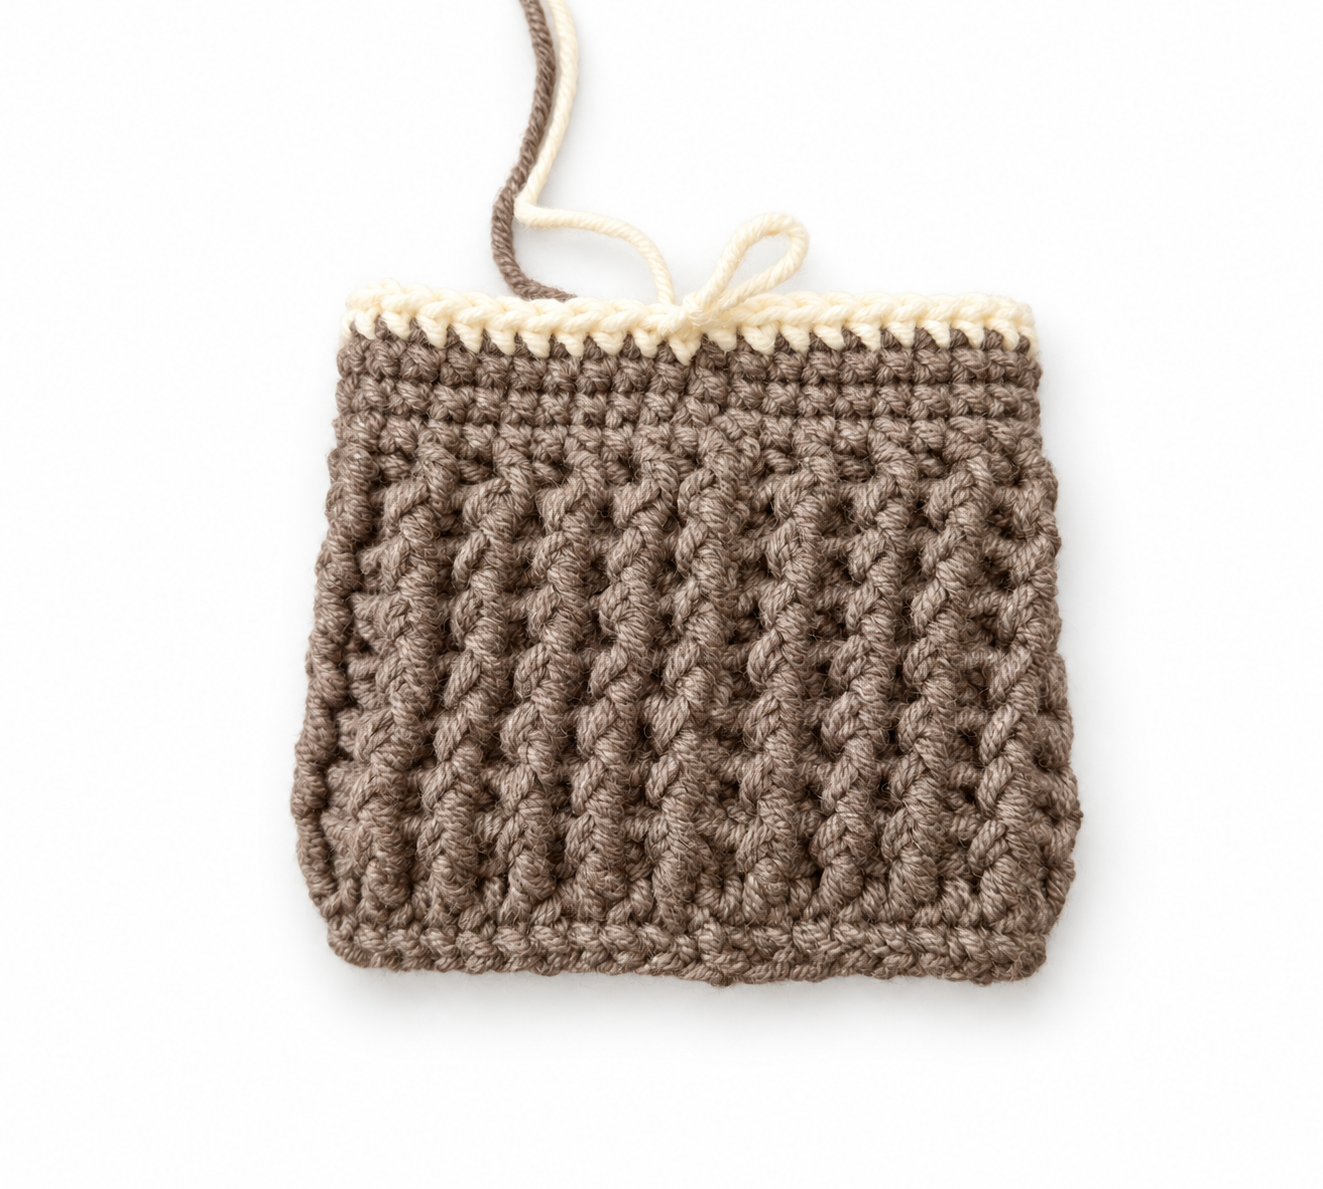
Rounds 16–18
Change back to brown and work the next 3 rounds in brown.
Ch 1, then work 1 sc into each stitch around. Join each round with 1 sl st.
Round 19
Change color.
Ch 1, then work 1 sc into each stitch around. Join the round with 1 sl st.
Round 20 – Increases
From Round 20, we begin increasing because the hand gradually gets wider at this point.
Work 4 sc, inc – repeat to the end of the round.
Quick explanation for beginners:
Work 1 sc into each of the next 4 stitches. In the 5th stitch, work 2 sc into the same stitch. This increases the stitch count by 1.
Then work another 4 sc and increase again in the next stitch. Continue this way to the end of the round.
If there aren’t enough stitches left at the end to complete another full repeat, simply work 1 sc into each remaining stitch.
Round 21
Ch 1, work 1 sc into each stitch around. Join the round with 1 sl st.
Change color.
Round 22
Ch 1, work 1 sc into each stitch around. Join the round with 1 sl st.
Round 23
Ch 1, (5 sc, inc) – repeat to the end of the round.
Round 24
Work 1 sc into each stitch around. Join the round with 1 sl st.
Change color.
Round 25
Ch 1, work 1 sc into each stitch around. Join the round with 1 sl st.
Round 26
Ch 1, (6 sc, inc) – repeat to the end of the round.
Round 27
Work 1 sc into each stitch around. Join the round with 1 sl st.
Change color.
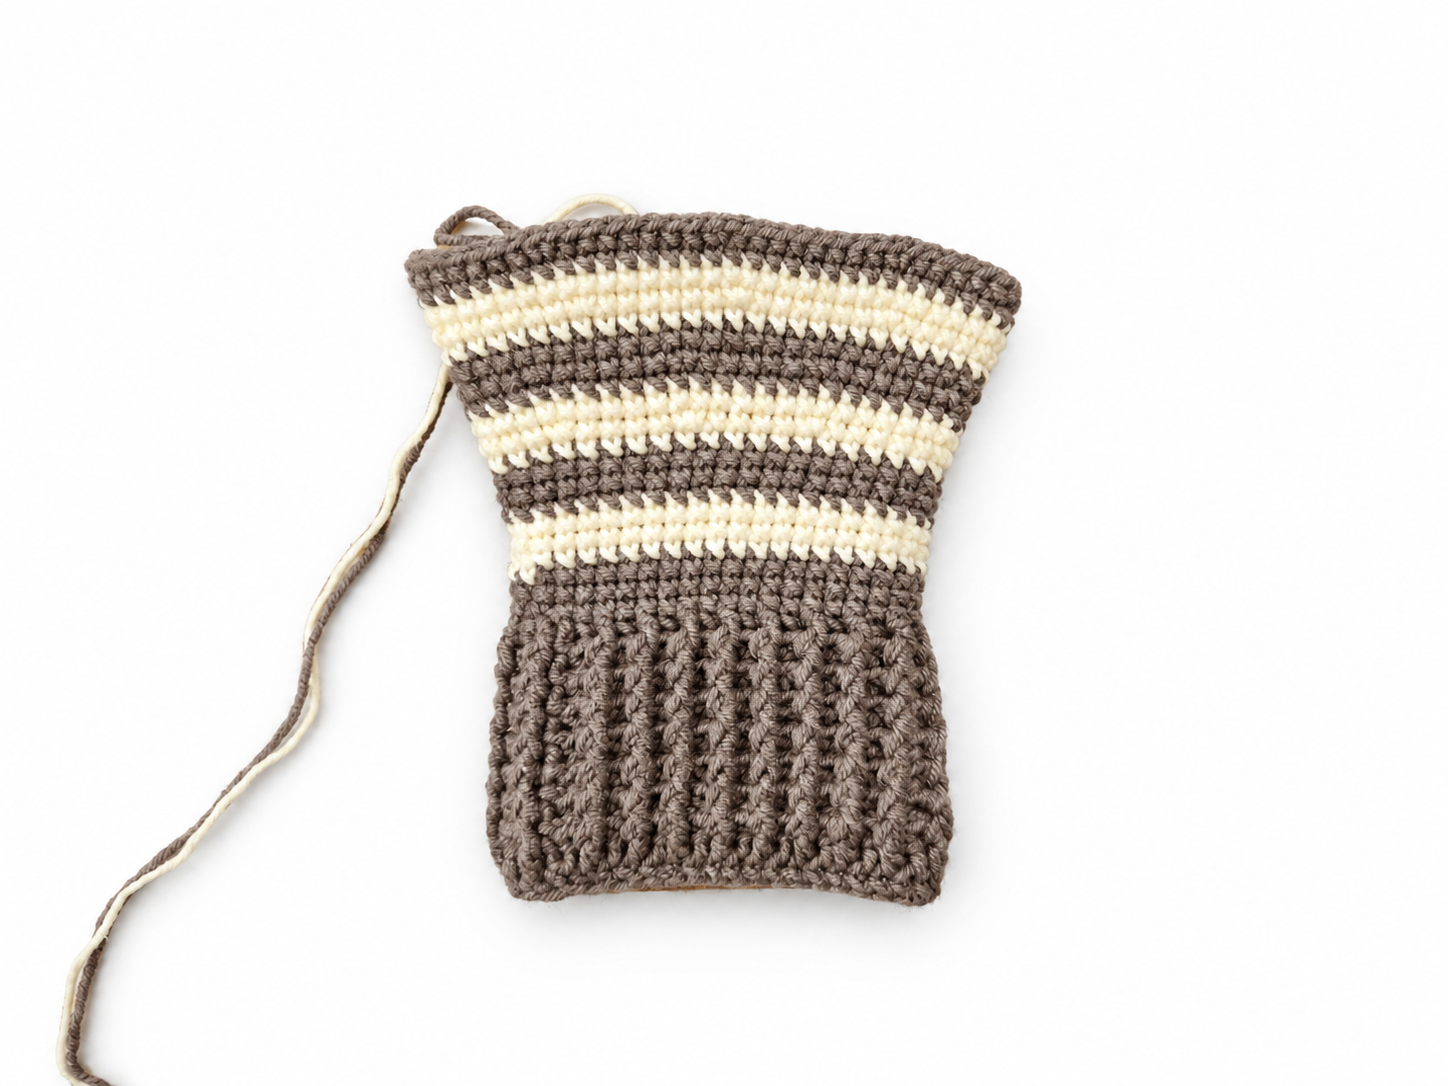
Round 28
Ch 1, work 1 sc into each stitch around. Join the round with 1 sl st.
Round 29
Ch 1, (7 sc, inc) – repeat to the end of the round.
Separating the Thumb
By Round 29, we have worked enough increases and can now separate the thumb.
Try the glove on and check where the thumb sits comfortably. Then use a piece of yarn to connect the two sides between the thumb and index finger. This will help you see which stitches need to remain free for the thumb.
If the glove still feels a little too tight at this point, simply work a few more rounds with increases until it fits comfortably around your hand. Only then separate the thumb.
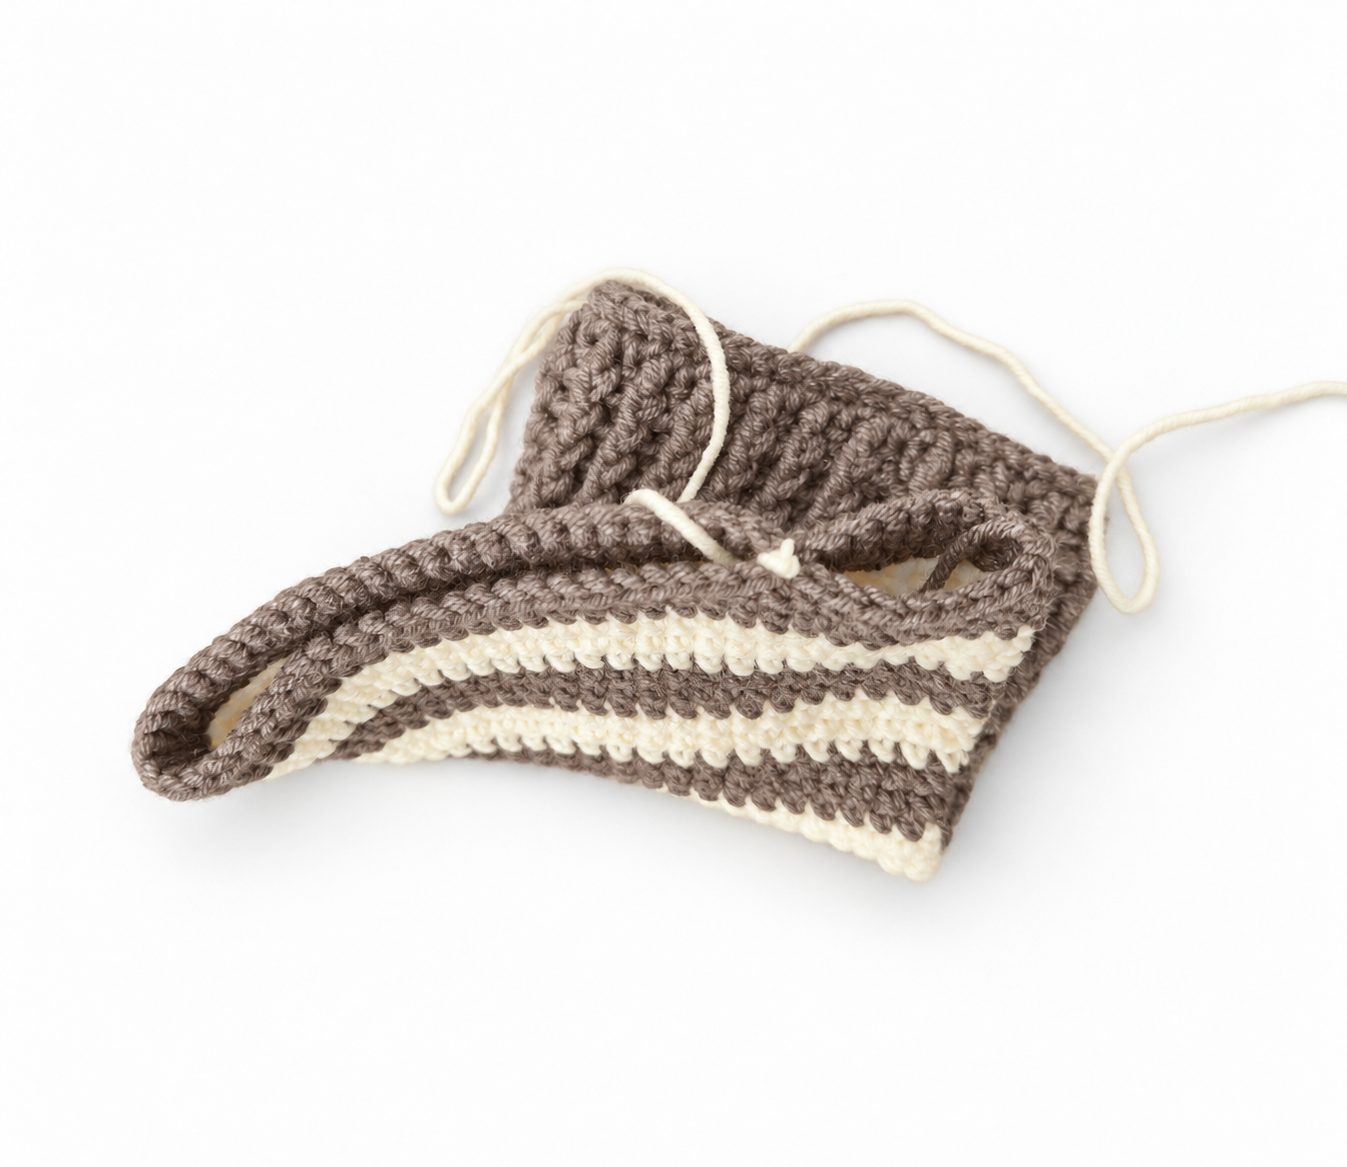
Finish off the current color and join the new color in the next stitch.
Continue crocheting around the smaller section with the new color. Leave the stitches set aside for the thumb unworked – we will come back to them later.
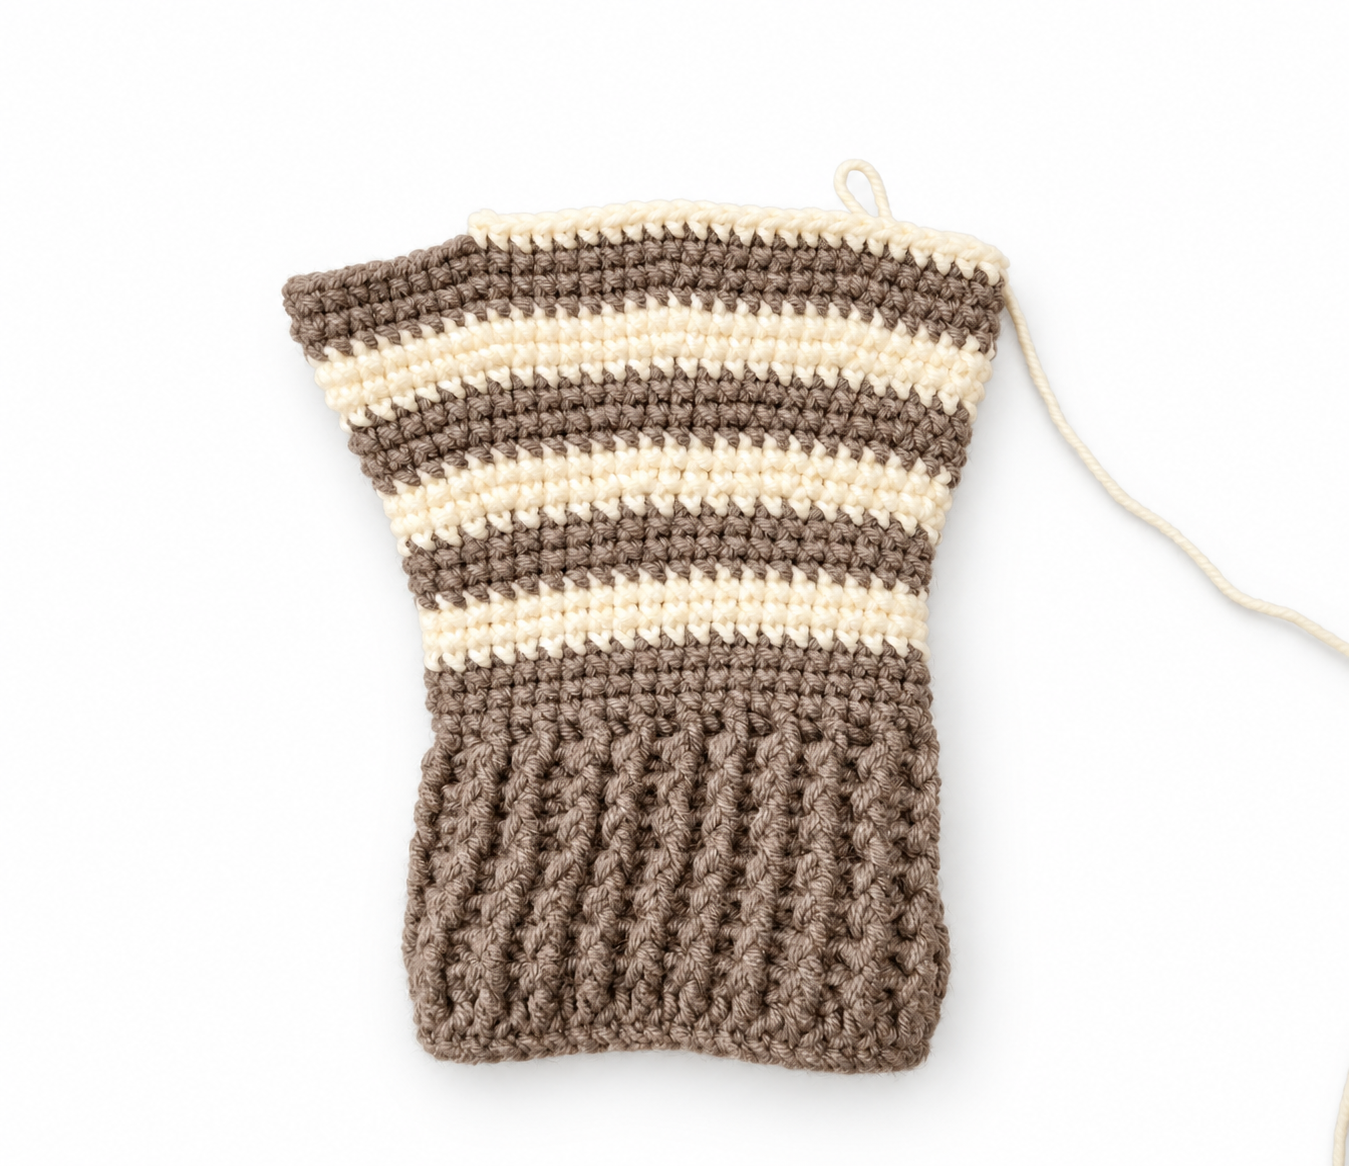
From this point on, the fit will be individual, as everyone’s hands are a little different. Try the glove on regularly as you work and check whether you have reached the base of the remaining 4 fingers.
Once you have reached the right height, divide the remaining stitches into 4 approximately equal sections, one for each finger.
Use stitch markers or small pieces of contrasting yarn to mark where each finger section begins and ends. Try the glove on once more to make sure the sections line up comfortably with your fingers before you start crocheting them.
You can use slightly fewer stitches for the little finger, as it is usually narrower than the other fingers.
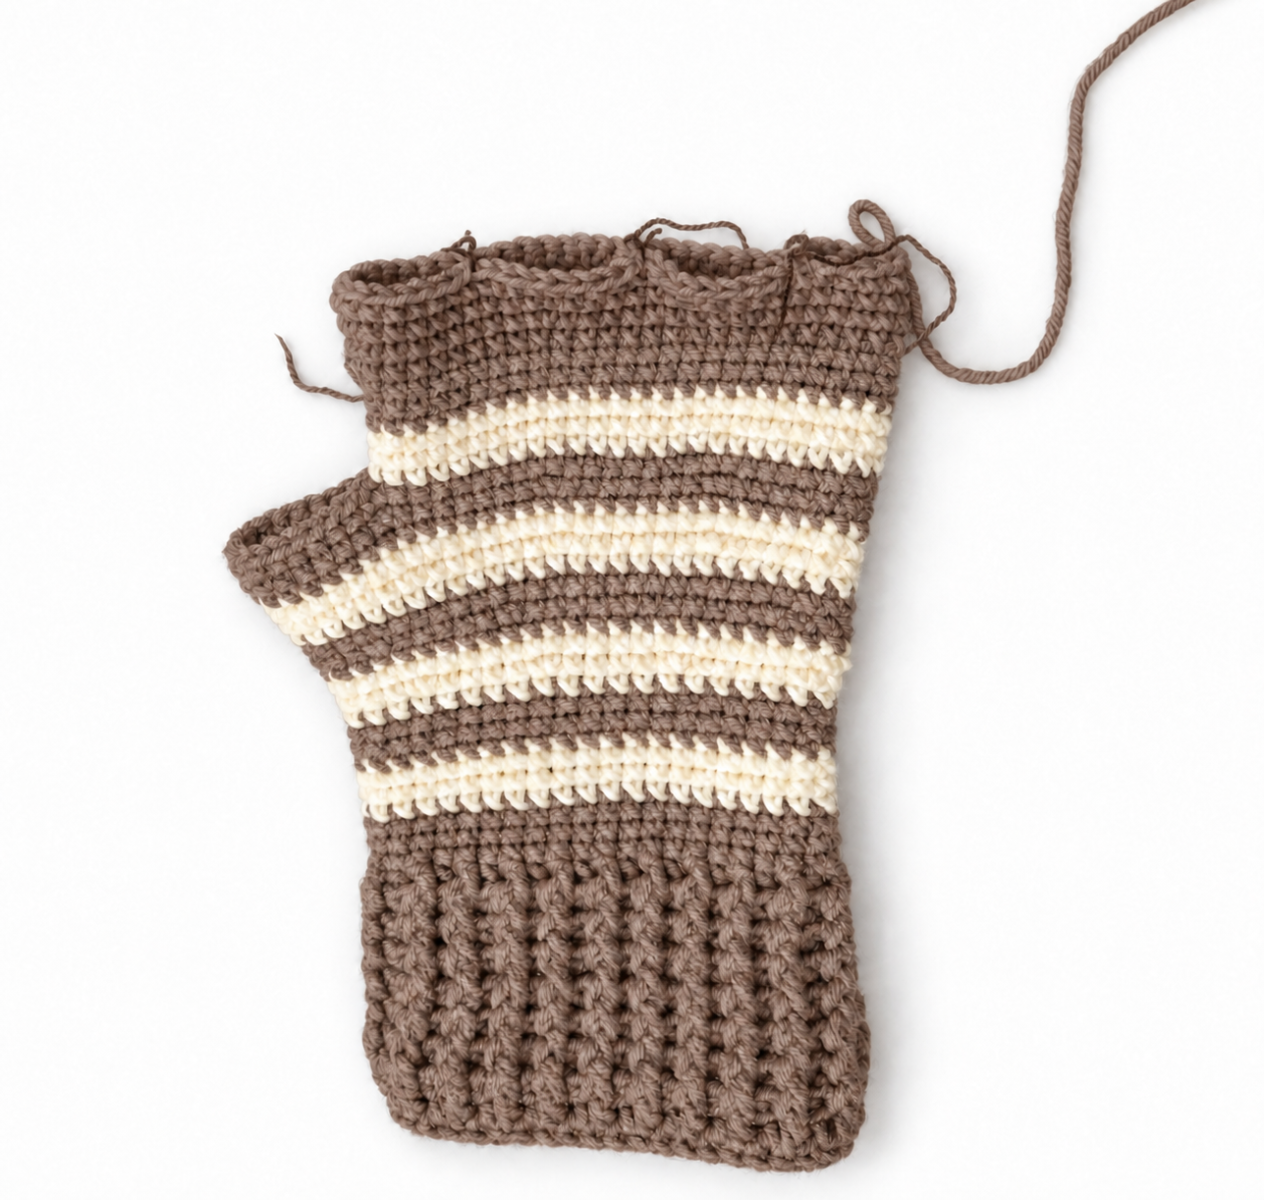
Once you have divided the stitches into 4 sections, crochet each finger separately.
1. Start the first finger
Take the stitches you set aside for the first finger and continue working them in sc. Leave the stitches for the other fingers unworked for now.
2. Work in continuous rounds
From this point on, work in continuous spiral rounds. This means you don’t join the rounds with a slip stitch – simply continue crocheting around.
3. Check the length regularly
Everyone’s fingers are different lengths, so there is no fixed number of rounds. Try the glove on regularly as you work and check the length.
4. Shape the fingertip
When you have about 2 cm (¾ in) left before reaching the tip of your finger, start decreasing.
Work 2 stitches together for each decrease. Continue decreasing until only a small opening remains.
5. Close the finger
Cut the yarn and pull it through the remaining stitches. Gently pull the opening closed and weave in the end on the inside of the glove.
6. Crochet the remaining fingers
Work the other fingers in the same way: pick up the stitches for the next finger, work in continuous spiral rounds using sc, try the glove on regularly to check the length, and start decreasing about 2 cm (¾ in) before reaching the fingertip.
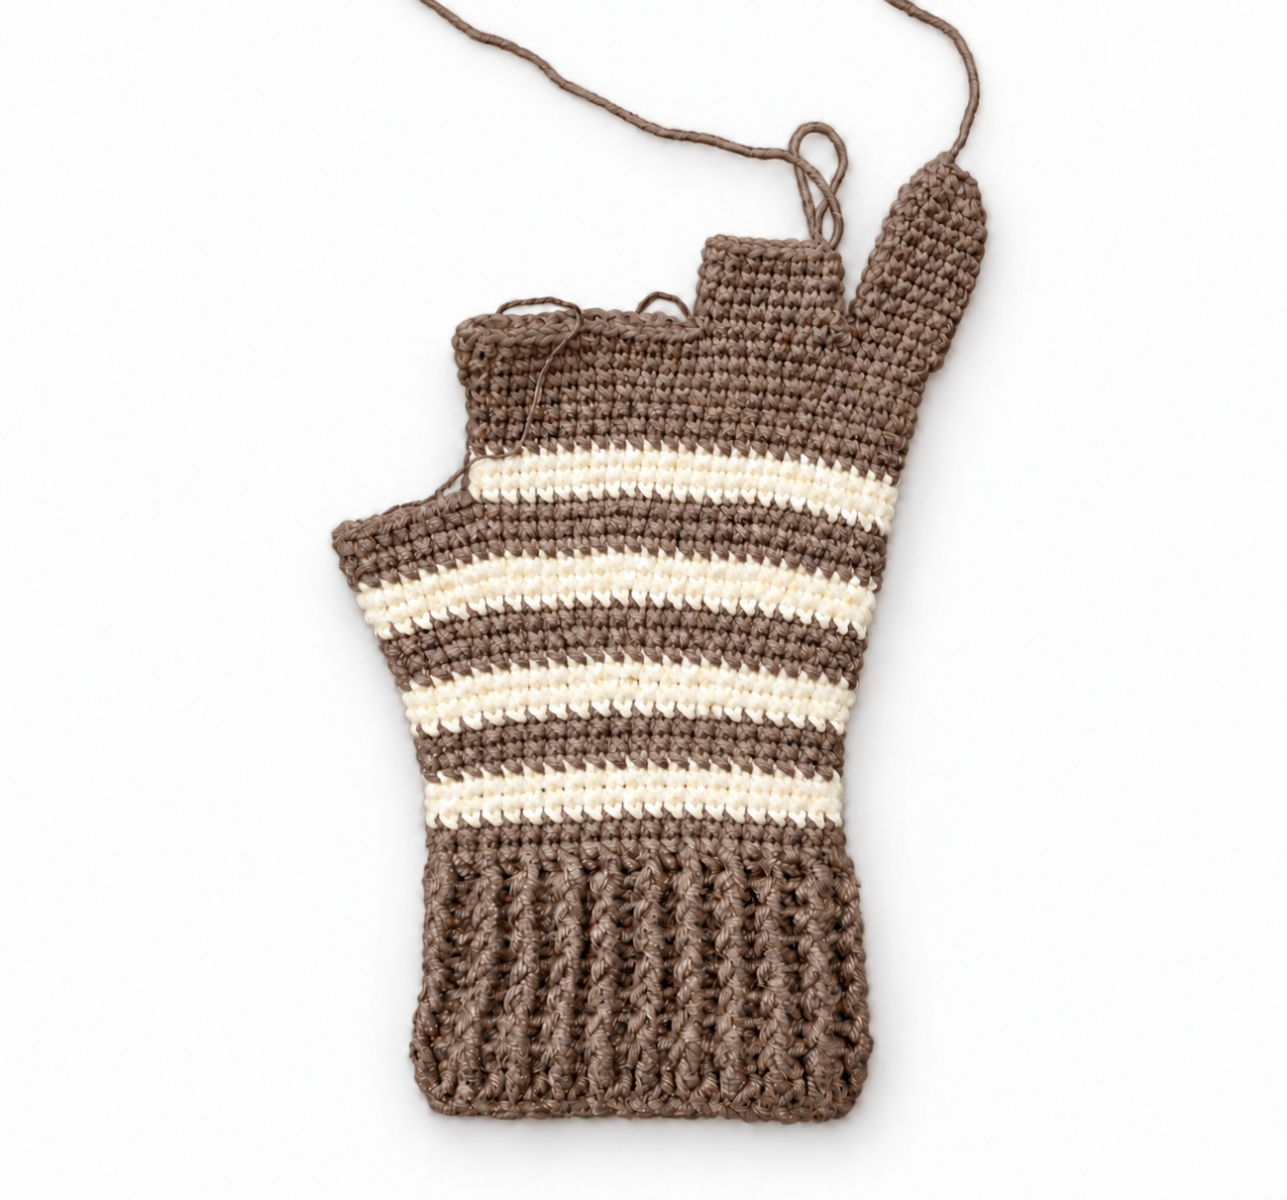
And now for the best part – your gloves are finished!
Take a moment to look at what you’ve made, and don’t worry if every stitch isn’t absolutely perfect. That’s the beauty of handmade pieces – those little differences are what make each one special and unique.
Before wearing your gloves for the first time, I recommend gently washing them according to the care instructions for your yarn and letting them dry in shape. This can help the stitches settle and make the finished fabric look even more even.
I hope you enjoyed crocheting these gloves and that you’ll love wearing them. If you enjoyed the pattern, I’d be very happy to see photos of your finished gloves.
And don’t be afraid to make the pattern your own – try different colors, use another yarn, or change small details to suit your style. That’s one of the things I love most about handmade projects.