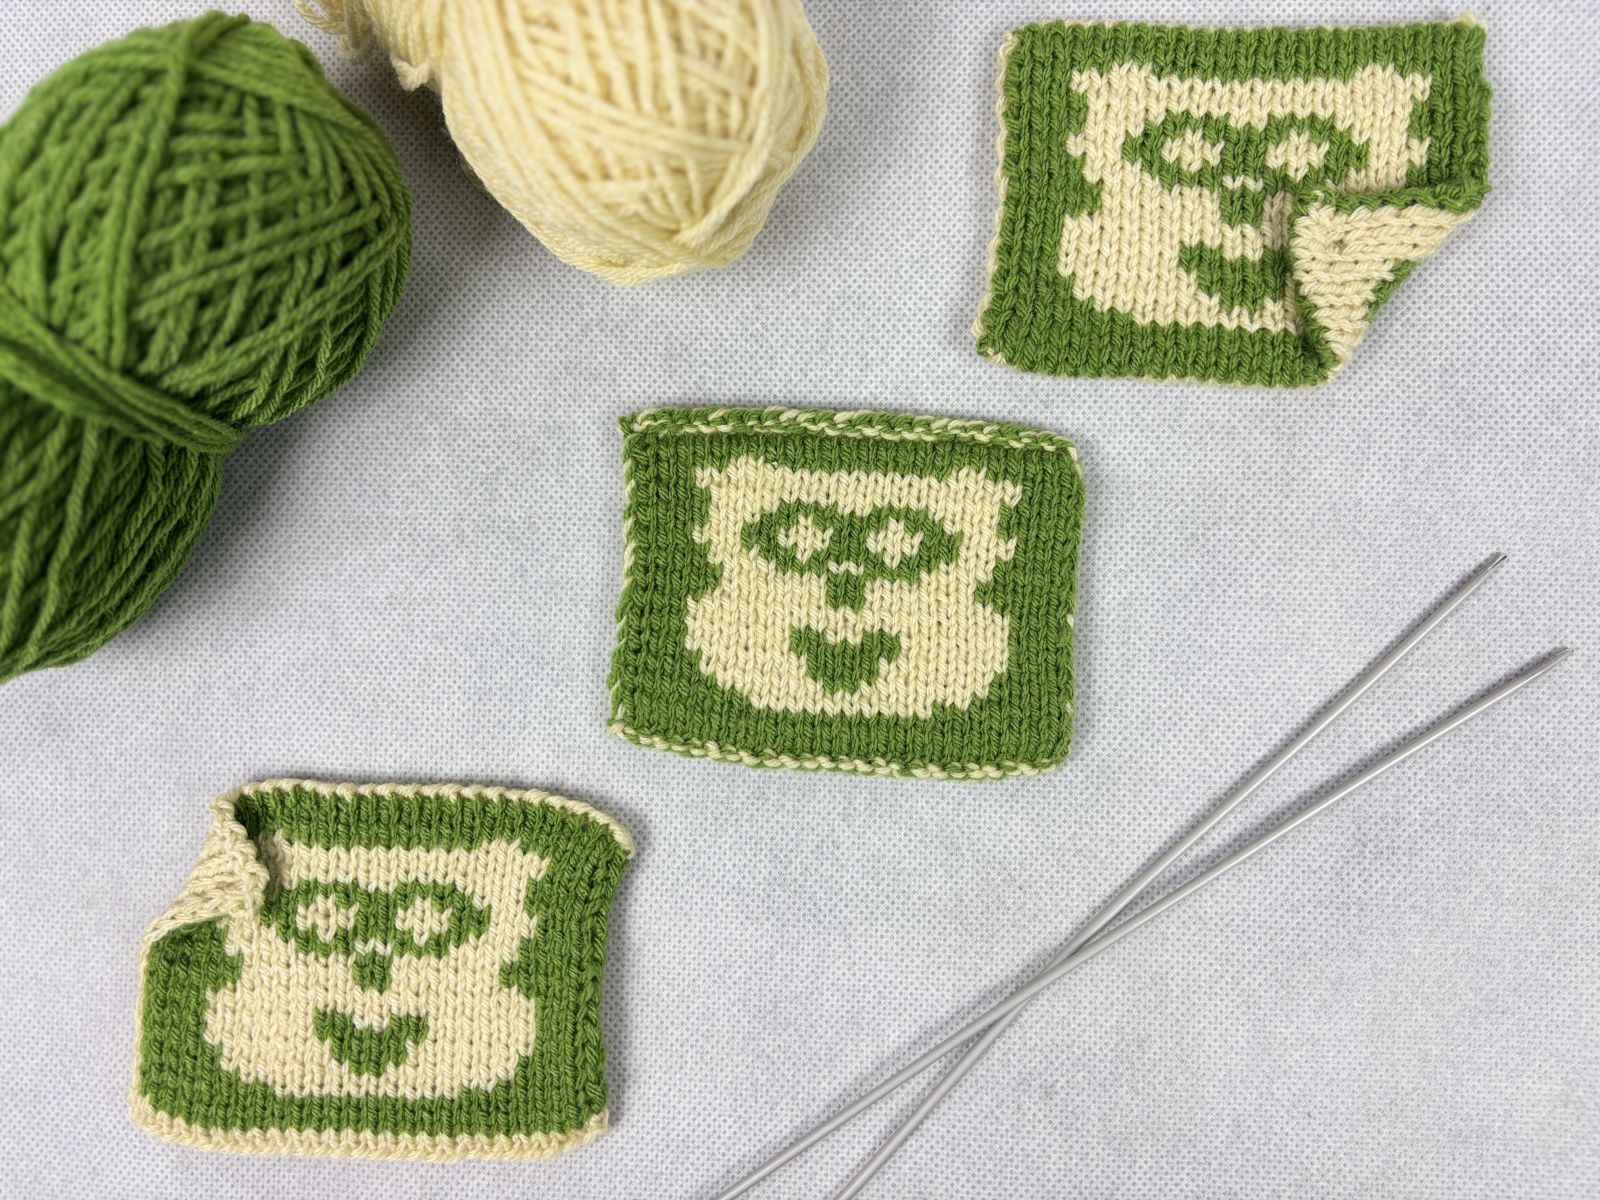
Double-faced knitting creates two layers of fabric knitted simultaneously that are mirror images of each other. Both the front and back are “attractive” and have inverted colors. In double-faced knitting, the edge is particularly important because it needs to neatly join both sides while also being elastic or sturdy. There are several tried-and-true techniques—depending on whether you want a decorative, sturdy, or invisible edge. In this blog post, I’ll show you a few of the most common techniques
An Overview of Casting On Methods for Double Knitting
|
Mixed Two-Colour Long-Tail Cast-On |
|
|
Simple Double Cast-On |
|
|
Invisible Cast-On |
|


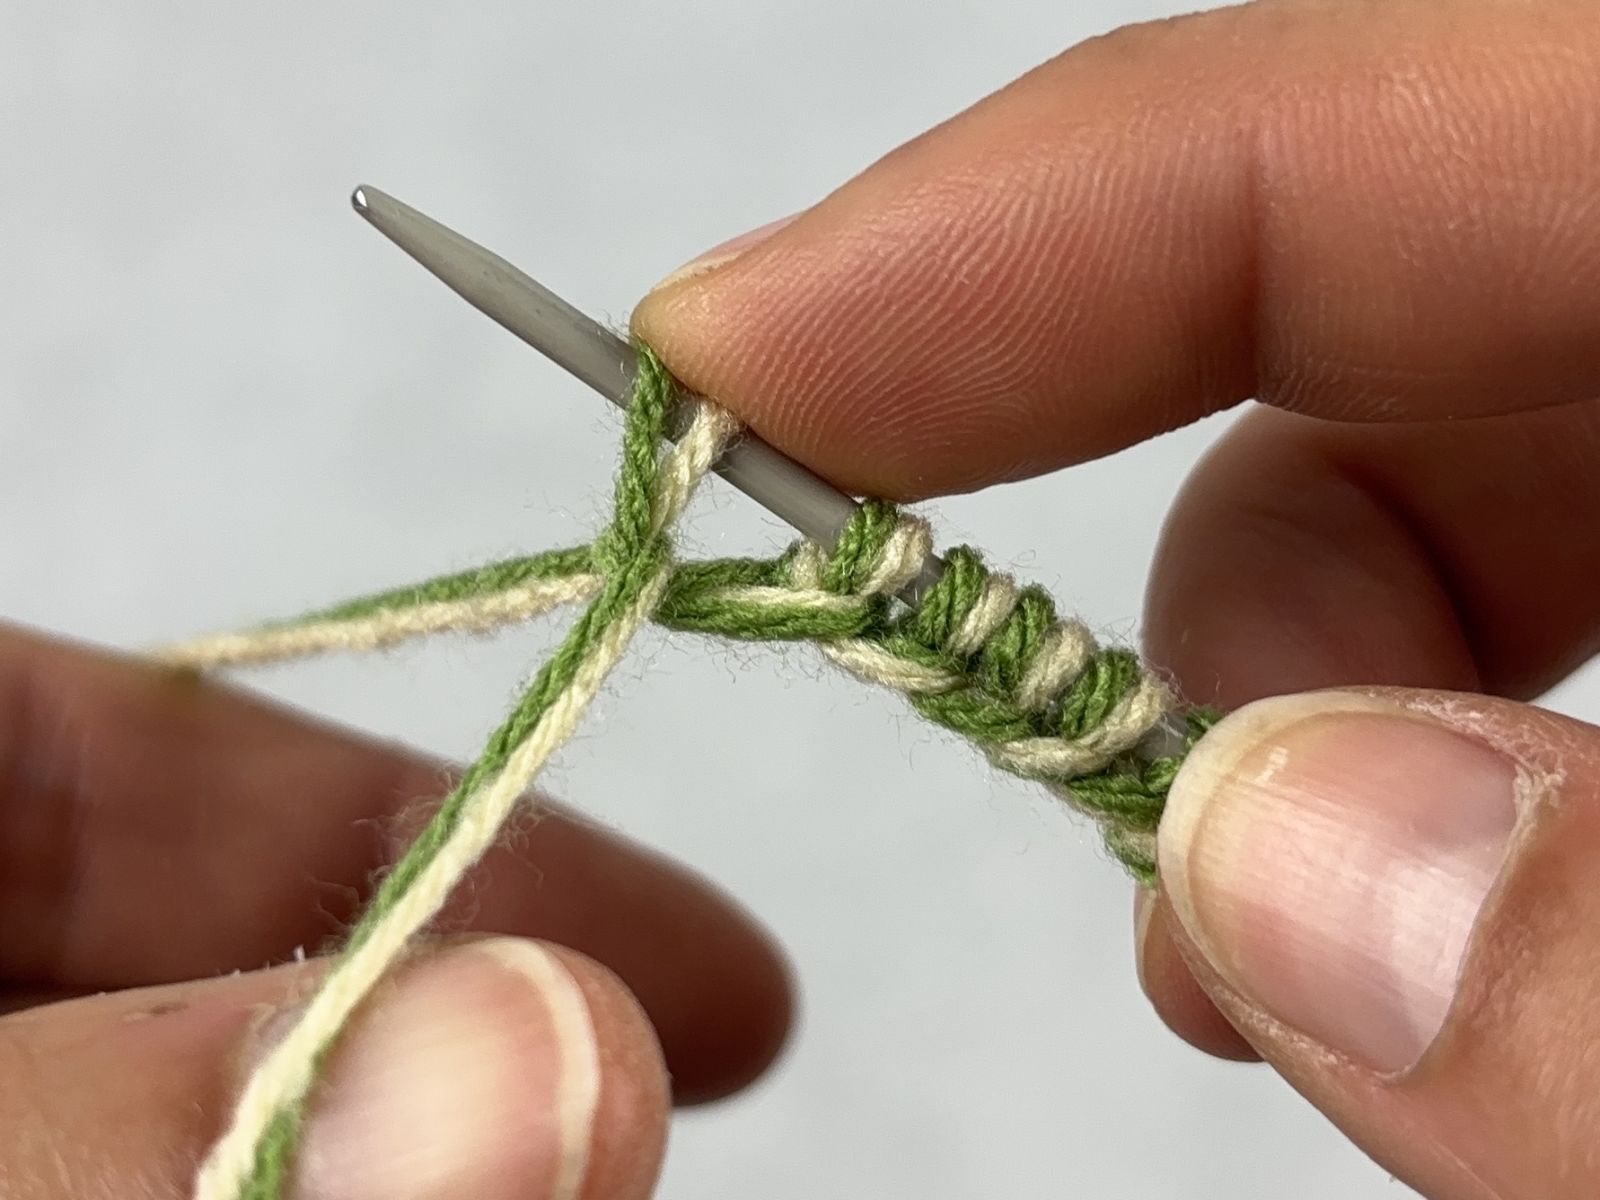
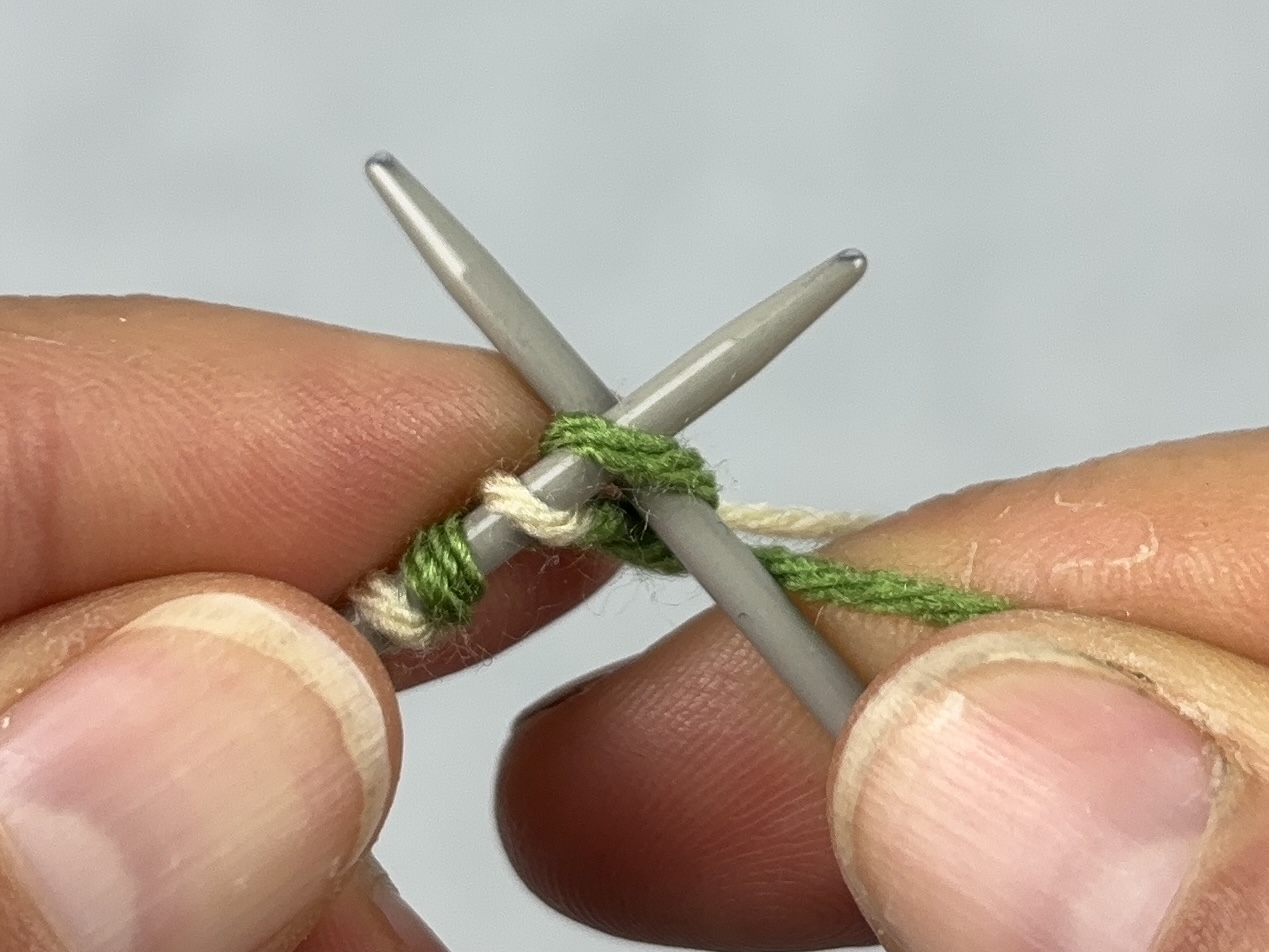
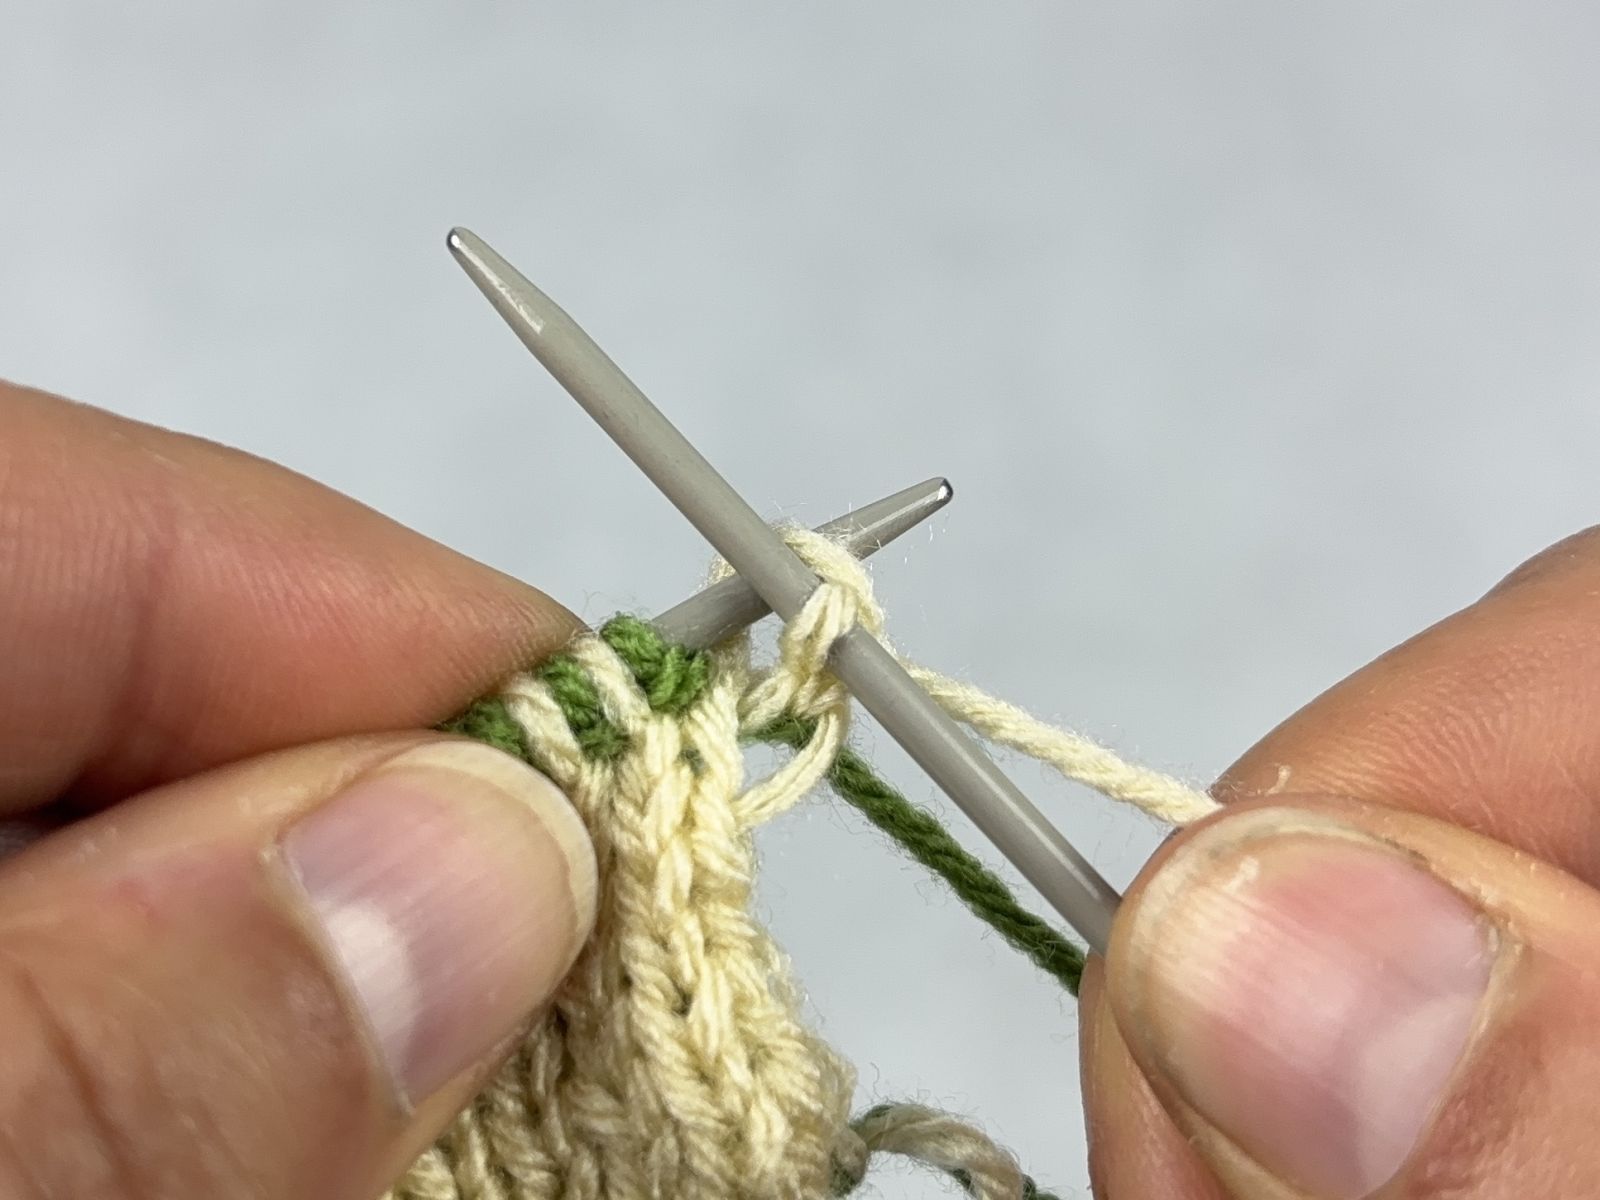
Mixed Two-Colour Long-Tail Cast-On
Technique:
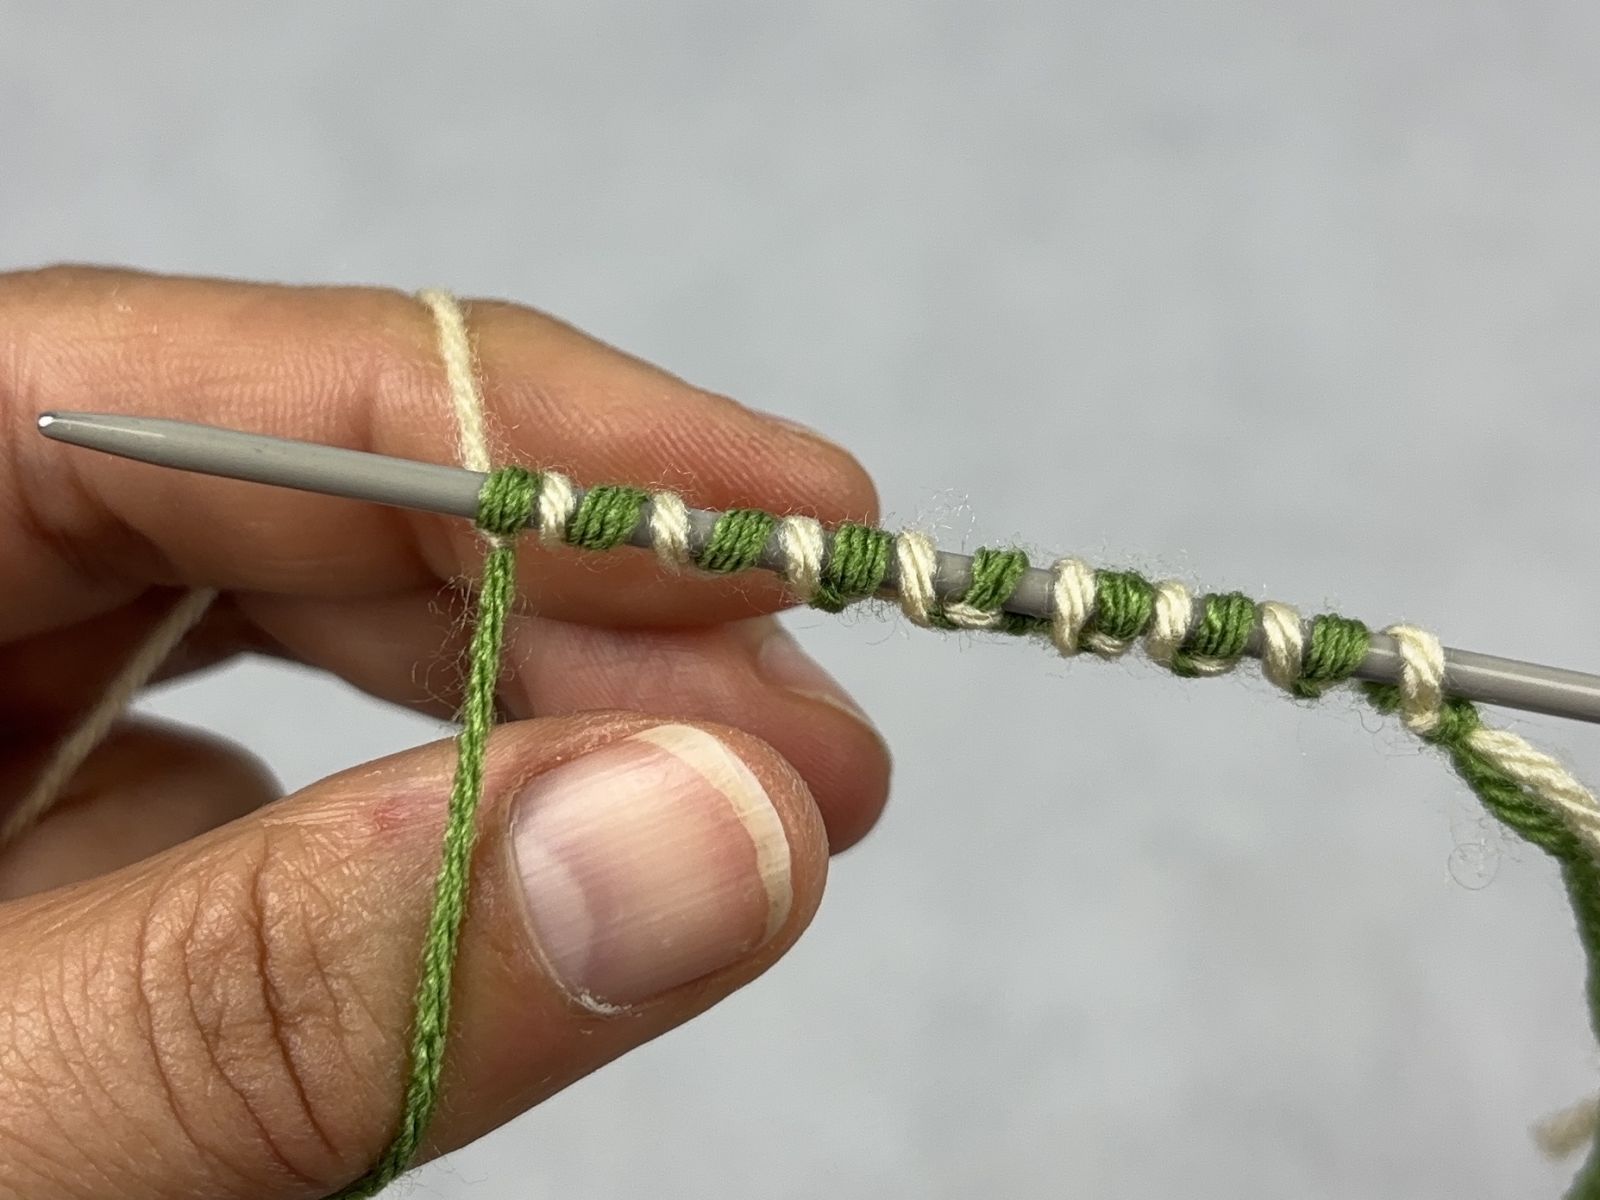
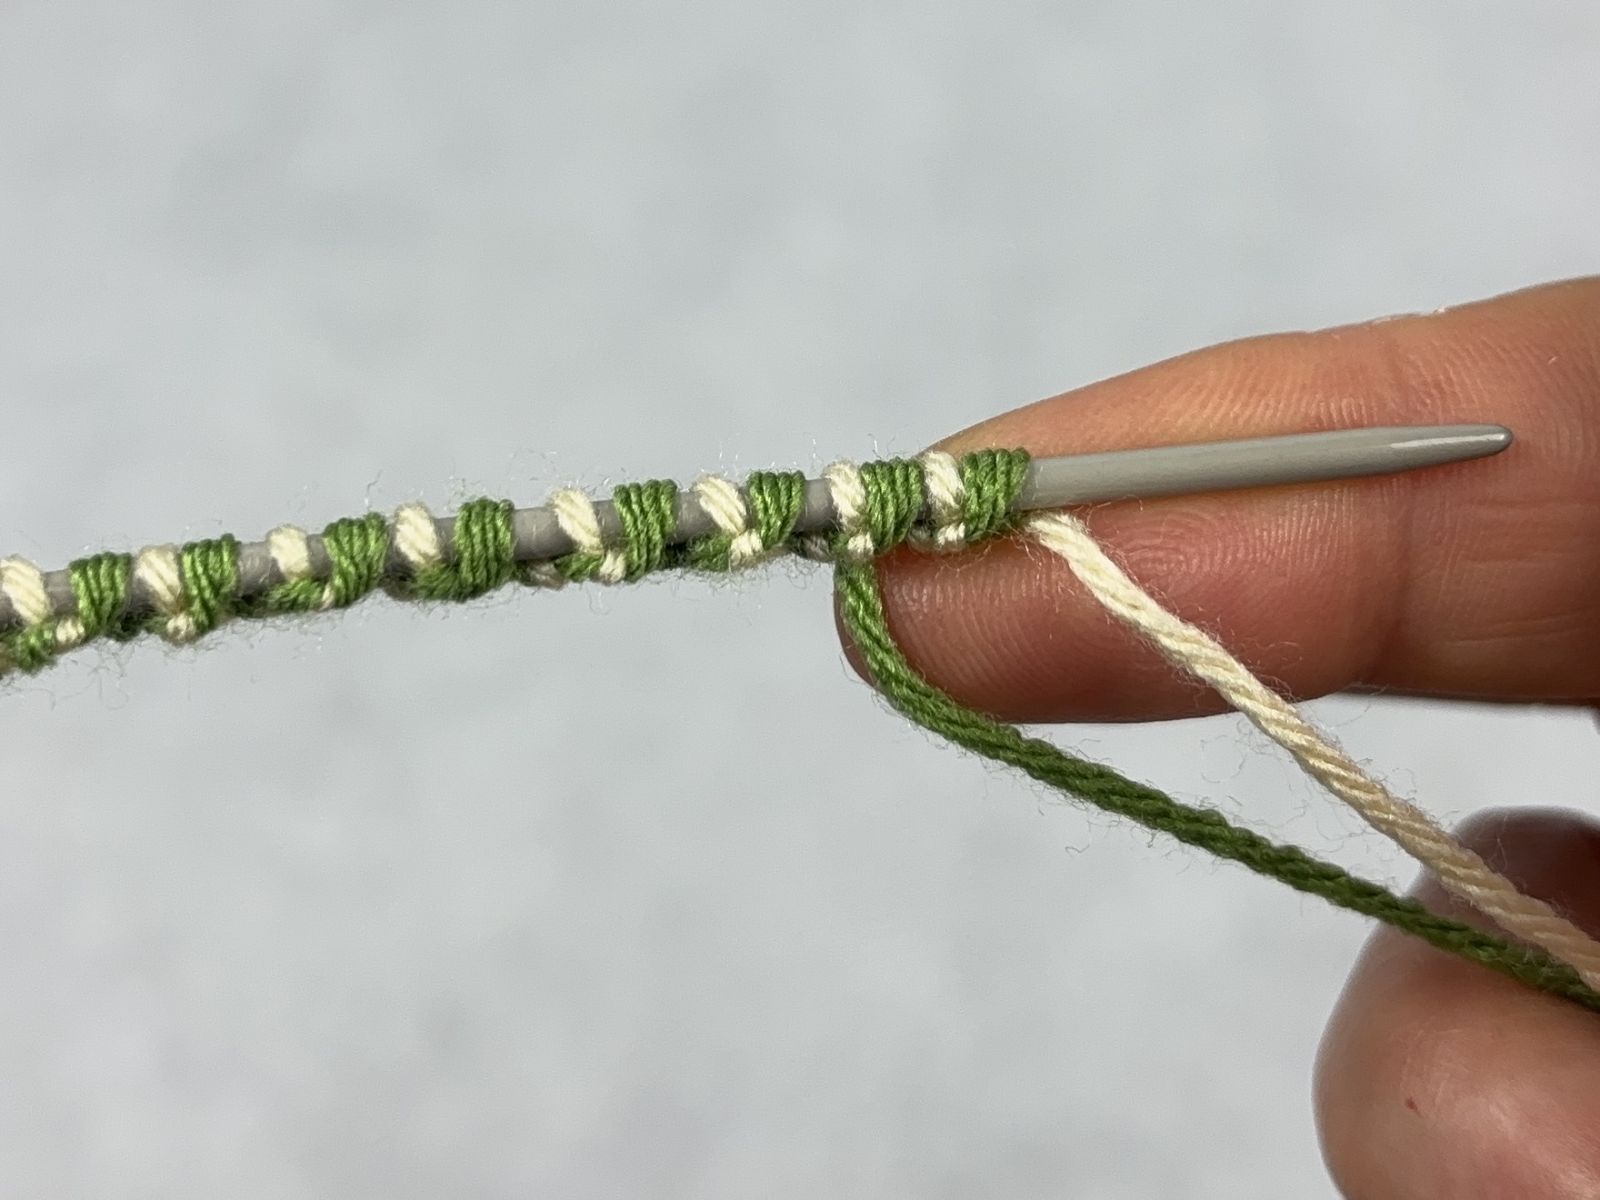
- The double stitches are cast on using both working threads at the same time with a long-tail cast-on
- The exact order in which the two threads are guided determines the order of the double stitches
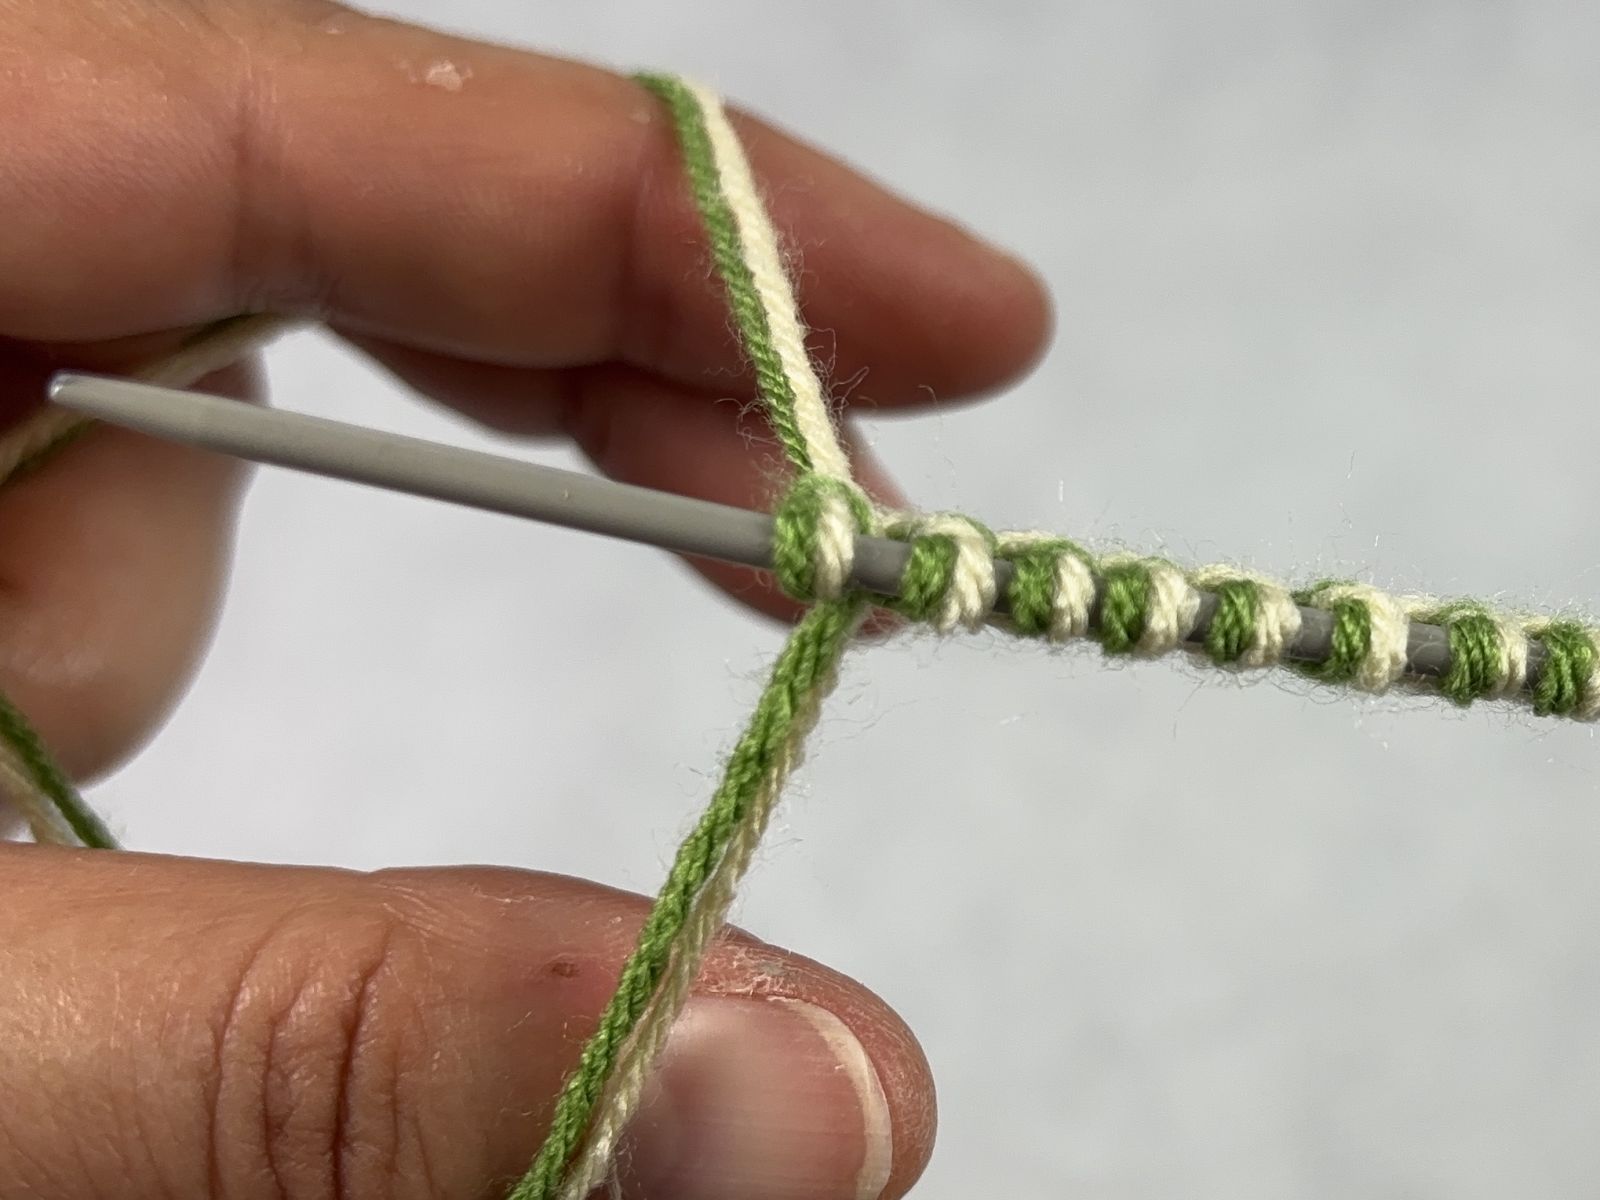
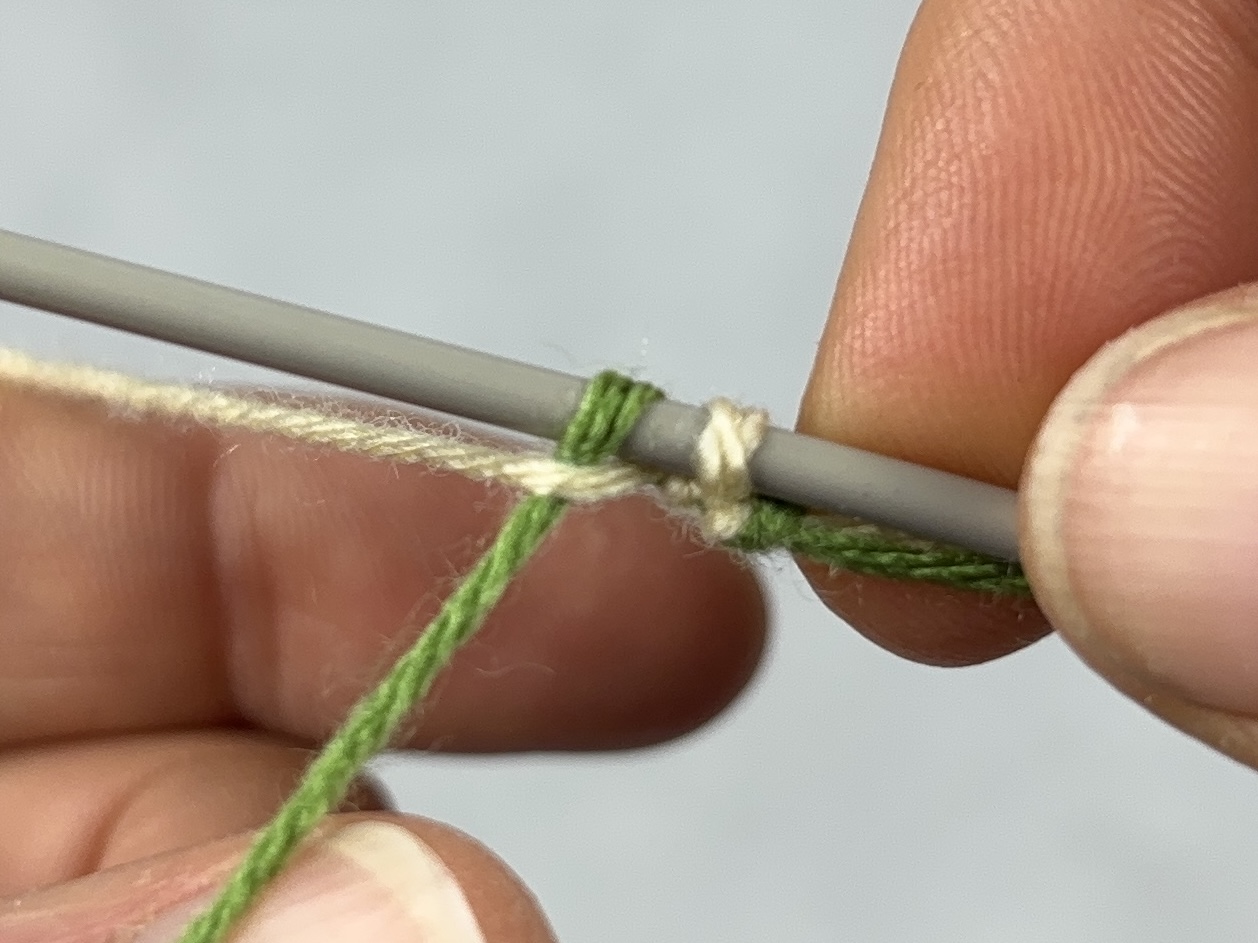
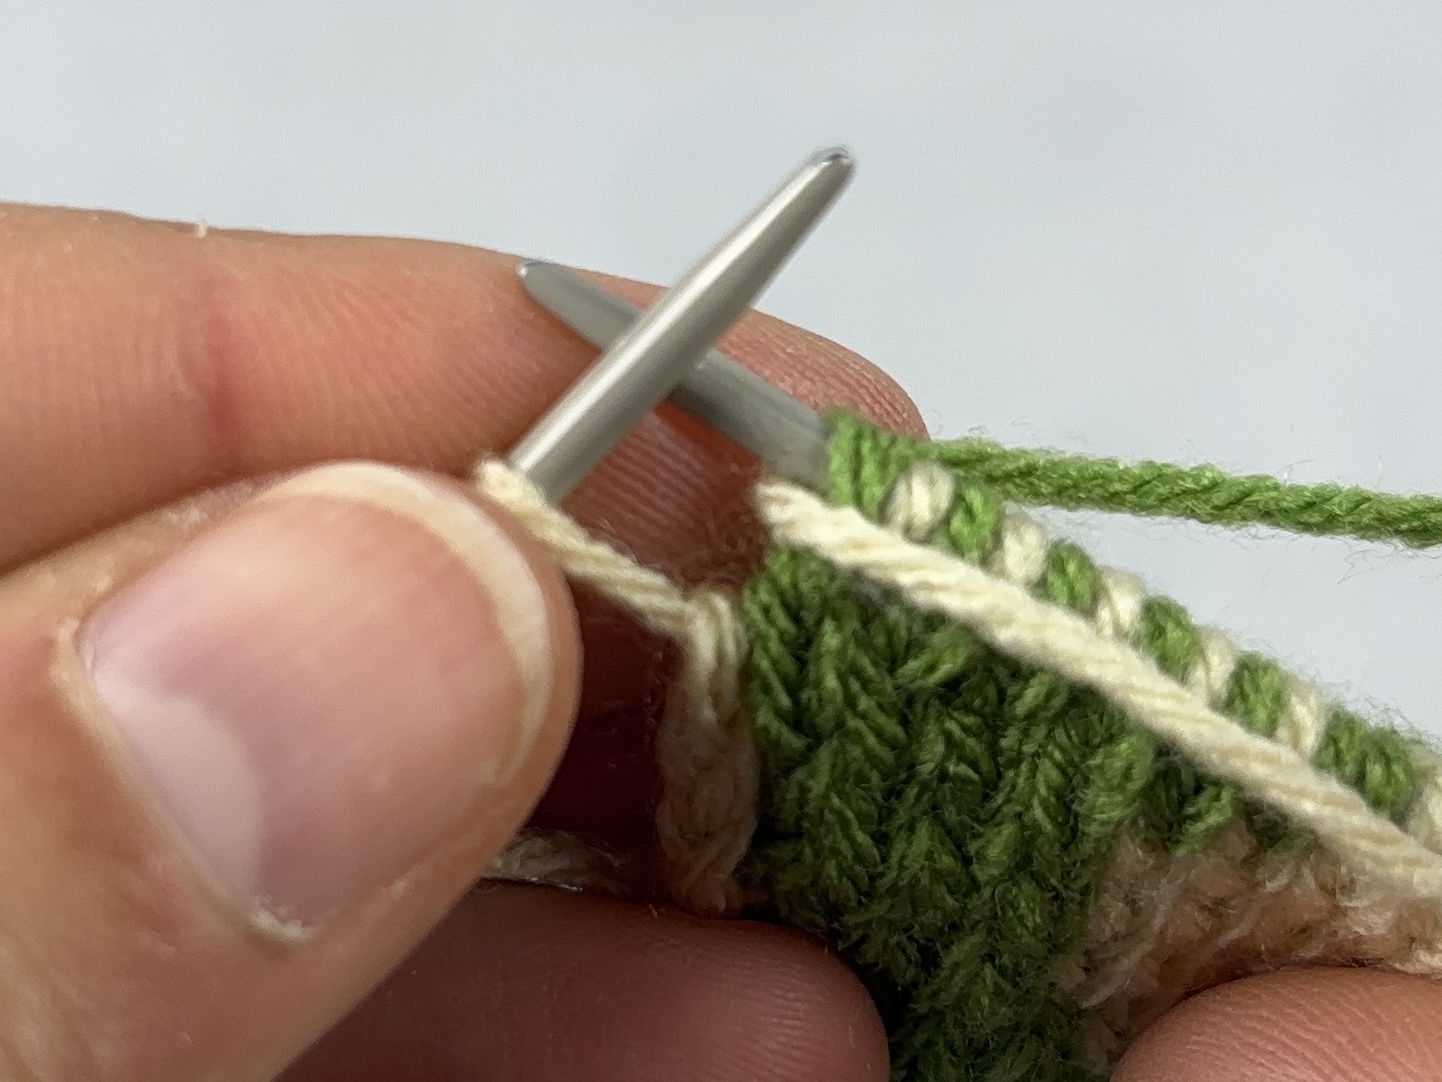
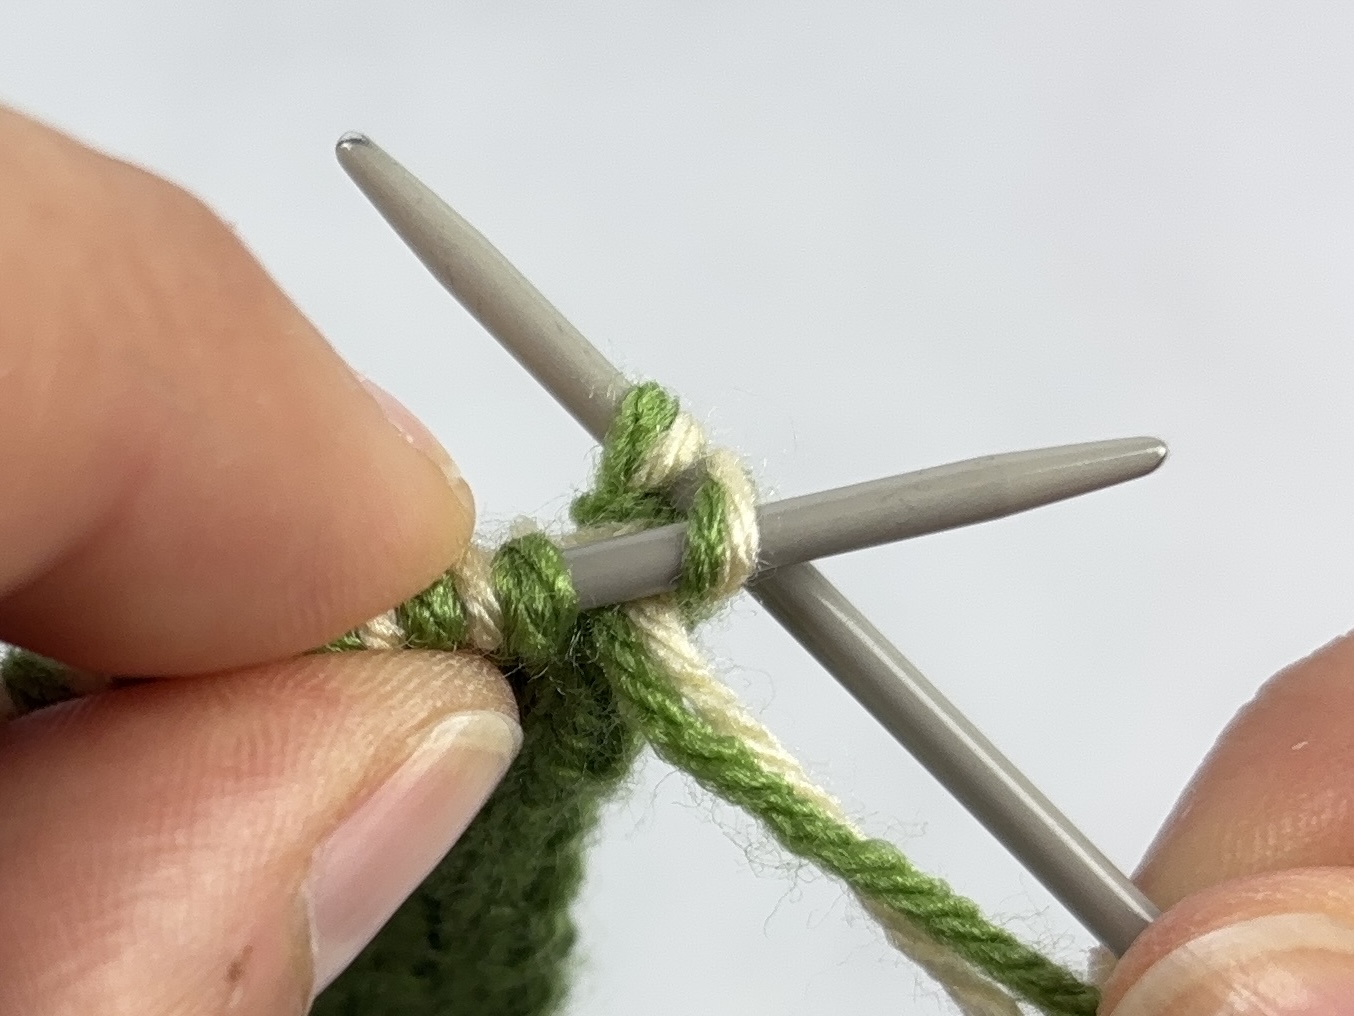
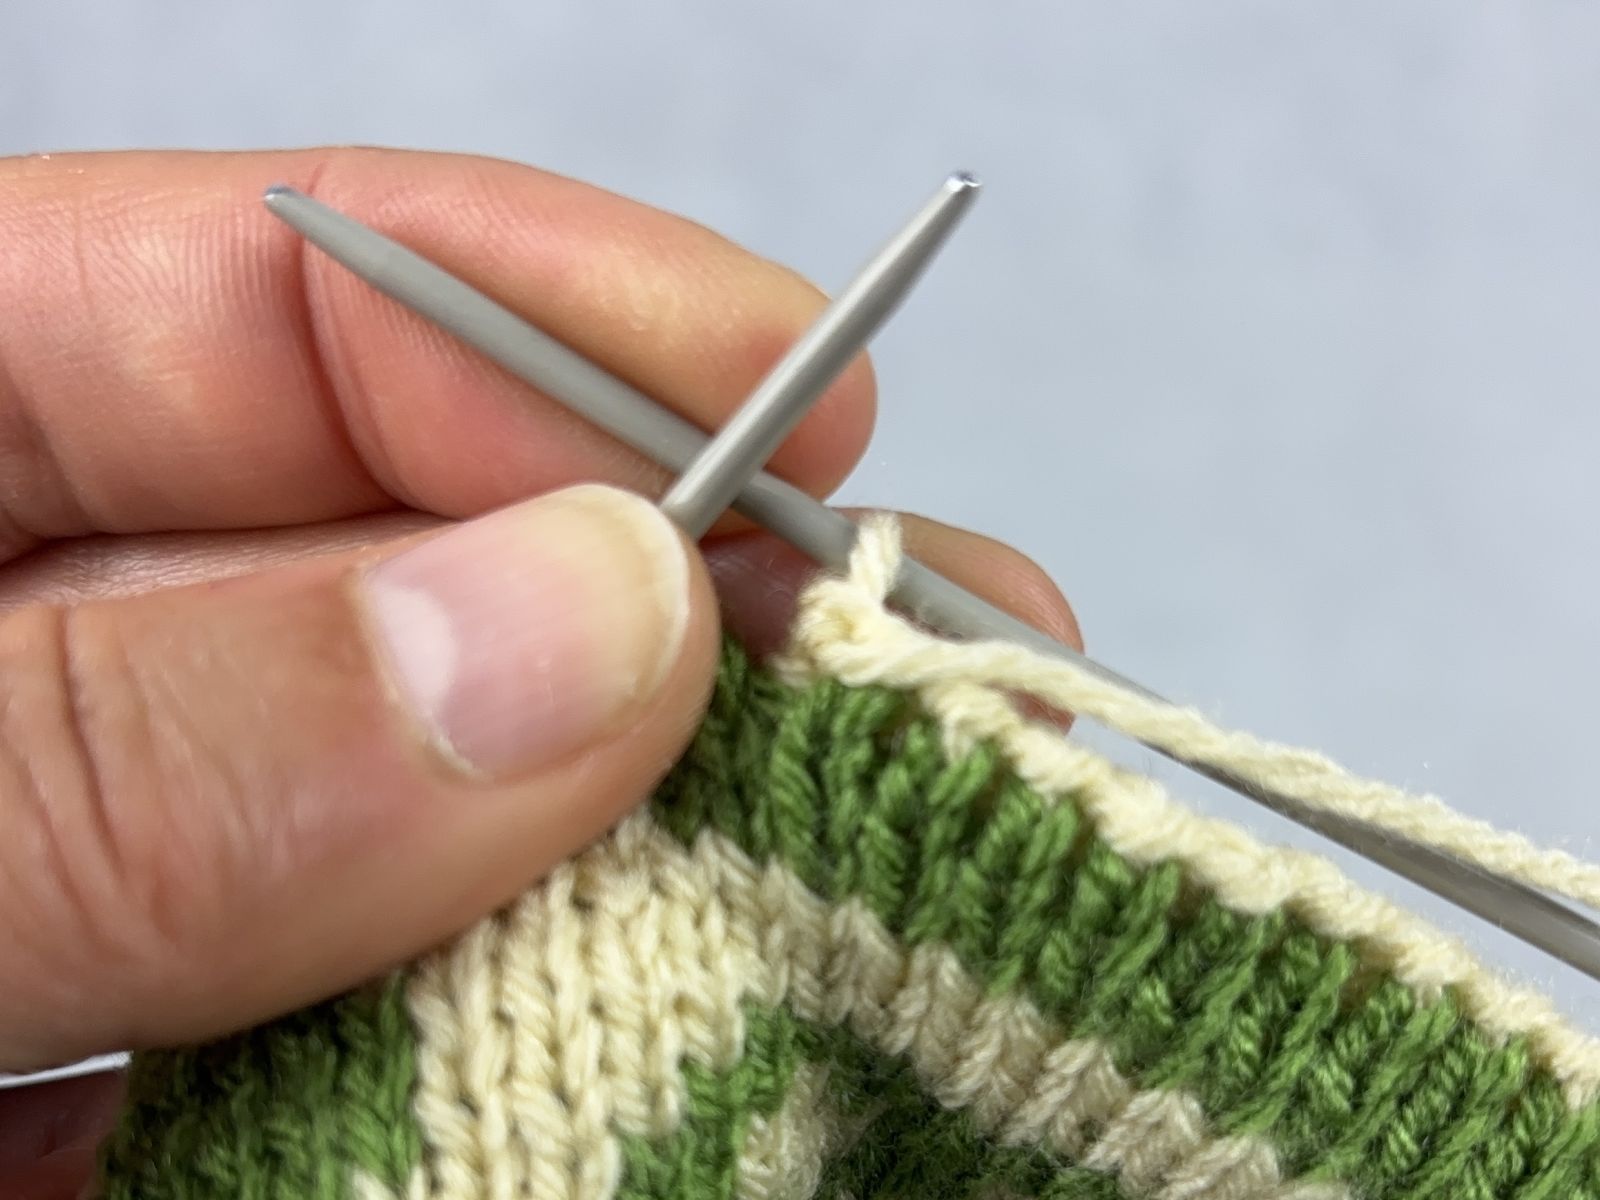
To ensure the colours are placed on the knitting needle in the same order in each double stitch, I often give it a little help by placing my right index finger on the two loops of a double stitch before I pull them tight. This prevents the loops from switching places just before the final pull.
|
|
|
|
Placing your index finger there prevents the two double stitches from switching places at the last moment. |
The colours in each double stitch are arranged in the same order on the needle. |
Properties:
- sturdy, decorative, compact edge
- immediately functional double-faced start
- creates a two-tone “edge”
- well-suited for beginners in double-faced knitting
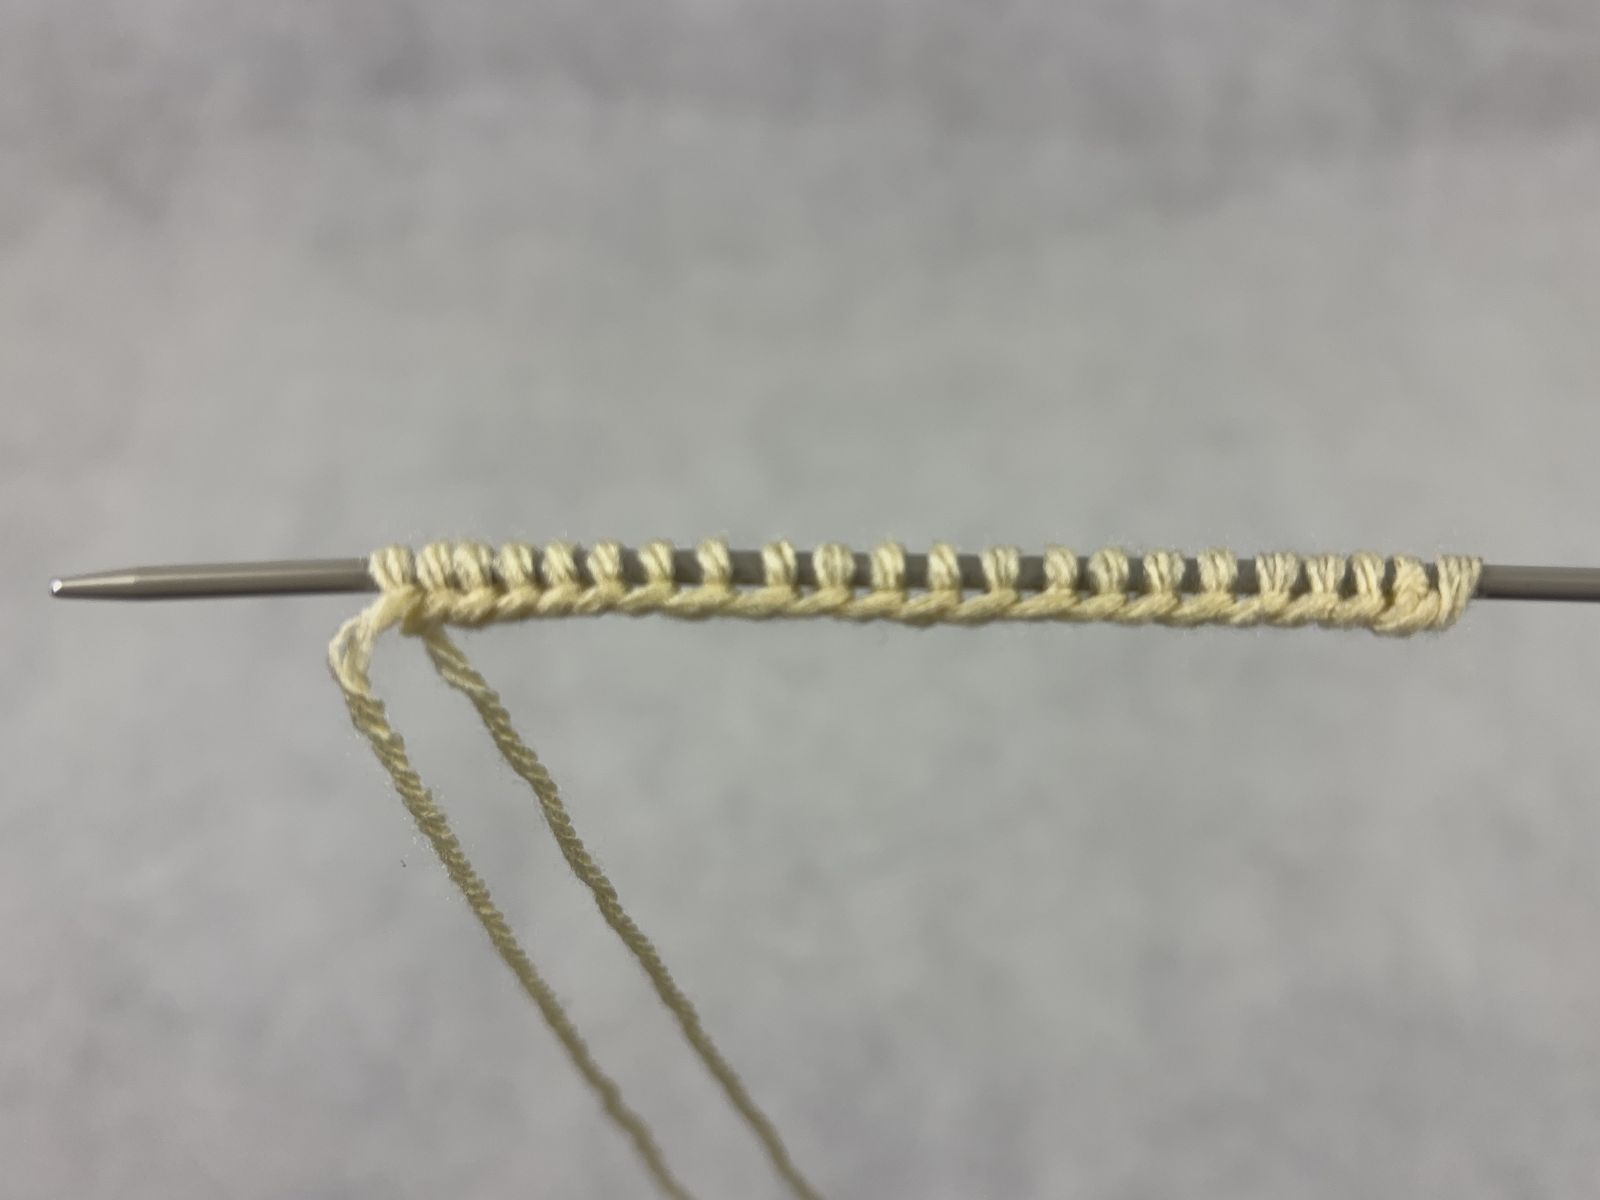
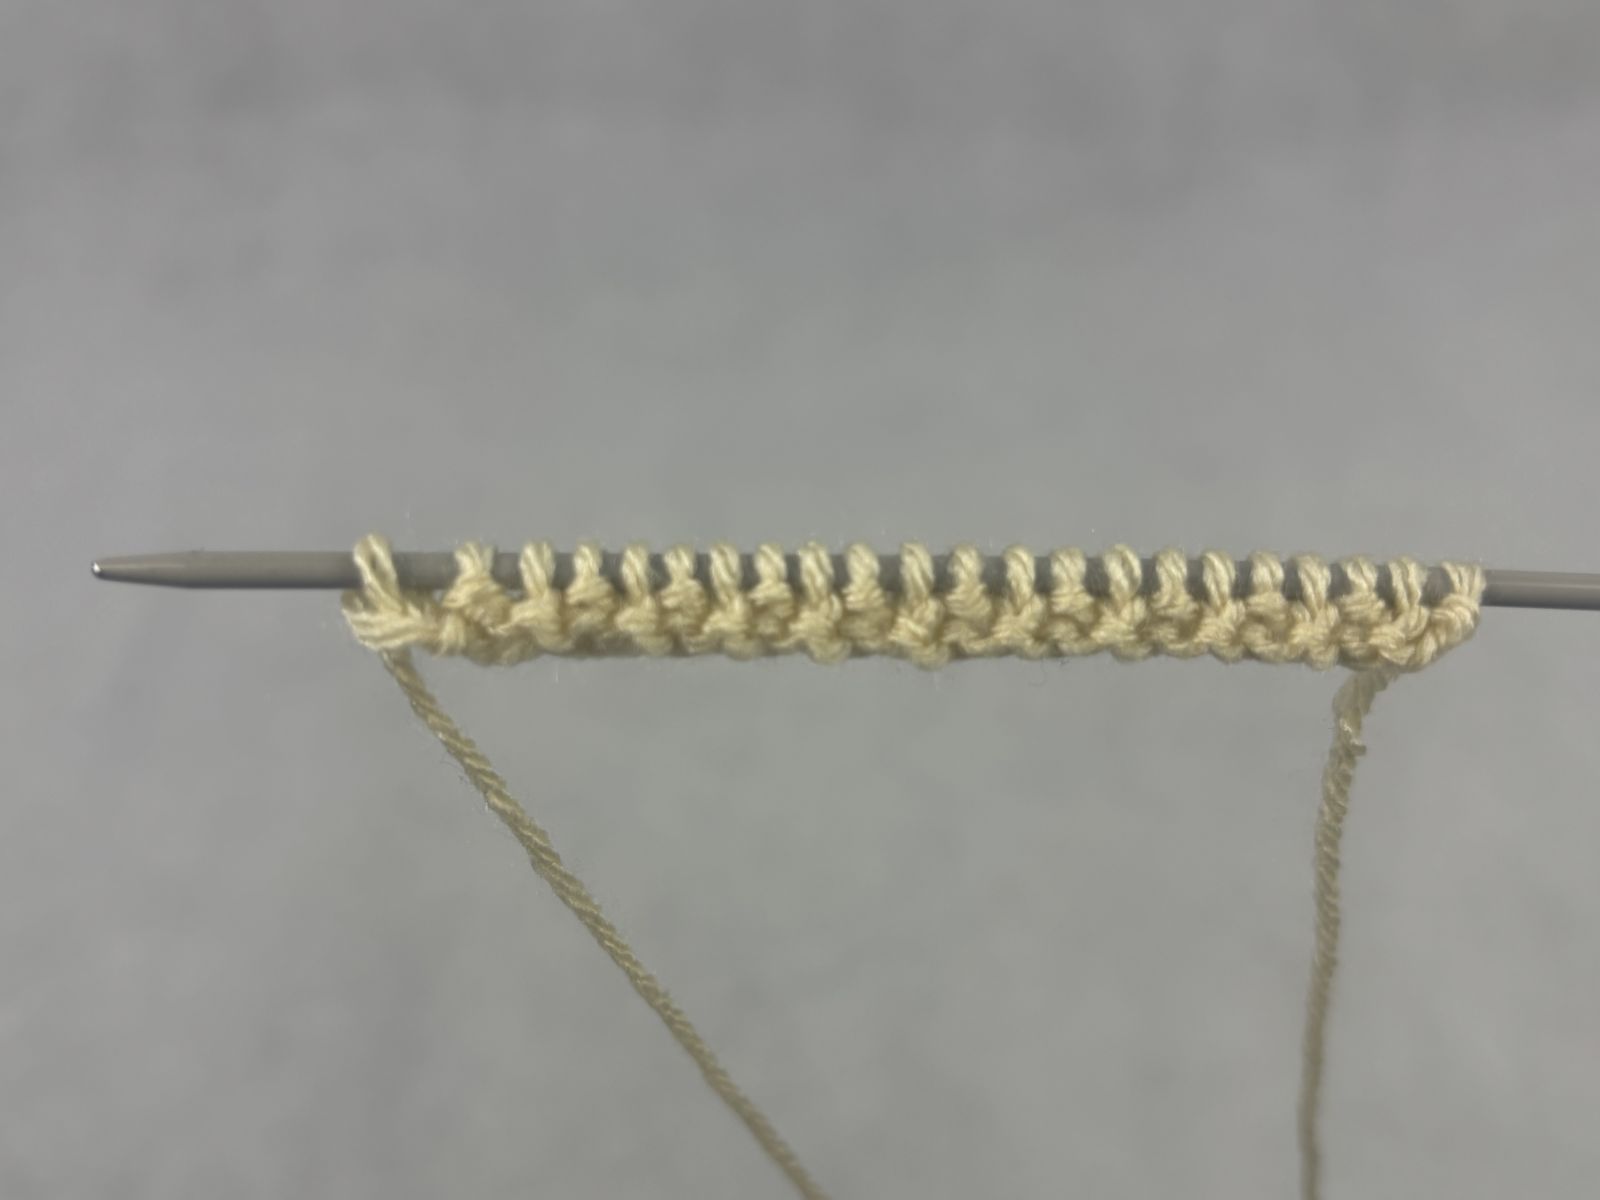
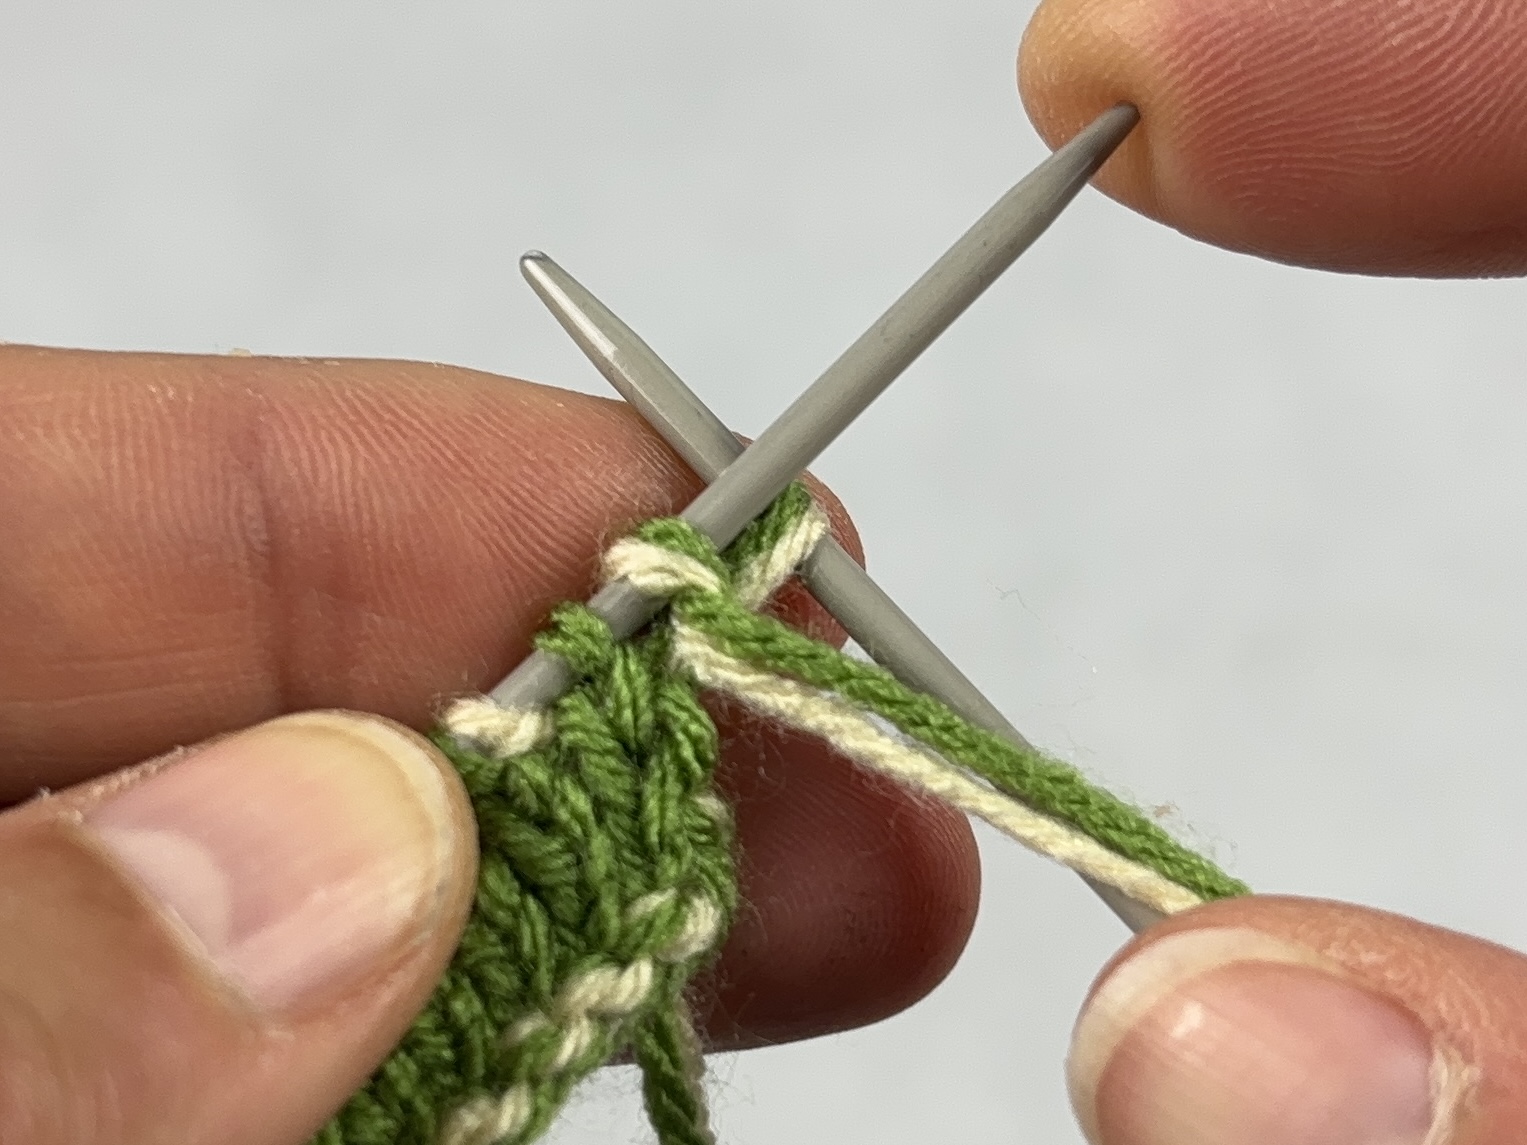
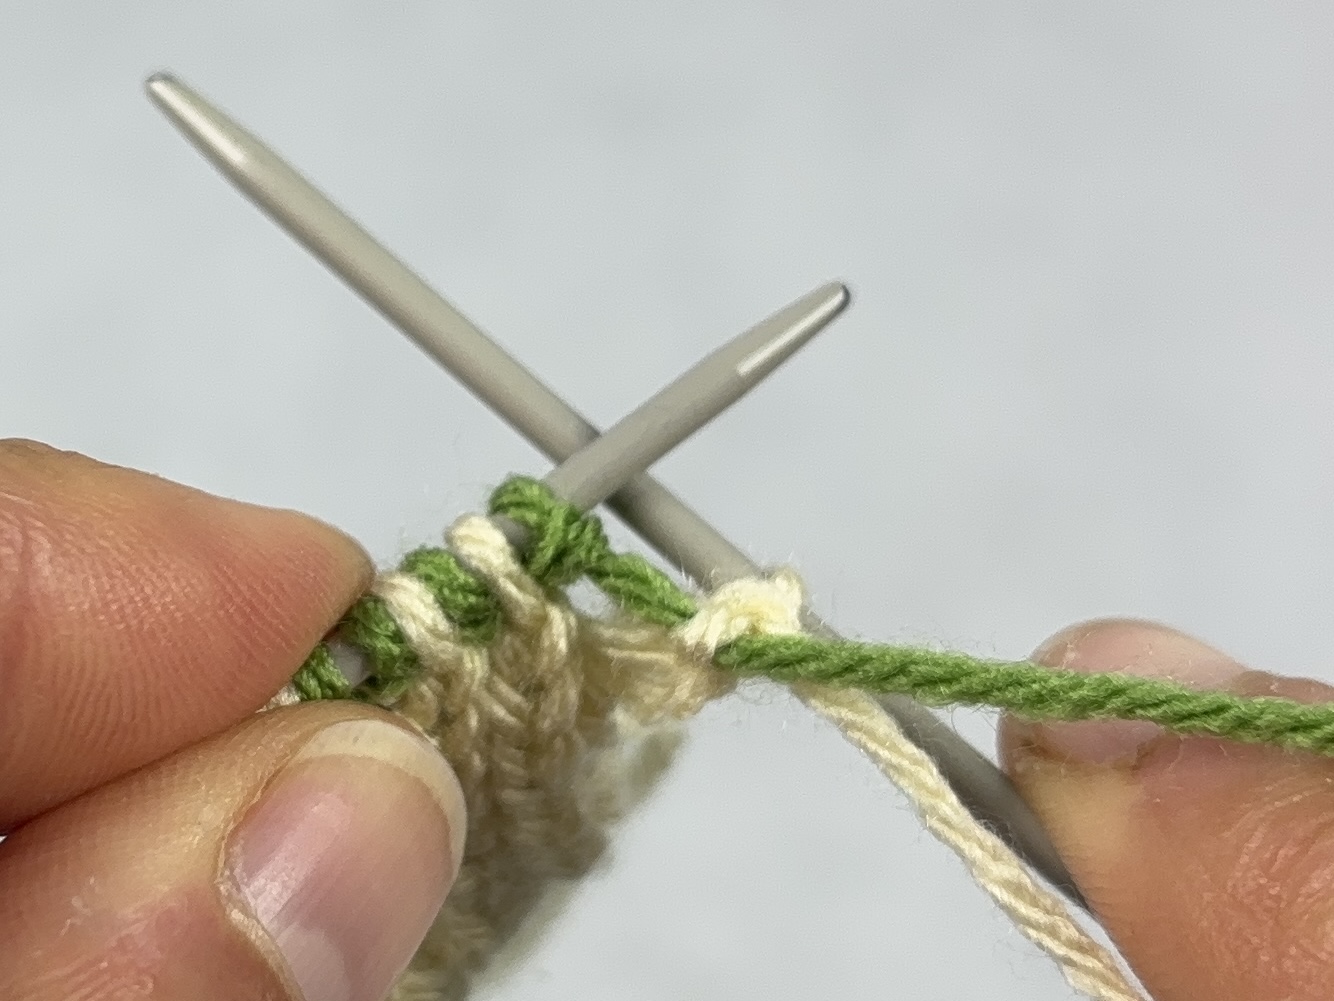
Simple Double Cast-On
Technique:
- Using one colour, cast on double the number of stitches using the long-tail cast-on method
- The second colour is introduced later
|
|
|
|
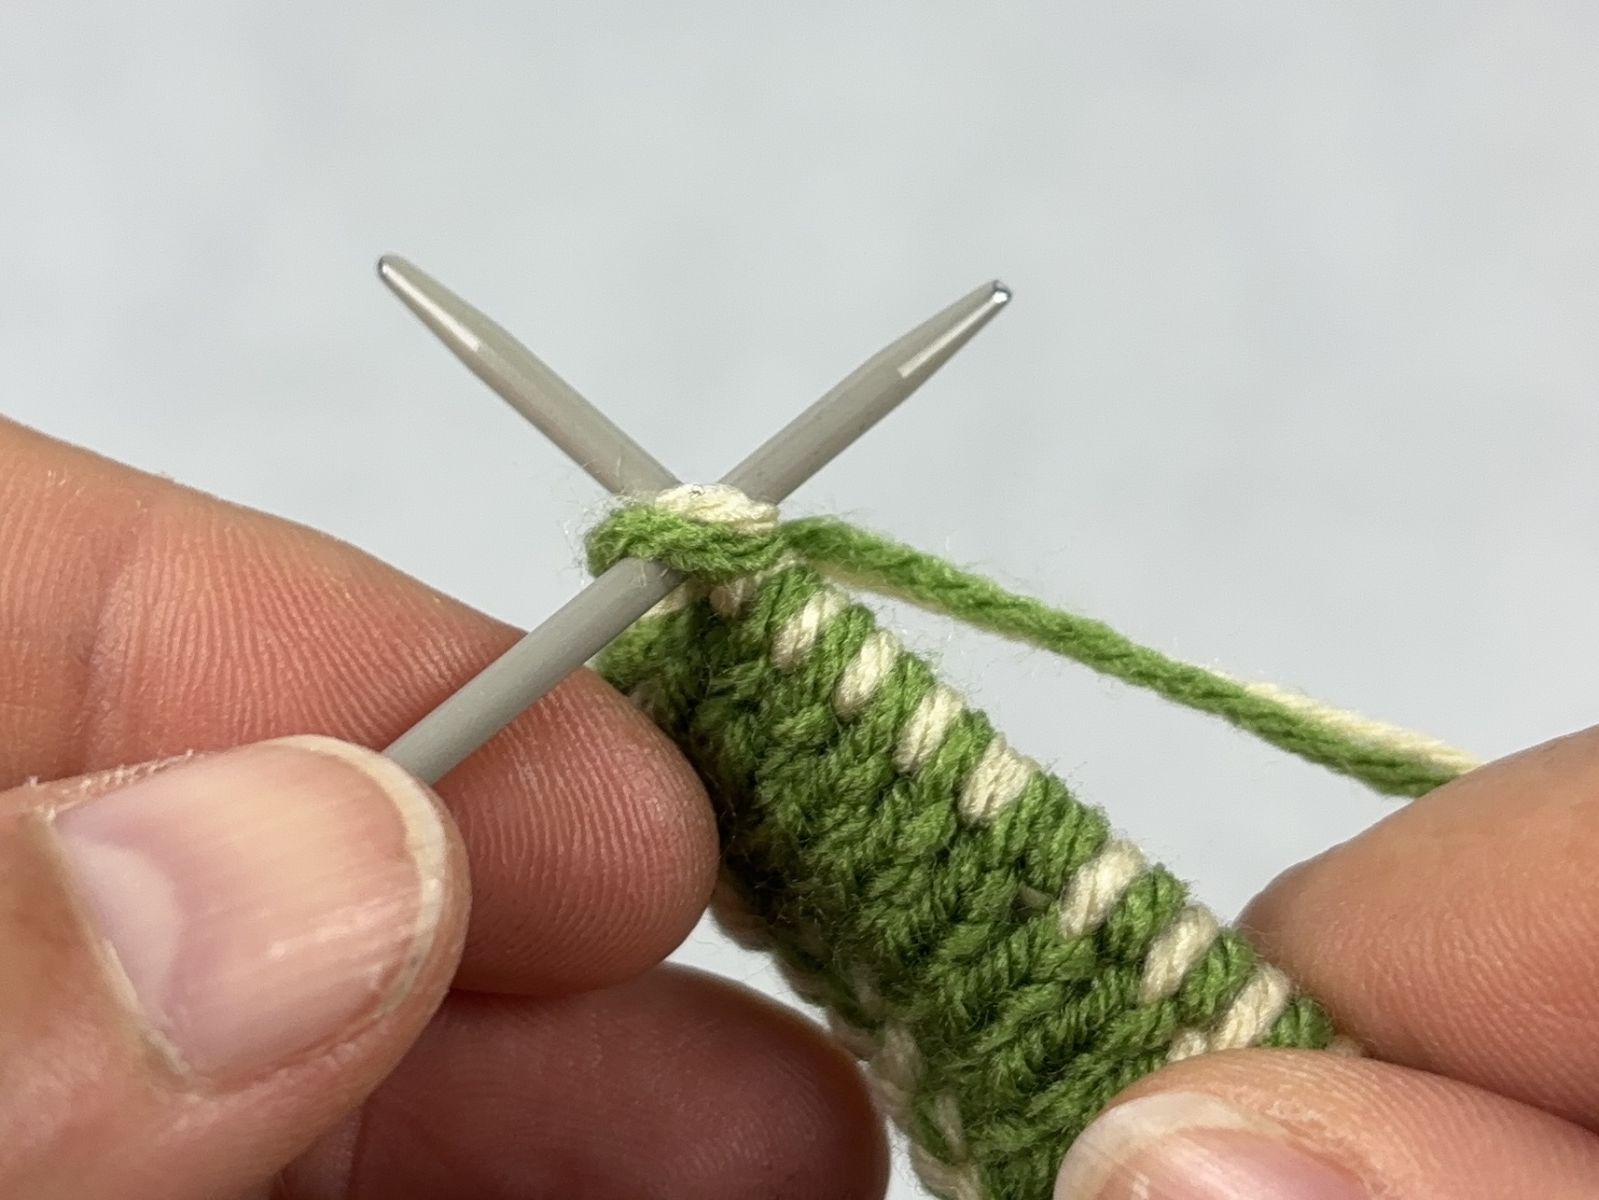
For each double stitch you need, cast on two stitches, then add two edge stitches.
Formula: Cast-on stitches = (number of double stitches × 2) + 2 edge stitches = (2 × 2 double stitches)
Example: For 10 double stitches, you need 20 stitches. With 4 additional edge stitches, you cast on a total of 24 stitches. |
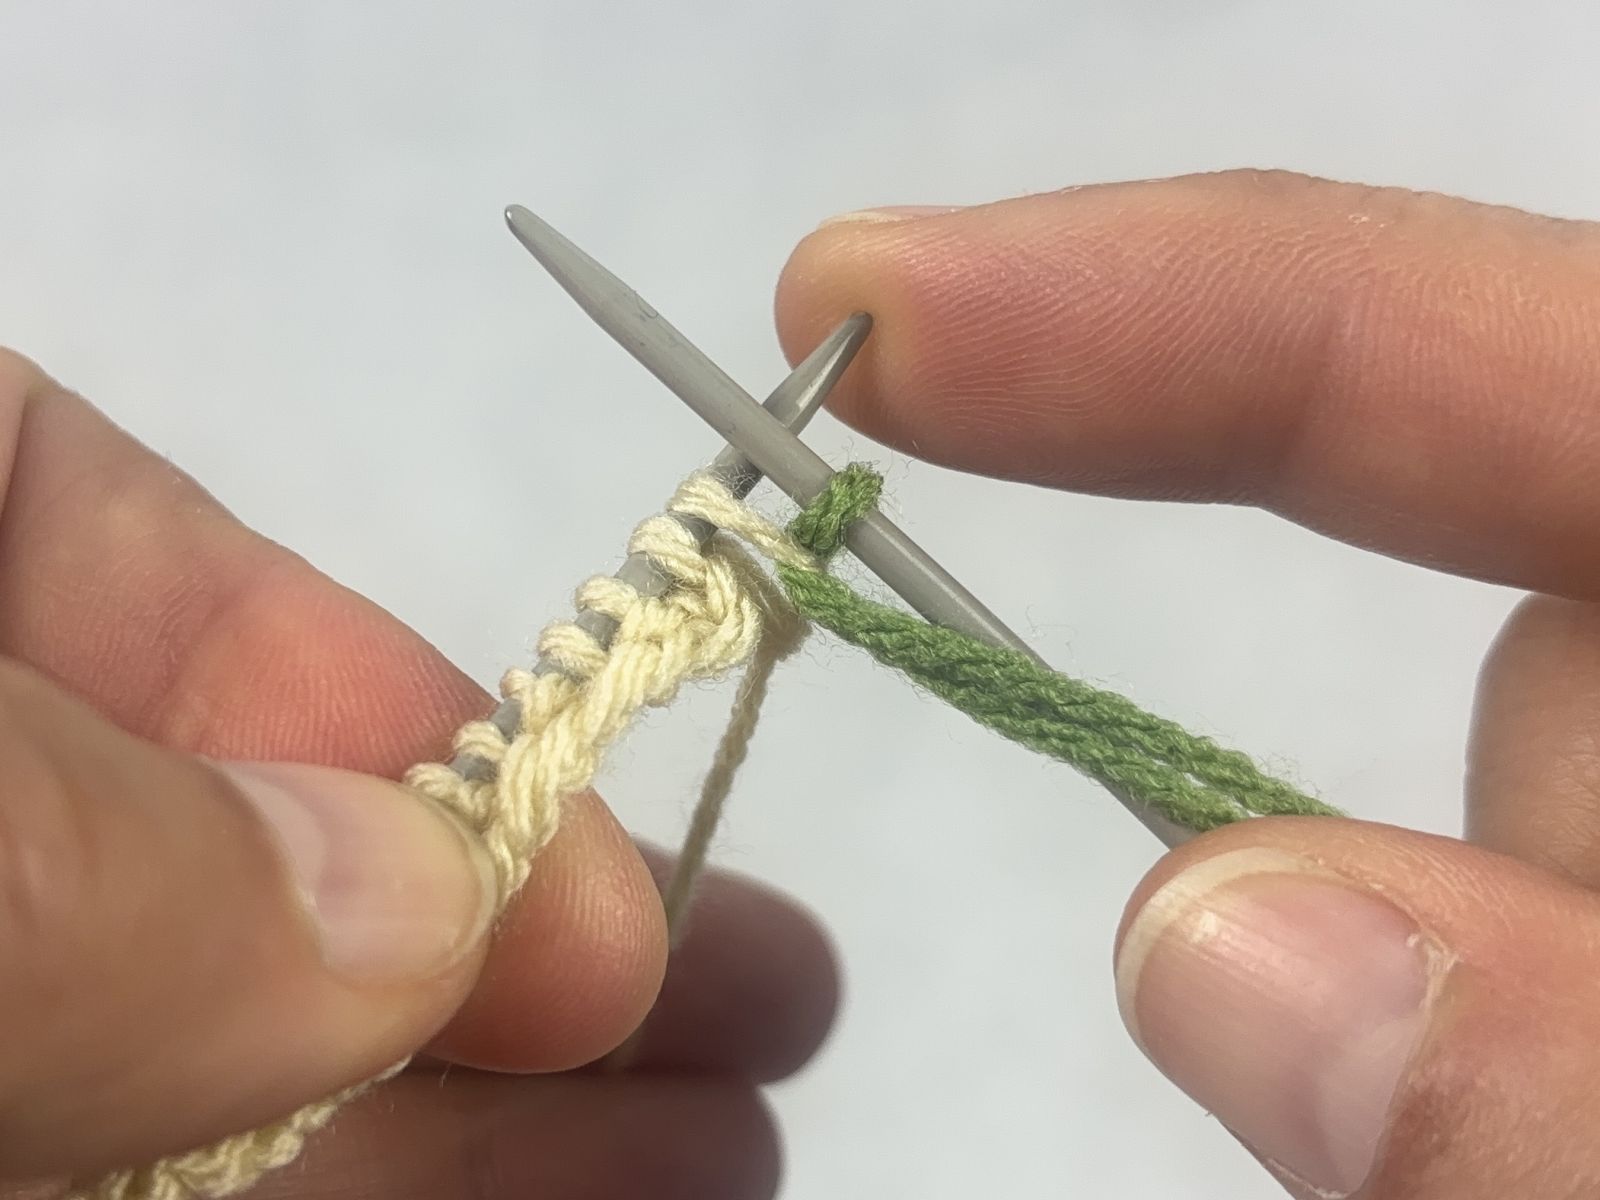
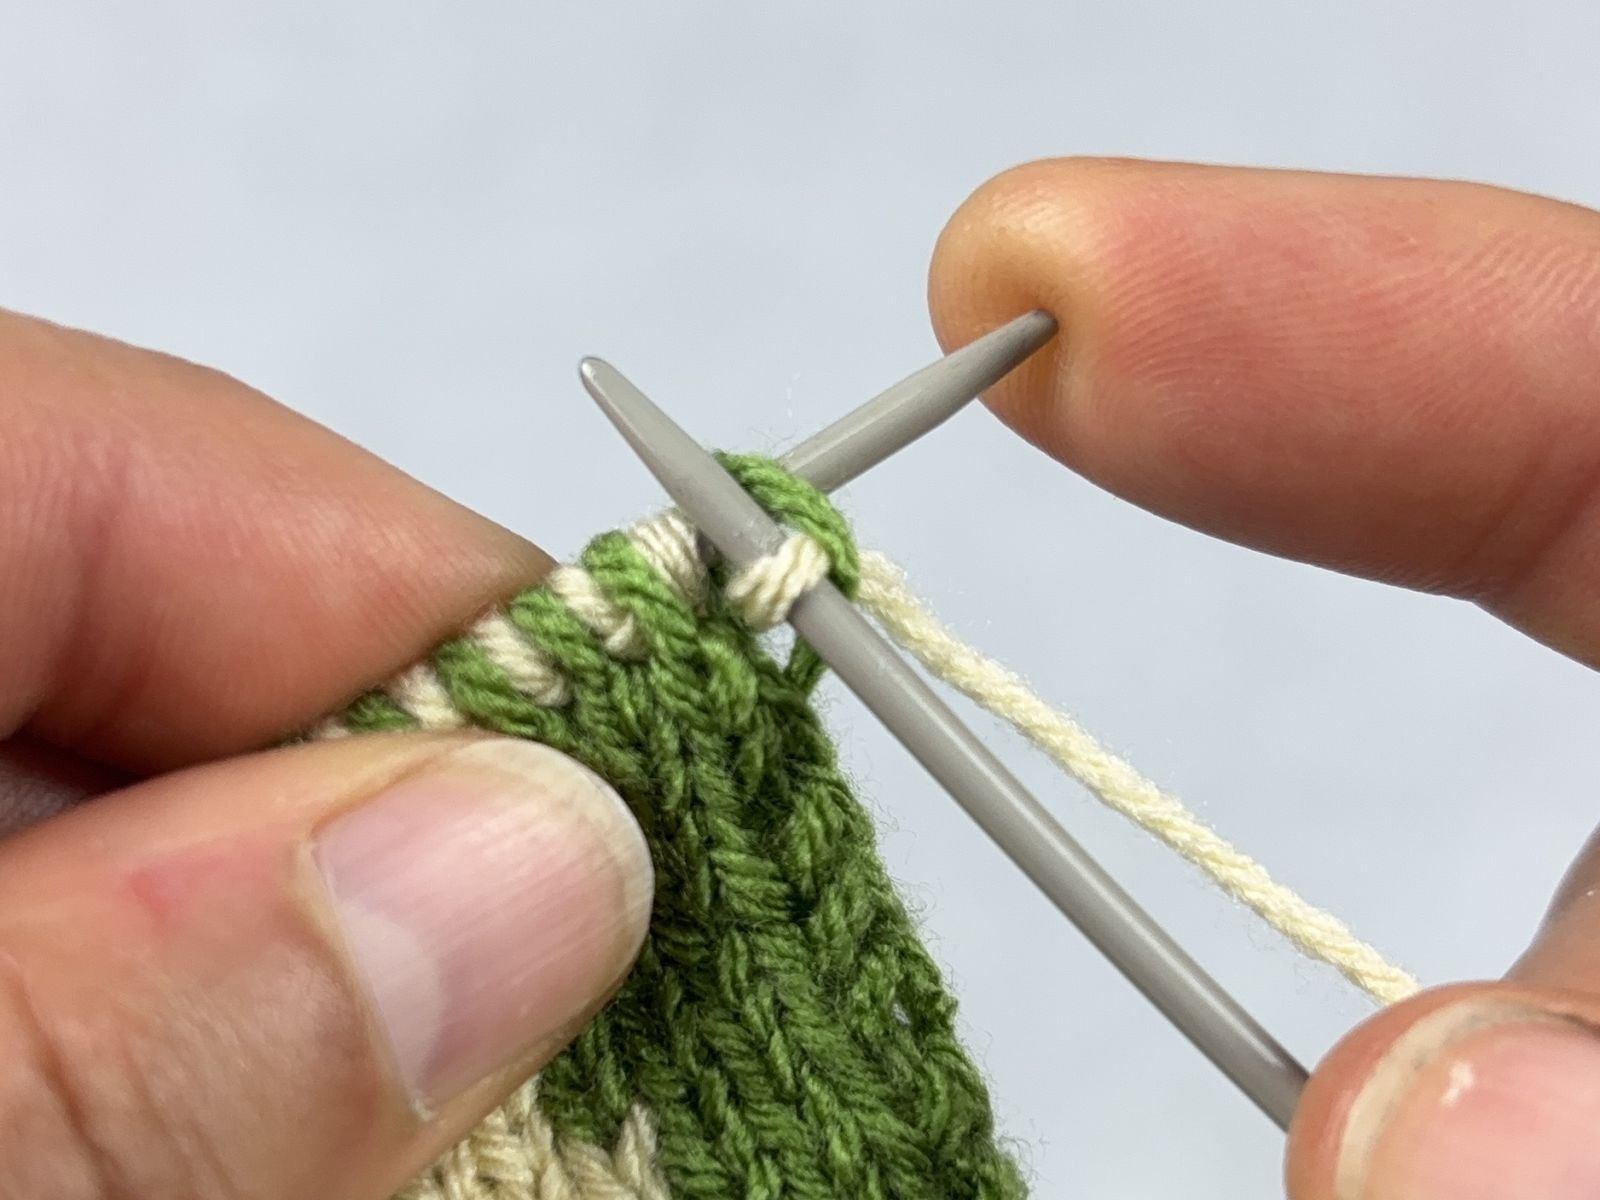
Knit the first stitch as indicated (purl or knit). Then knit the remaining stitches in alternating patterns: 1 purl, 1 knit, 1 purl, 1 knit, and so on, until you reach the last stitch. Knit the last stitch as well. |
|
|
|
|
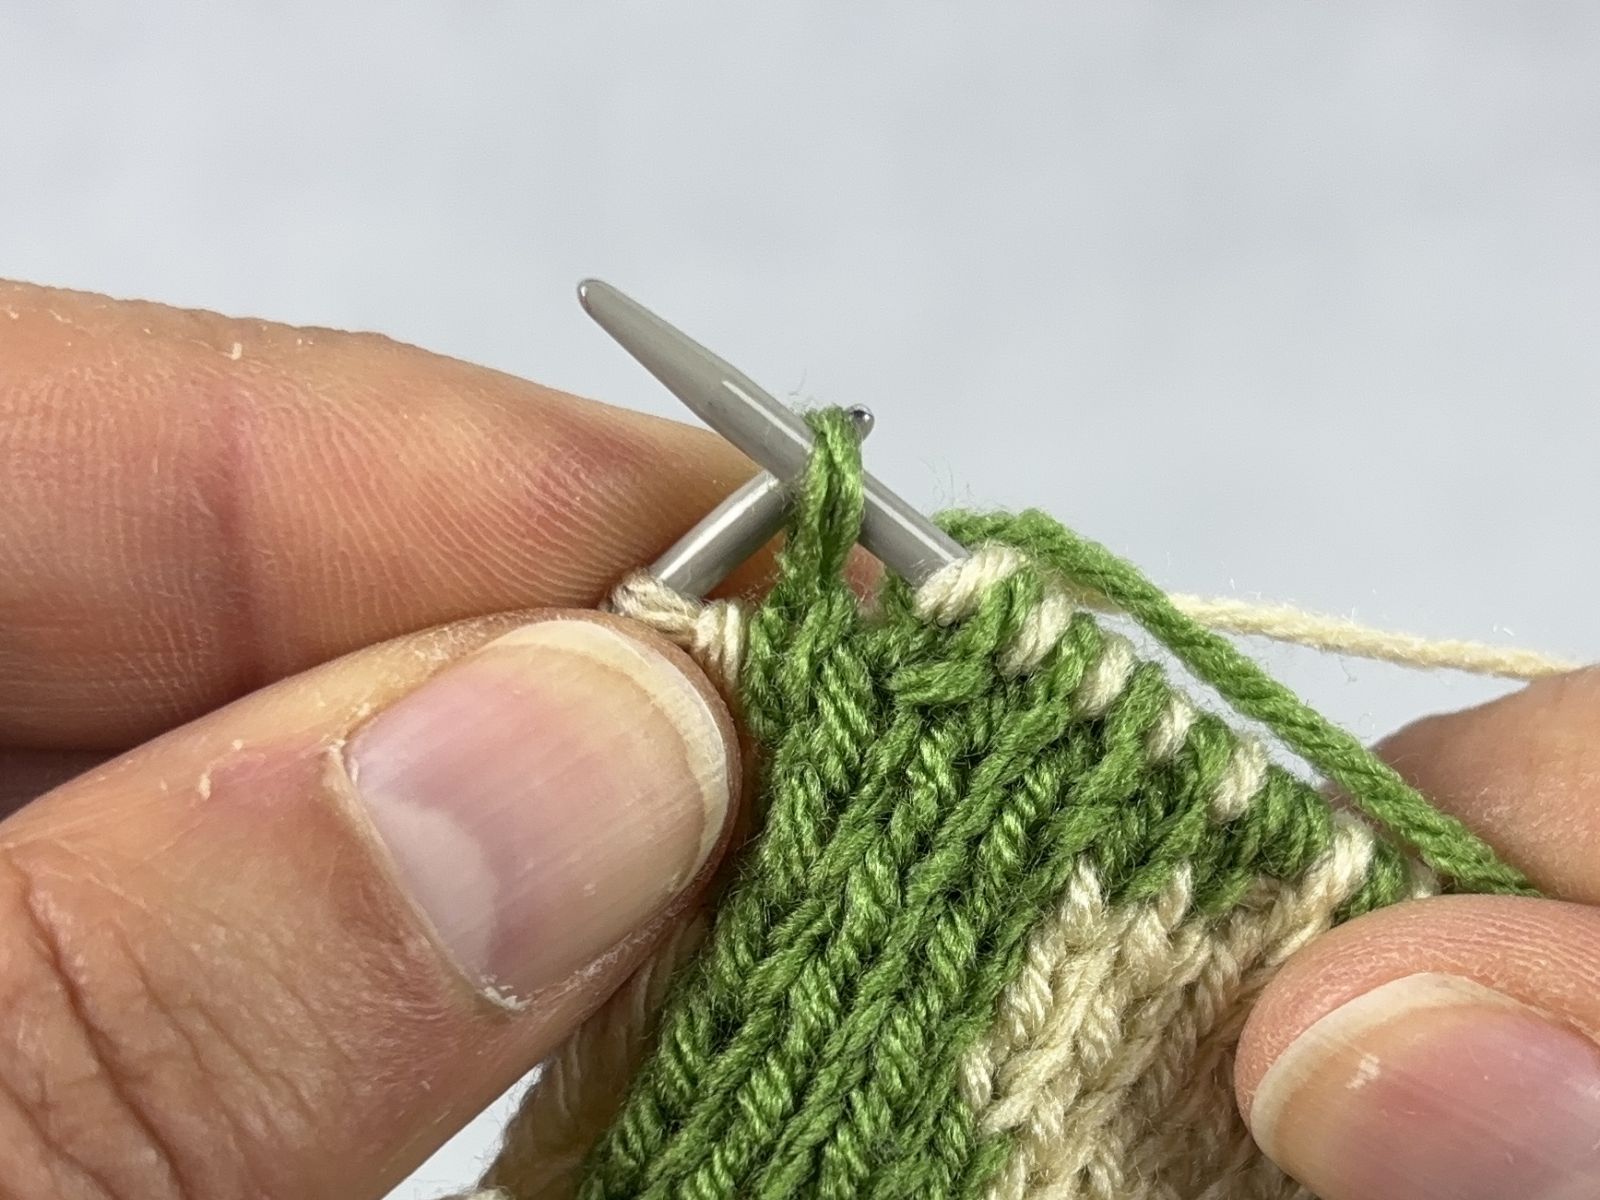
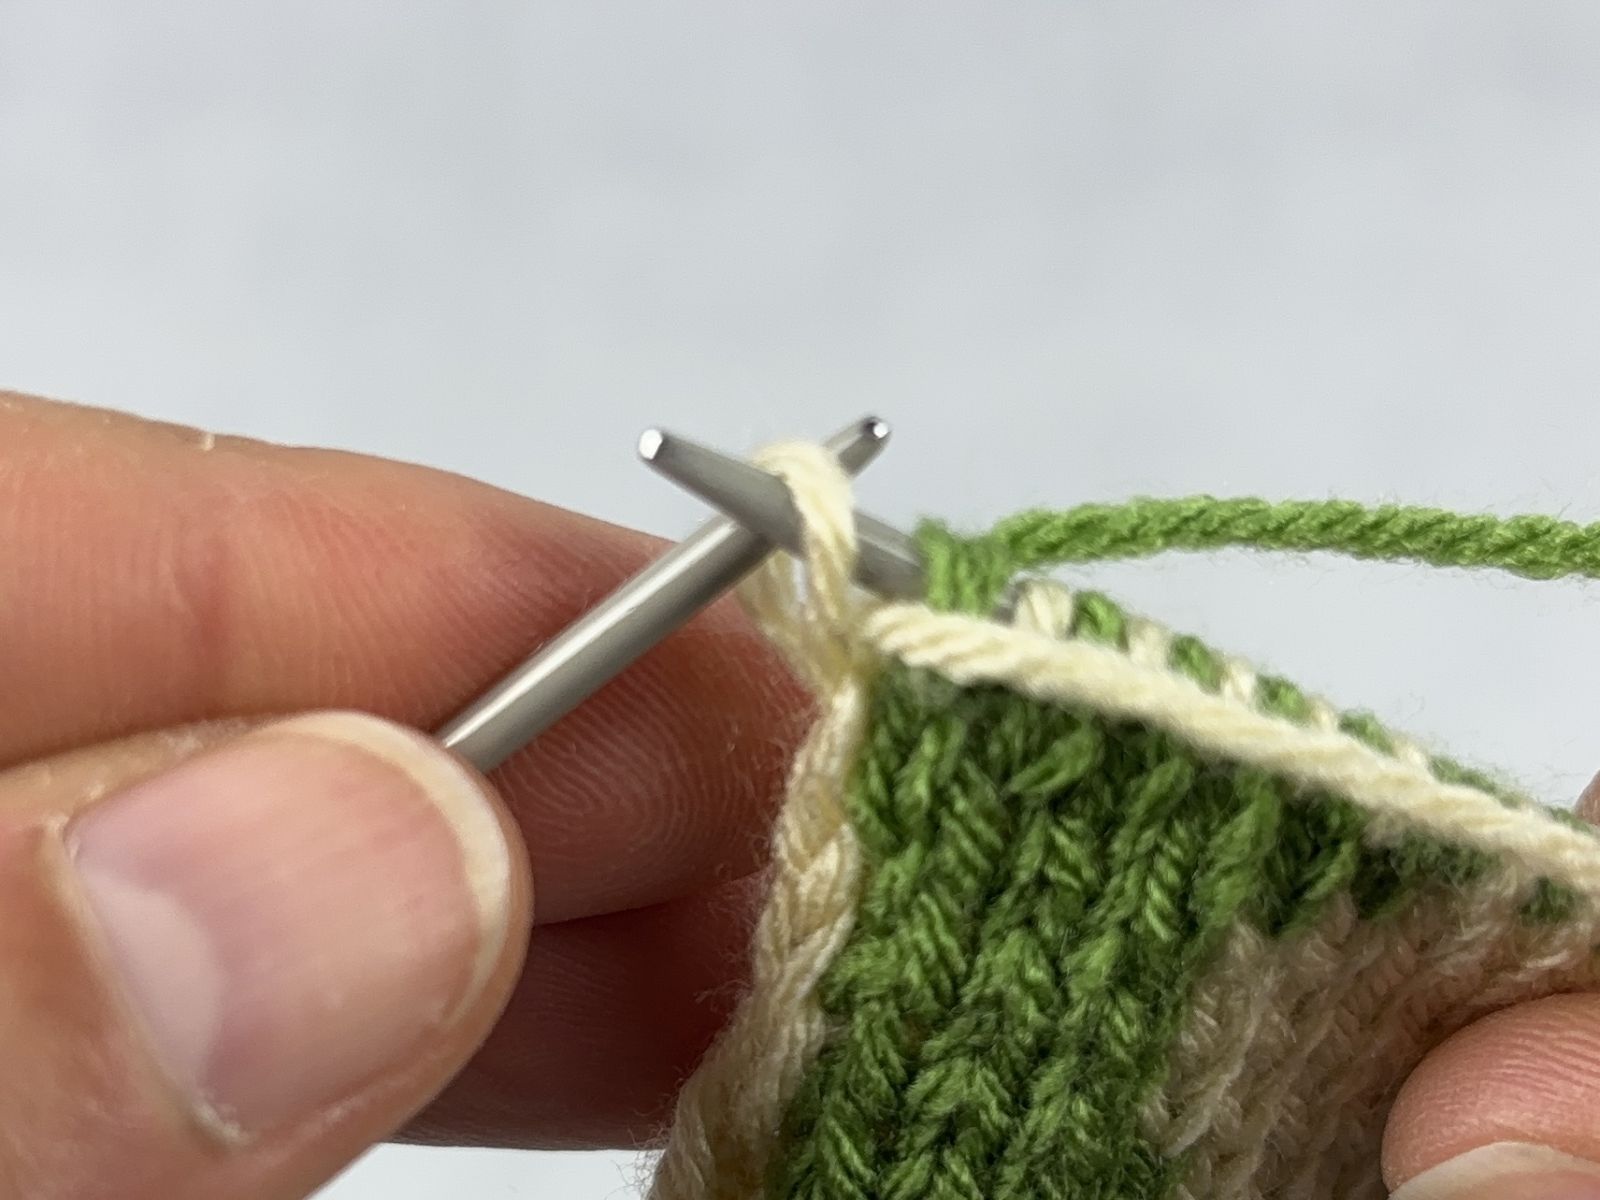
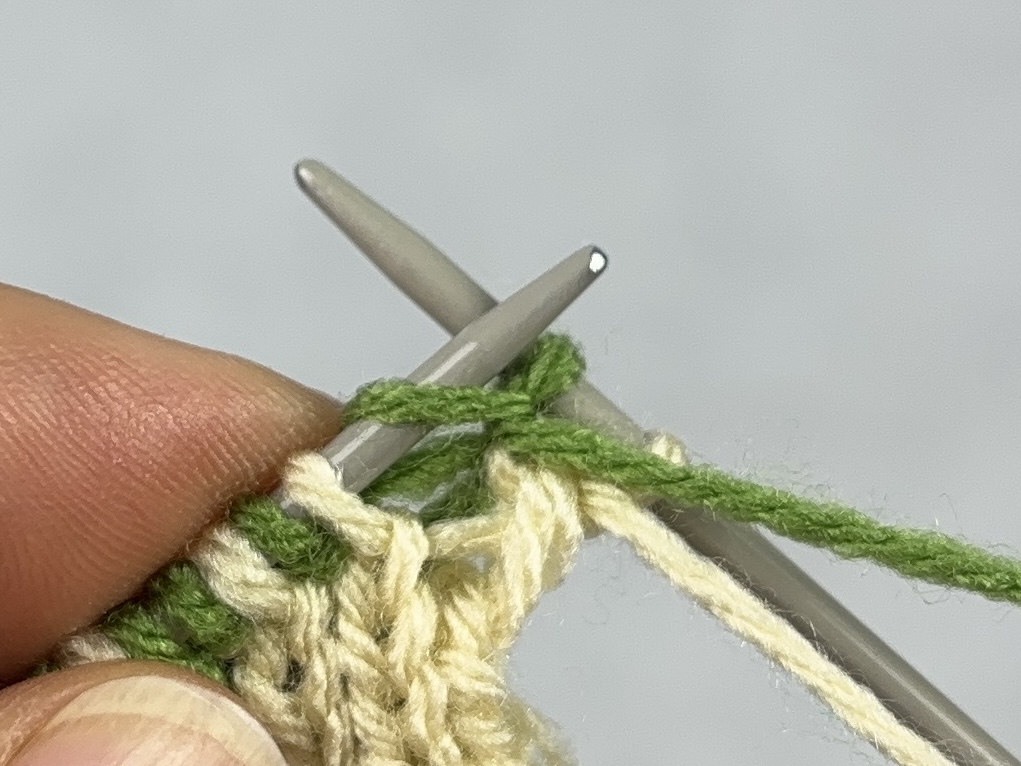
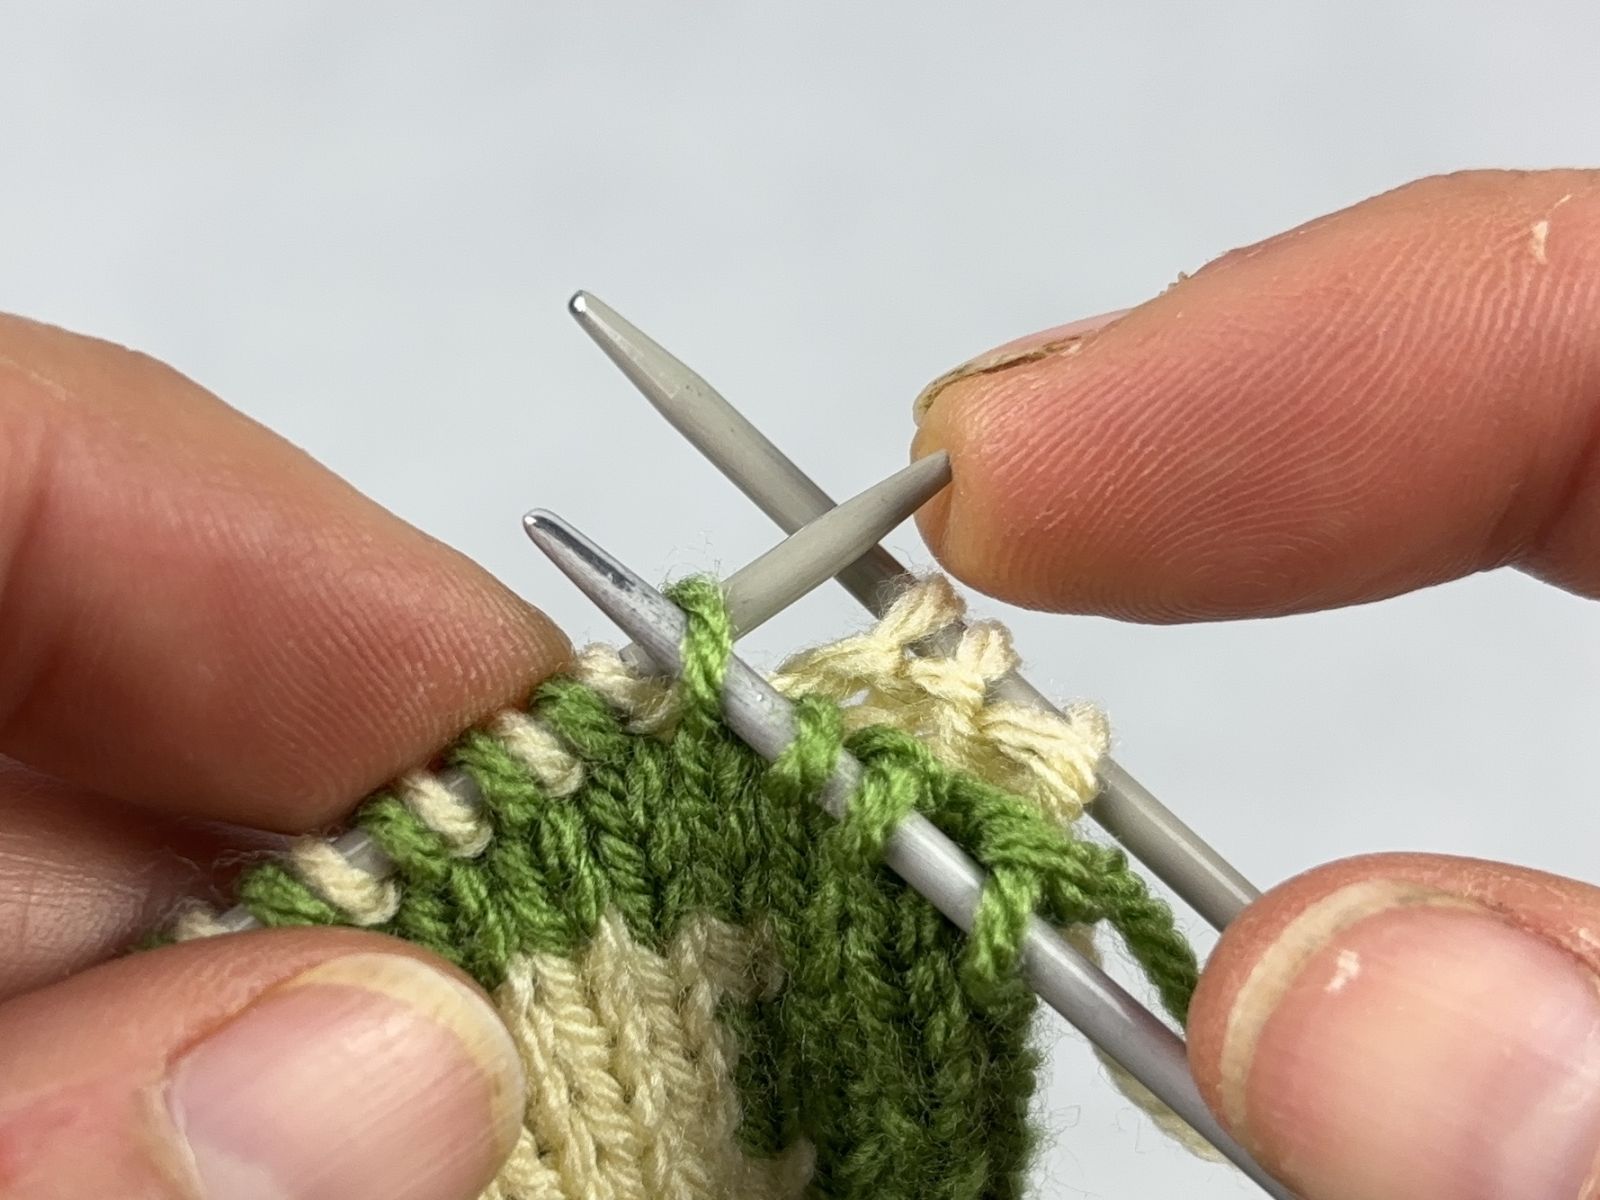
To start the second colour, pull the new thread through the first loop. Be sure to leave a sufficiently long tail. This tail should be carefully sewn off once the project is finished. |
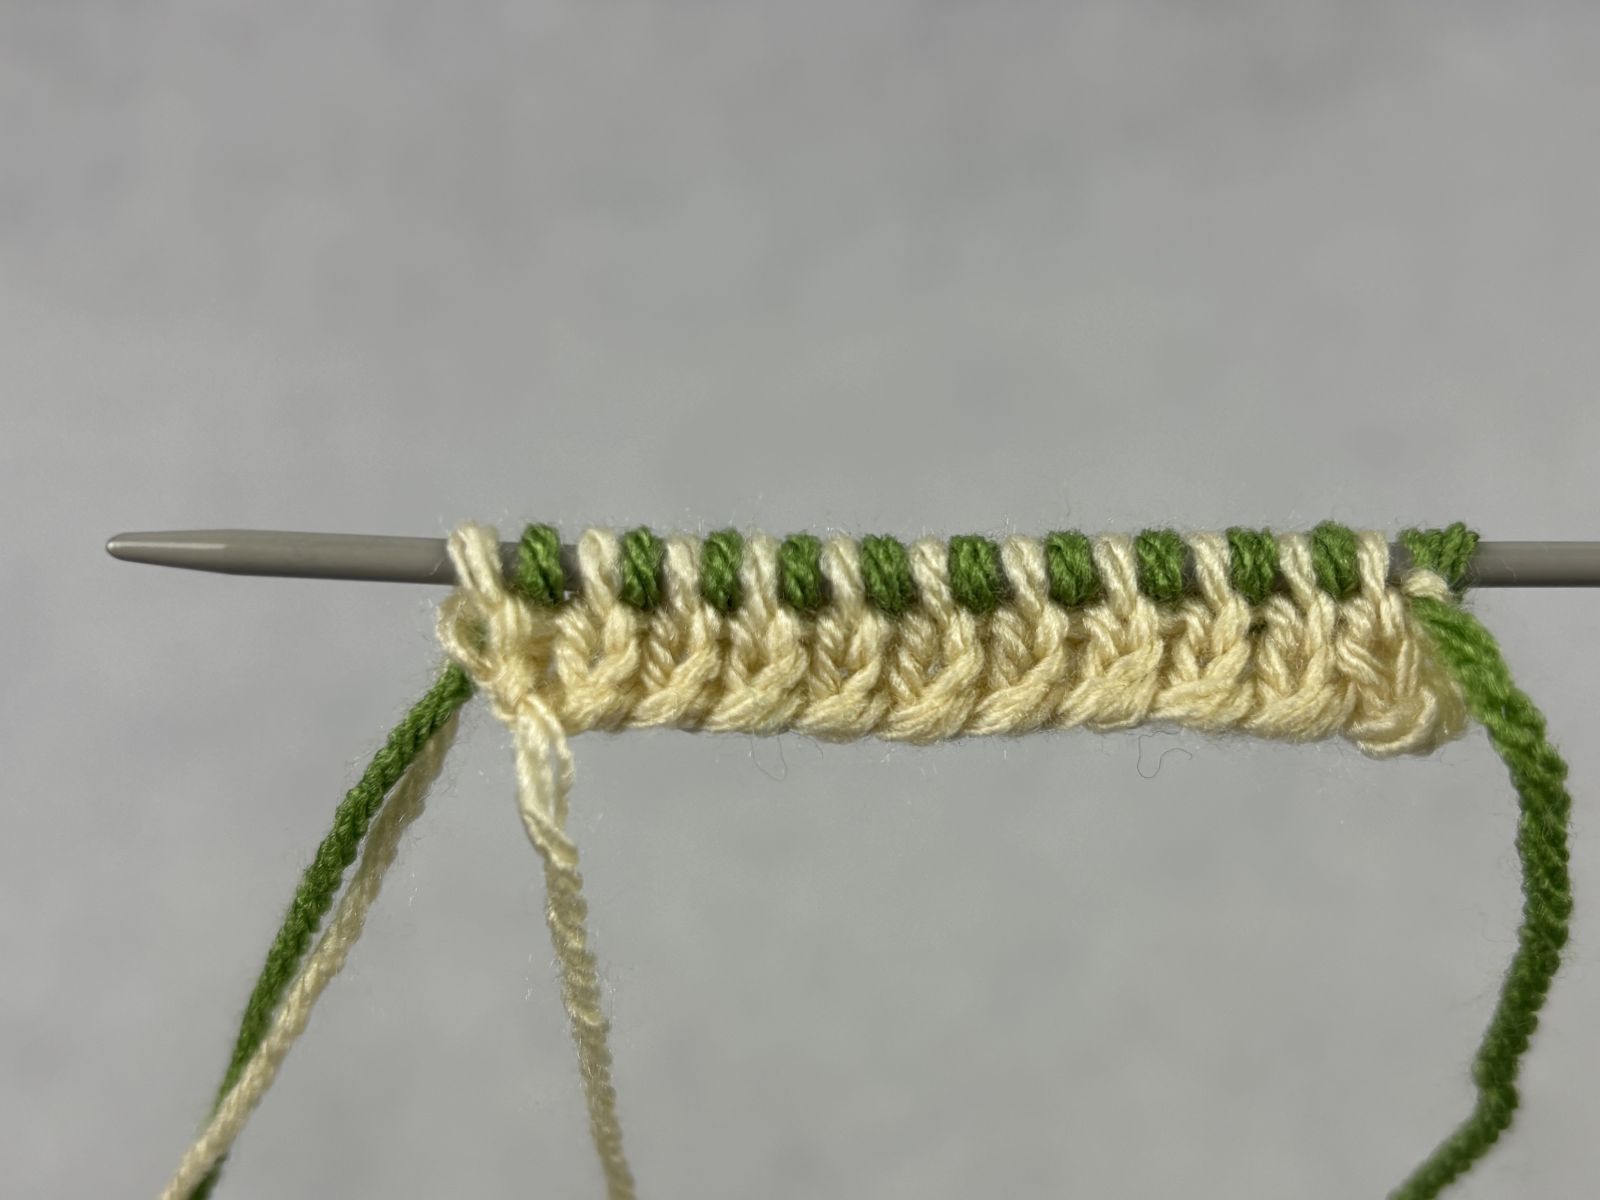
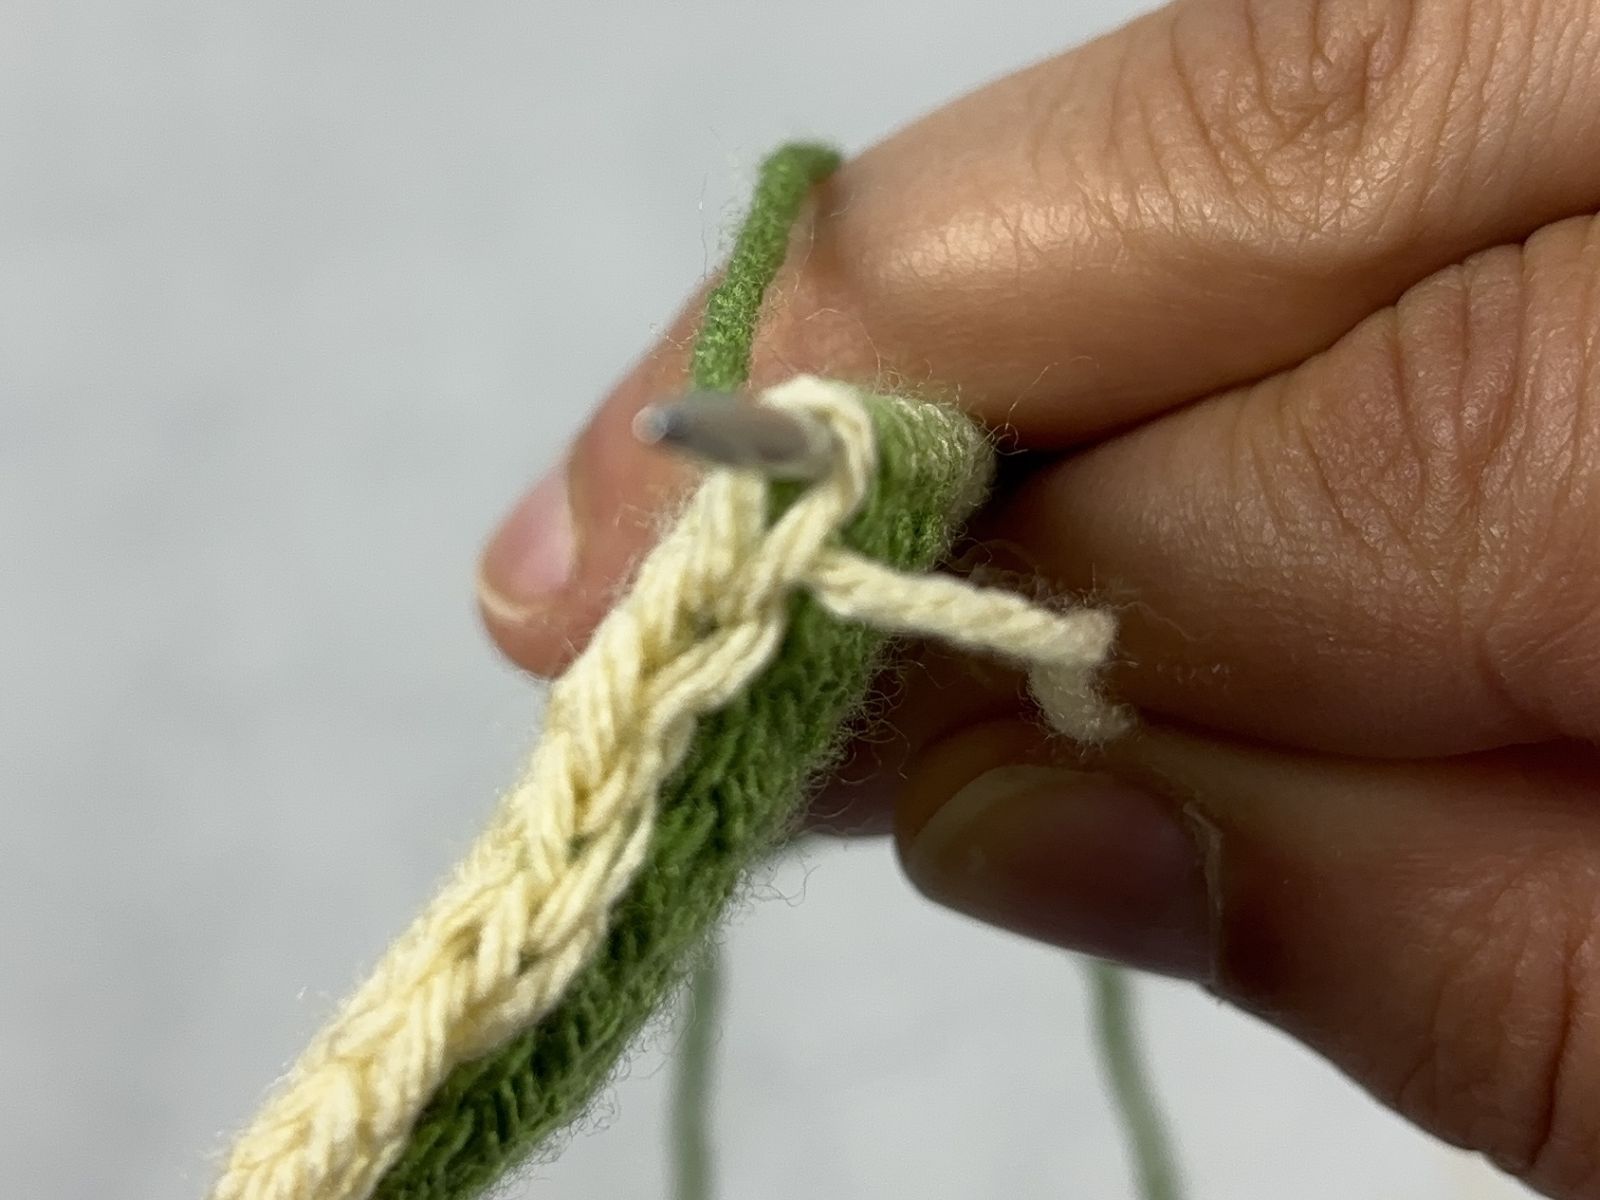
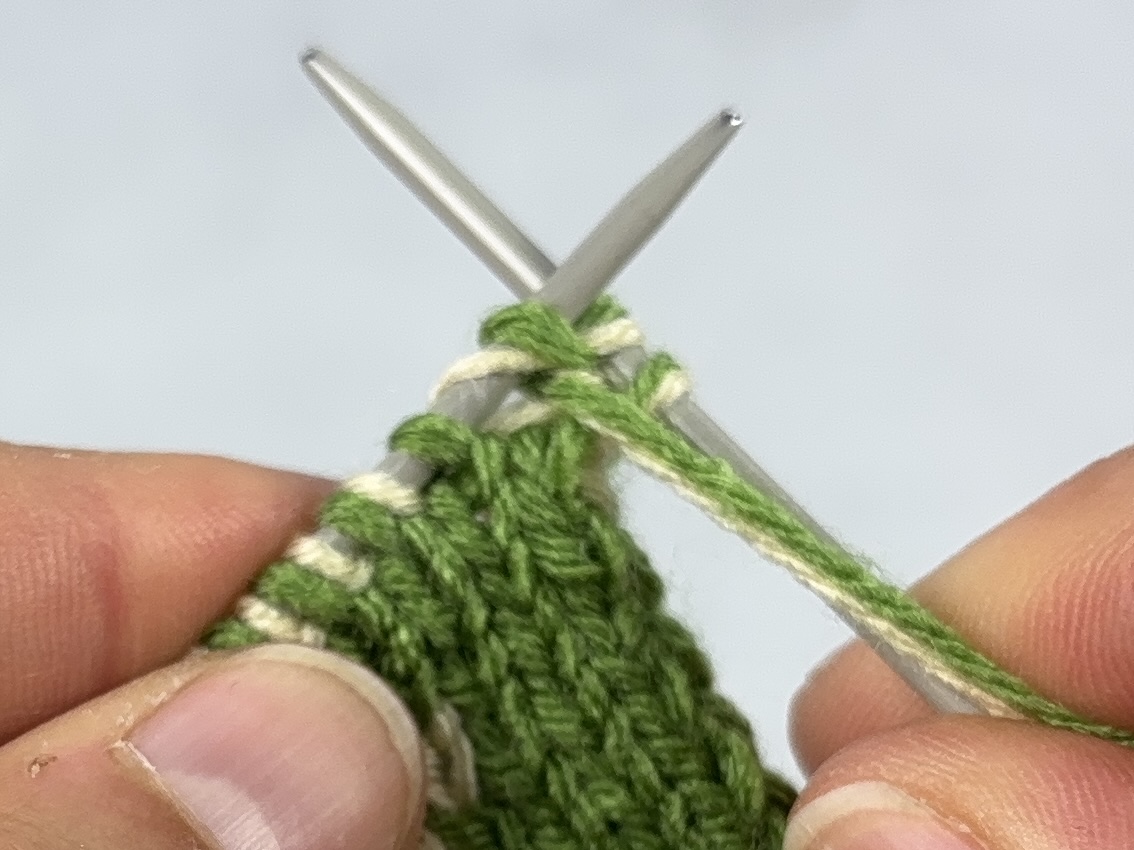
Knit the first double-face row using the standard double-face technique. To do this, knit all knit stitches with the foreground colour and all purl stitches with the background colour. |
Properties:
- Simple, good for beginners
- Creates a solid-color cast-on edge
- The edge is elastic
Invisible Cast-On
Technique:
- Both colours are cast-on simultaneously but alternately
- The stitches are worked directly in pairs (double stitches)
|
|
|
|
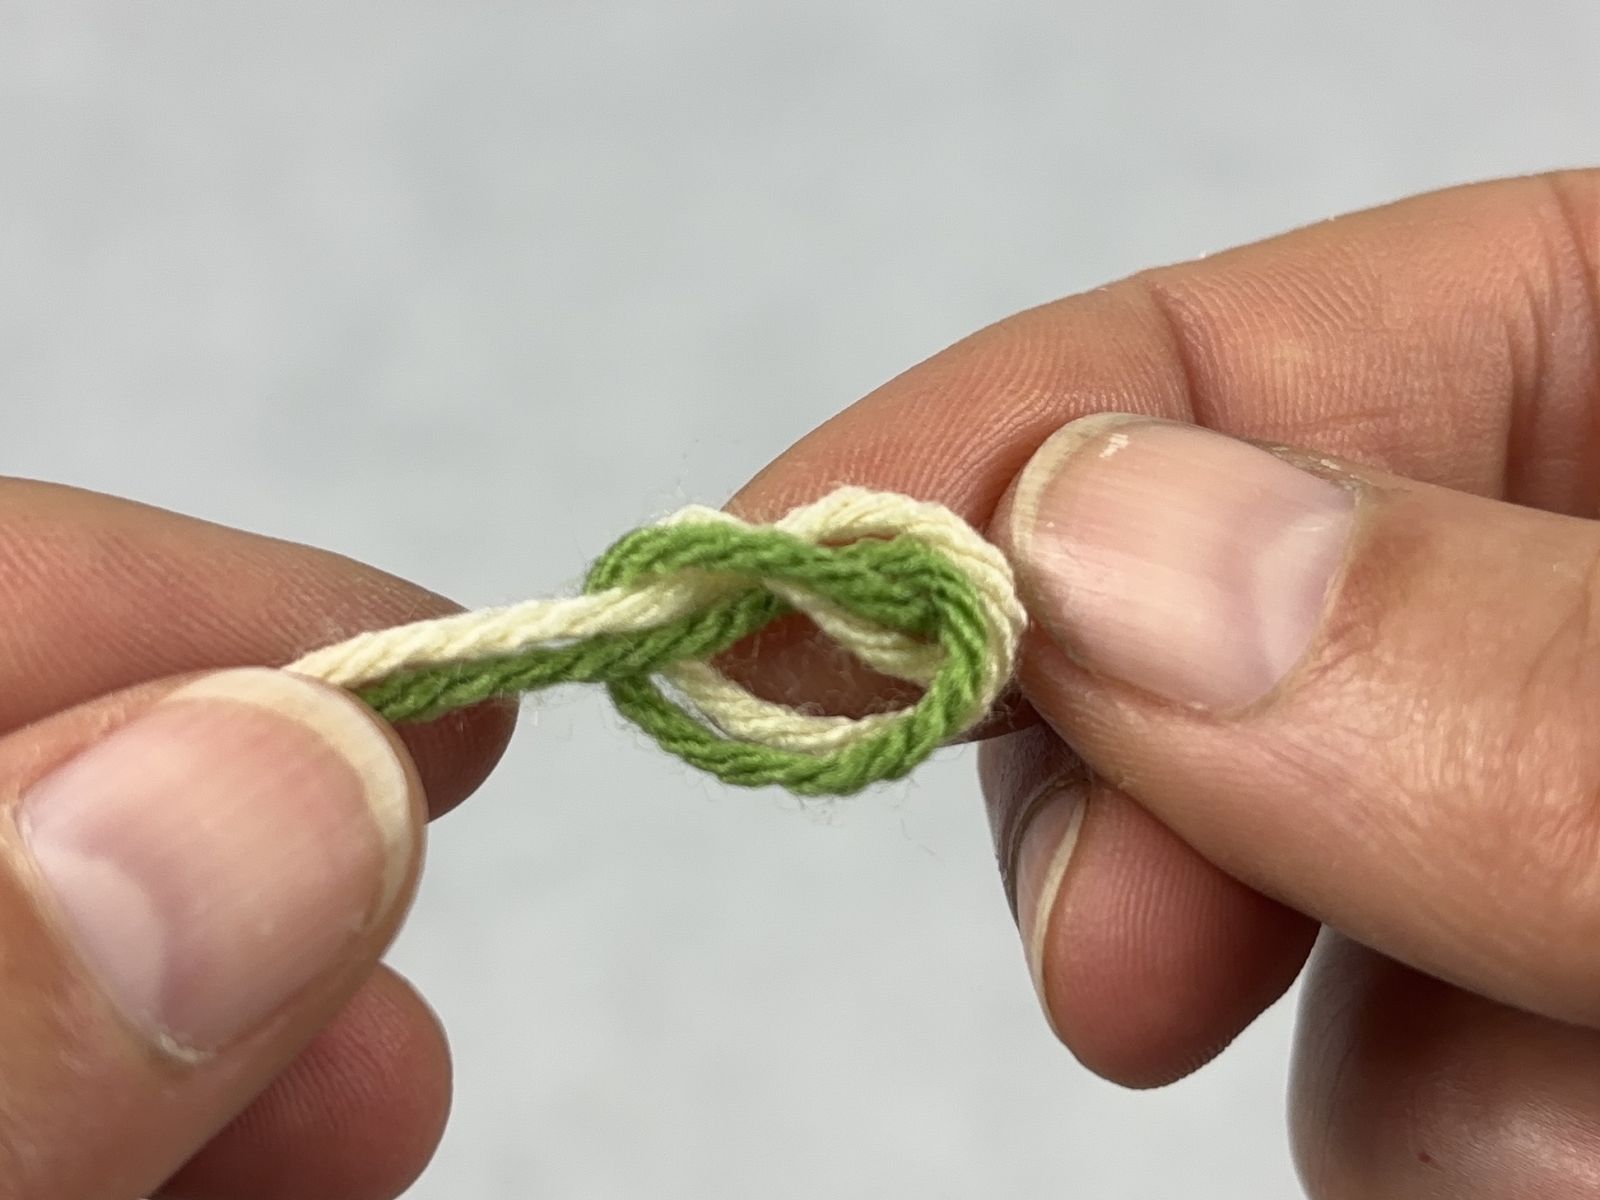
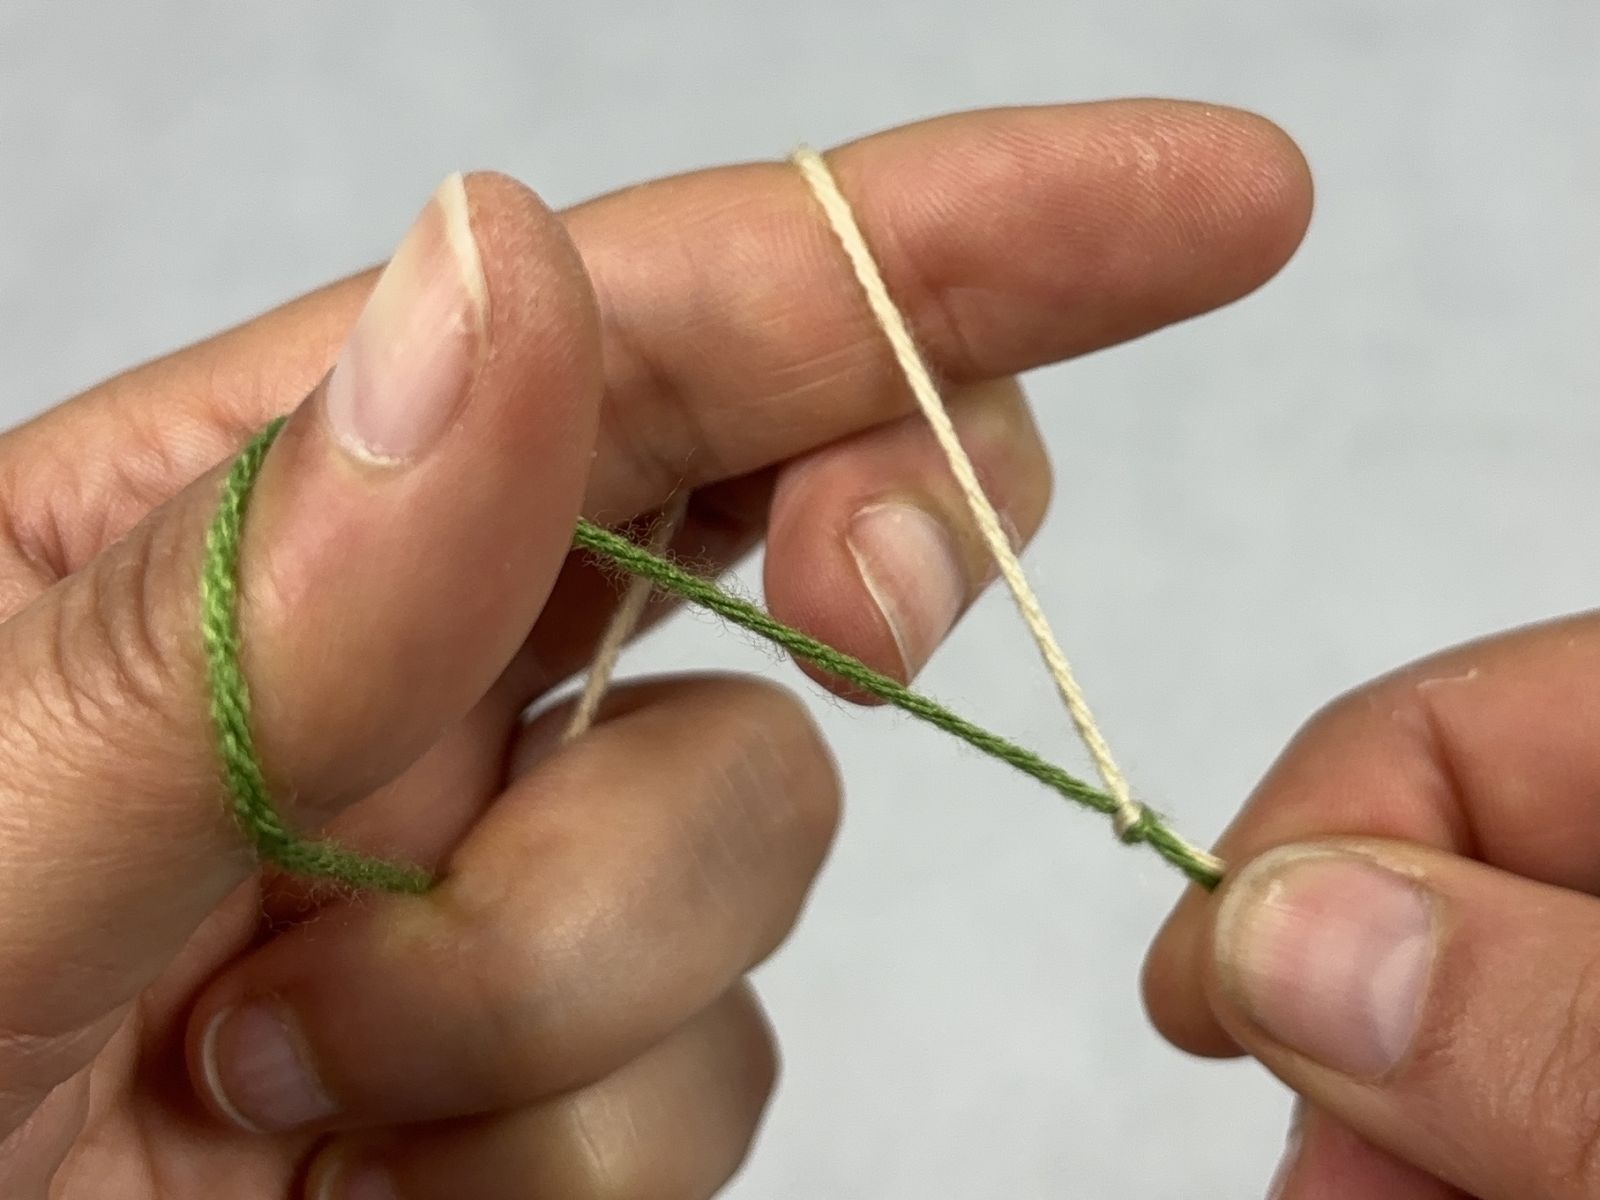
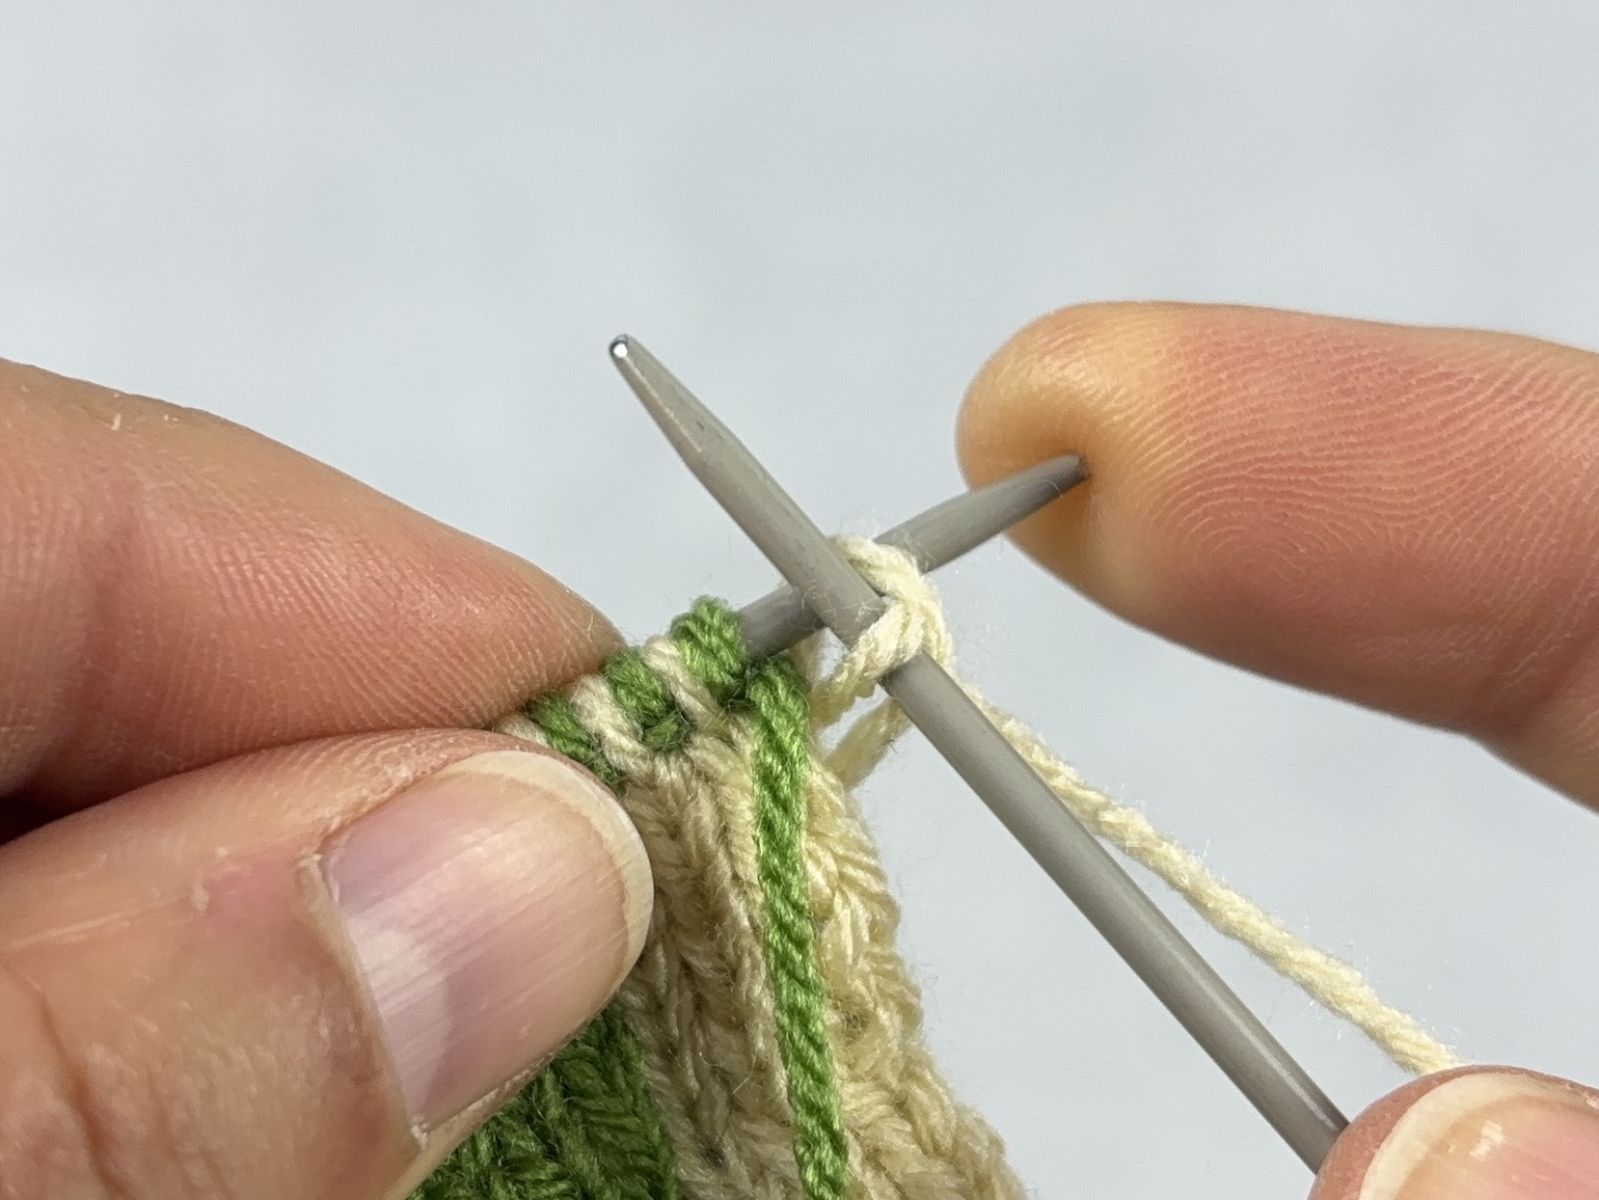
Tie the two threads together securely by tying a knot. |
Place one of the two threads over the index finger of your left hand and the other thread over the thumb of your left hand. Hold both threads firmly with the remaining fingers of your left hand so that they do not slip and remain taut. Hold the knotted ends of the threads with your right hand so that both threads are slightly taut. |
|
|
|
|
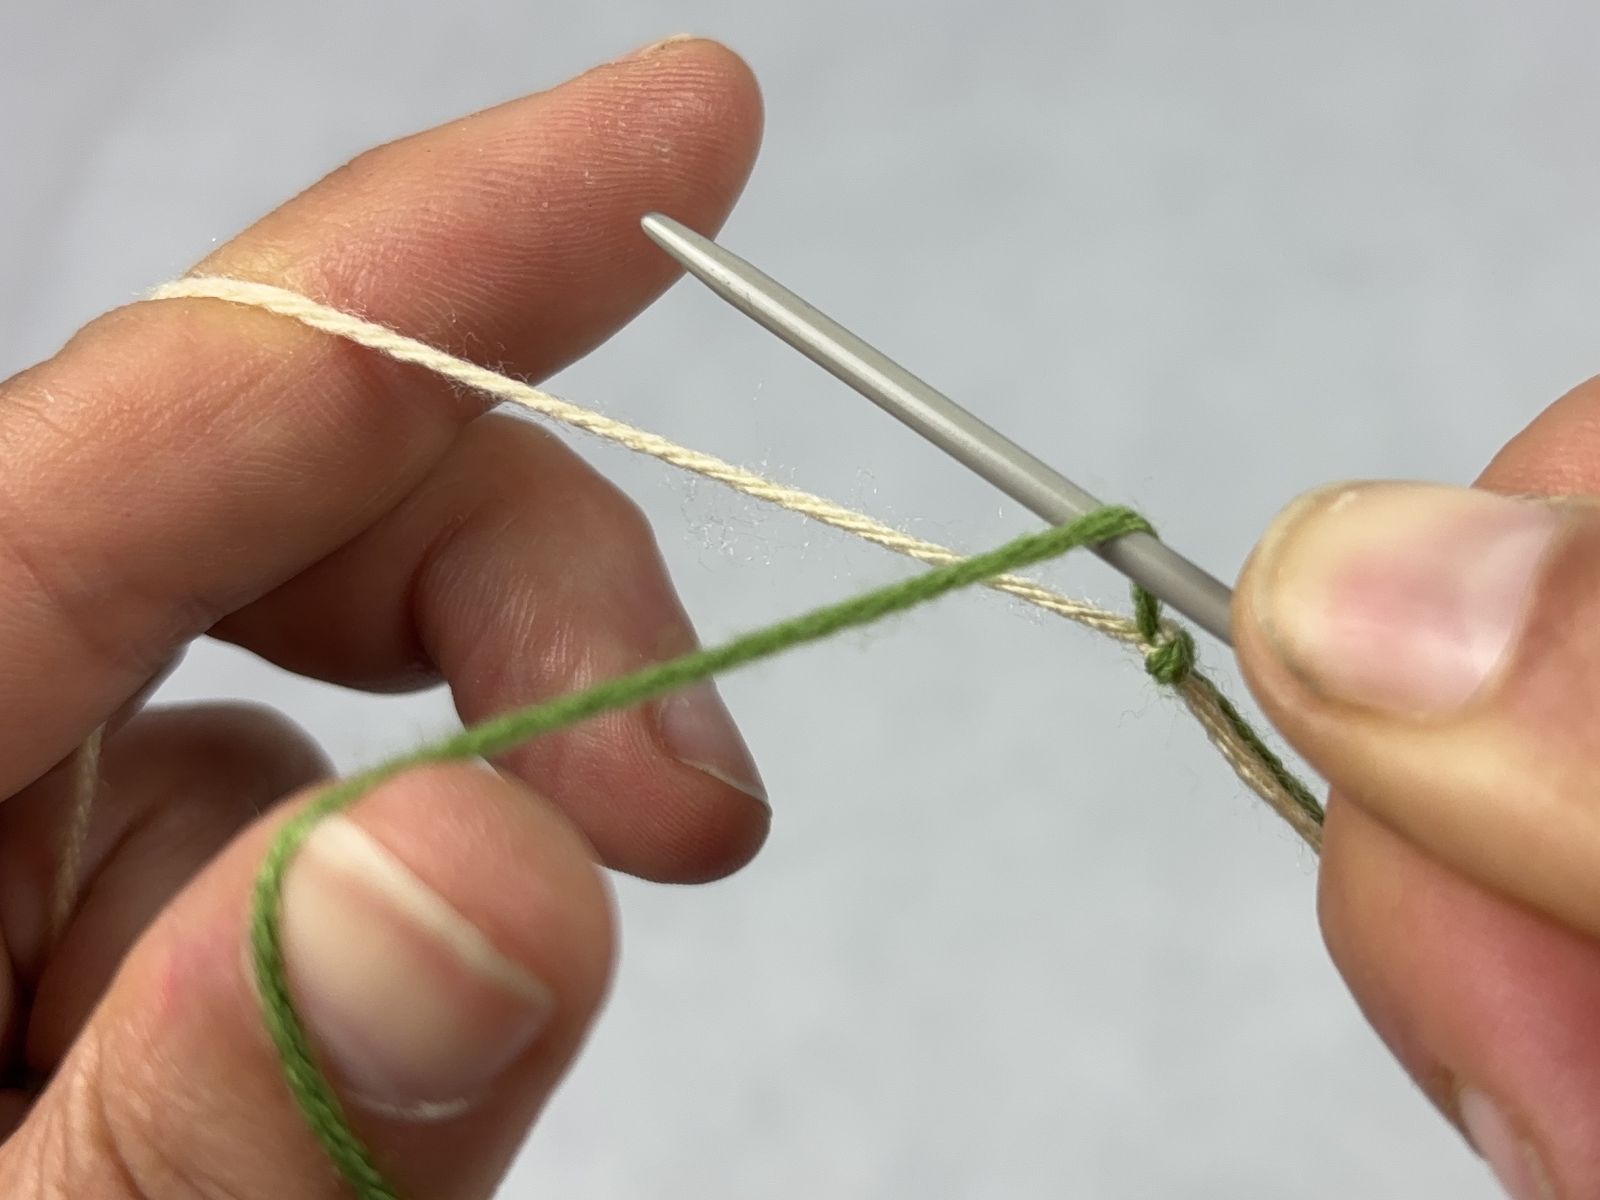
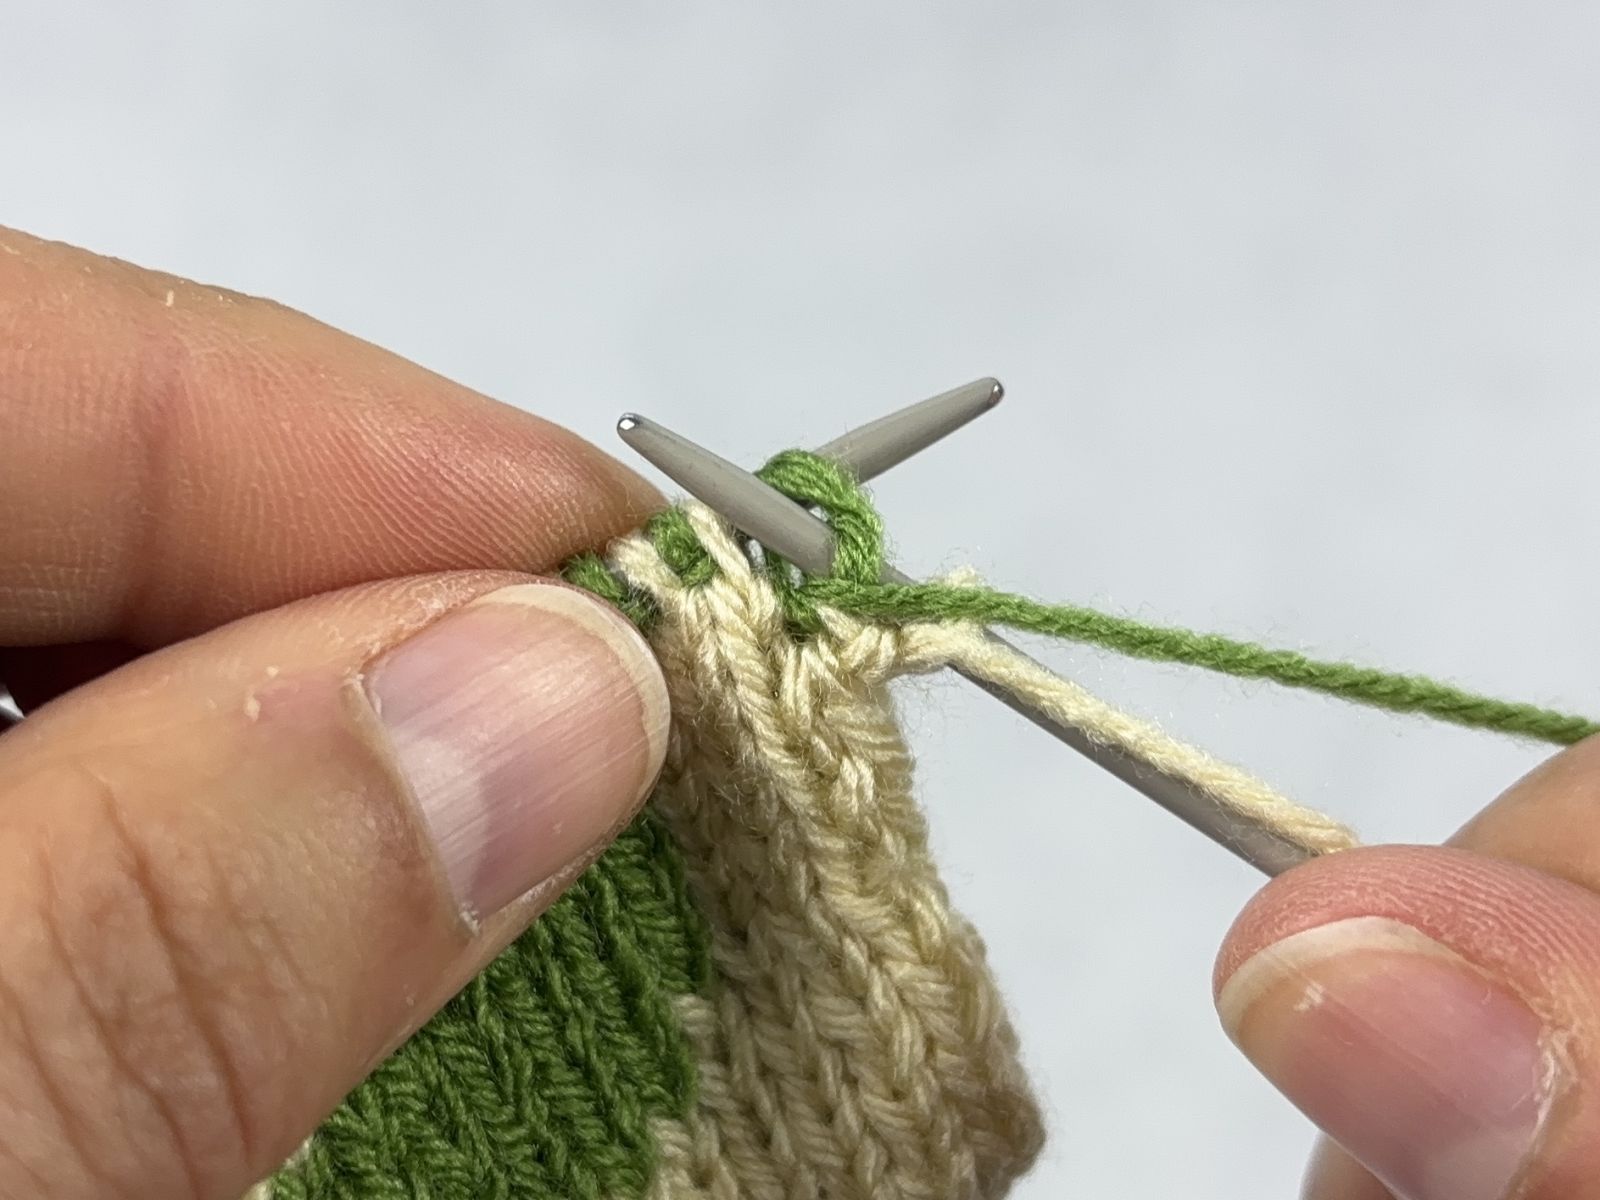
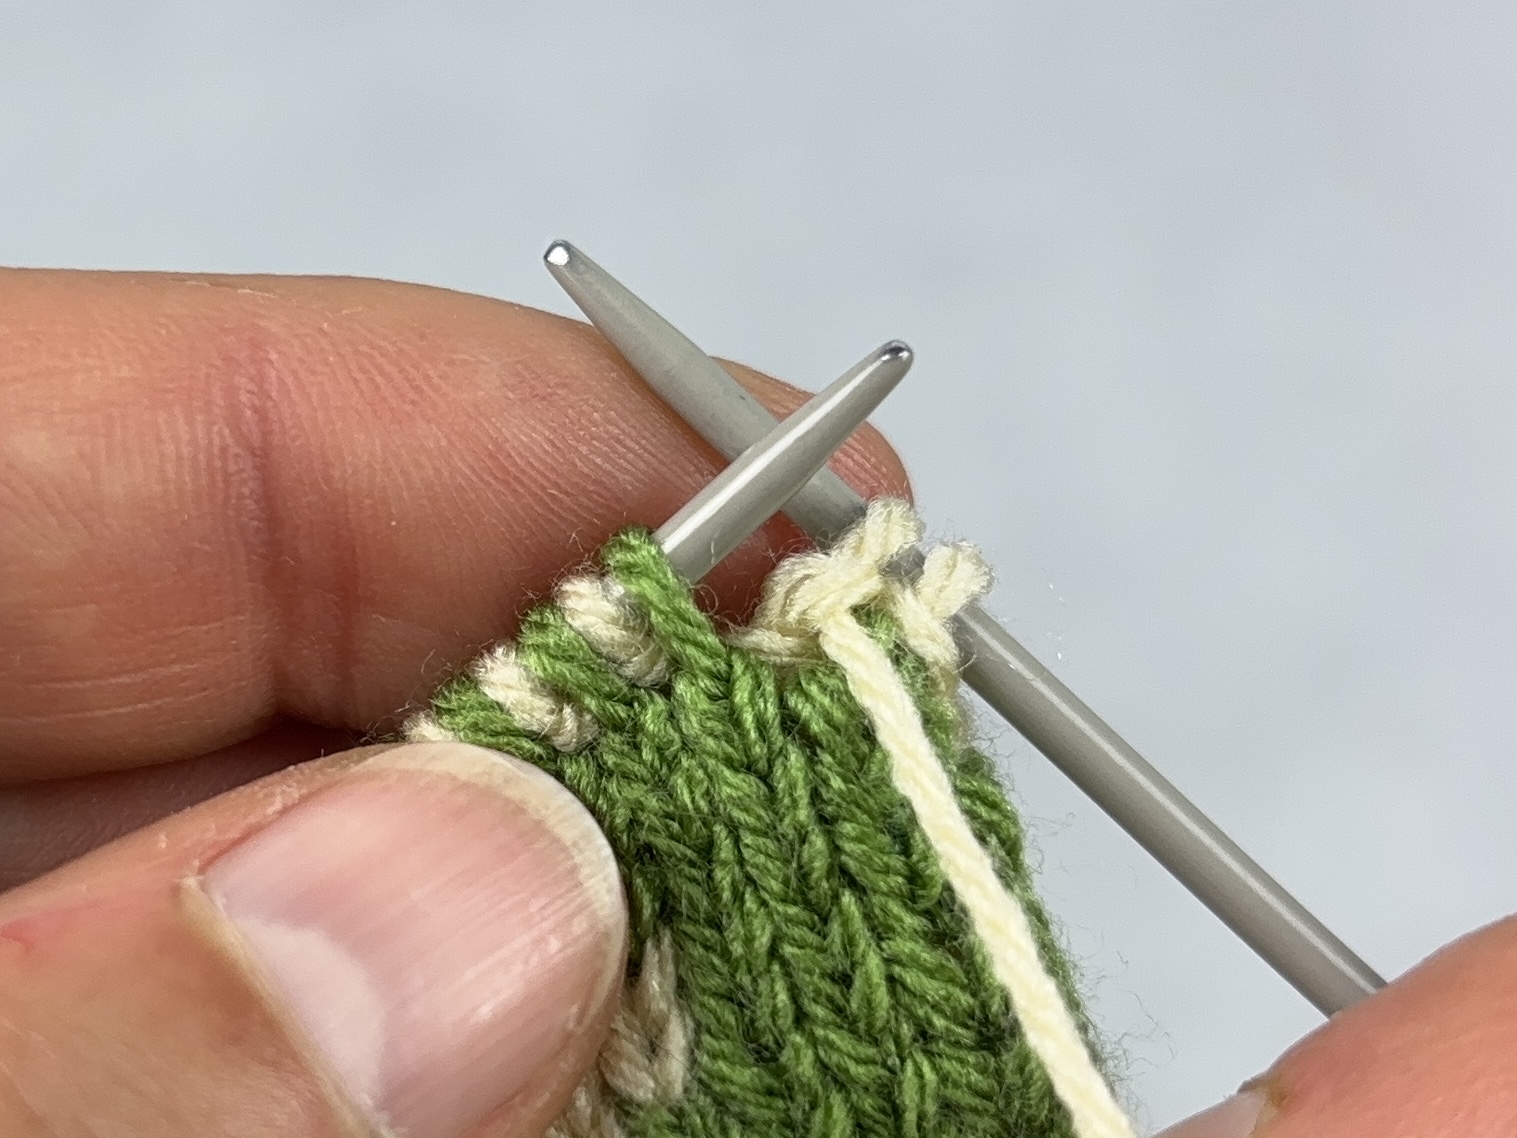
1. Hold the knitting needle in your right hand. 2. Pass the needle under the green thread on your left thumb. 3. Then move the needle toward your left index finger. 4. Pass the needle over the white thread on your index finger. |
5. Use the knitting needle to loop the white thread around your index finger and pull it under the green thread on your thumb. This creates a new white loop on the knitting needle. |
|
|
|
|
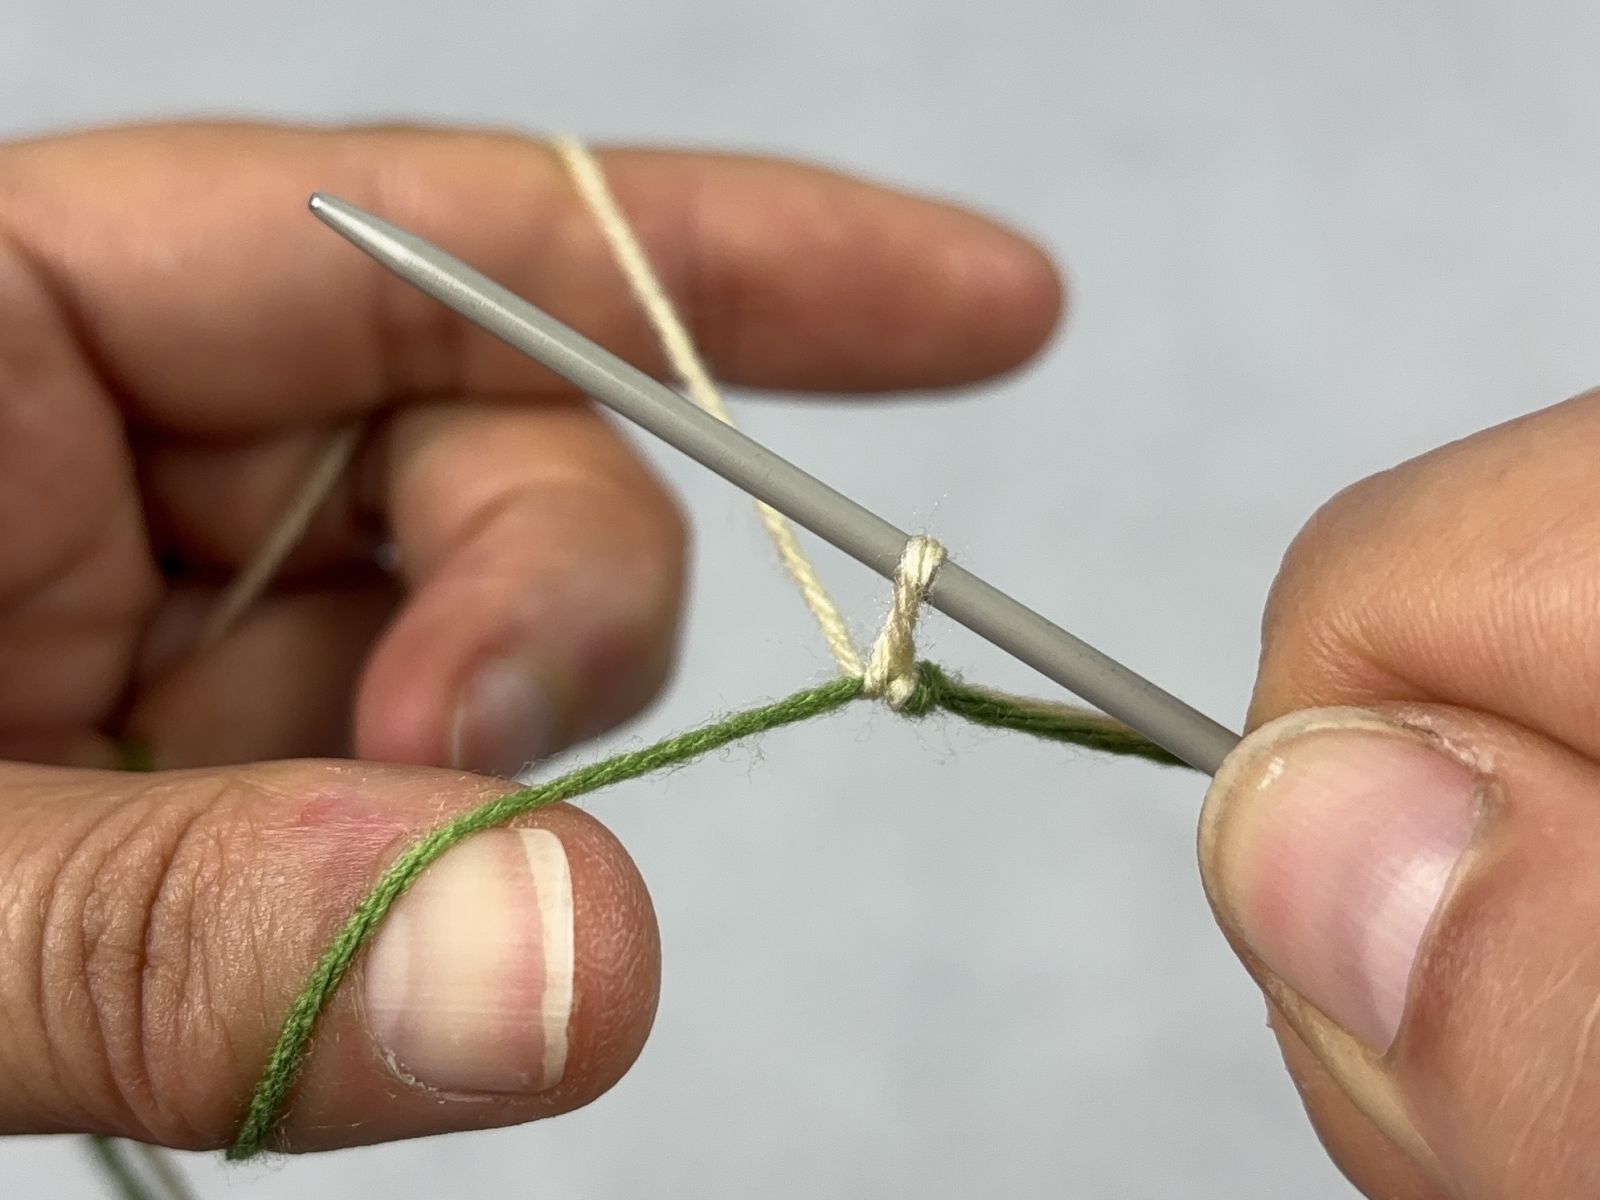
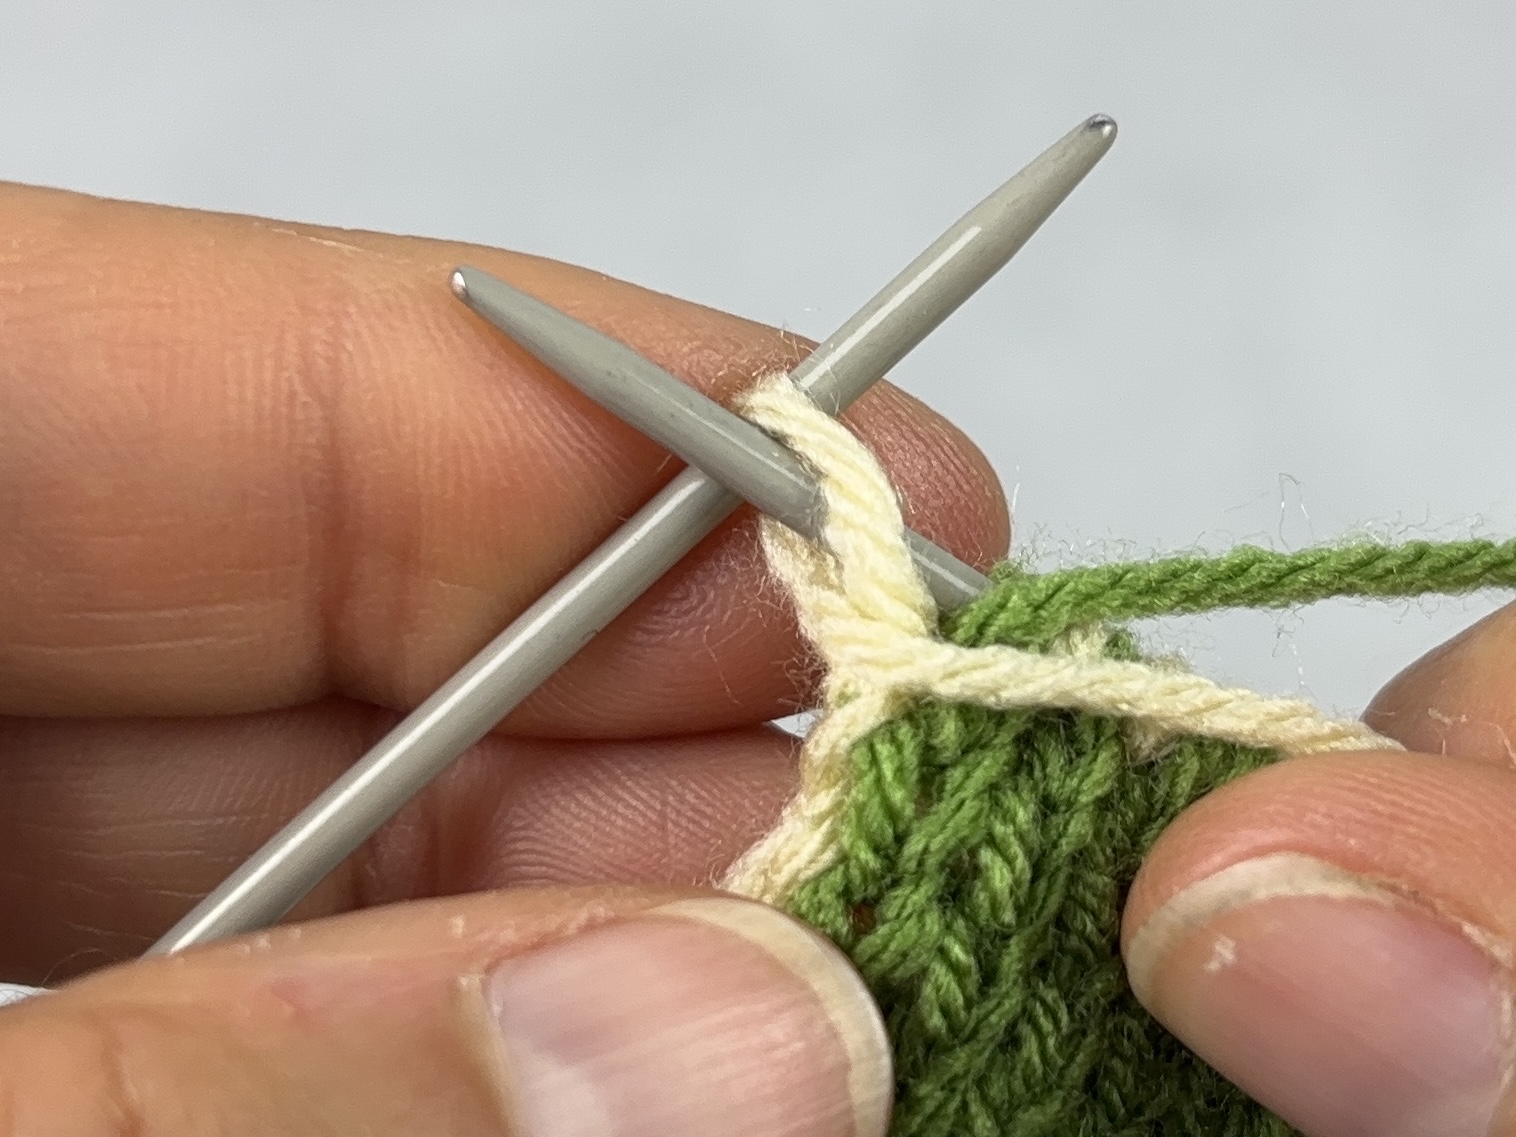
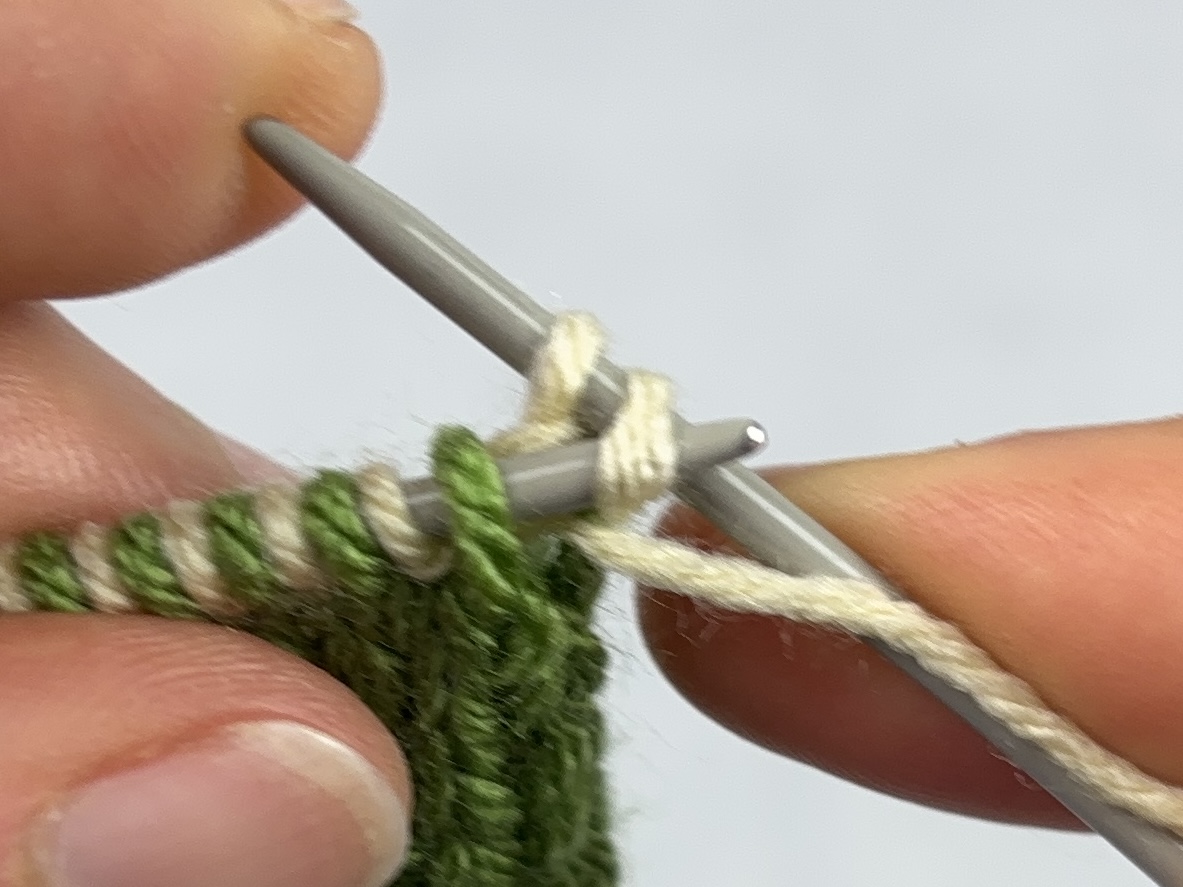
6. Guide the needle under the white thread on the index finger of your left hand. 7. Then move the needle toward the thumb of your left hand. 8. Guide the needle over the green thread on your thumb. |
9. Loop the green thread around your thumb with the knitting needle and pull it under the white thread on your thumb. This creates a new green loop on the knitting needle. |
|
|
|
|
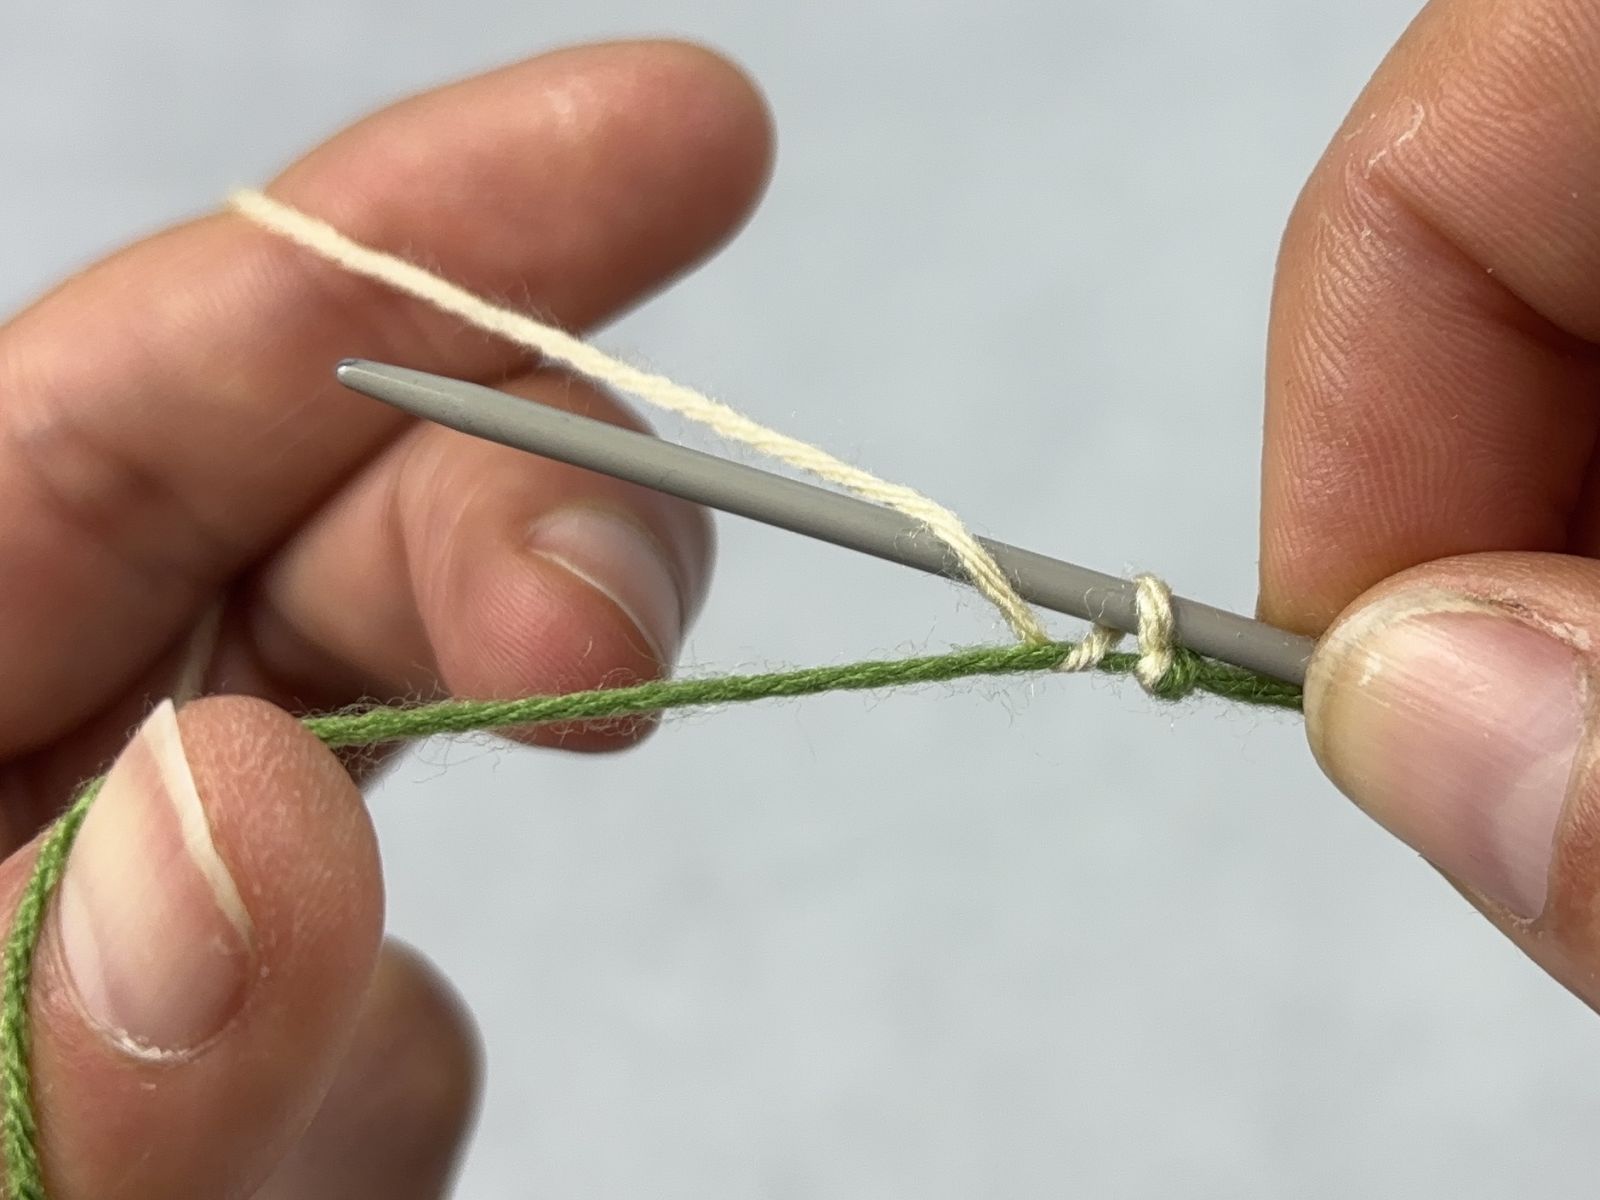
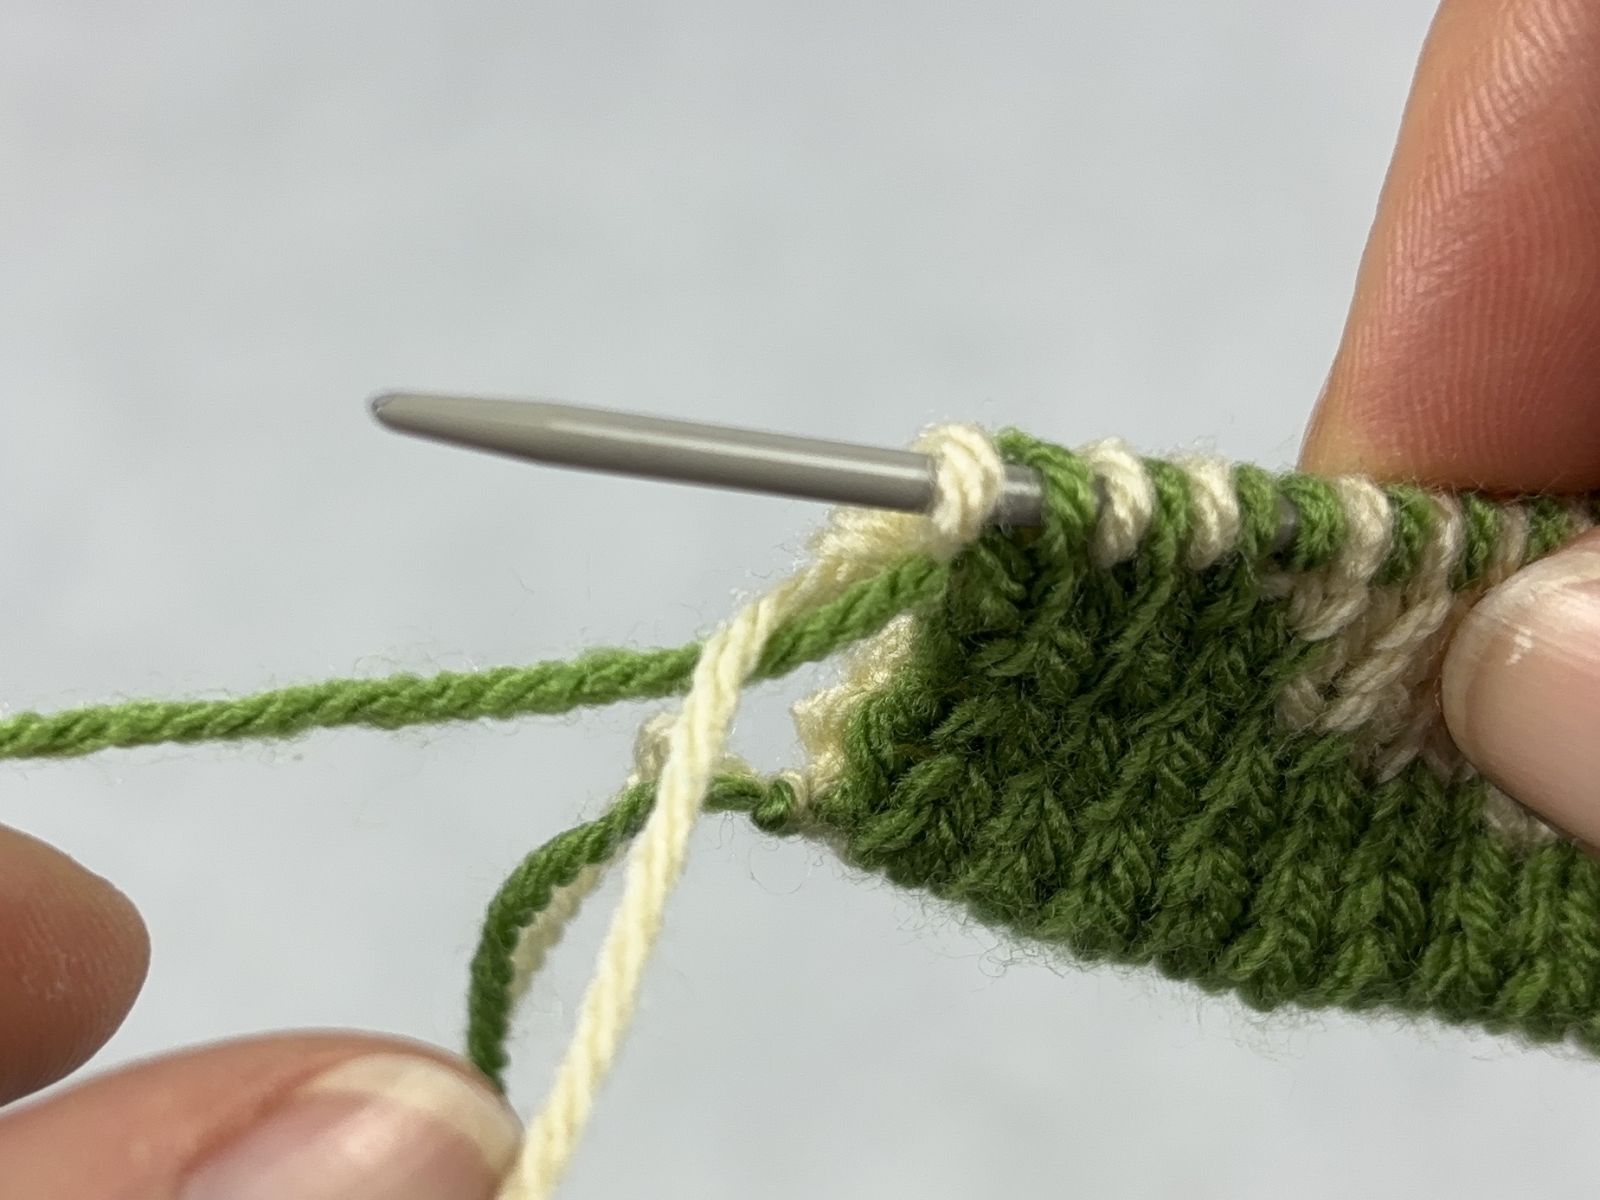
Repeat steps 2 through 9 until you have the desired number of double stitches on the needle |
Turn the work over |
|
|
|
|
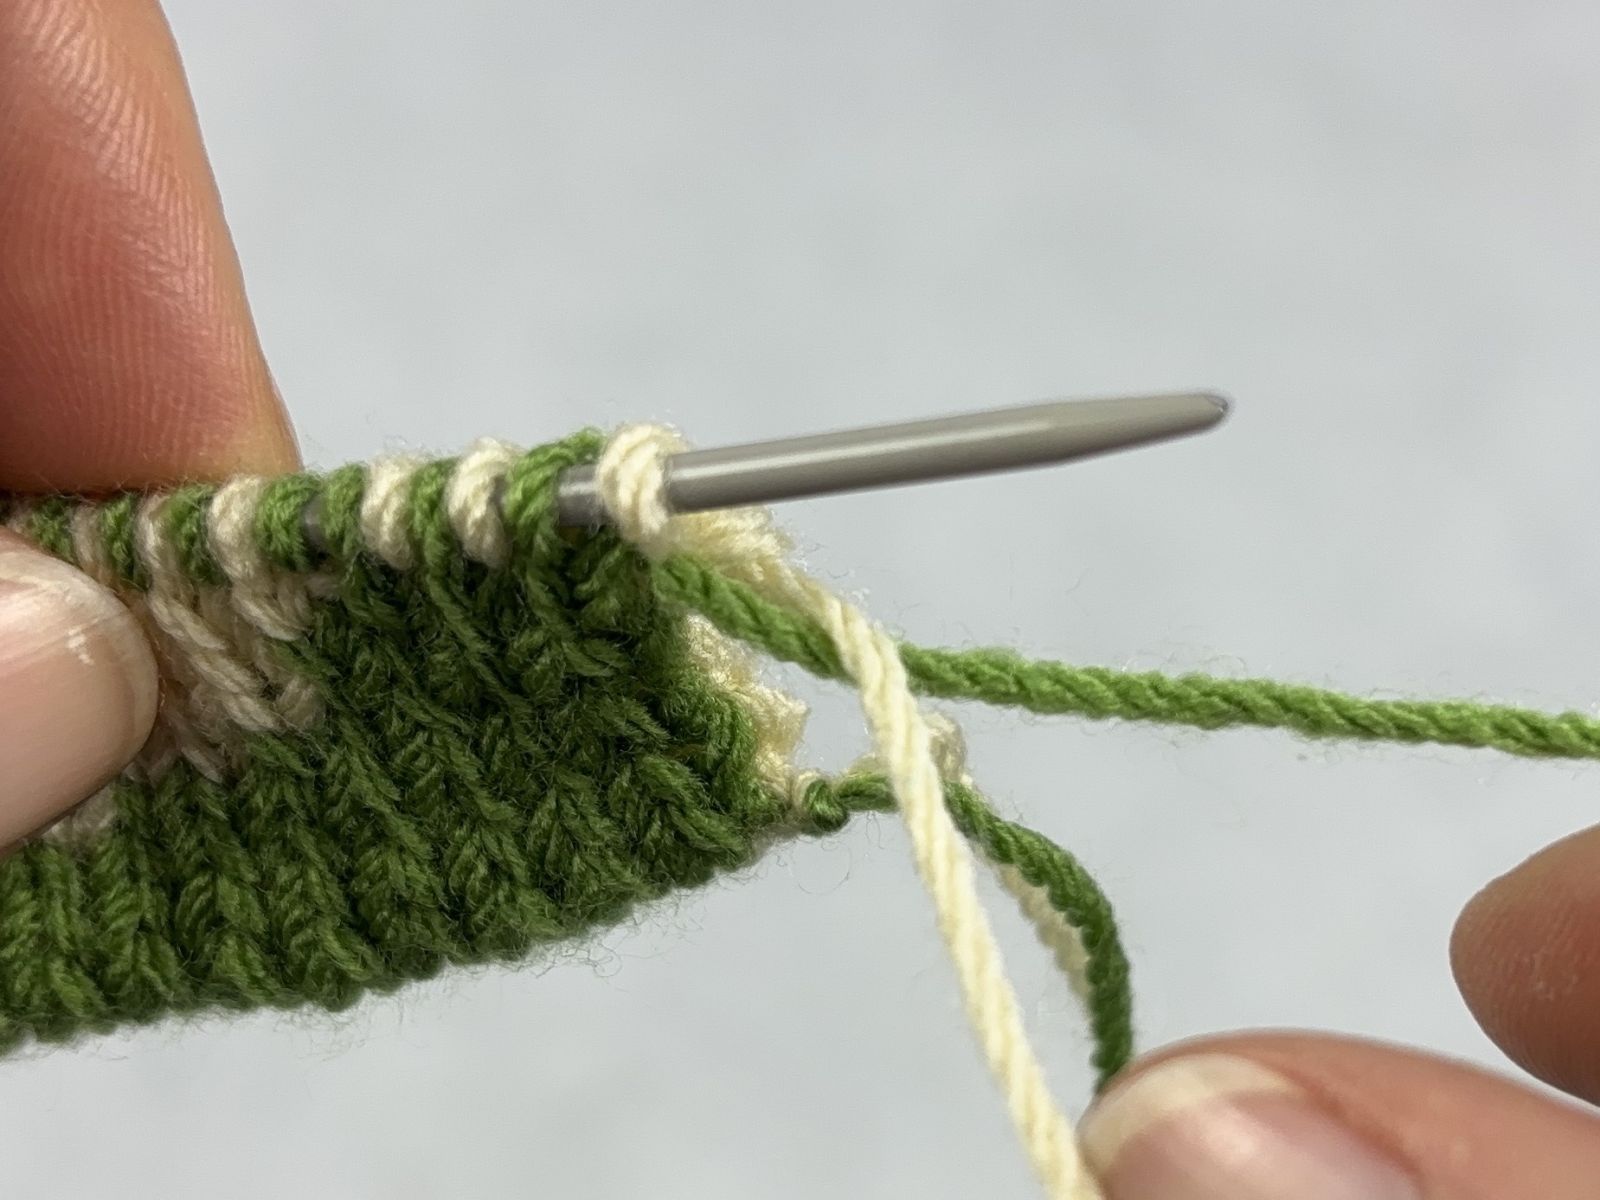
Make sure the two working strands are crossed over each other before you start knitting. This prevents the last loop formed on the needle from unraveling. |
Take the second knitting needle and knit the edge stitch first. Then continue working using the usual double-face technique. In the first row, all green knit stitches are knitted through the back loop. |
Properties:
- Clean, virtually invisible edge
- Immediately functional double-faced cast-on
- Professional look
An Overview of Edge Stitches in Double-Faced Knitting
|
Mixed Two-Colour Lifted Edge Stitch |
|
|
Solid-Colour Lifted Edge Stitch |
|
|
Invisible Edge Stitch |
|


Mixed Two-Colour Lifted Edge Stitch
Technique:
- The first double stitch of each row is purled with both strands
- The last double stitch of each row is slipped with both strands as if to knit
|
|
|
|
The first double stitch is purled with both strands at the same time. |
The last double stitch is slipped with both strands at the same time, as if knitting. |
Alternatively, you can work exactly the opposite way: Slip the first double stitch and knit the last double stitch.
The most important thing here is consistency: Choose one method and stick with it throughout the entire piece. This is the only way to create an even and neat edge.
Features:
- Sturdy, decorative, compact edge
- The knitted piece is closed on the sides
- Creates a two-tone “chain edge”
- Well-suited for beginners in double-face knitting
Solid-Colour Lifted Edge Stitch
Technique:
- The first stitch of each row and side is knit as usual, following the double-faced technique
- The last stitch of each row and side is slipped as if to purl
|
|
|
|
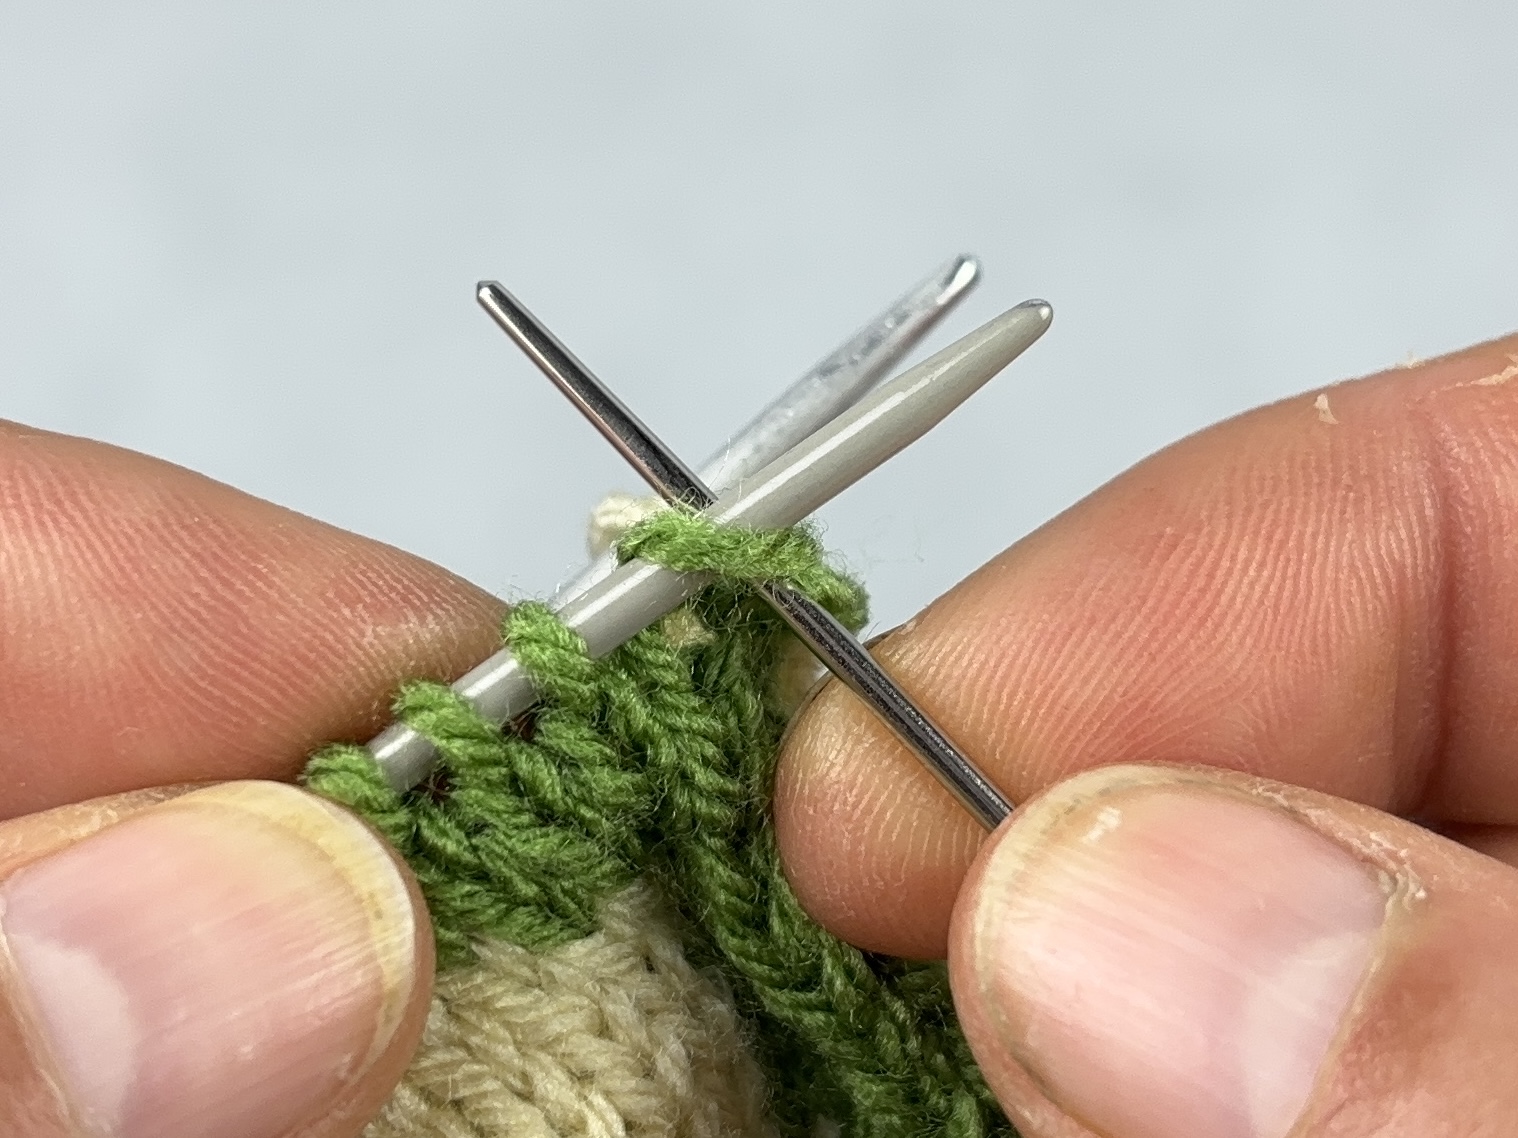
Slip the green stitch at the end of the row with both working strands behind the work, as if to purl. |
Place the white working thread in front of the work.
|
|
|
|
|
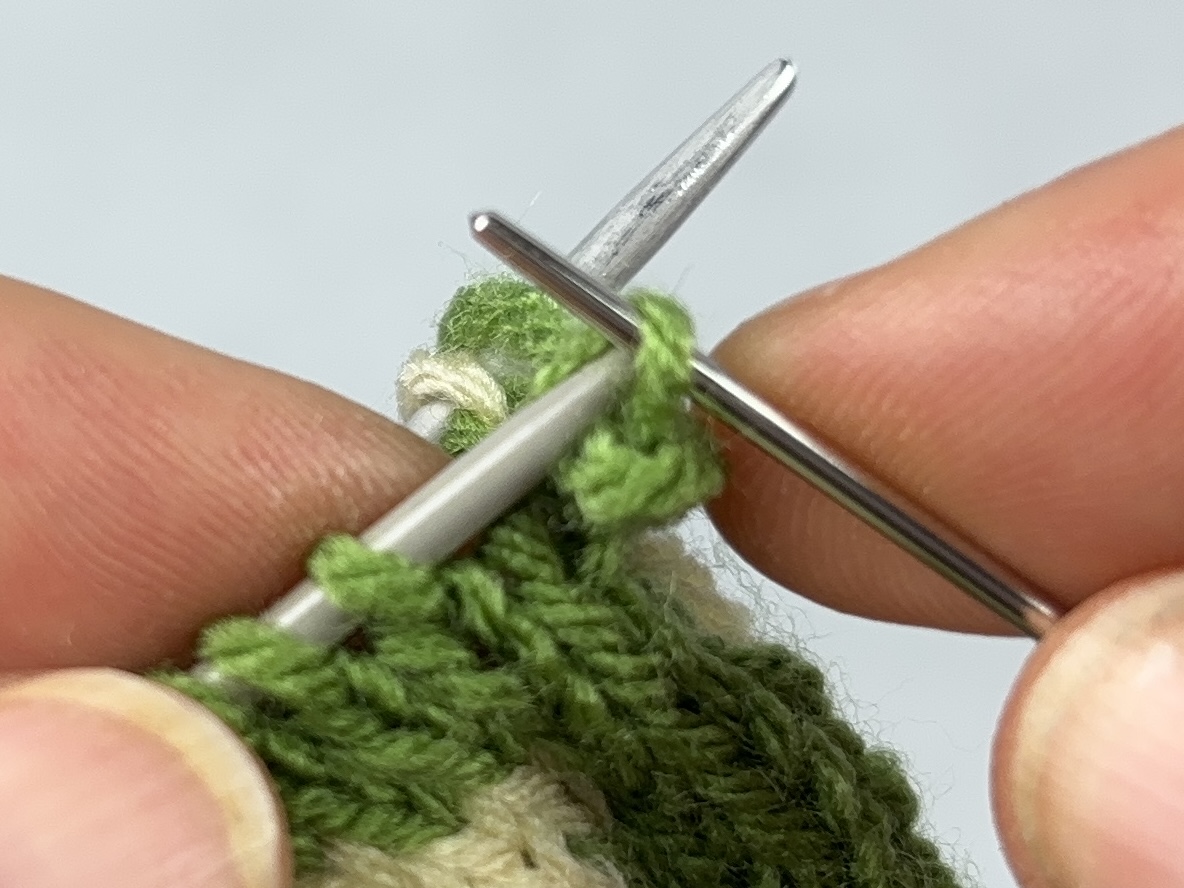
Pick up the white stitch as if knitting purl. |
This is what the edge stitch looks like from the side. |
|
|
|
|
This is what the edge stitch looks like from above. |
Turn the work over |


|
|
|
|
Knit the first white stitch. |
Next, wrap the two working strands around each other and purl the first green stitch. Continue knitting the row using the usual double-face technique until the end of the row. |
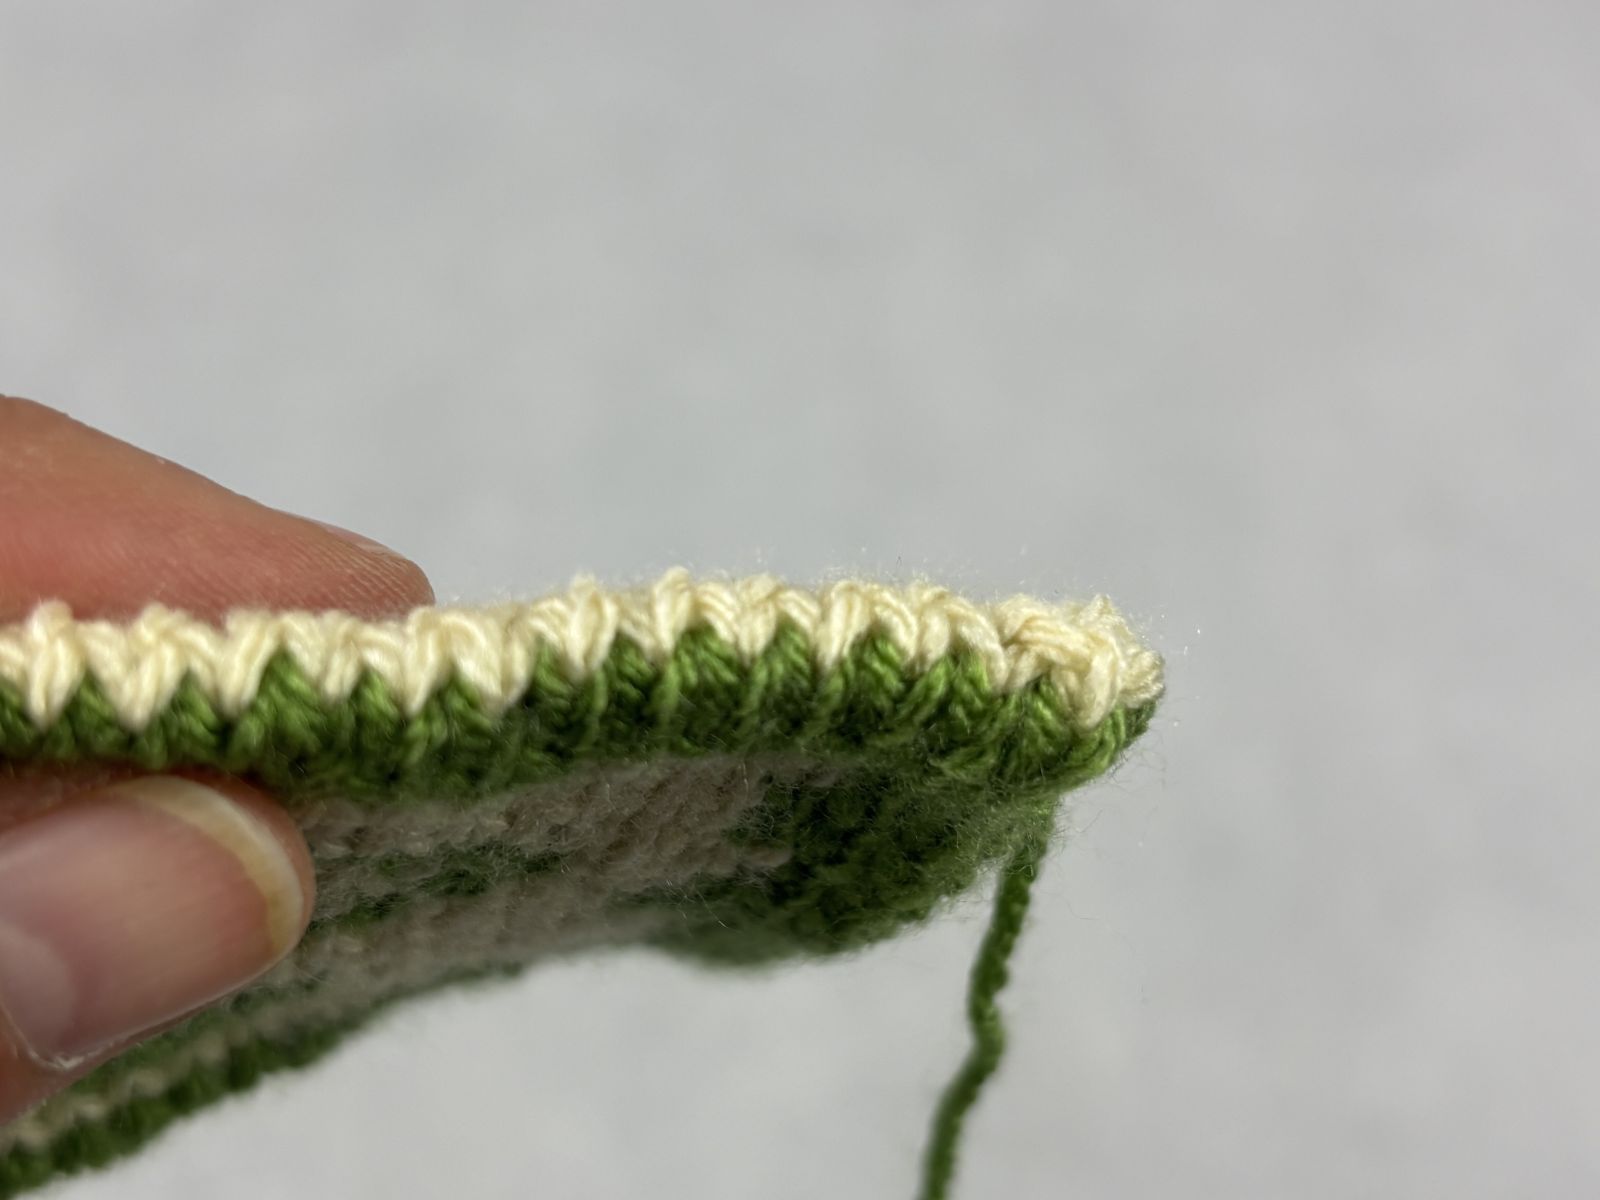
Properties:
- a loose, decorative border
- creates a “chain edge” with different colors on the left and right sides of the piece
Invisible Edge Stitch
Technique:
- Both the first stitch of each row and side and the last stitch of each row and side are knitted as usual according to the double-faced technique
- When turning the work, the working threads are crossed over each other
|
|
|
|
Knit the row using the usual double-faced technique up to and including the last two stitches. |
Cross the two working threads over each other. |
|
|
|
|
Turn the work over |
Knit the first white stitch. Make sure the white working yarn is wrapped around the green working yarn. |
|
|
|
|
Place both working threads in front of your work. |
Purl the first green stitch. Continue knitting the row using the usual double-face technique until the end of the row. |
Properties:
- Sturdy, compact edge
- No distinct edge stitches visible (invisible edge)
An Overview of Casting Off in Double-Face Knitting
|
Mixed Two-Colour Cast-Off |
|
|
Single-Color Cast-Off |
|
|
Invisible Cast-Off |
|


Mixed Two-Colour Cast-Off
Technique:
- The double stitches are knitted together using both strands to form a single stitch
- The first two-strand stitch is slipped over the second two-strand stitch
|
|
|
|
Pick up the first two double stitches (each consisting of a front and a back stitch) together and knit them together with both working strands as if to purl. Knit the next double stitch in the same way. |
Using the left needle, lift the first knitted stitch over the second stitch and let it slide off the needle. |
You can also easily choose to knit instead of purl the stitches.
Properties:
- sturdy, decorative, compact edge
- creates a two-tone “chain edge”
- well-suited for beginners in double-faced knitting
Single-Color Cast-Off
Technique:
- The stitches in the cast-off row are worked with only one strand of yarn
- The first stitch worked is slipped over the second stitch
|
|
|
|
Knit the first front stitch with the working yarn. Recommendation: Use the same color as when casting on. |
Knit the next purl stitch with the same working yarn on the back side. Now there are two stitches on the right needle. |
|
|
|
|
Lift the first stitch over the second and let it slide off the needle |
Continue this pattern—knit the front-side stitches, purl the back-side stitches, and slip the previous stitch over each time—until the end of the row.
|
Properties
- The edge appears to be a solid color.
- The edge is relatively flat and neat.
- The elasticity is moderate.
Invisible Cast-Off
Technique:
- The stitches from the front and back sections of the knitted piece are transferred to two different needles
- The two sides of the piece are joined together using kitchener stitches
|
|
|
|
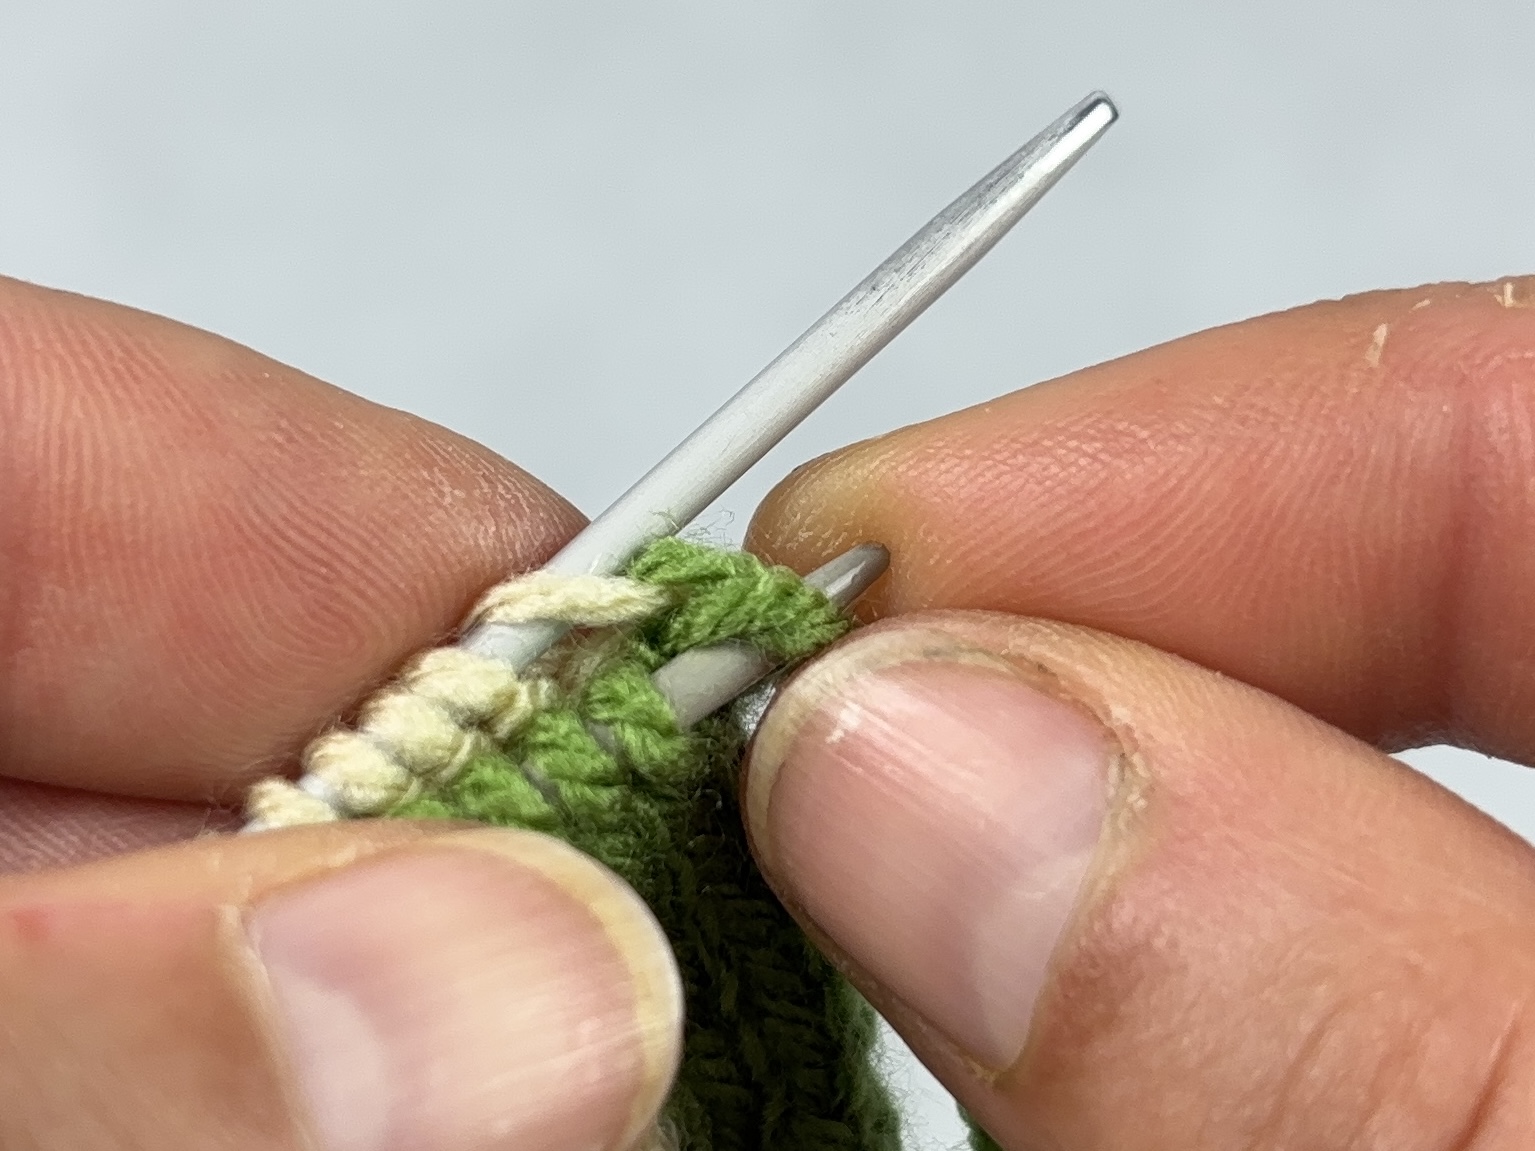
Pick up the stitches from the front and back sections of the work onto two different double-pointed needles |
Cut the working yarn, leaving a tail that is about three times the current width of the knitted piece |

|
|
|
|
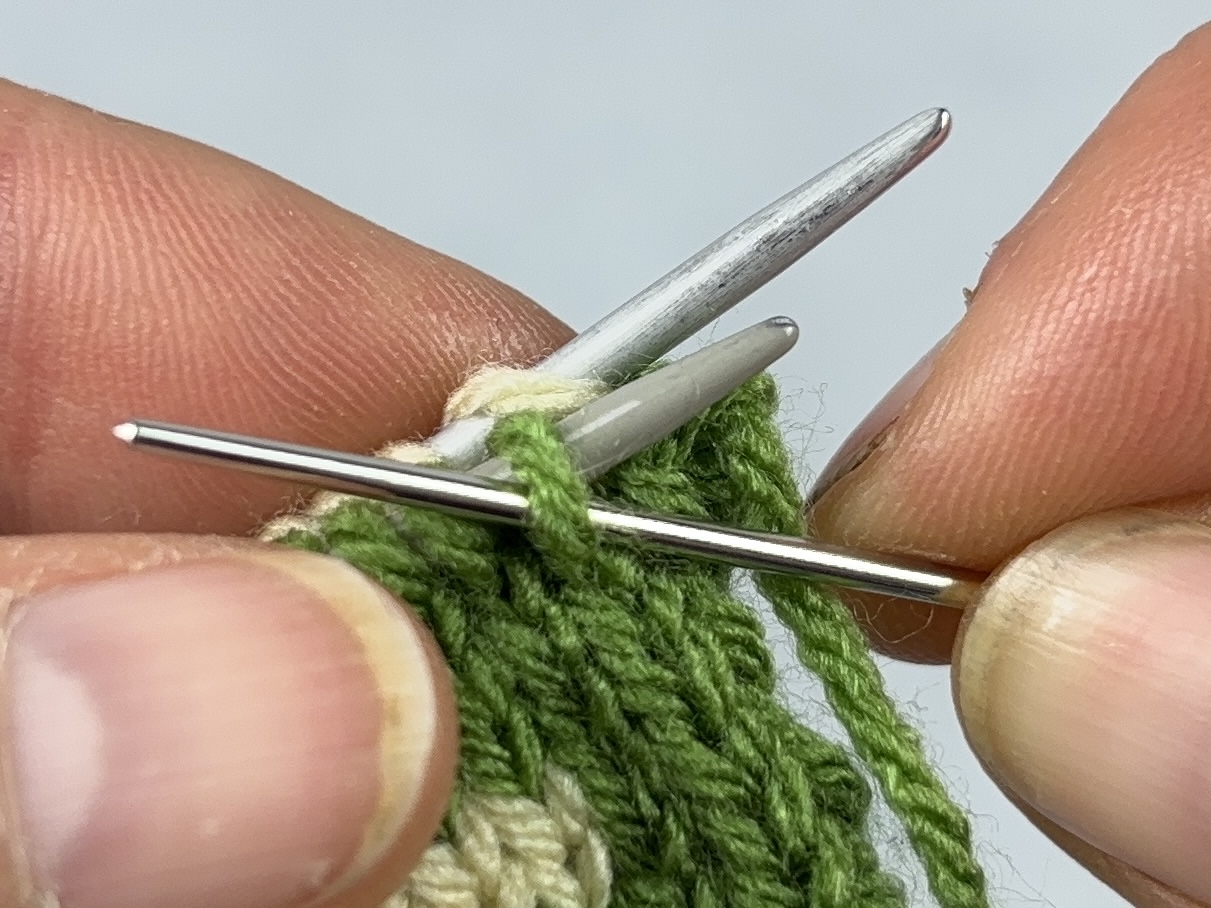
Thread the long end of the yarn into a yarn needle. 1. Using the yarn needle, insert it from back to front (as if knitting purl) through the first stitch on the front knitting needle and pull the yarn all the way through. |
2. Next, using the wool needle, insert the needle from front to back (as if knitting) through the first stitch on the back needle and pull the yarn all the way through. |

|
|
|
|
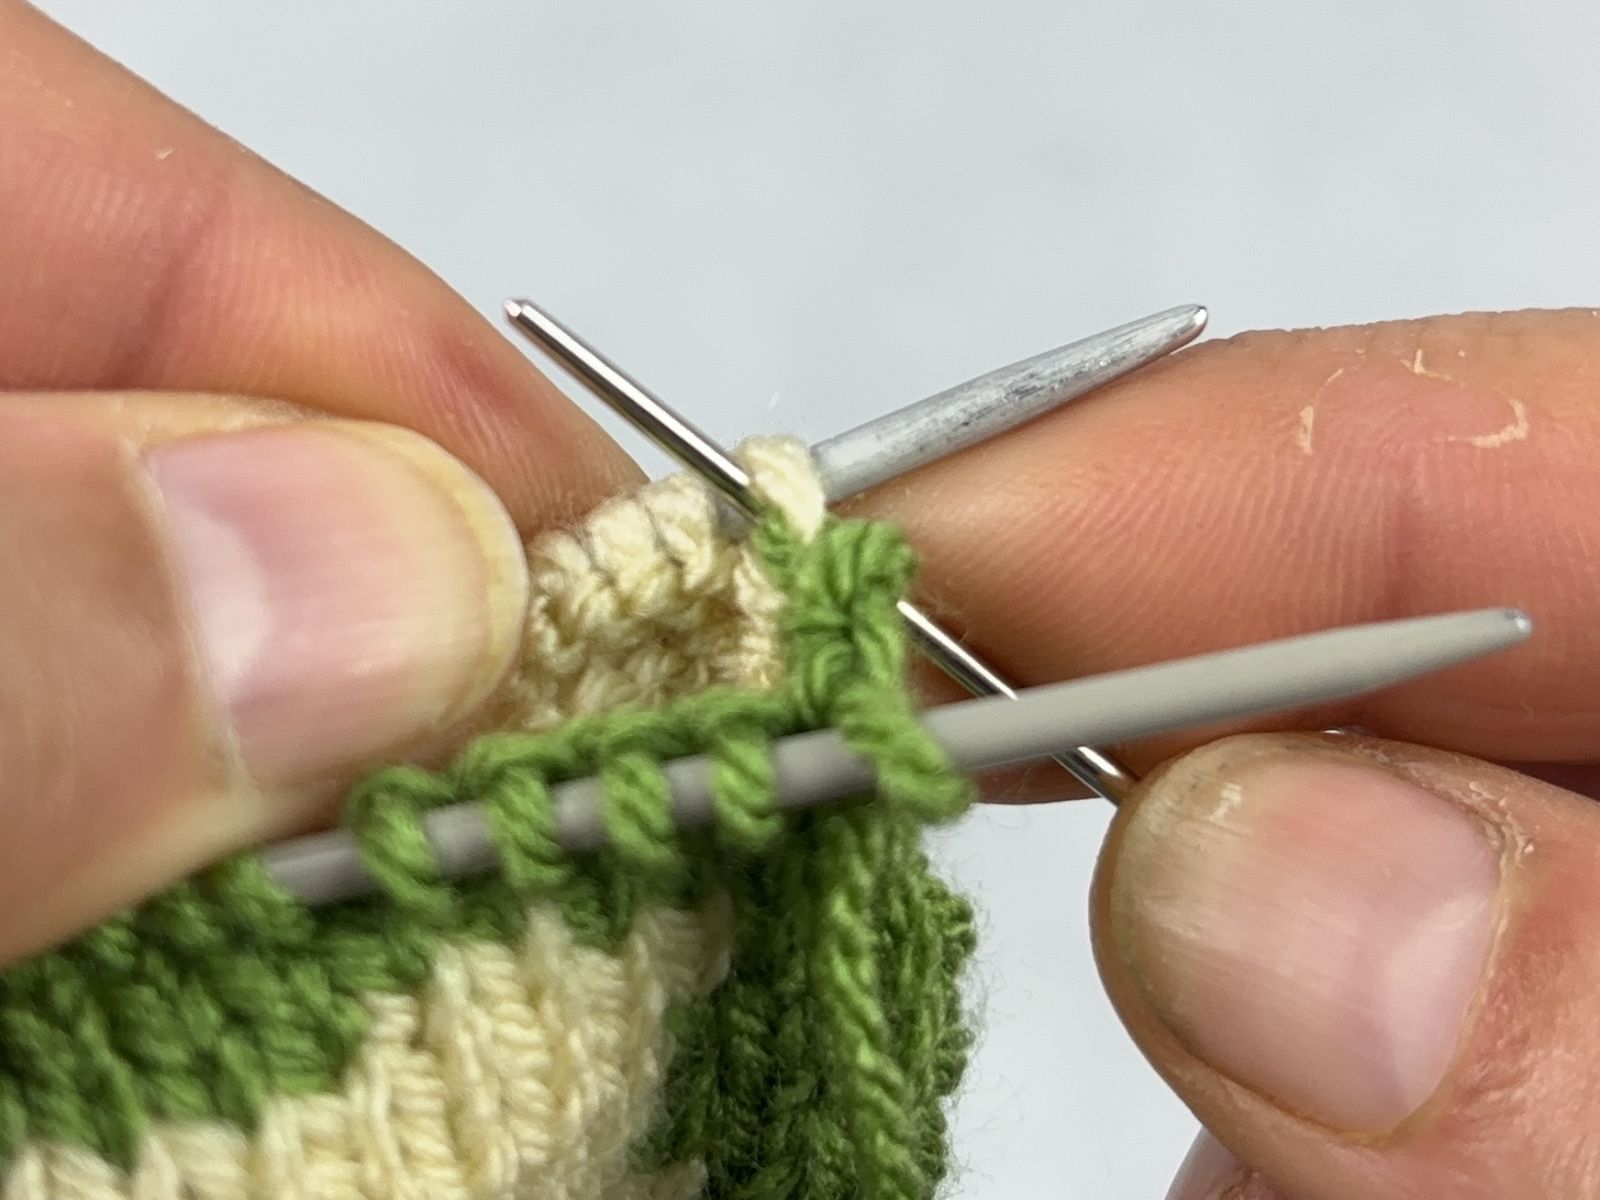
3. Insert the wool needle again from the front to the back (as if knitting) through the first stitch on the front needle… |
4. … and slide this stitch off the knitting needle. |
|
|
|
|
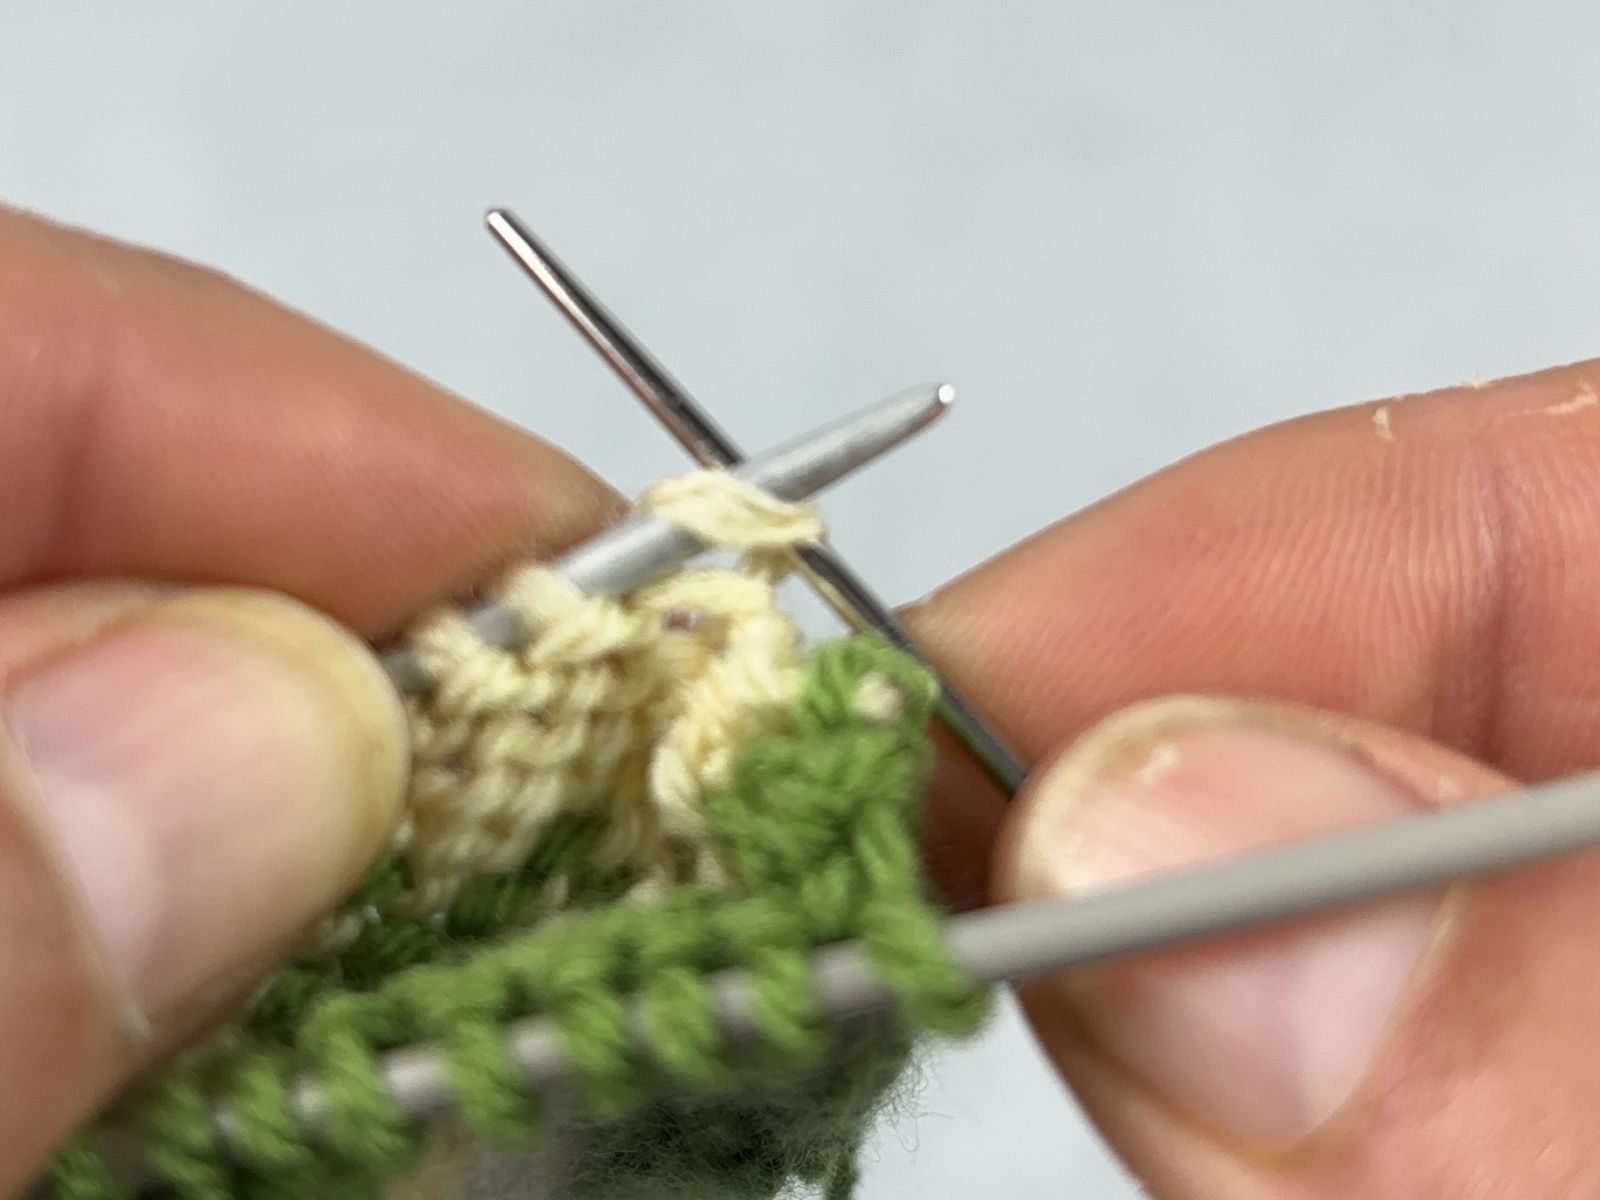
5. Insert the wool needle from back to front (in the same direction as when knitting purl stitches) through the next stitch on the front needle, and pull the yarn all the way through. |
6. Using the wool needle, insert it from the back to the front (from back to front, as when knitting purl stitches) into the first stitch on the back needle again. Then let this stitch slide off the needle. |
|
|
|
|
7. Insert the wool needle from front to back (in the same direction as when knitting) through the next stitch on the back needle and pull the yarn all the way through. |
8. Insert the wool needle again from the front to the back (as if knitting) through the first stitch on the front needle… |
|
|
|
|
9. … and slide this stitch off the knitting needle. |
Repeat steps 5 through 9 until all stitches have been casted off. |
Properties:
- Very clean
- Identical to the cast-on
Applications of the Various Double-Face Edge Techniques
|
Edge Technique |
Application |
|
When you want the edges to retain their shape or when they’ll be subjected to greater mechanical stress. Examples:
|
|
When softness, flexibility, or a decorative effect are more important than maximum dimensional stability. Typical examples include:
|
|
When the edge should be as unobtrusive as possible and attention should be drawn to the reversible pattern or colour scheme. It is particularly suitable for projects in which the edge is not intended to stand out as a design element in its own right. Typical applications:
|
Which edging technique is right for you?
Edge techniques in double-faced knitting are much more than just a technical detail—they have a decisive influence on the stability, appearance, and character of a knitted piece. Whether sturdy and dimensionally stable, soft and decorative, or as inconspicuous as possible: each method has its own strengths and its very specific area of application.
Which technique is the “best” therefore always depends on the project and your personal preferences.
Now I’d love to hear about your experience: Which edge technique do you prefer to use in double-faced knitting—and why? Is there a method you always choose, or do you switch it up depending on the project?


