Today, I want to tell you about a very special idea that not only brings shining smiles to children’s faces but also enriches our family time: crocheted bags for our little girl (and sometimes for our big son or myself). As a mom who loves to combine creative projects with heart and style, I always enjoy seeing my daughter proudly carry her new favorite bag. And the best part? We designed it together — she contributed her ideas, I did the crochet work, and together we created something that’s not only beautiful but also reflects our family story.
Why crocheted bags are so much more than just accessories
For me, these bags are small keepsakes that reflect our shared moments, colors, and wishes. My daughter loves choosing her favorite colors and telling me: “Mom, make me a pink or yellow bag, or green... and with little flowers!” It’s incredibly joyful to bring her wishes to life and then show her the result. It’s not just a fashion accessory, but also an expression of her personality and a reminder of our creative family hours — even if my little one is only two years old 😜.
General tips for the perfect, child-friendly crochet bag with attention to detail
Choosing the right materials:
I make sure to use soft, durable yarns that feel comfortable on children’s skin. The bag should be sturdy enough to withstand everyday use, but also soft enough to feel nice. For small children, it’s not just important but essential that the yarns are free from harmful substances!
Colors that make children’s hearts beat faster:
Here, I involve my daughter actively in the decision-making. Together, we browse my yarn stash and pick bright colors, pastel shades, or patterns that excite her. This makes the bag even more special for her because she knows she had a hand in designing it.
Shape and functionality:
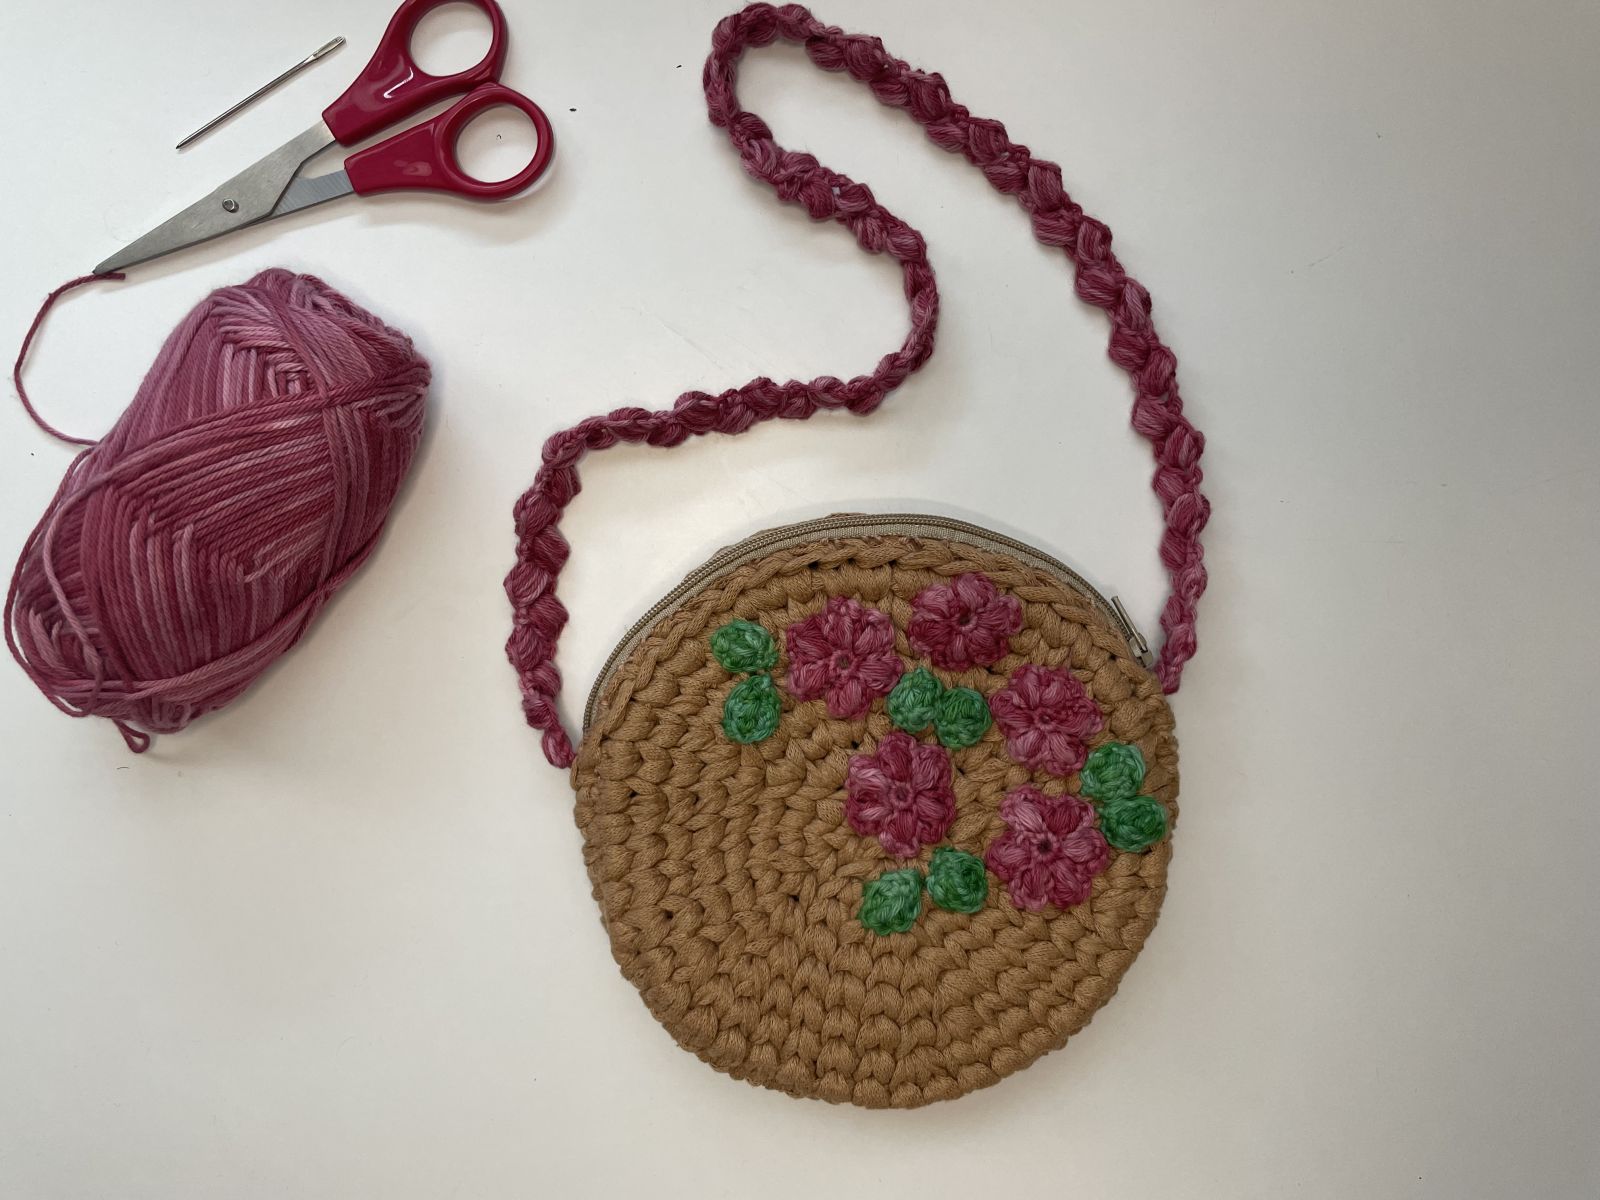
We opt for a small crossbody bag, perfect for carrying a favorite toy or little treasures from kindergarten. The size should be lightweight so that small hands can carry it comfortably without it feeling heavy. For beginners, I recommend starting with a round version — like the one shown here — because it’s the easiest to crochet.
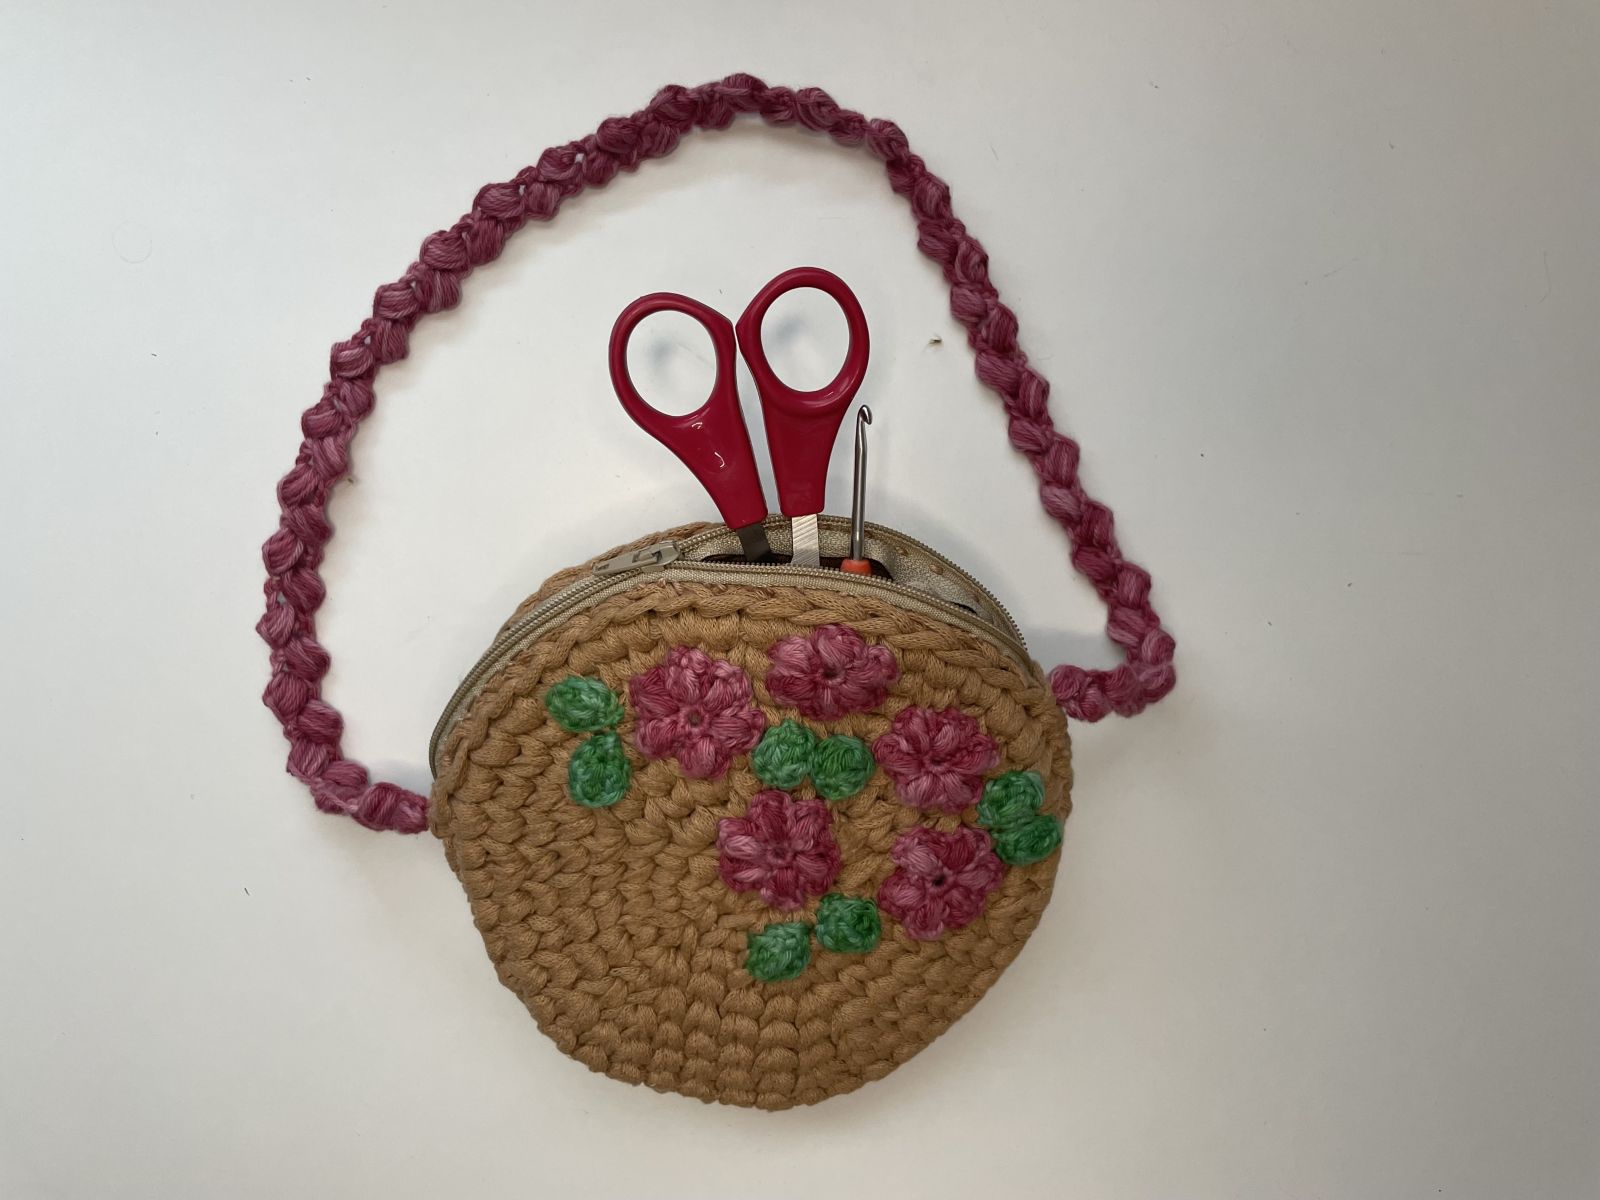
My creative highlight for this blog: the "Flower Meadow" bag:
.jpeg)
Here's an example that we planned together: a cheerful bag with colorful crochet flowers. I crocheted the basic shape, and my daughter picked out the colors for the flowers. We made small crocheted blossoms, which we then sewn onto the bag. The result is a joyful, colorful bag that reflects her personality and matches her favorite dress perfectly.
Even though my daughter isn’t able to crochet herself yet, it’s a great joy for her to be involved in the idea-creation process. Picking out the colors together, thinking about which decorations fit, makes her proud and gives her a sense of participation. For me, it’s a wonderful opportunity to boost her confidence and show her that her wishes matter.
Practical tip:
Let your children choose their favorite motifs, and involve them in the execution — for example, when attaching decorations or closing the bag, because there are so many other ways to personalize it beyond what I’m sharing with you here.
I wish you lots of fun planning, crocheting, and family creativity! Maybe the idea of actively involving your little ones in the design process will inspire you — even if they can’t crochet yet — because everything is much more beautiful when done together.
And now, things are really getting started!
What you'll need for your little flower meadow to take along:

- 1 skein of ribbon yarn in a neutral color**
- a few leftover strands of cotton yarn in your or your child's favorite flower colors
- a few leftover strands of cotton yarn in green
- 1 zipper approximately 15 cm long
(- possibly small rings for the strap — personally, I find it more beautiful without)
- a crochet hook size 6 or 7 (depending on how tightly you crochet) to work with the ribbon yarn
- a crochet hook size 3 for the flowers and leaves
- stitch markers
And this is how it’s done:
We use the following stitches:
Chain stitch Yarn over, pull through the loop.
Slip stitch Insert the hook into the stitch, yarn over, and pull the yarn through the loop on the hook.
Single crochet Insert the hook into the stitch, yarn over, and pull the yarn through. There are now 2 loops on the hook. Yarn over again and pull through both loops on the hook.
Half double crochet Yarn over, insert the hook into the next stitch, yarn over, and pull the yarn through. There are 3 loops on the hook. Yarn over again and pull through all three loops.
Double crochet Yarn over, insert the hook into the next stitch, yarn over, and pull the yarn through. There are 3 loops on the hook. Yarn over again and pull through the first two loops. Yarn over once more and pull through the remaining two loops.
Treble crochet Yarn over twice, insert the hook into the next stitch, yarn over, and pull the yarn through. There are now 4 loops on the hook. Yarn over and pull through the first two loops. Yarn over again and pull through the next two loops. Yarn over once more and pull through the last two loops.
The Bag

The round shape of the bag is crocheted twice in continuous spiral rounds using single crochets (i.e., ongoing rounds without joining). To make crocheting easier and reduce frustration when counting, using a round marker can be helpful.
In this pattern, stitches are worked **directly into the stitch** to create a nice-looking pattern. Unlike the usual method of crocheting into the front and back loops, here the needle is inserted directly into the stitch of the previous round:

From the front, it looks like this:
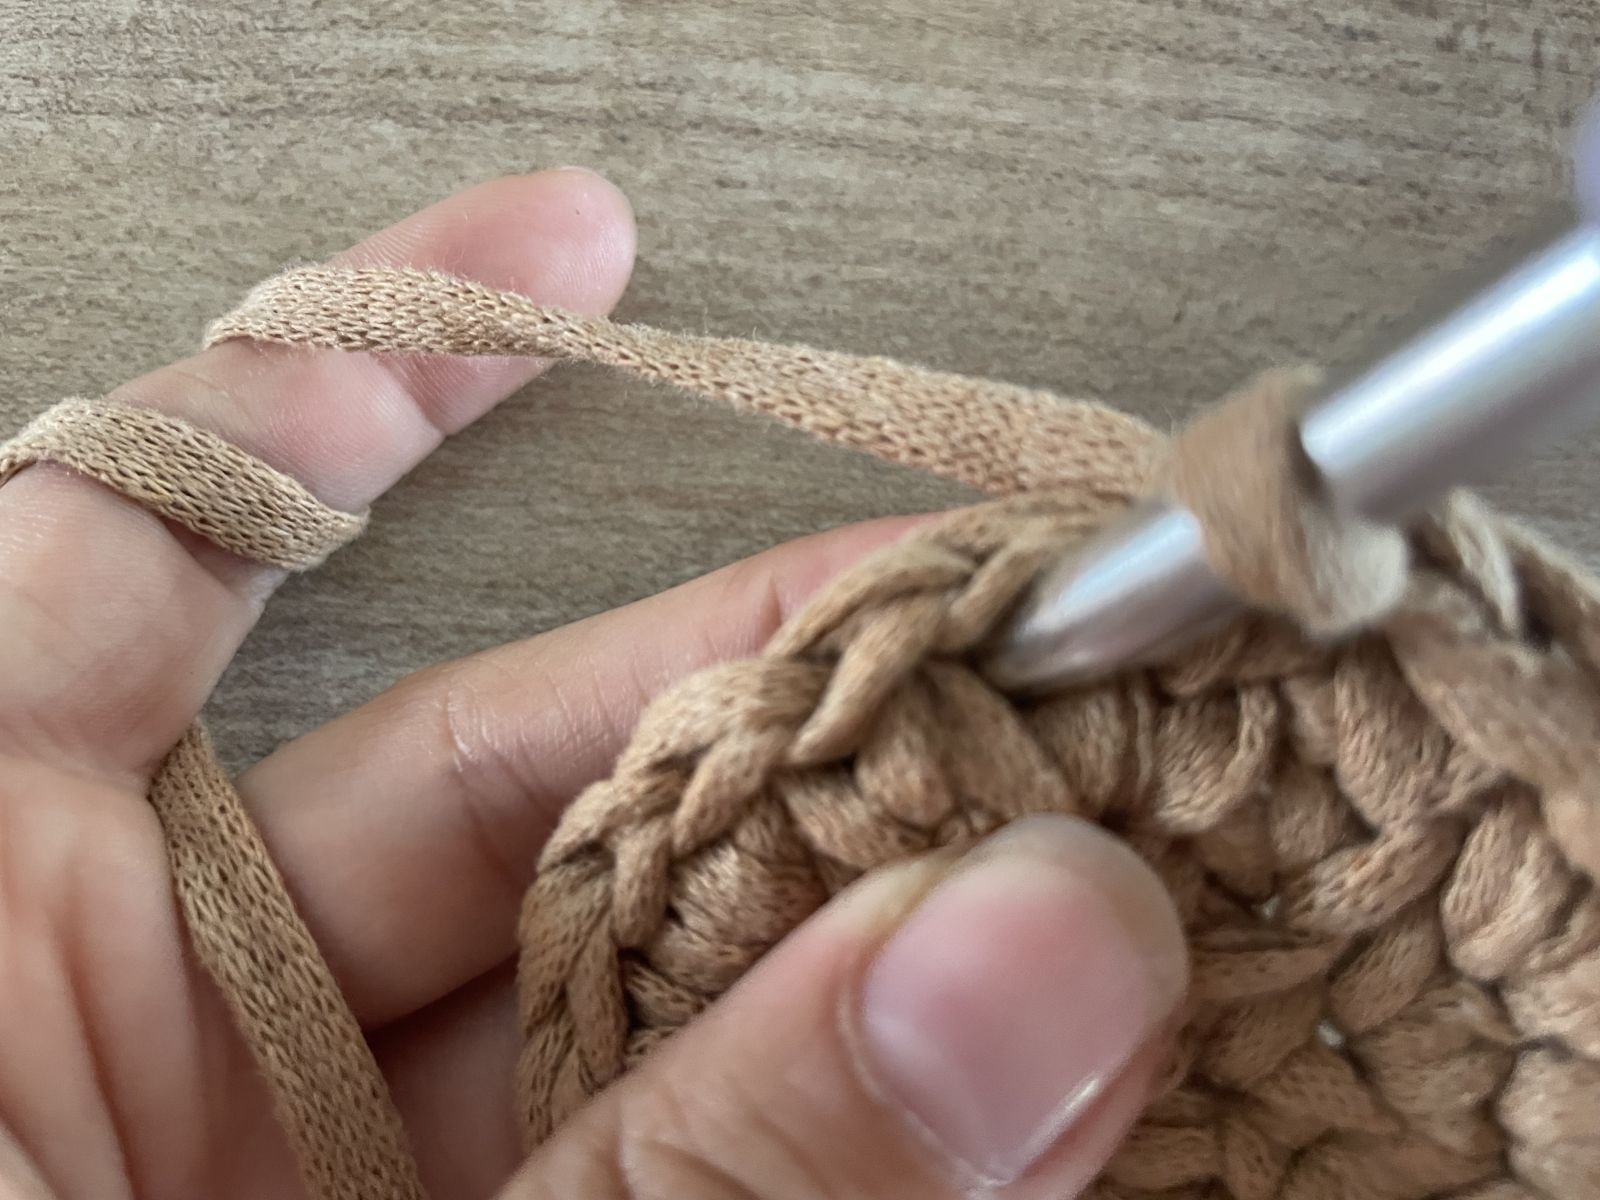
And from the back, it looks like this:
Round 1:
Crochet six single crochets into a magic ring (6)
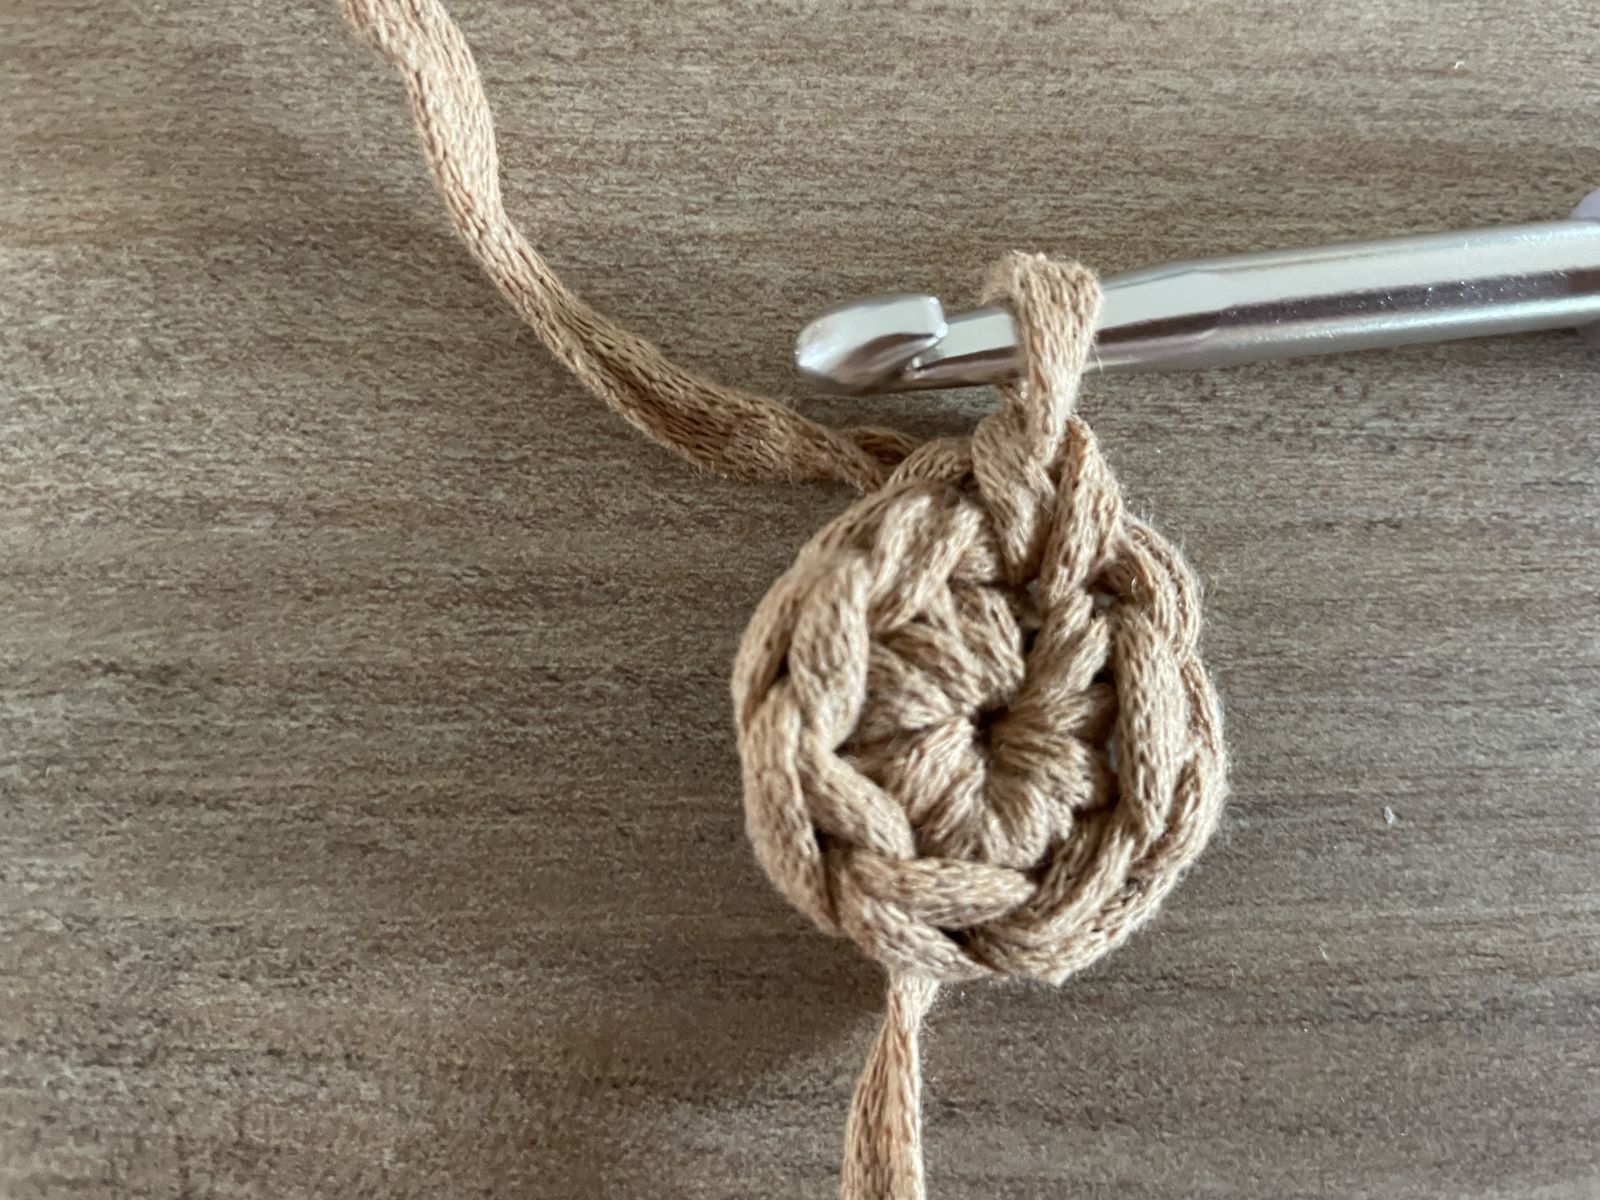
Round 2: double each stitch (12)
.jpeg)
Round 3: *the first stitch double, then single crochet* — repeat six times (18)
Round 4: *single crochet, double, single crochet* — repeat six times (24)
Round 5: *three single crochets, double* — repeat six times (30)
Round 6: *two single crochets, double, two single crochets* — repeat six times (36)
Round 7: *double, five single crochets* — repeat six times (42)
Round 8: *three single crochets, double, three single crochets* — repeat six times (48)
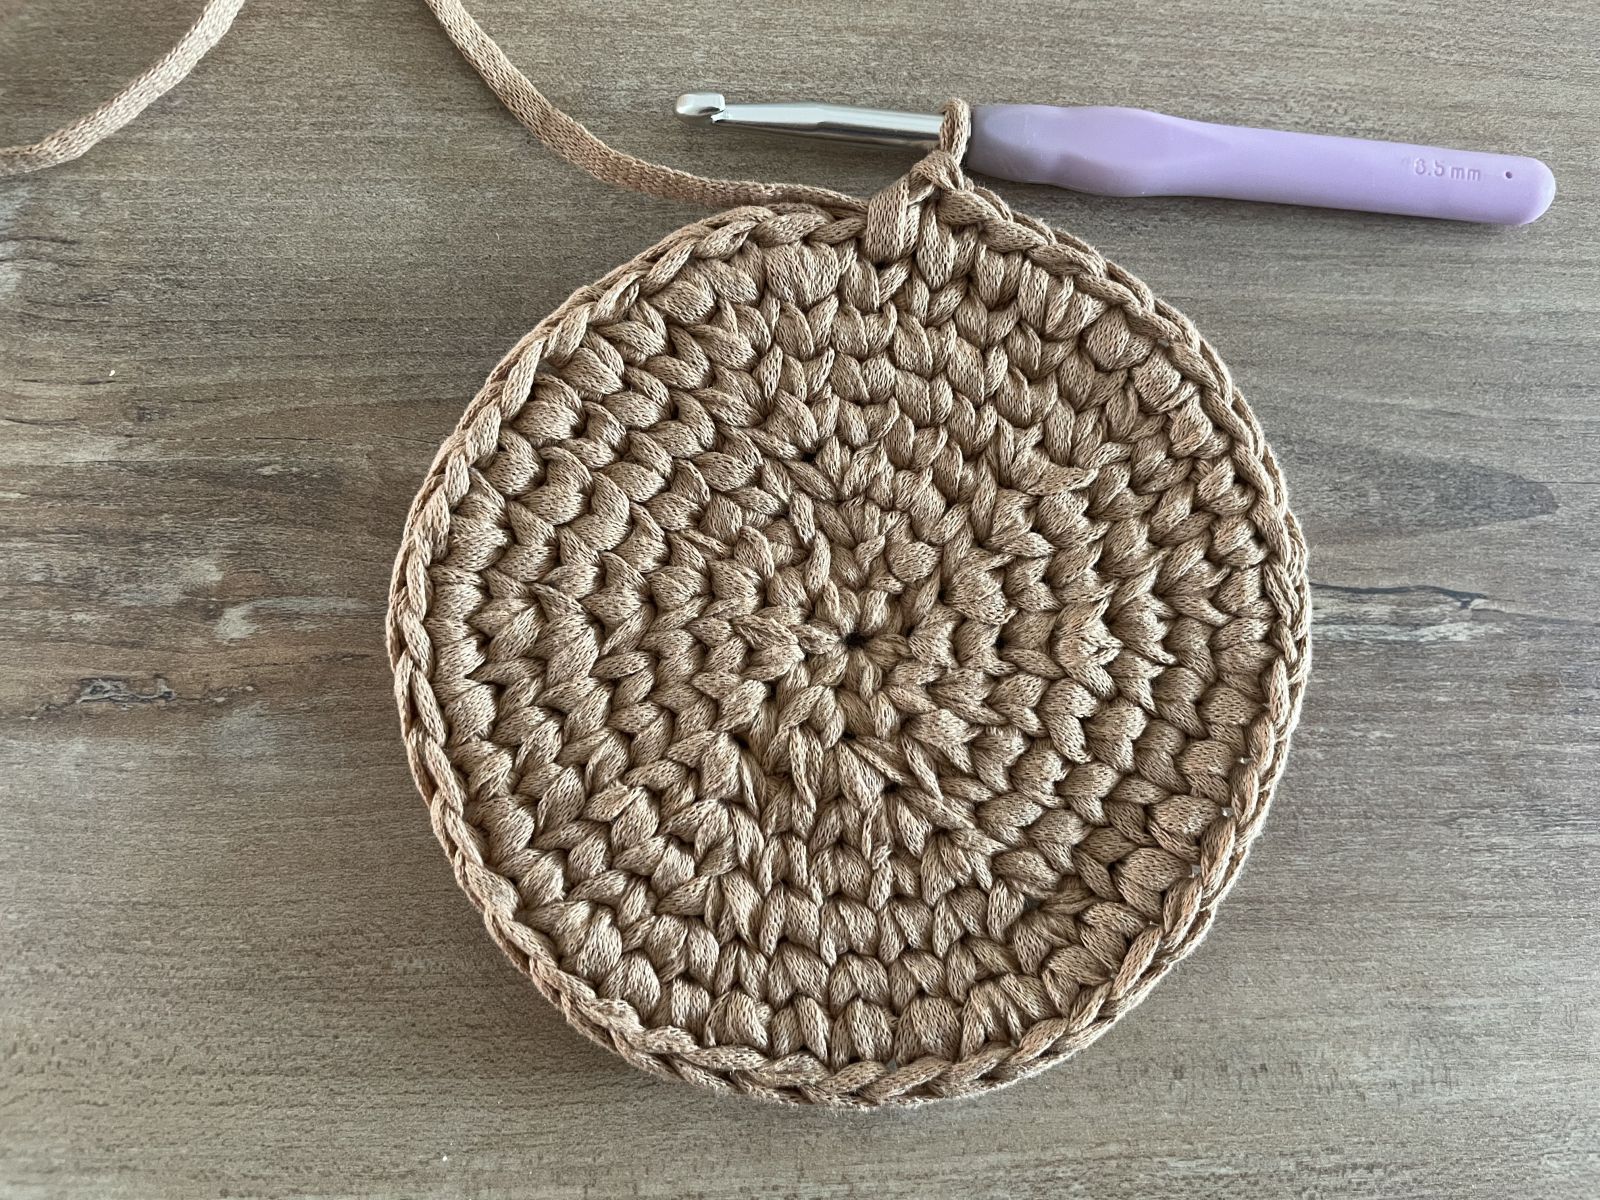
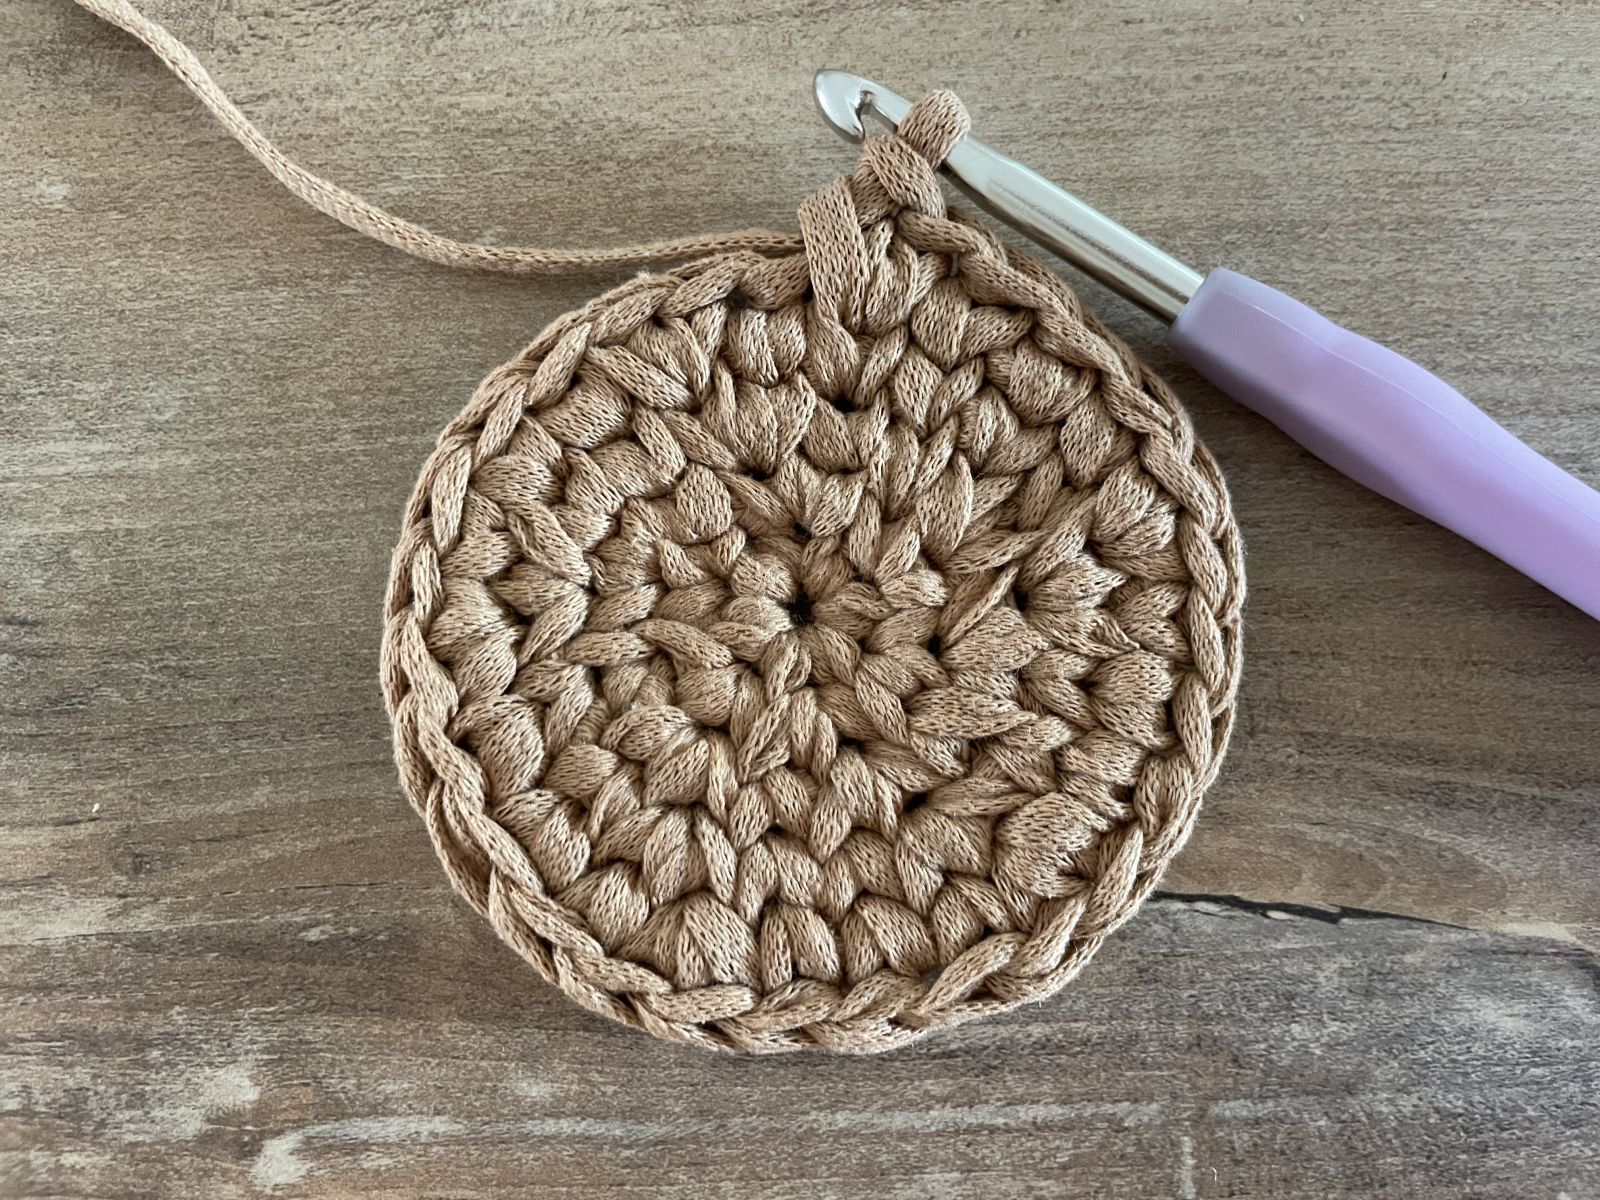
Round 9: 48 single crochets (48)
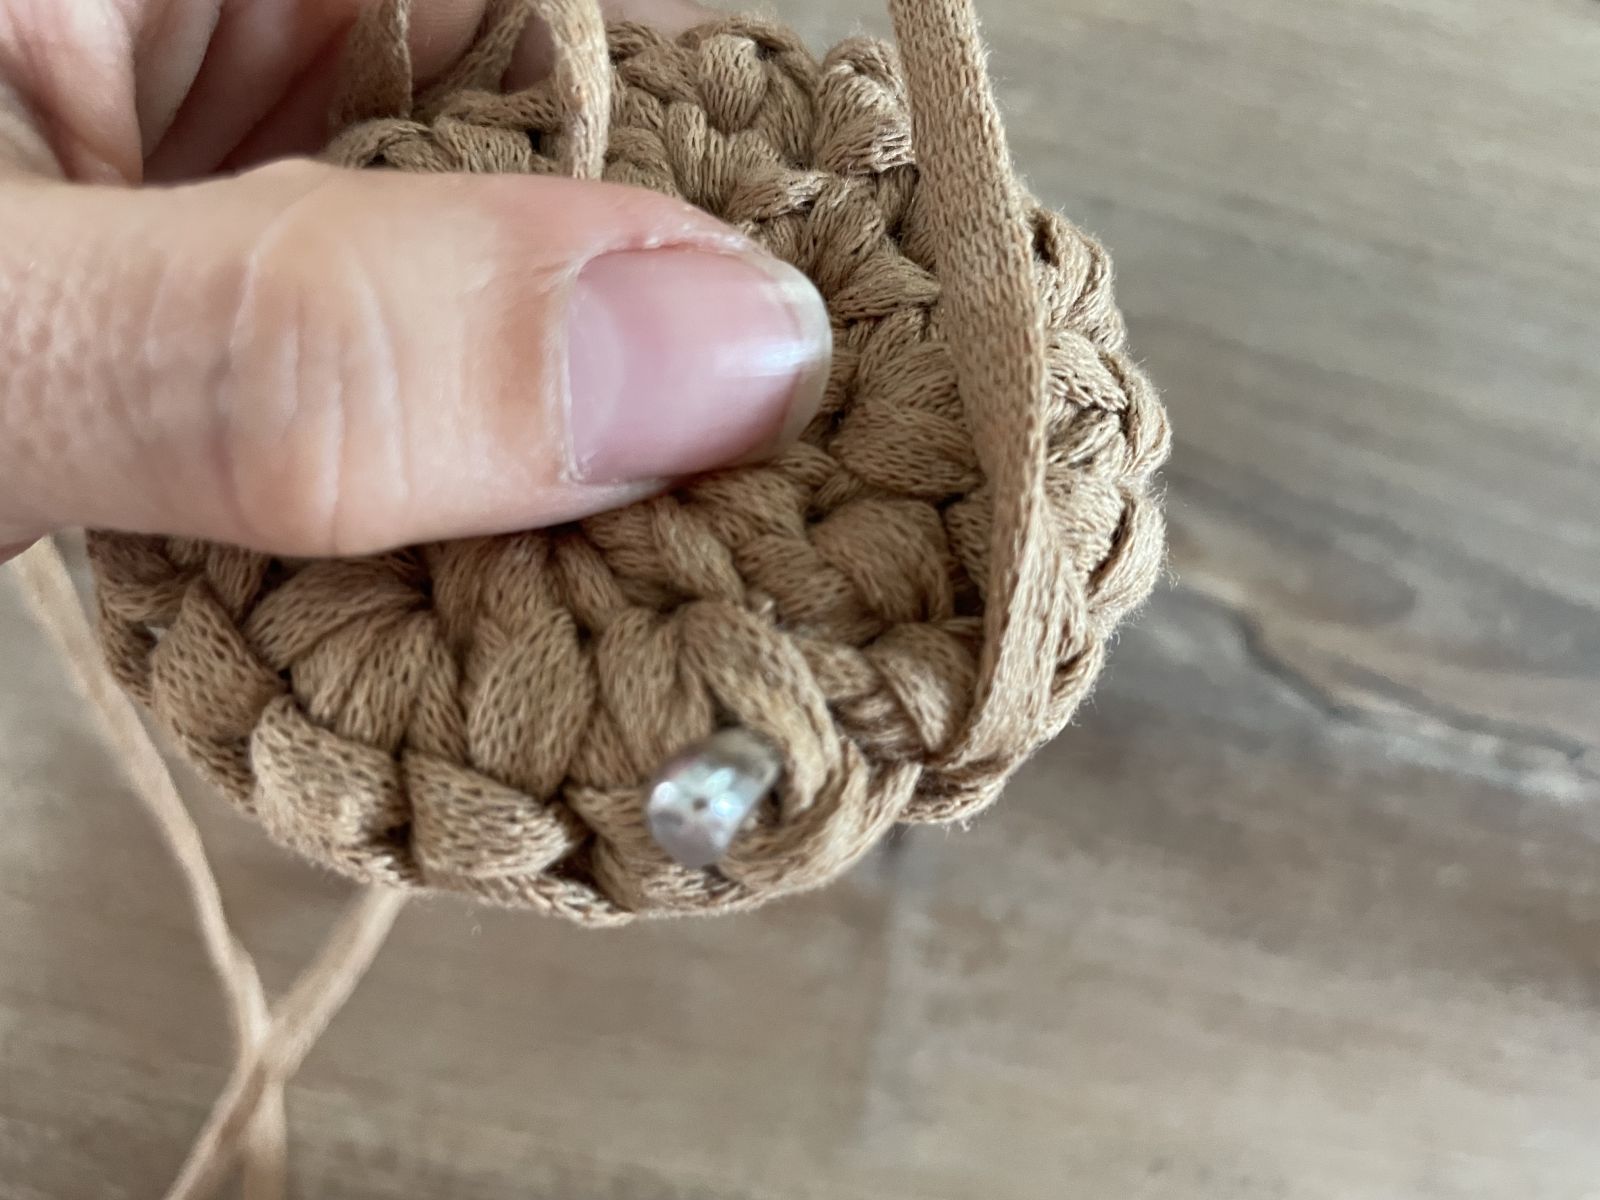
Two of these two parts are then placed together, with the side that should be on the outside at the end facing outward:

Then, these two parts are joined together with single crochets. To do this, insert the hook through the stitches of both parts and then crochet a normal single crochet:
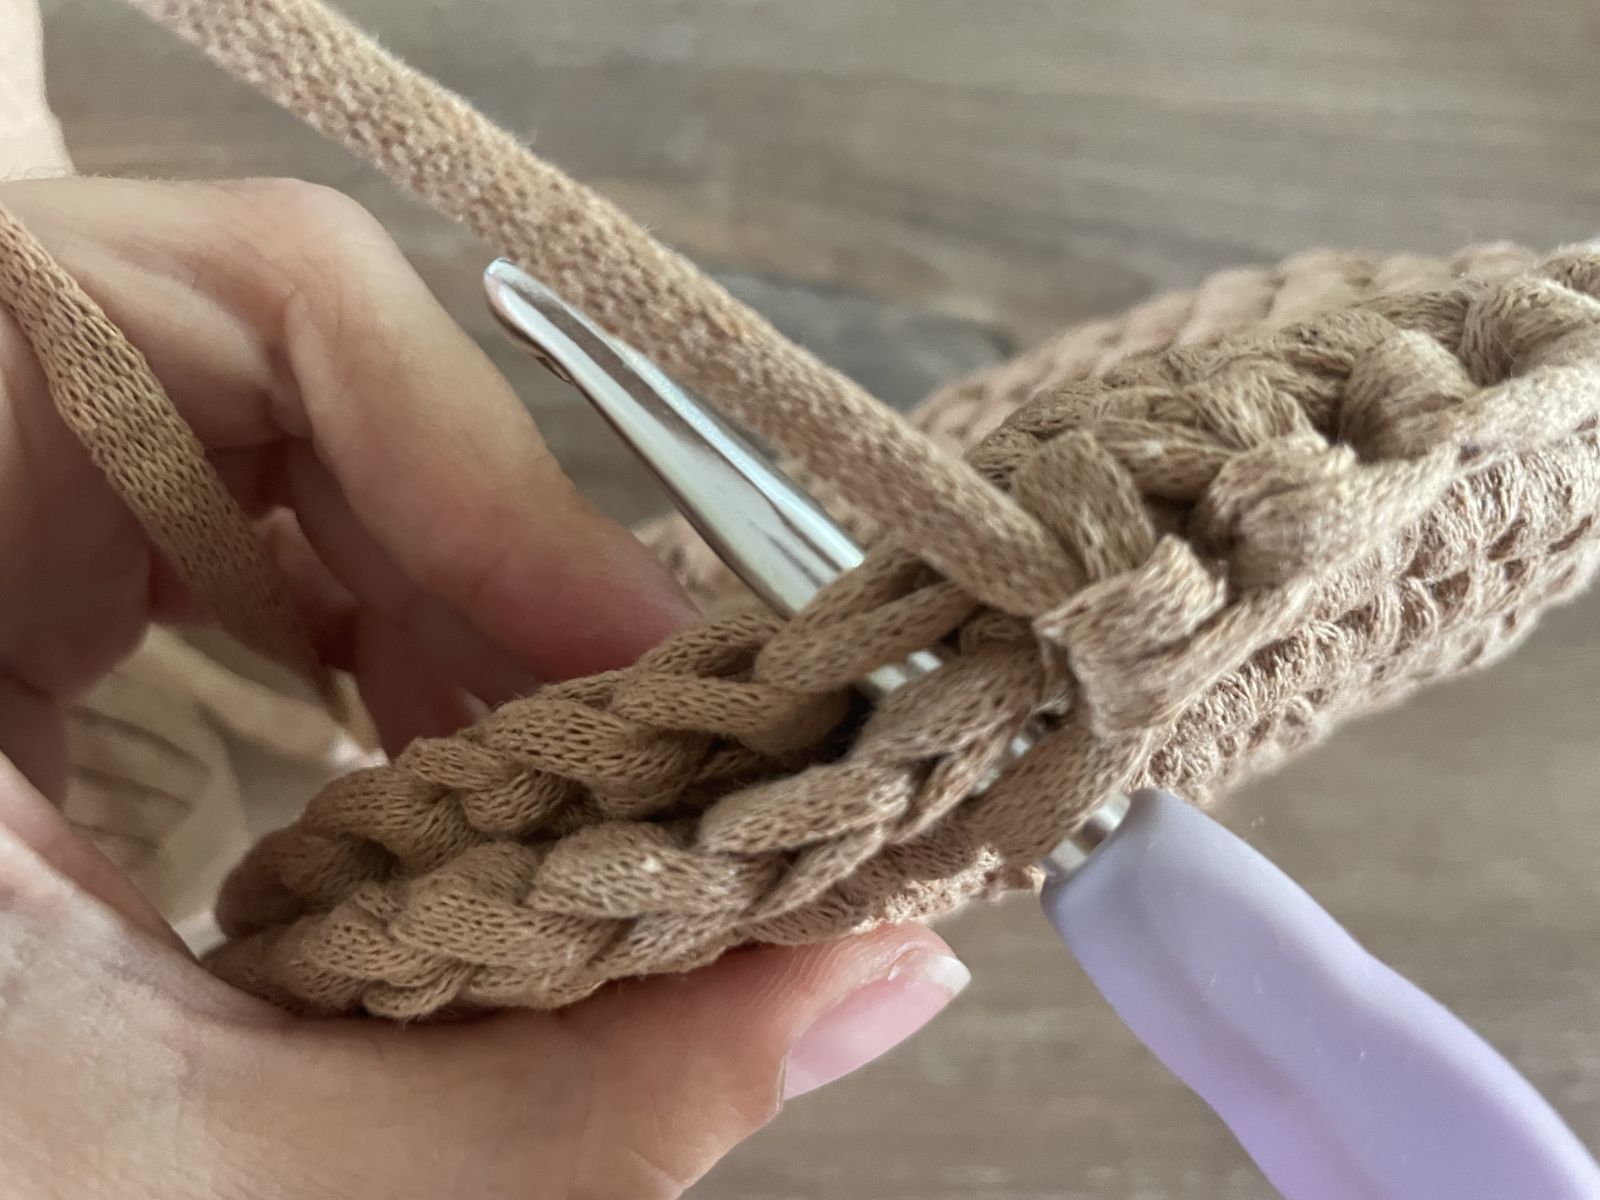
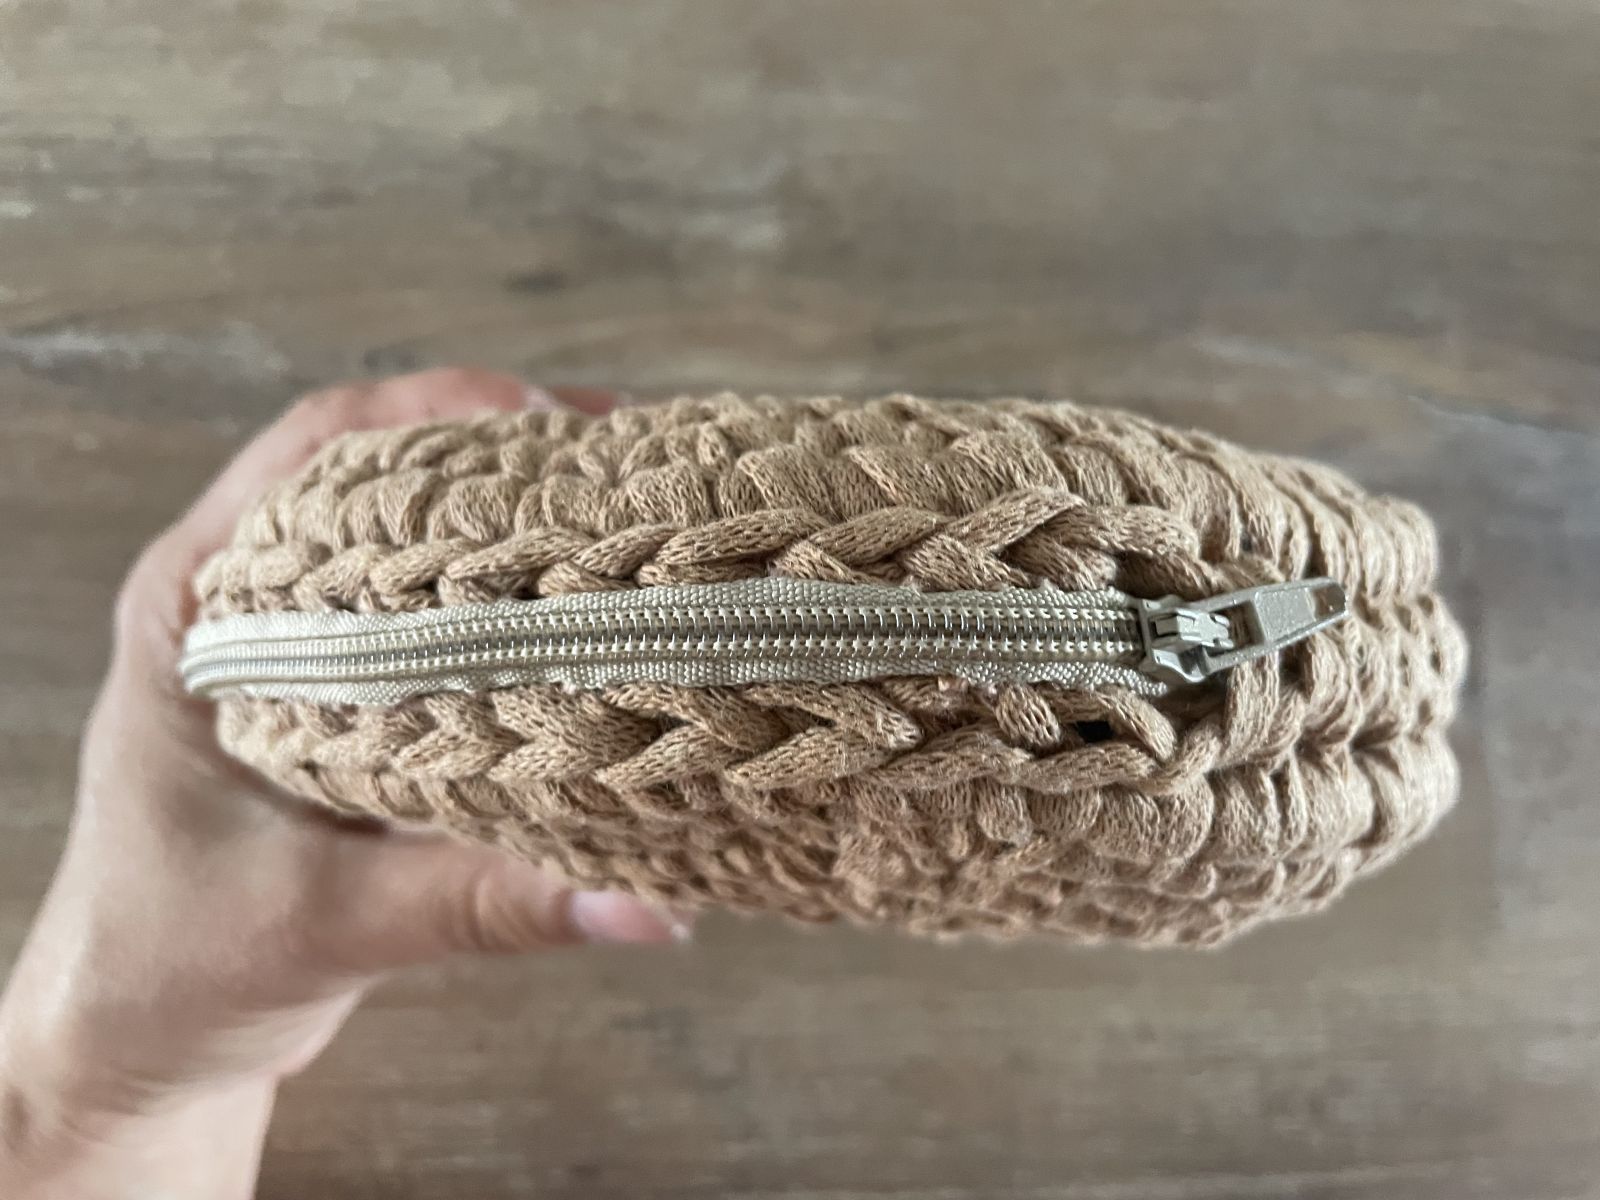
This is repeated until there is just enough space left for the zipper to fit in. The zipper is then pinned to the side pieces with sewing pins and sewn in place. (Please remember that the zipper must remain open at the end so that the bag can be turned inside out — meaning the outer side can be turned back out again.)
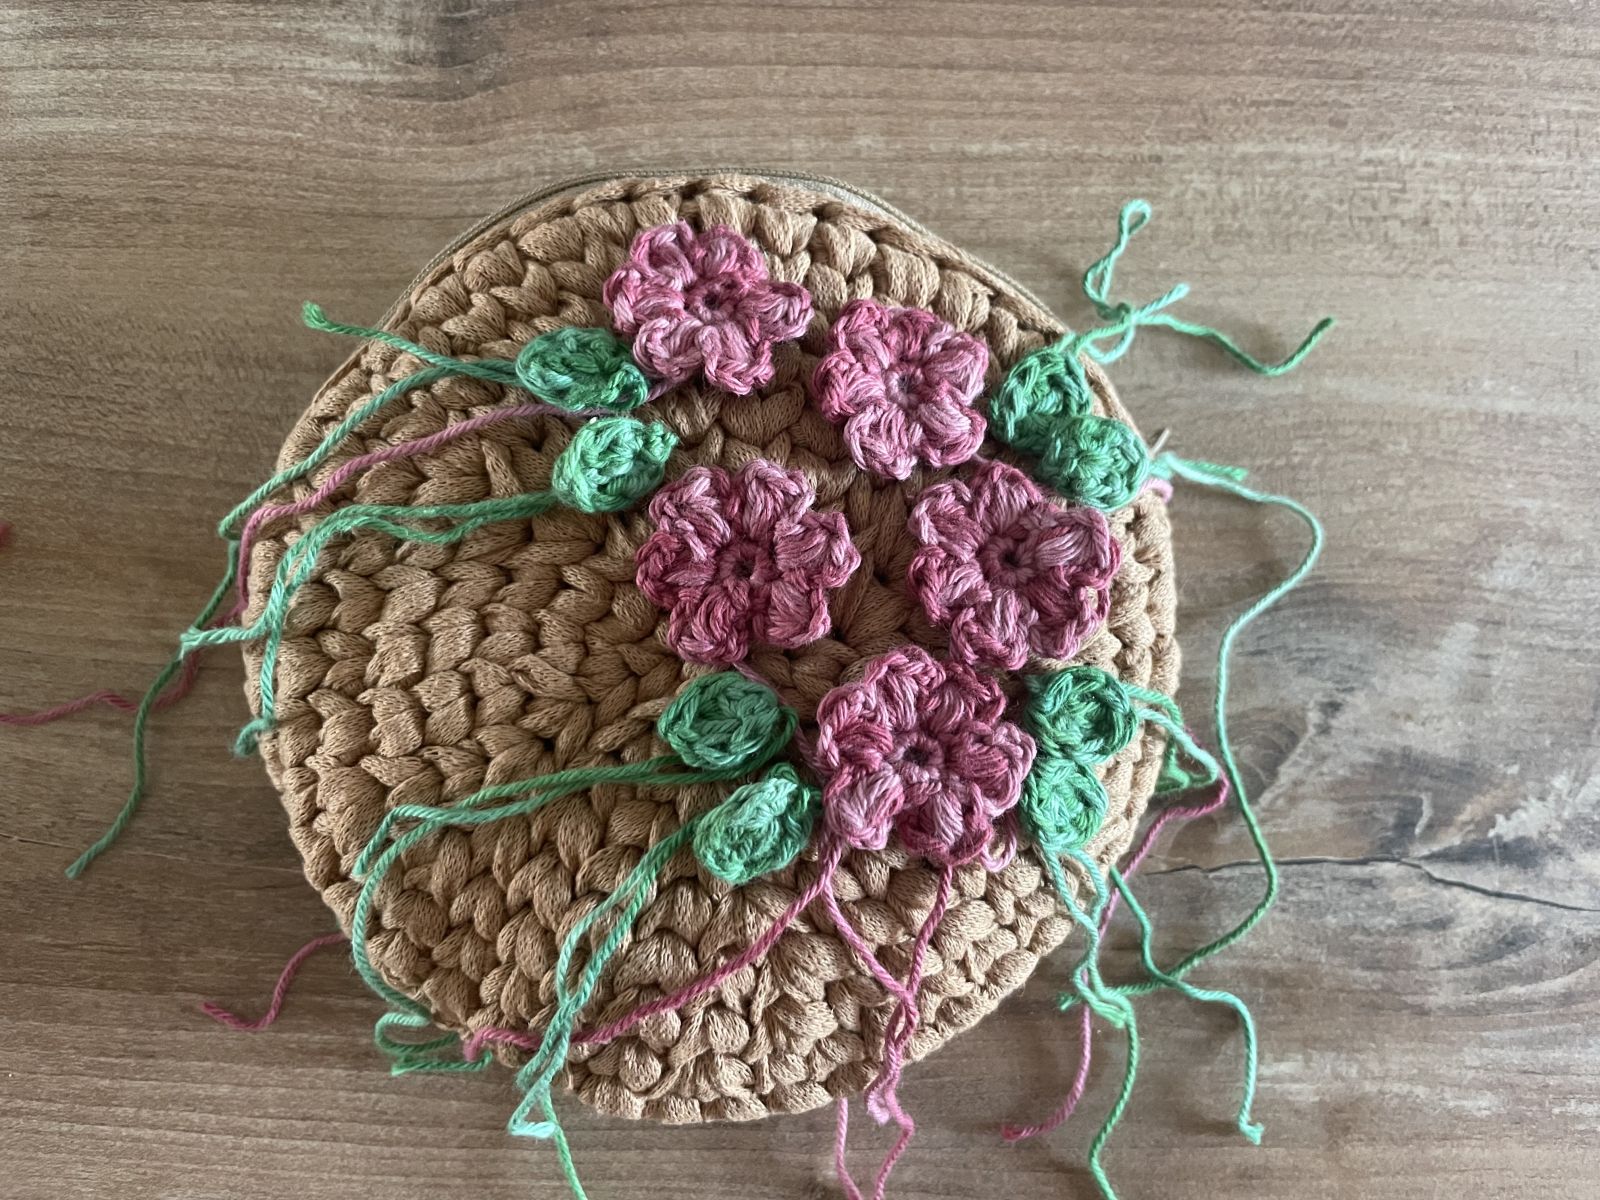
Once the bag is almost finished, it can be decorated with the flowers and leaves. Of course, you can also use other appliqués as an alternative. Ideas for this can regularly be found on the Blog
Flowers
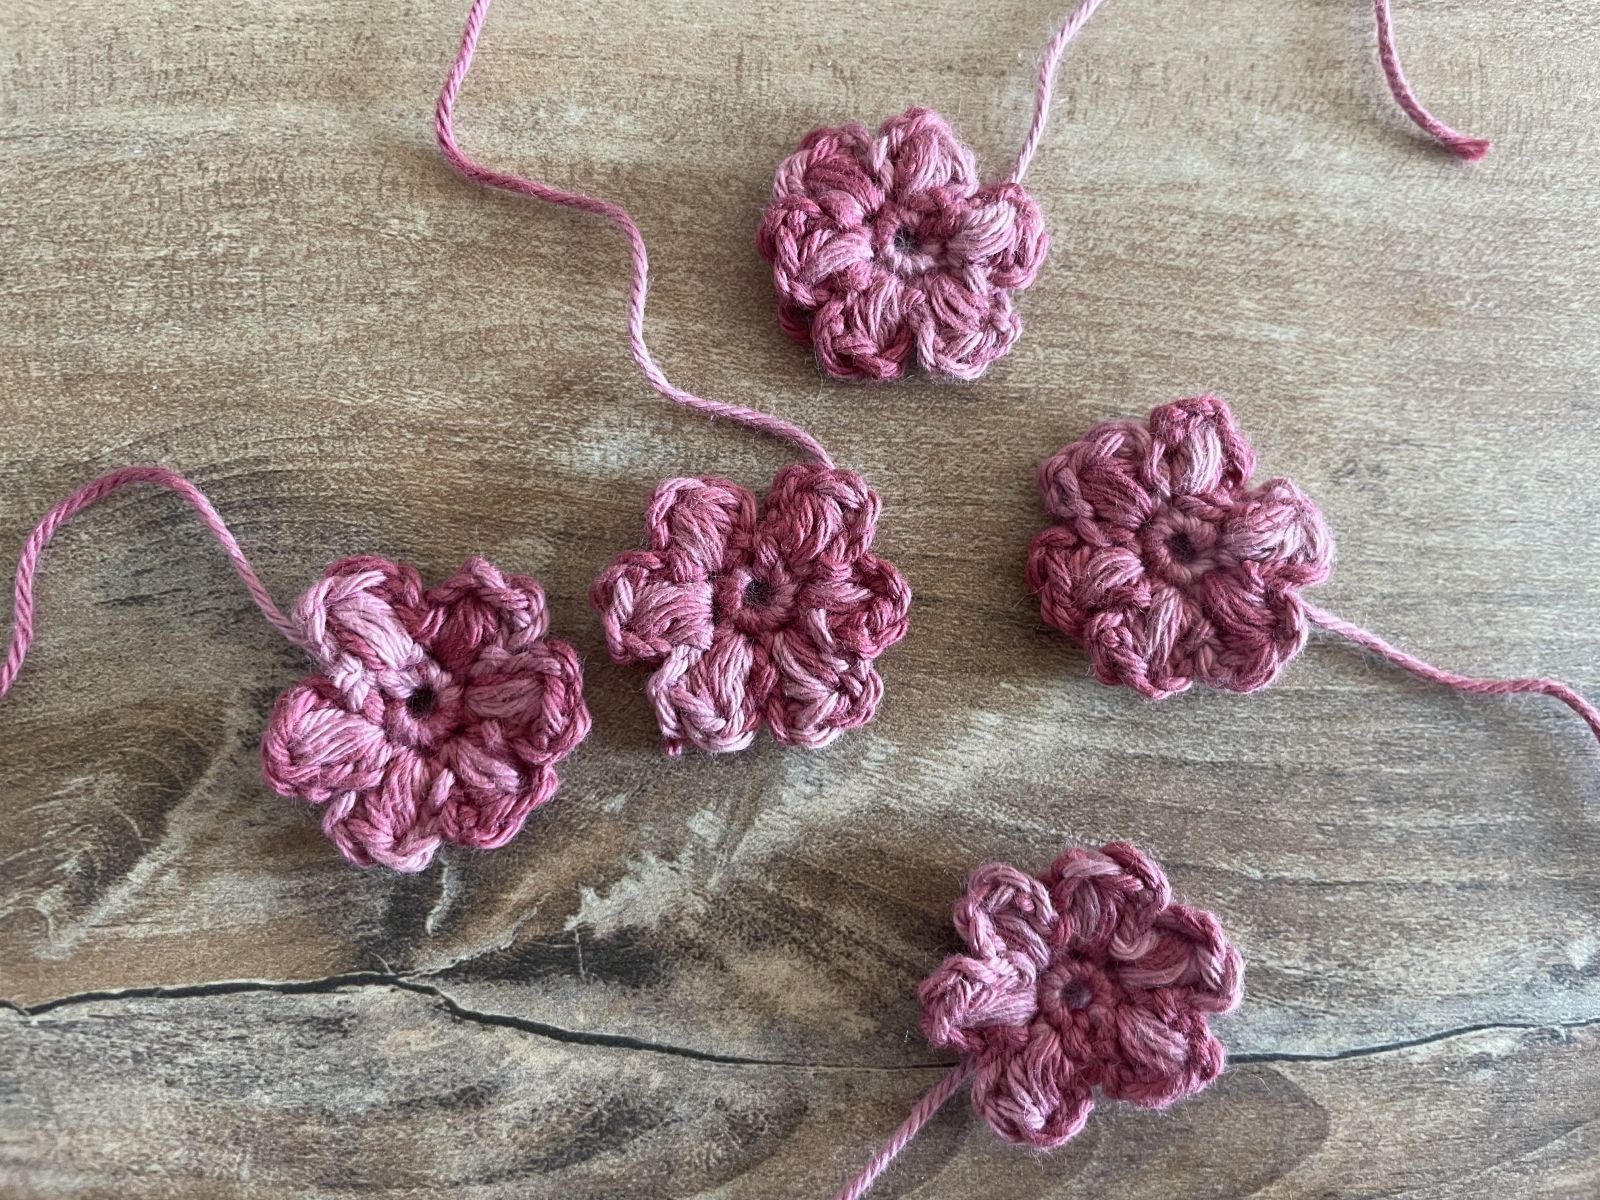
The five small flowers are crocheted quickly and easily, consisting of two completed rounds — so the round is finished with a slip stitch, and then a new round begins.
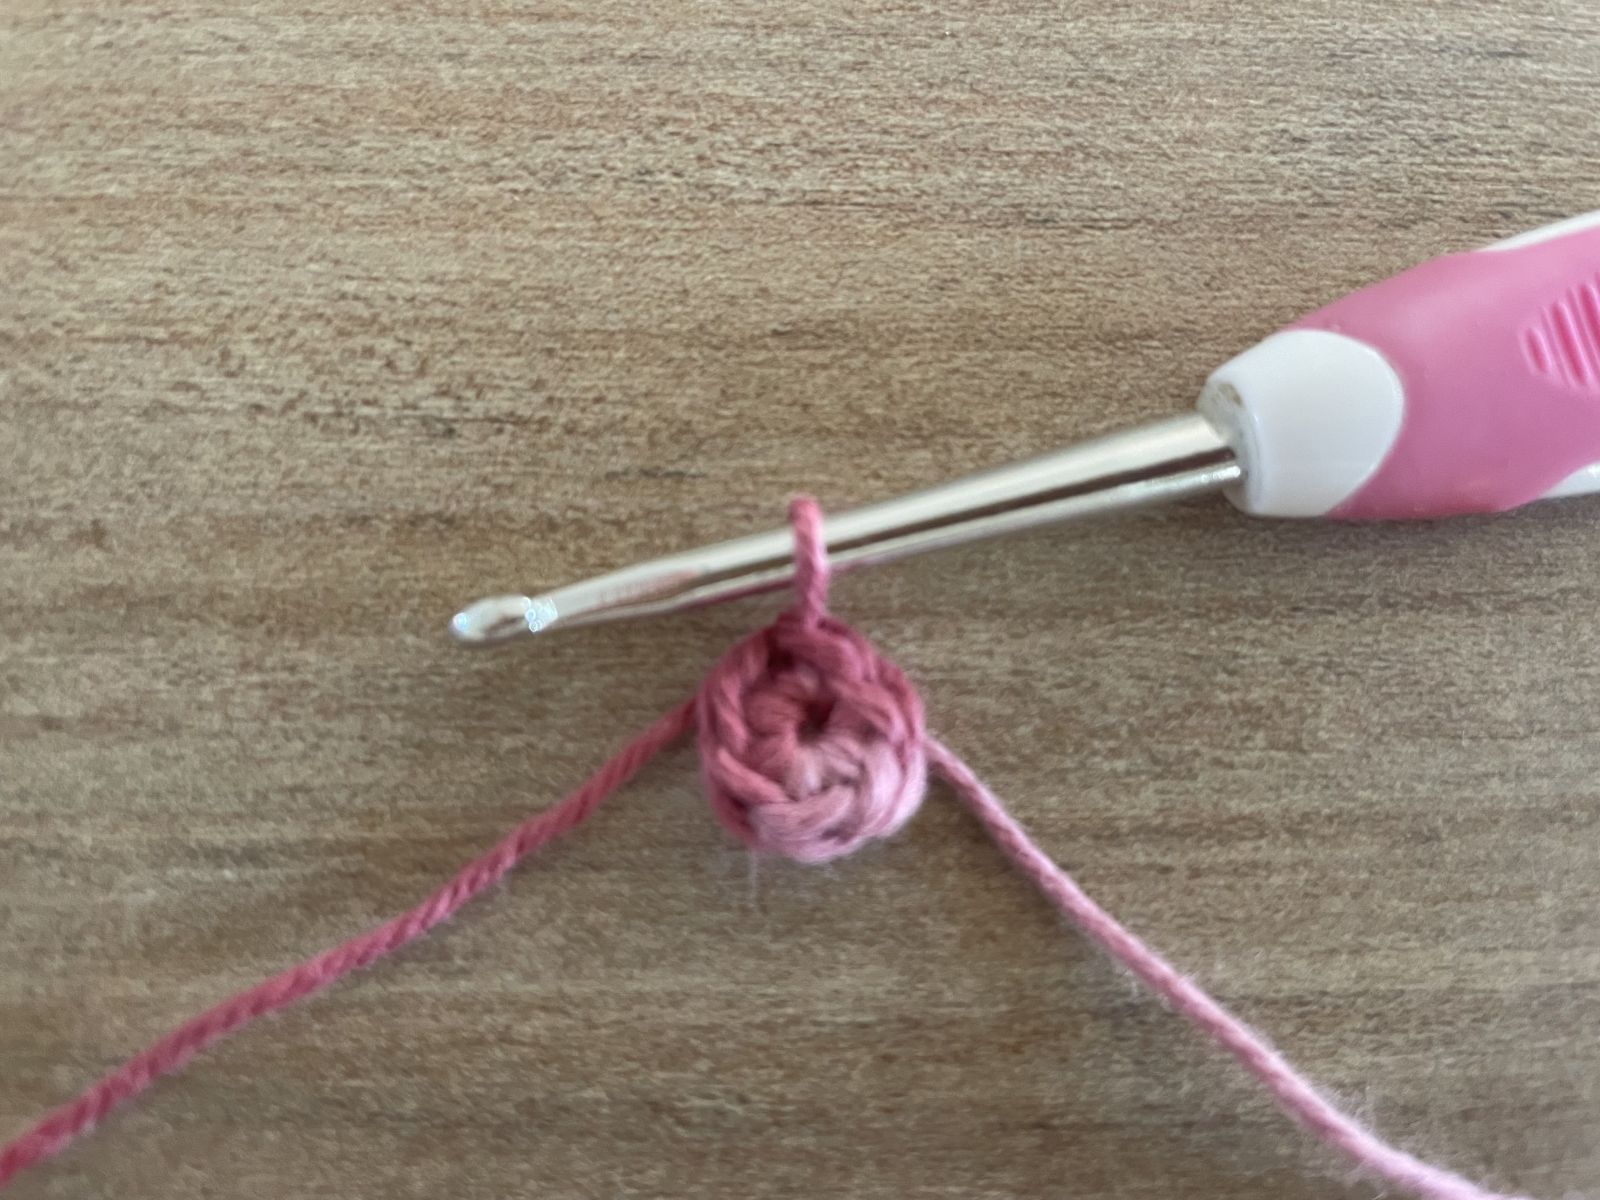
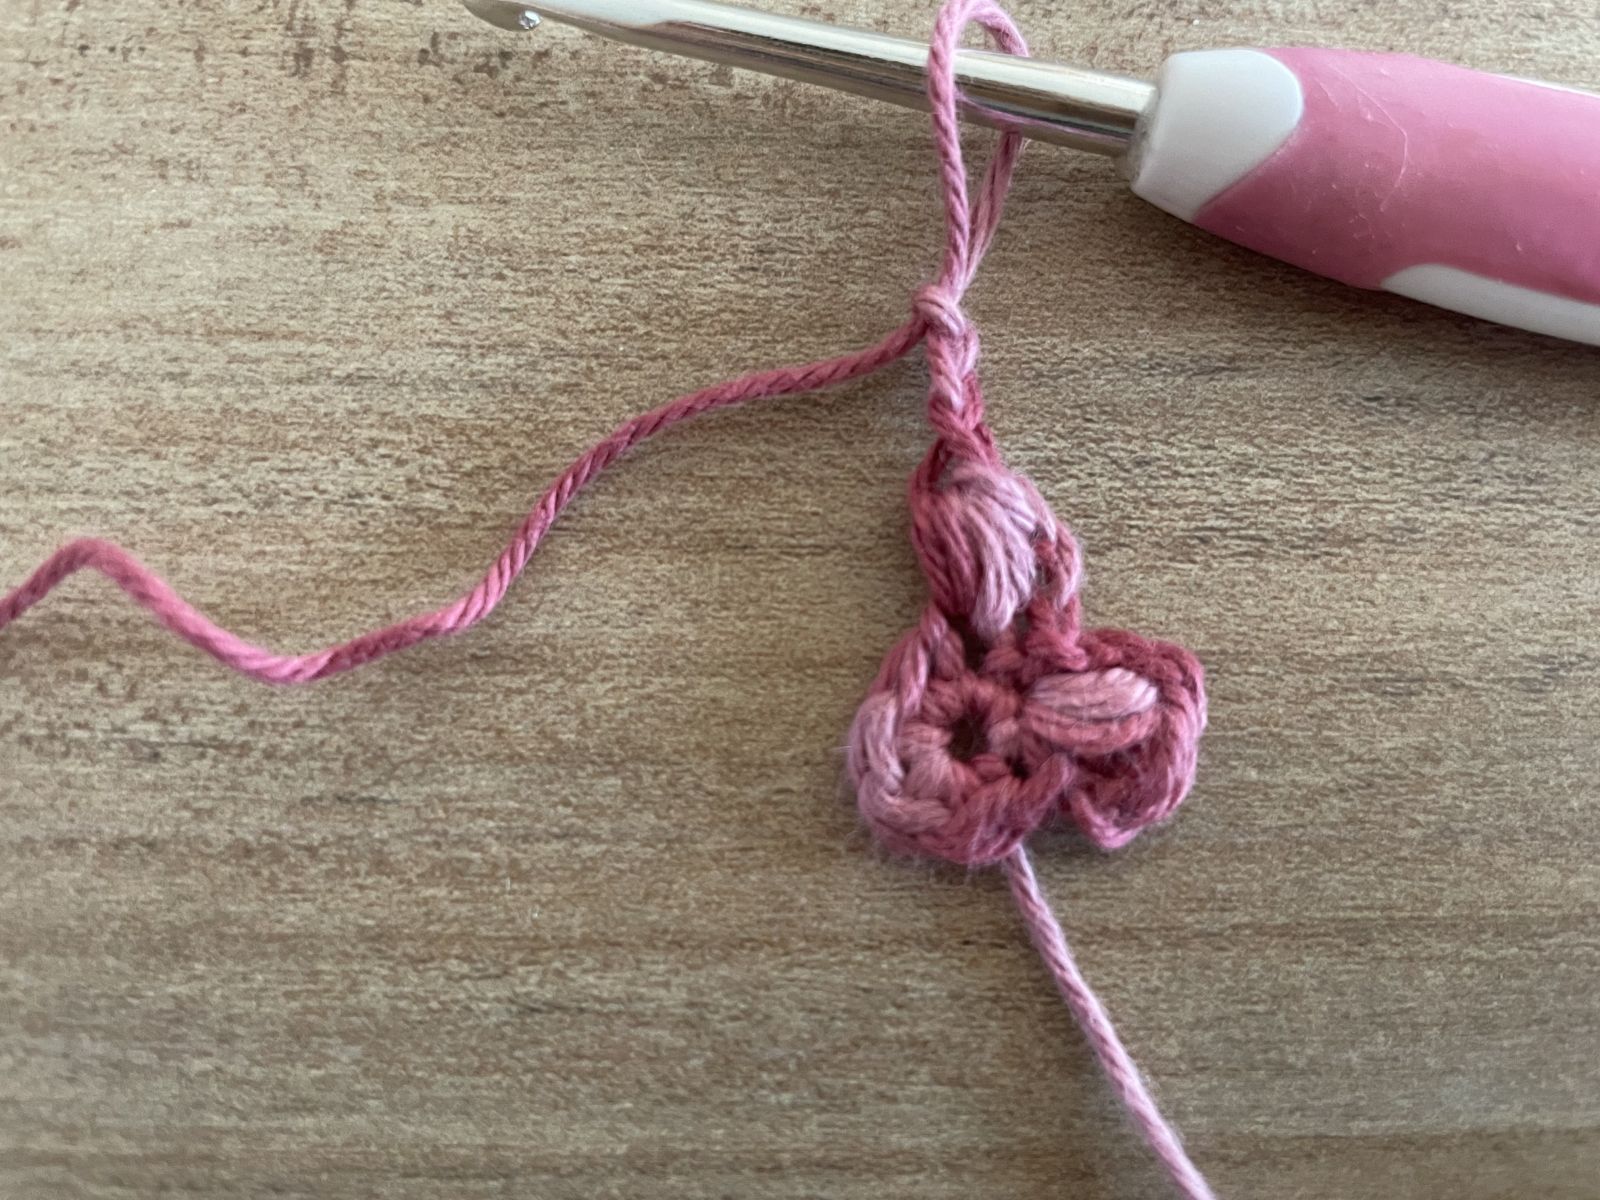
Round 1: Crochet six single crochets into a magic ring and close with a slip stitch.
Round 2: In each single crochet, crochet a bobble stitch.
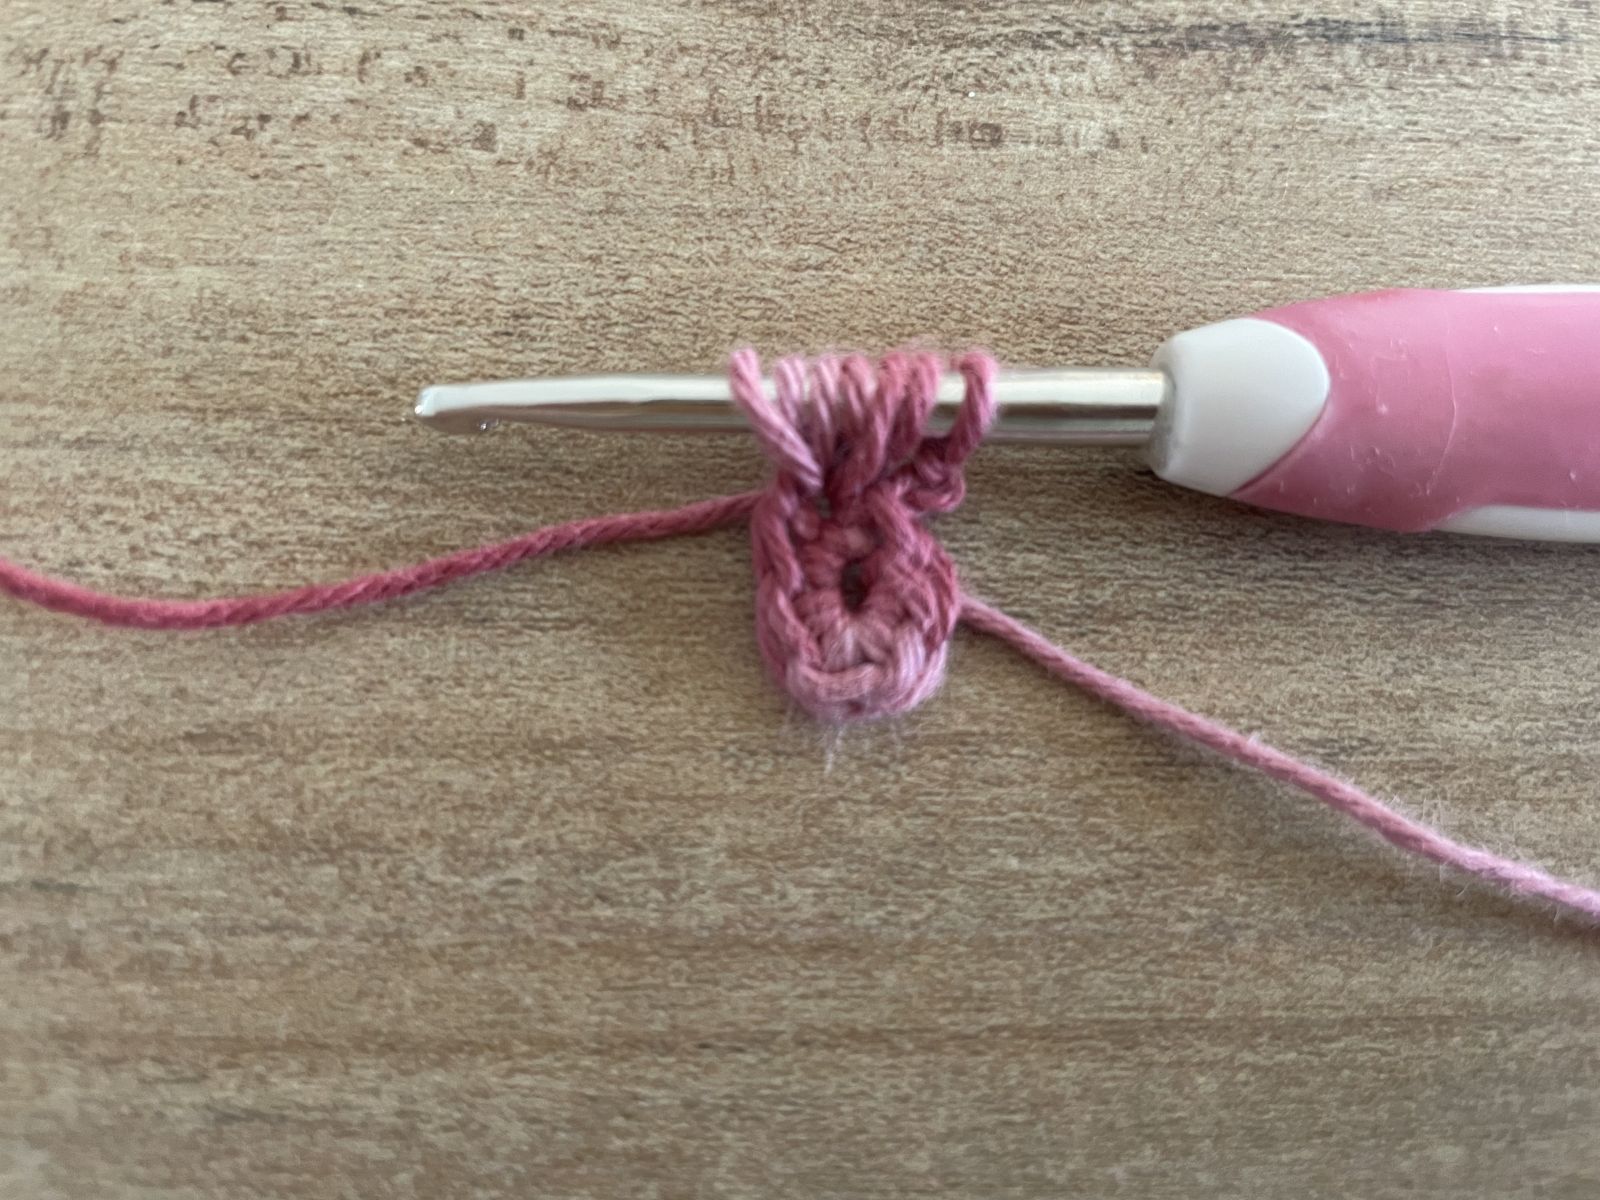
A bobble stitch here consists of: two chain stitches and three elongated yarn overs, three chain stitches, and a slip stitch.
Leaves

The eight small leaves consist of a single round, with all stitches crocheted into a magic ring. The stitches are worked in the following order:
A single crochet, a half double crochet, a double crochet, a treble crochet, a double crochet, a half double crochet, and a single crochet.
Strap for the bag
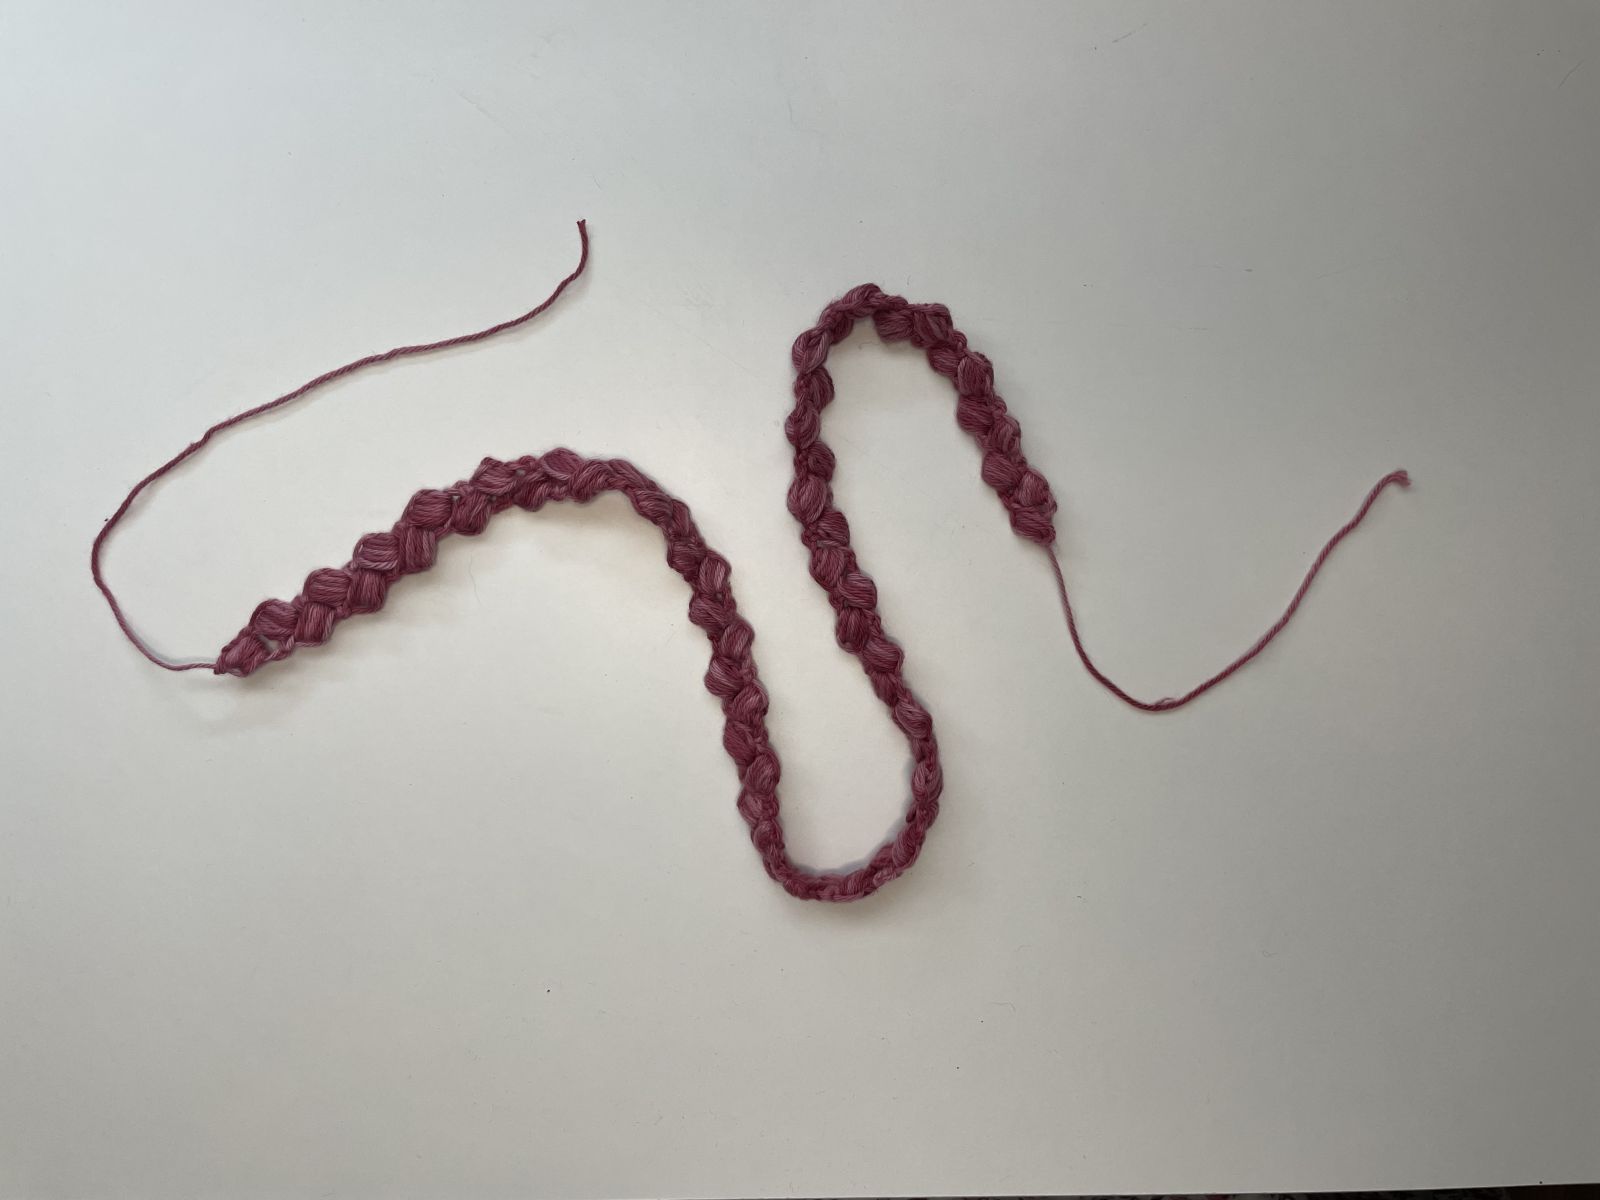
Creating the strap requires a bit of practice at first. However, once you've repeated the process a few times, it gets easier and quicker to do.
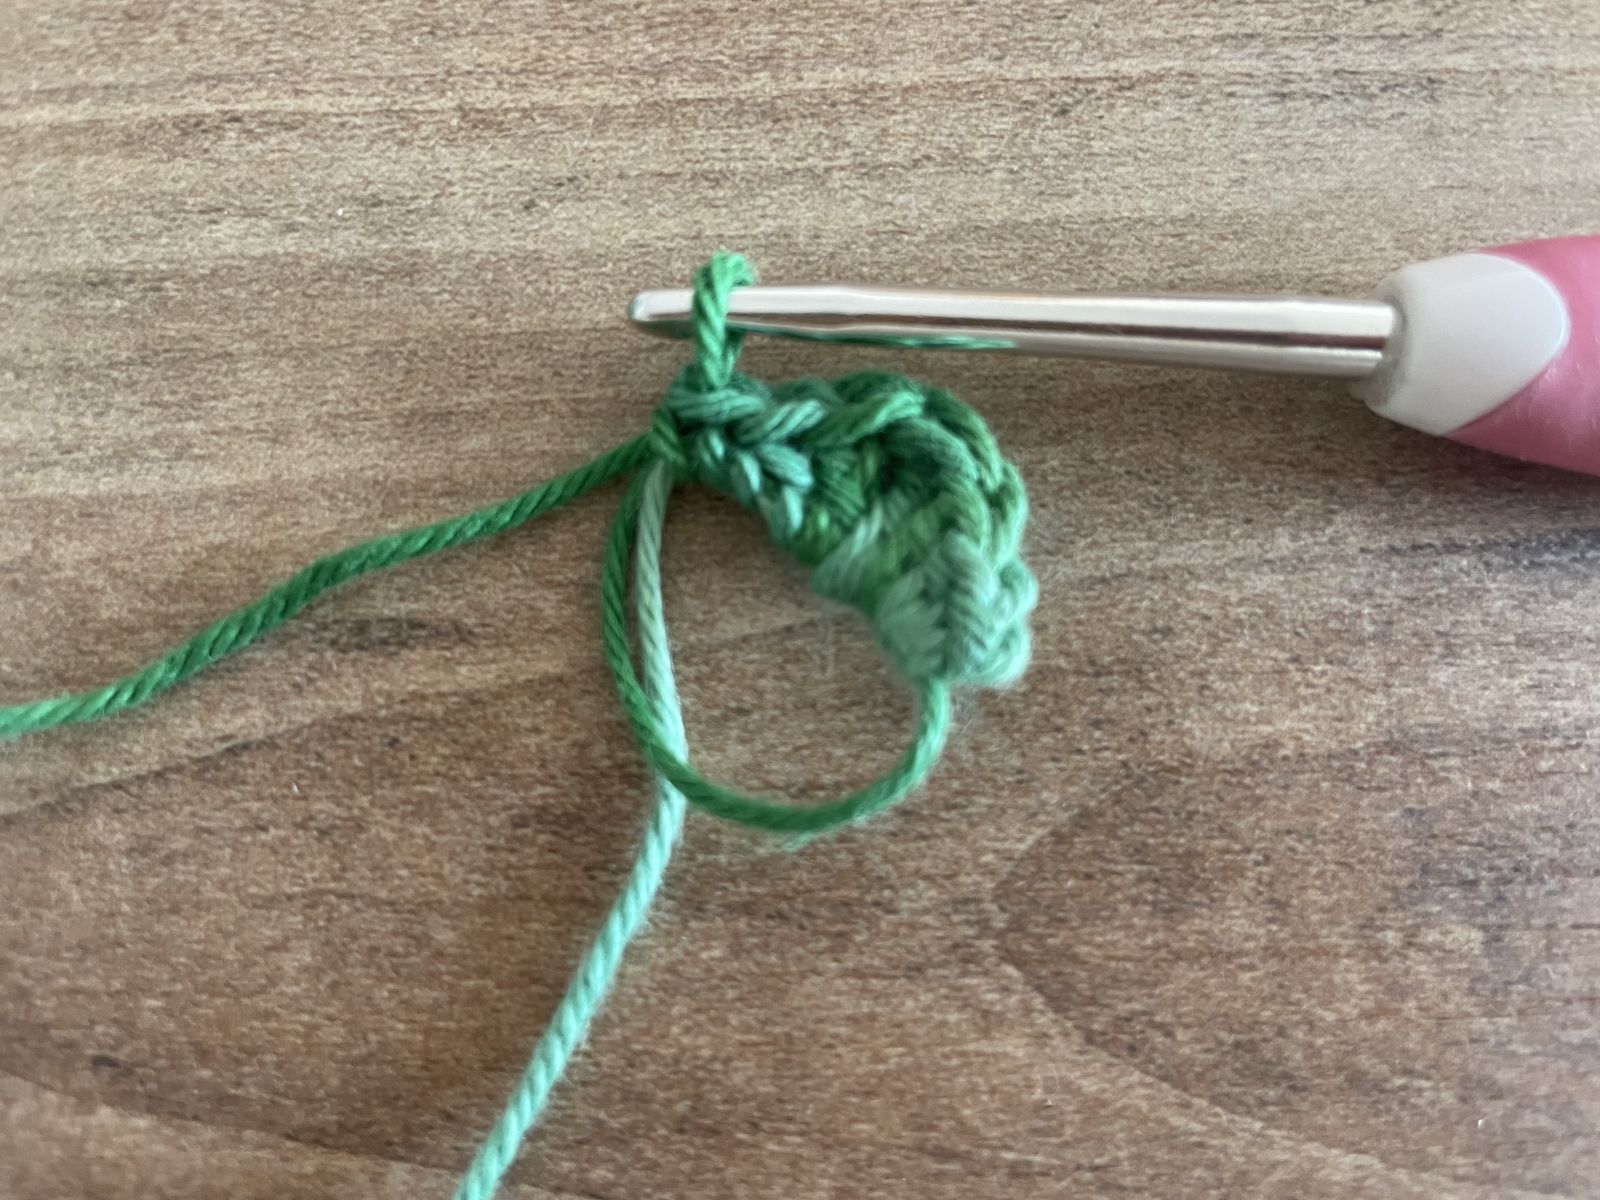
1. Start with three chain stitches.
2. Then, crochet a bobble stitch into the first of the three chain stitches, with this bobble consisting of six yarn overs. To complete the stitch, pull the yarn through so that two loops remain on the hook, then yarn over again and pull through both loops.
3. Next, crochet two chain stitches and turn the work so that the chain stitches are now on the opposite side of the previous row. Now, repeat step 2.
4. Repeat step 3 as many times as needed until the strap reaches your desired length.
Now, sew on the flowers, leaves, and strap, and everything is lovingly assembled:
.jpeg)
And now you can fill your bag with your favorite things:
Other great ideas that make family everyday life more beautiful and easier can be found in our shop.