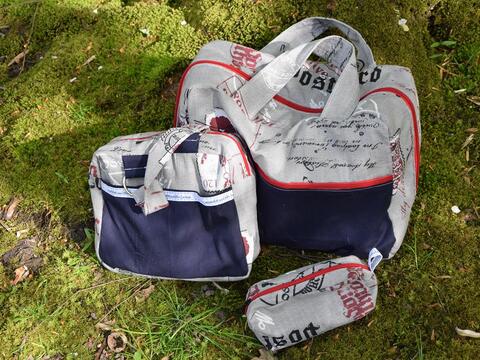
Before a move (or sometimes in between) I always have to sort out my clothes. Jeans are the item of clothing that I sort out the most: Not because they no longer fit, but because holes have often formed between the thighs. As broken clothes are no longer suitable for the old clothes collection and darning or repairing jeans has not really proved to be a sensible and durable option for me, I have been looking for ways to at least continue using the fabric.
(1).png)
The result is this beautiful shoulder bag in patchwork style. The practical thing about it is that you can really use any denim fabric, whether thin or thick, with elastane or without, children's jeans or adult jeans - you can simply use anything. The bag will look best if you use at least 4 different colored jeans.
In my case, I used one trouser leg from each of 4 different pairs of jeans. You will probably need more if you are using children's clothes (although these probably don't go through as quickly and are better passed on to other children), but you may need less if you are using men's jeans. You will need a total of 56 squares measuring 10 x 10 cm.
A patchwork ruler and a rotary cutter are suitable for cutting the individual squares - then everything goes particularly quickly. Of course, you can also mark everything with tailor's chalk and cut it out with fabric scissors.
To cut it out, I first roughly cut off a trouser leg and cut along one side of the leg. I then straightened one side and cut a 10 cm wide strip from this using the patchwork ruler and rotary cutter, which was then divided into 10 cm squares. I did this for all 4 pairs of jeans and ended up with slightly more than the 56 squares I needed. Incidentally, it is not so important that you use exactly the same amount of each color.
.png)
The next step is to do the puzzle: place the squares in front of you so that the bottom row consists of 3 squares and the 5 rows above each consist of 5 squares. Play around with the colors until you like everything. I like it best when there is as much contrast as possible between the individual squares, but it's not always possible to achieve this. As you can see in the photo, it doesn't matter if one color appears several times in a row.
(1).png)
Next, we sew together row by row: Starting with the bottom 3 squares. To do this, place the left two squares right sides together and sew them together with a seam allowance of 1 cm and a straight stitch (length 3 mm) on one side. Don't forget to lock the top and bottom edges! Then unfold the two squares and place the third square right sides together on the right side of the two sewn-together squares and sew on the third as described above.
(1).png)
(1).png)
Continue in this way with all the squares one after the other until you have a total of 10 rows with 5 squares each and 2 rows with 3 squares. Now it's time to iron!
(1).png)
Press all seam allowances open, this makes the next step much easier, even if it is quite tedious work. In the next step, the rows are sewn right sides together with a seam allowance of 1 cm. Make sure that you keep to the order you have previously chosen and that the seam edges meet directly. You may also want to pin the seams together beforehand or clip them so that nothing can slip. You should also make sure that the pressed seam allowances are positioned correctly or stop just before the seam when sewing, leave the needle in the fabric, lift the presser foot and use a flat object (ruler, small scissors) to press the seam allowance in the right direction.
.png)
The finished page will look something like this:
(1).png)
Or the back like this:
(1).png)
As you may have already guessed, all seam allowances need to be pressed over again. Before we continue sewing, I would recommend loading the bottom bobbin of your sewing machine with new thread.
(1).png)
All seam allowances are then sewn from the right side with a narrow edge. As I didn't want to change the sewing machine foot first, I set my sewing needle to the left position and then used the previously placed seam as a stop point for the sewing machine foot.
.png)
I first sewed all seam allowances on both sides of the seam from top to bottom, then from left to right. At the beginning and end of each seam, the thread is locked inside the outer seam allowance before you start the next seam. I didn't bother cutting the thread after each seam, but simply lifted the presser foot and realigned the fabric (possibly pulling the threads a little longer so that the fabric doesn't stretch).
The finished result now looks something like this, and although it was a lot of work, I think it's worth sewing all the seams again.
.png)
Next, place both sides of the bag right sides together and sew the long sides and the bottom together with a seam allowance of 1 cm.
.png)
Once this is done, the seam allowances are pressed apart again and topstitched on both sides. This is a little tricky at the sides, but with a little patience and if you keep aligning the fabric, it will work. Alternatively, you can simply skip the topstitching.
Next, shape the bottom. To do this, pull the bag apart at the cut-out corners to form a base. Again, make sure that the seams meet and then sew the edges together.
.png)
Now that the outer bag is ready, we can take care of the lining. To do this, cut out the two sides of the lining from a non-stretch fabric such as cotton woven fabric. The measurements for the pieces of fabric are the same as for your outer bag: Overall, the piece is 42 cm wide and 50 cm high.
.png)
The two lining pieces are then placed on top of each other, right sides facing, and the sides and bottom are closed again first, then the bottom is formed as with the outer bag.
.png)
Now the inner bag is also ready.
Finally, the straps are still missing: to do this, cut two strips of fabric measuring 8 cm x 75 cm, fold them over the long side and sew them together with a seam allowance of 1 cm. When sewing together, also close one of the short sides so that the strap is easier to turn with a turning tool or a long wooden spoon or similar.
.png)
But first the seam allowances are shortened here, if you have a zigzag cutter available, then use it, so the fabric doesn't fray so much. Otherwise, trim the seam allowance to about 3 mm and then turn the straps inside out.
Press everything smooth and sew the straps close to the edge on both sides.
.png)
We have now prepared all the individual parts. If you want to attach a leather label to the bag, now is a good time to do so. I have sewn one in the middle, i.e. in the third square on one side.
(1).png)
Then insert the outer bag into the inner bag so that both right sides are facing each other. Place the straps between the outer and inner bag: the beginning and end of the strap are each centered on the second and fourth square. Check again that the straps are not twisted!
Viewed from above, the following layers are now on top of each other: inner bag, straps, outer bag, outer bag, straps, inner bag. Pin everything in place and again make sure that the side seams in particular meet exactly.
(1).png)
Then sew once all the way around, but leave a turning opening on one side between the straps. Turn everything through this opening, shape it and smooth it out. I closed the turning opening with a mattress stitch because it simply looks cleaner. Finally, the top edge is sewn down again close to the edge so that the lining does not spill out.
(1).png)
Your upcycled jeans bag is ready!
I hope you enjoyed the tutorial and if you have any questions or problems, please write to me in the comments. Of course, I would also appreciate positive feedback :)
If you find any mistakes in the translation, please let me know ^^
Otherwise, have fun sewing and feel free to check out my other free blog posts or take a look around my store, where you'll find lots more sewing and crochet instructions for practical items or cute cuddly toys and amigurumi.