Hand sewing tips
To me, hand stitching is absolutely relaxing. I can be completely in the here and now.
The important thing for me is that I don't put any time pressure on myself. The quilt takes as long as it needs. Sewing by hand is only relaxing if you really enjoy it and don't put any stress on yourself.
There are even studies that report the stress-relieving effects of quilting.
When you sew by hand, you can do it almost anywhere. Wherever there is time to wait: in the waiting room at the medical center, at the government office, or at the bus station. It doesn't matter, you can sew your quilt anywhere.
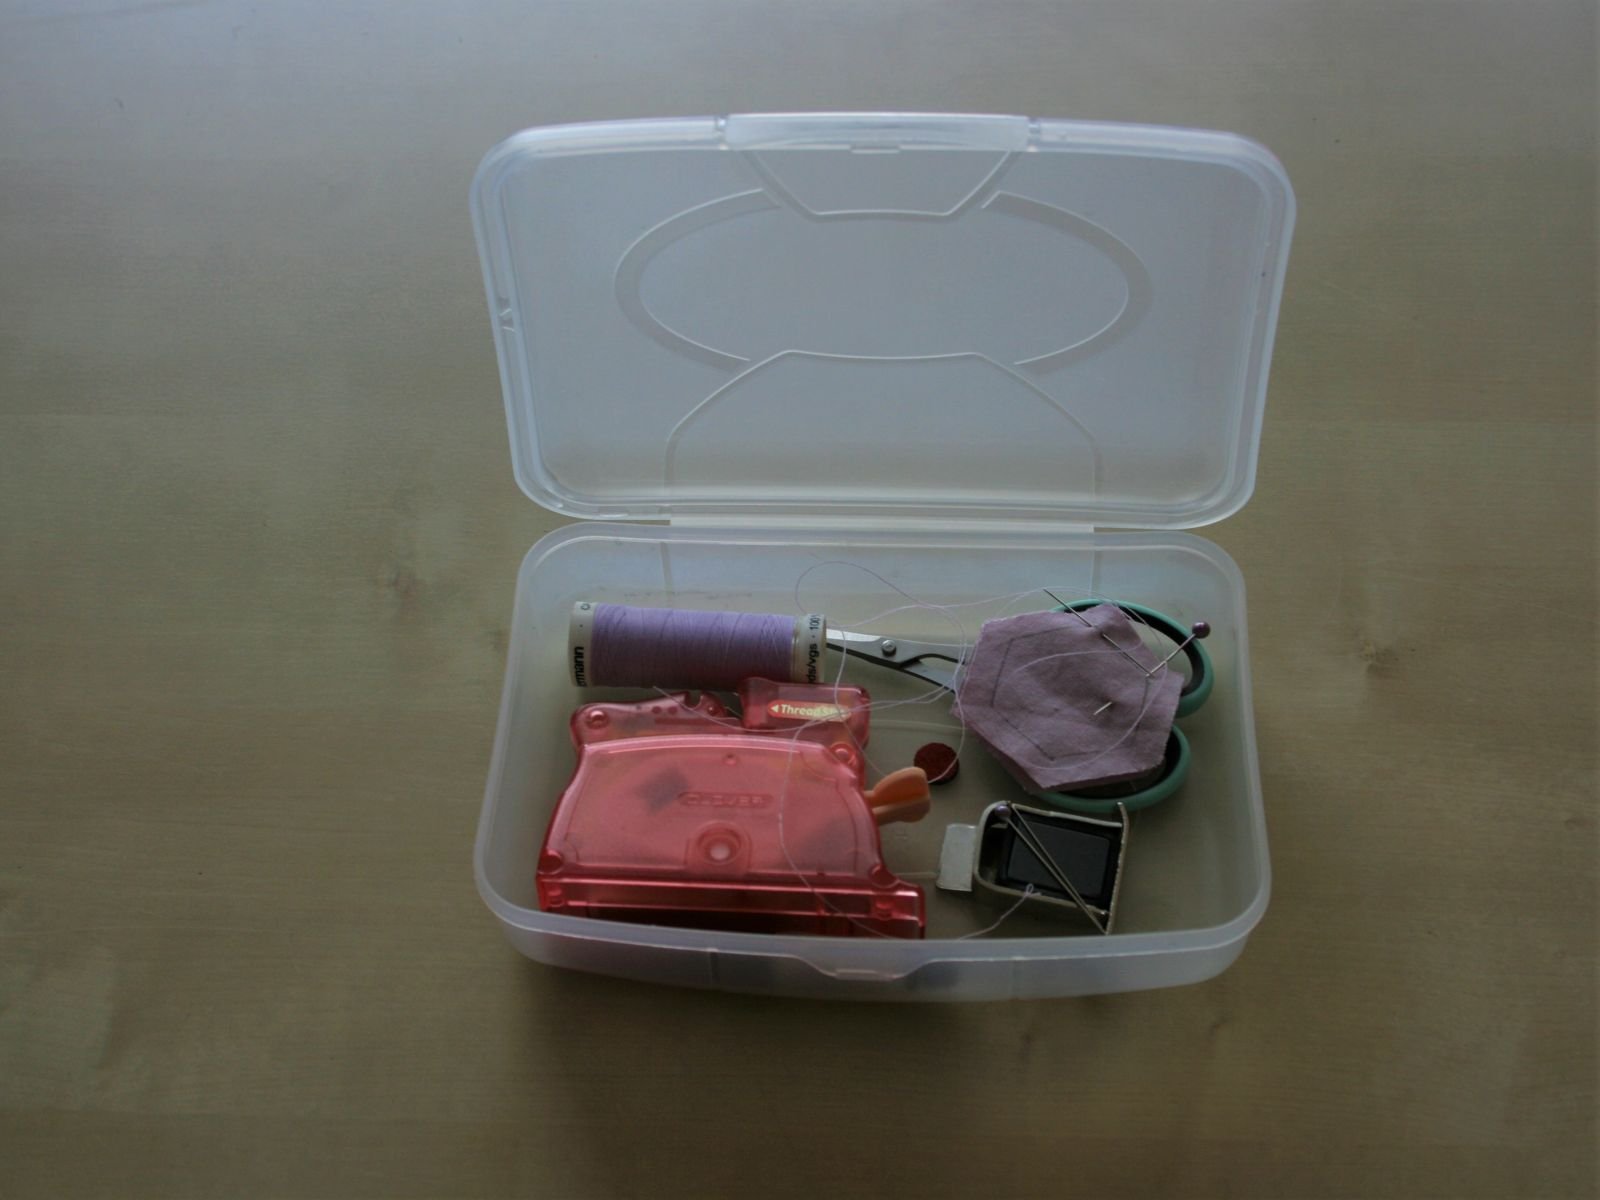
I always have a small box in my purse. In this box are my sewing tools so that I can always make a quilt on the spur of the moment.
In this box I keep a needle and thread, the pieces of fabric, a seam ripper, a small pair of scissors, and a threader.
I have the sewing supplies in the box and ready to go. I spend the time doing something nice, whether I wait two minutes or twenty minutes 😊.
For patchwork & quilting, you need these basic hand sewing skills:
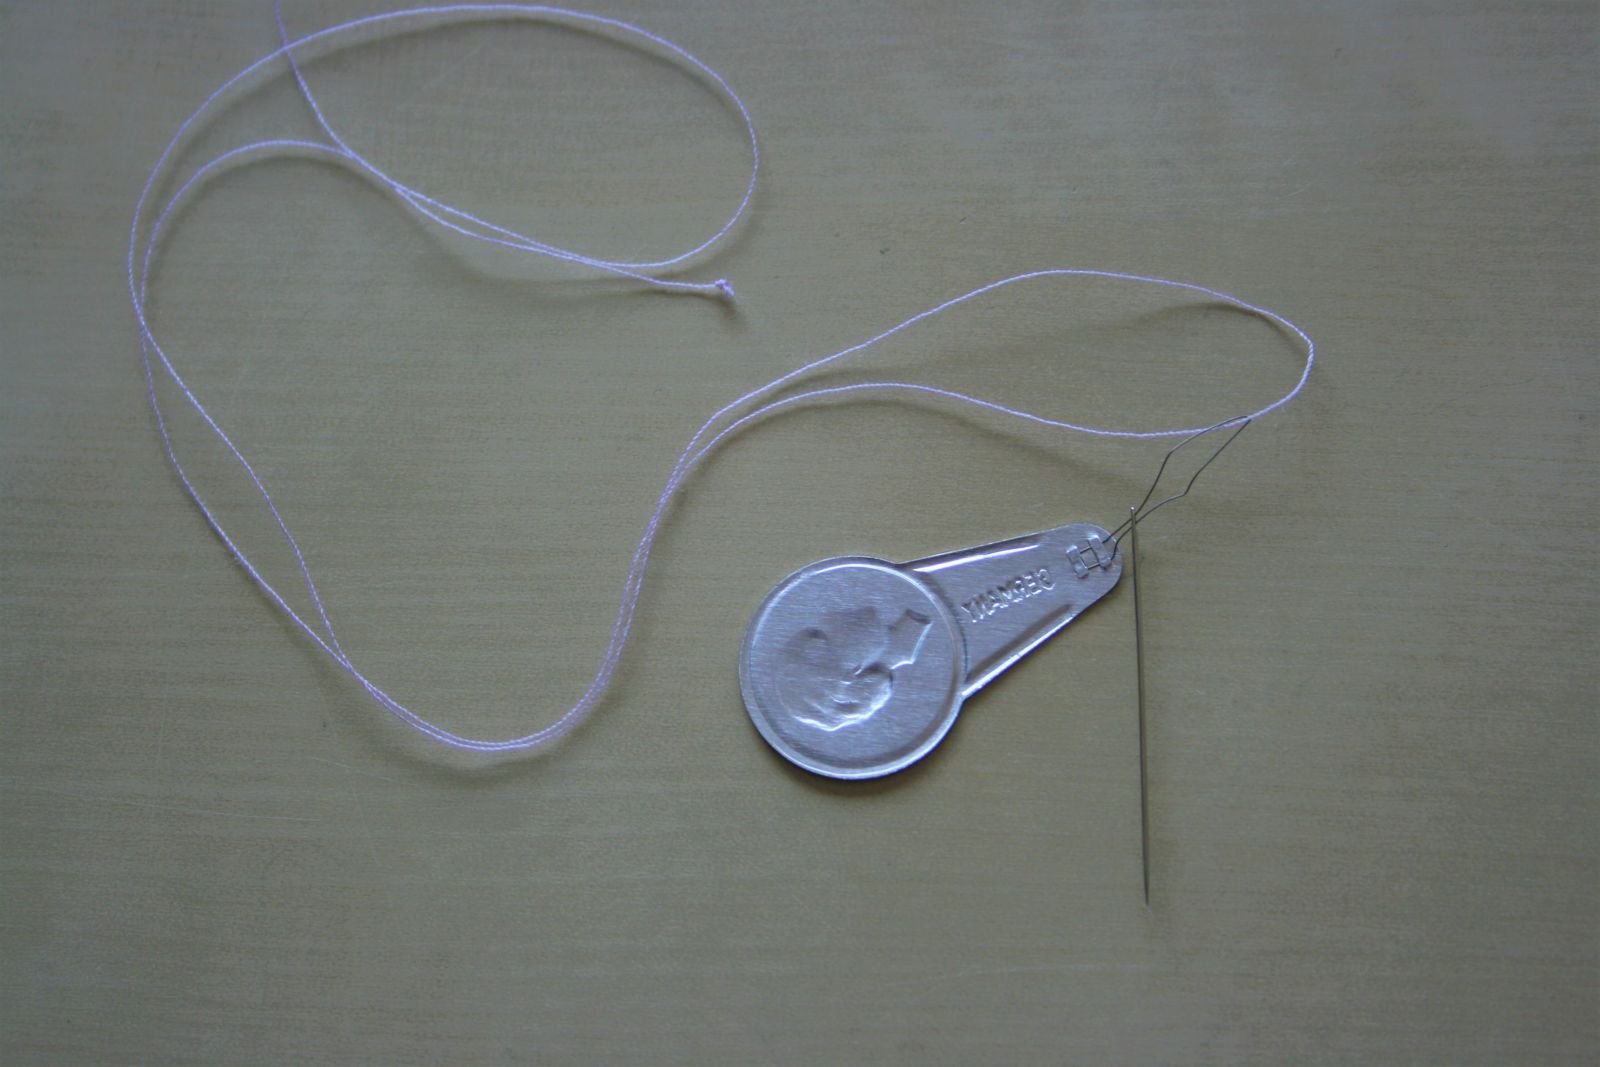
- You know how to thread a needle, or (like me) you have a needle threader to help you 😉 .
- Needle threaders are still available today in the basic metal version (which is what my grandmother used) or in the hip version for extra thin sewing needles.
.jpg)
- You can sew 2 pieces of fabric together.
- To make sure you sew as straight as possible, you can also draw a seam line.
- When the two pieces are sewn together, do the following
- When the two pieces are sewn together, you don't need to go straight to the iron. You can just use your fingers to bend the pieces a little bit apart and straighten them out.
If you already have this knowledge, you can skip the next sections. If not, read on, I'll explain in detail. You'll see it's pretty simple.
Here are my basics if you have no experience with hand sewing:
Sewing needle and threading.
First, thread your thread into your needle.
Which needle you use is a matter of taste. A fairly large and thick needle has the advantage that it has a large eye and is easier to grip than smaller needles. The disadvantage is that it's a bit bulky and slides through the fabric a bit harder than thinner needles.
For this reason I use extra thin and very sharp needles. I sew by hand sometimes 4 hours a day, so it makes a difference which needle I use.
The disadvantage of the thin needle is the very small eye. To thread the thread, I need the special threader designed for these extra thin needles. Okay, I admit, other people have threaded this needle for me with the naked eye when I forgot the threader on the way. I love gimmicks like that to make my work easier 😉 .
Try a few different needles or just use the one you have at home for the first few seams.
The beauty of frequent hand sewing is that you're all in and you get to experience all the materials first hand. It starts with the needle and continues with the thread. With the sewing machine, you take the thread that your machine likes and works well with. When sewing by hand, use the thread that YOU like.
I love thread that glides easily through fabric like a needle. There are countless manufacturers and materials to choose from. Again, it's best to start with what you have at home.
I love my polyester thread called "all sewing thread". The name doesn't sound exciting, but to me it's sewing heaven on earth. It is very thin and tolerates frequent washing and drying in my quilts.
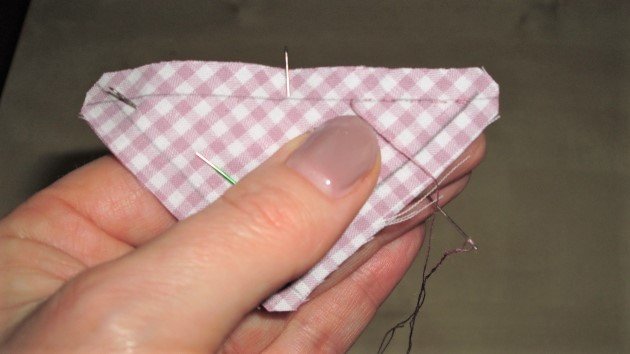
The first thing you do is thread the thread into the needle. Then secure one end of the thread with a knot. Secure the two pieces of fabric with one or more pins so they don't move.
That's it for the preparation, and you're ready to start the running stitch.
The running stitch method
The running stitch method is an extremely simple sewing technique that allows you to easily join the two pieces of fabric.
I am left-handed, so in the photos you will see me sewing from left to right; if you are right-handed, of course you sew from right to left. I mirrored my photo series with a photo editing program and hope that the "right handed anatomy" is correct. 😉
Here you can see the process:
The beginning
It's important to secure the thread well in the fabric at the beginning and end of the seam so that the seam won't come undone later.
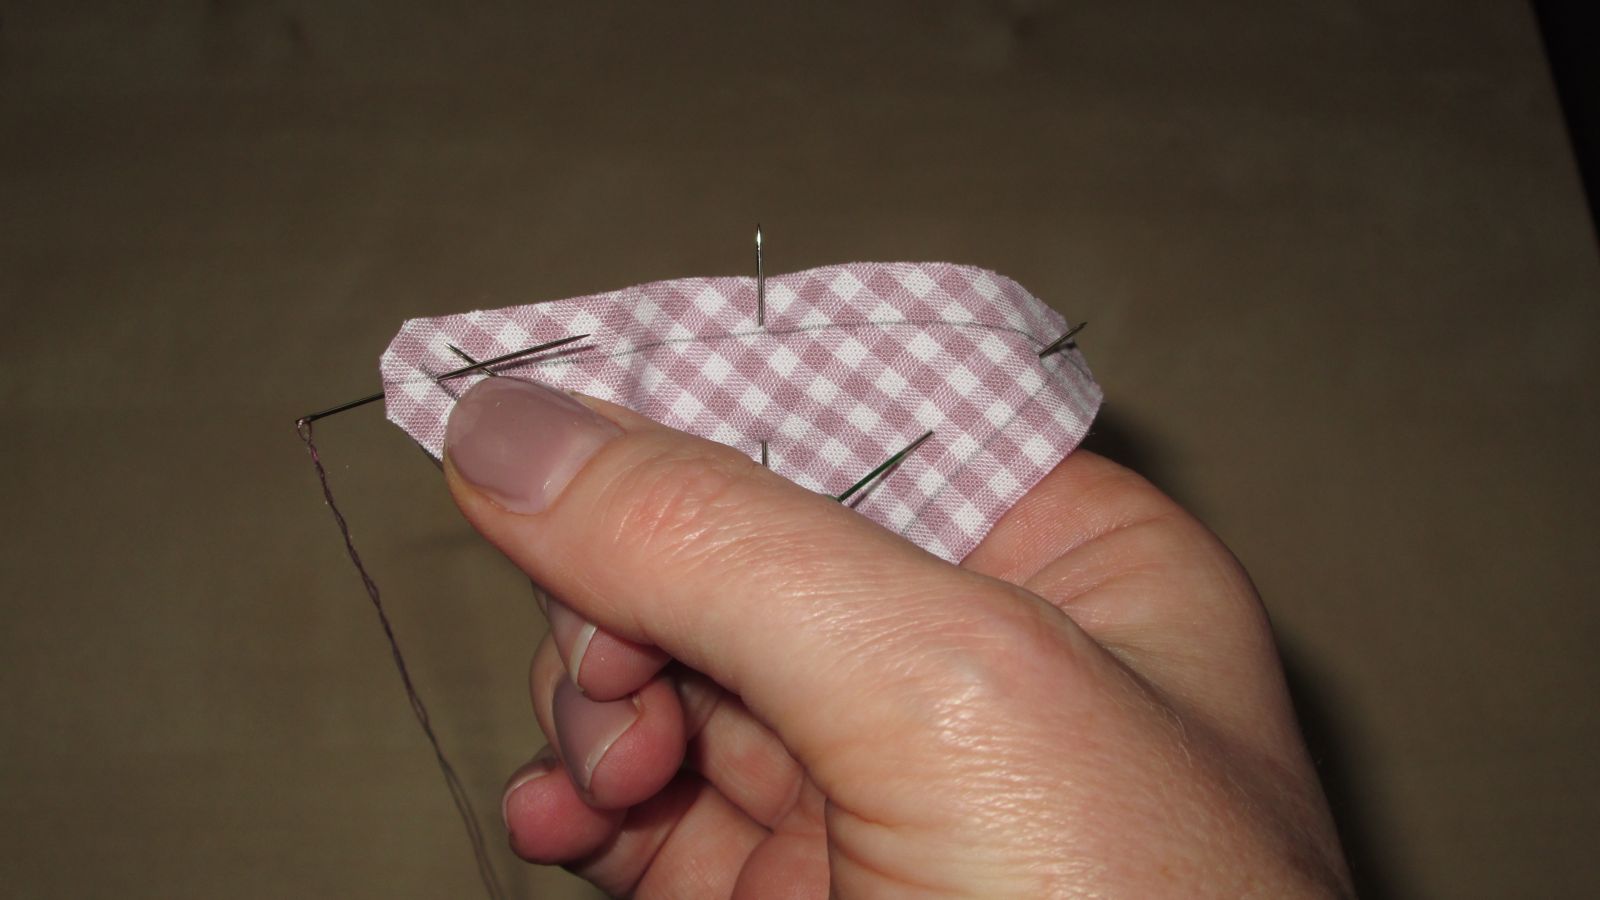
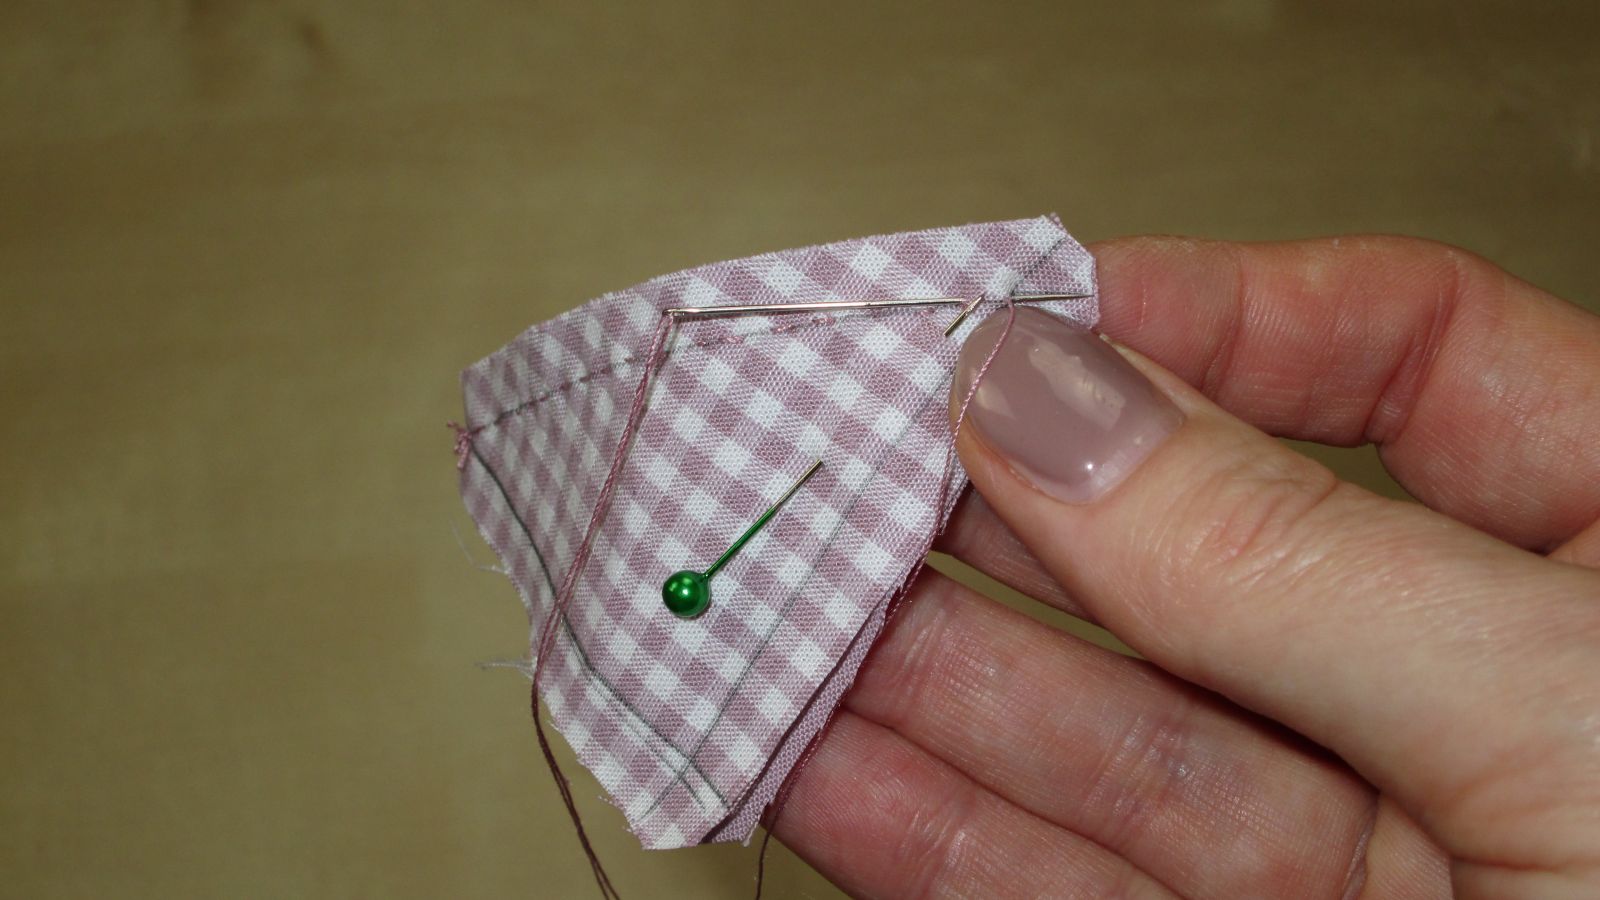
Take the two pieces of fabric in one hand and the needle in the other.
It makes sense to draw a seam line on the fabric so you can easily follow it. I will show you how to draw this seam line in the next chapter.
You pierce both pieces of fabric with the needle where your seam line starts. Then you make a stitch, which means you insert the needle into both pieces of fabric a little further along the seam line.
How to make a backstitch
Repeat this, making a stitch in the very front of the fabric where (roughly) you just made the first stitch in the fabric.
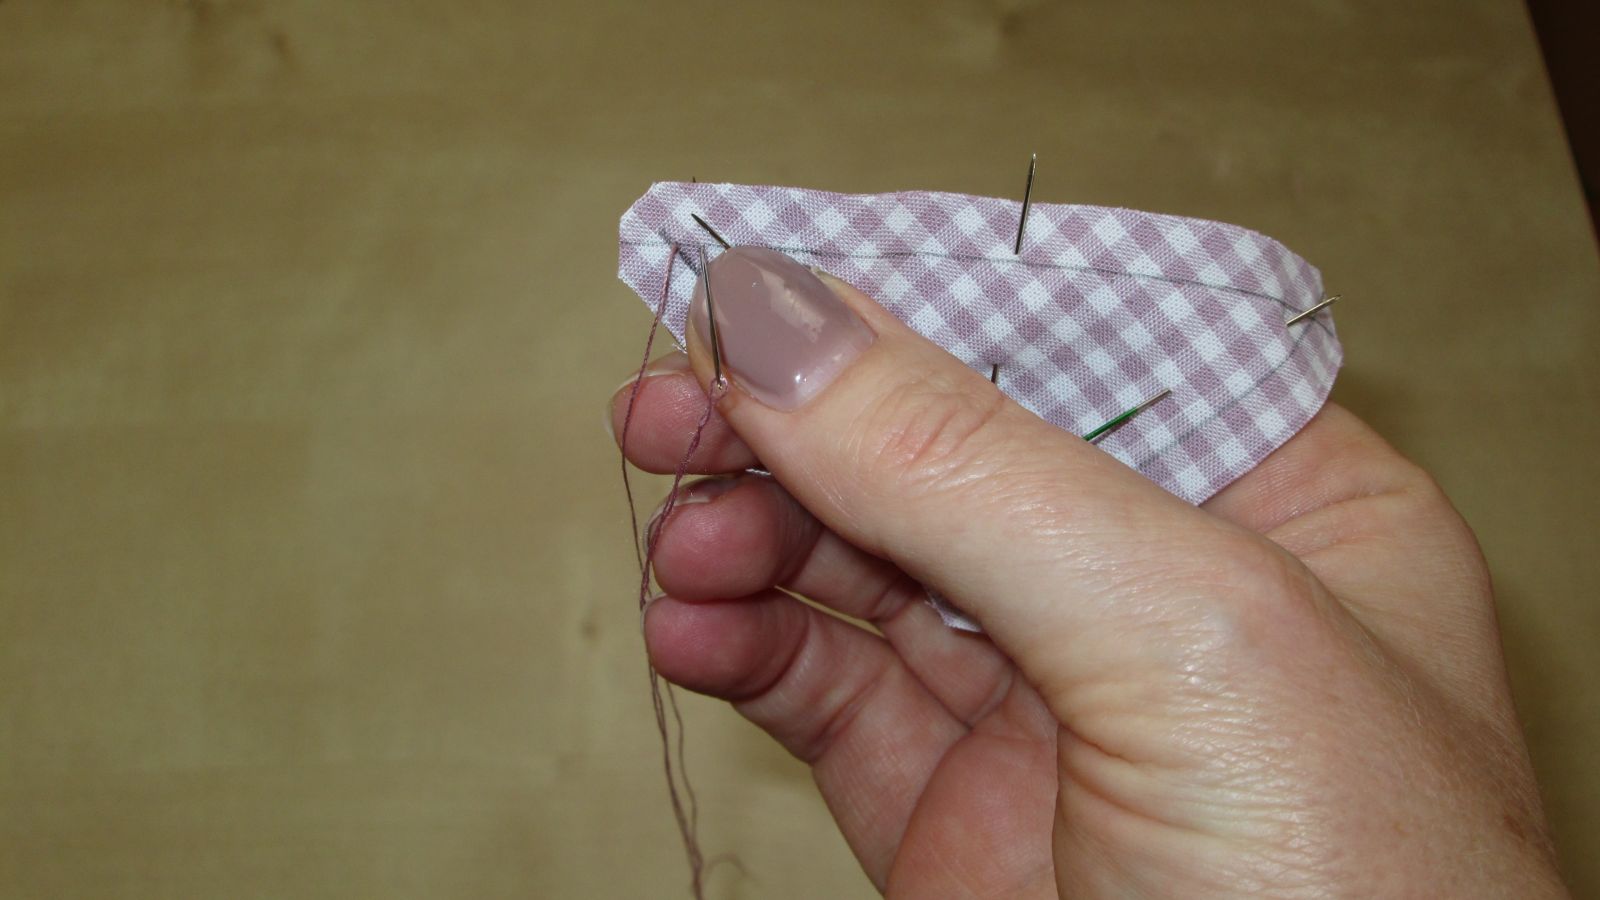
Repeat this again. So you make two backstitches. This will tighten the seam so that it cannot come undone.
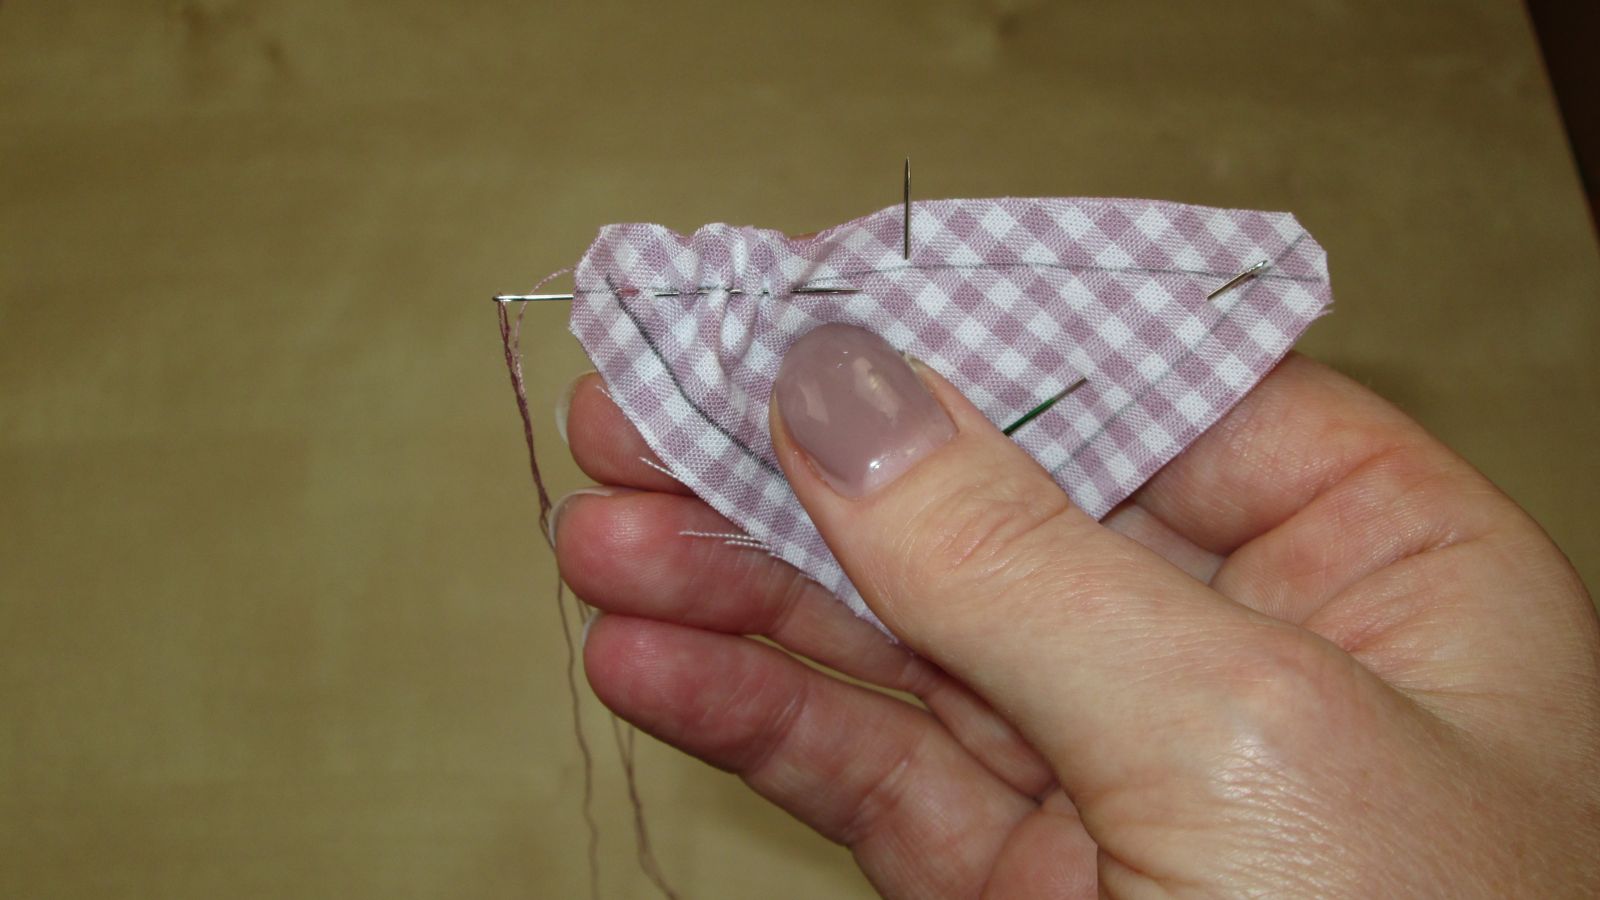
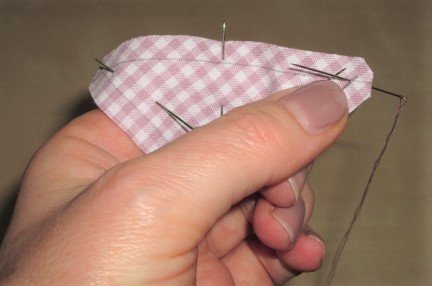
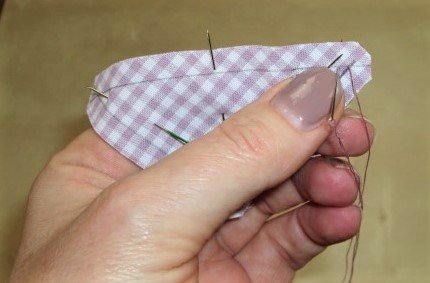
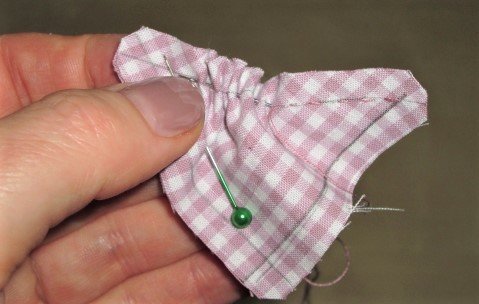
Now comes the very simple running stitch. You stick the needle into both pieces of fabric along the seam line, back and forth, "in the fabric, out of the fabric". You push the needle into the fabric and gather the fabric around the needle.
Now pull the thread through the sewn fabric and smooth out the pieces of fabric.
Repeat this "piecing" process until you reach the end of your seam line.
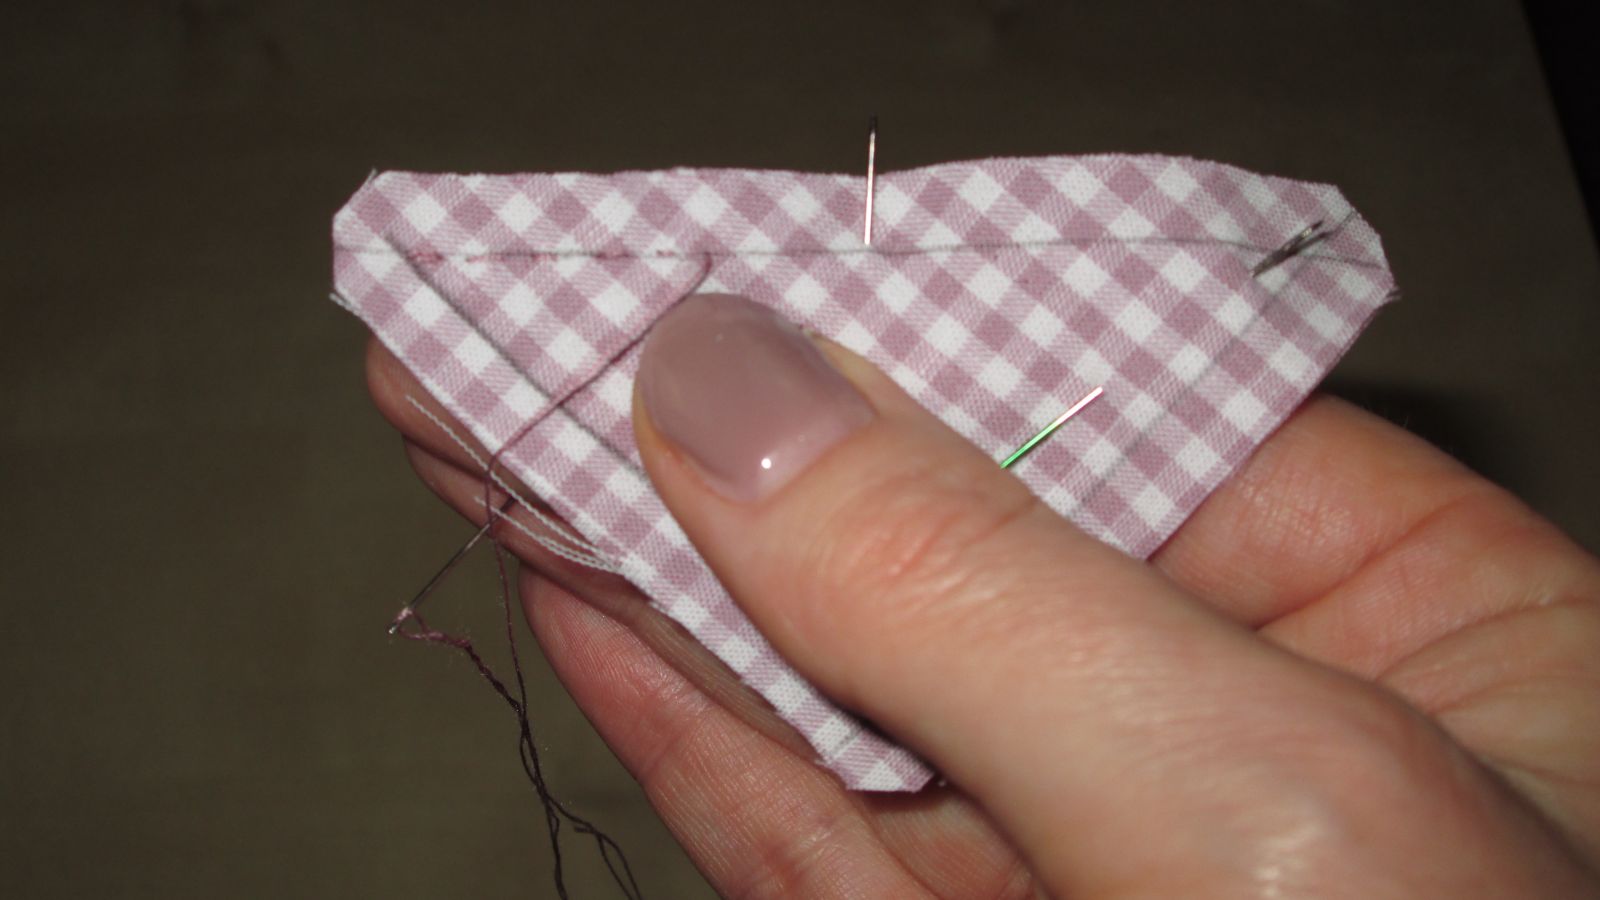
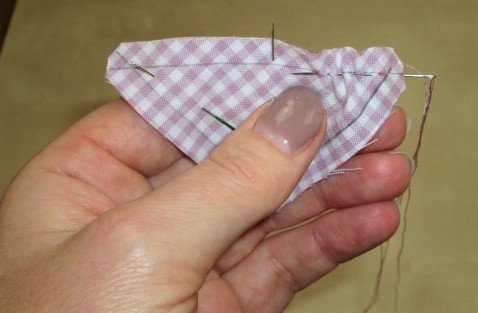
The backstitch at the end of the seam line
Repeat the last stitch at the end of the seam line 2 more times to tighten the seam. This will prevent the seam from unraveling if you cut the thread about 1 - 1.5 cm after the last stitch.
Here is the photo series for right-handers:
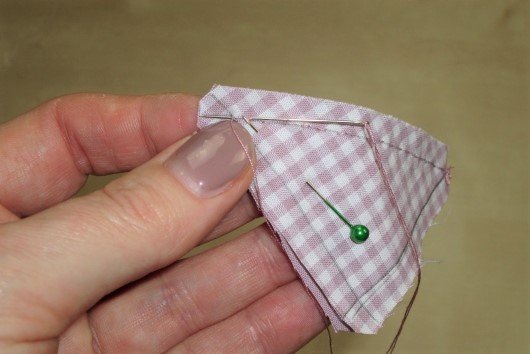
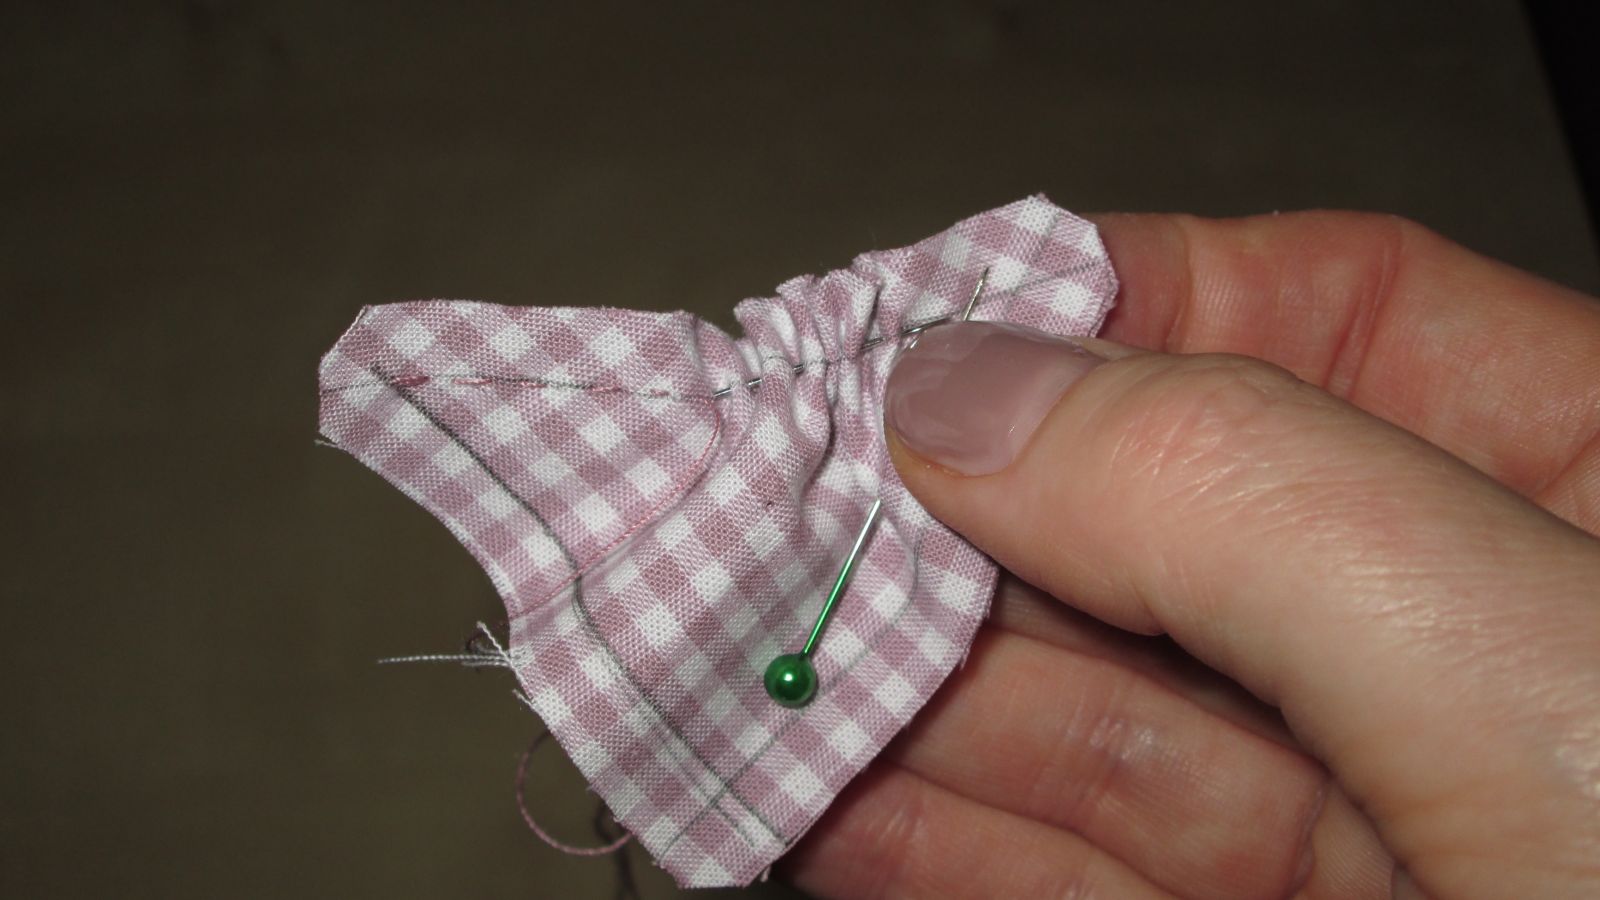
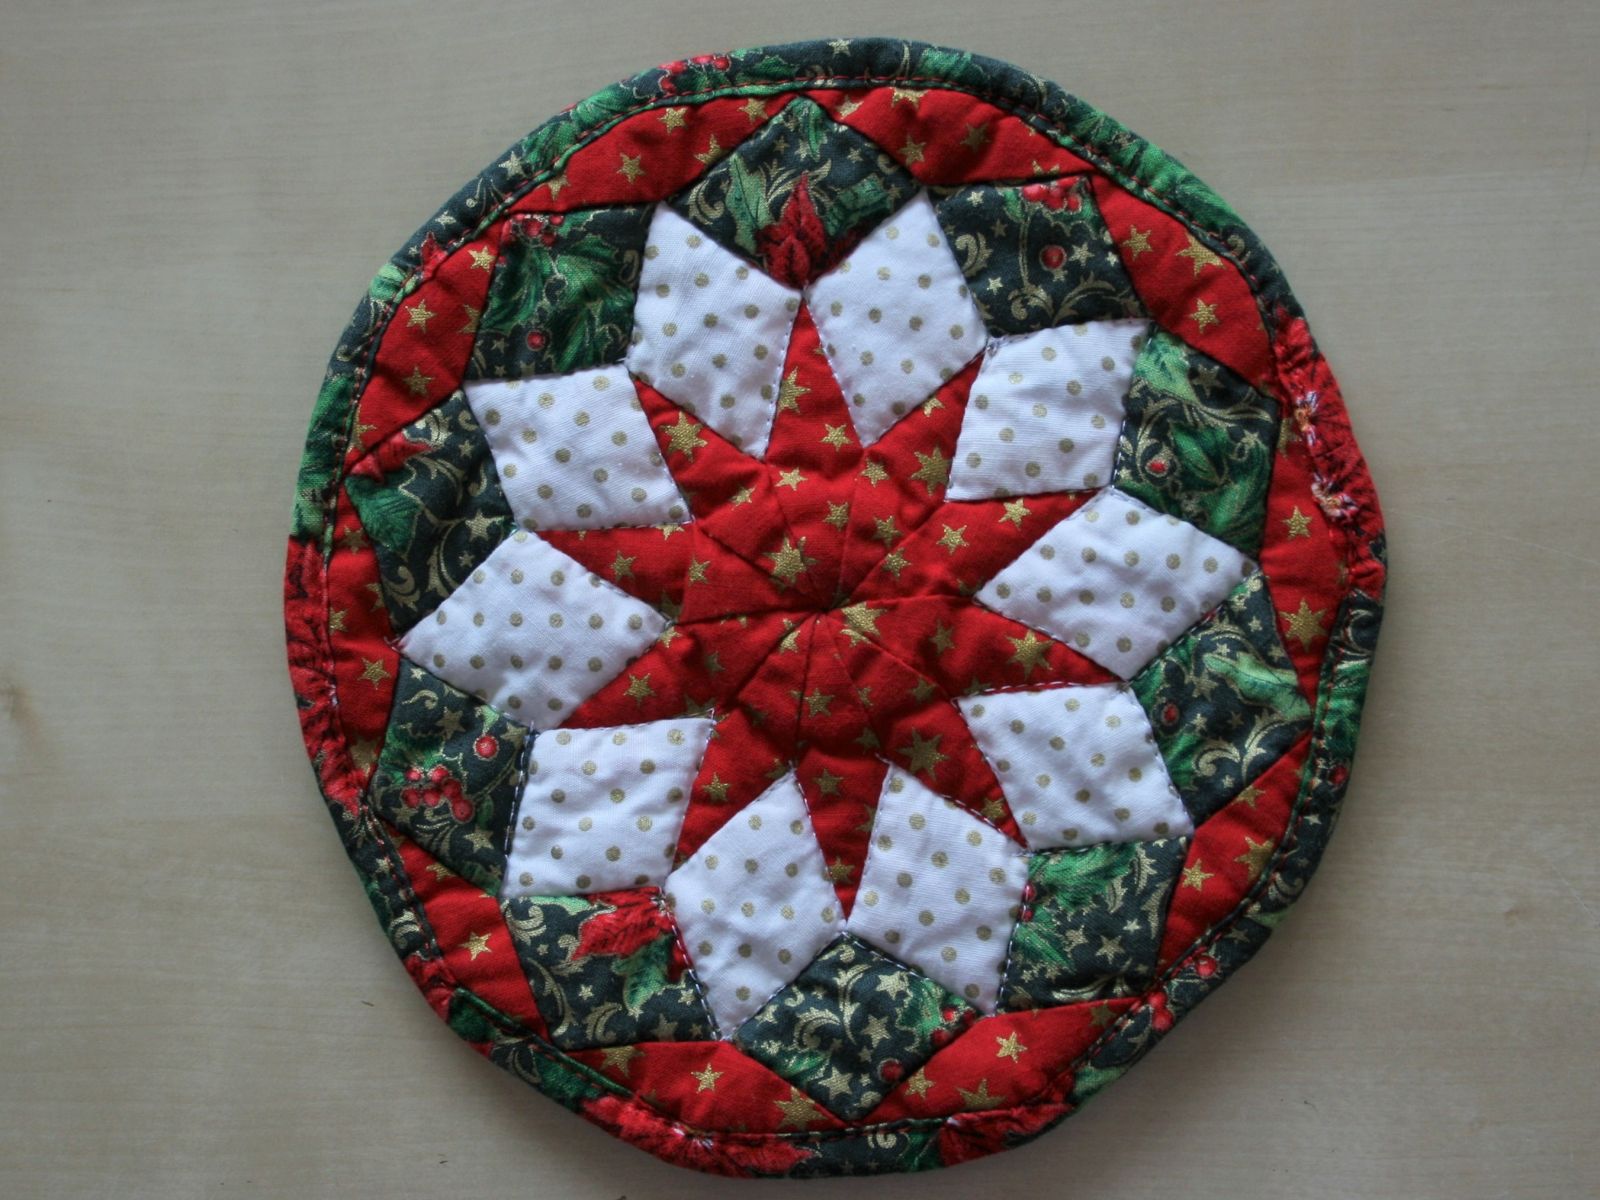
That's it. Your first two pieces of patchwork fabric are sewn together. If you sew a small patchwork pattern, the final result might look like this:
Drawing a seam line
To sew a straight line by hand, you can draw a line on the fabric 0.75 cm from the edge of the fabric. This 0.75cm seam allowance is the standard sewing foot width in Germany. This seam allowance is usually used for hand sewing.
You can simply take a patchwork ruler, place it on the appropriate edge of the fabric, and then draw a line with a pencil at a distance of 0.75cm on the wrong (not pretty) side of the fabric.
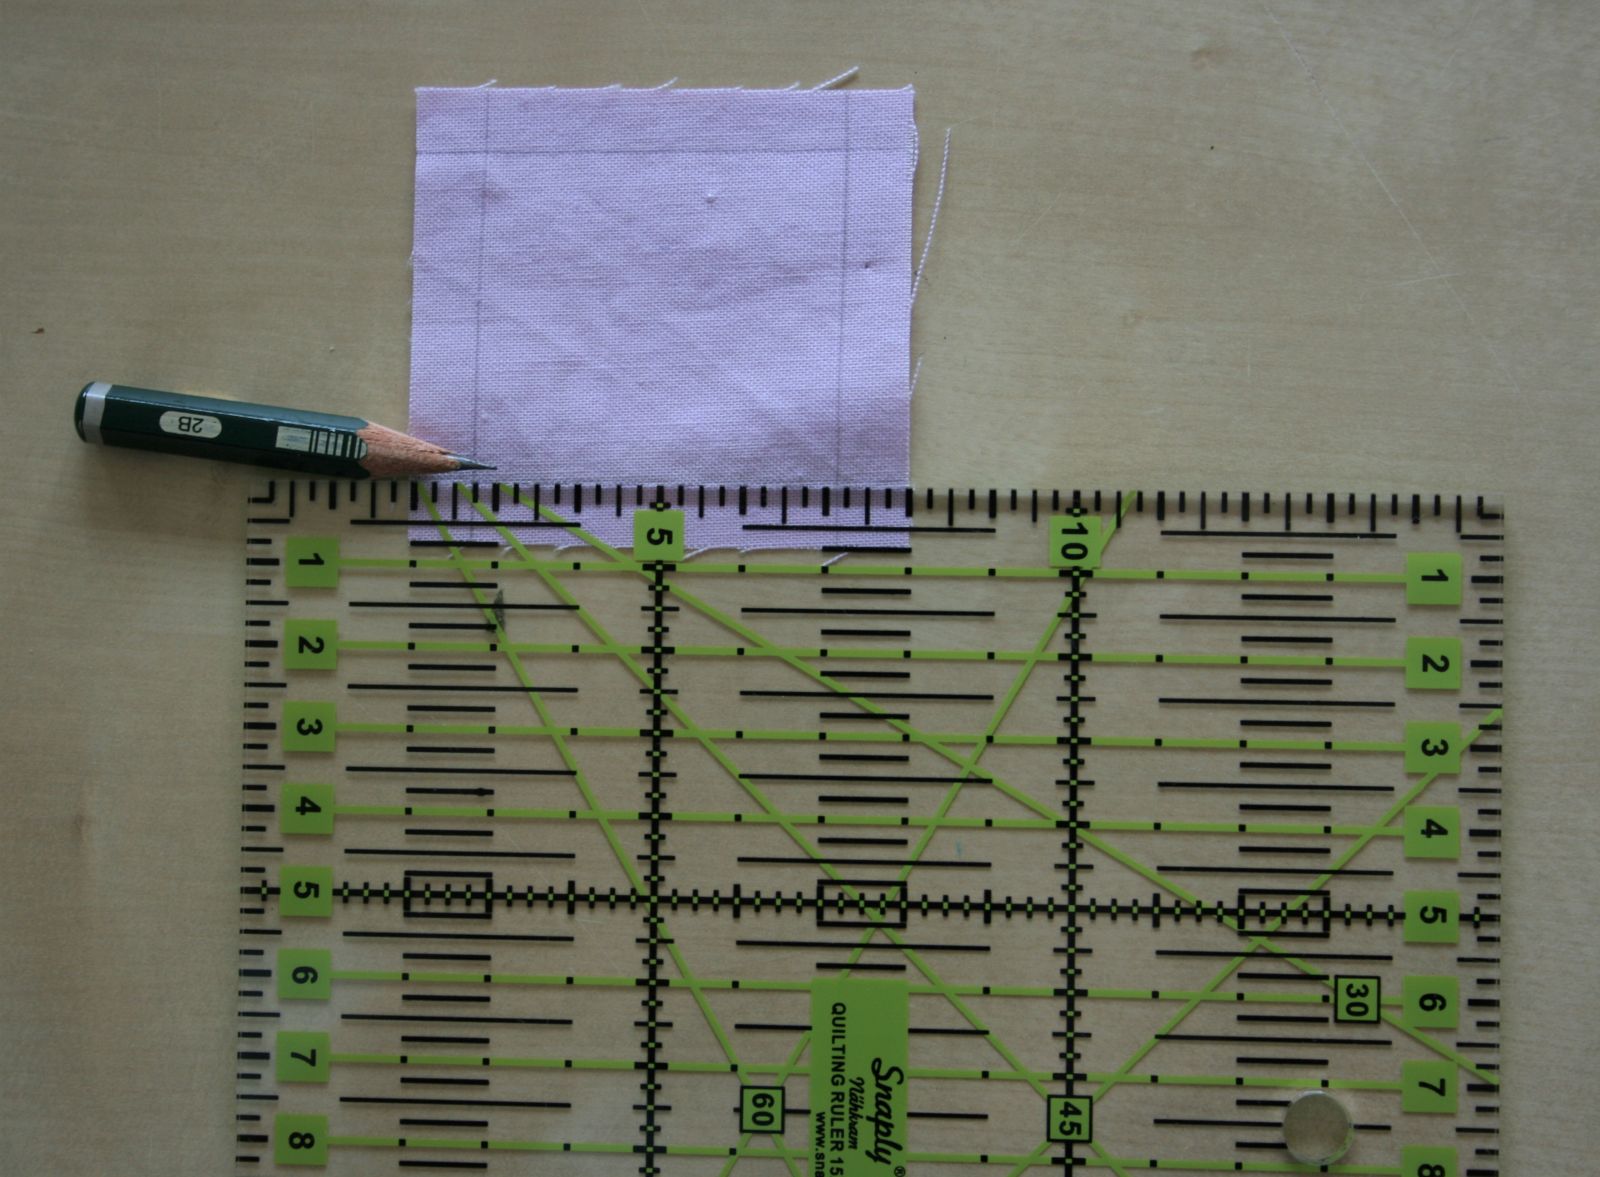
A patchwork ruler has 0.25cm graduations. You can also use it to cut your fabric with a rotary cutter and cutting mat.
By the way, American and British patchwork and quilt patterns written in inches have a seam allowance of ¼ inch, which is about 0.6 cm. Just FYI, in case you are using inch instructions in the future.
You can find my blog post on how to cut your beautiful cotton fabric in a resource friendly way here.
So you see how easy it is to get started with patchwork. Have fun with it!
Happy stitching!
Chris


