Schnell zur Zielseite
Stöbern in Kategorien
Community & Hilfe

A Flying Saucer

Donnerstag, 28. Mai 2020

Blog-Inhaltsbild für 'A Flying Saucer'

Materials:
- Yarn, (acrylic or cotton) of your choice. The yarn colour is at your discretion. Grey, silver, or blue will do. Additional yarn of a contrasting colour.  
- A small amount of white colour  yarn 
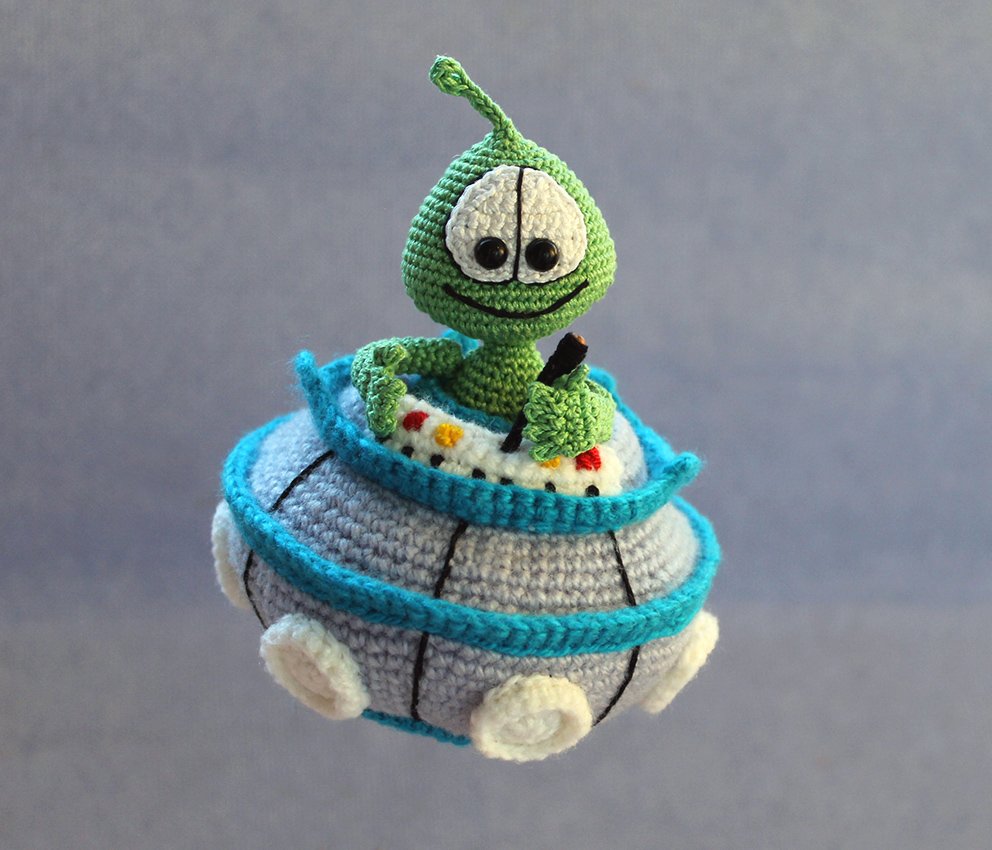
I used grey and blue colour acrylic yarn, 250 m/100 g. The size of my flying saucer is 10 cm in diameter, its height is 6 cm + 9 cm for the transparent part. The size is suitable for a small alien such as this one, pattern at the link https://www.crazypatterns.net/en/blog/1937/little-martian Blog-Inhaltsbild für 'A Flying Saucer'
- A crochet hook, I used 1,5 mm crochet hook
- Hollow fibre for stuffing
- A piece of wire approx.  15cm long 
- Transparent glue
- A sewing needle, matching sewing threads
- Black, red, yellow colour embroidery yarn/thread
4 buttons 1 cm in diam. 
A plastic bottle of the appropriate shape (I used 0.5ltrs volume bottle) or a plastic cup

Abbreviations:
ch – chain
sl st – slip stitch
sc – single crochet
inc – increase (2 sc in 1 st)
dec – decrease (single crochet two stitches together)
(...) x N times – repeat instructions in brackets N times

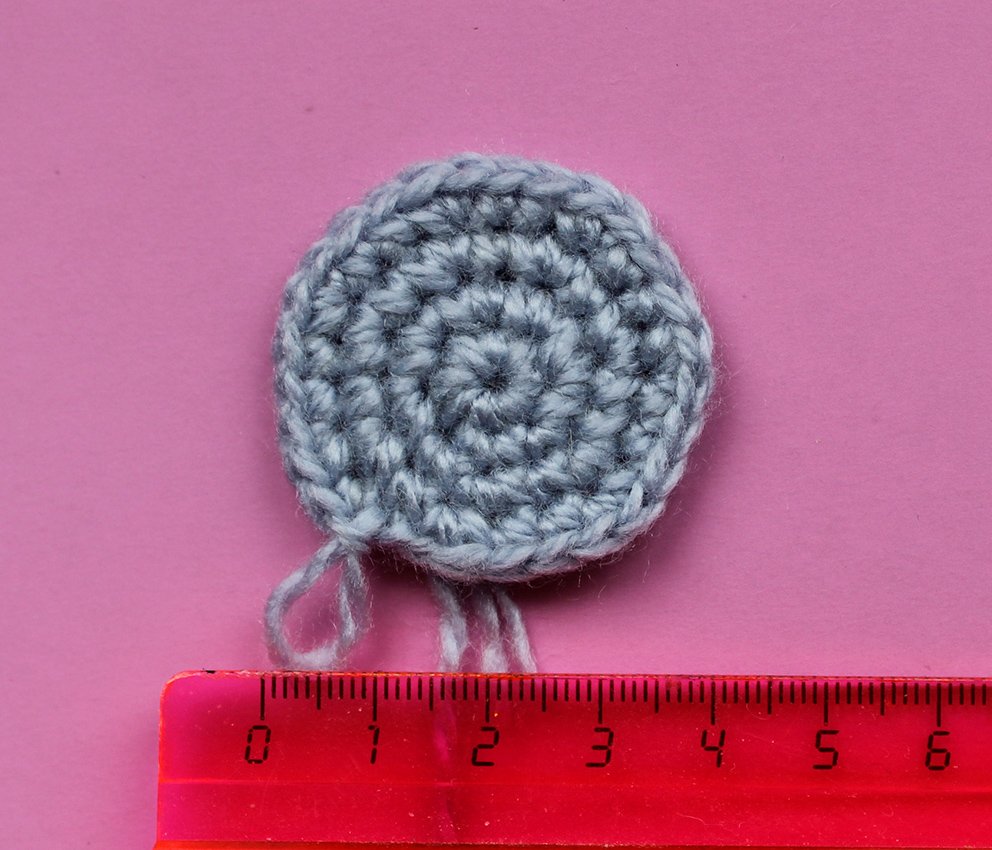
Inner part – cabin
Crochet with the main color
1) 7 sc in a Magic Ring
2) 7 inc (14)
3) (1 sc, inc)х 7 times (21)
4) (1 sc, inc, 1 sc)х 7 times (28)
5) Work 28 sc into the back loops only

Blog-Inhaltsbild für 'A Flying Saucer'

Blog-Inhaltsbild für 'A Flying Saucer'
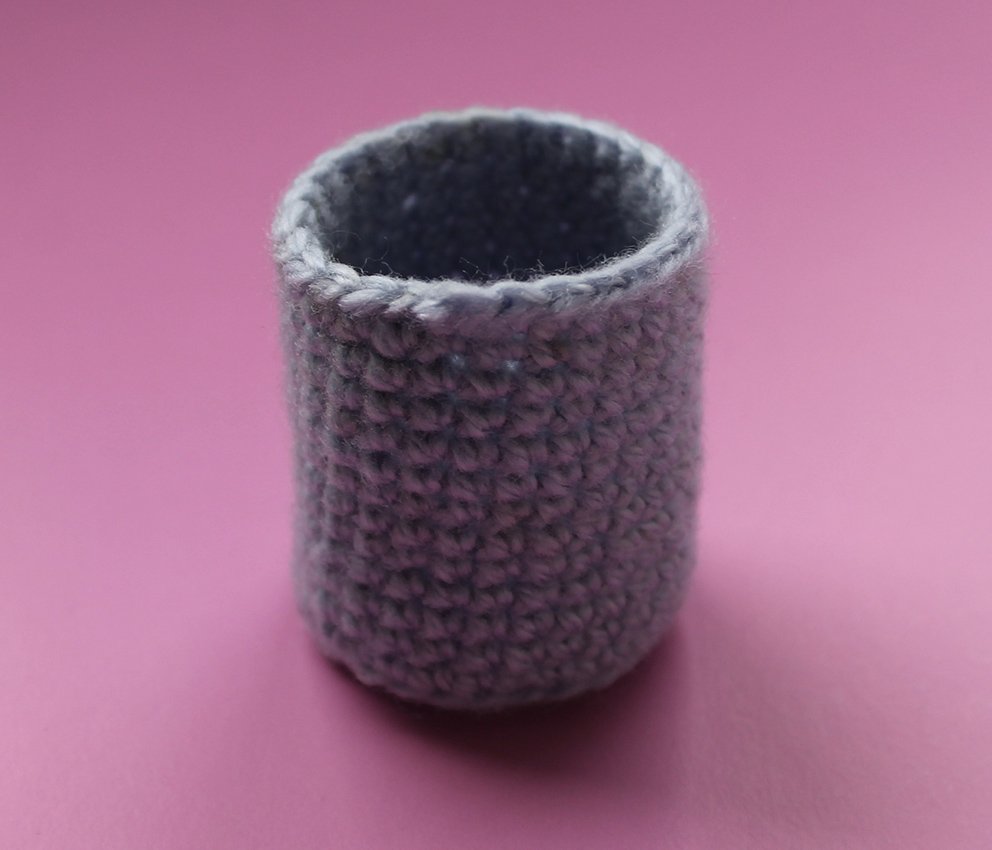
6-16) 28 sc
17) 26 sc, 2 sl st (28)
Fasten off, cut off.

Blog-Inhaltsbild für 'A Flying Saucer'

Outer part (bottom)
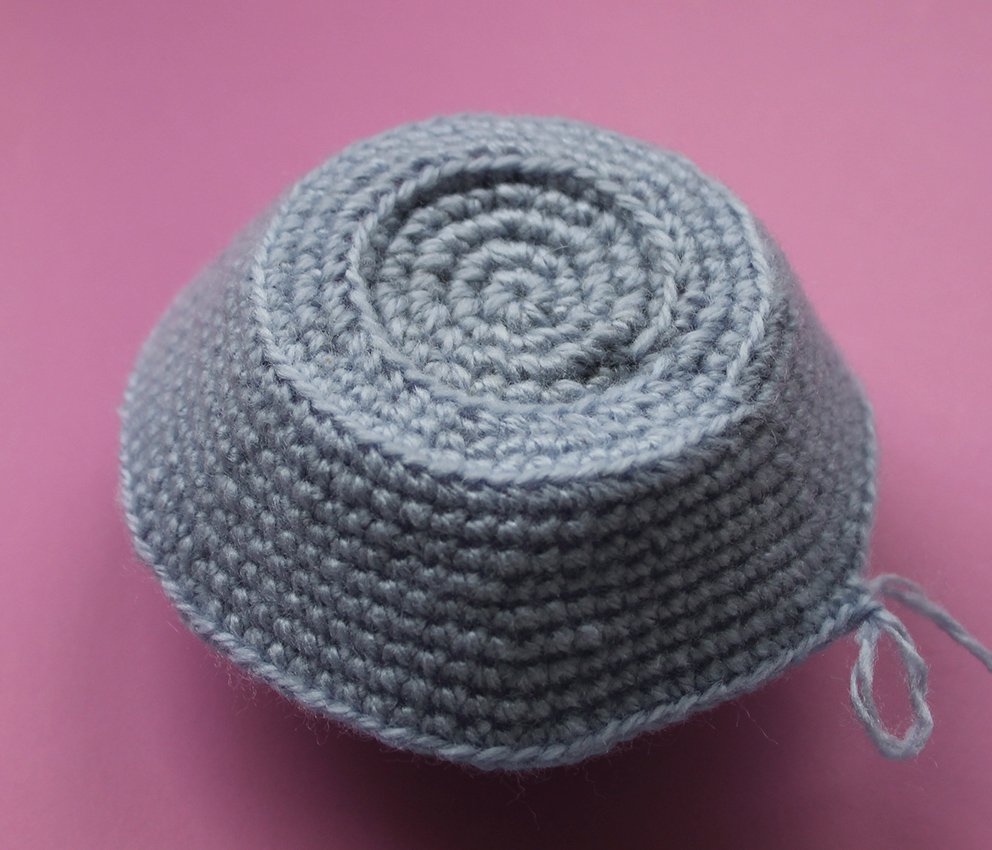
Join the thread behind the front loops of Rnd 5.
1) (3 sc, inc)х 7 times (35)

Blog-Inhaltsbild für 'A Flying Saucer'
2) into the back loops only: (2 sc, inc, 2 sc)х 7 times (42)
3) (inc, 5 sc)х 7 times (49)
4) (3 sc, inc, 3 sc)х 7 times (56)
5) into the back loops only: 56 sc
6) (13 sc, inc)х 4 times (60)

Blog-Inhaltsbild für 'A Flying Saucer'
7) (9 sc, inc)х 6 times (66)
8) 66 sc
9) (10 sc, inc)х 6 times (72)
10) 72 sc
11) (inc, 11 sc)х 6 times (78)
12) 78 sc
13) (inc, 12 sc)х 6 times (84)
14) 84 sc

Blog-Inhaltsbild für 'A Flying Saucer'

Blog-Inhaltsbild für 'A Flying Saucer'
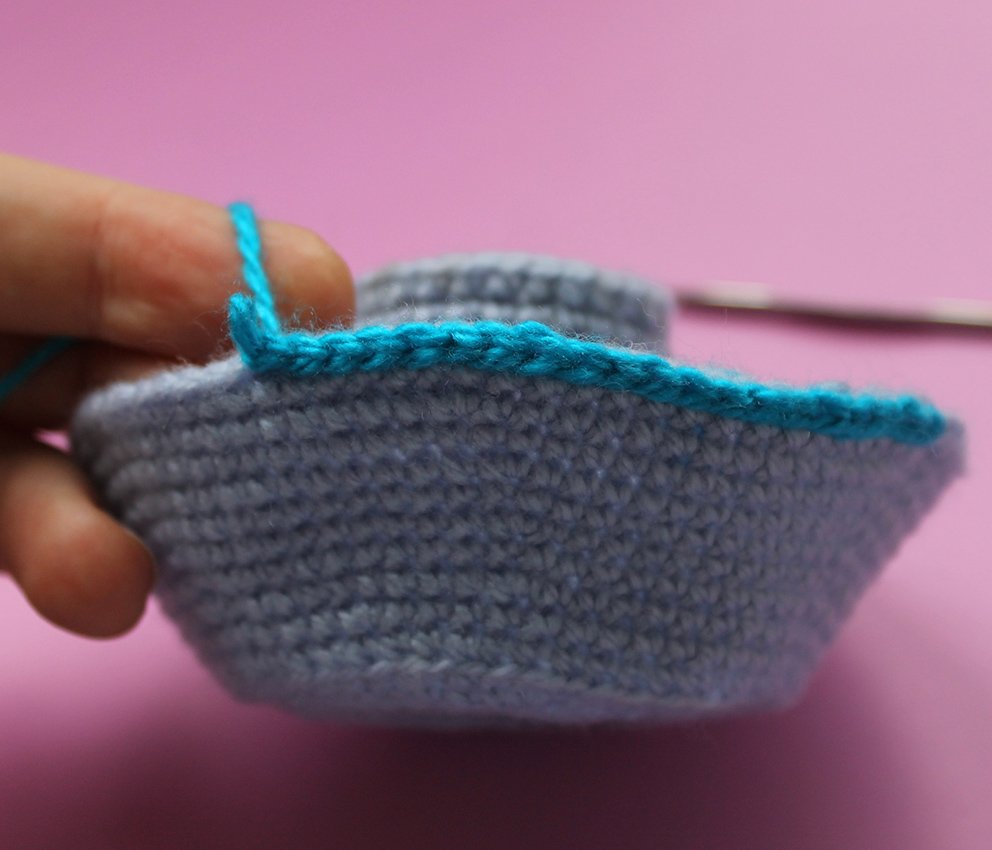
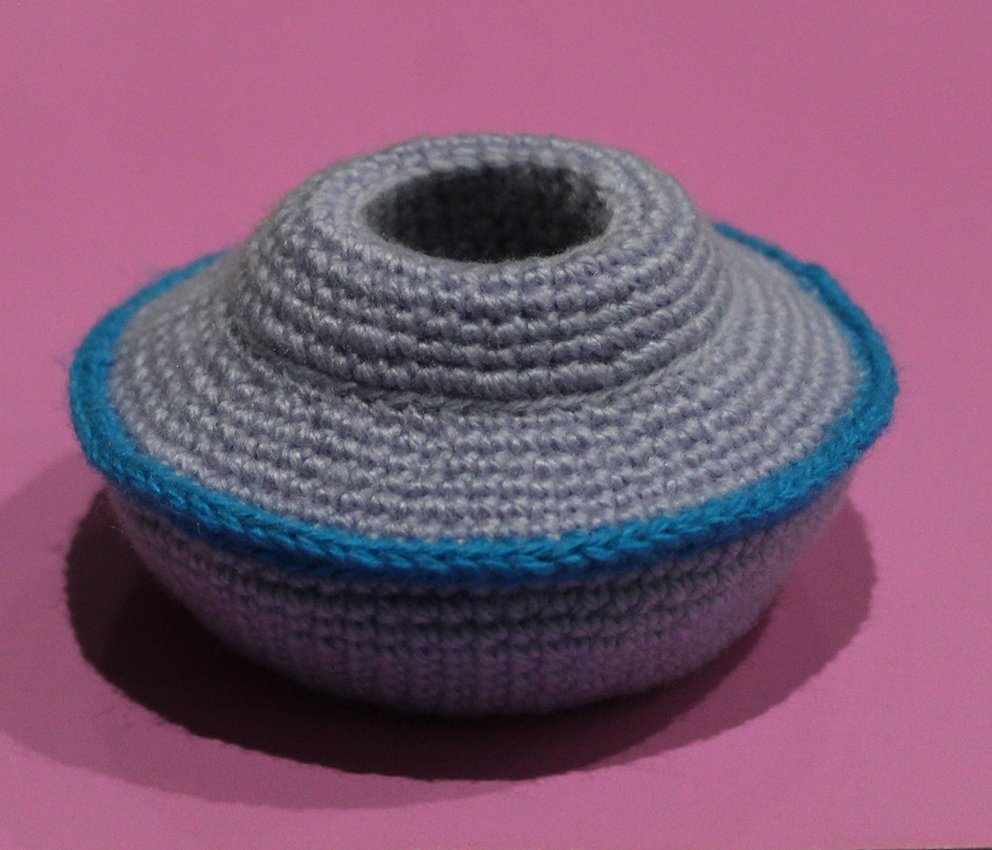
Change to the contrasting colour yarn
15) 84 sl st
Fasten off, cut off.

Blog-Inhaltsbild für 'A Flying Saucer'
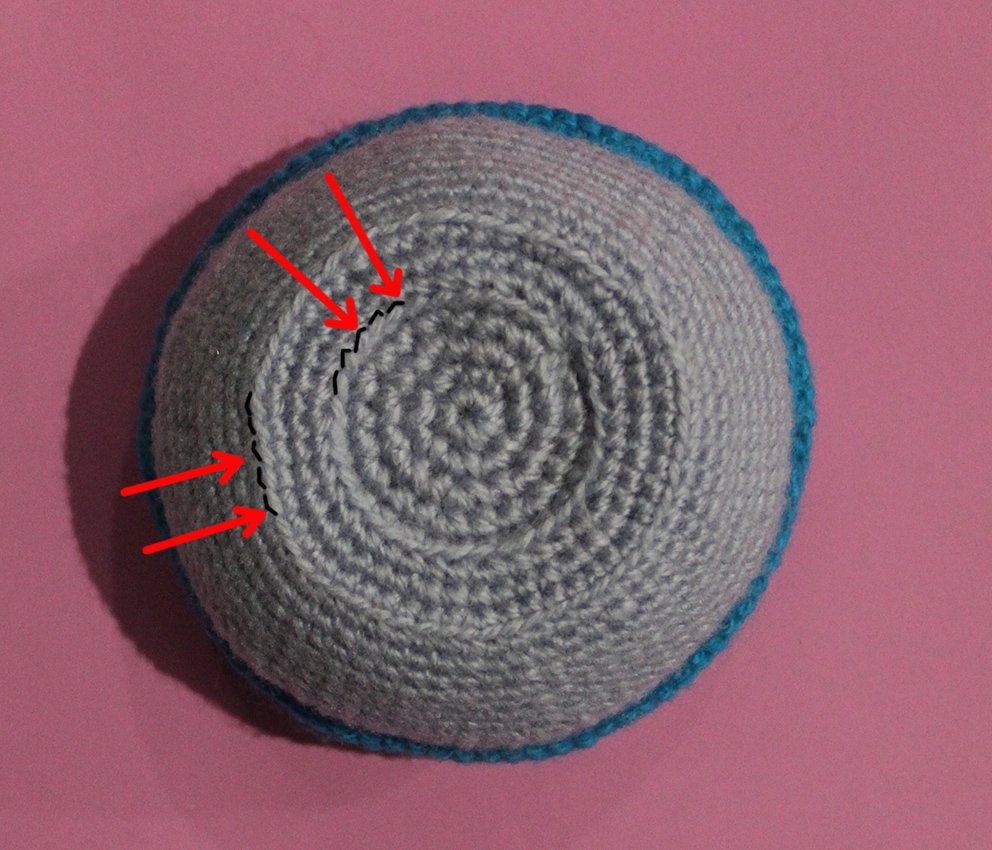
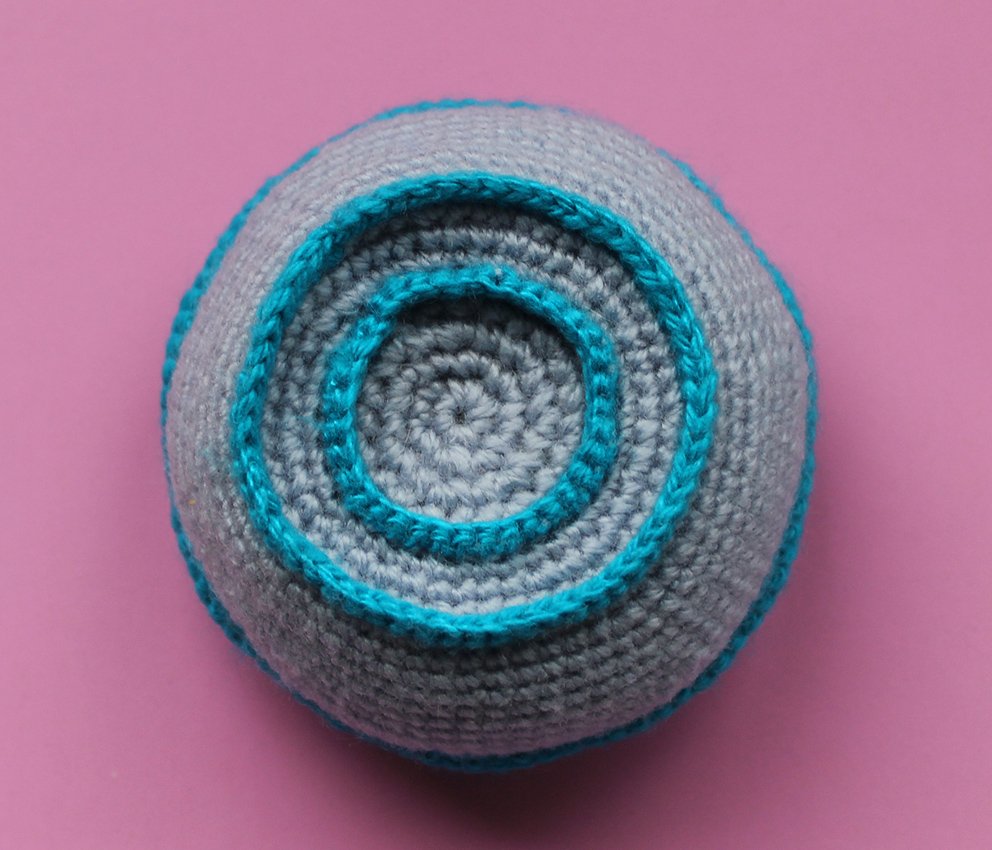
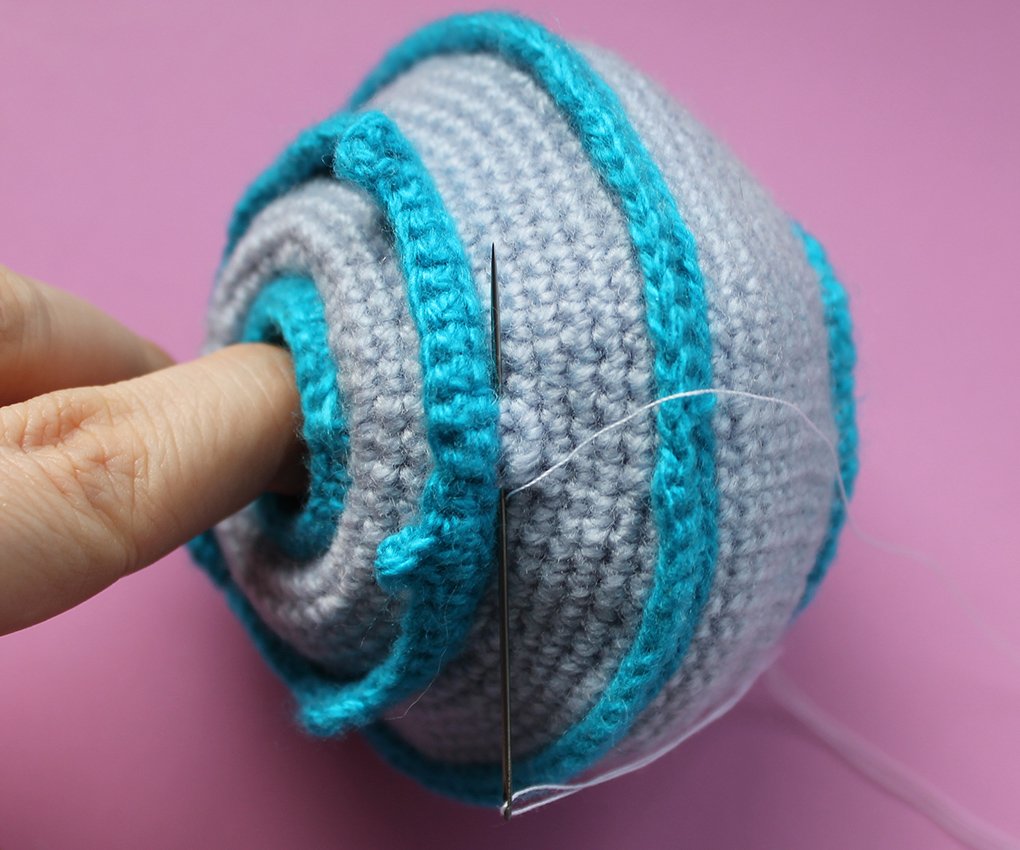
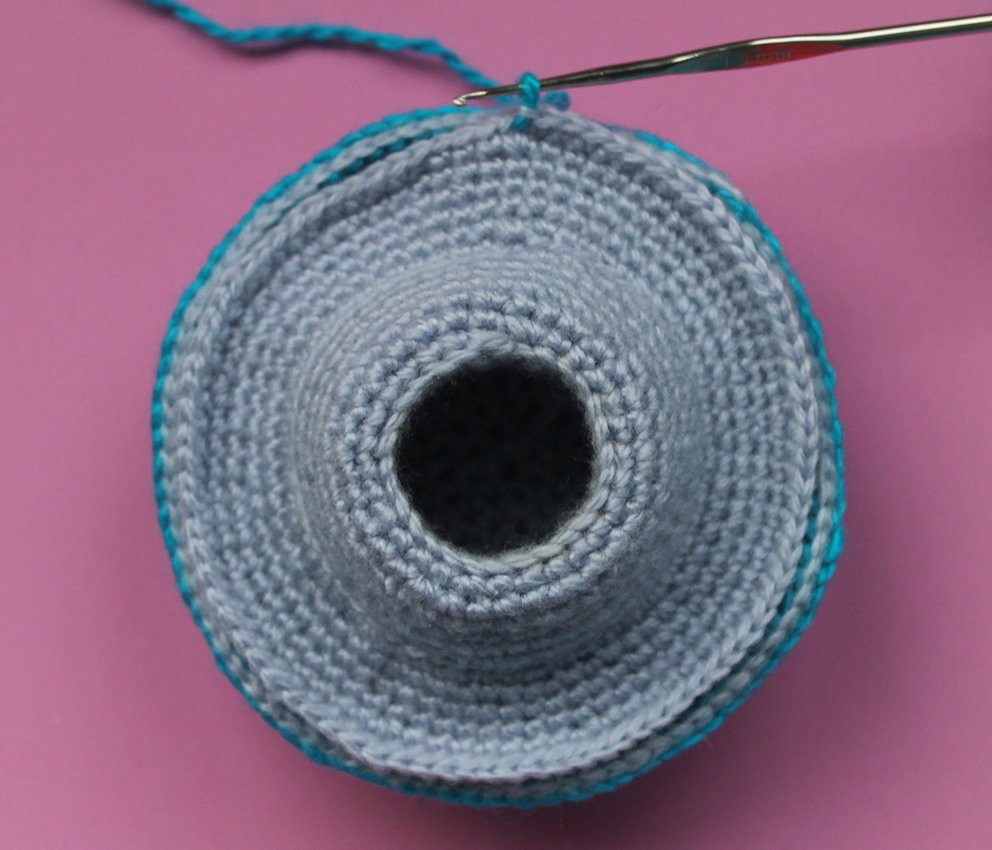
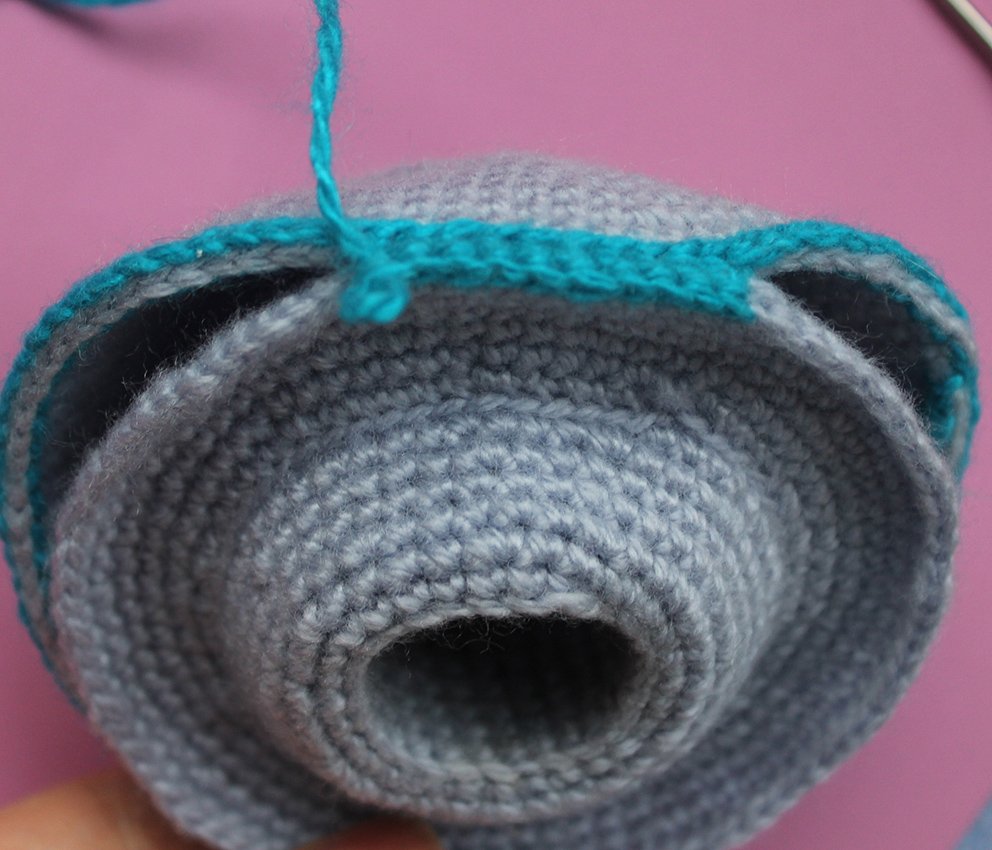
Turn the part. Join in the contrasting colour yarn behind the front loops of Rnd 2. Work 35 sc. Fasten off, cut off. 
Join in the contrast colour yarn behind the front loops of Rnd 5. Work 56 sc. Fasten off, cut off.

Blog-Inhaltsbild für 'A Flying Saucer'

Blog-Inhaltsbild für 'A Flying Saucer'

Blog-Inhaltsbild für 'A Flying Saucer'
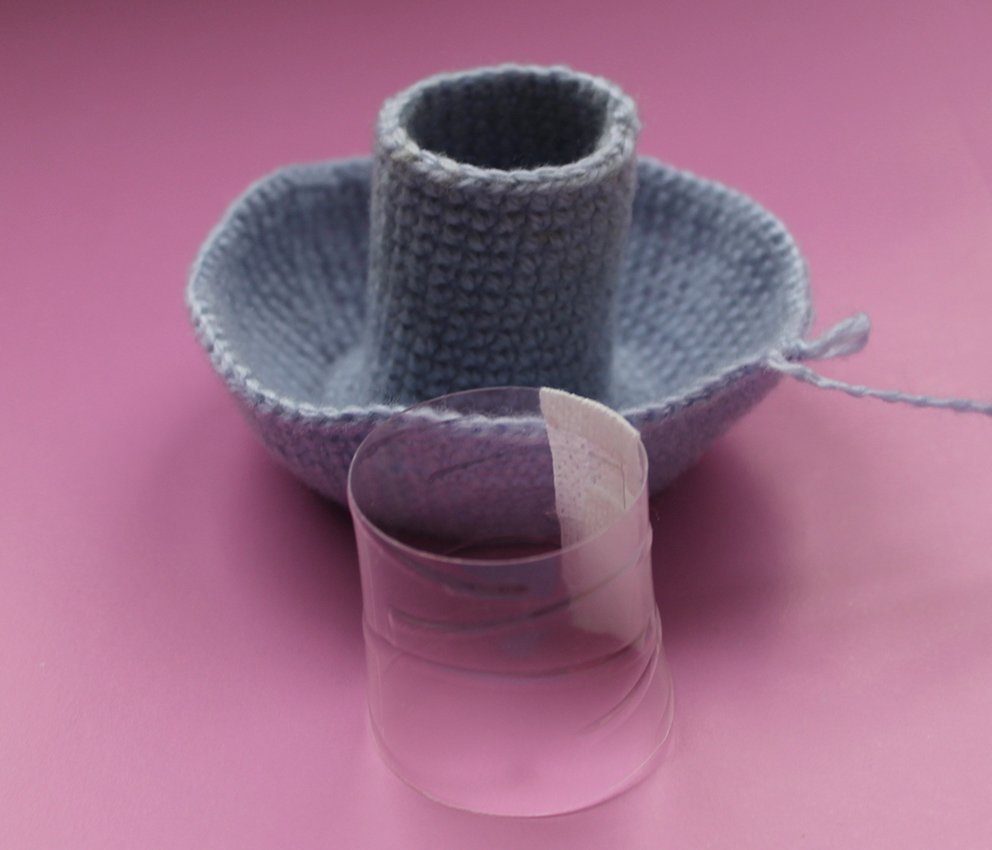
Take a plastic bottle and cut out a rectangle to strengthen the cabin. The rectangle should equal to the height of the cabin minus 0.5cm. The length of the rectangle should equal to the circumference of the cabin plus 0.5cm. 
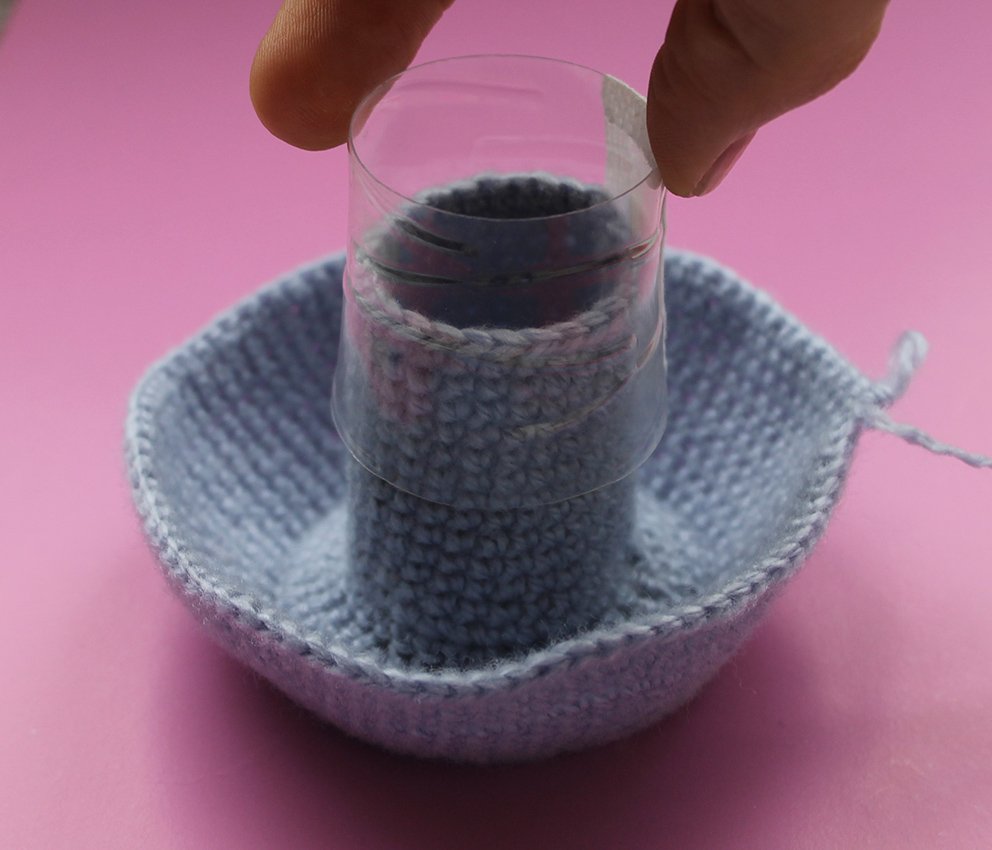
Roll the part, fasten the edges with some self-adhesive fabric tape. Put it over the cabin, see photos for guidance. 

Blog-Inhaltsbild für 'A Flying Saucer'

Blog-Inhaltsbild für 'A Flying Saucer'

Outer part (top)
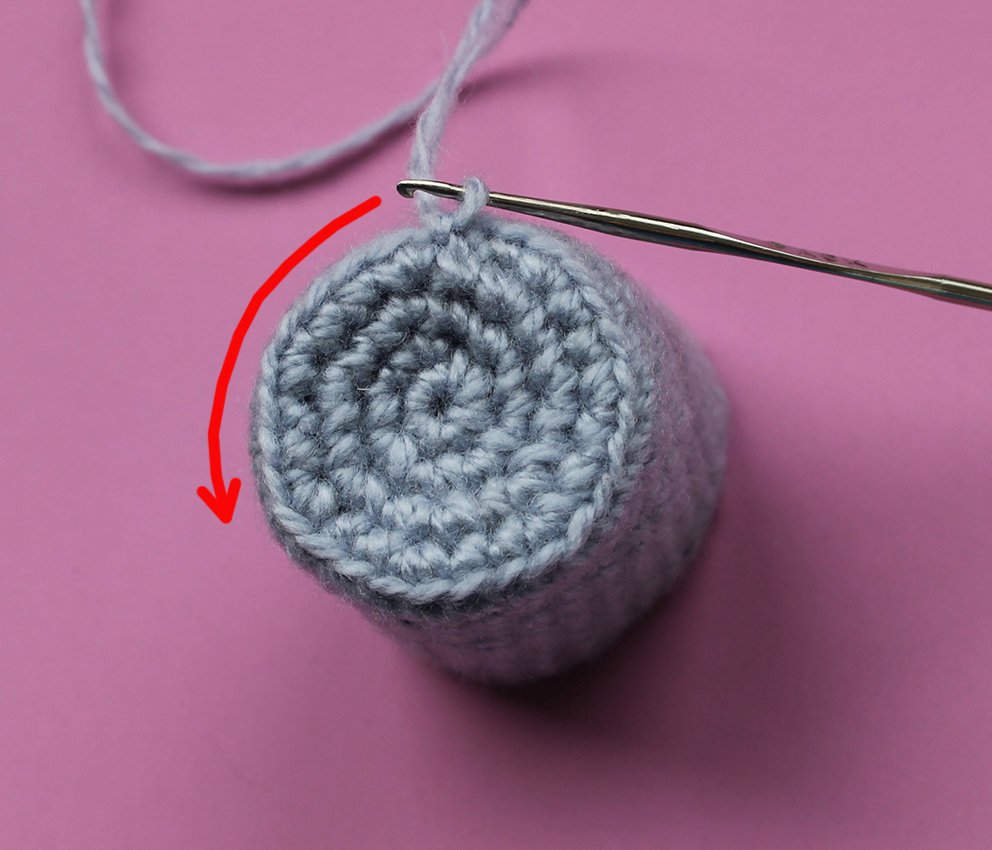
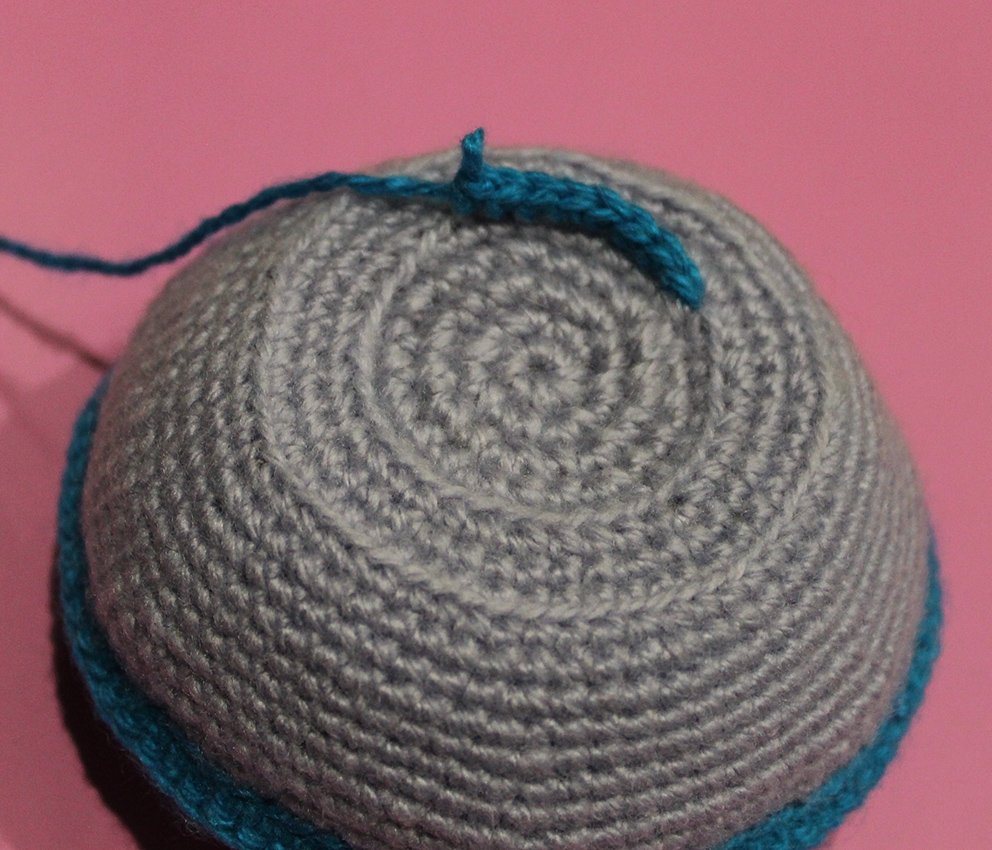
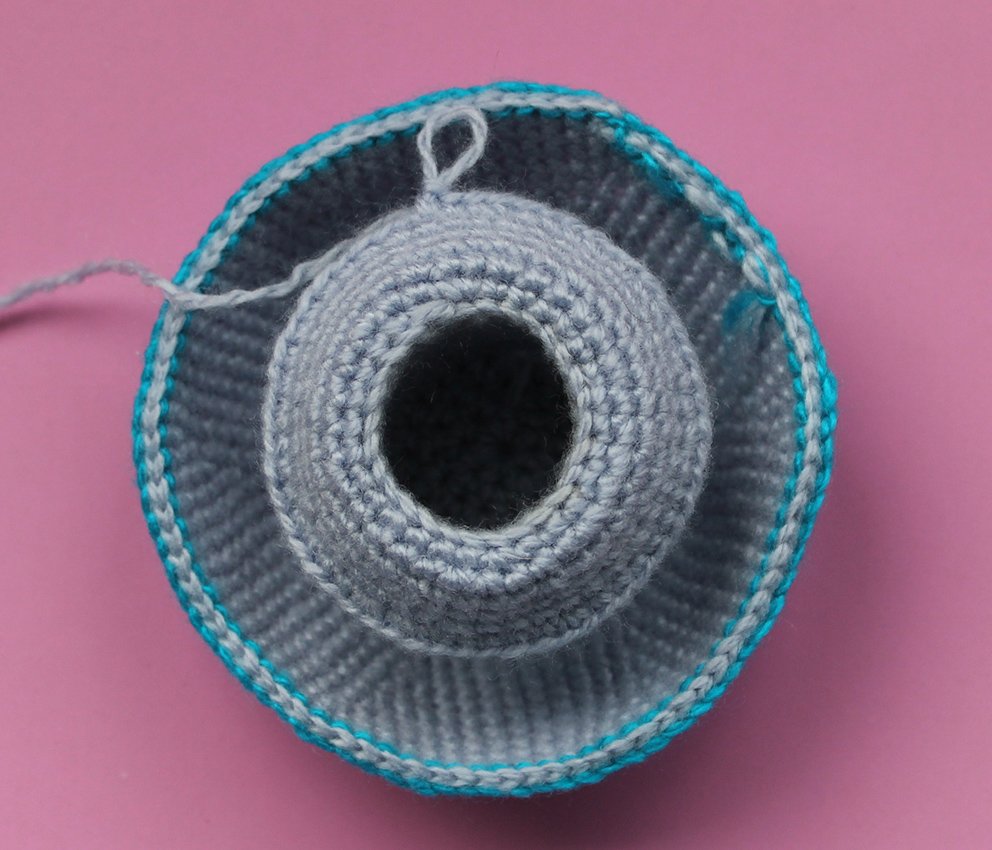
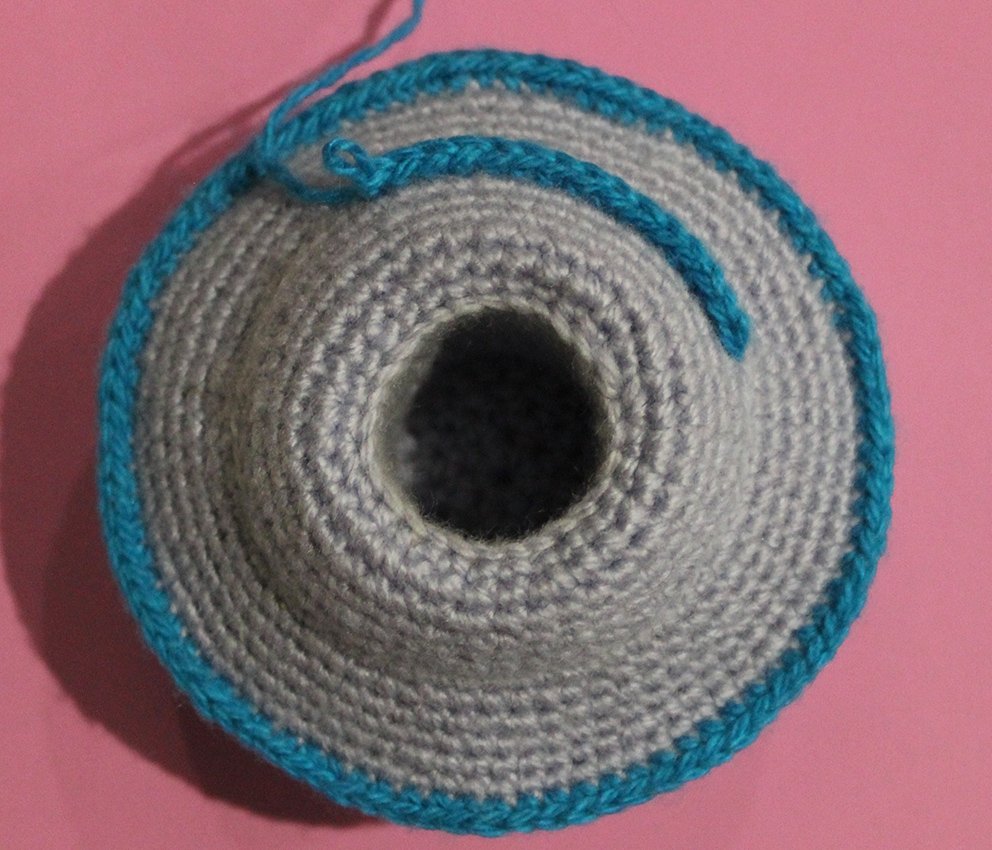
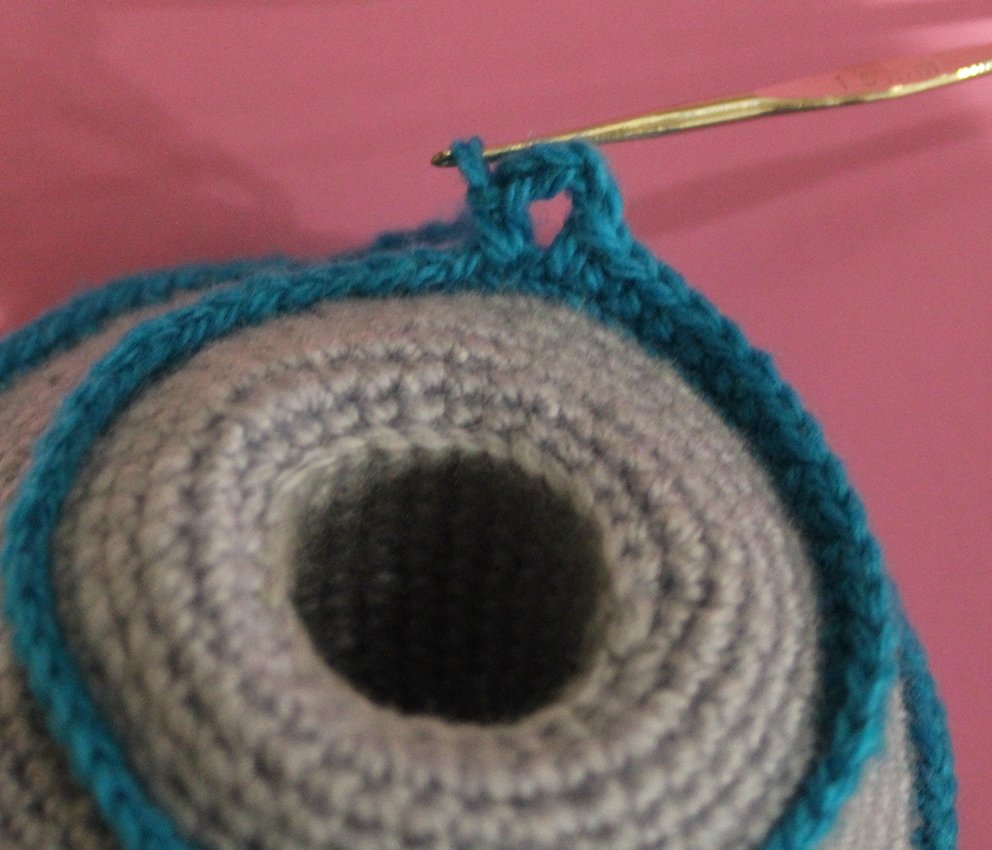
Attach the yarn to the Rnd 17 of the cabin. Crocheting direction is marked with an arrow on the photo. 

Blog-Inhaltsbild für 'A Flying Saucer'
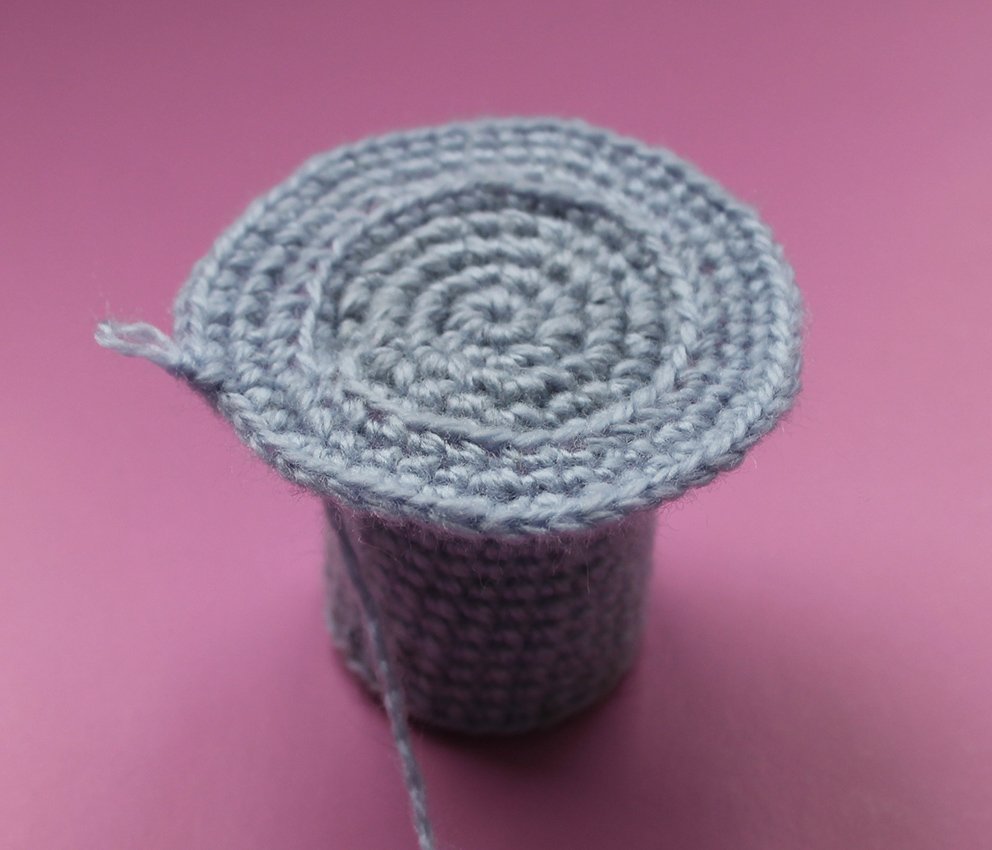
1) (13 sc, inc)х 2 times (30)
2) (2 sc, inc, 2 sc)х 6 times (36)
3) (inc, 5 sc)х 6 times (42)
4) 42 sc
5) (3 sc, inc, 3 sc)х 6 times (48)
6) (inc, 7 sc)х 6 times (54)
7) Work 54 sl st into the back loops only

Blog-Inhaltsbild für 'A Flying Saucer'
Prepare a bottle of a suitable size and shape. Cut off 9-10cm. Attach it to Rnd 7, both parts should have an equal diameter. If the diameter of the bottle is slightly smaller it’s not an issue, after you’ve finished a round you may tighten it with a thread. Do it after you’ve stuffed it with some hollow fibre as shown on the photo. 

Blog-Inhaltsbild für 'A Flying Saucer'

Blog-Inhaltsbild für 'A Flying Saucer'
8) (5 sc, inc)х 9 times (63)
9) 63 sc
10) (3 sc, inc, 3 sc)х 9 times (72)
11) 72 sc
12) (7 sc, inc)х 9 times (81)
13) (13 sc, inc, 13 sc)х 3 times (84)
Change to the contrasting colour yarn.

Blog-Inhaltsbild für 'A Flying Saucer'

Join the top and bottom parts together: 
14) work 84 sc together with the front loops of the last Rnd of the flying saucer’s bottom part. 
Stuff as you go. It’s important to properly spread the hollow firbe. See the photo for guidance. 

Blog-Inhaltsbild für 'A Flying Saucer'

Blog-Inhaltsbild für 'A Flying Saucer'
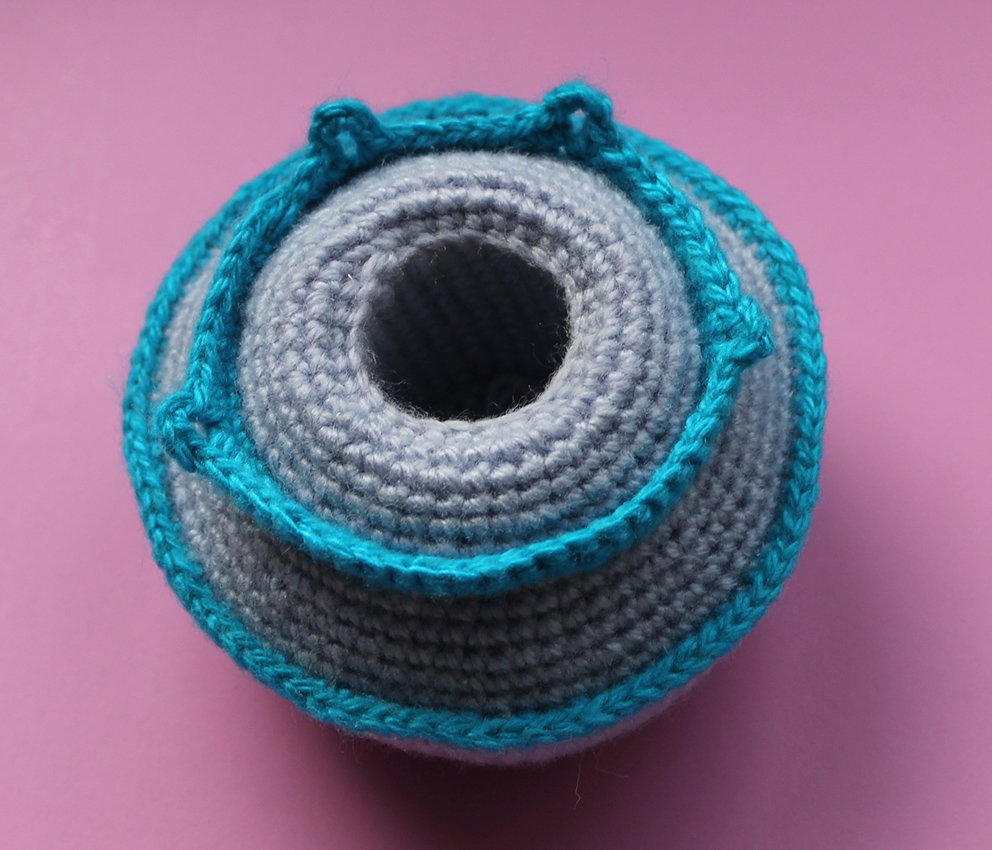
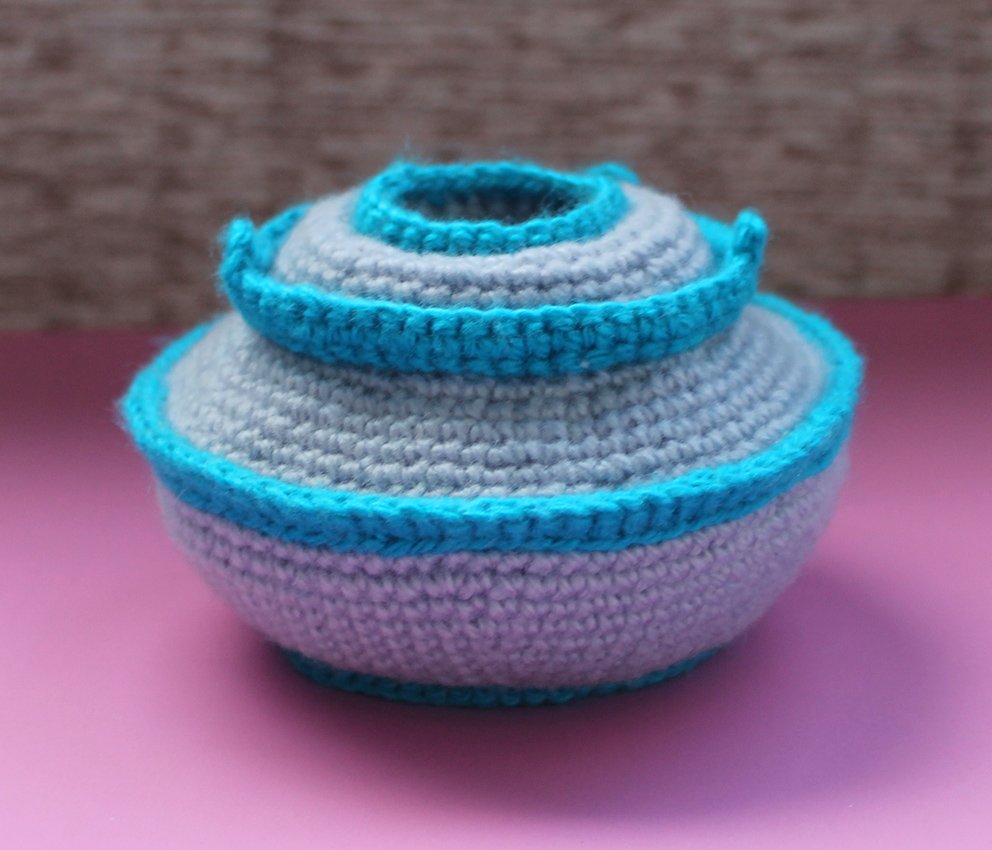
Attach the contrasting colour yarn to Rnd 1 of the top part, work 28 sc. Fasten off, cut off. Attach the contrasting colour yarn to the half loops of Rnd 7 of the top part, work: 
1) 54 sc, join in 1st and the last loops with the sl st.  
2) 1 ch, 10 sc, 4 ch, 24 sc, 4 ch, 11 sc, 4 ch, 8 sc, 4 ch, 1 sc
Cut off. Bind off. Hide the end of the yarn inside. These loops are for the buttons. 

Blog-Inhaltsbild für 'A Flying Saucer'

Blog-Inhaltsbild für 'A Flying Saucer'

Blog-Inhaltsbild für 'A Flying Saucer'

Blog-Inhaltsbild für 'A Flying Saucer'
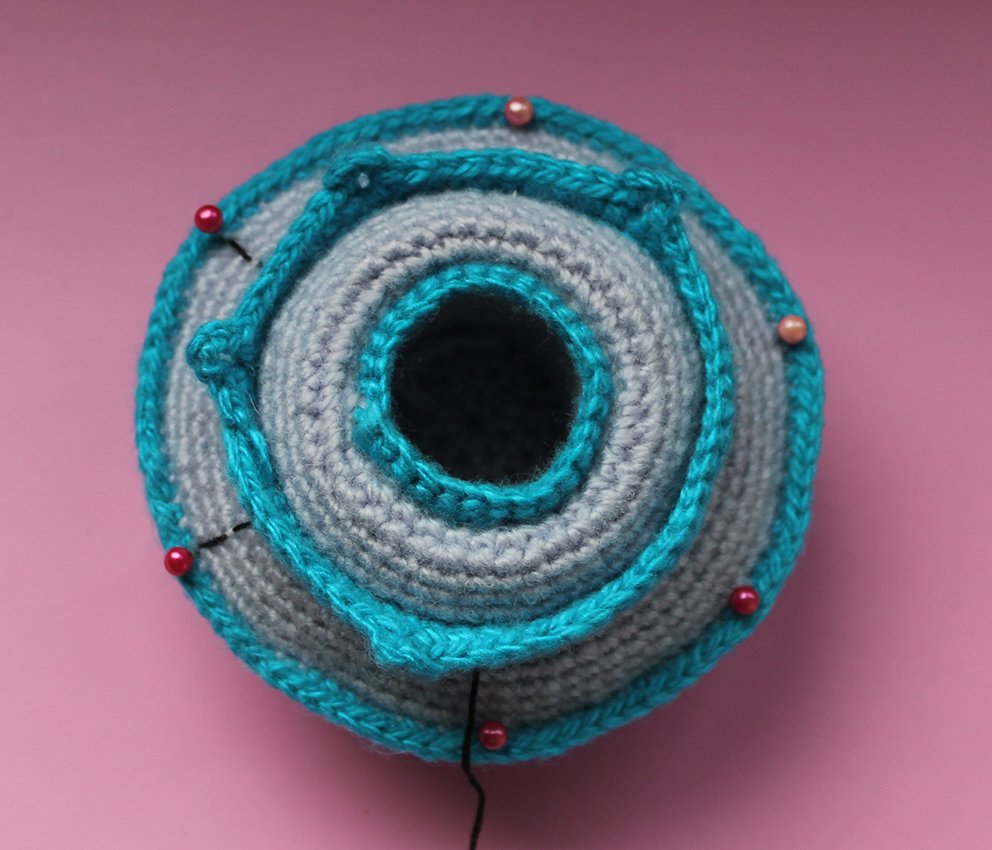
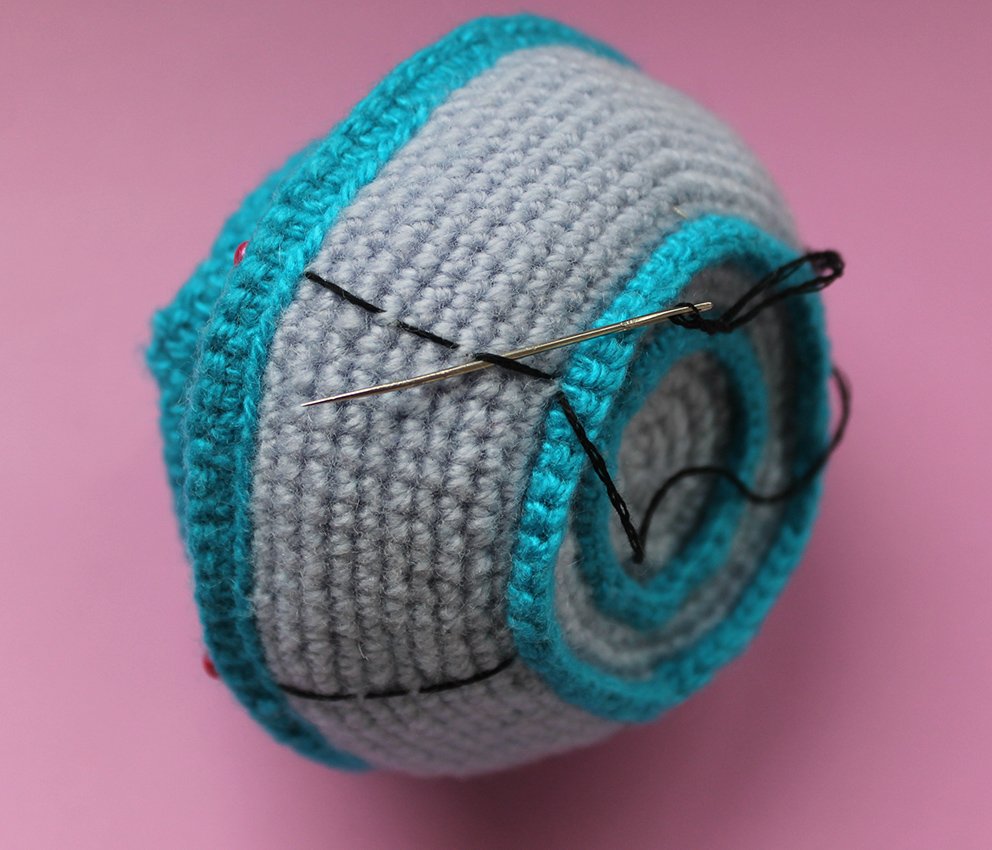
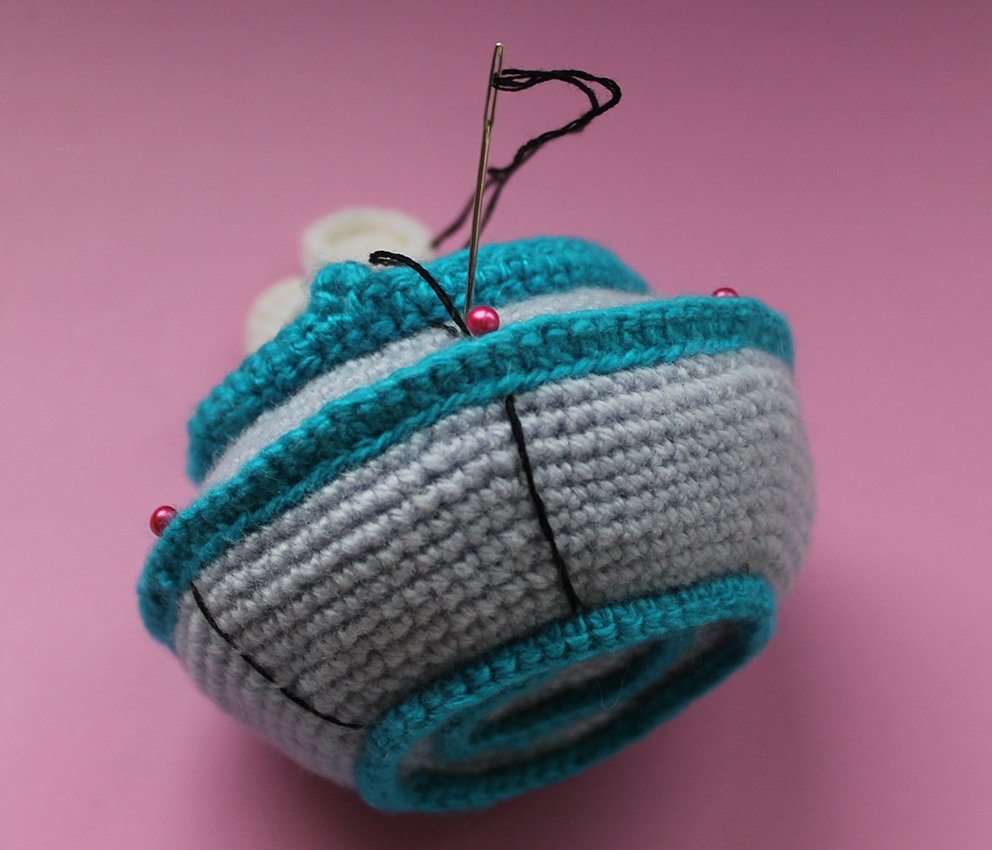
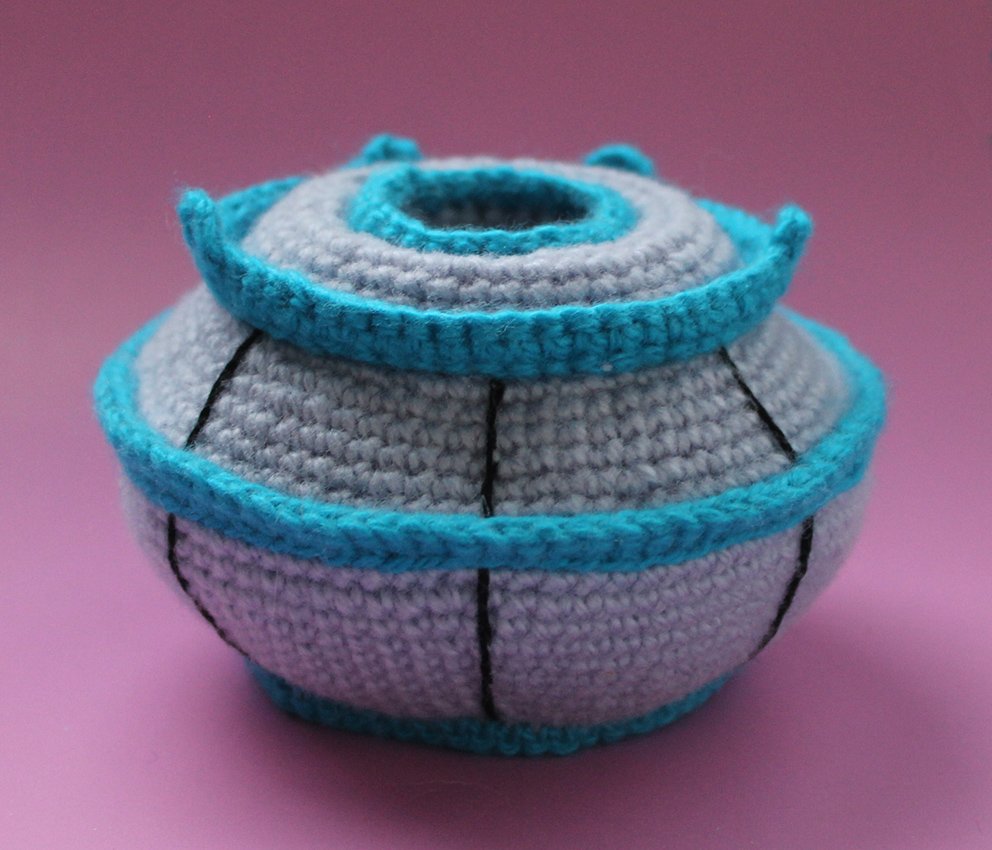
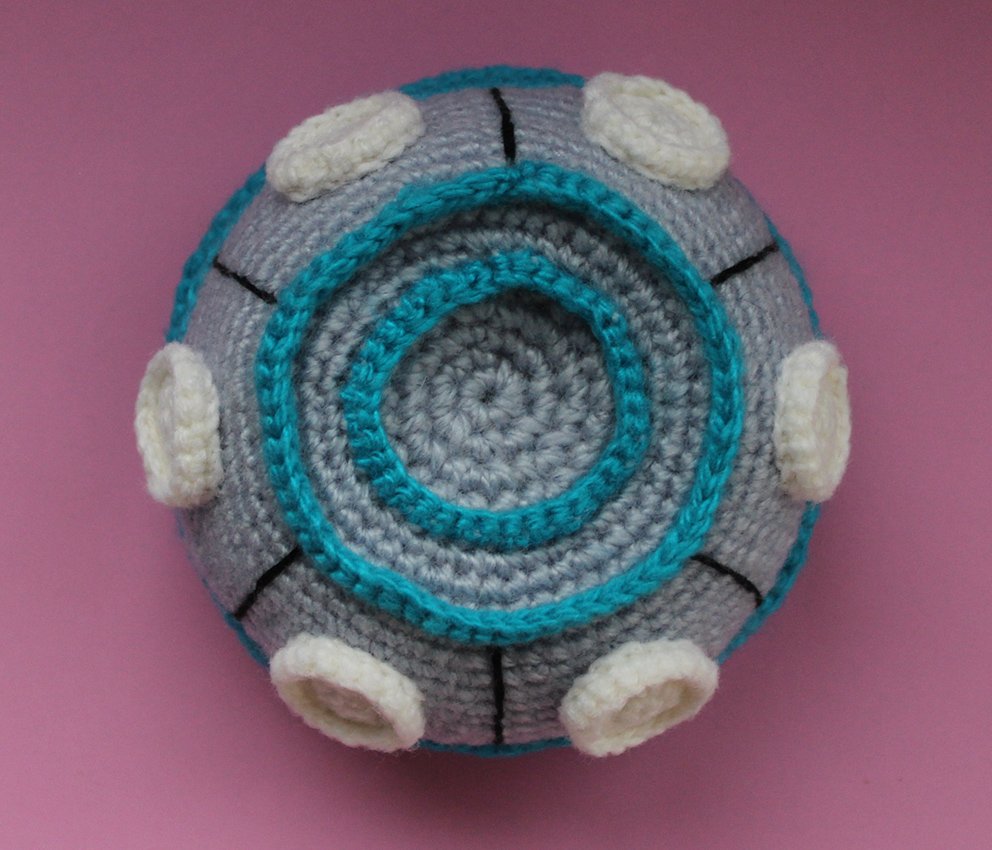
Divide the circle into 6 parts with some dressmaking pins. Embroider the segments on the flying saucer with black colour yarn/thread. 

Blog-Inhaltsbild für 'A Flying Saucer'

Blog-Inhaltsbild für 'A Flying Saucer'

Blog-Inhaltsbild für 'A Flying Saucer'

Blog-Inhaltsbild für 'A Flying Saucer'
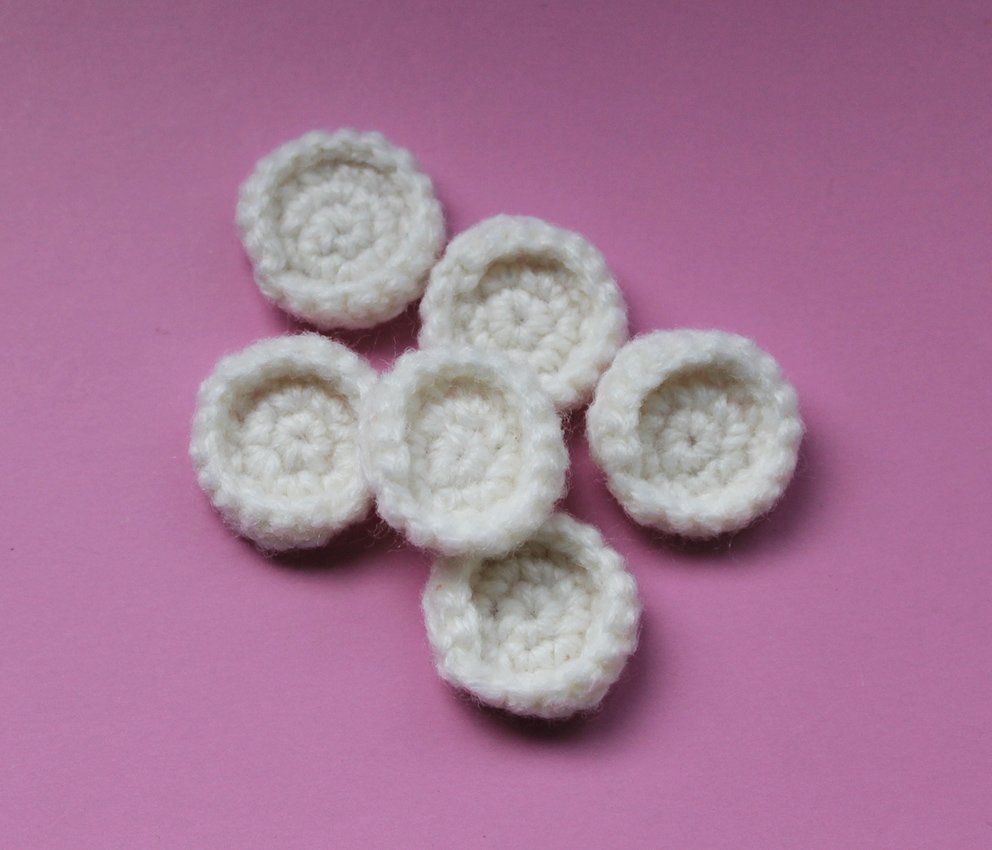
Porthole (make 6)
Work with white colour yarn.
1) 6 sc in a Magic Ring
2) 6 inc (12)
3) (inc, 1 sc)х 6 times (18)
4) Work 18 sc into the front loops only
Fasten off, cut off.
Attach the portholes one to each sector and sew them on.

Blog-Inhaltsbild für 'A Flying Saucer'

Blog-Inhaltsbild für 'A Flying Saucer'
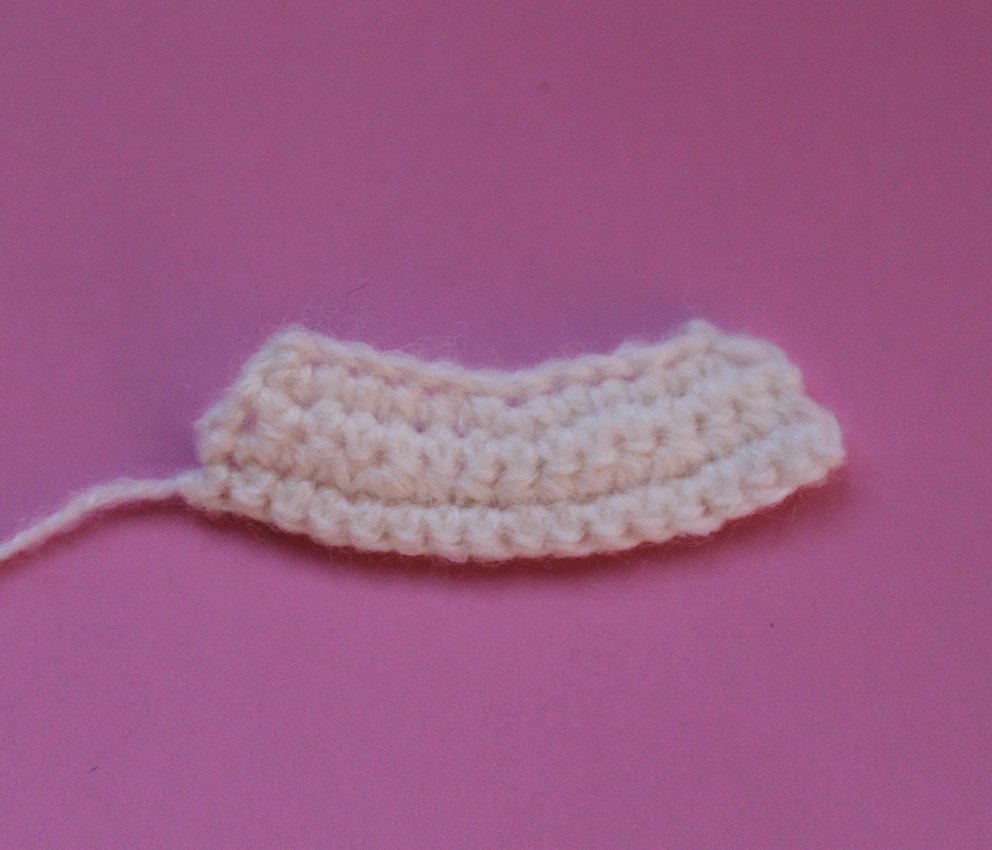
Dashboard
Work with white colour yarn.
Ch 12 
1) starting from 2nd ch from hook: (inc, 4 sc)х 2 times, inc, ch, turn (14)
2) 14 sc, ch, turn (14)
3) (4 sc, inc)х 2 times, 4 sc, ch, turn (16)
4) 16 sc
Fasten off, cut off.

Blog-Inhaltsbild für 'A Flying Saucer'
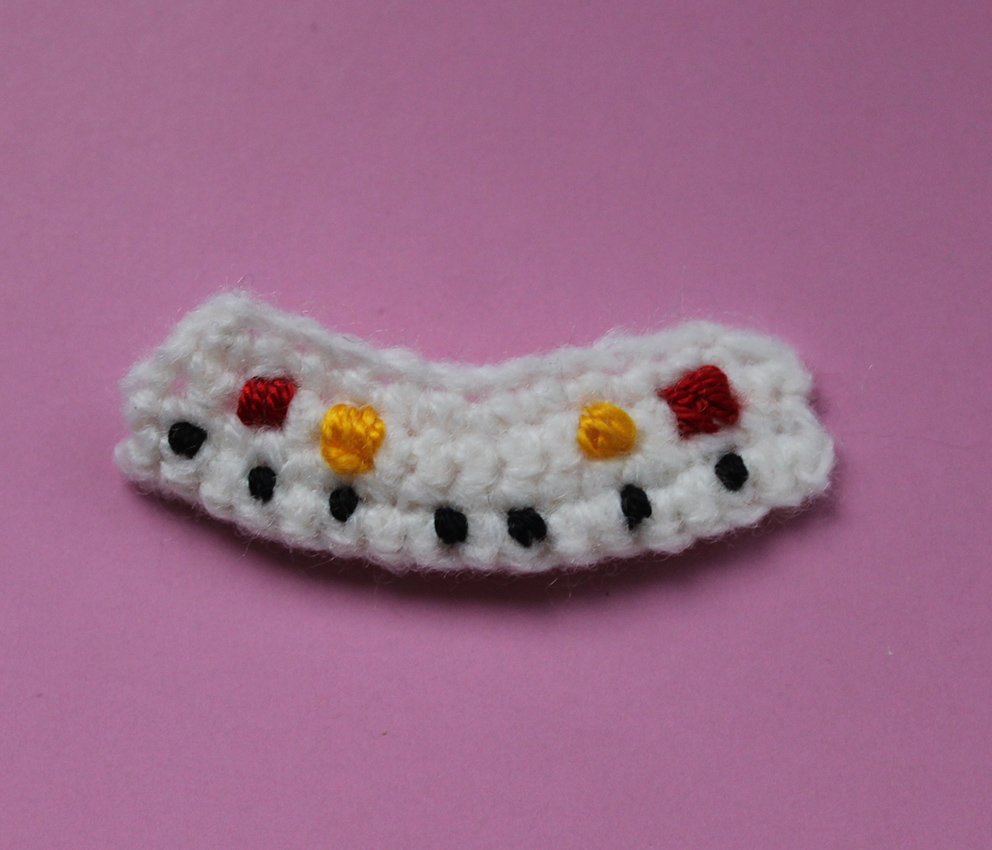
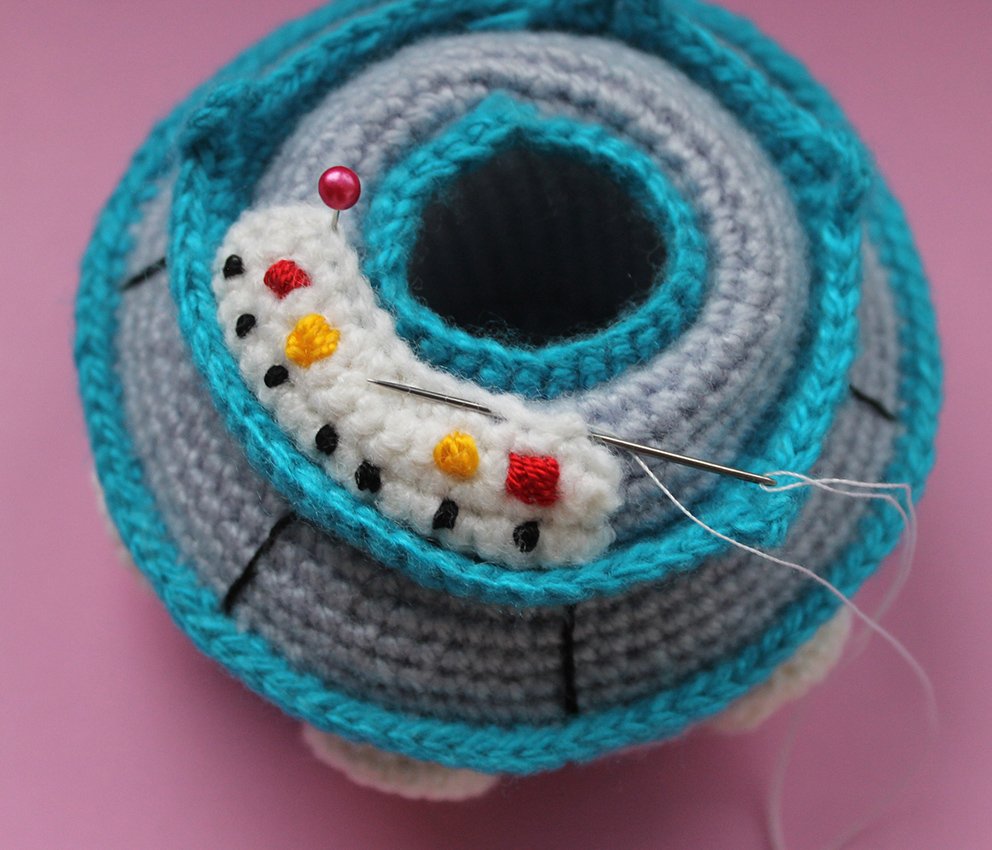
Embroider a few buttons on the dashboard with red, yellow and black yarns/treads. Sew it on. 

Blog-Inhaltsbild für 'A Flying Saucer'

Blog-Inhaltsbild für 'A Flying Saucer'
Control lever
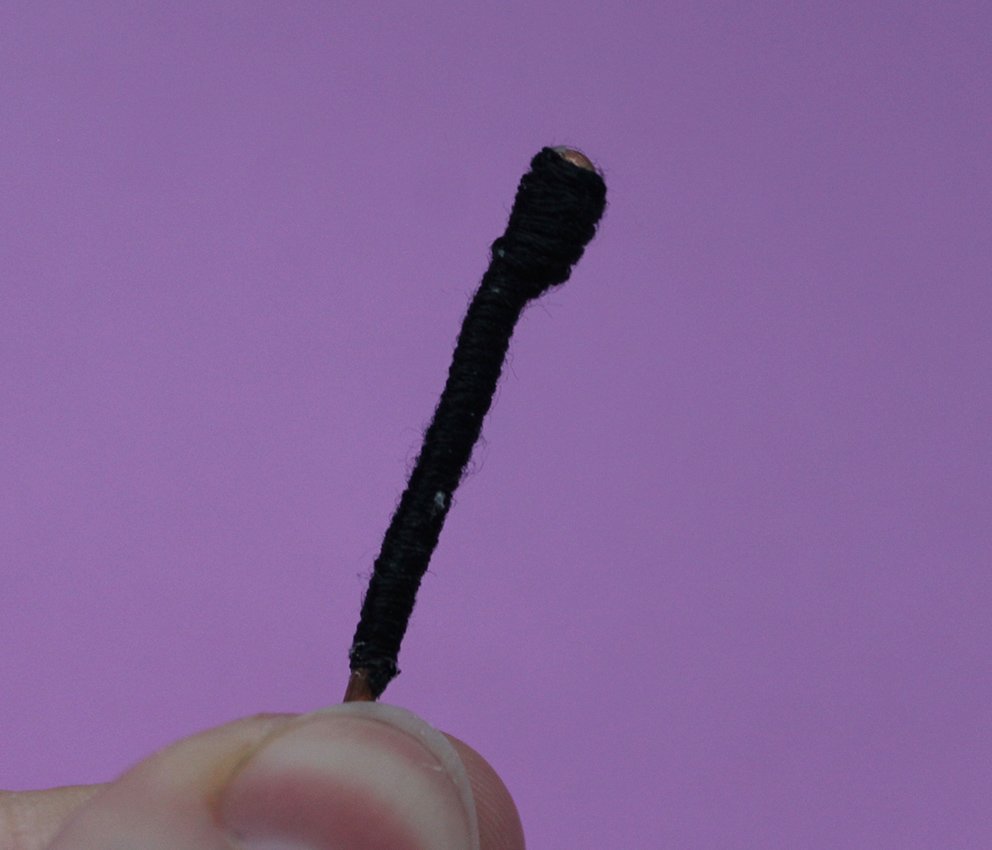
Prepare a piece of wire, about 4 cm long. Bend the end with the help of pliers. Apply some glue onto the wire and wrap black yarn around it. Leave to dry. Insert it in the dashboard. 

Blog-Inhaltsbild für 'A Flying Saucer'

Blog-Inhaltsbild für 'A Flying Saucer'

Blog-Inhaltsbild für 'A Flying Saucer'
Transparent part of the cabin
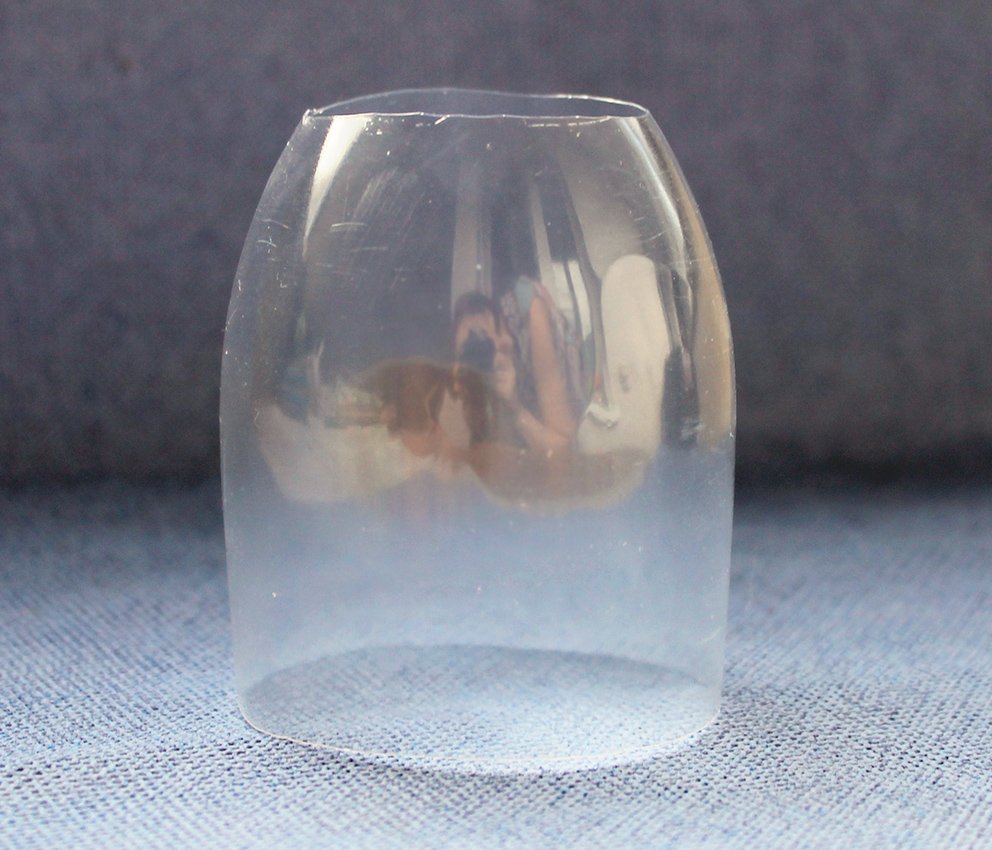
I used a part of the plastic bottle (9cm long), I cut off the bottom and top parts from it. I decorated the opening in the top part with a crocheted hatch. You may substitute it for a plastic cup. 

Blog-Inhaltsbild für 'A Flying Saucer'
Hatch
Work with a contrasting colour yarn
1) 6 sc in a Magic Ring
2) 6 inc (12)
3) (inc, 1 sc)х 6 times (18)
4) (1 sc, inc, 1 sc)х 6 times (24)
5) (inc, 3 sc)х 6 times (30)
6) (2 sc, inc, 2 sc)х 6 times (36)
7) (inc, 5 sc)х 6 times (42)
8) 42 sc
Fasten off, cut off.

Blog-Inhaltsbild für 'A Flying Saucer'
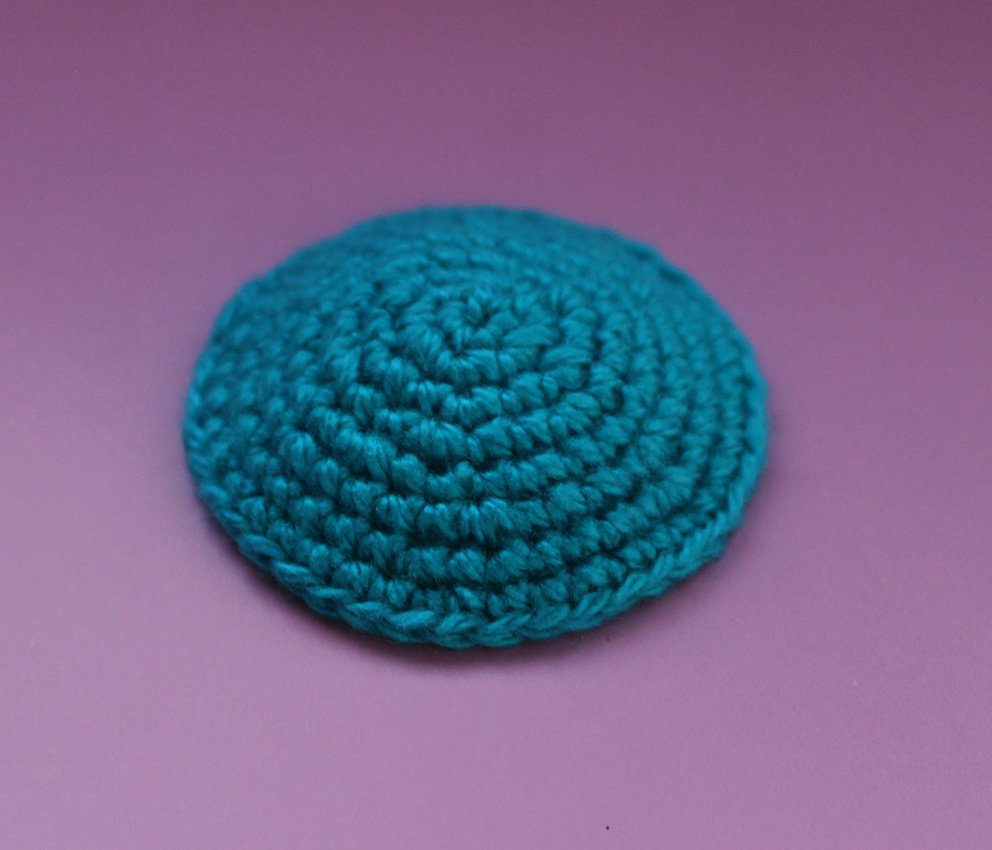
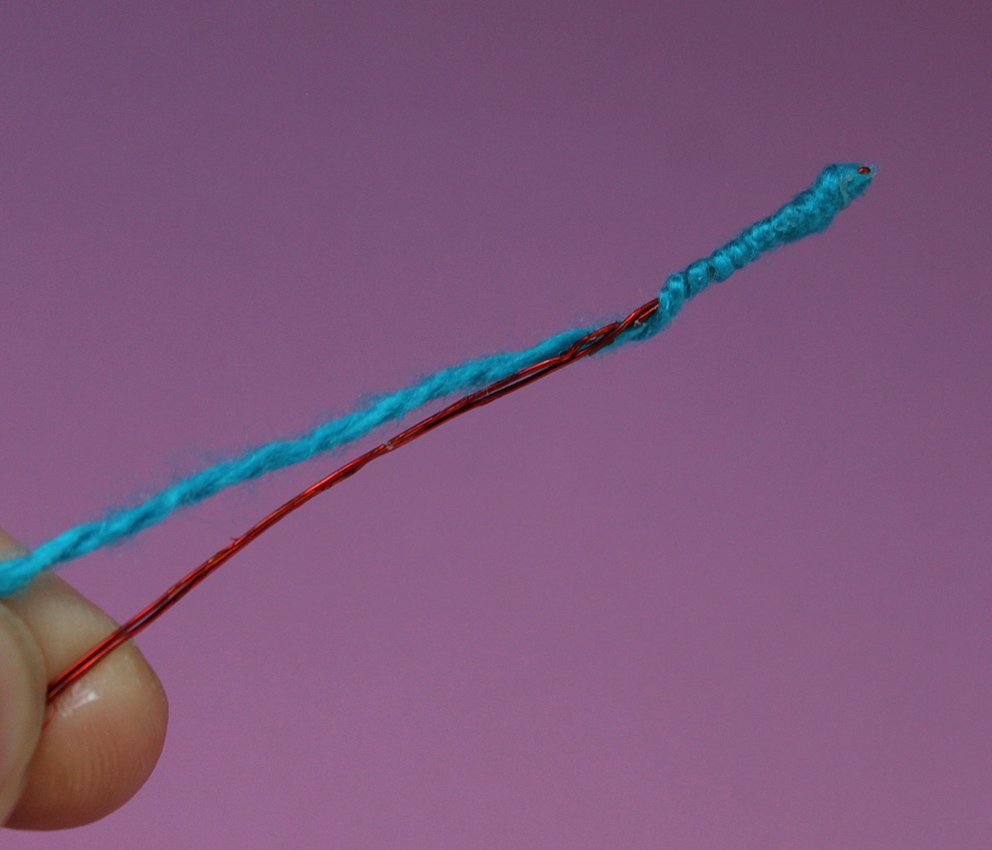
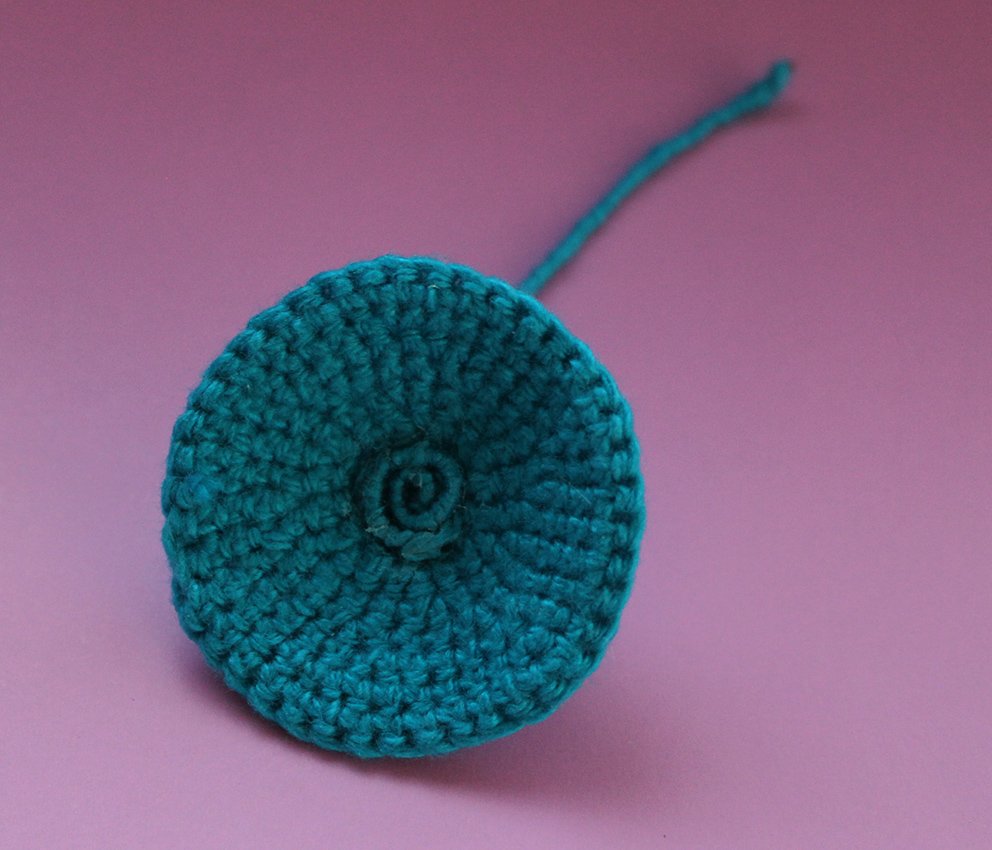
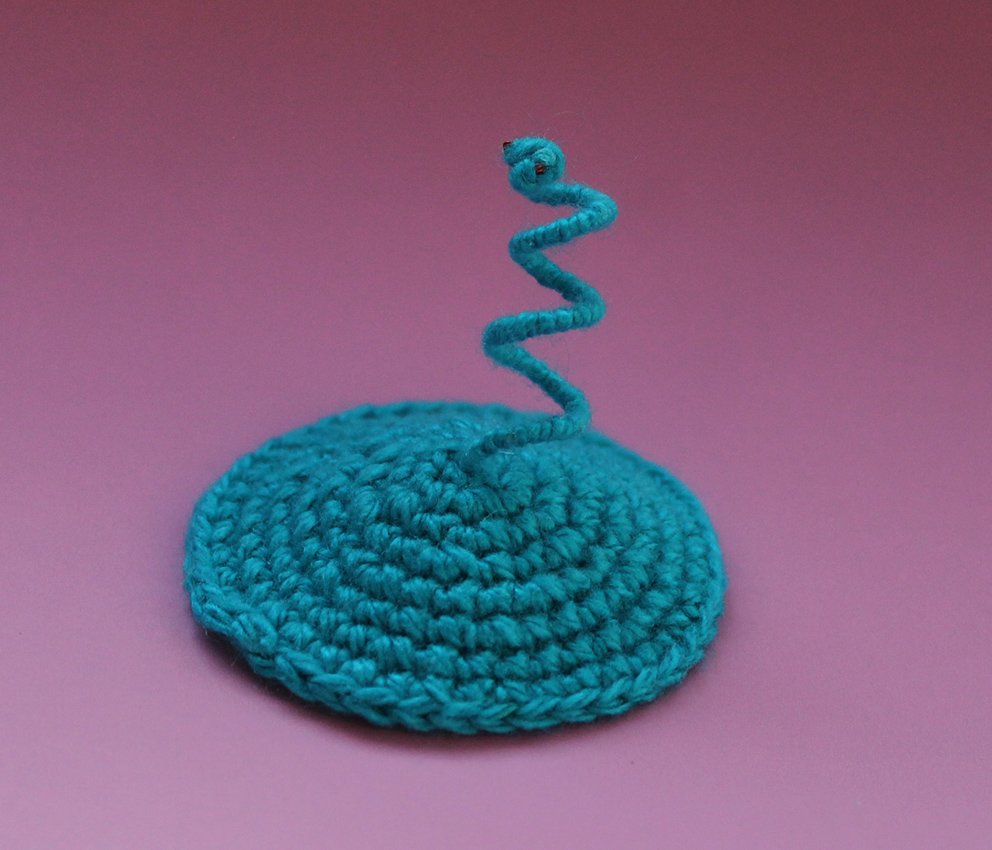
Decorate the hatch with a spring. Prepare a piece of wire, about 10 cm long. Apply some glue onto the wire and wrap yarn around it. Leave to dry. Insert the spring into the centre of the hatch, fasten it on the inside. 

Blog-Inhaltsbild für 'A Flying Saucer'

Blog-Inhaltsbild für 'A Flying Saucer'

Wrap the outer part around a pencil and stretch it a little. 

Blog-Inhaltsbild für 'A Flying Saucer'

Blog-Inhaltsbild für 'A Flying Saucer'
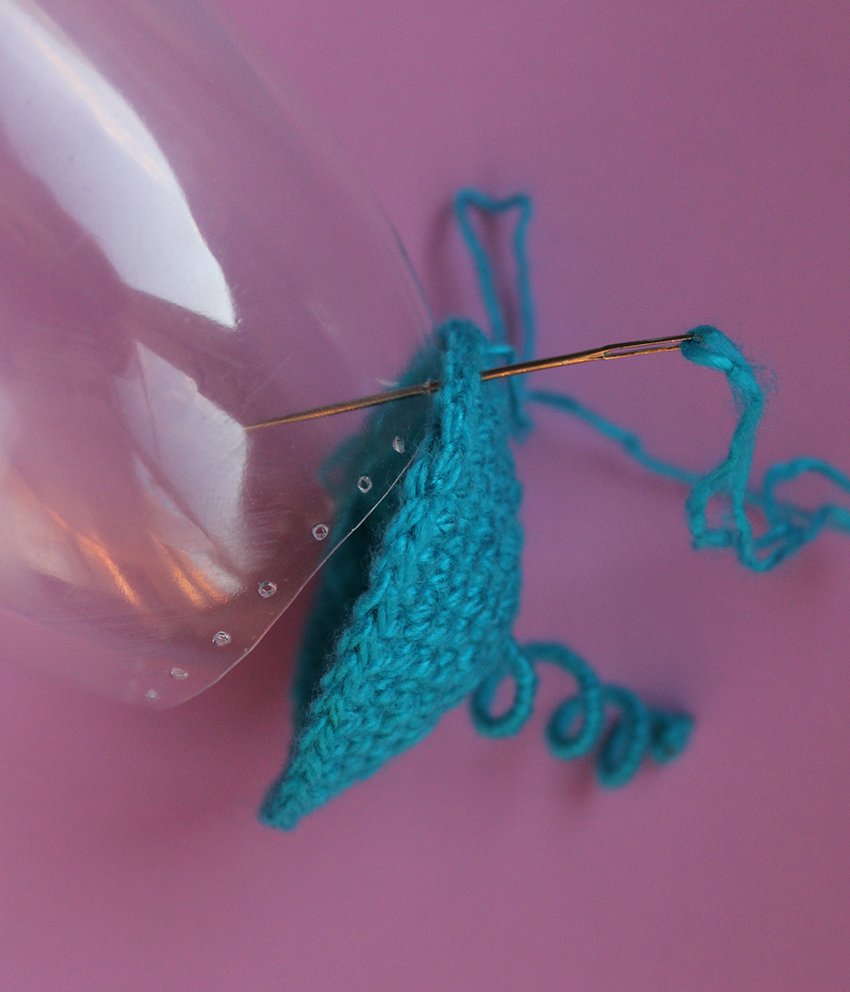
Glue or sew the hatch to the bottle. To ease the process pierce some holes around the edge of the bottle with a sewing needle.  

Blog-Inhaltsbild für 'A Flying Saucer'

Blog-Inhaltsbild für 'A Flying Saucer'
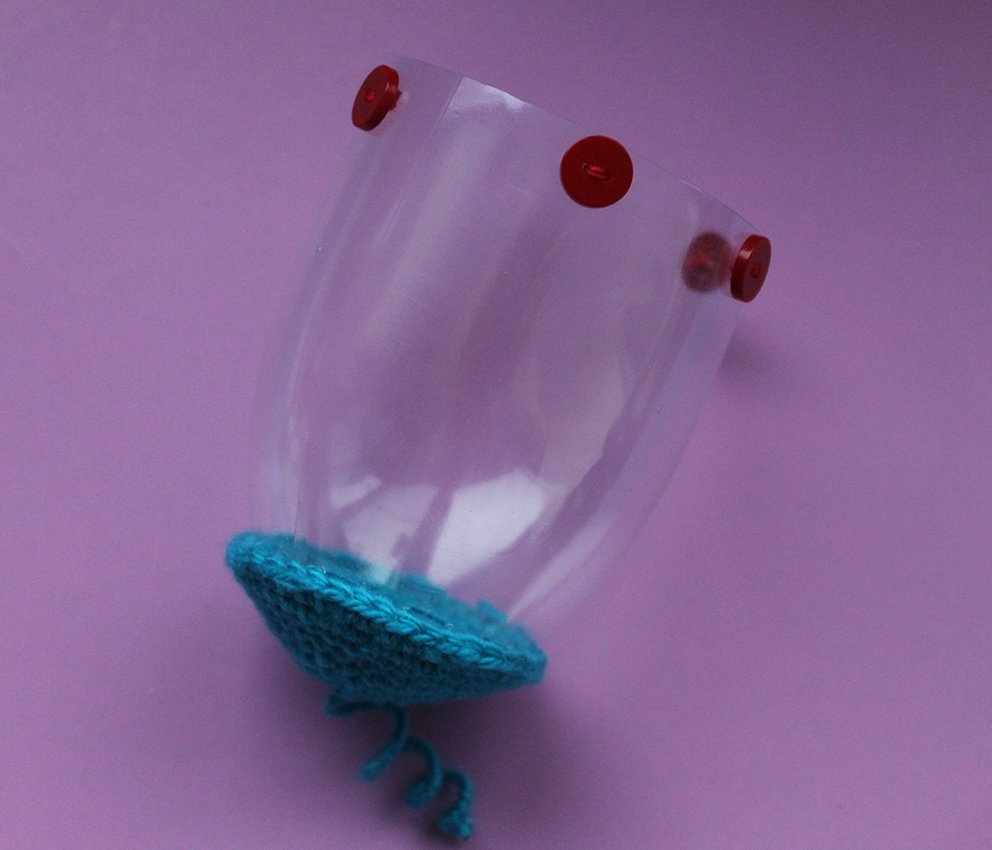
Attach and sew the buttons to the bottom part in line with the button holes and fasten them.  

Blog-Inhaltsbild für 'A Flying Saucer'

Blog-Inhaltsbild für 'A Flying Saucer'
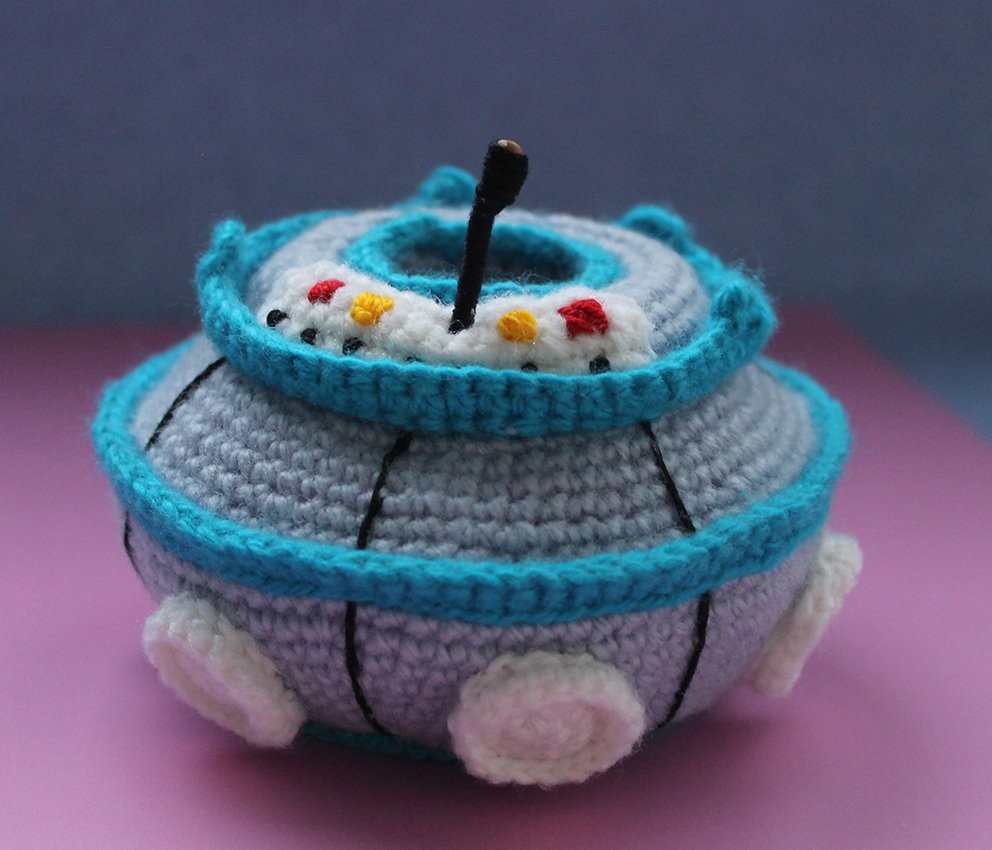
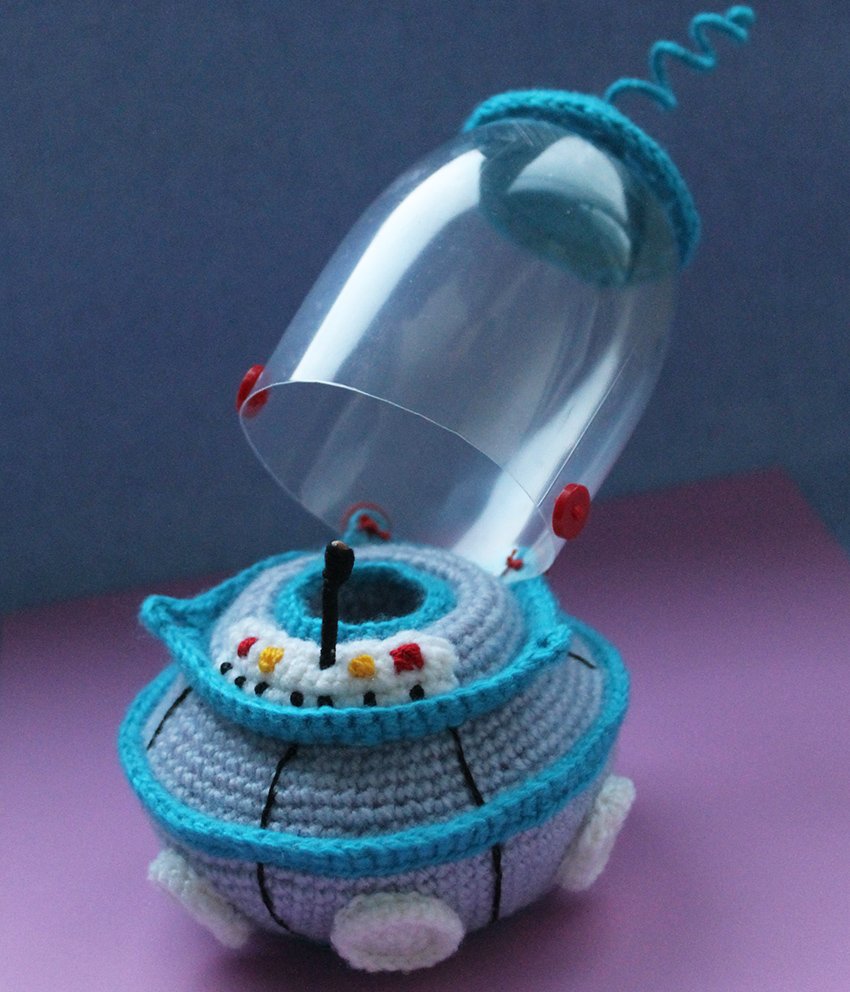
The flying saucer is complete! Place your little Martian inside the space ship. Everything is ready for a space flight! 

Blog-Inhaltsbild für 'A Flying Saucer'


Standard Benutzer Avatarbild
Bitte registrieren oder einloggen!
carinalimaa
vor 2 Jahren
I'm completely in love with this alien on the ship. 😍 I'll do it and see how it turns out. I have a YouTube channel too, could I record the step by step there and give you the credits?
    carinalimaa
    carinalimaa carinalimaa
    vor 2 Jahren
    Ah, I'm Brazilian, I would record in Portuguese. ❤️
anke-jaddatz
vor 2 Jahren
Ich verstehe es auch so das man 2 Flaschenteile bzw einmal als rechteck zurecht geschnitten benötigt. Komme nicht weiter
annie-quinn
vor 4 Jahren
Sooooo adorable 🥰
mystitchescount
vor 4 Jahren
I love this pattern and I have enjoyed working on it but I do not understand where or how to place the second bottle with the cap portion. Please help.
    crochetfantasy
    crochetfantasy Autor mystitchescount
    vor 4 Jahren
    Hello! Only one bottle. Look at the pictures.
joanne-ziuchkovski
I don't understand how to insert and use the second bottle piece in the cabin portion of the pattern. Do you have additional instructions or photos?
bonny-rogers
vor 5 Jahren
I would like to know what weight cotton yarns you used for the spaceship and for the alien As my alien using #3 weight cotton yarn and 1.25 hook comes out too big for the ship. You say
yours is 11cm tall mine is 14cm.
    crochetfantasy
    crochetfantasy Autor bonny-rogers
    vor 5 Jahren
    Hello! At the top of the page, see my materials. Yarn thickness indicated.
    She is different. For a spaceship, I took yarn 2 times thicker.
diana-dwyer
vor 5 Jahren
he came out bigger than yours-Maybe 7 inches to top of head,but I just this he's so cute in his spaceship[ about 1 foot total in ship-would send pic but no where to put it
    crochetfantasy
    crochetfantasy Autor diana-dwyer
    vor 5 Jahren
    You can upload photos to the gallery.
isabel-alanis
vor 5 Jahren
Excelente! Gracias por compartir 😊
clara-sousa
vor 5 Jahren
Giríssimo!
    crochetfantasy
    crochetfantasy Autor clara-sousa
    vor 5 Jahren
    Obrigado!

Letzte Aktivitäten in Blogs

Kostenlose Häkelanleitung Amigurumi Drache
136 Kommentare Neu von ursula-arnold1
Mittwoch, 13. August 2025
Blüten-Teelichter häkeln: Sommerdeko mit Herz & Häkelhülle
2 Kommentare Neu von Mit-Liebe-verbunden
Freitag, 8. August 2025
Kostenlose Anleitung Schmetterling, Glückswürmchen, Sorgenwürmchen - ohne Vernähen
38 Kommentare Neu von AlexRo-fuer-Kinderherzen
Montag, 4. August 2025
Überrock oder Cape für kleine Puppen häkeln – kostenlose Häkelanleitung
4 Kommentare Neu von Schnuckelina
Dienstag, 29. Juli 2025
Free double knitting pattern for a "C"
3 Kommentare Neu von kiiwiknitsncrochet
Freitag, 25. Juli 2025

Meist-diskutierte Beiträge

Kostenlose Häkelanleitung Amigurumi Drache
Von TansuluuCraftHaus 133+ Kommentare
Donnerstag, 1. Oktober 2015
Kostenlose Häkelanleitung Babyschuhe für Neugeborene!
Von Leem 85+ Kommentare
Montag, 30. Oktober 2017
Kostenlose Anleitung für Socken häkeln Grösse 36 bis 47
Von Wollzauber73 35+ Kommentare
Freitag, 4. Dezember 2015
Hundekotbeutel-Spender
Von AmiToysNini 31+ Kommentare
Donnerstag, 12. August 2021

Beliebte Anleitungen

Top Anleitung von MadMe aus der Häkeln Kategorie!
Top Anleitung von NiksNadelwelt aus der Häkeln Kategorie!
Top Anleitung von claudia-sticken aus der Häkeln Kategorie!
Top Anleitung von MorbenDesign aus der Häkeln Kategorie!
Top Anleitung von CarosMasche aus der Häkeln Kategorie!
Top Anleitung von Die-Haekelnudel aus der Häkeln Kategorie!
Top Anleitung von AngiDesign aus der Häkeln Kategorie!
Top Anleitung von MommyPatterns aus der Häkeln Kategorie!
Top Anleitung von flotte-Zaubernadel-Nadine-Eckh aus der Häkeln Kategorie!
Top Anleitung von Wunderlichs-Kreativchaos aus der Häkeln Kategorie!
Top Anleitung von AngiDesign aus der Häkeln Kategorie!
Top Anleitung von flotte-Zaubernadel-Nadine-Eckh aus der Häkeln Kategorie!
Top Anleitung von milahaekelt aus der Häkeln Kategorie!
Top Anleitung von flotte-Zaubernadel-Nadine-Eckh aus der Häkeln Kategorie!
Mehr Top-Anleitungen

Kostenlose Anleitungen

Top Anleitung von scandigrey aus der Häkeln Kategorie!
Top Anleitung von Keksis_bunte_Maschen aus der Häkeln Kategorie!
Top Anleitung von Rosi_und_Hanni aus der Häkeln Kategorie!
Top Anleitung von TanjasTraumwelten aus der Häkeln Kategorie!
Top Anleitung von Haekelicious aus der Häkeln Kategorie!
Top Anleitung von WollholicClaudia aus der Häkeln Kategorie!
Top Anleitung von MorbenDesign aus der Häkeln Kategorie!
Top Anleitung von ternuraamigurumi aus der Häkeln Kategorie!
Top Anleitung von KiZoBaer aus der Häkeln Kategorie!
Top Anleitung von Hobbii aus der Häkeln Kategorie!
Top Anleitung von jennysideenreich aus der Häkeln Kategorie!
Top Anleitung von Wurzels-Maschendesign aus der Häkeln Kategorie!
Top Anleitung von mrs-mischaa aus der Häkeln Kategorie!
Top Anleitung von mi-li aus der Häkeln Kategorie!
Top Anleitung von haekelkeks aus der Häkeln Kategorie!
Mehr kostenlose Anleitungen

Das könnte Dir gefallen

-20% Video Häkelanleitung V-Auschnitt-Pullover / Shirt Pinaca

Häkelanleitung V-Auschnitt-Pullover / Shirt Pinaca

(4)
ab 3,76 € 4,95 €

Twinny No. 1 - Twinset Top und Shirt

(2)
ab 3,99 €

Häkelanleitung Lampion "boho chic"

(70)
ab 5,61 €
-30% Mops Häkelanleitung Amigurumi Spielzeug

Mops Häkelanleitung Amigurumi Spielzeug

(1)
ab 5,25 € 7,90 €

Kleid Quinn häkeln Häkelkleid

(5)
ab 3,80 €
Video Häkelanleitung Pullover/Shirt Jacke/Weste Kajona

Häkelanleitung Pullover/Shirt Jacke/Weste Kajona

(2)
ab 4,70 €
CAL Häkelanleitung CAL Duskwalk

Häkelanleitung CAL Duskwalk

ab 4,28 €

Kostenlose Anleitungen

Pullover Strandliebe häkeln Häkelpullover

(2)
Kostenlos

Häkelanleitung Herzenssache

(175)
Kostenlos

Edlothia

(888)
Kostenlos

Anleitung für Häkelweste Viola

(117)
Kostenlos

Tuch "Jatutu" - Tunesisch gehäkelt

(1)
Kostenlos

Haekelicious Wende Oktopus

(124)
Kostenlos

Schönes Häkelanleitung für Kätzchen

(2)
Kostenlos

Sunflower Mandala

(69)
Kostenlos