Für diese Anleitung wurde noch keine Bewertung geschrieben
Schnell zur Zielseite
Community & Hilfe
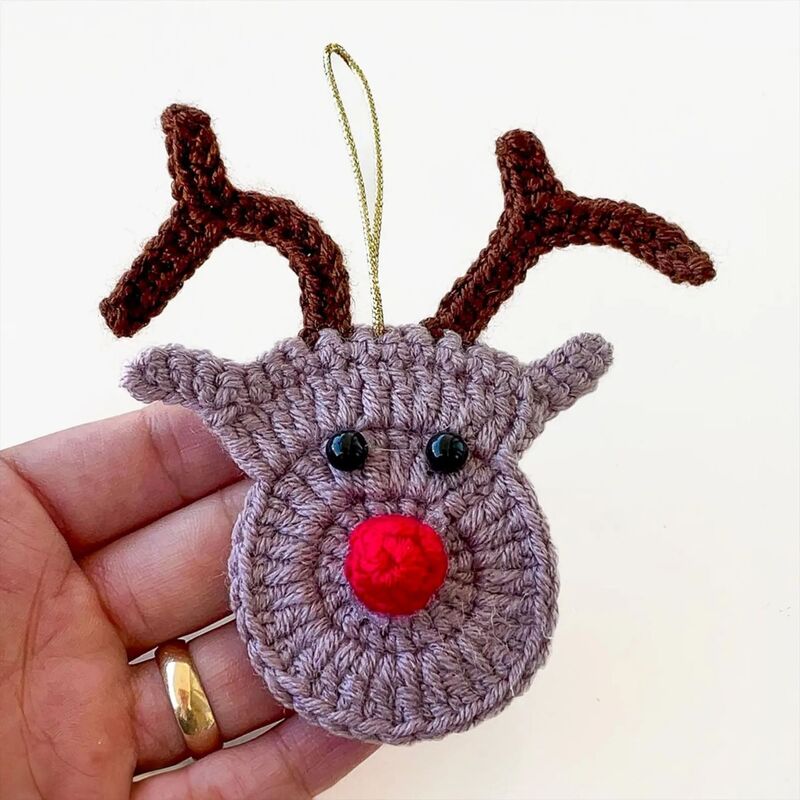
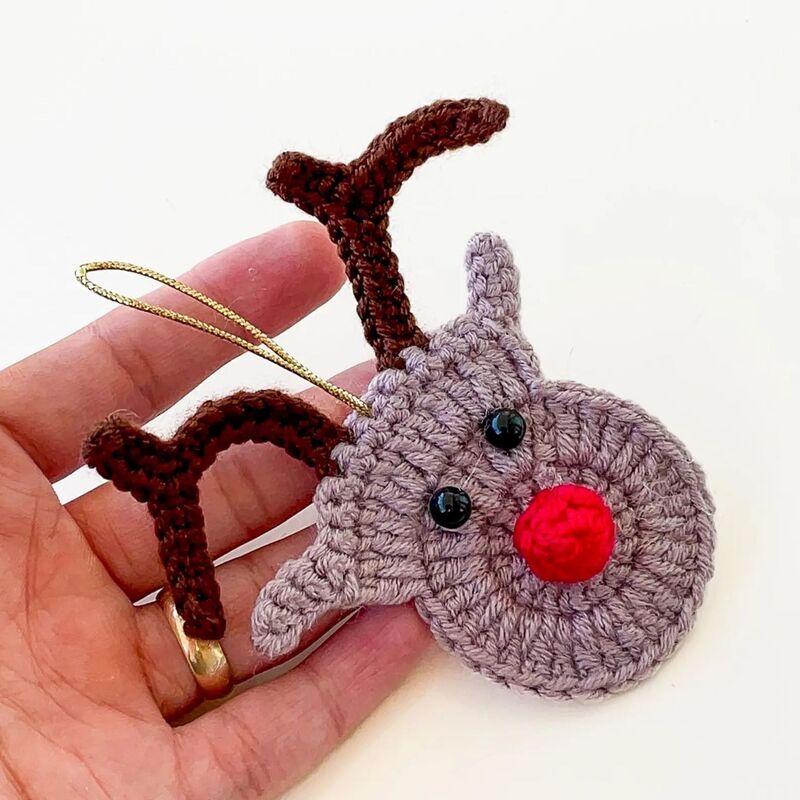
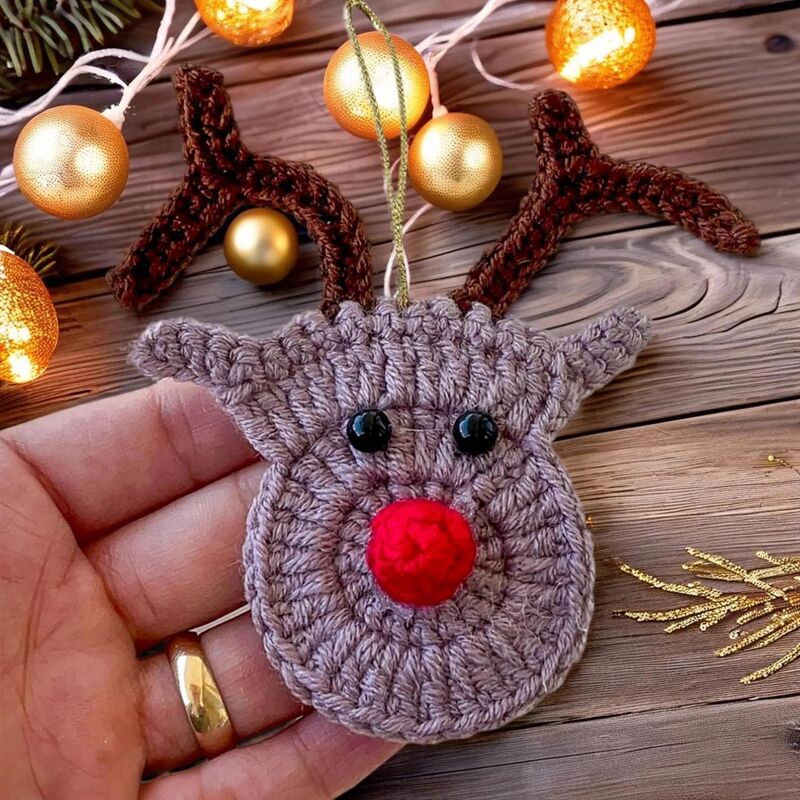


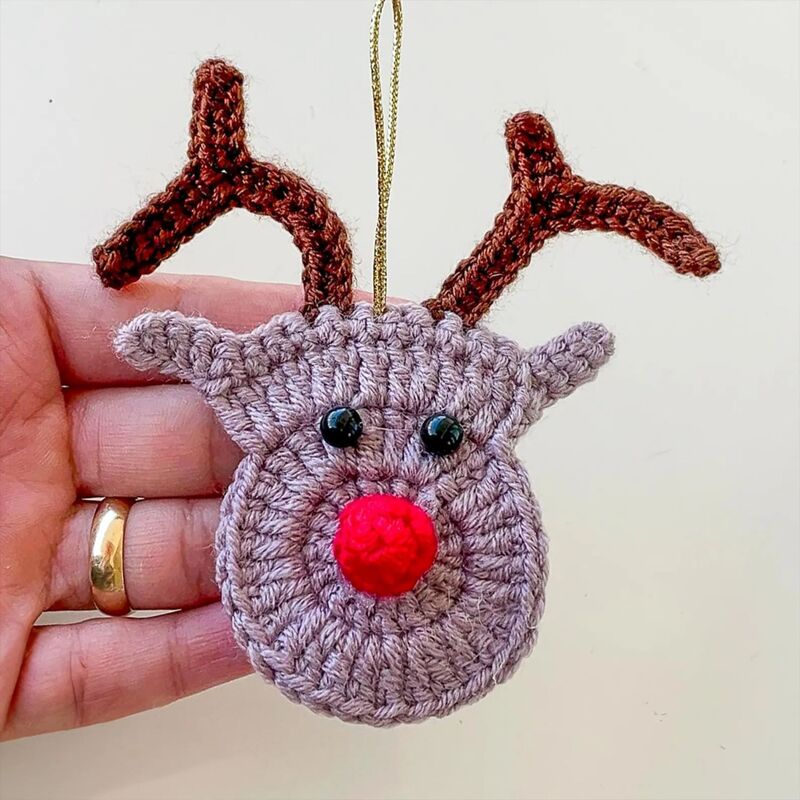


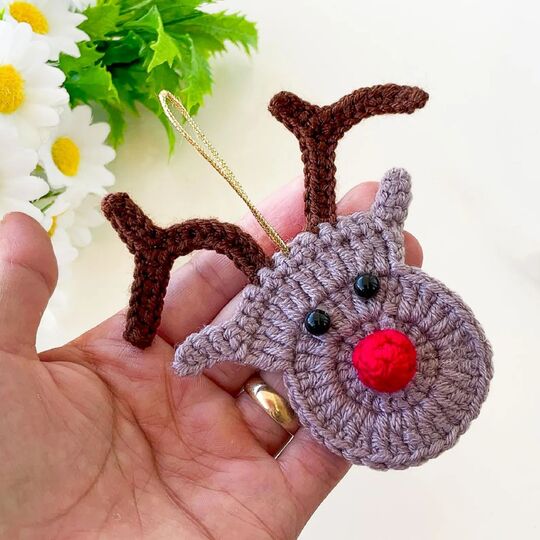
Create a charming reindeer crochet ornament designed as a minimal hanging motif for holiday decorating. This offer is a DIGITAL PDF PATTERN (not a finished item) and includes clear written instructions with step-by-step photographs to guide you through the project from start to finish. The finished piece is intended as a hanging tree ornament and can also be used as a small seasonal decoration or gift accent.
Difficulty / Skill Level: Beginner–Intermediate
Necessary Knowledge: Basic crochet experience is recommended, including working with chains, simple increases, and joining rounds. You should also be comfortable with basic sewing/assembly to attach small parts.
Pattern Structure: Written step-by-step instructions supported by photo tutorials, plus a video tutorial reference inside the PDF.
Technique Overview (general): The project is worked in the round for the head base, then shaped with simple chain-based sections for ears and antlers, finished with small sewn details and a hanging loop.
CROCHET / SEWING TECHNIQUES USED
Magic ring start
Working in joined rounds
Increasing in the round (double crochet increases)
Working into foundation chains
Single crochet into chains
Slip stitch joining
Fastening off and weaving in ends
Simple sewing/assembly (attaching nose, securing parts)
Creating and attaching a hanging loop
Finished Size (as stated in the PDF): approx. 7–9 cm (2.75–3.5 in) tall including antlers; 5–6 cm (2–2.4 in) wide.
Size Note: Final size may vary slightly depending on yarn choice, hook size, and personal tension.
Crochet Hook: 2 mm crochet hook
Yarn: Baby yarn in brown, red, and black
Eyes: Two small black beads or safety eyes
Tools: Scissors, yarn needle
Other: Glue (for finishing/support if needed)
TIPS & HELPFUL NOTES
Hook size & tension: The recommended hook size is a guideline—adjust if your stitches feel too tight or too loose to achieve a smooth, even fabric.
Shaping: If the work begins to bulge or wave, try a slightly larger hook to improve the shape.
Assembly guidance: The nose is sewn to the center of the head; eyes are positioned above the nose using either safety eyes or sewn beads.
Hanging loop: Use a 10 cm (approx. 4 in) yarn piece, fold in half, knot the ends, and secure the loop between the antlers so it sits snugly.
Printing support: Print at 100% / Actual Size and avoid “Fit to Page” to prevent distortion.
Du kannst die Anleitung sofort nach dem Eingang der Zahlung herunterladen.
Create a charming reindeer crochet ornament designed as a minimal hanging motif for holiday decorating. This offer is a DIGITAL PDF PATTERN (not a finished item) and includes clear written instructions with step-by-step photographs to guide you through the project from start to finish. The finished piece is intended as a hanging tree ornament and can also be used as a small seasonal decoration or gift accent.
Difficulty / Skill Level: Beginner–Intermediate
Necessary Knowledge: Basic crochet experience is recommended, including working with chains, simple increases, and joining rounds. You should also be comfortable with basic sewing/assembly to attach small parts.
Pattern Structure: Written step-by-step instructions supported by photo tutorials, plus a video tutorial reference inside the PDF.
Technique Overview (general): The project is worked in the round for the head base, then shaped with simple chain-based sections for ears and antlers, finished with small sewn details and a hanging loop.
CROCHET / SEWING TECHNIQUES USED
Magic ring start
Working in joined rounds
Increasing in the round (double crochet increases)
Working into foundation chains
Single crochet into chains
Slip stitch joining
Fastening off and weaving in ends
Simple sewing/assembly (attaching nose, securing parts)
Creating and attaching a hanging loop
Finished Size (as stated in the PDF): approx. 7–9 cm (2.75–3.5 in) tall including antlers; 5–6 cm (2–2.4 in) wide.
Size Note: Final size may vary slightly depending on yarn choice, hook size, and personal tension.
Crochet Hook: 2 mm crochet hook
Yarn: Baby yarn in brown, red, and black
Eyes: Two small black beads or safety eyes
Tools: Scissors, yarn needle
Other: Glue (for finishing/support if needed)
TIPS & HELPFUL NOTES
Hook size & tension: The recommended hook size is a guideline—adjust if your stitches feel too tight or too loose to achieve a smooth, even fabric.
Shaping: If the work begins to bulge or wave, try a slightly larger hook to improve the shape.
Assembly guidance: The nose is sewn to the center of the head; eyes are positioned above the nose using either safety eyes or sewn beads.
Hanging loop: Use a 10 cm (approx. 4 in) yarn piece, fold in half, knot the ends, and secure the loop between the antlers so it sits snugly.
Printing support: Print at 100% / Actual Size and avoid “Fit to Page” to prevent distortion.
Sobald Käufer:innen dieses Produkt bewerten, erscheinen hier Produktbewertung, Verteilung und Erfahrungsberichte.


Teile deine Ideen, Werke und Erfahrungen.
Um diese Funktionen zu nutzen, brauchst du ein Benutzerkonto. Du kannst ein Konto erstellen oder einloggen.
42 Gewinne / 300 € Gesamtwert: 30×5 €, 10×10 €, 2×25 € – einfach Newsletter aktivieren. Kein Kauf nötig. Abmeldung jederzeit. Gewinne in Form von Crazypatterns‑Einkaufsguthaben. Mehr Informationen
Frage stellen