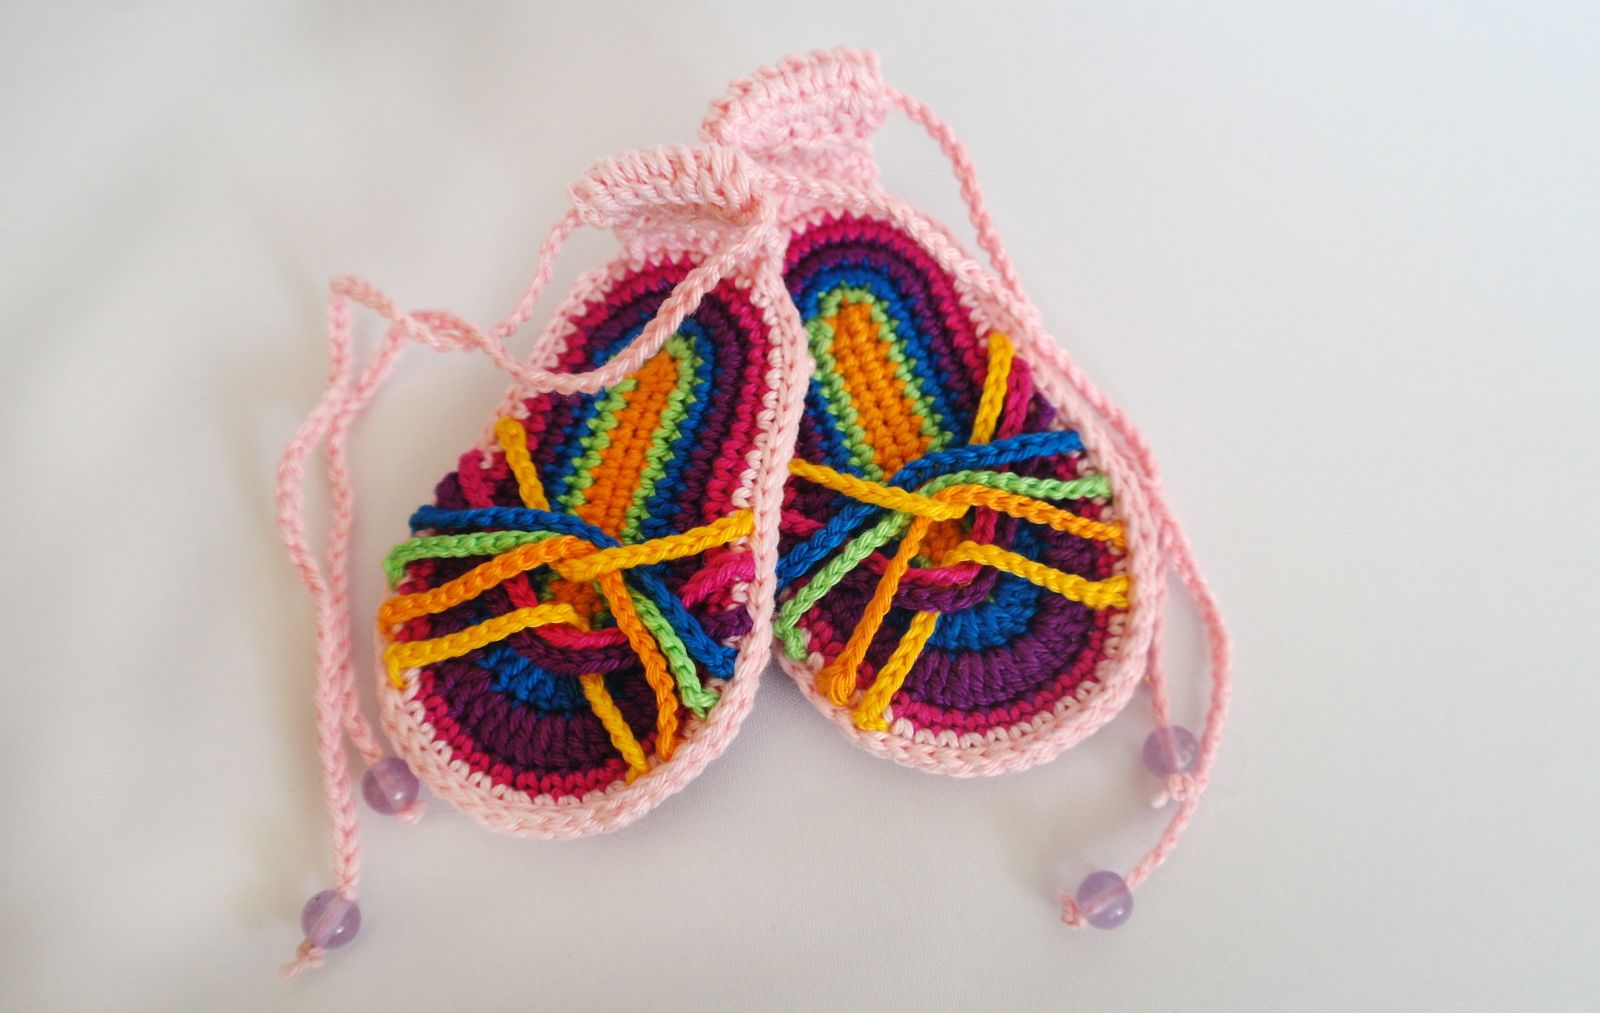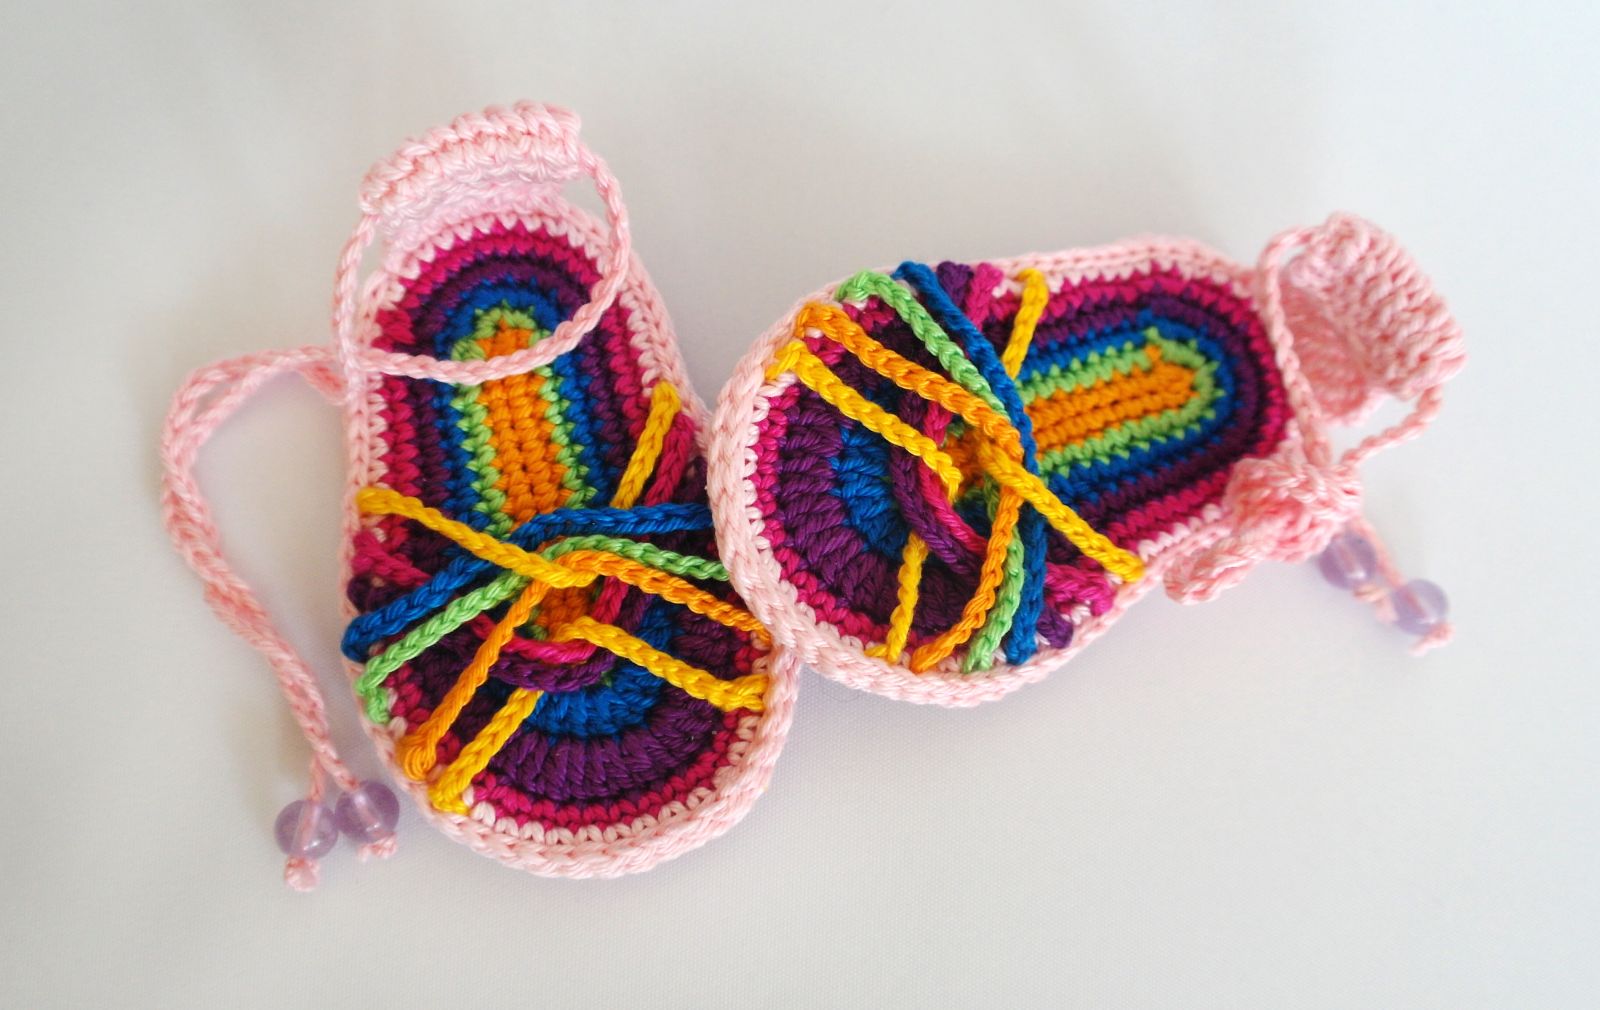
Cute Summer Baby Shoes
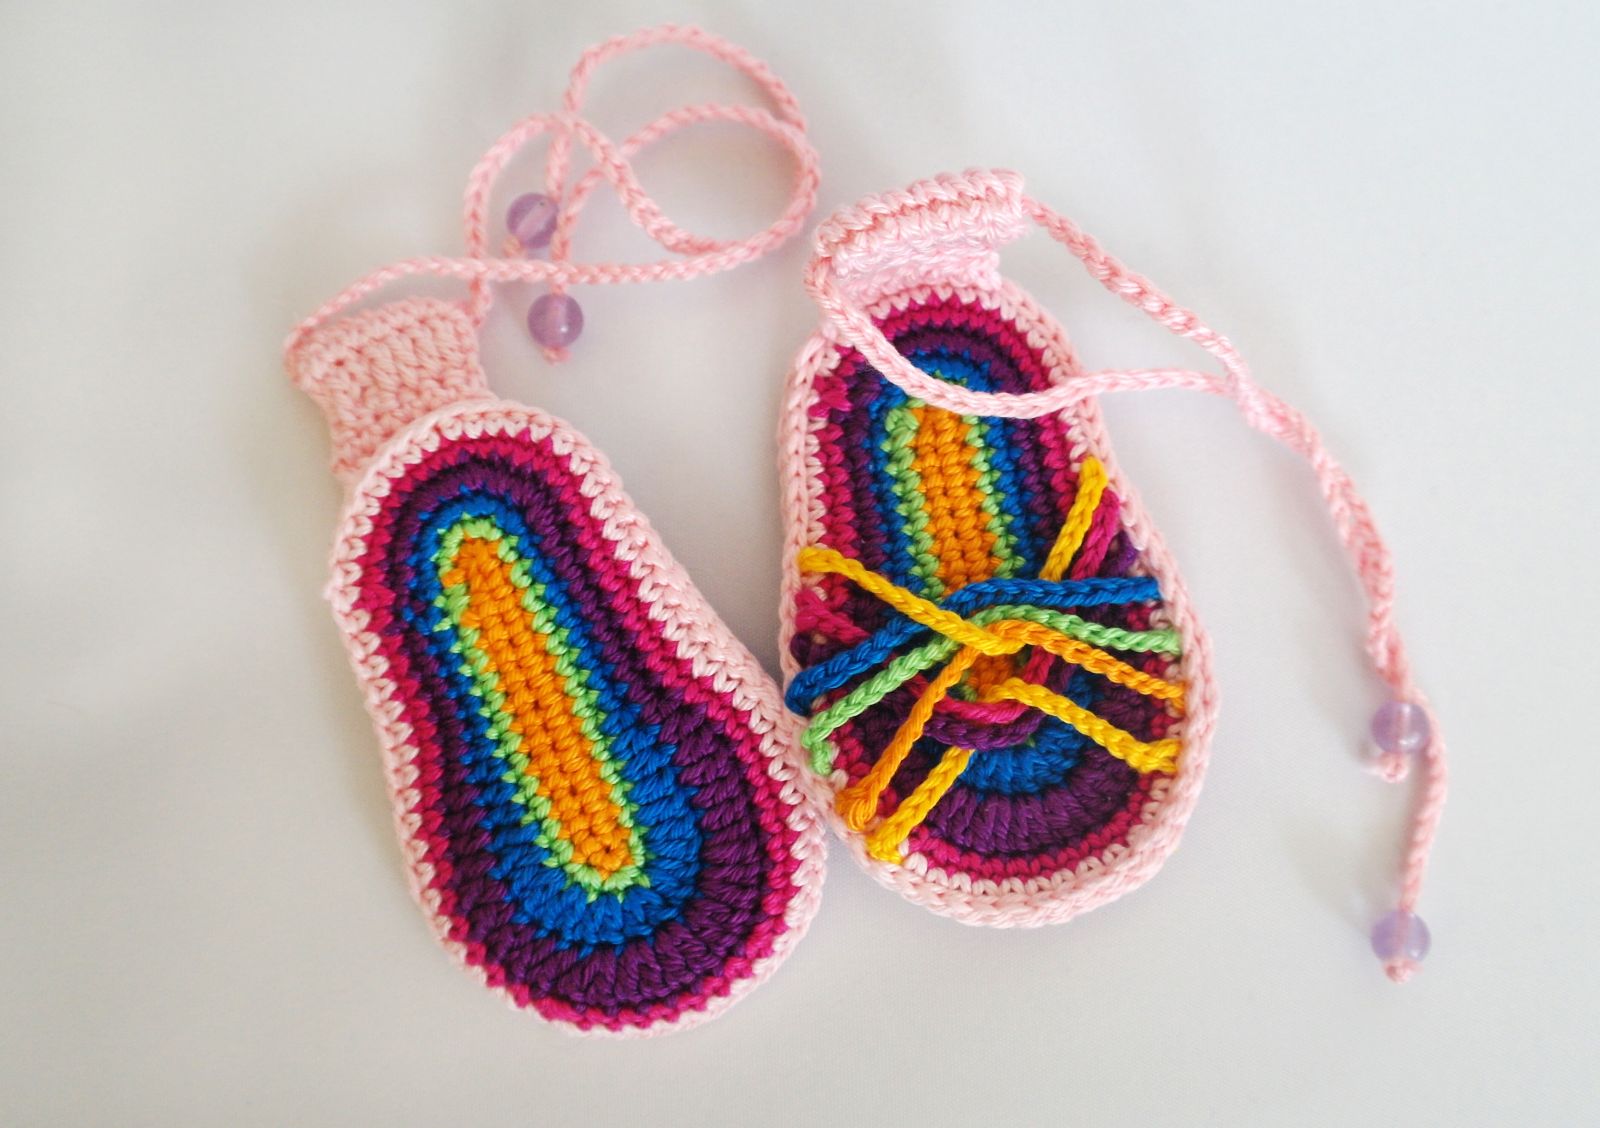
With this crochet pattern, you can make cute summer baby shoes in any color you like. The pattern is easy to follow and includes lots of photos to guide you through each step. It's great for beginners as well as more experienced crocheters.
Size Information
The finished shoes are about 9–10 cm (3.5–4 inches) long, which usually fits babies around 3–6 months old. Keep in mind that every baby is different, so this is only a rough guide.
If you want to make a different size, it's best to measure the baby's foot before you start and compare it with a size chart. This will help you get the perfect fit.
You will need:
- 2.5 mm crochet hook
- Cotton yarn in various colors (50g/125m)
- Sewing needle, buttons
Abbreviations:
sc – single crochet
ch – chain
inc – increase, crochet two stitches in one
dec – decrease, crochet two stitches together
3 sc in 1 – crochet 3 sc in 1 stitch of the previous row
X dec – X-times decrease
X inc – X-times increase
(---)x – repeat those in brackets Х times
sl st – slip stitch
dc - double crochet
Start with the sole
Crochet 14 ch, from the 2 loop from the hook
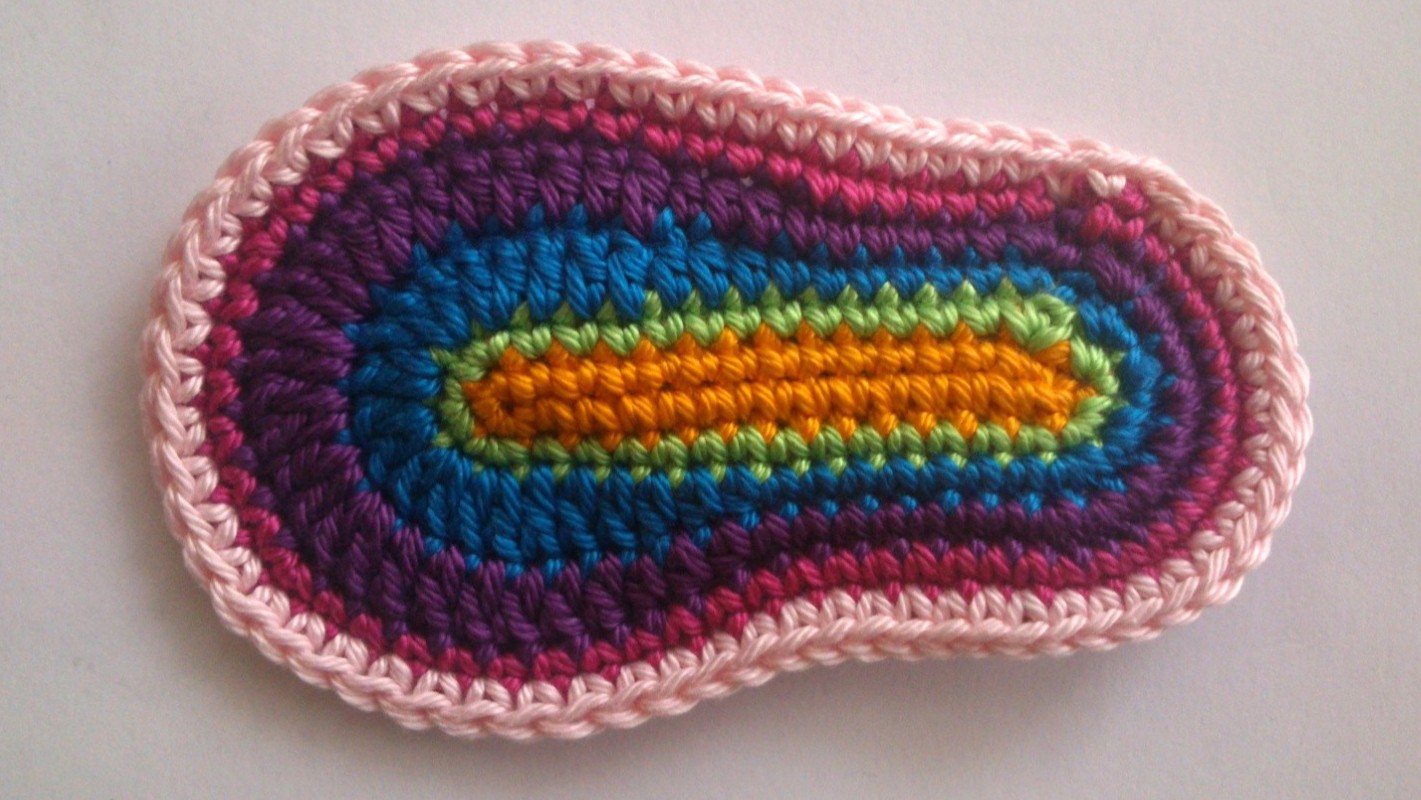
1 R: (Yellow) crochet 13 sc, 3 sc in 1, further crochet along the other side of the chain 13 sc, 2 sc in 1, finish with 1 sl st. Cut and secure the thread.
2 R: (Green) Ch 1, 13 sc, 3 sc inc, 13 sc, 2 sc inc, finish with 1 sl st. Cut and secure the thread.
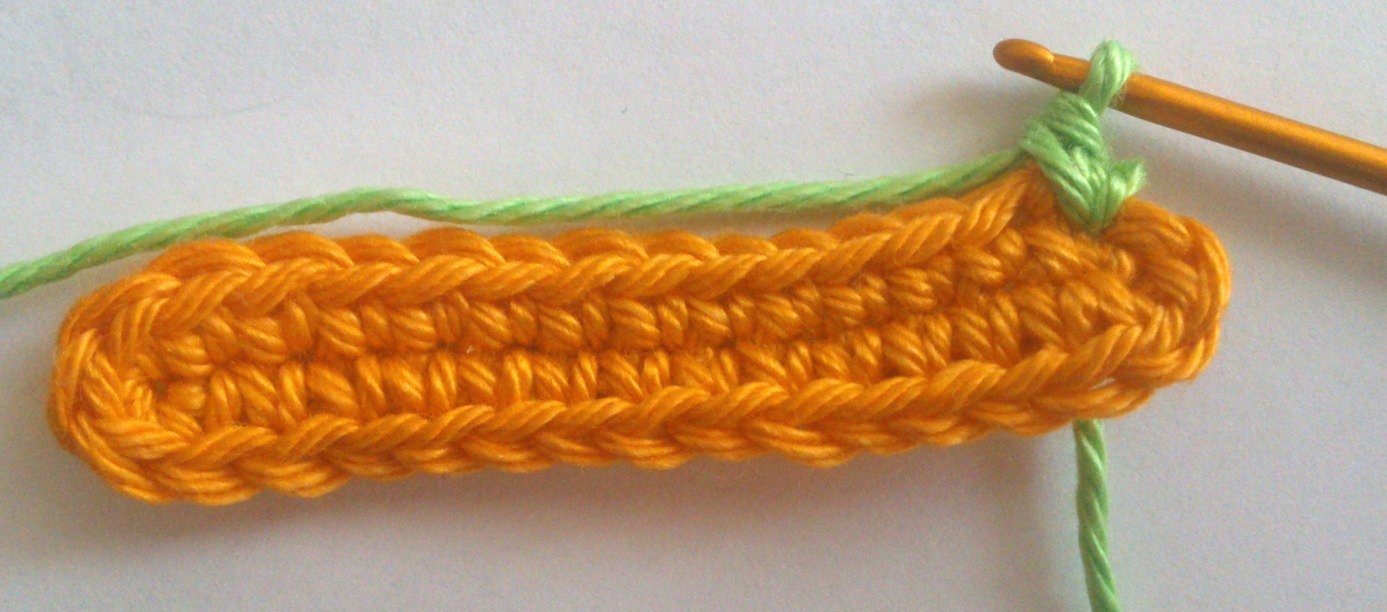
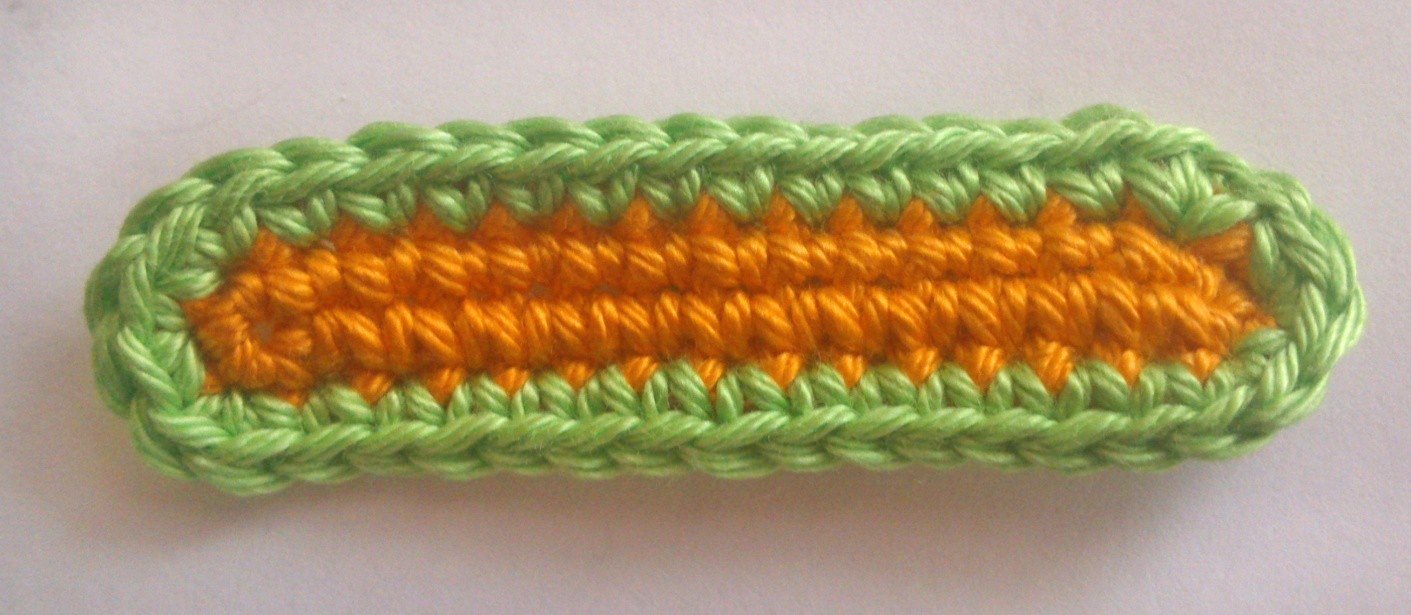
3 R: (Blue) Ch 1, 8 sc, 3 hdc, 3 dc,( 2 dc crochet into 1 st of the previous round)x 6, 3 dc, 3 hdc, 8 sc, (2 sc crochet into 1 st of the previous round) x4, finish with 1 sl st. Cut and secure the thread.
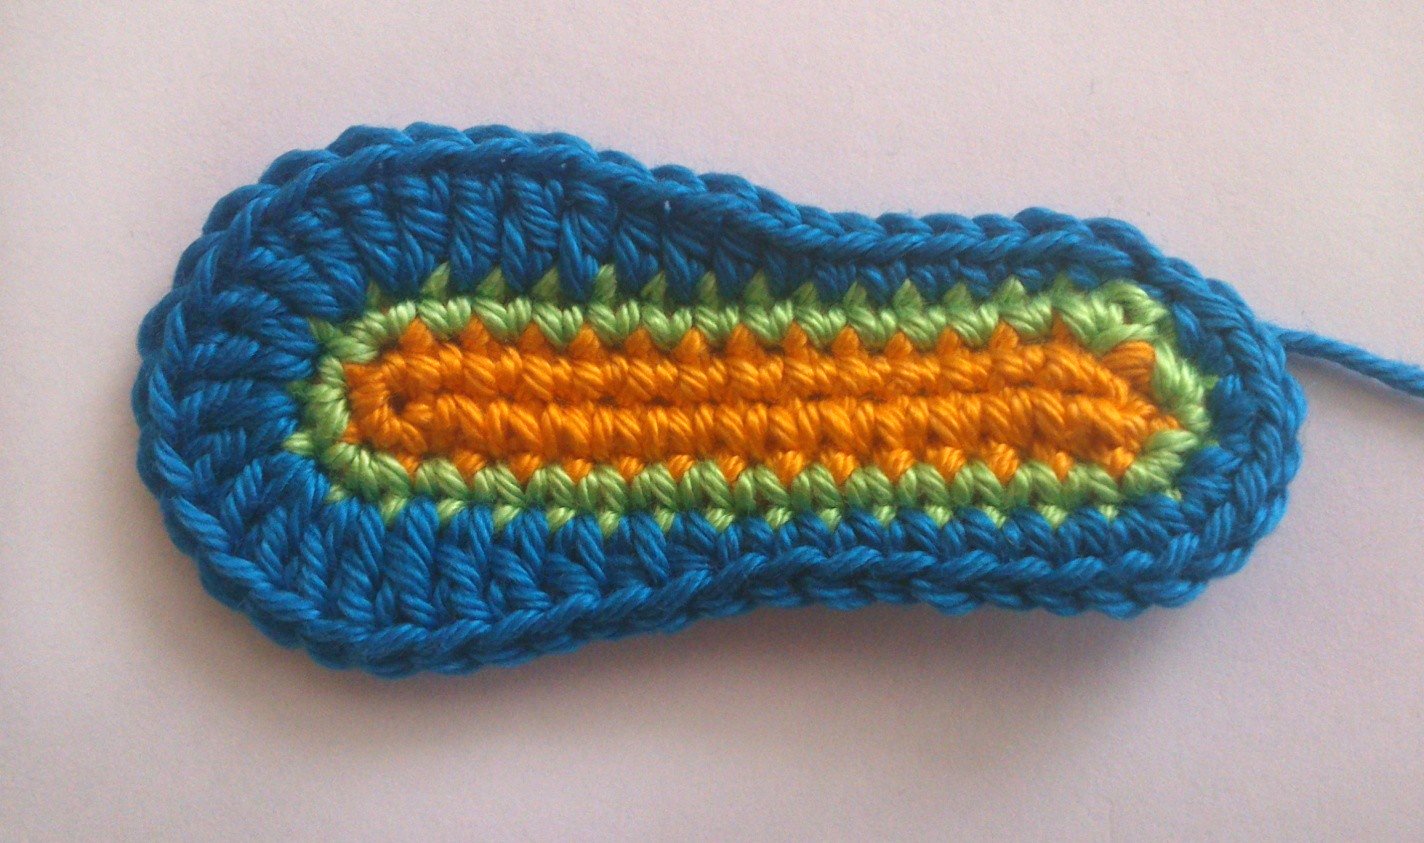
4 R: (Purple) Ch 1, 8 sc, 3 hdc, 6 dc, (2 dc crochet into 1 st of the previous round)x 6, 6 dc, 3 hdc, 8 sc, (2sc crochet into 1 st of the previous round)x 8, finish with 1 sl st. Cut and secure the thread.
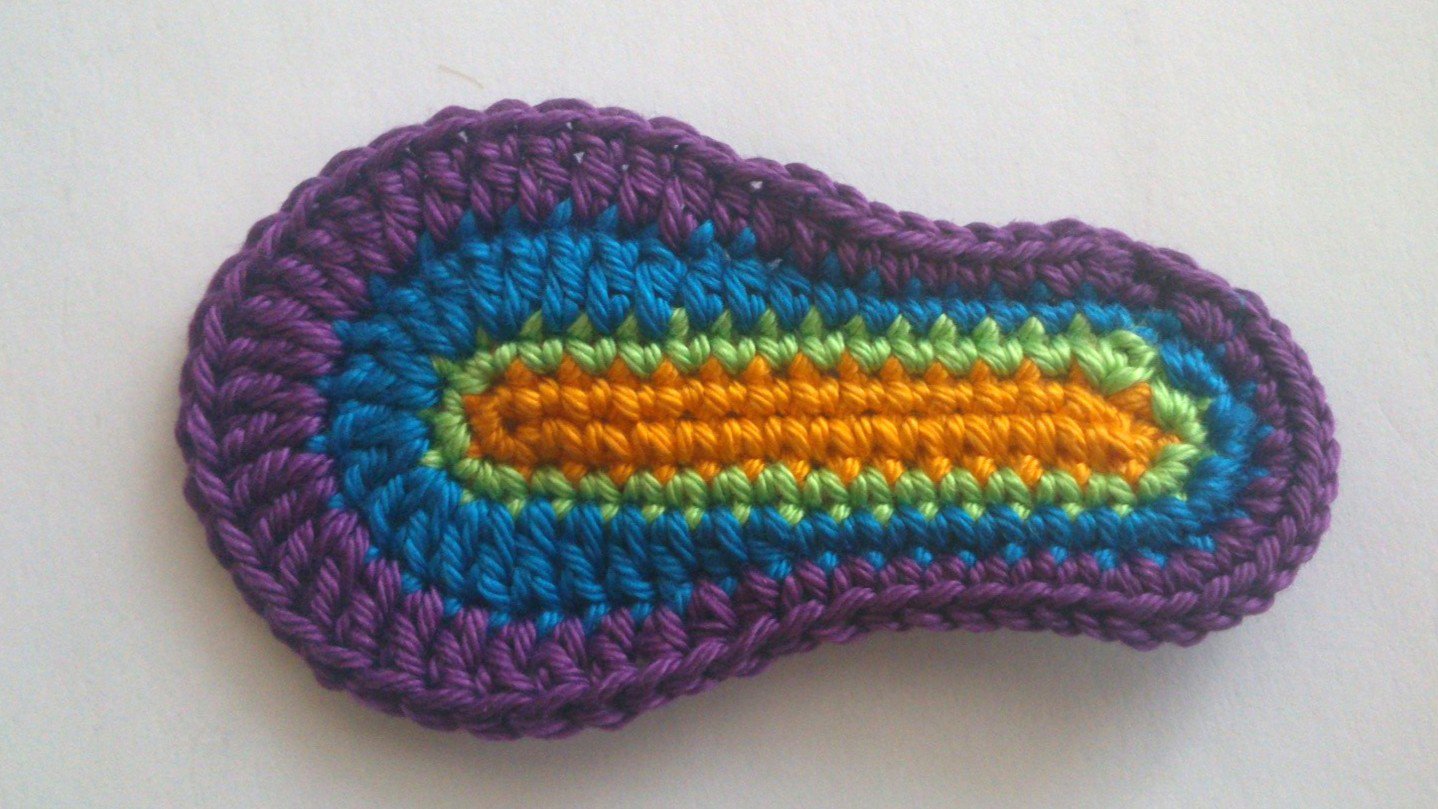
5 R: (Pink) Ch 1, 16 sc, 2 sc in 1, 10 sc, 2 sc in 1, 32 sc, finish with 1 sl st. Cut and secure the thread.
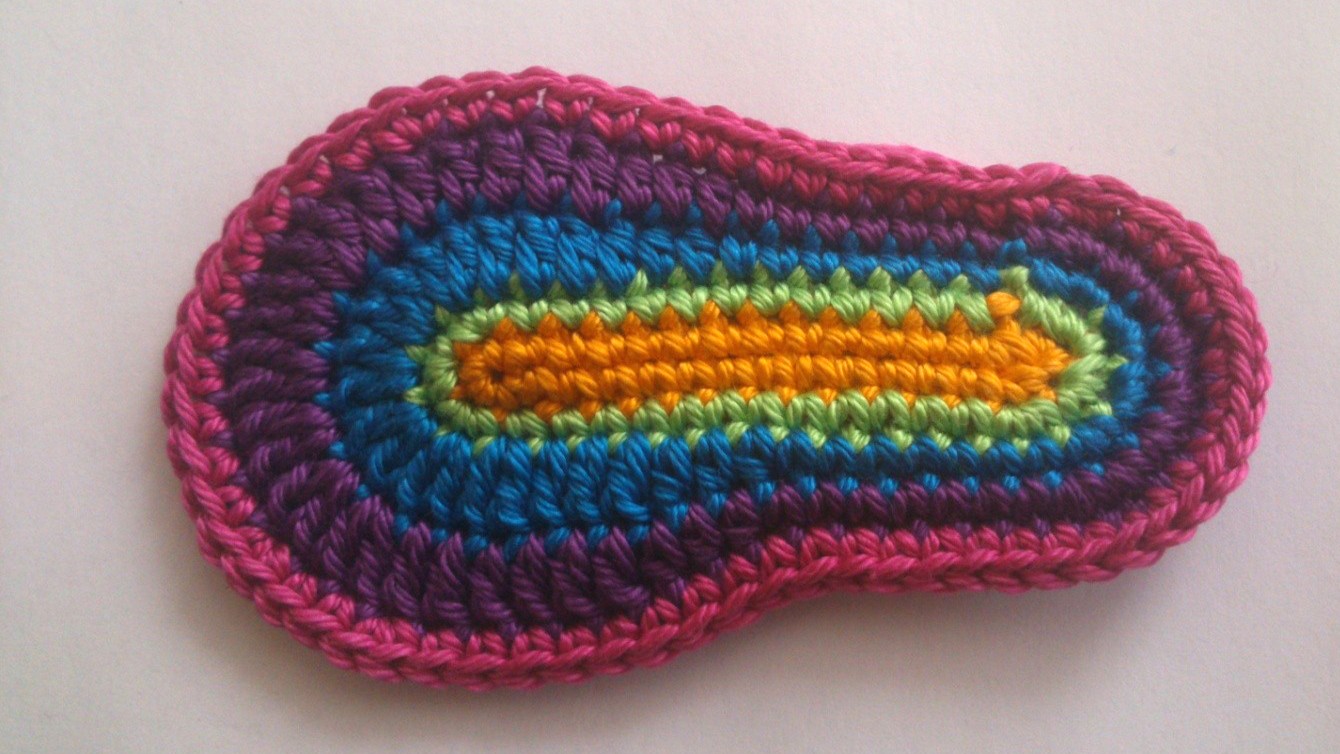
6 R: (light Pink) crochet 62 sc, Cut and secure the thread.
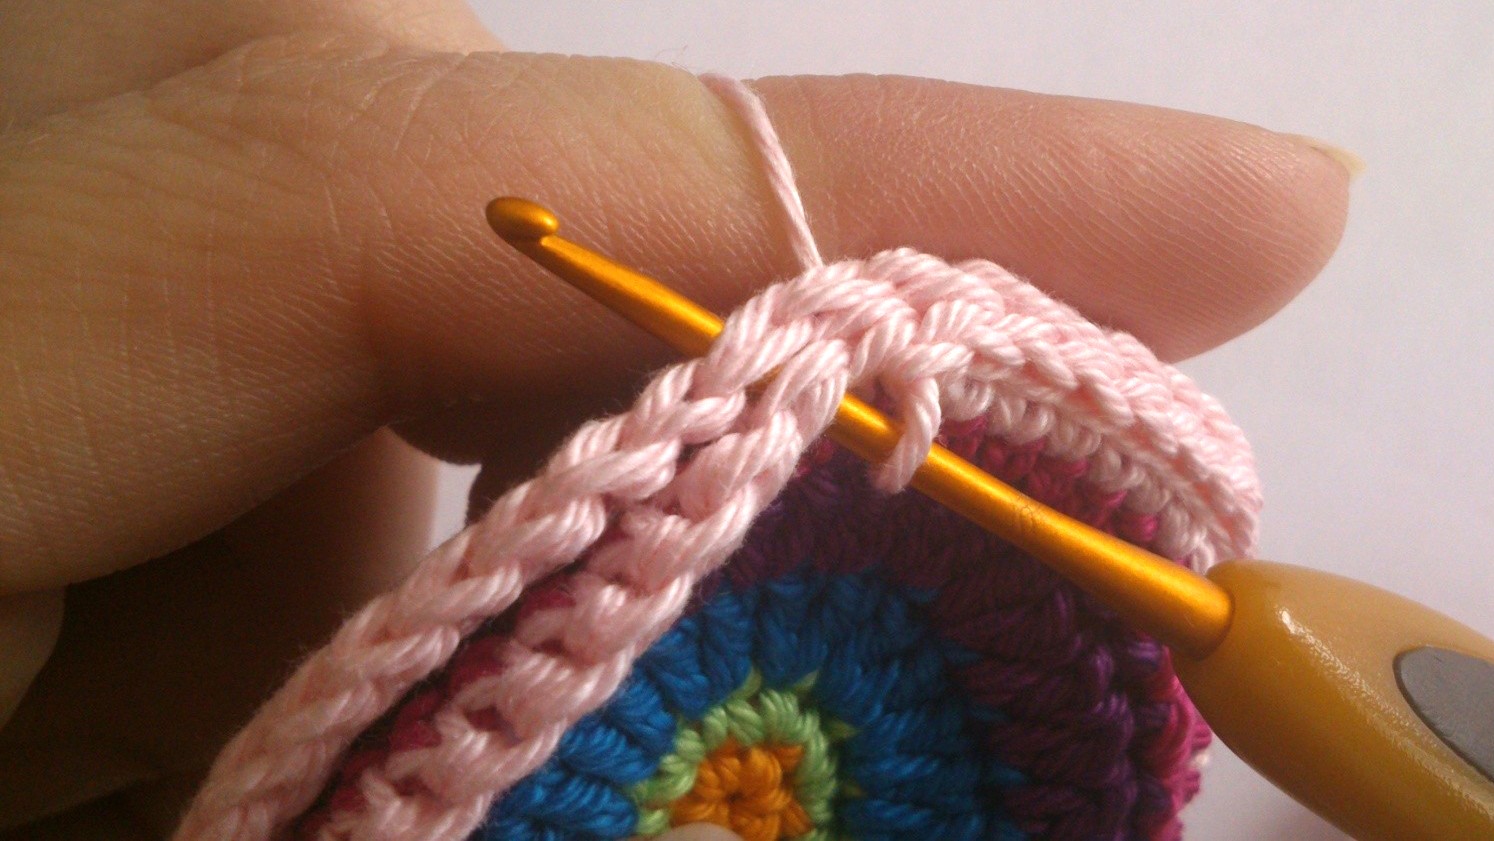
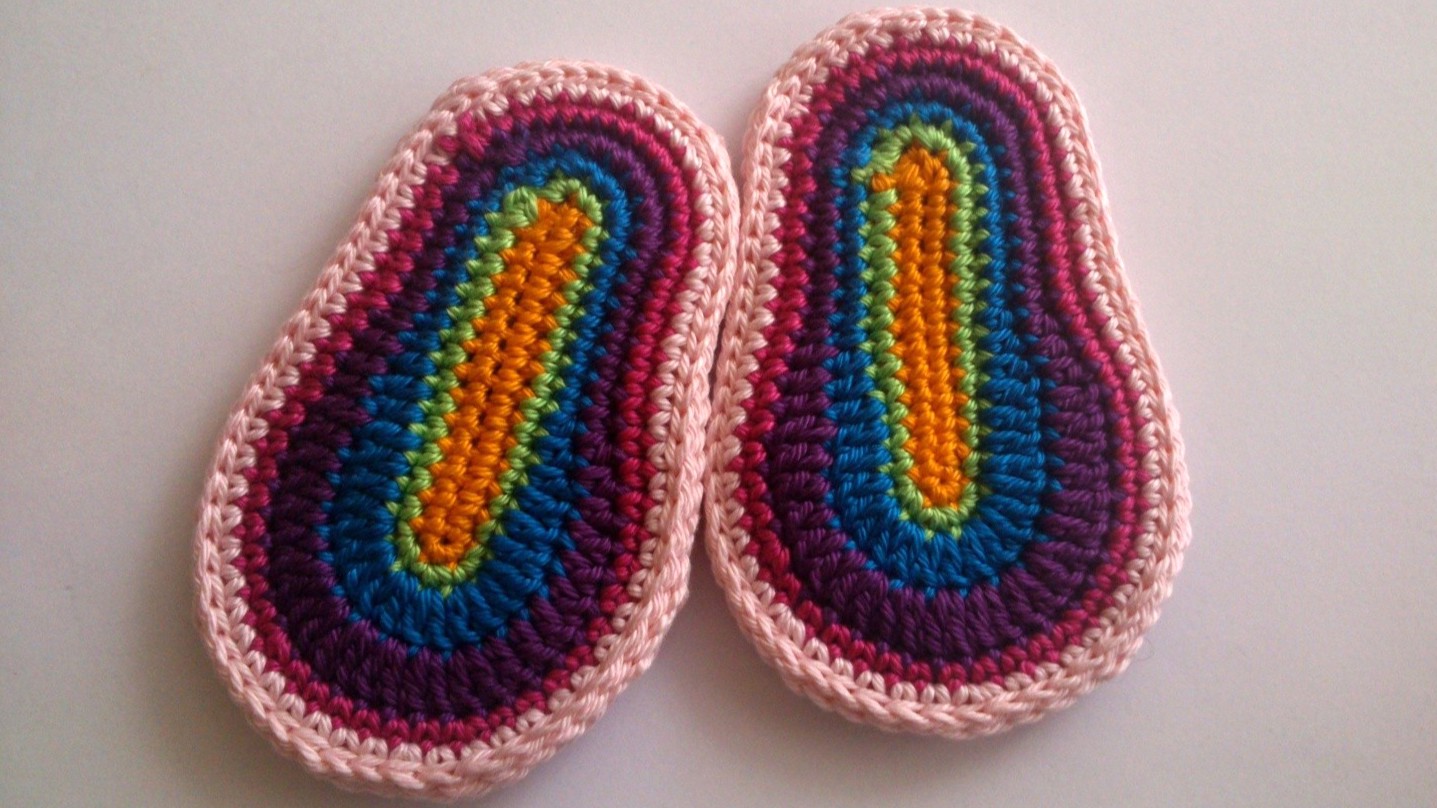
Two soles are required for each shoe. Place the finished soles together, ensuring that they align perfectly, and join them by crocheting slip stitches around the entire edge. The yarn tail can be neatly hidden between the two soles. For this step, I used the same light pink yarn that was used for the final round of the sole.
Toe of the Shoe
To begin the toe of the shoe, crochet a chain. The required number of chain stitches may vary depending on the thickness of the baby's foot, so it is recommended to measure the circumference of the foot beforehand and adjust the length of the chain accordingly.
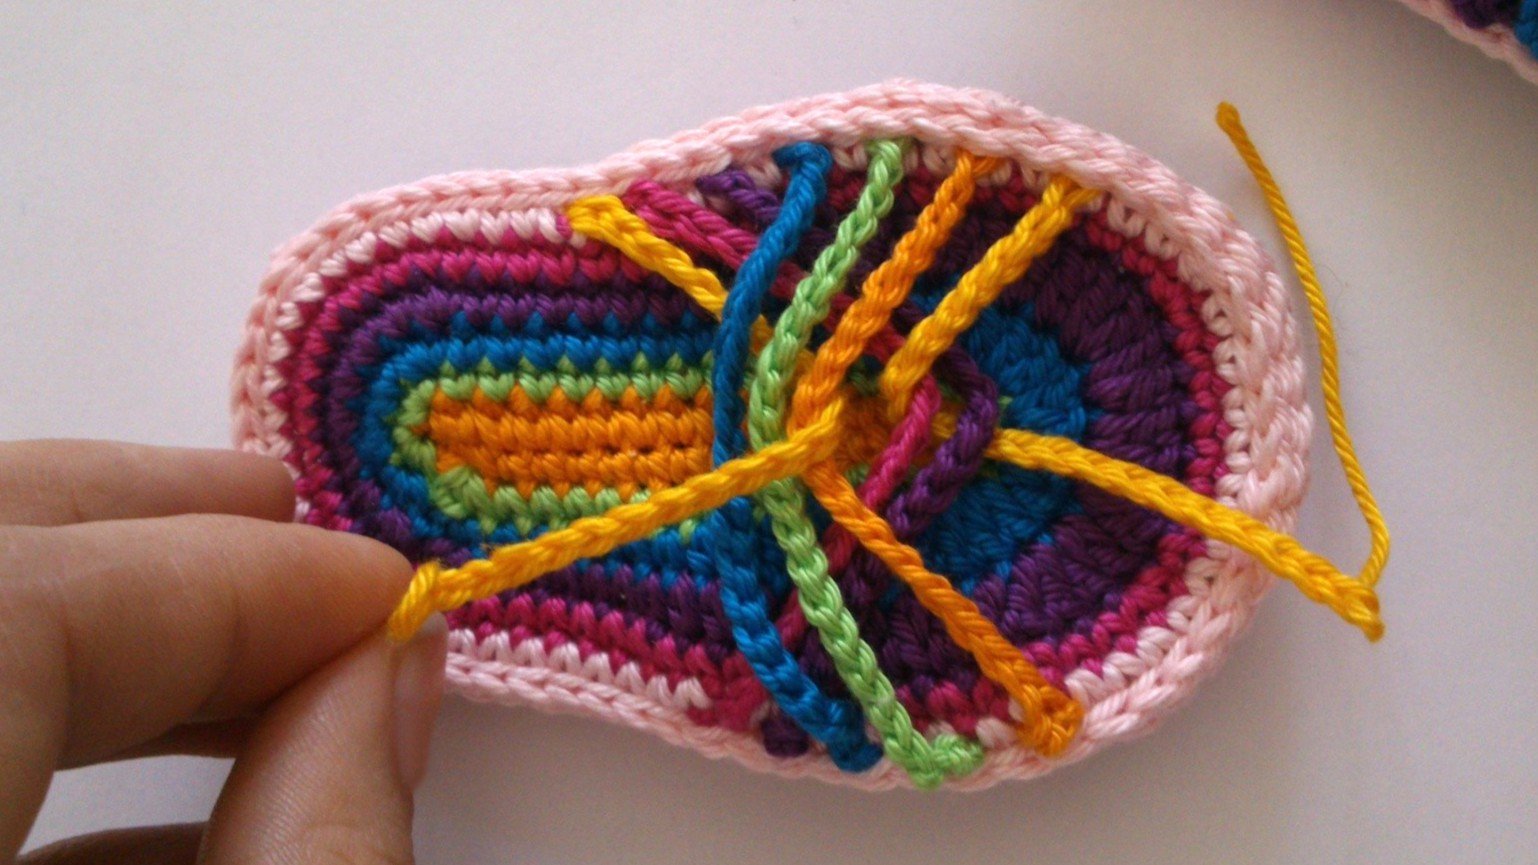
Hold the sole with the toe facing towards you and count 6 stitches to the right of the center. Insert your crochet hook into the 7th stitch, yarn over, and pull the yarn through the stitch.
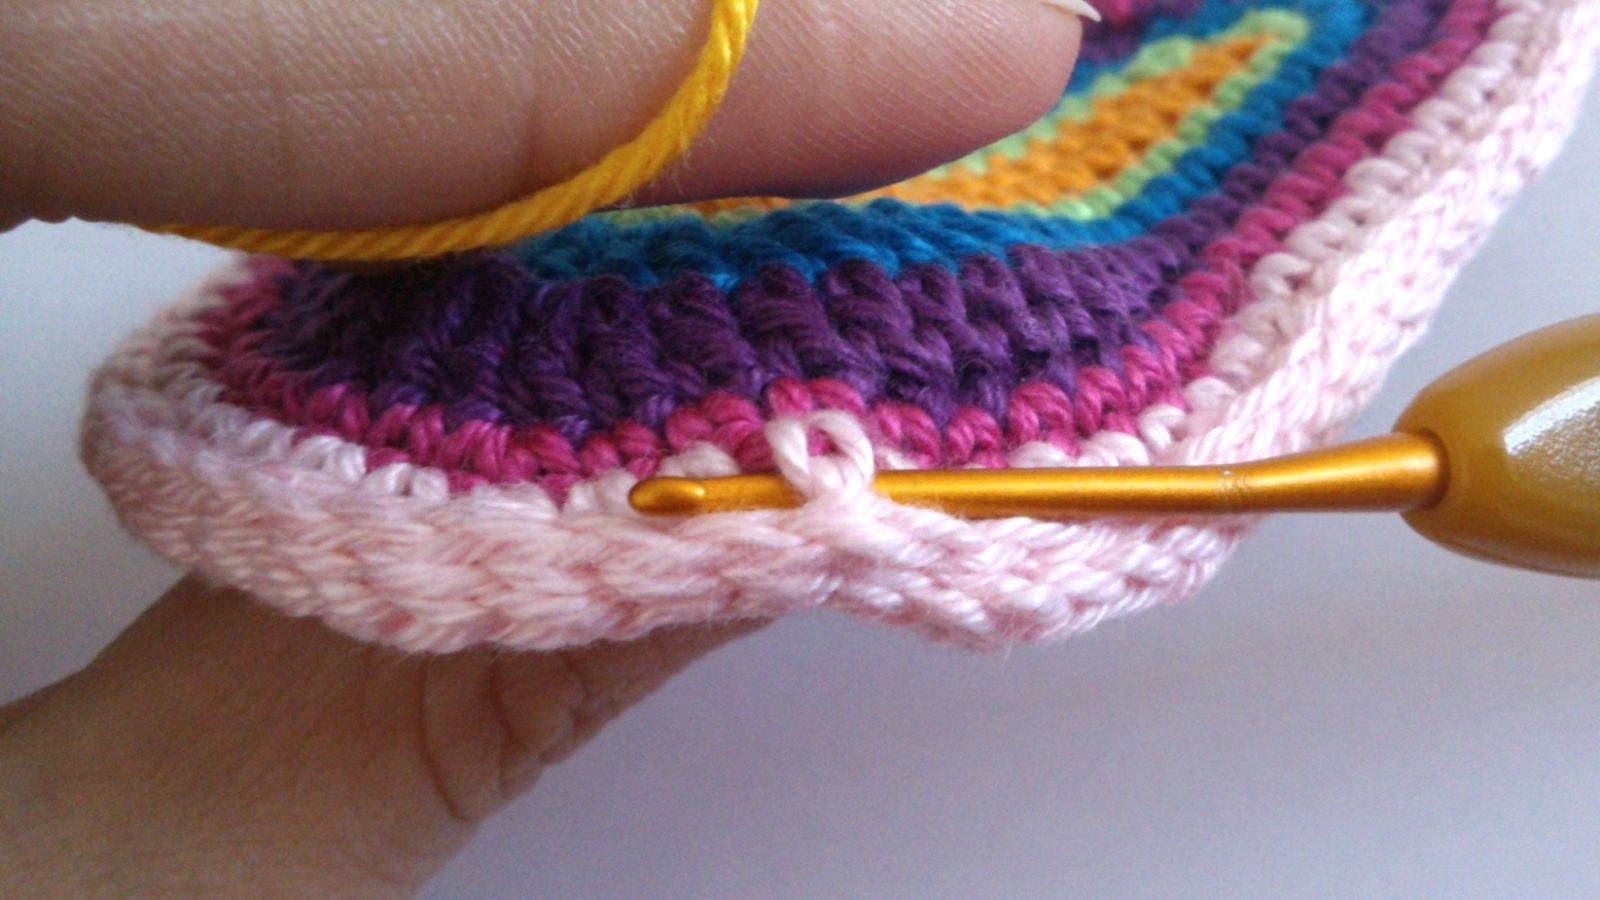
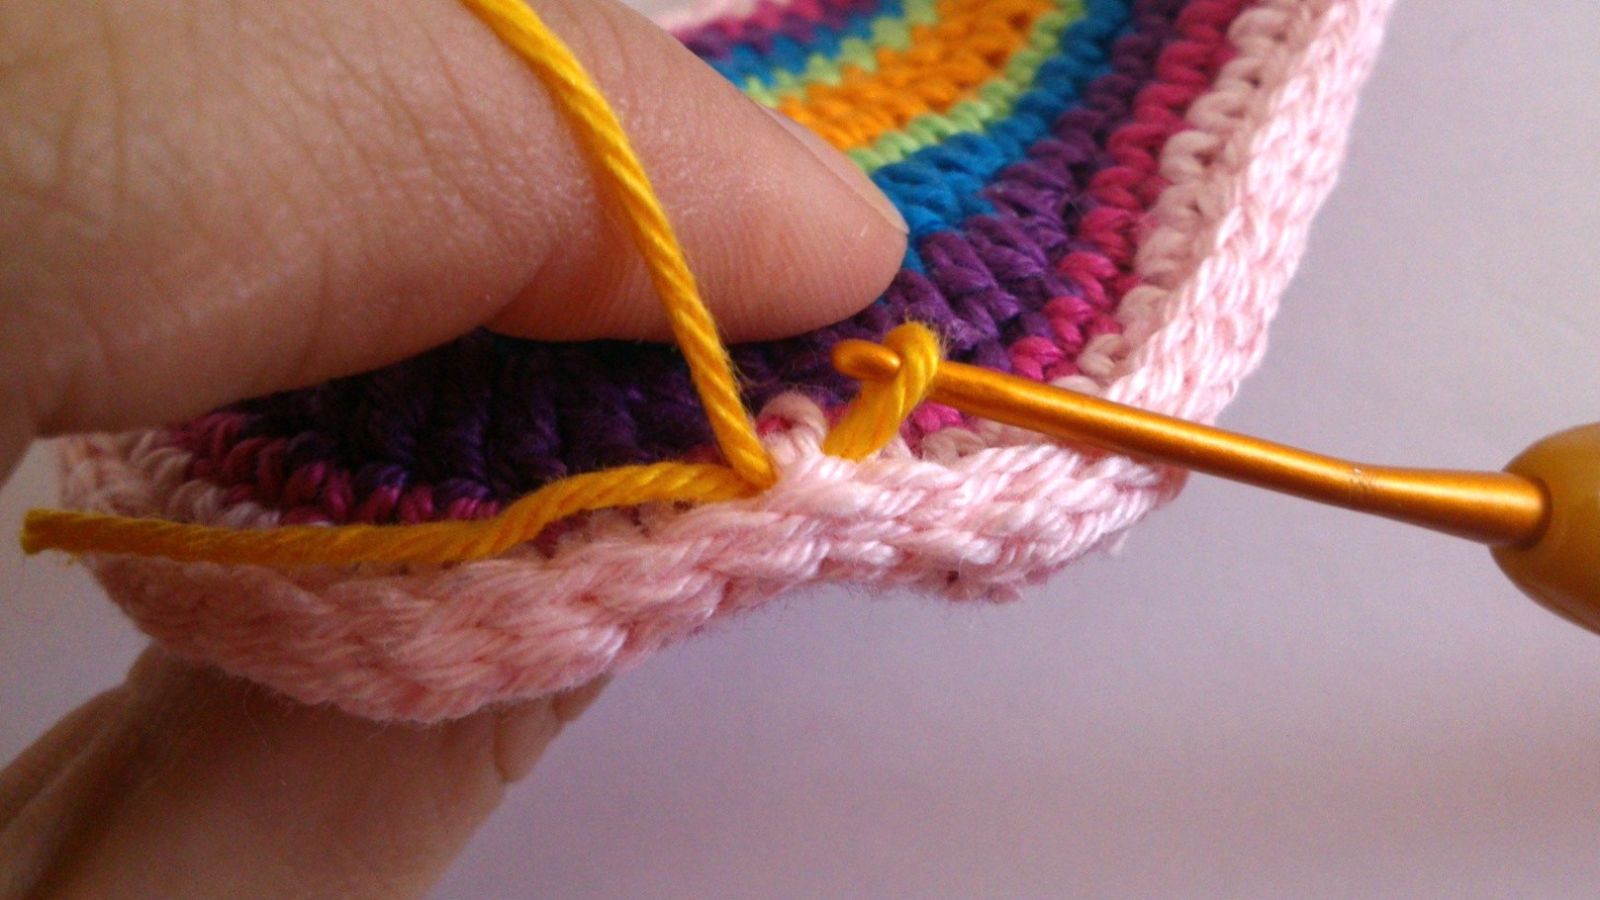
Chain 22, leaving a sufficiently long yarn tail at the beginning for attaching the chain later. Once the chain is complete, skip one stitch on the sole and change to the second color.
With the new color attached, insert your crochet hook into the 9th stitch, yarn over, and pull the yarn through the stitch. Then crochet a chain of 27 stitches, again leaving a sufficiently long yarn tail at the end so that the chain can be attached later.
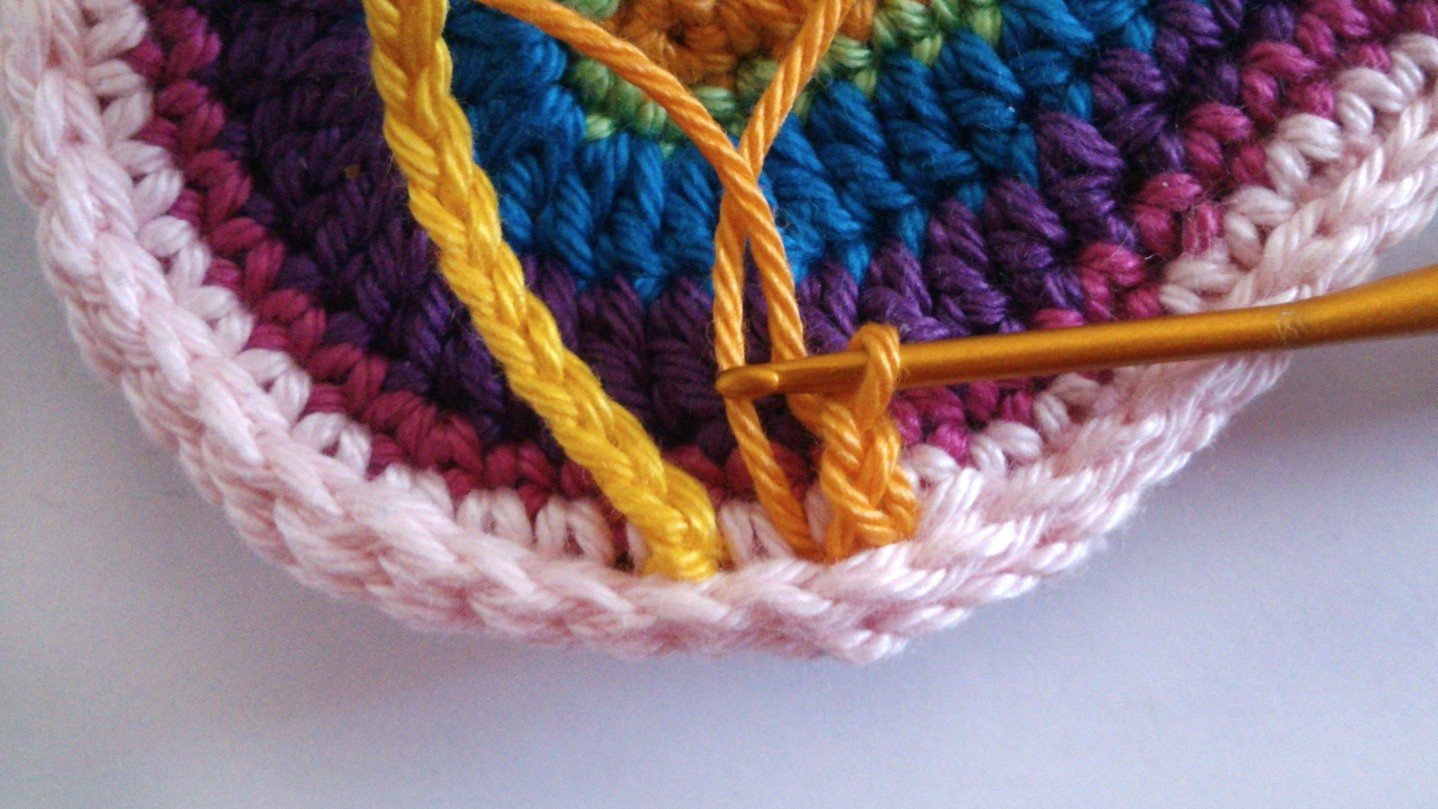
Continue working in the same way around the front of the shoe. Insert your hook into every second stitch of the sole and crochet another chain of 27 stitches. After completing each chain, cut the yarn and leave a long tail for sewing or attaching it later.
Repeat this process until you have created a total of seven chains across the toe section. The first chain consists of 22 stitches, while all remaining chains consist of 27 stitches each.
For better orientation, please refer to the accompanying photographs. They clearly show the exact placement of each chain and the spacing between the attachment points, making it easier to achieve the desired shape of the shoe.
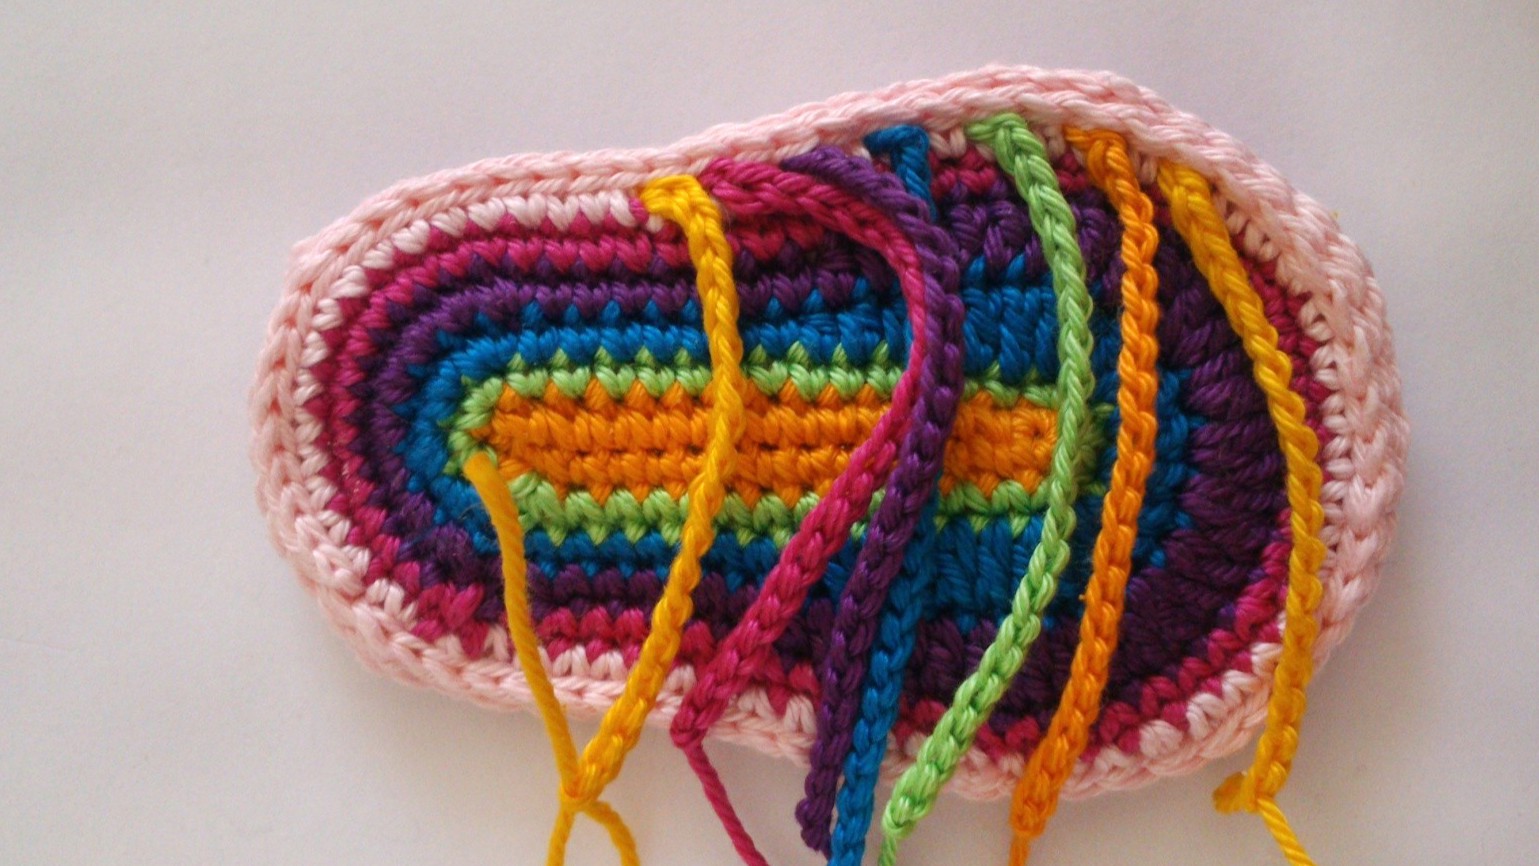
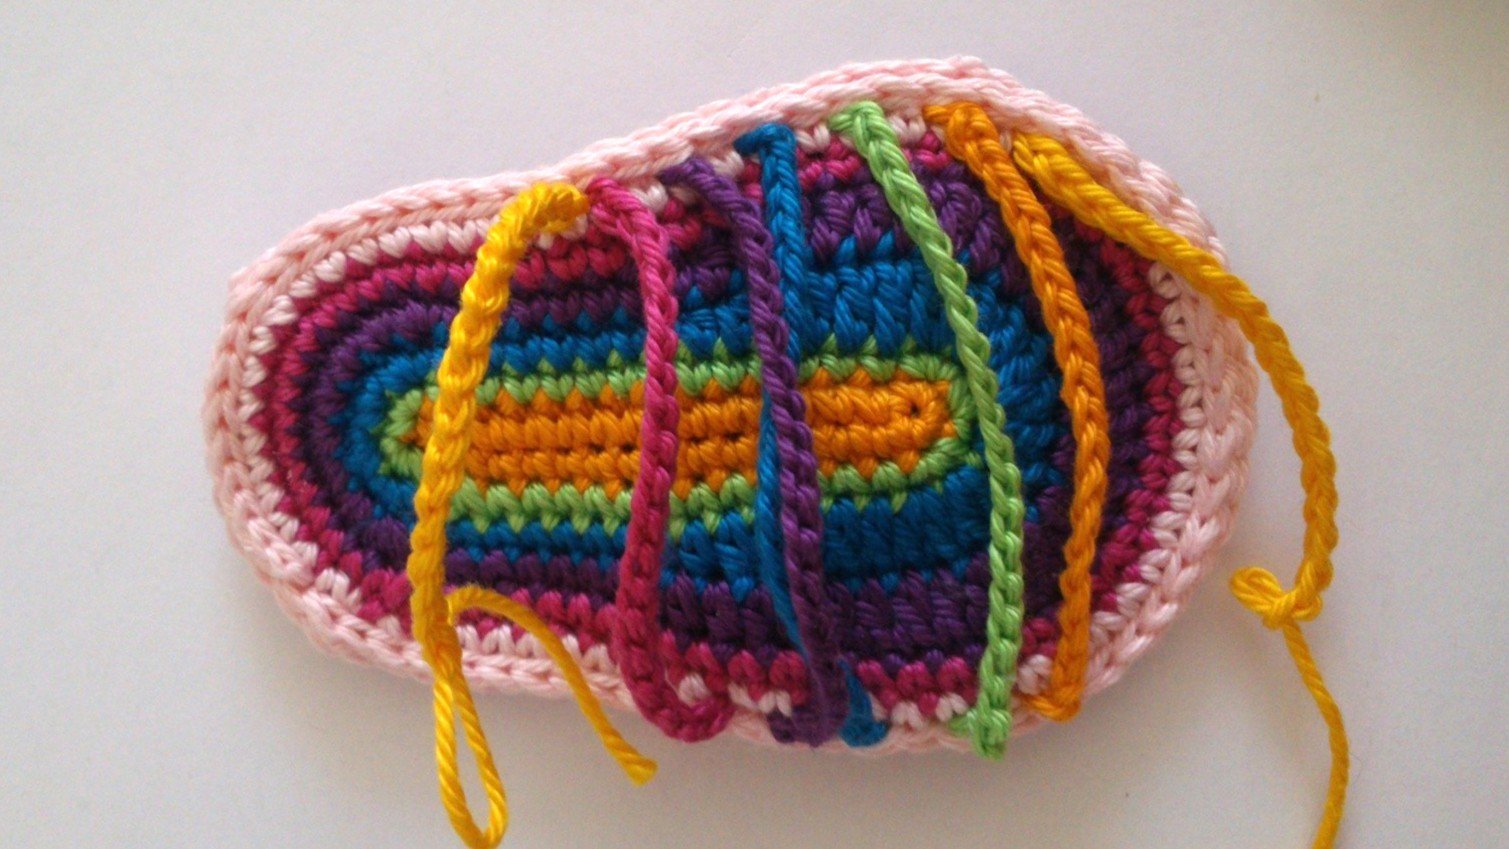
The first and the last chains are left free and are not attached to the shoe. The 2nd, 3rd, 4th, 5th, and 6th chains are sewn onto the left side of the shoe, positioning them parallel to each other and spacing them evenly to create the desired shape.
When attaching the chains, make sure they are neither too loose nor too tight, as this will affect both the appearance and fit of the finished shoe. The accompanying photographs show the exact placement of each chain and can be used as a guide throughout this step.
Once all chains have been sewn into place, securely fasten off all yarn tails.
Pull the first chain through stitches 5 and 6 and sew it in place. Then pull the last chain through stitches 2, 3, and 4 and sew it in place as well. This will give the toe a nice pointed shape. Finally, weave in all yarn ends and secure them well.
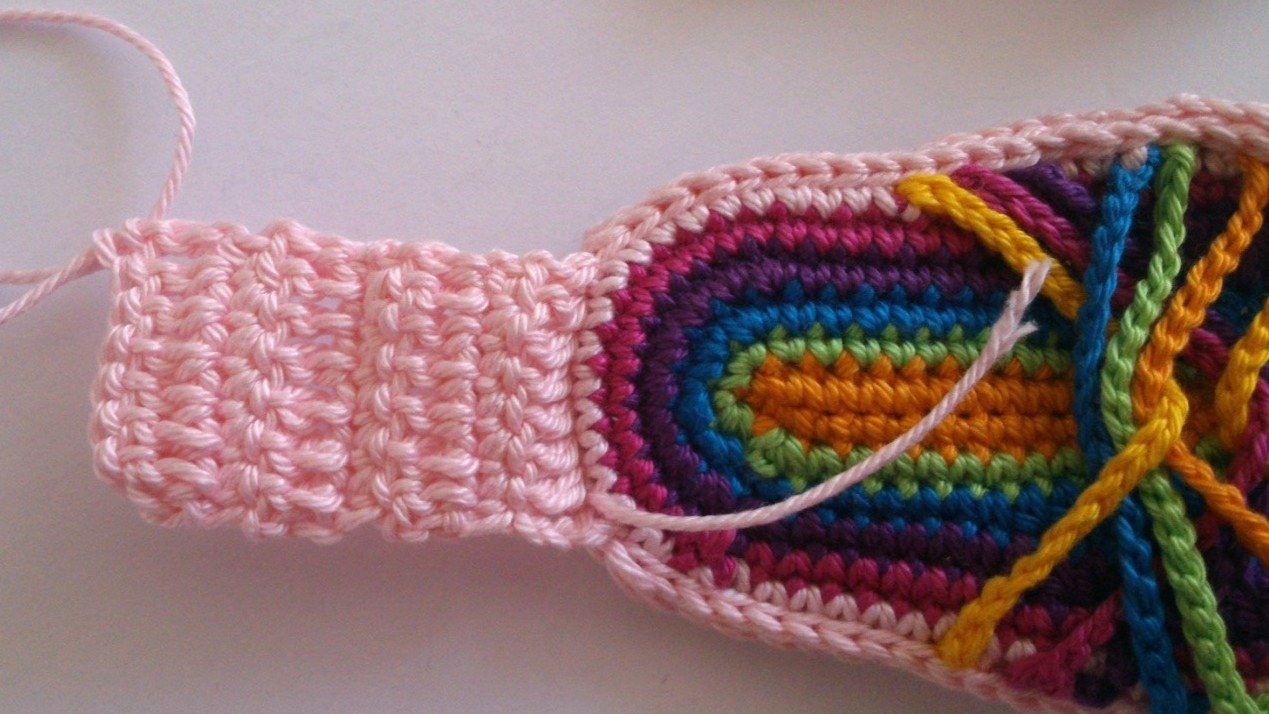
Heel (light pink)
Crochet in the center of the heel:
1. in the center ch 3, crochet 7 dc
2. turn the work, Ch 1, 7 sc
3. turn the work, Ch 3, 7 dc
4. turn the work, Ch 1, 7 sc
5. turn the work, Ch 3, 7 dc
6. turn the work, Ch 1, 7 sc
7. turn the work, Ch 3, 7 dc
8. turn the work, Ch 1, 7 sc, finish with 1 sl st.
Place together and sew. Secure and hide the thread.
Crochet a chain of 100 stitches and thread it through the designated stitches of the shoe. In the photos, you can see that I decorated the chain with beads. However, I do not recommend using beads or other small decorative items, as they may present a choking hazard for babies.
If you decide to use beads, make sure they are attached very securely and check them regularly to ensure they cannot come loose. The safety of the finished shoes and the baby wearing them is solely your responsibility.