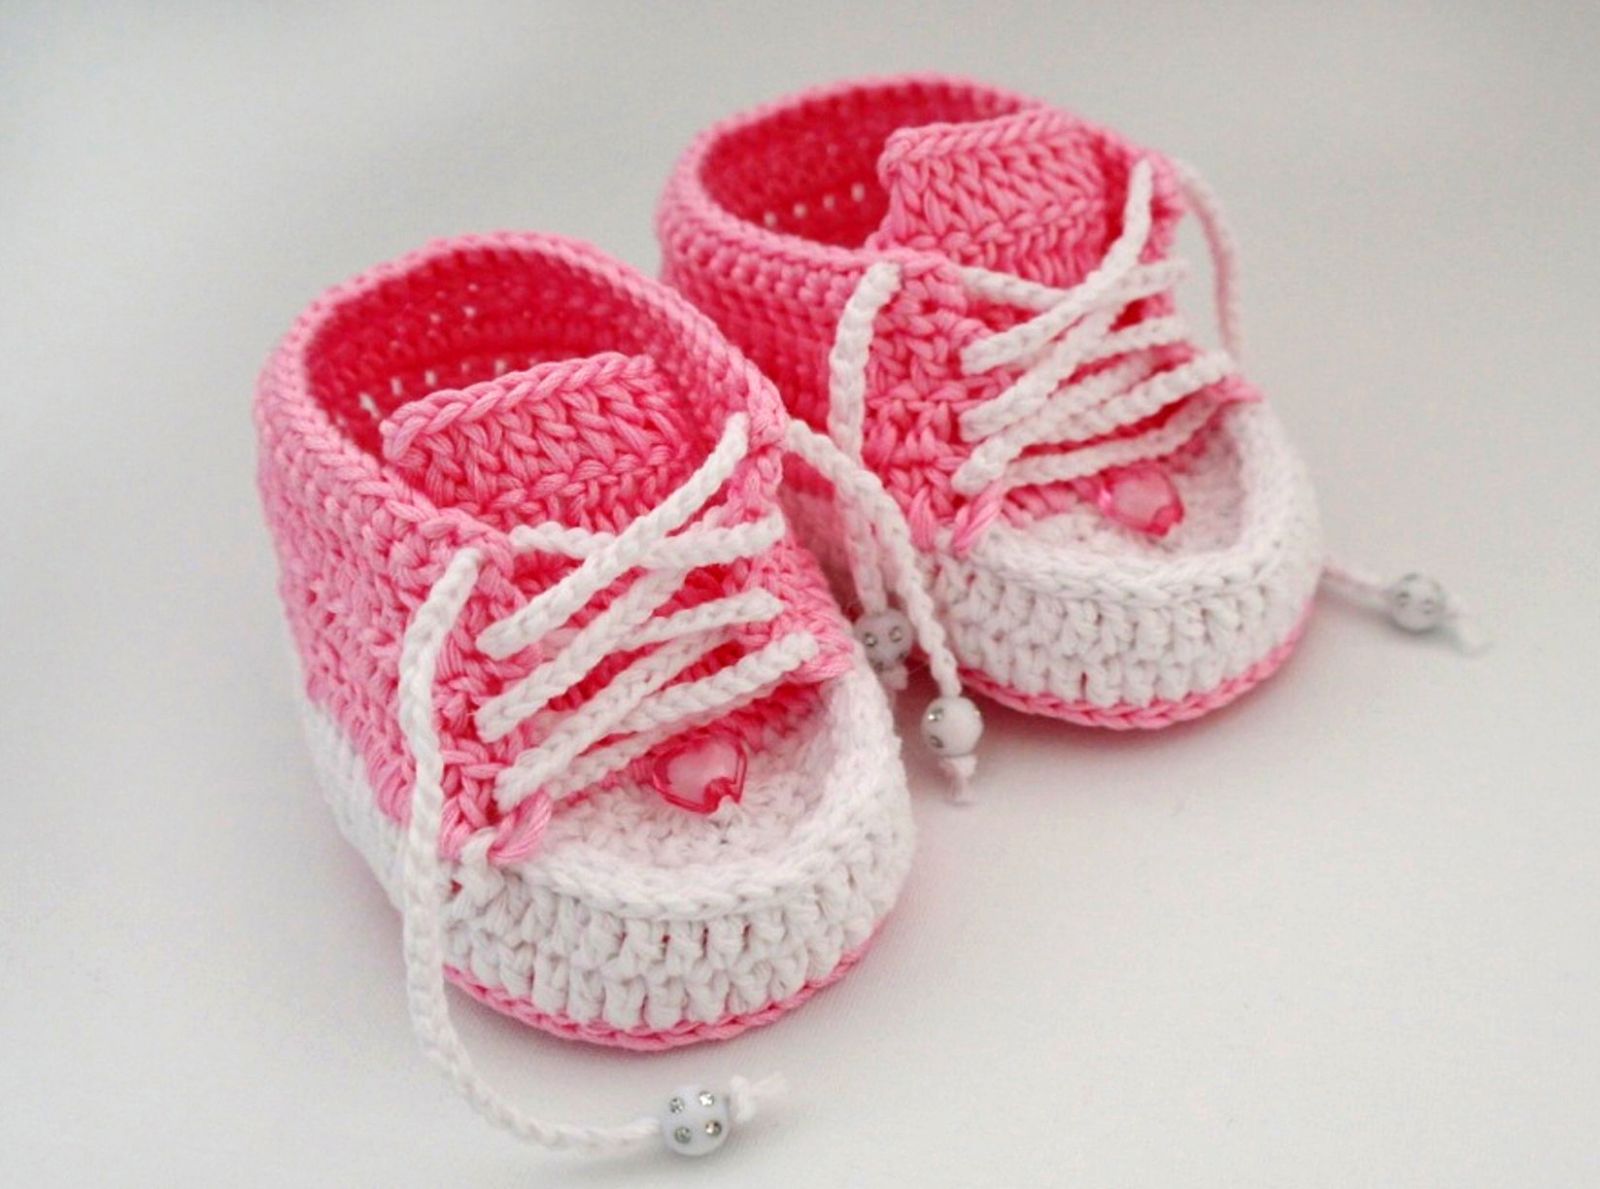
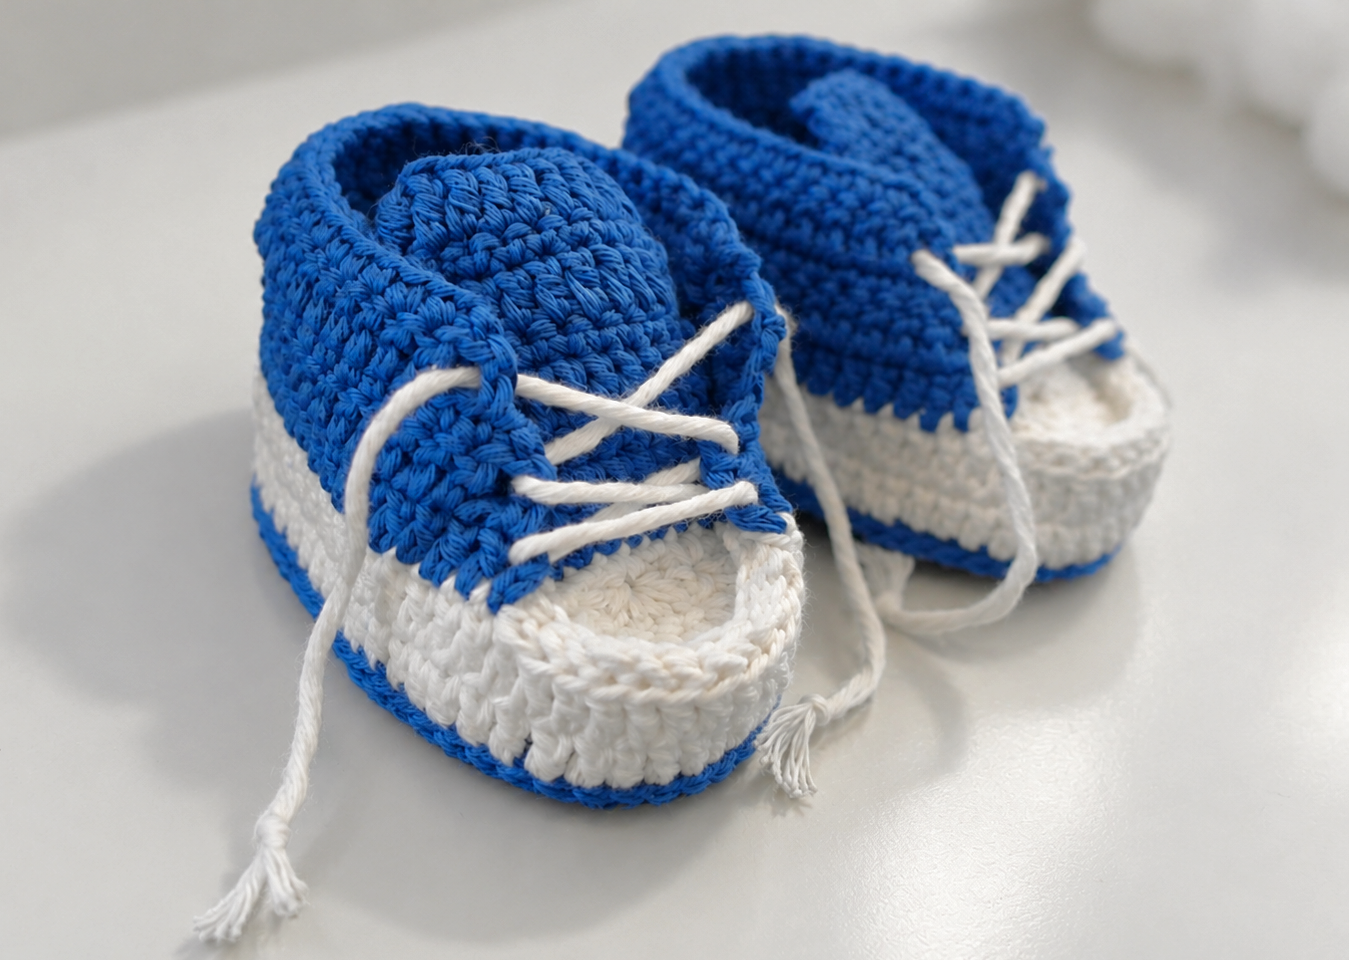
Crochet Pattern – Baby Chucks
You will need:
- 2.5 mm crochet hook
- Cotton yarn in various colors (50g/125m)
- Sewing needle, buttons
Abbreviations:
sc – single crochet
ch – chain
inc – increase, crochet two stitches in one
dec – decrease, crochet two stitches together
3 sc in 1 – crochet 3 sc in 1 stitch of the previous row
X dec – X-times decrease
X inc – X-times increase
(---)x – repeat those in brackets Х times
sl st – slip stitch
dc - double crochet
Create adorable baby booties for both girls and boys with this crochet pattern. By combining different colors, patterns, and decorative details, you can personalize the booties to match your own style and preferences.
The pattern includes clear instructions and is suitable for both beginners and experienced crocheters.
Size Information
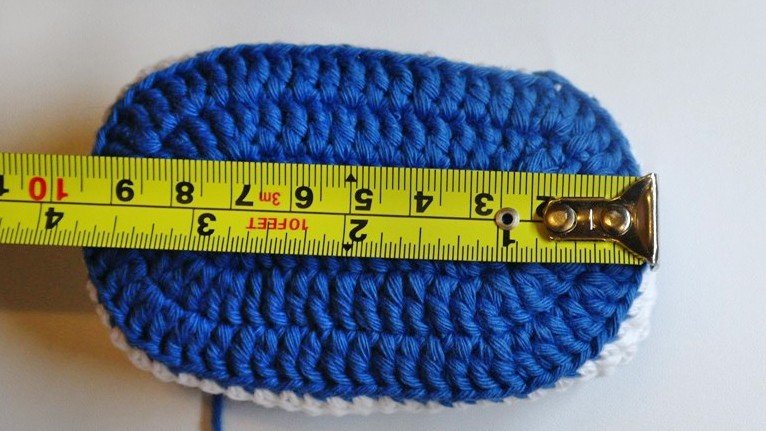
The finished booties measure approximately 9 to 10 cm (3.5 to 4 inches) in length, which generally corresponds to babies aged 3 to 6 months.
Please note that this age range is intended as a general guideline only, as every baby's feet develop at a different rate. For the best fit, it is recommended to measure the baby's foot before starting and compare the measurement with a standard sizing chart.
Start with the sole
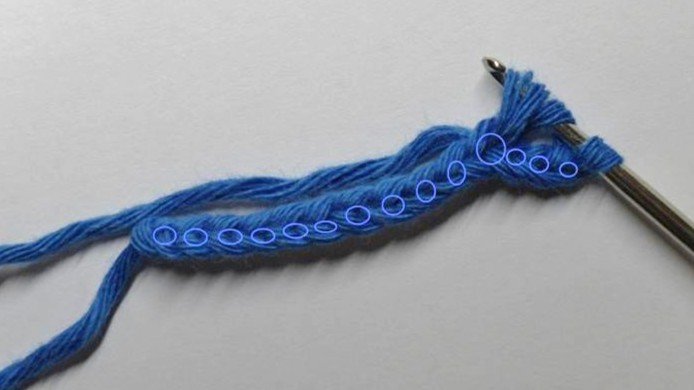
Crochet 14 ch, from the 4 loop from the hook
1 R: 10 dc, 7 dc in 1, further crochet along the other side of the chain 10 dc, 5 dc in 1, finish with 1 sl st
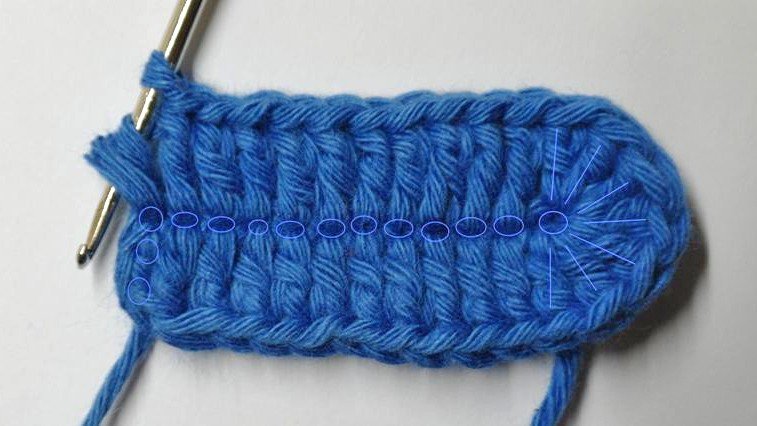
2 R: Ch 3, 10 dc, (2 dc crochet into 1 st of the previous round)x 7, 10 dc, (2 dc crochet into 1 st of the previous round)x 5, finish with 1 sl st
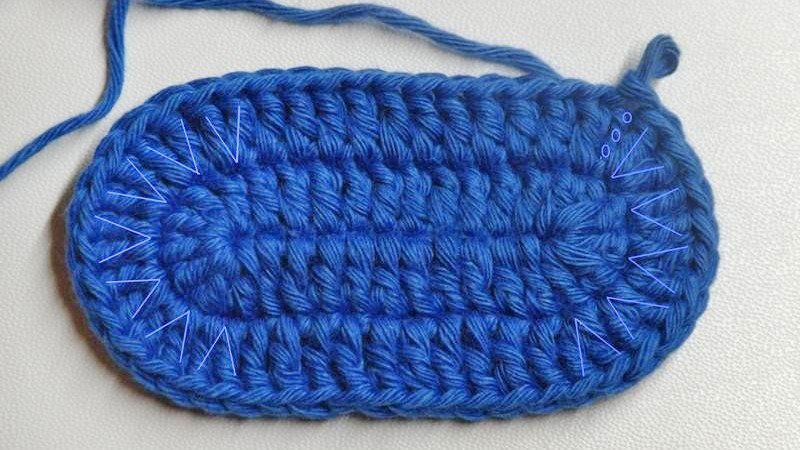
3 R: Ch 3, 10 dc, (1 dc inc, 1 dc)x 7, 10 dc, (1 dc inc, 1 dc)x5, 1 sl st
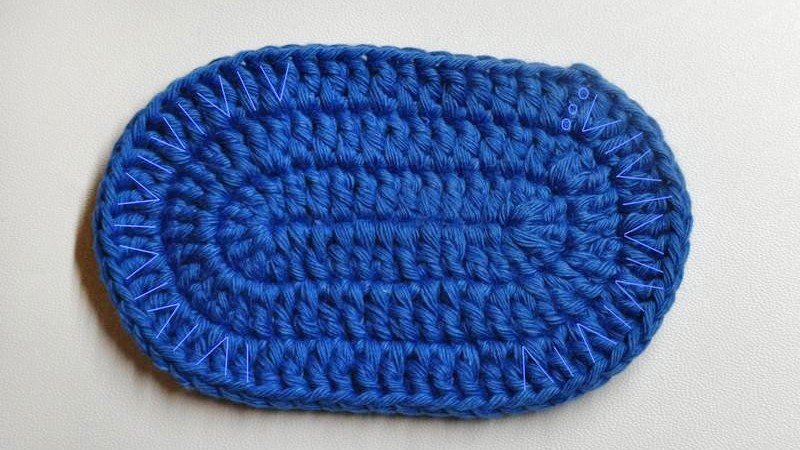
Color change (white)
4 R: Ch 3, 56 sc crochet into the back loop only, 1 sl st
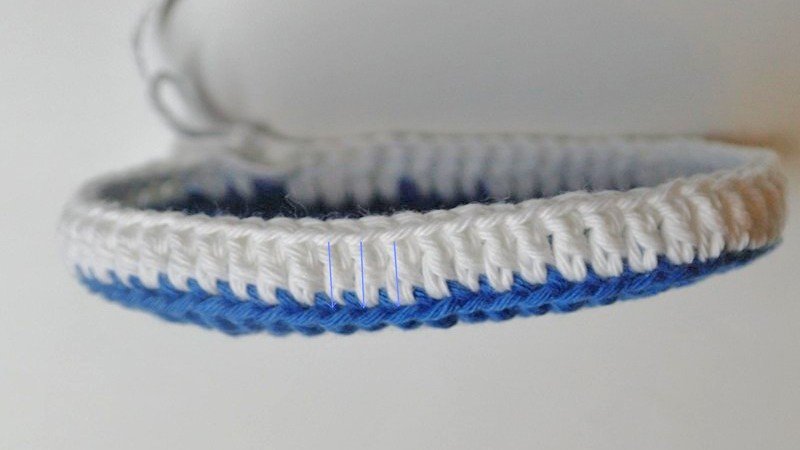
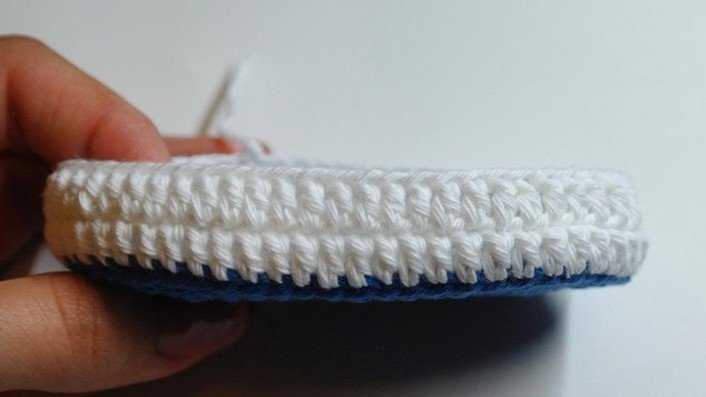
5 R: Ch 3, 56 dc, 1 sl st
Fasten off the thread and weave in the ends.
Upper Part of the Shoe
Hold the sole so that the toe is pointing away from you. Mark the center of the toe section with a stitch marker or a piece of contrasting yarn.
From this center point, count 8 stitches to the left and 8 stitches to the right, placing a stitch marker at each position. You should now have three markers: one in the center and one on each side. These markers will serve as a guide for positioning the upper part of the shoe.
Start at the left-hand marker. Join the yarn to the marked stitch and begin crocheting across the stitches between the two outer markers, working from the left marker to the right marker.
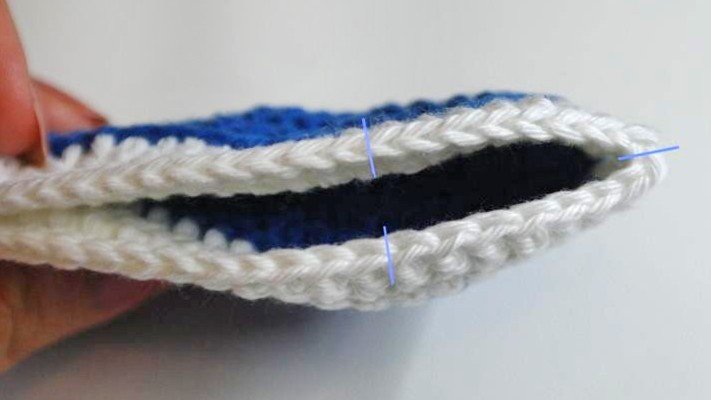
1 R: ch 3, 7 dc, 2 dc crochet together, 22 dc, 2 dc crochet together, 7 dc
2 R: turn the work, Ch 3, skip 1 st (leave unworked),36 dc, skip 1 st (leave unworked), 1 dc.
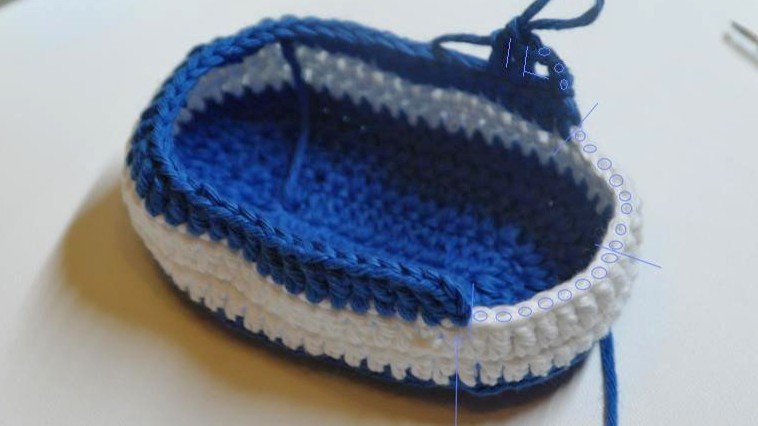
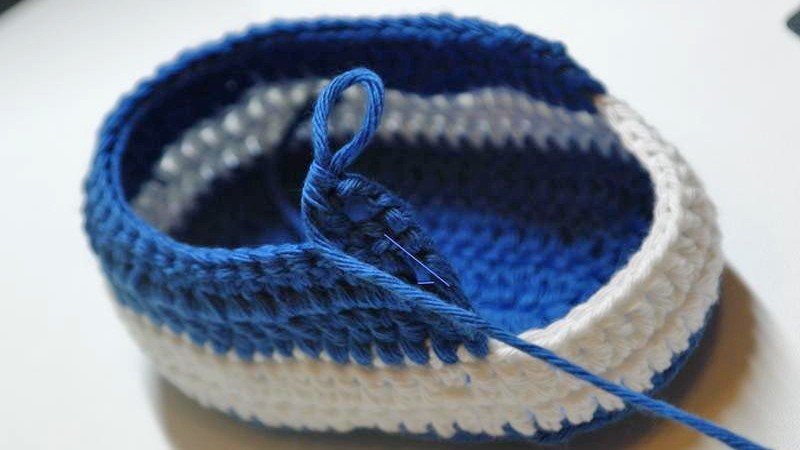
3 R: turn the work, Ch 3, skip 1 st (leave unworked), 35 dc, Skip 1 st (leave unworked), 1 dc
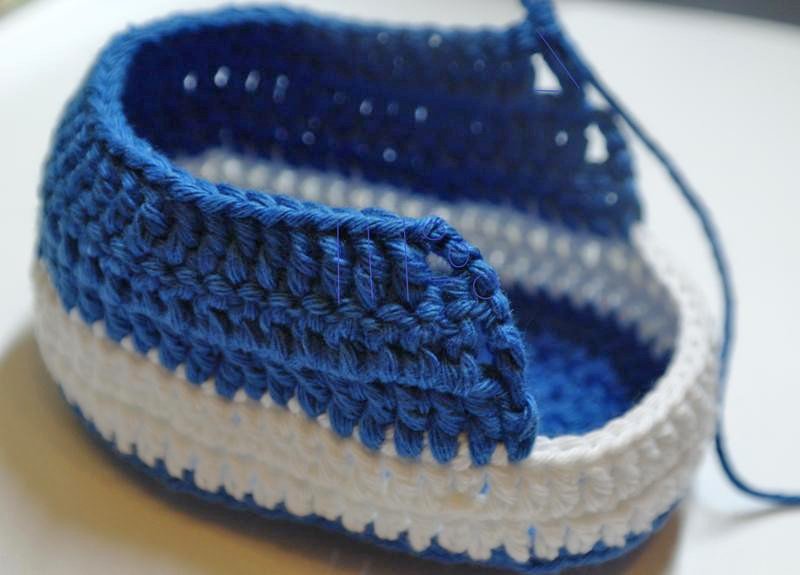
4- 5 R: turn the work, ch 1, 35 sc
Fasten off the thread and weave in the ends.
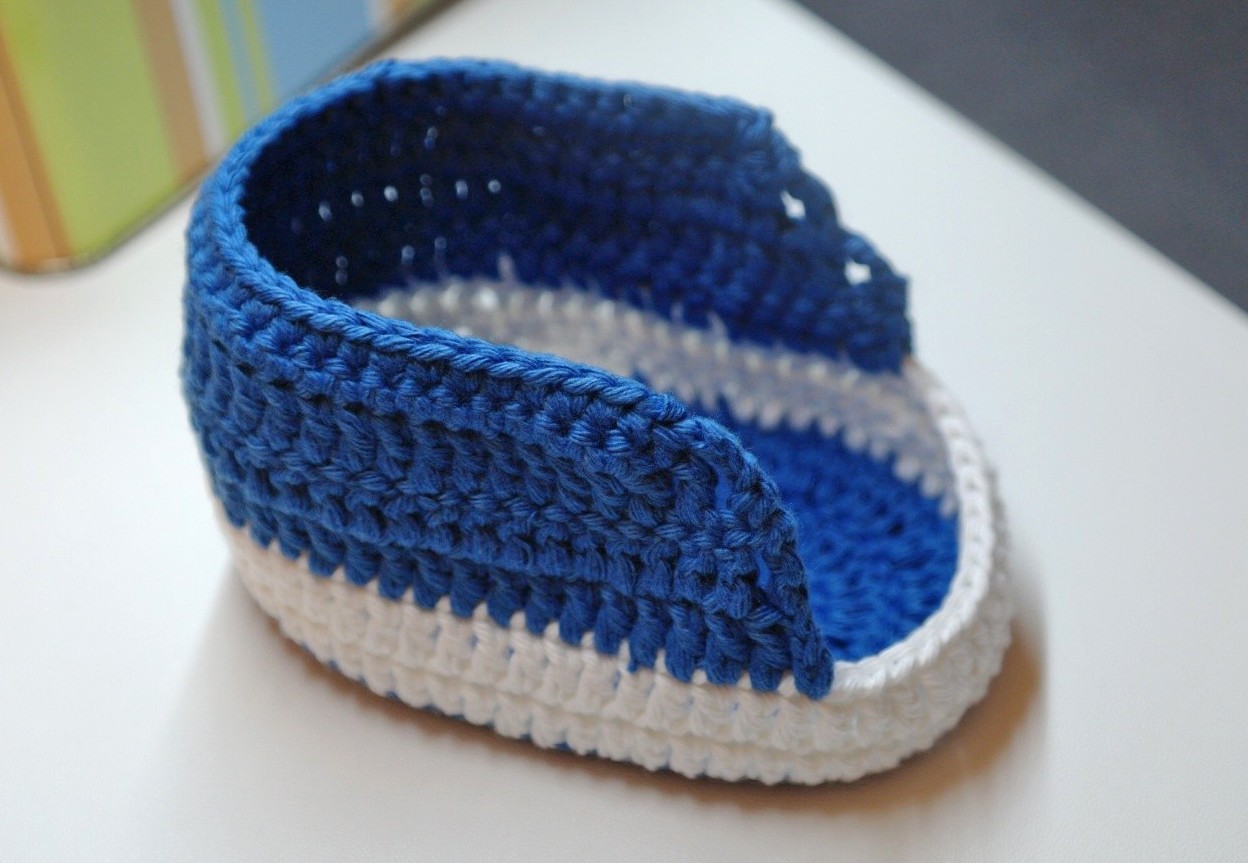
Tongue
Use white yarn for the tongue.
1 R: Crochet 4 ch, from the 3 loop from the hook 8 dc
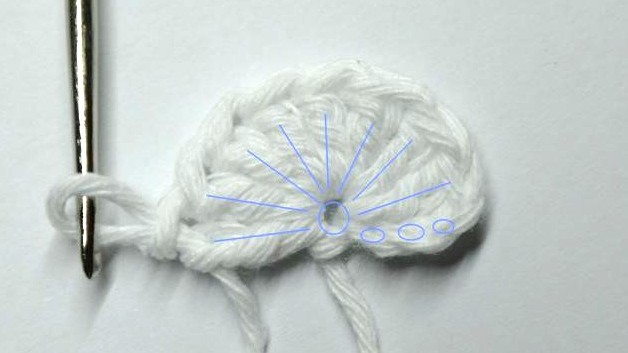
2 R: turn the work, ch 3, 8 inc
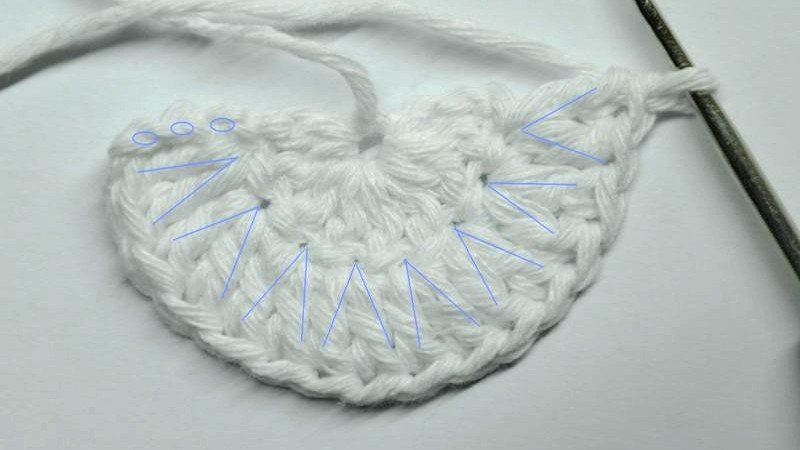
Round 3: Work this round along the opposite side of the tongue.
In my sample, this results in a total of 11 stitches. Depending on exactly where you insert your hook and how the stitches are picked up, you may end up with one stitch more or one stitch less.
This slight variation is completely normal and will not affect the fit or appearance of the shoe.
3 R: Ch 1, 11 sc
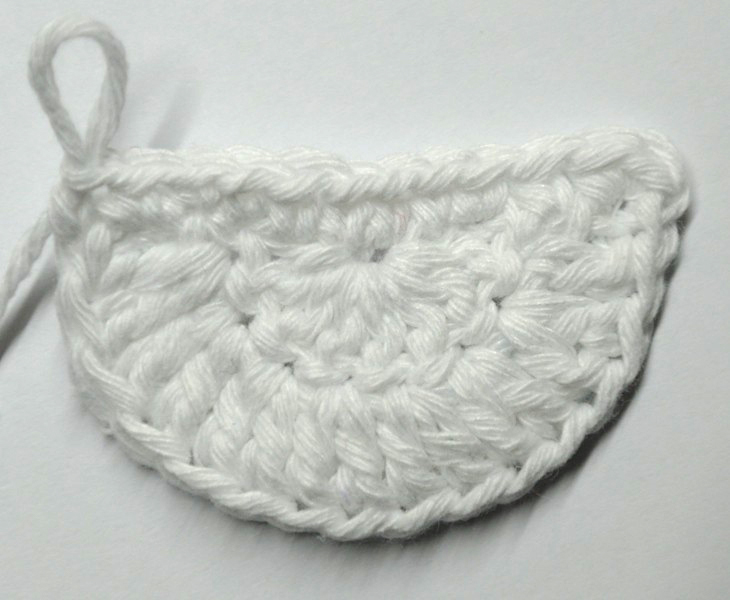
Color change (blue)
4 R: turn the work, ch 3, 11 dc
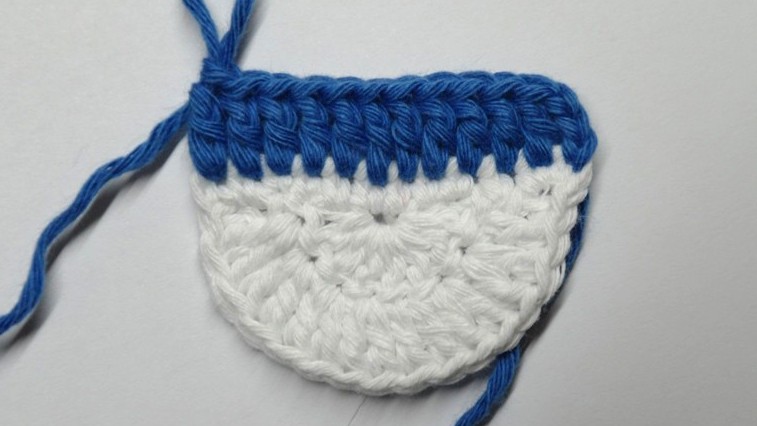
5 R: turn the work, ch 3, 11 dc
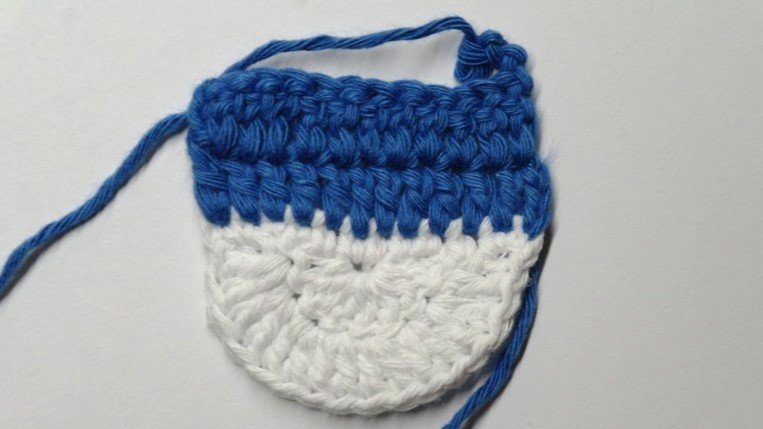
6 R: turn the work, ch 3, 11 dc
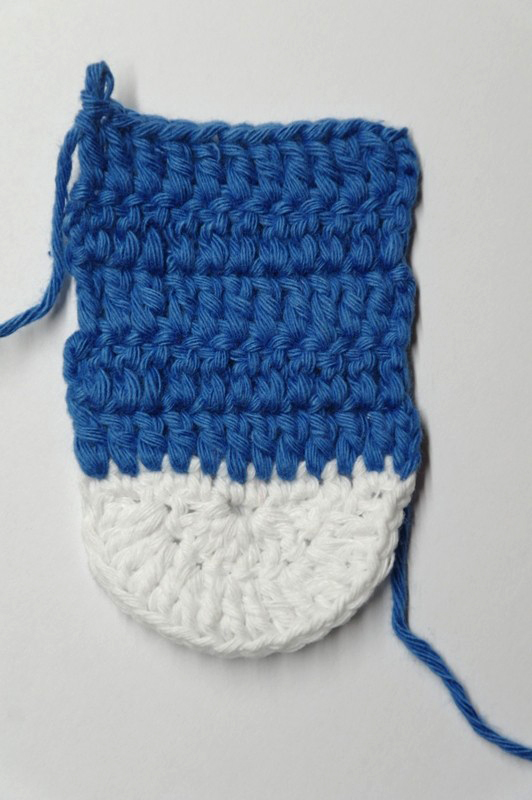
7 R: turn the work, ch 3, 11 dc
8 R: turn the work, ch 3, 11 dc
9 R: turn the work, ch 3, 11 dc
Fasten off the thread and weave in the ends.
Attaching the Tongue to the Shoe
The tongue is now complete and can be attached directly to the shoe.
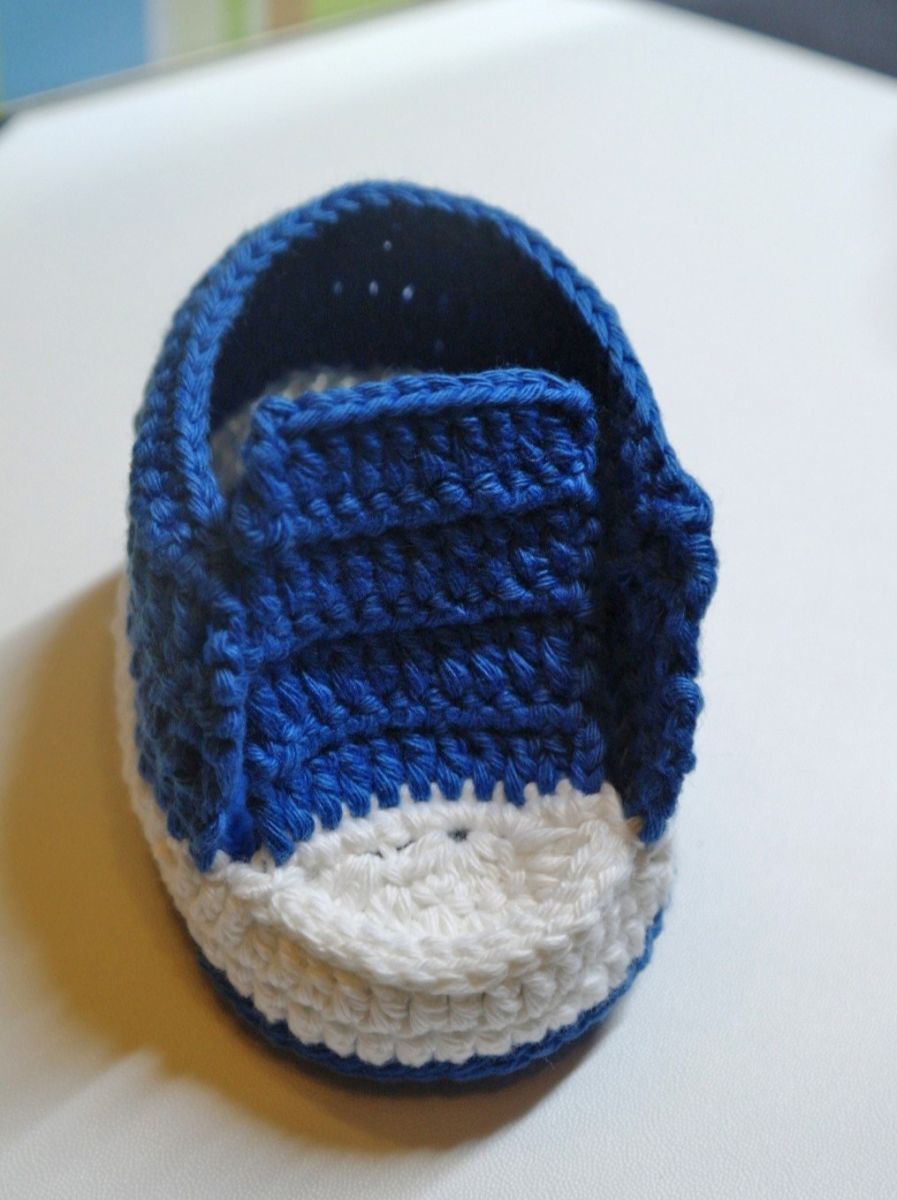
Position the tongue in the center of the front section of the shoe so that it sits evenly between the two sides of the upper. Make sure the tongue is straight and that its tip is centered over the toe of the shoe. If necessary, secure it temporarily with stitch markers or pins.
Begin on the right side of the tongue. Insert your hook through both the stitches of the tongue and the corresponding stitches of the shoe or shoe edge at the same time.
Continue working in this manner, joining the tongue to the shoe stitch by stitch until you reach the end. Once attached, the tongue should be firmly secured and sit neatly in the center of the shoe.
Finally, check the alignment one more time to ensure that both sides of the shoe are symmetrical and that the classic Baby Chucks shape is maintained.
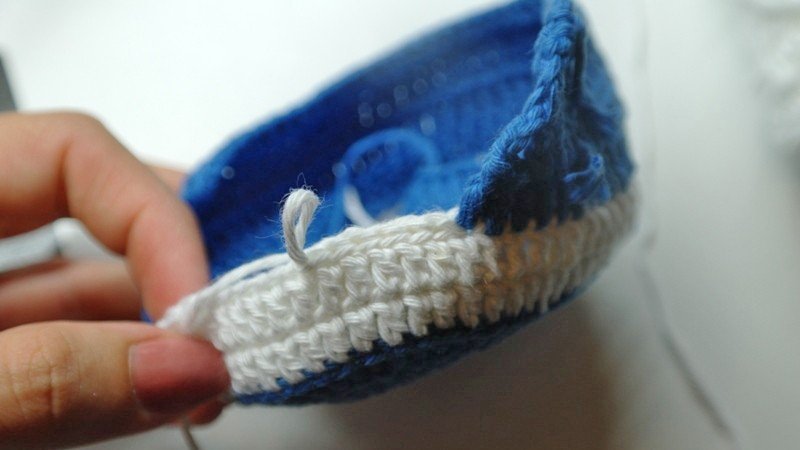
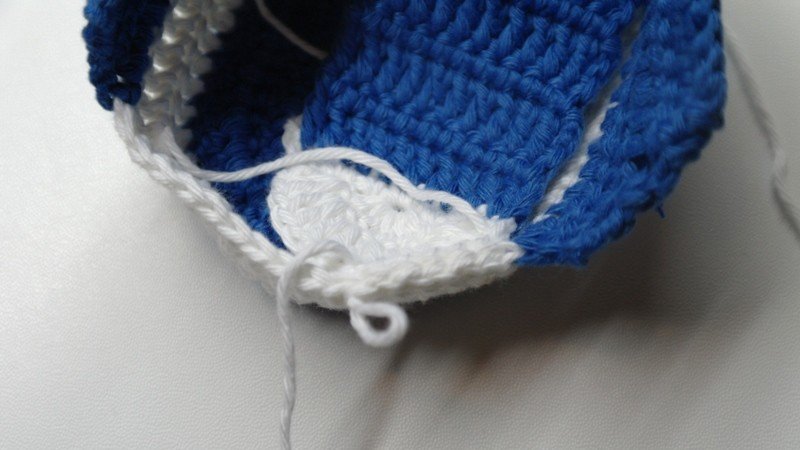
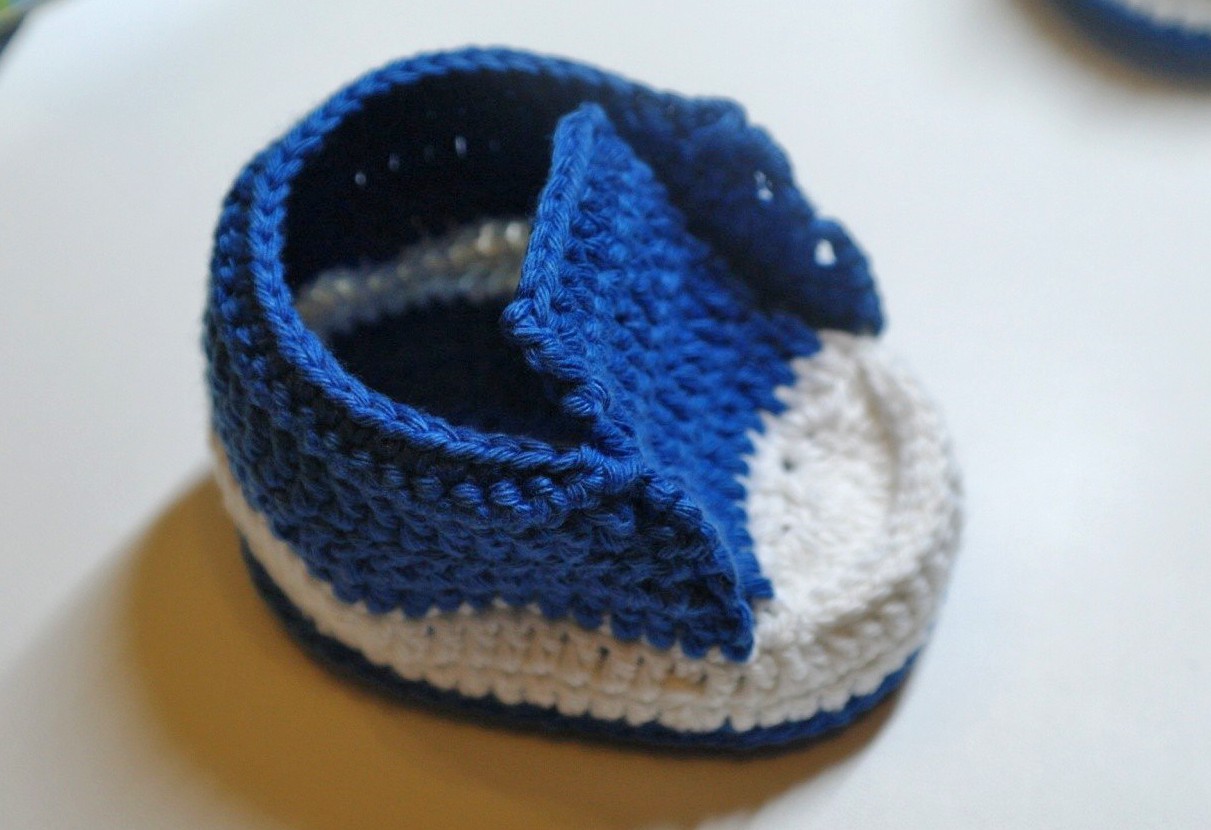
Finally, work one round of slip stitches (sl st) evenly around the entire sole. This creates a clean, defined border that highlights the shape of the sole and gives the baby Chucks their classic sneaker-inspired appearance.
Fasten off and weave in any remaining yarn ends neatly.
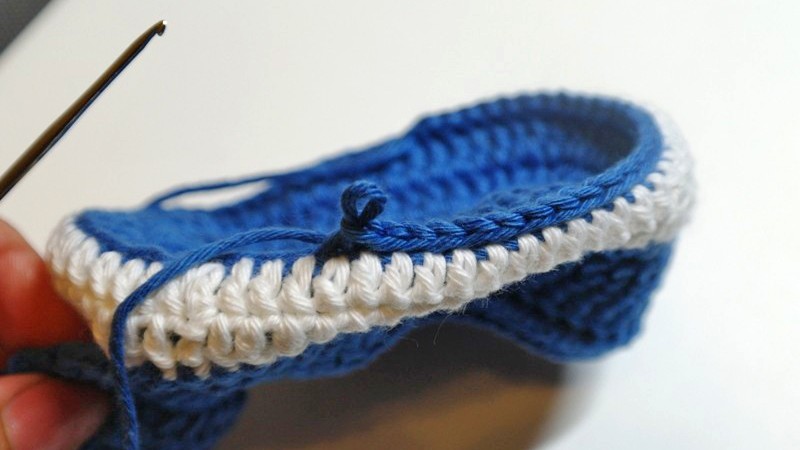
Shoelaces and Safety Note
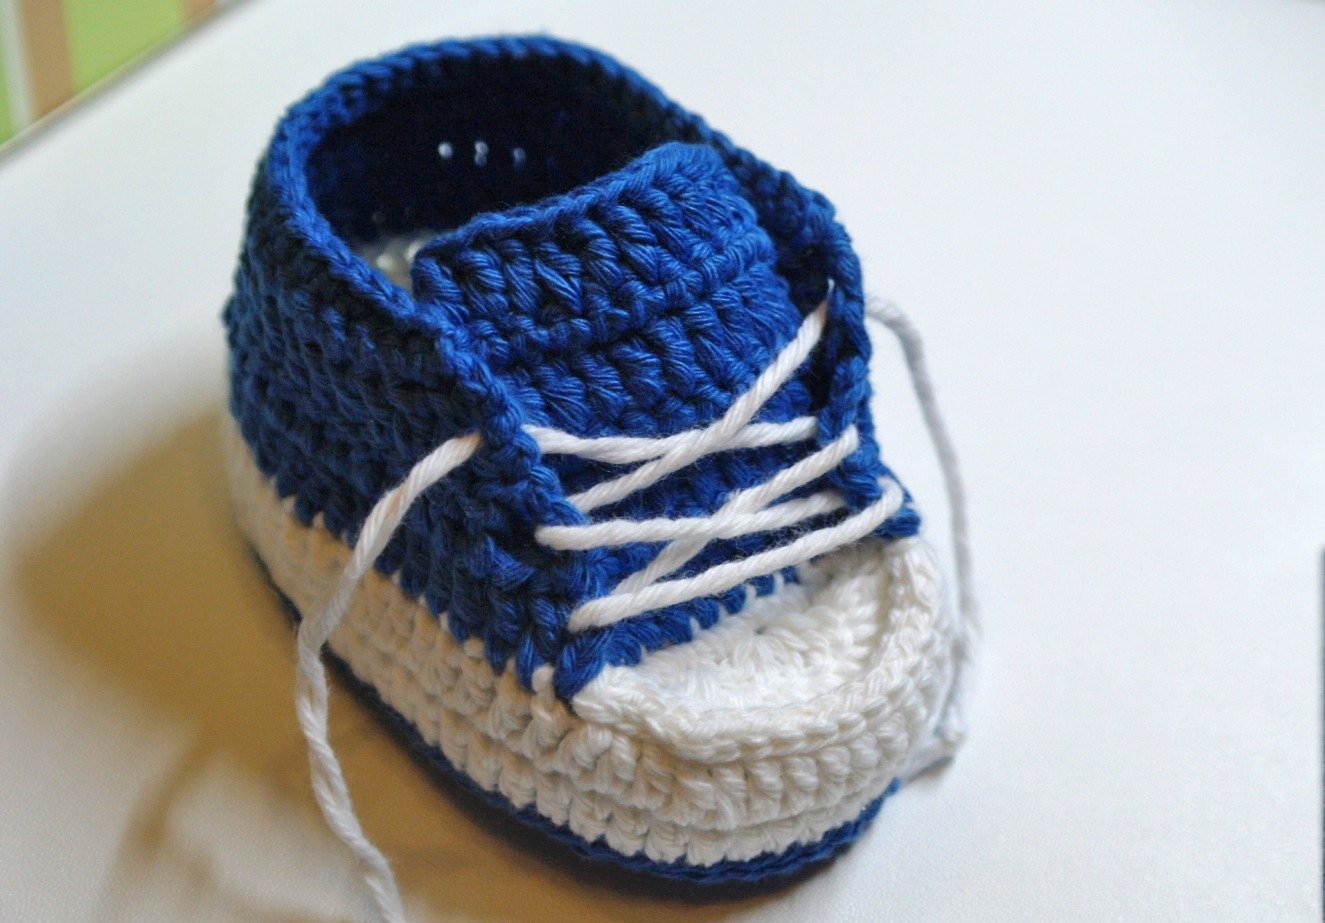
Next, thread the shoelaces through the openings on the sides of the shoe upper. Start at the bottom and weave the laces evenly through the gaps until you achieve the classic lacing style of the Baby Chucks.
Important Safety Note
If you would like to add decorative elements to the baby booties, please keep in mind that they are intended for babies. Avoid using small attachments such as buttons, beads, or other embellishments that could become detached and pose a choking hazard.
If you choose to add decorations, make sure they are attached securely and with great care. Inspect the booties regularly to ensure that no parts have come loose. Taking these precautions will help keep the booties safe for the baby to wear.