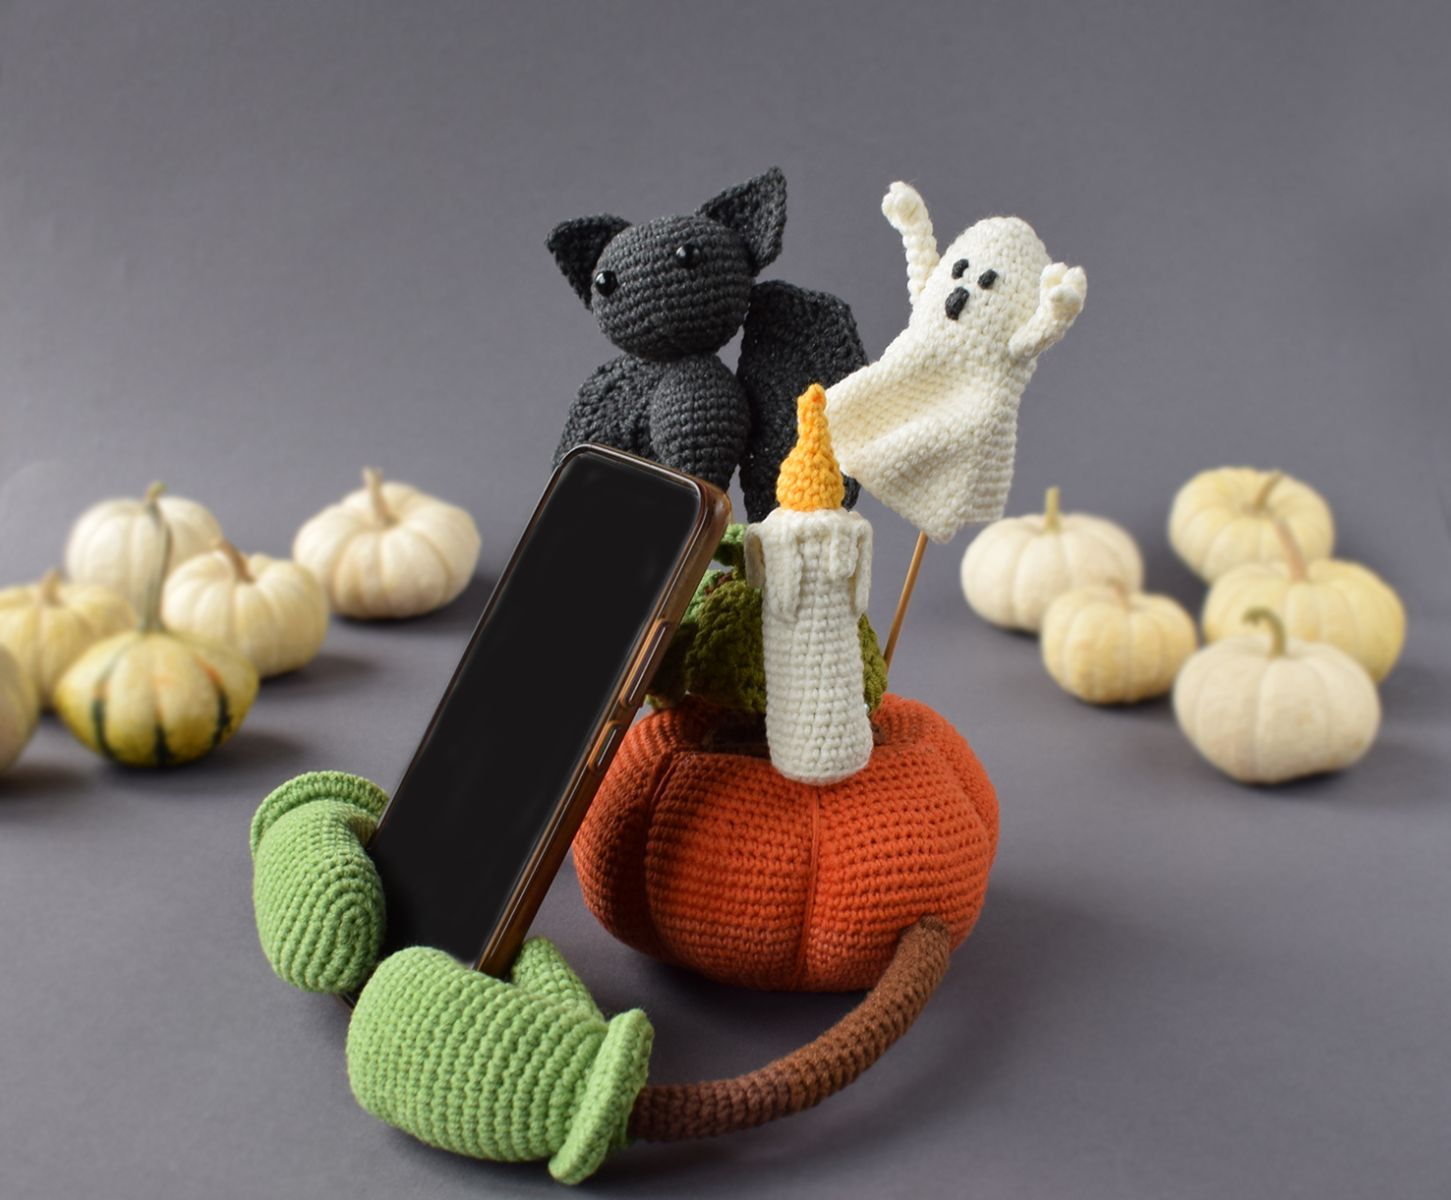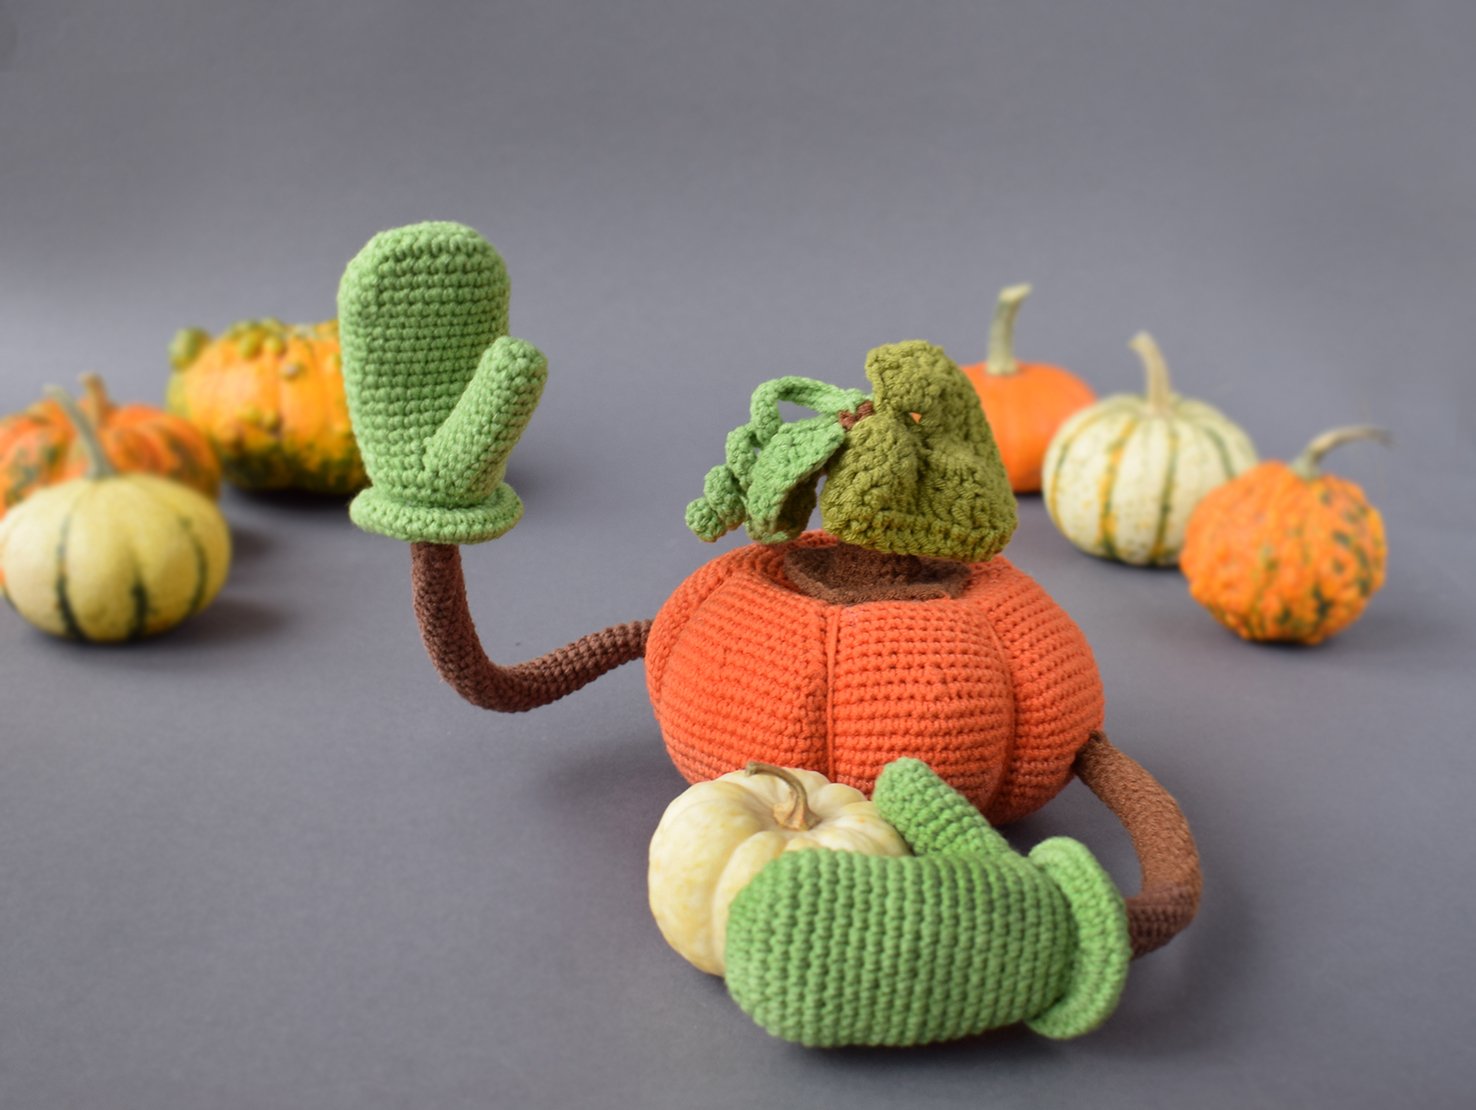
I keep finding inspiration for new phone stand designs, time and time again. 😊 I simply couldn’t pass up such a striking image as a gorgeous, bright orange pumpkin! Now, this cheerful little helper brightens up my rainy days with its vibrant color and its funny little companions. Even if you don’t need a phone stand like this, I think it would make an interesting piece of autumn décor. What do you think? Would this pumpkin fit in with your Halloween decorations?
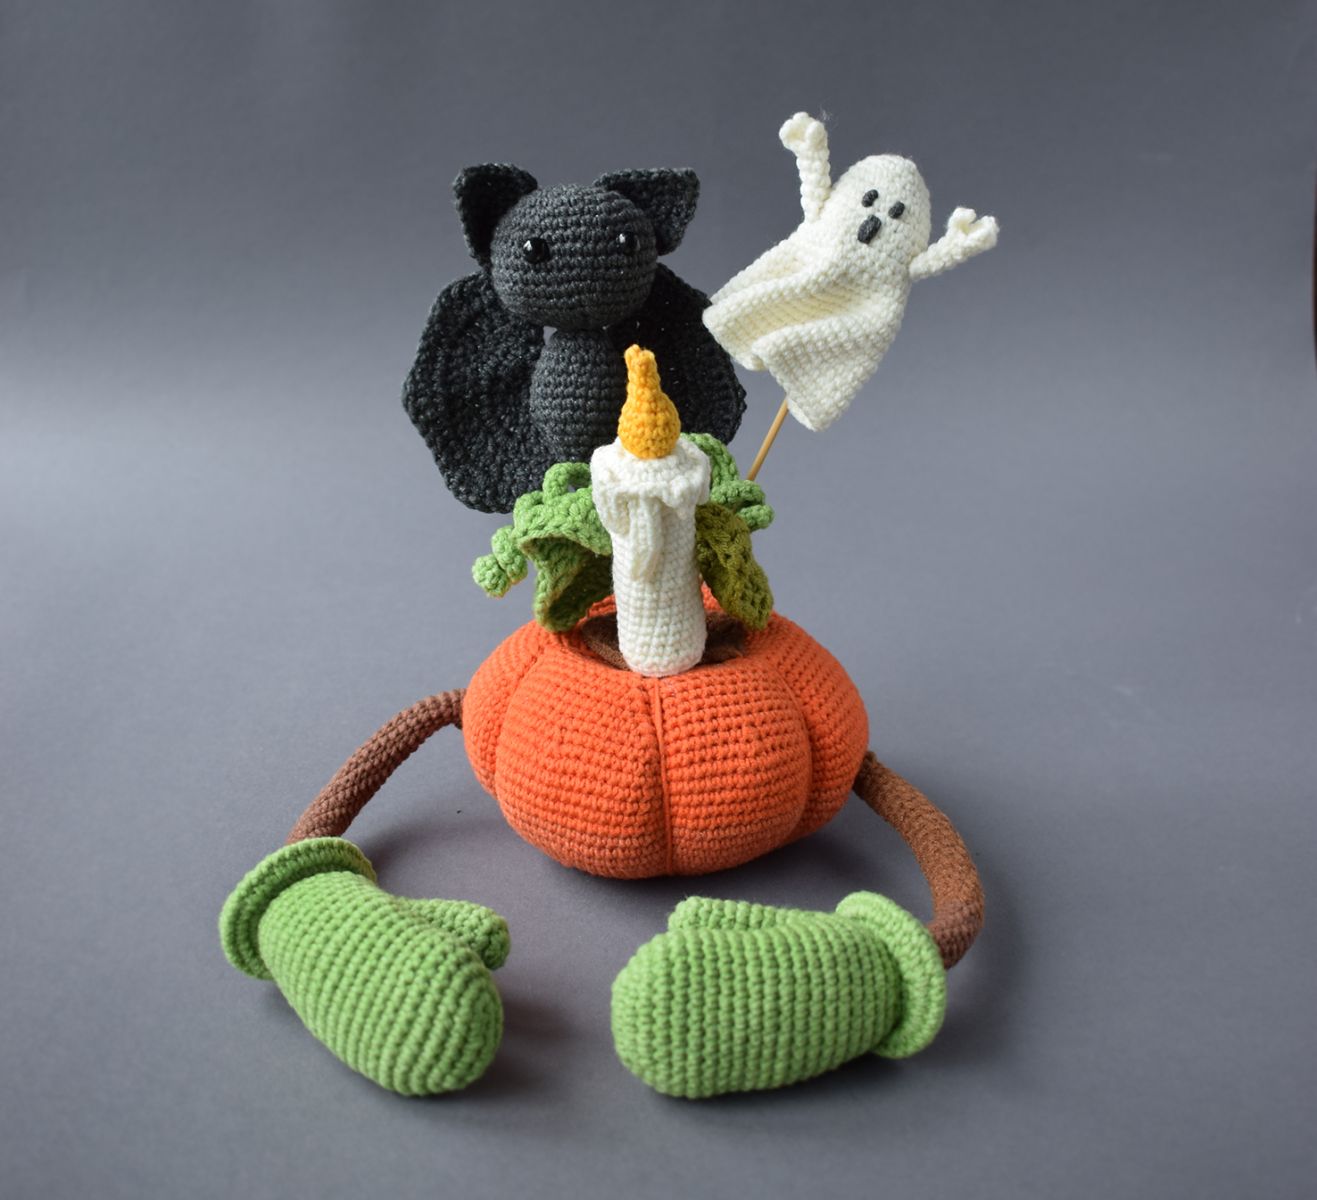
You will need the following materials to crochet:
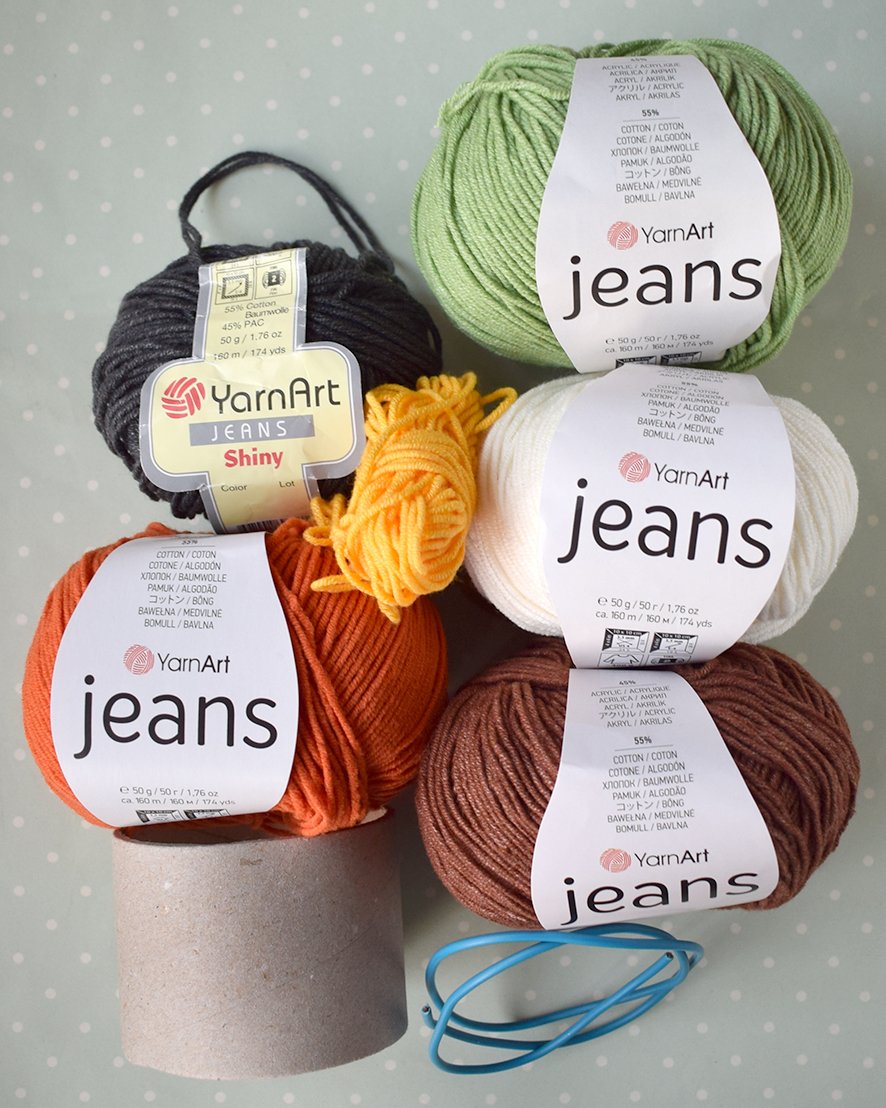
– cotton yarn YarnArt jeans 50 gr /160 m (colors: orange, brown, green, white, black)
– crochet hook 1,75 mm (important, the size should match the yarn so that the stitches are even).
– needle, scissors, approximately 70 cm of wire, filler, cardboard bobbin or plastic napkin.
Abbreviations:
ch – chain
sc – single crochet
inc – increase
dec – decrease, two single crochets together
dc – double crochet
dc – double crochet
tr – treble crochet
We will create this project starting from the center of the piece, with assembly taking place as we crochet. First, we will crochet the pumpkin and build the framework.
Pumpkin (in orange)
1. Crochet 6 sc in a Magic Ring
2. 6 inc = 12 sc
3. (1 sc, 1 inc) х 6 = 18 sc
4. (2 sc, 1 inc) х 6 = 24 sc
5. (3 sc, 1 inc) х 6 = 30 sc
6. (4 sc, 1 inc) х 6 = 36 sc
7. (5 sc, 1 inc) х 6 = 42 sc
8. (6 sc, 1 inc) х 6 = 48 sc
9. (7 sc, 1 inc) х 6 = 54 sc
10. 54 sc
11. (8 sc, 1 inc) х 6 = 60 sc
12. 60 sc
13. (9 sc, 1 inc) х 6 = 66 sc
14. (10 sc, 1 inc) х 6 = 72 sc
15. (5 sc, 1 inc) х 12 = 84 sc (Please note — there are more increases here)
16. (6 sc, 1 inc) х 12 = 96 sc
17. (7 sc, 1 inc) х 12 = 108 sc
18. (8 sc, 1 inc) х 12 = 120 sc
19 – 25. 120 sc
26. (8 sc, 1 dec) х 12 = 108 sc
27. (7 sc, 1 dec) х 12 = 96 sc
28. (14 sc, 1 dec) х 6 = 90 sc (Please note — the number of decreases has been changed again here)
29. (13 sc, 1 dec) х 6 = 84 sc
30. (12 sc, 1 dec) х 6 = 78 sc
31. (11 sc, 1 dec) х 6 = 72 sc
32. (10 sc, 1 dec) х 6 = 66 sc
33. (9 sc, 1 dec) х 6 = 60 sc
Now let us create the frame for the entire construction.
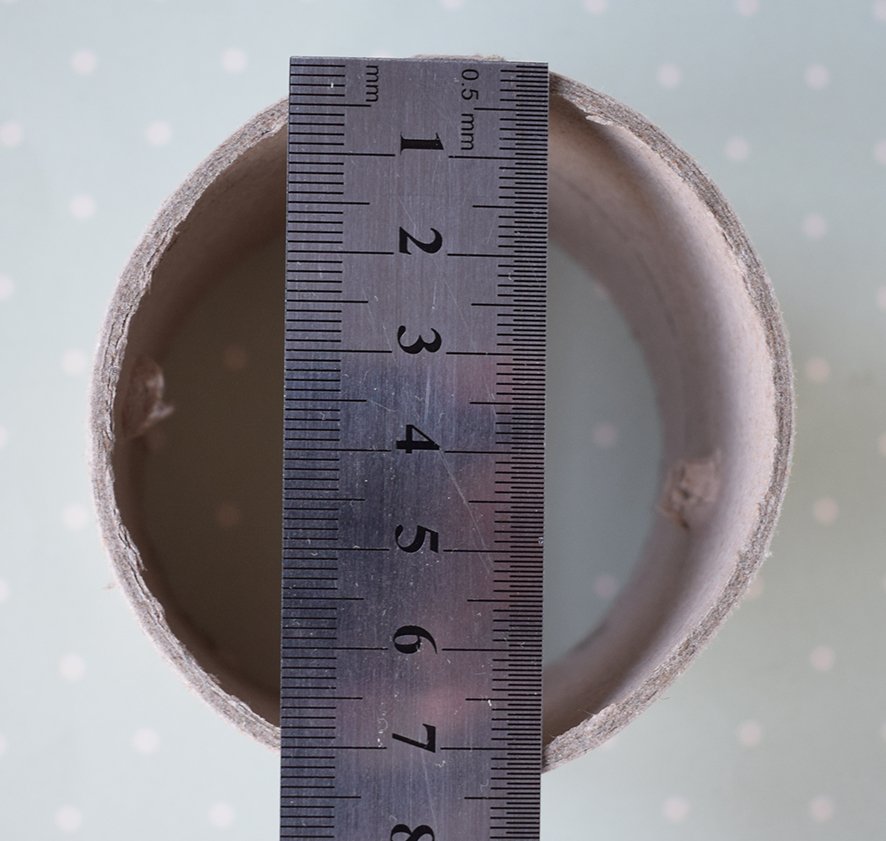
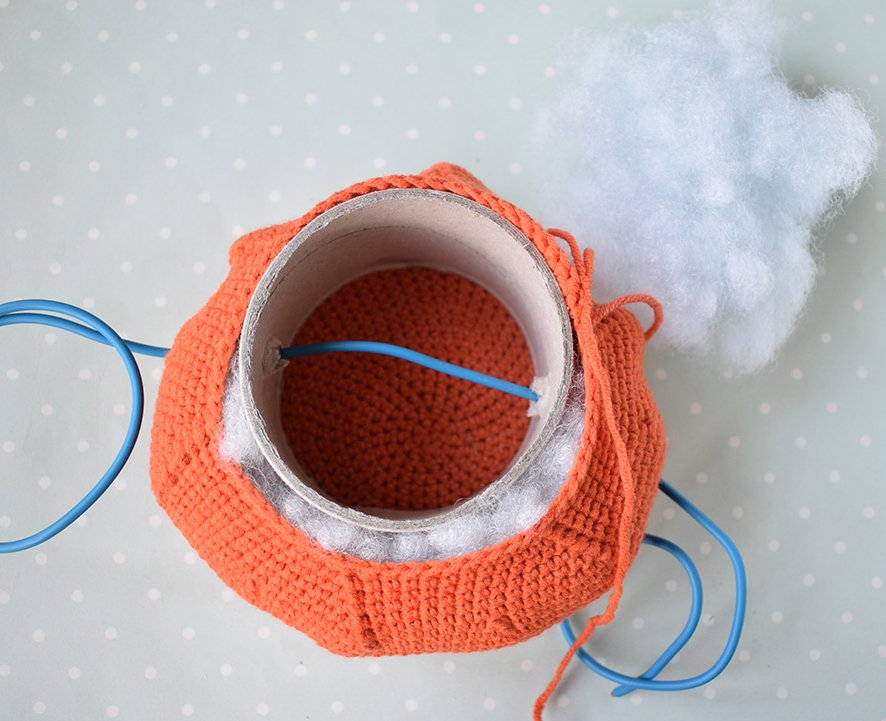
For the frame, I am using a sturdy cardboard yarn cone measuring 6 × 7 cm. I made two holes all the way through it, approximately halfway up, for the wire. This piece will be placed inside the pumpkin. You can either find a suitable size to fit your crocheted piece or make a frame of your own using sturdy plastic.
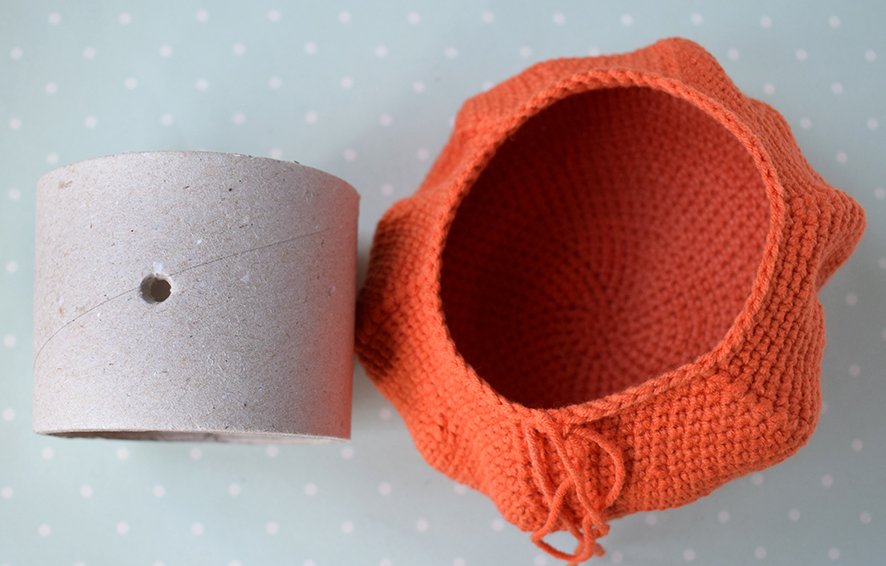
To give the pumpkin a beautiful shape, add stuffing to the space between the crocheted fabric and the cardboard cone. Carefully pierce the crocheted fabric opposite the holes in the cardboard cone so that you can thread the wire through. You can use a knitting needle or crochet hook to gently separate the stitches if necessary. This way, the wire frame for the arms will fit snugly inside the construction. If you plan to use your pumpkin as a phone or tablet stand, make sure the arms are long enough to accommodate your particular device.
34. (8 sc, 1 dec) х 6 = 54 sc
35. (7 sc, 1 dec) х 6 = 48 sc
36. 48 sc
37. (6 sc, 1 dec) х 6 = 42 sc
38. 42 sc
39. (5 sc, 1 dec) х 6 = 36 sc
40. 36 sc
41. (4 sc, 1 dec) х 6 = 30 sc
42. 30 sc
43. (3 sc, 1 dec) х 6 = 24 sc
44. 24 sc
45. (2 sc, 1 dec) х 6 = 18 sc
46. (1 sc, 1 dec) х 6 = 12 sc
47. 6 dec = 6 sc
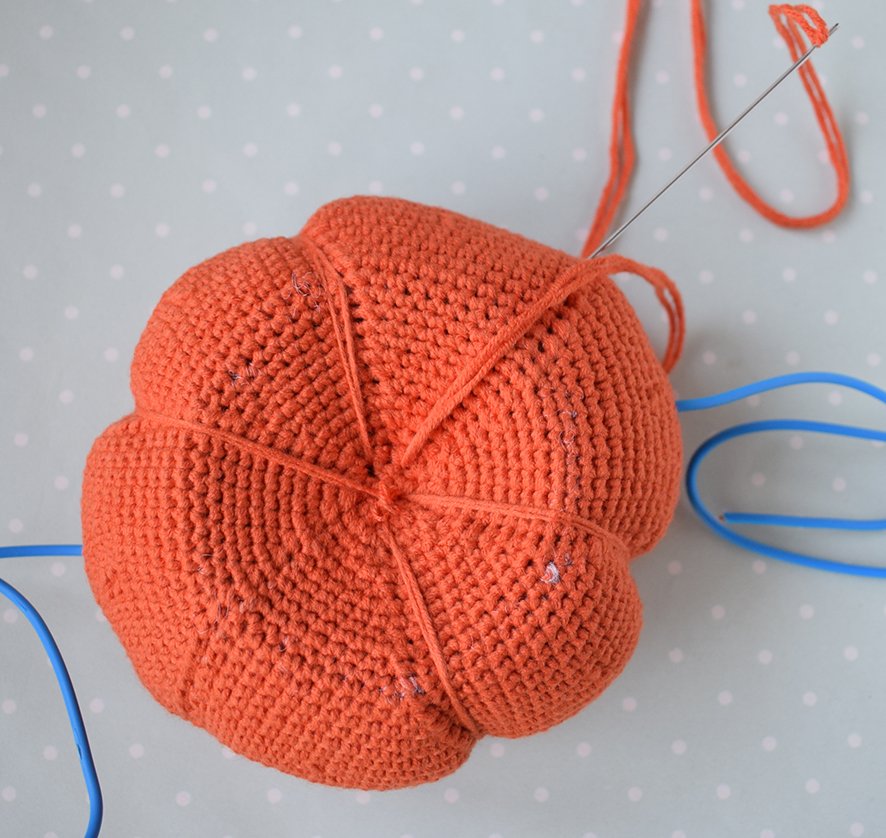
Close, trim the thread. Leave a long end of the thread for further work.
Using a long needle, create the indentations that form the pumpkin’s characteristic segments. Insert the needle through the top and down through the bottom of the pumpkin, then pull the long strands firmly at the sides to shape the segments.
Pumpkin stem (brown in color)
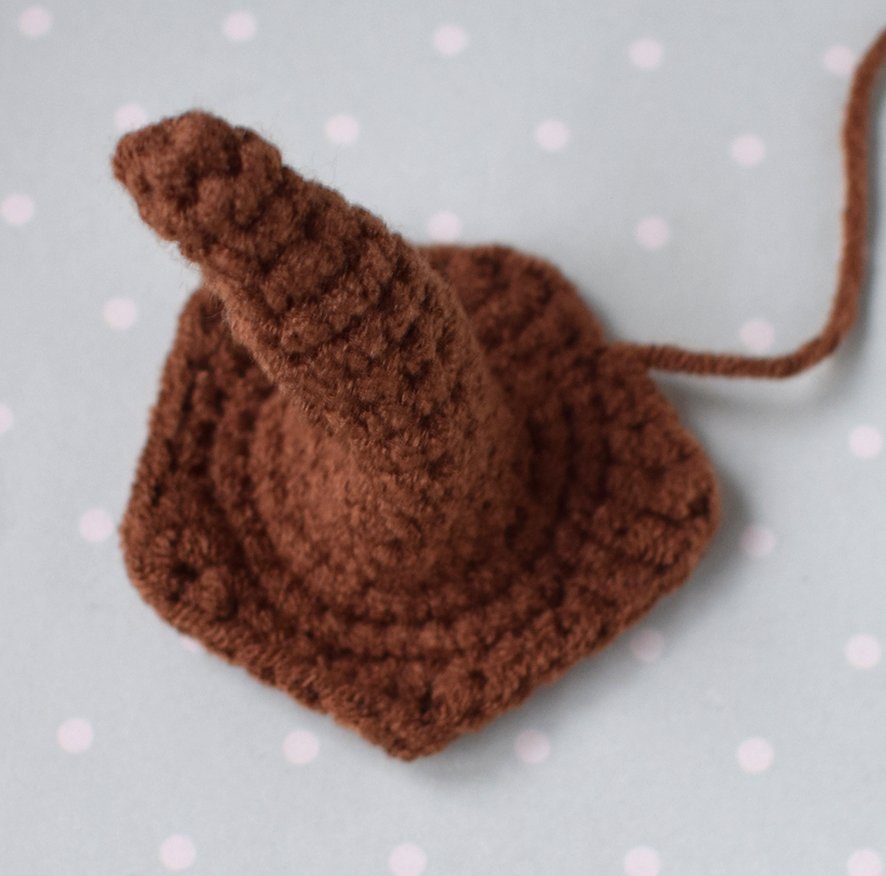
1. Crochet 6 sc in a Magic Ring
2 – 4. 6 sc
5. (1 sc, 1 inc) х 3 = 9 sc
6 – 8. 9 sc
9. (2 sc, 1 inc) х 3 = 12 sc
10 – 12. 12 sc
13. (3 sc, 1 inc) х 3 = 15 sc
14, 15. 15 sc
16. 15 inc = 30 sc
17. 30 sc
18. (1 sc, 1 dc, 1 tr, 1 dc, 2 sc) х 5 = 30 loops
Close, trim the thread. Leave a long end of the thread for further work.
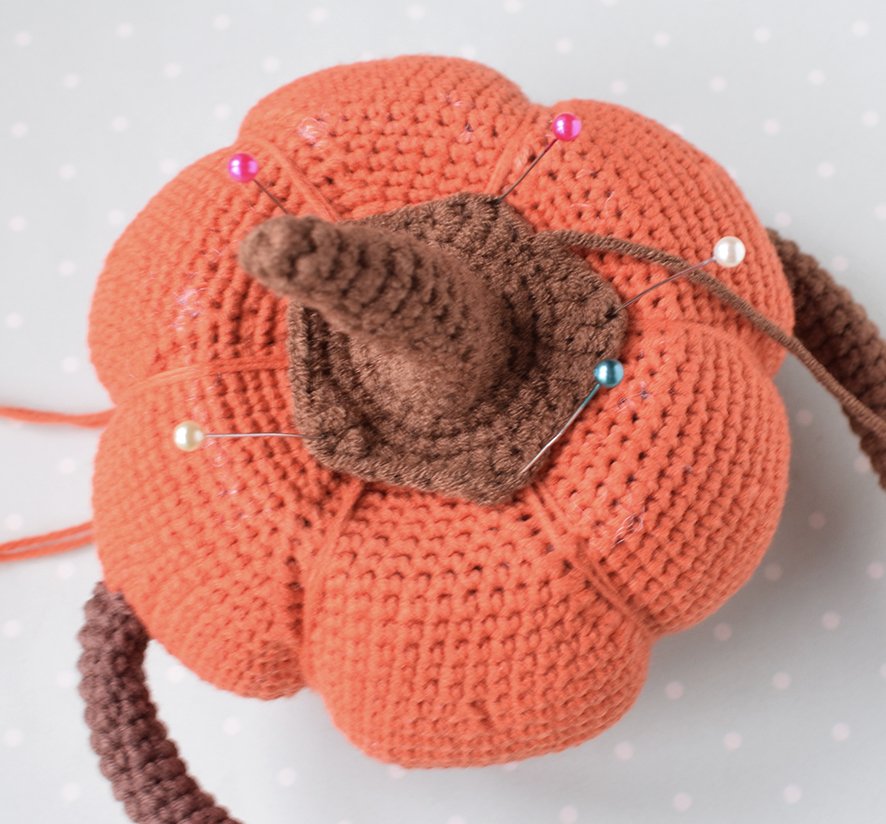
Sew it to the center of the top part of the pumpkin.
Hands (2 pcs, brown yarn)
8 ch in a ring
1 –32 = 8 sc
Close, trim the thread. Leave a long end of the thread for further work.
Place these pieces onto the frame and sew them to the pumpkin.
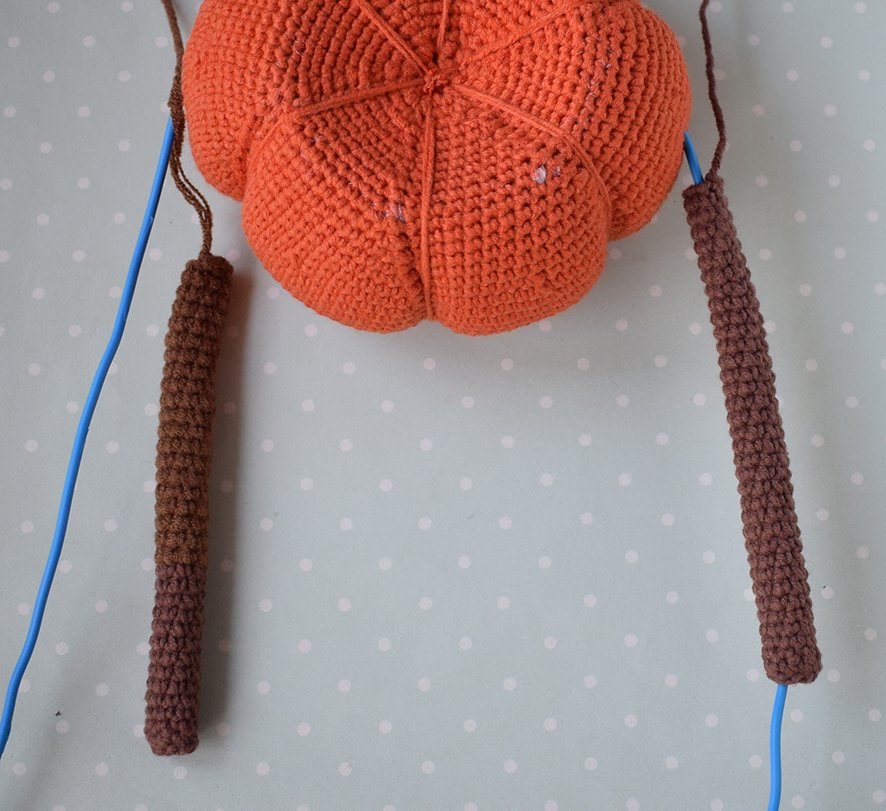
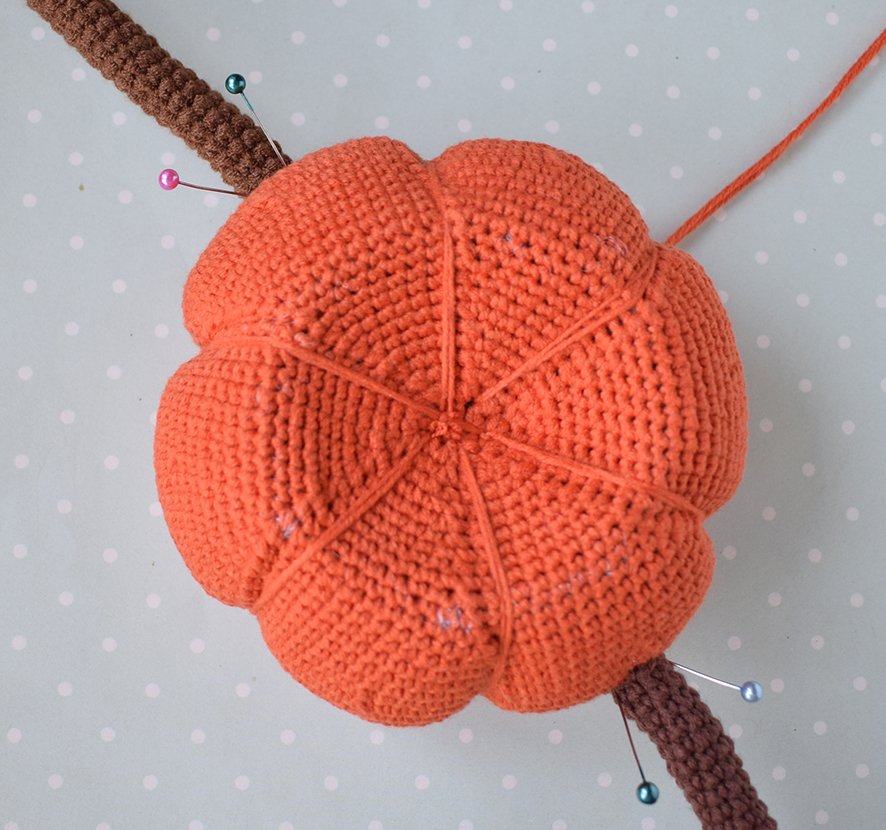
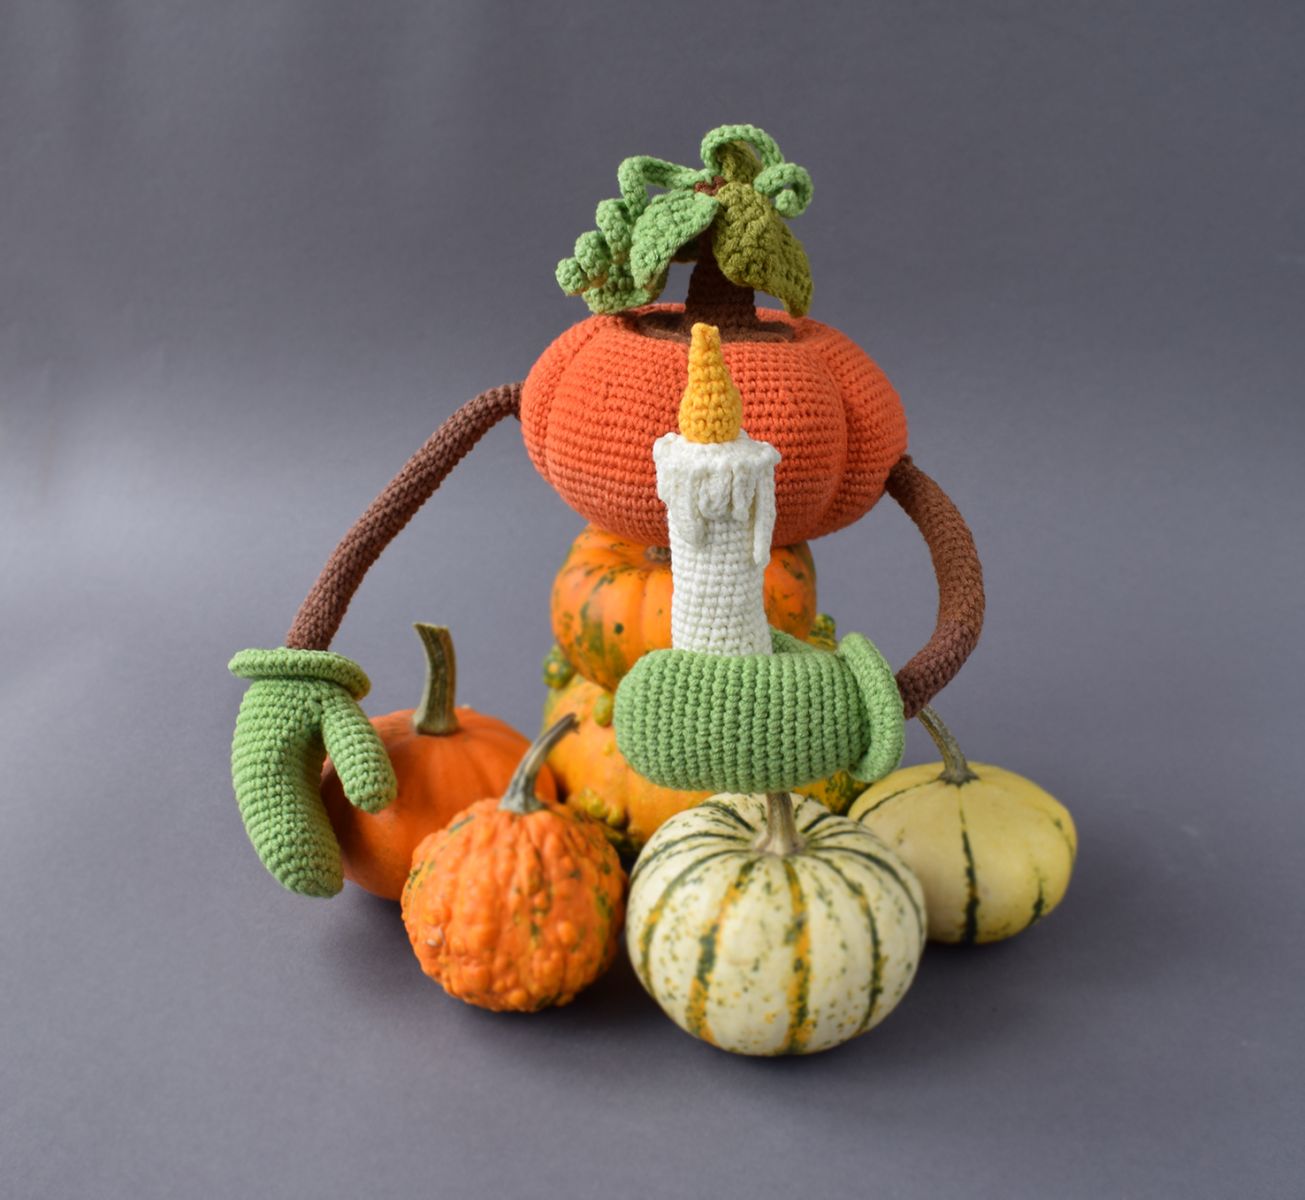
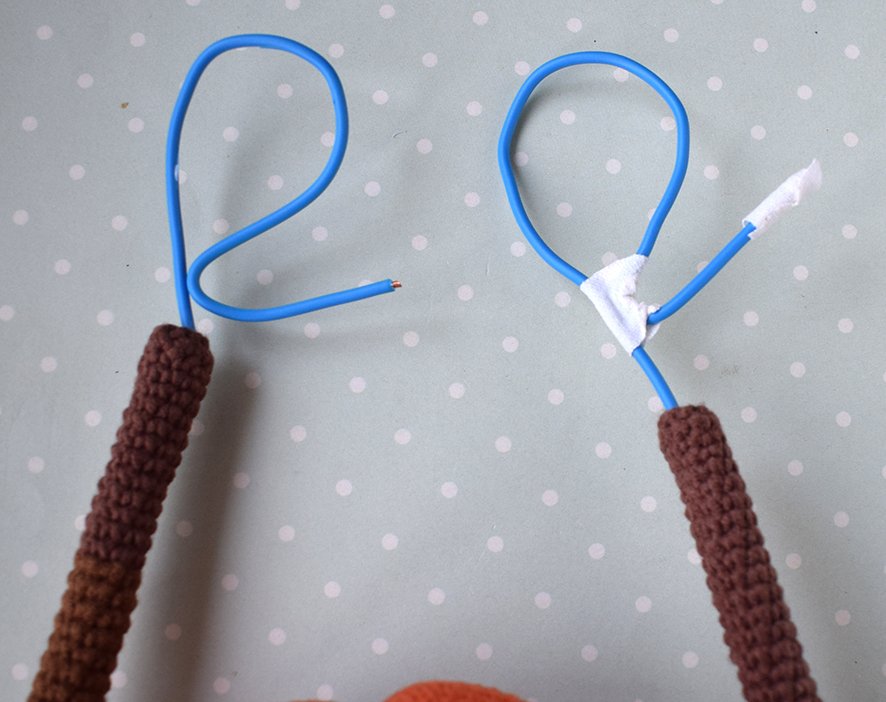
Shape the wire frame for the hands, including the thumbs, as shown in the photo. For safety, you can wrap the wire with adhesive tape.
Tip: Once you have finished making the frame, check again that the arms are long enough and have a wide enough reach to support your phone or tablet.
Gloves (2 pcs, green)
Thumb (2 pcs)
1. Crochet 6 sc in a Magic Ring
2. 6 inc = 12 sc
3 – 11 = 12 sc
Close, trim the thread.
Main part of the glove (2 pcs)
Chain 7 stitches, starting 2 stitches from the needle.
1. Crochet 5 sc, 3 in 1, 4 sc, 3 in 1 = 15 sc
2. 5 sc, 2 inc, 6 sc, 2 inc = 18 sc
3. 6 sc, 3 inc, 6 sc, 3 inc, 1 sc = 25 sc
4. 9 sc, 1 inc, 12 sc, 1 inc, 2 sc= 27 sc
5 – 16 = 27 sc
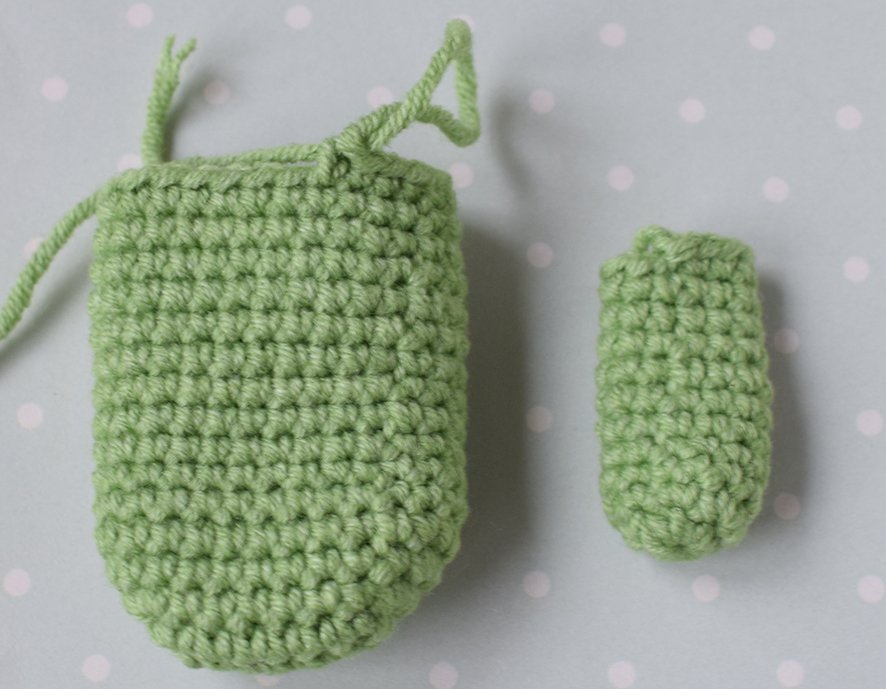
Now we connect the thumb to the main part.
For the left glove, we crochet the following rows as follows:
19. 14 sc, 6 sc, 10 sc = 30 sc
17. 1 sc, 6 sc together with the finger, 20 sc = 27 sc
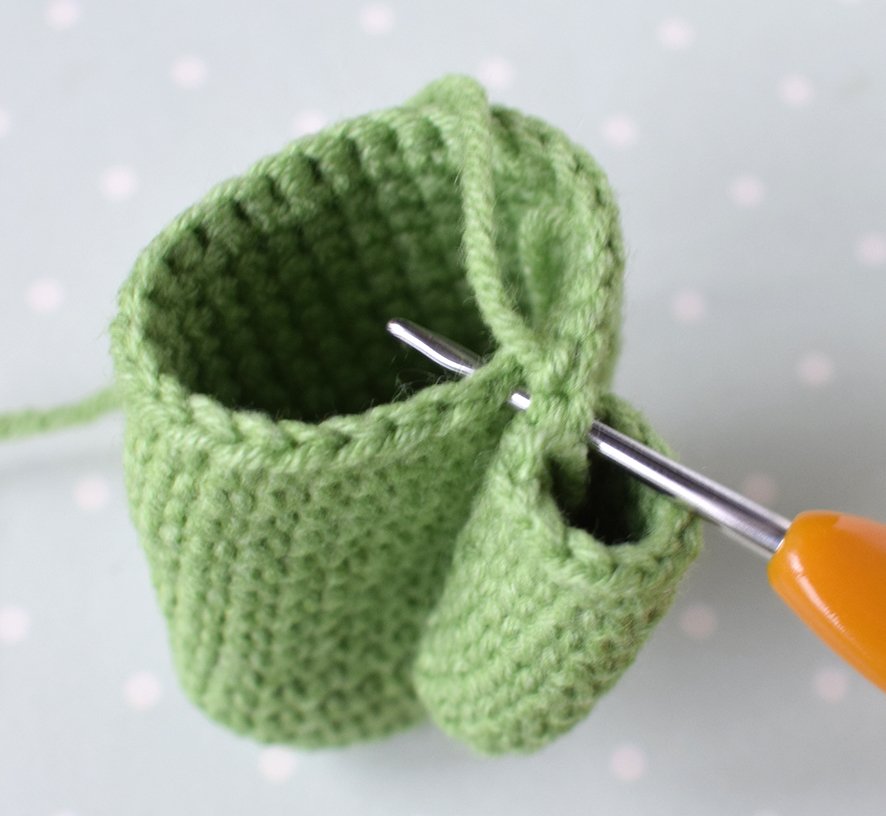
18. 1 sc, 6 sc on the outer edge of the finger, 20 sc = 27 sc
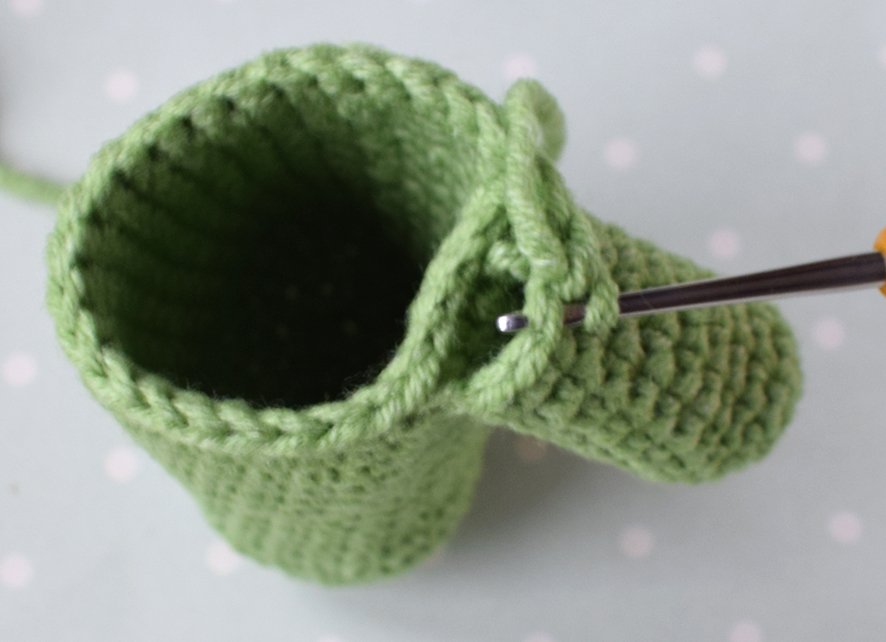
For the right glove, we crochet the following rows as follows:
17. 4 sc, 6 sc together with the finger, 17sc = 27 sc
18. 4 sc, 6 sc on the outer edge of the finger, 17 sc = 27 sc
Continue crocheting both gloves evenly with the crochet hook.
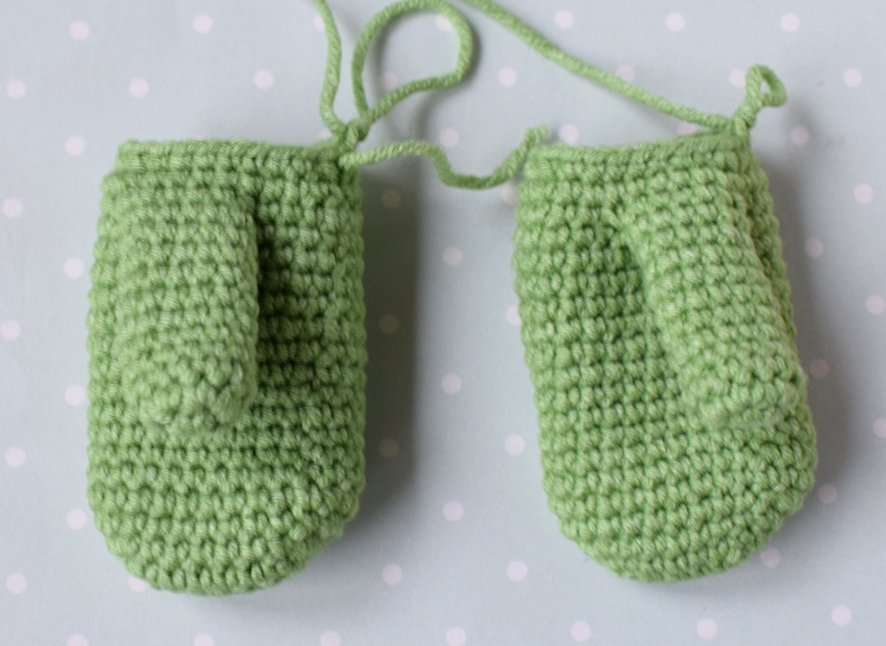
19. 27 sc
20. (7 sc, 1 dec) х 3 = 24 sc
At this stage, we need to place this part on the frame. Add some filling material, but only a little, so that the hand can bend easily and the part can hold an object.
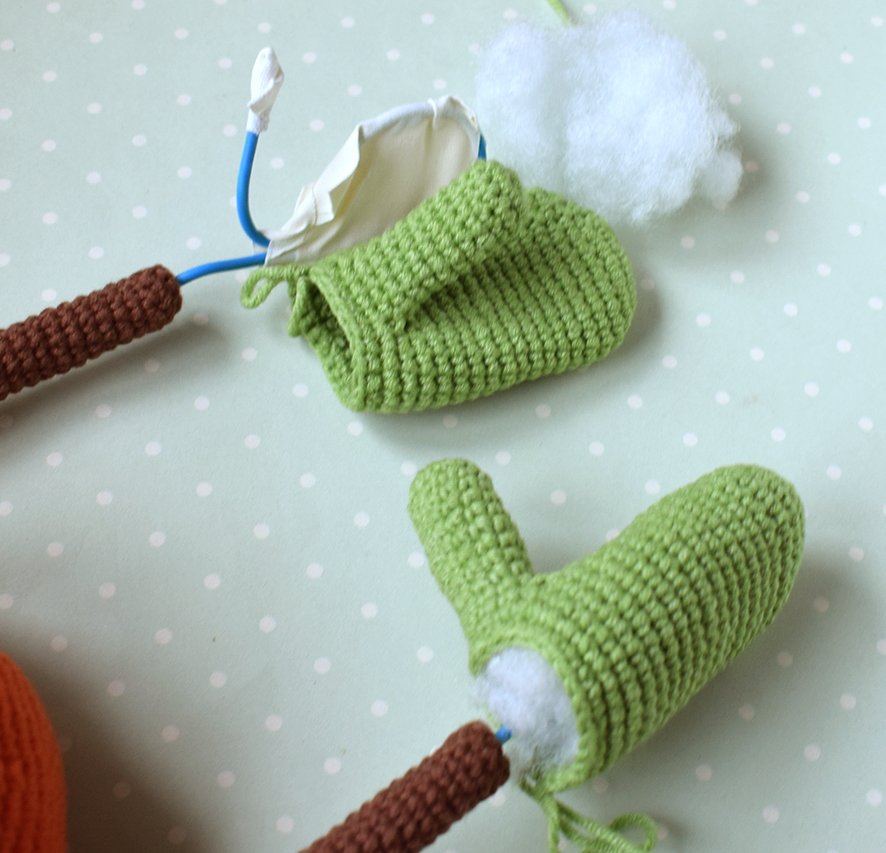
Now we continue crocheting around the frame. It's a bit fiddly, but the end result is worth the effort.
21. (2 sc, 1 dec) х 6 = 18 sc
22. We only crochet into the front loop: 18 sc = 36 sc
In the photo, I have shown the back loop. It will be useful to us later.
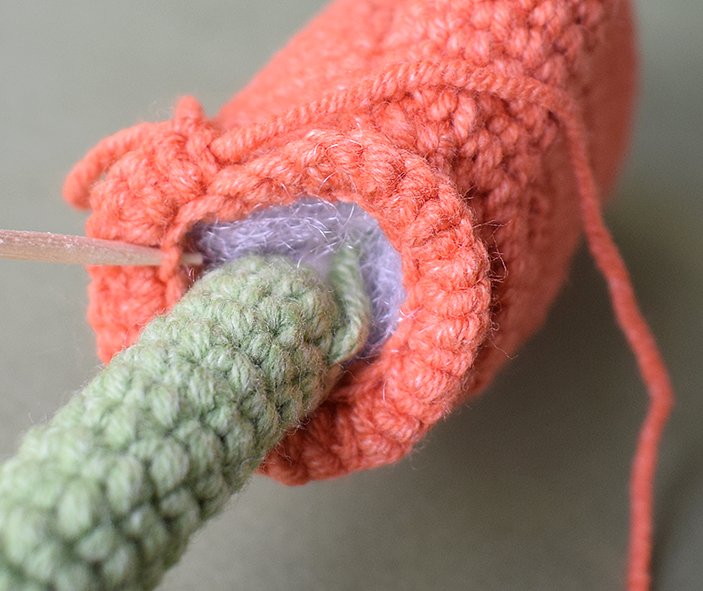
23 – 26 = 36 sc
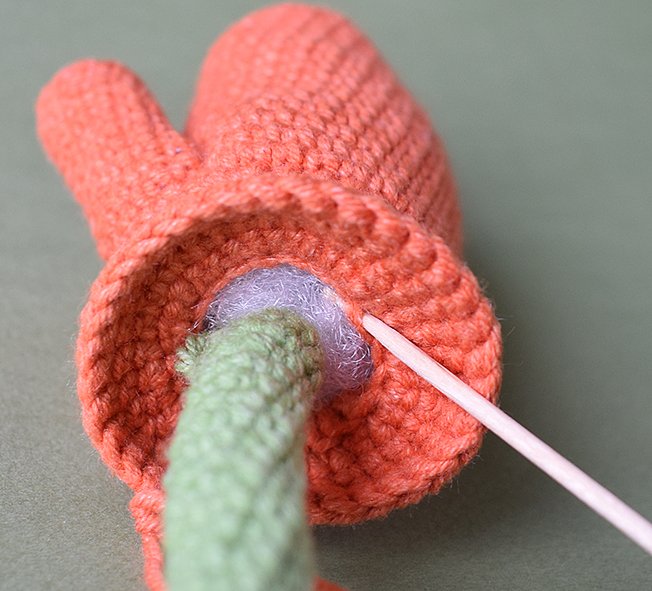
26. We make a fold and crochet through the remaining part of the stitches from 22 row 18 dec = 18 sc
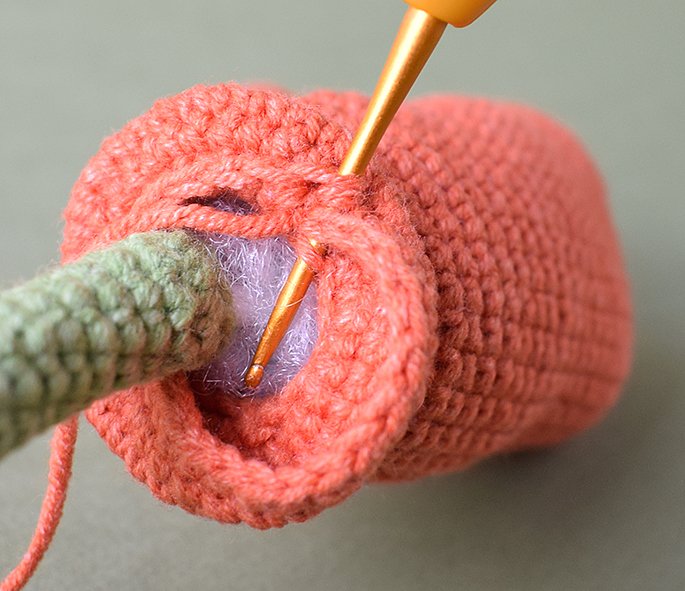
27. (1 сб, 1 dec) х 6 = 12 sc
Close, trim the thread.
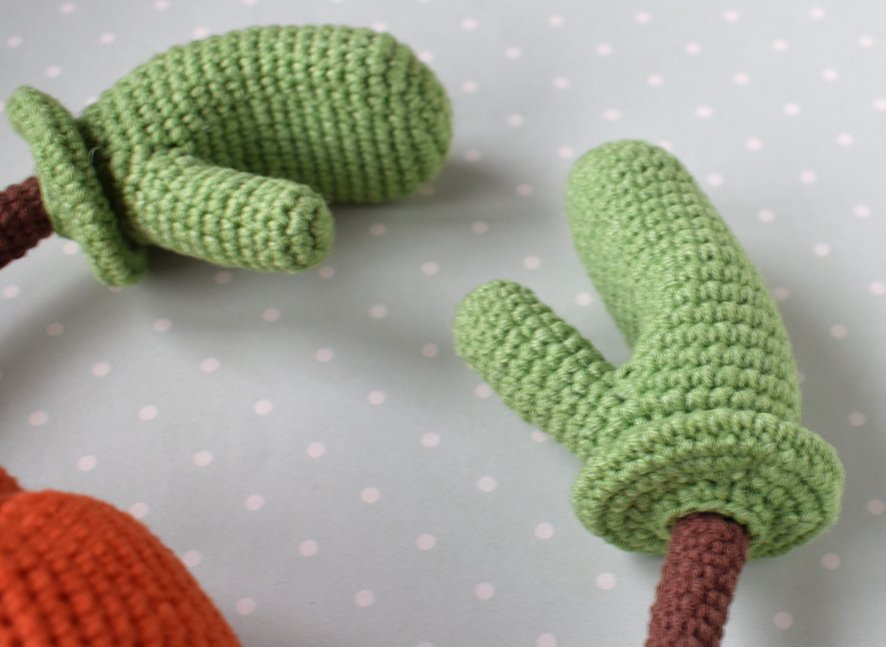
Pumpkin tendrils (in green)
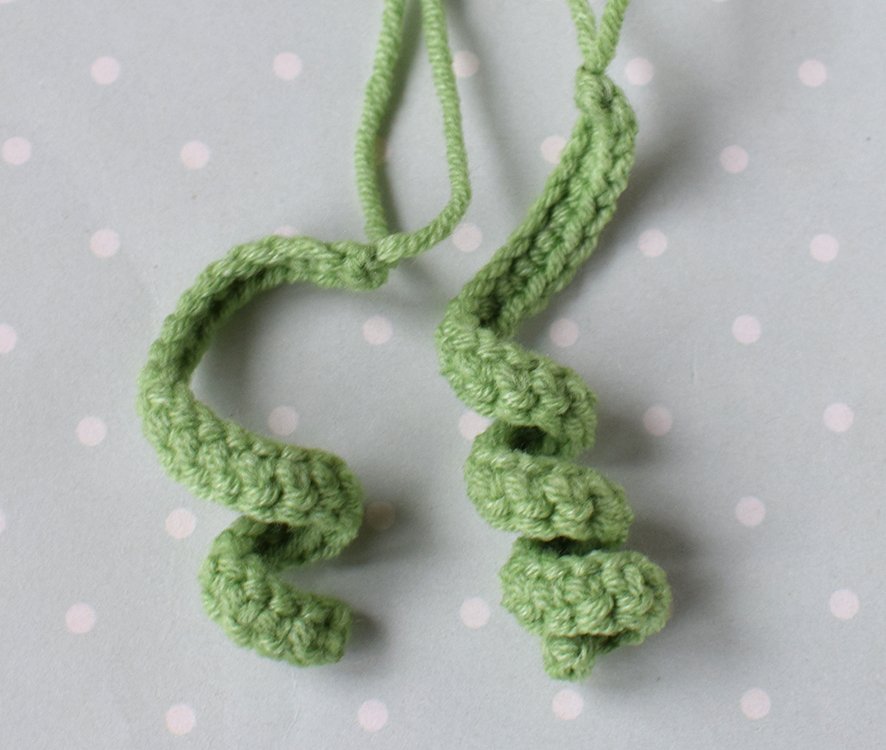
Make the decorative pumpkin tendrils as long as you like. For my pumpkin, I made one tendril with 30 ch, then worked 29 sc, starting in the 2nd ch from the hook. For the second tendril, I made 50 ch, then worked 49 sc, starting in the 2nd ch from the hook.
Close, trim the thread. Leave a long end of the thread for further work.
Pumpkin leaf (green yarn)
5 ch into a ring
1. Join 5 ch into a ring with 1 sc
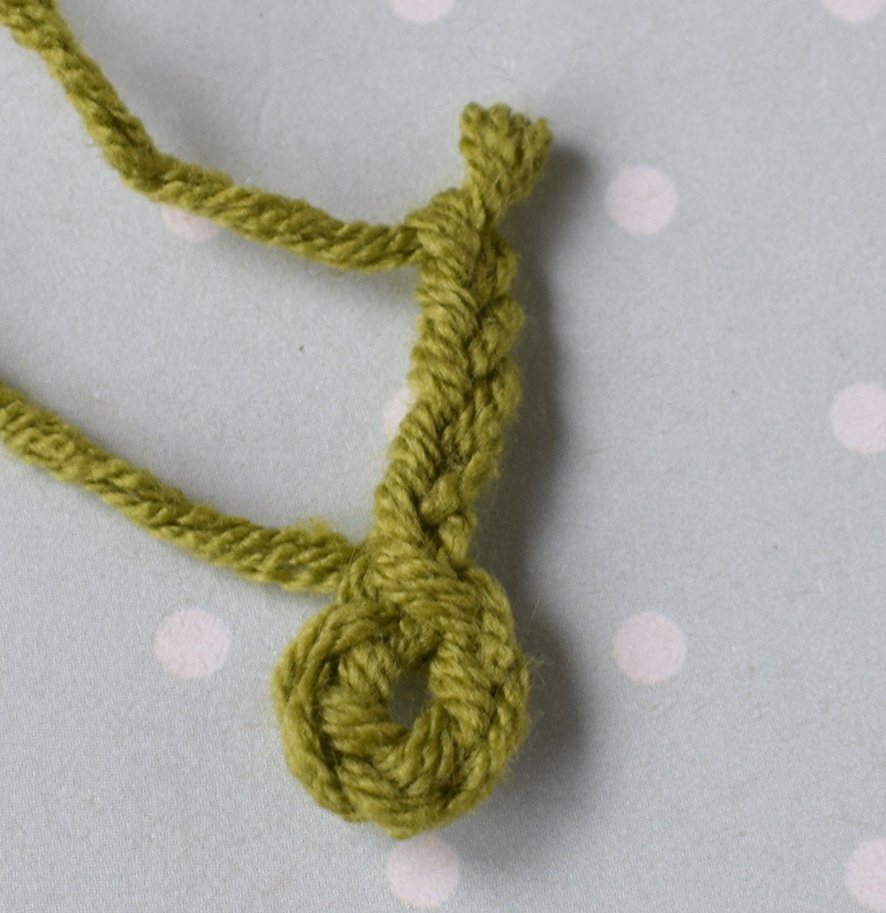
Join 7 ch into a ring with 1 sc
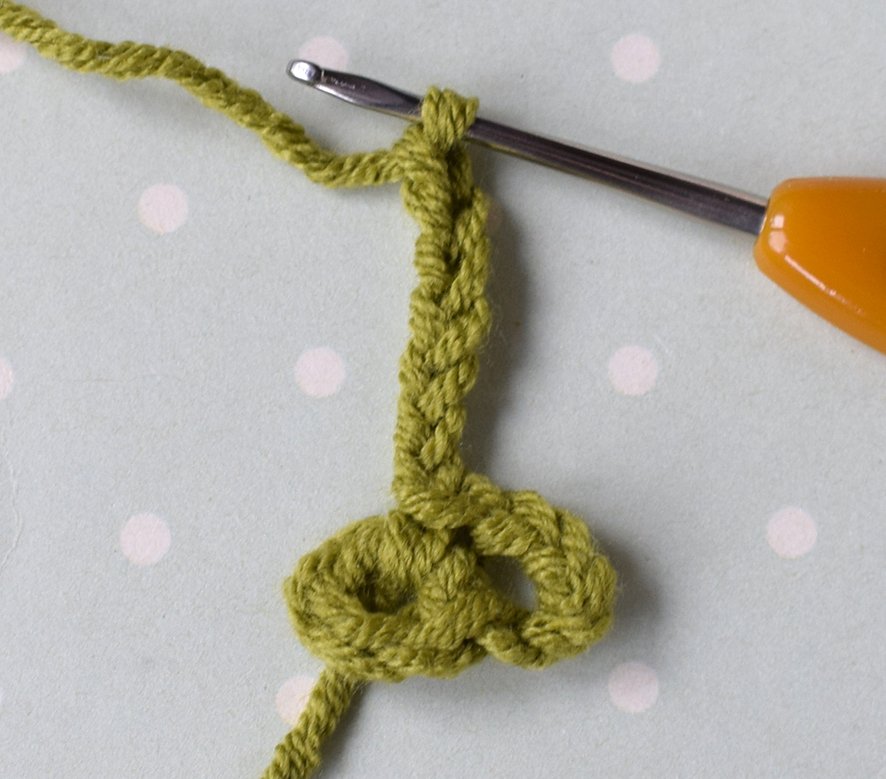
Join 5 ch into a ring with 1 sc
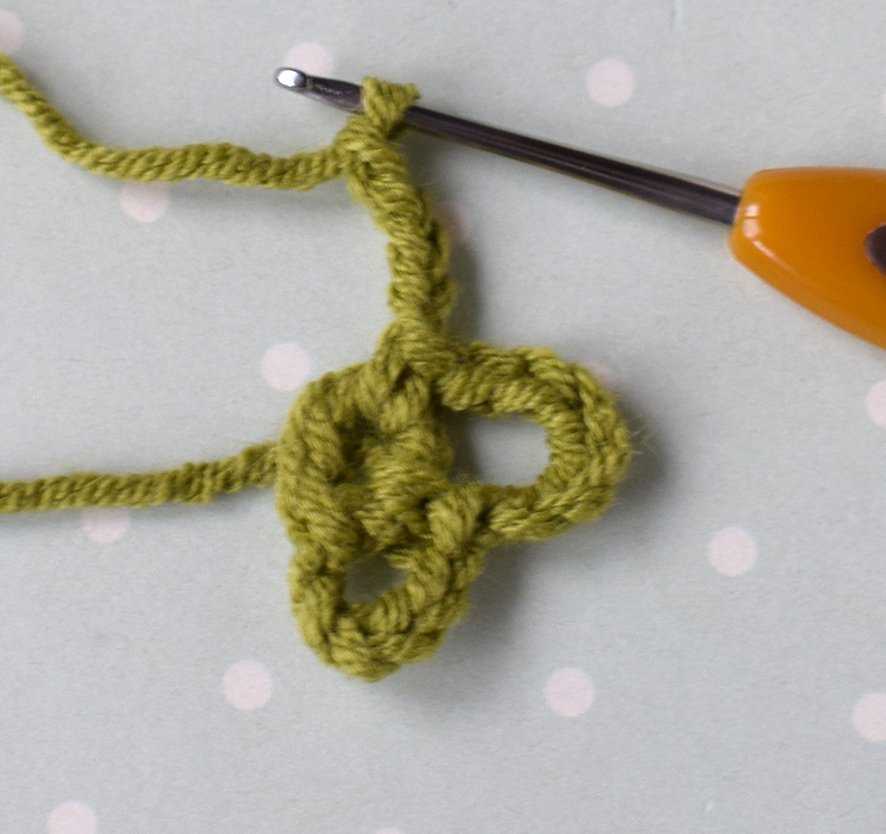
2. Into the first ch-5 arch, work 2 dc, 1 tr, 2 dc.
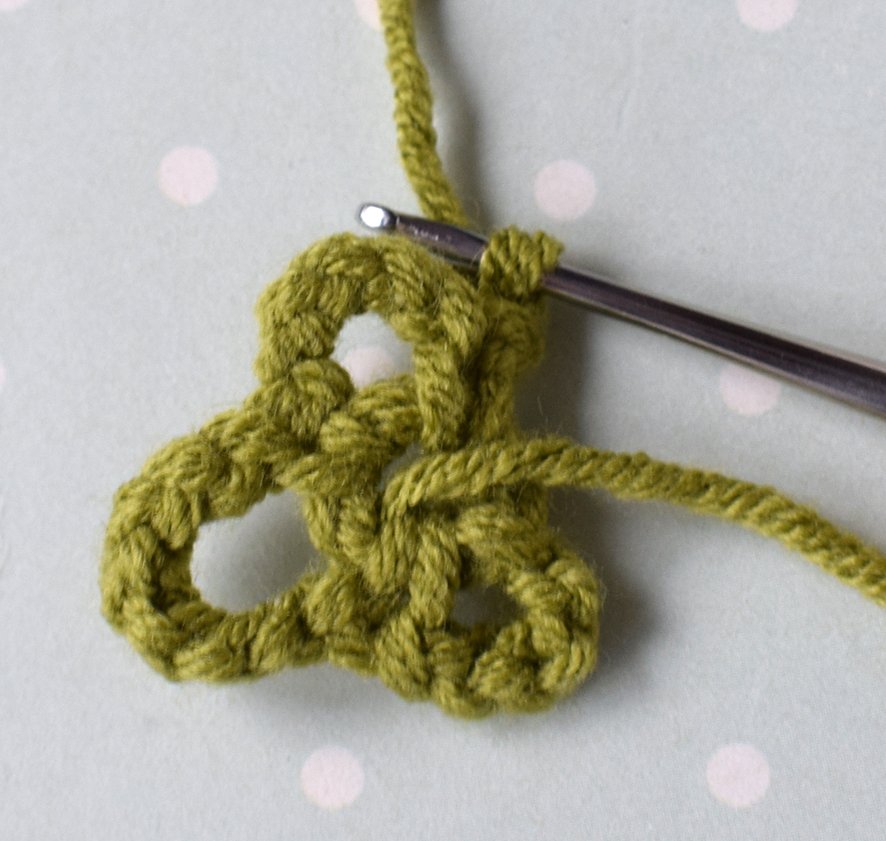
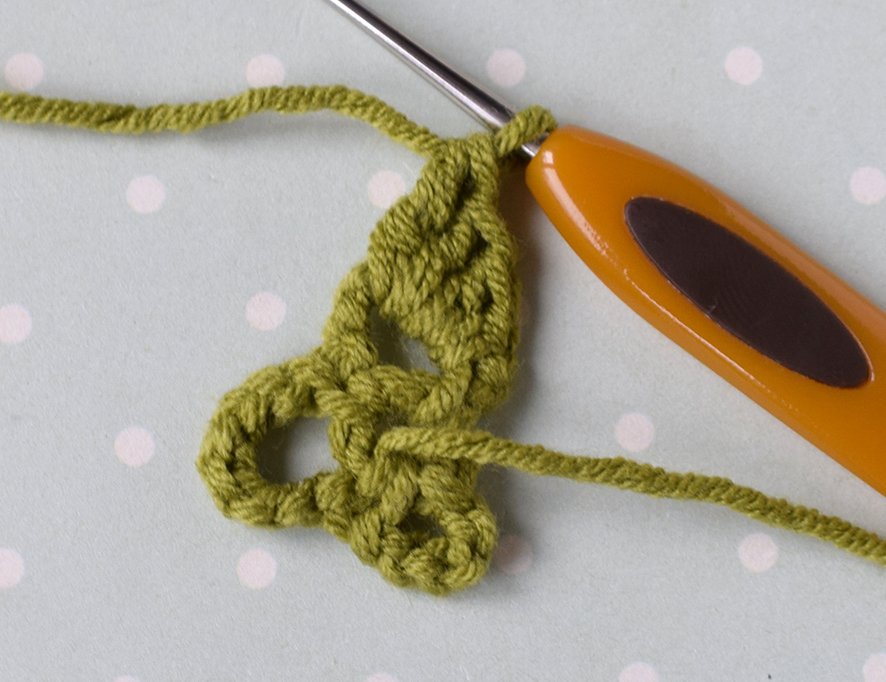
Work 1 sc between the arches.
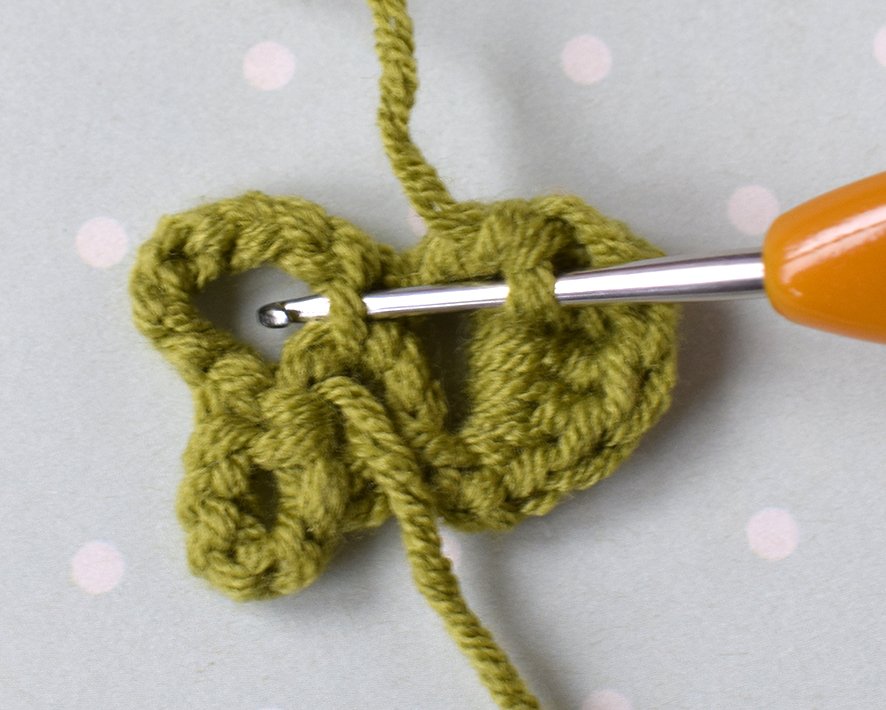
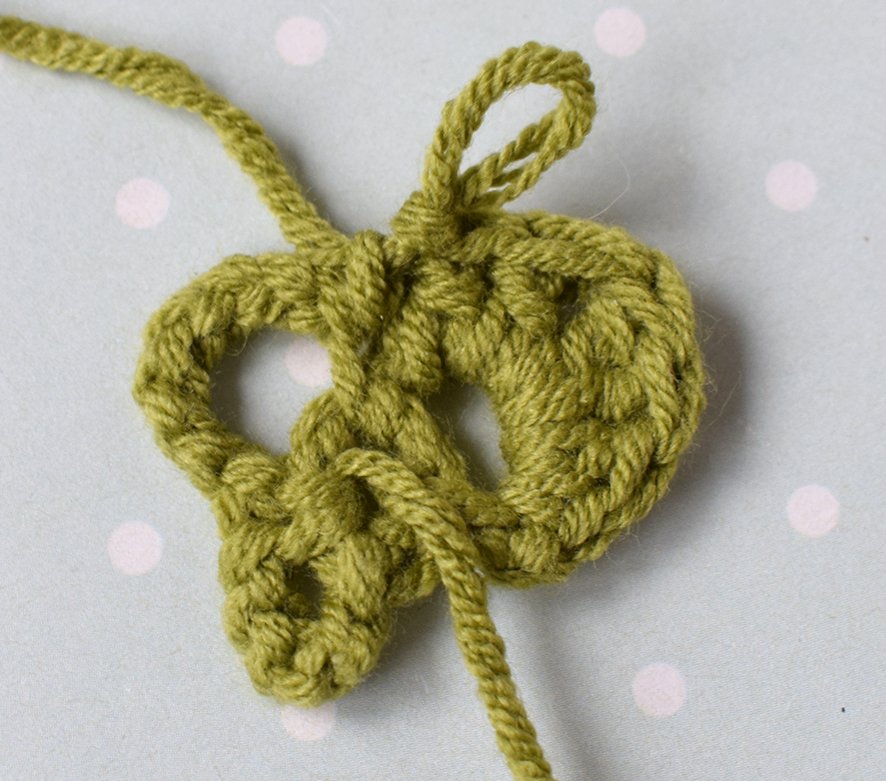
Into the second ch-7 arch, work 3 dc, 2 tr, 3 dc.
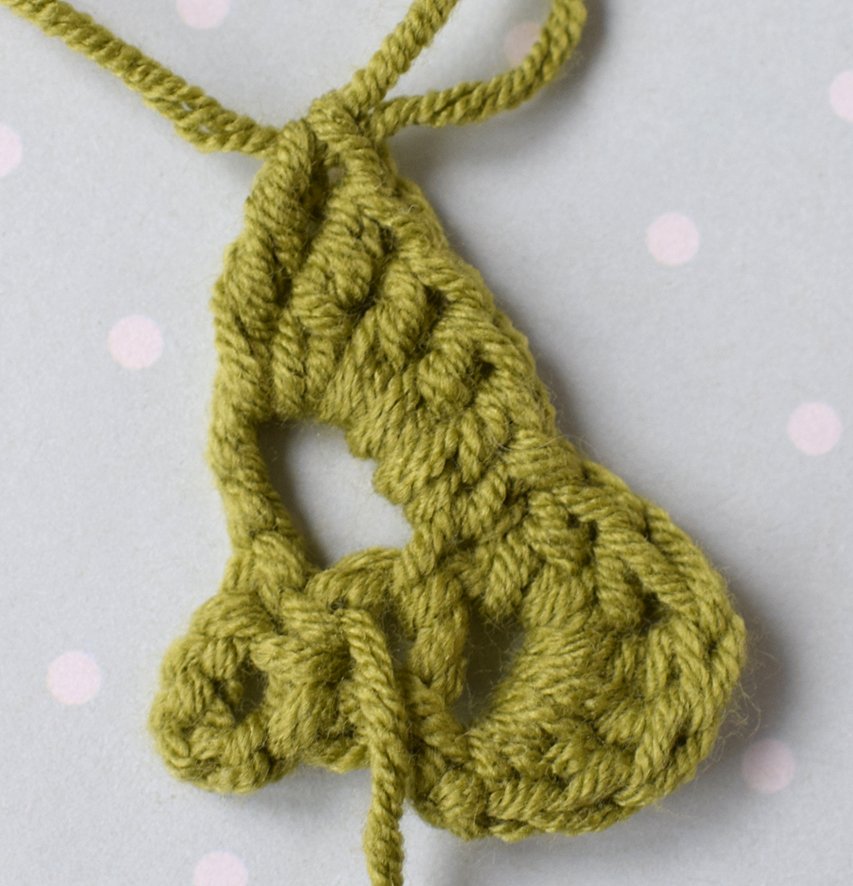
Work 1 sc between the arches.
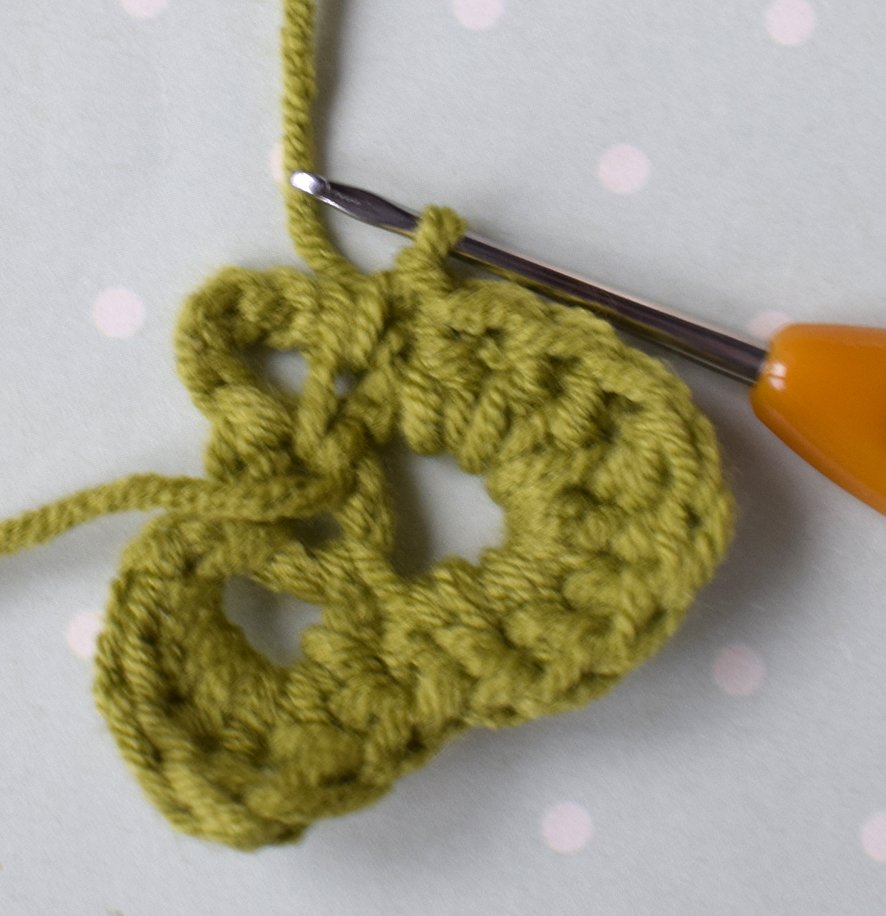
Into the third ch-5 arch, work 2 dc, 1 tr, 2 dc.
ch, turn work
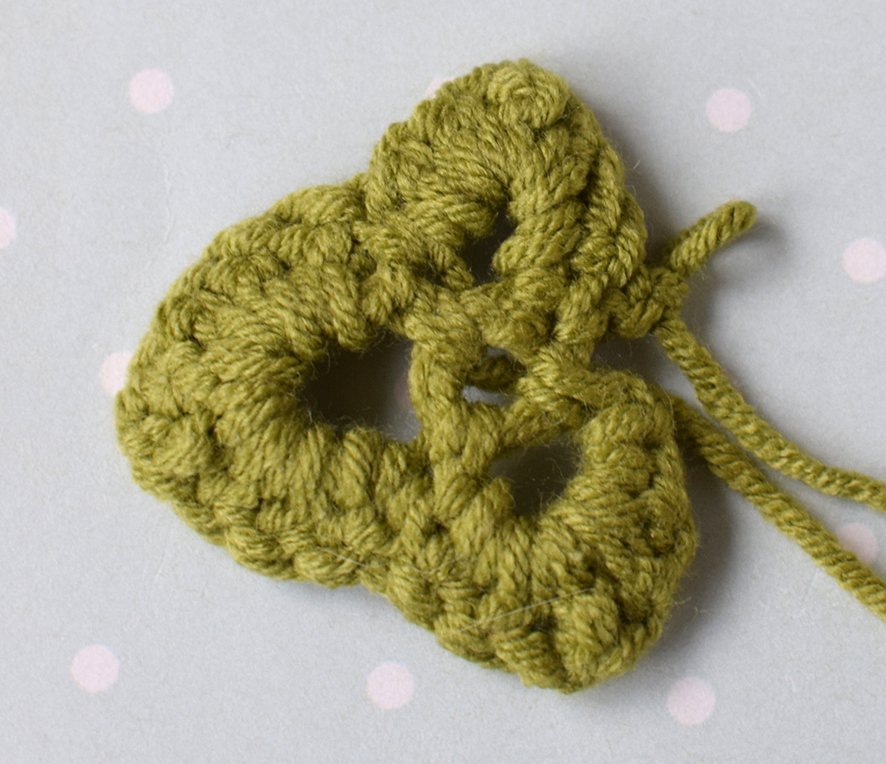
3. Into the ch-5 arch, work 2 dc, 2 tr in the next stitch, 2 dc.
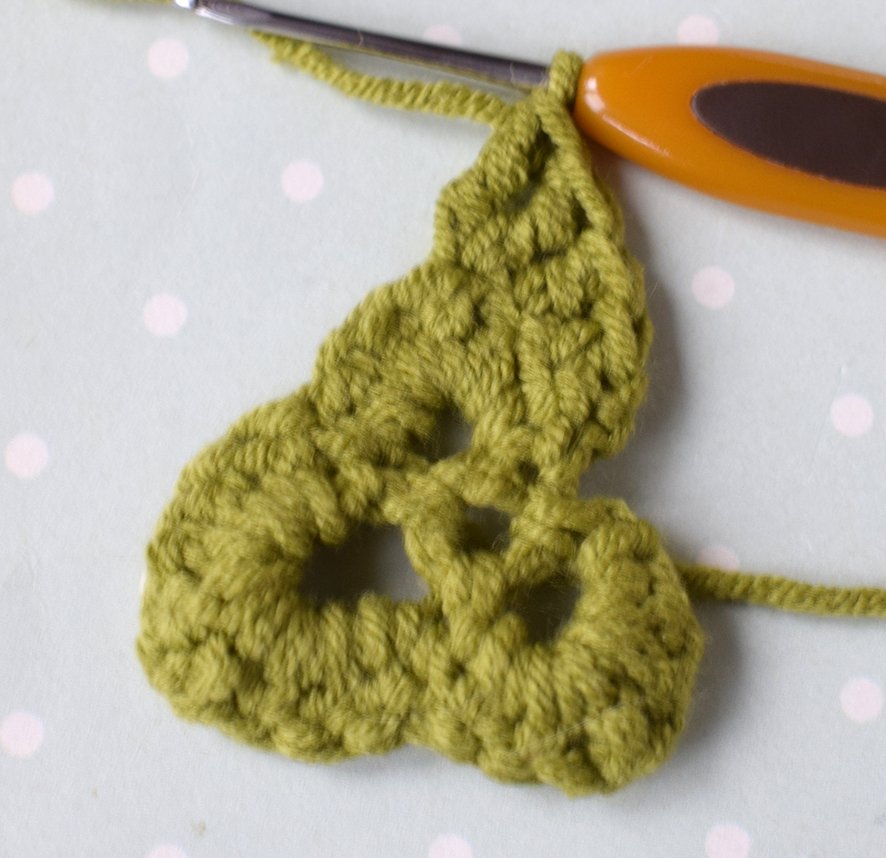
Work 1 sc between the arches.
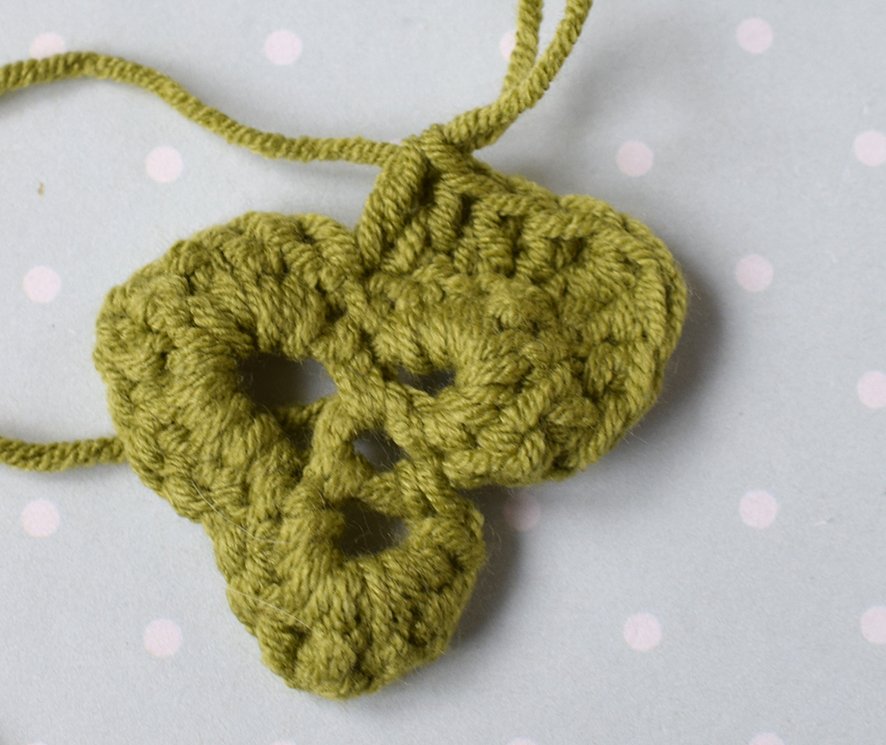
Into the ch-7 arch, work 3 dc, 4 tr in the next 2 stitches (2 tr in each stitch), 3 dc.
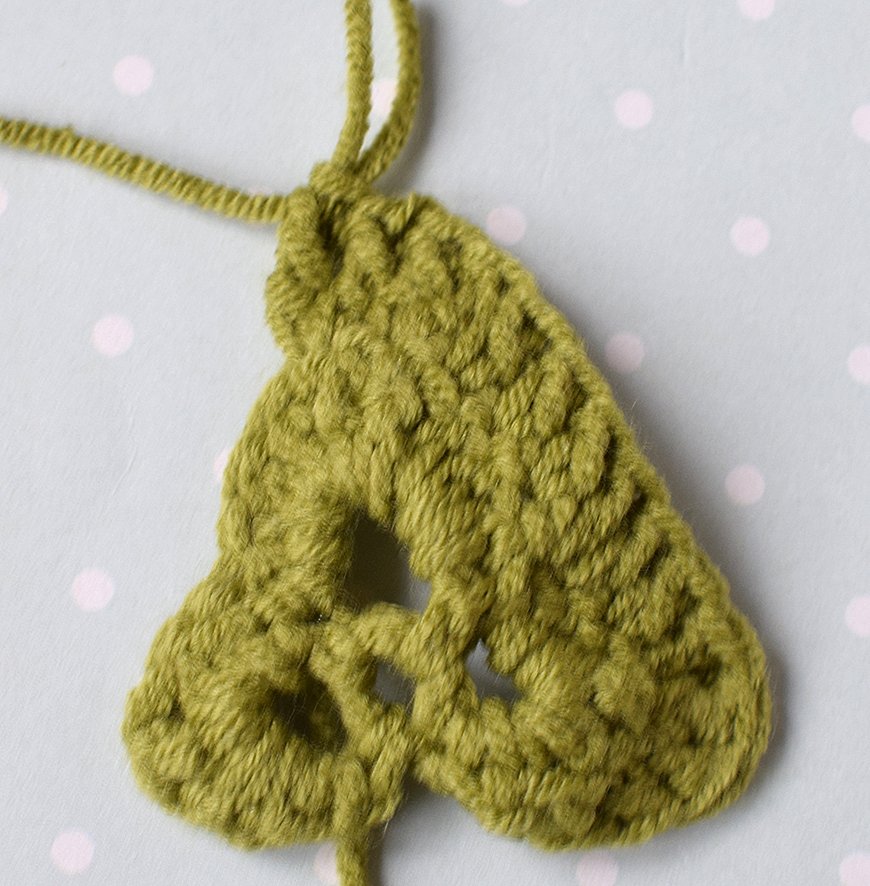
Work 1 sc between the arches.
Into the ch-5 arch, work 2 dc, 2 tr in the next stitch, 2 dc.
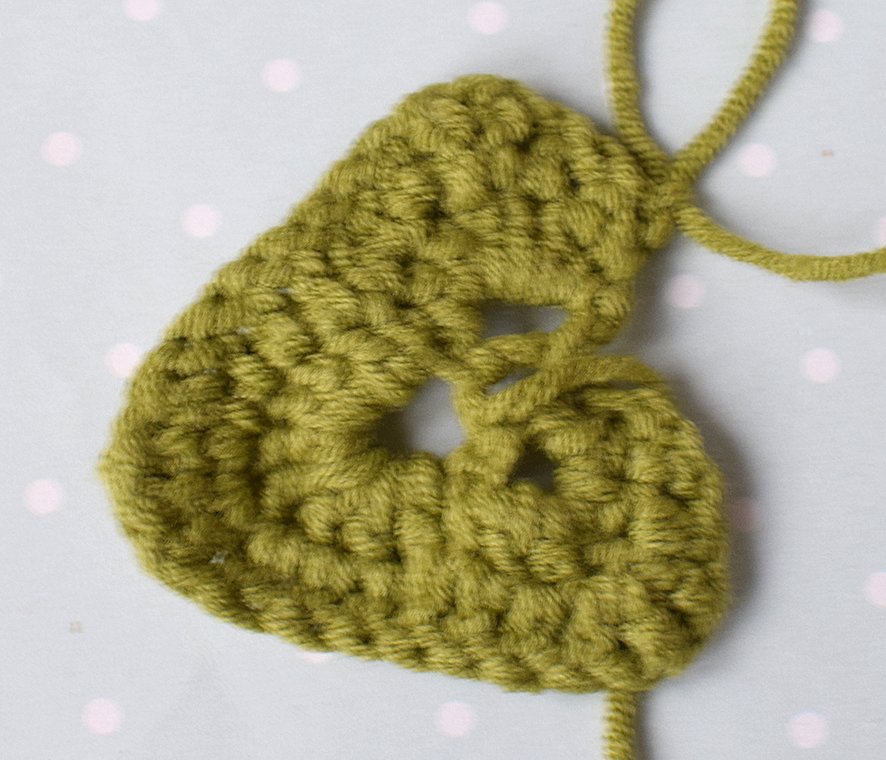
ch, turn work
4. Into the ch-5 arch, work 2 dc, 3 tr in the same stitch, 3 dc.
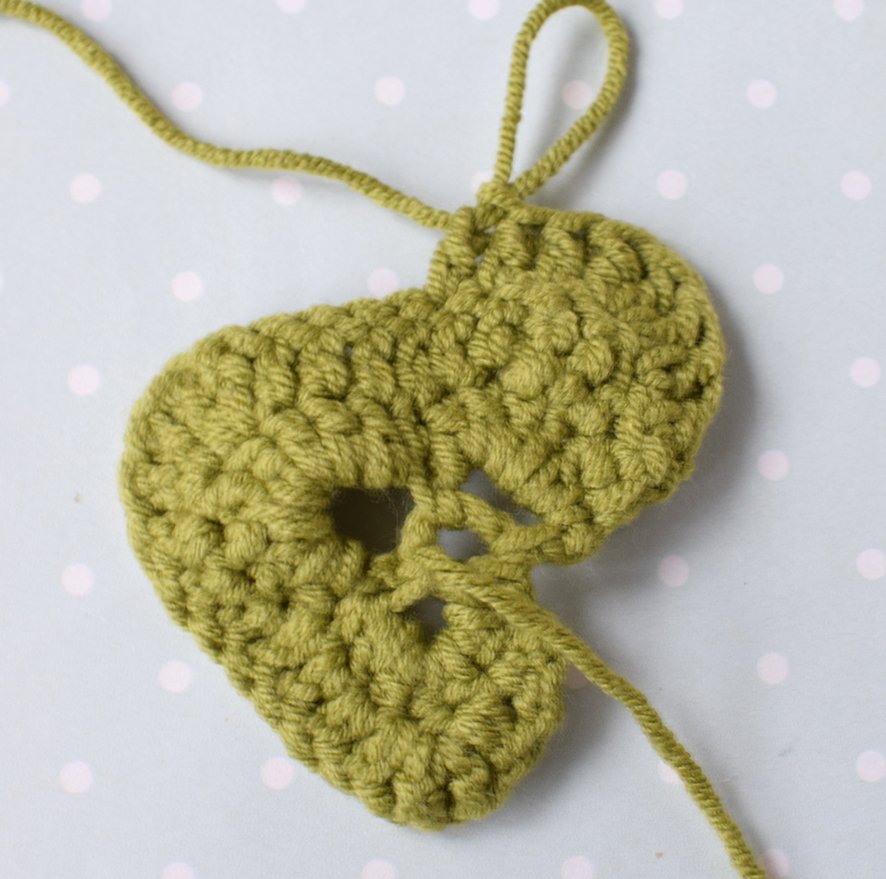
Into the ch-7 arch, work 5 dc, 6 tr in the next 3 stitches (2 tr in each stitch), 4 dc.
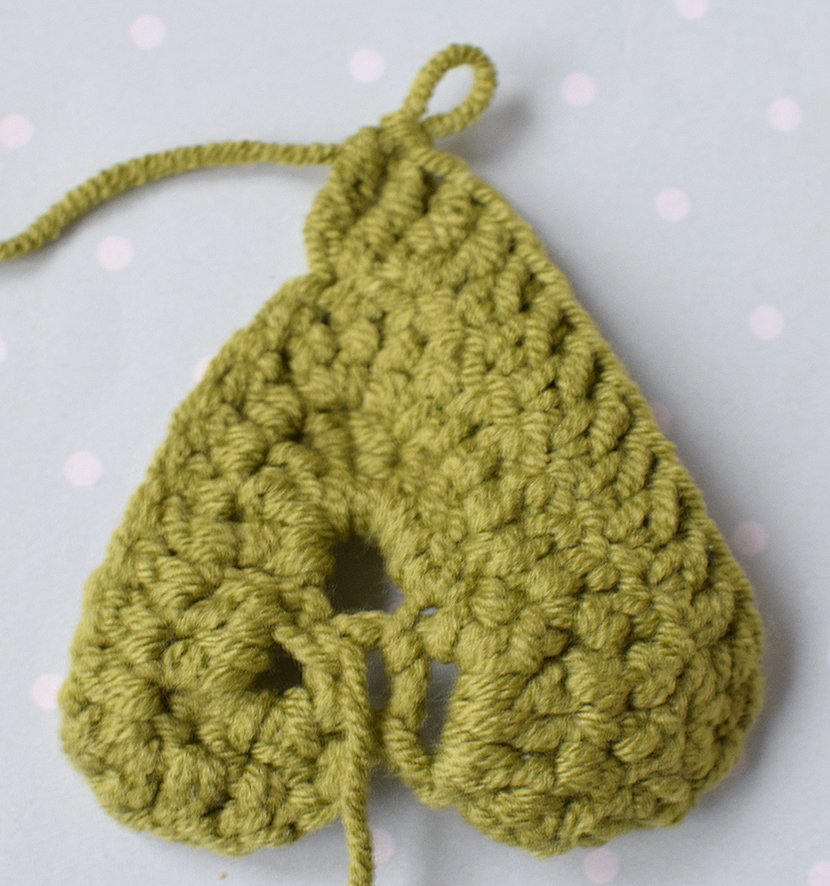
Work 1 sc between the arches.
Into the ch-5 arch, work 2 dc, 3 tr in the same stitch, 3 dc.
Close, trim the thread. Leave a long end of the thread for further work.
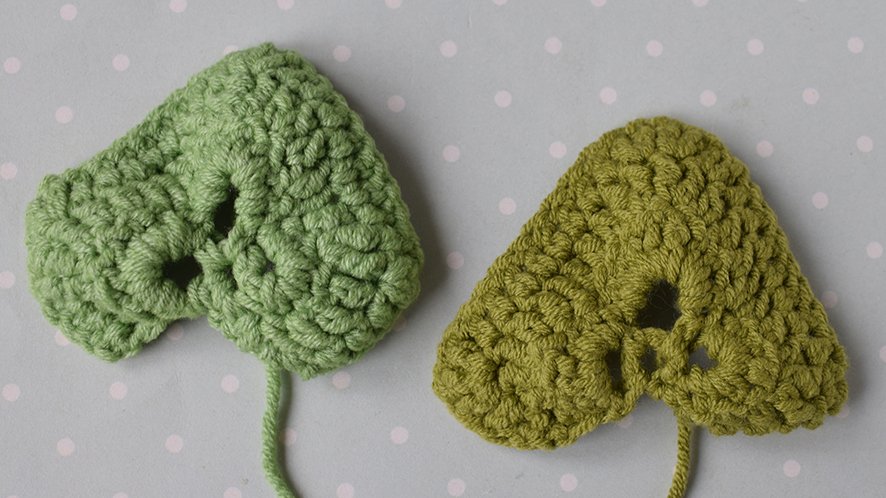
Attach to the top of the pumpkin stem, along with the decorative tendrils.
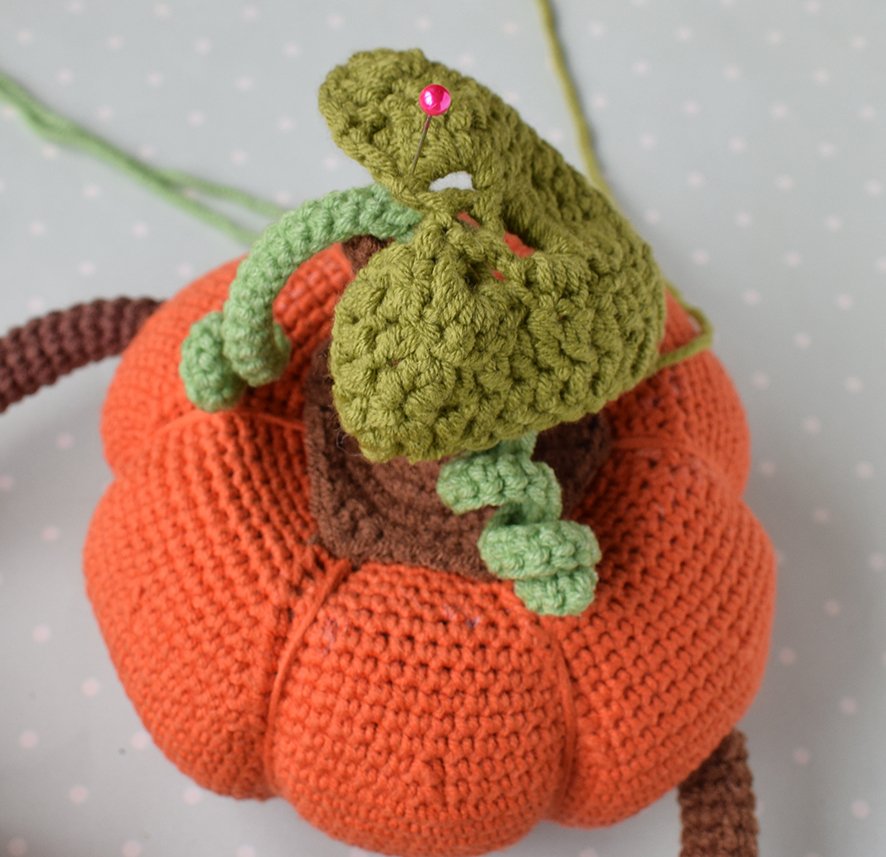
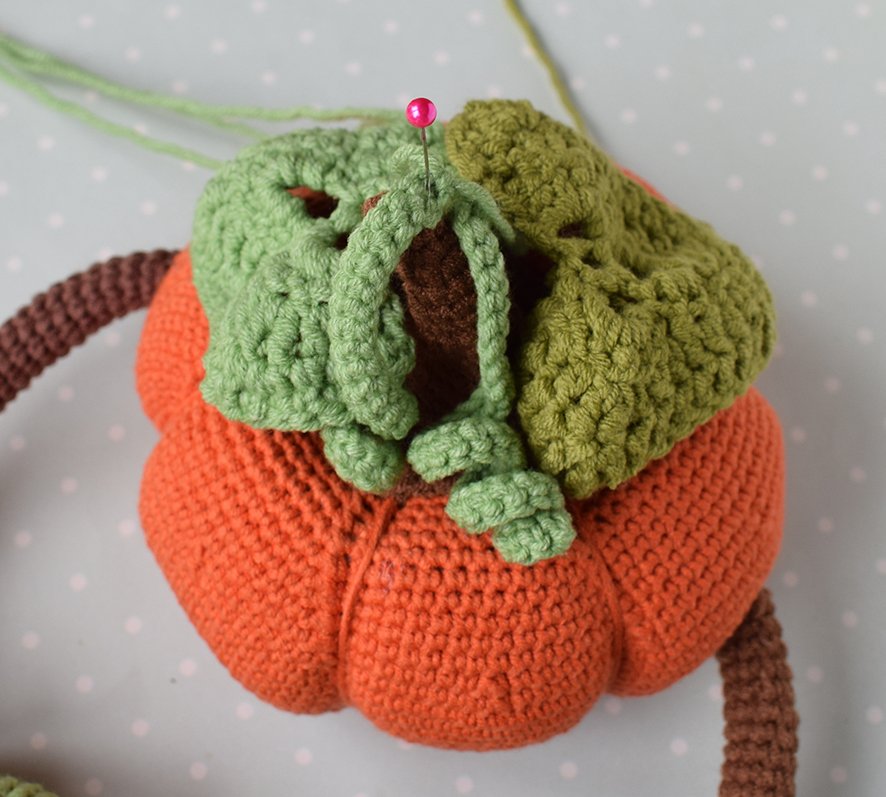
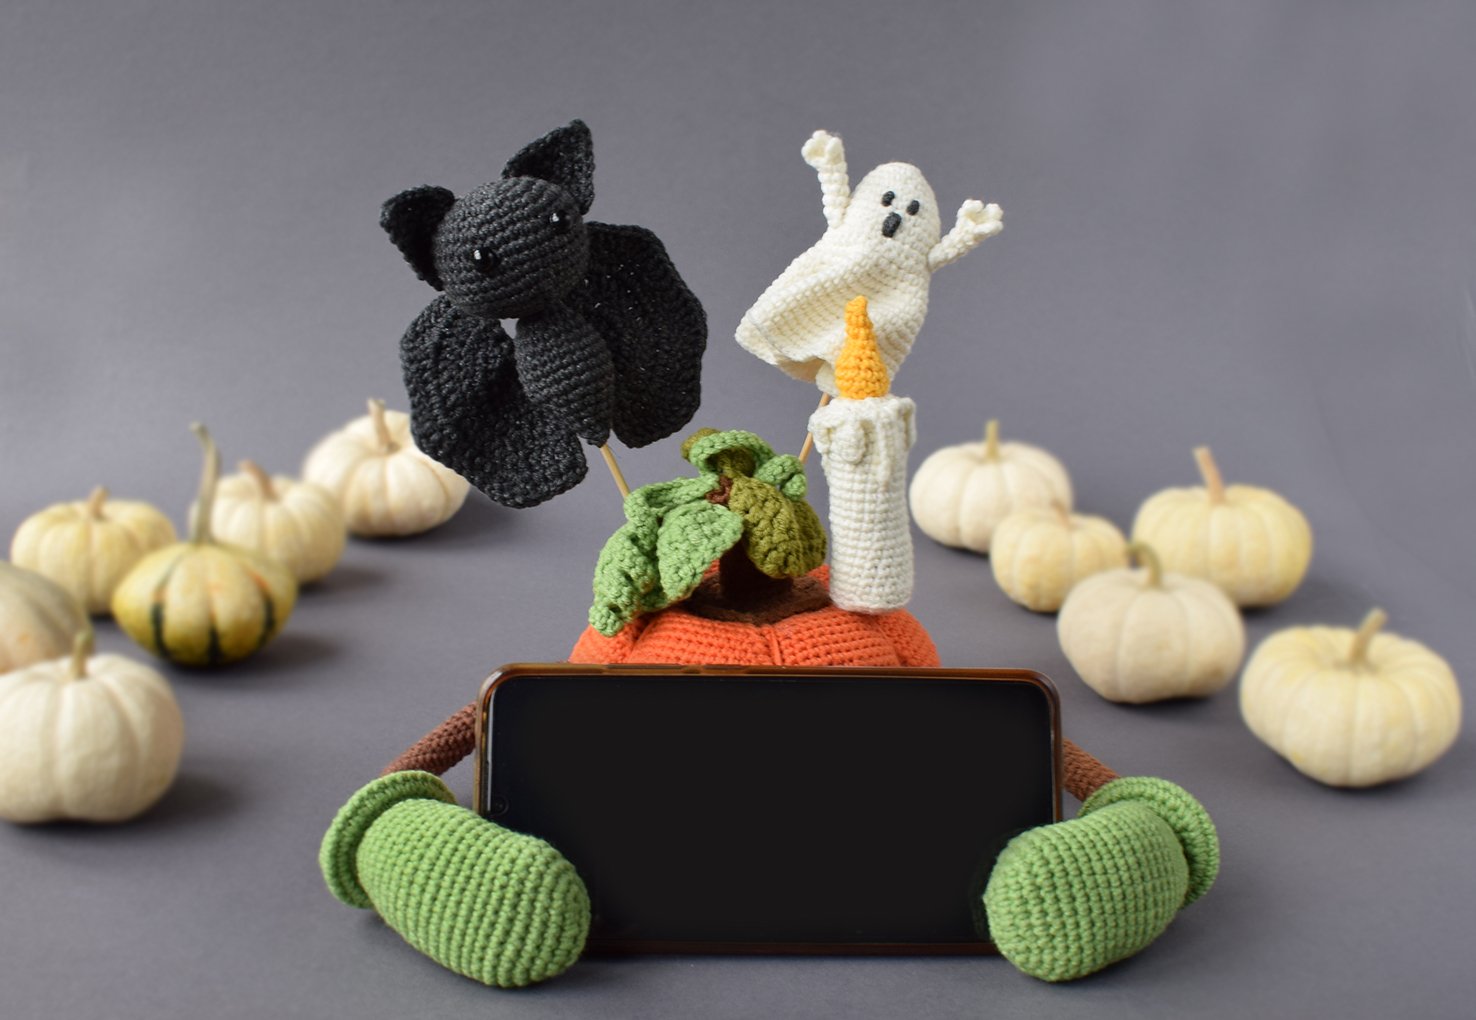
The pumpkin is already a beauty on its own and can serve as either a phone stand or a lovely decoration. But I would like to suggest crocheting a festive little company to go with it! Two opposites — white and black — yet both are flying creatures that love the night.
BAT
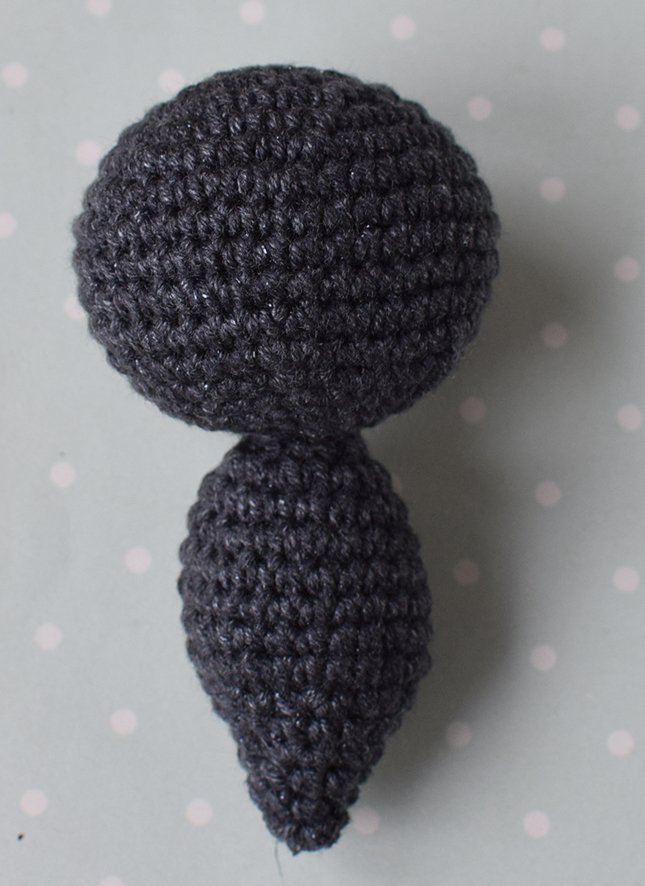
Head + body (black)
1. Crochet 6 sc in a Magic Ring
2. 6 inc = 12 sc
3. (1 sc, 1 inc) х 6 = 18 sc
4. (2 sc, 1 inc) х 6 = 24 sc
5. (3 sc, 1 inc) х 6 = 30 sc
6. (4 sc, 1 inc) х 6 = 36 sc
7. (5 sc, 1 inc) х 6 = 42 sc
8 – 11. 42 sc
12. (5 sc, 1 dec) х 6 = 36 sc
13. (4 sc, 1 dec) х 6 = 30 sc
14. (3 sc, 1 dec) х 6 = 24 sc
15. (2 sc, 1 dec) х 6 = 18 sc
16. (1 sc, 1 dec) х 6 = 12 sc
17. 6 dec = 6 sc
18. 6 inc = 12 sc
19. (1 sc, 1 inc) х 6 = 18 sc
20. 18 sc
21. (2 sc, 1 inc) х 6 = 24 sc
22 – 25. 24 sc
Then add the filling material.
26. (2 sc, 1 dec) х 6 = 18 sc
27. 18 sc
28. (1 sc, 1 dec) х 6 = 12 sc
29. 12 sc
30. 6 dec = 6 sc
Close, trim the thread.
Ears (2 pcs, black)
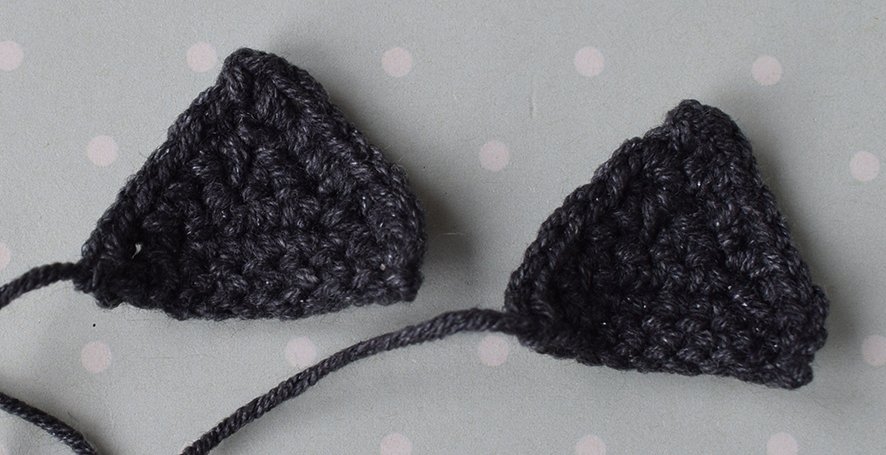
Chain 9 stitches, starting 2 stitches from the needle.
1. Crochet 8sc, ch, turn work
2. 1 dec, 4 sc, 1 dec = 6 sc, ch, turn work
3. 1 dec, 2 sc, 1 dec = 4 sc, ch, turn work
4. 2 dec, ch, turn work
5. 1 dec
Work single crochet stitches all along the edge for a nice finish.
Close, trim the thread. Leave a long end of the thread for further work.
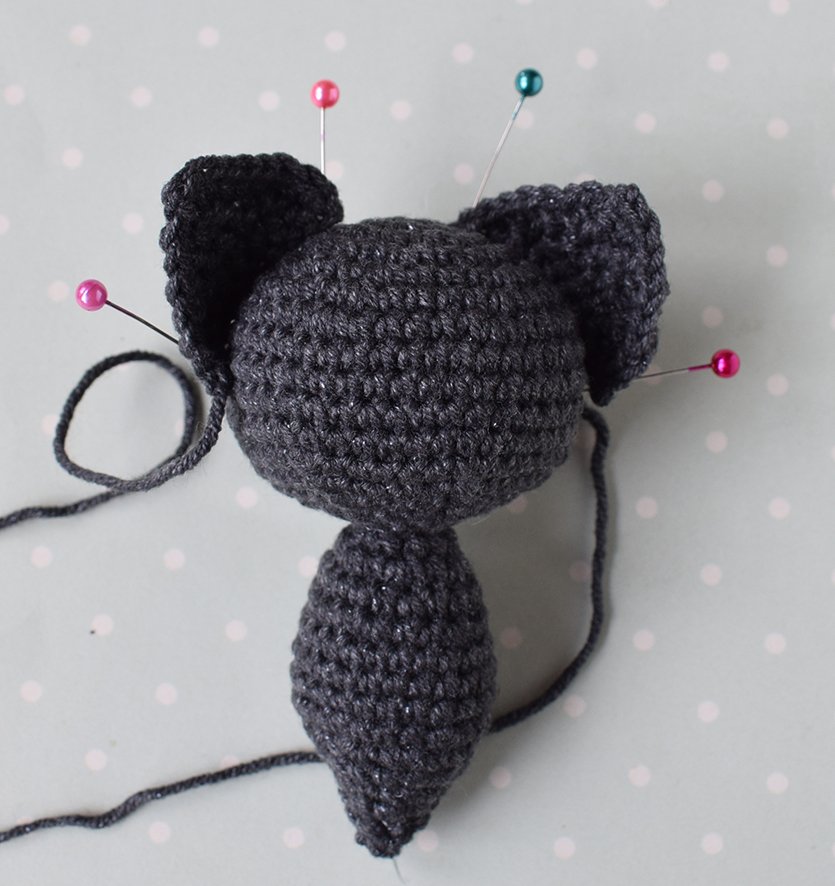
Sew the ears onto the bat's head.
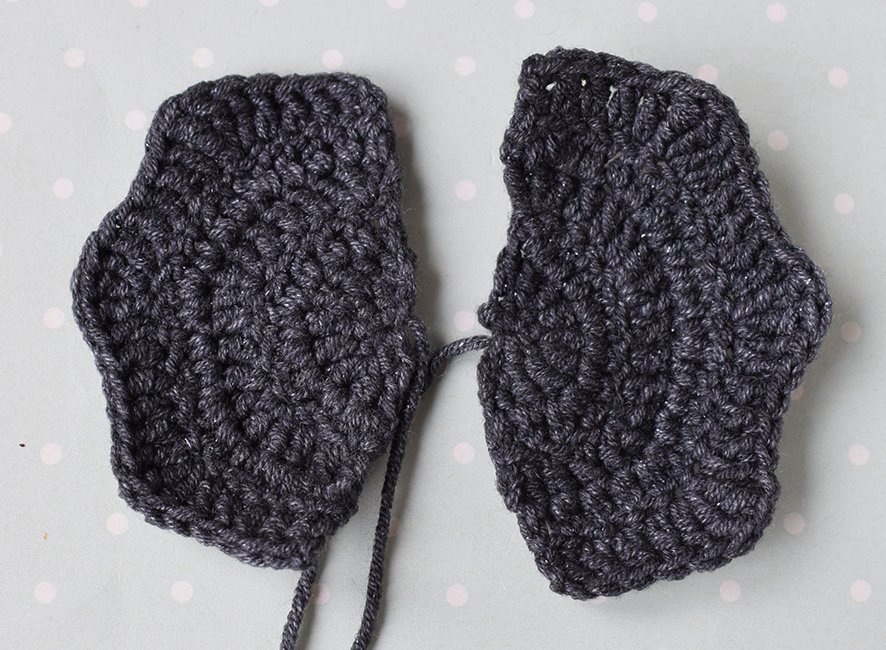
Wings (2 pcs, black)
1. 6 ch into a ring, ch, turn work
2. (1 dc, 1 inc) х 3 = 9 dc, ch, turn work
3. (2 dc, 1 inc) х 3 = 12 dc, ch, turn work
4. (3 dc into a single loop, 3 dc) х 4 = 18 dc, ch, turn work
5. 1 dc, (1 inc, 3 dc) х 4, 1 dc = 22 dc, ch, turn work
6. 4 dc, 3 tr into a single loop,
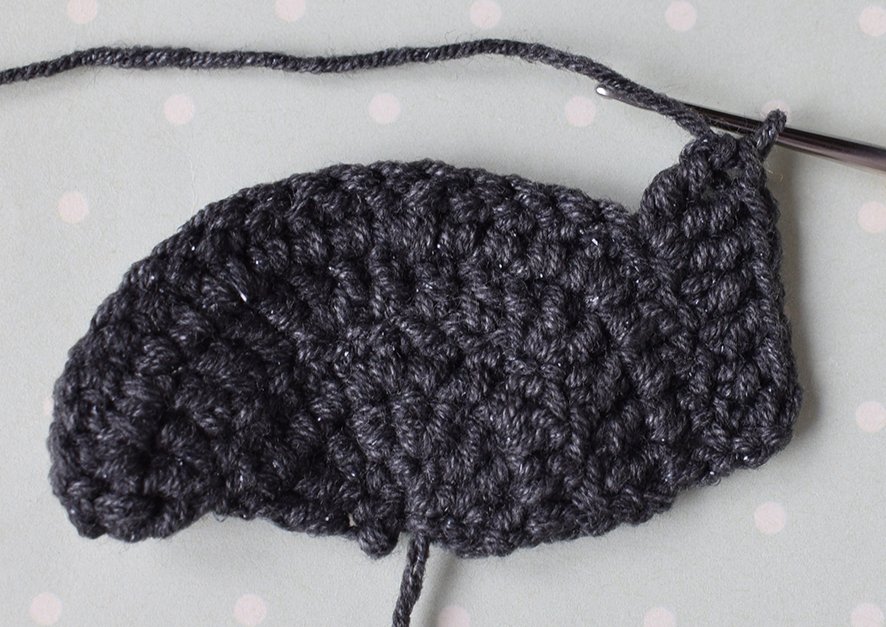
5 dc, 3 tr into a single loop, 5 dc, 3 tr into a single loop, 5 dc = 28 dc
Close, trim the thread. Leave a long end of the thread for further work.
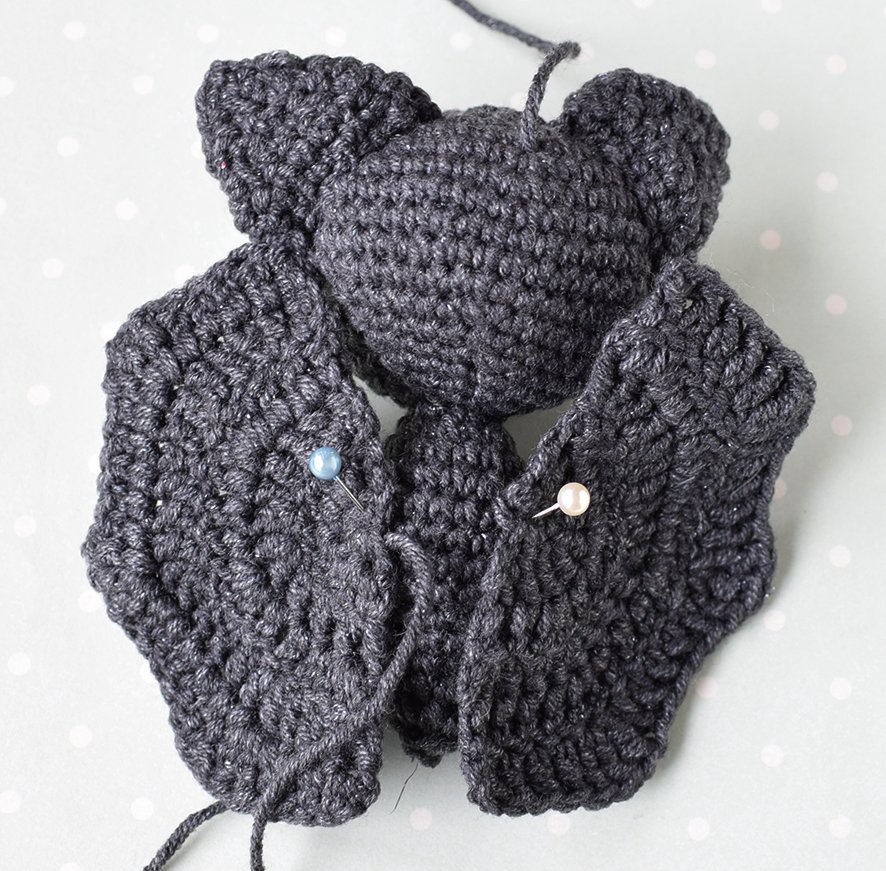
Sew the wings onto the back of the bat's body.
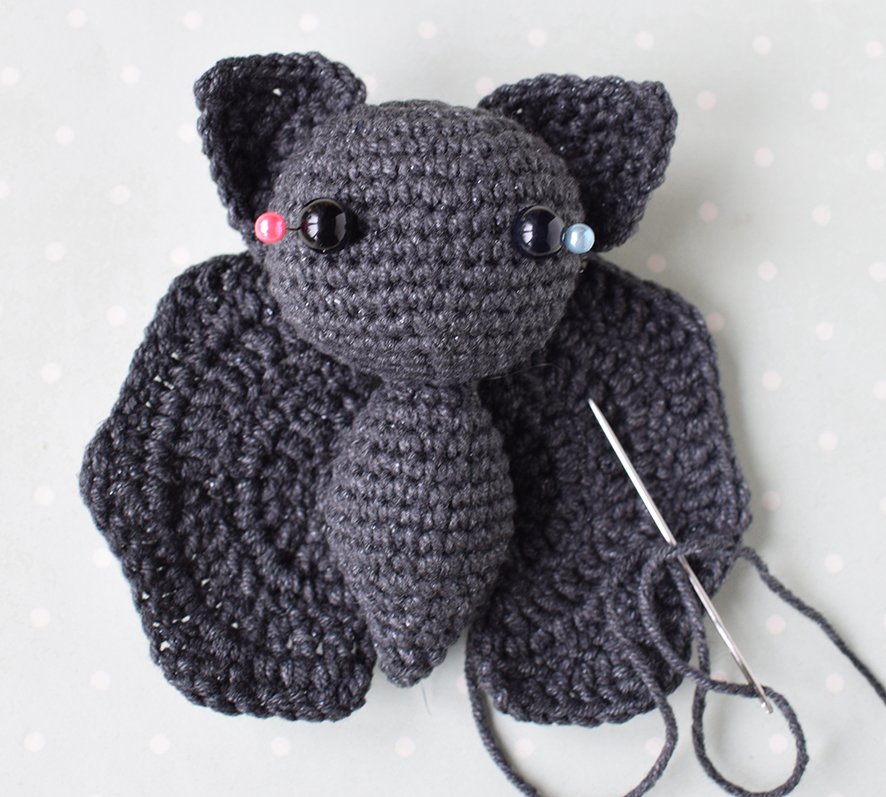
Sew on small black buttons to serve as the bat’s eyes.
GHOST
Head + body (in white)
1. Crochet 6 sc in a Magic Ring
2. 6 inc = 12 sc
3. (1 sc, 1 inc) х 6 = 18 sc
4. 18 sc
5. (2 sc, 1 inc) х 6 = 24 sc
6, 7. 24 sc
8. (3 sc, 1 inc) х 6 = 30 sc
9, 10. 30 sc
11. crochet into the back loop 30 sc
12. (3 sc, 1 dec) х 6 = 24 sc
Then add the filling material.
13. (2 sc, 1 dec) х 6 = 18 sc
14. (1 sc, 1 dec) х 6 = 12 sc
15. 6 dec = 6 sc
Close, trim the thread.
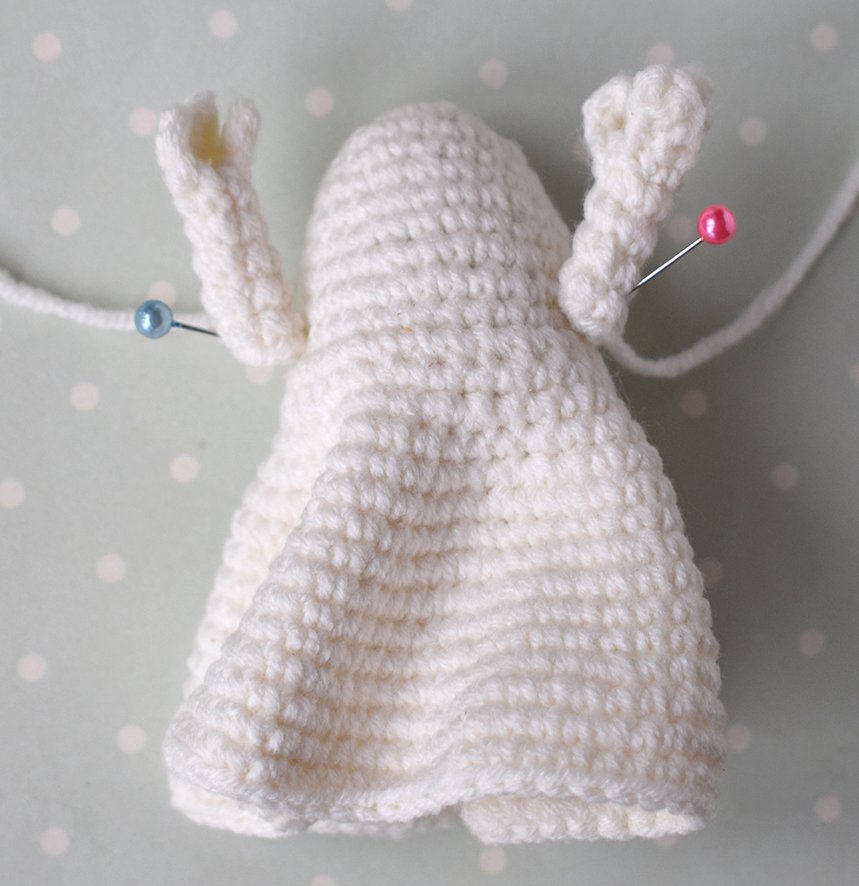
In the photo, I’ve used a pin to point out the remaining half-stitches.
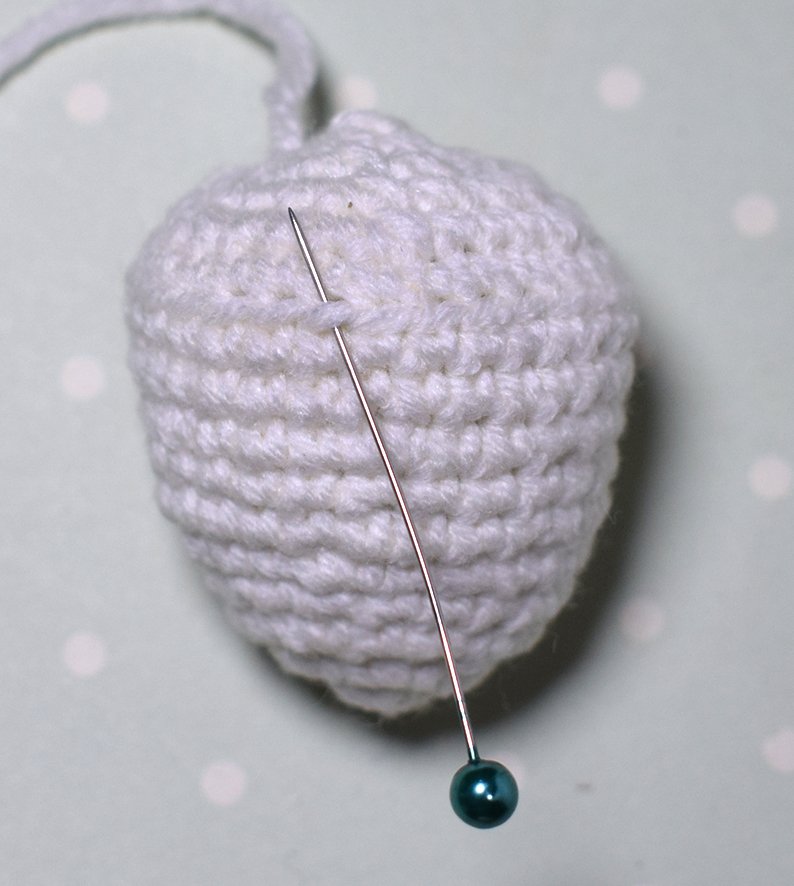
Attach the yarn to the remaining half-stitches of row 11; we will now continue crocheting from this point.
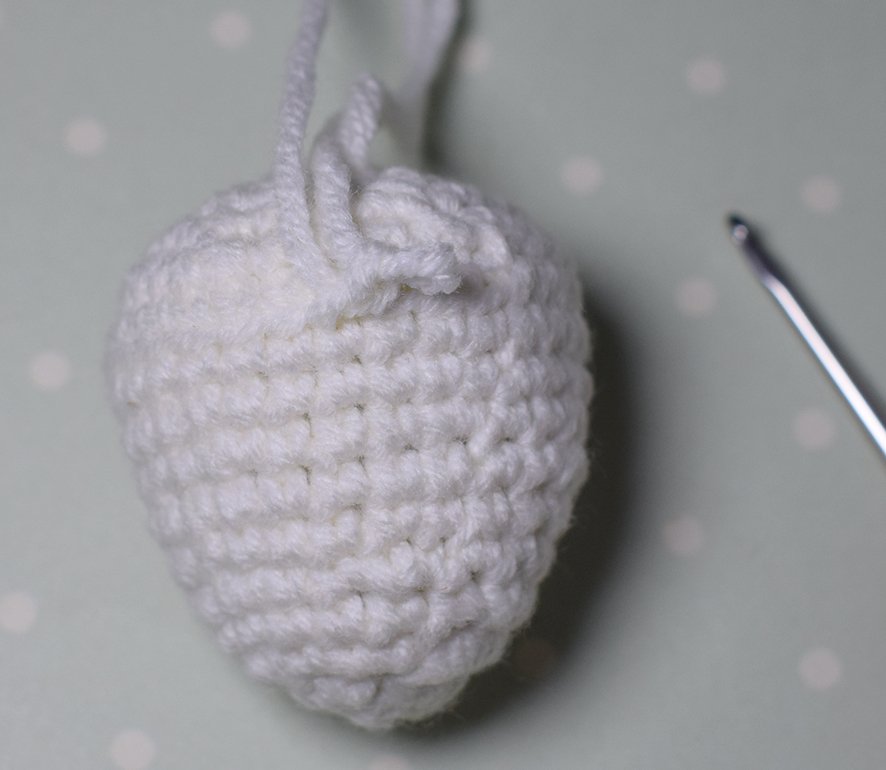
1, 2. 30 sc
3. (4 sc, 1 inc) х 6 = 36 sc
4. 36 sc
5. (2 sc, 1 inc) х 12 = 48 sc
6, 7. 48 sc
8. (3 sc, 1 inc) х 12 = 60 sc
9 – 11. 60 sc
12. (4 sc, 1 inc) х 12 = 72 sc
13 – 15. 72 sc
Close, trim the thread.
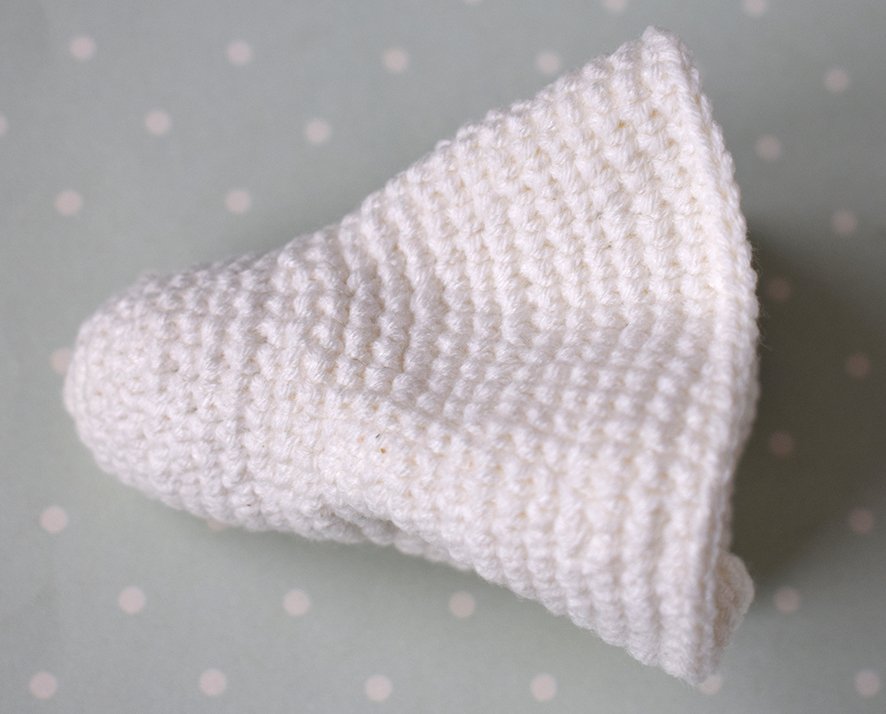
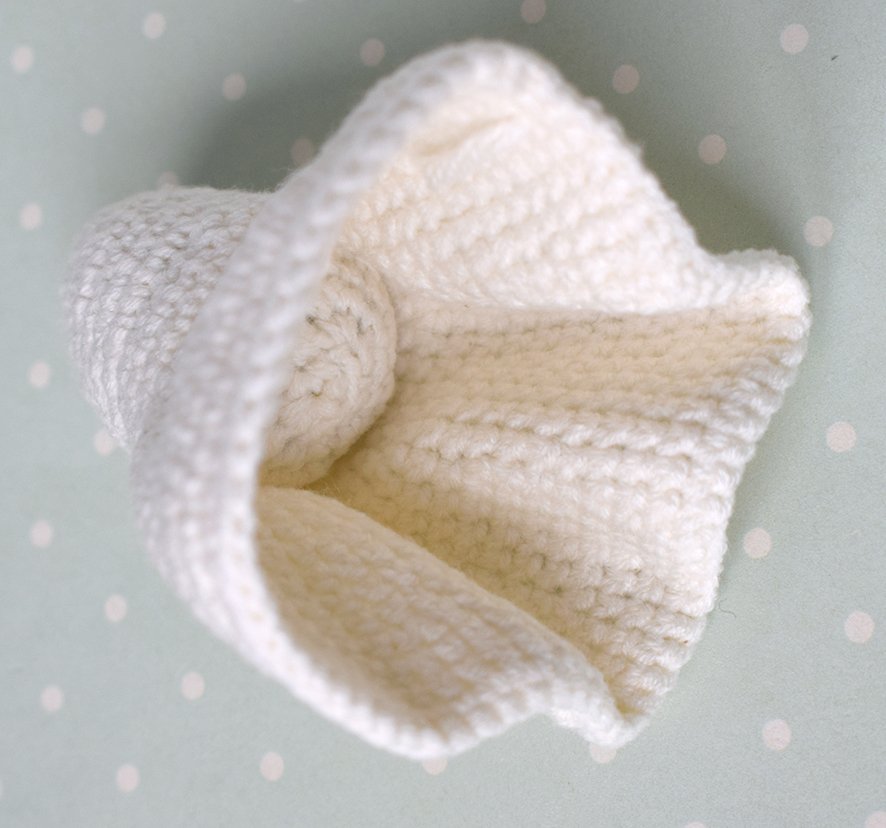
Arms (2 pieces, in white)
1. Chain 4 stitches, starting 2 stitches from the needle сrochet 3 sc
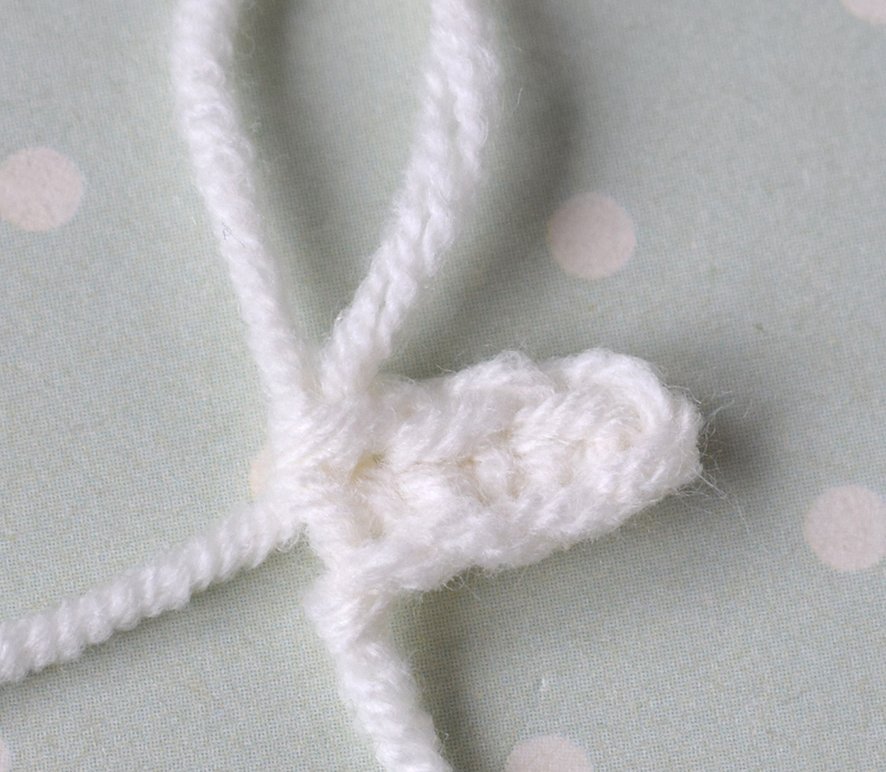
Chain 4 stitches, starting 2 stitches from the needle сrochet 3 sc
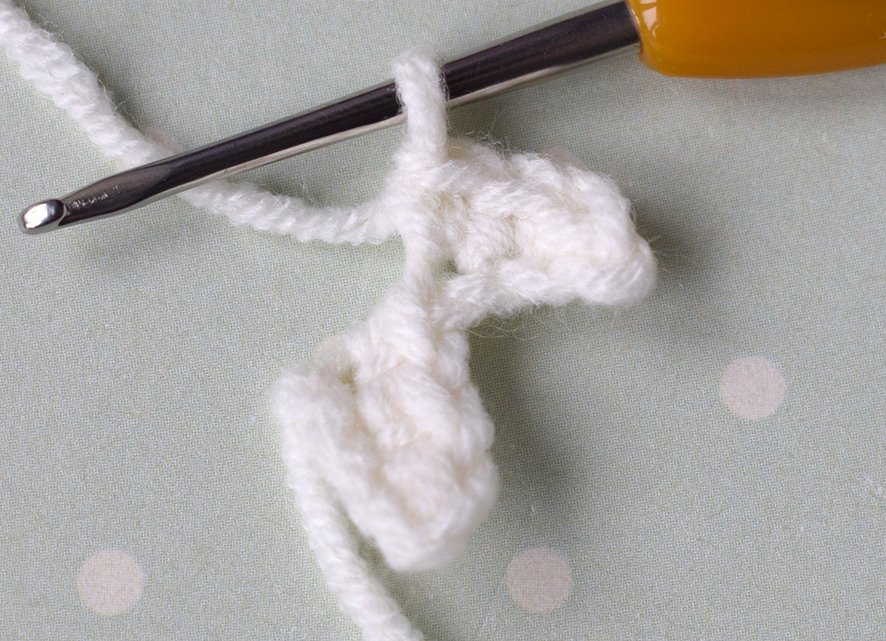
Chain 4 stitches, starting 2 stitches from the needle сrochet 3 sc
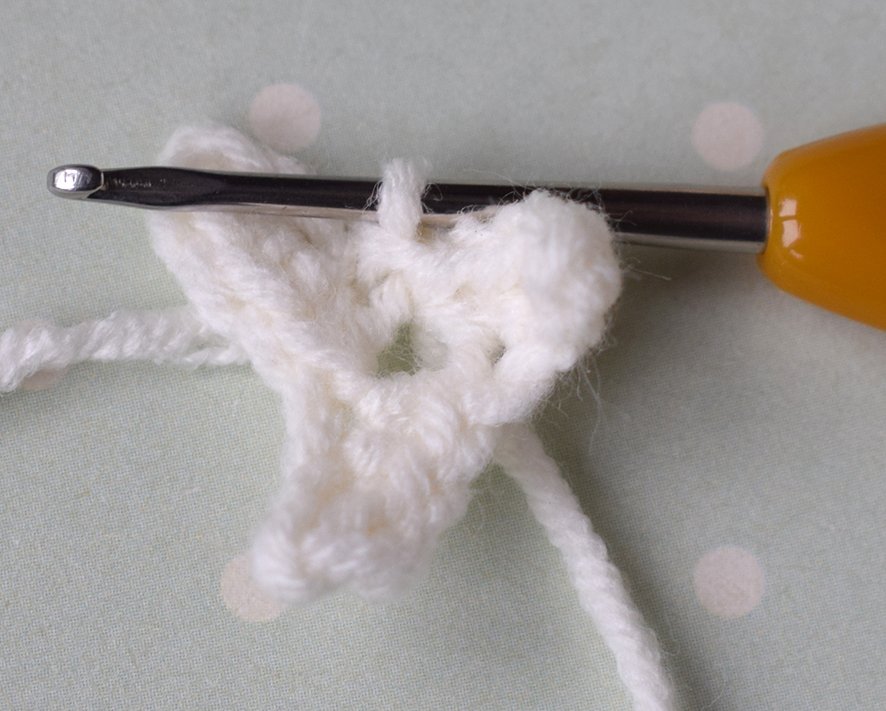
Now join the chains to form a ring. I used three fingers for my little ghost instead of five or four.
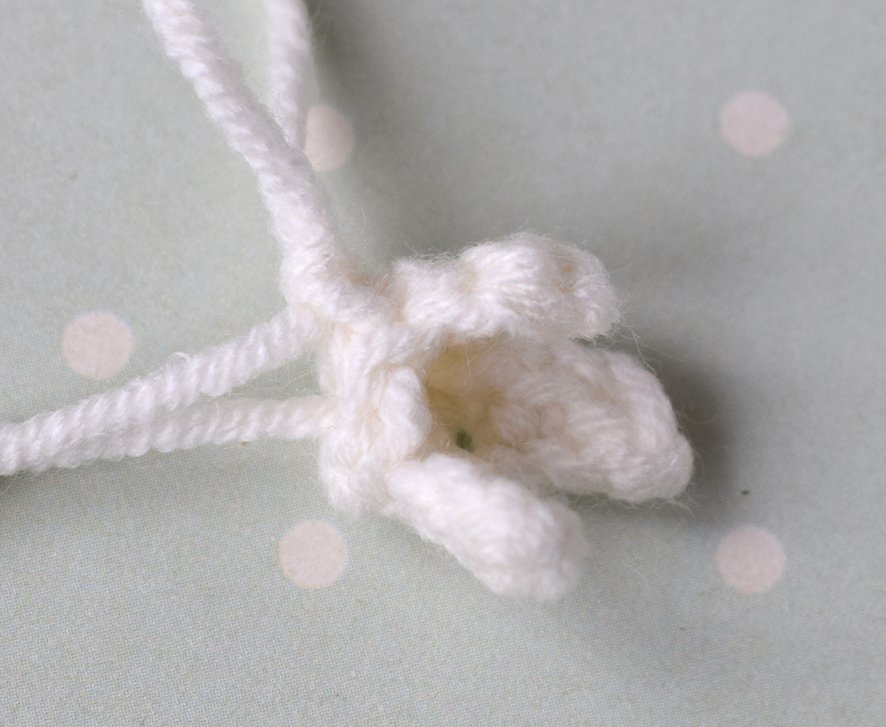
Work 5 rounds of 6 sc.
Close, trim the thread. Leave a long end of the thread for further work.
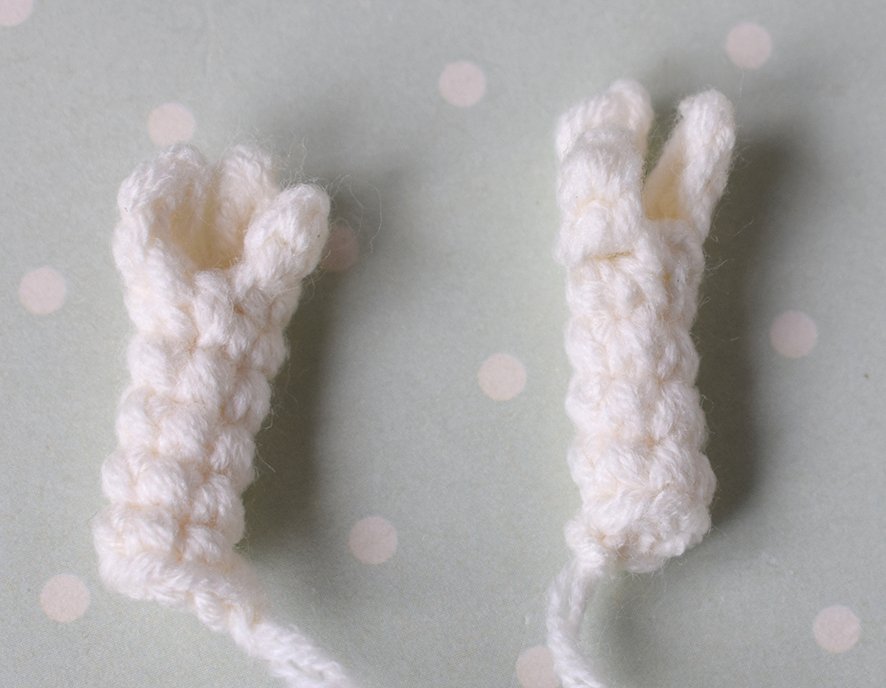
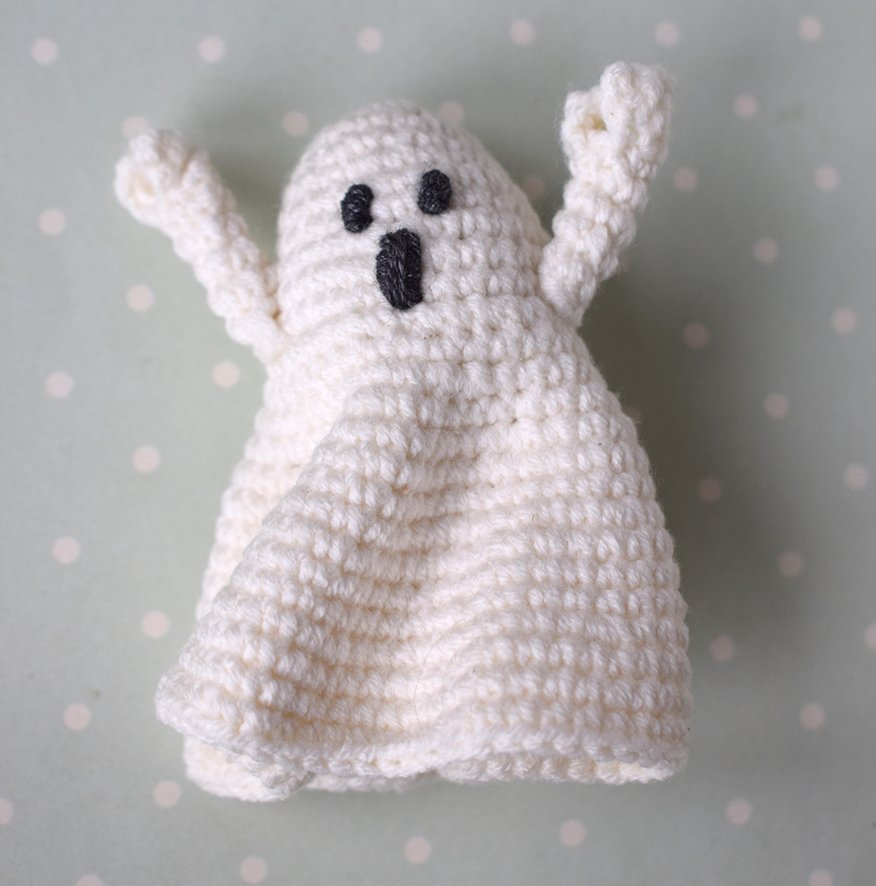
Sew the arms to the body. I attached them in a raised position, as if the little ghost were trying to scare us!
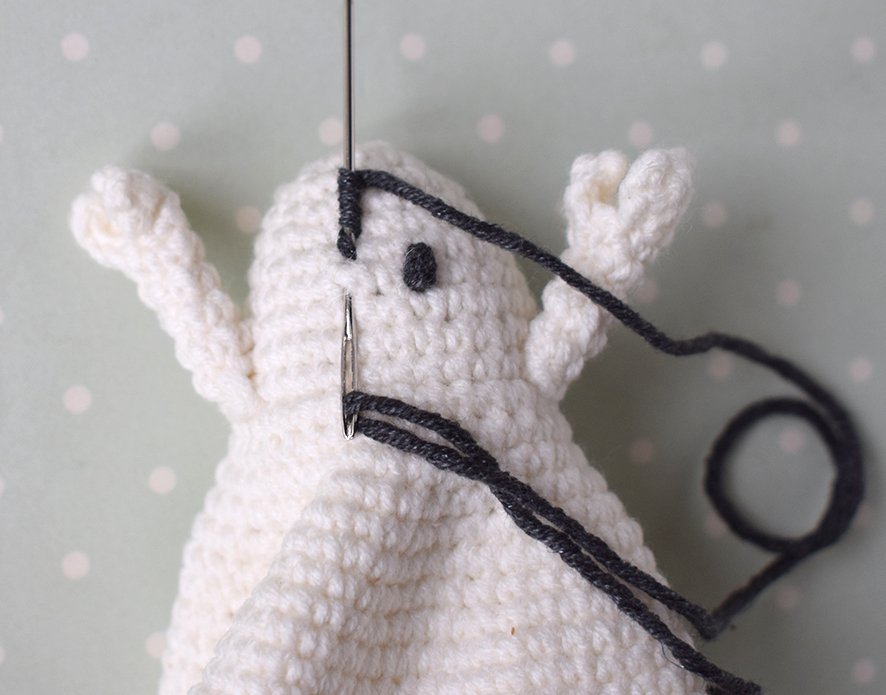
Embroider the eyes and mouth using black thread, wrapping the thread around the needle 5–7 times.
Candle (white)
1. Crochet 6 sc in a Magic Ring
2. 6 inc = 12 sc
3. (1 sc, 1 inc) х 6 = 18 sc
4. through the back loop 18 sc
5 – 25 = 18 sc
Then add the filling material.
26. through the back loop 18 sc
27. (1 sc, 1 dec) х 6 = 12 sc
28. 6 dec = 6 sc
Close, trim the thread.
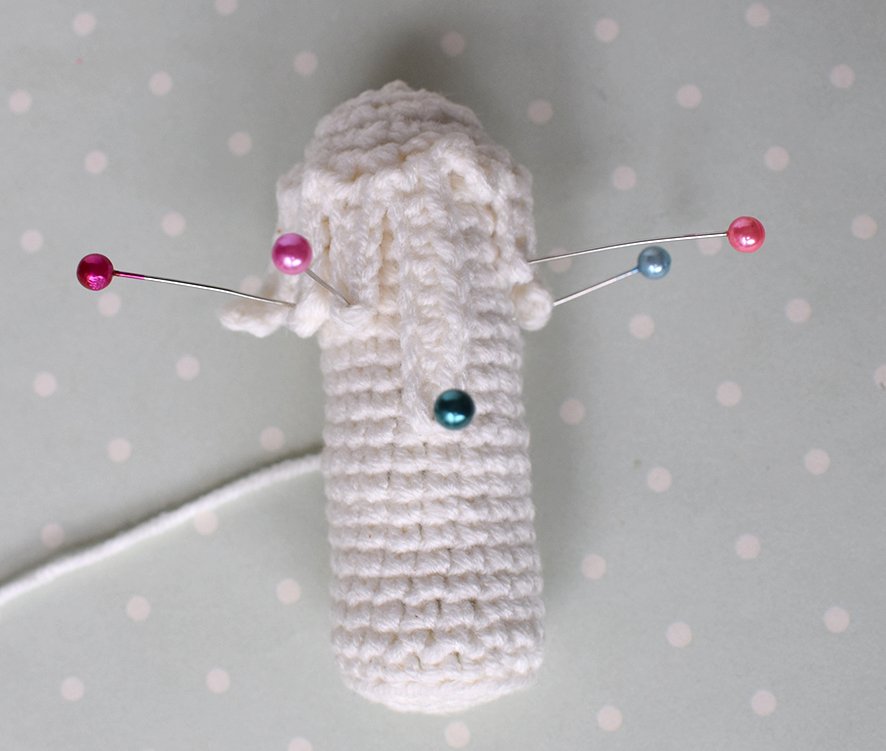
The photo shows the remaining loops, marked with a pin.
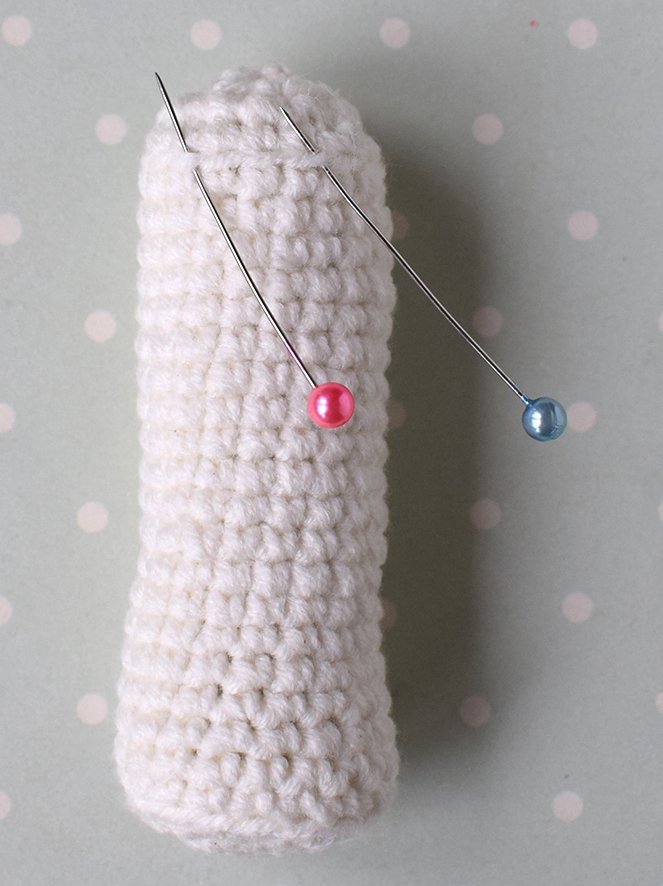
When we left the front loops unworked in Round 4, this was purely for decorative purposes. This technique allows the fabric to curve slightly more in the direction we need.
To crochet the imitation of dripping wax on the candle, we will use the remaining loops from Round 26.
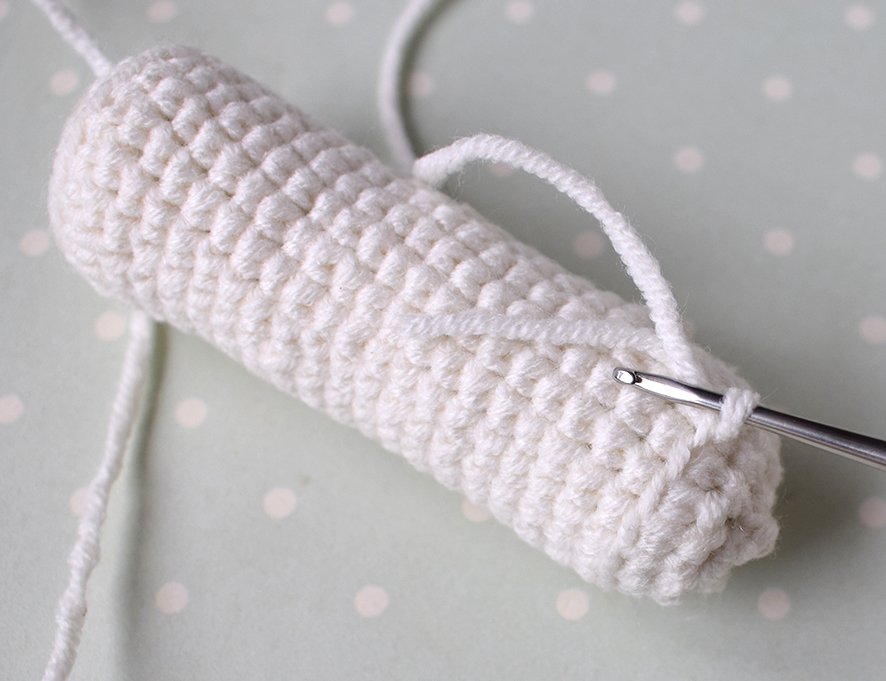
Attach the yarn to the remaining loops of Round 26. From this point on, you can let your imagination guide you! The wax drips are made by crocheting chains of different lengths. For example, ch 5, then work 4 sc, starting in the 2nd ch from the hook. Secure this chain to one of the remaining loops with a sc. Continue in the same way around, making chains of varying lengths to create the desired dripping-wax effect.
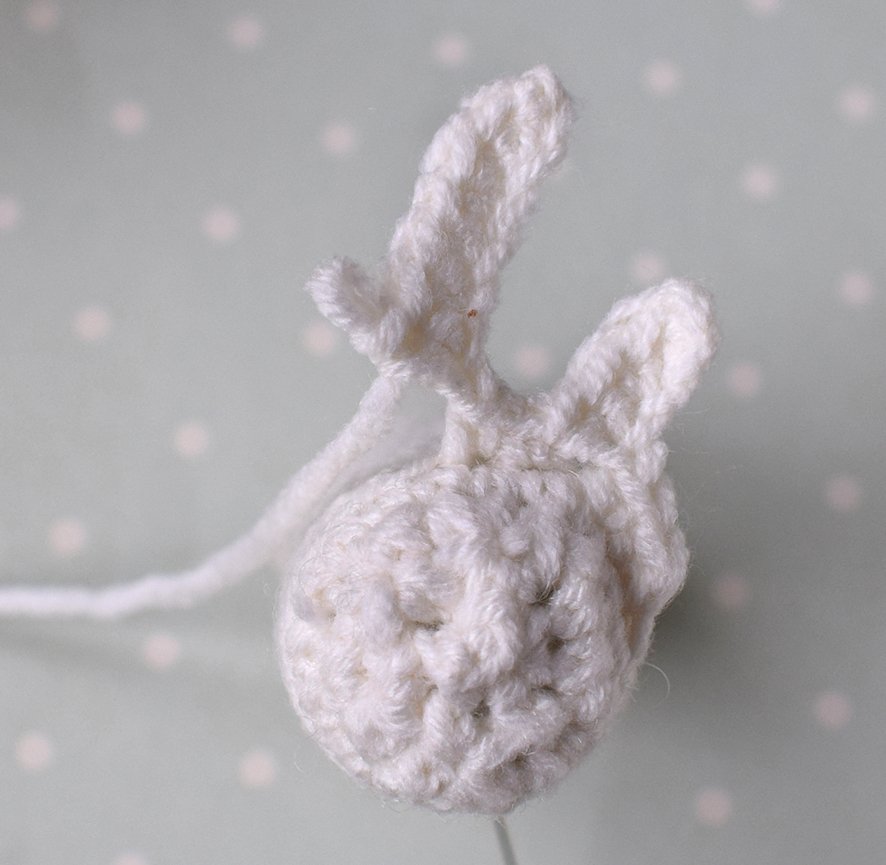
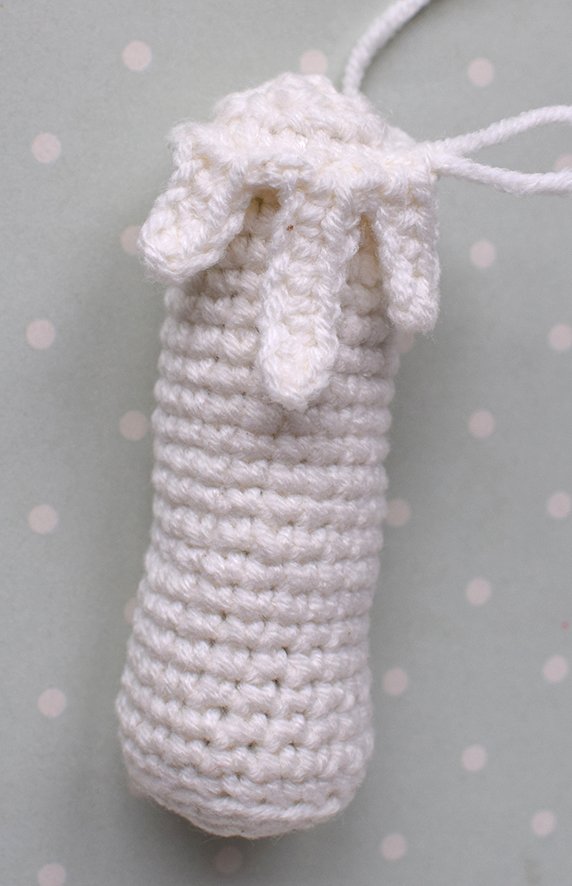
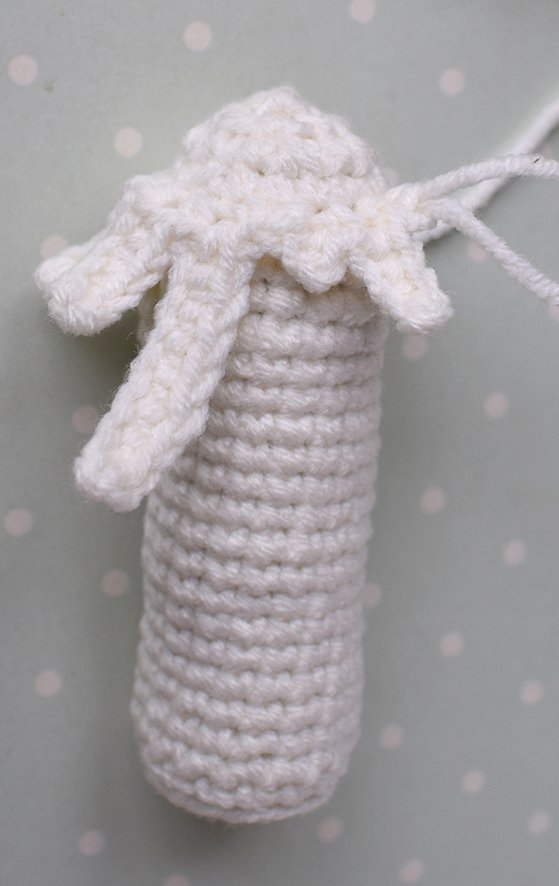
Finally, sew the ends of these chains to the candle with a couple of stitches.
Candle flame (yellow color)
1. Crochet 6 sc in a Magic Ring
2. 6 inc = 12 sc
3, 4 = 12 sc
5. (2 sc, 1 dec) = 9 sc
6. 1 dec, 7 sc = 8 sc
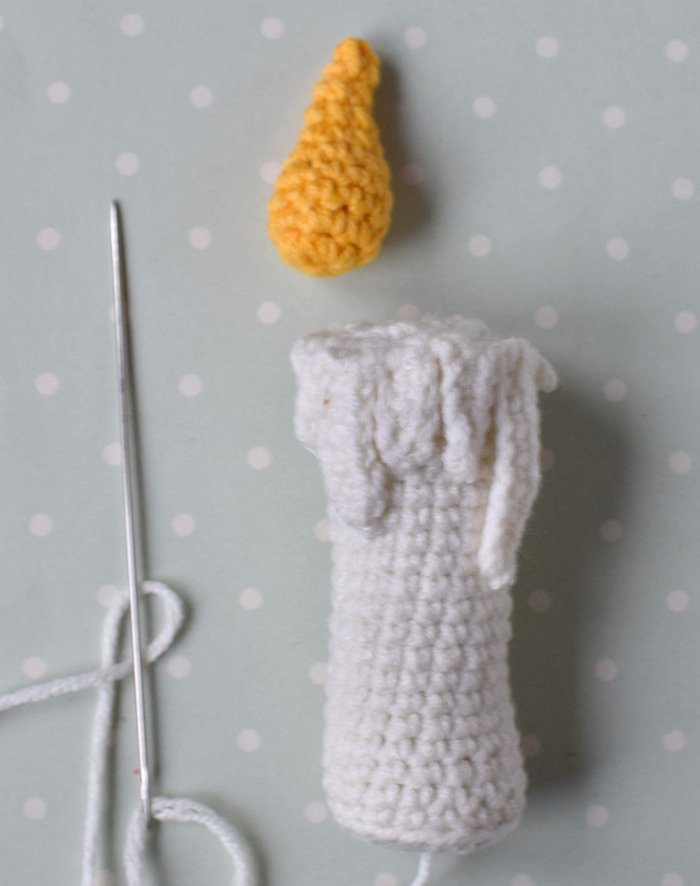
Then add the filling material.
7. 3 sc, 1 dec, 3 sc = 7 sc
8. 1 dec, 5 sc = 6 sc
9. 1 dec, 4 sc = 5 sc
Close, trim the thread. Leave a long end of the thread for further work.
Sew the little flame onto the top of the candle.
Attach the bat and the ghost to a wooden skewer.
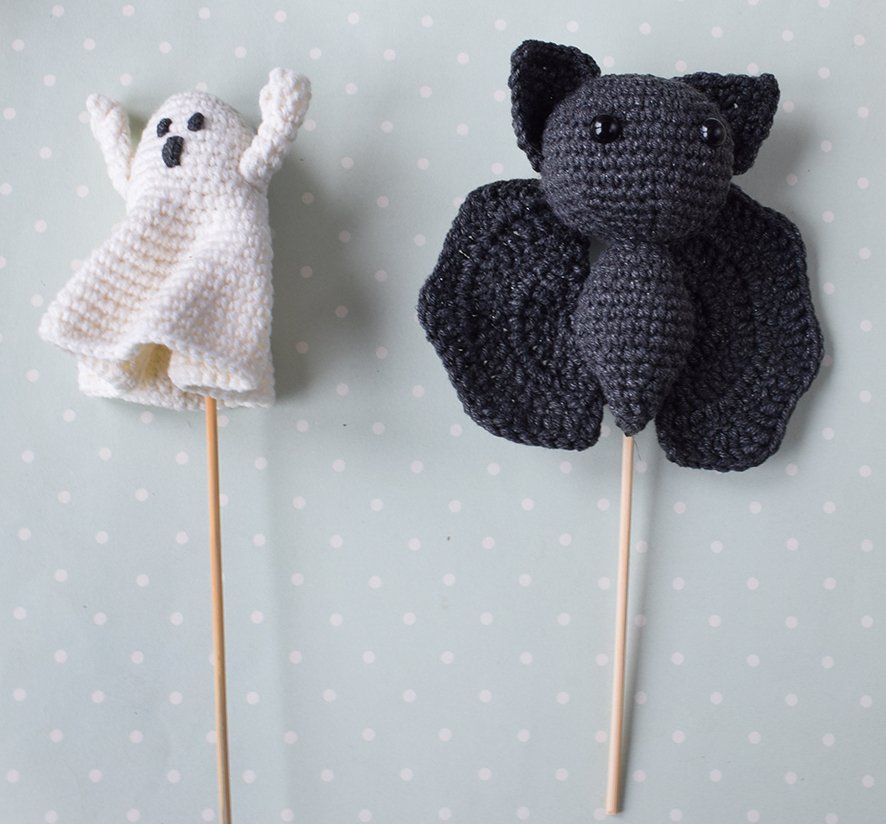
I love that the little characters can be moved around, allowing you to change the composition a little whenever you like. And once Halloween is over, the pumpkin itself can continue to bring joy, cheerfully waving its hand in greeting. What could be more magical than a pumpkin like that?