
Crochet Pattern for Baby Shoes (Boys & Girls)
.JPG)
This crochet pattern will help you create adorable baby shoes for both boys and girls. The design is suitable for beginners as well as experienced crocheters and can be easily customized with different colors, buttons, and decorative details.
Important sizing note:
The size used in this pattern (9-10 cm / 3.5-4 inches) is suitable for babies approximately 3-6 months old. Since babies' feet grow at different rates, I recommend checking a standard baby shoe size chart and measuring the baby's foot length before starting your project.
You will need:
- 2.5 mm crochet hook
- Cotton yarn in various colors (50g/125m)
- Sewing needle, buttons
Abbreviations:
sc – single crochet
ch – chain
inc – increase, crochet two stitches in one
dec – decrease, crochet two stitches together
3 sc in 1 – crochet 3 sc in 1 stitch of the previous row
X dec – X-times decrease
X inc – X-times increase
(---)x – repeat those in brackets Х times
sl st – slip stitch
hdc - half double crochet
dc - double crochet
Cute Baby Shoes for Girls
.JPG)
Begin with the soles. Since each baby shoe is made with two soles joined together, you will need to crochet four soles in total for one pair of shoes.
Soles
Crochet 15 ch, from the 2 loop from the hook
1 R: 7 sc, 3 hdc, 3 dc, 5 dc in 1 ch, further crochet along the other side of the chain 3 dc, 3 hdc, 7 sc, finish with 1 sl st (31)
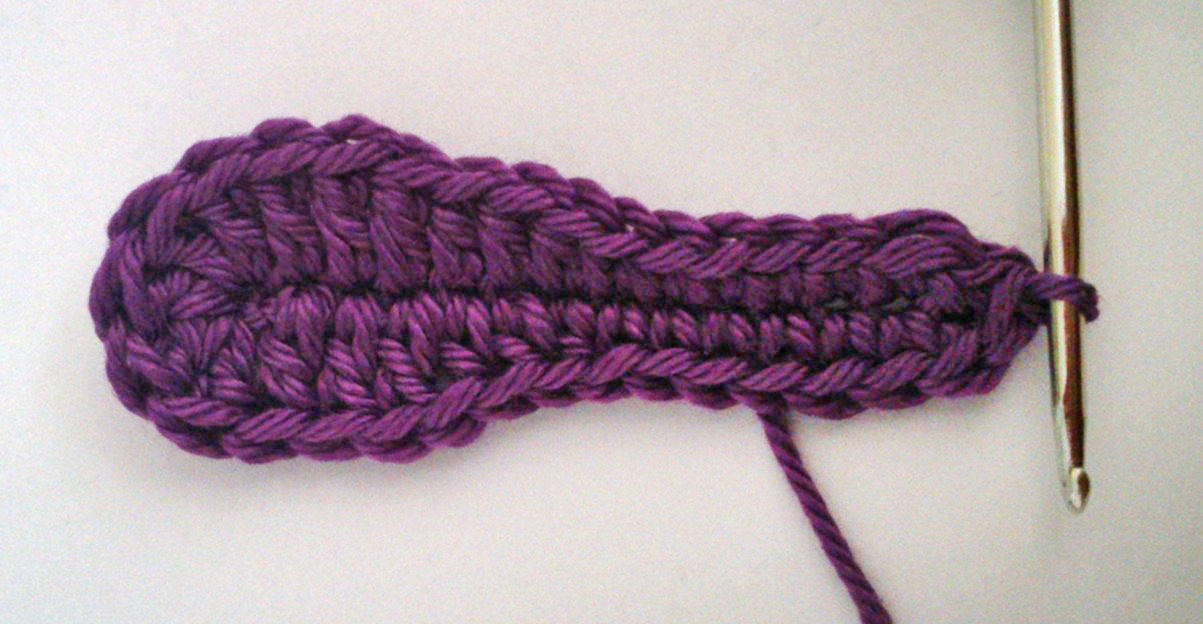
2 R: ch 3, 13 dc, 5 dc inc, 13 dc, 3 dc crochet into 1 st of the previous round, 1 sl st (39)
.jpg)
Change color,
3 R: ch 3, 13 dc, (1 dc inc, 1 dc) x 5, 13 dc, 3 dc inc, 1 sl st (47) Cut the yarn and weave in the ends.
.jpg)
Once the soles are finished, place them together and join them. I crocheted the two soles together using slip stitches (sl st). To do this, insert the crochet hook through both soles and pull the yarn through. The photos clearly show how the soles are joined. I used a different color yarn for joining the soles, but this is not necessary. It is entirely a matter of personal preference.
.jpg)
.jpg)
Once the sole is finished, work the heel. Hold the sole with the heel facing you and mark the center stitch. From this center stitch, count 5 stitches to the left and 5 stitches to the right, placing a marker at each point. Begin crocheting at the left marker.
.jpg)
1. R: Start at the left marker and crochet into the first stitch, (working in the back loop only) ch 3, 4 dc.
2. R: turn, ch 1, 5 sc. Cut the thread. Please look at the photo below to understand better.
Continue crocheting past the right marker
.jpg)
Row 1: Starting at the right marker, count 4 stitches toward the toe. Insert your hook into the 4th stitch and crochet back toward the heel, working in the back loops only (BLO) ch 3, 4 dc
2. R: turn, ch 1, 5 sc
3. R: turn, ch 3, 5 dc crochet, 10 ch and join to the other side with 1 dc, 5 dc crochet
To understand it better, please look at the photo below.
.jpg)
.jpg)
4. R: turn, ch 1, 20 sc crochet.
.jpg)
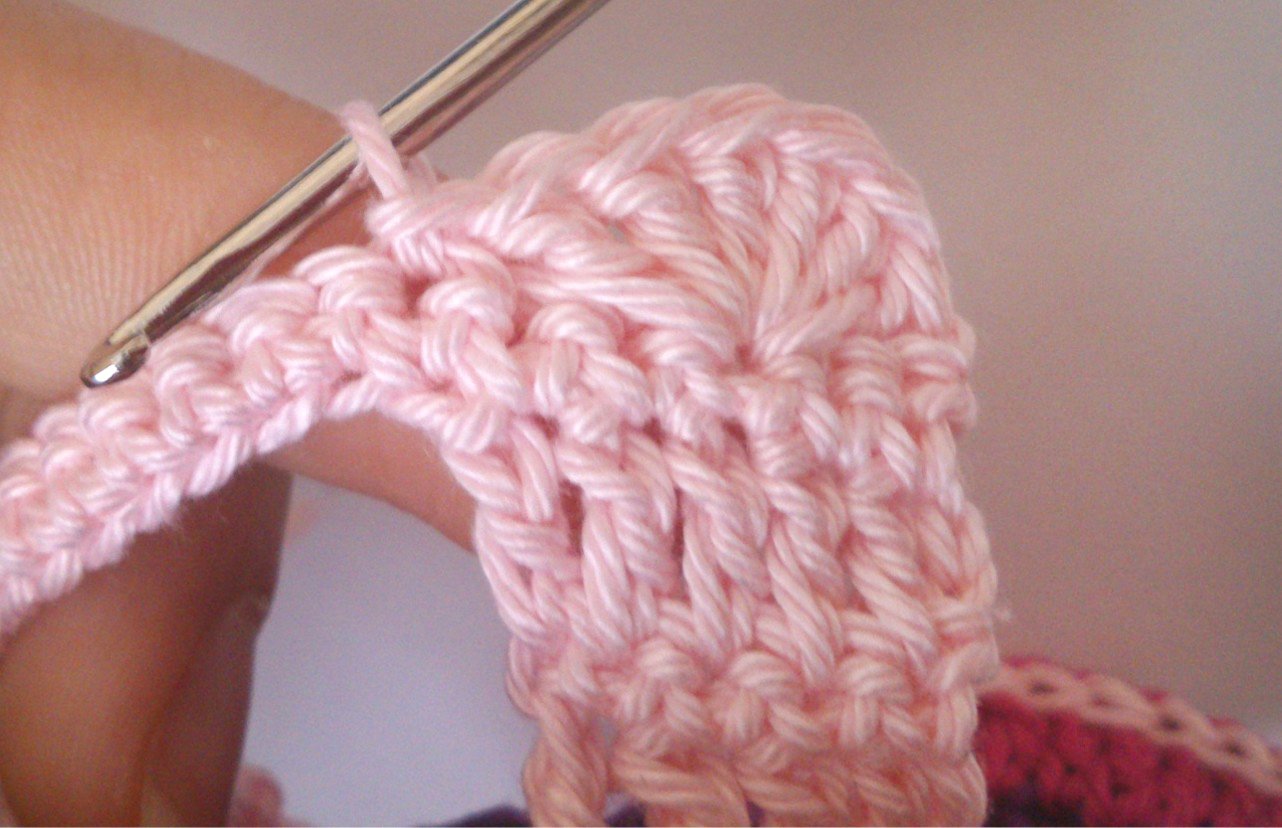
5 R: ch 1, (Skip 2 stitches, work 6 dc into the next stitch, skip 2 stitches, then work 1 sl st into the following stitch.) Repeat from * to * 3 more times.
.jpg)
.jpg)
.jpg)
.jpg)
Next, chain 40 stitches. Fasten off and cut the yarn.
.jpg)
Now move to the opposite side. Insert your hook into a double crochet stitch and pull the yarn through. Chain 40 stitches.
.jpg)
.jpg)
Fasten off and carefully weave in all yarn ends. Alternatively, you can hide the yarn ends between the two layers of the sole.
Spitze häkeln
Ch 17. Work 6 dc into the 3rd chain from the hook. Skip 2 stitches and work 1 sl st into the next stitch. Skip 2 stitches and work 6 dc into the next stitch. Skip 2 stitches and work 1 sl st into the next stitch. Skip 2 stitches and work 6 dc into the next stitch, then work 1 sl st into the next stitch.
.jpg)
.jpg)
Move to the opposite side. Skip 2 stitches and work 6 dc into the next stitch. Skip 2 stitches and work 1 sl st into the next stitch. Skip 2 stitches and work 6 dc into the next stitch. Skip 2 stitches and work 1 sl st into the next stitch. Skip 2 stitches and work 6 dc into the next stitch, then work 1 sl st into the next stitch.
.jpg)
.jpg)
If necessary, use a yarn needle to sew any remaining gaps closed.
.jpg)
.jpg)
Sew the front piece into place. Then carefully secure and weave in all yarn ends. Your shoes are now finished!
If desired, you can further embellish the shoes. For example, you may embroider small dots with glitter yarn or add other decorative details.
As these shoes are intended for babies, I do not recommend using beads or other small detachable embellishments, as they may present a choking hazard.
I personally attached small hearts to the laces and secured them with tight knots. However, it is your responsibility to ensure that any embellishments are securely attached. Be sure to check them regularly to make sure that all decorative elements remain firmly in place.
.JPG)
Cute baby shoes for boys
.JPG)
You start with the sole. Two soles are needed for each baby shoe. So, a total of four soles need to be crocheted.
Soles (blue)
Crochet 14 ch, from the 3 loop from the hook
1 R: 10 dc crochet, 7 dc in 1 , further crochet along the other side of the chain 10 dc, 5 dc in 1, finish with 1 sl st
.jpg)
2 R: ch 3, 10 dc, (2 dc in 1 )x 7, 10 dc, (2 dc in 1)x 5, 1 sl st
.jpg)
3 R: ch 3, 10 dc, (1 dc inc, 1 dc)x 7, 10 dc, (1 dc inc, 1 dc)x 5, 1 sl st
.jpg)
Once both soles have been completed, place them together and join them using slip stitches (sl st). To do this, insert your hook through both soles, yarn over, and pull the yarn through the loops. The photos below clearly show how the soles are joined.
.jpg)
.jpg)
In the next step, we crochet the toe of the shoe. Toe (Grey)
1 R: Join 12 double crochets into a magic ring, start with 3 chain stitches.
.jpg)
2 R: ch 3, 12 dc inc (total of 24 stitches)
.jpg)
3 R: ch 3, (ch 2, skip 1 stitch, 1 dc in the next stitch) 8 times. Turn the work. The lace is now worked in rows.
.jpg)
4 R: ch 3, (ch 2, skip 1 stitch, 1 dc in the next stitch) 8 times. Fasten off and cut the yarn, leaving a long tail for sewing. At this stage, you will notice that the front piece is no longer flat but has started to take on its curved shape.
.jpg)
Now turn to the side of the circle that has not yet been worked. Identify the center 5 stitches and attach the yarn to the middle stitch of these 5 stitches. Begin crocheting from this point.
1 R: ch 3, 5 dc crochet
.jpg)
2 R: turn the work, ch 1, crochet 5 sc
3 R: turn the work, ch 3, crochet 5 dc
4 R: turn the work, ch 1, crochet 5 sc
5 R: turn the work, ch 3, crochet 5 dc
6 R: turn the work, ch 1, crochet 5 sc
7 R: turn the work, ch 3, crochet 5 dc
Fasten off and cut the yarn, leaving a tail long enough for sewing. Fold the crocheted strip in half and sew it securely to the lower edge of the circle, leaving a small opening. The shoe lace will be threaded through this opening later.
.jpg)
.jpg)
Next, work the heel (green).
Hold the sole with the heel facing you and locate the center stitch. From the center stitch, count 10 stitches to the right and place a stitch marker.
1 R: Insert your hook into the upper edge of the sole, ch 3, then work 20 dc. Please refer to the photo below for a clearer understanding of the placement.
.jpg)
.jpg)
2 R: turn the work, ch 1, 20 sc
.jpg)
3 R: (grey color change) turn the work, ch 3, 20 dc
.jpg)
4 R: turn the work, ch 1, 20 sc
.jpg)
5 R: (green color change) turn the work, ch 3, 20 dc, then crochet 23 ch, starting 3 ch from the hook crochet 1 dc, 1 ch, skip one stitch, 1 dc, 1 ch, skip one stitch, 16 dc
.jpg)
.jpg)
Join with a slip stitch, cut the yarn, fasten off, and weave in the ends.
.jpg)
For the left shoe, insert your hook into a stitch on the right side, yarn over, and pull up a loop. Ch 23. Skip the first 3 chain stitches and work back along the chain as follows: 1 dc, ch 1, skip 1 stitch, 1 dc, ch 1, skip 1 stitch, then work 16 dc. Join with a sl st. Fasten off and weave in the yarn end.
.jpg)
Position the toe section in the center of the sole and sew it securely in place. The yarn tail can easily be hidden between the two layers of the sole. Next, thread the strap through the designated opening.
.jpg)
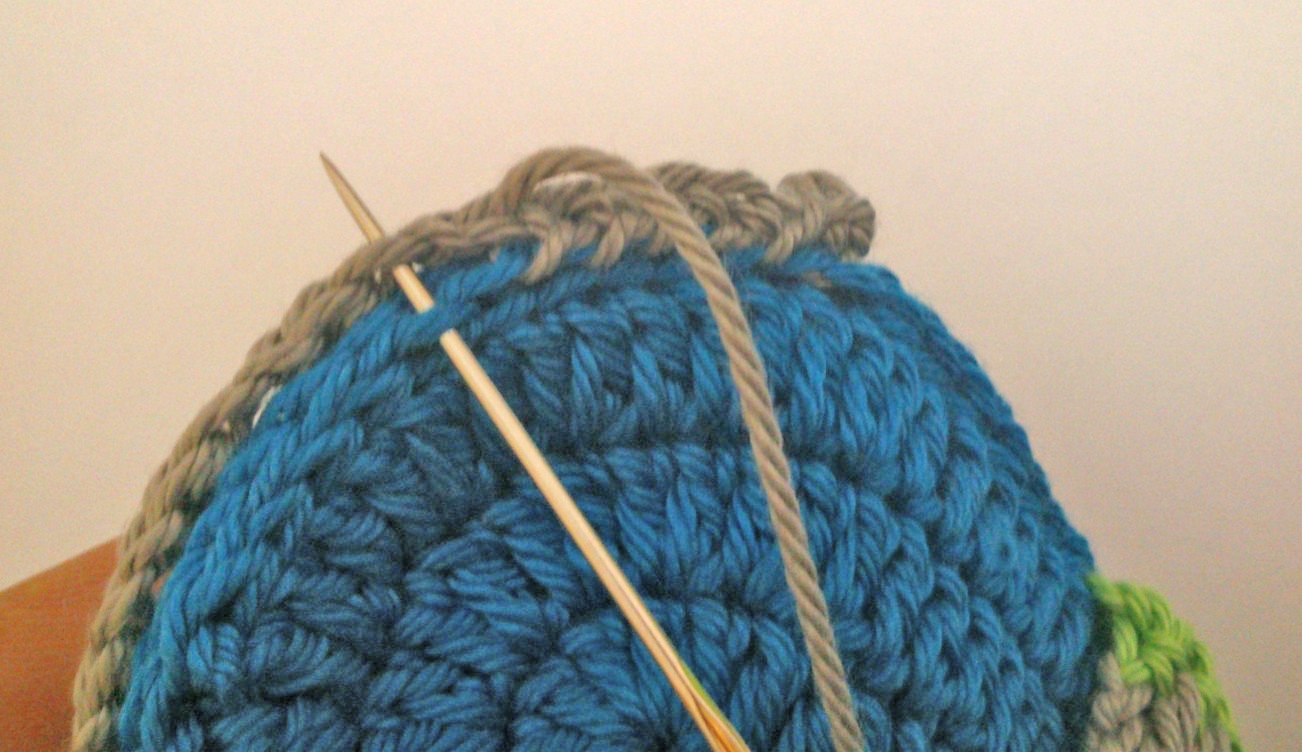
Sew a button securely onto each side of the shoe. As these shoes are intended for babies, buttons and other small parts may present a choking hazard if they become loose. Therefore, take extra care to ensure that all buttons are sewn on firmly and securely. Regularly inspect the shoes and check that all buttons and decorative elements remain securely attached during use.
.JPG)


