
The knitted Bee
.JPG)
.JPG)
The bee is knitted from soft chenille yarn and measures approximately 20 cm in height. By connecting the head and body with joint discs, the head can be turned in various directions. If you prefer not to use joint discs, you can simply sew the head firmly in place. The arms and legs are sewn onto the body.
The size of the bee can be easily adjusted by changing the yarn weight. Using thick chenille yarn creates an especially fluffy little bee, ideal as a gift for young children or anyone who loves soft companions. If you use thinner yarn, the bee becomes proportionally smaller, turning into a compact, handy little friend.
In principle, any type of yarn can be used. The thicker the yarn, the larger and cuddlier the bee will be; the thinner the yarn, the more delicate and compact it will turn out.
Knitting Instructions:
All parts are crafted entirely with two knitting needles.
Follow these steps:
First Row - Purl Stitches Begin by knitting the first row entirely in purl stitches. These will form the back side of your project, creating a neat texture.
Second Row - Knit Stitches In the second row, knit every stitch. This will produce a smooth, even front for your piece.
Repeating the Pattern Continue alternating between purl stitches in the odd-numbered rows and knit stitches in the even-numbered rows:
- Odd-numbered rows (e.g., 1st, 3rd, 5th): Work in purl stitches.
- Even-numbered rows (e.g., 2nd, 4th, 6th): Work in knit stitches.
This straightforward pattern of alternating knit and purl rows is ideal for beginners, offering an easy yet satisfying introduction to the craft.
You will need the following:
✓ Rico Ricorumi Nilli Nilli yarn: 30 g yellow, 30 g brown
✓ Knitting needles – 1.50 mm
✓ Stuffing/fiberfill
✓ 12 mm safety eyes
✓ 1 extra-long sewing needle
Choose the yarn, knitting needles, and eye size according to your own taste and experience.
Abbreviations:
- CH – Chain(s)
- inc – increase
- dec – decrease
- X dec – X- times decrease
- X inc – X- times increase
- ST – Stitch
- P – purl
- K– knit (garter stitch)
Legs (2 pieces, brown color)
Cast on 6 stitches (ch) onto the knitting needle. Make sure the stitches are evenly stretched while knitting to ensure your knitted piece is nice and even.
1. 6 P (6)
2. 6 K inc. (12)
3. 12 P (12)
4. (1 K, inc)x 6 (18)
5. 18 P
6. (2 K, inc)х 6 (24)
7. 24 P
8. 10 K, 1 dec, 10 K, 1 dec (22)
9. 22 P
10. 22 K
11. 22 P
12. 9 K, 1 dec, 9 K, 1 dec (20)
13. 20 P
14. 20 K
15. 20 P
16. 8 K, 1 dec, 8 K, 1 dec (18)
17. 18 P
18. 18 K
19. 18 P
20. 18 K
21. 18 P
22. 7 K, 1 dec, 7 K, 1 dec (16)
23. 16 P
24. 6 K, 1 dec, 6 K, 1 dec (14)
25. 14 P
26. 14 K
27. 14 P
28. 5 K, 1 dec, 5 K, 1 dec (12)
29. 12 P
30. 4 K, 1 dec, 4 K, 1 dec (10)
31. 10 P
32. 3 K, 4 inc, 3 K (14)
33. 14 P
34. 14 K
35. 14 P
36. 7 dec, 1 K (8)
Finally, bind off the remaining stitches. Then fold the legs together and sew them along the edge using the same yarn. Add a small amount of stuffing as you sew, just enough to give the legs a gentle shape.
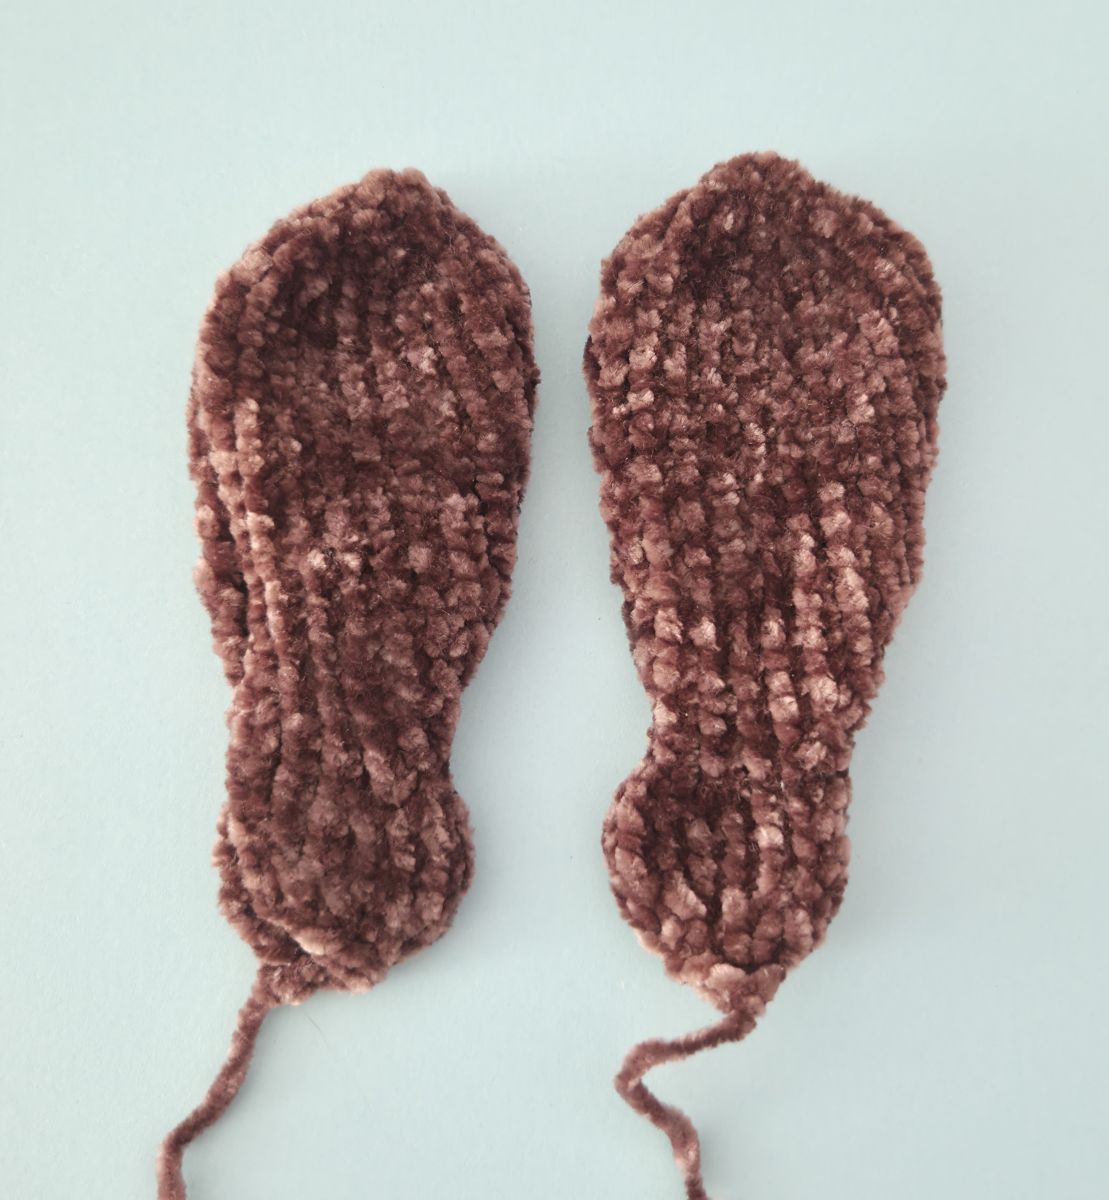
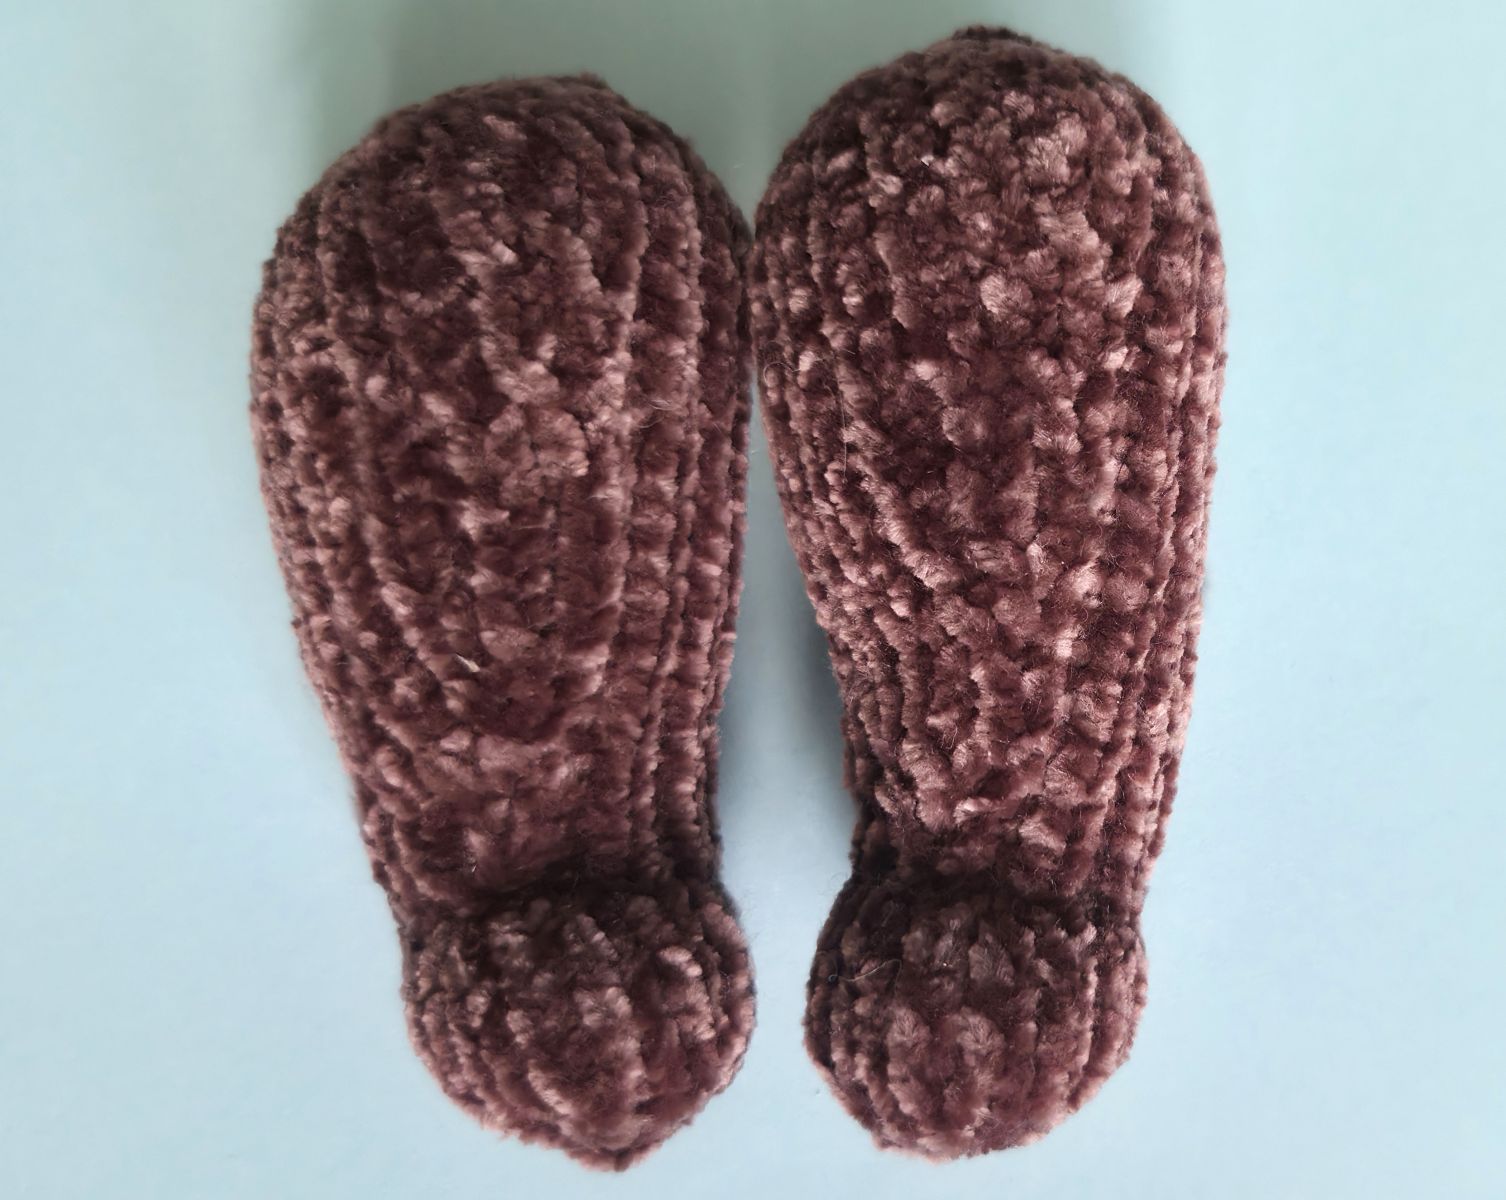
Arms, start crocheting in yellow (2 pieces)
Cast on 12 stitches (ch) onto the knitting needle. Make sure the stitches are evenly stretched while knitting to ensure your knitted piece is nice and even.
1. 12 P
2. 12 K
3. 12 P
4. 12 K
5. 12 P
6. 12 K
7. 12 P
8. 12 K
9. 12 P
10. 4 K, 1 dec, 4 K, 1 dec (10)
11. 10 P
12. 1 K, 1 dec, 1 K, 1 dec, 1 K, 1 dec, 1 K (7)
13. 7 P
Change the color to brown
14. 1 K, 1 inc, 1 K, 1 inc, 1 K, 1 inc, 1 K (10)
15. 10 P
16. 4 K, 1 inc, 4 K, 1 inc (12)
17. 12 P
18. 12 K
19. 12 P
20. 12 K
21. 12 P
22. 12 K
23. 12 P
24. 12 K
25. 12 P
26. 12 K
27. 12 P
28. 12 K
29. 12 P
30. 12 K
31. 12 P
32. 12 K
33. 12 P
34. 12 K
35. 12 P
36. 6 dec
Finally, bind off the remaining stitches. Then place the hands together and sew them along the edge using the same yarn. Add a small amount of stuffing as you sew, just enough to give the hands a gentle shape.
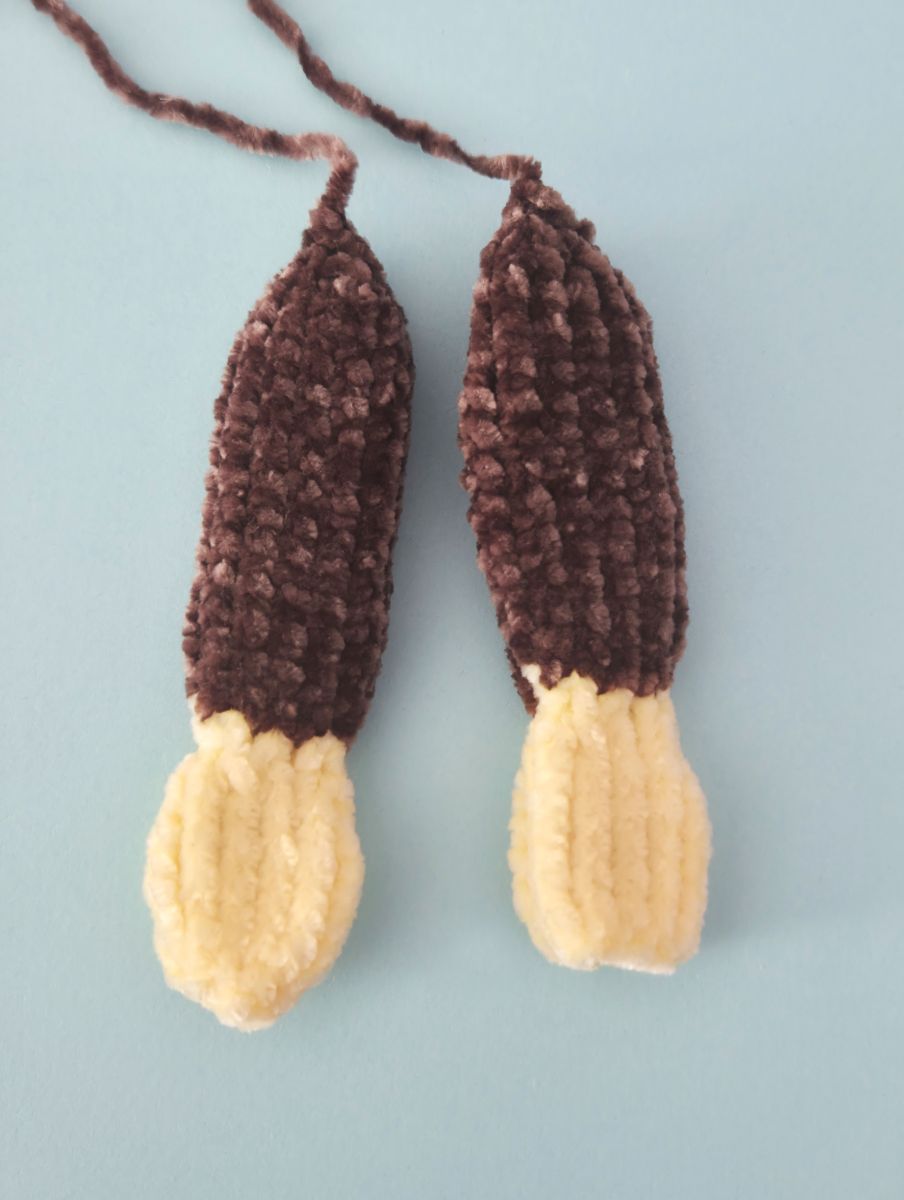
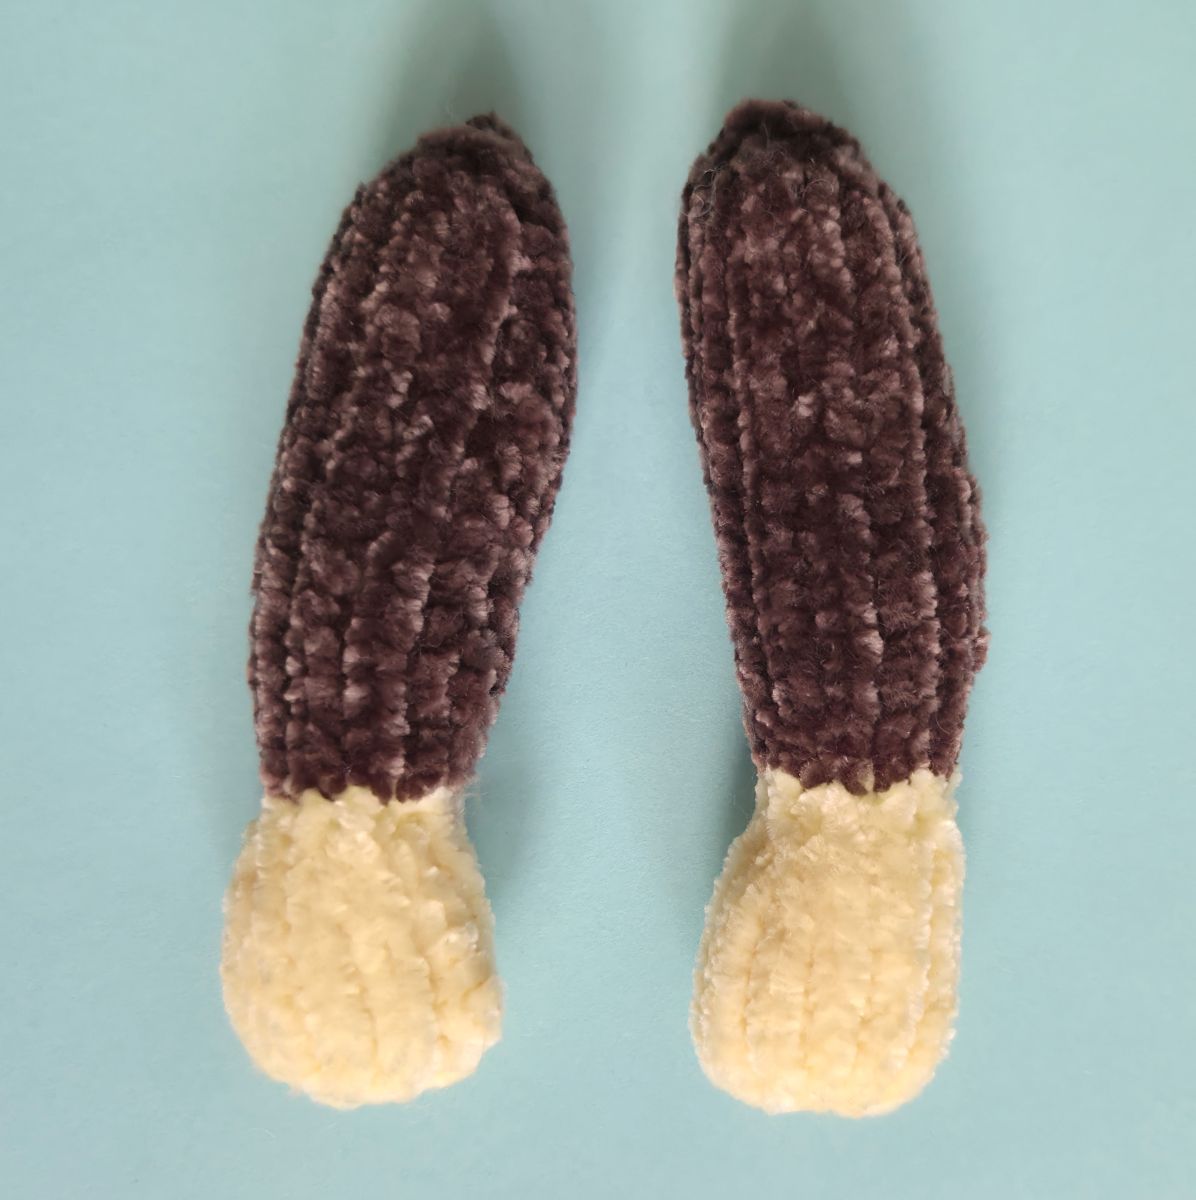
Head (Yellow)
Cast on 6 stitches (ch) onto the knitting needle. Make sure the stitches are evenly stretched while knitting to ensure your knitted piece is nice and even.
1. 6 P (6)
2. 6 K inc. (12)
3. 12 P (12)
4. (1 K, inc)x 6 (18)
5. 18 P (18)
6. (2 K, 1 K inc)x6 (24)
7. 24 P (24)
8. (3 K, 1 K inc)x 6 (30)
9. 30 P (30)
10. (4 K, 1 K inc)x 6 (36)
11. 36 P (36)
12. (5 K, 1 K inc)x 6 (42)
13. 42 P (42)
14. (6 K, 1 K inc)x 6 (48)
15. 48 P (48)
16. (7 K, 1 K inc)x 6 (54)
17. 54 P
18. 12 K, (1 inc, 1 K)x 5, place marker 1, 10 K, place marker 2, (1 inc, 1 K)x 5, 12 K (64)
Knit a total of 13 rows in stockinette stitch:
On the front side of the work, knit all stitches across the row.
On the back side of the work, purl all stitches across the row.
19, 21, 23, 25, 27, 29, 31 - 64 P
20, 22, 24, 26, 28, 30 - 64 K
32. 12 K, 8 dec, place marker 3, 8 K, place marker 4, 8 dec, 12 K (48)
33. 48 P
Knit a total of 12 rows in stockinette stitch:
On the front side of the work, knit all stitches across the row.
On the back side of the work, purl all stitches across the row.
35, 37, 39, 41, 43, 45 – 48 P
34, 36, 38, 40, 42, 44 – 48 K
46. (6 K, 1 dec)x 6 (42)
47. 42 P (42)
48. (5 K, 1 dec)x6 (36)
49. 36 P (36)
50. (4 K, 1 dec)x 6 (30)
51. 30 P (30)
52. (3 K, 1 dec)x 6 (24)
53. 24 P (24)
54. (2 K, 1 dec)x 6 (18)
55. 18 P
56. (1 K, 1 dec)x 6 (12)
57. 12 P
58. 6 dec
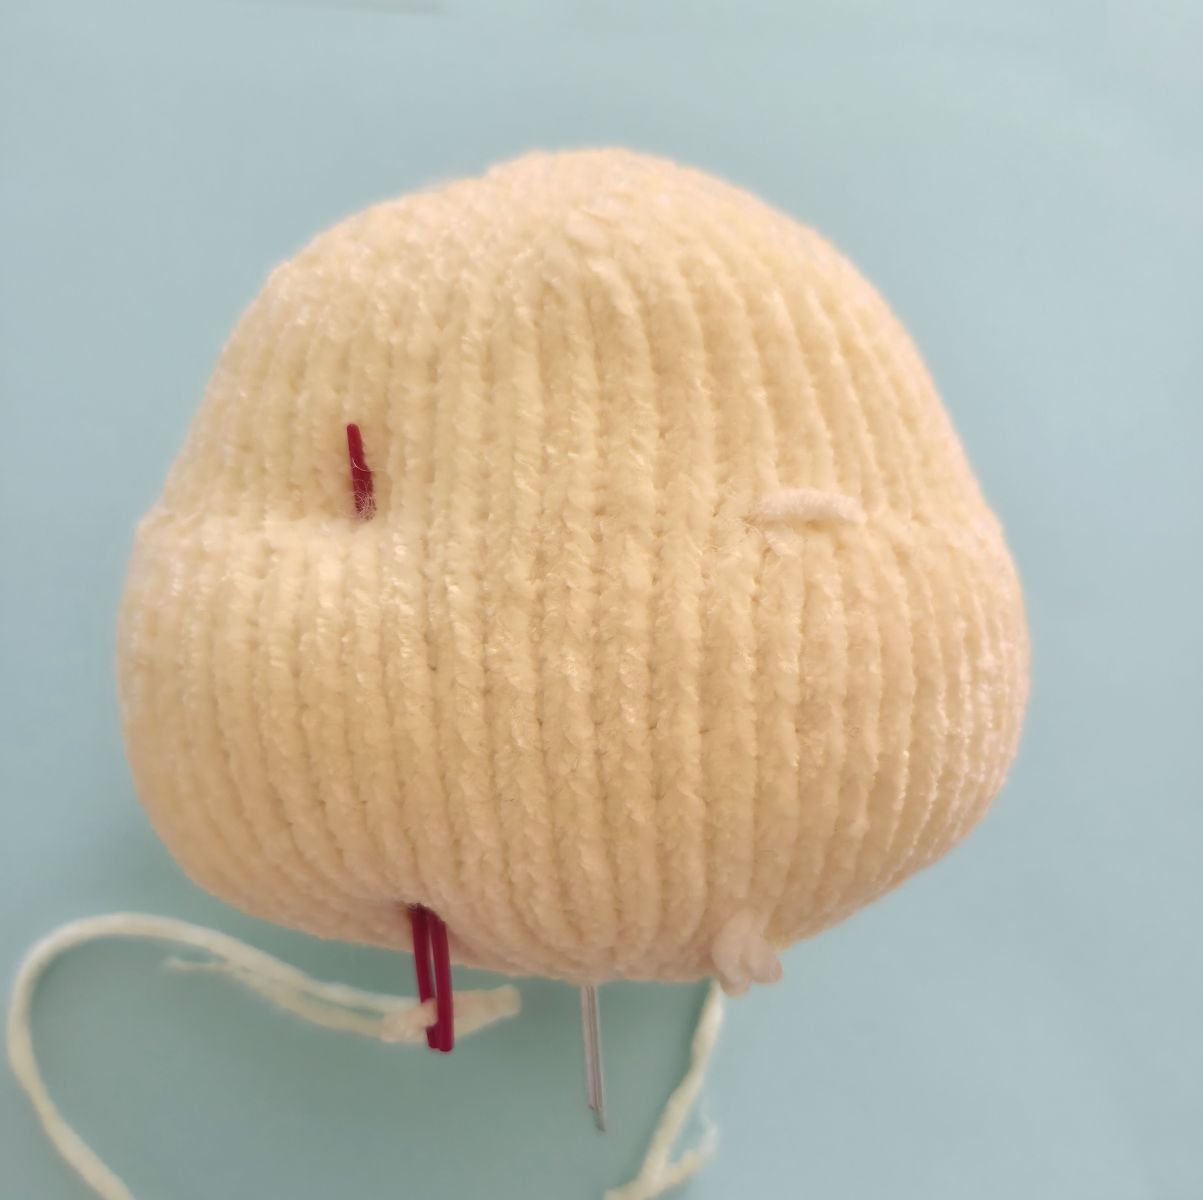
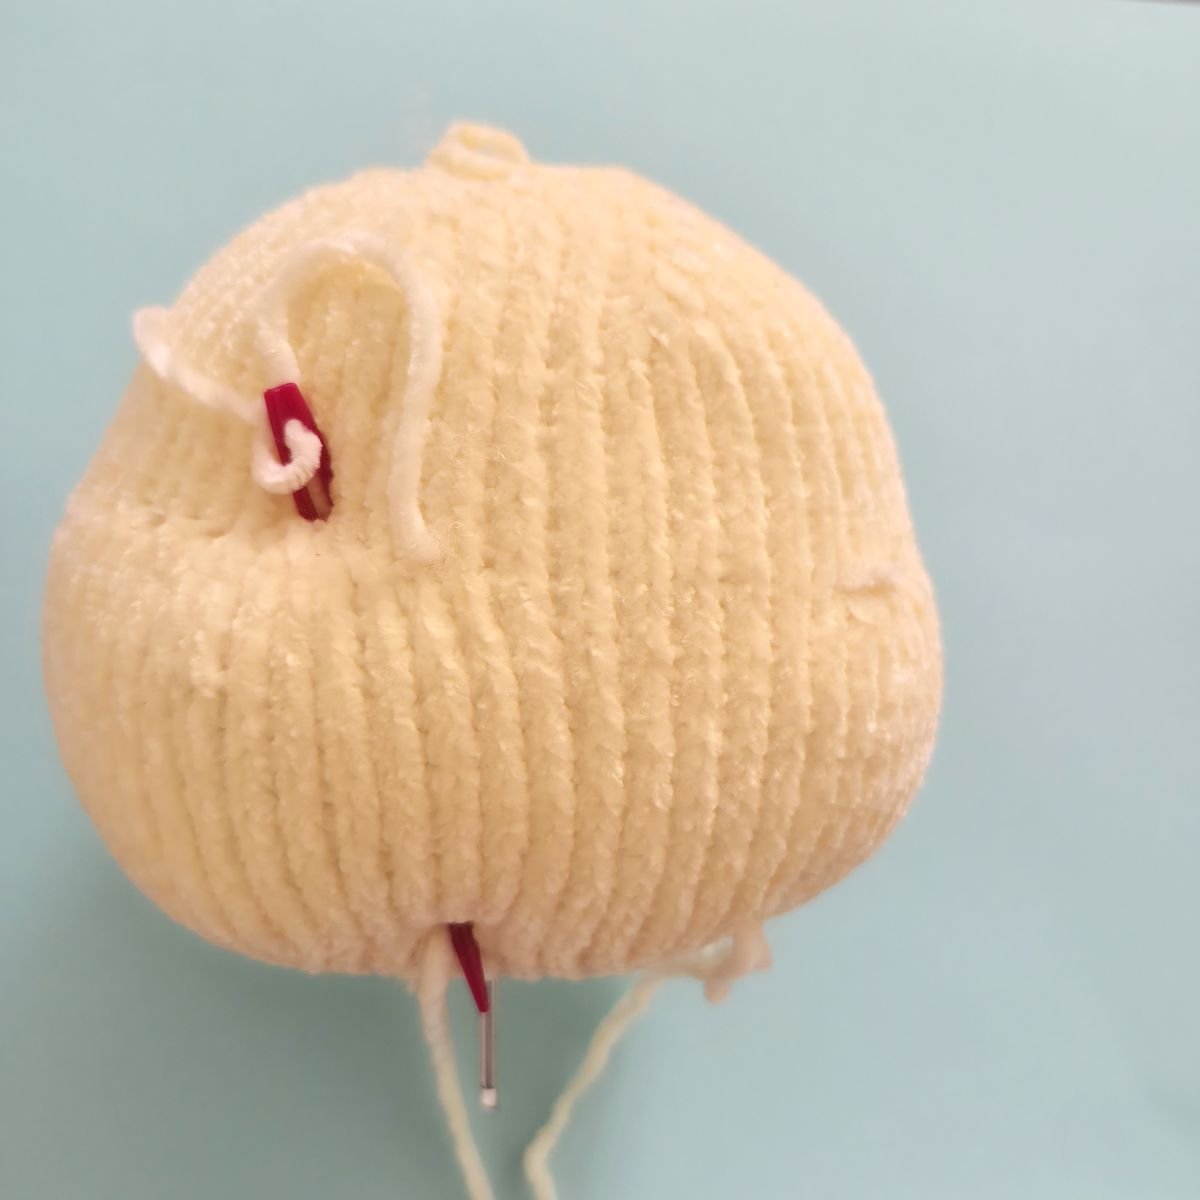
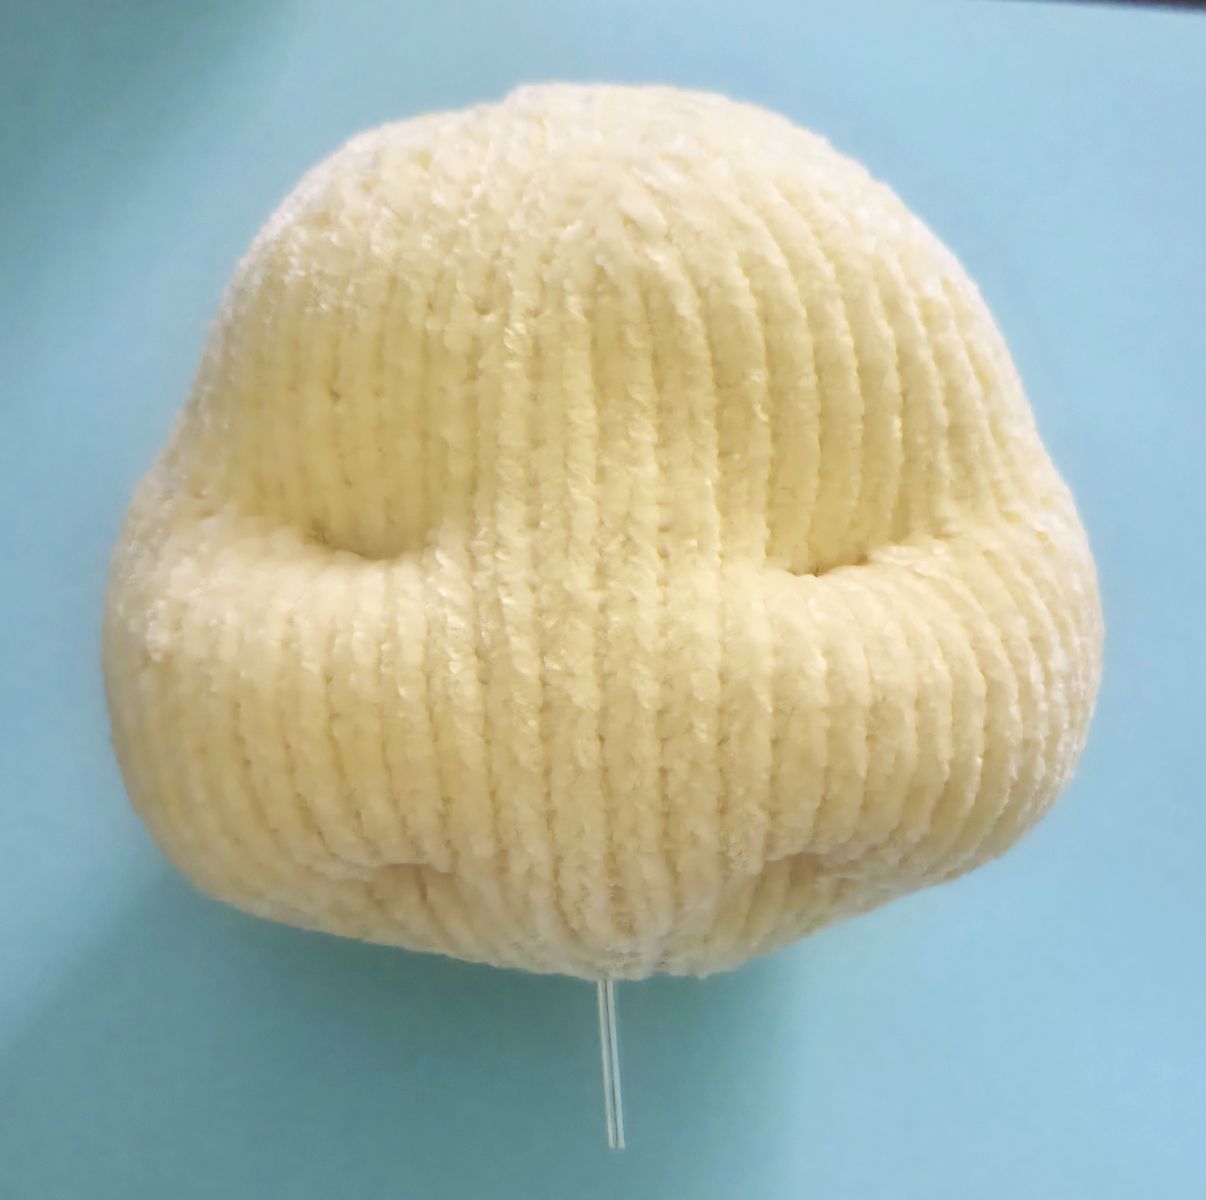
Finally, bind off the remaining stitches. Sew the head together from the bottom up. Leave a small opening for the safety eyes while sewing. This opening does not need to be large, as the stuffing will be inserted later and the head needs to retain its shape. First, sew the head together. Then, take the joint set with washers (25 mm wooden disc). Next, prepare the cotter pin: place the washer on the pin first, followed by the wooden disc. Then, insert the cotter pin exactly into the center of the head. Finally, stuff the head—paying special attention to the cheeks, as they need to be well-filled to create the indentations later.
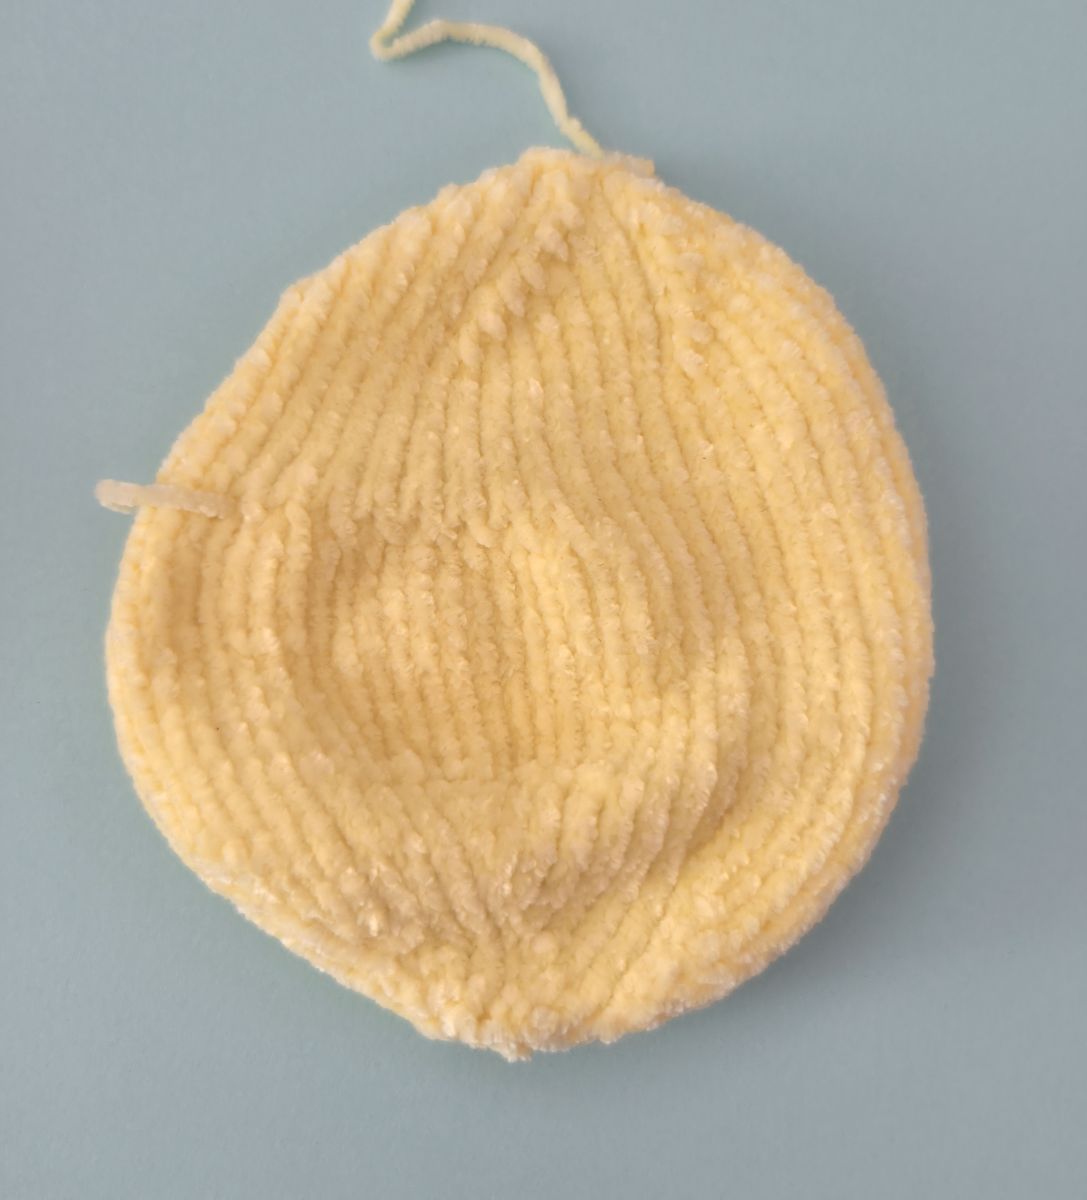
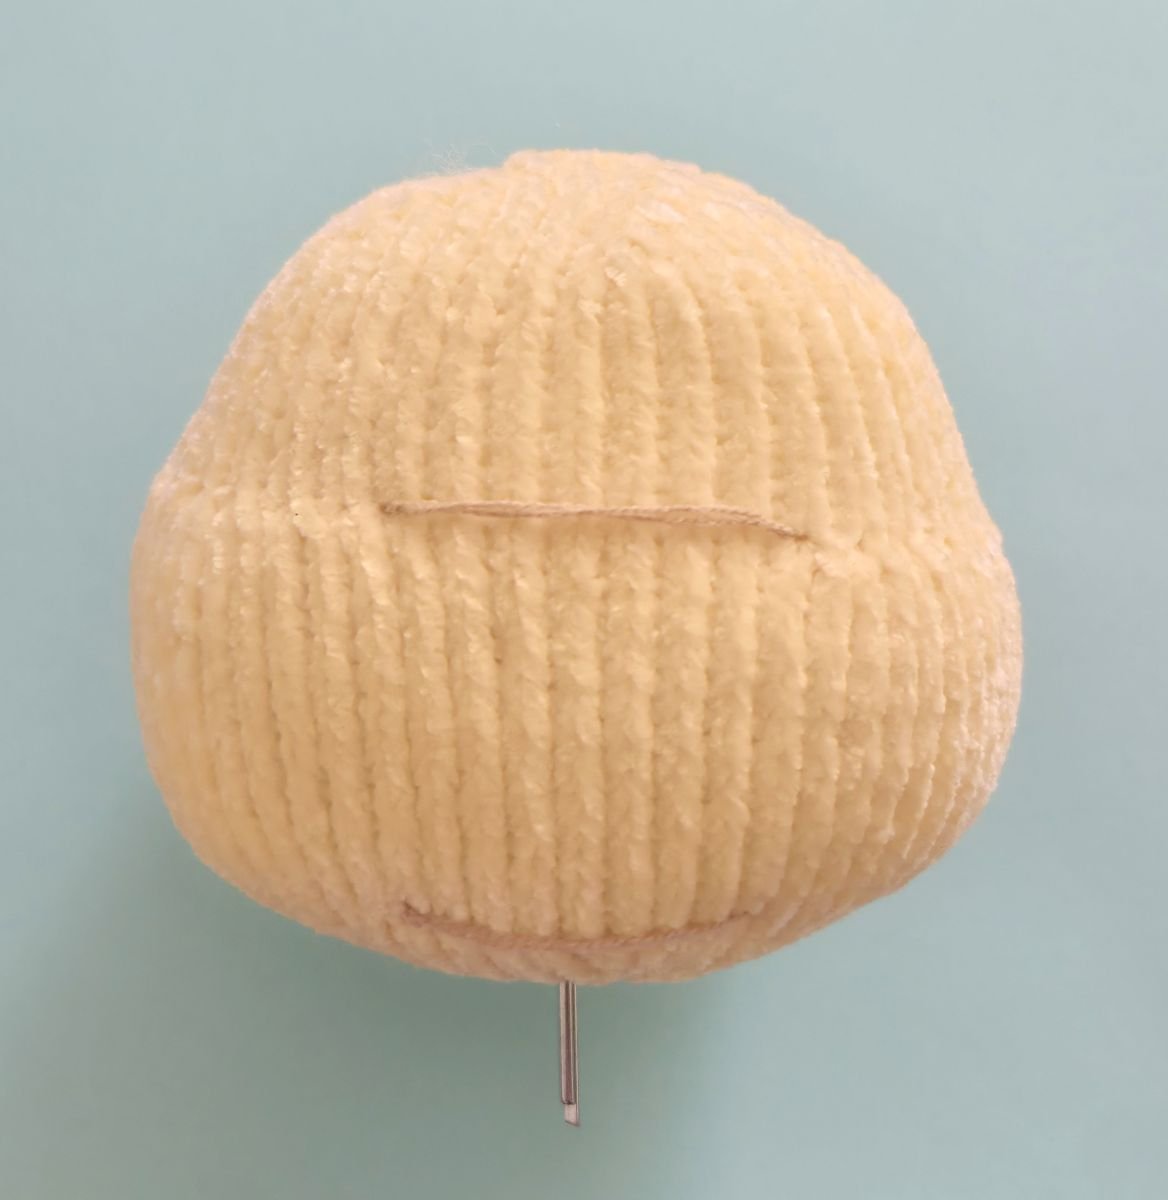
Find the markers for the tightening of the eyes and smile in the 18th and 32th rounds. Insert the needle in the 18th round (marker 1) and come out in the 32th round (marker 3). Count out 3 stitches to the right, insert the needle and go back into the 18th round to the 1st marker, but similarly stepping 1 stitch to the right. Do not tighten the thread right away. Repeat the same for the second eye. Insert the needle in the 18the round (marker 2) and come out in the 32th round (marker 4). Step 3 stitches to the left and then go back to the 2nd marker, but similarly stepping 1 stitch to the left. Tighten the threads, make the knots, weave in the ends. This creates the hollows for the eyes and the corners of the smile.
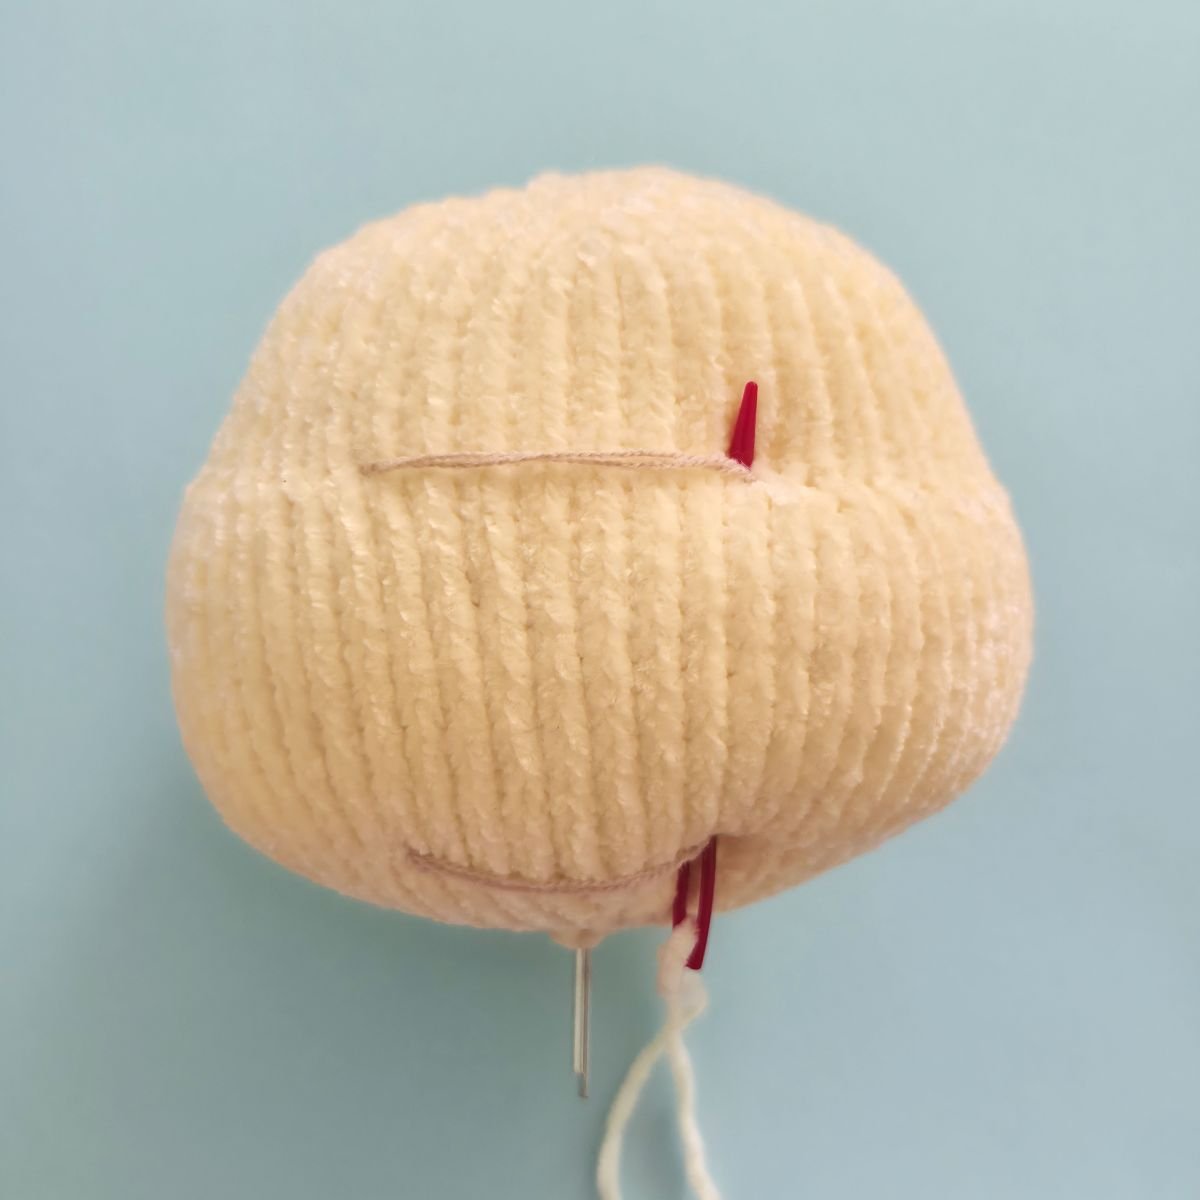
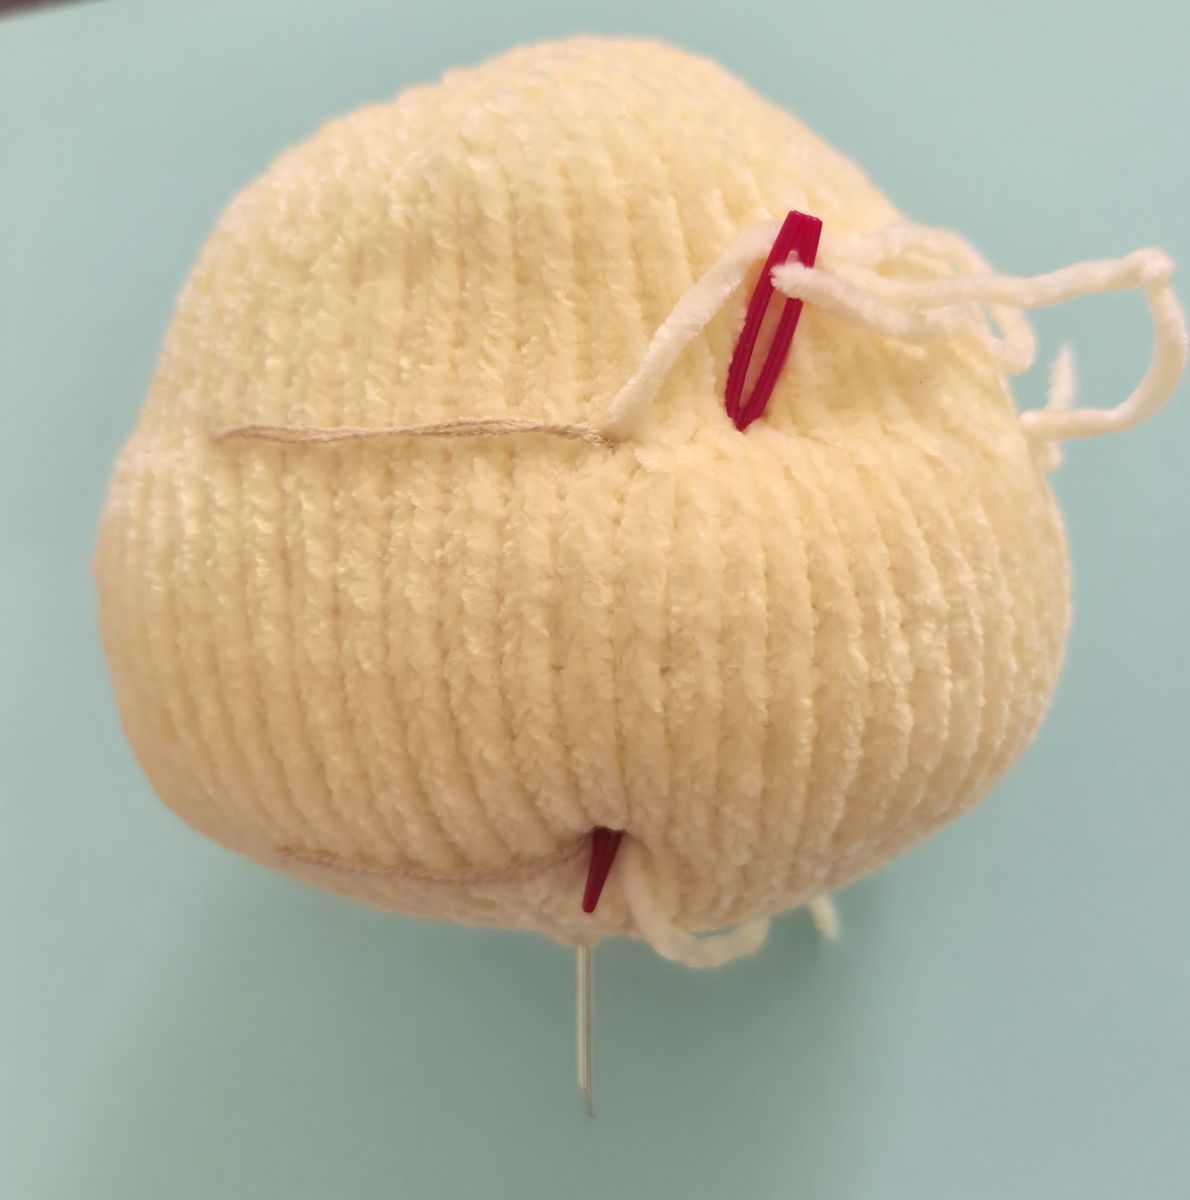
For the safety eyes:
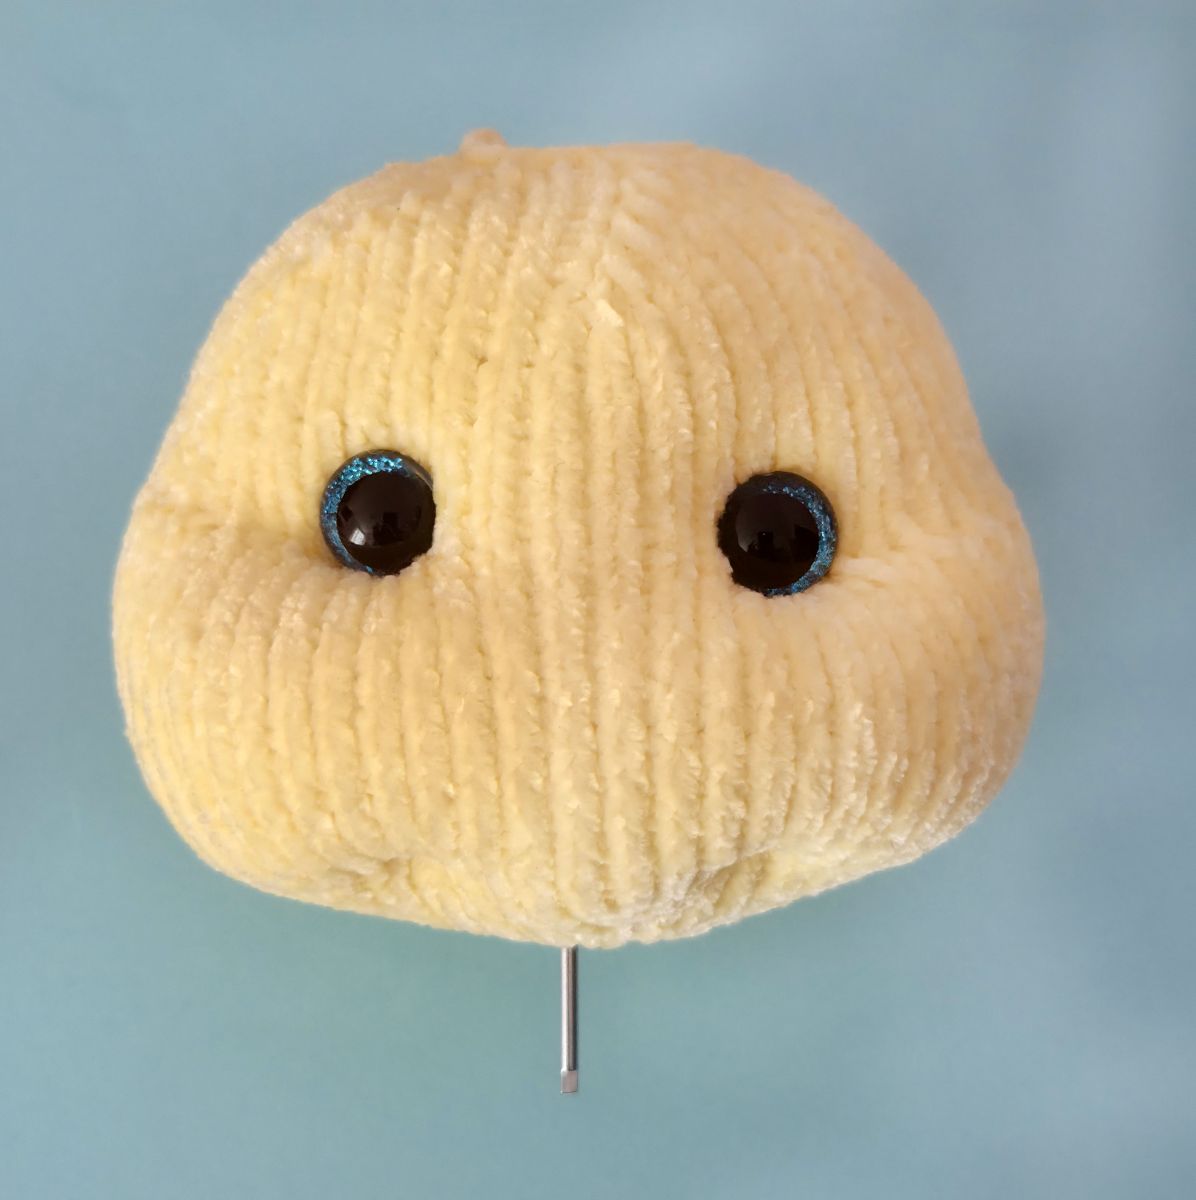
Using 2 round above where the eye indents were shaped, insert the safety eyes and carefully fasten them moving aside the stuffing inside the head.
Body, start crocheting in yellow
If you do not wish to use joint sections, the body is started differently. To do this, cast on 30 stitches and knit according to the following instructions until the color changes to brown. These 30 stitches form the neck.
1. 30 P
2. 30 K
3. 30 P
4. 30 K
5. 30 P
6. (4 K, 1 K inc)х6 (36)
7. 36 P
From Round 15 onwards, continue knitting the body as previously described.
Once the body is fully completed, sew it together and stuff it evenly.
Then securely attach the head by sewing the neck area of the head firmly to the head.
Cast on 6 stitches (ch) onto the knitting needle. Make sure the stitches are evenly stretched while knitting to ensure your knitted piece is nice and even.
1. 6 P (6)
2. 6 K inc. (12)
3. 12 P (12)
4. (1 K, inc)x 6 (18)
5. 18 P (18)
6. (2 K, 1 K inc)x 6 (24)
7. 24 P (24)
8. (3 K, 1 K inc)x 6 (30)
9. 30 P (30)
10. 30 K
11. 30 P
12. 30 K
13. 30 P
14. (4 K, 1 K inc)х6 (36)
Change the color to brown
15. 36 P
16. 36 K
17. 36 P
18. (5 K, 1 K inc)х 6 (42)
19. 42 P
20. 42 K
21. 42 P
Change the color to yellow
22. (6 K, 1 K inc)х 6 (48)
23. 48 P
24. 48 K
25. 48 P
26. 48 K
27. 48 P
28. 48 K
29. 48 P
30. 12 K, (1 K, 1 inc)х 12, (Here we made the increases for the buttocks), 12 K (60)
Change the color to brown
31. 60 P
32. 60 K
33. 60 P
34. 60 K
35. 60 P
36. 60 K
37. 60 P
38. 60 K
39. 60 P
40. (8 K, 1 dec)х 6 (54)
41. 54 P
42. 54 K
43. 54 P
44. (7 K, 1 dec)х 6 (48)
45. 48 P
46. (6 K, 1 dec)х 6 (42)
47. 42 P
48. (5 K, 1 dec)х 6 (36)
49. 36 P
50. (4 K, 1 dec)х 6 (30)
51. 30 P
52. (3 K, 1 dec)х 6 (24)
53. 24 P
54. (2 K, 1 dec)х 6 (18)
55. 18 P
56. (1 K, 1 dec)х 6 (12)
57. 12 P
58. 6 dec.
Finally, bind off the remaining stitches. Sew the body seam from the top down to the middle. Then attach the head to the body.
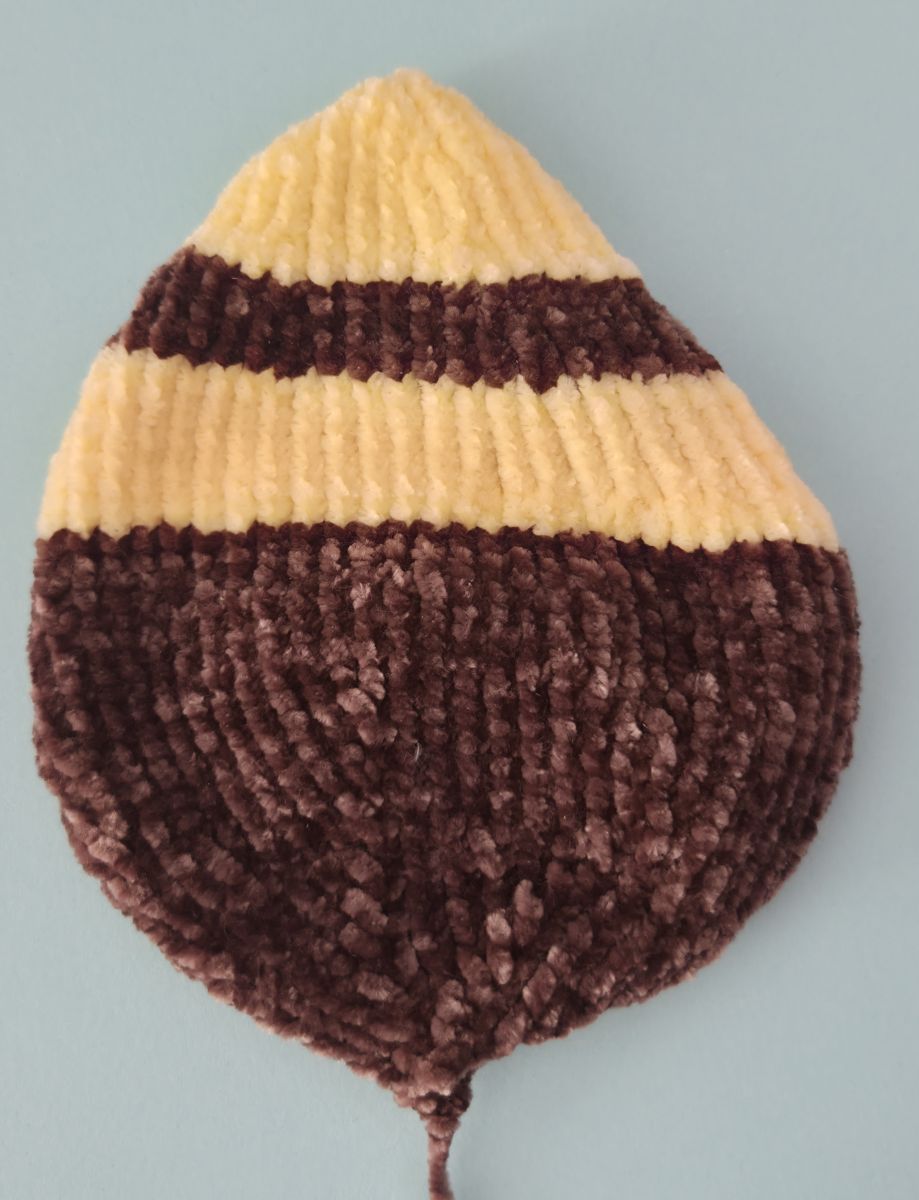
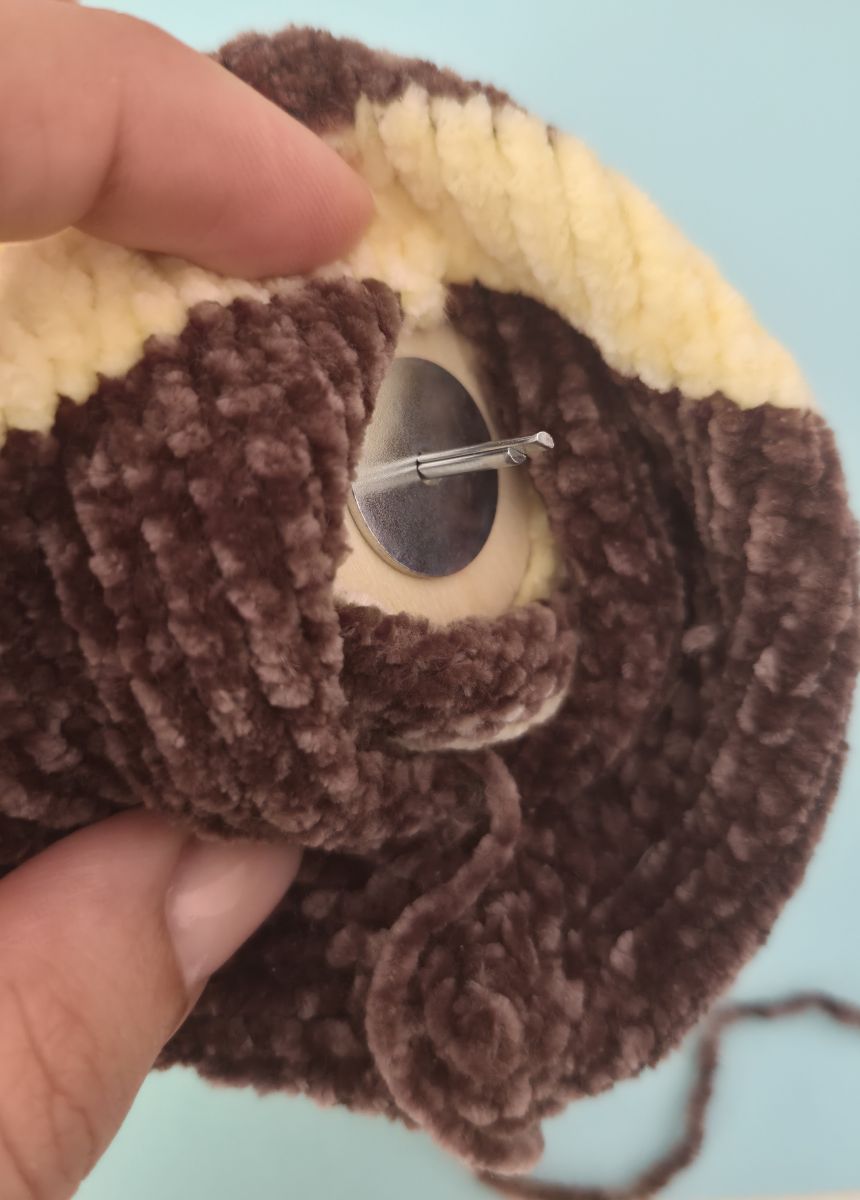
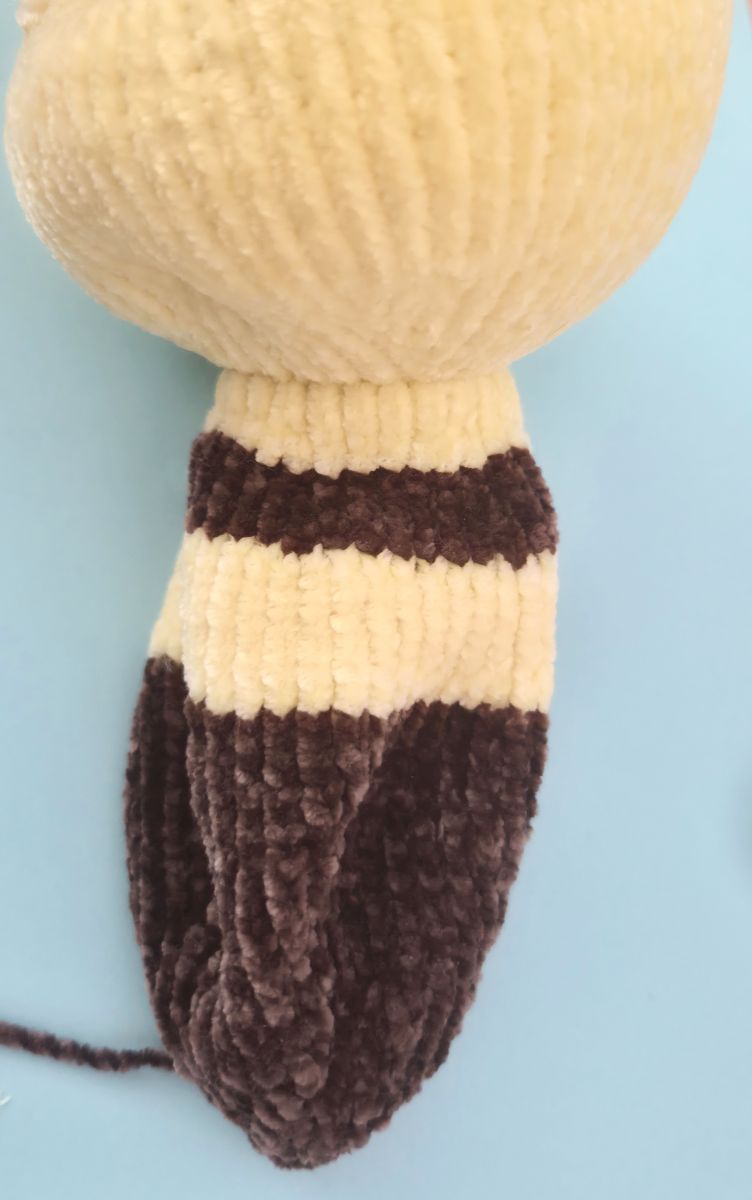
To connect the head, insert a cotter pin. I use a 25 mm wooden disc for this joint. First, insert the cotter pin extending from the head into the exact center of the body. Then place the wooden disc onto the pin and tighten the washer. Use pliers to bend the ends of the cotter pin firmly so the head is securely attached to the body.
Eyebrows
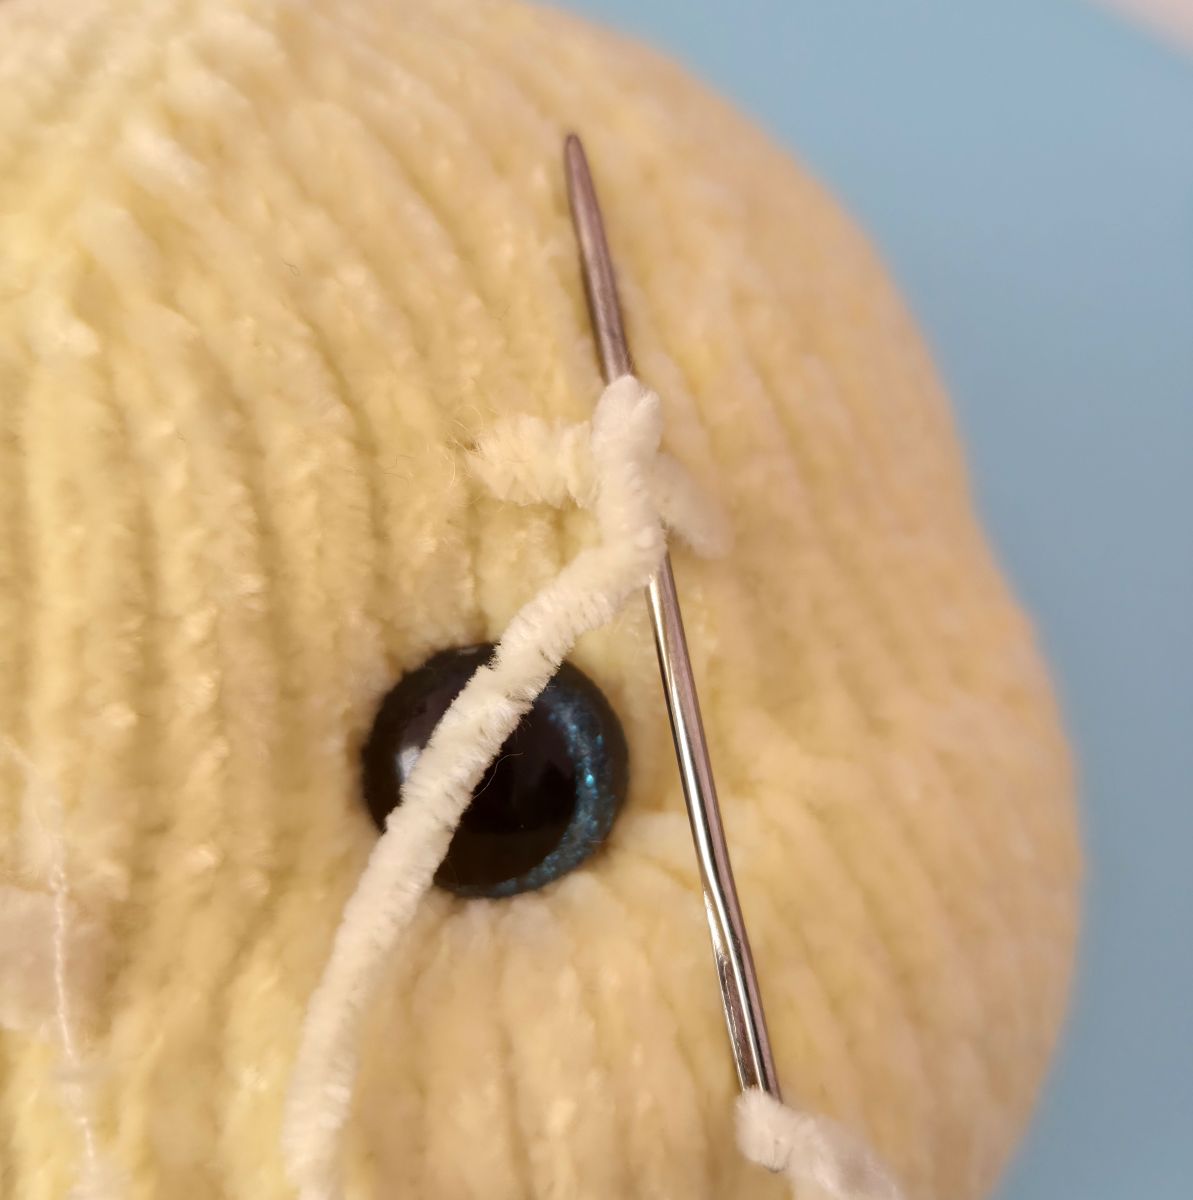
Make a few stitches at the desired spot above the eye. Then work stitches all around these base stitches. Insert and withdraw the thread repeatedly just beside the existing line, covering the stitches and forming a soft, rounded edge. This creates a small, solid eyebrow shape.
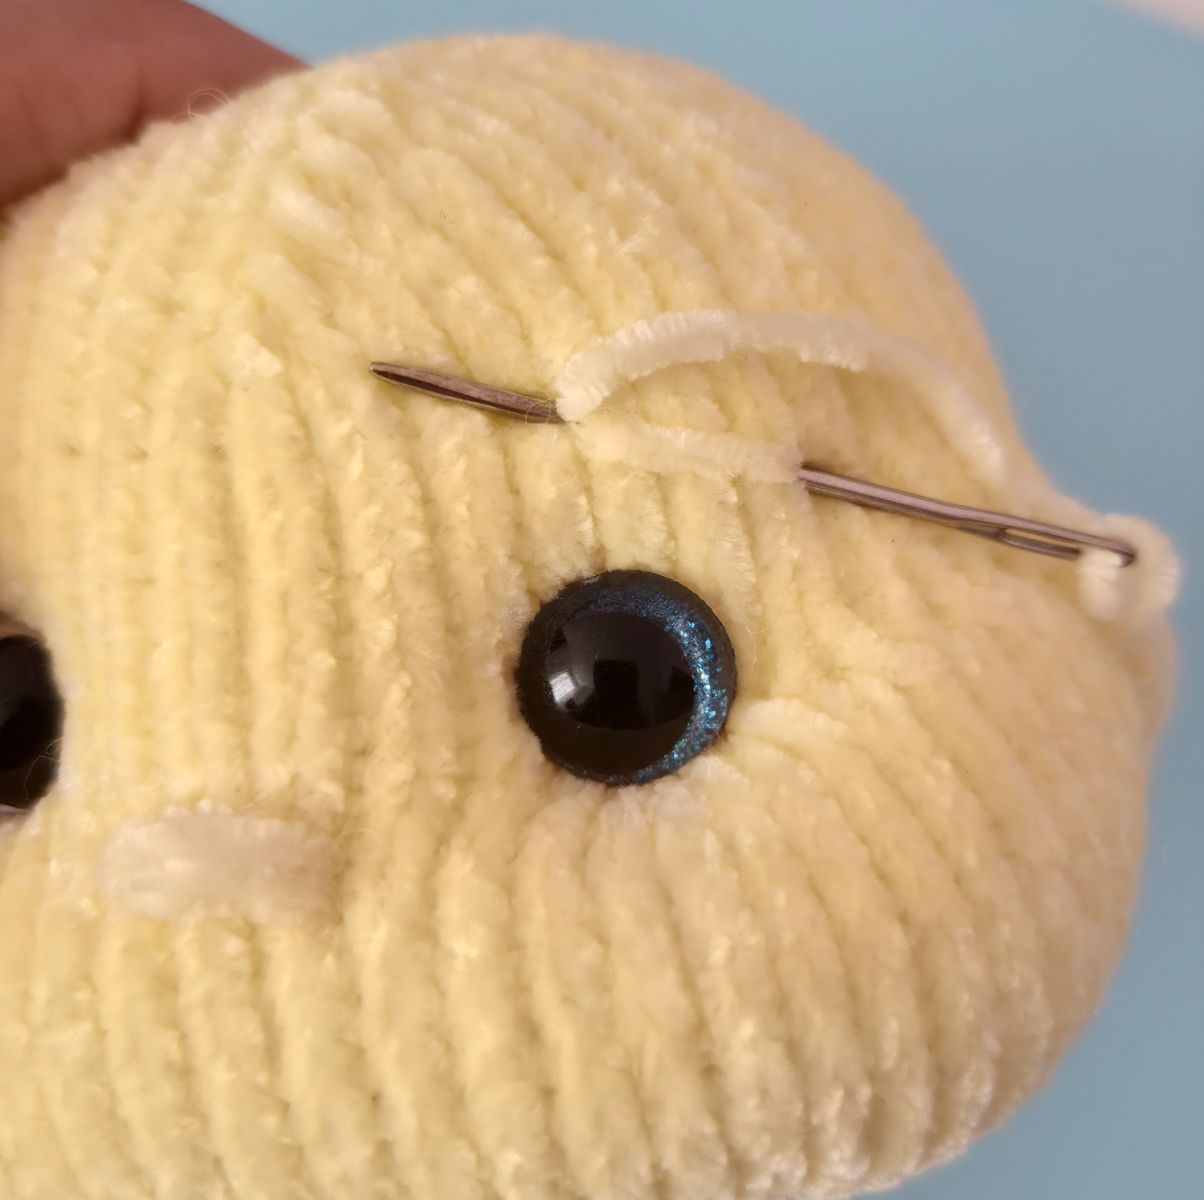
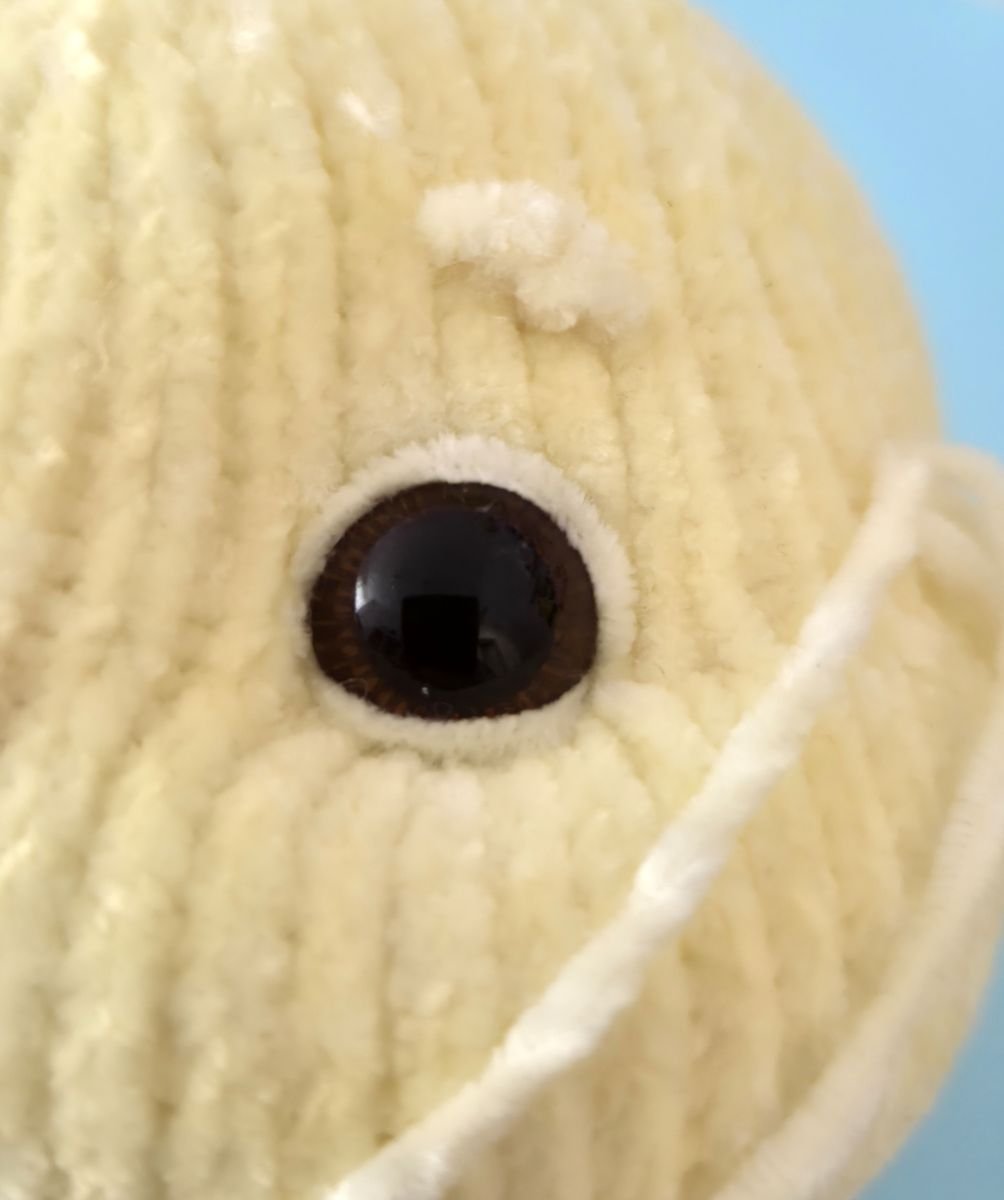
Stitch the nose in the center between the eyes, positioned slightly lower.
If desired, you can also embroider eyelids. I did this by making a few stitches above and below the eye to create a gentle, arched eyelid shape.
If the thread slips while embroidering, you can apply a tiny drop of craft glue to secure it. Allow the glue to dry completely before continuing.
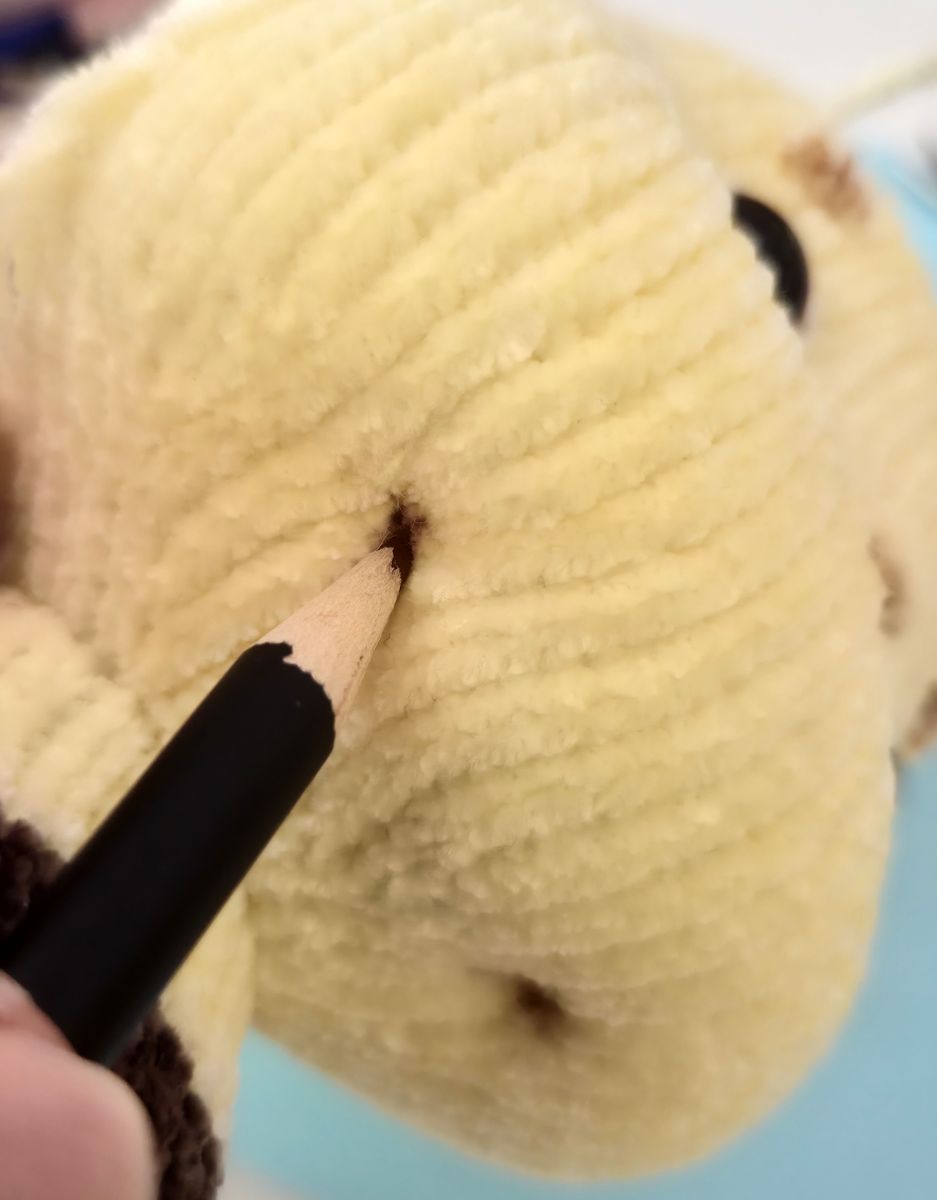
At the end, the face can be lightly toned as desired. I used colored pencils for this. With a brown colored pencil, I softly emphasized the freckles, the eyebrows, and the nose area, and added a small smile at the bottom. With a pink colored pencil, the cheeks were gently shaded.
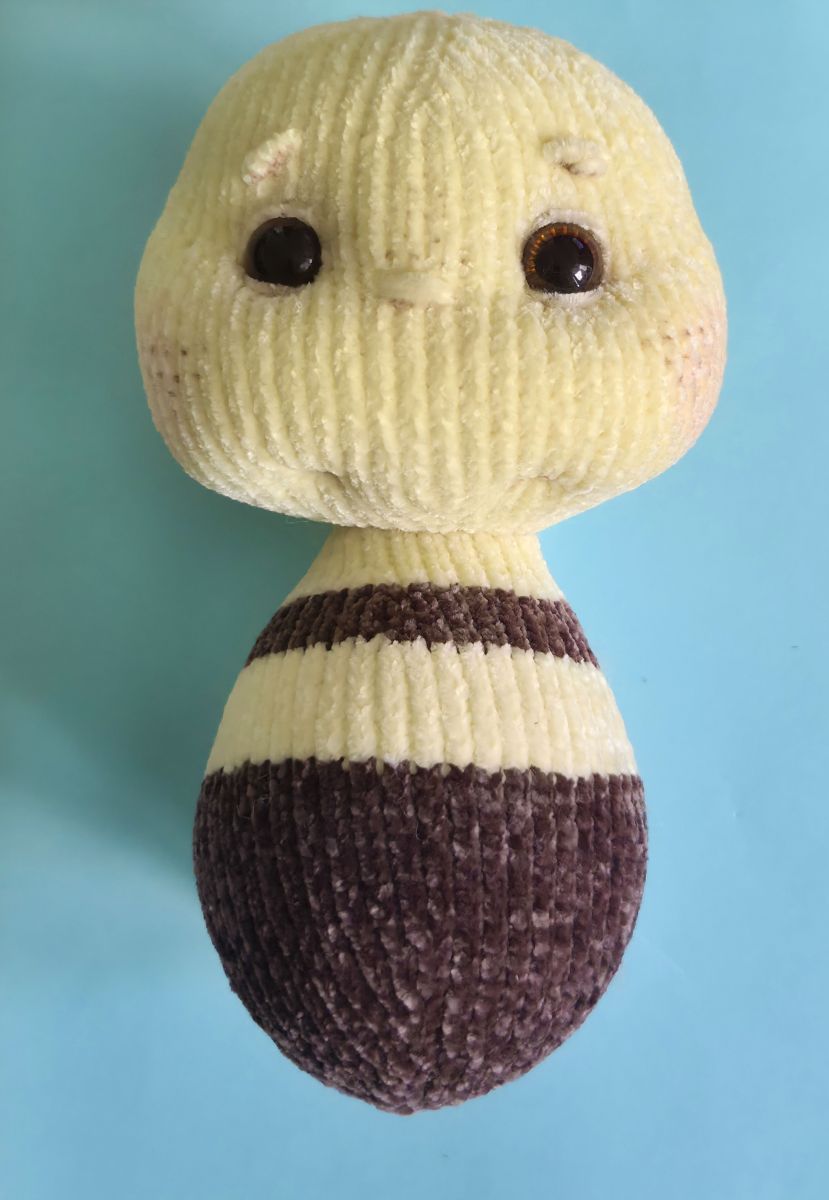
Finally, sew on the arms and legs. Position them evenly and attach them securely to the body.
Antenna (brown color)
Cast on 6 stitches (ch) onto the knitting needle. Make sure the stitches are evenly stretched while knitting to ensure your knitted piece is nice and even.
1. 6 P (6)
2. (1 K, 1 inc)х 3 (9)
3. 9 P
4. 9 K
5. 9 P
6. (1 K, 1 dec)х3 (6)
7. 6 P
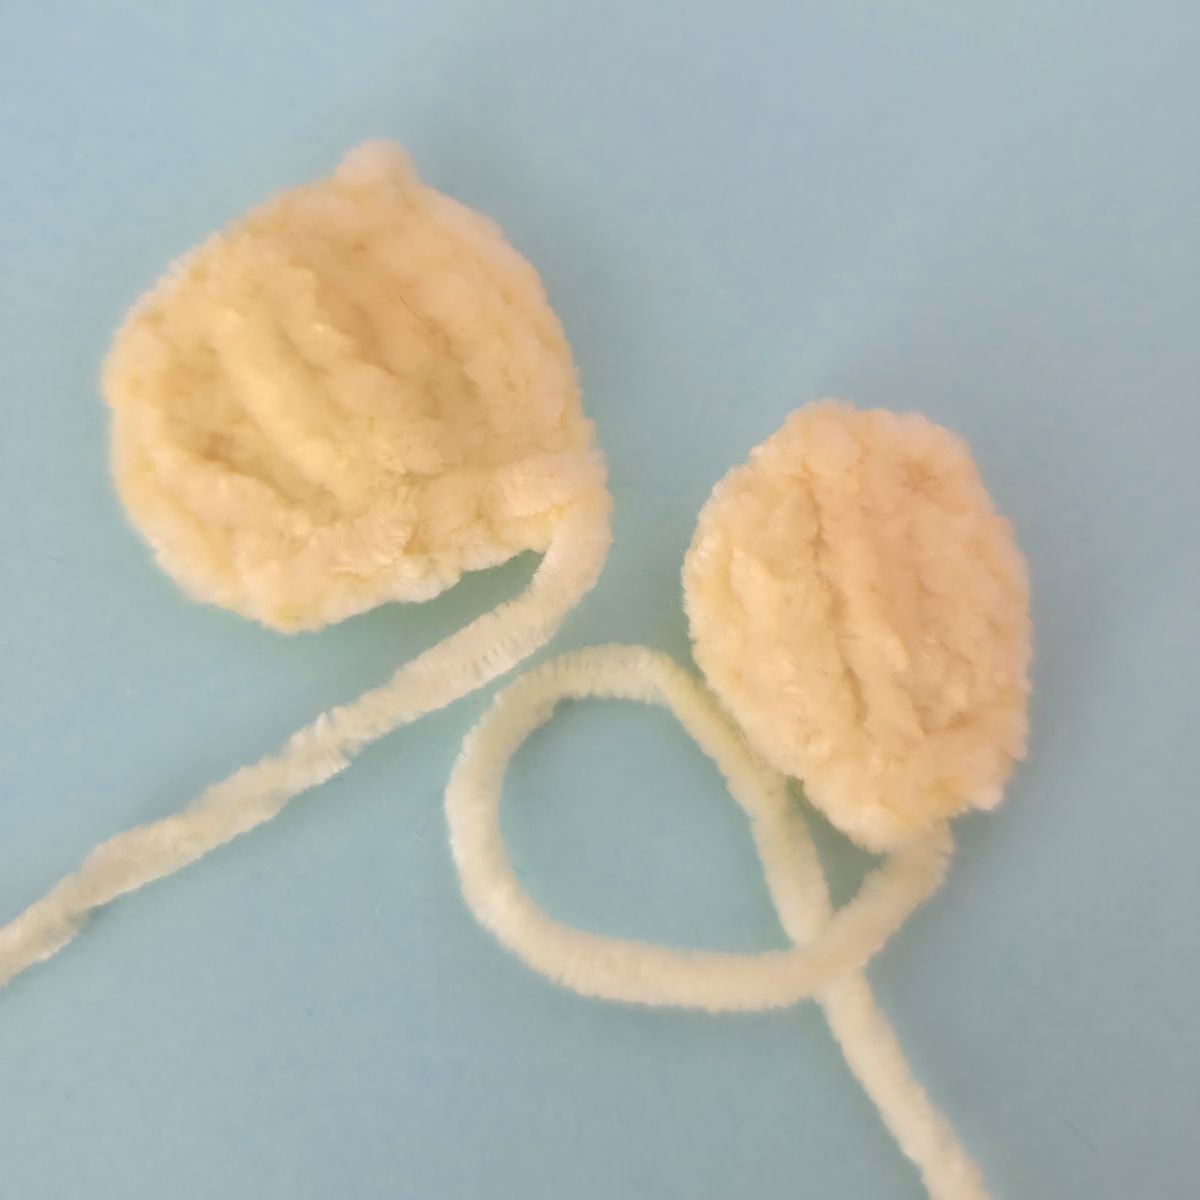
Finally, bind off the remaining stitches. Fold the sides together and sew them closed.
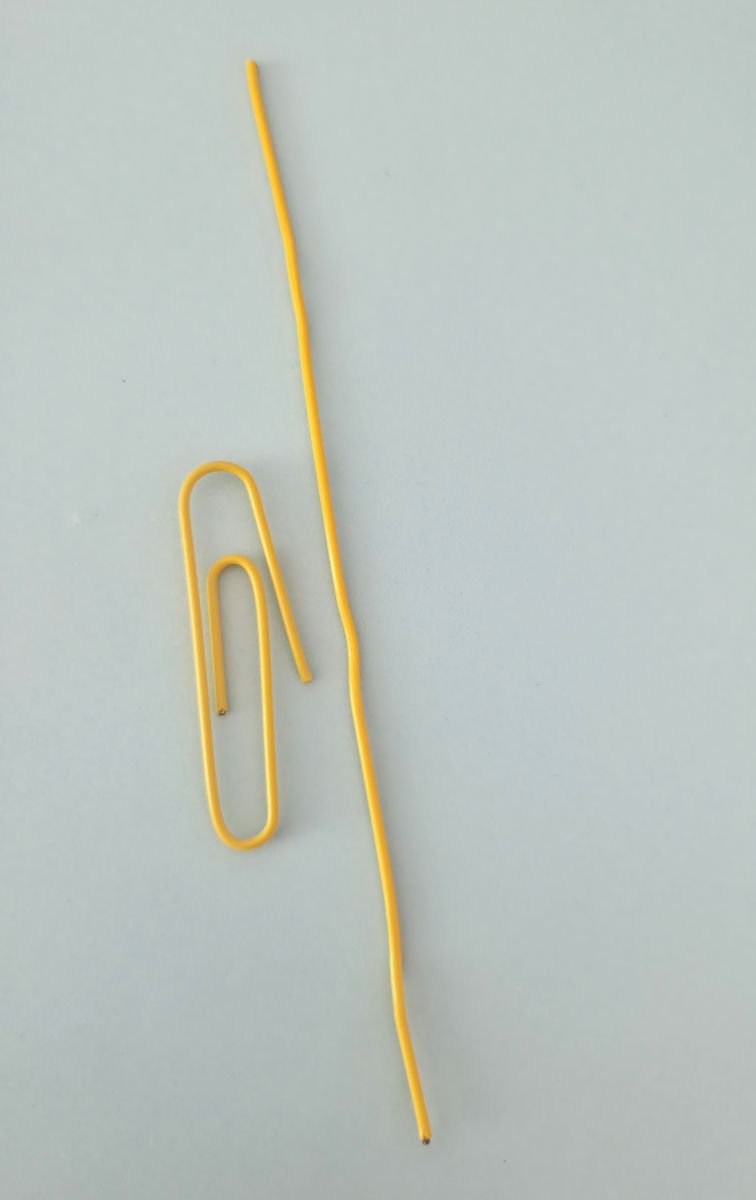
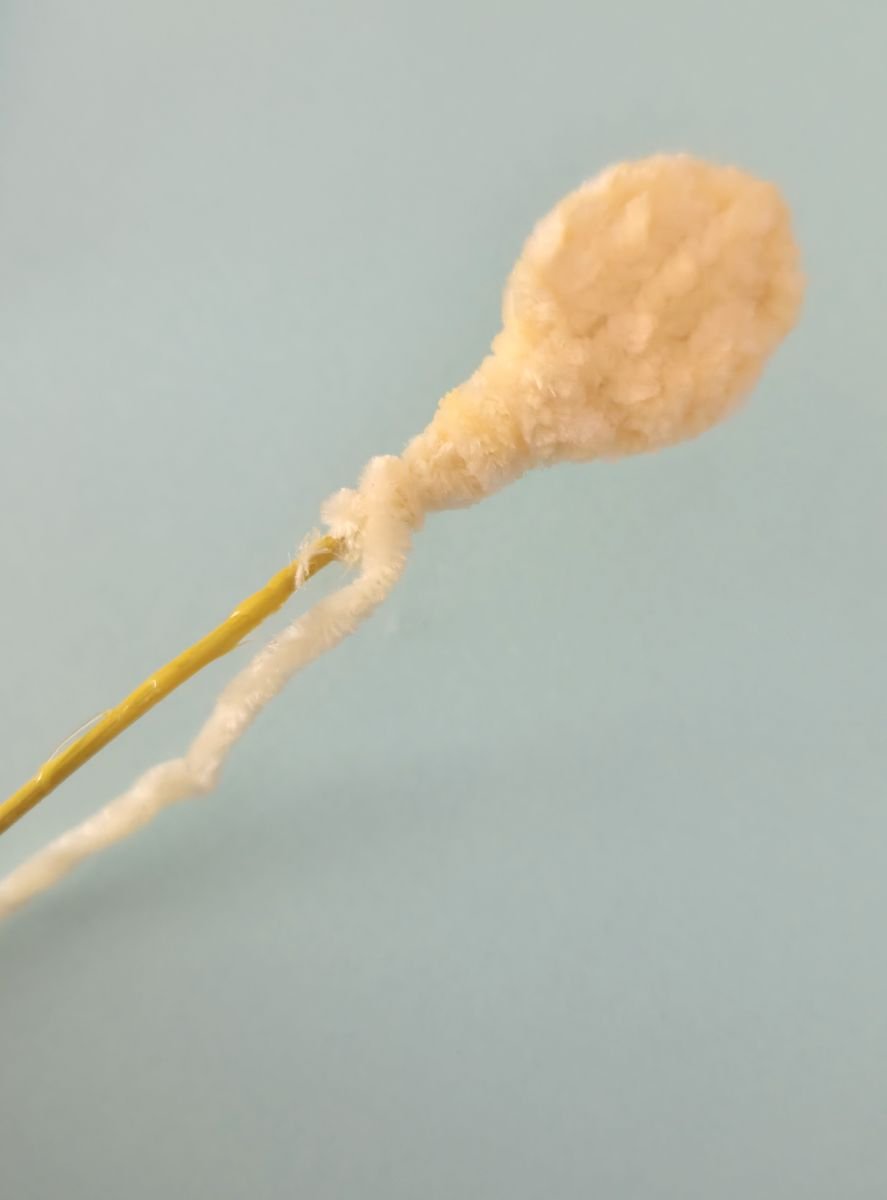
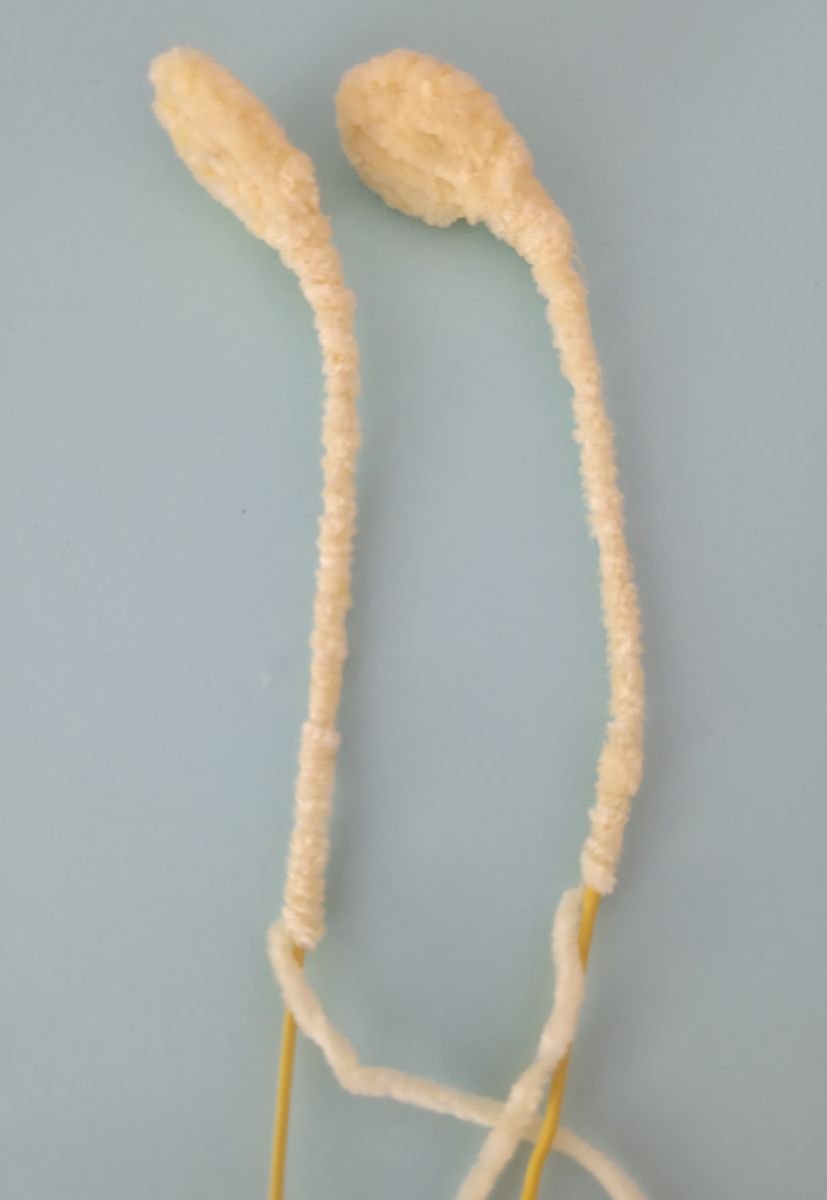
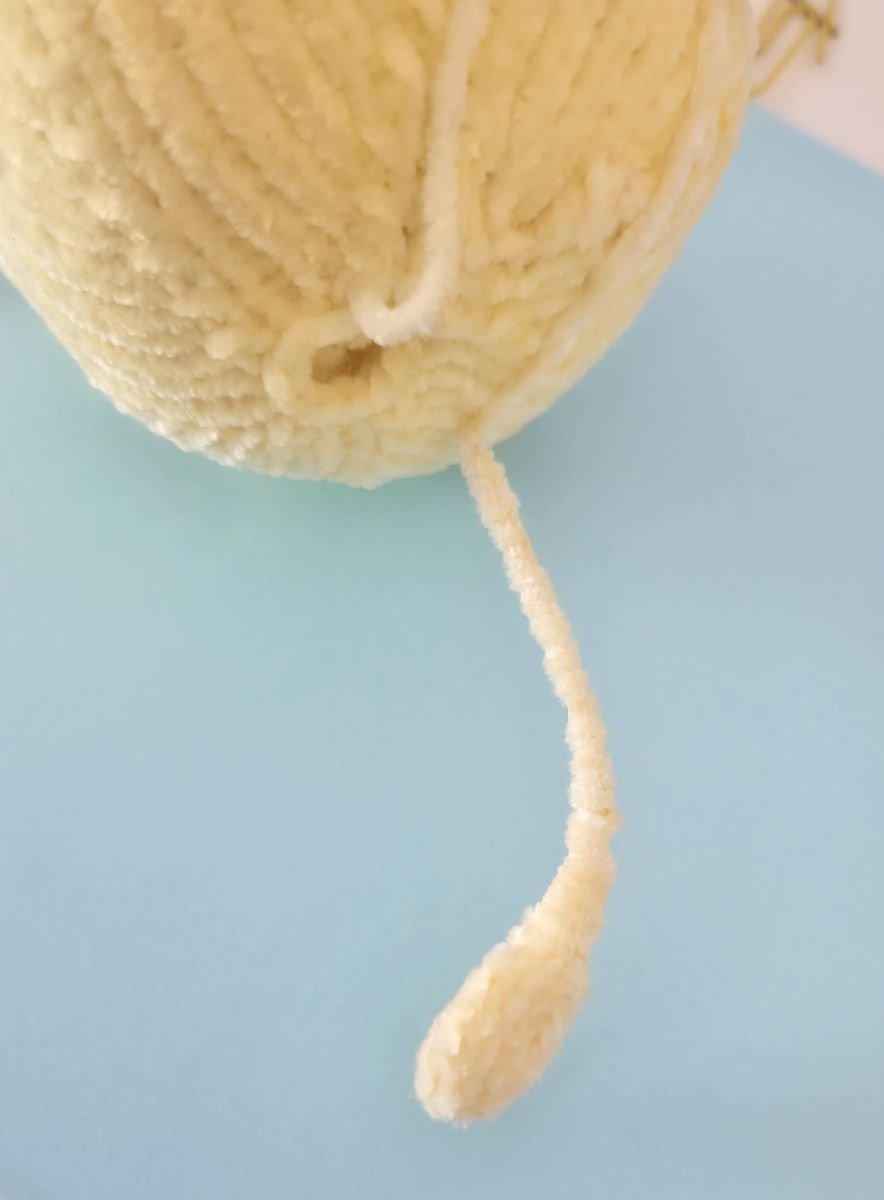
For the wire, I used a large paperclip, straightening it to create a smooth, even shape. Apply a small amount of glue to one end and insert it into the knitted piece. Then take the yarn and wrap it tightly around the wire, securing it with clear glue as you go. Keep rotating the wire while wrapping; the yarn should form a dense, even layer without gaps.
Leave the last 2 cm of the wire unwrapped and leave the yarn tail for sewing on. Once the wrapped section is completely dry, insert the bare end into the head, adjust the position, and sew it securely in place.
Forewing (2 pieces, white color)
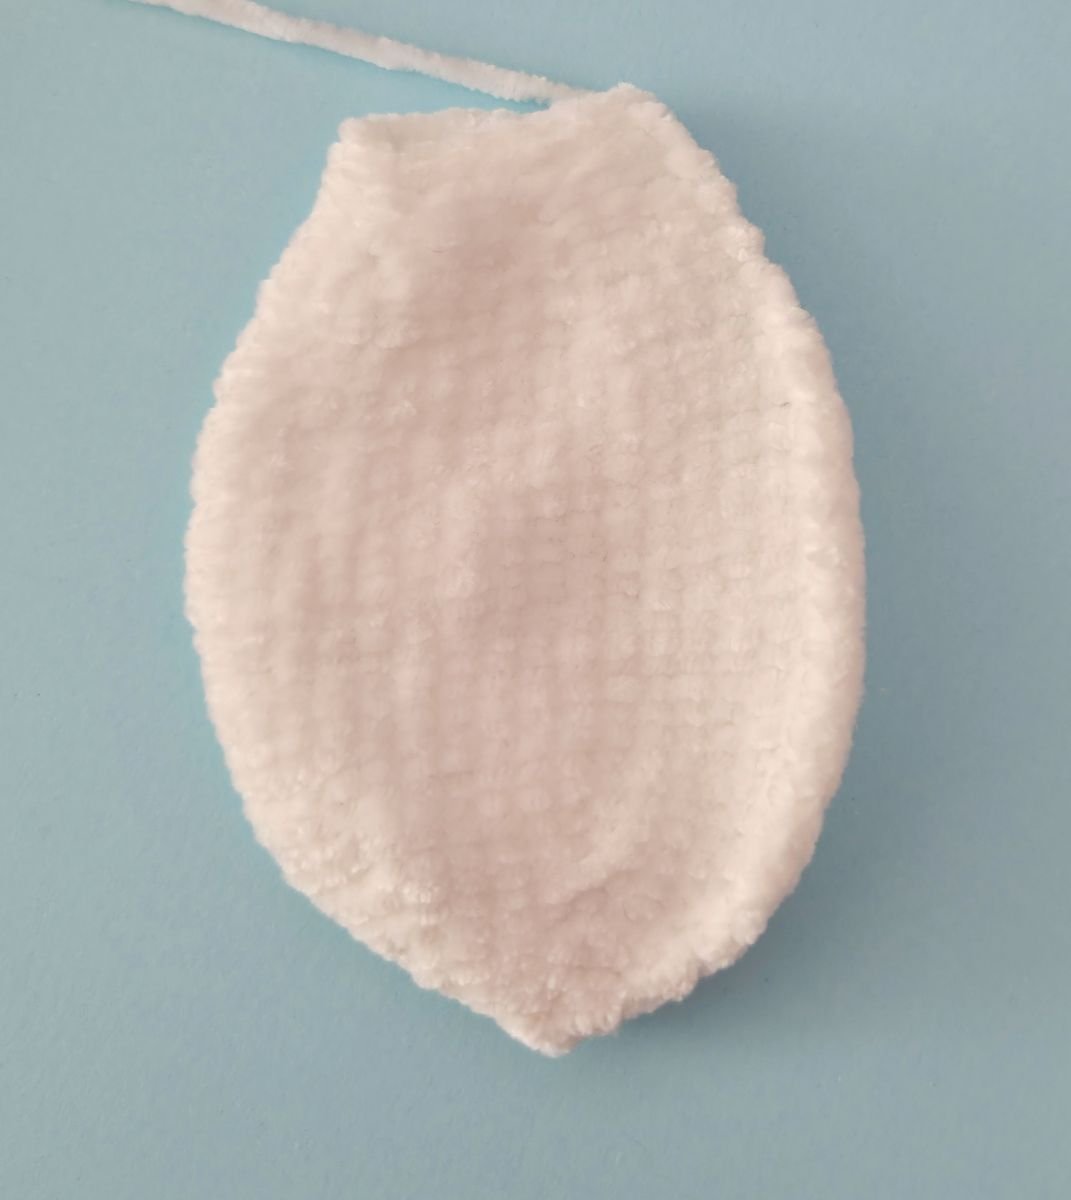
Cast on 6 stitches (ch) onto the knitting needle. Make sure the stitches are evenly stretched while knitting to ensure your knitted piece is nice and even.
1. 6 P (6)
2. 6 K inc. (12)
3. 12 P (12)
4. (1 K, 1 K inc)x 6 (18)
5. 18 P (18)
6. (2 K, 1 K inc)x6 (24)
7. 24 P (24)
8. (3 K, 1 K inc)x 6 (30)
9. 30 P (30)
10. (4 K, 1 K inc)x 6 (36)
11. 36 P
12. 36 K
13. 36 P
14. 36 K
15. 36 P
16. 36 K
17. 36 P
18. 36 K
19. 36 P
20. 36 K
21. 36 P
22. 36 K
23. 36 P
24. 36 K
25. 36 P
26. 16 K, 1 dec, 16 K, 1 dec (34)
27. 34 P
28. 34 K
29. 34 P
30. 15 K, 1 dec, 15 K, 1 dec (32)
31. 32 P
32. 14 K, 1 dec, 14 K, 1 dec (30)
33. 30 P
34. (3 K, 1 dec)х 6 (24)
35. 24 P
36. 24 K
37. 24 P
38. (2 K, 1 dec)х 6 (18)
39. 18 P
40. 18 K
41. 18 P
42. 18 K
43. 18 P
44. 18 K
45. 18 P
Finally, bind off the remaining stitches. Do not stuff.
Rearwing (2 pieces, white color)
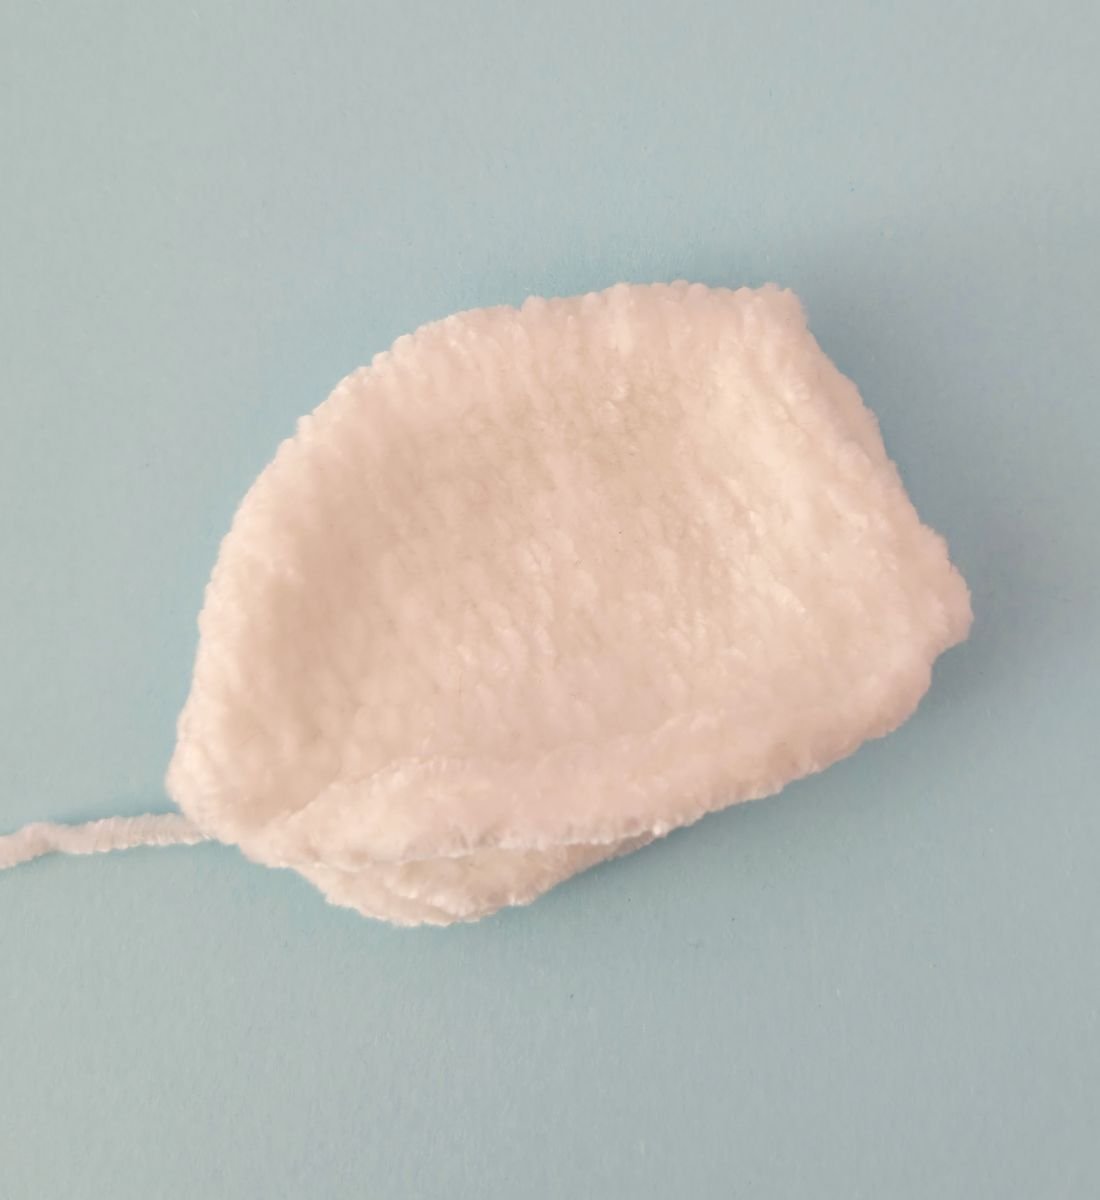
Cast on 6 stitches (ch) onto the knitting needle. Make sure the stitches are evenly stretched while knitting to ensure your knitted piece is nice and even.
1. 6 P (6)
2. 6 K inc. (12)
3. 12 P (12)
4. (1 K, 1 K inc)x 6 (18)
5. 18 P (18)
6. (2 K, 1 K inc)x6 (24)
7. 24 P (24)
8. (3 K, 1 K inc)x 6 (30)
9. 30 P
10. 30 K
11. 30 P
12. 30 K
13. 30 P
14. 30 K
15. 30 P
16. 30 K
17. 30 P
18. 30 K
19. 30 P
20. 30 K
21. 30 P
22. 13 K, 1 dec, 13 K, 1 dec (28)
23. 28 P
24. 12 K, 1 dec, 12 K, 1 dec (26)
25. 26 P
26. 26 K
27. 26 P
28. 11 K, 1 dec, 11 K, 1 dec (24)
29. 24 P
30. 24 K
31. 24 P
32. (2 K, 1 dec)х 6 (18)
33. 18 P
Finally, bind off the remaining stitches. Do not stuff.
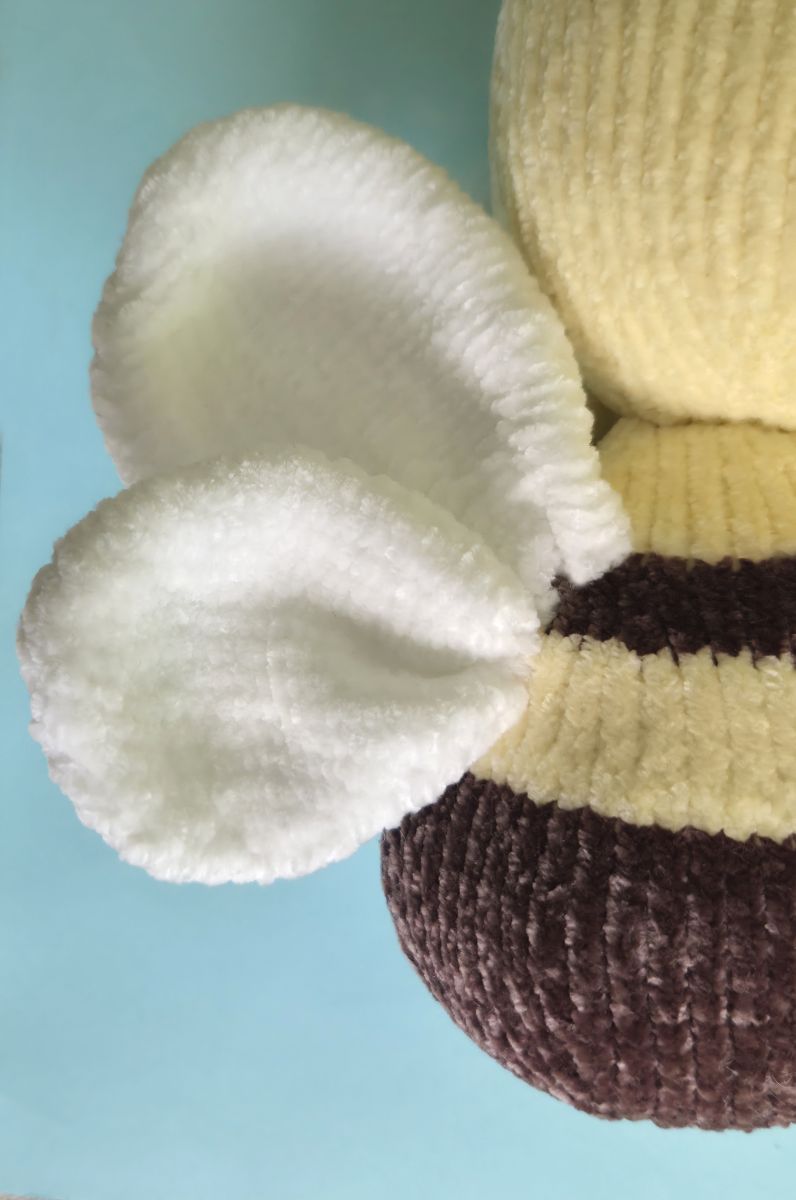
Gather all 4 wings together as shown in the picture and sew them firmly to the back.
Stinger
Cast on 6 stitches.
1. 6 P
2. 6 K
3. 6 P
4. 6 M rechts inc. (12)
5. 12 P (12)
Finally, the remaining stitches are bound off, and the piece is sewn together.
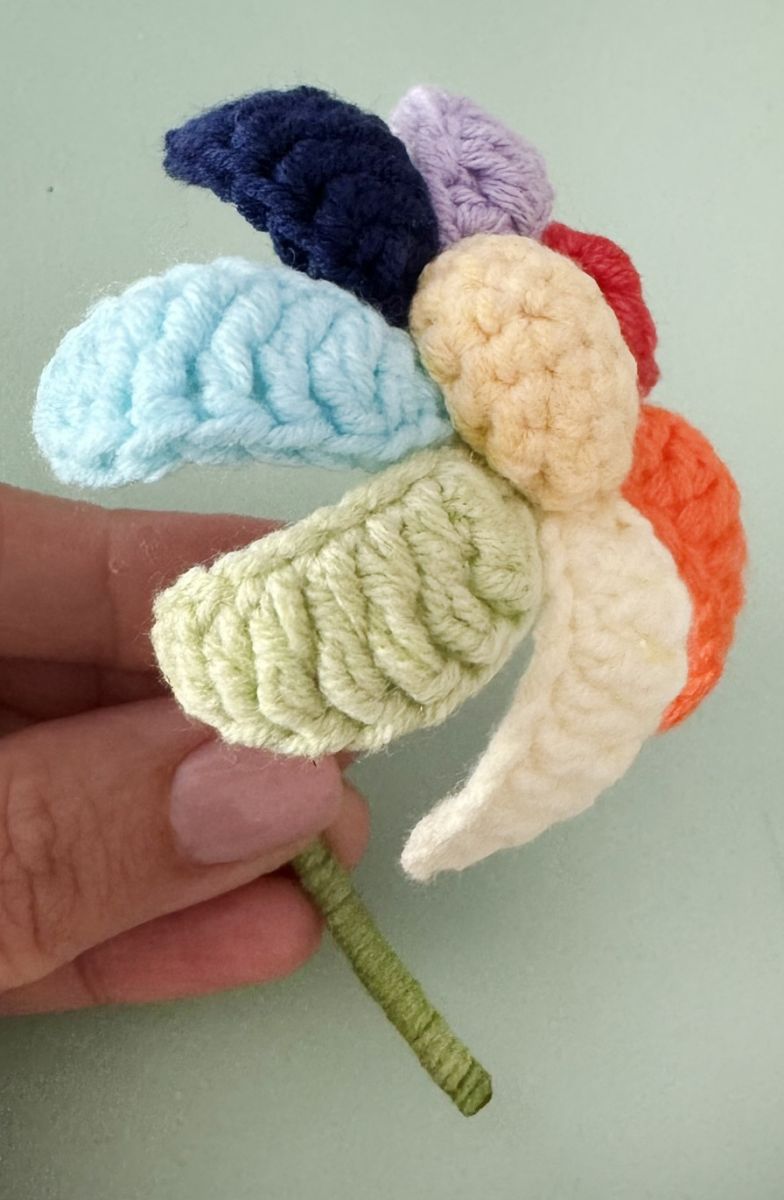
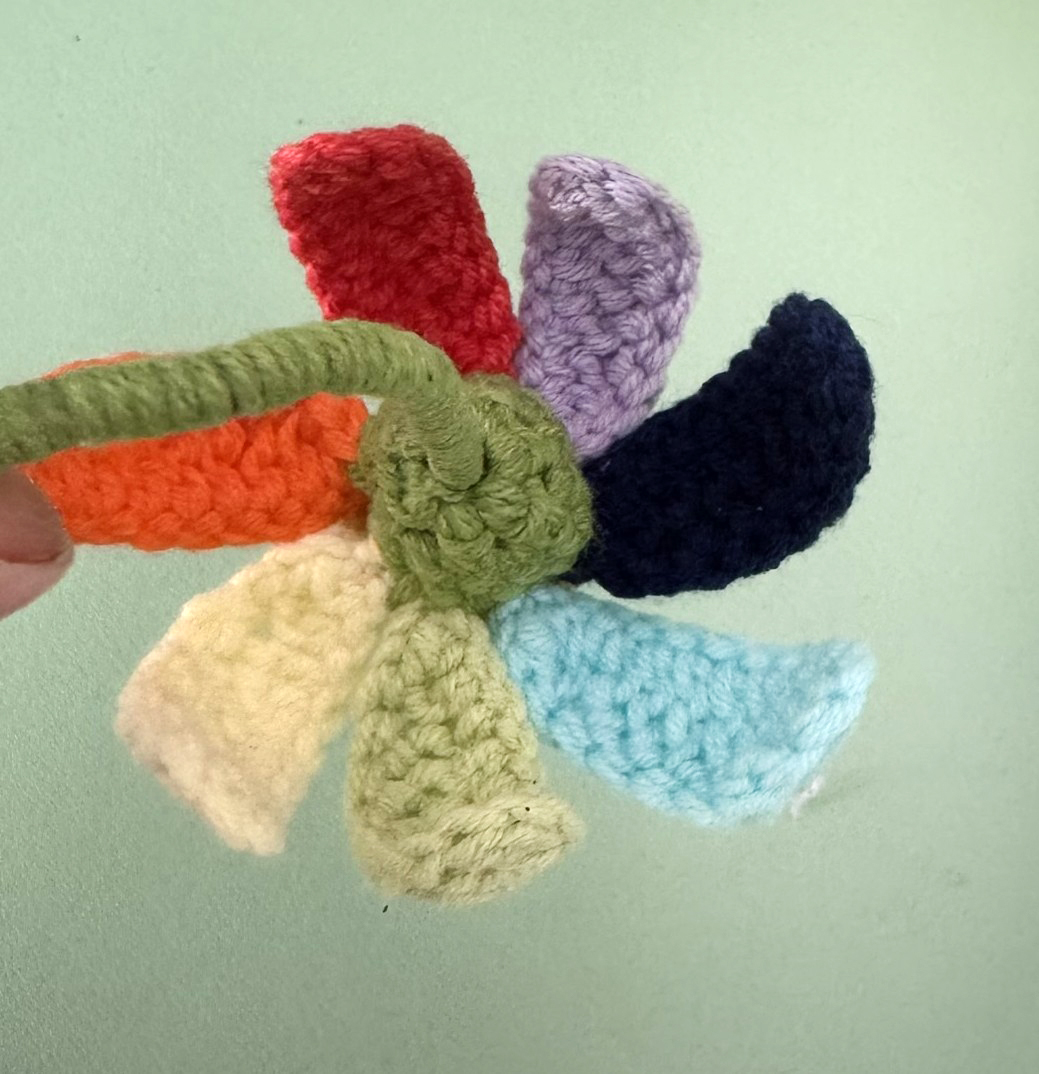
The flower is crocheted. I am happy to share the complete pattern so that others can make it as well.
Flower
Start with yellow
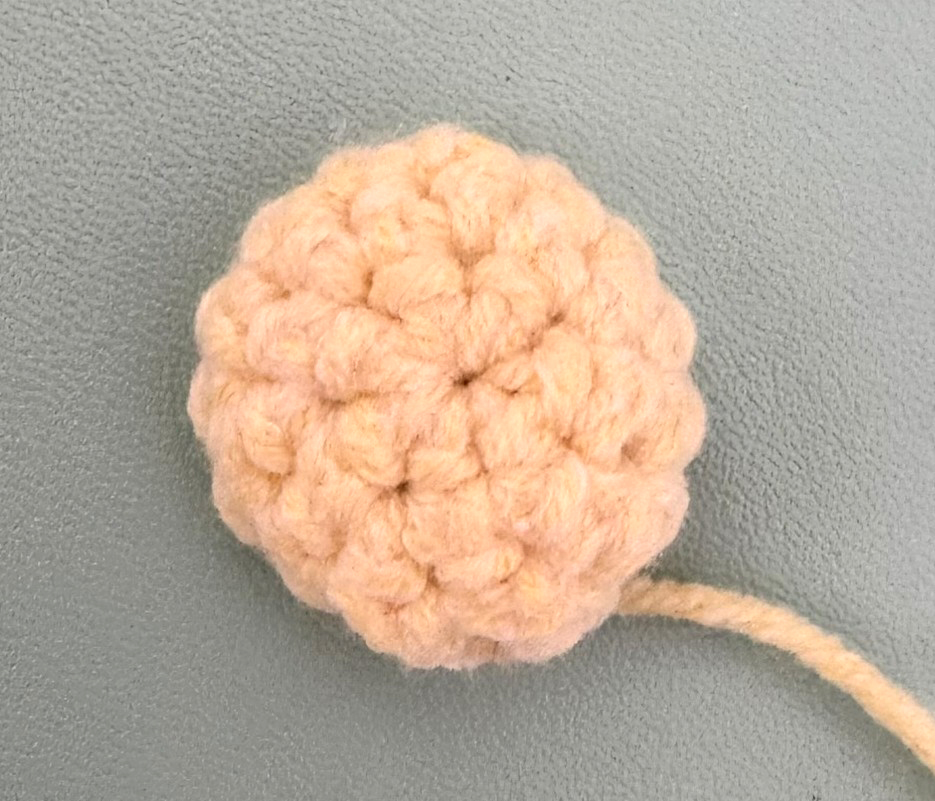
1. 7 sc in a yarn ring
2. 7 sc, fasten the yarn, and cut
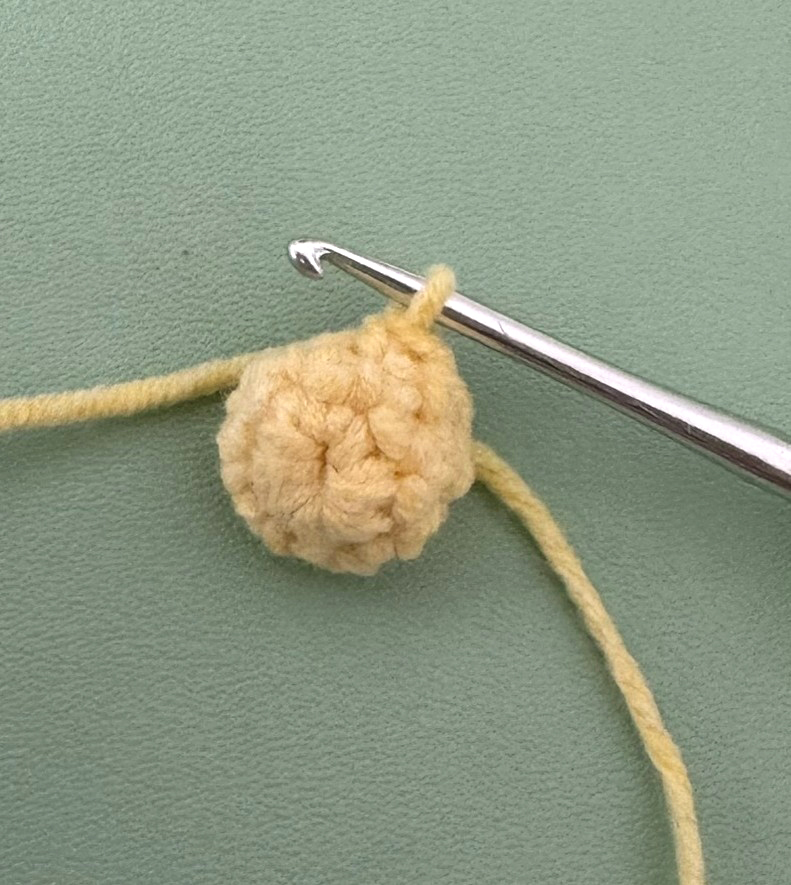
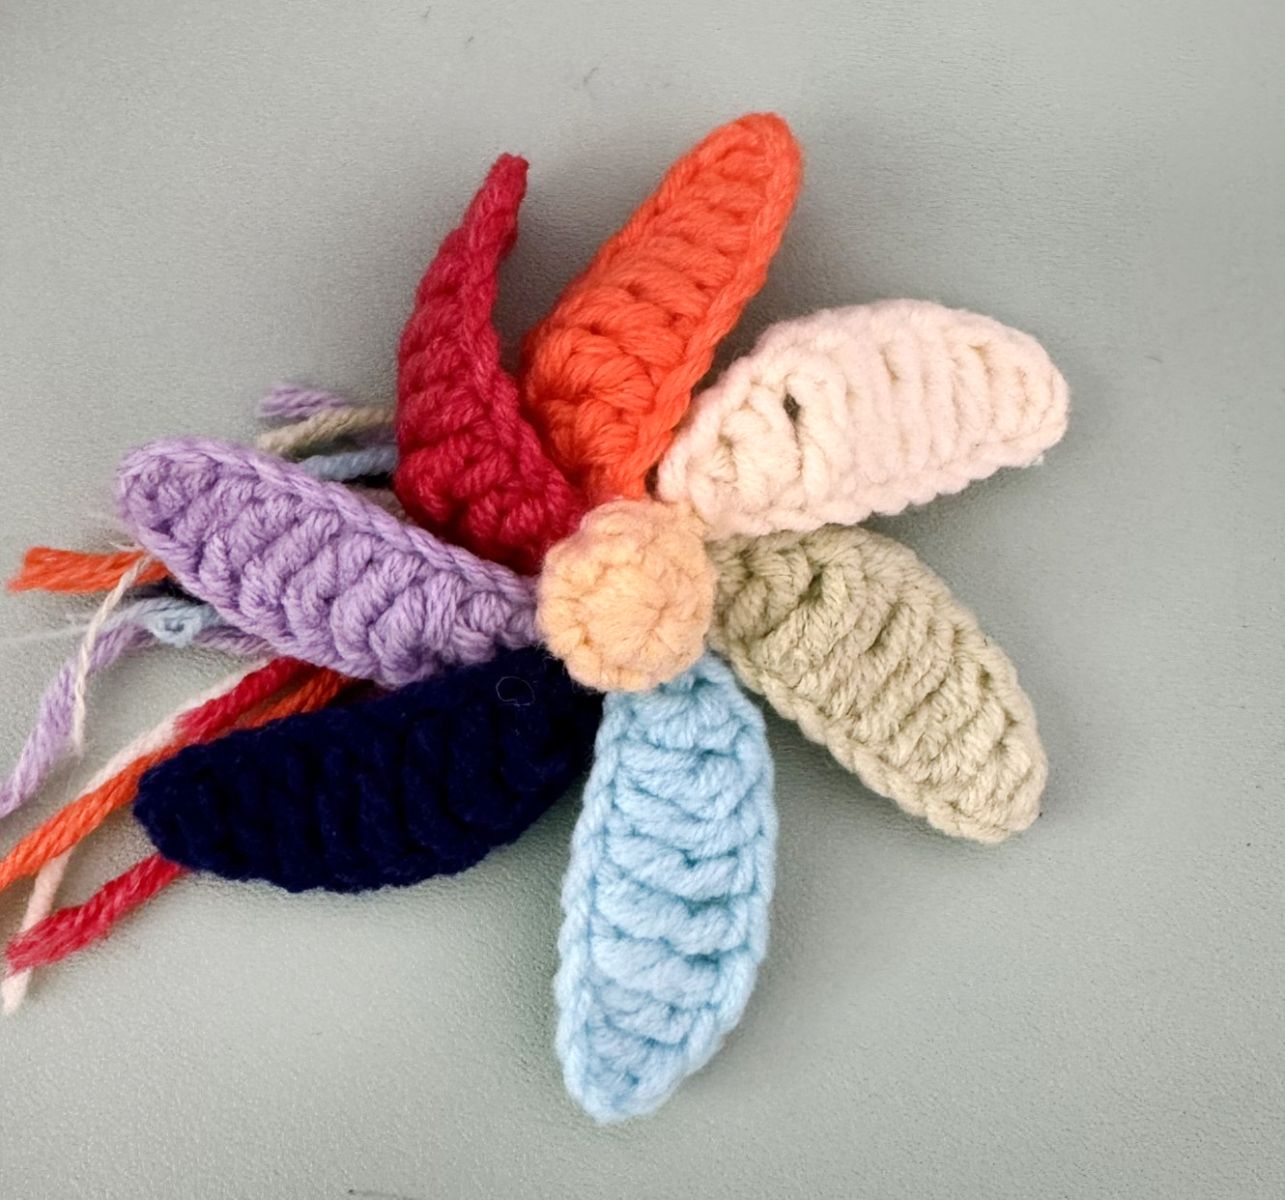
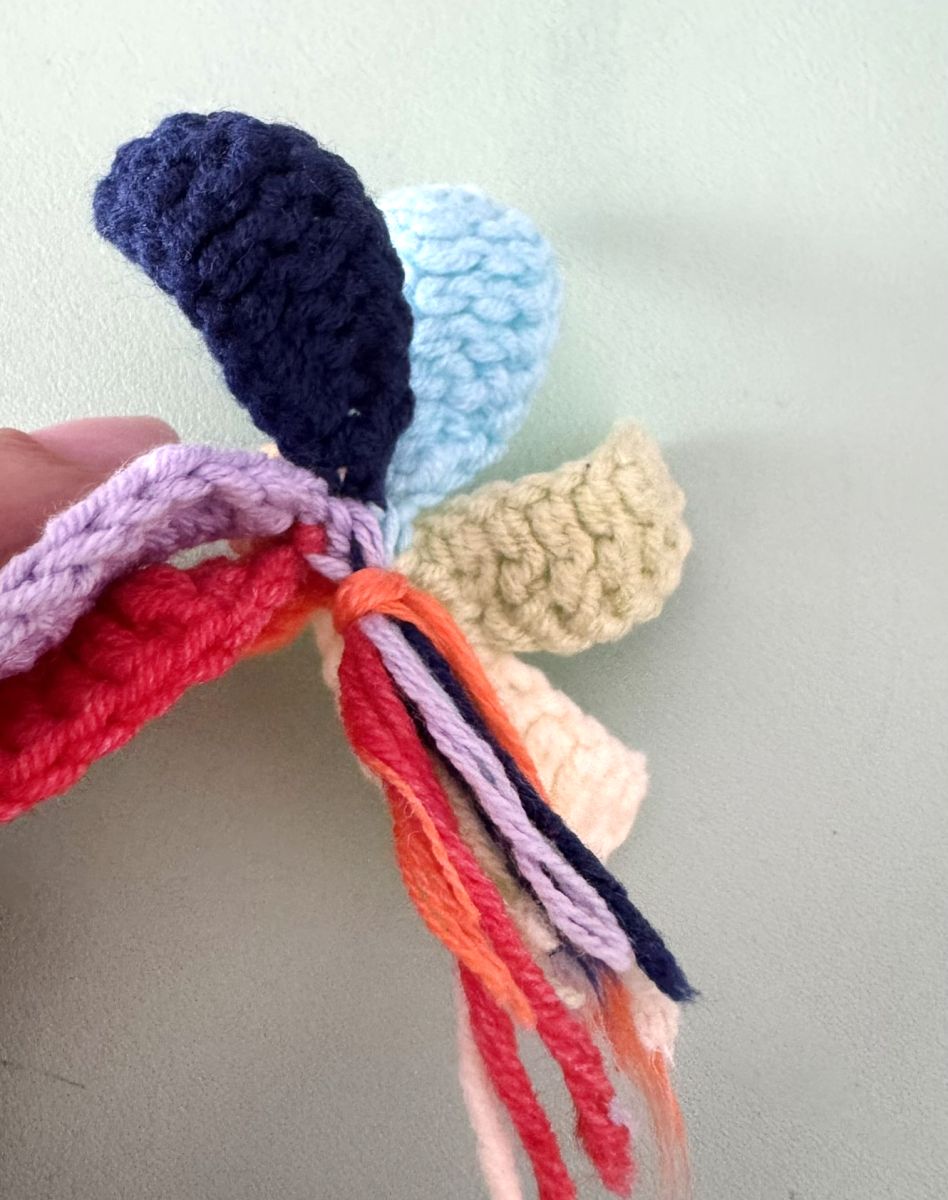
Leaves: I chose several colors for the flower, but you can also use a single shade to match your preference.
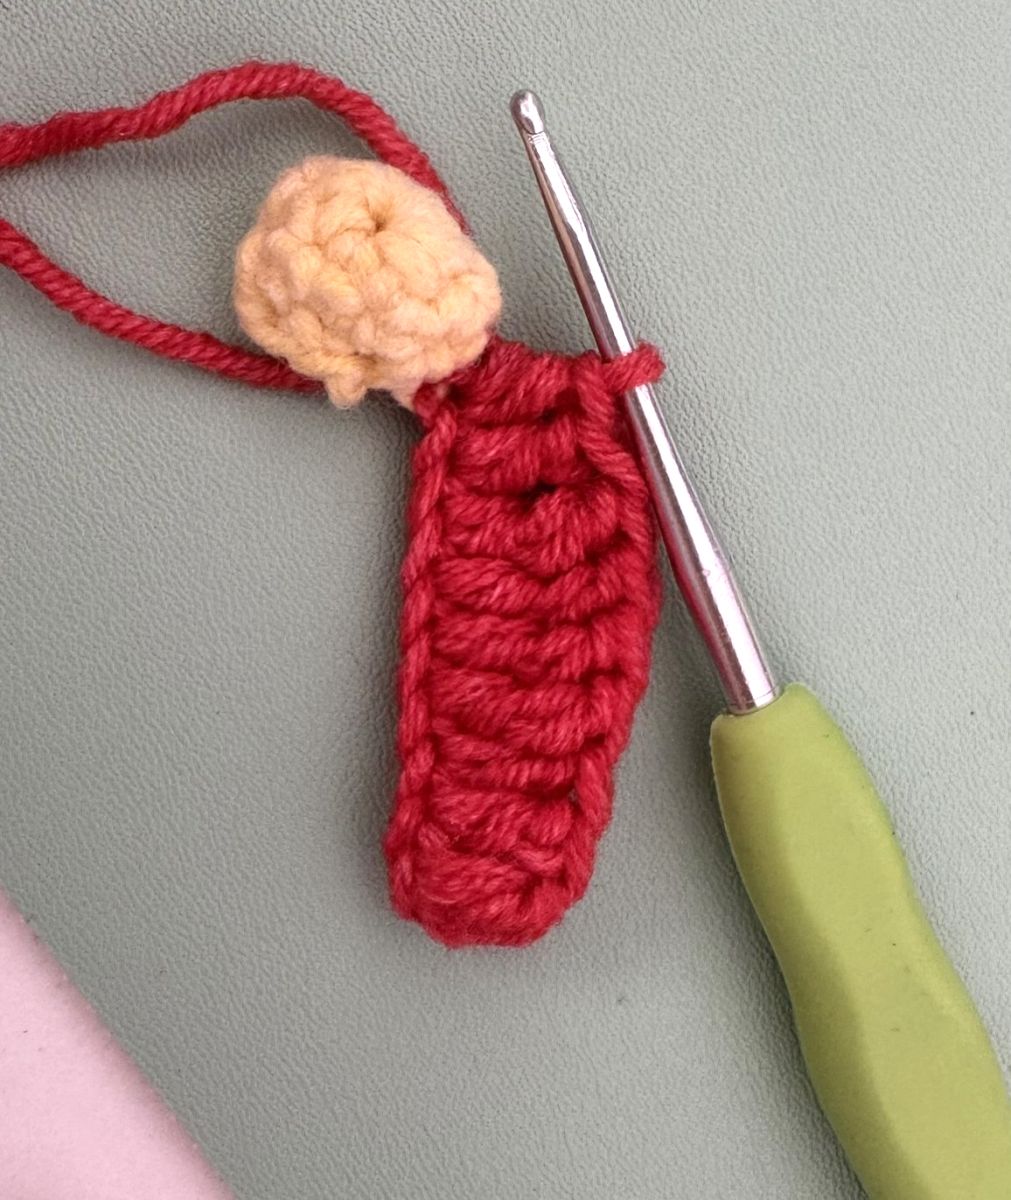
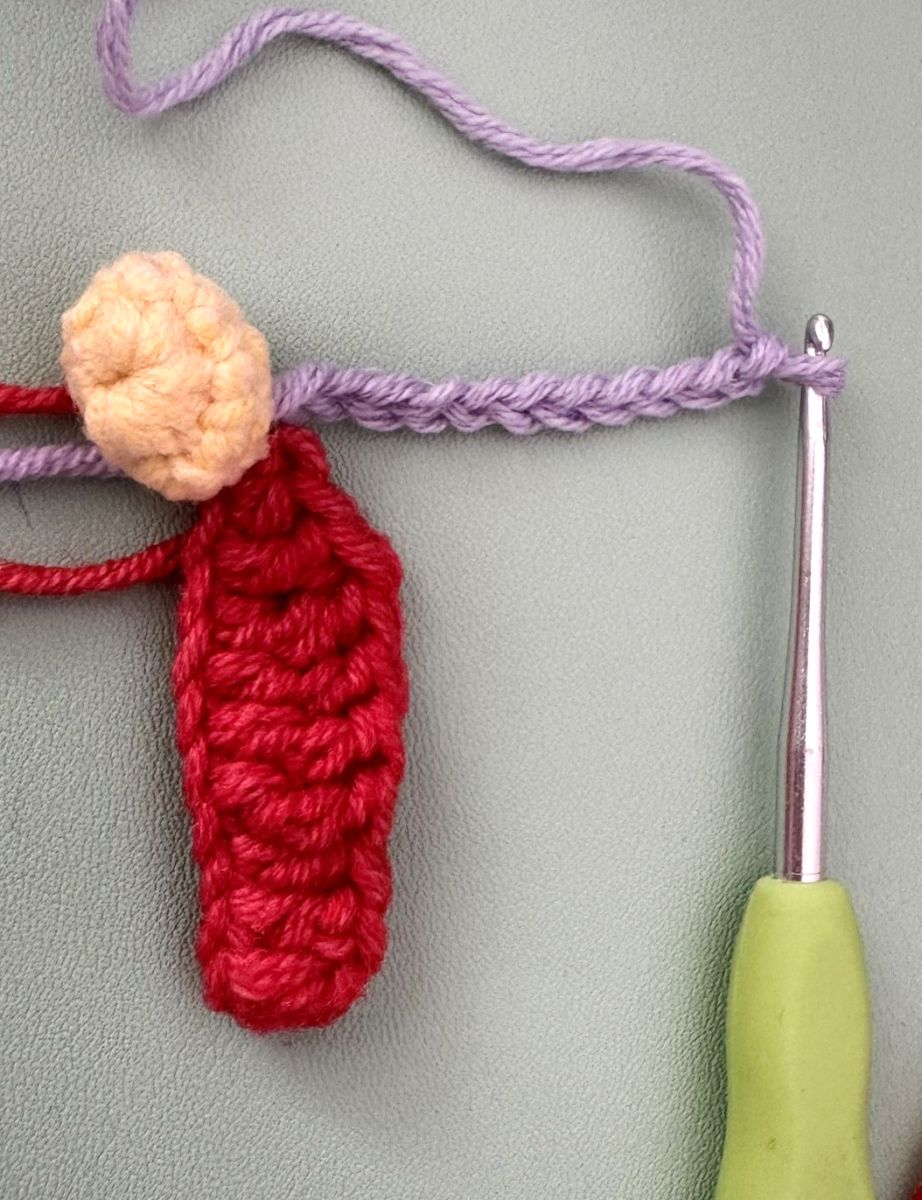
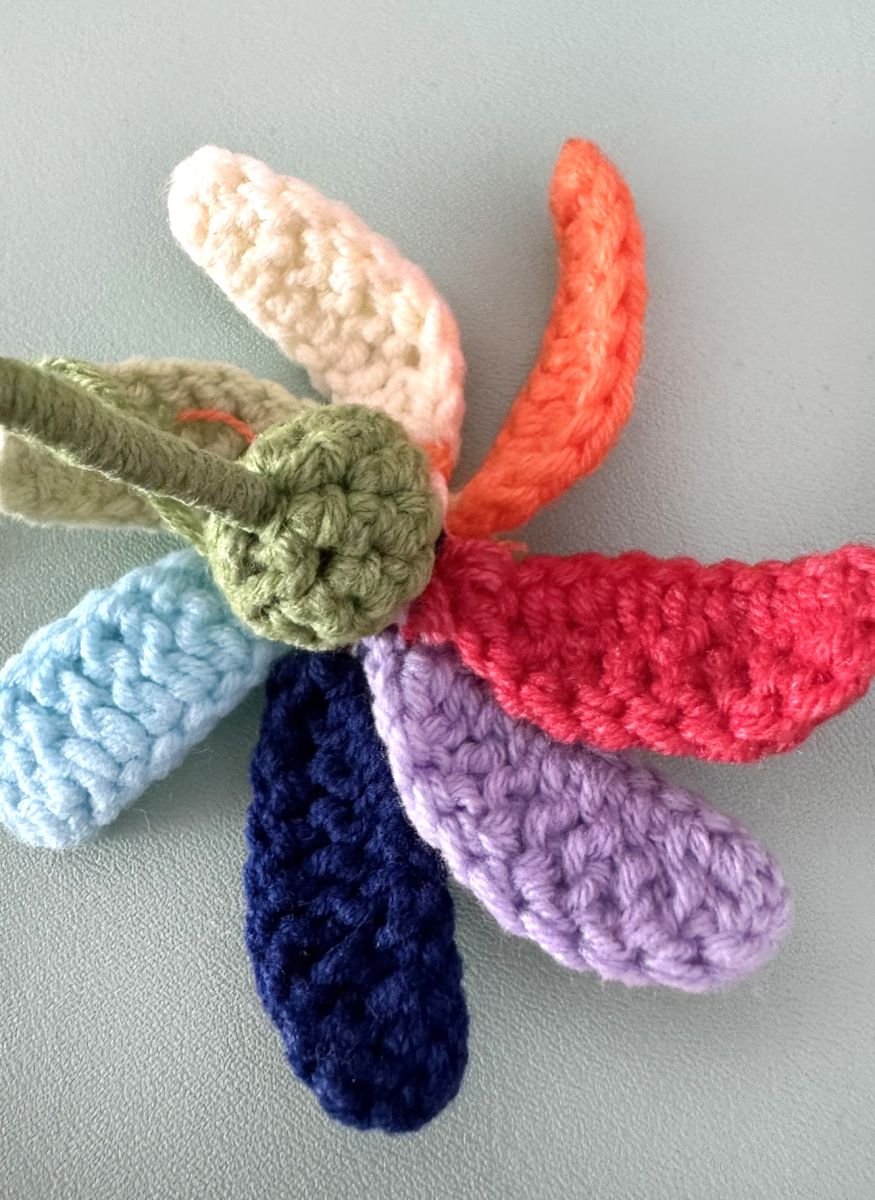
Choose one of seven colors—in my case, red. Insert the yarn and crochet 11 chain stitches (ch). Starting from the third chain from the hook, work the following pattern:
2double crochet stitches, 5 treble crochet stitches, 1 double crochet stitch, 1 half double crochet (hdc) stitch
Finish with a slip stitch (sl st) in the same stitch as the yellow piece and secure the yarn.
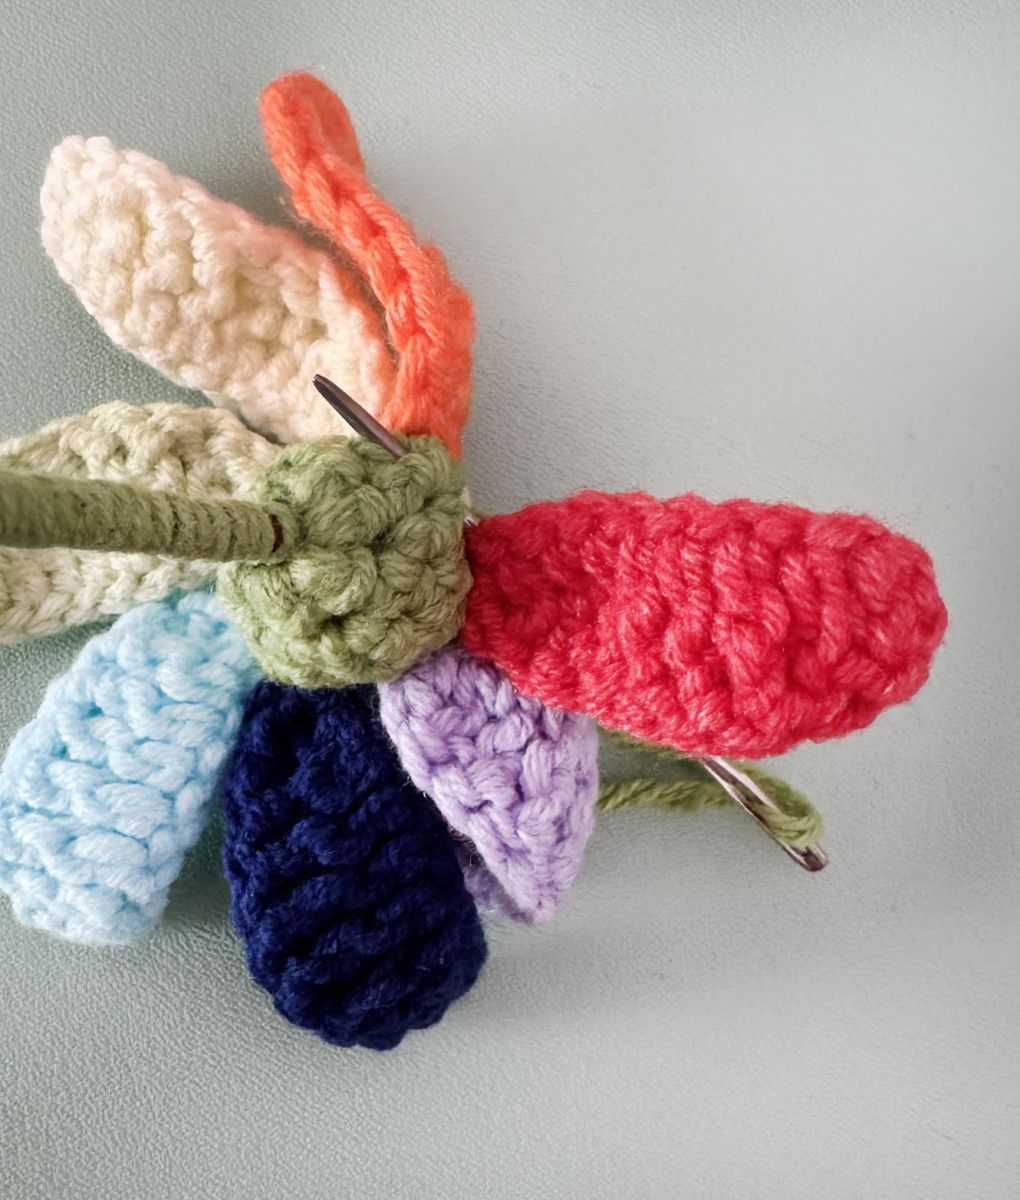
Repeat the process for the remaining six leaves. The yellow piece has seven stitches in total, each stitch corresponding to a leaf.
.JPEG)
Stem (green)
The stem consists of two parts.
Part 1
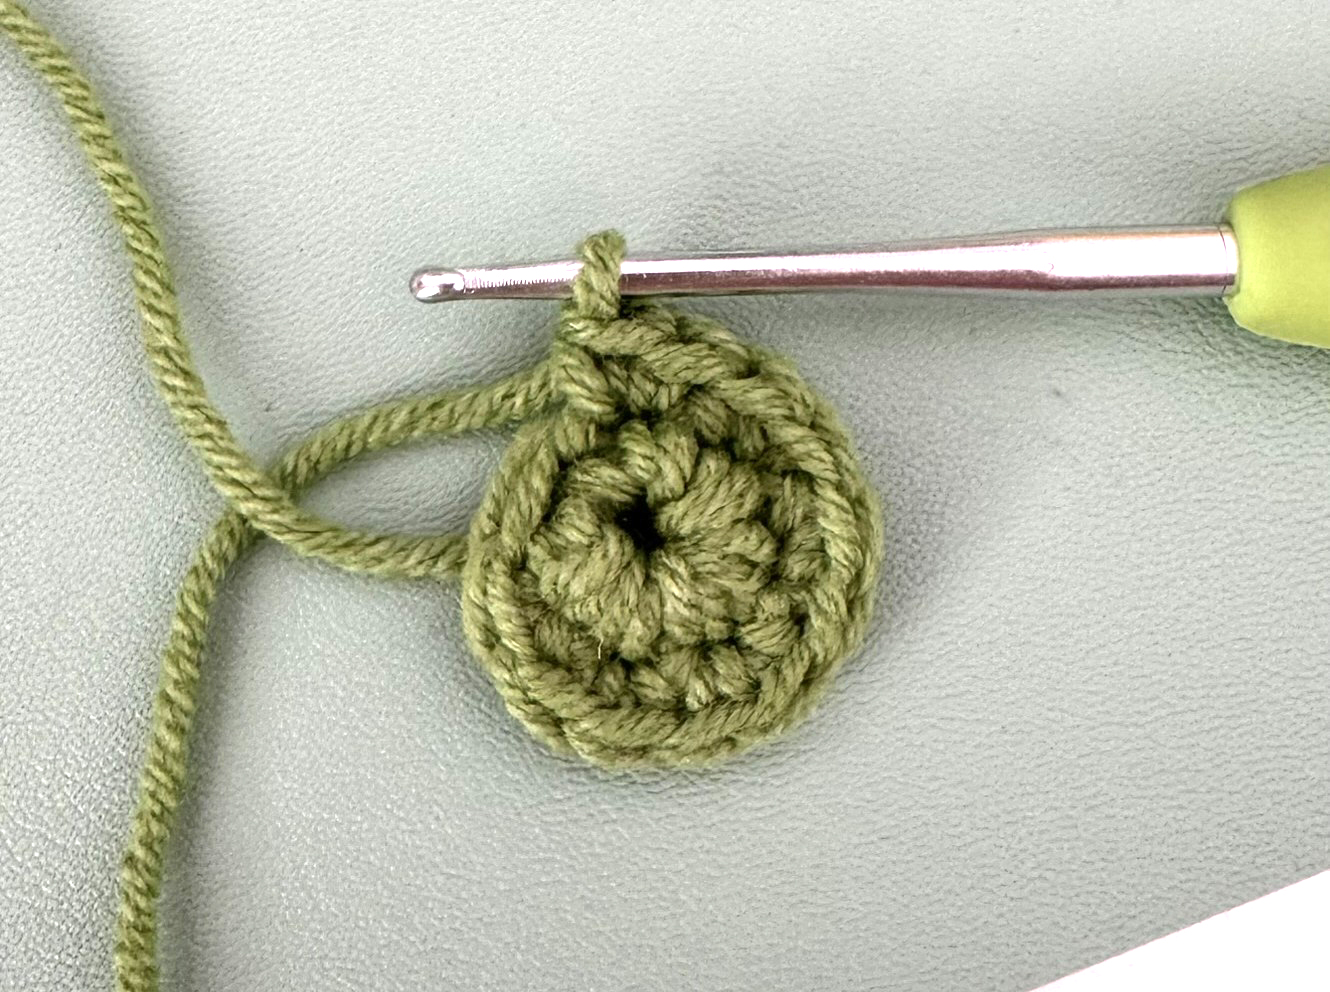
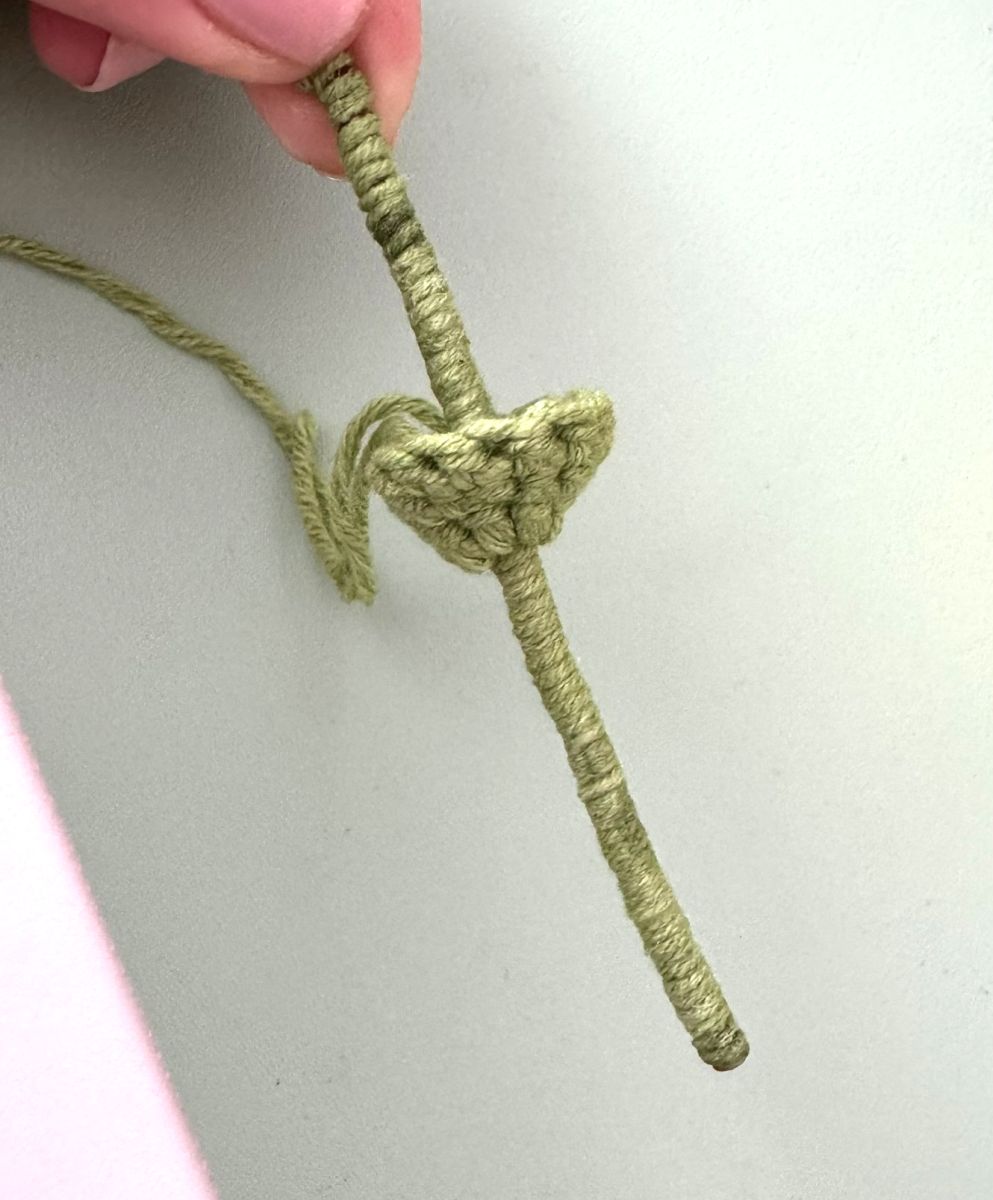
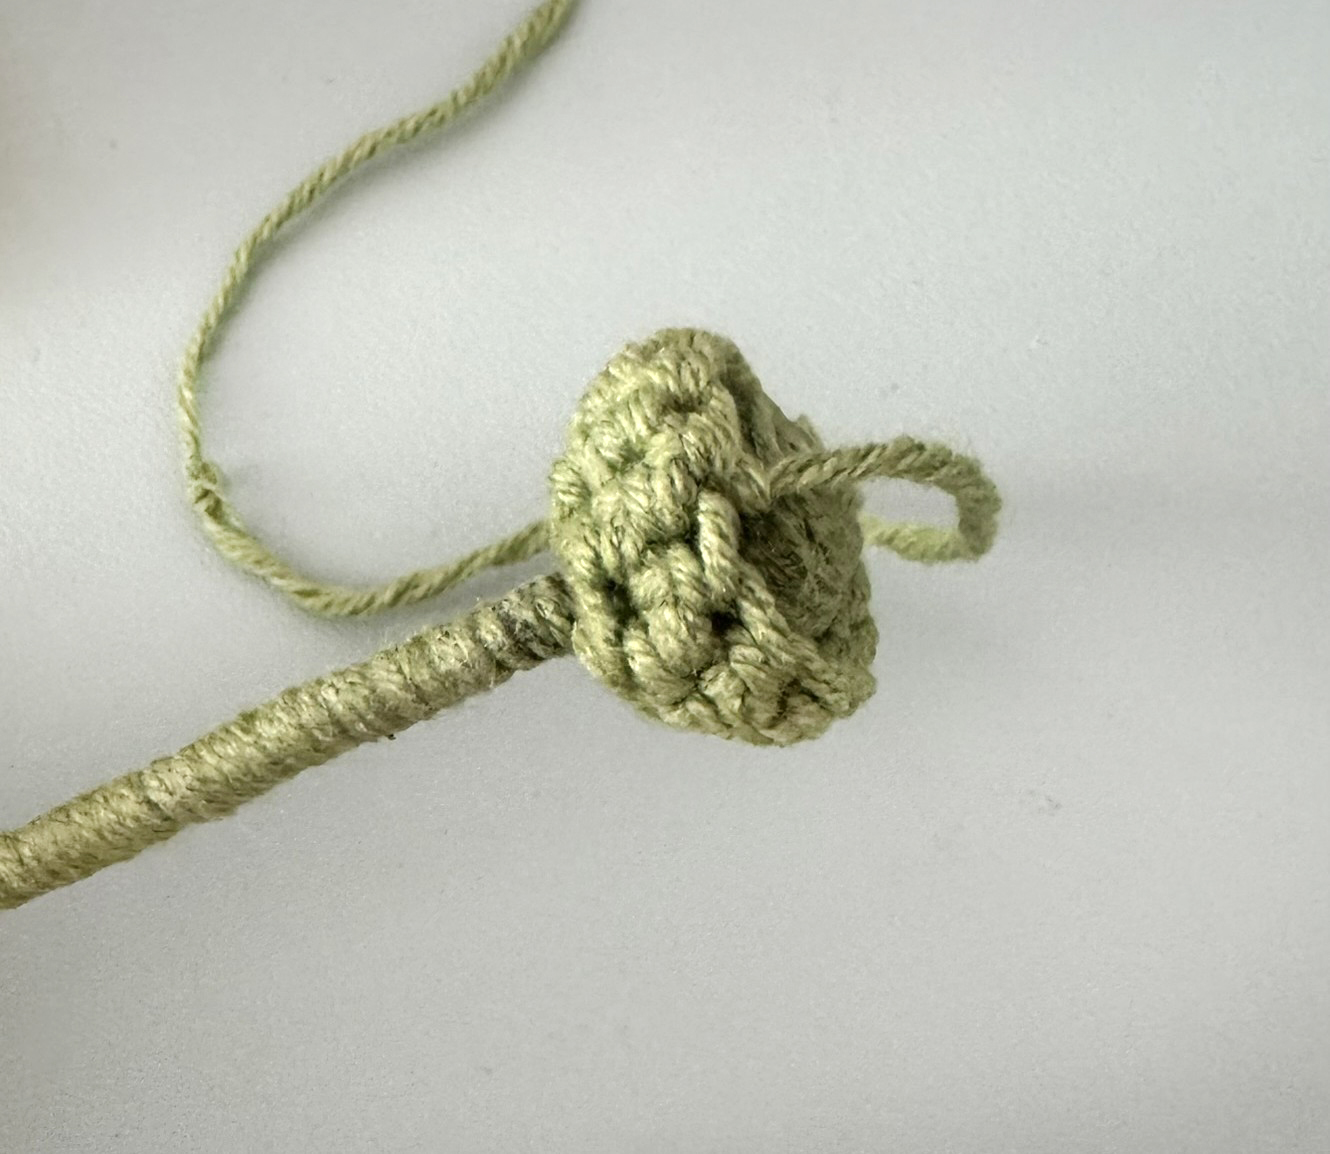
1. 7 sc in a magic ring, leaving a small opening for the wire – don't pull it too tight.
2. 7 inc (14)
3. 14 sc, cut, leaving the thread for sewing.
Part 2
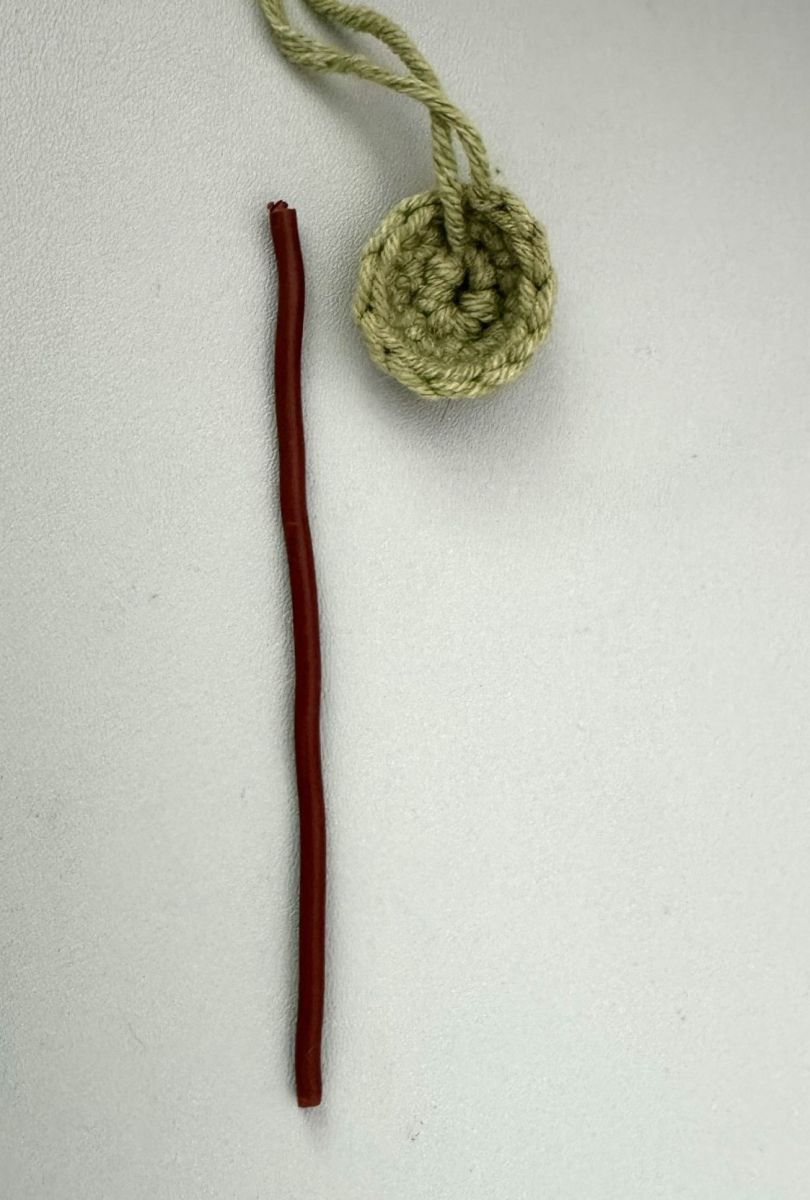
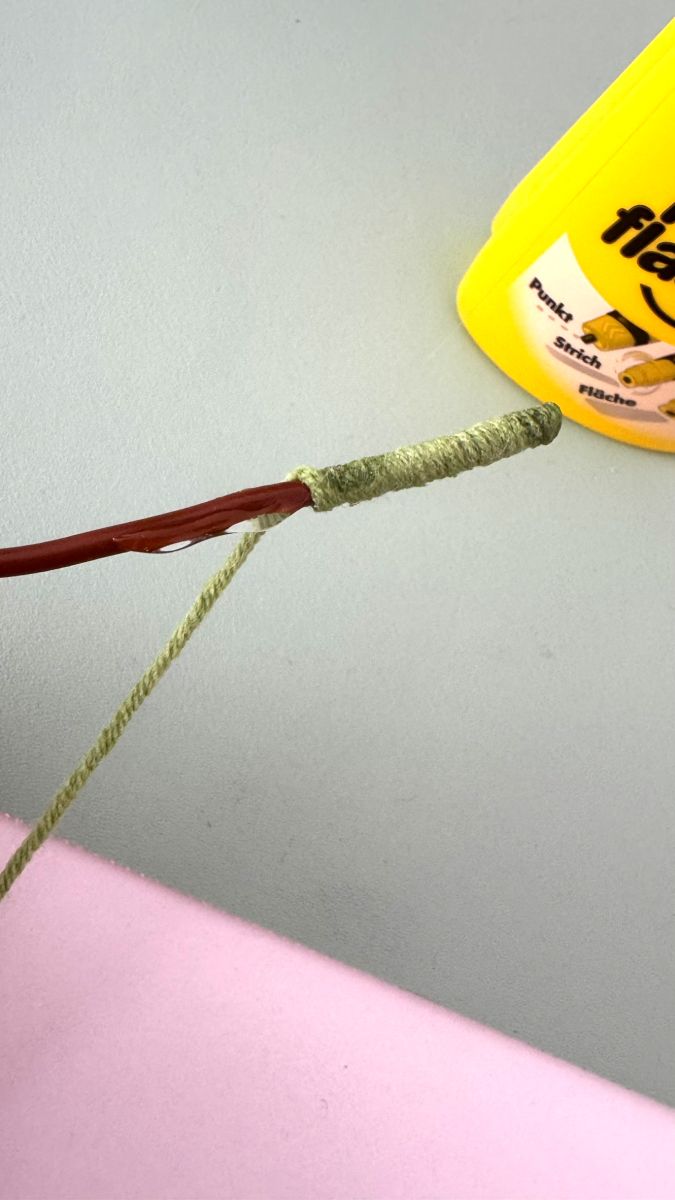
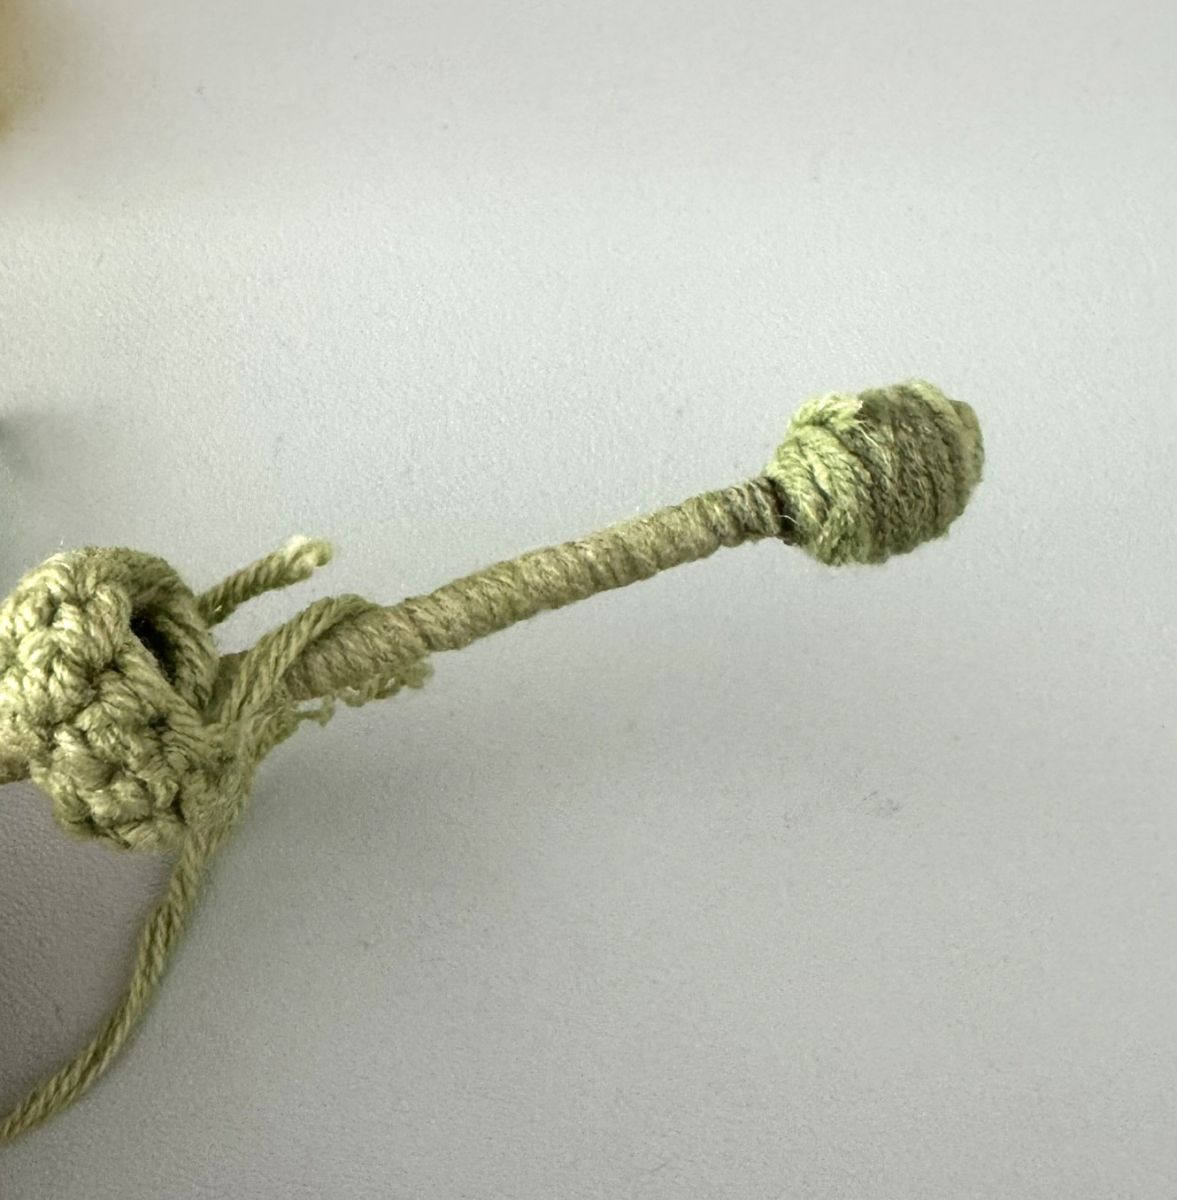
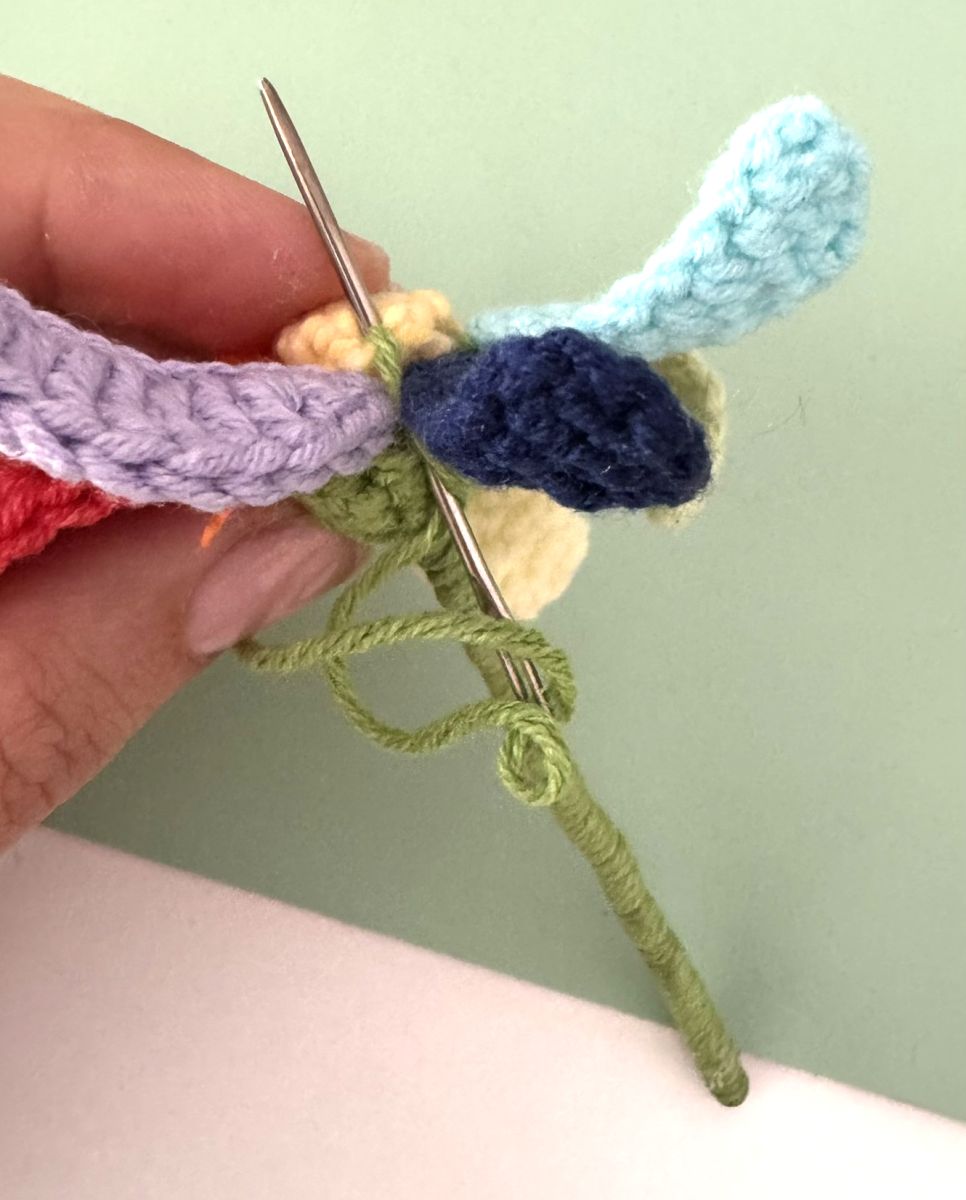
Coat one end of the wire with glue. Wrap the thread around the wire, securing it with clear glue while constantly twisting the wire to keep the thread tight. Wrap the other end of the wire around itself about 0.5 cm until a small ball forms—this ensures the stem stays securely attached to the flower. Pull Part 1 through the stem to the ball, then attach and cut all leaf threads. Attach the stem and sew it to the flower.
I decided to make the yellow part of the flower larger, as I liked it better that way.
1. 7 sc in a magic ring
2. 7 inc (14)
3. 14 sc
Sew it on and then embroider small dots with orange paint. The flower is finished!
Crown Crochet 19 ch and close into a circle (crochet in spiral rounds)
1. 19 sc
2. 19 sc, crochet 7 ch
Starting from the 2nd chain from the hook, work the following sequence:
2 sc, 3 half double crochet, 1 double crochet
Skip 2 stitches, then make 1 slip stitch (sl st) in the third stitch.
Next, chain 7, and repeat the sequence above: From the 2nd ch from the hook, work: 2 sc, 3 hdc, 1 dc
Skip 2 stitches, then make 1 sl st in the third stitch
Repeat this sequence 4 more times to complete the crown structure.
.JPG)


