
After almost every sewing project, smaller fabric scraps are left over that are no longer large enough for another project. But they are still far too good to throw away.
Most of the scraps I collect are jersey fabrics, so I am always looking for ideas that allow me to make use of even the smallest pieces. That is how I discovered Kinusaiga – a technique in which individual pieces of fabric are combined to create a complete picture, without any sewing.
For my first attempt, I created a design called “Sunrise over the Hills”. In this tutorial, I am using a second landscape motif featuring the sea, a boat, mountains, the sky and the sun to show you the technique step by step.
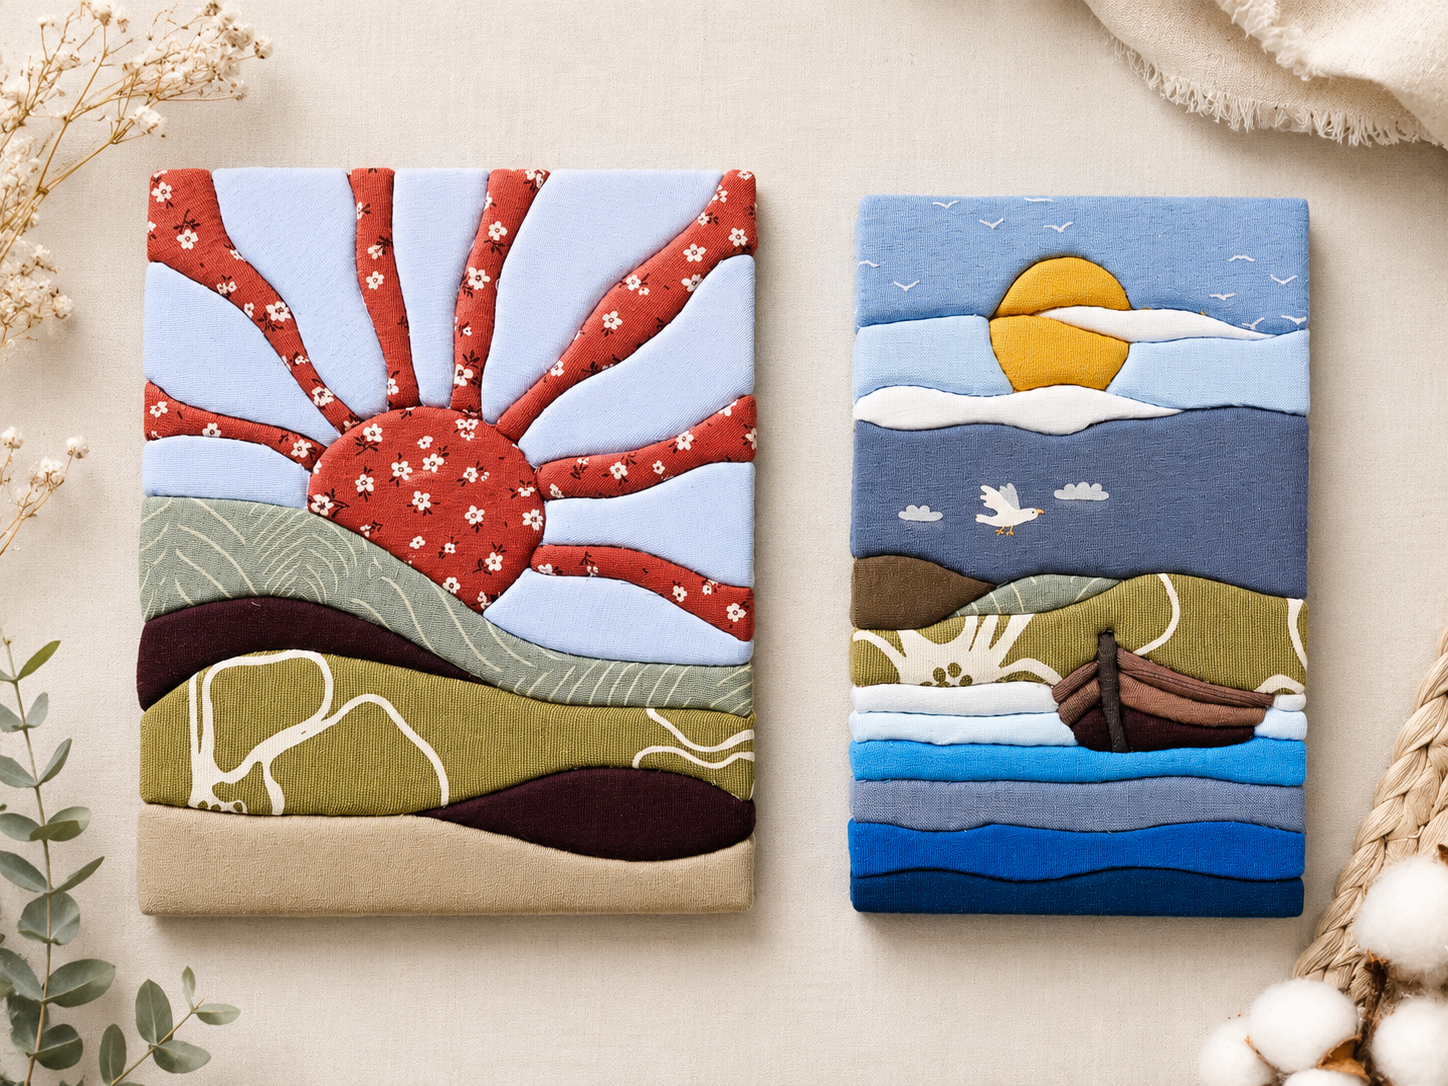
What Is Kinusaiga?
Kinusaiga is often described as “painting with fabric”. Instead of using brushes and paint, the picture is created from individual pieces of fabric.
The outlines of a design are cut into a firm but cuttable board. The fabric pieces are then placed onto the corresponding sections, and their edges are pushed into the prepared grooves using a blunt tool.
No sewing is involved. The fabric edges disappear completely into the board, gradually creating a smooth, continuous surface. Depending on the fabrics you choose, the finished picture can look completely different, as not only the colours but also the patterns and textures become part of the design.
From Kimekomi Dolls to Fabric Pictures
Kinusaiga is often described as an ancient Japanese technique. However, the form of fabric picture we know today is much more recent. It was developed in the 20th century by Japanese artist Setsu Maeno.
She was inspired by the traditional Kimekomi technique, in which pieces of fabric are pressed into grooves cut into a firm doll body. Maeno transferred this principle to flat surfaces and mainly used silk fabrics, including pieces from old kimonos.
This is exactly what I find so appealing about Kinusaiga: the fabric is not simply being used up. Each piece is deliberately chosen for its colour, pattern or texture.
My version using jersey fabric and double-sided transfer tape is, of course, a modern variation, but it follows the same basic idea.
(1).jpg)
By Yoshio Kohara, CC BY 3.0, https://commons.wikimedia.org/w/index.php?curid=56683481
Which Fabrics Are Suitable?
Fabrics that can be cut neatly and pushed easily into the grooves work particularly well for Kinusaiga. Woven cotton, patchwork fabrics and linen are commonly used.
I mainly work with jersey scraps. Jersey hardly frays and adapts well to curved shapes. At the same time, it can stretch or become distorted while you are working with it.
For this reason, I cover my styrene board with double-sided transfer tape first. The fabric already sticks to the surface before its edges are pressed into the grooves, which makes the jersey much easier to control.
I use 3M 468MP transfer tape. The individual pieces measure 20 × 20 cm. Depending on the size of the design, the board can either be cut to fit one piece or covered with several pieces of tape.
For a first project, I would recommend a slightly firmer cotton jersey. Very soft or highly stretchy jersey can be more difficult to work with.
Which Templates Are Suitable for Kinusaiga?
For beginners, designs with larger, clearly separated sections work best. Very small details, narrow points and tight curves make inserting the fabric pieces much more difficult.
It is also important to consider whether every section of the design can actually be made from a separate piece of fabric. Completely enclosed small shapes can be problematic if the surrounding area is not divided further.
When searching for suitable designs, it can therefore help to use terms such as “mosaic”, “template” or “colouring page”. Mosaic designs often already consist of clearly separated sections and can easily be adapted for Kinusaiga.
Simple colouring pages can also work well. If useful divisions are missing, you can add your own lines. Try to make them follow the natural shape of the motif, for example a curve, a shadow or an existing contour.
Before you start, check the template carefully. Every marked section should be suitable for cutting and inserting as a separate piece of fabric.
For my tutorial, I am using a landscape motif featuring the sea, a boat, mountains, the sky and the sun. The boat is deliberately kept simple so that the design does not become unnecessarily fiddly.
Materials
For my Kinusaiga picture, I use:
- a 2 cm thick styrene board
- a printed template
- various jersey fabric scraps
- 3M 468MP double-sided transfer tape
- washi tape or another removable adhesive tape
- a sharp craft knife or scalpel
- a cutting mat
- fabric scissors
- a smooth, blunt tool for pressing in the fabric edges
You can use a blunt knitting needle, a bone folder, a wooden or plastic cuticle pusher, or a modelling tool to press the fabric into the grooves. The most important thing is that the tool is smooth and has neither a hook nor a sharp edge.
Despite its convenient shape, a crochet hook is less suitable. The hook could catch individual jersey loops and pull small threads out of the fabric.
I start with a blunt knitting needle. A slightly wider, flat tool can also be useful for longer lines.
.png)
Safety Note
The outlines are cut into the styrene board using a very sharp knife. Always work on a suitable cutting mat and cut away from your body wherever possible. Children should not carry out this step.
Preparing the Styrene Board
First, cut the 2 cm thick styrene board to the desired size. The dimensions depend entirely on your chosen template. You can either cut the board to match one 20 × 20 cm piece of transfer tape or combine several pieces for a larger design.
Next, cover the entire front of the styrene board with the transfer tape. Rub it down carefully and as smoothly as possible. Leave the protective backing paper on the top surface for now.
When using several pieces, make sure that they meet neatly. Overlapping sections may become visible beneath the fabric later.
.png)
Securing the Template and Cutting the Outlines
Because the transfer tape is already attached to the board, I do not transfer the template using carbon paper. Instead, I place the printed design directly onto the protective backing paper of the transfer tape.
Align the template carefully and secure it around the edges with several pieces of washi tape. The paper must not move while cutting.
Now cut directly along the printed lines with a sharp craft knife. In one step, you cut through the paper template, the protective backing of the transfer tape and a few millimetres into the styrene board.
.png)
Use light pressure and go over a line a second time if necessary. Do not cut all the way through the board.
For curved lines, it is usually easier to rotate the board slowly instead of forcing the knife around the curve.
Once all the lines have been cut, remove the washi tape and carefully lift off the paper template. The design is now cut directly into the tape-covered styrene board.
Leave the protective backing paper on the rest of the surface. Later, remove it only from the section you are currently covering with fabric. This keeps the remaining adhesive clean and protected.
.png)
Choosing and Arranging the Fabrics
Before cutting, I first lay out my jersey scraps next to one another. This makes it easier to see which colours and patterns work well together.
For my landscape picture, I need different fabrics for the sky, sun, mountains, sea and boat. Not every section needs a completely different colour. Landscape pictures often look more harmonious when several shades from the same colour family are combined.
I would use bold prints only as deliberate accents. If every section contains a striking pattern, the picture can quickly become too busy. Small prints, subtle colour variations or marl fabrics can create beautiful effects.
The direction of the pattern also matters. Stripes, leaves or other recognisable motifs should be positioned correctly before the fabric is cut.
Adding the First Fabric Section
I begin with one of the larger areas, such as the sky or the sea. First, I carefully remove the cut section of protective backing paper from this area only.
.png)
The neighbouring sections remain covered, so the fabric sticks only where it is needed.
I then place the jersey onto the exposed adhesive as smoothly as possible. I take care not to stretch it. The fabric should lie in its natural state and be pressed down only lightly.
.png)
Next, I trim the fabric around the section, leaving a small allowance on every side. This allowance must be large enough to disappear securely inside the groove.
.png)
Excess fabric can always be trimmed away later. If the piece is cut too small from the beginning, however, it may slip back out of the groove.
Pressing in the Fabric Edges
I now use a blunt knitting needle to press the fabric allowance carefully into the cut outline.
I begin on one side and then continue on the opposite side. This helps to secure the jersey evenly. If I worked across the whole section from left to right, the fabric could become distorted in one direction.
The knitting needle should push the fabric into the groove without piercing it. If it catches individual loops or leaves marks, a wider tool such as a cuticle pusher or bone folder can be used instead.
If too much fabric collects inside the groove and creates a bulky area, carefully pull the edge out again and trim it slightly. It can then be pressed back into place.
.png)
Working Neatly Around Curves and Corners
Curves are best worked in small sections. I press only a few millimetres of fabric into the groove at a time and slowly follow the outline.
Jersey generally adapts well to curved shapes because of its stretch. However, it should not be pulled tight. Otherwise, the knit structure may distort or the surface may develop ripples.
.png)
Too much fabric can collect in corners. It is especially important not to leave an overly large allowance there. If a small lump forms, remove the fabric again, trim the corner carefully and insert it once more.
Any additional cuts into the fabric should be made very cautiously. If the cut extends too far, it may remain visible outside the groove.
Completing the Picture Section by Section
Continue in the same way until the entire design is covered. For my landscape picture, I begin with the larger sections such as the sky, sea and mountains.
The sun and boat follow afterwards. The boat is slightly more detailed, but it is deliberately simplified so that the individual pieces can still be inserted neatly.
After every section, I check whether the fabric lies flat, whether all raw edges have disappeared completely and whether the jersey has become distorted.
Small mistakes can usually still be corrected as long as the allowance has not been cut too short. However, the transfer tape holds the fabric more firmly than traditional Kinusaiga without an additional adhesive layer. The fabric should therefore be aligned carefully before it is pressed down completely.
.png)
Finishing the Outer Edges Without a Frame
I do not use an additional picture frame to finish the edges. Instead, I cover the sides of the styrene board with fabric as well.
To do this, I extend every cut line that reaches the outside of the design vertically across the edge of the styrene board. The cuts therefore do not end on the front surface but continue over the side and towards the back.
.png)
.png)
For sections along the outside edge, I leave a larger fabric allowance. The fabric does not stop at the front edge of the picture. Instead, it is folded over the side of the board and onto the back.
On the reverse side, I press the fabric edge into another prepared groove to secure it.
This covers the visible sides of the styrene board completely with fabric. The method takes a little more time than simply placing the finished picture in a frame, but the sides also look neat and fully finished.
As a result, no additional frame is required.
I work particularly carefully around the corners, as several fabric edges may meet there. The allowances must not be too large, otherwise the corners quickly become bulky.
.png)
I initially cut the fabric only roughly, wrap it around the edge to test the fit and then trim it little by little until it lies smoothly and can be secured neatly on the back.
.png)
Continue in the same way with all the remaining sections: remove the protective backing, place the fabric onto the surface, trim it with a small allowance and push the edges into the grooves. Work your way through the design section by section until every area is covered with fabric and your Kinusaiga picture is complete.
.png)
I hope I have shown you a lovely way to use even smaller fabric scraps creatively with Kinusaiga. By combining different colours and patterns, the same template can look completely different every time.
Maybe you feel inspired to have a look through your own fabric scraps and give the technique a try.
Have fun creating and using up your fabric scraps!


