
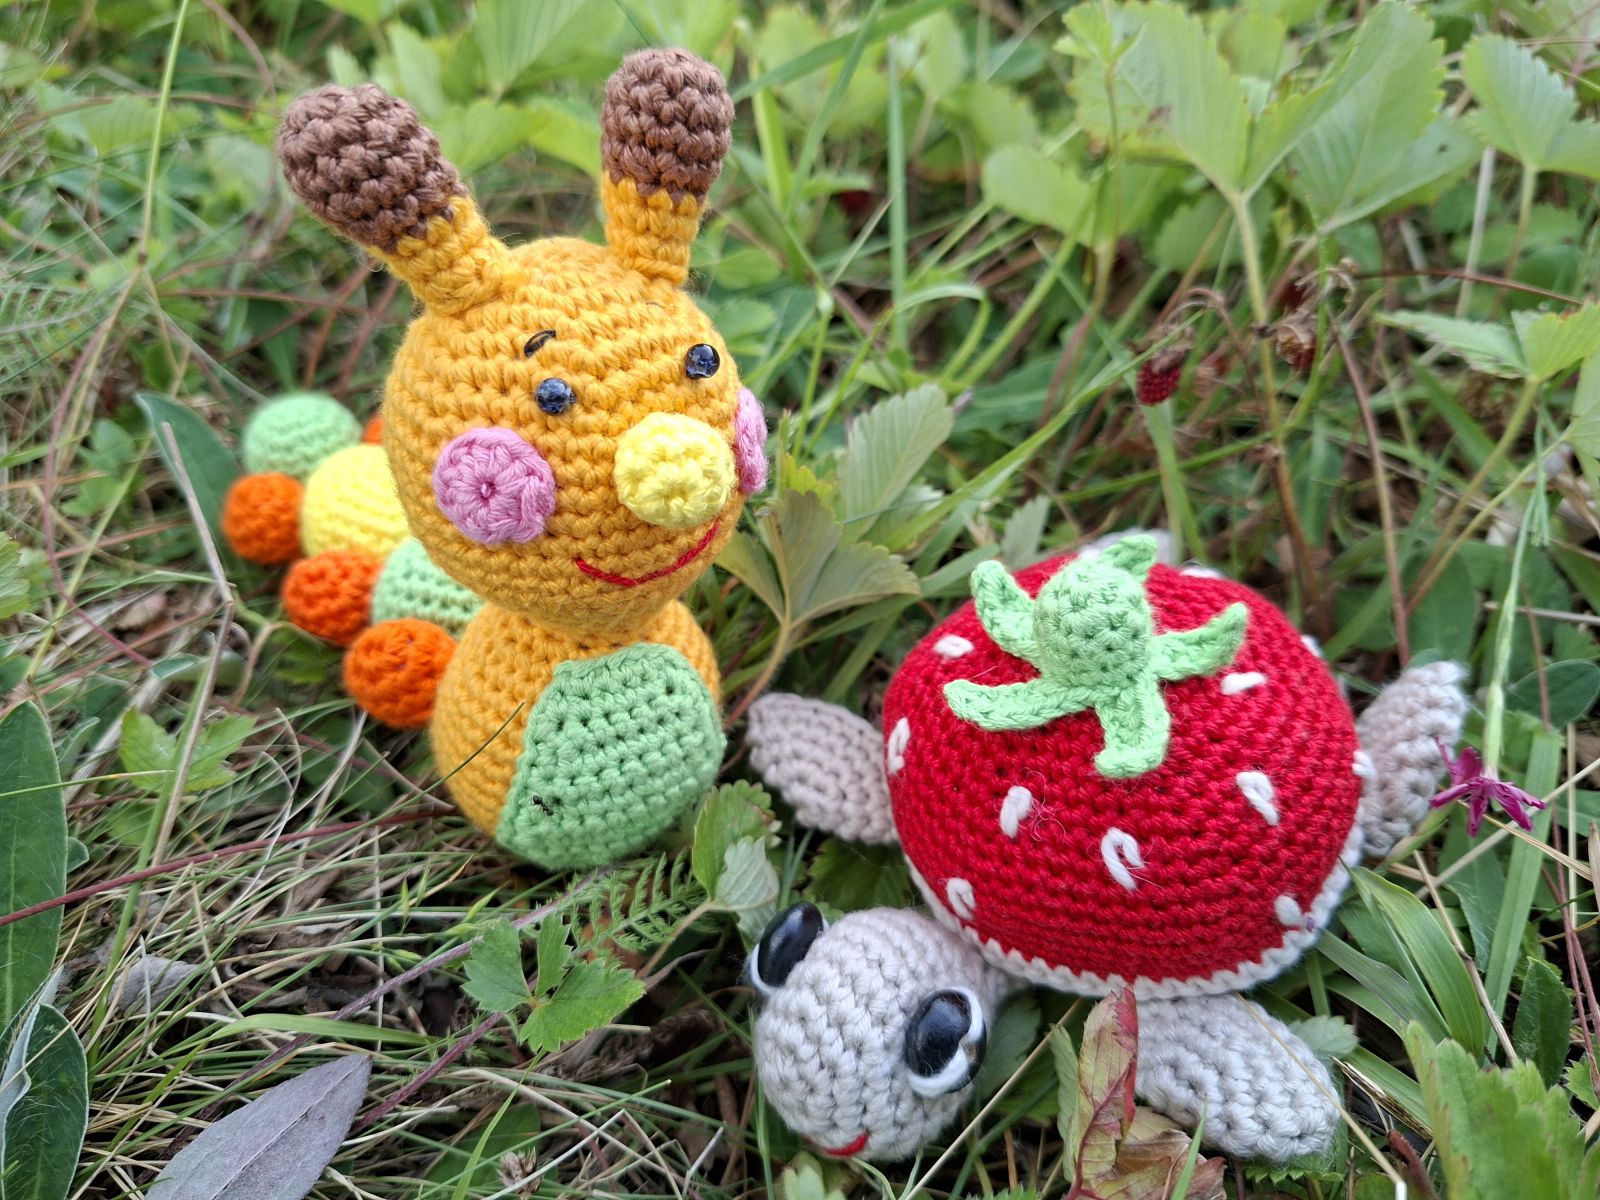
Today, we are diving into the world of mini amigurumi to create a little strawberry turtle and a colorful caterpillar. These two quick projects are super-fast to make and are guaranteed to bring a smile to anyone's face. This is a double dose of crochet insects patterns that are quick, completely beginner-friendly and perfect for using up your yarn rests. Perfect for last-minute gifts, to give a charming touch to your handmade collection or just add some tiny cuteness to your desk. It can also be used as a cute seasonal decoration, especially for summer-themed setups. Also, you can use it as a keychain or bag charms and backpack decorations. Whether you are a beginner looking for a quick project or a seasoned pro needing fun, this tiny insect duo is just what you need. This pattern uses very basic crochet stitches, such as single crochet stitches and double crochet stitches, and some crochet techniques, like increase and decrease. It´s a very simple design which can be made in any desired colors. If you’re looking to practice crocheting in the round, this is the perfect pattern to practice with! The pattern is very detailed. It comes with easy-to-follow written instructions and photo tutorial. Scroll down to see the step-by-step written instructions and supplies you’ll need and let’s get hooked!
SUPPLIES YOU NEED
cotton yarn (Schachenmayr Catania 125m/ 50g) in the following colors: yellow and green, orange, beige and red, a bit of rose, brown and black for embroidery, crochet hook 2,5 mm or the size required by your yarn, polyester fiberfill stuffing, chopstick or something similar to help with stuffing small parts, stitch marker, scissors, yarn needle, safety eyes or two little black beads 3-5 mm.
Feel free to experiment with different yarns. Using different materials and hook size to what is recommended may alter the final appearance of your amigurumi.
SKILL LEVEL
I would classify this free crochet pattern as an advanced beginner. It is necessary to have some experience with amigurumi before creating this project.
FINISHED SIZE
The ready amigurumi is approx. 11 cm and 16 cm, from bottom to top, can be made bigger or smaller depending on the yarn and hook you use.
SKILLS YOU NEED
chain, single crochet, double crochet, half double crochet, slip stitch, increase, decrease, front post double crochet
ABBREVIATIONS
Ch =chain
St = stitch
Sc = single crochet
Sl st = slip stitch
dec = decrease stitch (two single crochets together)
inc = increase stitch (two single crochets in the one stitch)
Dc = double crochet
Hdc = half double crochet
Tc = treble crochet
Rnd = Round
* = repeat the instructions for the times indicated
(...) = at the end of every round total amount of stitches is indicated
TIPS
- Do not join rounds, work in a continuous spiral
- Place a stitch marker or a piece of yarn at the beginning stitch of the round and move it up at the start of each additional round
- This pattern doesn´t include any specific stitch tutorials
- All stitches are worked into both loops, unless stated otherwise in the pattern
- The number of stitches for completion is noted in parentheses at the end of each round
- When filling with polyester stuffing, pull apart each large chunk into many smaller chunks. This ensures an even distribution of firmness within the amigurumi
- Amigurumi can be made in any desired colors
- The pattern is written in English using US crochet terminology
- Work the pattern in the order as shown below, because it is joined together as it is made.
Seamless way of changing color when working in the round
Pick up the new color at the end of the round: inset your hook into the stitch, yarn over the new color and pull through the stitch and the loop on your hook to complete the stitch.
To make a magic ring
- Loop the thread twice around your middle finger
- Put the hook under both loops, pull the yarn under the loops and hook the thread again
- Pull the thread through the new loop. The first crochet stitch is ready!
- Repeat the number of times needed.
- Pull the inner threads to tighten the ring.
REVERSE SINGLE CROCHETS
Reverse single crochet, also known as crab stitch, makes a twisted cord edging and is worked in the opposite direction to usual. For the normal single crochet you work from the right to left, so for the reverse single crochet you work from left to right:
chain 1 stitch, insert hook into first stitch on the right, grab the yarn and pull up a loop, there are now 2 loops on hook. Yarn over, pull through all the loops on the hook, repeat these steps into each stitch around.
INSTRUCTIONS
The amigurumi consists of several parts which you crochet separately and then sew them together.
TURTLE
BODY
Start your work using beige colored yarn.
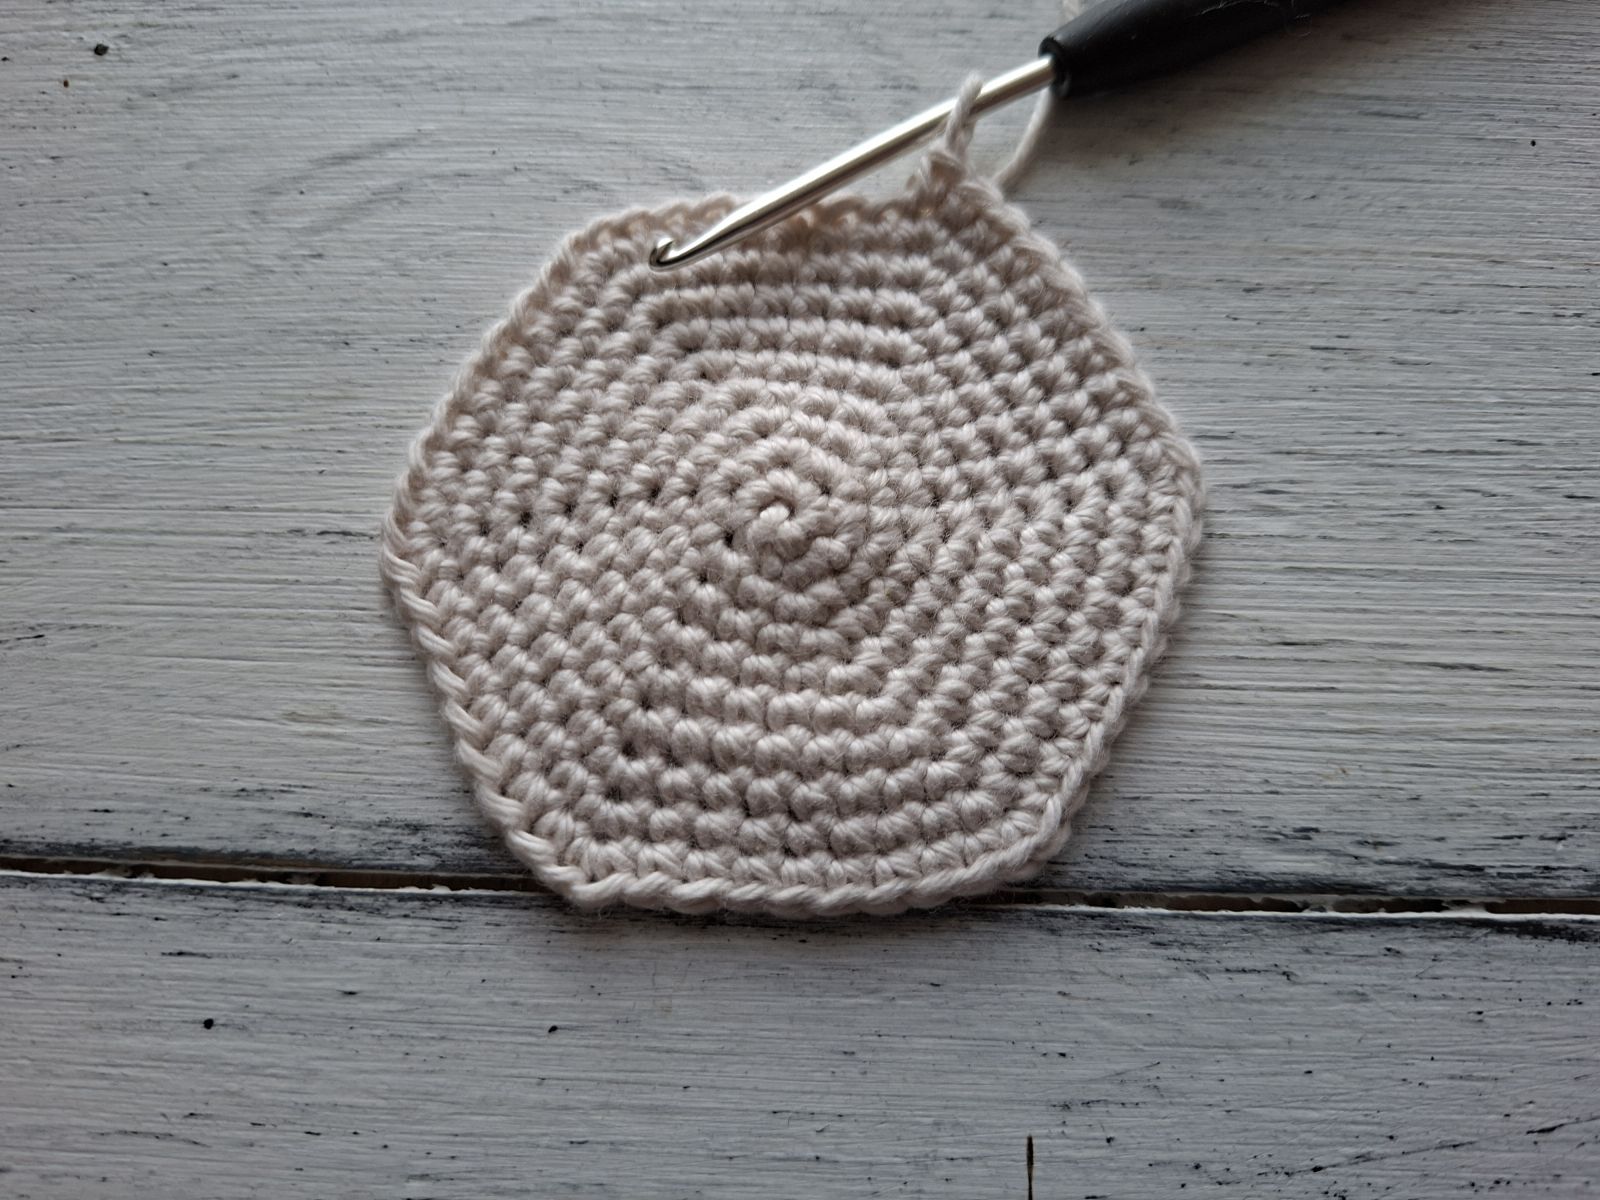
Round 1: 6 single crochets into Magic Ring
Round 2: increase 6 times (12 stitches)
Round 3: *single crochet in the next stitch, increase* (18 stitches)
Round 4: *single crochet in each of next 2 stitches, increase* (24 stitches)
Round 5: *single crochet in each of next 3 stitches, increase* (30 stitches)
Round 6: *single crochet in each of next 4 stitches, increase* (36 stitches)
Round 7: *increase, single crochet in each of next 5 stitches* (42 stitches)
Round 8: *increase, single crochet in each of next 6 stitches* (48 stitches)
Round 9: *increase, single crochet in each of next 7 stitches* (54 stitches)
Round 10: single crochet in each of next 54 stitches
Fasten off, hide all yarn ends.
Crochet with red colored yarn and begin with a magic ring.
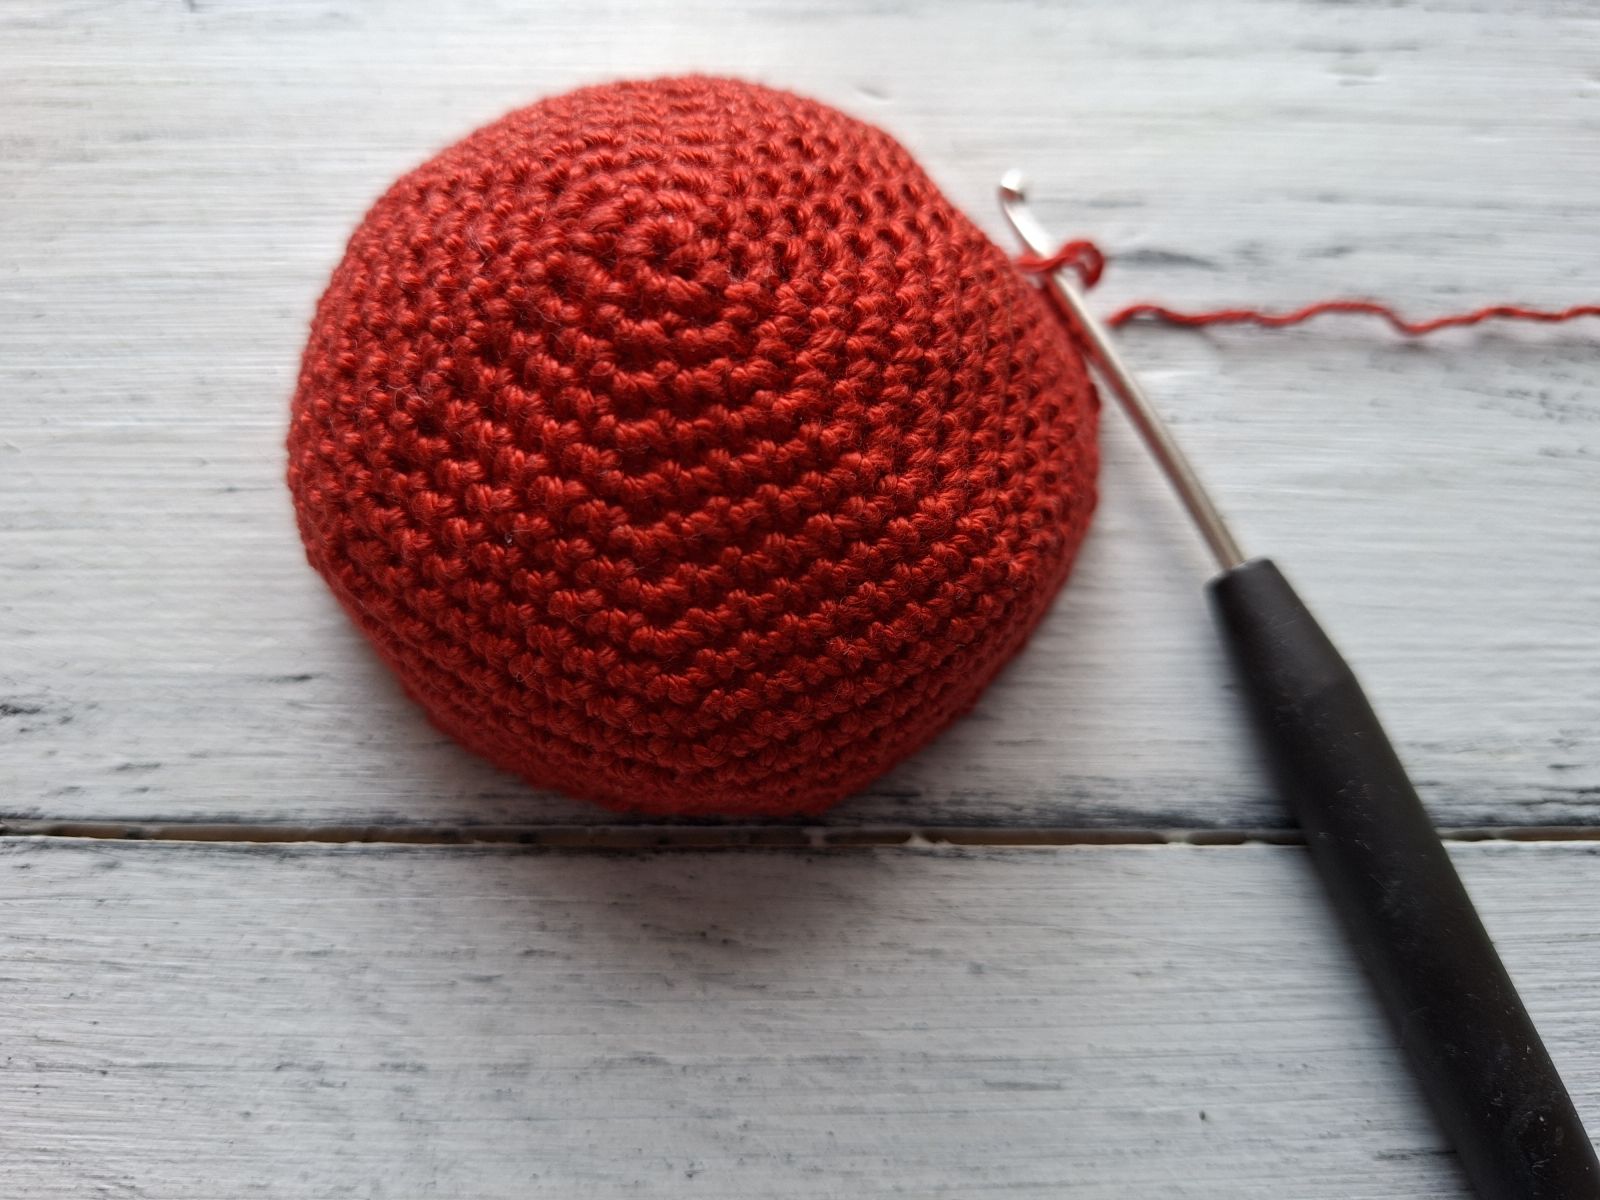
Round 1: 6 single crochets into Magic Ring
Round 2: increase 6 times (12 stitches)
Round 3: *single crochet in the next stitch, increase* (18 stitches)
Round 4: *single crochet in each of next 2 stitches, increase* (24 stitches)
Round 5: *single crochet in each of next 3 stitches, increase* (30 stitches)
Round 6: *single crochet in each of next 4 stitches, increase* (36 stitches)
Round 7: *increase, single crochet in each of next 5 stitches* (42 stitches)
Round 8: *increase, single crochet in each of next 6 stitches* (48 stitches)
Round 9: single crochet in each of next 48 stitches
Round 10: *increase, single crochet in each of next 7 stitches* (54 stitches)
Rounds 11-14: single crochet in each of next 54 stitches
Fasten off leaving a long tail for sewing.
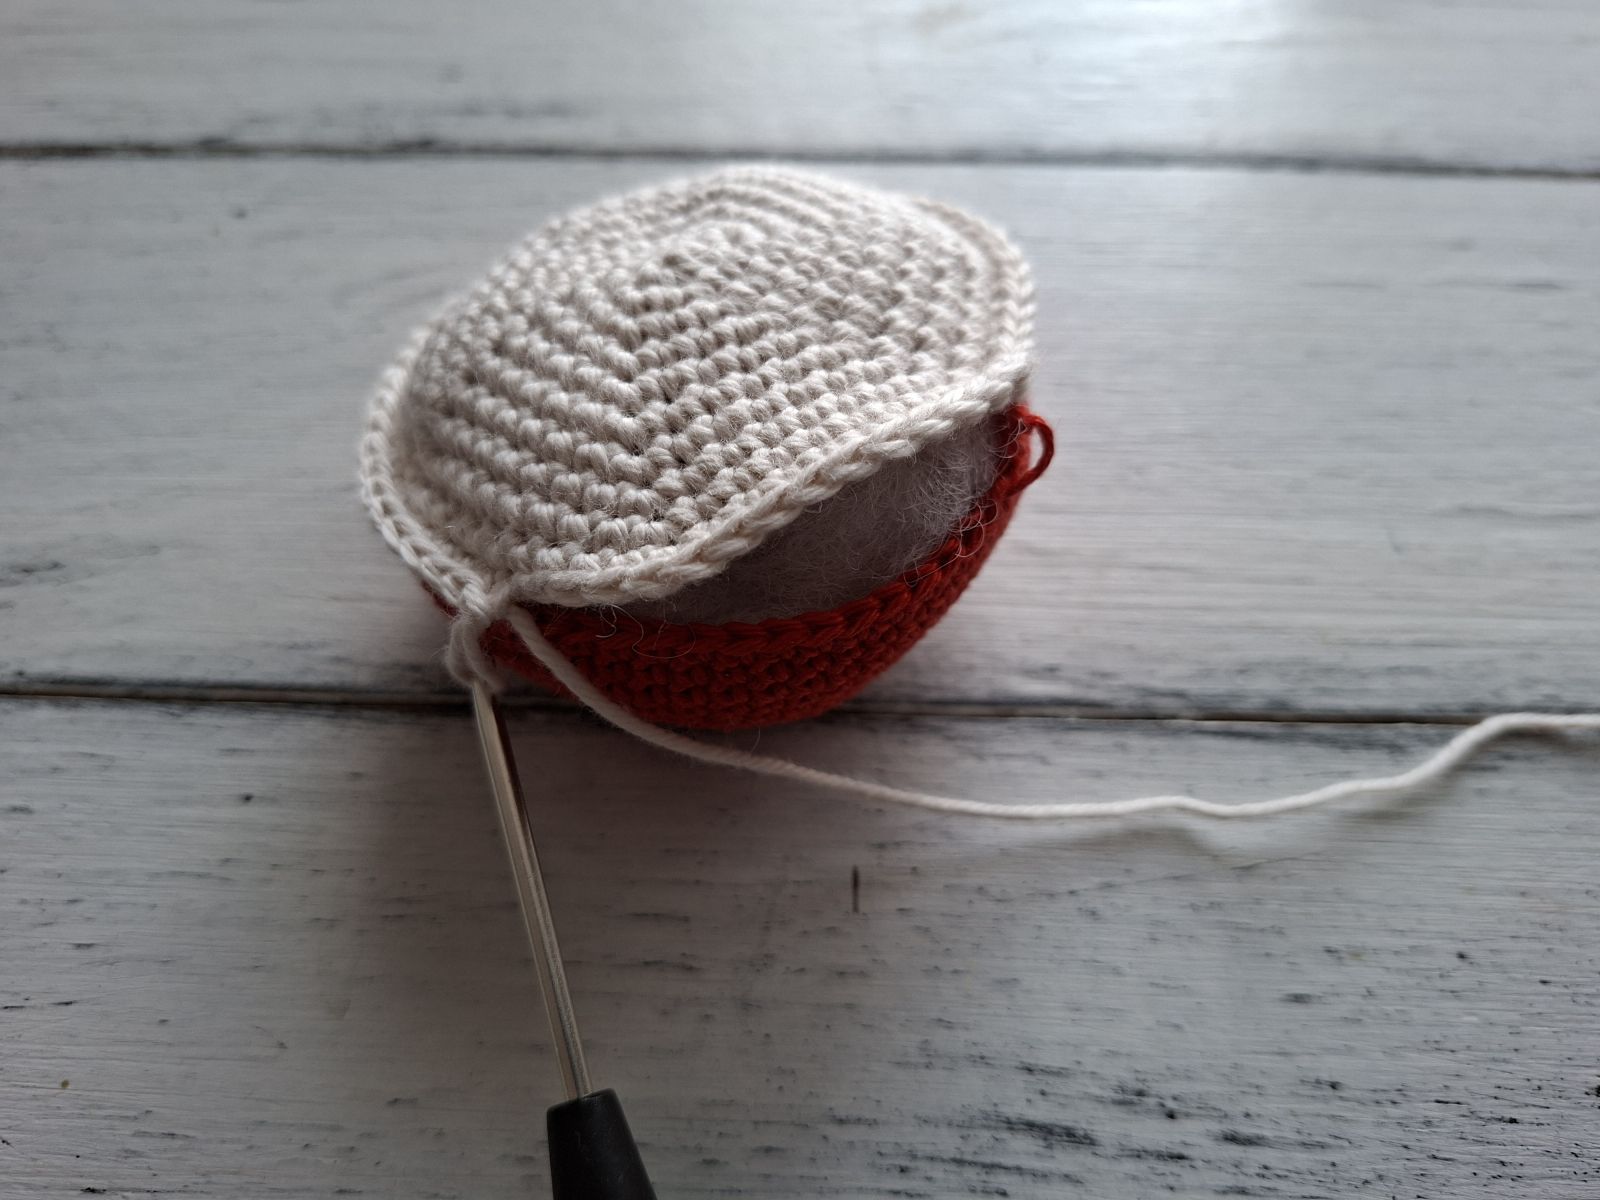
Sew bottom to the upper part of the body using hook. Before the hole is closed stuff your bug.
STEM
Crochet with green colored yarn and begin with a magic ring.
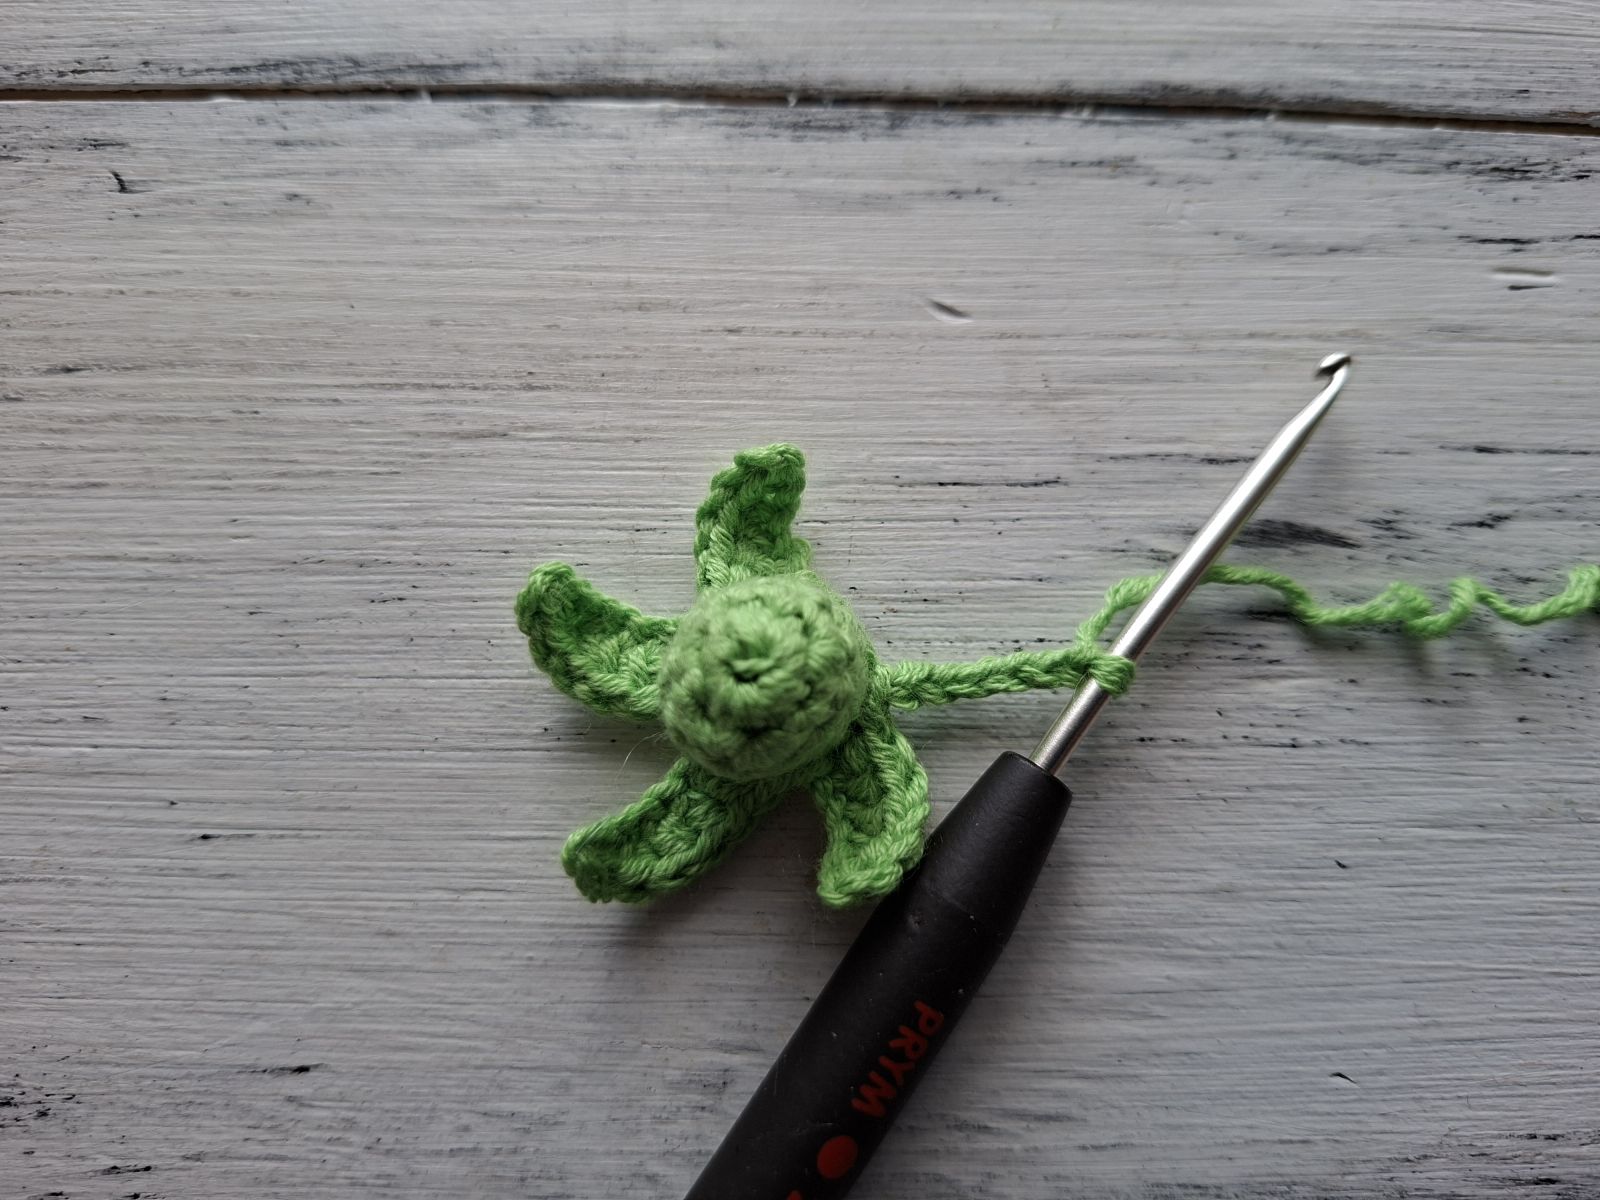
Round 1: 5 single crochets into the Magic ring
Round 2: increase every stitch (10 stitches)
Round 3-5: single crochet in each of next 10 stitches, slip stitch
Round 2: *chain 6 stitches, slip stitch in the second chain from hook, single crochet in the next stitch, hdc in each of next 3 stitches, slip stitch in each of next 2 stitches*, repeat from* to* 5 times.
Fasten off leaving a long tail for sewing.
HEAD
Crochet with beige colored yarn and begin with a magic ring.
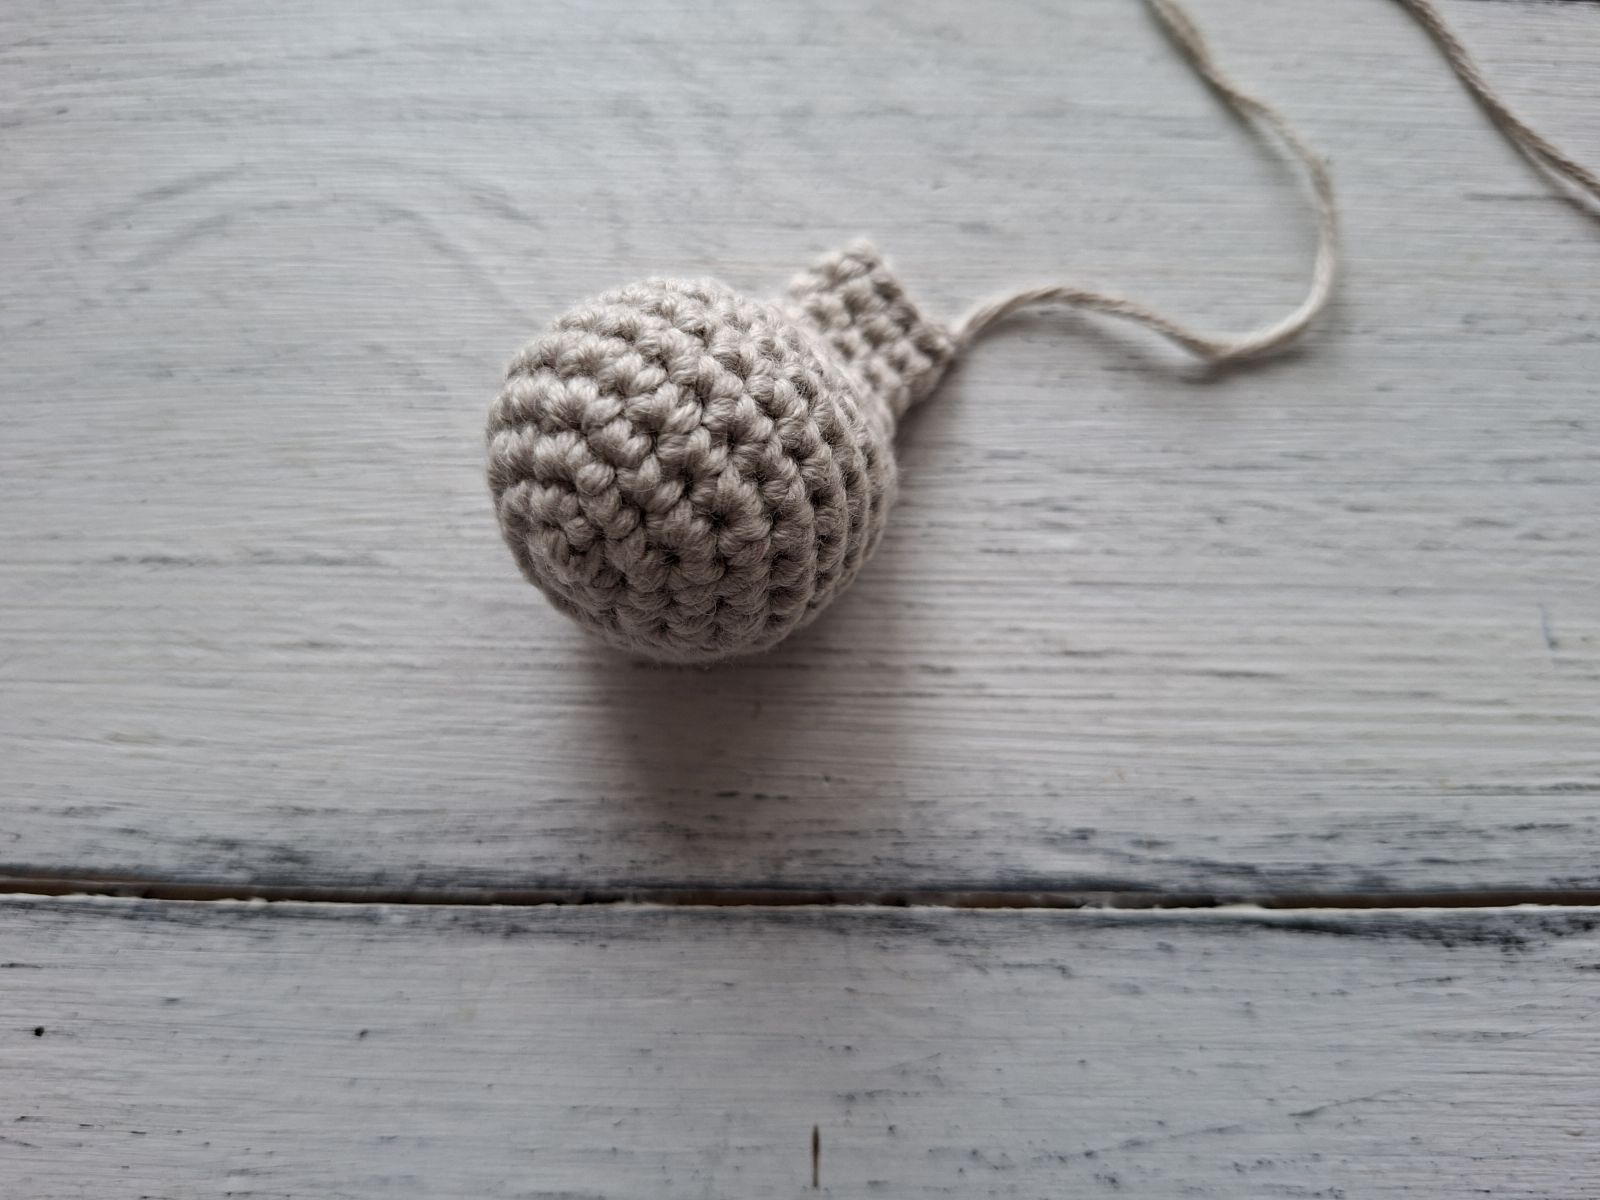
Round 1: 6 single crochets into Magic Ring.
Round 2: increase every stitch (12 stitches)
Round 3: *increase, single crochet in the next stitch* (18 stitches)
Round 4: *increase, single crochet in each of next 2 stitches* (24 stitches)
Round 5-8: single crochet in each of next 24 stitches
Round 9: *decrease, single crochet in each of next 2 stitches* (18 stitches)
Round 10: *decrease, single crochet in the next stitch* (12 stitches)
Round 11: *decrease, single crochet in each of next 2 stitches* (9 stitches)
Rounds 12-14: single crochet in each of next 9 stitches
Stuff the head. Fasten off leaving a long tail for sewing.
LEG (2x)
Crochet with beige colored yarn and begin with a magic ring.
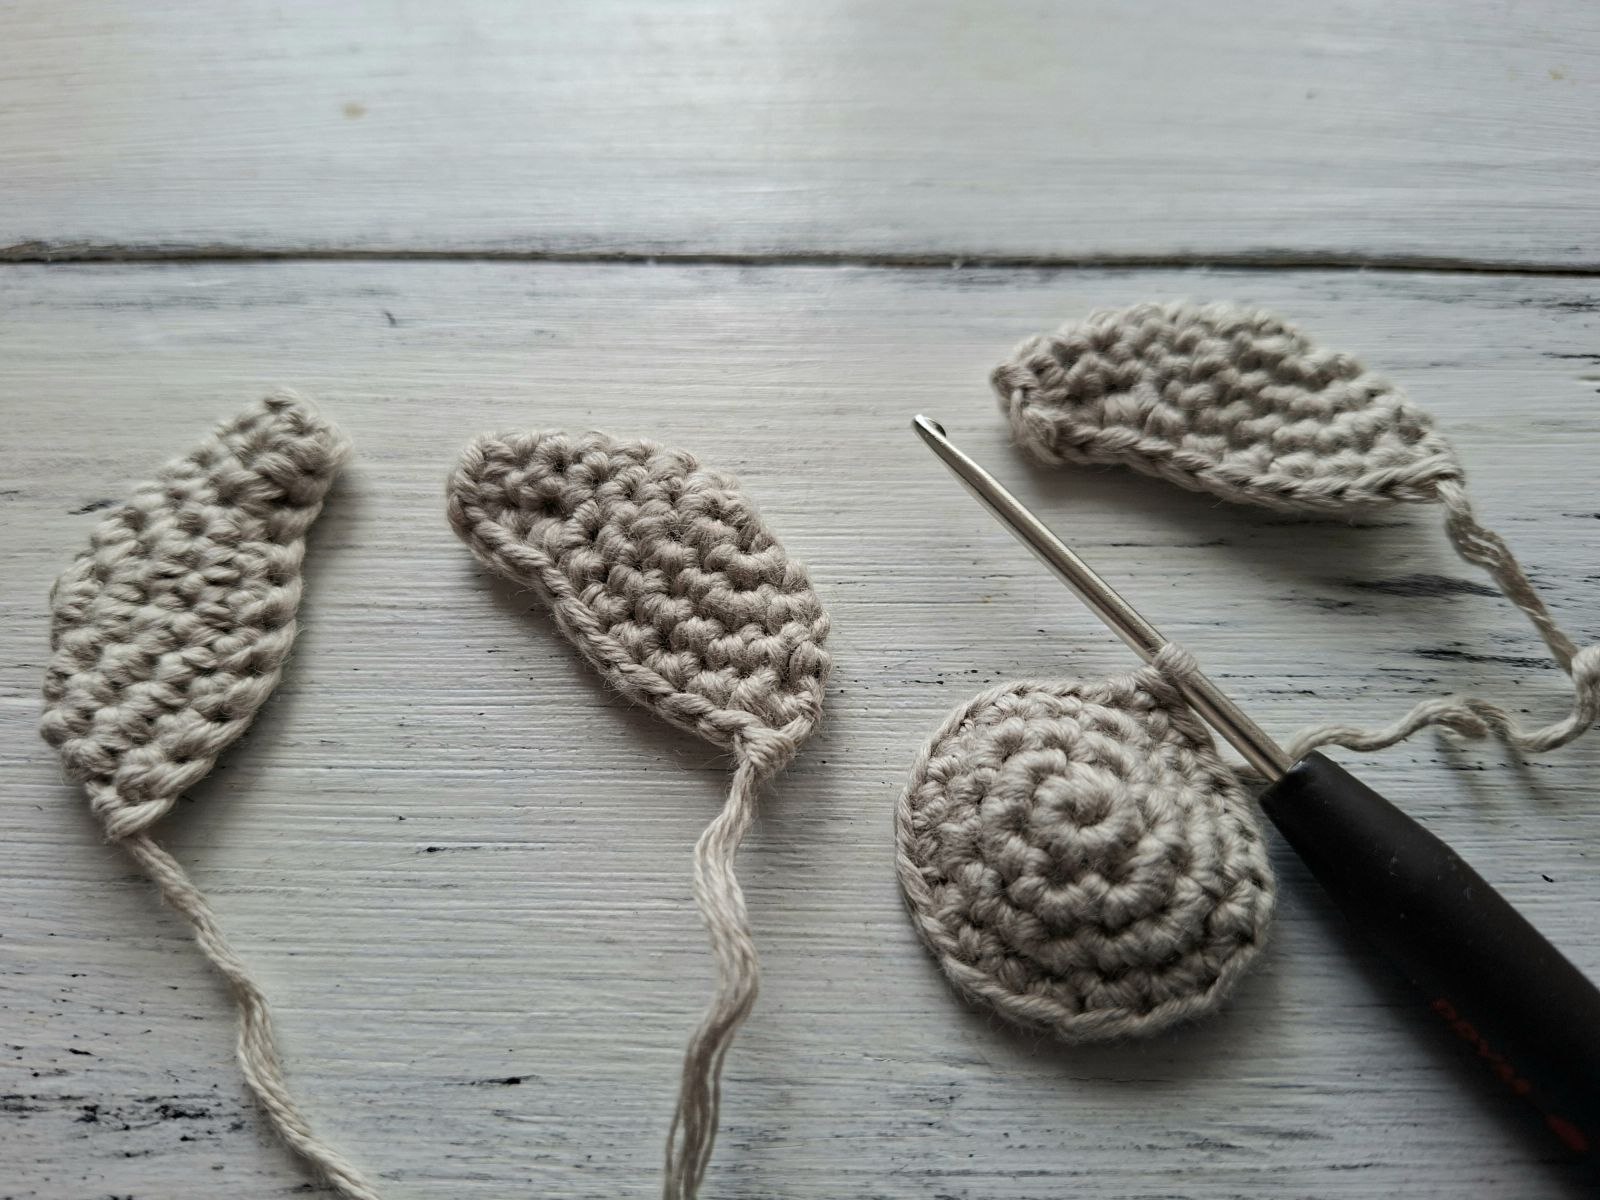
Round 1: 6 single crochets into Magic Ring.
Round 2: increase every stitch (12 stitches)
Round 3: *increase, single crochet in the next stitch* (18 stitches)
Round 4: *increase, single crochet in each of next 2 stitches* (24 stitches)
Round 5: single crochet in each of next 24 stitches
Rounds 6-8: single crochet in each of next 5 stitches, chain 1 stitch, turn the work.
Fold and sew together with single crochets. Fasten off leaving a long tail for sewing.
TAIL
Crochet with beige colored yarn and begin with a magic ring.
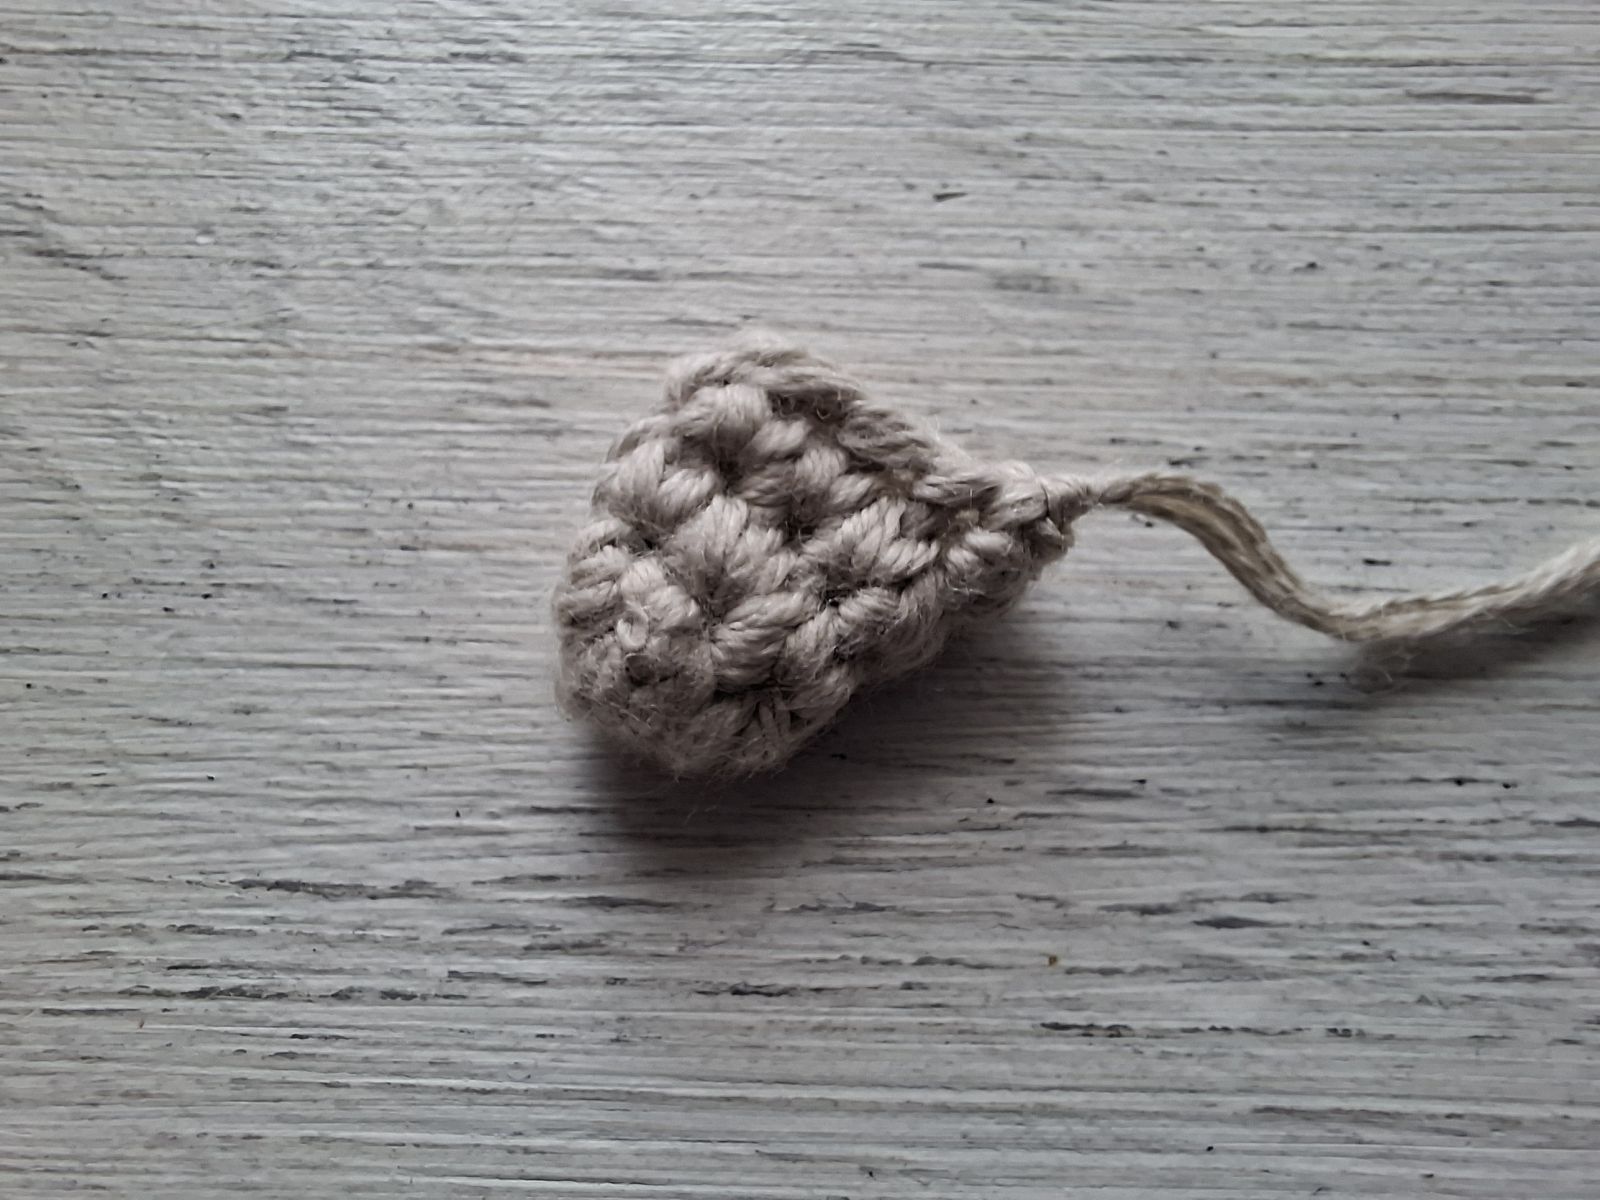
Round 1: 6 single crochets into Magic Ring.
Round 2: single crochet in each of next 6 stitches
Round 3: *increase, single crochet in the next stitch* (9 stitches)
Round 4: single crochet in each of next 9 stitches
Fasten off leaving a long tail for sewing.
ASSEMBLY
Since all the elements of your turtle are crocheted, it´s time to sew them together. Use a blunt sewing needle.
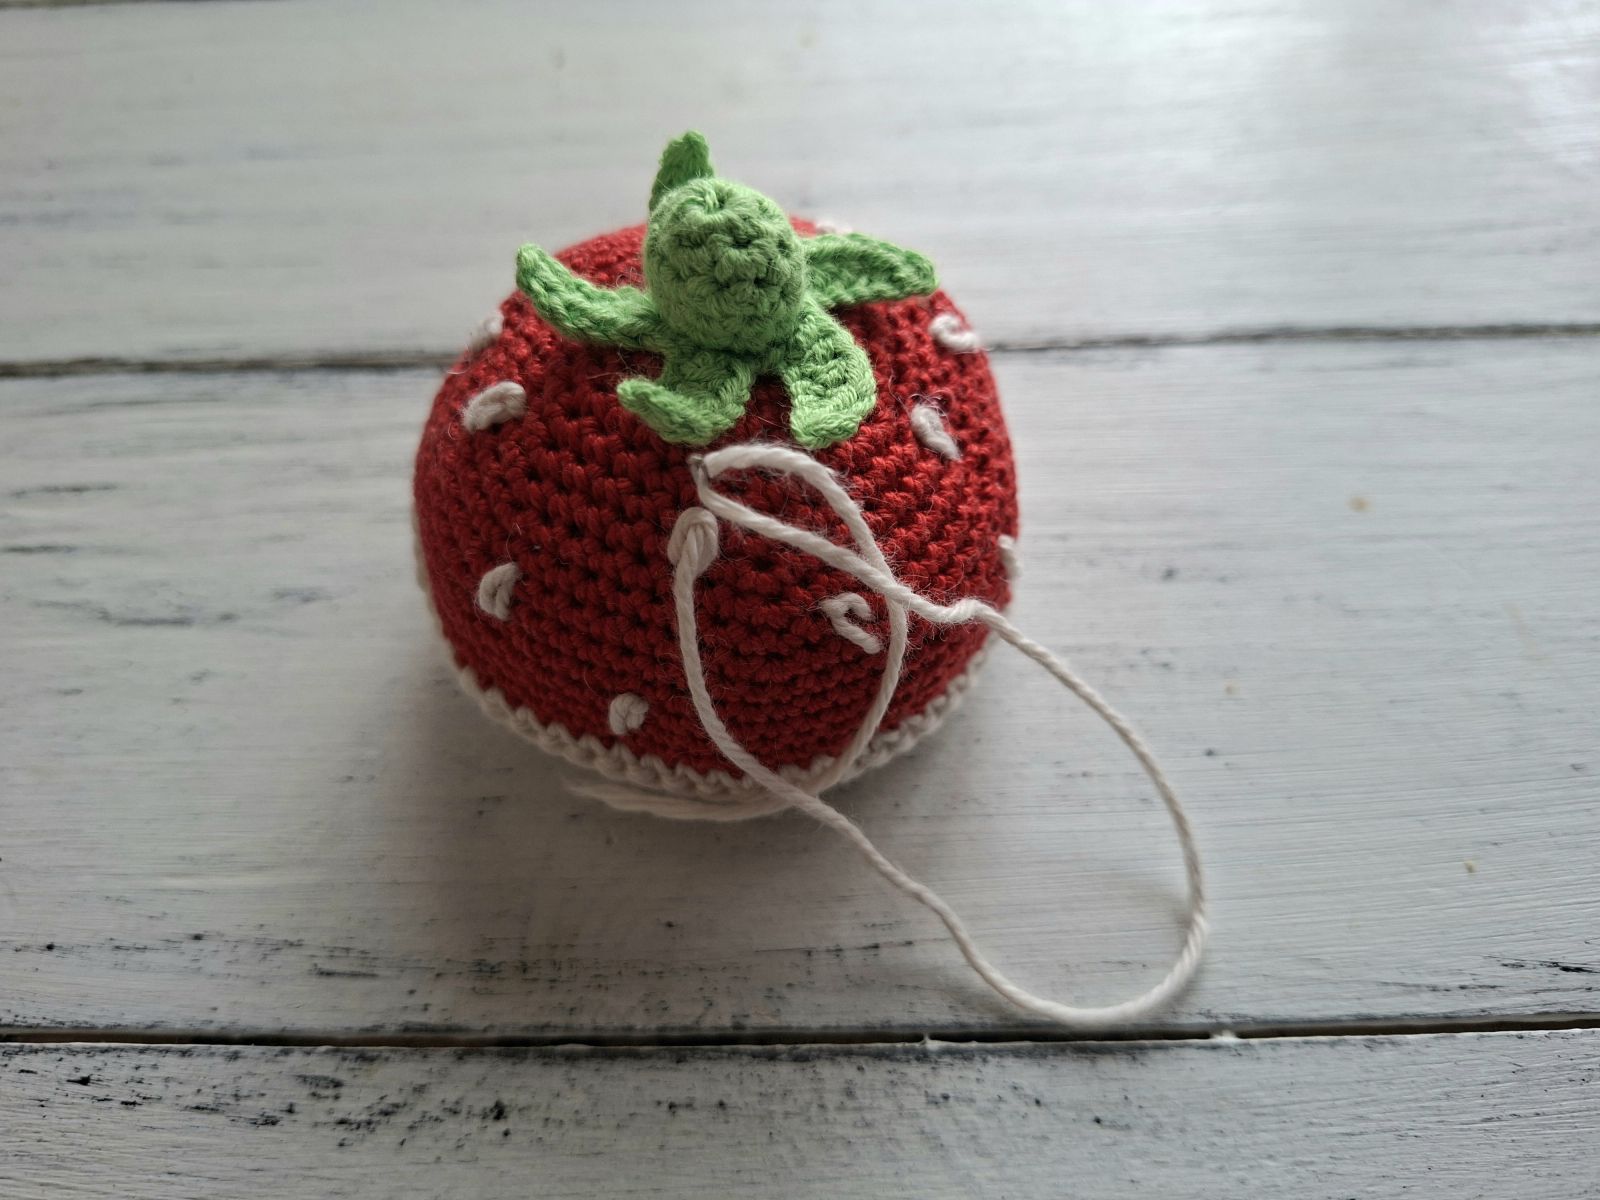
Sew little beads on the strawberries or embroider the strawberry seeds (use white or yellow yarn to sew small Vs around the strawberries). Sew or glue stems to the top of the body. Do not sew or glue the tips of the leaves.
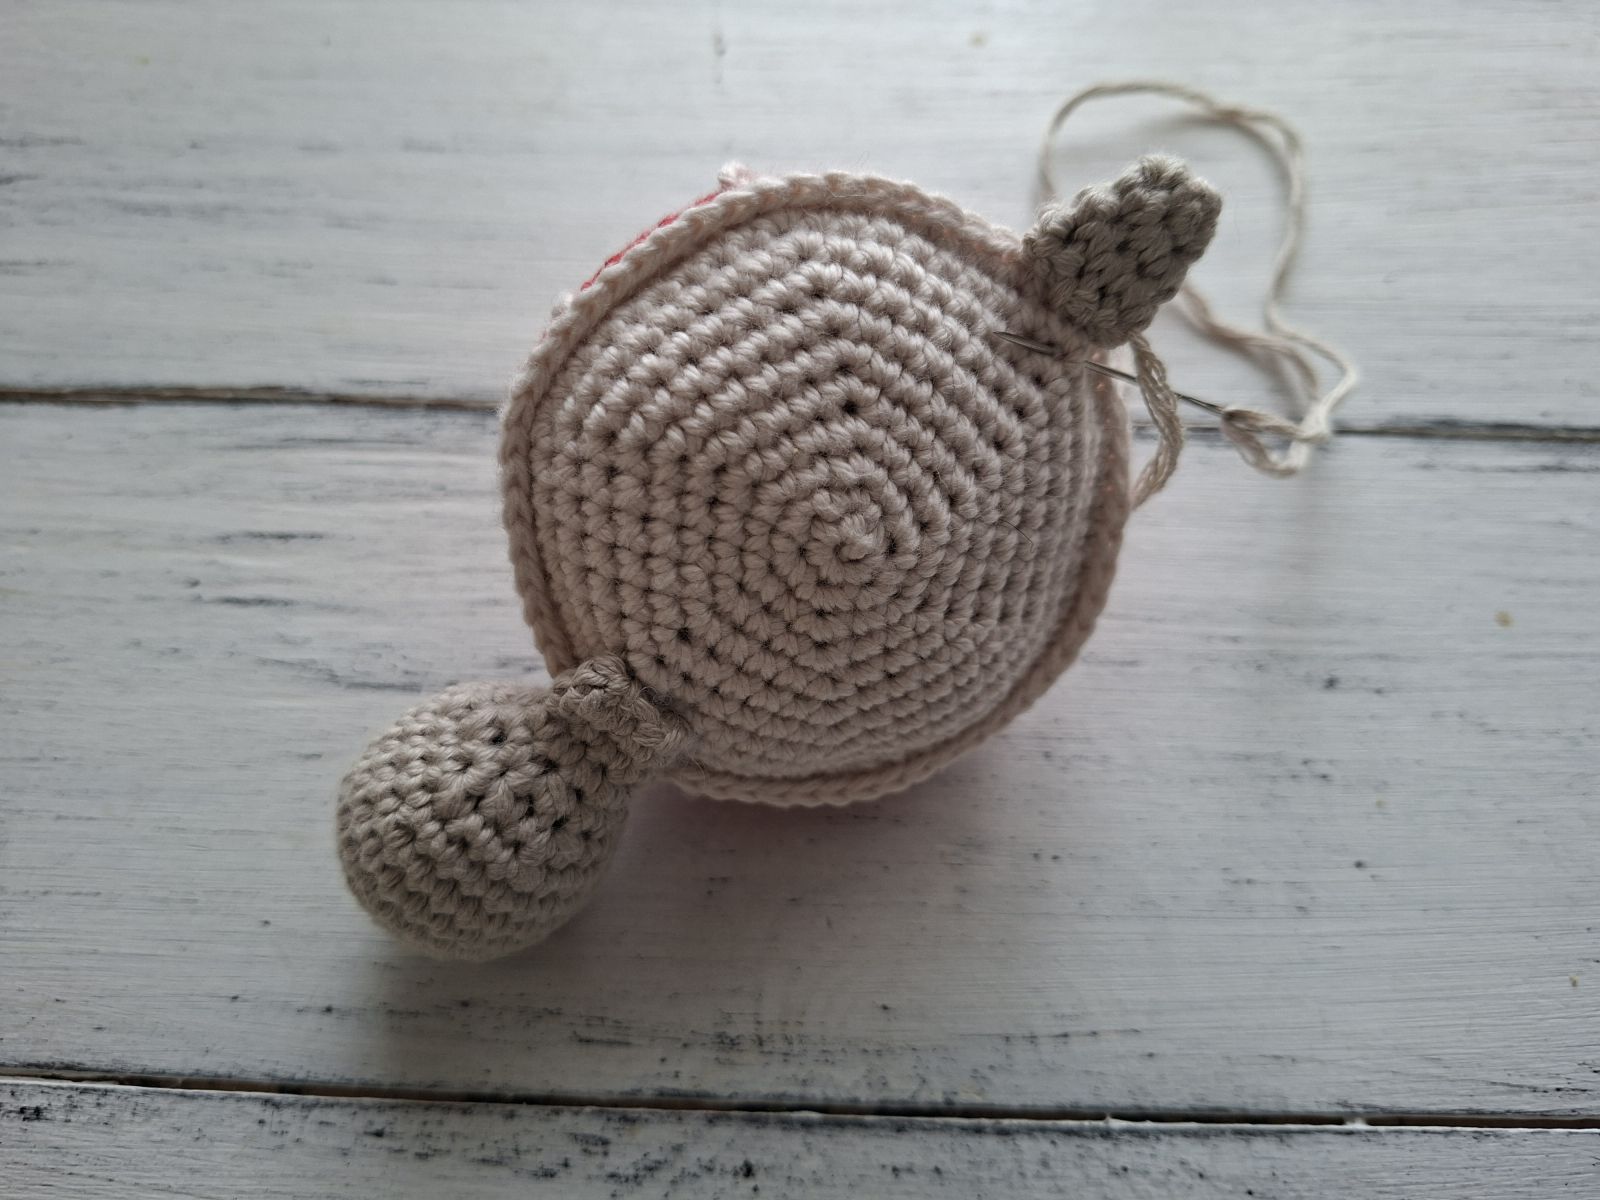
Sew the head to the body of your turtle. Hide all yarn ends. Attach the tail as shown on the pic.
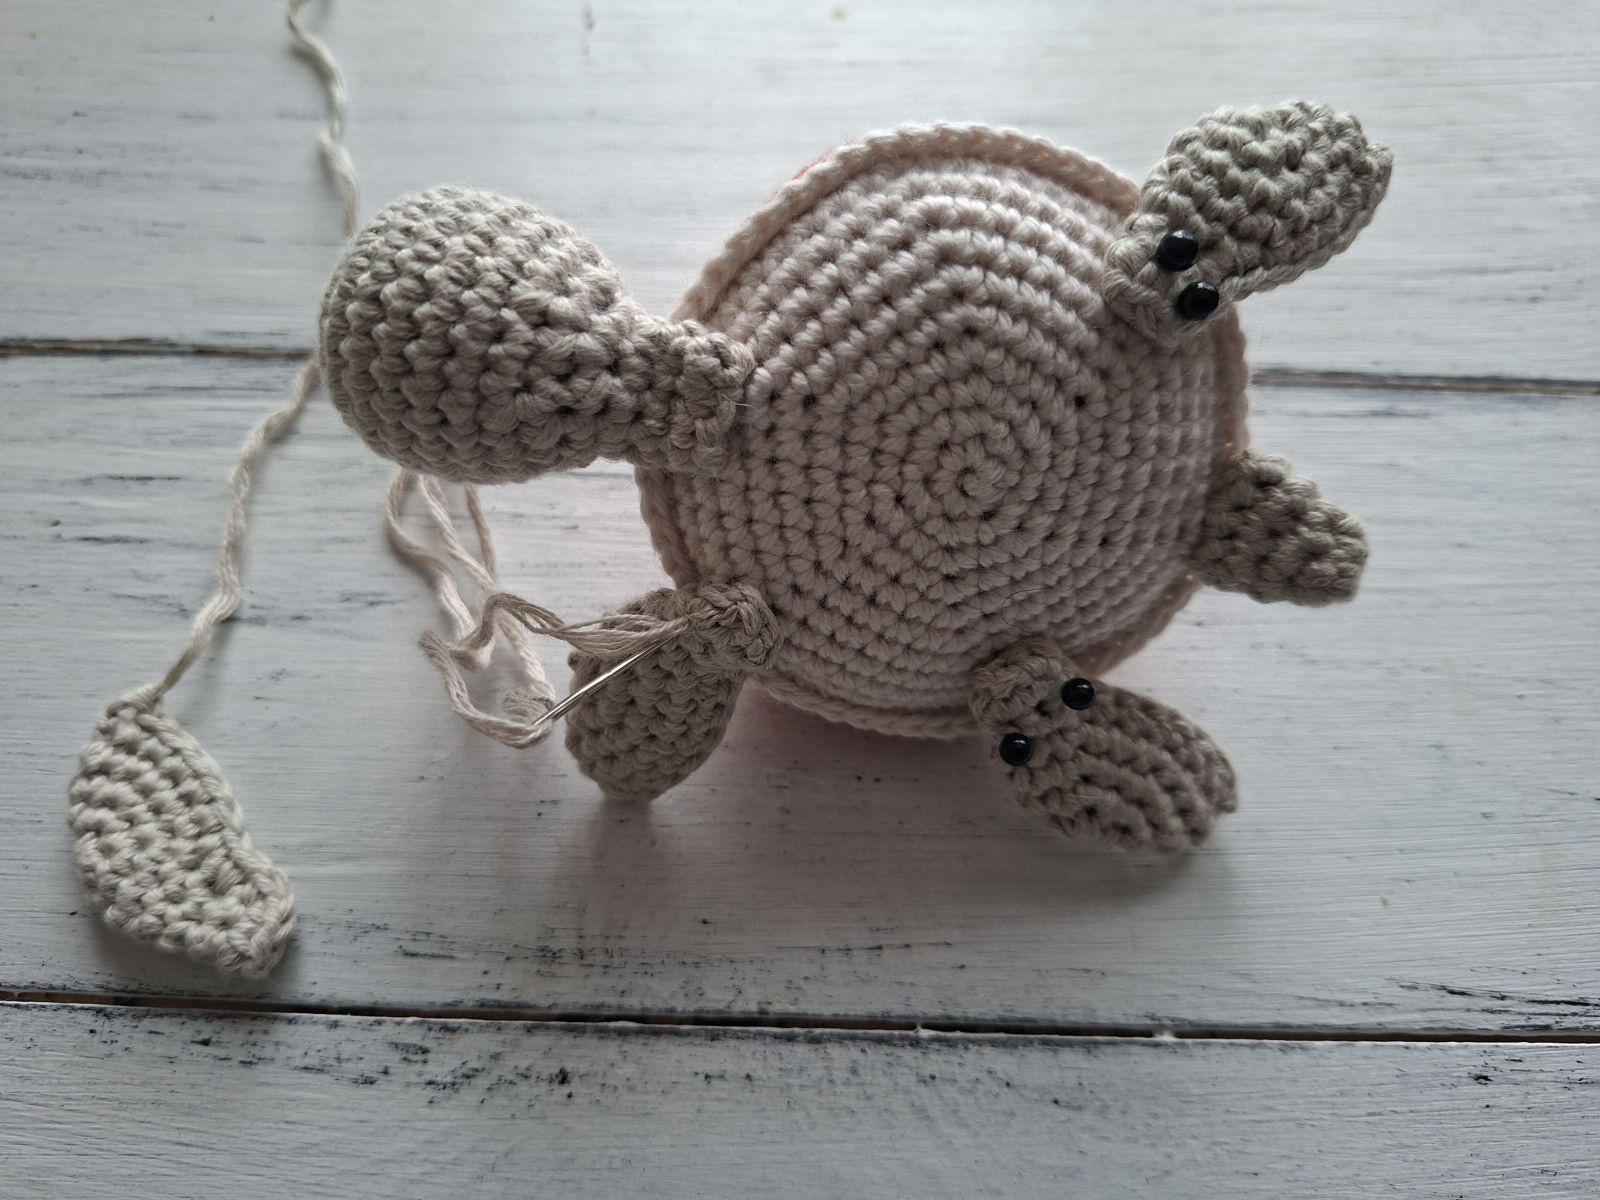
Sew legs to the bottom of the body. Position legs and using the yarn left sew them to the body of the turtle. Be sure to step back and take a look to make sure they are even.
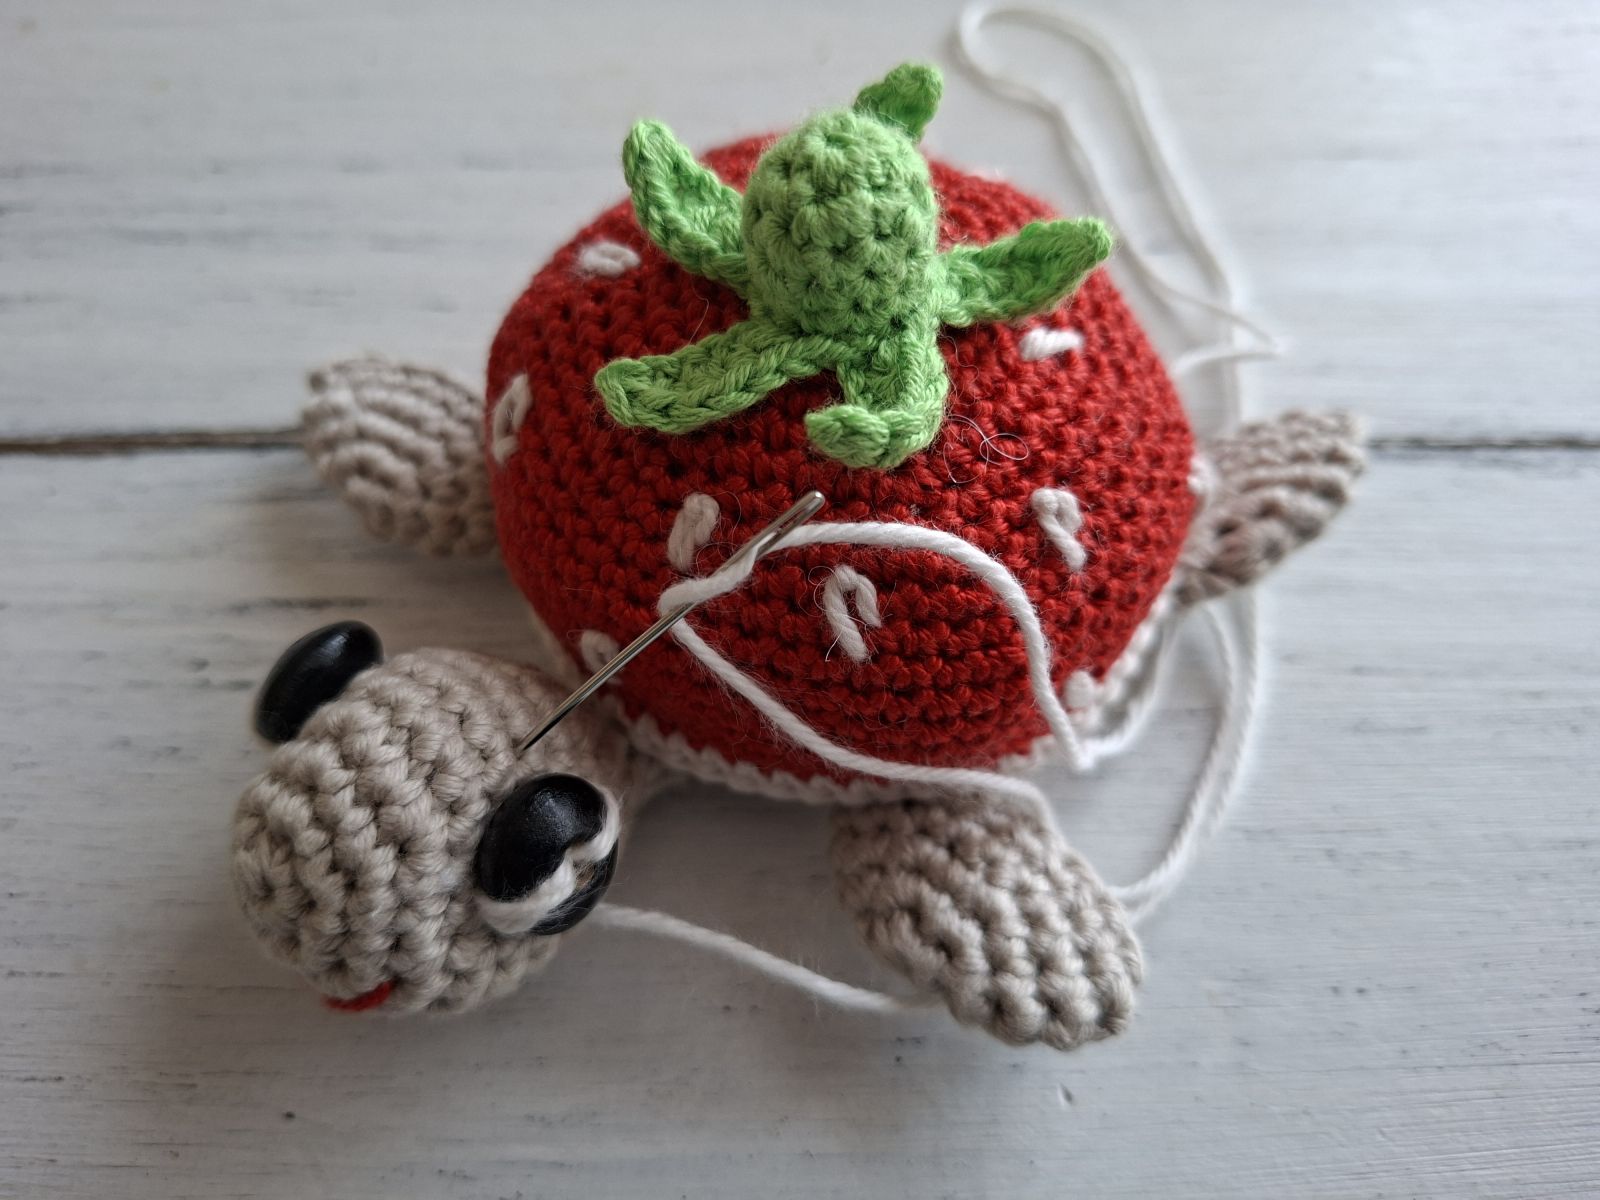
Decide where you position eyes, mark where you want them to be with pins, place them in the right place on the top of the head and sew them with yarn ends left to the head of your bug. Be sure to step back and take a look to make sure they are even.
Embroider mouth with red colored yarn. You can also proceed with a smile and add a tongue if desired. Hide the yarn tails inside the head. Sew black beads or embroider eyes with black yarn.
CATERPILLAR
HEAD
Crochet with yellow yarn or the color of yarn you wish and begin with a magic ring
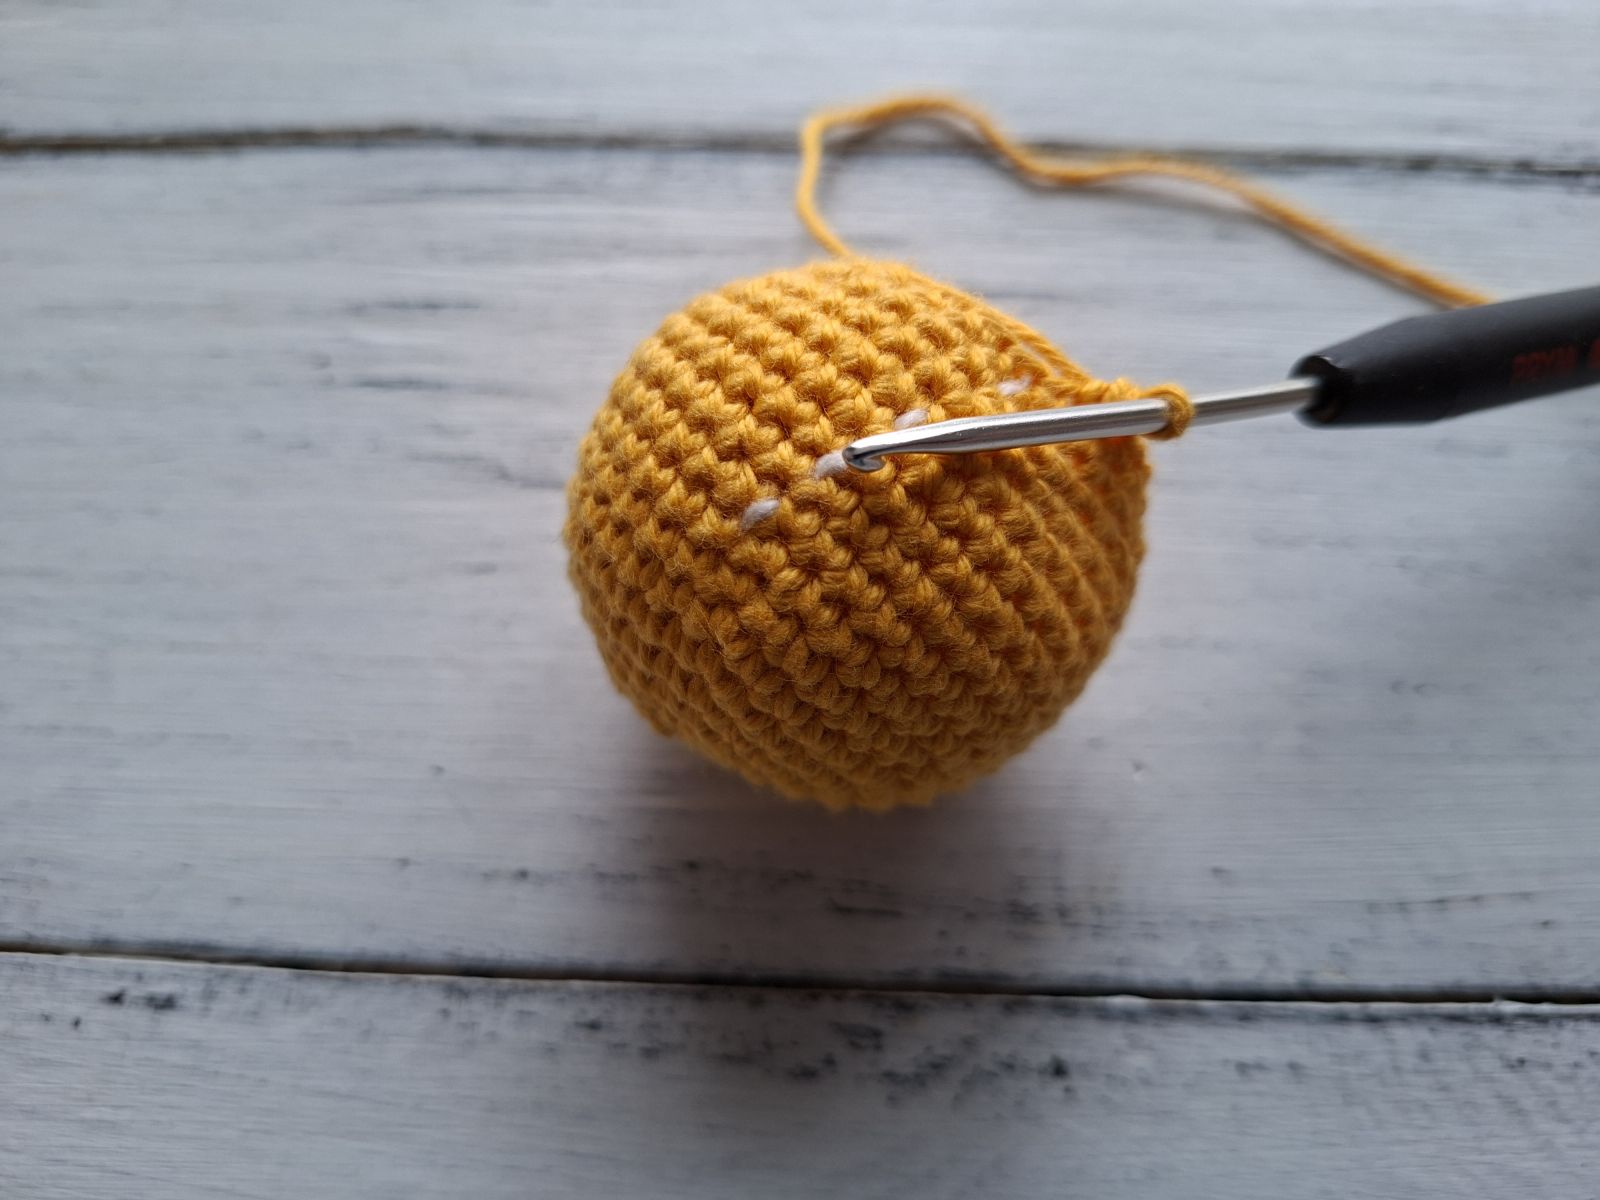
Round 1: 6 single crochets into a Magic Ring
Round 2: increase 6 times (12 stitches)
Round 3: *single crochet in next stitch, increase*, repeat from* to* 6 times (18 stitches)
Round 4: single crochet in each of next 18 stitches
Round 5: *single crochet in each of next 2 stitches, increase*, repeat from* to* 6 times (24 stitches)
Round 6: *single crochet in each of next 3 stitches, increase*, repeat from* to* 6 times (30 stitches)
Round 7: *single crochet in each of next 4 stitches, increase*, repeat from* to* 6 times (36 stitches)
Round 8: single crochet in each of next 36 stitches
Round 9: *single crochet in each of next 5 stitches, increase*, repeat from* to* 6 times (42 stitches)
Rounds 10-14: single crochet in each of next 42 stitches
Round 15: *decrease, single crochet in each of next 5 stitches* (36 stitches)
Round 16: single crochet in each of next 36 stitches
Round 17: *decrease, single crochet in each of next 4 stitches* (30 stitches)
Stuff the head firmly with fiberfill.
Round 18: *decrease, single crochet in each of next 3 stitches* (24 stitches)
Round 19: *decrease, single crochet in each of next 2 stitches* (18 stitches)
Round 20: *decrease, single crochet in the next stitch* (12 stitches)
Round 21: single crochet in each of next 12 stitches
Do not fasten off.
BODY
Continue crocheting with yellow yarn.
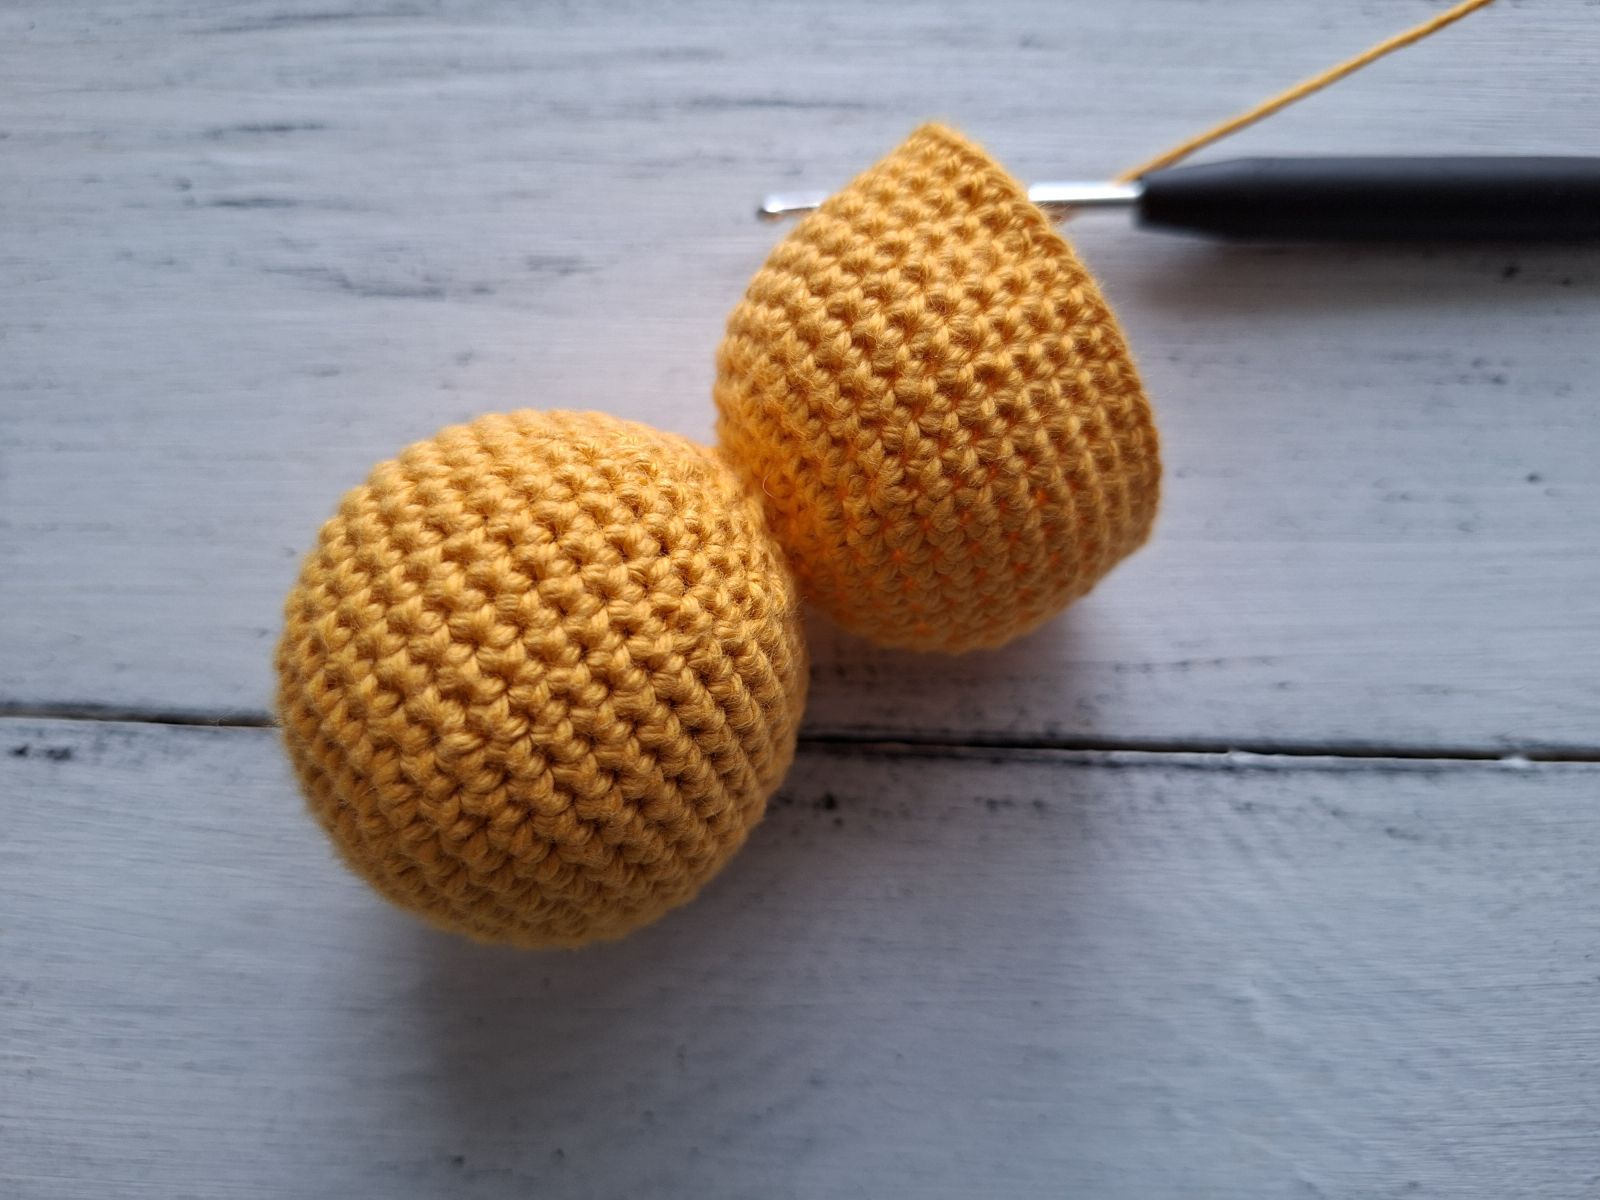
PART 1
Round 22: increase every stitch (24 stitches)
Round 23: *single crochet in each of next 3 stitches, increase*, repeat from* to* 6 times (30 stitches)
Round 24: single crochet in each of next 30 stitches
Round 25: *single crochet in each of next 4 stitches, increase*, repeat from* to* 6 times (36 stitches)
Rounds 26-32: single crochet in each of next 36 stitches
Round 33: *decrease, single crochet in each of next 4 stitches* (30 stitches)
Stuff the body firmly with fiberfill
Round 34: *decrease, single crochet in each of next 3 stitches* (24 stitches)
Round 35: *decrease, single crochet in each of next 2 stitches* (18 stitches)
Round 36: *decrease, single crochet in the next stitch* (12 stitches)
Round 37: *decrease*.
Fasten off. Hide yarn ends.
PART 2
Crochet with green yarn or the color of yarn you wish and begin with a magic ring.
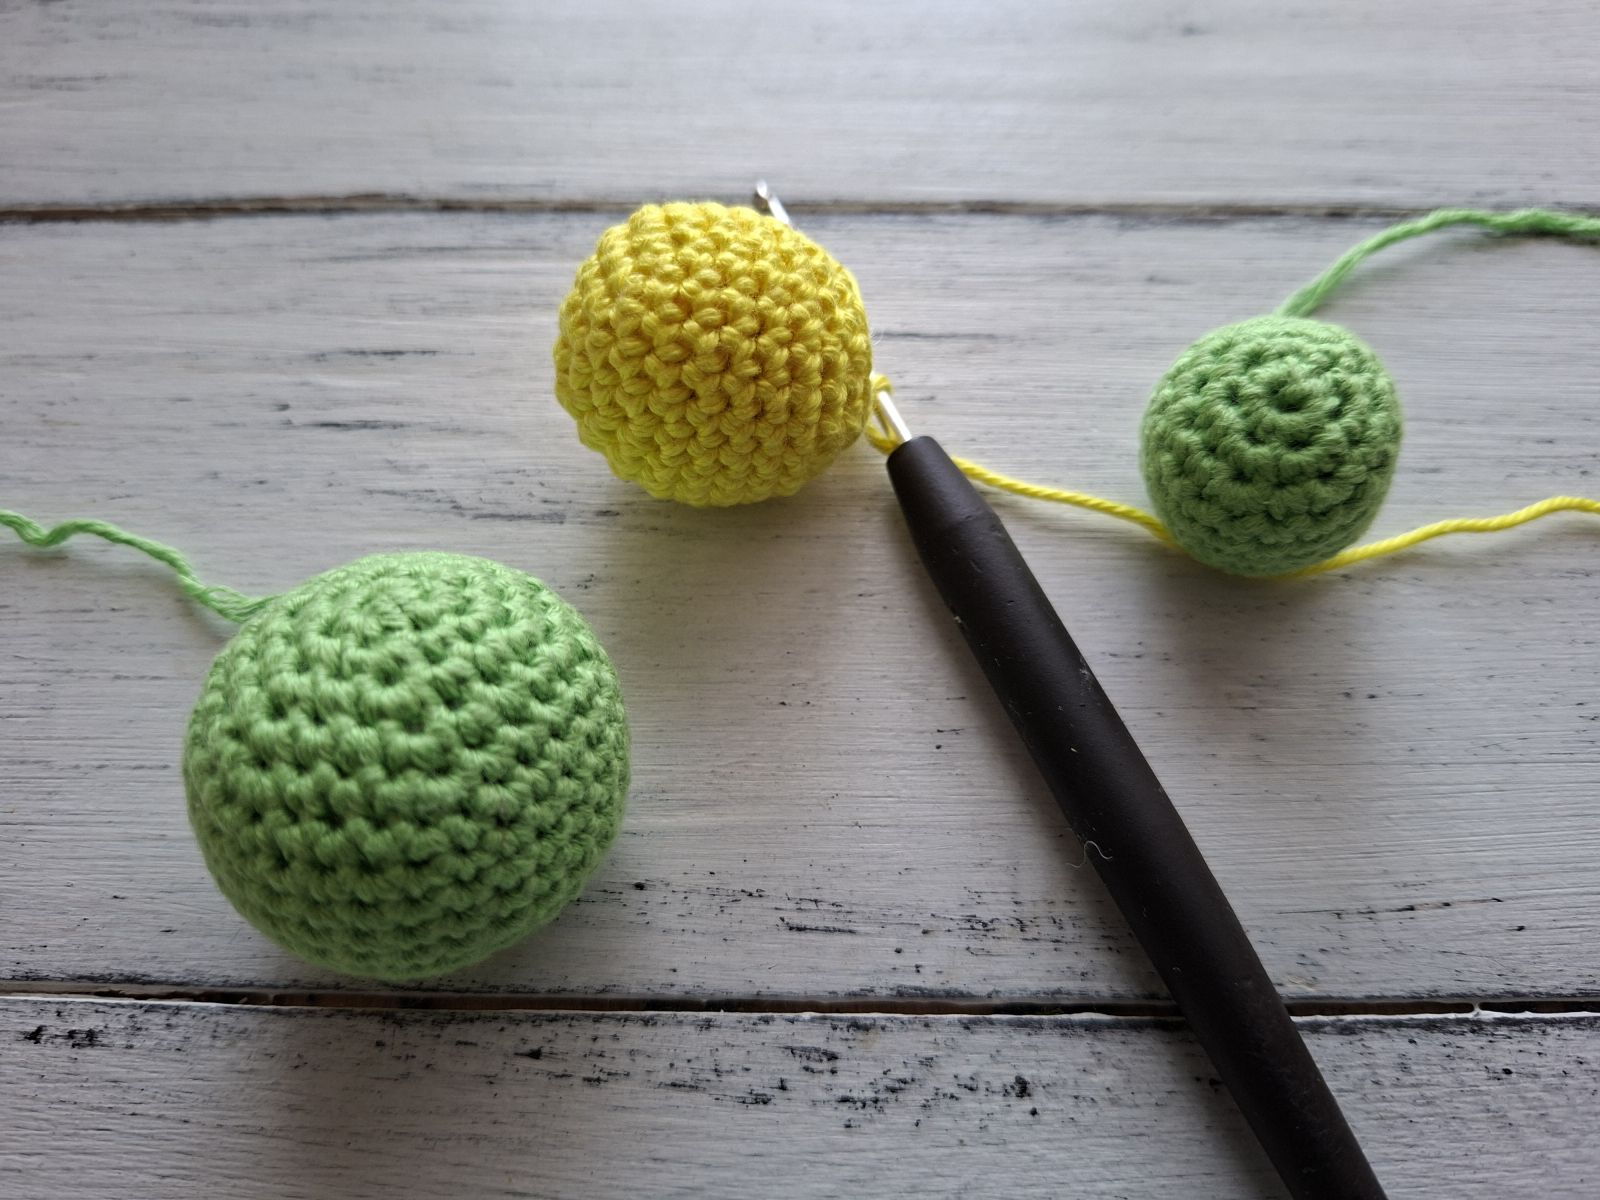
Round 1: 6 single crochets into a Magic Ring
Round 2: increase 6 times (12 stitches)
Round 3: *single crochet in next stitch, increase*, repeat from* to* 6 times (18 stitches)
Round 4: *single crochet in each of next 2 stitches, increase*, repeat from* to* 6 times (24 stitches)
Round 5: *single crochet in each of next 3 stitches, increase*, repeat from* to* 6 times (30 stitches)
Rounds 6-11: single crochet in each of next 30 stitches
Round 12: *decrease, single crochet in each of next 3 stitches* (24 stitches)
Round 13: *decrease, single crochet in each of next 2 stitches* (18 stitches)
Round 14: *decrease, single crochet in the next stitch* (12 stitches)
Round 15: *decrease*.
Fasten off, leaving a long tail for sewing.
PART 3
Crochet with yellow yarn or the color of yarn you wish and begin with a magic ring.
Round 1: 6 single crochets into a Magic Ring
Round 2: increase 6 times (12 stitches)
Round 3: *single crochet in next stitch, increase*, repeat from* to* 6 times (18 stitches)
Round 4: *single crochet in each of next 2 stitches, increase*, repeat from* to* 6 times (24 stitches)
Round 5-9: single crochet in each of next 24 stitches
Round 10: *decrease, single crochet in each of next 2 stitches* (18 stitches)
Round 11: *decrease, single crochet in the next stitch* (12 stitches)
Round 12: *decrease*.
Fasten off, leaving a long tail for sewing.
PART 4
Crochet with green yarn or the color of yarn you wish and begin with a magic ring.
Round 1: 6 single crochets into a Magic Ring
Round 2: increase 6 times (12 stitches)
Round 3: *single crochet in next stitch, increase*, repeat from* to* 6 times (18 stitches)
Round 4-8: single crochet in each of next 18 stitches
Round 11: *decrease, single crochet in the next stitch* (12 stitches)
Round 12: *decrease*.
Fasten off, leaving a long tail for sewing.
BELLY
Crochet with green yarn or the color of yarn you wish and begin with a magic ring.
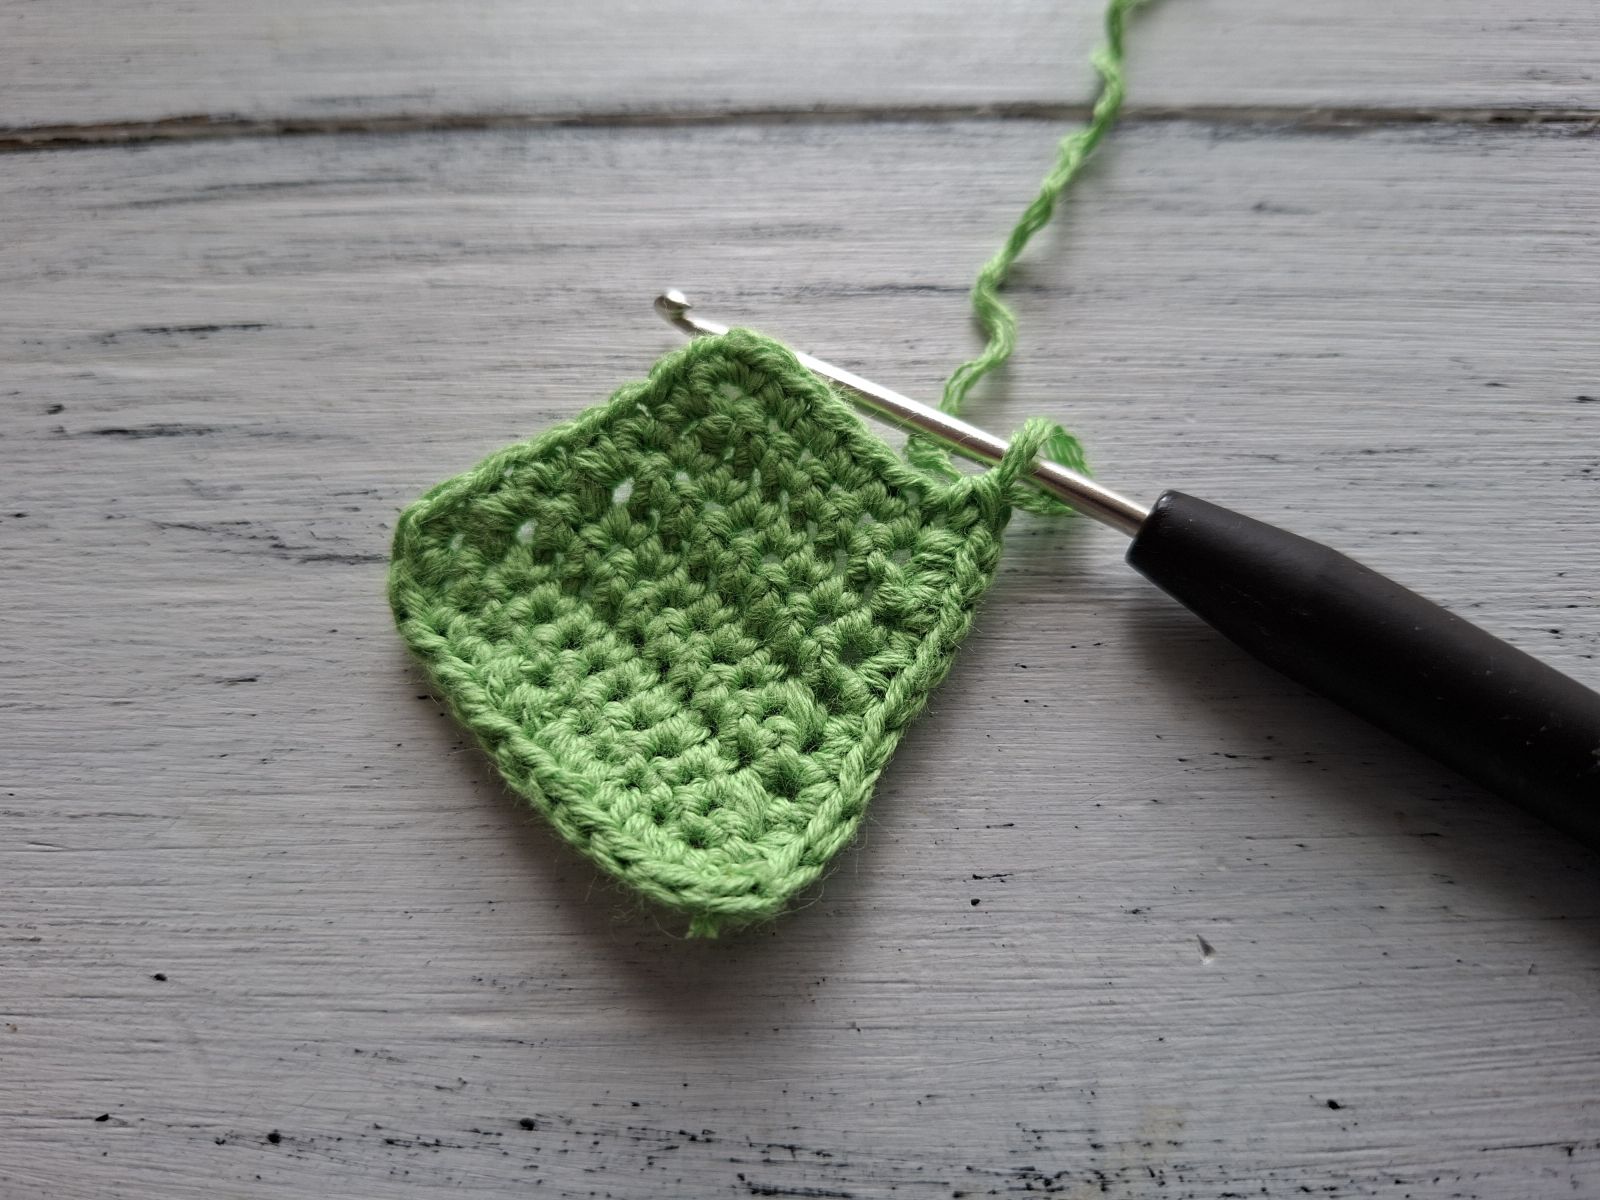
Start with a foundation chain of 13 stitches.
Row 1: single crochet into the second chain from the hook and each of next 10 stitches, chain 1 stitch, turn the work.
Row 2: decrease, single crochet in each of next 8 stitches, decrease, chain 1 stitch, turn the work
Row 3: single crochet in each of next 10 stitches, chain 1 stitch, turn the work
Row 4: decrease, single crochet in each of next 6 stitches, decrease, chain 1 stitch, turn the work
Rows 5-6: single crochet in each of next 8 stitches, chain 1 stitch, turn the work
Row 7: decrease, single crochet in each of next 4 stitches, decrease, chain 1 stitch, turn the work
Row 3: single crochet in each of next 6 stitches, chain 1 stitch, turn the work
Work one round single crochets or reverse single crochets all around the belly.
Fasten off, leaving a long tail for sewing.
LEG (6x)
Crochet with orange colored yarn and begin with a magic ring.
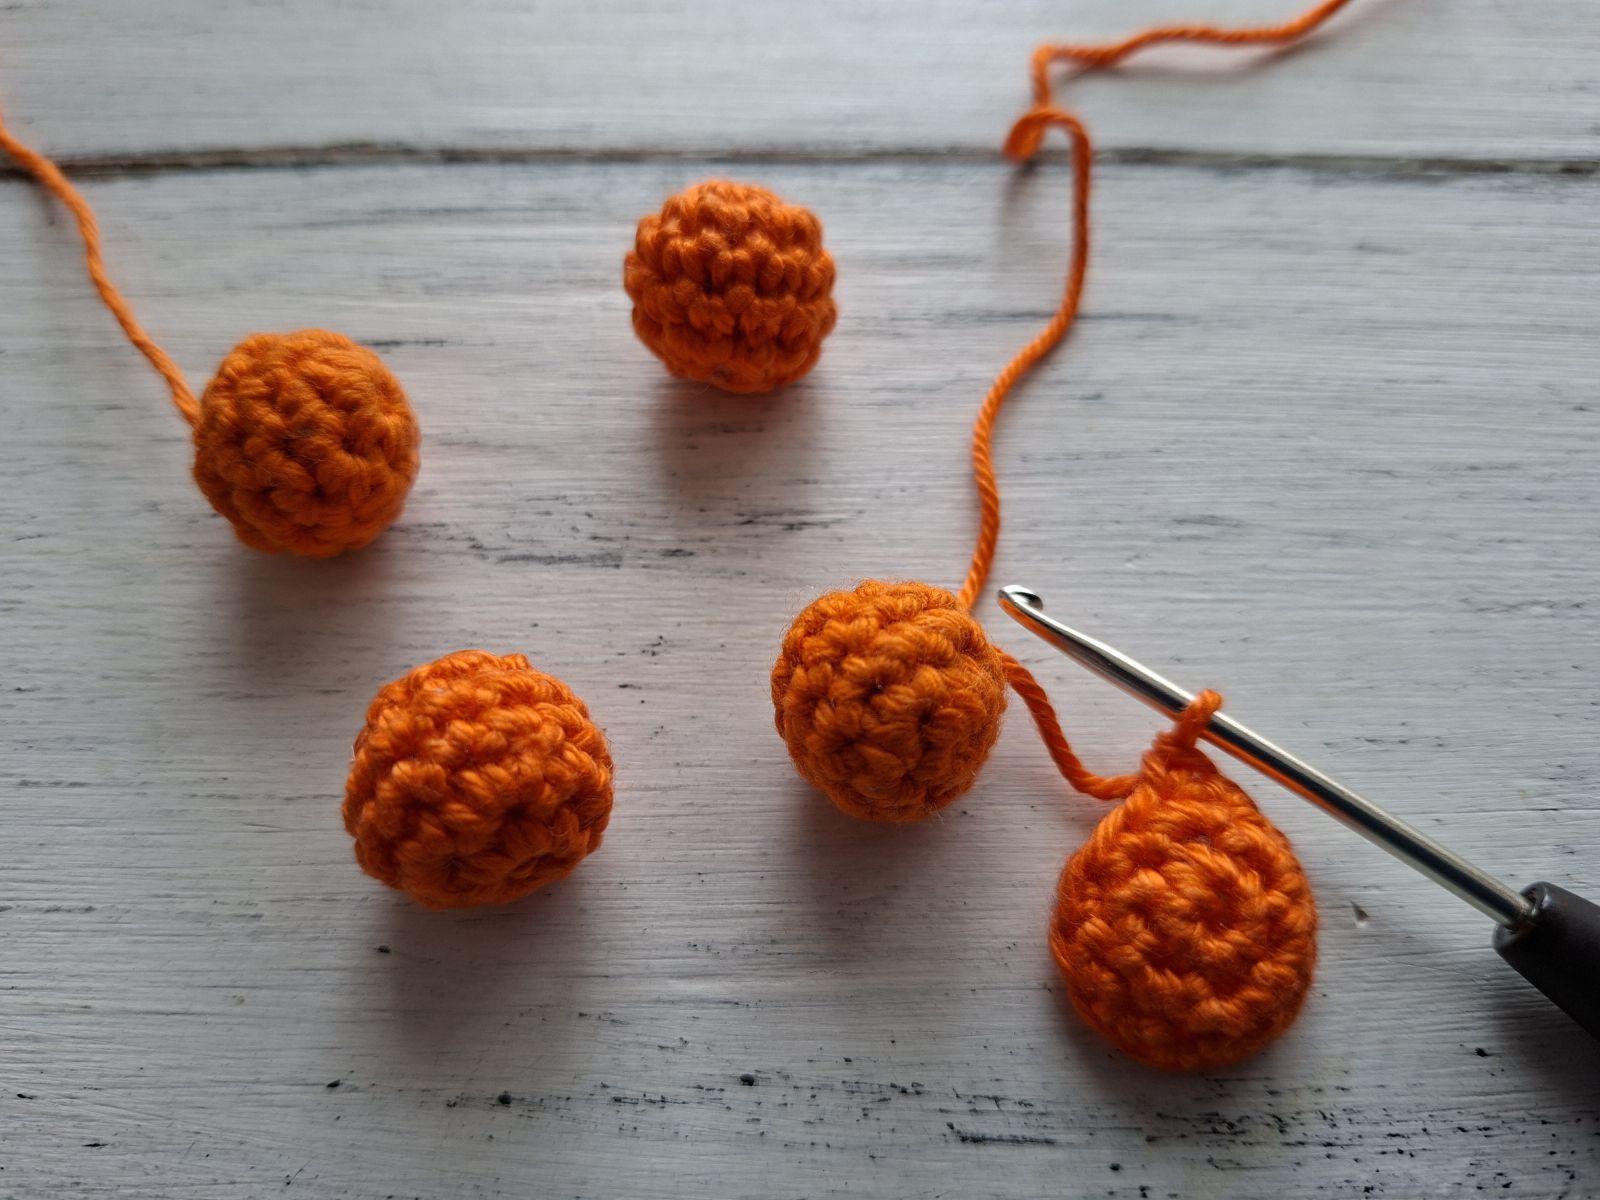
Round 1: 6 single crochets into Magic Ring
Round 2: increase 6 times (12 stitches)
Round 3-4: single crochet in each of next 12 stitches
Stuff the leg slightly.
Round 5: *decrease*.
Fasten off leaving a long tail for sewing. Work the other legs the same way.
NOSE
Crochet with yellow yarn or the color of yarn you wish and begin with a magic ring.
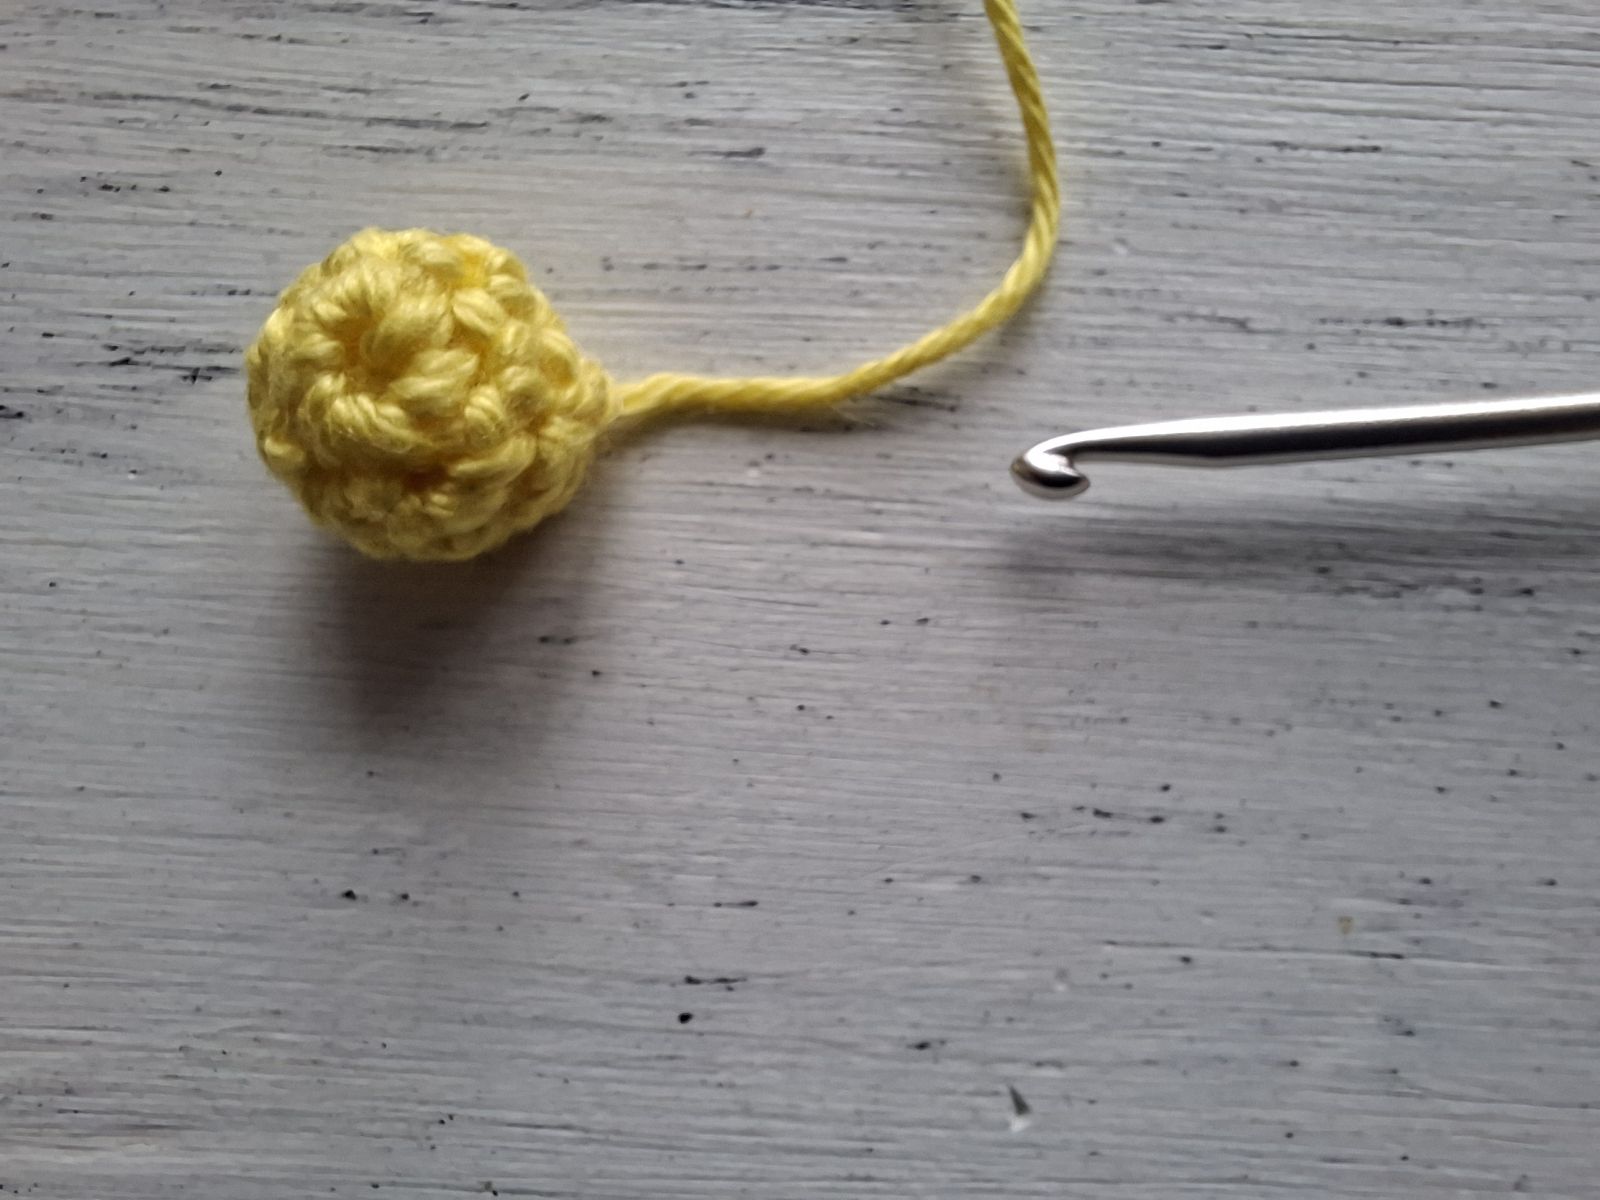
Round 1: 6 single crochets into a Magic Ring
Round 2: *single crochet in next stitch, increase*, repeat from* to* 6 times (9 stitches)
Round 3-4: single crochet in each of next 9 stitches
Fasten off, leaving a long tail for sewing.
ANTENNA (2x)
Start crocheting with brown yarn.
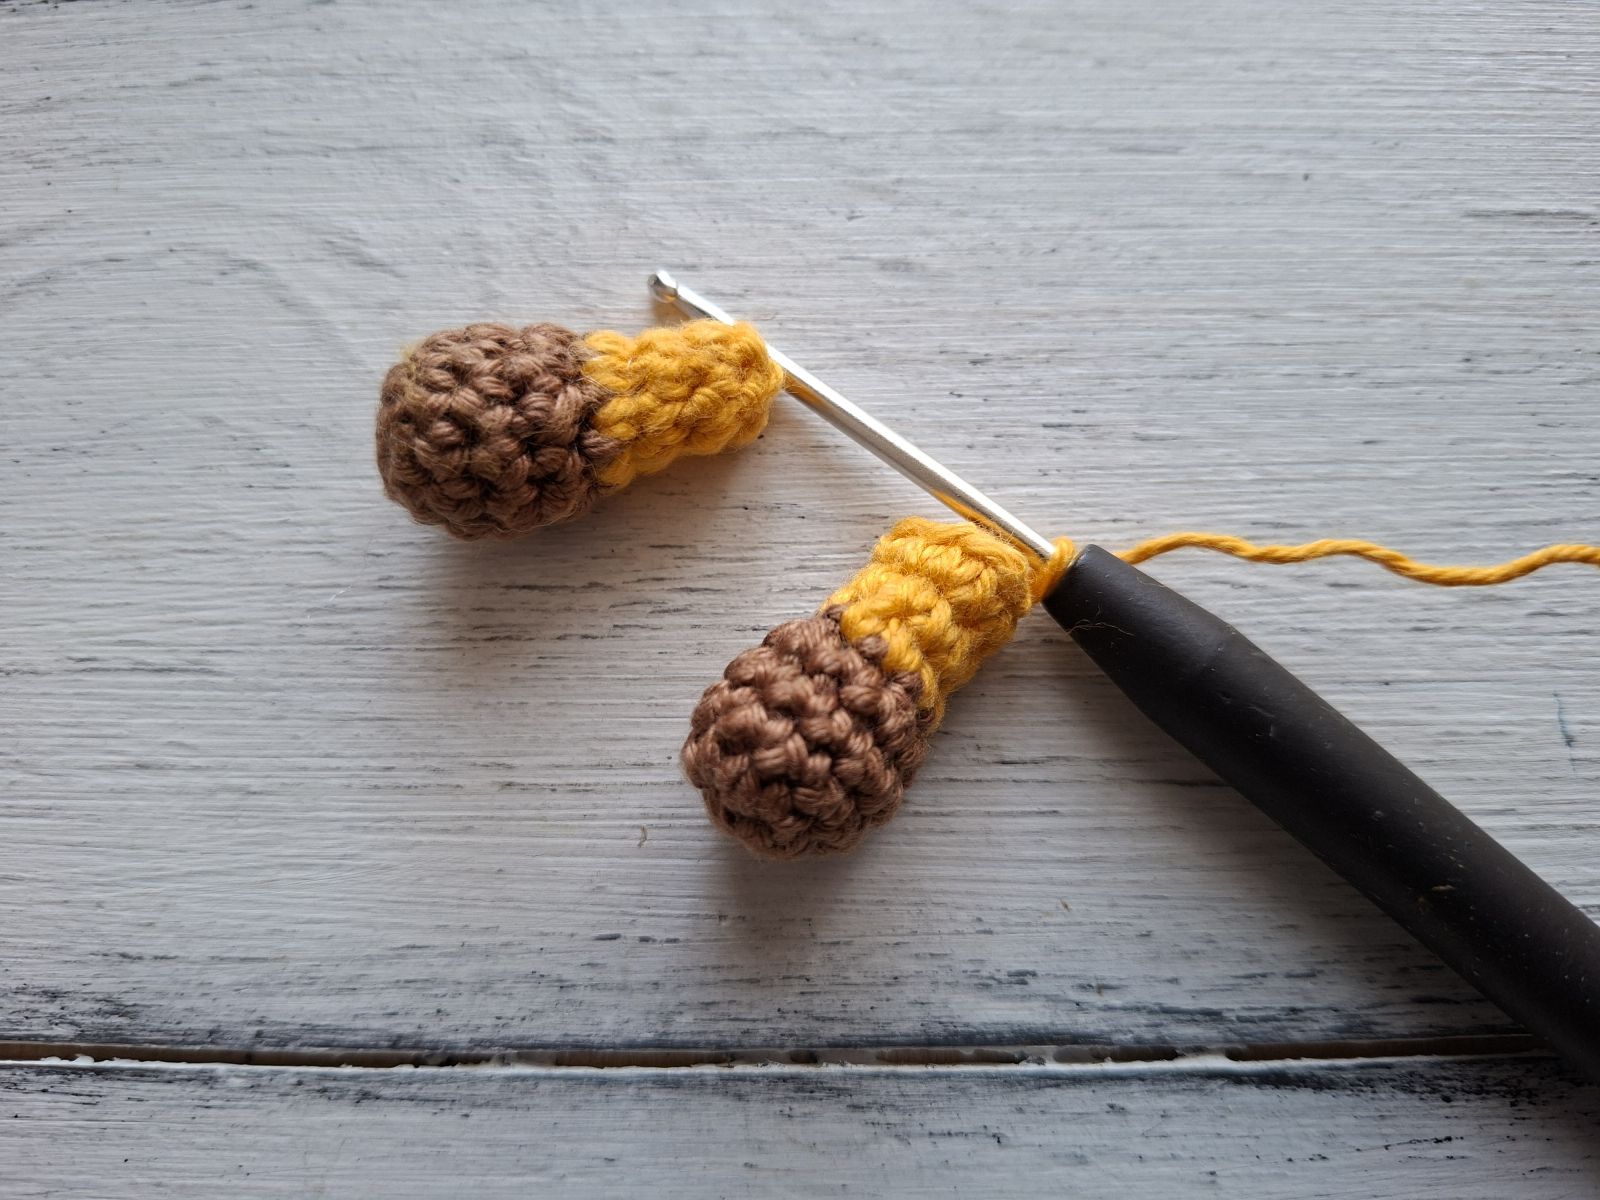
Round 1: 6 single crochets into Magic Ring.
Round 2: increase 6 times (12 stitches)
Rounds 3-4: single crochet in each of next 12 stitches
Round 5: *decrease, single crochet in the next stitch* (9 stitches)
Change the yarn color to yellow
Continue crocheting without decreasing:
Rounds 6-8: single crochet in each of next 9 stitches
Stuff slightly.
Fasten off leaving a long tail for sewing. Work the second antenna the same way.
CHEEK (2x)
Crochet with rose yarn
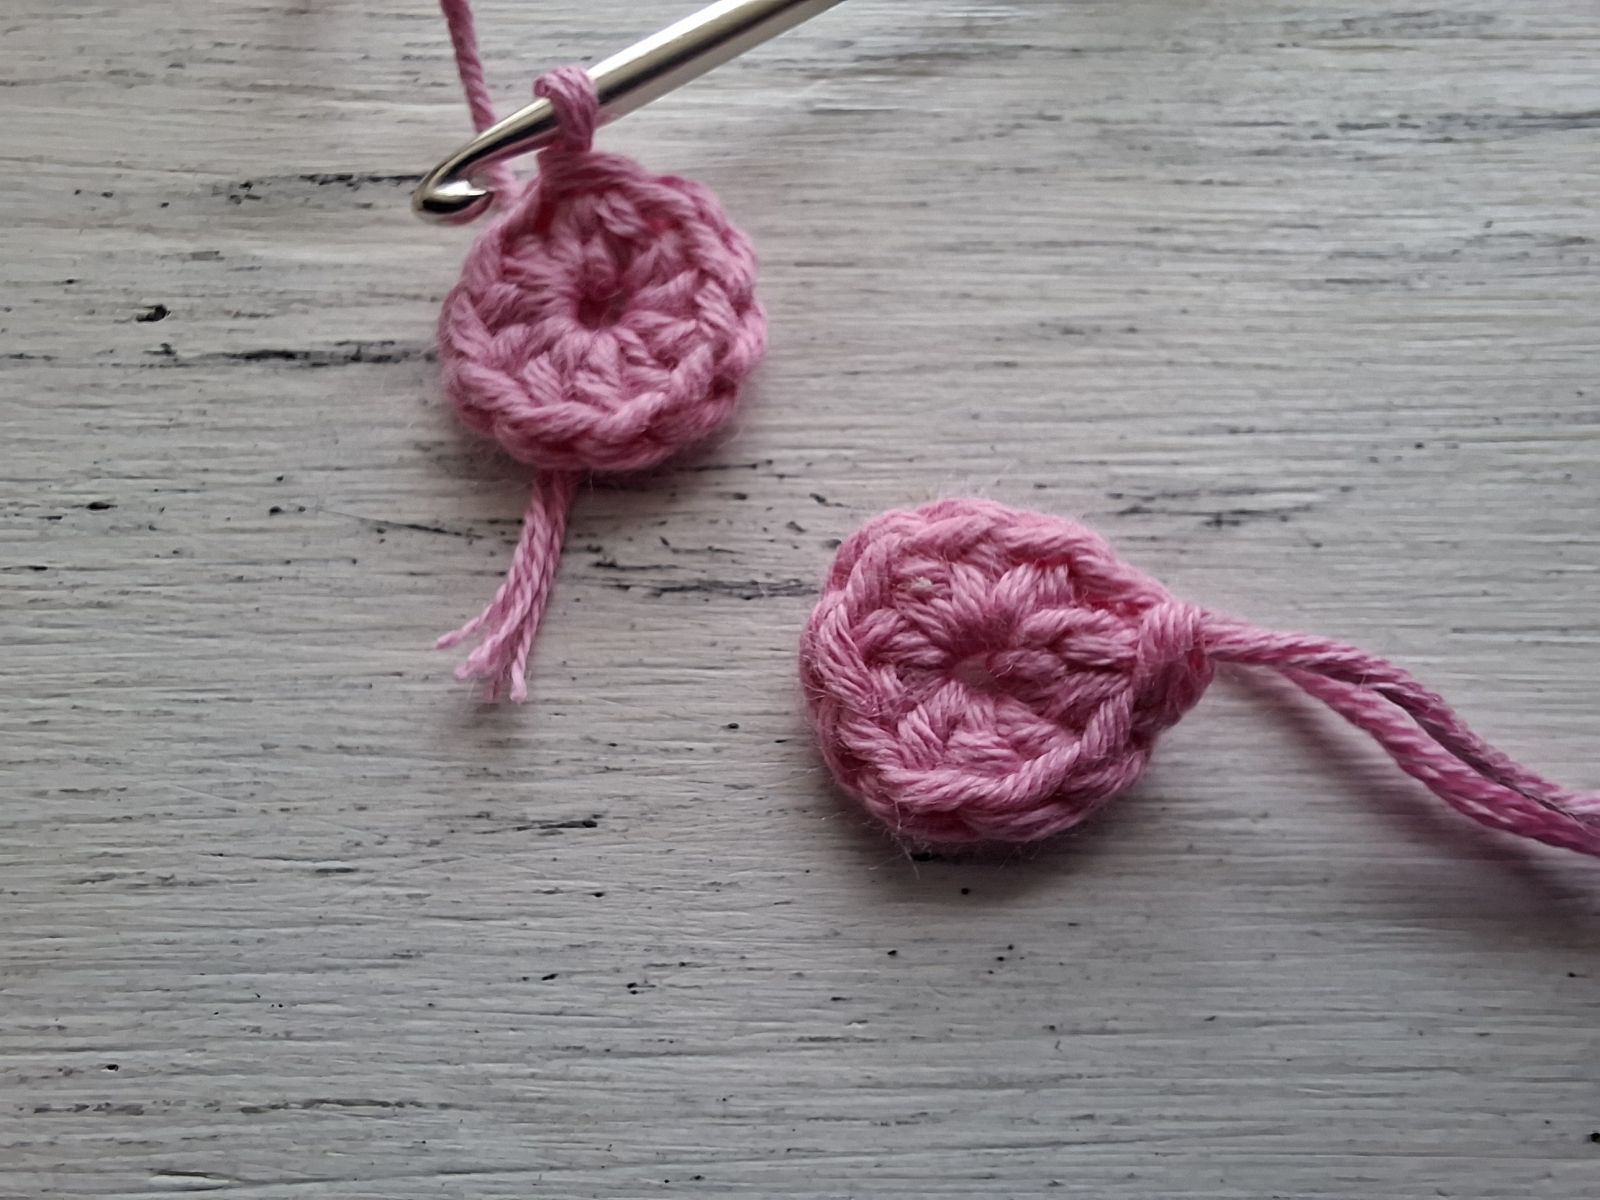
Work 10 half double crochets into a Magic ring.
Fasten off leaving a long tail for sewing. Work the second cheek the same way.
ASSEMBLY
Since all the elements of your amigurumi are crocheted, it´s time to sew them together. Use a blunt sewing needle.
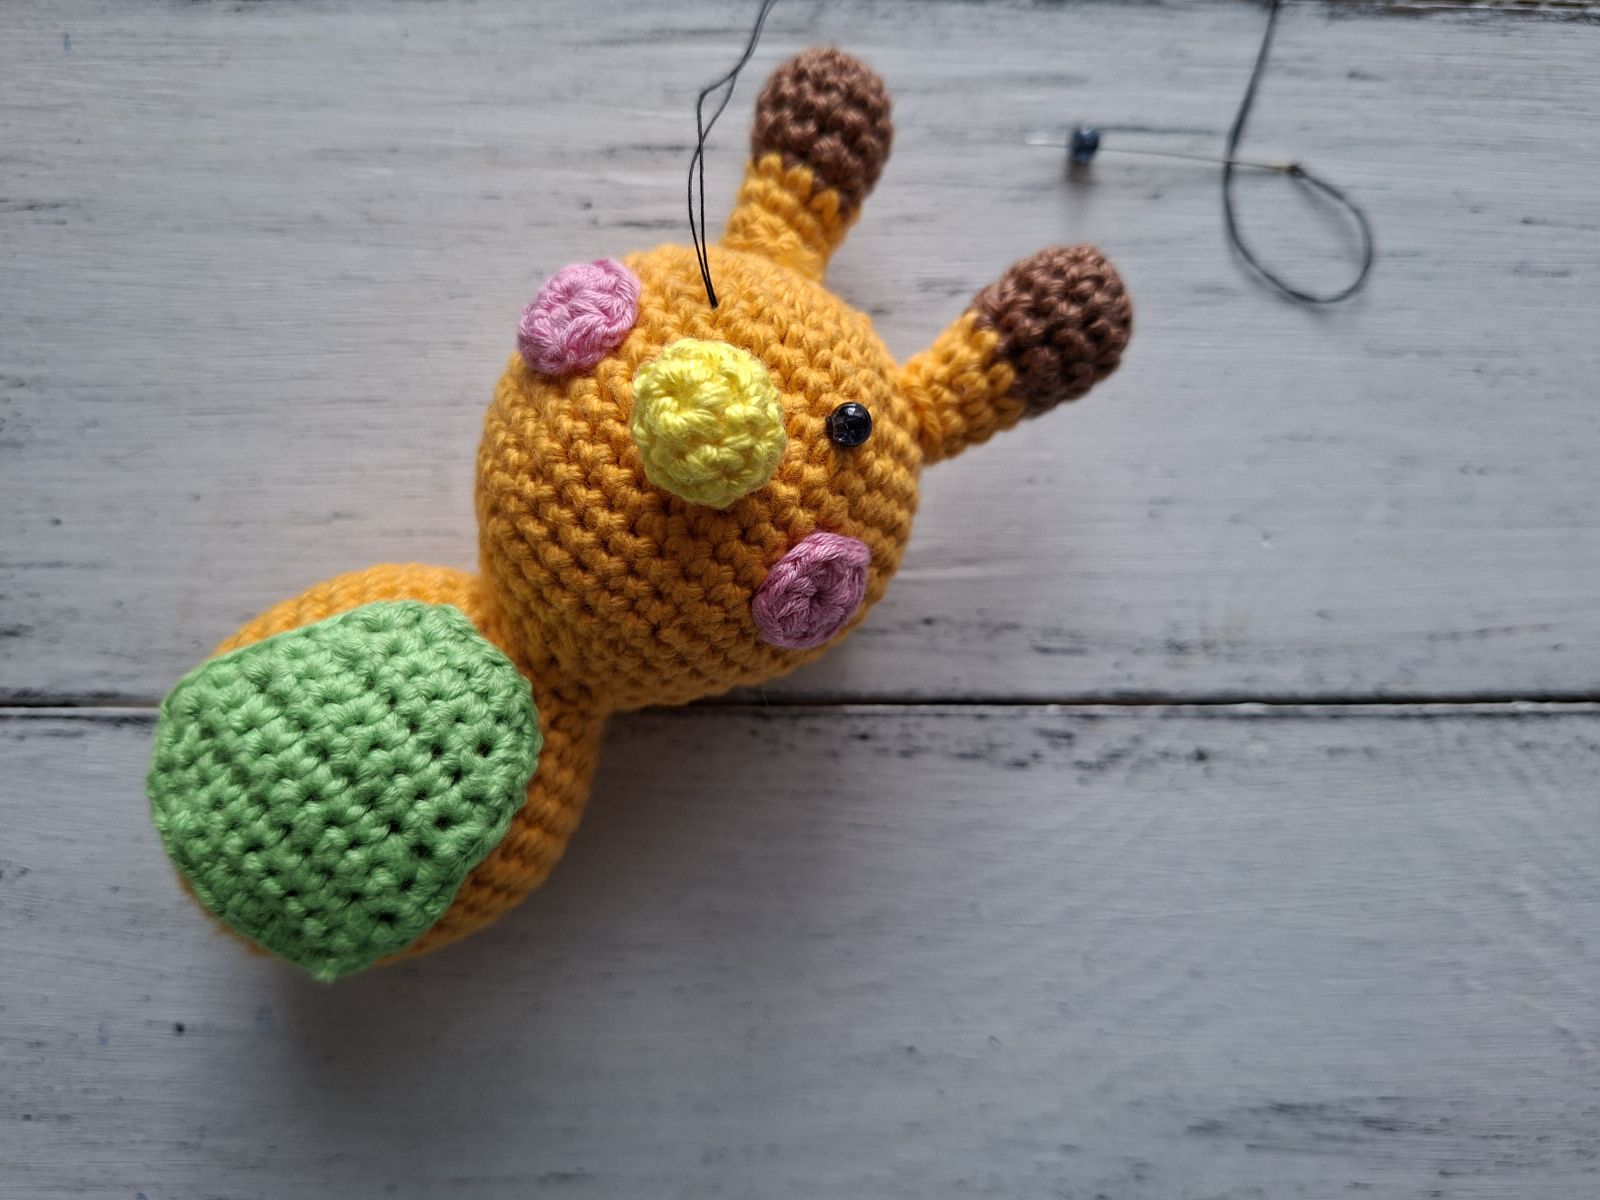
Antennas are attached to the head now. Position antennas first and using the yarn left sew them to the head of the amigurumi. Be sure to step back and take a look to make sure they are even. Attach the nose and cheeks to the head. Now sew the belly to the body.
Mark where you want the eyes to be placed with pins and sew them with the distance of 4-5 stitches to the head of your amigurumi.
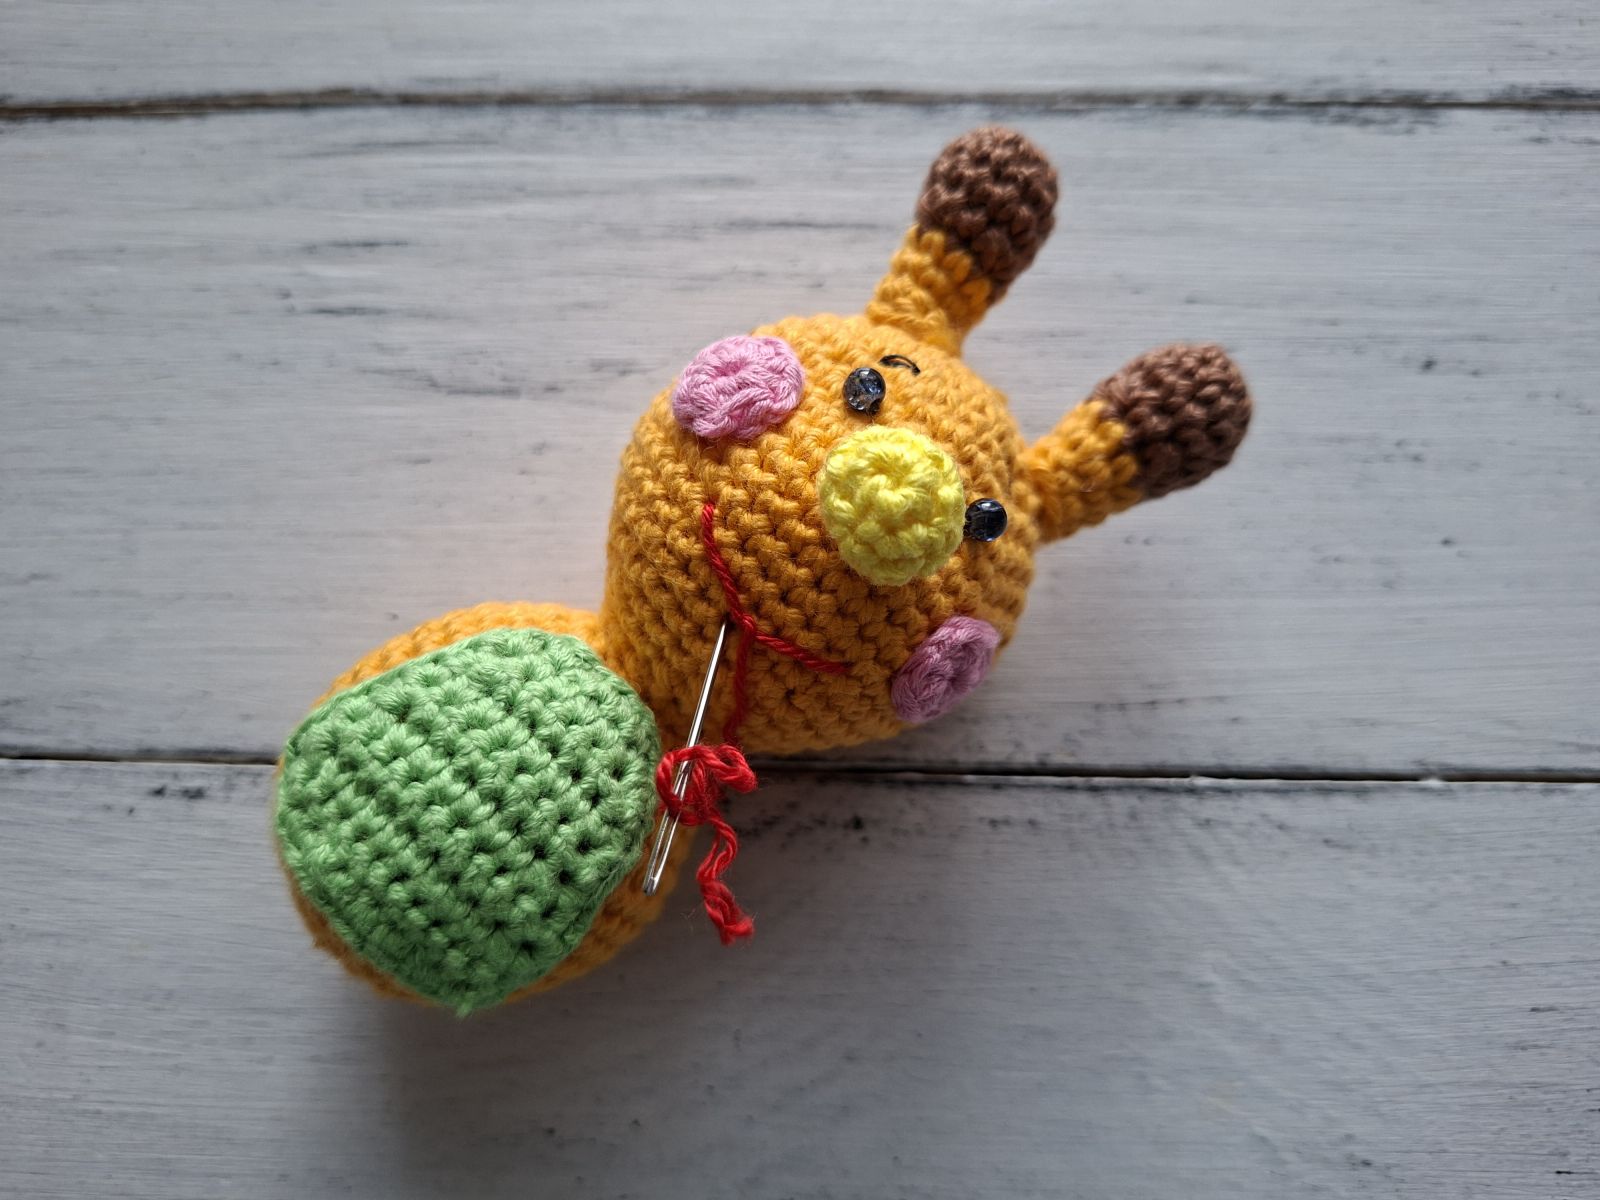
Embroider eyebrows with black colored yarn. You can also add eyelashes if desired. Hide the yarn tails inside the head.
Now embroider mouth with the red yarn. Insert the needle through the top of the head and pull it through leaving a little bit of a tail. Then insert the needle again and pull it through where you want your amigurumi´s mouth to be. At the end pull the needle out the same hole it originally went into, so that both yarn tails are coming out of the same hole. Tie a knot with both yarn tails, as close to the surface of the head as possible. Hide the yarn tails inside the head.
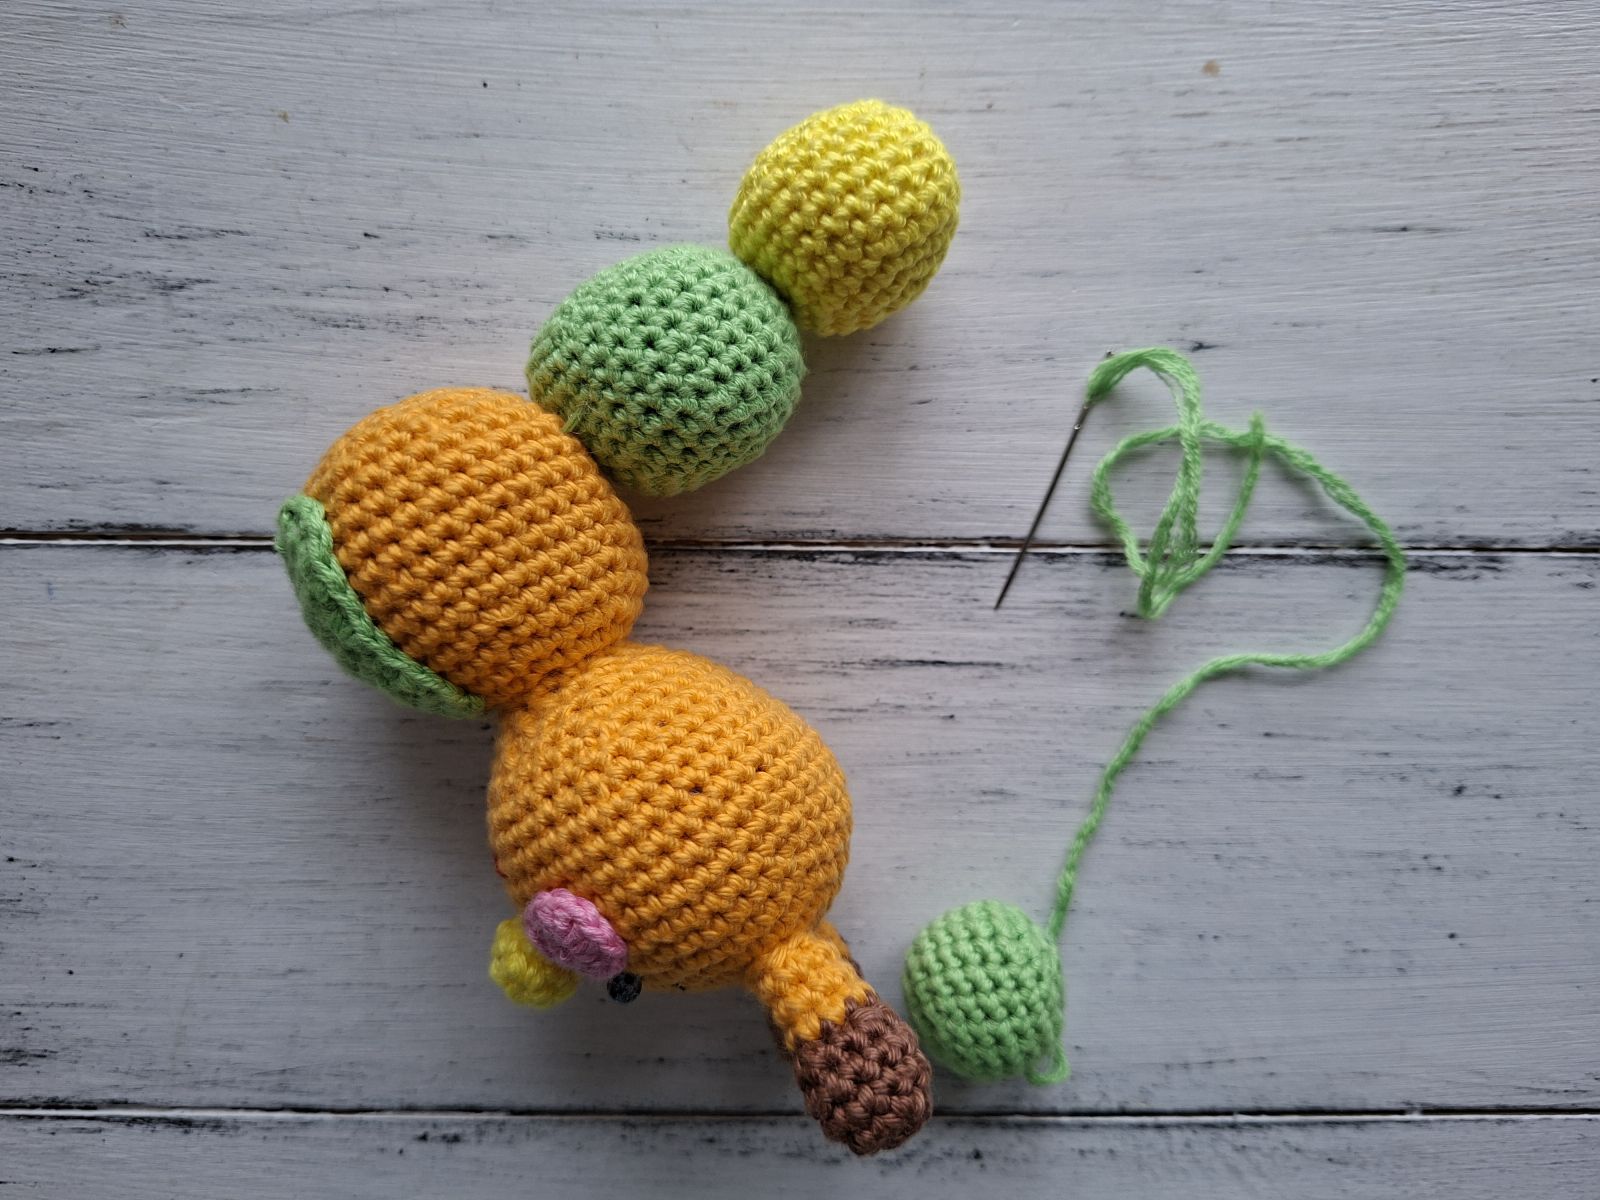
Attach all parts of the body as shown in the picture above. Hide all yarn ends.
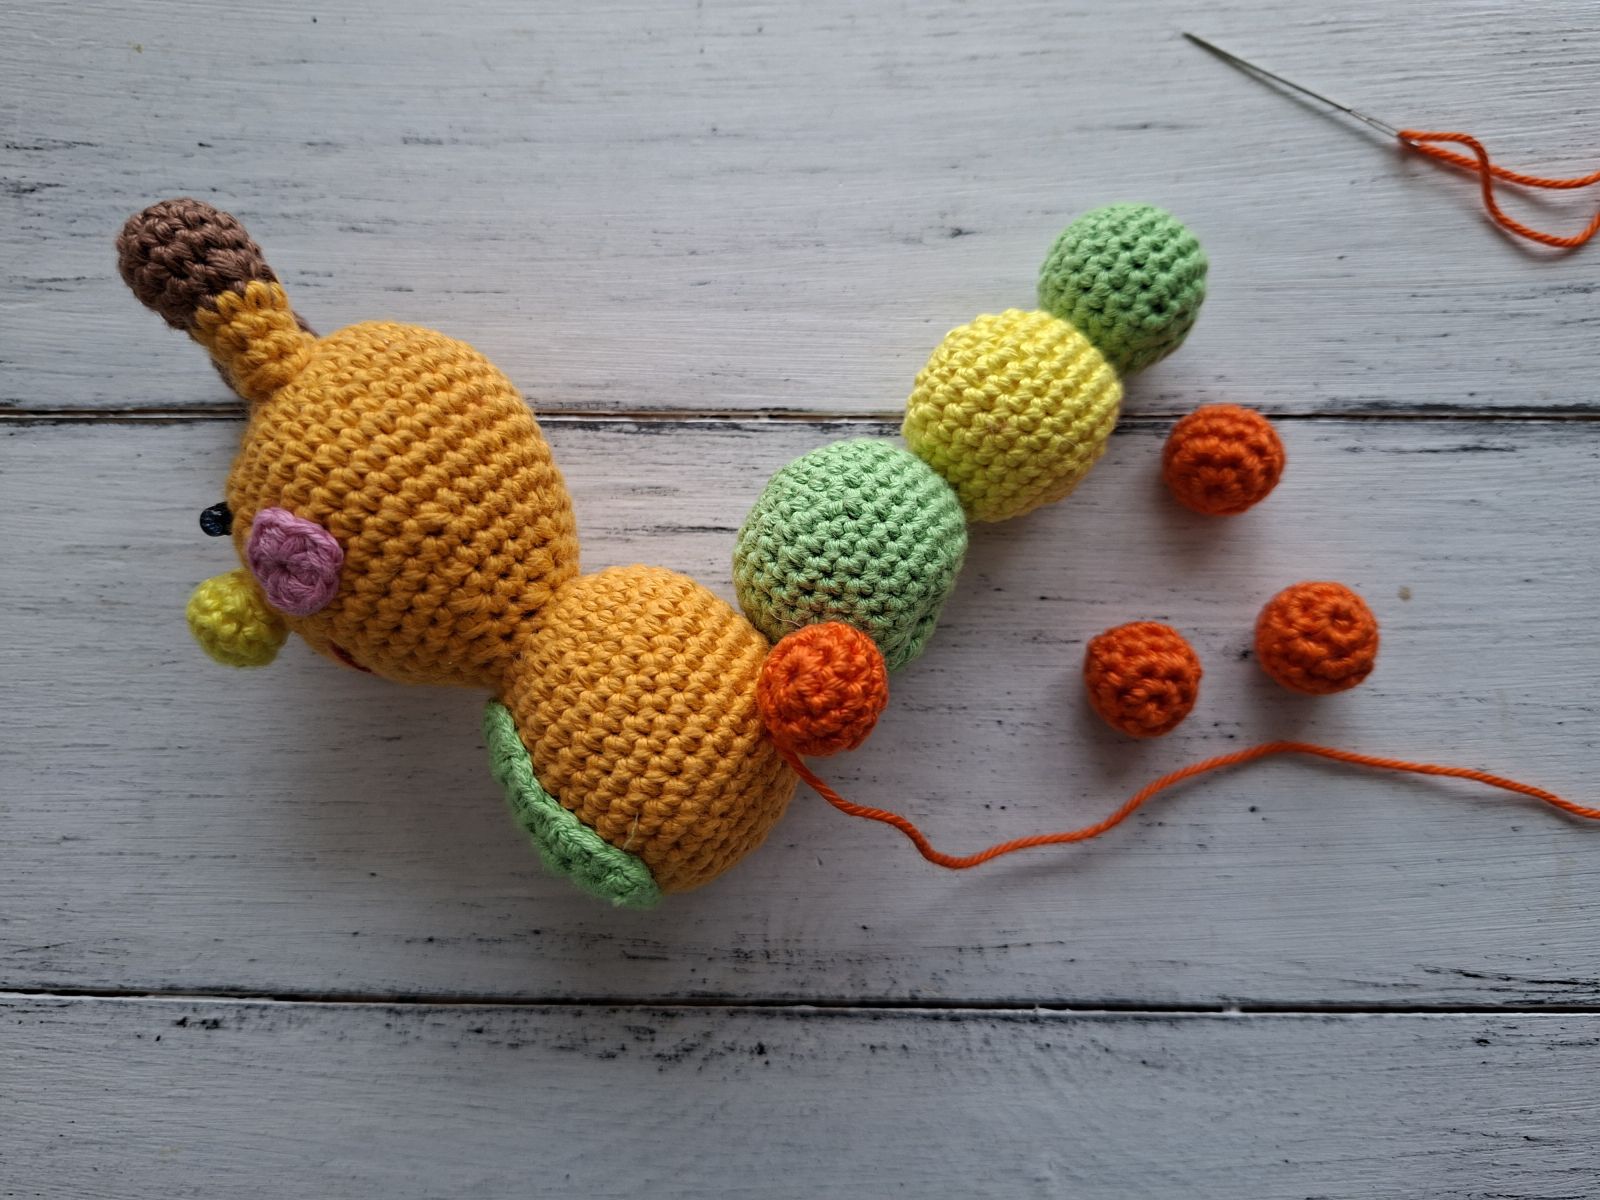
Legs are attached to the body now. Position legs first and using the yarn left sew them to the body of the amigurumi. Be sure to step back and take a look to make sure they are even.
Ready! Happy crocheting!
I hope you enjoyed crocheting the owl and found the pattern helpful. I would love to see your finished amigurumi, so share a picture here or on Instagram by tagging me @tansuluucrafthaus.
If you would like to share this pattern, please link to this page. Also, please credit me when using this pattern by tagging me @tansuluucrafthaus on Instagram. Feel free to contact me with any questions.
Thank you for stopping by and have a lovely day!


