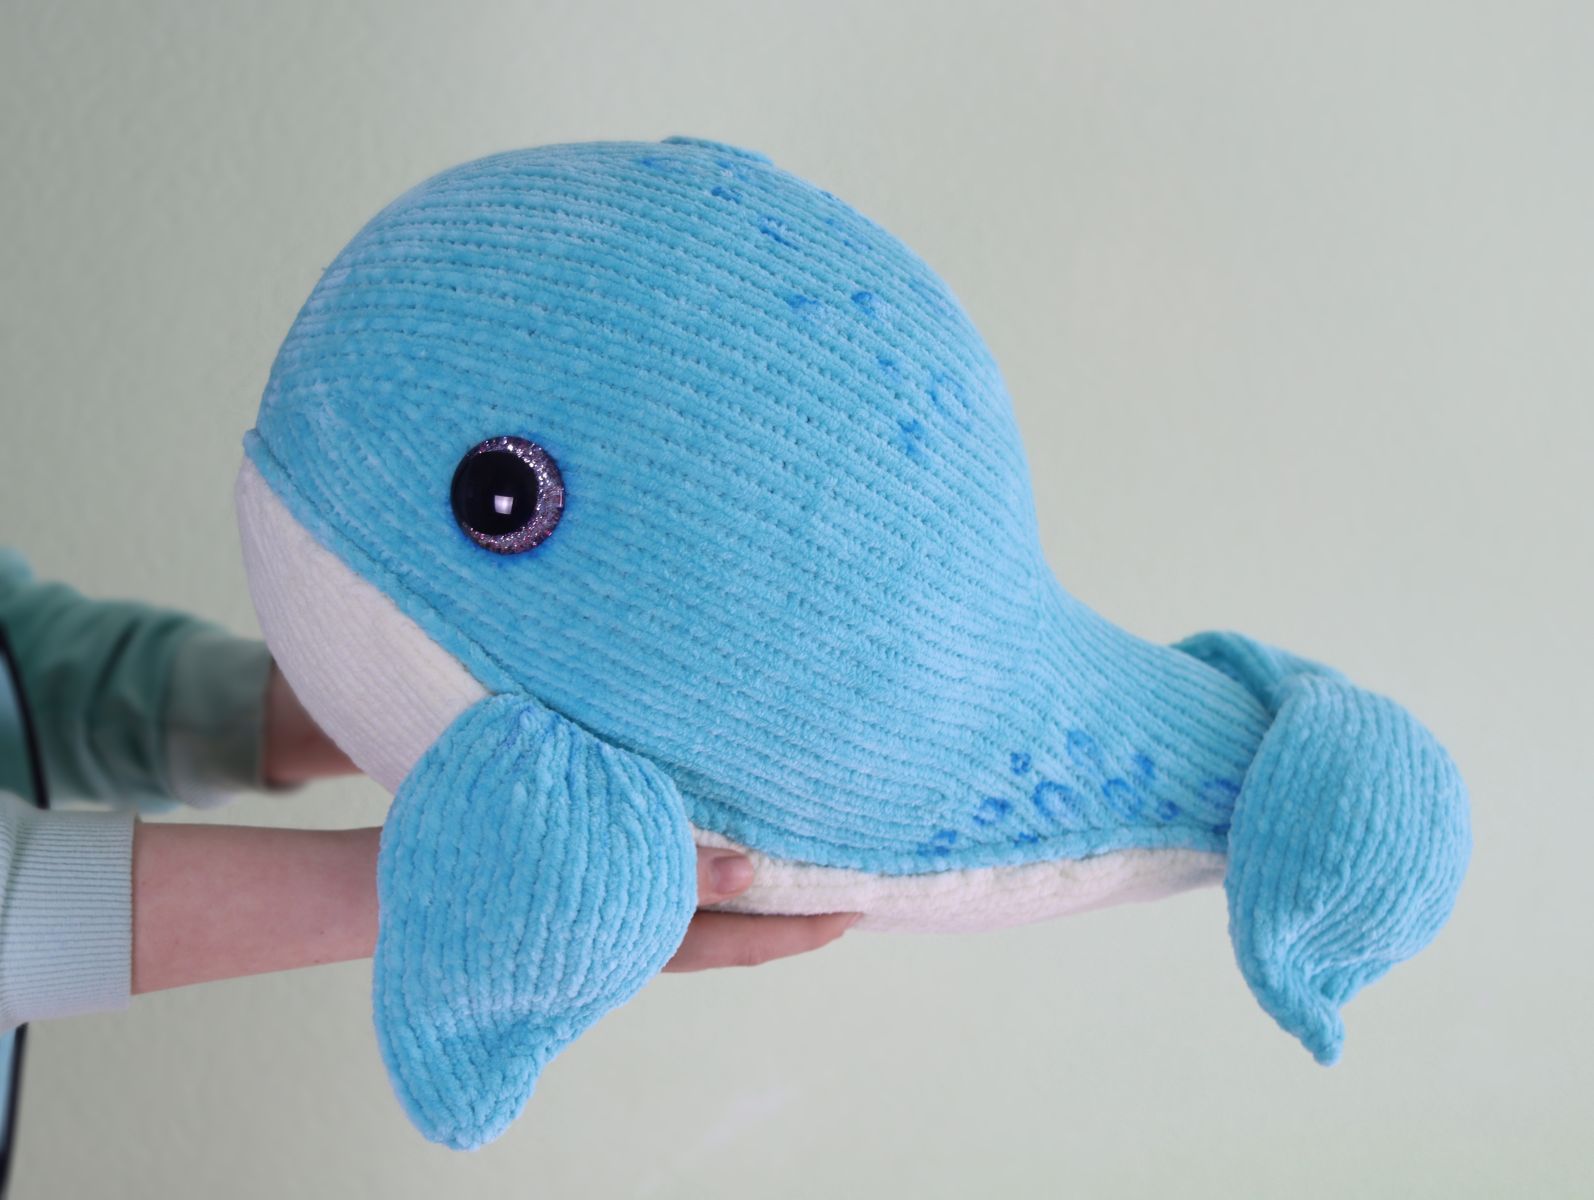
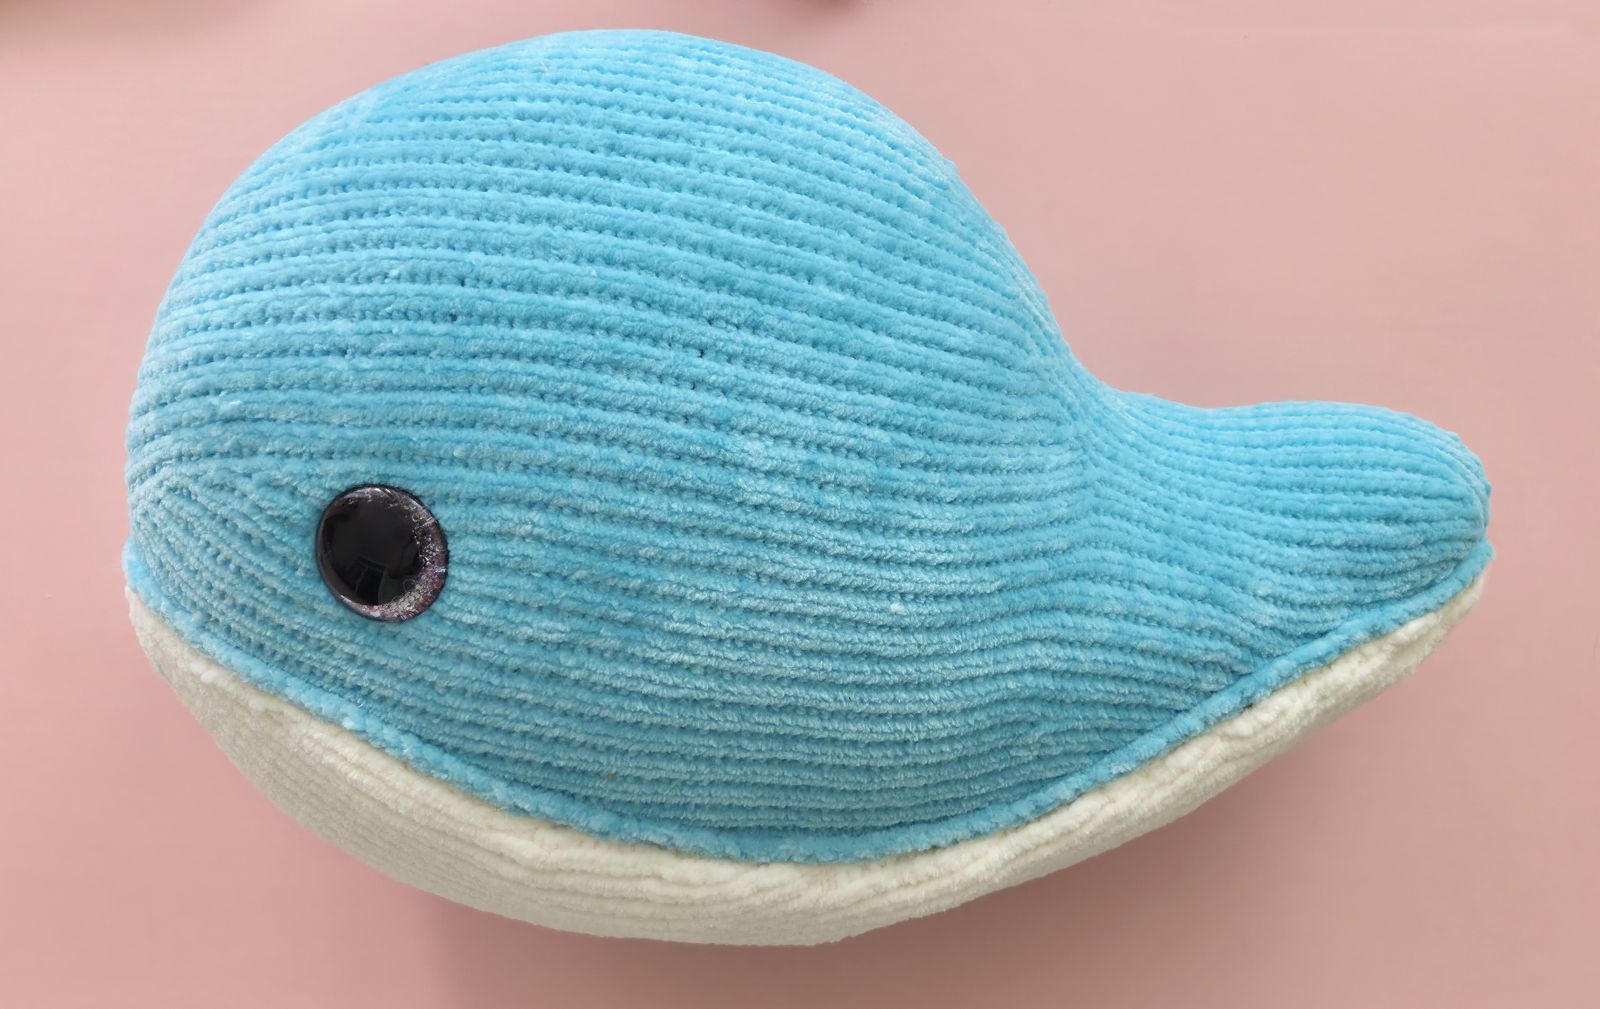
The Whale – A soft, cuddly friend
.JPG)
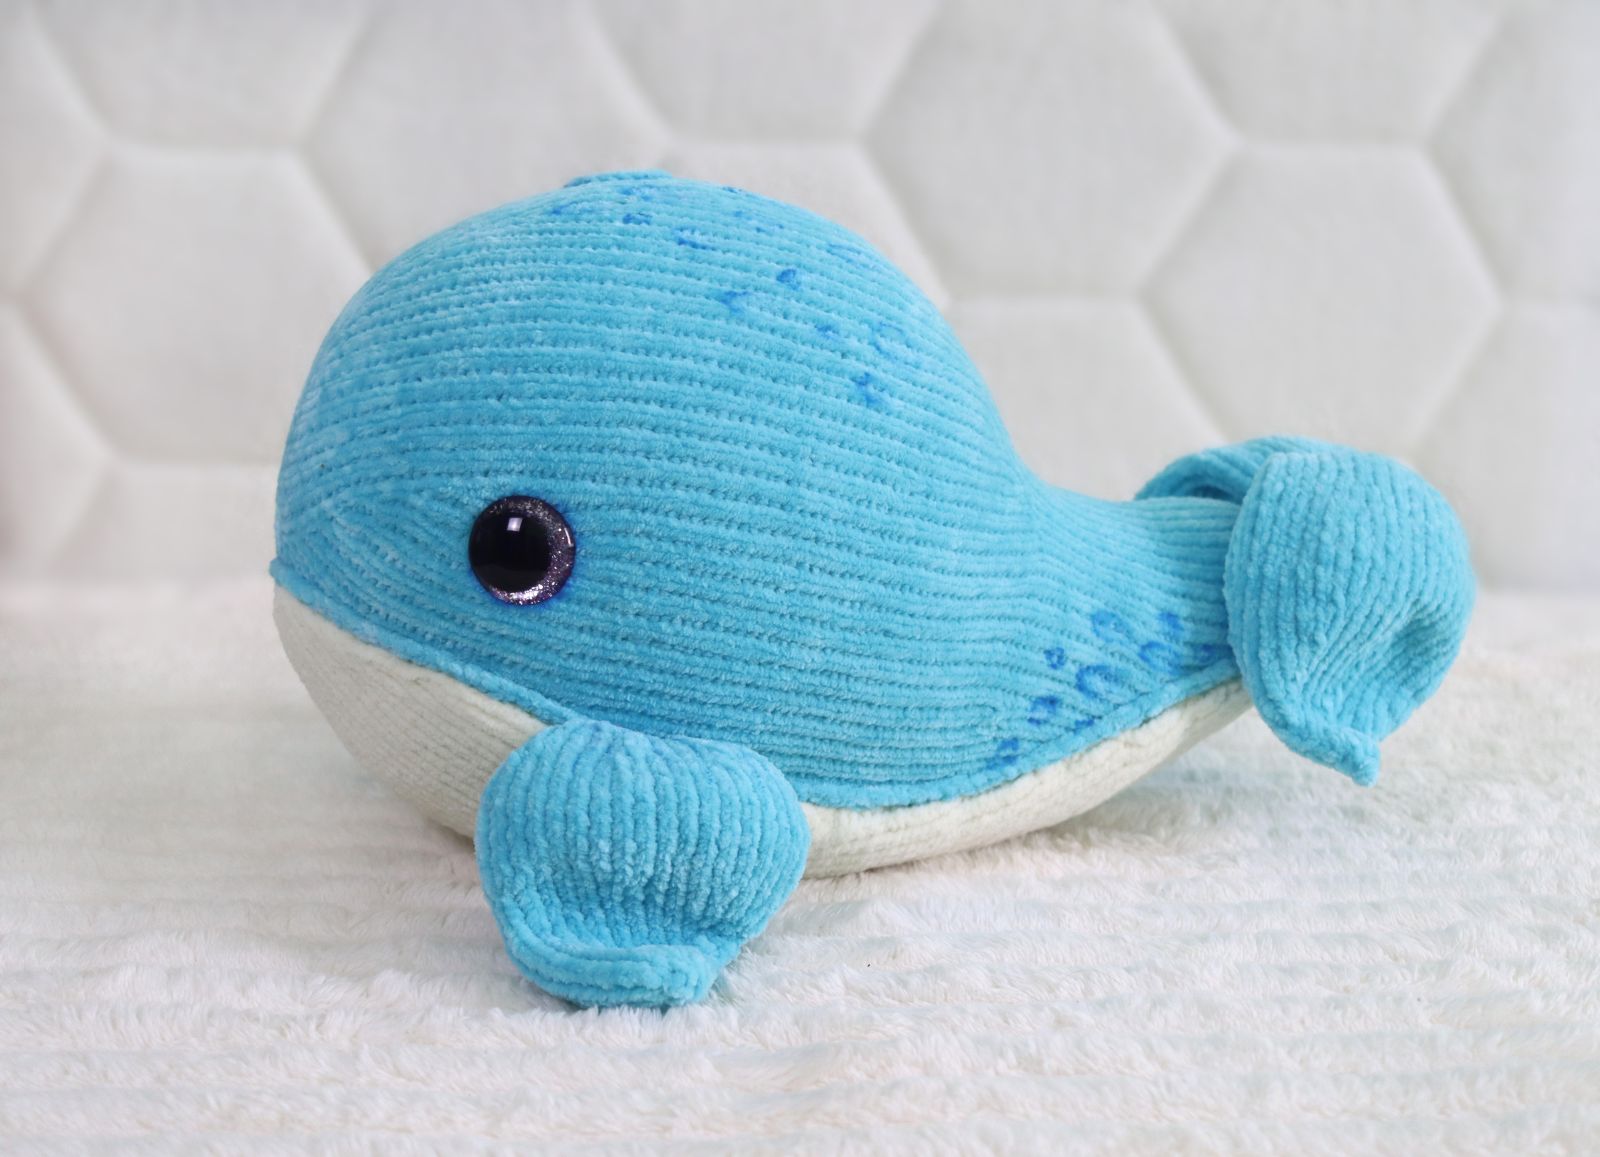
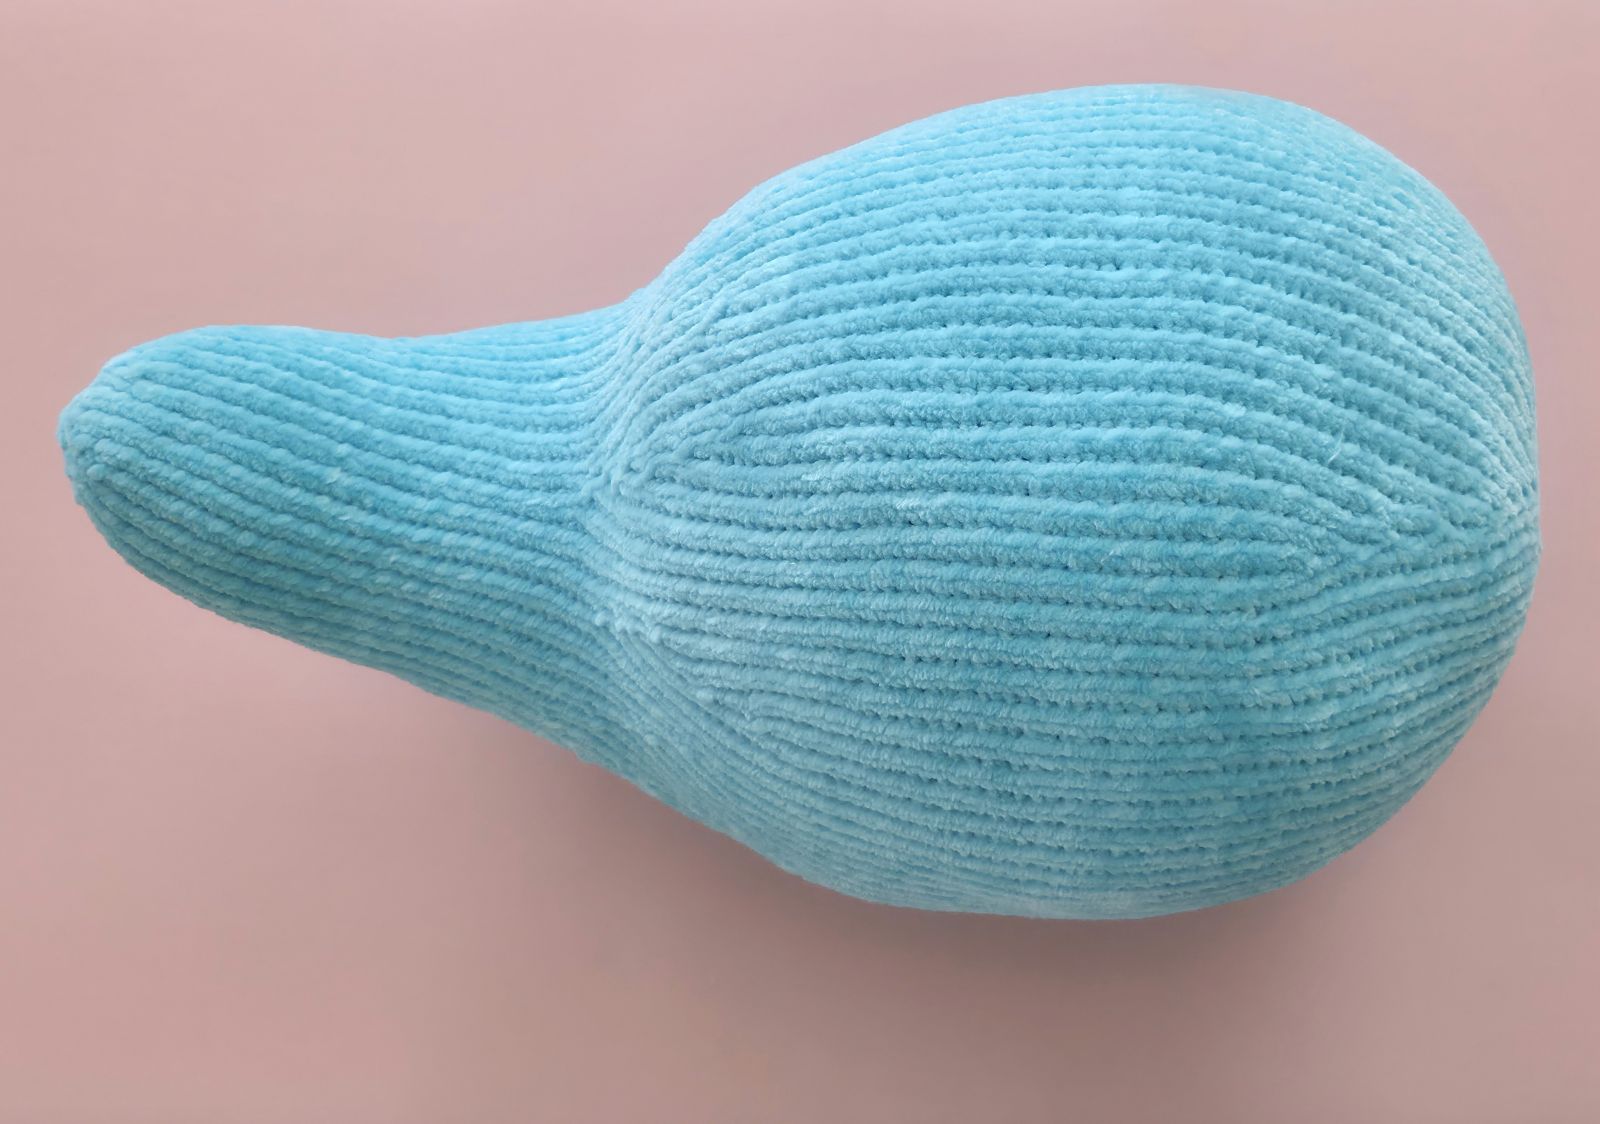
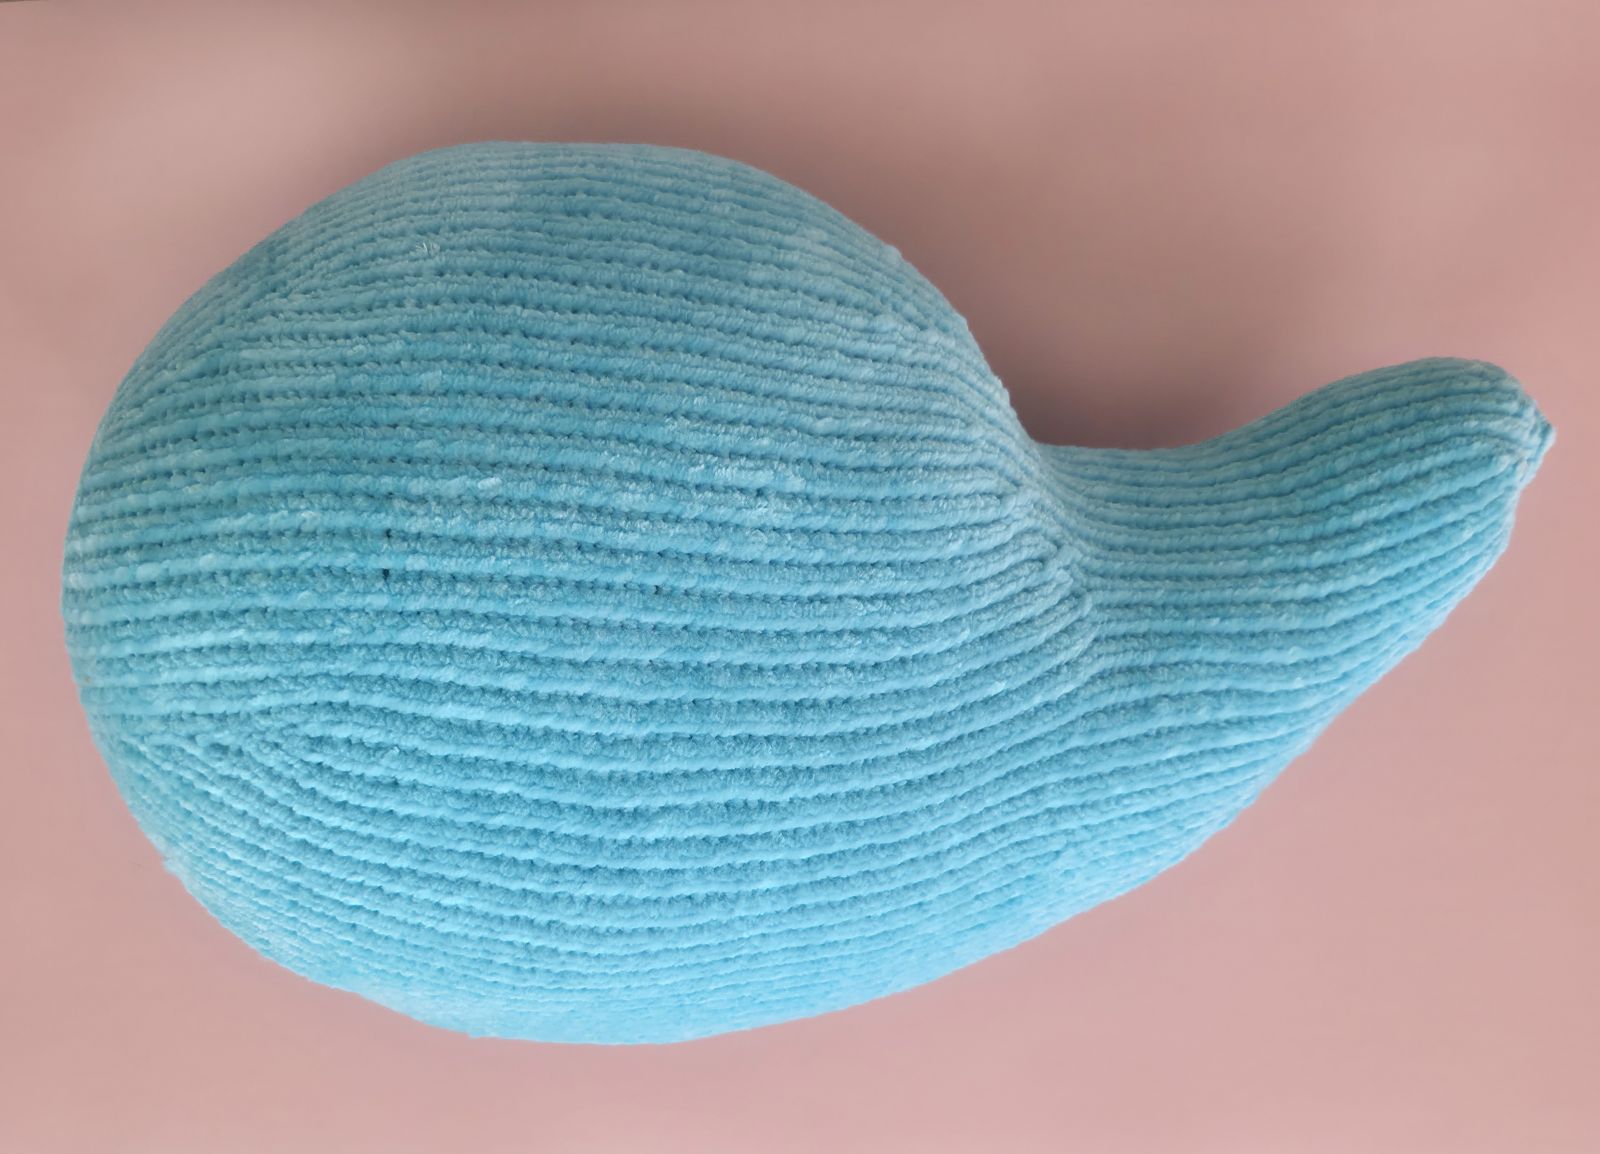
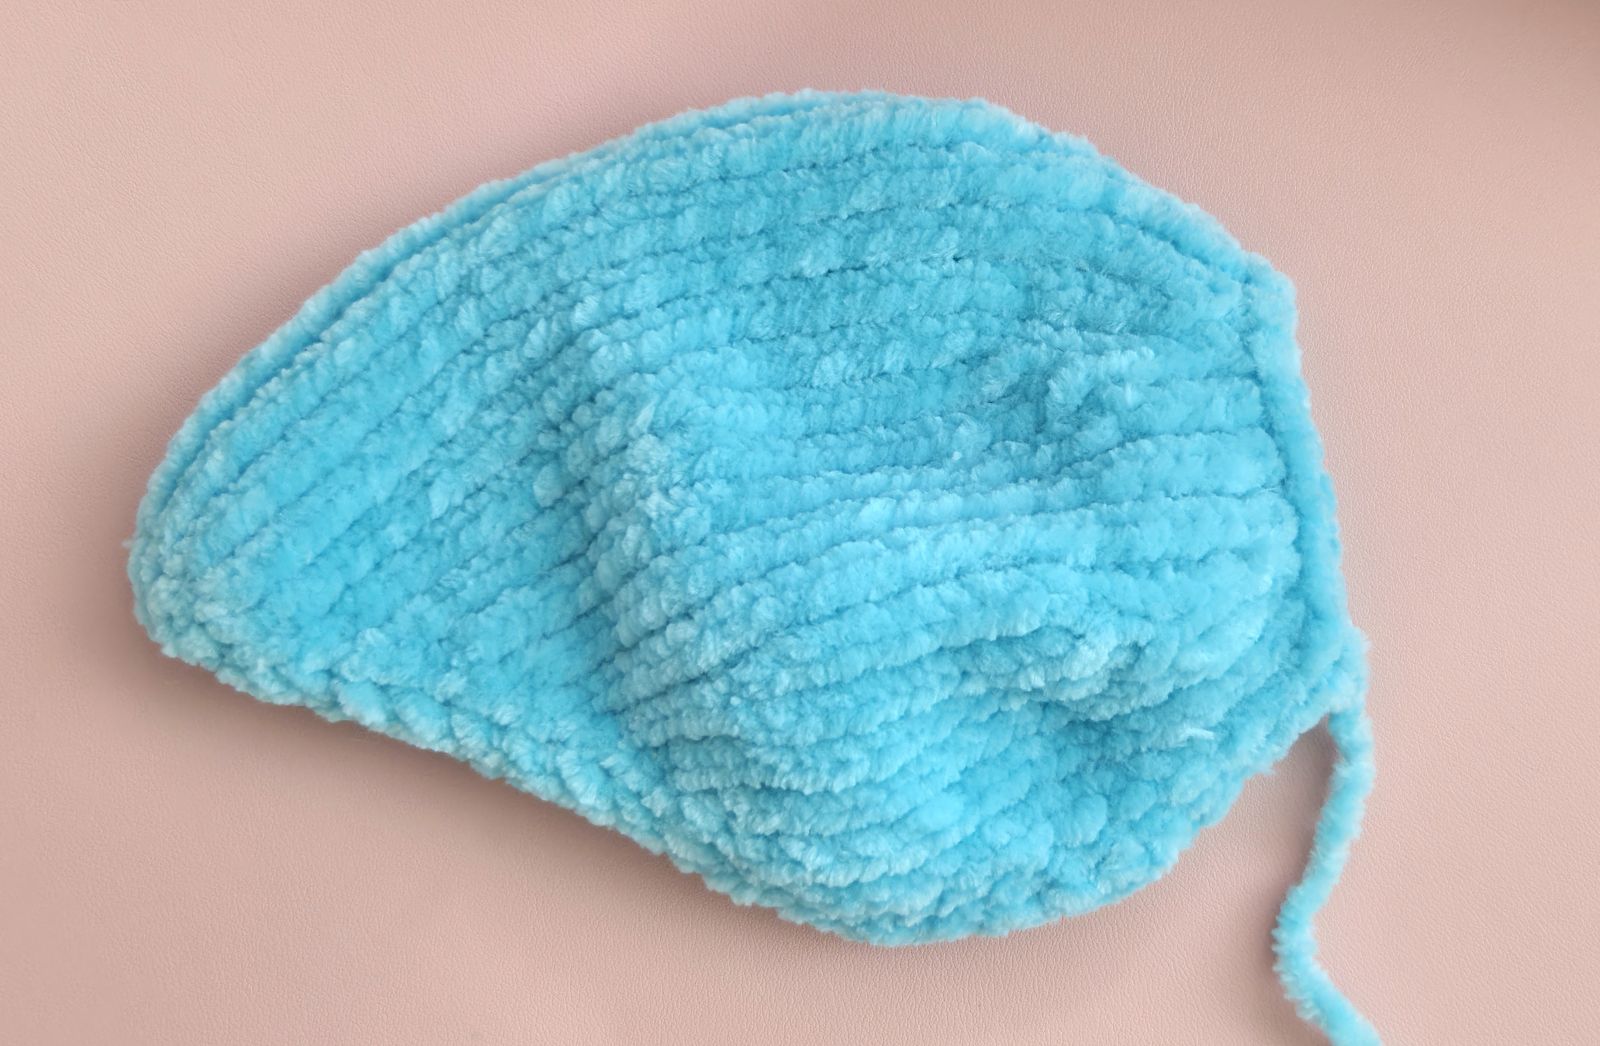
The whale is one of the most beloved stuffed animals among many children. It is knitted from soft chenille yarn and measures approximately 40 cm in size.
However, the size can be easily adjusted simply by varying the yarn thickness. Using thicker chenille yarn creates an exceptionally fluffy, voluminous whale—ideal as a gift for small children or for anyone who loves soft companions. Conversely, using thinner yarn will make the whale shrink proportionally, resulting in a smaller, more portable friend.
Knitting Instructions:
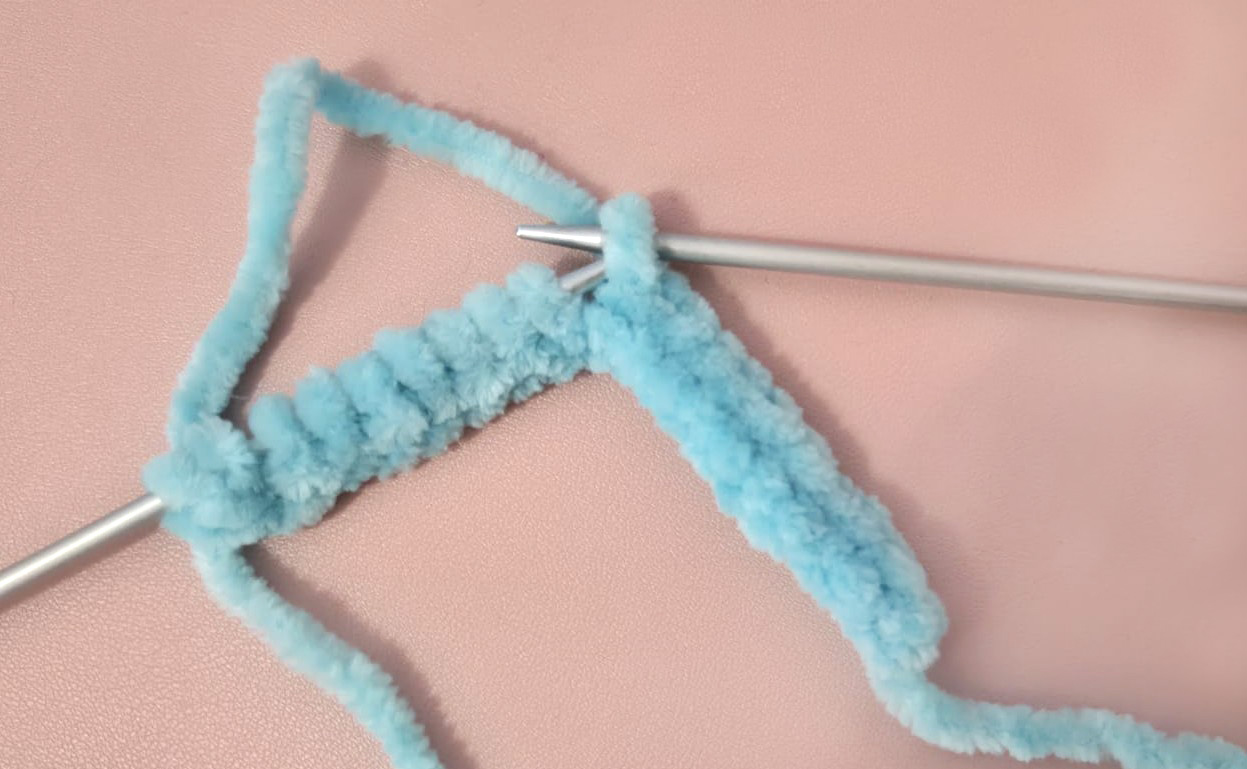
All parts are crafted entirely with two knitting needles.
Follow these steps:
First Row - Purl Stitches Begin by knitting the first row entirely in purl stitches. These will form the back side of your project, creating a neat texture.
Second Row - Knit Stitches In the second row, knit every stitch. This will produce a smooth, even front for your piece.
Repeating the Pattern Continue alternating between purl stitches in the odd-numbered rows and knit stitches in the even-numbered rows:
- Odd-numbered rows (e.g., 1st, 3rd, 5th): Work in purl stitches.
- Even-numbered rows (e.g., 2nd, 4th, 6th): Work in knit stitches.
This straightforward pattern of alternating knit and purl rows is ideal for beginners, offering an easy yet satisfying introduction to the craft.
Materials:
-Himalaya Dolphin Fine 100 gr/ 175 m.
Colour 80516- 180 gr. Colour 80506- 60 gr.
- Knitting needles 2,5 mm.
Please note that wool consumption can vary depending on the knitting style – those who knit loosely usually need a little more yarn than those who knit more tightly. You can choose the wool and knitting needles entirely according to your taste and experience.
✓ Safety eyes 30 mm
✓ Stuffing, tapestry needle.
Abbreviations:
Ch – Chain(s)
inc – increase
dec – decrease
X dec – X- times decrease
X inc – X- times increase
P – purl
K– knit (garter stitch)
.JPG)
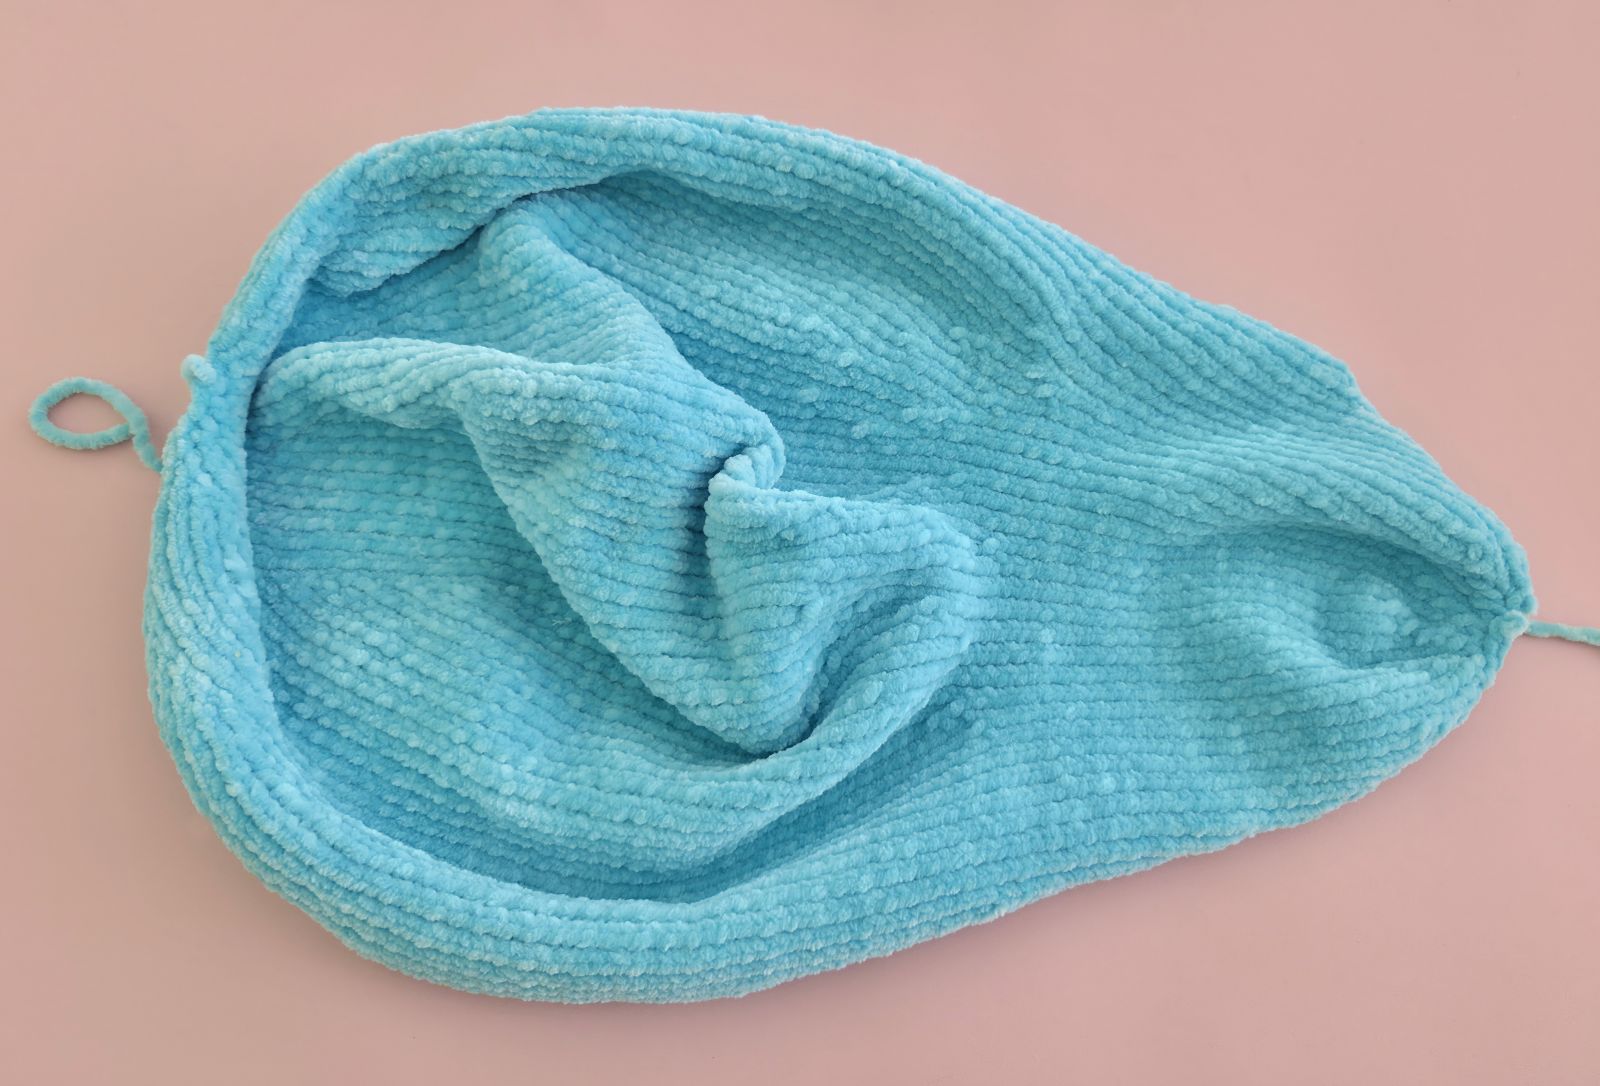
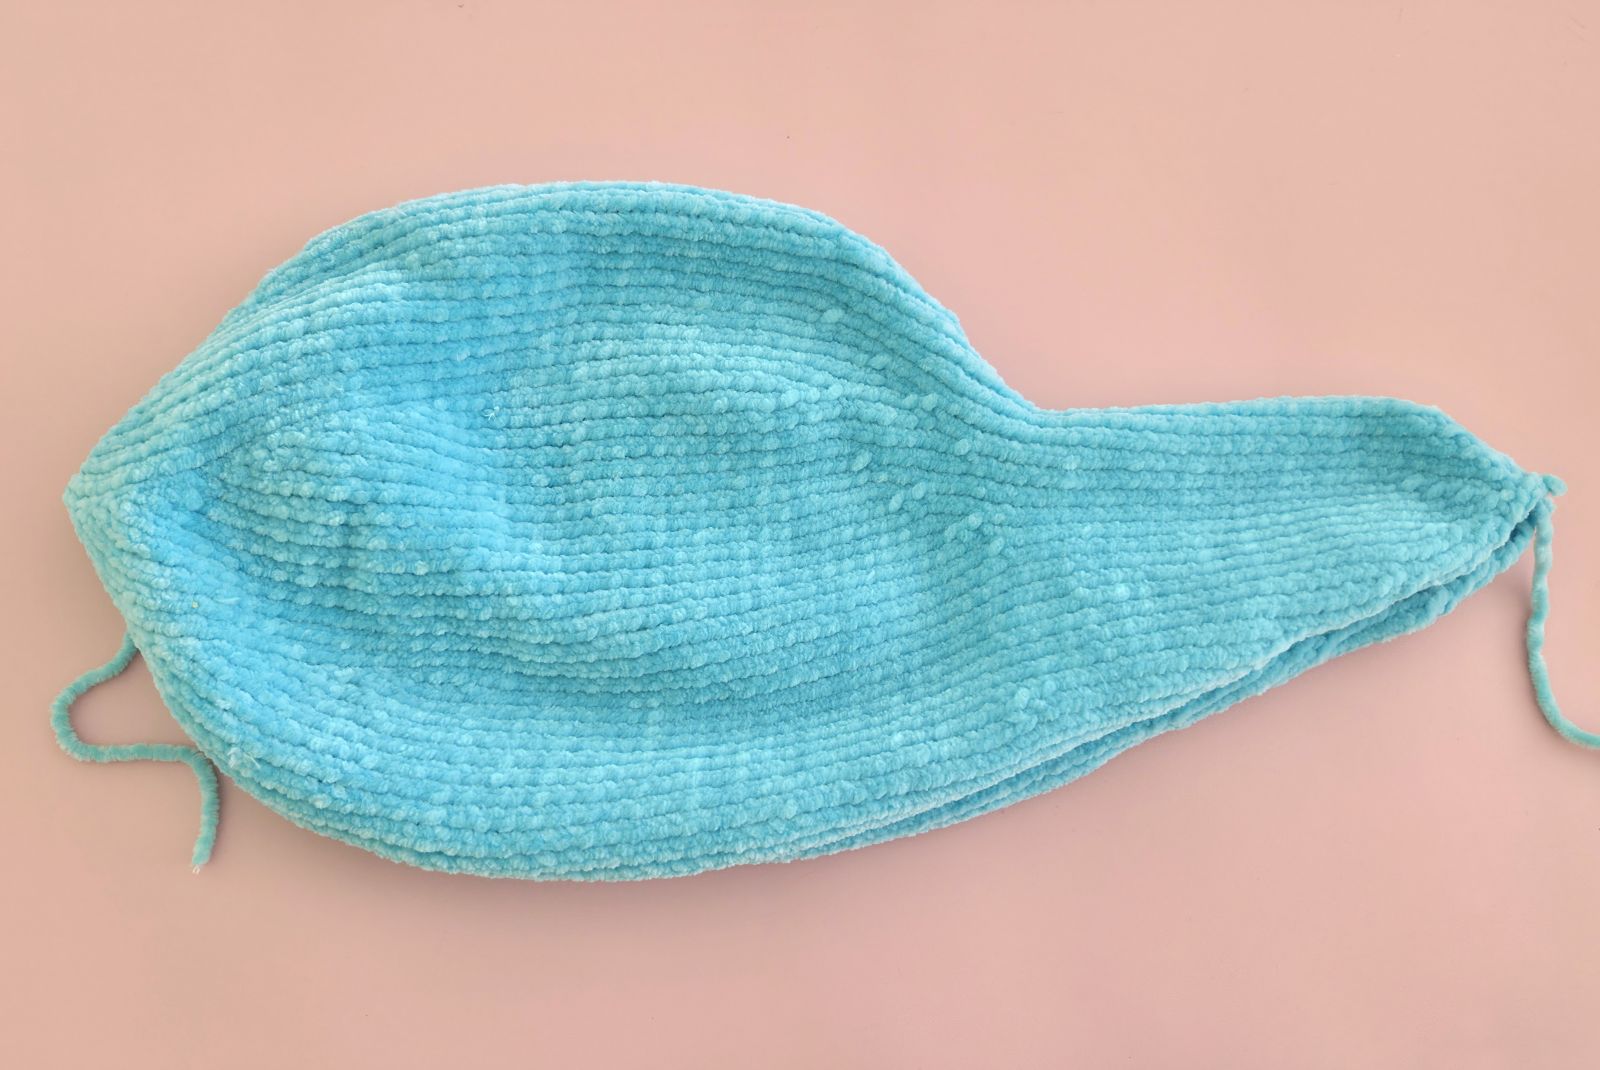
Body and Head (blue)
Cast on 6 stitches (ch) onto the knitting needle. Make sure the stitches are evenly stretched while knitting to ensure your knitted piece is nice and even.
1. 6 P (6)
2. 6 K inc. (12)
3. 12 P (12)
4. (1 K, 1 K inc)x 6 (18)
5. 18 P (18)
6. (2 K, 1 K inc)x 6 (24)
7. 24 P (24)
8. (3 K, 1 K inc)x 6 (30)
9. 30 P (30)
10. (4 K, 1 K inc)x 6 (36)
11. 36 P (36)
12. (5 K, 1 K inc)x 6 (42)
13. 42 P (42)
14. (6 K, 1 K inc)x 6 (48)
15. 48 P (48)
16. (7 K, 1 K inc)x 6 (54)
17. 54 P (54)
18. (8 K, 1 K inc)x 6 (60)
19. 60 P
20. (9 K, 1 K inc)x 6 (66)
21. 66 P
22. 66 K
23. 66 P
24. (10 K, 1 K inc)x 6 (72)
25. 72 P
26. 72 K
27. 72 P
28. (11 K, 1 K inc)x 6 (78)
29. 78 P
30. 78 K
31. 78 P
32. (12 K, 1 K inc)x 6 (84)
33. 84 P
34. (13 K, 1 K inc)x 6 (90)
Place a marker for the eyes in this row.
Knit a total of 35 rows in stockinette stitch:
On the front side of the work, knit all stitches across the row.
On the back side of the work, purl all stitches across the row.
35, 37, 39, 41, 43, 45, 47, 49, 51, 53, 55, 57, 59, 61, 63, 65, 67, 69 - 90 P
36, 38, 40, 42, 44, 46, 48, 50, 52, 54, 56, 58, 60, 62, 64, 66, 68 - 90 K
70. 28 K, 1 dec, 9 K, 1 dec, 9 K, 1 dec, 9 K, 1 dec, 27 K (86)
71. 86 P
72. 32 K, 1 dec, 18 K, 1 dec, 32 K (84)
73. 28 K, 1 dec, 7 K, 1 dec, 7 K, 1 dec, 7 K, 1 dec, 27 K (80)
74. 80 P
75. 80 K
76. 80 P
77. 24 K, 1 dec, 4 K, 1 dec, 4 K, 1 dec, 4 K, 1 dec, 4 K, 1 dec, 4 K, 1 dec, 24 K (74)
78. 74 P
79. 74 K
80. 74 P
81. 21 K, 1 dec, 4 K, 1 dec, 4 K, 1 dec, 4 K, 1 dec, 4 K, 1 dec, 4 K, 1 dec, 21 K (68)
82. 68 P
83. 21 K, 1 dec, 3 K, 1 dec, 3 K, 1 dec, 3 K, 1 dec, 3 K, 1 dec, 3 K, 1 dec, 21 K (62)
84. 62 P
85. 62 K
86. 62 P
87. 18 K, 1 dec, 3 K, 1 dec, 3 K, 1 dec, 3 K, 1 dec, 3 K, 1 dec, 3 K, 1 dec, 18 K (56)
88. 56 P
89. 18 K, 1 dec, 16 K, 1 dec, 18 K (54)
90. (7 K, 1 dec)x 6 (48)
91. 48 P
92. 48 K
93. 48 P
94. 48 K
95. 48 P
96. 48 K
97. 48 P
98. 1 K, 1 dec, 42 K, 1 dec, 1 K (46)
99. 46 P
100. 1 K, 1 dec, 40 K, 1 dec, 1 K (44)
101. 44 P
102. 1 K, 1 dec, 38 K, 1 dec, 1 K (42)
103. 42 P
104. 42 K
105. 42 P
106. 1 K, 1 dec, 36 K, 1 dec, 1 K (40)
107. 40 P
108. 1 K, 1 dec, 34 K, 1 dec, 1 K (38)
109. 38 P
110. 1 K, 1 dec, 32 K, 1 dec, 1 K (36)
111. 36 P
112. 1 K, 1 dec, 30 K, 1 dec, 1 K (34)
113. 34 P
114. 34 K
115. 34 P
116. 34 K
117. 34 P
118. 1 K, 1 dec, 28 K, 1 dec, 1 K (32)
119. 32 P
120. 1 K, 1 dec, 26 K, 1 dec, 1 K (30)
121. 30 P
122. 30 K
123. 30 P
124. (3 K, 1 dec)x6 (24)
125. 24 P
126. (2 K, 1 dec)x6 (18)
127. 18 P
128. (1 K, 1 dec)x6 (12)
129. 12 P
130. 6 dec
Finally, bind off the remaining stitches. Next, sew the body together using the same yarn. Ensure that the seam is neat and even; it runs along the underside of the whale’s belly. As you sew the body, gradually stuff it with fiberfill to create a smooth, uniform shape.I began sewing at the tail end and worked my way forward toward the head. Leave a small opening at the head to allow for attaching the safety eyes later on.
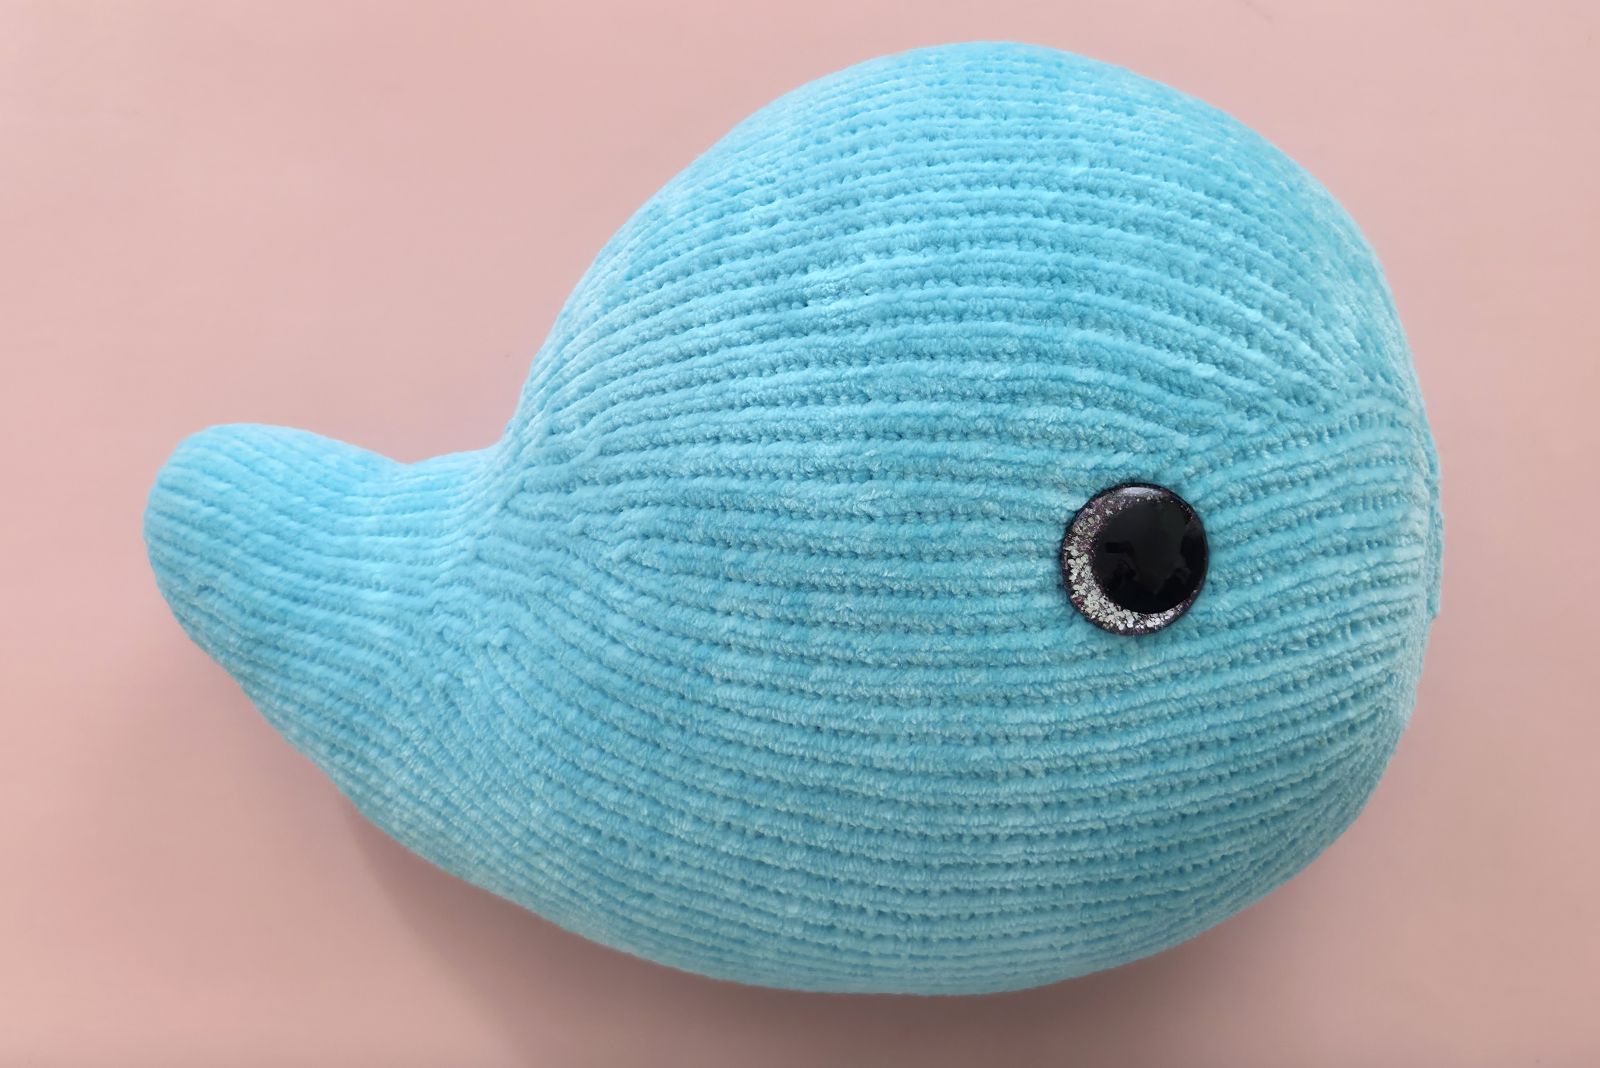
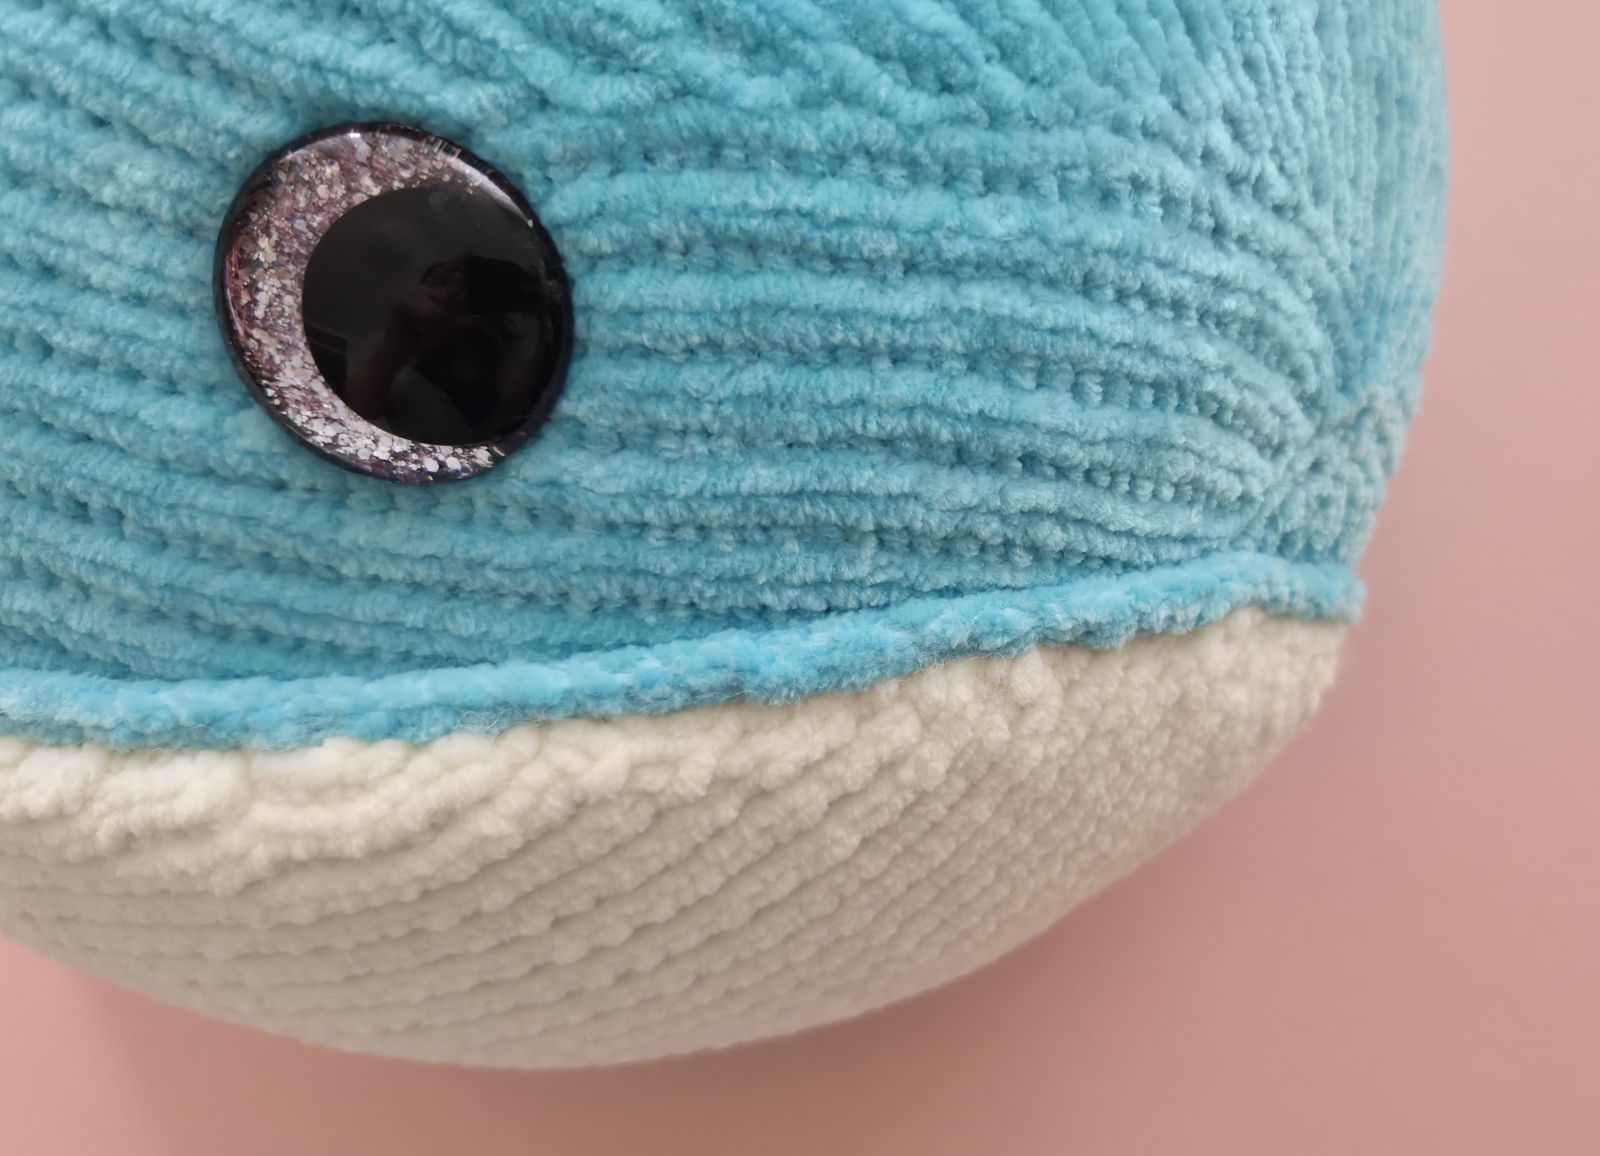
On my whale, the eyes are positioned at approximately Round 35. However, feel free to experiment with different placements to see what looks best. The placement and type of eyes significantly influence the whale’s facial expression. It is worth testing various options—especially once the whale has been stuffed—so you can fine‑tune the expression to perfection.
I used safety eyes with a rim. A particularly nice feature of this style is that, once attached, the eyes nestle slightly into the knitted fabric. This effect is created both by the thicker rim of the eye itself and by the securing pice on the inside, which gently presses the eye into the material and ensures a secure fit without the need to create indentations beforehand.
Carefully insert the safety eyes through the stitches at Round 35, then secure them on the inside using the corresponding securing. Afterward, check thoroughly that the eyes are firmly seated and cannot be pulled out—either by tugging on them or during play. Loose eyes pose a safety risk for children, so taking extra care here is essential.
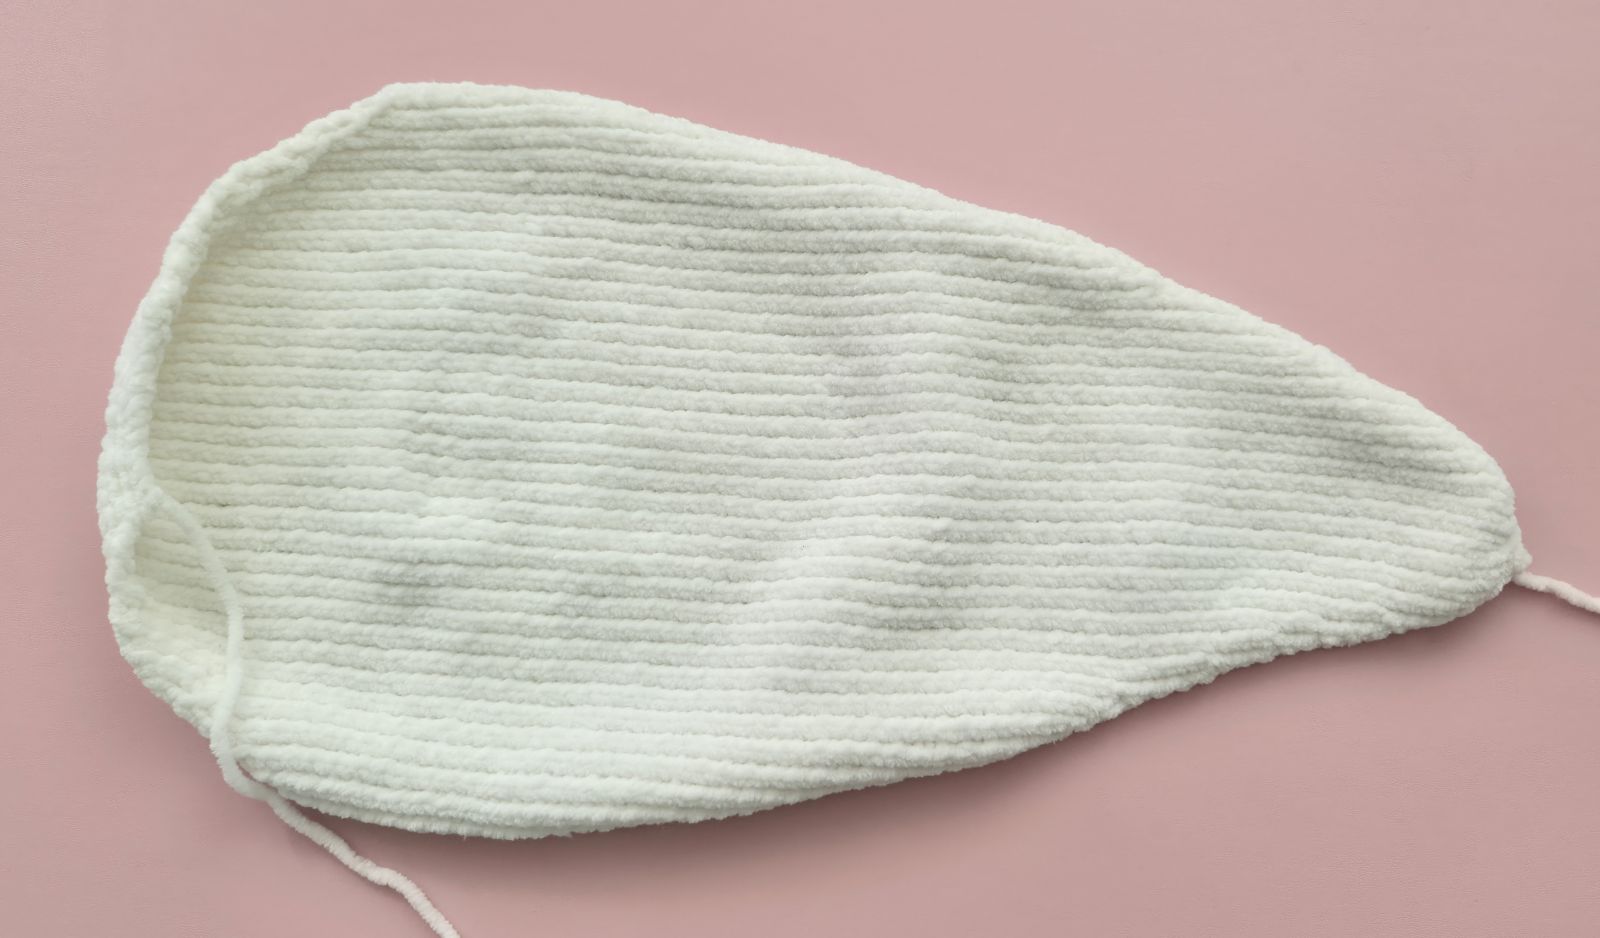
Belly (white)
Cast on 6 stitches (ch) onto the knitting needle. Make sure the stitches are evenly stretched while knitting to ensure your knitted piece is nice and even.
1. 6 P (6)
2. 6 K inc. (12)
3. 12 P (12)
4. 1 K, 1 inc, 8 K, 1 inc, 1 K (14)
5. 14 P
6. 14 K
7. 14 P
8. 14 K
9. 14 P
10. 1 K, 1 inc, 10 K, 1 inc, 1 K (16)
11. 16 P
12. 16 K
13. 16 P
14. 16 K
15. 16 P
16. 1 K, 1 inc, 12 K, 1 inc, 1 K (18)
17. 18 P
18. 18 K
19. 18 P
20. 1 K, 1 inc, 14 K, 1 inc, 1 K (20)
21. 20 P
22. 20 K
23. 20 P
24. 20 K
25. 20 P
26. 1 K, 1 inc, 16 K, 1 inc, 1 K (22)
27. 22 P
28. 22 K
29. 22 P
30. 22 K
31. 22 P
32. 1 K, 1 inc, 18 K, 1 inc, 1 K (24)
33. 24 P
34. 1 K, 1 inc, 20 K, 1 inc, 1 K (26)
35. 26 P
36. 1 K, 1 inc, 22 K, 1 inc, 1 K (28)
37. 28 P
38. 1 K, 1 inc, 24 K, 1 inc, 1 K (30)
39. 30 P
40. 1 K, 1 inc, 26 K, 1 inc, 1 K (32)
41. 32 P
42. 32 K
43. 32 P
44. 32 K
45. 32 P
46. 32 K
47. 32 P
48. 32 K
49. 32 P
50. 32 K
51. 32 P
52. 32 K
53. 32 P
54. 1 K, 1 inc, 28 K, 1 inc, 1 K (34)
55. 34 P
56. 34 K
57. 34 P
58. 34 K
59. 34 P
60. 1 K, 1 inc, 30 K, 1 inc, 1 K (36)
61. 36 P
62. 36 K
63. 36 P
64. 1 K, 1 inc, 32 K, 1 inc, 1 K (38)
Knit a total of 37 rows in stockinette stitch:
On the front side of the work, knit all stitches across the row.
On the back side of the work, purl all stitches across the row.
65, 67, 69, 71, 73, 75, 77, 79, 81, 83, 85, 87, 89, 91, 93, 95, 97, 99, 101 – 38 P
66, 68, 70, 72, 74, 76, 78, 80, 82, 84, 86, 88, 90, 92, 94, 96, 98, 100 - 38 K
102. 1 K, 1 dec, 32 K, 1 dec, 1 K (36)
103. 36 P
104. 1 K, 1 dec, 30 K, 1 dec, 1 K (34)
105. 34 P
106. 34 K
107. 34 P
108. 1 K, 1 dec, 28 K, 1 dec, 1 K (32)
109. 32 P
110. 1 K, 1 dec, 26 K, 1 dec, 1 K (30)
111. 30 P
112. 30 K
113. 30 P
114. 1 K, 1 dec, 24 K, 1 dec, 1 K (28)
115. 28 P
116. 1 K, 1 dec, 22 K, 1 dec, 1 K (26)
117. 26 P
118. 1 K, 1 dec, 20 K, 1 dec, 1 K (24)
119. 24 P
120. 1 K, 1 dec, 18 K, 1 dec, 1 K (22)
121. 22 P
122. 1 K, 1 dec, 16 K, 1 dec, 1 K (20)
123. 20 P
124. 1 K, 1 dec, 14 K, 1 dec, 1 K (18)
125. 18 P
126. (1 K, 1 dec)x6 (12)
127. 12 P
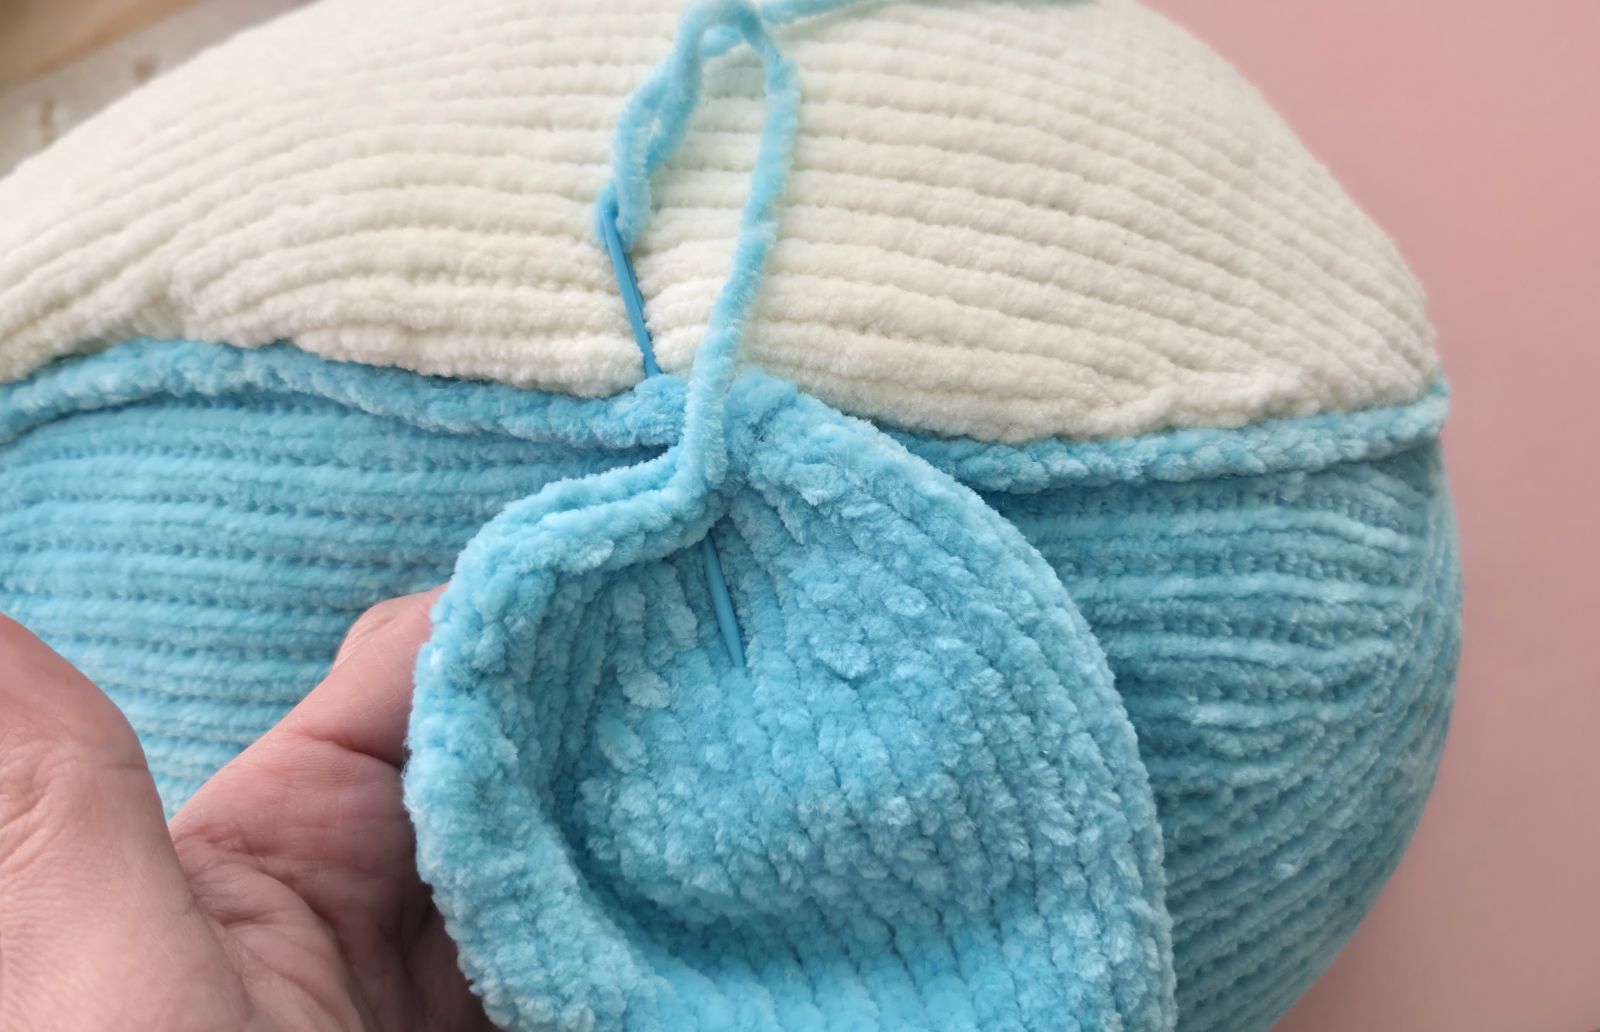
Finally, bind off the remaining 12 stitches. The white section is sewn onto the underside of the whale’s belly. First, determine the correct placement to ensure that both sides appear symmetrical. To do this, carefully align the pieces and pin them in place using specialized pins so that nothing shifts while sewing. As you sew, make frequent small adjustments to the edges to achieve a smooth, uniform shape.

Since I wasn’t entirely satisfied with the transition between the white and blue sections, I decided to outline this area with slip stitches. To avoid additional sewing, I did not create a separate chain of stitches; instead, I worked the slip stitches directly along the seam line. This is quite simple: insert your crochet hook between the stitches and pull the yarn through. It is important to work all slip stitches evenly to create a clean, tidy transition.
After completing the first round, I found that a second round of slip stitches made the transition look even nicer. This second round is much easier to crochet, as it is worked directly into the slip stitches from the previous round.
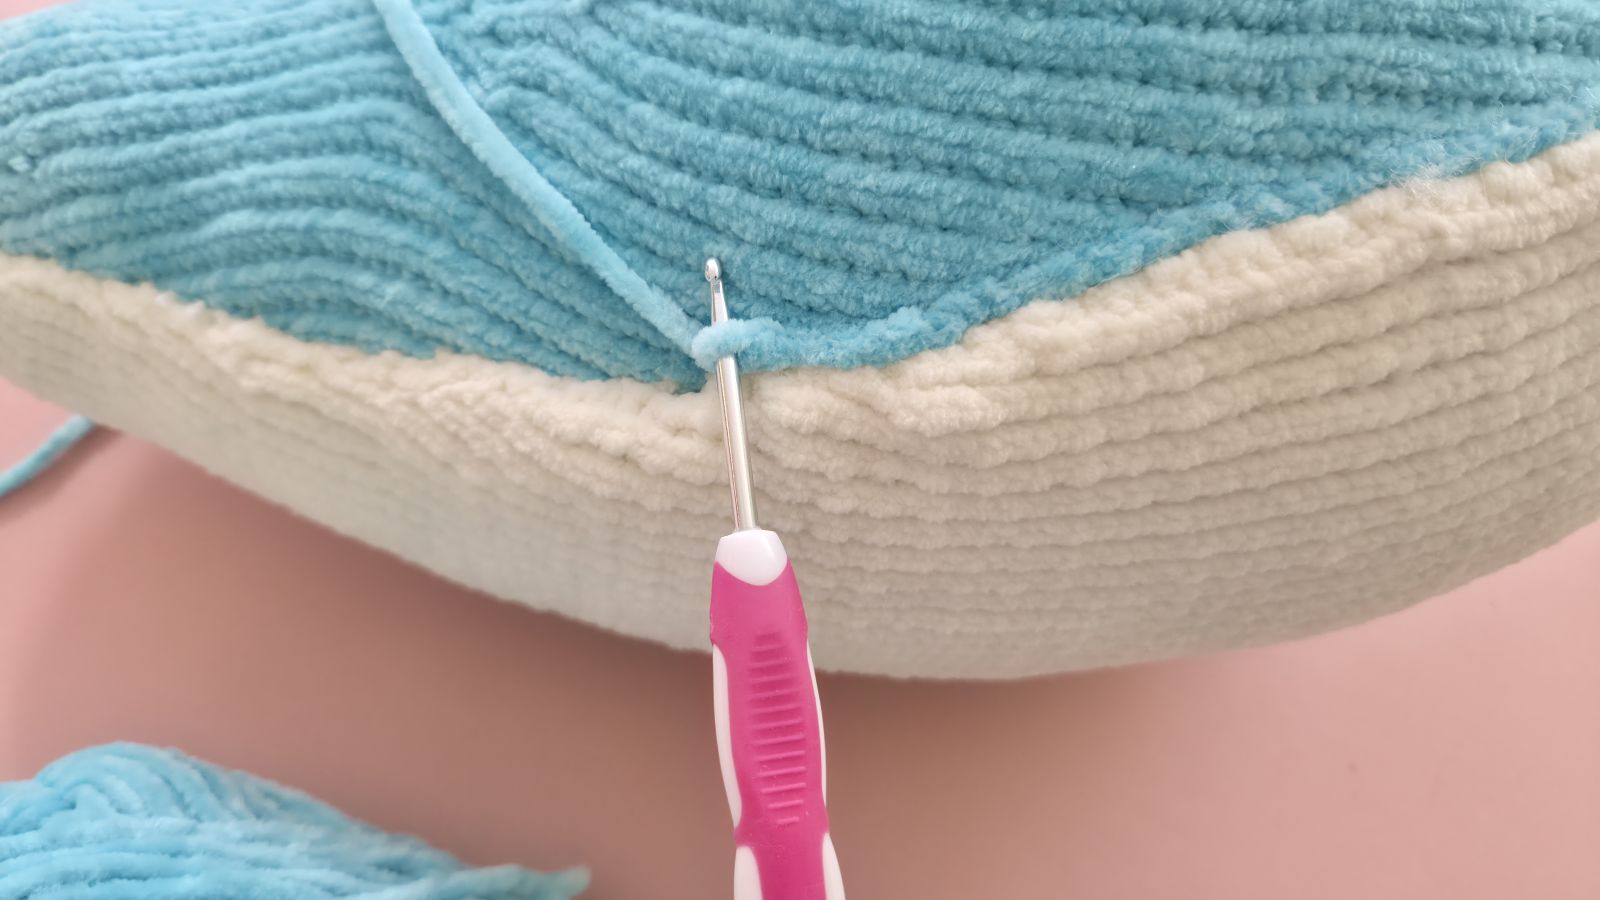
This step is optional and can be skipped if you are satisfied with the original transition and seam line.
Tail (2 pieces)
Cast on 6 stitches (ch) onto the knitting needle. Make sure the stitches are evenly stretched while knitting to ensure your knitted piece is nice and even.
1. 6 P (6)
2. 6 K inc. (12)
3. 12 P (12)
4. 1 K, 1 inc, 8 K, 1 inc, 1 K (14)
5. 14 P
6. 1 K, 1 inc, 10 K, 1 inc, 1 K (16)
7. 16 P
8. 1 K, 1 inc, 12 K, 1 inc, 1 K (18)
9. 18 P
10. 1 K, 1 inc, 14 K, 1 inc, 1 K (20)
11. 20 P
12. 1 K, 1 inc, 16 K, 1 inc, 1 K (22)
13. 22 P
14. 1 K, 1 inc, 18 K, 1 inc, 1 K (24)
15. 24 P
16. 1 K, 1 inc, 20 K, 1 inc, 1 K (26)
17. 26 P
18. 1 K, 1 inc, 22 K, 1 inc, 1 K (28)
19. 28 P
20. 1 K, 1 inc, 24 K, 1 inc, 1 K (30)
21. 30 P
22. (4 K, 1 K inc)x 6 (36)
23. 36 P
24. 36 K
25. 36 P
26. (5 K, 1 K inc)x 6 (42)
27. 42 P
28. 42 K
29. 42 P
30. 42 K
31. 42 P
32. 42 K
33. 42 P
34. 42 K
35. 42 P
36. 42 K
37. 42 P
38. (5 K, 1 dec)x 6 (36)
39. 36 P
40. 36 K
41. 36 P
42. (4 K, 1 dec)x 6 (30)
43. 30 P
44. 30 K
45. 30 P
46. (3 K, 1 dec)x 6 (24)
47. 24 P
48. (2 K, 1 dec)x 6 (18)
49. 1 K, 1 dec, 6 K, 1 dec, 7 K (16)
50. 16 P
51. 1 K, 1 dec, 5 K, 1 dec, 6 K (14)
52. 14 P
53. 1 K, 1 dec, 4 K, 1 dec, 5 K (12)
54. 12 P
55. 6 dec
Finally, bind off the remaining stitches. Then fold the piece in half and sew it together using the same yarn. The seam runs along the side. The whale’s tail is not stuffed.
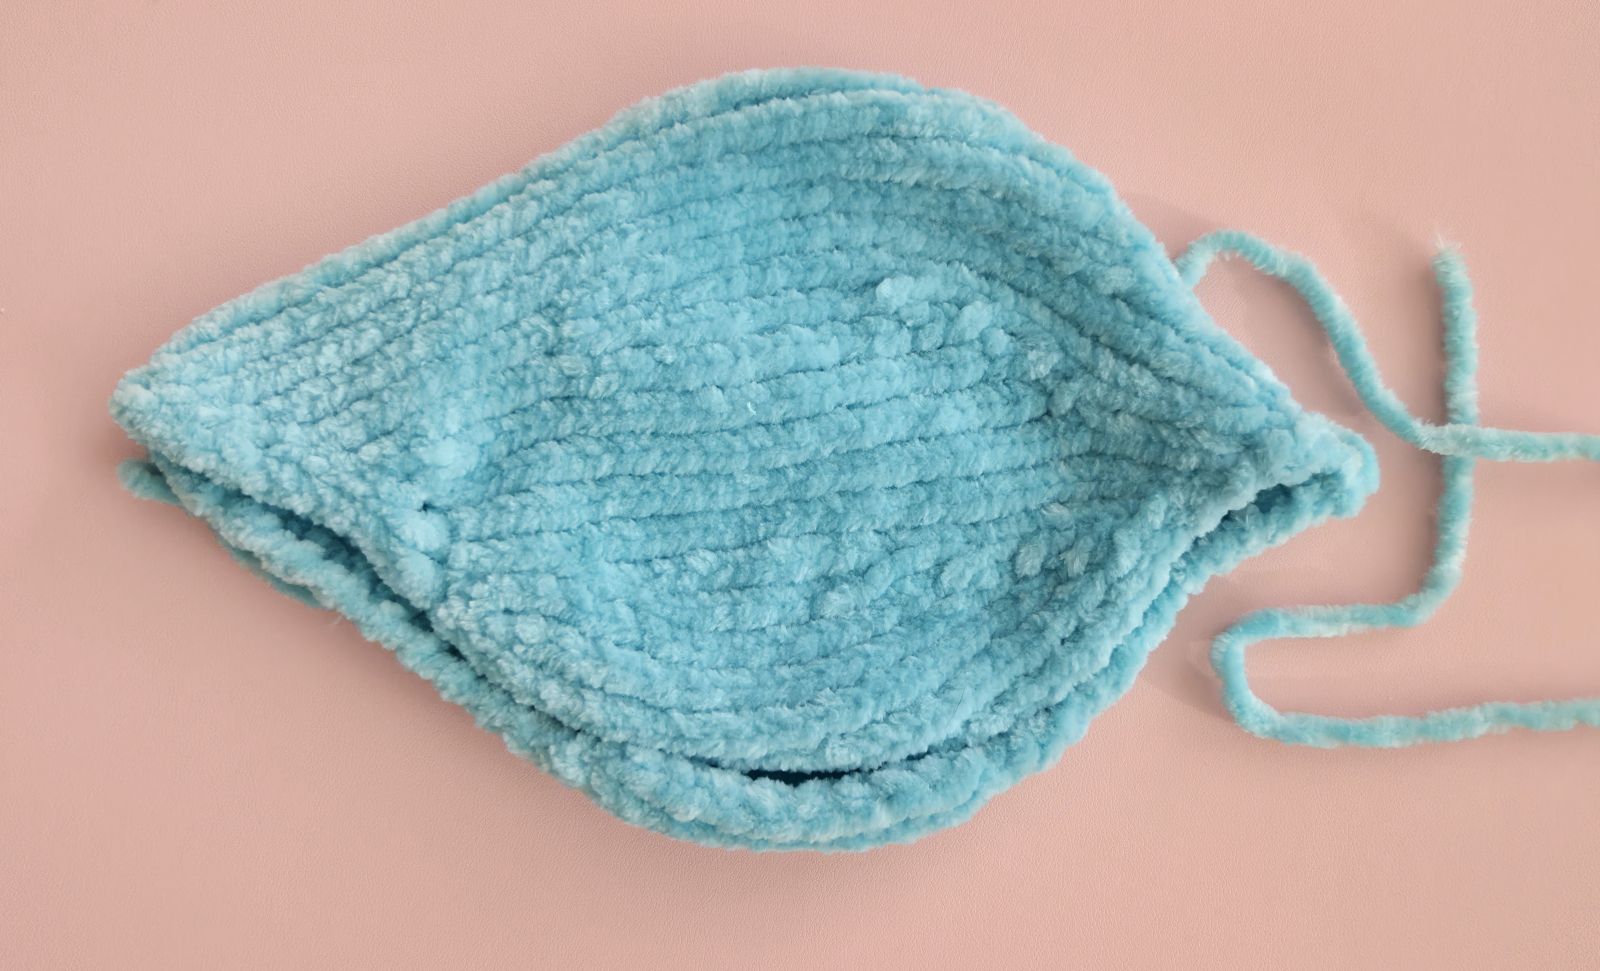
Place both pieces side by side, as shown in the picture, and sew them together. Then sew the finished tail to the upper of the body.

Fin (2 pieces)
Cast on 6 stitches (ch) onto the knitting needle. Make sure the stitches are evenly stretched while knitting to ensure your knitted piece is nice and even.
1. 6 P (6)
2. 6 K inc. (12)
3. 12 P (12)
4. 1 K, 1 inc, 8 K, 1 inc, 1 K (14)
5. 14 P
6. 1 K, 1 inc, 10 K, 1 inc, 1 K (16)
7. 16 P
8. 1 K, 1 inc, 12 K, 1 inc, 1 K (18)
9. 18 P
10. 1 K, 1 inc, 14 K, 1 inc, 1 K (20)
11. 20 P
12. 1 K, 1 inc, 16 K, 1 inc, 1 K (22)
13. 22 P
14. 1 K, 1 inc, 18 K, 1 inc, 1 K (24)
15. 24 P
16. 1 K, 1 inc, 20 K, 1 inc, 1 K (26)
17. 26 P
18. 1 K, 1 inc, 22 K, 1 inc, 1 K (28)
19. 28 P
20. 1 K, 1 inc, 24 K, 1 inc, 1 K (30)
21. 30 P
22. (4 K, 1 K inc)x 6 (36)
23. 36 P
24. 36 K
25. 36 P
26. 36 K
27. 36 P
28. 36 K
29. 36 P
30. 36 K
31. 36 P
32. 36 K
33. 36 P
34. (4 K, 1 dec)x 6 (30)
35. 30 P
36. (3 K, 1 dec)x 6 (24)
27. 24 P
28. 24 K
29. 24 P
30. 4 K, 1 dec, 4 K, 1 dec, 4 K, 1 dec, 4 K, 1 dec (20)
31. 20 P
Finally, bind off the remaining stitches. Then fold the fin in half and sew it together using the same yarn. The seam runs along the side. Do not stuff the fin.
The fins are attached to both sides of the body. I sewed them on exactly along the color transition, following the slip‑stitch line.
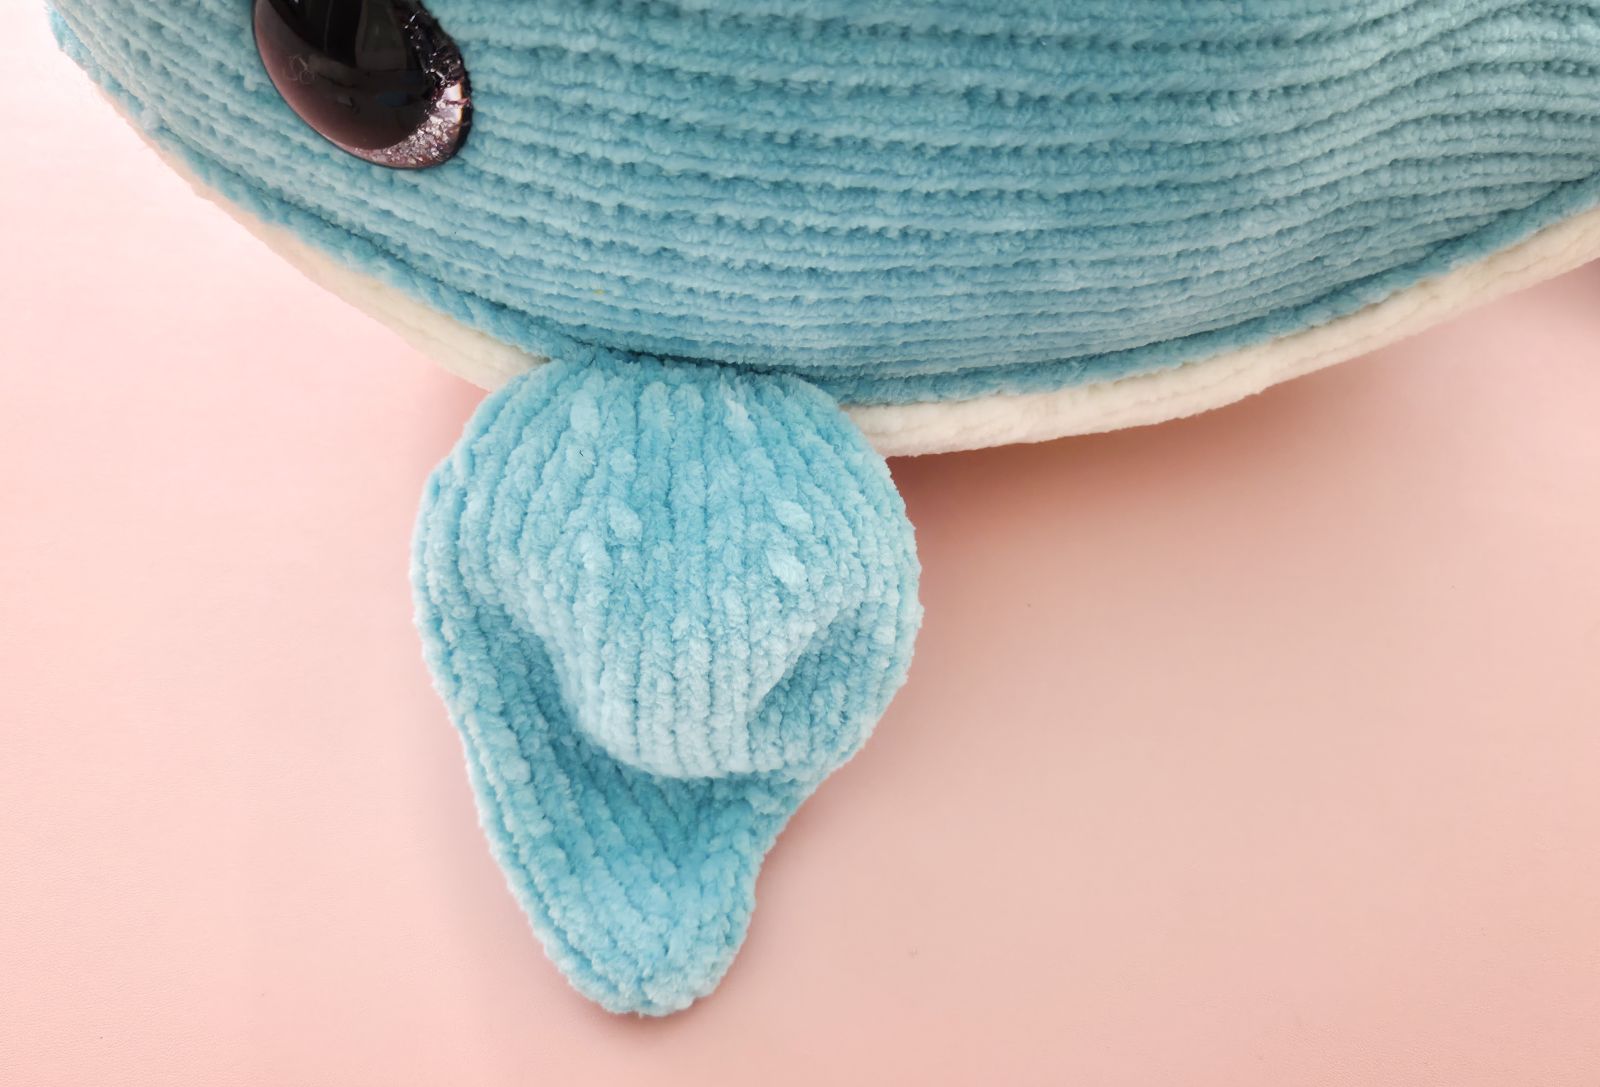
For the blowhole, I picked up the required stitches directly from the top of the body using a crochet hook and crocheted a small opening in the first round.
.jpeg)
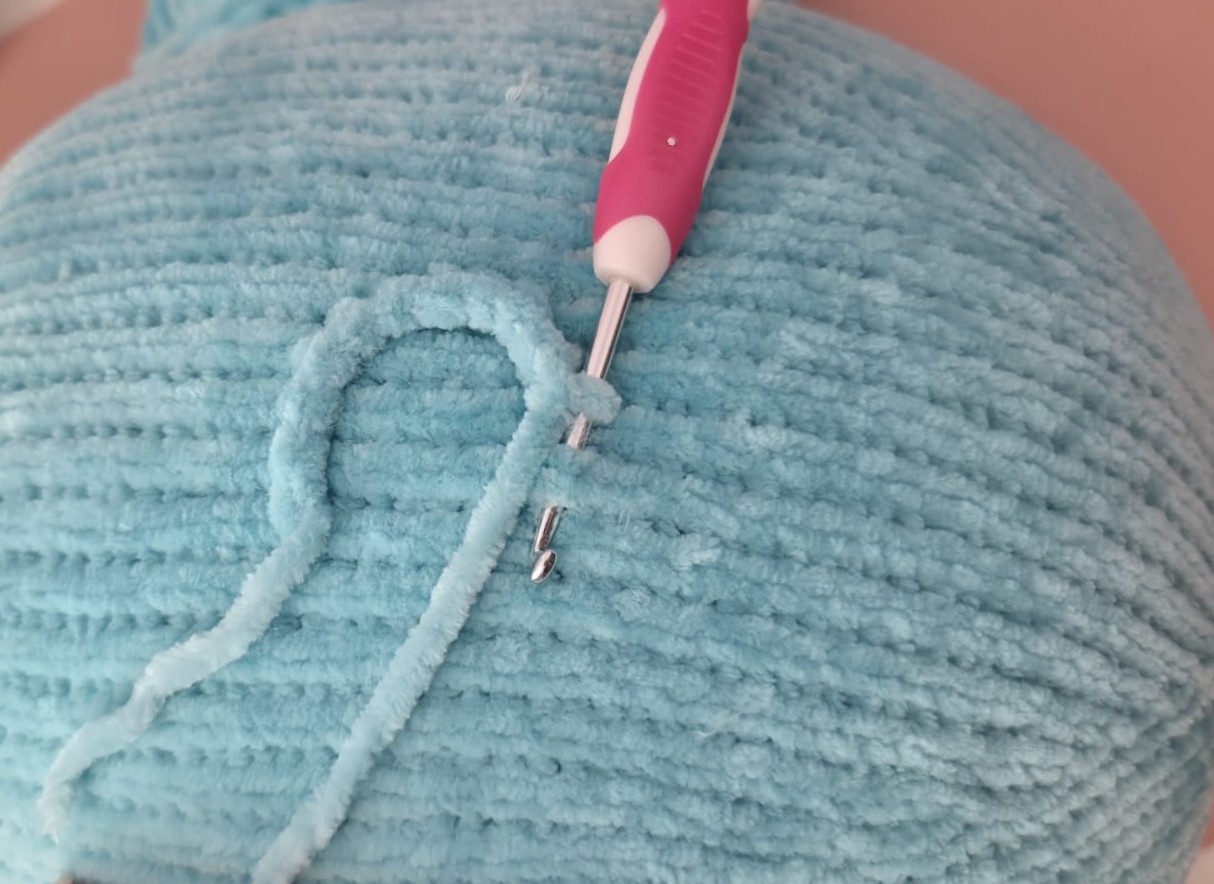
Alternatively, you can cast on the required number of stitches (approx. 20 stitches) onto knitting needles and bind them off immediately. This creates a chain of stitches, which is then sewn onto the top of the whale’s body to serve as the blowhole.
In the end, I decided to add a few spots. To do this, I used suitable fabric markers and applied the circles directly onto the knitted fabric. The spots will not fade or bleed later. There are special fabric markers available that are waterproof and air‑dry, so no ironing is required.
Alternatively, the spots can be embroidered using matching yarn, or knitted as small separate pieces and then sewn on.