Free Crochet Pattern for a Poppy Wreath
.jpg)
Materials:
-
A round wreath base to crochet around (for example, made of styrofoam)
-
A 2.5 mm crochet hook (US: Size B-1 or C-2)
-
YarnArt Jeans yarn (50g = 160m / Sport weight):
-
Light-colored yarn for the large wreath base
-
Bright red yarn for the poppies
-
Green yarn for the small leaves and buds
-
A tiny bit of yellow and black for the center of the flowers
-
-
A yarn needle for sewing together, or some hot glue
Abbreviations (US Terms):
-
ch = chain (Luftmasche)
-
sc = single crochet (feste Masche)
-
dc = double crochet (Stäbchen)
-
tr = treble crochet (doppeltes Stäbchen)
-
sl st = slip stitch (Kettmasche)
Today, we are going to crochet a beautiful, colorful flower wreath together. It's a lot of fun and not difficult at all! All you need is a round base to crochet around, a crochet hook, and soft yarn. We will use light-colored yarn for the large wreath base, bright red yarn for the large poppies, and green yarn for the small leaves. We will also need a tiny bit of yellow and black for the center of the flowers.
Hier ist die Übersetzung für den Start der Mohnblume:
Poppy Flower
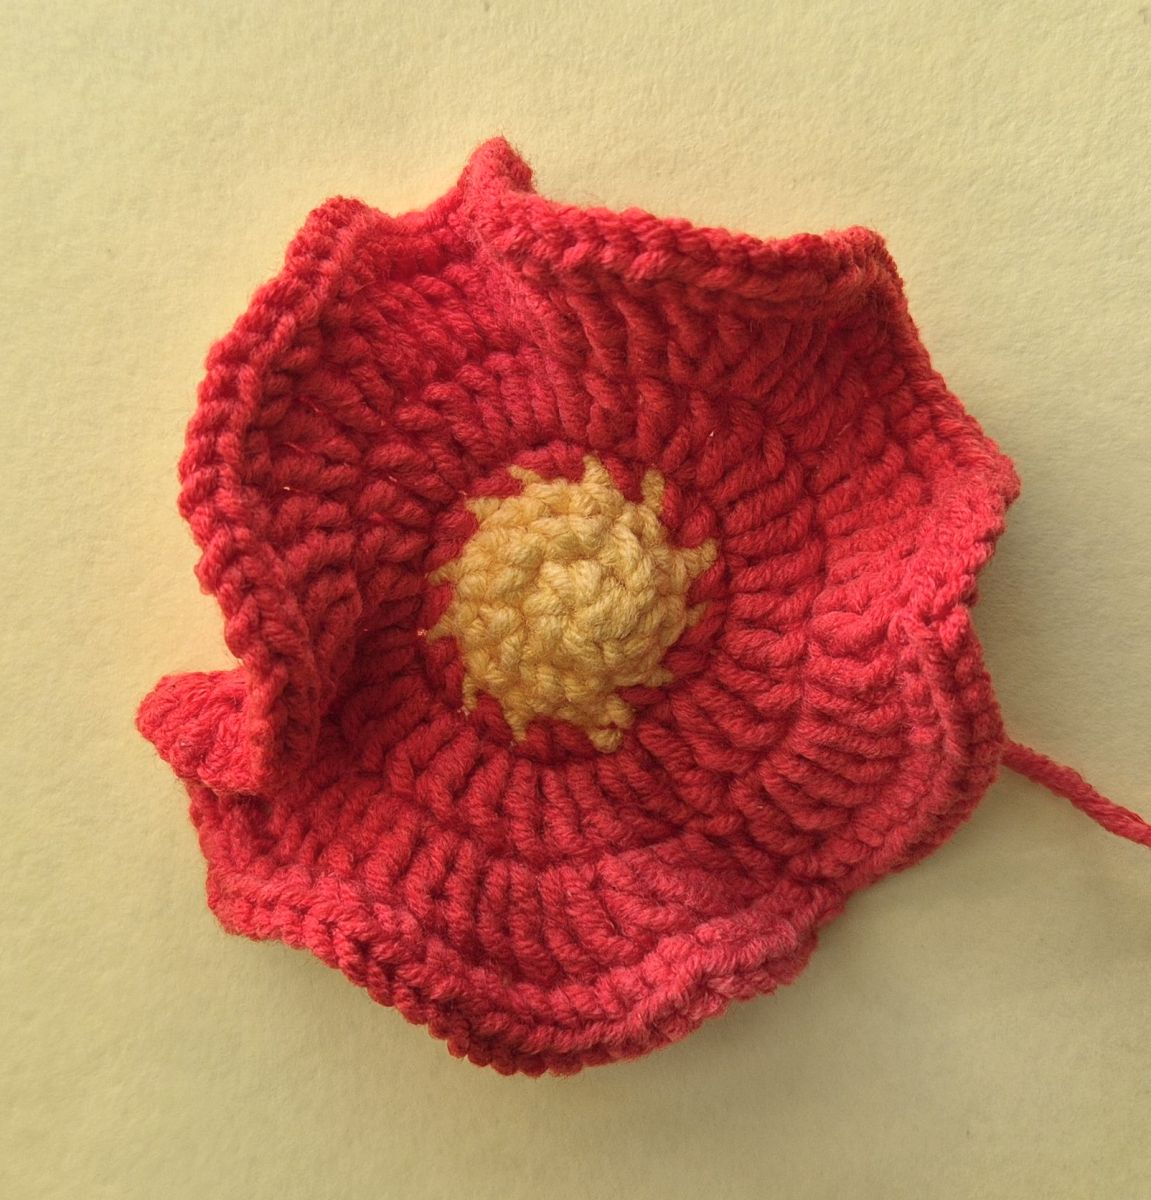
We will start with the center of the flower and then crochet our way outward, round by round, to the large, red petals.
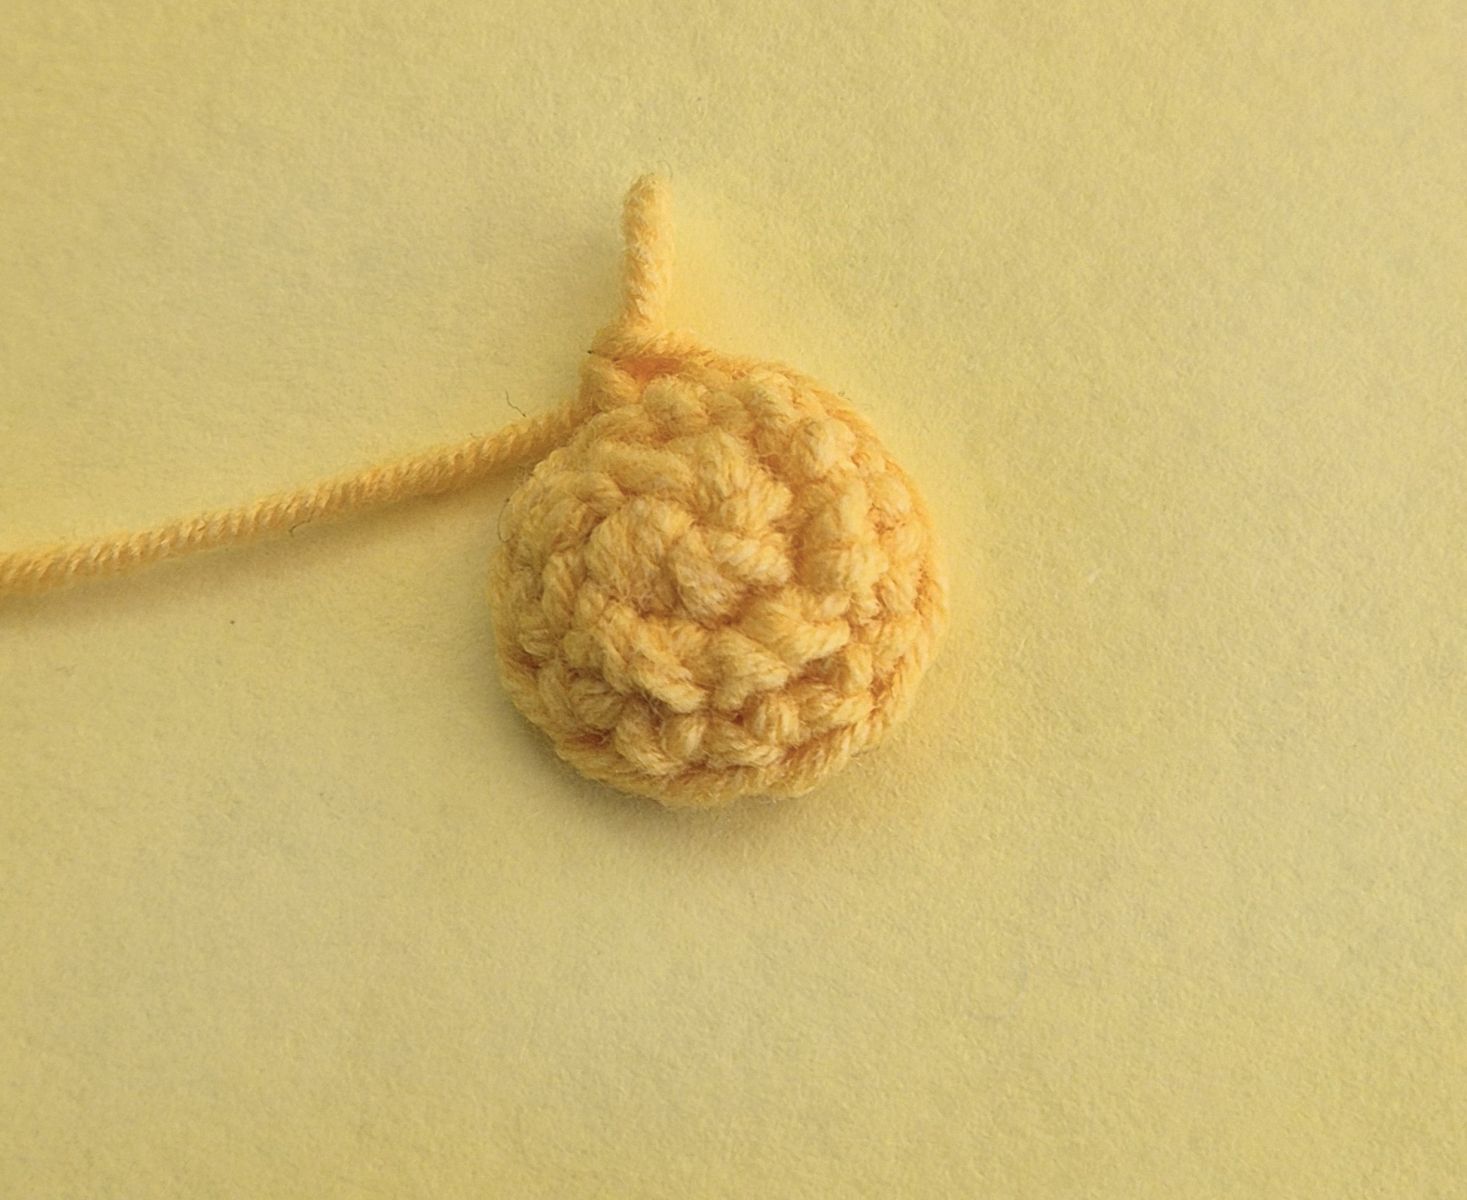
The Flower Center
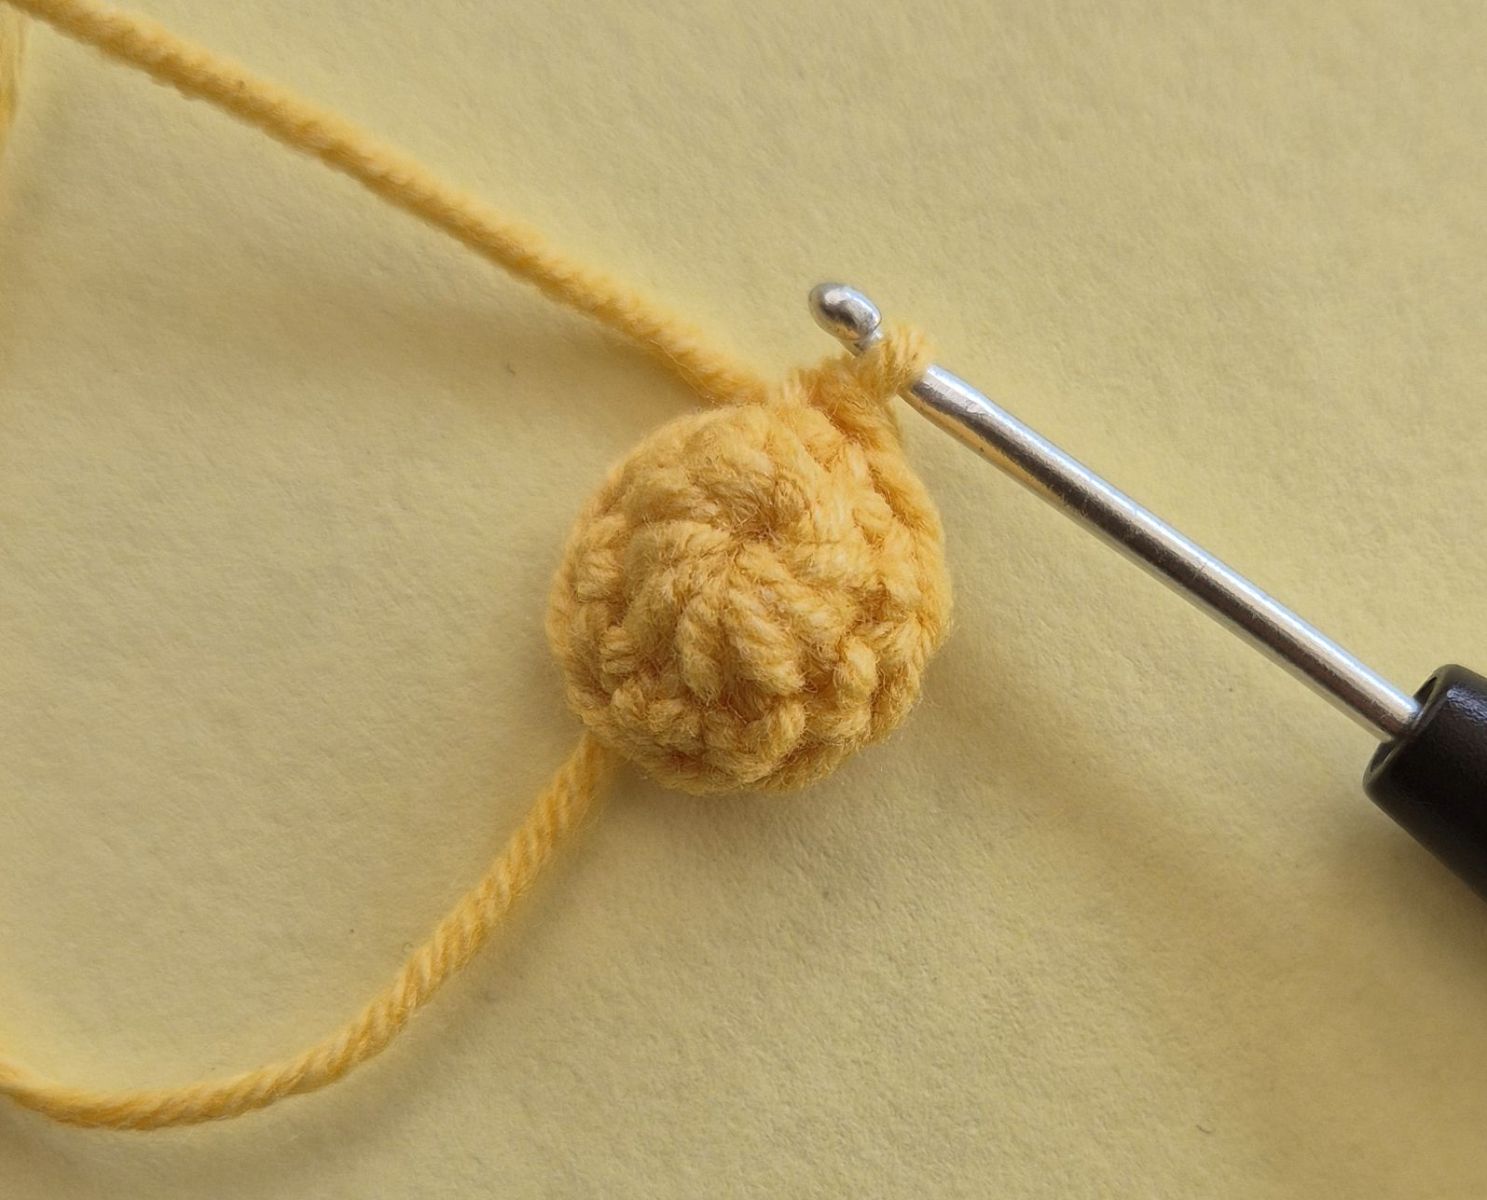
Take your yellow yarn, crochet 6 single crochets into a magic ring, and close the round with a slip stitch.
Round 1: Increase in every stitch. Crochet 2 single crochets into each stitch of the previous round (12 sc).
Round 2: Crochet 1 single crochet into each stitch of the previous round (12 sc).
Poppy Flower We start with the flower center and then crochet round by round outward to the large, red petals. The flower center Take your yellow yarn, crochet 6 single crochets into a magic ring and close the round with a slip stitch.
Round 3: Double every stitch. Crochet 2 single crochets into each stitch of the previous round (12 sc).
Round 4: Crochet 1 single crochet into each stitch of the previous round (12 sc).
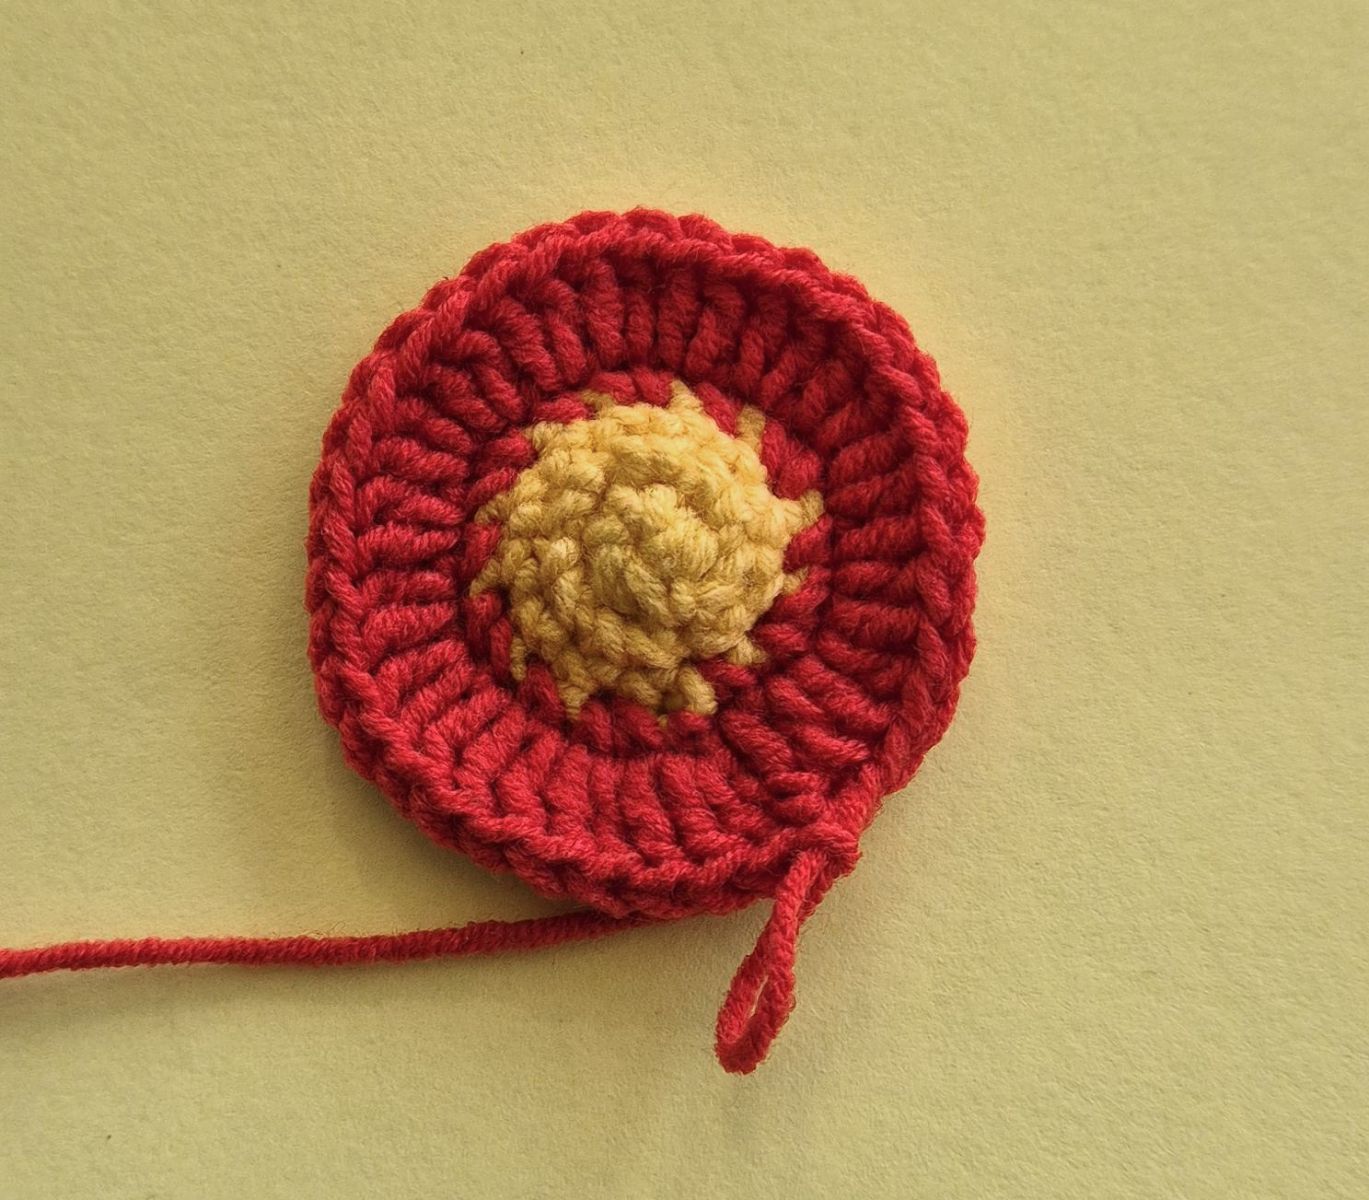
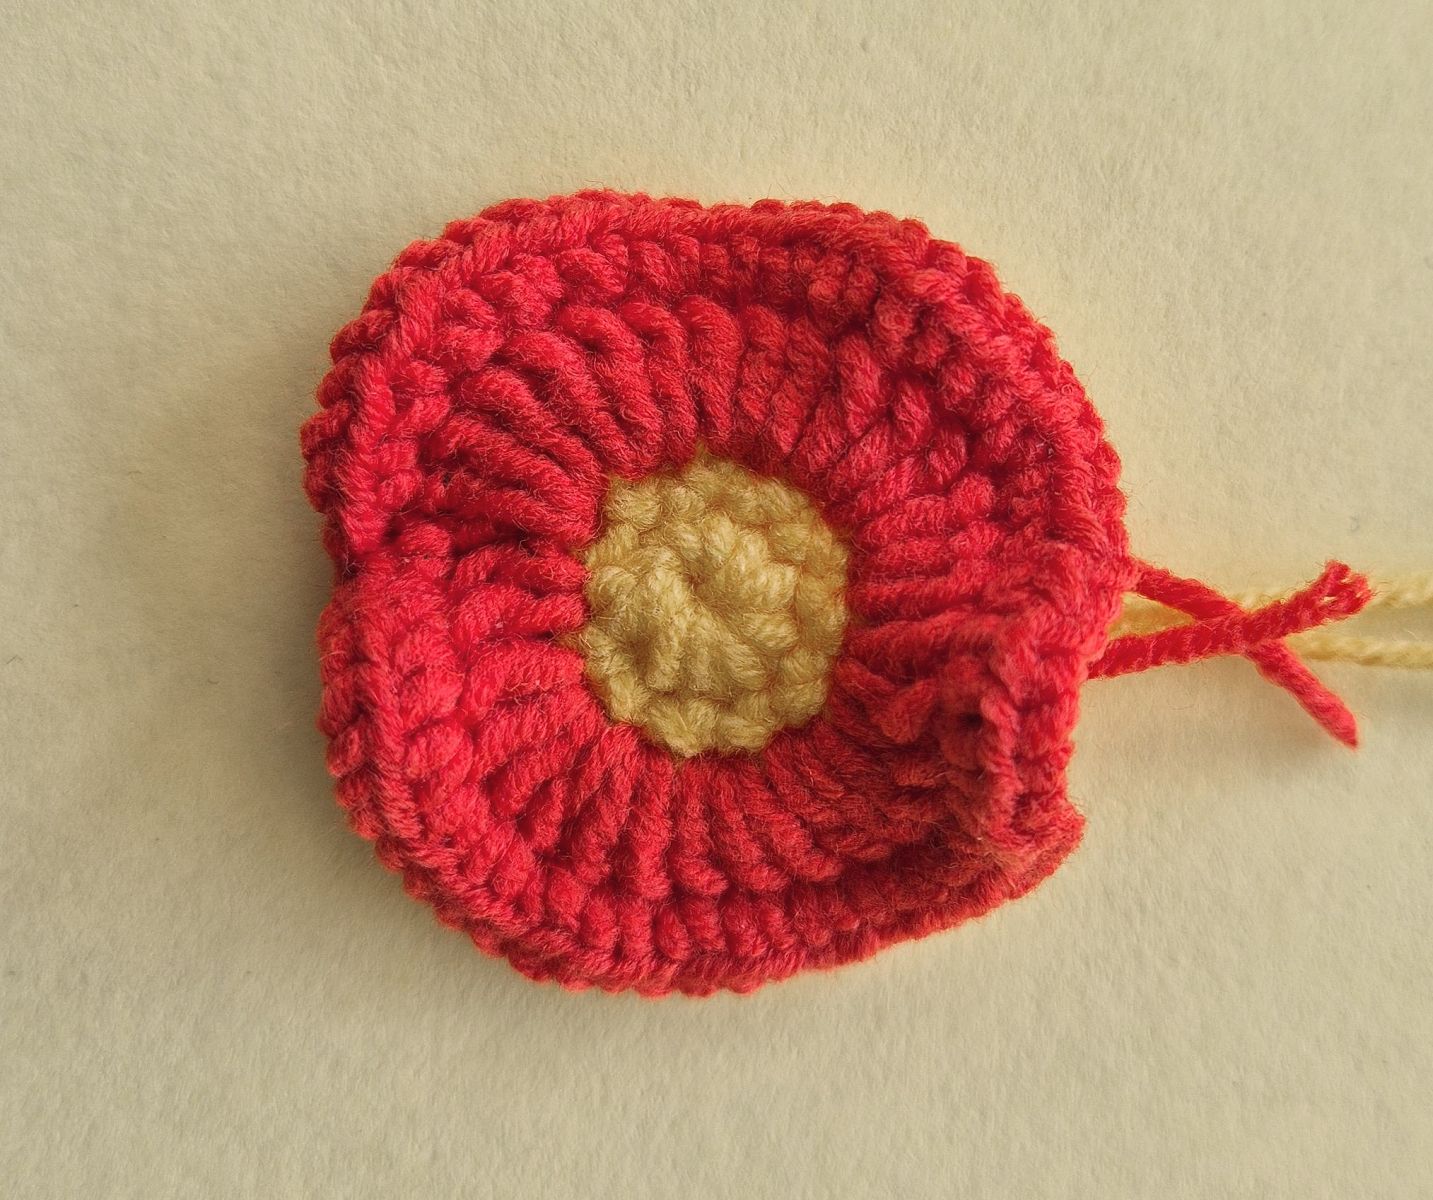
Round 5: Start with 3 chains (as the first double crochet). Now crochet 2 double crochets into each of the following 7 stitches, and only 1 double crochet into each of the next 2 stitches. Repeat this step a total of 4 times. Close the round with a slip stitch.
Round 6: Crochet 2 single crochets into each stitch of the previous round. Close the round with a slip stitch. Cut the yarn and weave in all ends invisibly.
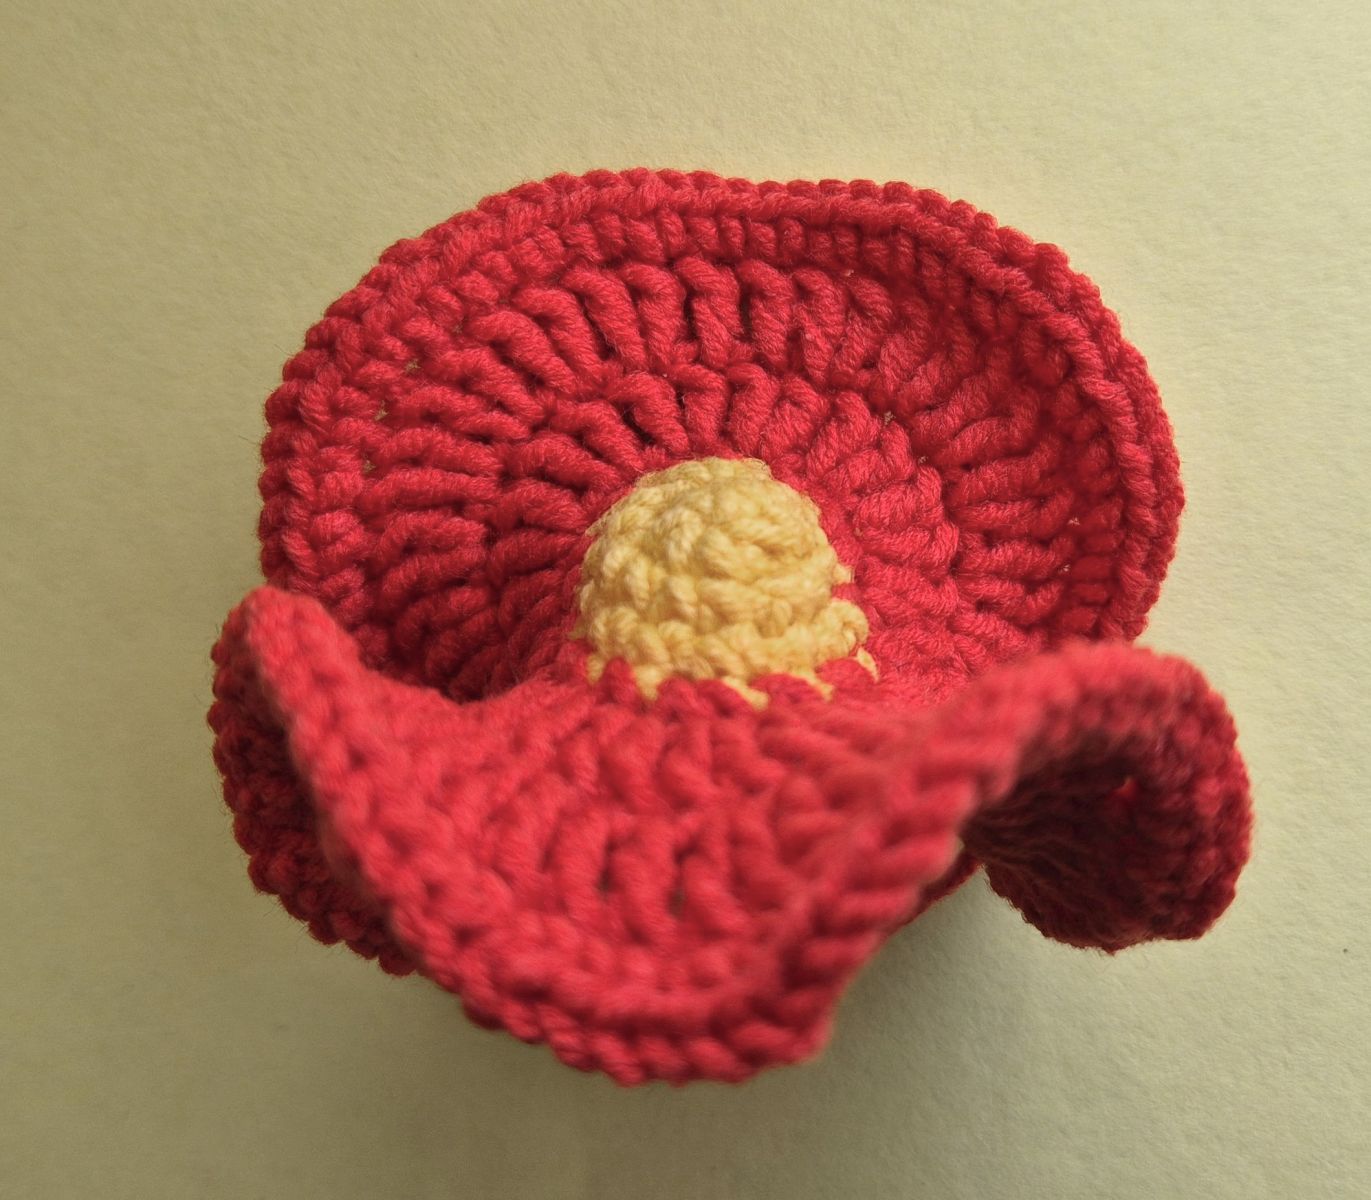
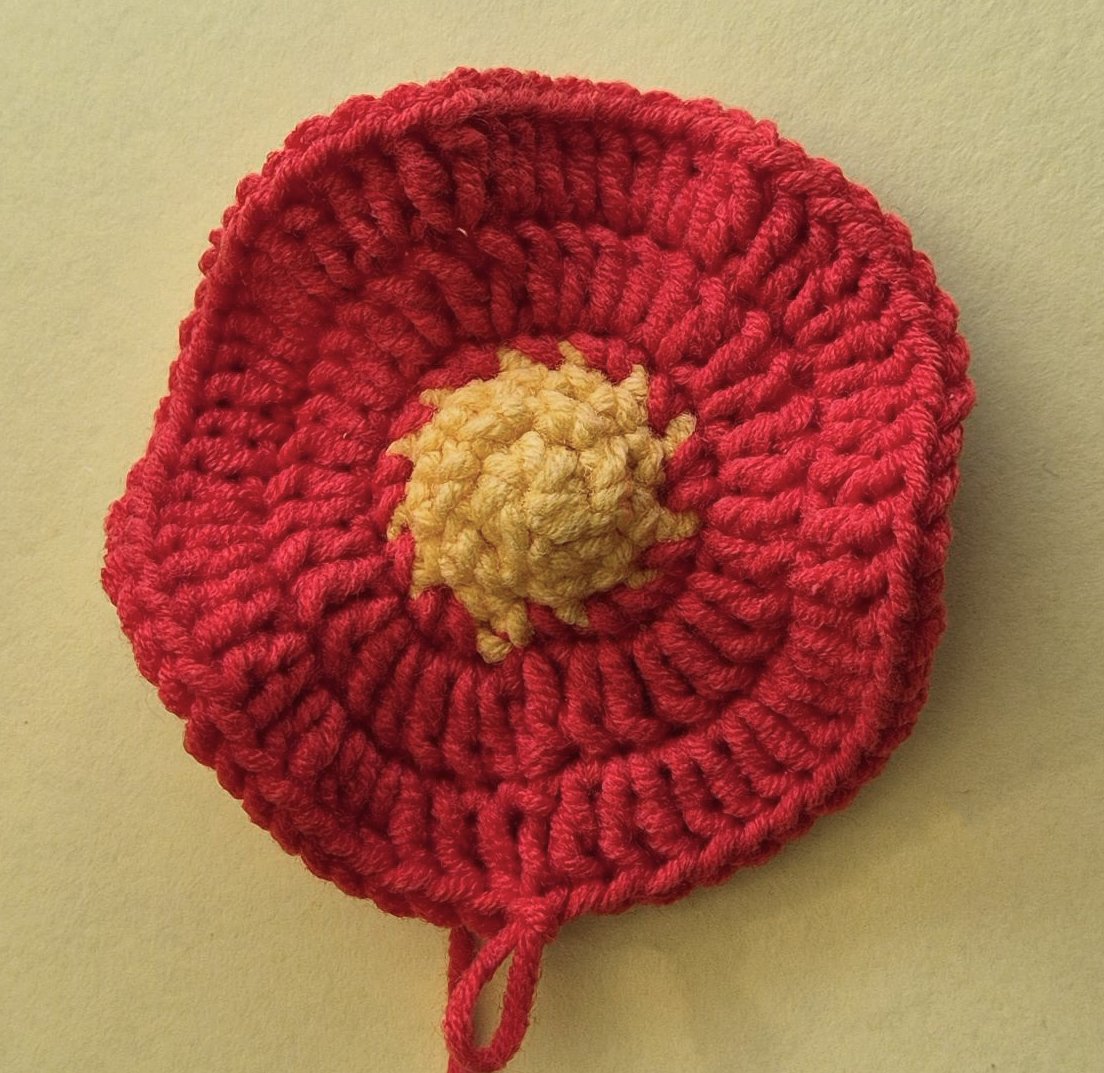
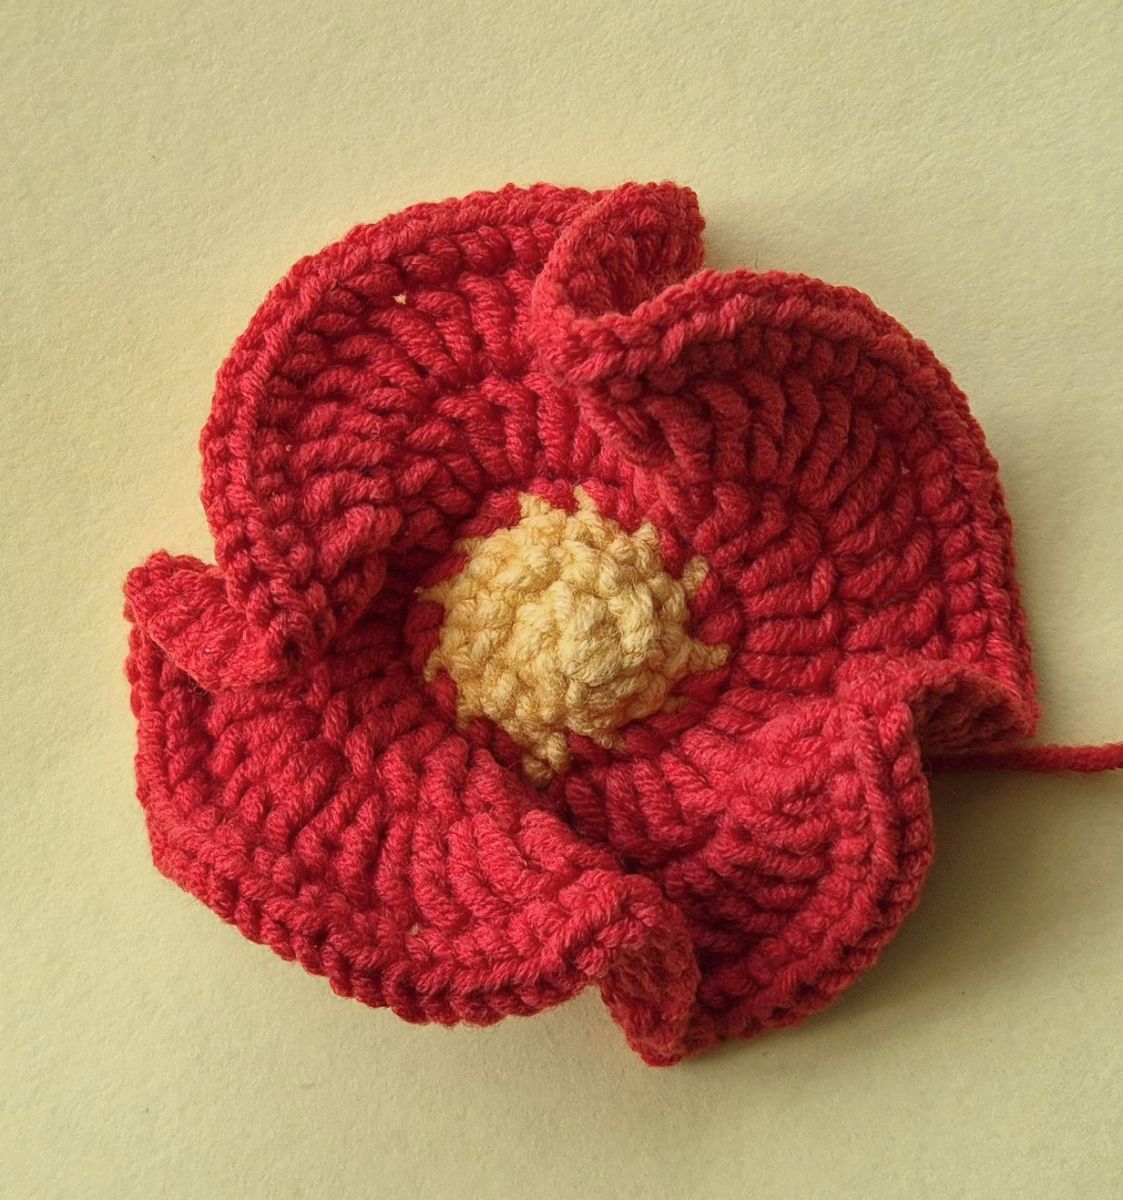
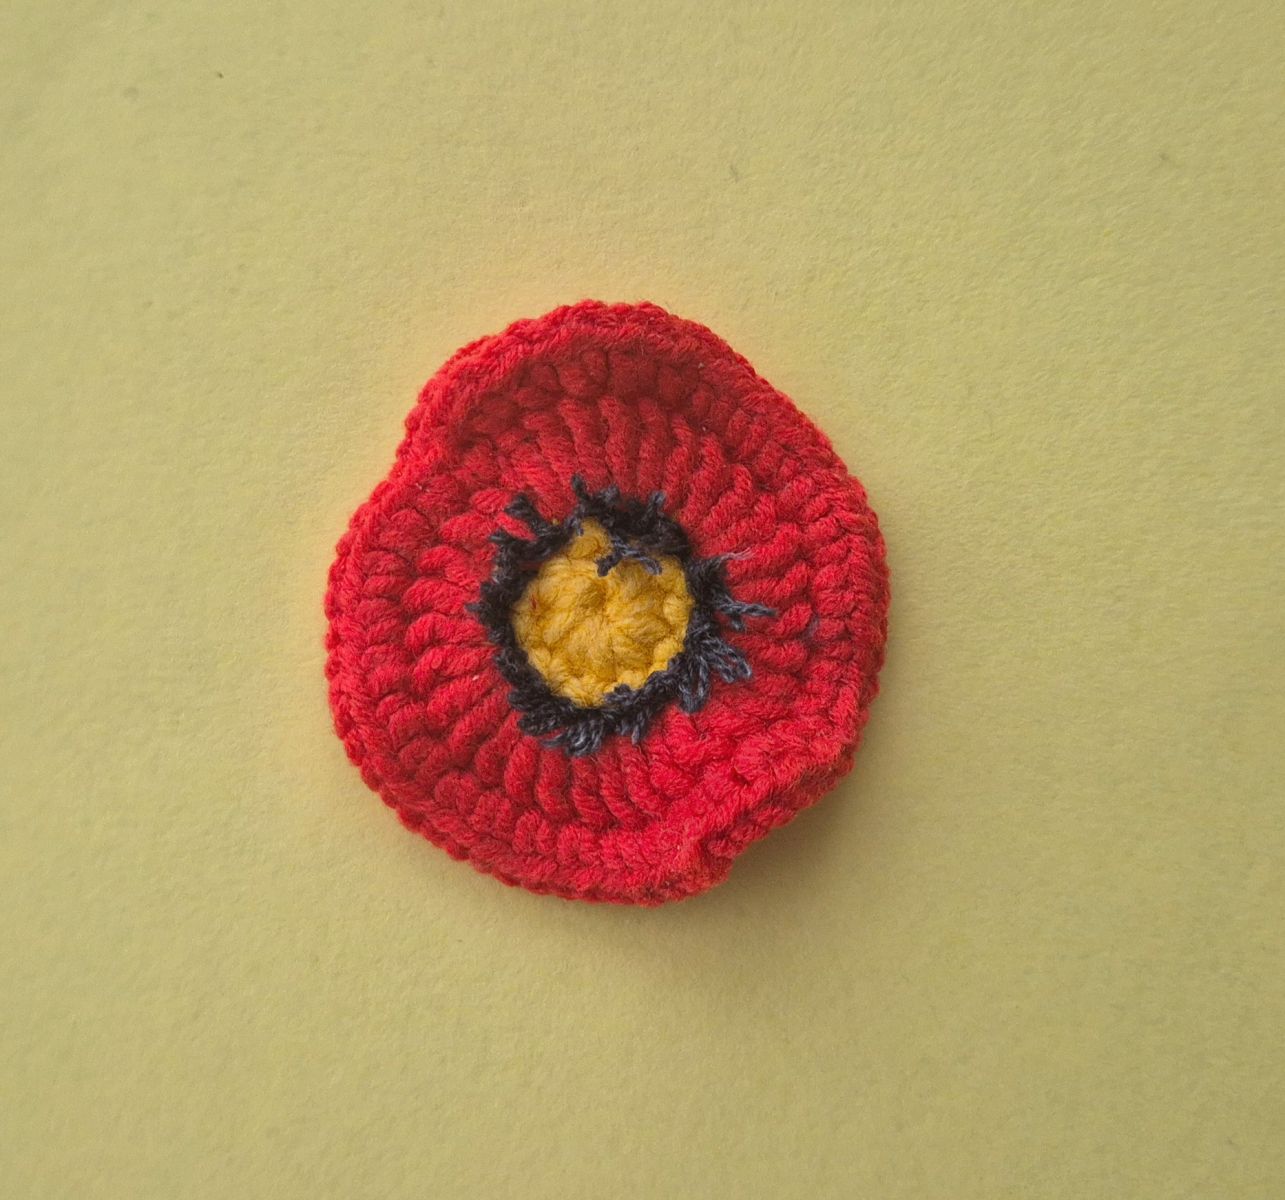
Now we shape our finished poppy flower so that it looks really pretty. Gently press the red petals a little into shape with your fingers, so that the flower curves slightly upward like a small bowl.
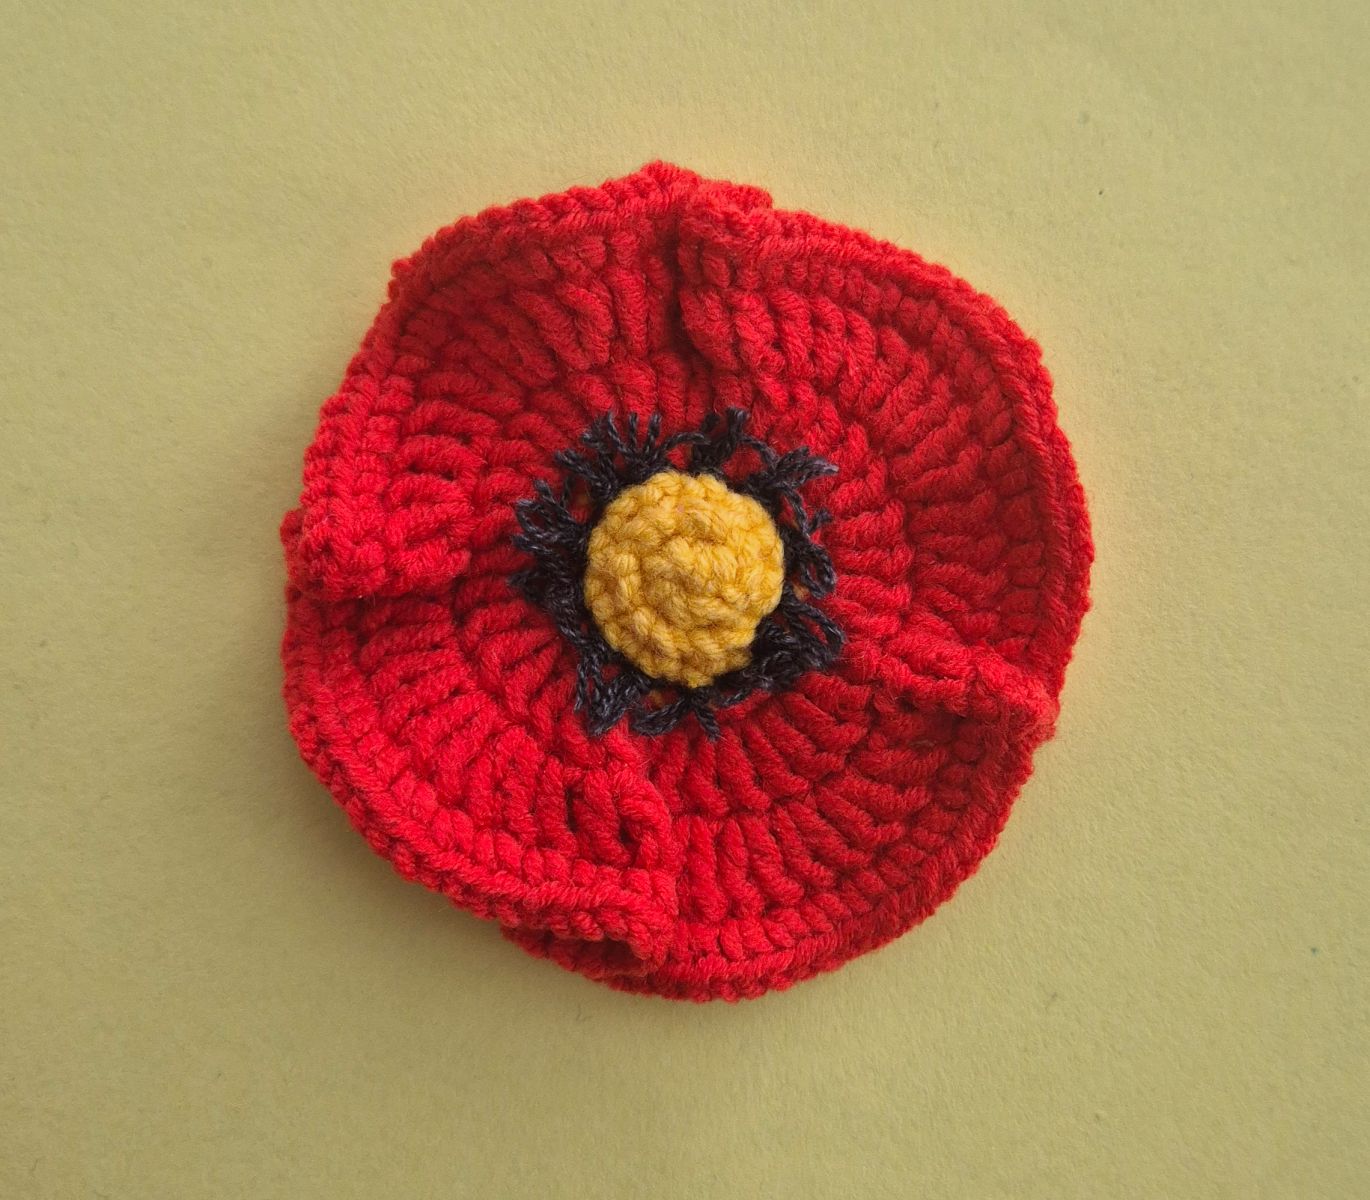
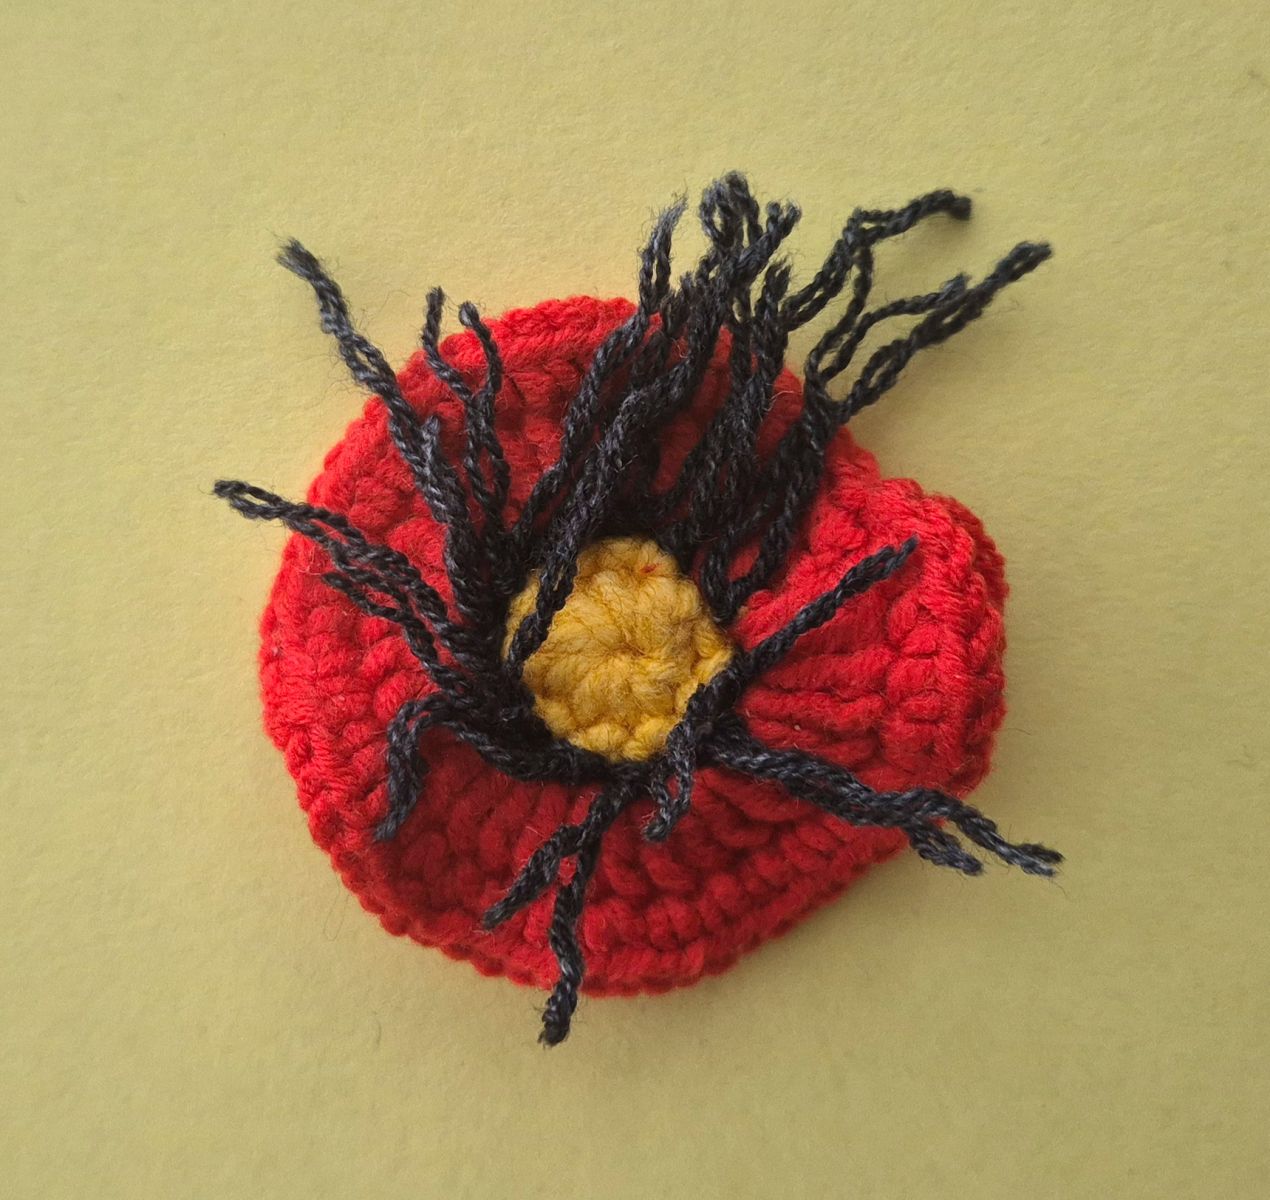
To make the flower look like a real poppy, it is still missing the typical, fine hairs in the center:
Take a few black, thin threads (for example, completely normal sewing thread or thin crochet yarn). Pulling through: Pull these threads with the crochet hook or an embroidery needle right between the 2nd and 3rd round from the back to the front through the flower.
Carefully trim the threads on the front side with scissors to the correct length, so that they look like small, fine fringes peeking out of the yellow center.
Option 2: For even more waves and volume Would you like the red petals to wave even more and the flower to get an even prettier bowl shape? That is very easy! By increasing even more stitches in the red rounds, the blossom puffs up beautifully. The yellow center stays the same, but with the red petals we now speed things up: The flower center (same as in option 1) Start: Take your yellow yarn, crochet 6 single crochets into a magic ring and close the round with a slip stitch (sl st).
Round 1: Double every stitch (12 sc).
Round 2: Crochet 1 sc into each stitch (12 sc). The extra-wavy petals Now switch to the red yarn.
Round 3: Crochet 1 single crochet into the first stitch, then 2 single crochets into the next stitch. Repeat this step until the end of the round (18 sc).
Round 4: Start with 3 chains (as the first double crochet). Now crochet 2 double crochets into each stitch of the previous round. Close the round with a slip stitch (36 dc).
Round 5: (This is where it gets extra wavy): Start with 3 chains (as the first double crochet). Now crochet 3 double crochets into each of the following 7 stitches, then only 1 double crochet into each of the next 2 stitches. Repeat this step a total of 4 times. Close the round with a slip stitch.
Round 6: Crochet 2 single crochets into each stitch of the previous round. Close the round with a slip stitch. Cut the yarn and weave in all ends invisibly. The shaping of the bowl and the pulling through of the fine, black hairs in the center work exactly as described above for this option.
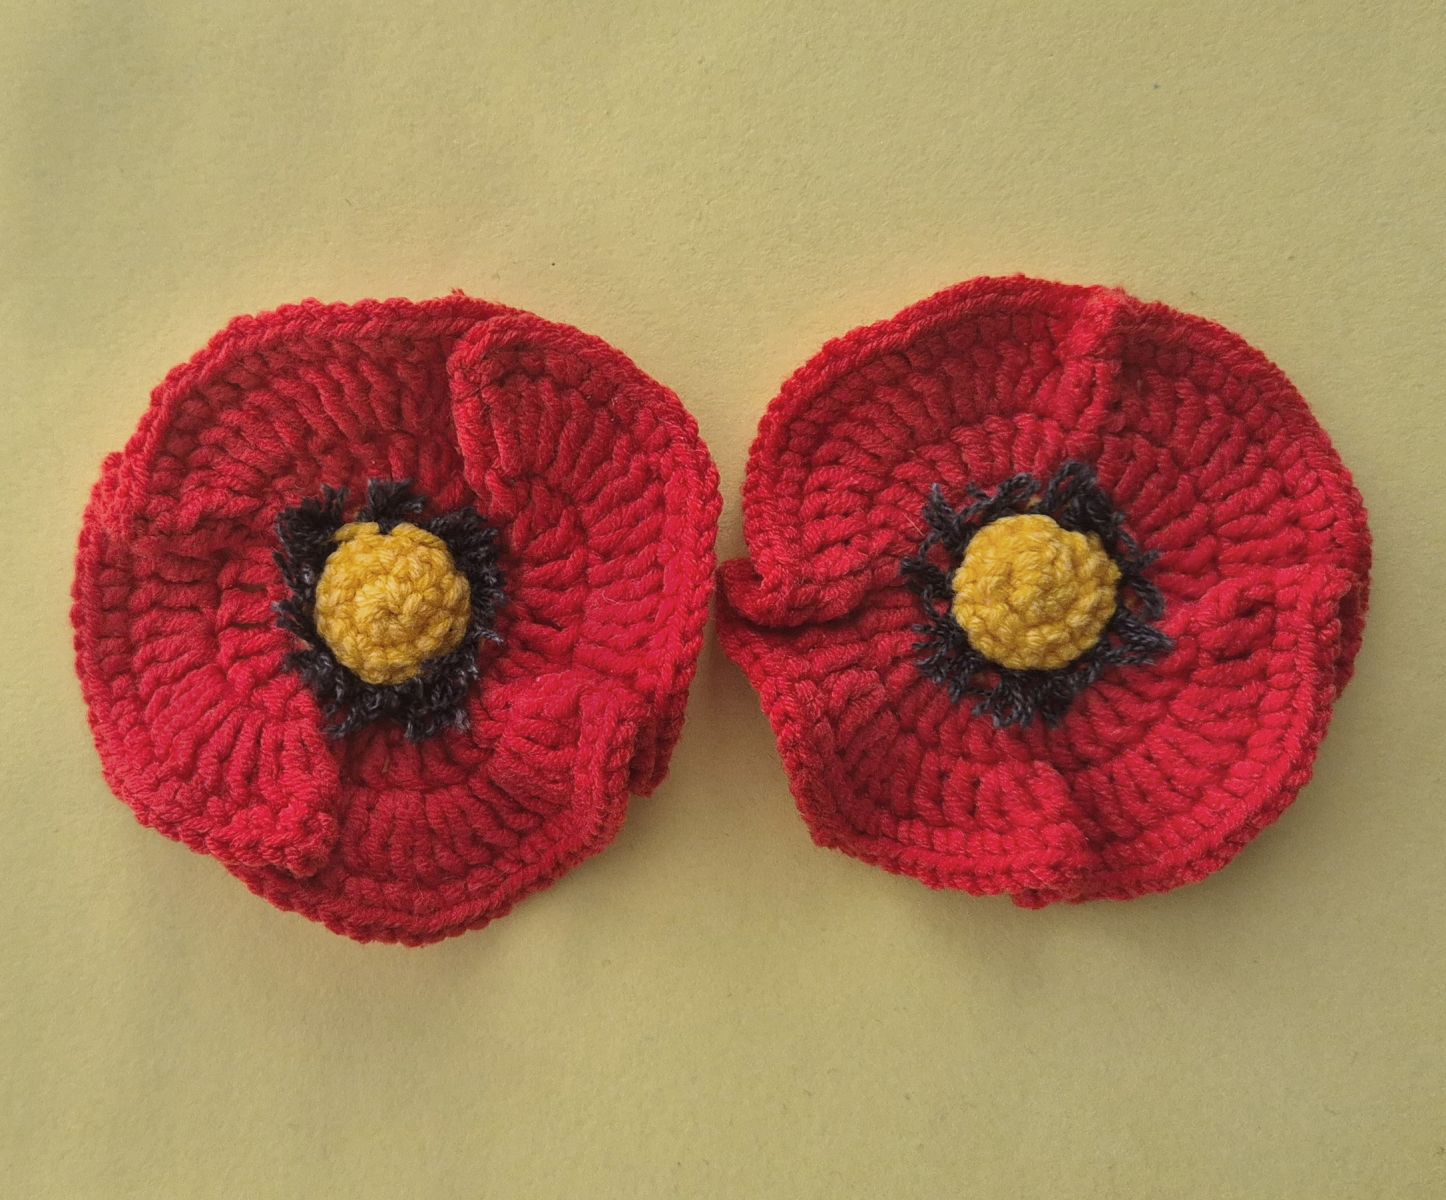
The small poppy flower
But to make our wreath look even more lively and varied, we will now crochet a small poppy flower. The small flower works almost the exact same way as the large one, but goes a little bit faster. It is perfect for filling gaps on the wreath and adding pretty accents.
The small flower center
Take your yellow yarn, crochet 10 single crochets into a magic ring and close the round with a slip stitch.
Now switch to the red yarn.
Round 2: Start with 3 chains (this is your first double crochet). Now crochet 3 double crochets into each stitch of the previous round. Close the round with a slip stitch.
Round 3: Crochet 2 single crochets into each stitch of the previous round. Close the round with a slip stitch. Cut the yarn and weave in all ends invisibly.
Just like with the large flower, we repeat the steps here briefly to make the poppy look truly alive. Here is the quick summary: Take black thread (e.g. sewing thread). Pull the thread from back to front between Round 2 and 3. Cut short on the front side as small fringes. (As usual, you can find the very precise explanation with all details at the very bottom at the end of the pattern!)
Poppy bud
To make your poppy flower set perfect, we will now crochet a small, sweet poppy bud. It is still closed and really spices up any bouquet! The bud consists of two small parts that we simply put into each other at the end.
Part 1: The green calyx
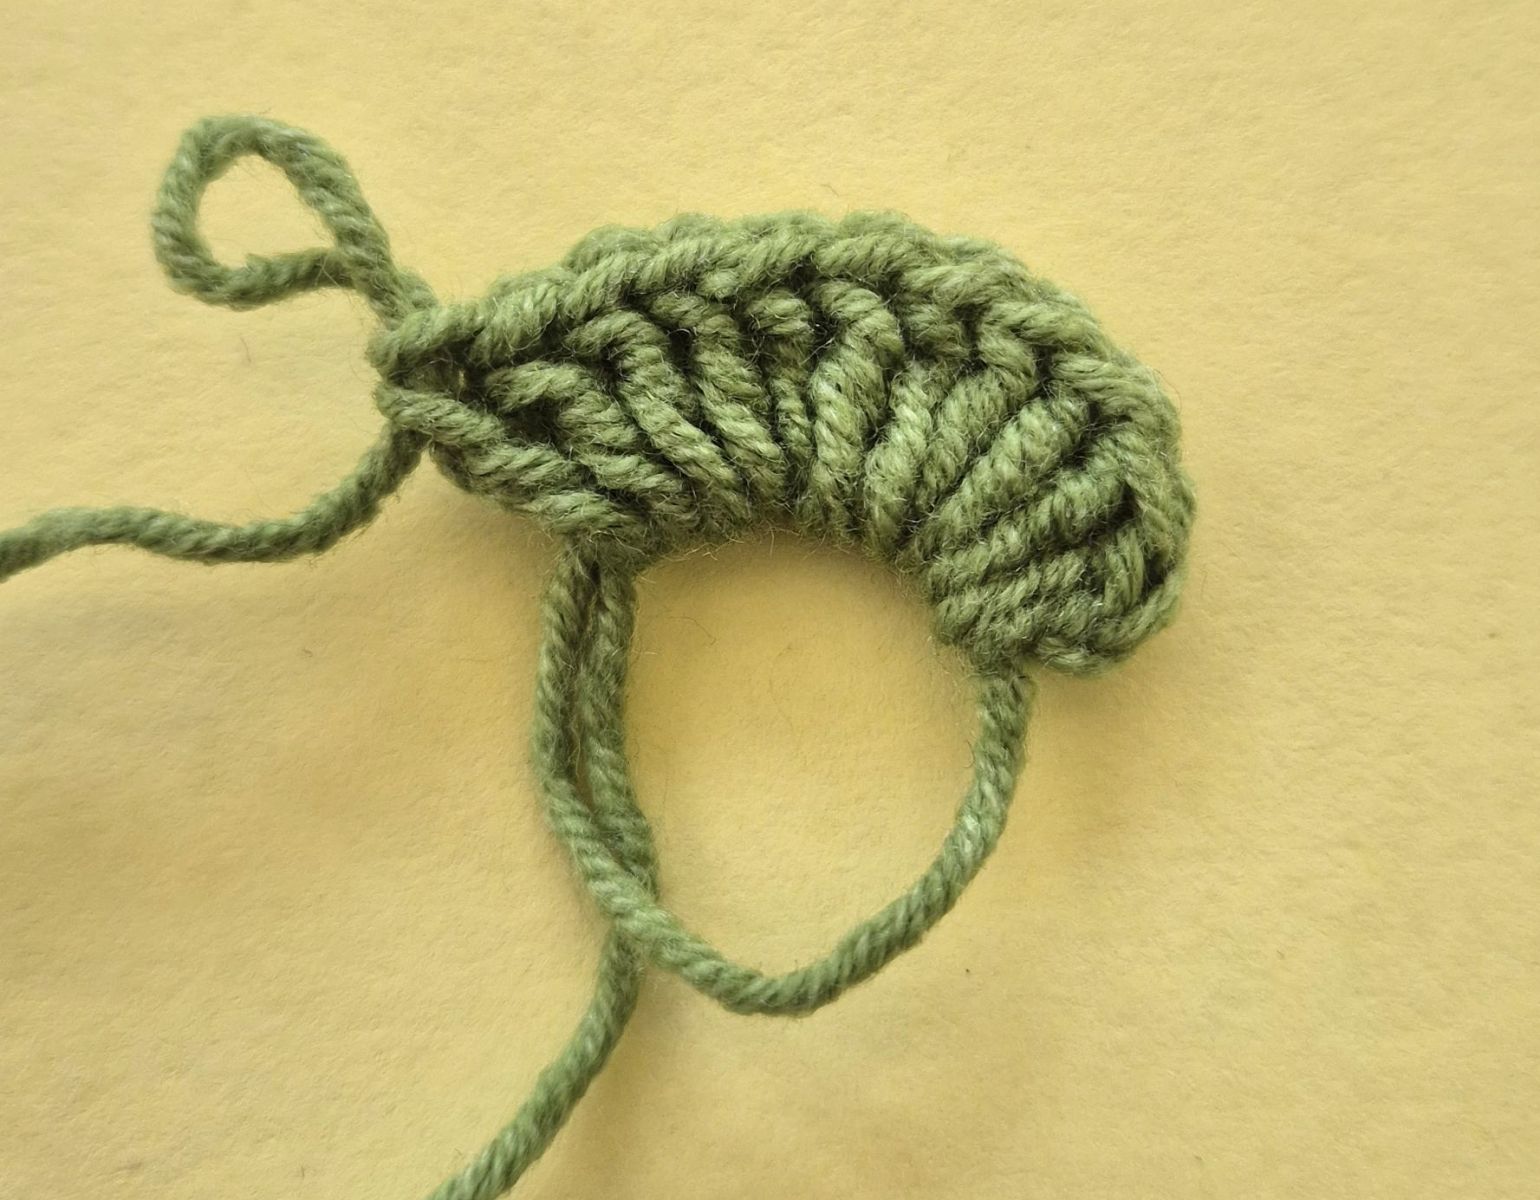
Row 1: Start with green. Crochet 3 chains (this is your first double crochet) and then 11 more double crochets into a magic ring. Pull the yarn tight. Turn the work. (You now have a crocheted semicircle with 12 stitches).
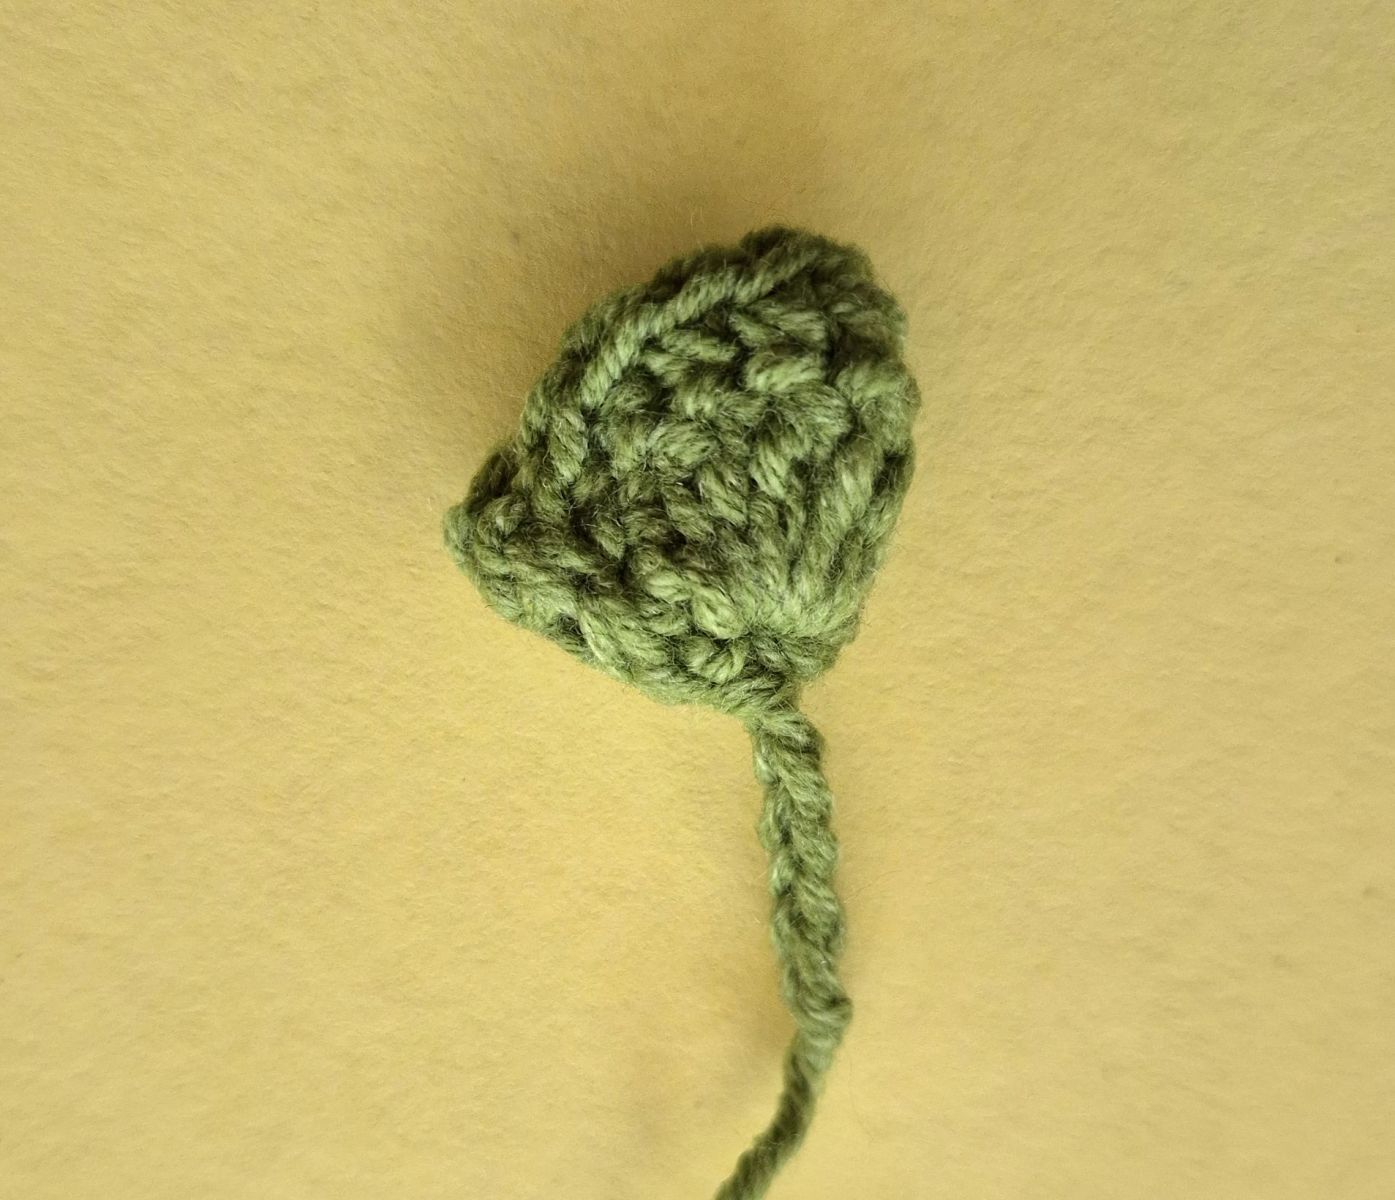
Row 2: Crochet 1 single crochet into each stitch of the previous row (a total of 12 sc). Crocheting together: Now fold the green part together so that a small cone is formed (the nice side faces outward). Crochet the two side edges together from top to bottom with single crochets or slip stitches.
The stem: When you have arrived at the bottom tip, directly crochet a chain of 5 chains for the small stem. Then cut the yarn and weave in invisibly.
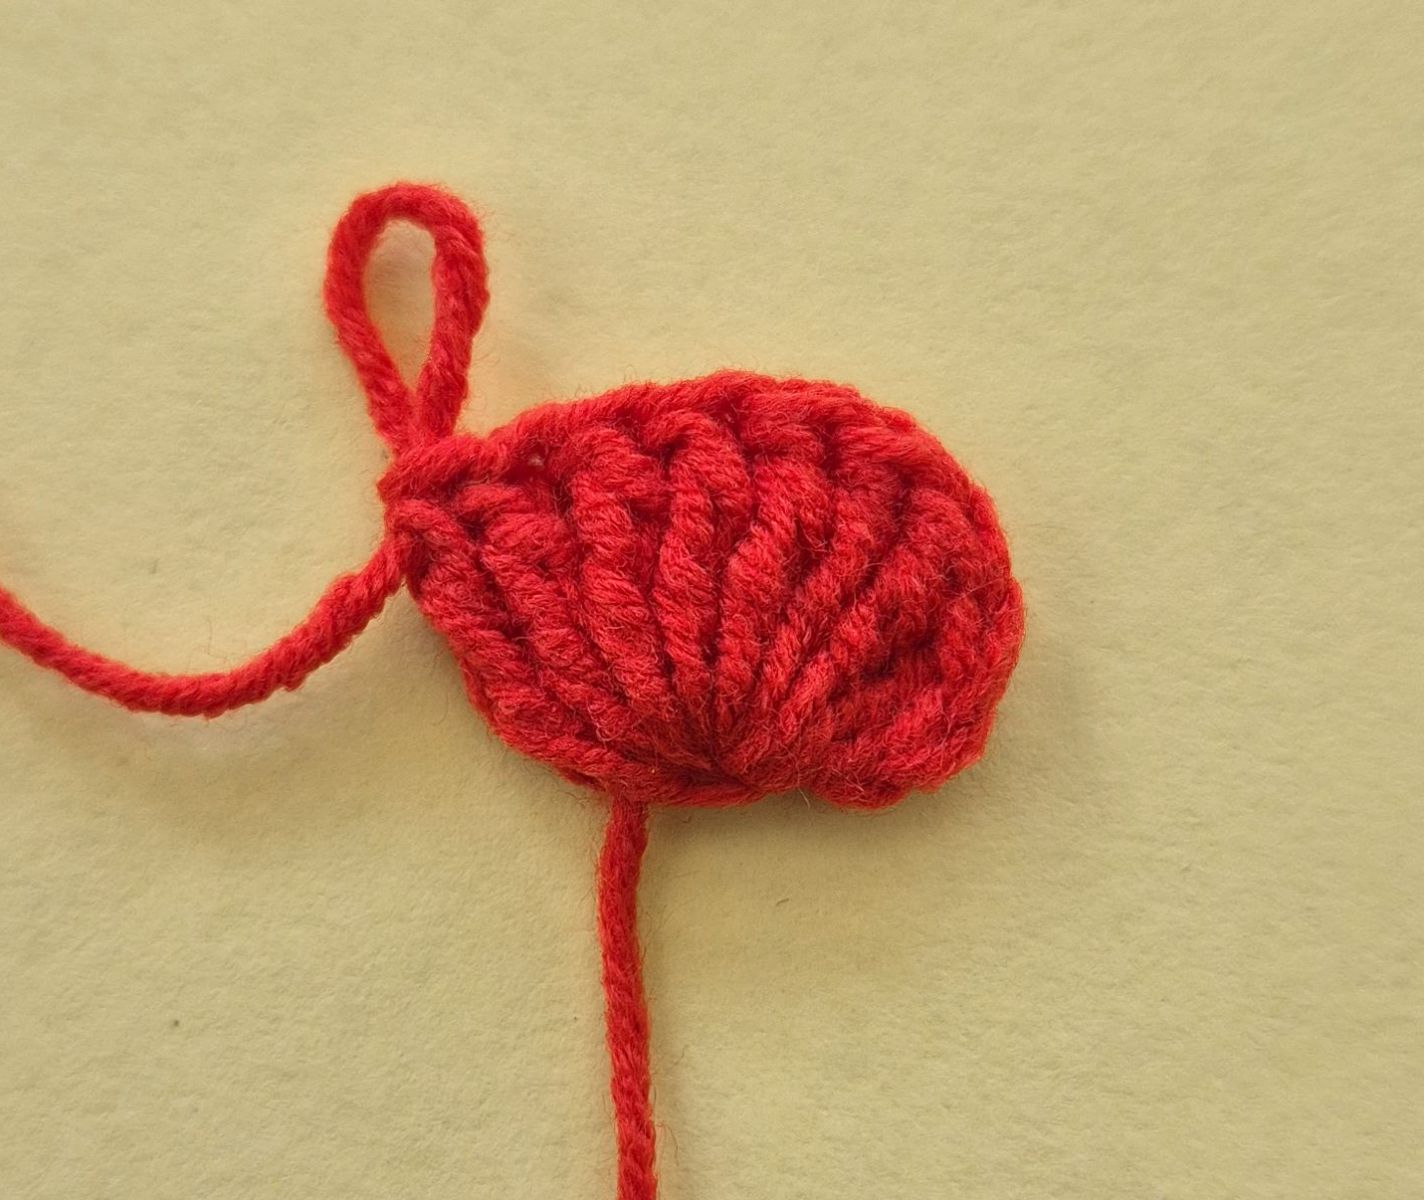
Part 2: The red blossom
Start with red. Crochet 4 chains (replace the first treble crochet) and then 8 treble crochets into a magic ring. Finishing: Pull the yarn very tight so that the treble crochets form into a dense, small bobble. Cut the yarn and weave it in.
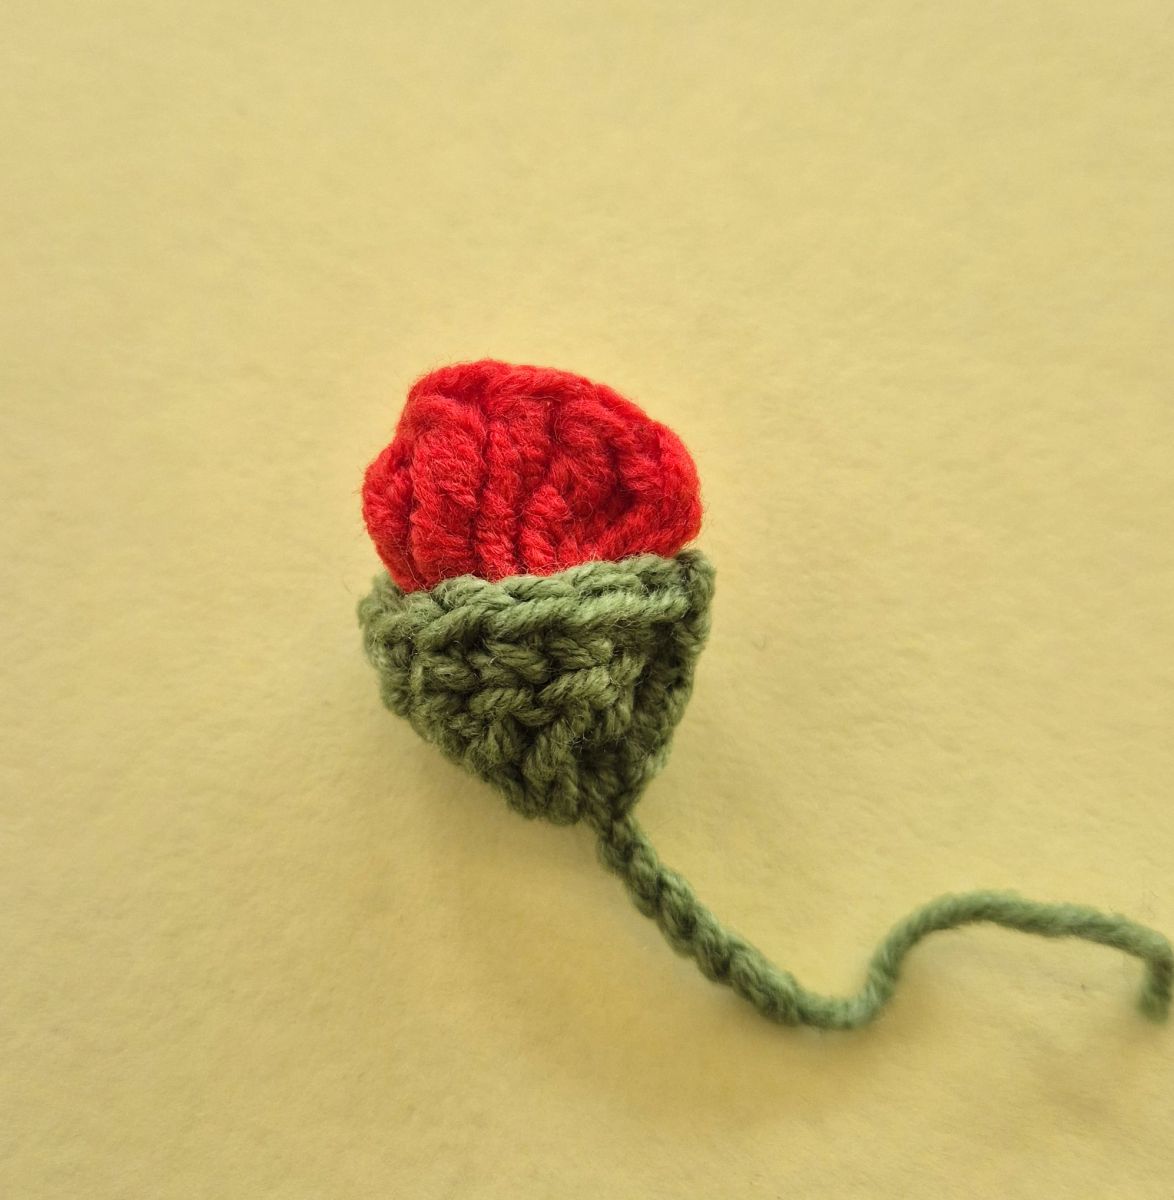
Assembling
Now take the red part (part 2) and put it from the top into the green calyx cone (part 1), so that the red peeks out at the top like a real bud. Sew the two parts together from the inside with a few small stitches so that nothing slips. Your poppy bud is finished!
Finally, we bring our poppy flower truly to life – with the leaves.
Here, we first crochet the center and then let the small branches grow out to the left and right.
The center and the first side of the leaf
Take your green yarn and cast on a chain of 16 chains.
The leaf tip: Insert into the 2nd stitch from the hook and crochet 1 single crochet into this and each of the next five stitches. You are now on the main chain in the center. The 1st fringe: Now cast on 6 new chains directly from here. Insert into the 2nd stitch from the hook and crochet 5 single crochets back until you have reached the center again.

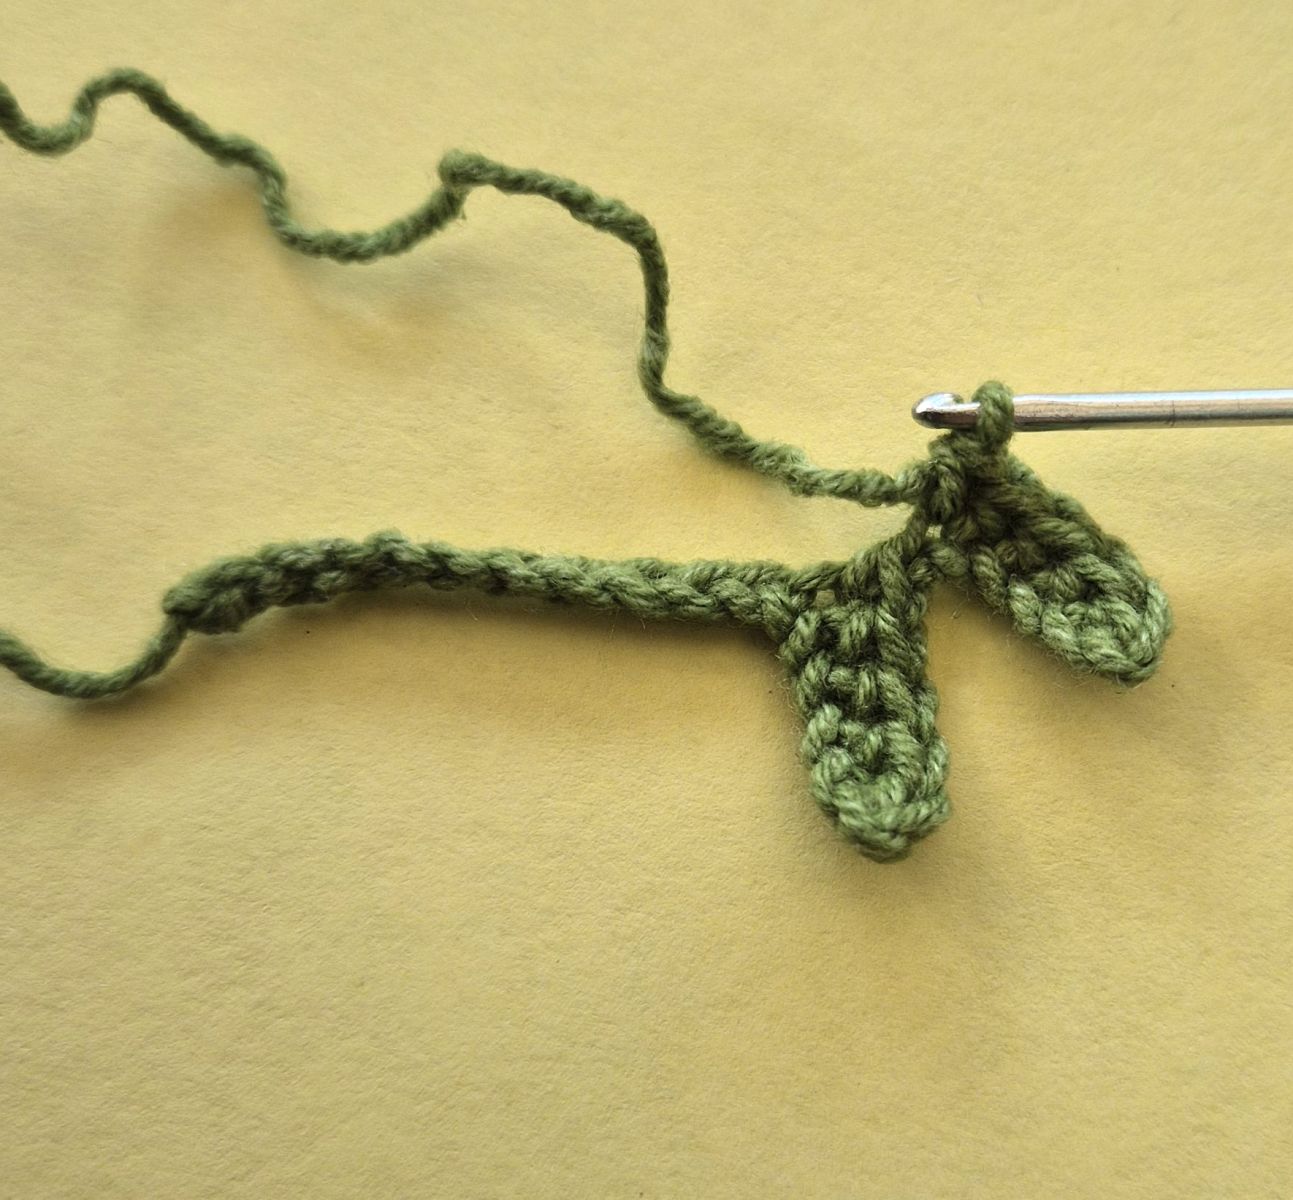
Further in the center: Now crochet 3 single crochets further down along the original chain.
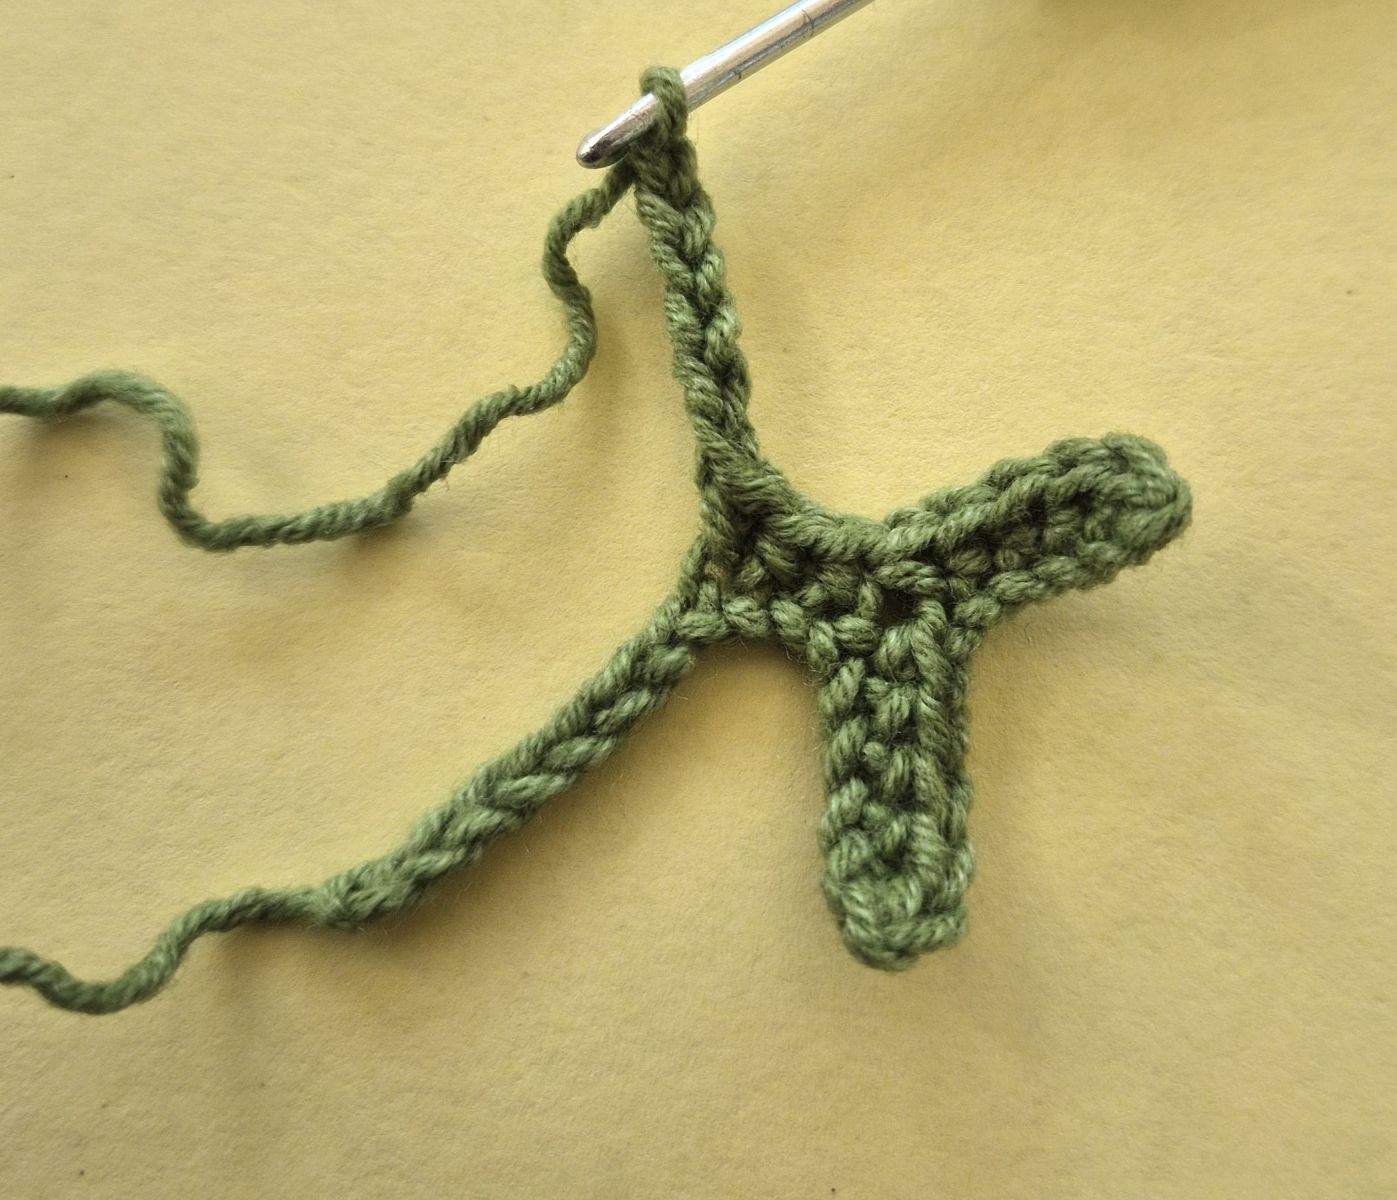
Repeat the steps for the fringes (from * to *) 3 more times until you have reached the bottom.
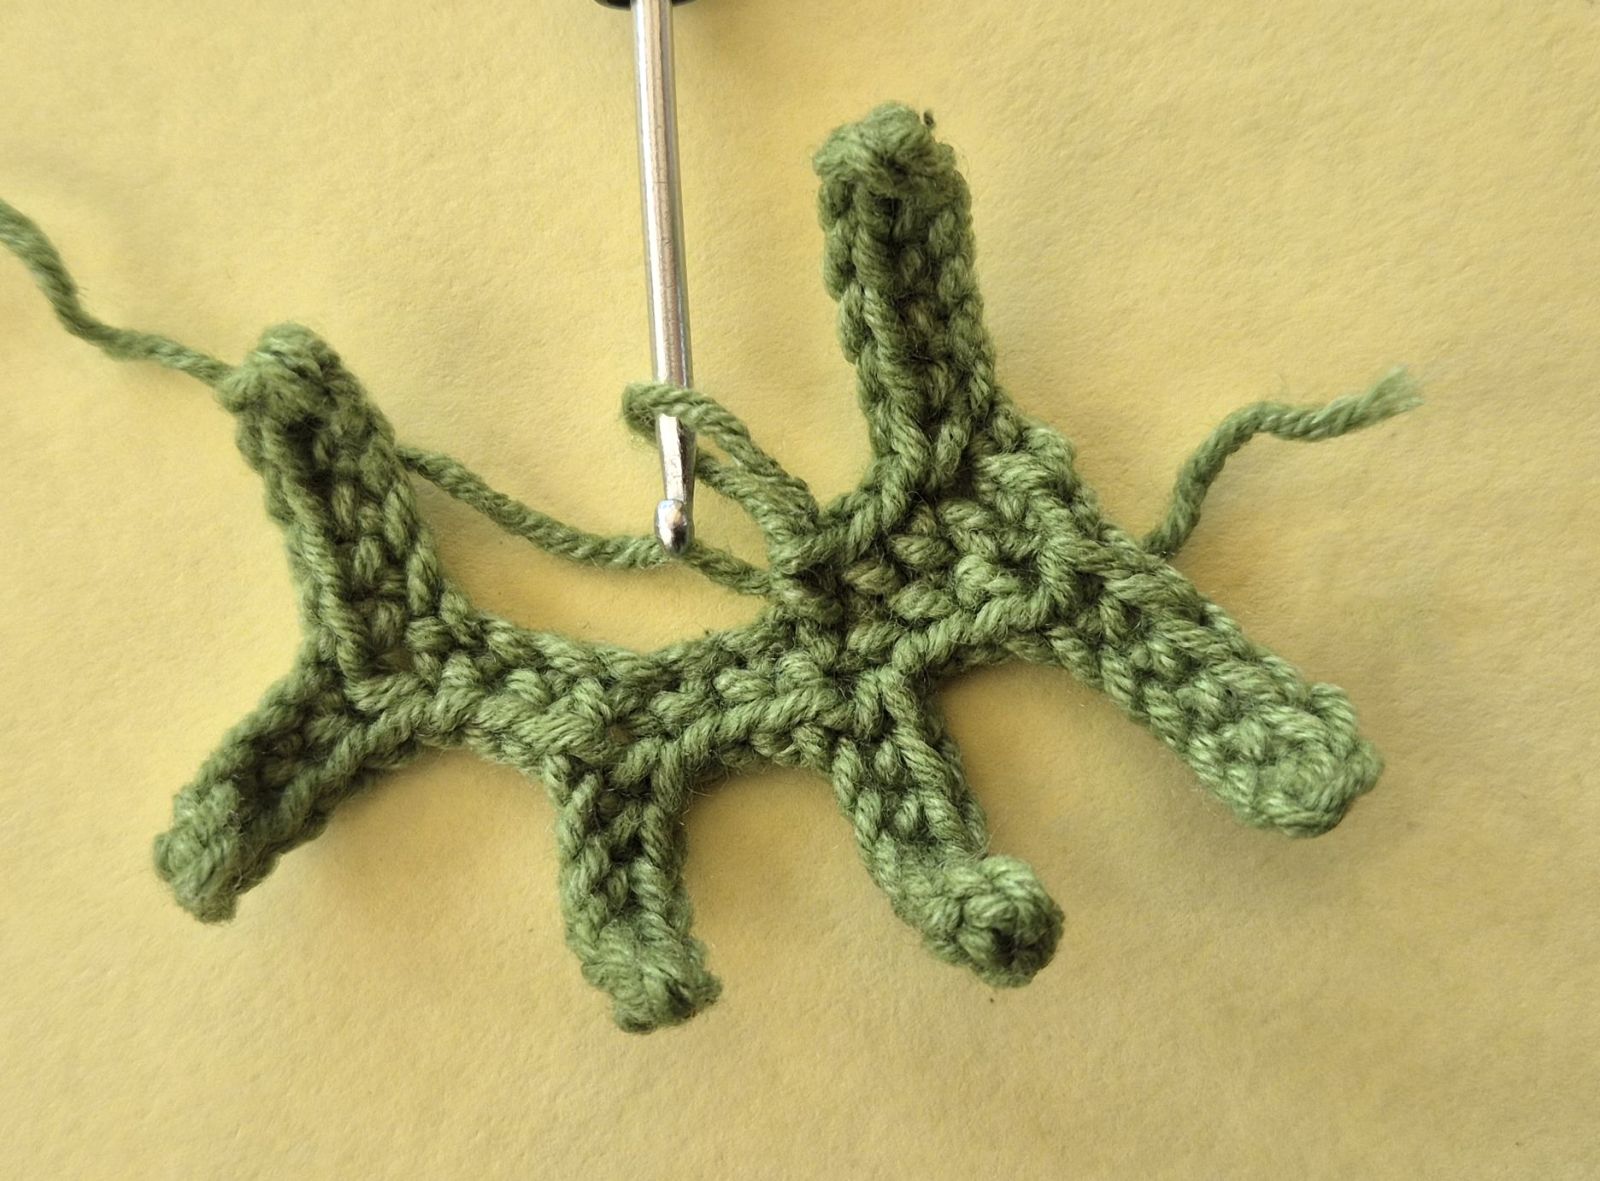
The opposite side Switching sides: We have now arrived at the bottom.
Turn the work so that you can now crochet back up toward the leaf tip on the opposite side (the underside) of the initial chain.
The next fringes: Cast on 6 chains again, crochet 5 sc back to the center starting from the 2nd stitch from the hook.
In the center: Crochet 3 single crochets up along the center.
Repeat this on this side as well until you have reached the leaf tip at the top again. Cut the yarn and weave in ends.
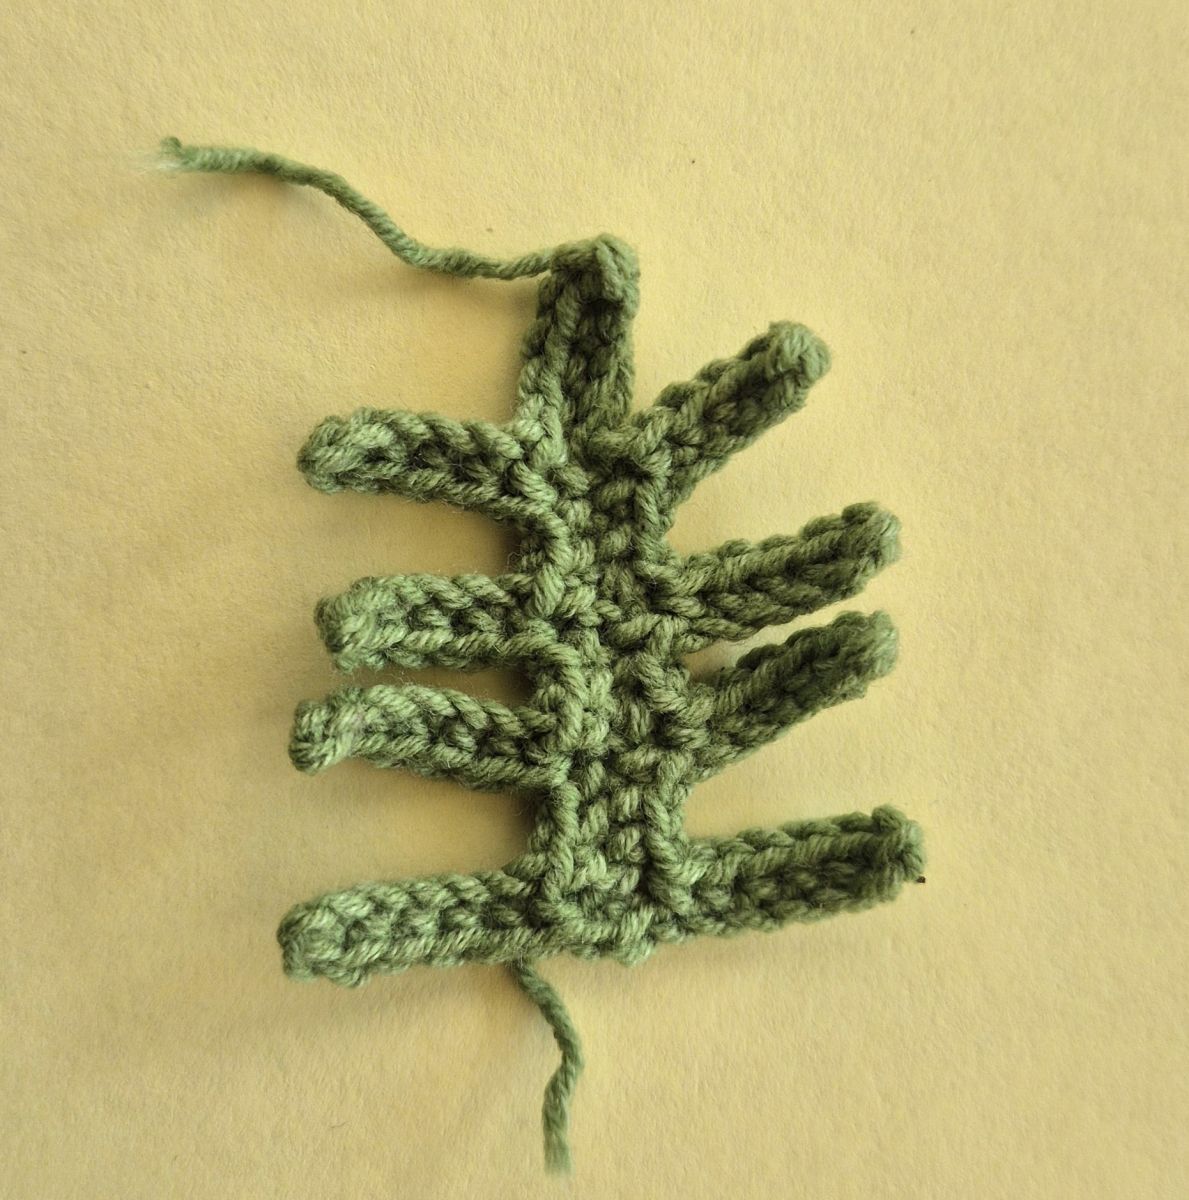
Crocheted leaves often tend to curl or roll up a little. This can be easily solved:
Ironing: Place a cloth over the finished leaves and iron them nice and flat. This way, they will lay wonderfully straight.
Spray starch: If you have spray starch (laundry starch) at home, spray the leaves lightly with it after ironing. This gives them a great, firm shape and improves the hold enormously!
Crocheting around the Styrofoam wreath
Now all that's missing is the base where all your beautiful poppy flowers, buds, and leaves will find their place! To do this, we crochet a long, flat band that is simply sewn together around the ring at the end.
Step 1: Determine the circumference
Cast on a chain of chains that fits tightly exactly once around the thickest part of your Styrofoam ring.
As a guide: For my wreath, that was 46 chains.
.jpg)
Step 2: Crocheting the band (The length)
Row 1: Insert into the 2nd stitch from the hook and crochet 1 single crochet (sc) into each following stitch. Turn the work.
All following rows: Crochet 1 chain (ch) as a turning chain, then crochet 1 single crochet (sc) into each stitch of the previous row again. Turn the work.
Repeat this row until the band is long enough to fit completely once around the large circle of the wreath.
Every now and then, try placing the band around your ring as a test to check how much is still missing. For my wreath, it ended up being a total of 264 rows.
.jpg)
.jpg)
Step 3: Dressing and sewing the wreath
Closing the short ends: First, sew the two short ends (the beginning and the end of your crocheted band) together with a needle so that a closed circle is formed.
.jpg)
Now pull this crocheted circle over your Styrofoam ring.
Closing the back: Fold the long edges together on the back of the wreath and sew them closed using a matching yarn needle.
.jpg)
Now it's time to design! Distribute the large poppy flowers, the small blossoms, the buds, and the leaves on the ring however you like it best. You can either sew the crocheted parts in place using matching yarn or simply attach them with hot glue.
I hope you had a lot of fun crocheting! Have fun hanging it up or gifting it!


