A knitted Duckling
.JPG)
Knitted with thick, soft yarn, this duckling quickly becomes a cuddly companion about 40 cm tall. The head, legs, and wings are securely sewn to the body, making the duckling sturdy, durable, and perfect for snuggling.
You can easily adjust the size by choosing different yarn weights. Extra‑large chenille yarn turns the duckling into a fluffy, oversized friend – ideal as a gift for a small child or anyone who loves soft, huggable toys. Using thinner yarn will make the duckling proportionally smaller. Yarn with approximately 160 m/50 g will result in a much more compact, easy‑to‑handle duckling.
A knitted duckling is more than just a toy – it’s a soft, warm little friend for life.
Knitting Instructions:
All parts are crafted entirely with two knitting needles.
Follow these steps:
First Row - Purl Stitches Begin by knitting the first row entirely in purl stitches. These will form the back side of your project, creating a neat texture.
Second Row - Knit Stitches In the second row, knit every stitch. This will produce a smooth, even front for your piece.
Repeating the Pattern Continue alternating between purl stitches in the odd-numbered rows and knit stitches in the even-numbered rows:
- Odd-numbered rows (e.g., 1st, 3rd, 5th): Work in purl stitches.
- Even-numbered rows (e.g., 2nd, 4th, 6th): Work in knit stitches.
This straightforward pattern of alternating knit and purl rows is ideal for beginners, offering an easy yet satisfying introduction to the craft.
Materials:
-Yarn Himalaya Dolphin Baby or YarnArt Dolce 120m/100 gr.
Yellow- 350 gr. Rose - 25 gr.
- Knitting needles 3,5 mm.
Please note that wool consumption can vary depending on the knitting style – those who knit loosely usually need a little more yarn than those who knit more tightly. You can choose the wool and knitting needles entirely according to your taste and experience.
✓ Safety eyes 20 mm
✓ Stuffing, tapestry needle.
Abbreviations:
CH – Chain(s)
inc – increase
dec – decrease
X dec – X- times decrease
X inc – X- times increase
ST – Stitch
P – purl
K– knit (garter stitch)
Body
Cast on 6 stitches (ch) onto the knitting needle. Make sure the stitches are evenly stretched while knitting to ensure your knitted piece is nice and even.
1. 6 P (6)
2. 6 K inc. (12)
3. 12 P (12)
4. (1 K, 1 K inc)x 6 (18)
5. 18 P (18)
6. (2 K, 1 K inc)x 6 (24)
7. 24 P (24)
8. (3 K, 1 K inc)x 6 (30)
9. 30 P (30)
10. (4 K, 1 K inc)x 6 (36)
11. 36 P (36)
12. (5 K, 1 K inc)x 6 (42)
13. 42 P (42)
14. (6 K, 1 K inc)x 6 (48)
15. 48 P (48)
16. (7 K, 1 K inc)x 6 (54)
17. 54 P (54)
18. ( 8 K, 1 K inc)x 6 (60)
19. 60 P
20. ( 9 K, 1 K inc)x 6 (66)
21. 66 P
Knit a total of 18 rows in stockinette stitch:
On the front side of the work, knit all stitches across the row.
On the back side of the work, purl all stitches across the row.
23, 25, 27, 29, 31, 33, 35, 37, 39 - 66 P
22, 24, 26, 28, 30, 32, 34, 36, 38 - 66 K
40. 17 K, (2 K, 1 dec)x 8, 17 K (58)
41. 58 P
Knit a total of 10 rows in stockinette stitch:
On the front side of the work, knit all stitches across the row.
On the back side of the work, purl all stitches across the row.
42, 44, 46, 48, 50,– 58 K
43, 45, 47, 49, 51, - 58 P
52. 17 K, (1 K, 1 dec)x 8, 17 K (50)
Knit a total of 19 rows in stockinette stitch:
On the front side of the work, knit all stitches across the row.
On the back side of the work, purl all stitches across the row.
53, 55, 57, 59, 61, 63, 65, 67, 69, 71 - 50 P
54, 56, 58, 60, 62, 64, 66, 68, 70 - 50 K
72. (8 K, 1 dec)x 5 (45)
73. 45 P
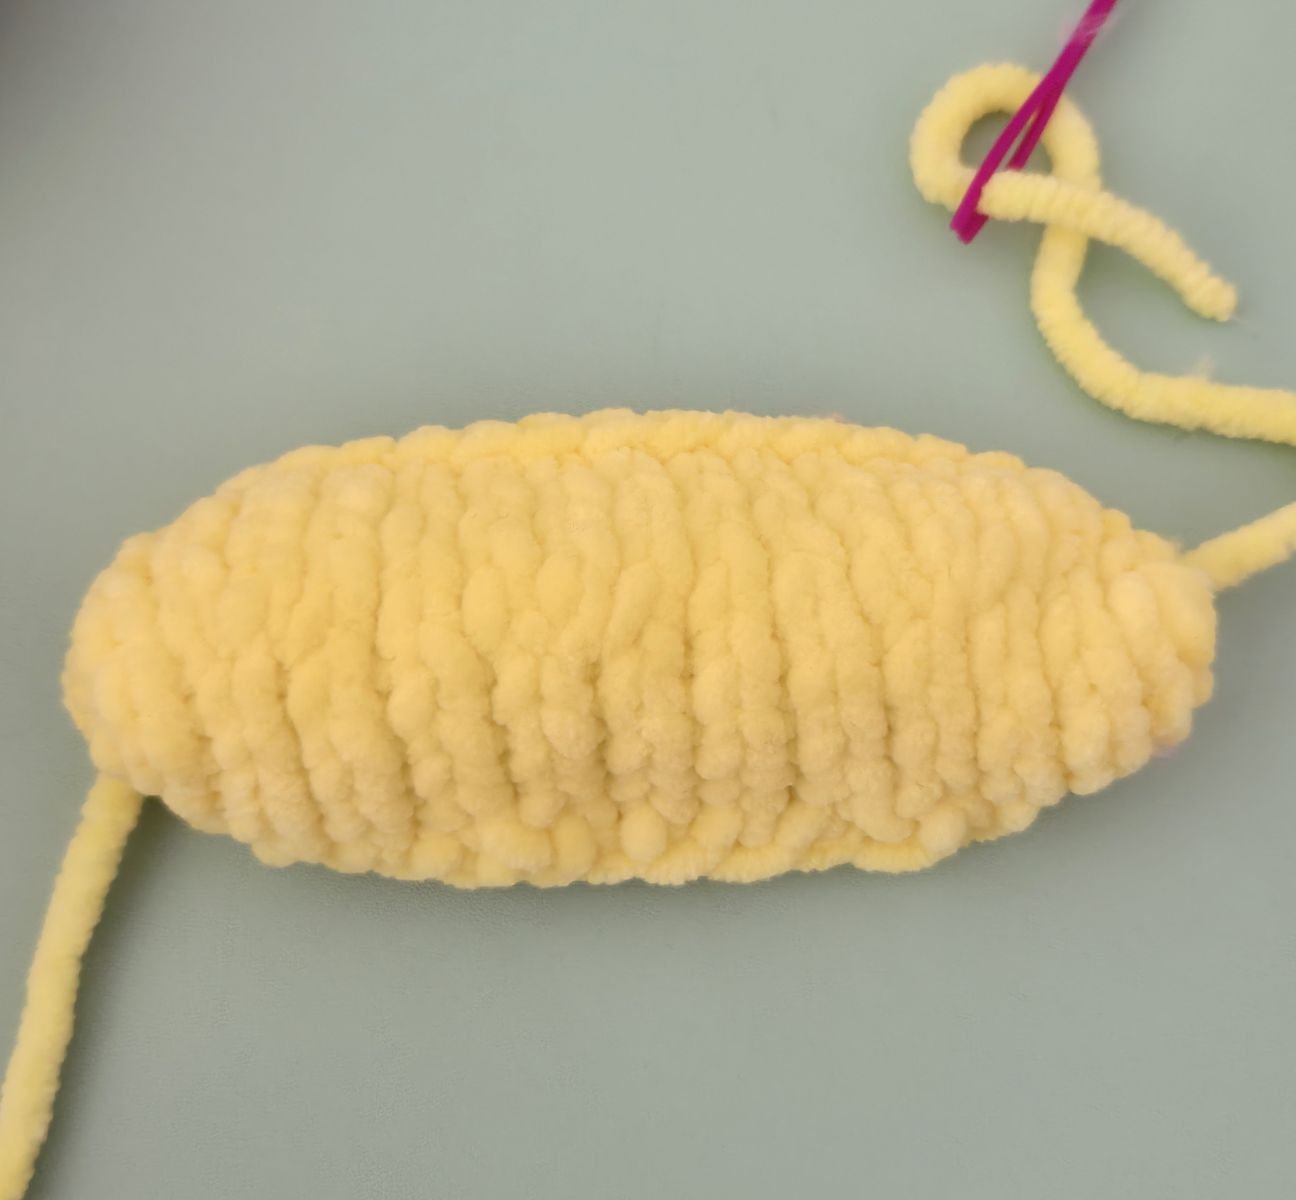
Finally, cast off the remaining 45 stitches. Sew the body together using the same yarn, keeping your stitches neat so the seam looks clean and tidy. As you sew, gradually stuff the body with fiberfill to give it a smooth, even shape.
Wings (2 pcs.)
Cast on 6 stitches (ch) onto the knitting needle. Make sure the stitches are evenly stretched while knitting to ensure your knitted piece is nice and even.
1. 6 P (6)
2. 6 K inc. (12)
3. 12 P (12)
4. (1 K, 1 K inc)x 6 (18)
5. 18 P (18)
6. (2 K, 1 K inc)x6 (24)
7. 24 P
8. 24 K
9. 24 P
10. 24 K
11. 24 P
12. 24 K
13. 24 P
14. 5 K, 1 dec, 10 K, 1 dec, 5 K (22)
15. 22 P
16. 22 K
17. 22 P
18. 5 K, 1 dec, 8 K, 1 dec, 5 K (20)
19. 20 P
20. 20 K
21. 20 P
22. 4 K, 1 dec, 8 K, 1 dec, 4 K (18)
23. 18 P
24. 4 K, 1 dec, 6 K, 1 dec, 4 K (16)
25. 16 P
26. 16 K
27. 16 P
28. 16 K
29. 16 P
30. 16 K
31. 16 P
32. 16 K
33. 16 P
34. 3 K, 1 dec, 6 K, 1 dec, 3 K (14)
35. 14 P
36. 2 K, 1 dec, 6 K, 1 dec, 2 K (12)
37. 12 P
38. 12 K
39. 12 P
40. 6 dec
41. 6 P
Finally, cast off the remaining stitches as usual. Then sew the two wings together – do not stuff them, so they stay nicely flat.
You can sew the wings together with a needle in the traditional way. However, I simply placed them on top of each other and crocheted them together using single crochet stitches. This creates a decorative, slightly raised edge on one side. I preferred this look over a simple sewn seam.
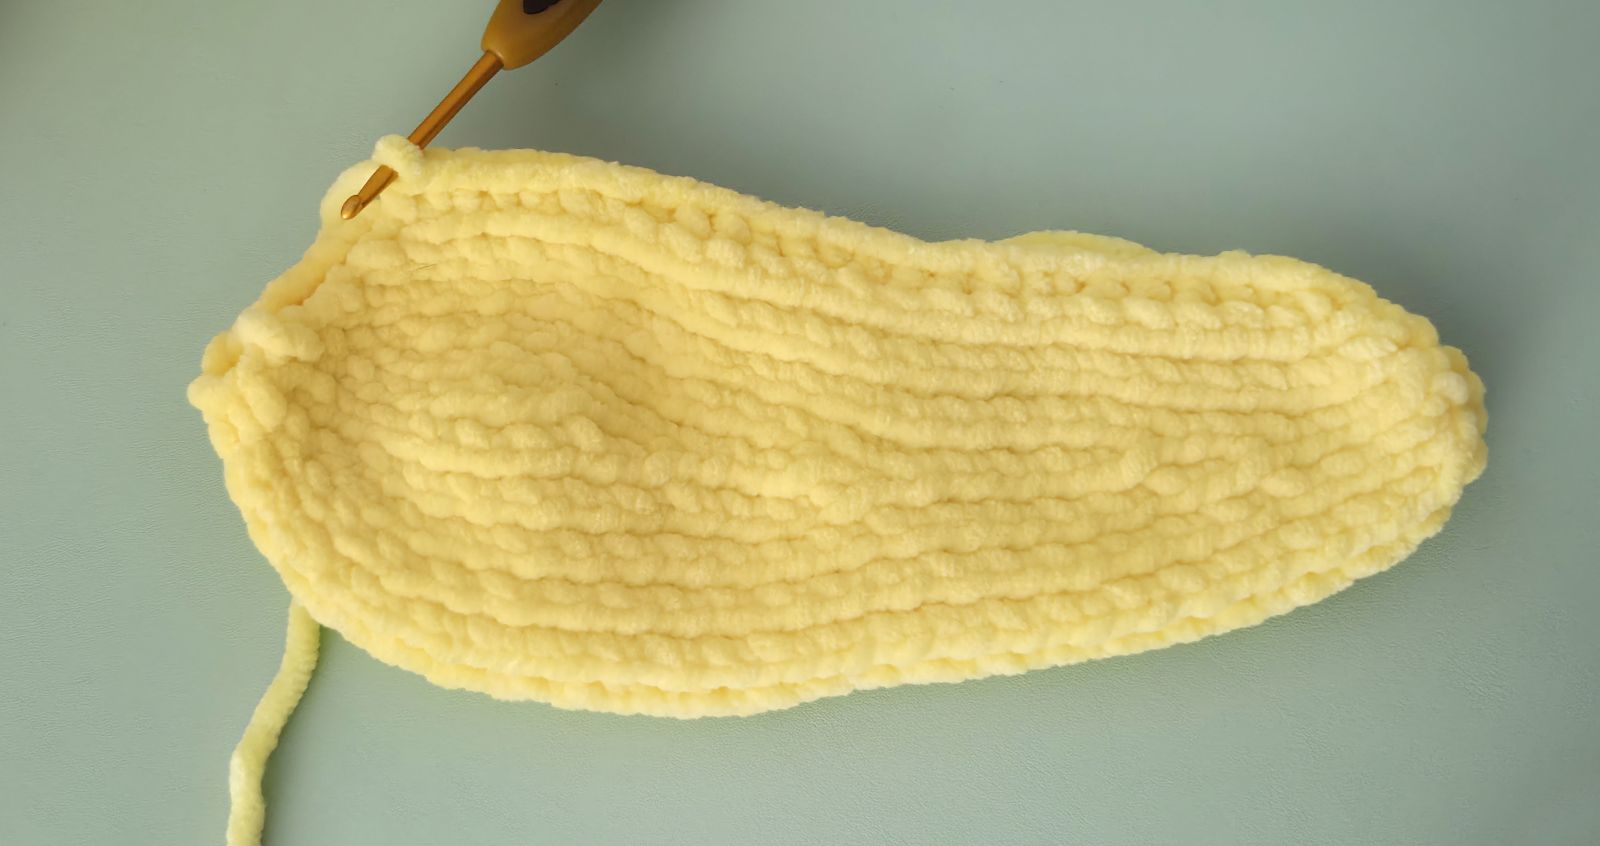
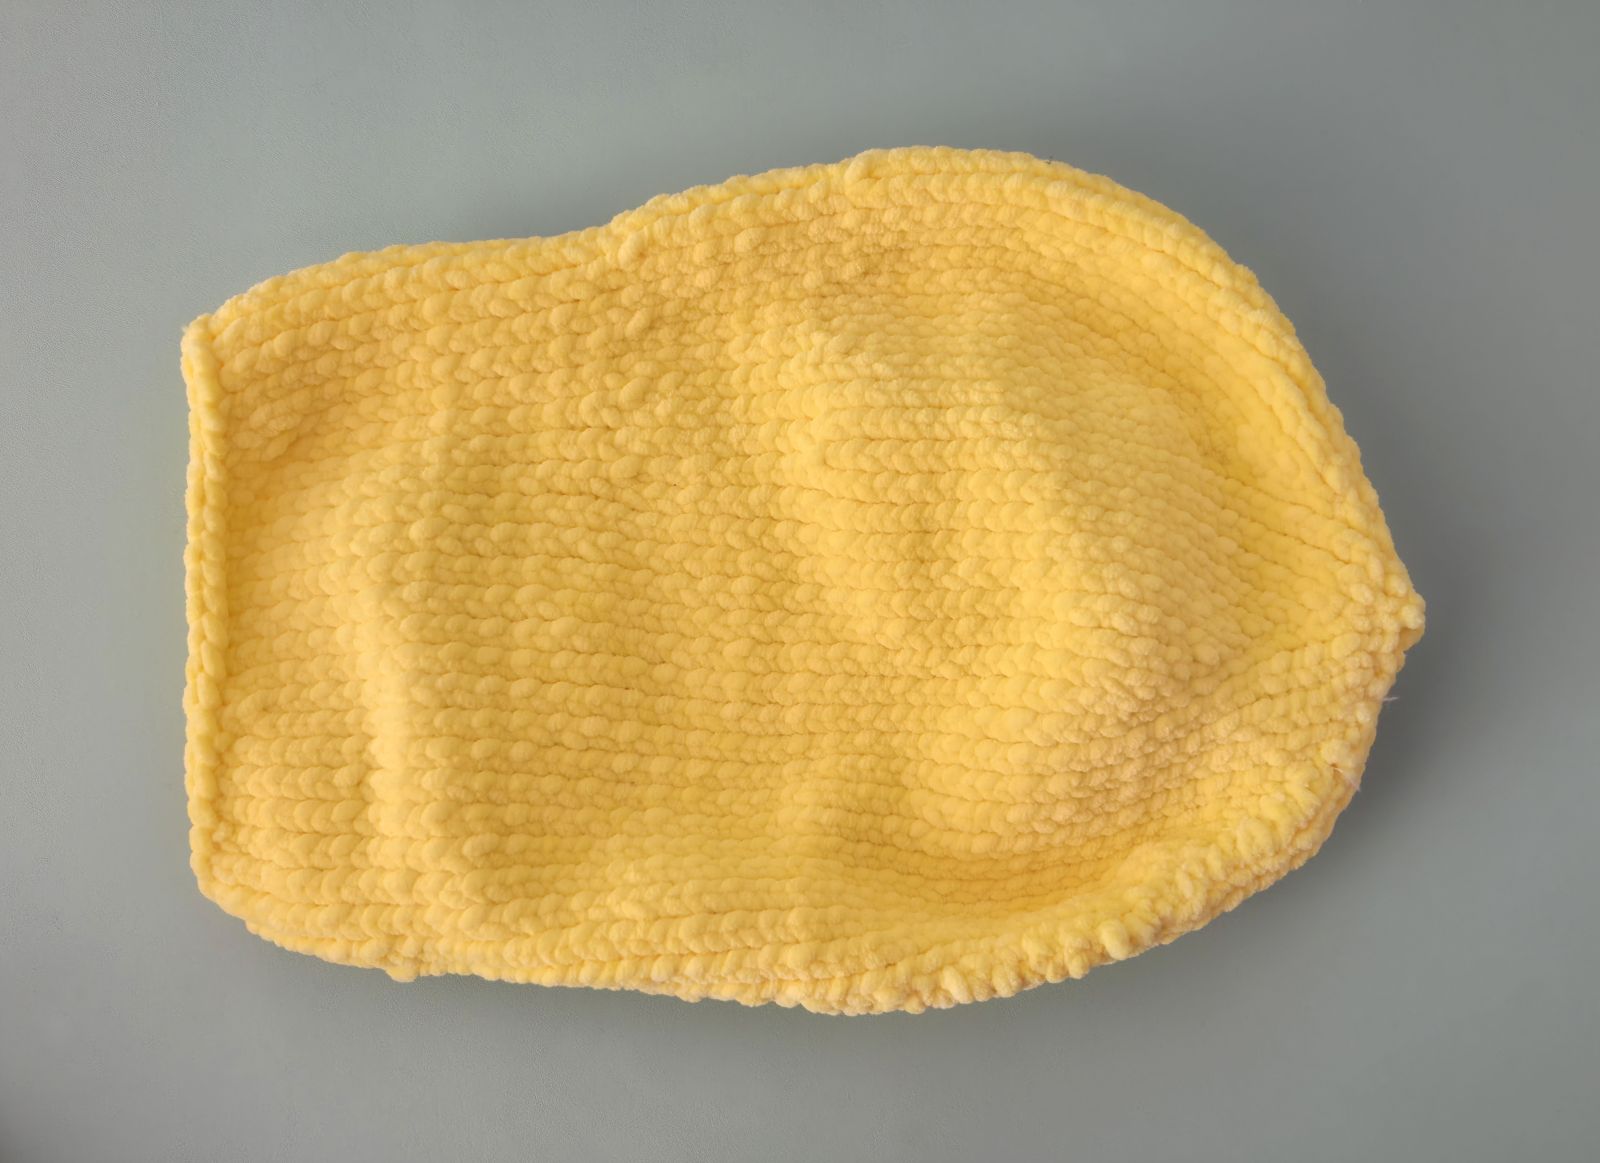
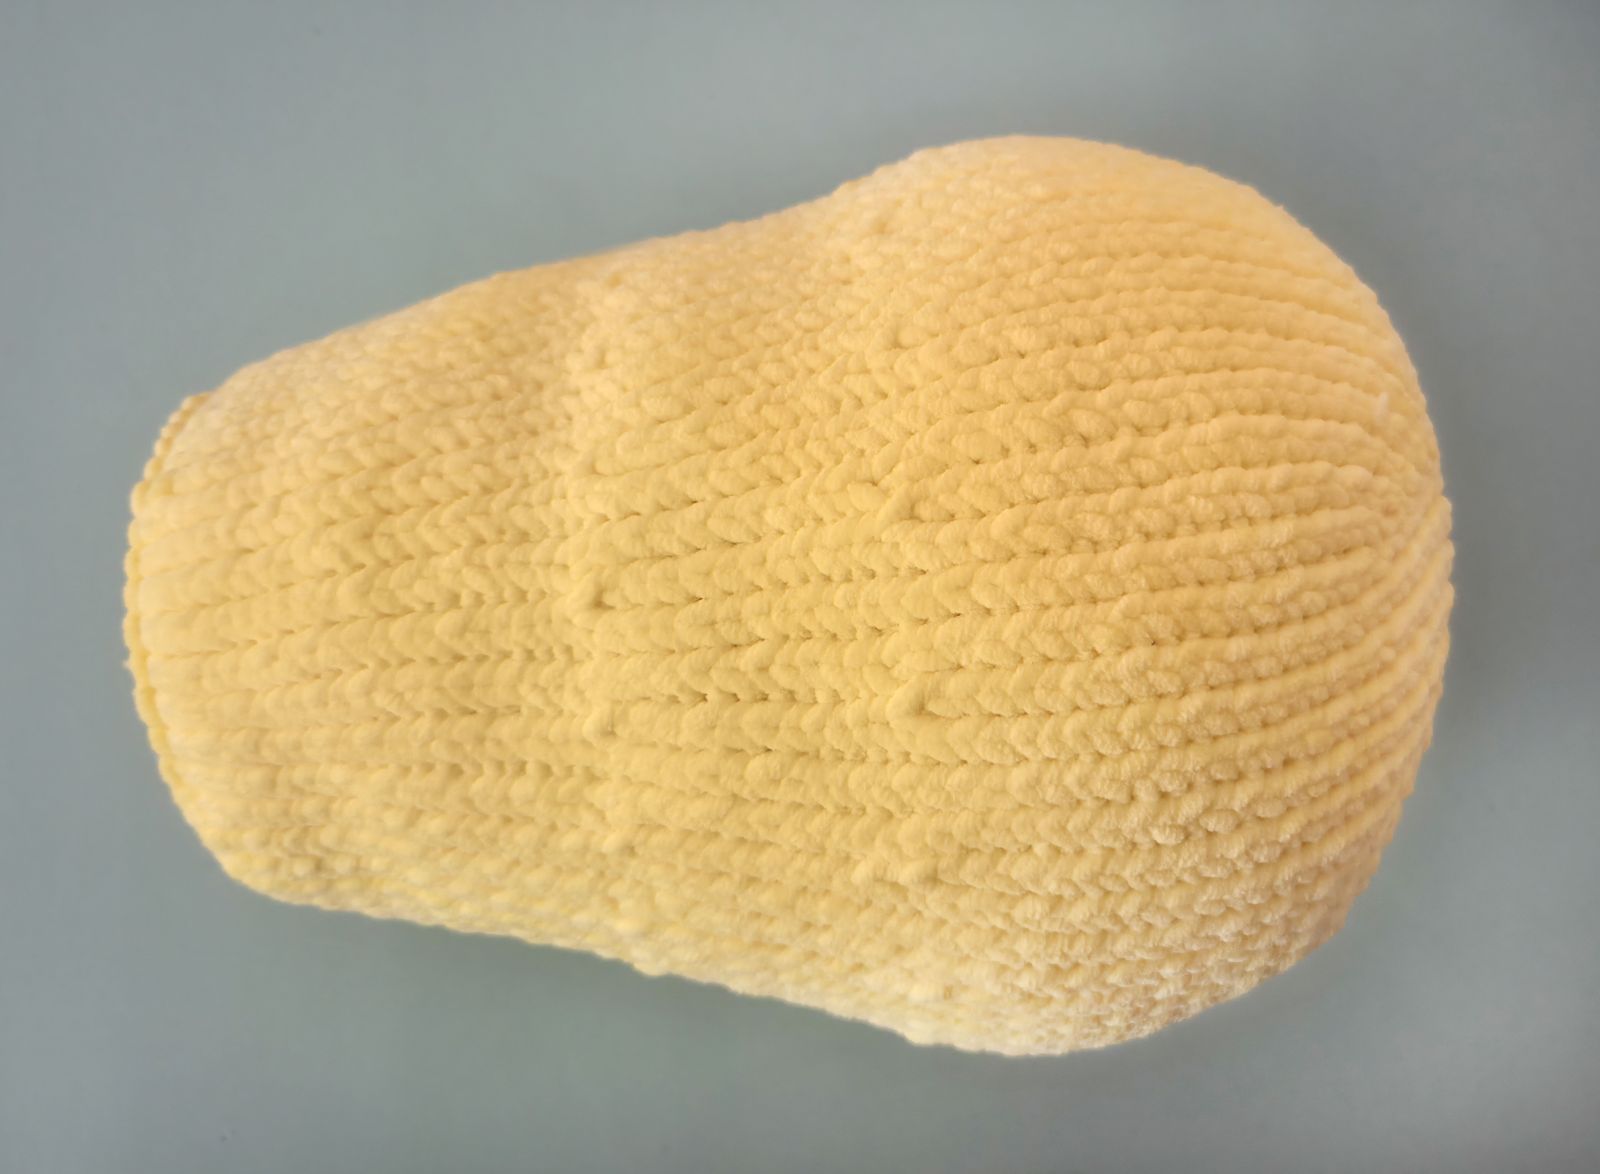
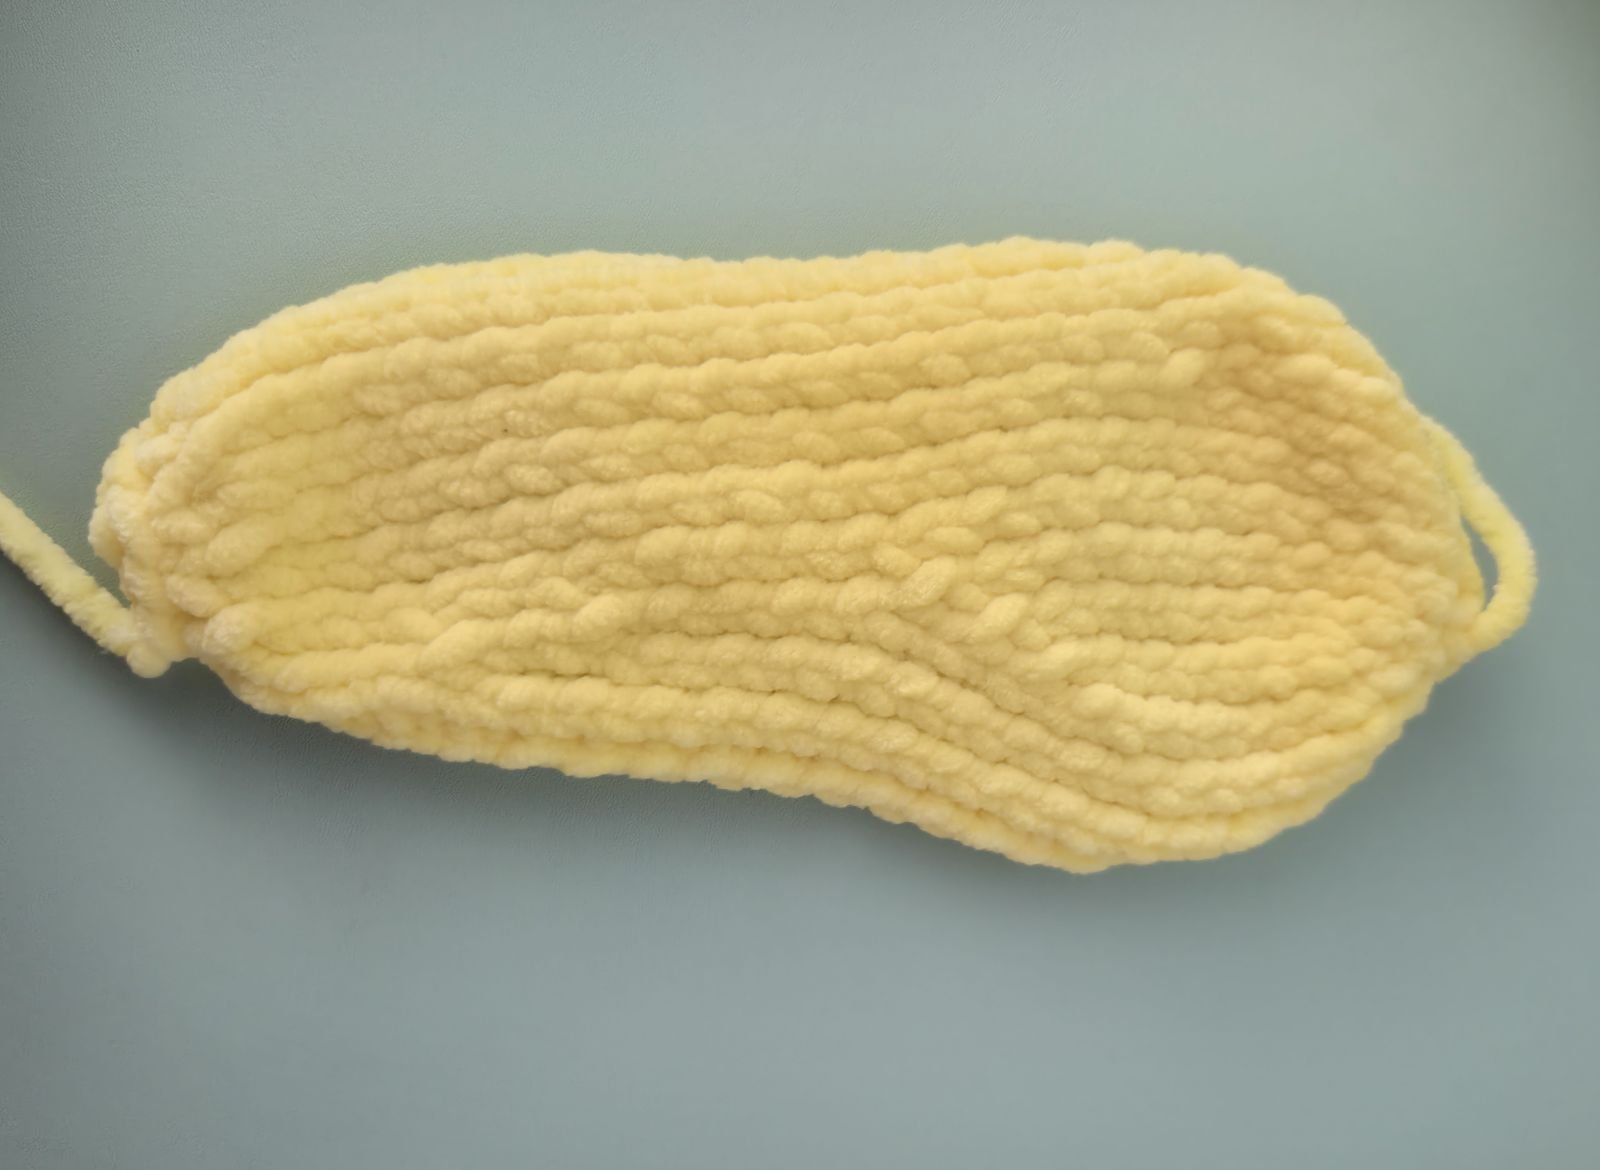
Working the Legs
The legs are made up of two separate pieces, which are knitted individually. Once both pieces are finished, place them on top of each other and sew them together.
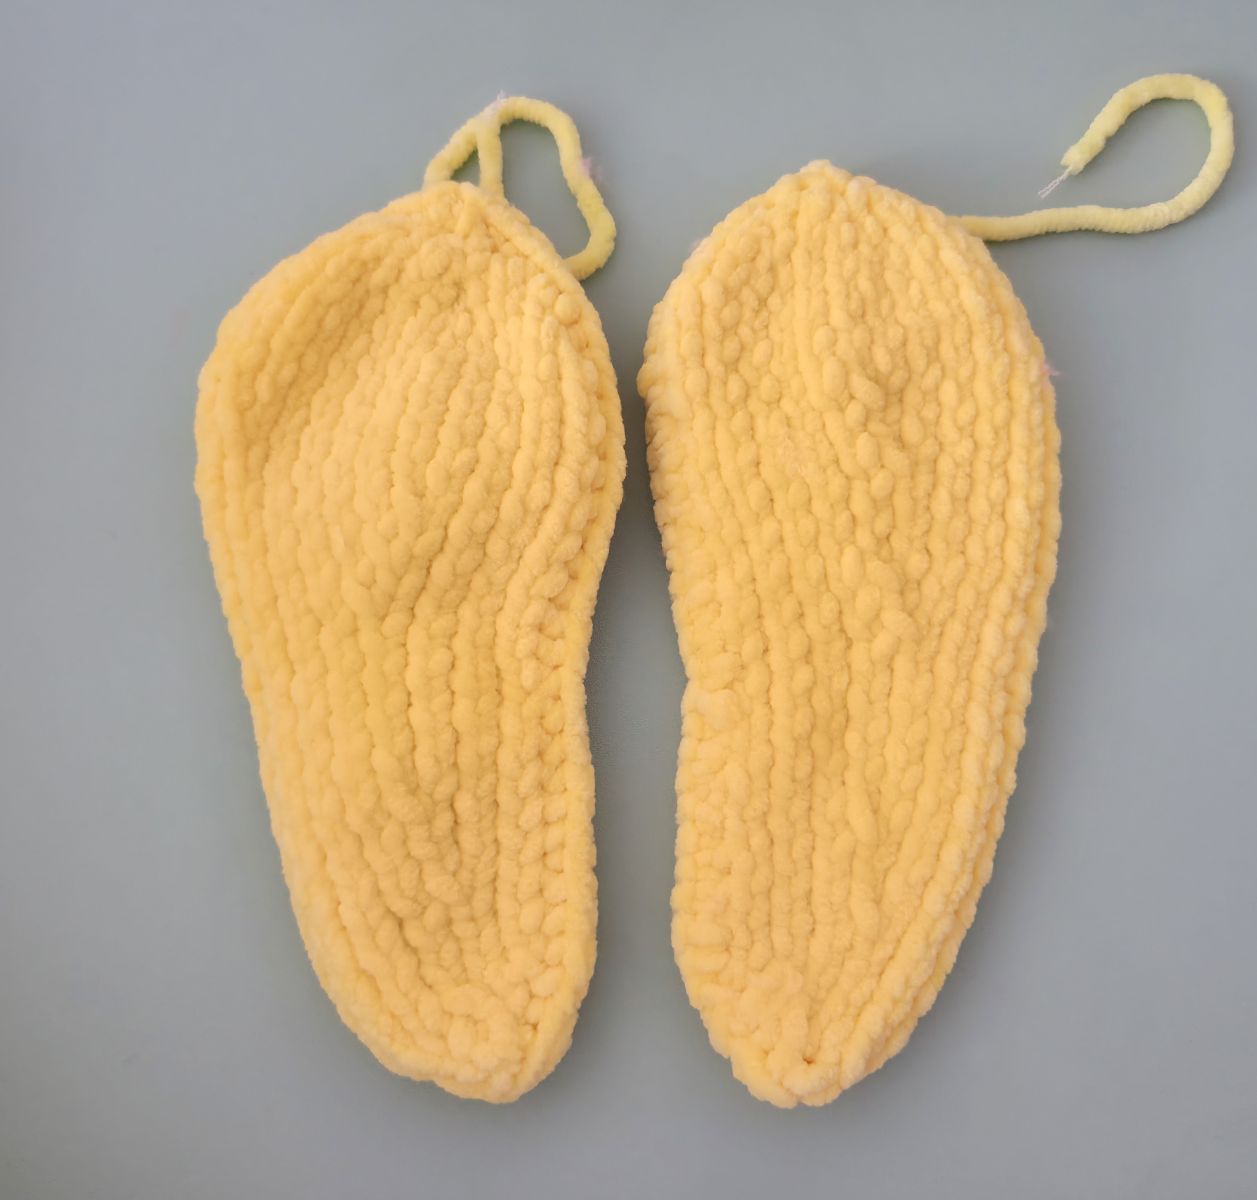
Knitting part 1 (foot):
Cast on 13 stitches (ch) onto the knitting needle. Make sure the stitches are evenly stretched while knitting to ensure your knitted piece is nice and even.
1. 13 P
2. 13 K
3. 13 P
4. 13 K
5. 13 P
6. 5 K, 1 dec, 6 K (12)
7. 12 P
8. 5 K, 1 dec, 5 K (11)
9. 11 P
10 . 11 K
11. 11 P
12. 5 K, 1 dec, 4 K (10)
13. 10 P
14. 4 K, 1 dec, 4 K (9)
15. 9 P
16. 9 K
17. 9 P
18 . (1 K, 1 dec)x 3 (6)
19. 6 P
20. 6 K
21. 6 P
22. (1 K, 1 inc)x 3 (9)
23. 9 P
24. 9 K
25. 9 P
26. 4 K, 1 inc, 4 K (10)
27. 10 P
28. 4 K, 1 inc, 5 K (11)
29. 11 P
30. 11 K
31. 11 P
32. 5 K, 1 inc, 5 K (12)
33. 12 P
34. 5 K, 1 inc, 6 K (13)
35. 13 P
37. 13 K
39. 13 P
40. 13 K
41. 13 P
Finally, cast off the remaining stitches. Join the sides together and sew them closed. Do not stuff while sewing.
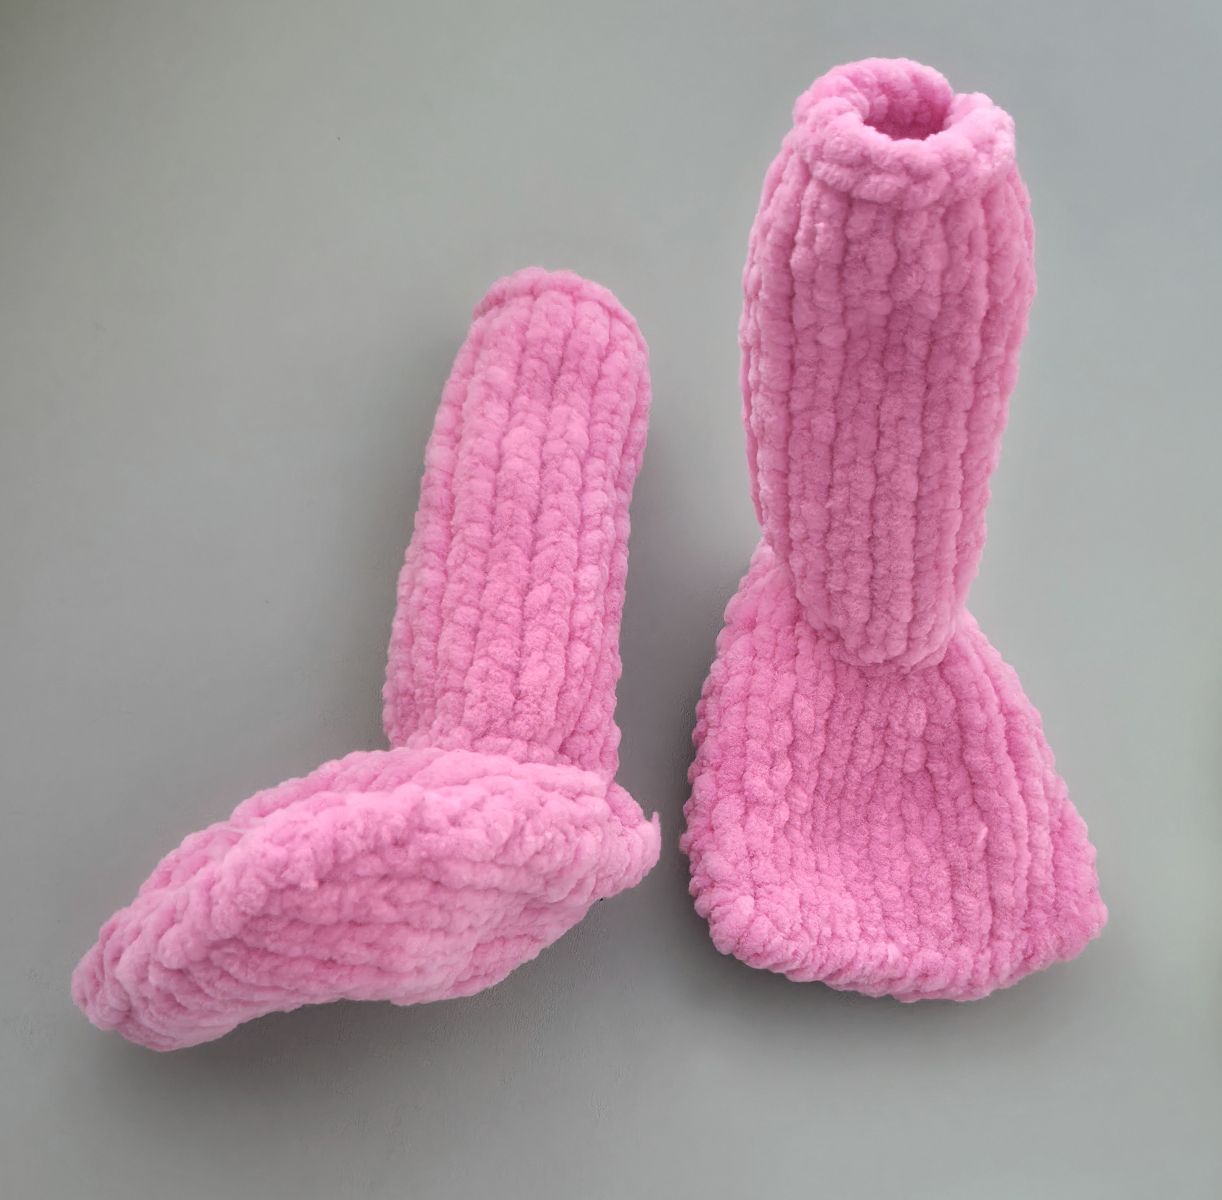
Knitting part 2 (leg)
Cast on 14 stitches (ch) onto the knitting needle. Make sure the stitches are evenly stretched while knitting to ensure your knitted piece is nice and even.
1. 14 P
2. 14 K
3. 14 P
4. 14 K
5. 14 P
6. 14 K
7. 14 P
8. 14 K
9. 14 P
10. 14 K
11. 14 P
12. 14 K
13. 14 P
14. 14 K
15. 14 P
16. 14 K
17. 14 P
18. 14 K
19. 14 P
20. 14 K
21. 14 P
22. 14 K
23. 14 P
24. 14 K
25. 14 P
Finally, cast off the remaining stitches as usual.
Place the two sides of Part 2 on top of each other and sew them together. I chose not to stuff this piece because I preferred the flatter shape. However, you can add a small amount of stuffing if you prefer a rounder look.
Once Part 2 is closed, sew it to Part 1 at the top along the narrow edge. Attach it by sewing around the edge in a circular motion to ensure it sits securely and evenly.
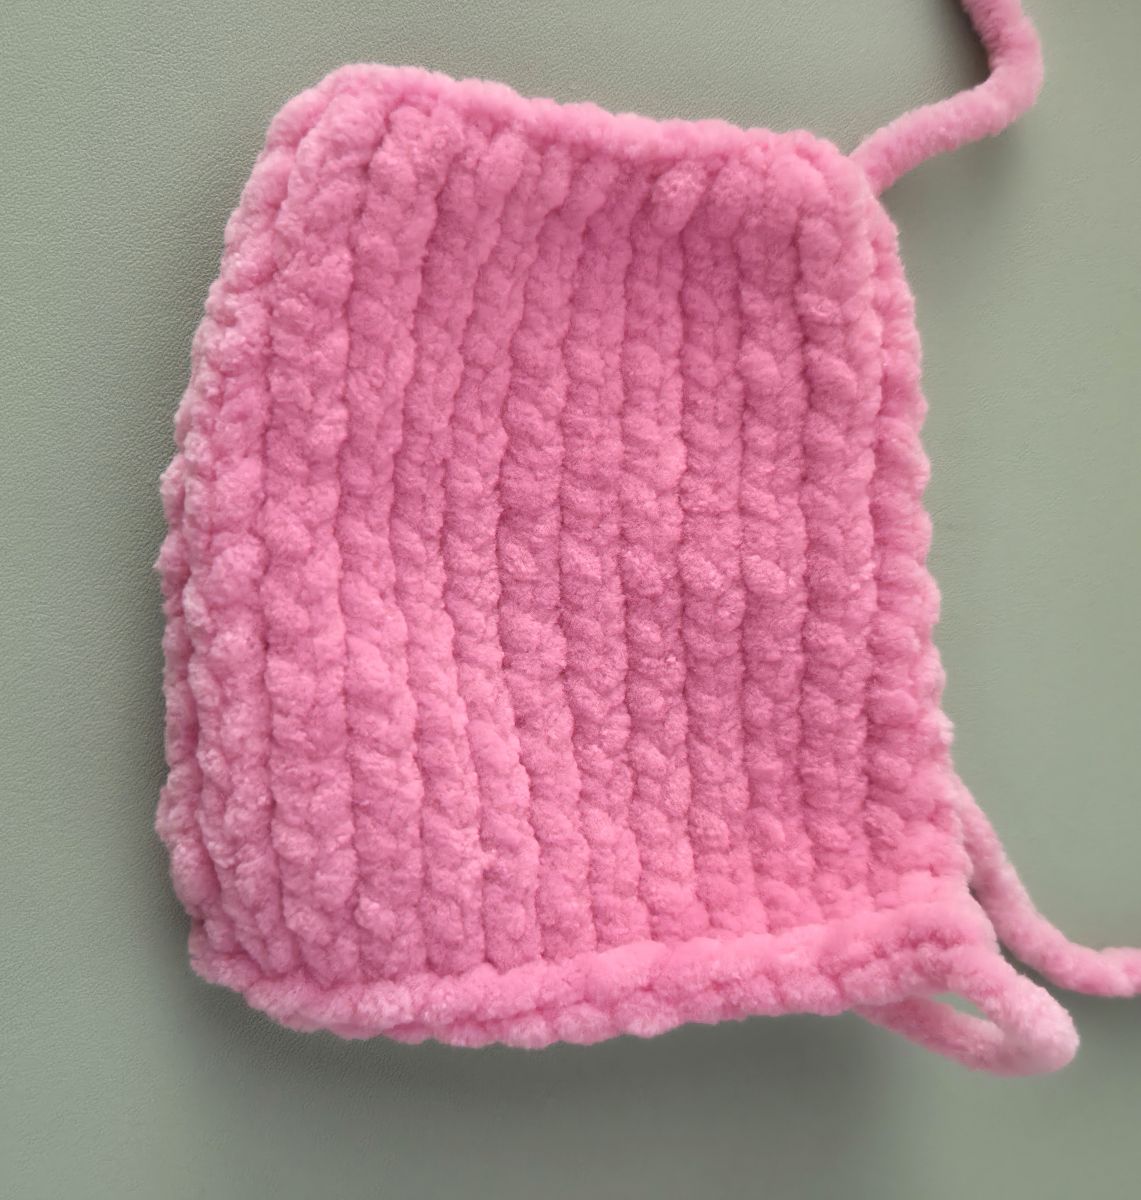
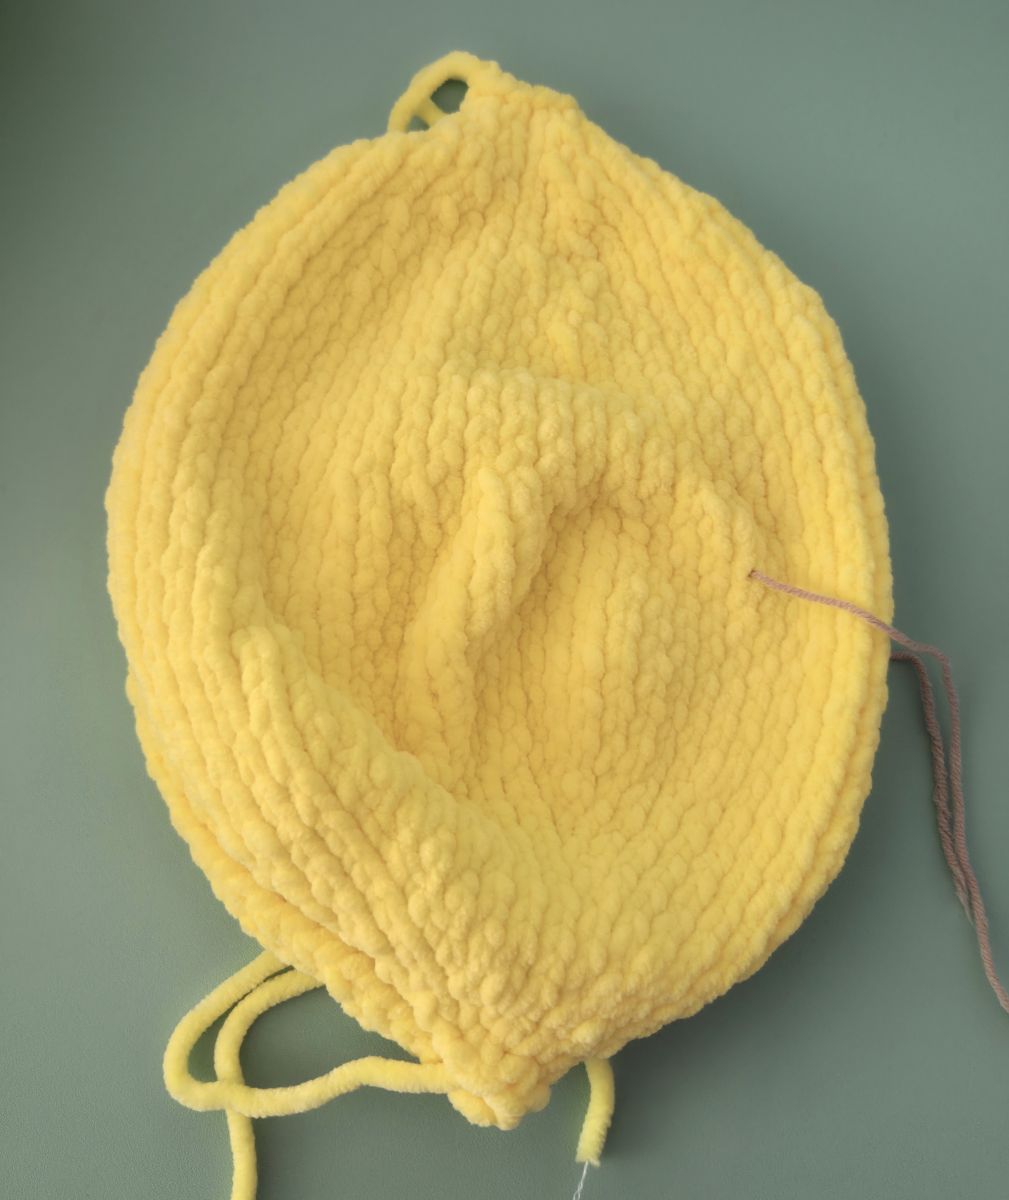
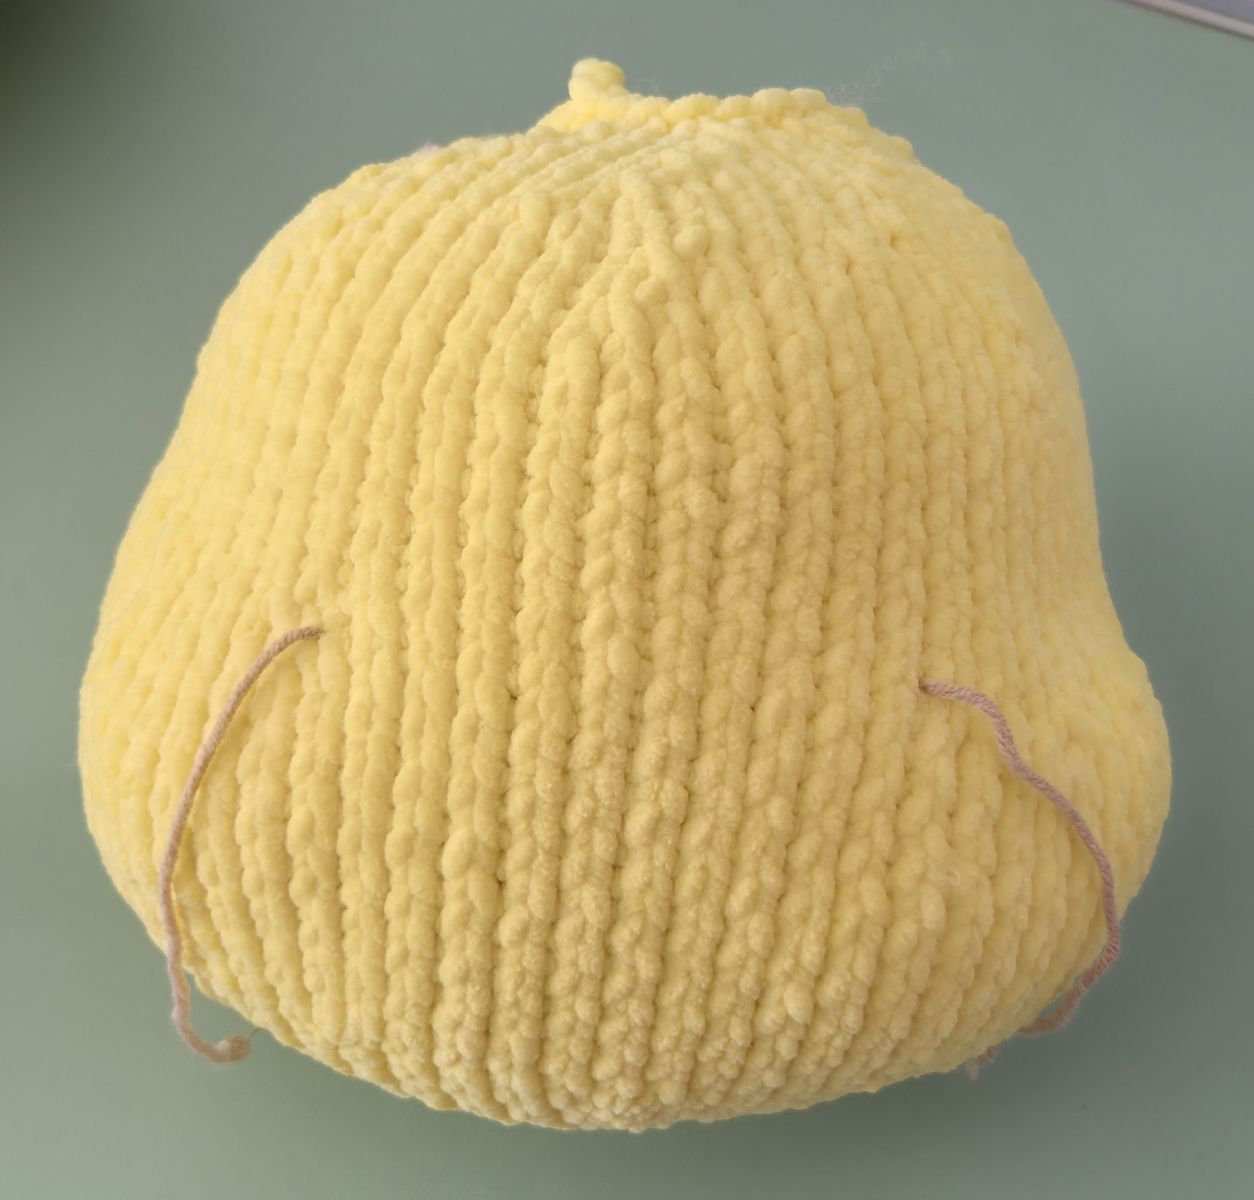
Head
Cast on 6 stitches (ch) onto the knitting needle. Make sure the stitches are evenly stretched while knitting to ensure your knitted piece is nice and even.
1. 6 P (6)
2. 6 K inc. (12)
3. 12 P (12)
4. (1 K, 1 K inc)x 6 (18)
5. 18 P (18)
6. (2 K, 1 K inc)x6 (24)
7. 24 P (24)
8. (3 K, 1 K inc)x 6 (30)
9. 30 P (30)
10. (4 K, 1 K inc)x 6 (36)
11. 36 P (36)
12. (5 K, 1 K inc)x 6 (42)
13. 42 P (42)
14. (6 K, 1 K inc)x 6 (48)
15. 48 P (48)
16. (7 K, 1 K inc)x 6 (54)
17. 54 P
18. 10 K, (1 inc, 1 K)x6, 10 K, (1 inc, 1 K)x6, 10 K (66)
Knit a total of 13 rows in stockinette stitch:
On the front side of the work, knit all stitches across the row.
On the back side of the work, purl all stitches across the row.
19, 21, 23, 25, 27, 29, 31, - 66 P
20, 22, 24, 26, 28, 30 - 66 K
32. 28 K , Marker, 10 K, Marker, 28 K
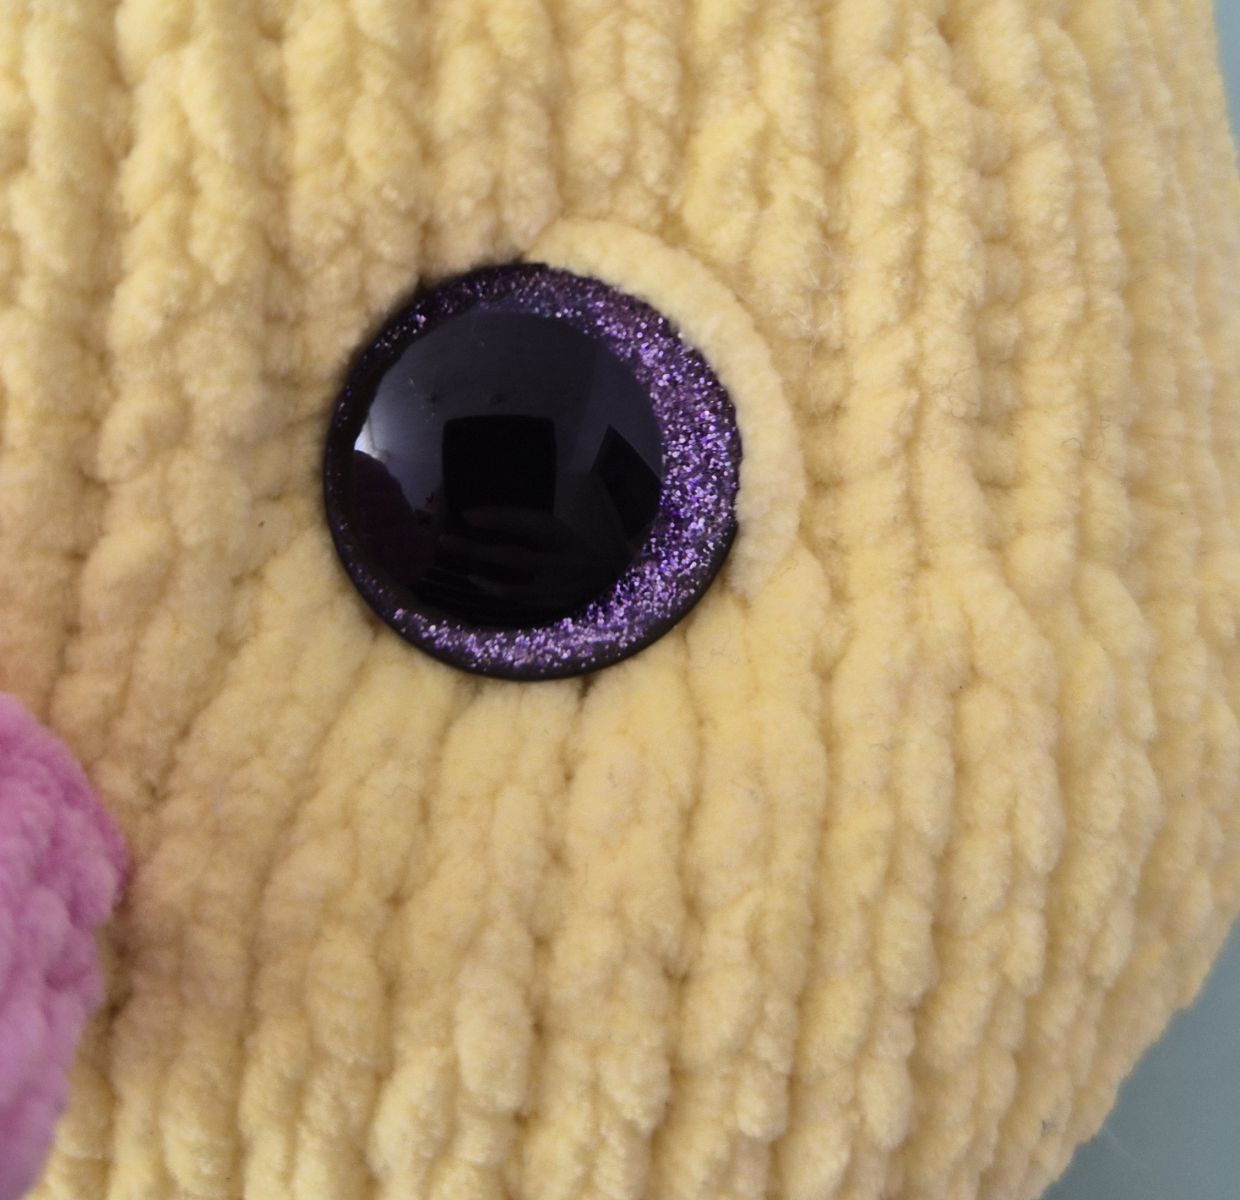
In this case, the marker serves as a guide for the eyes.
33. 66 P
34. 10 K, (1 dec, 1 K)x6, 10 K, (1 dec, 1 K)x6, 10 K (54)
Knit a total of 11 rows in stockinette stitch:
On the front side of the work, knit all stitches across the row.
On the back side of the work, purl all stitches across the row.
35, 37, 39, 41, 43, 45 – 54 P
36, 38, 40, 42, 44 – 54 K
46. (7 K, 1 dec)x 6 (48)
47. 48 P (48)
48. (6 K, 1 dec)x 6 (42)
49. 42 P (42)
50. (5 K, 1 dec)x6 (36)
51. 36 P (36)
52. (4 K, 1 dec)x 6 (30)
53. 30 P (30)
54. (3 K, 1 dec)x 6 (24)
55. 24 P (24)
56. (2 K, 1 dec)x 6 (18)
57. 18 P (18)
58. (1 K, 1 dec)x 6 (12)
59. 12 P
60. 6 dec (6)
Finally, cast off the remaining stitches. Sew the head together, keeping your stitches neat so the seam looks tidy. As you sew, gradually stuff the head with fiberfill to give it a smooth, even shape. Leave a small opening at the top so you can attach the eyes from the inside.
Eyes – An Important Detail for Every Toy
The eyes are a key element, as they give each toy its unique expression and character. It’s often worth checking what types of eyes you already have at home. If nothing suitable is available, you can, of course, crochet the eyes yourself – there are plenty of helpful tutorials online.
For my duck, I used safety eyes with a rim. A particularly nice feature of this type is that the eyes easily sink into the knitted fabric once attached. This is due to the semi‑circular securing piece on the inside: it presses the eye gently into the material, ensuring a firm hold without needing to create indentations beforehand.
Insert the safety eyes through the stitches in row 32 (marked positions) and secure them from the inside with the corresponding backing piece. Afterwards, carefully check that the eyes are firmly attached and cannot be pulled or loosened. Loose eyes can pose a danger to children, so please take extra care.

Alternative: Sew‑in Eyes
Instead of safety eyes, you can also use sew‑in eyes. These are attached directly to the head with yarn, ideally from the inside. Again, make sure the eyes are sewn on very securely, especially if the toy is intended for small children. Small parts that come loose can be swallowed – the responsibility for secure attachment lies entirely with the maker.
Once the eyes are attached, you can begin knitting the beak.
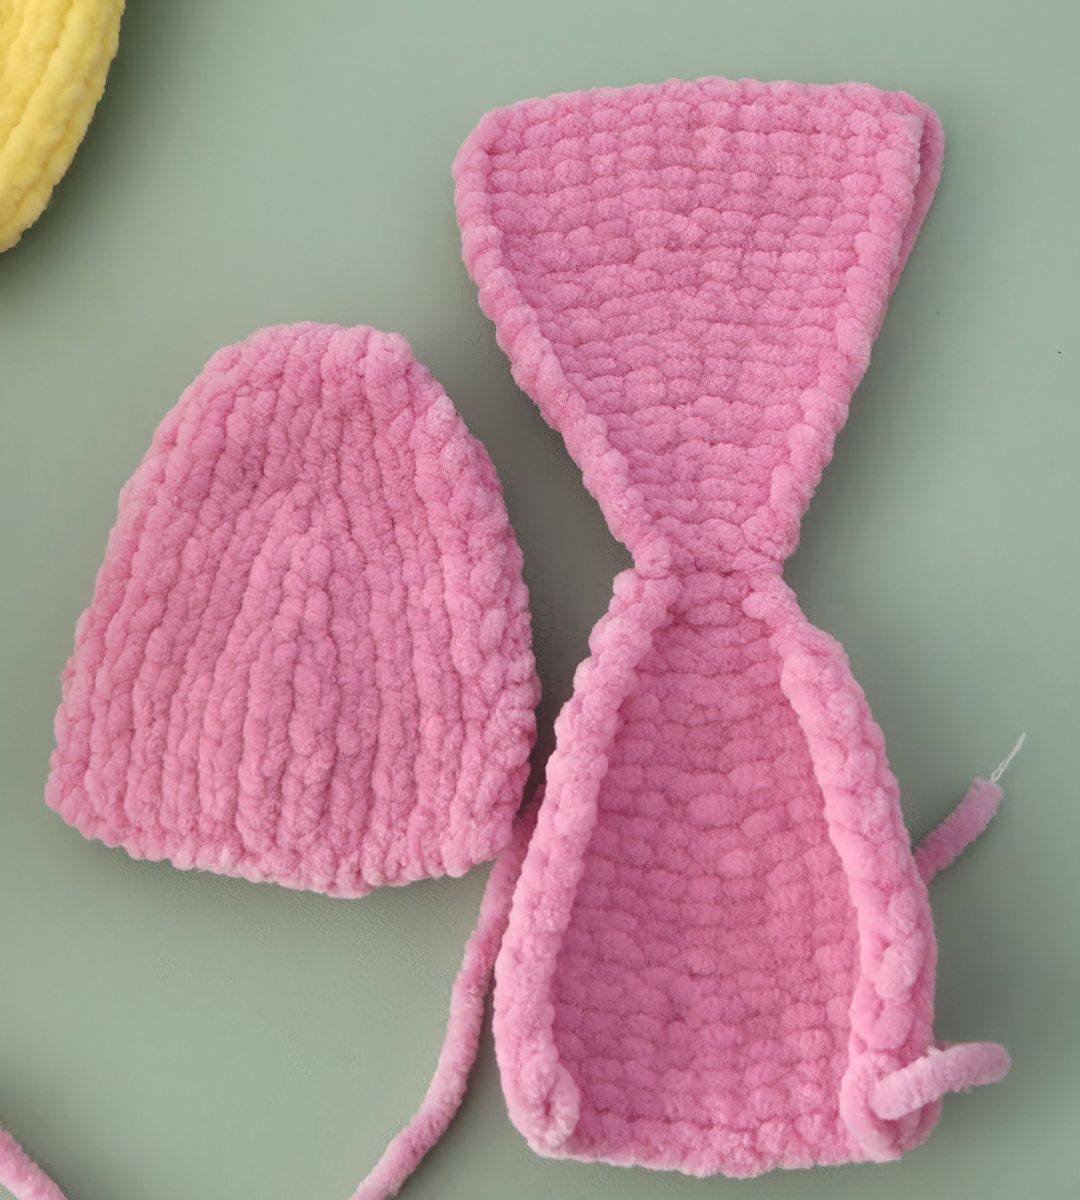
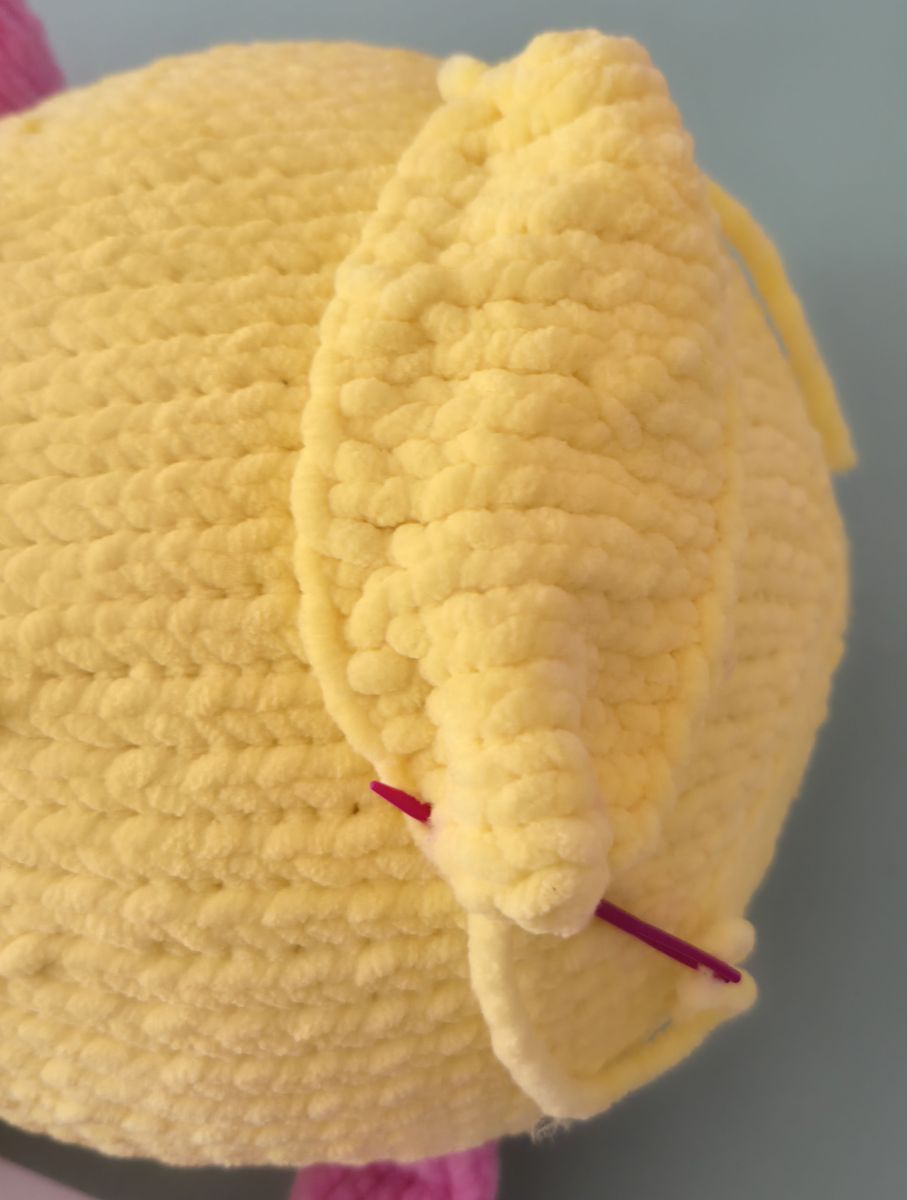
Beak
Part 1 (above)
Cast on 9 stitches (ch) onto the knitting needle. Make sure the stitches are evenly stretched while knitting to ensure your knitted piece is nice and even.
1. 9 P
2. 9 K
3. 9 P
4. 9 K
5. 9 P
6. 9 K
7. 9 P
8. 9 K
9. 9 P
10. 9 K
11. 9 P
12. 9 K
13. 9 P
14. 9 K
15. 9 P
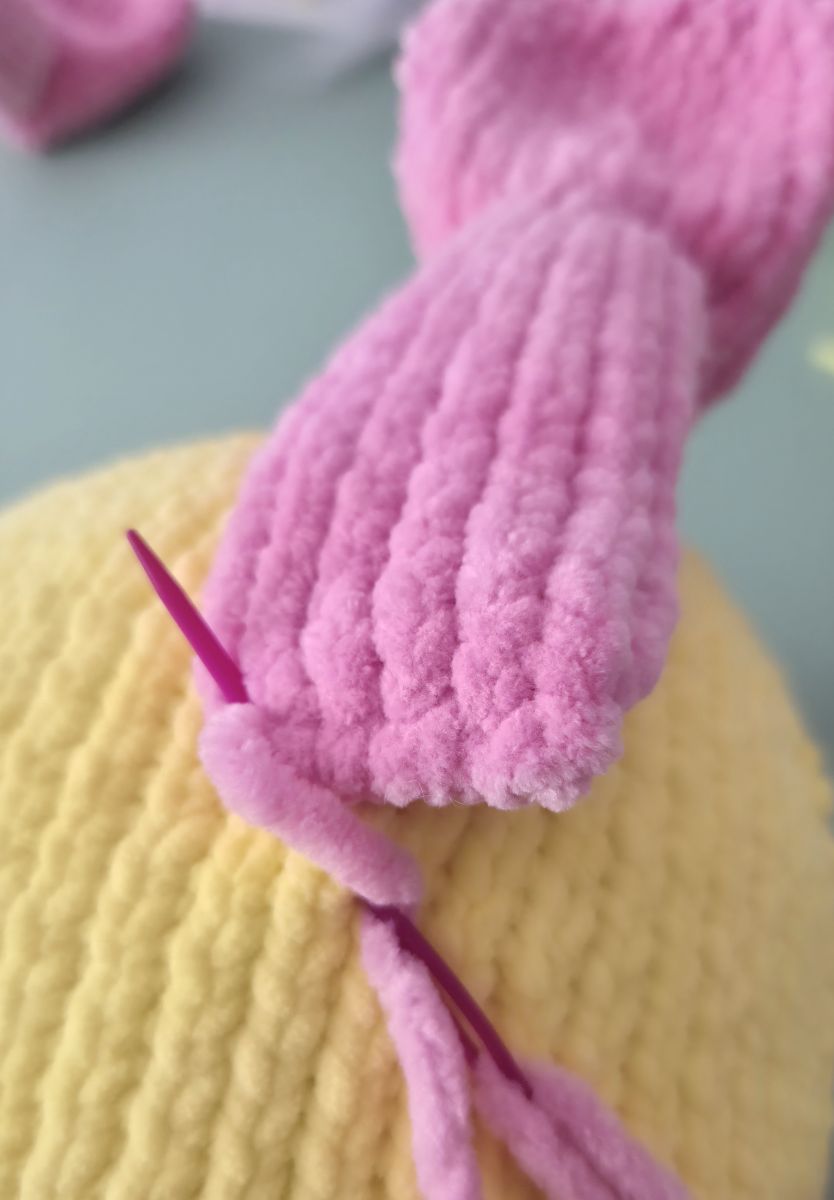
Finally, cast off the remaining stitches. Do not stuff the beak. Fold the sides together and sew along three edges to create a flat shape.
Gently bend the beak into a semicircle to give it the typical duck shape, and attach it to the head in this curved position.
Feel free to experiment a little when sewing it on – some prefer the beak centered, others slightly higher or lower. The placement depends entirely on your personal preference and the expression you want your duck to have.
I personally positioned the beak toward the lower part of the head.
Part 2 (below)
Cast on 4 stitches (ch) onto the knitting needle. Make sure the stitches are evenly stretched while knitting to ensure your knitted piece is nice and even.
1. 4 P
2. 4 K
3. 4 P
4. 4 K
5. 4 P
Finally, cast off the remaining stitches. Do not stuff the beak. Fold the sides together and sew them along three edges to create a flat shape.
Position the lower part of the beak underneath the upper part and secure it in place. This creates the typical, slightly open duck‑beak shape that gives the face an especially cute expression.
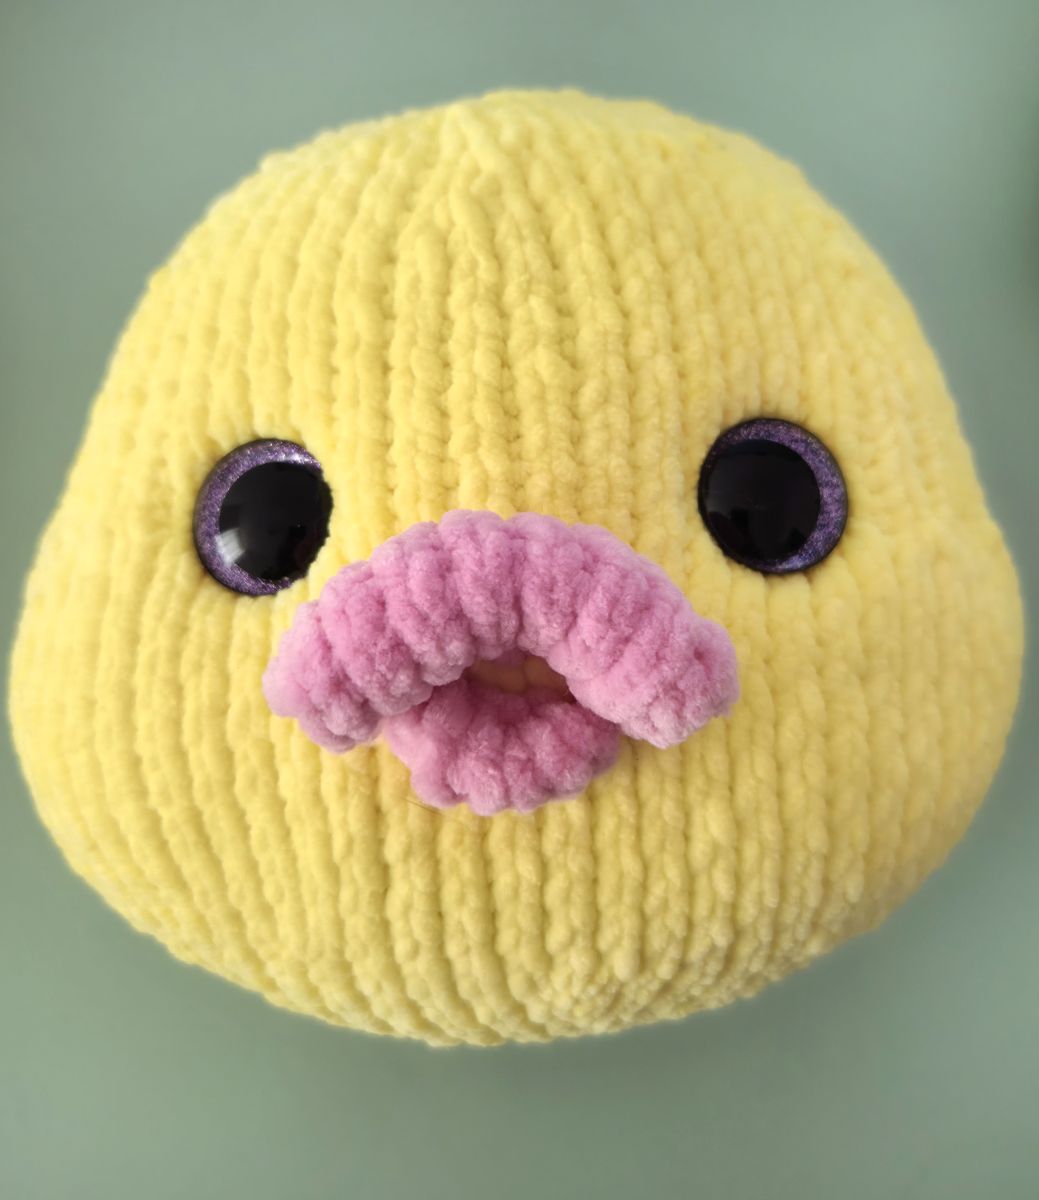
Attaching the Eyelids and Eyebrows
The eyelids are sewn on using the same yarn that was used for the head.

Working the Eyebrows
To create the eyebrows, use the same yarn you used to knit the duck. Begin by making a few small stitches above the eye in the desired position. These stitches should follow a gentle curve that matches the shape of the eyebrow. Repeat this several times along the same line until a clearly visible, slightly denser base is formed.
Next, embroider around these foundation stitches. Insert the needle close to the existing line and bring it out again just beside it, enclosing the base stitches and softly rounding the edges. This creates a small, closed eyebrow shape that blends harmoniously into the duck’s face and gives it a gentle, expressive look.
Sewing the Head and Body Together
The head is now finished and can be attached to the body. When sewing it on, make sure centered, parallel to the body. This helps prevent the head from tilting to one side later. Once the head is securely attached, sew the legs to the underside of the body. Position them symmetrically so they support the duck’s relaxed, reclining posture.
Finally, attach the wings to of the body. It’s helpful to check the placement beforehand to ensure both wings sit evenly and create a harmonious overall look.

Tail
Cast on 14 stitches (ch) onto the knitting needle. Make sure the stitches are evenly stretched while knitting to ensure your knitted piece is nice and even.
1. 14 P
2. 14 K
3. 14 P
4. 14 K
5. 14 P
6. 2 K, 1 dec, 6 K, 1 dec , 2 K (12)
7. 12 P
8. 12 K
9. 12 P
10. 2 K, 1 inc, 6 K, 1inc , 2 K (14)
11. 14 P
12. 14 K
13. 14 P
14. 14 K
15. 14 P
Finally, cast off the remaining stitches. Fold the sides of the piece together and sew them along the side seam.
Attach the tail to the center of the duck’s rear end. As you sew, gradually stuff it with fiberfill to give it a nicely rounded shape. Make sure the stuffing is evenly distributed so the tail looks smooth and balanced.
Highlighting Cheeks and Face
Once the duckling is fully assembled, you can add even more personality with a few small finishing touches.
The cheeks can be beautifully highlighted using pastel chalk. Pick up a little color, tap off the excess, and gently apply it with a brush or cotton swab until you achieve a soft, delicate blush.
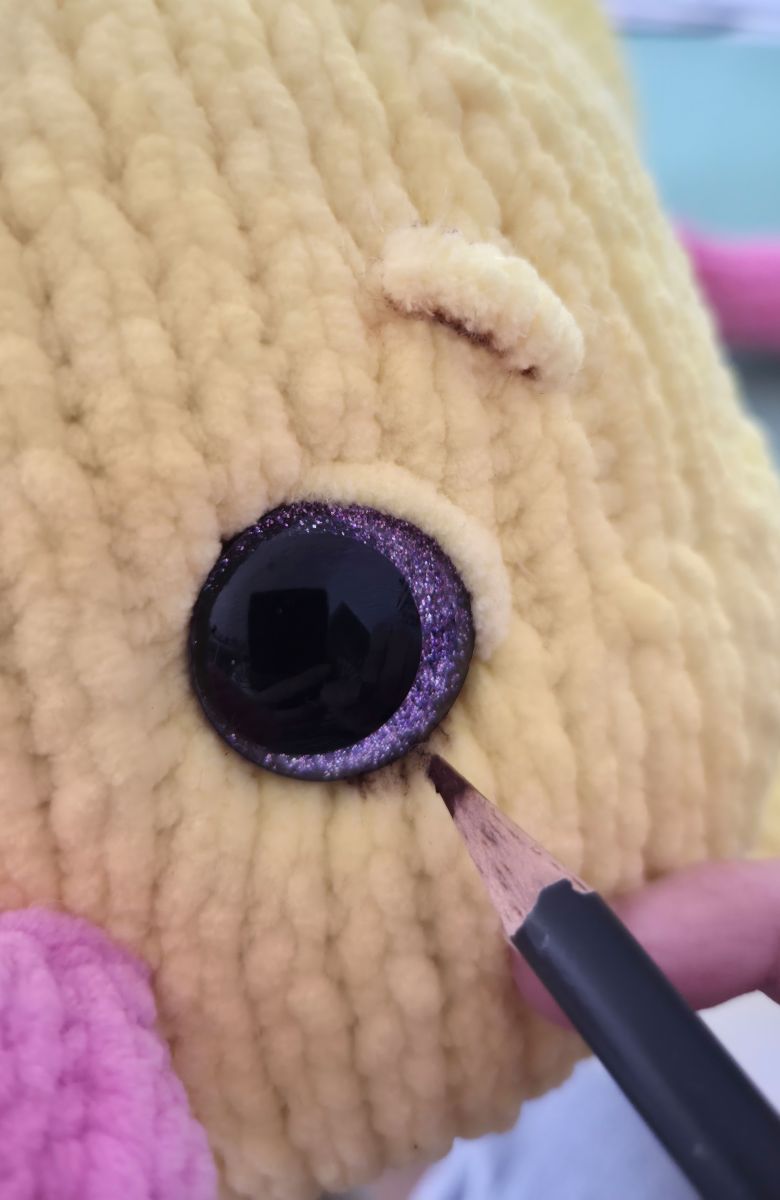
You can also subtly accentuate the eyebrows and the area around the eyes. Soft‑lead colored pencils work especially well for this. With just a few light strokes, the duckling gains a lively, friendly expression.
.JPG)


