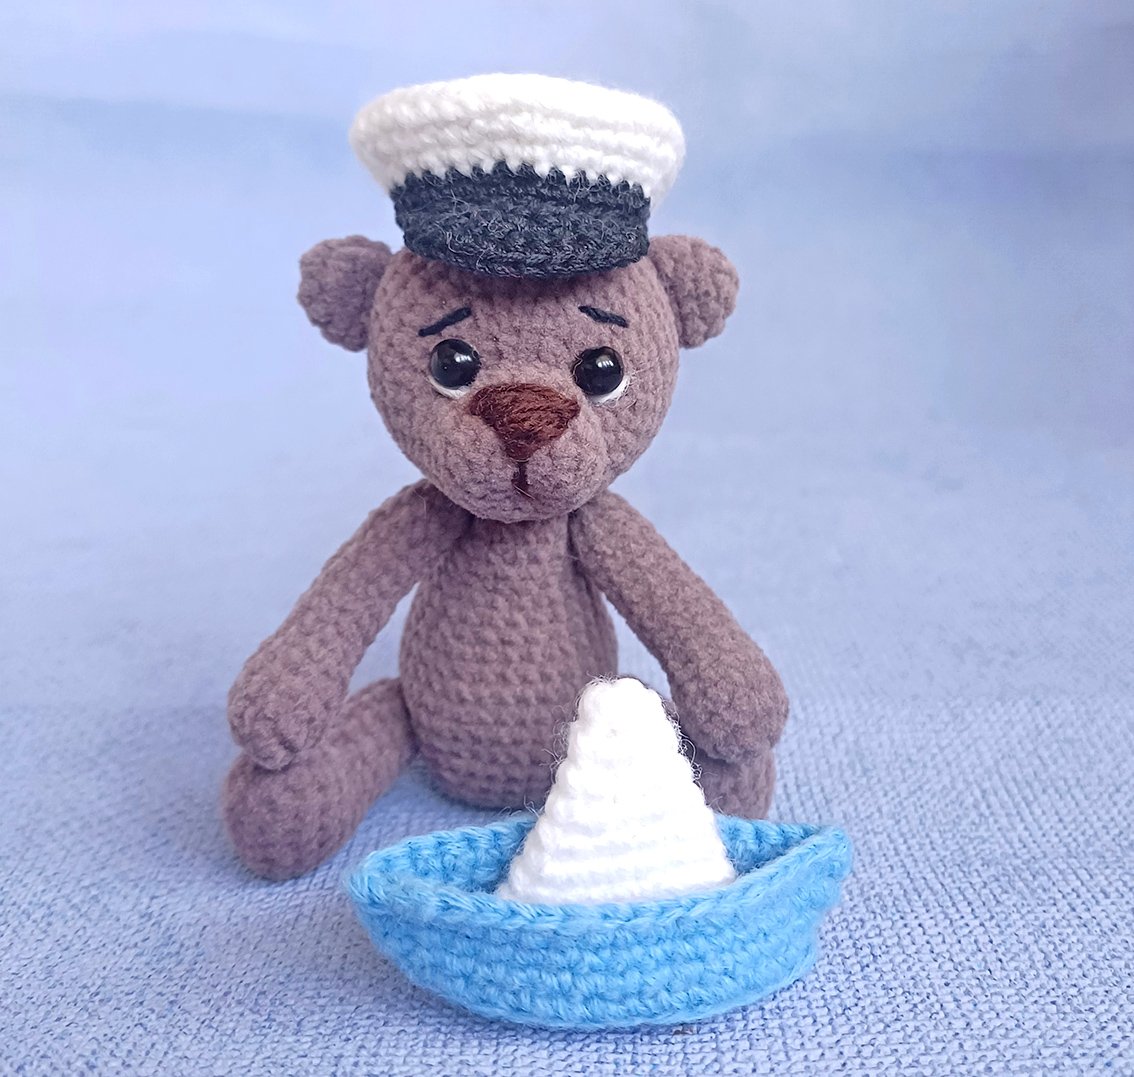
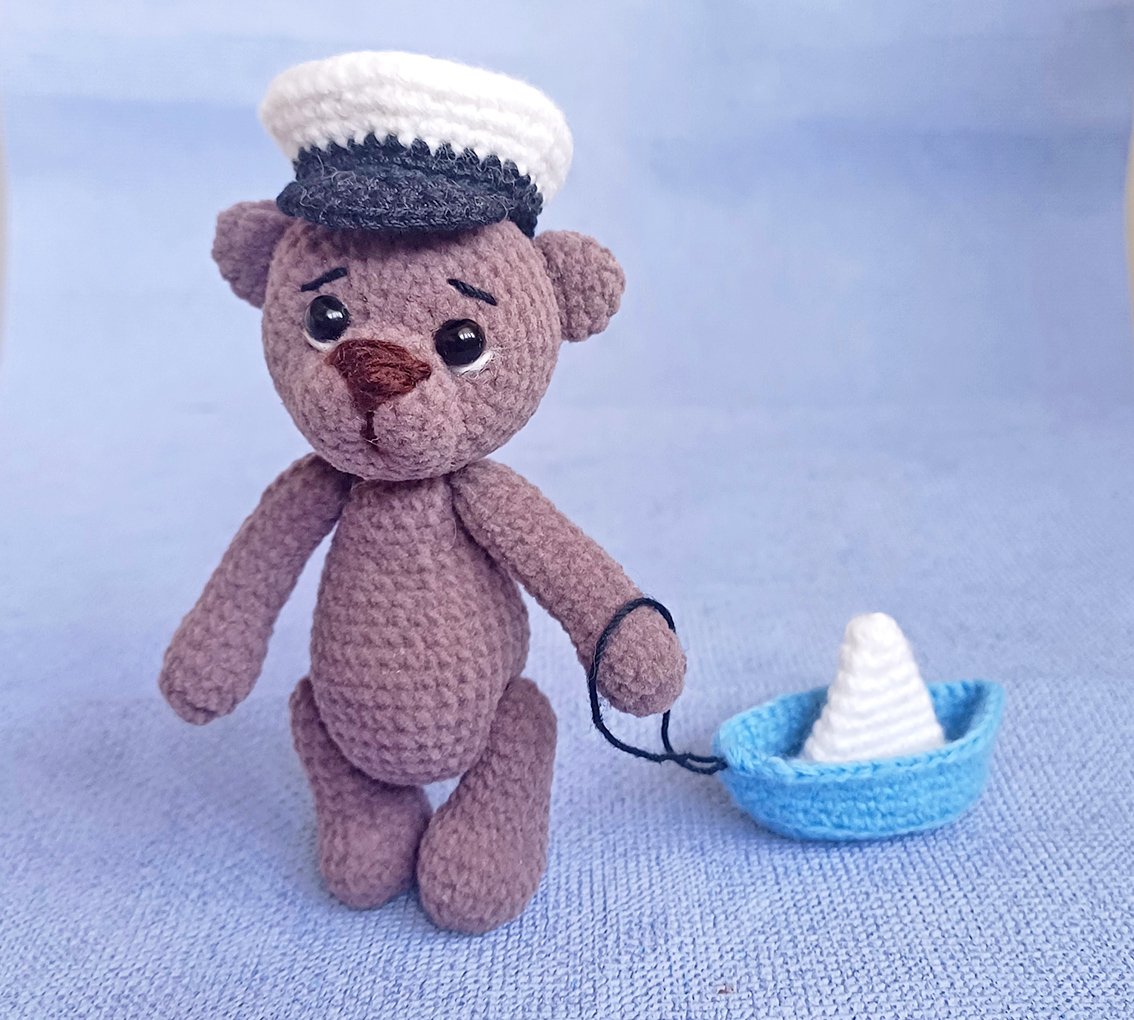
The sailor bear
Materials:
You can choose the yarn at your discretion, of a similar color, composition and thickness. Cotton, acrylic, wool will do. I used 400 m/100g velour yarn. Yarn consumption depends on its thickness and a crochet hook size. The height of my bear is 10 cm. Depending on the thickness of yarn a finished toy size may differ.
Yarn of the following colours is required: brown, black, blue and white.
- A crochet hook, I used 1,25 mm crochet hook;
- A sewing needle, matching sewing threads;
- A long needle for sculpting, strong thread for sculpting;
- Hollow fibre for stuffing;
- For eyes: 2 half-beads or 1 pair of ready-made eyes (Choose the size individually. It depends on the size of your toy);
- For embroidery: a few threads of brown and white
- All purpose clear transparent glue, e.g. UHU.
Abbreviations:
ch – chain
sl st – slip stitch
sc – single crochet
hdc – half double crochet
dc – double crochet
inc – increase (2 sc in 1 st)
6 inc – 6 increases in sequence
dec – decrease (single crochet two stitches together)
6 dec – 6 decreases in sequence
(...) x N times – repeat instructions in brackets N times
Work with brown colour yarn.
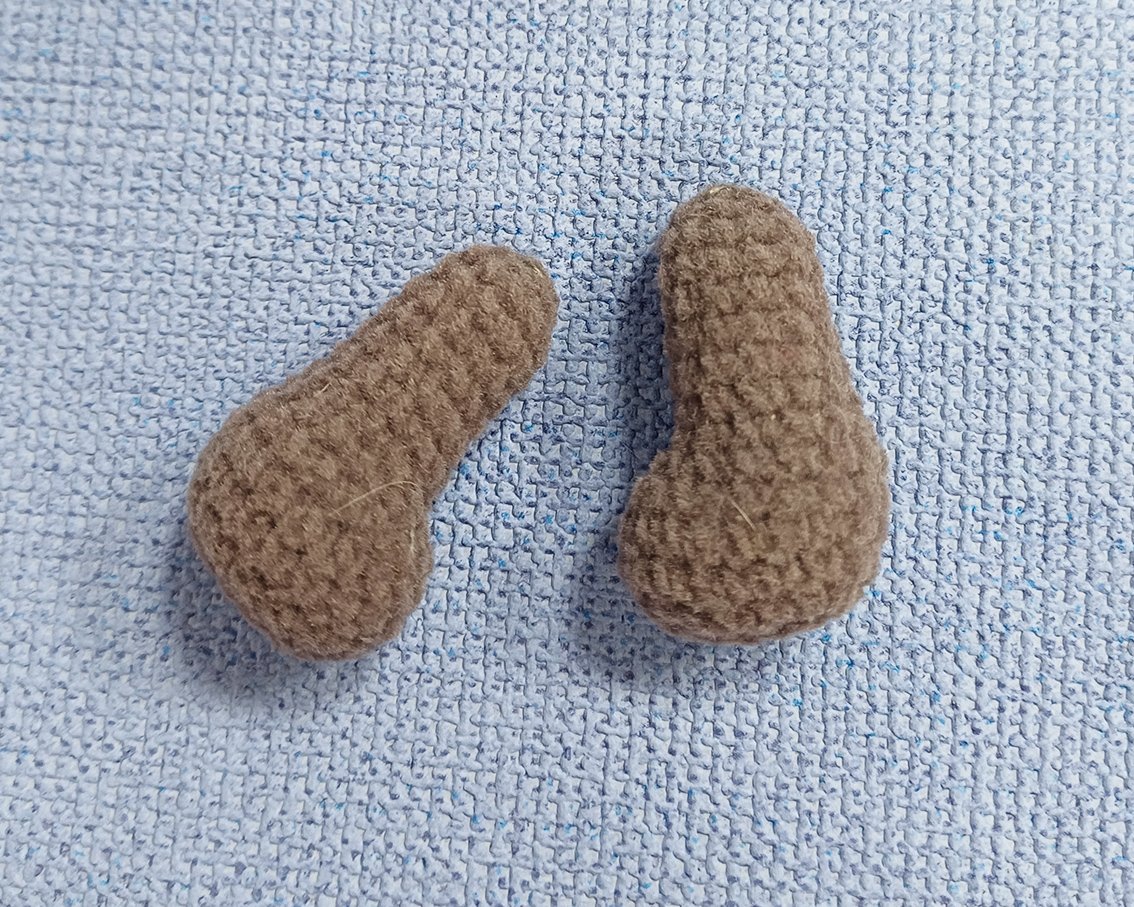
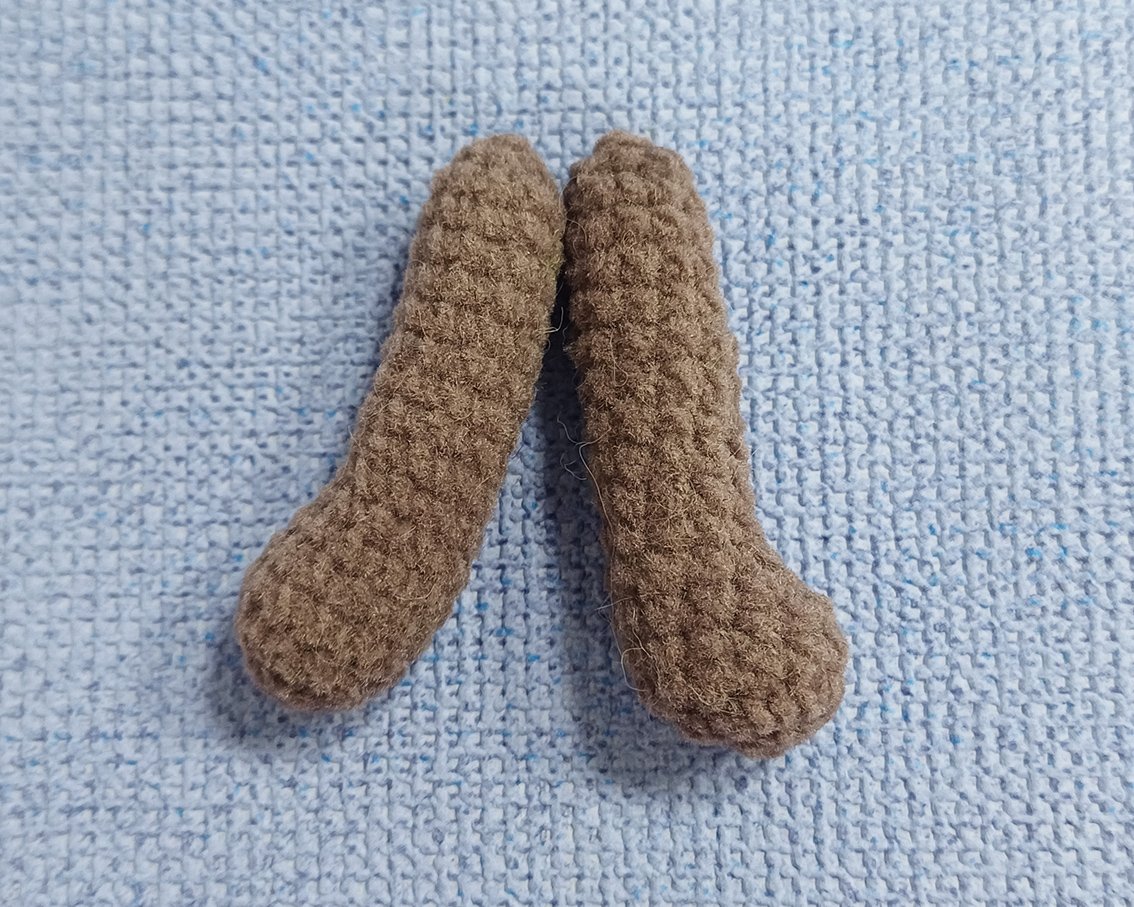
Legs (make 2)
Work 6 ch
Rnd 1. starting from 2nd ch from hook: 4 sc, 3 sc in the last stitch, continue along the other side of chain: 3 sc, 1 inc = 12
Rnd 2. 1 inc, 3 sc, 3 inc, 3 sc, 2 inc = 18
Rnd 3-5. (3 rounds). 18 sc
Work 1 sc, transfer your place marker here.
Rnd 6. 4 sc, 4 dec, 4 sc, 1 dec = 13
Rnd 7. 5 sc, 1 dec, 6 sc = 12
Rnd 8-13 (6 rounds). 12 sc
Add some hollow fibre.
Rnd 14. 6 dec = 6
Pull off the loops. Cut the thread, hide the end.
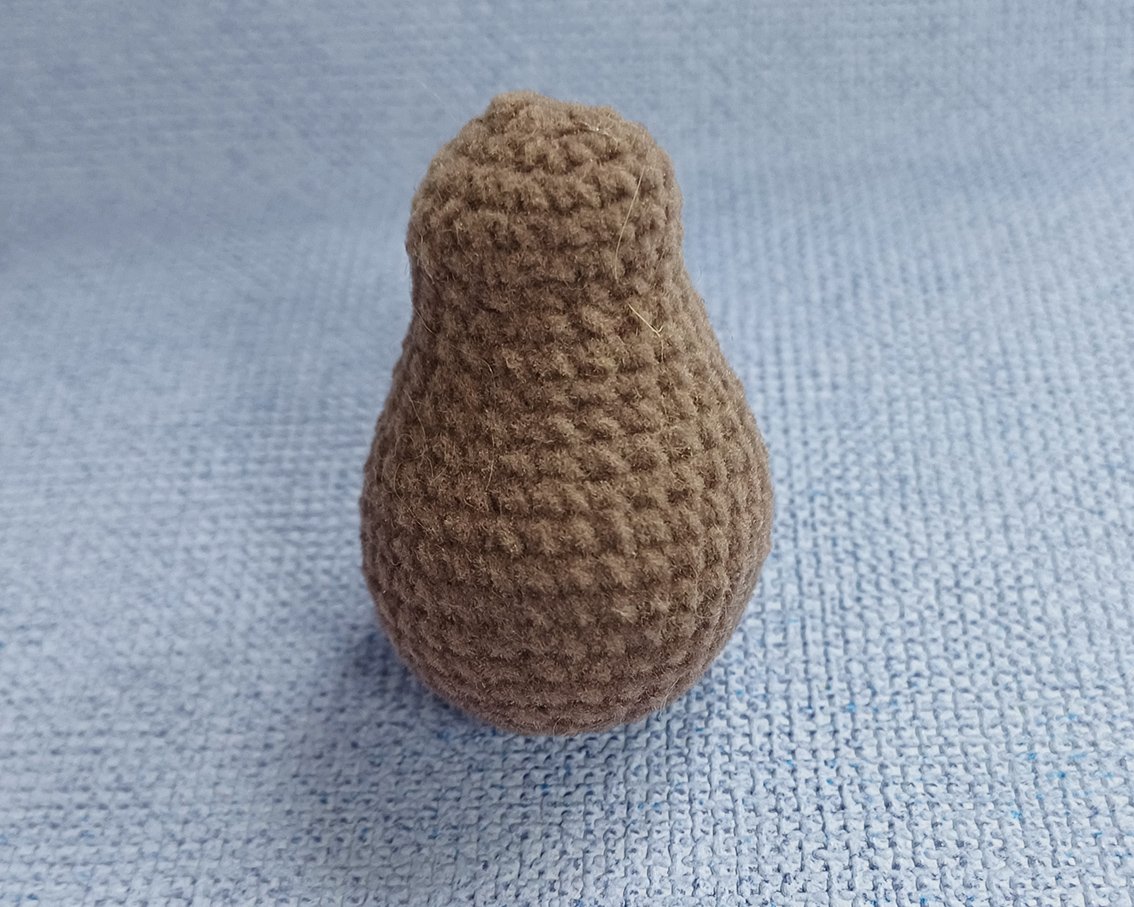
Arms (make 2)
Rnd 1. 6 sc in a Magic Ring
Rnd 2. 6 inc = 12
Rnd 3-5. (3 rounds). 12 sc
Rnd 6. 1 dec, 10 sc = 11
Rnd 7. 1 dec, 9 sc = 10
Rnd 8-16. (9 rounds). 10 sc
Stuff a little.
Rnd 17. 5 dec = 5
Pull off the loops. Cut the thread, hide the end.
Body
Rnd 1. 6 sc in a Magic Ring
Rnd 2. 6 inc = 12
Rnd 3. (1 sc, 1 inc) х 6 times = 18
Rnd 4. (2 sc, 1 inc) х 6 times = 24
Rnd 5. (3 sc, 1 inc) х 6 times = 30
Rnd 6. 30 sc
Rnd 7. 2 sc, (1 inc, 4 sc) х 5 times, 1 inc, 2 sc = 36
Rnd 8-12 (5 rounds). 36 sc
Rnd 13. 2 sc, (1 dec, 4 sc) х 5 times, 1 dec, 2 sc = 30
Rnd 14. 30 sc
Rnd 15. (3 sc, 1 dec) х 6 times = 24
Rnd 16-17 (2 rounds). 24 sc
Rnd 18. (2 sc, 1 dec) х 6 times = 18
Rnd 19-22 (4 rounds). 18 sc
Rnd 23. 9 dec = 9
Add some hollow fibre.
Pull off the loops. Cut the thread, hide the end.
Tail
Rnd 1. 6 sc in a Magic Ring
Rnd 2. (1 inc, 1 sc)х 3 times = 9
Rnd 3-4 (2 rounds). 9 sc
Rnd 5. (1 dec, 1 sc)х 3 times = 6
Stuff a little.
Fasten off, cut the thread, leaving approx. 30 cm long tail for sewing.
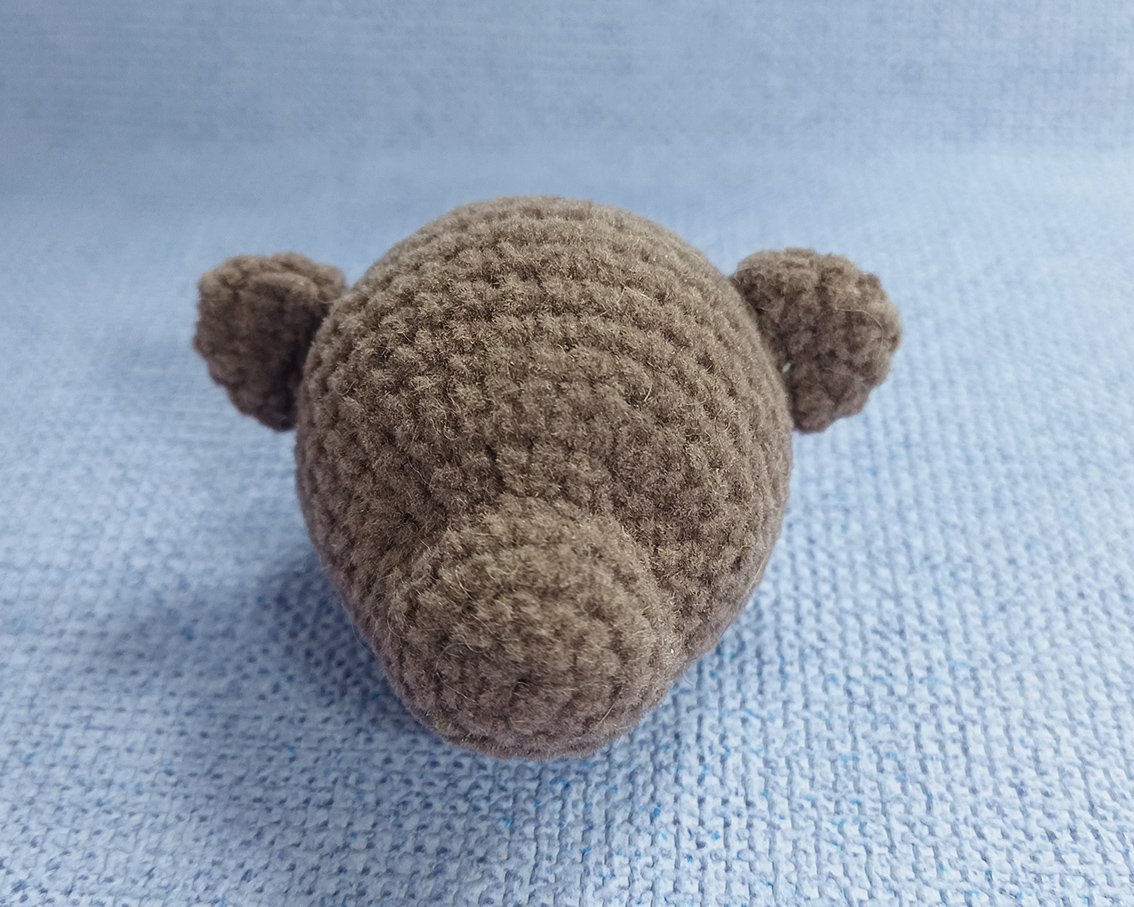
Ear (make 2)
Rnd 1. 6 sc in a Magic Ring
Rnd 2. (1 sc, 1 inc) х 3 times = 9
Rnd 2. (12 sc, 1 inc) х 3 times = 12
Rnd 4. 12 sc
Fasten off, cut the thread, leaving approx. 30 cm long tail for sewing.
Head
Rnd 1. 6 sc in a Magic Ring
Rnd 2. 6 inc = 12
Rnd 3. (1 sc, 1 inc) х 6 times = 18
Rnd 4-5. (2 rounds). 18 sc
Rnd 6. 6 sc, (2 hdc in 1 loop) х 6 times, 6 sc = 24
Rnd 7. 6 sc, (1 dc, 2 dc in 1 loop) х 6 times, 6 sc = 30
Rnd 8. 30 sc
Rnd 9. 2 sc, (1 inc, 4 sc) х 5 times, 1 inc, 2 sc = 36
Rnd 10. 36 sc
Rnd 11. (5 sc, 1 inc) х 6 times = 42
Rnd 12-14 (3 rounds). 42sc
Rnd 15. (5 sc, 1 dec) х 6 times = 36
Rnd 16. 36 sc
Rnd 17. 2 sc, (1 dec, 4 sc) х 5 times, 1 dec, 2 sc = 30
Rnd 18. 30 sc
Add some hollow fibre.
Rnd 19. (3 sc, 1 dec) х 6 times = 24
Rnd 20. (2 sc, 1 dec) х 6 times = 18
Rnd 21. (1 sc, 1 dec) х 6 times = 12
Rnd 22. 6 dec = 6
Add some hollow fibre.
Fasten off, cut off any excess yarn. Do not close off the loops of the last round just yet, you will do it later. You will do embroidery and decorate the face first and then hide yarn ends inside!
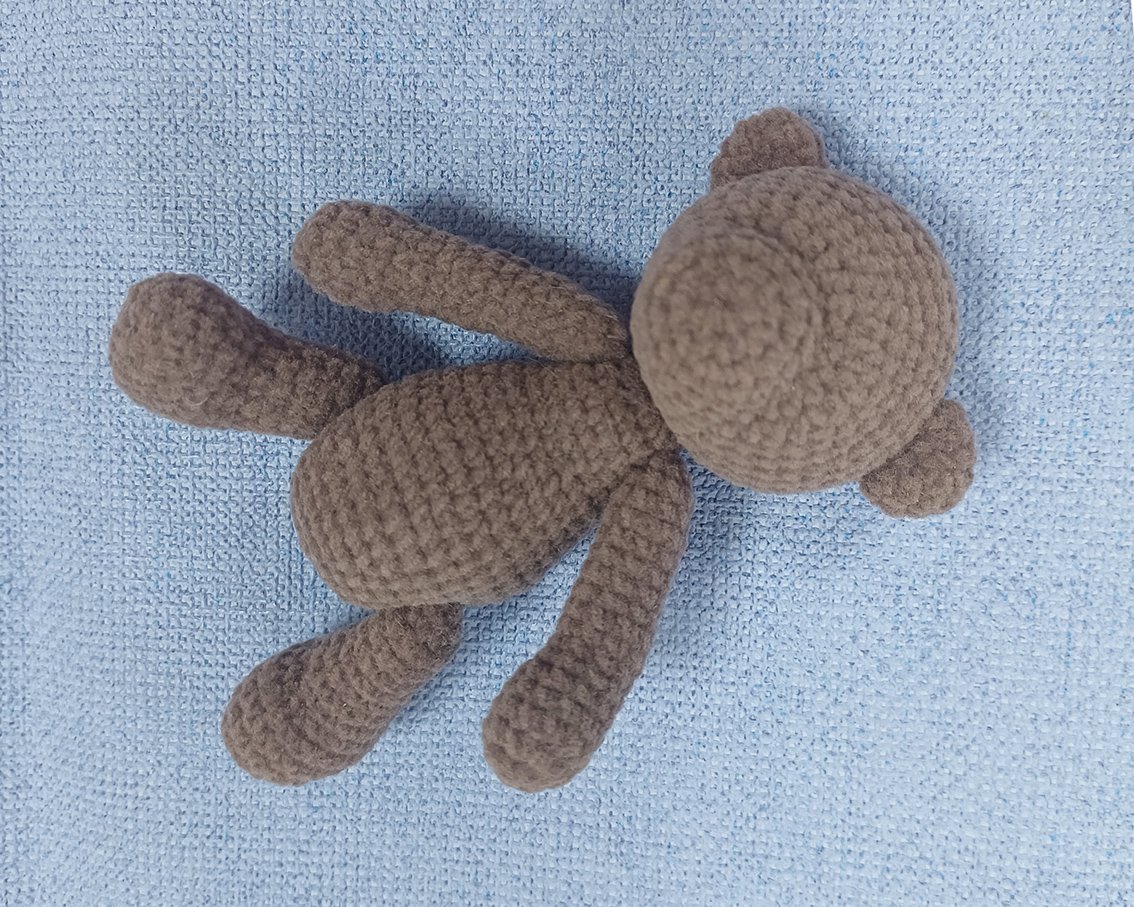
Attach the ears to the head and sew them on.
Sew the head to the body.
Attach and sew on the arms and legs.
Sew the tail on.
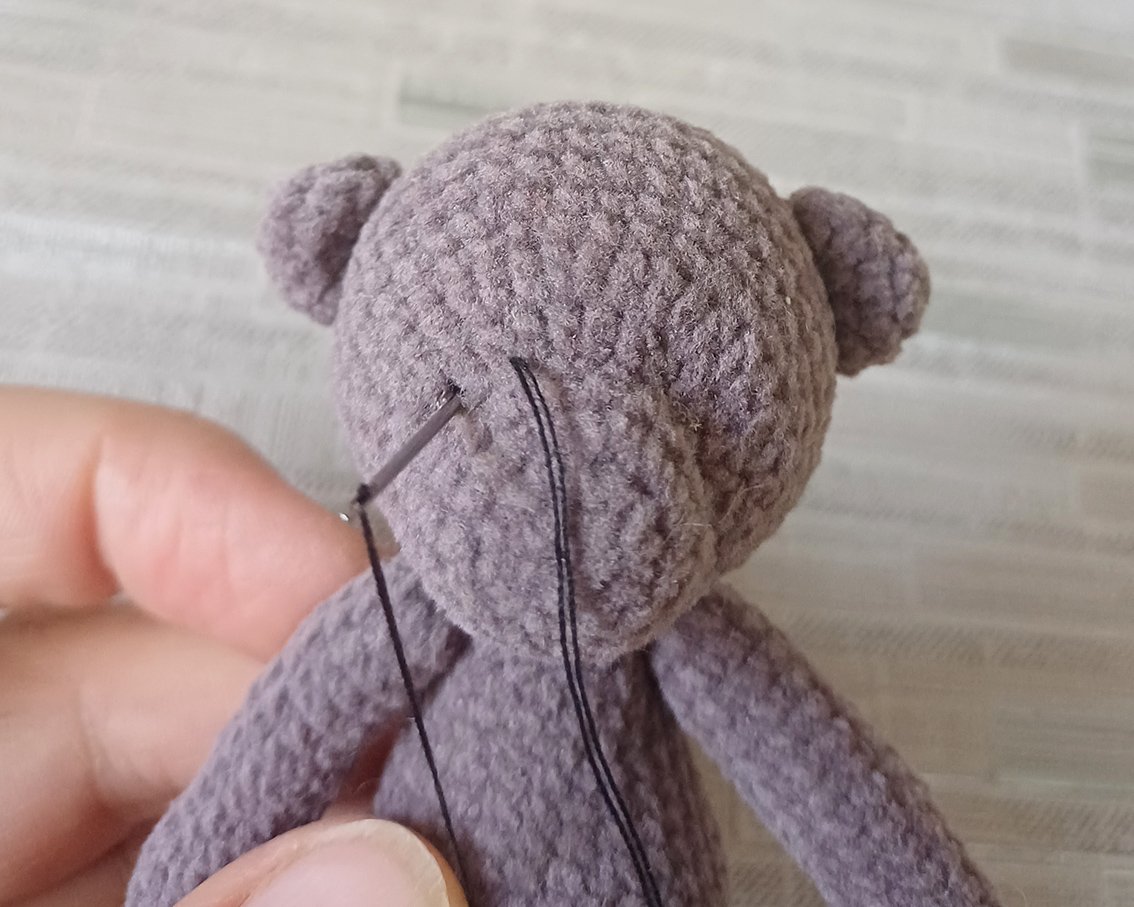
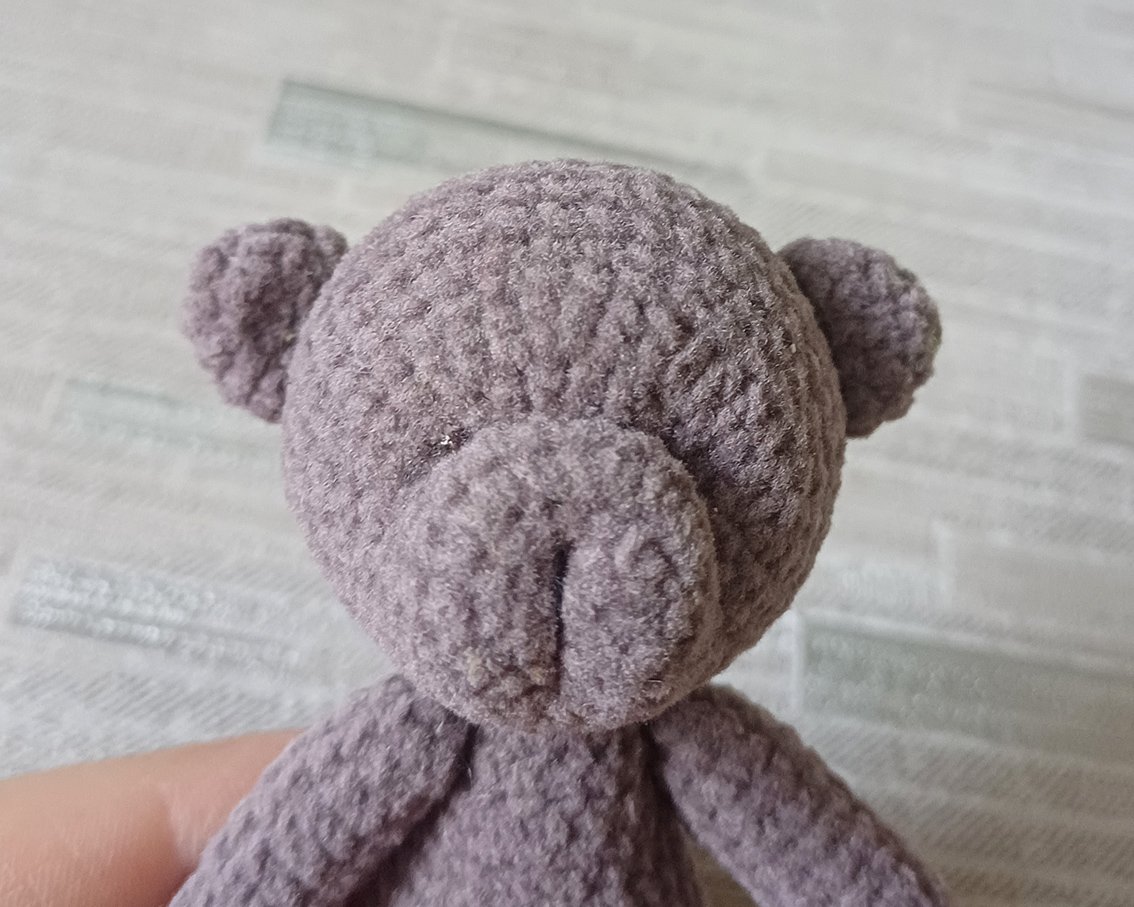
Find the spots for sculpting the eye pits as follows. See the photo for guidance.
Point 0 is an opening in the back of the head.
Spots 1 & 2, 3 & 4 are at the level of the 5th round on both sides of the muzzle, 2 stitches between them. (depending on the diameter of the eyes)

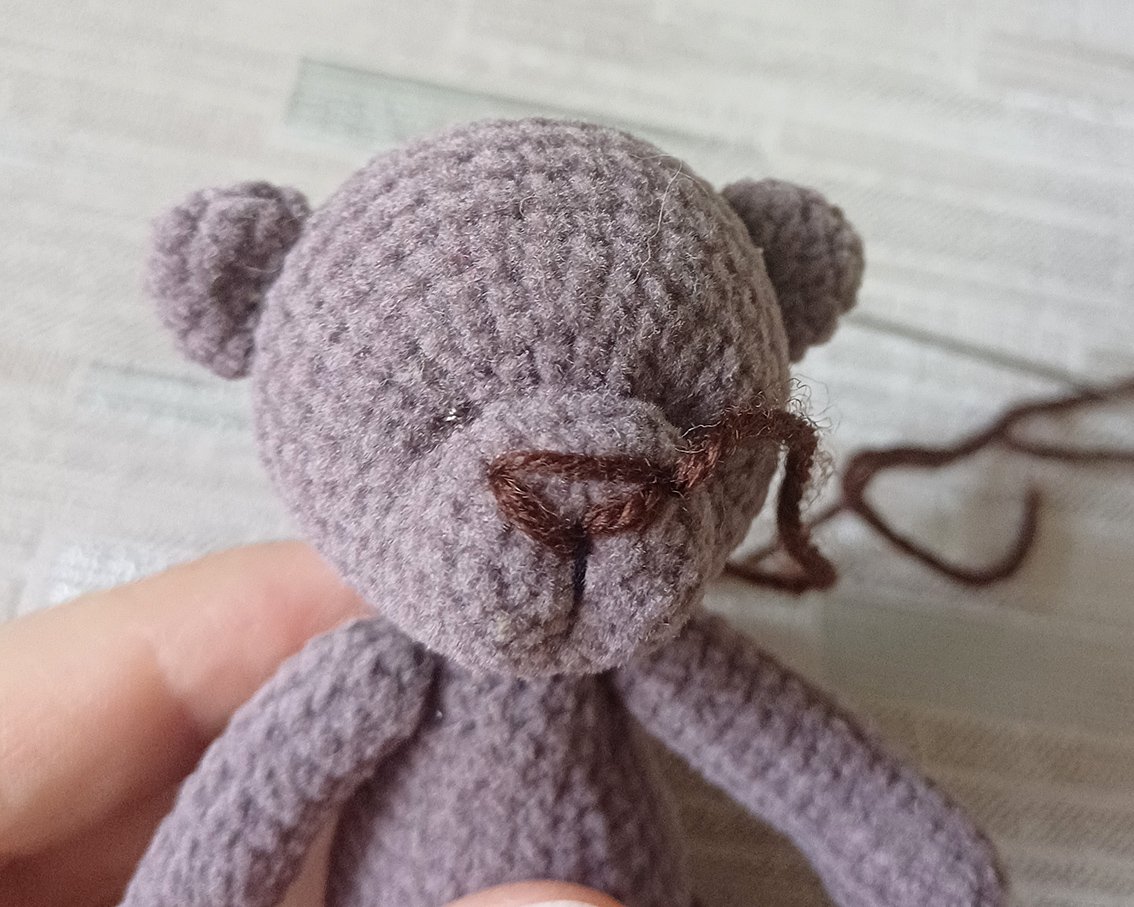
Prepare a long needle and a strong thread for sculpting. Insert the needle into the opening (point 0), leave a tail for further operation, take the needle out in point 2. Insert the needle in point 1 (the thread runs over the work), take the needle out in point 0. Tighten the thread, help with the fingers to keep it in place and make a knot. Repeat the tightening once more. Repeat sculpting for the left eye socket. Points #0-3-4-0. Hide the thread in the opening of the head.
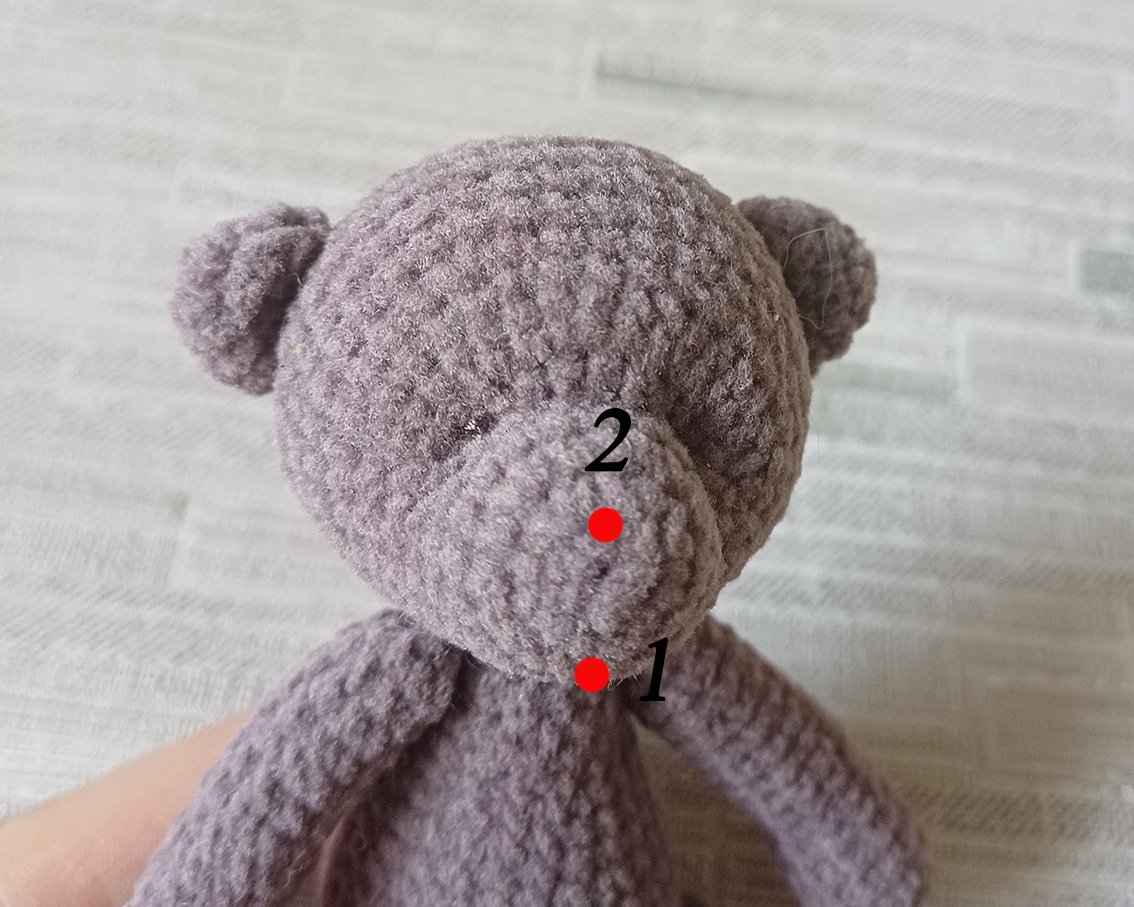
Sculpt the muzzle.
Point 1 is 3 rounds below the Amigurumi ring. Point 2 is 1 round above the Amigurumi ring.
Prepare a long needle and a strong black colour thread for sculpting. Insert the needle into the opening (point 0), leave a tail for further operation, take the needle out in point 1. Insert the needle in point 2 (the thread runs over the work), take the needle out in point 0. Tighten the thread, help with the fingers to keep it in place and make a knot. Repeat the tightening once more. Hide the thread in the opening of the head.
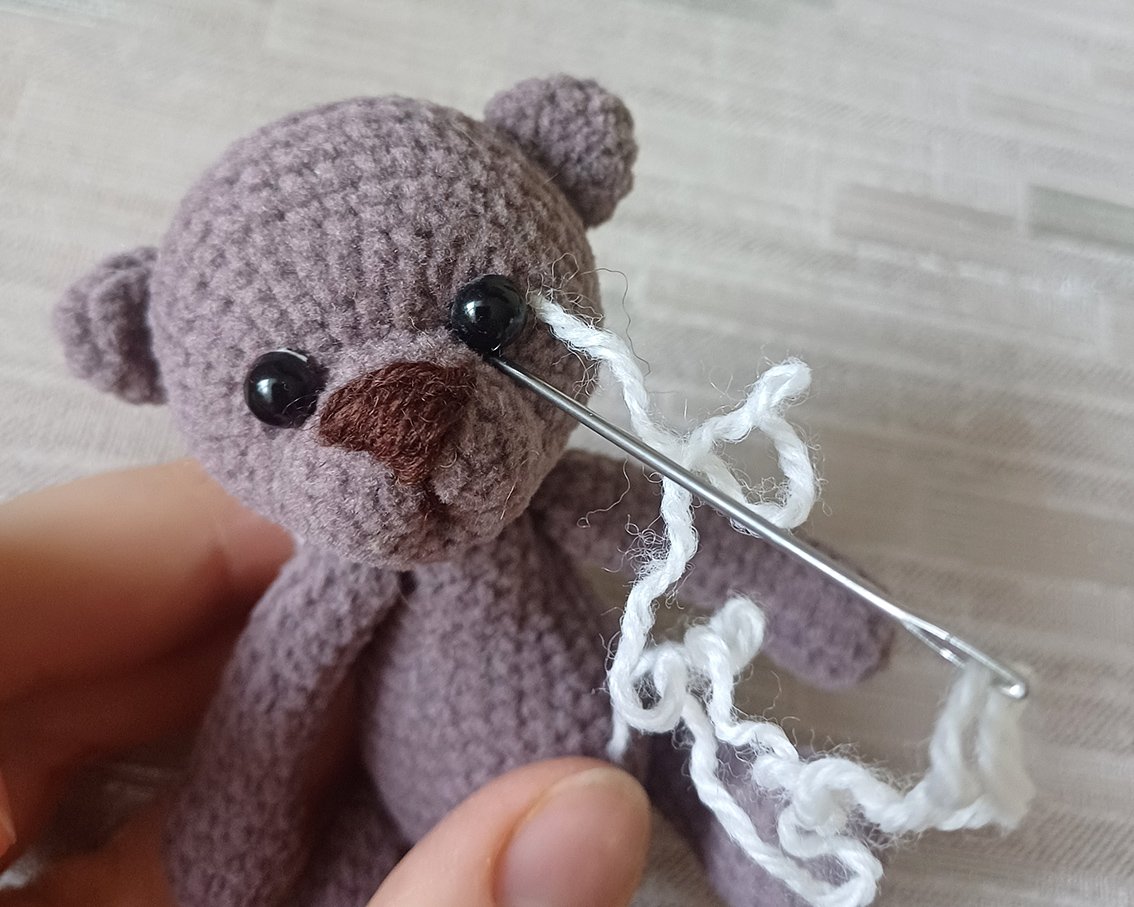
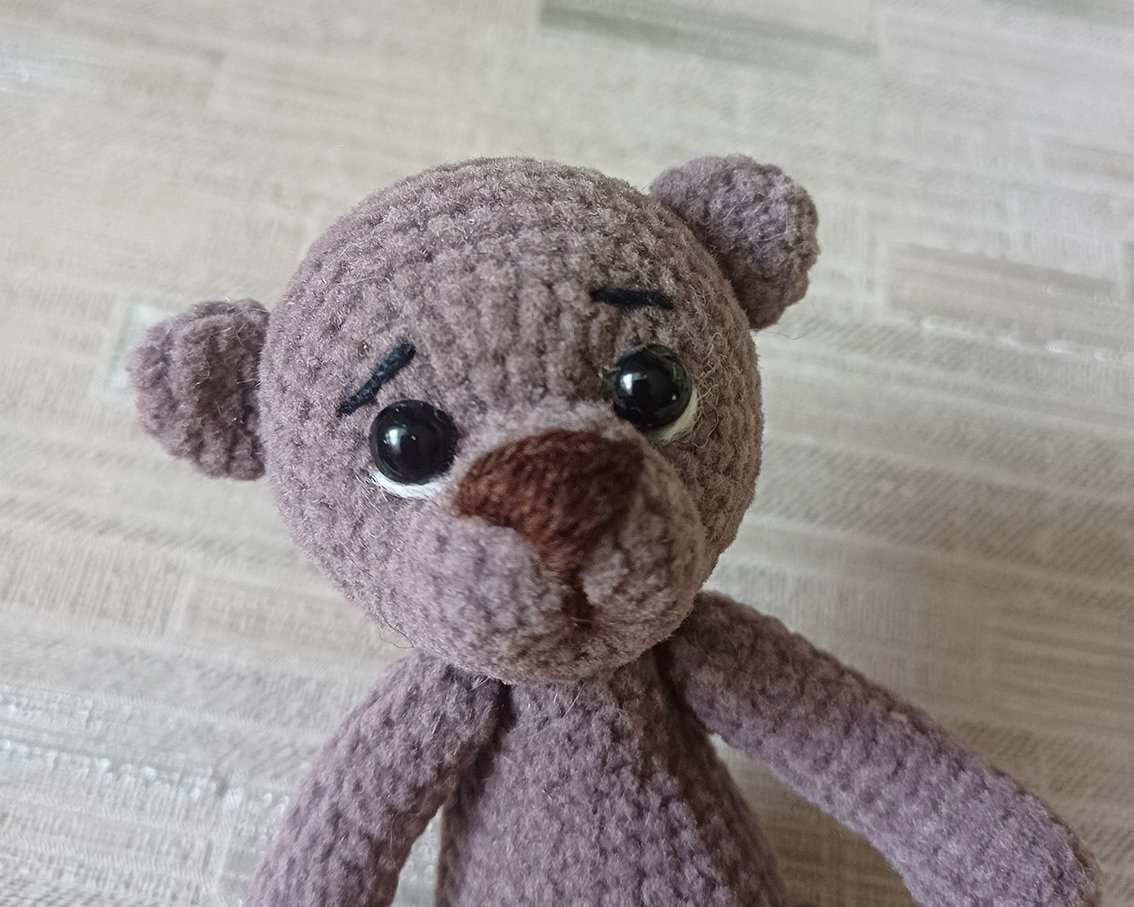
Embroider a black line on the muzzle. Embroider the nose with dark brown yarn.

Glue on the eyes. Embroider the whites of the eyes with white colour yarn. Insert the needle in the opening on the head to hide the ends. Do not forget to pull the loops on the head once you have finished to embroider. Embroider eyelids and eyebrows.
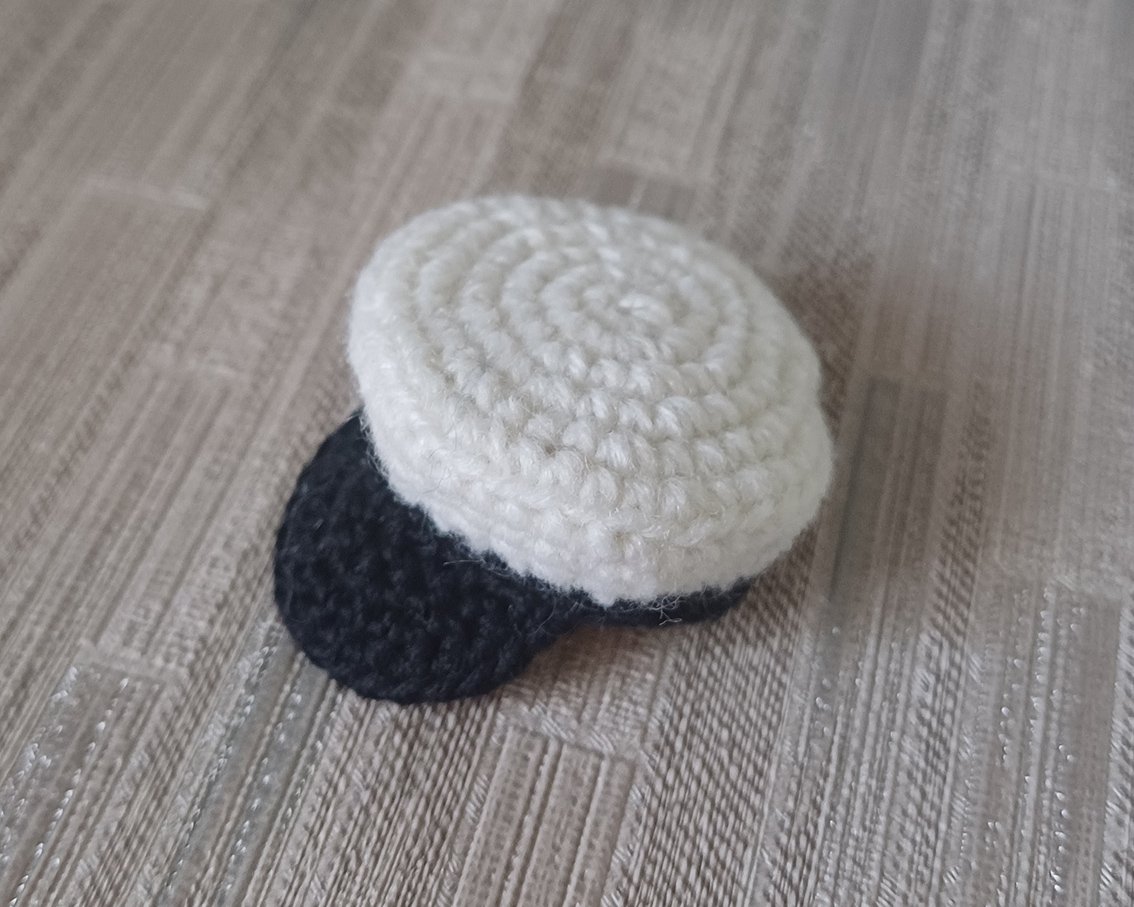
Captain's cap
Work with white colour yarn.
Rnd 1. 7 sc in a Magic Ring
Rnd 2. 7 inc = 14
Rnd 3. (1 sc, 1 inc) х 7 times = 21
Work 1 sc, transfer your place marker here.
Rnd 4. 1 sc, (1 inc, 2 sc) х 6 times, 1 inc, 1 sc = 28
Rnd 5. (1 inc, 3 sc) х 7 times = 35
Rnd 6. 2 sc, (1 inc, 4 sc) х 6 times, 1 inc, 1 sc, 1 sl st = 42
Rnd 7. into the back loops only 42 sc
Rnd 8. (1 dec, 4 sc) х 7 times = 35
Rnd 9. (5 sc, 1 dec) х 5 times = 30
Change to black yarn
Rnd 10-11 (2 rounds). 30 sc
Fasten off, cut off any excess yarn, hide the end.
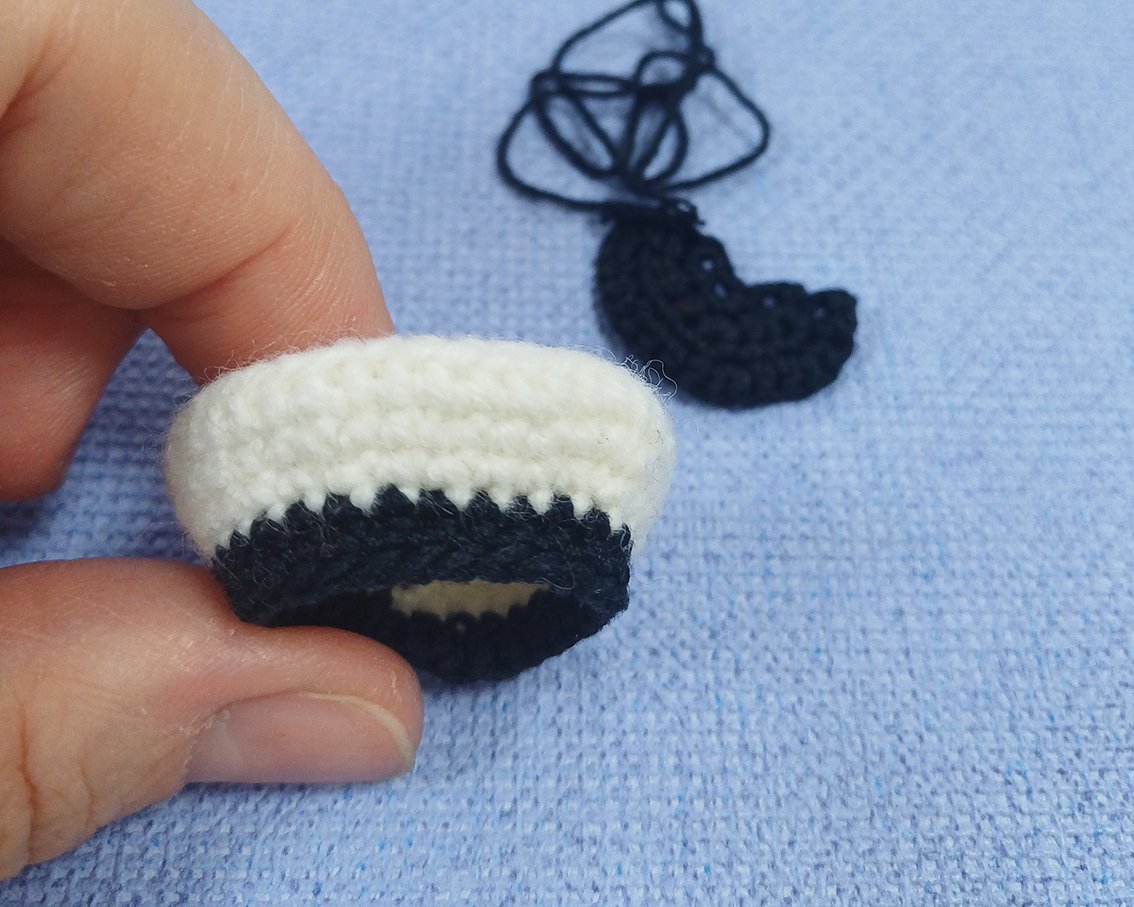
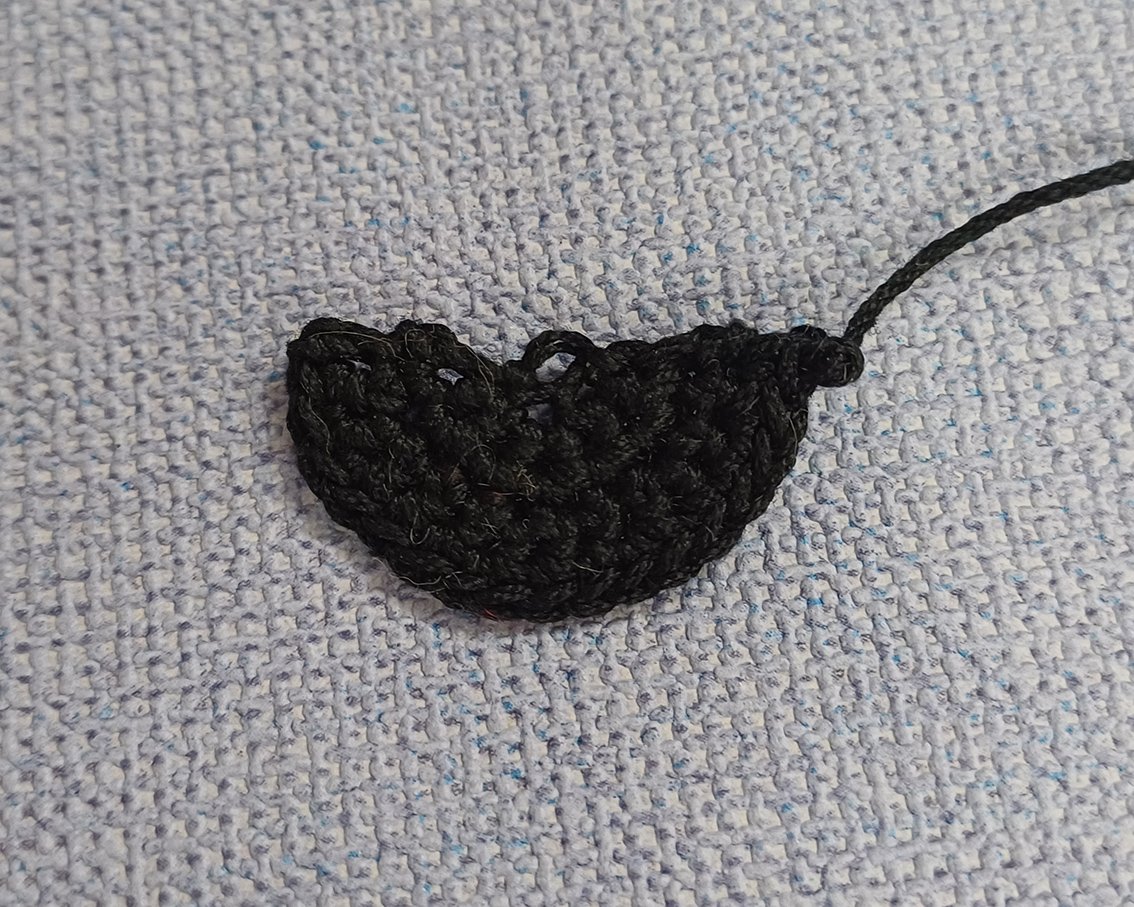
Visor
Work with black colour yarn.
Work 4 ch
Row 1. starting from 2nd ch from hook: 1 inc, 3 sc in 1 loop, 1 inc, 1 ch, turn = 7
Row 2. (1 sc, 1 inc) х 3 times, 1 sc, 1 ch, turn = 10
Row 3. (2 sc, 1 inc) х 3 times, 1 sc, 1 ch, turn = 13
Row 4. (2 sc, 1 inc) х 4 times, 1 sc = 17
Fasten off, cut the thread, leaving approx. 20 cm long tail for sewing.
Sew the visor to the cap.
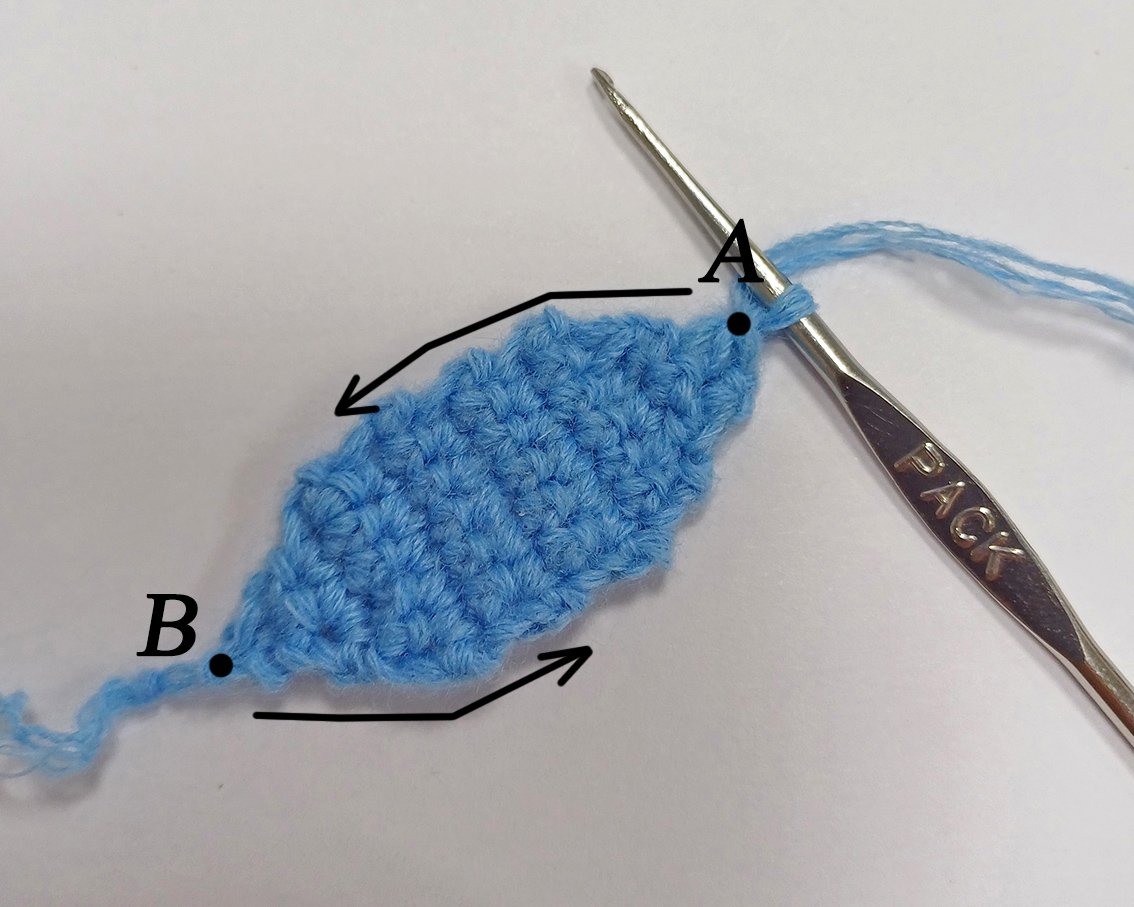
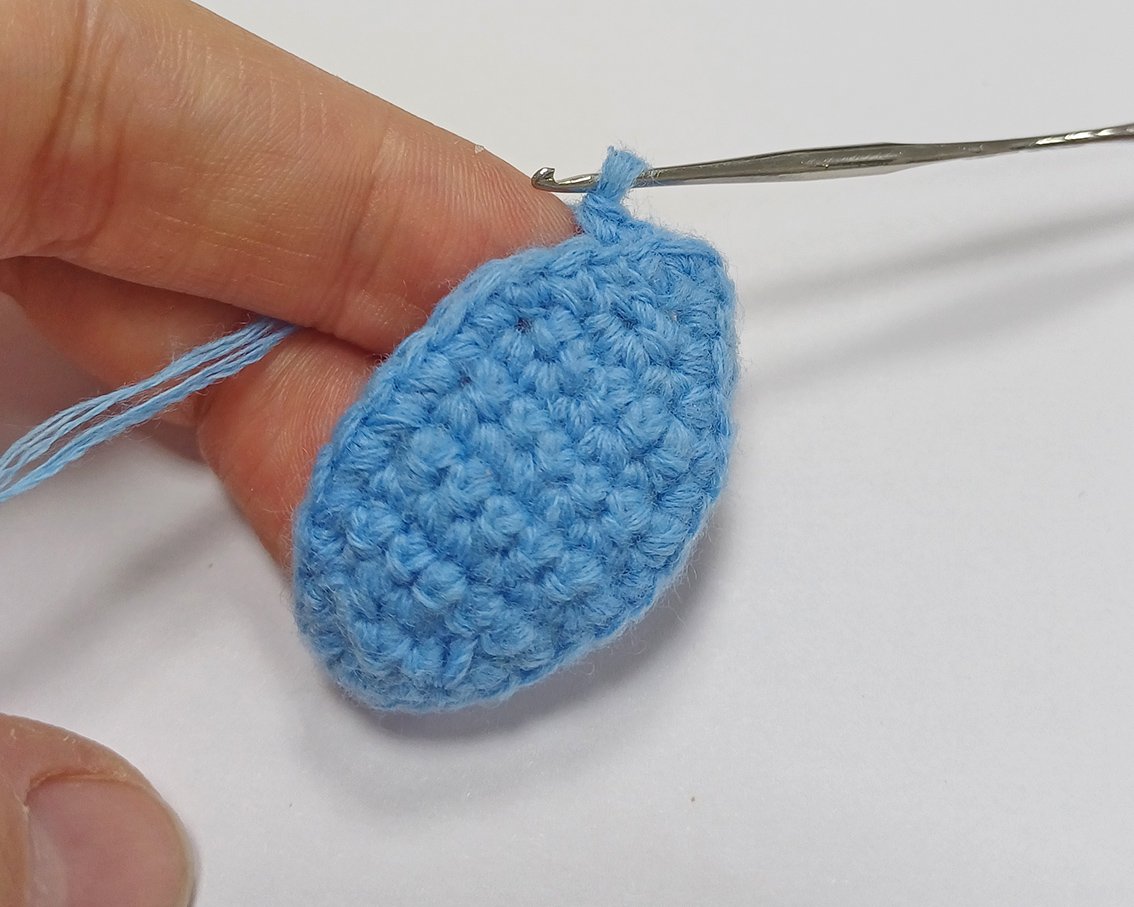
Boat
Use any coloured yarn. I used blue.
Row 1. Work 2 ch, starting from 2nd ch from hook: 1 sc 1 ch, turn = 1
Row 2. 1 inc, 1 ch, turn = 2
Row 3. 2 inc, 1 ch, turn = 4
Row 4. 1 inc, 2 sc, 1 inc, 1 ch, turn = 6
Row 5–10 (6 rounds). 6 sc, 1 ch, turn = 6
Row 11. 1 dec, 2 sc, 1 dec, 1 ch, turn = 4
Row 12. 2 dec, 1 ch, turn = 2
Row 13. 1 dec, 1 ch, do not turn, crochet from A to B 15 sc, crochet from B to A 15 sc = 30
Row 14. into the back loops only: 29 sc, 1 inc = 31
Row 15. 1 inc, 13 sc, 2 inc, 15 sc = 34
Row 16. 1 inc, 15 sc, 2 inc, 15 sc, 1 inc = 38
Row 17. 36 sc, 2 sl st = 38
Fasten off, cut off any excess yarn, hide the end.
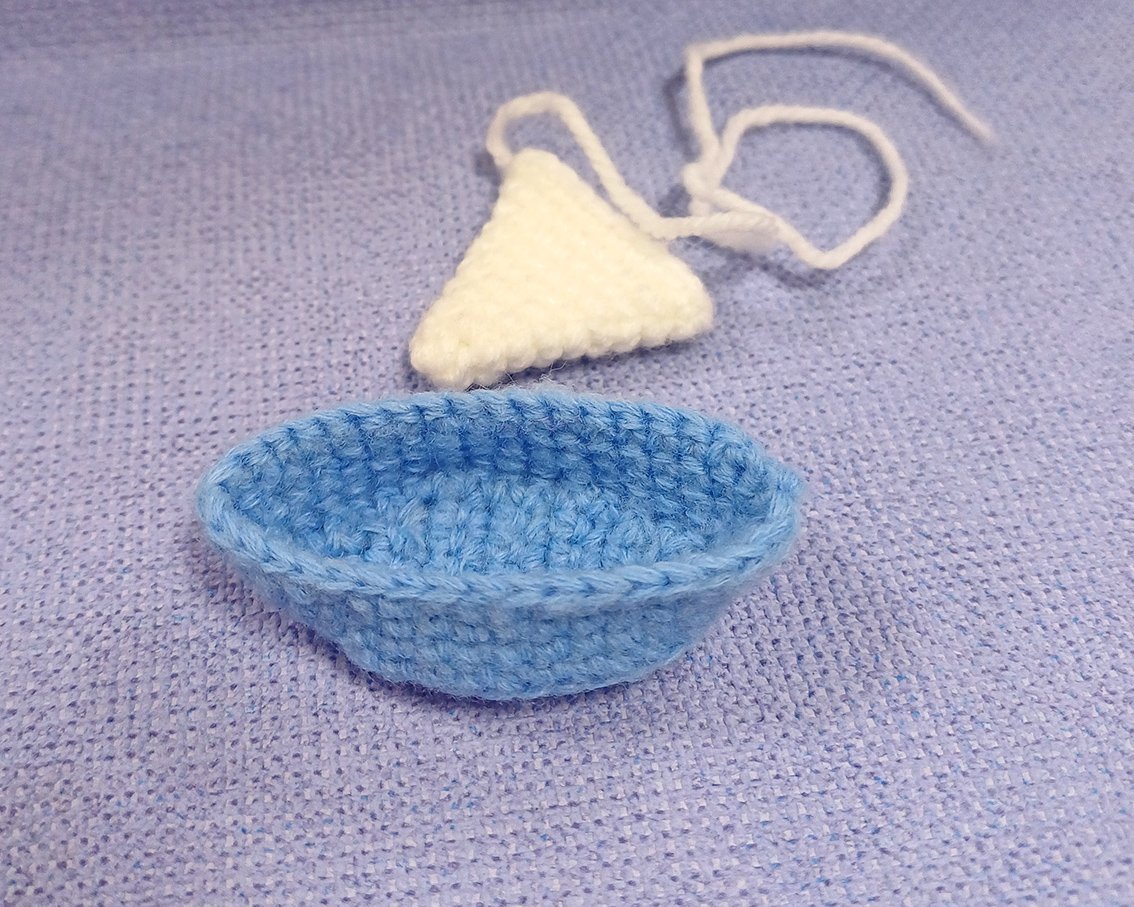
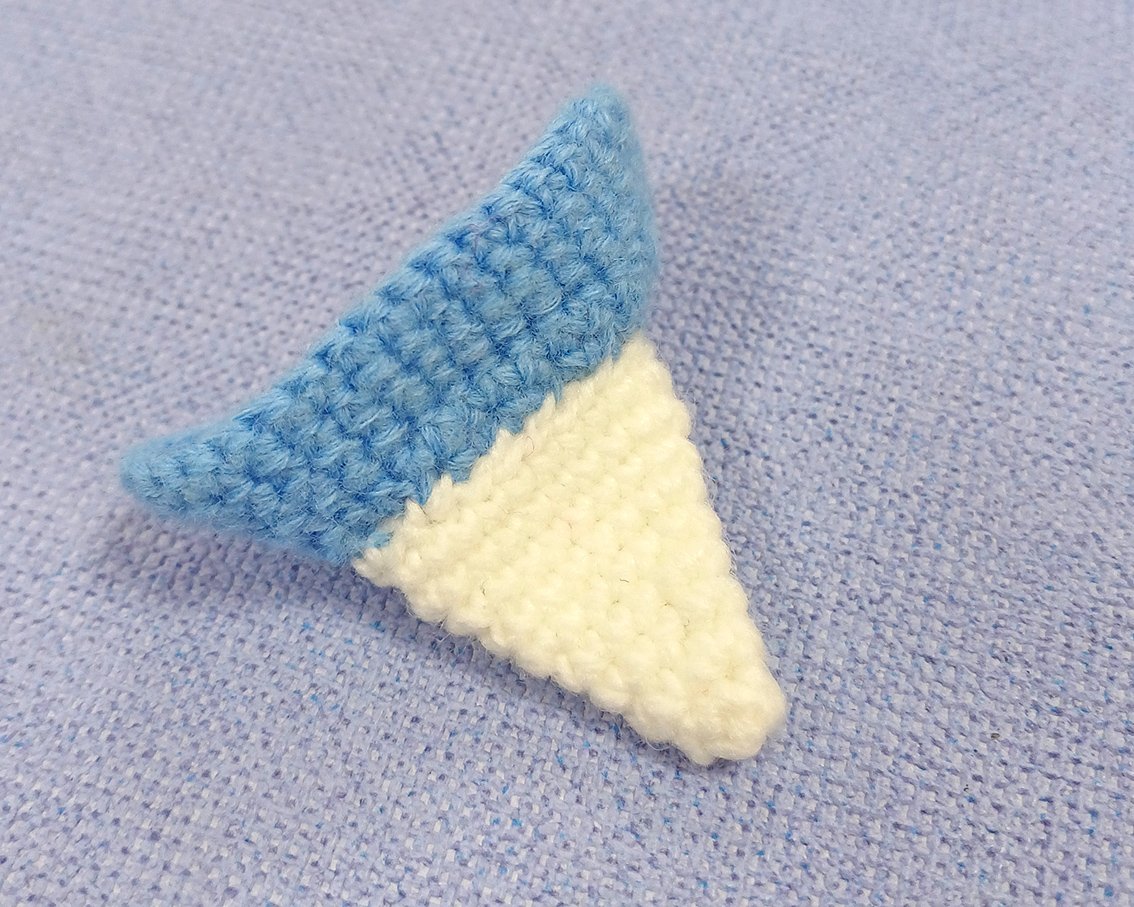
Sail
Work with white colour yarn.
Rnd 1. 6 sc in a Magic Ring
Rnd 2. 6 sc
Rnd 3. (1 inc, 1 sc, 1 inc) х 2 times = 10
Rnd 4. 10 sc
Rnd 5. (1 inc, 3 sc, 1 inc) х 2 times = 14
Rnd 6. 14 sc
Rnd 7. (1 inc, 5 sc, 1 inc) х 2 times = 18
Rnd 8. 18 sc
Rnd 9. (1 inc, 7 sc, 1 inc) х 2 times = 22
Rnd 10 (incomplete). 10 sc, 2 sl st
Fasten off, cut the thread, leaving approx. 30 cm long tail for sewing.
Sew the sail to the "bottom" of the boat.
The sailor bear is completed!
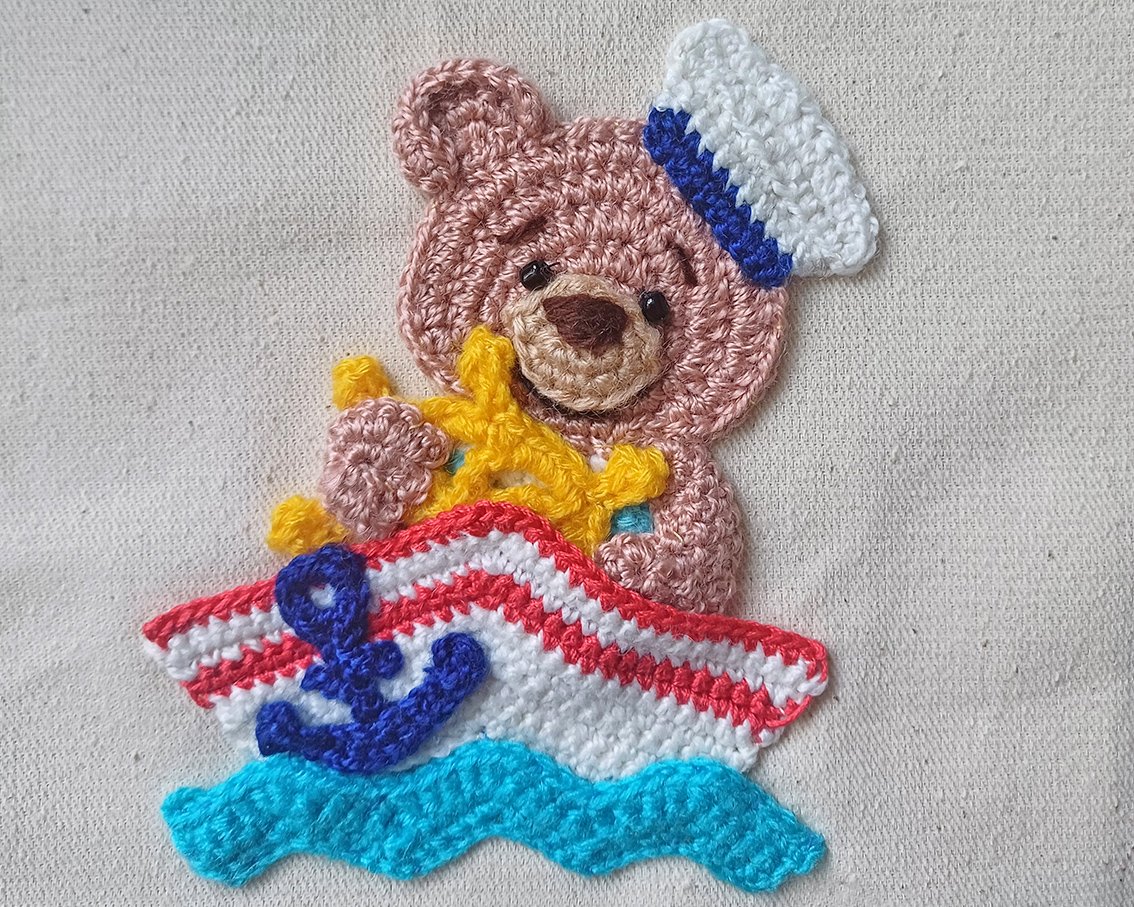 I also crocheted the sailor bear application. You can find the free pattern here https://www.crazypatterns.net/en/blog/4753/sailor-bear-application
You will find other interesting free crochet patterns by me on my blog.


