Materials:
Yarn of the same thickness of your choice (acrylic, wool, cotton). Choose 3 matching colors. I used crimson, pink and brown acrylic, 225 m/ 50 g. My cat is 11 cm tall.
- Yarn of the main color (color A) – approx. 15gr - Yarn of complimentary colors (colors B and C)– approx. 3-5gr
- A crochet hook, I have 1,25 mm crochet hook;
- Hollow fibre for stuffing;
- A sewing needle, matching sewing threads;
- A long needle for sculpting, strong thread for sculpting;
- 1 pair of ready-made eyes;
- Fishing line for mustache;
- A piece of wire with a diameter of 1mm approx. 50cm long;
- Adhesive fabric tape/plaster;
- Transparent glue;
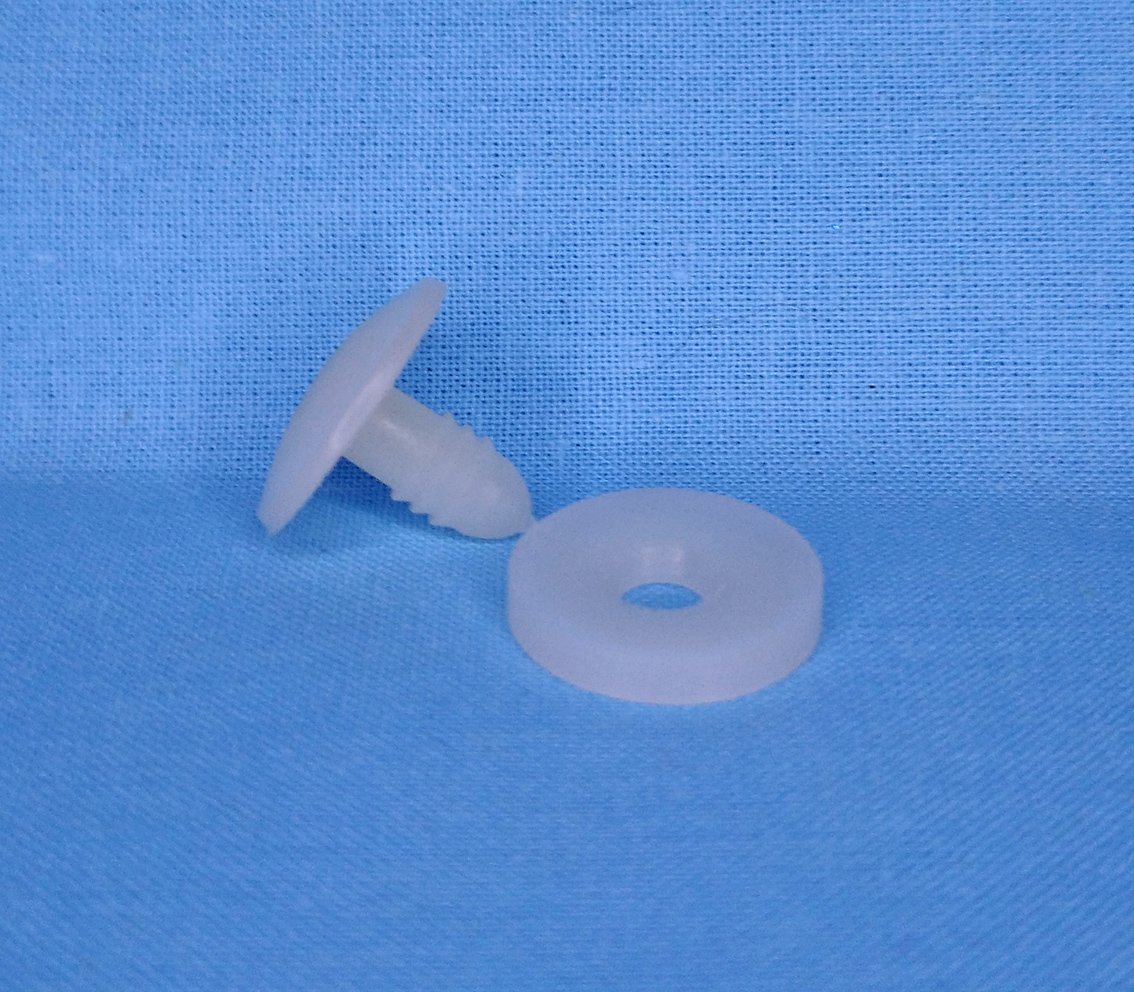
- 1 piece of doll join(12mm) - optional. You may choose to make the head solid sewn to the neck.
Abbreviations:
ch – chain
sl st – slip stitch
sc – single crochet
hdc – half double crochet
dc - double crochet
inc – increase (2 sc in 1 st)
2 inc, 3 inc – 2, 3 increases in sequence
dec – decrease (single crochet two stitches together)
(...) x N times – repeat instructions in brackets N times
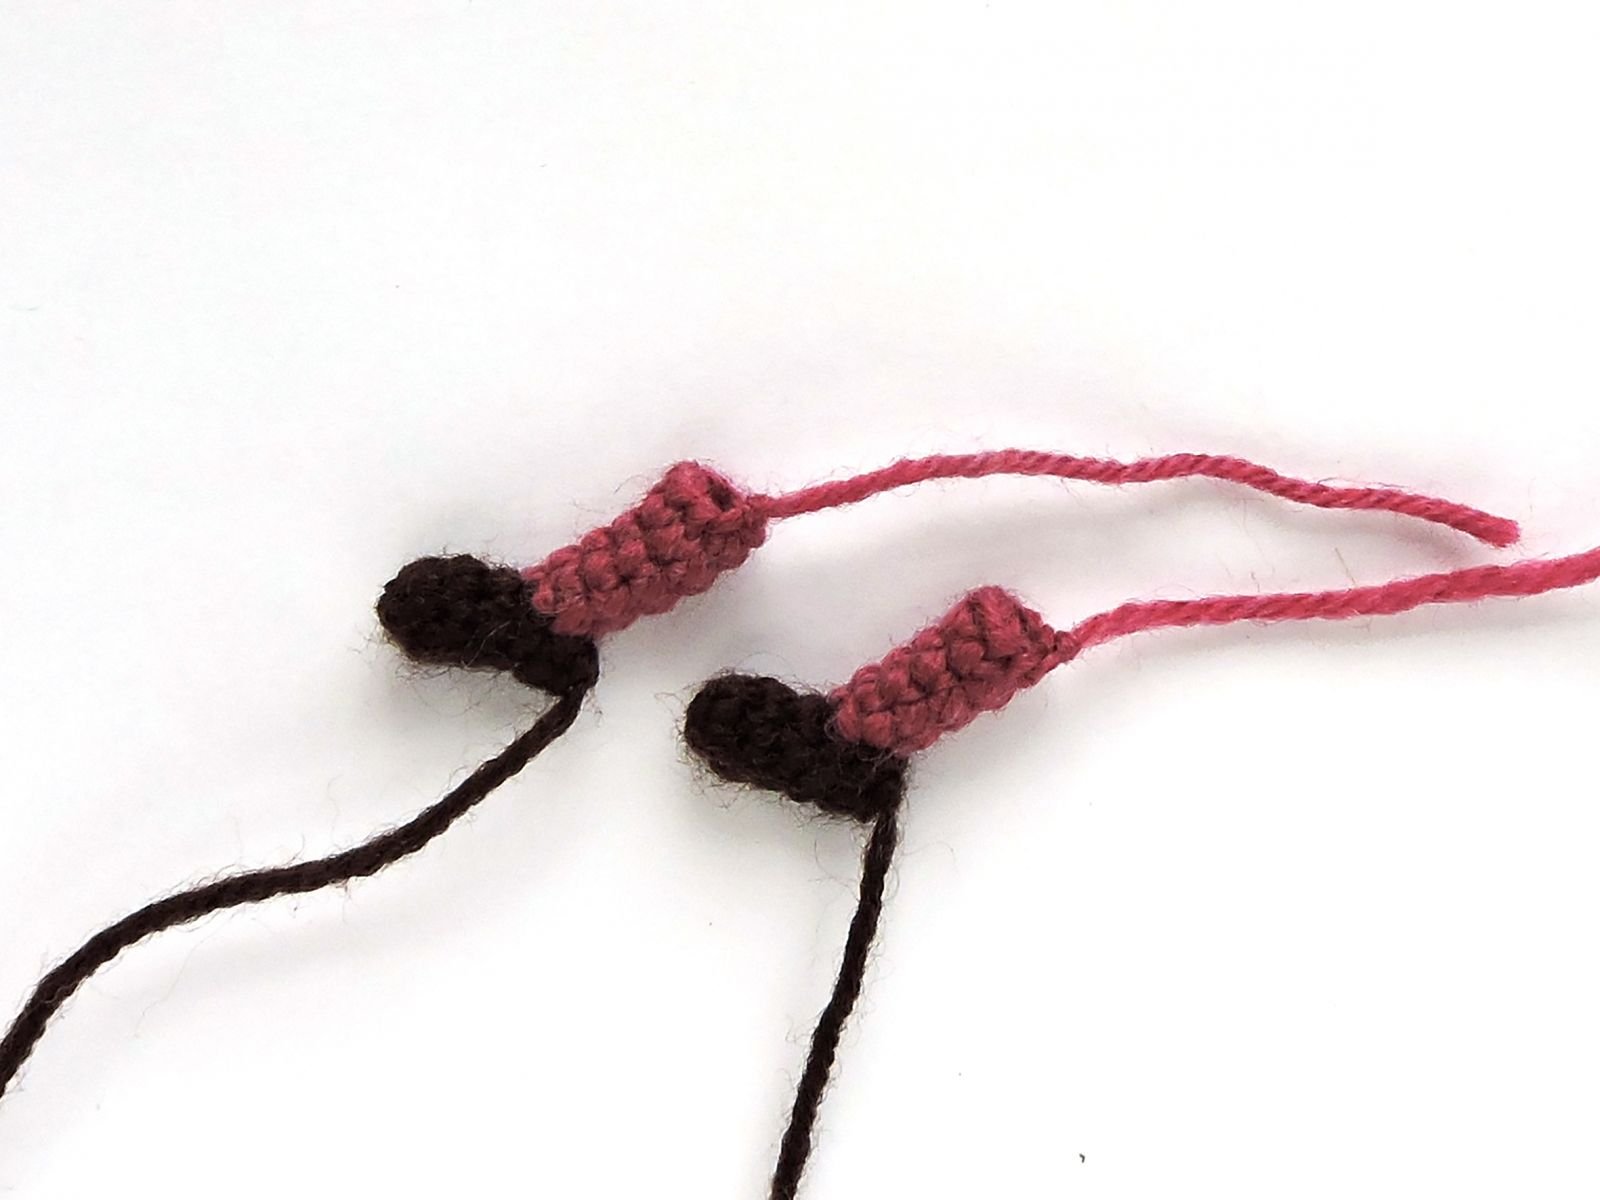
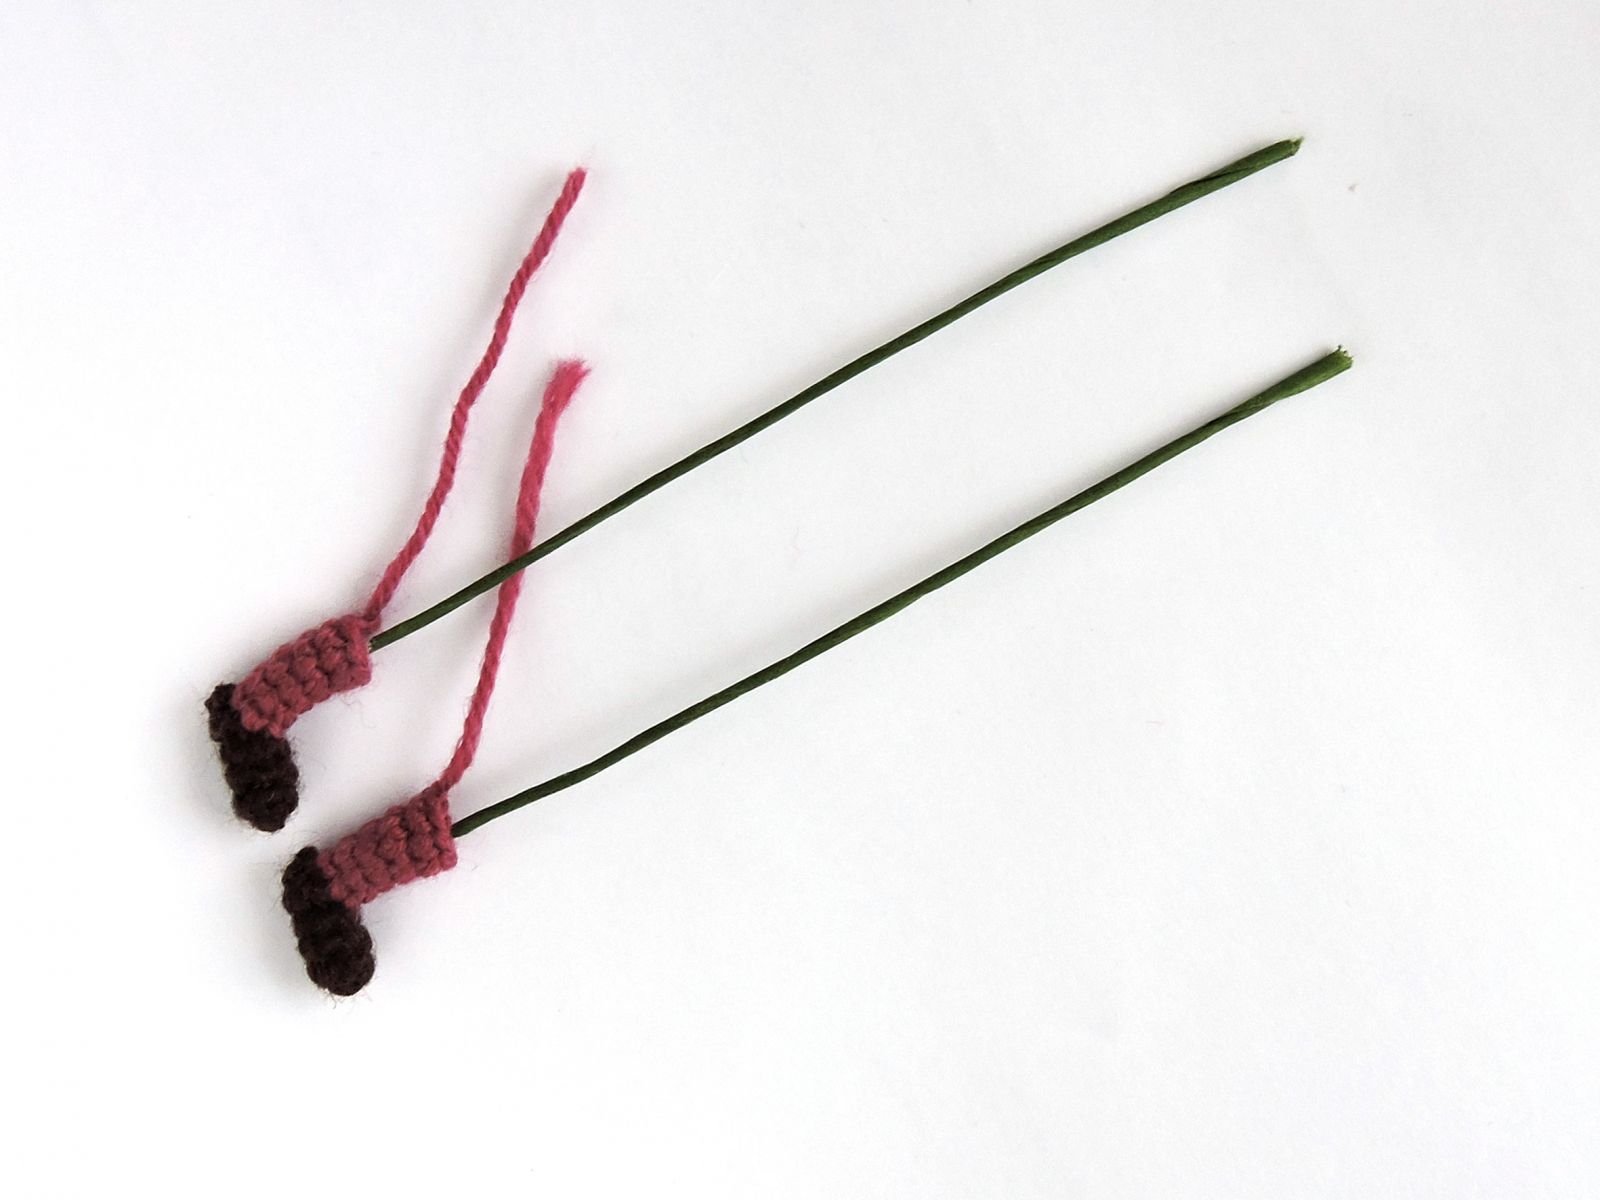
Arms (make 2)
Prepare a piece of wire, I used a 9 cm long piece. Bend the end with the help of pliers. Apply some glue onto the wire and wrap complimentary yarn (color B) around it – approx. 1 cm. To create a thickness, wrap the wire several times. Fix the thread with glue.
.JPG)
Take the yarn of the main color (color A). Continue wrapping the arm to the middle of the wire. To create a thickness, wrap the wire several times. Fix the thread with glue.
.JPG)
Legs (make 2)
Start with a complimentary color (color B).
Rnd 1: 6 sc in a Magic Ring
Rnd 2 – 4: 6 sc
Rnd 5: put an additional marker, 2 ch, skip 2 loops, 4 sc [6]
Rnd 6: along the chain: 2 sc, continue: 3 sc, 1 sl st [6]
Pull off the loops. Cut the thread, hide the end.
Join the yarn of the main color (color A) near the marked loop.
Rnd 1: work 6 sc around the hole in the 5th round of the foot [6]
.JPG)
Rnd 2: 6 sc
Rnd 3: 4 sc, inc, 1 sc [7]
Rnd 4: 7 sc
Rnd 5: 2 sc, inc, 3 sc, 1 sl st [8]
Prepare 2 pieces of wire, bend the end with the help of pliers. Insert the wire into the legs. Add some hollow fiber (optional).
Tail
Prepare a piece of wire, about 14 cm long. Bend the end with the help of pliers. Apply some glue onto the wire and wrap main yarn (color A) around it – approx. 9 cm. To create a thickness, wrap the wire several times. Fix the thread with glue.

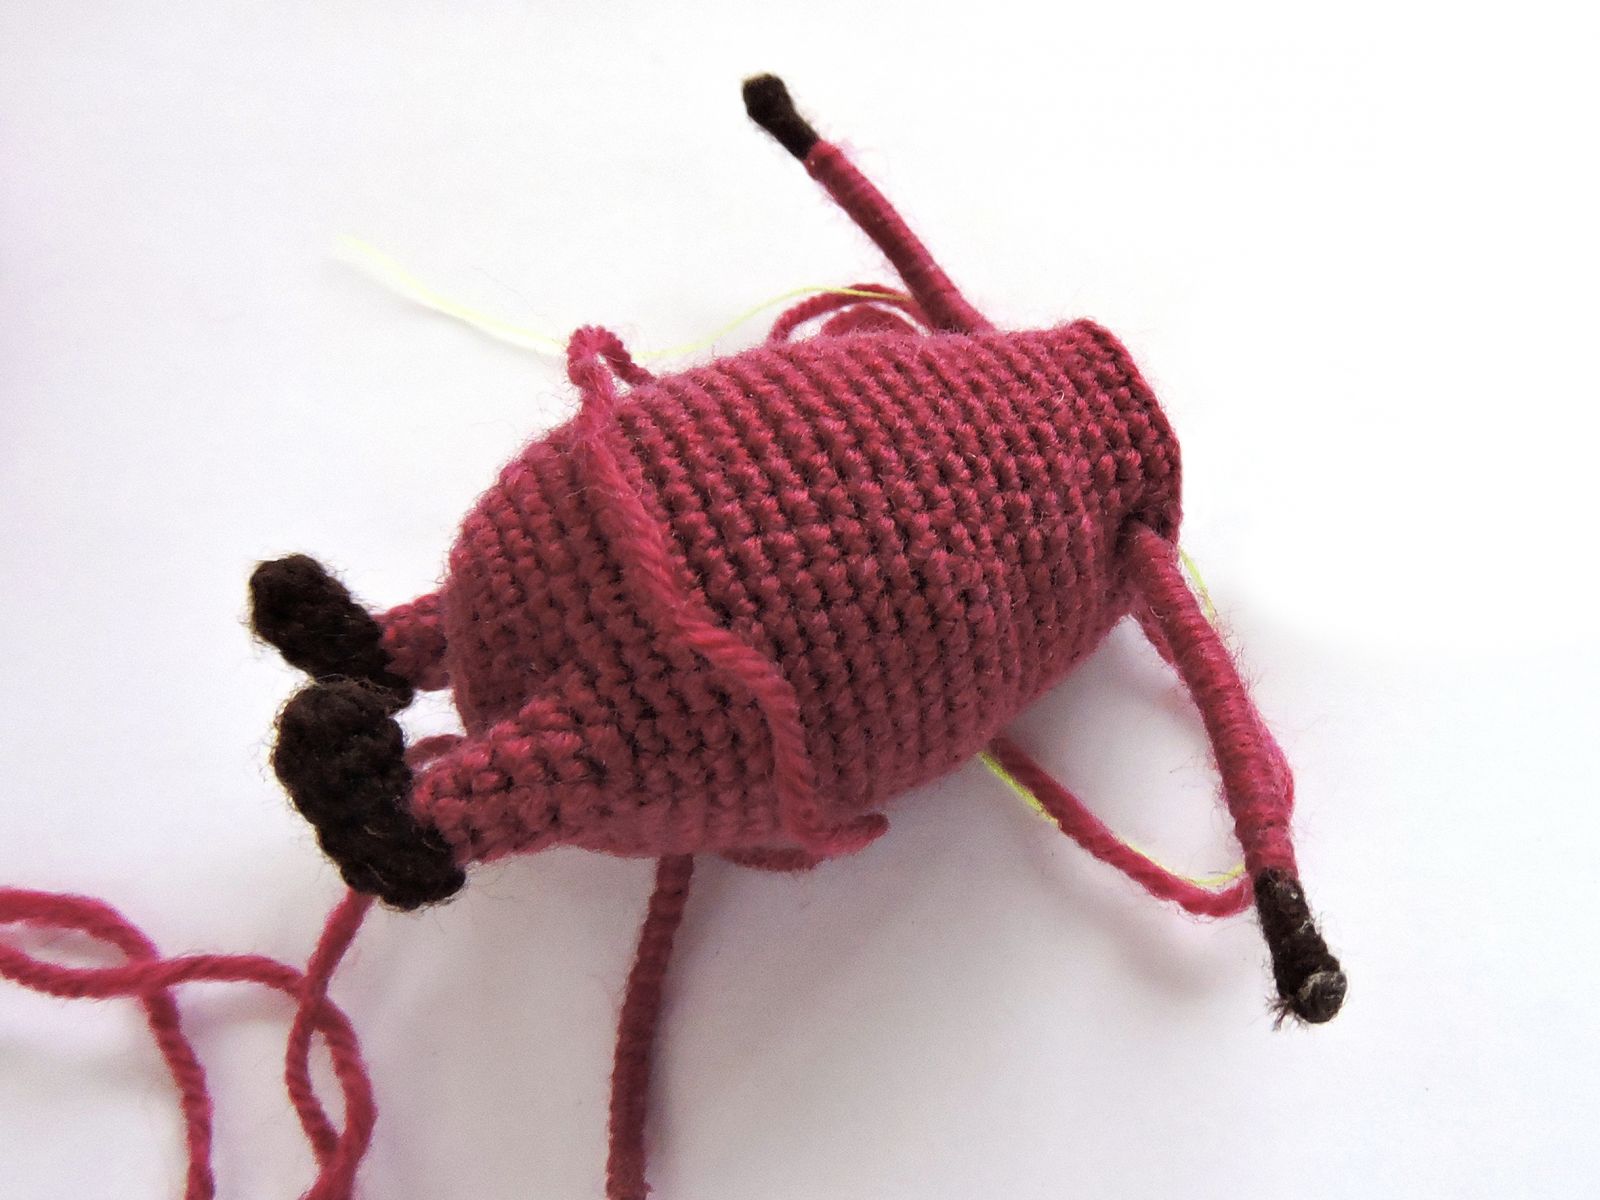
Body
Main color yarn (color A)
The marker should be in line with the centre of the back. Adjust as and when to keep it straight.
Rnd 1: 6 sc in a Magic Ring
Rnd 2: 6 inc [12]
Rnd 3: (1 sc, inc) х 6 times [18]
Rnd 4: (1 sc, inc, 1 sc) х 6 times [24]
Rnd 5: (3 sc, inc) х 6 times [30]
Join legs to the body in the next round, keep an eye on the symmetry of the toy!
Rnd 6: 6 sc, attach the 1st leg with the heel to the back (to the marker, see the photo for guidance), work the loops of the leg and body together: 3 sc, continue: 12 sc, attach the 2nd leg, work the loops of the leg and body together: 3 sc, сontinue: 6 sc [30]
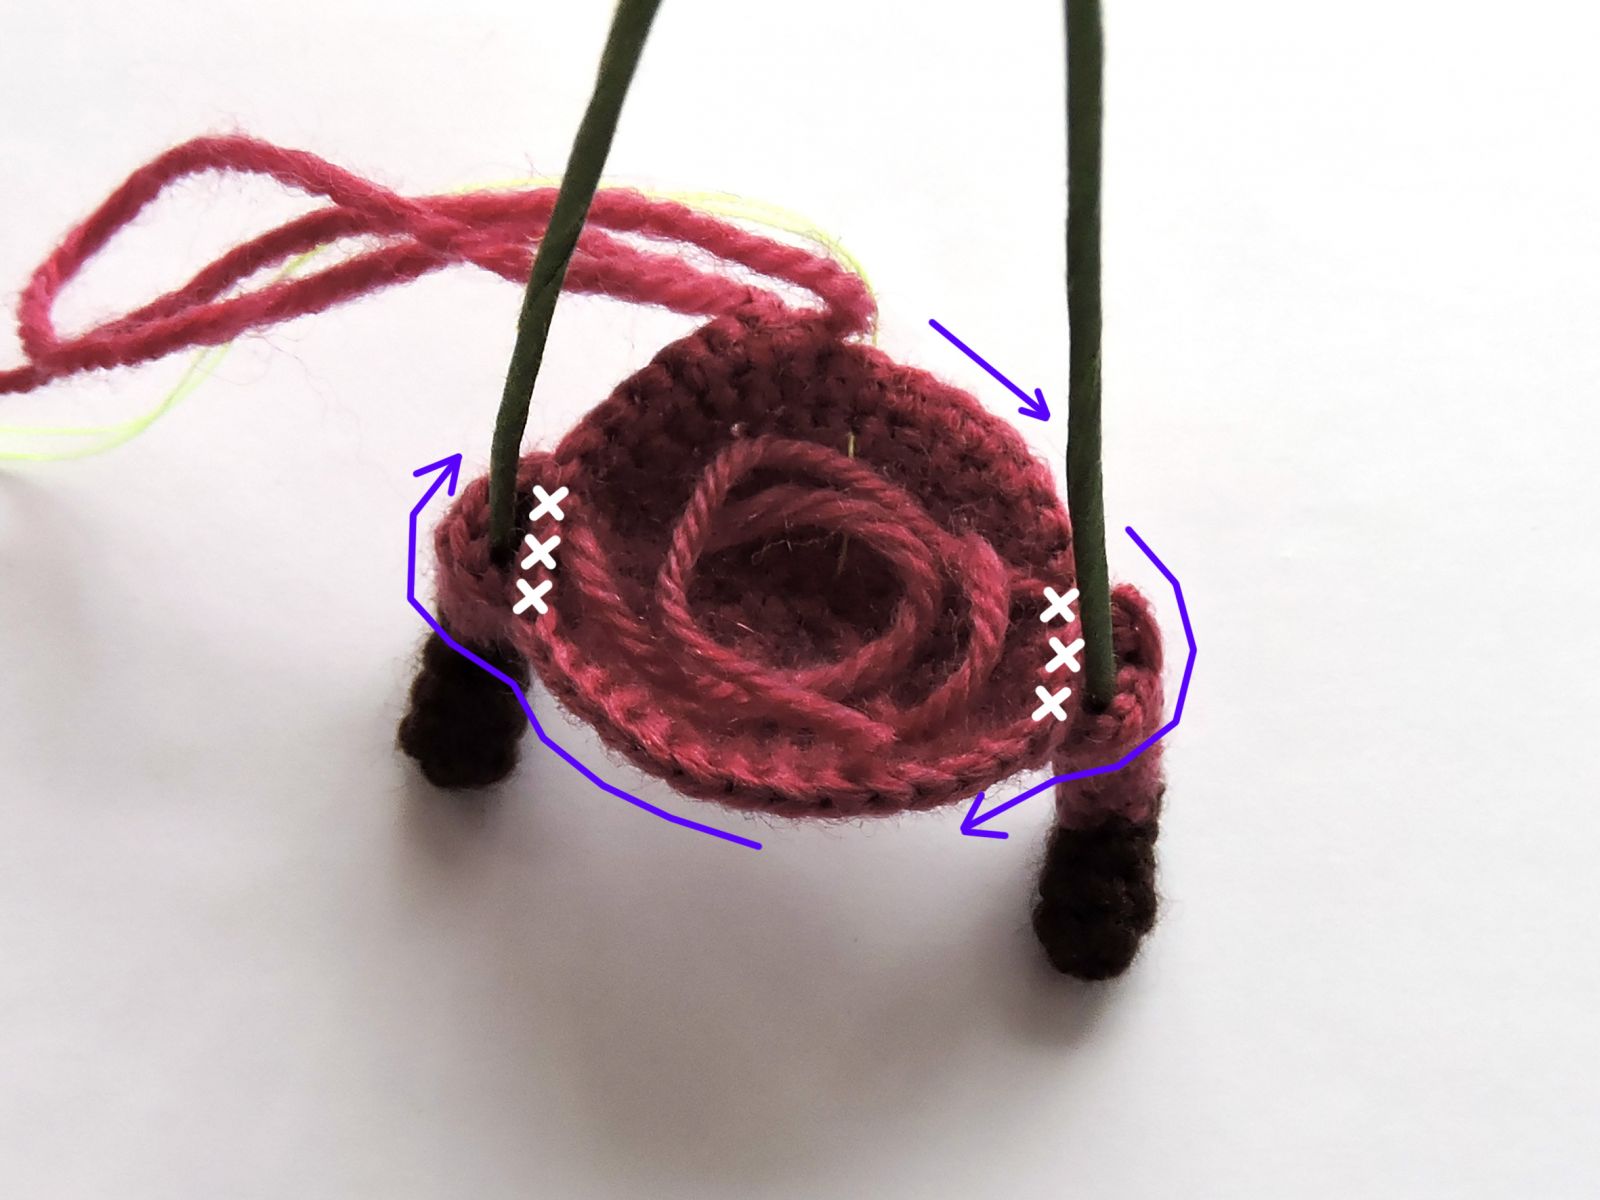
Rnd 7: 6 sc, work into the loops of the leg: 2 sc, inc, 2 sc, work into the loops of the body: 12 sc, work into the loops of the leg: 2 sc, inc, 2 sc, сontinue: 6 sc [36]

Rnd 8: (2 sc, inc, 2 sc) х 6 times [42]
Rnd 9: 42 sc
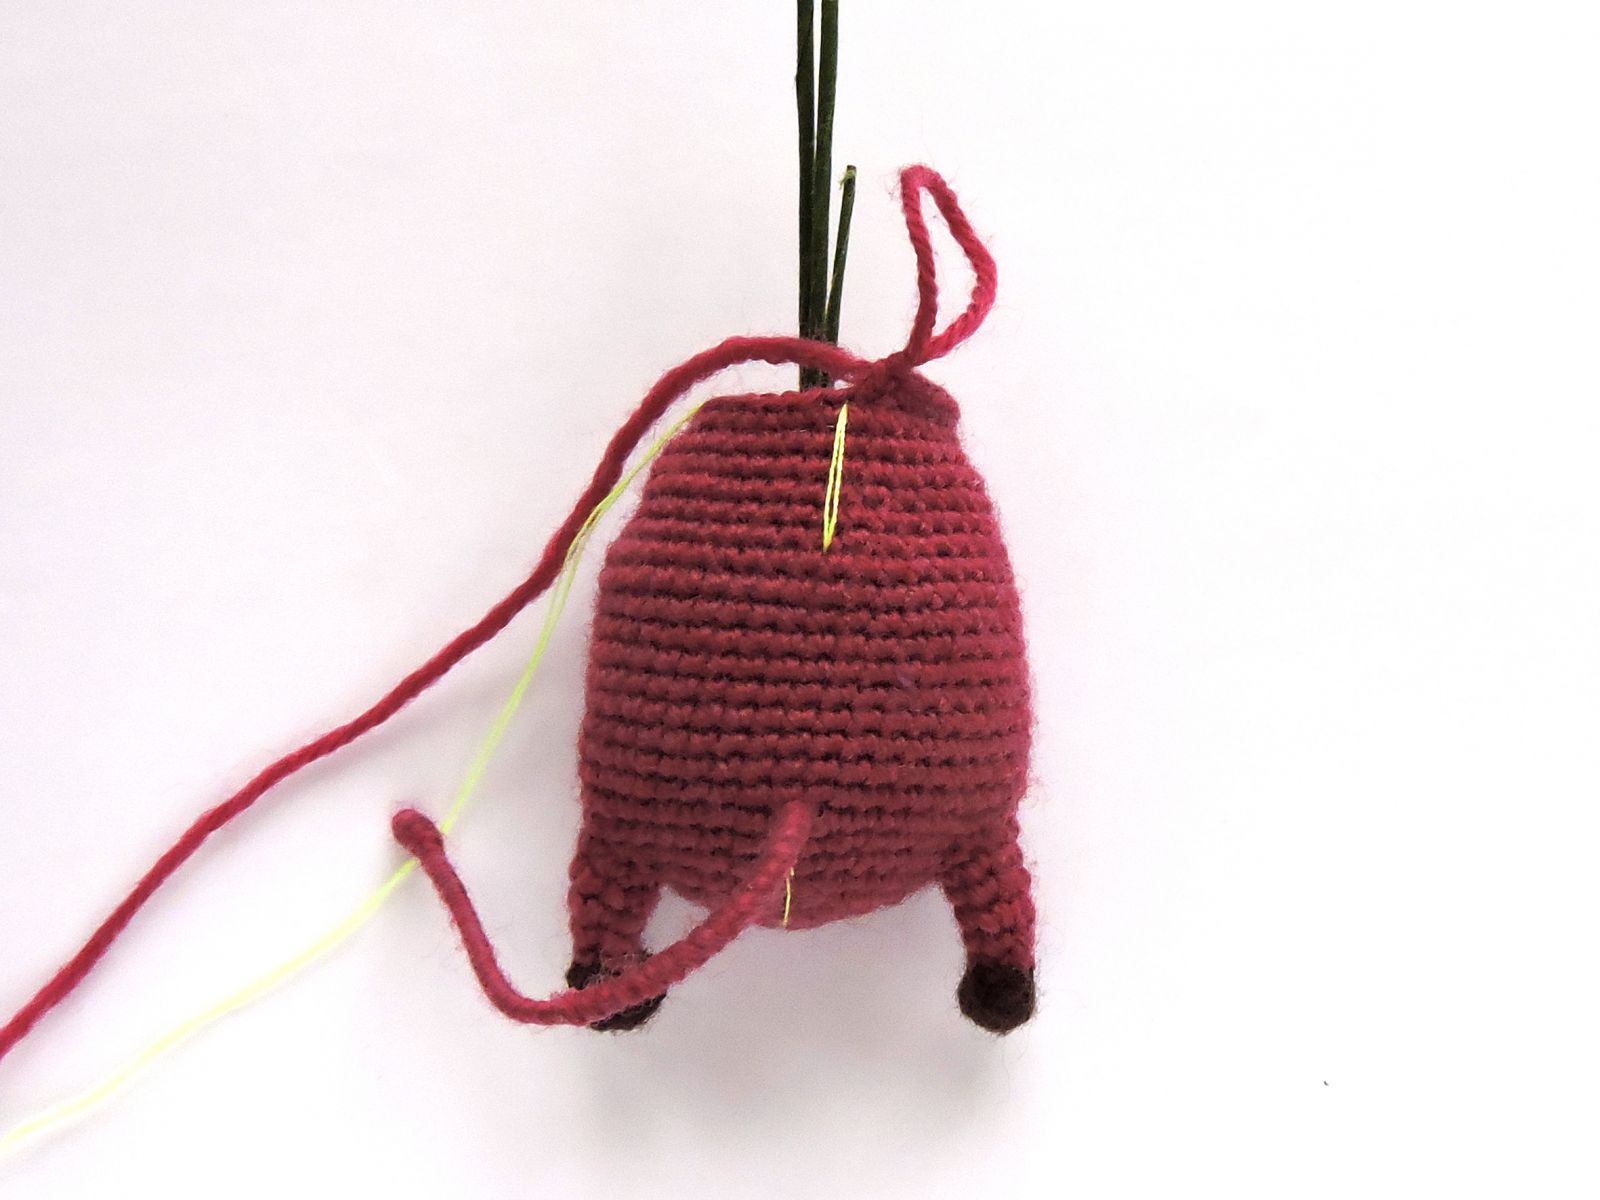
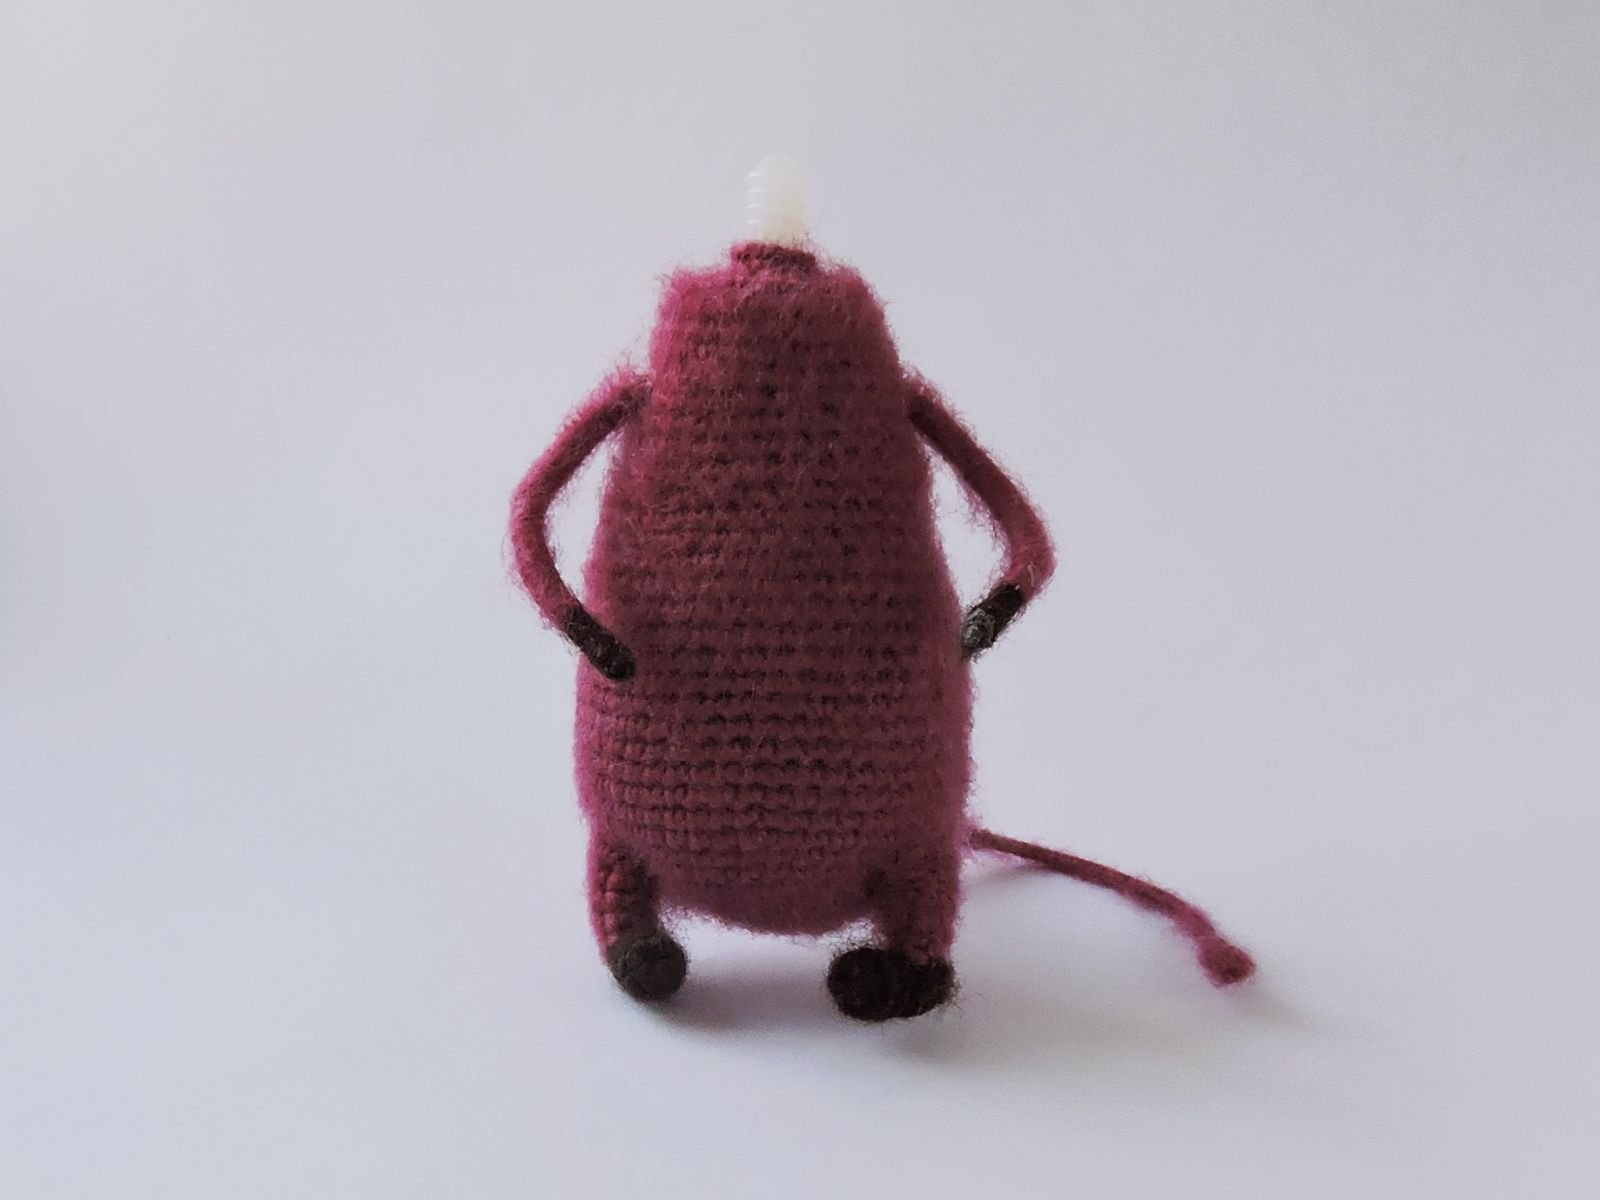
Insert the tail in the body. Twist the ends of the wires together. Wrap some adhesive fabric tape around those.
Rnd 10 – 18: 42 sc
Rnd 19: (6 sc, dec, 6 sc) х 3 times [39]
Rnd 20: 39 sc
Rnd 21: (11 sc, dec) х 3 times [36]
Rnd 22: 36 sc
Rnd 23: (5 sc, dec, 5 sc) х 3 times [33]
Rnd 24: 33 sc
Rnd 25: (9 sc, dec) х 3 times [30]
Rnd 26: 30 sc
Rnd 27: (4 sc, dec, 4 sc) х 3 times [27]
Rnd 28: 27 sc
Rnd 29: (7 sc, dec) х 3 times [24]
Insert the arms in the 28th round. Twist the ends of the wires together. Wrap some adhesive fabric tape around those. Keep an eye on the symmetry!
Rnd 30 – 32: 24 sc
Rnd 31: (1 sc, dec, 1 sc) х 6 times [18]
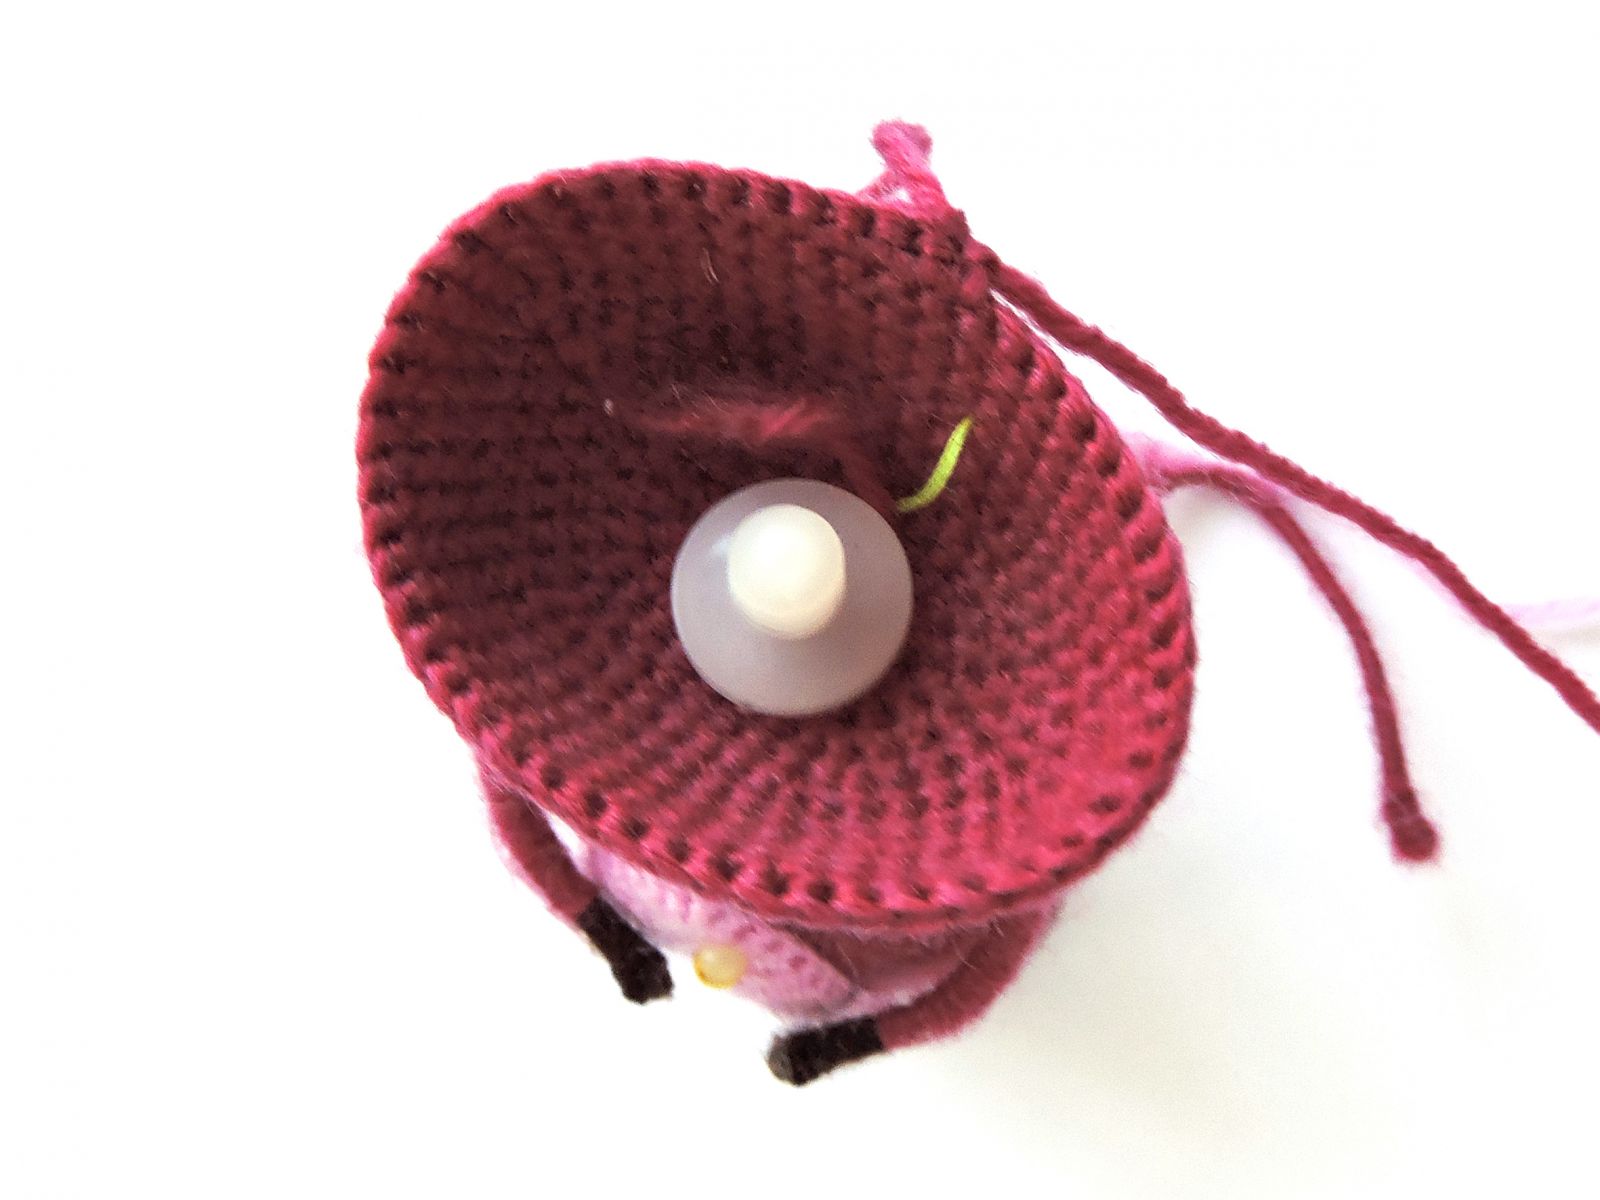
Add some hollow fibre. Insert the first part of the joint- a disk with a screw.
Rnd 32: (1 sc, dec) х 6 times [12]
Rnd 33: (2 sc, dec) х 3 times [9]
Cut off yarn. Tighten the loops well around the joint screw.
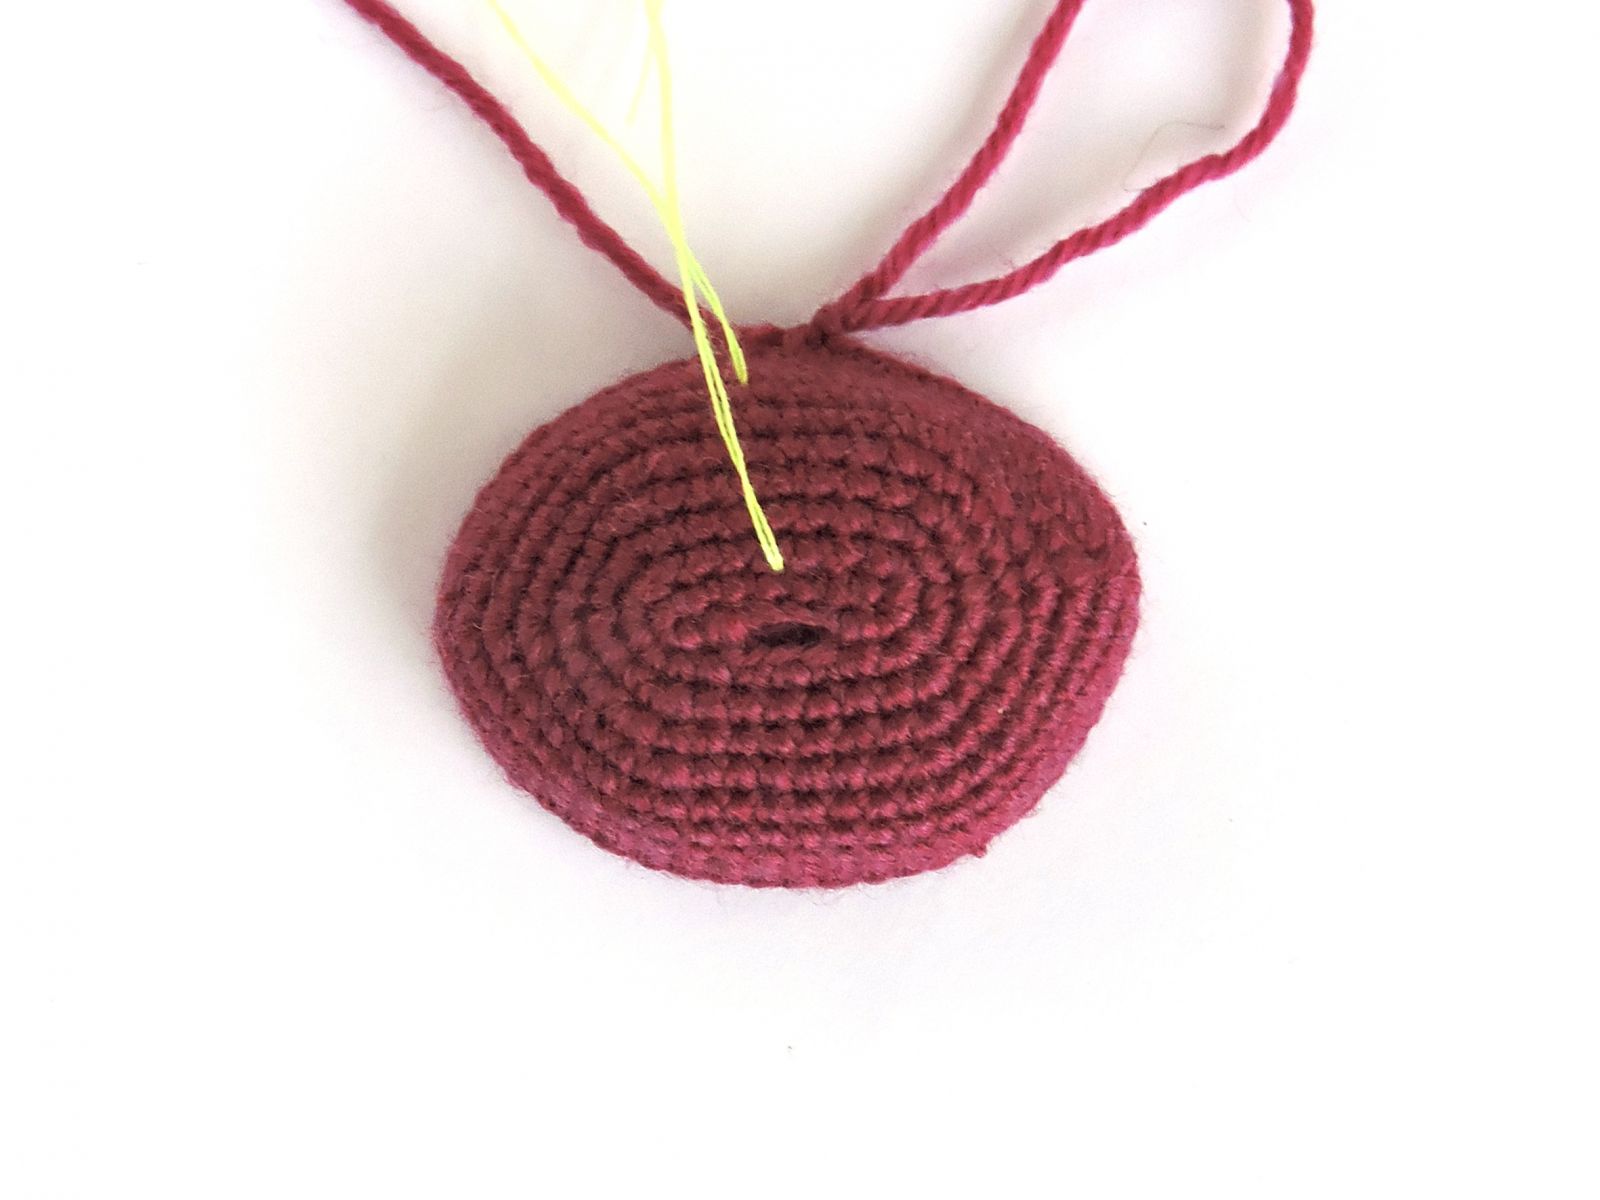
Head
Main color yarn (color A)
Rnd 1: 8 ch, starting from 2nd ch from hook: 6 sc, 3 sc in the last stitch, continue along the other side of chain: 1 sc, 3 ch, skip 3 loops (this is a hole for the joint), 1 sc, inc [16]
Rnd 2: inc, 5 sc, inc х 3 times, 1 sc, along the chain: 3 sc, continue: 1 sc, inc х 2 times [22]
Rnd 3: inc, 1 sc, 5 sc, (1 sc, inc) х 3 times, 5 sc, (1 sc, inc) х 2 times [28]
Rnd 4: (1 sc, inc, 1 sc), 5 sc, (1 sc, inc, 1 sc) х 3 times, 5 sc, (1 sc, inc, 1 sc) х 2 times [34]
Rnd 5: 15 sc, 3 sc in 1 loop, 17 sc, 3 sc in 1 loop [38]
Rnd 6: 16 sc, 3 sc in 1 loop, 18 sc, 3 sc in 1 loop, 2 sc [42]
Rnd 7: 17 sc, 3 sc in 1 loop, 20 sc, 3 sc in 1 loop, 3 sc [46]
Rnd 8: 18 sc, 3 sc in 1 loop, 22 sc, 3 sc in 1 loop, 4 sc [50]
Work 7 sc, transfer your place marker here - this is the middle of the back of the head.
Rnd 9 – 11: 50 sc
Put the head on the neck, insert the joint screw into the hole in the head. Press the plug tightly from above until it stops. To make it easier to snap into place hold it in hot water or heat it with a hairdryer.
Rnd 12: 11 sc, dec, 24 sc, dec, 11 sc [48]
Rnd 13: 10 sc, dec, 24 sc, dec, 10 sc [46]
Rnd 14: 10 sc, dec, 22 sc, dec, 10 sc [44]
Rnd 15: 9 sc, dec, 21 sc, dec, 10 sc [42]
Rnd 16: 42 sc
Rnd 17: (5 sc, dec) х 6 times [36]
Rnd 18: (2 sc, dec, 2 sc) х 6 times [30]
Rnd 19: (3 sc, dec) х 6 times [24]
Rnd 20: (1 sc, dec, 1 sc) х 6 times [18]
Rnd 21: (1 sc, dec) х 6 times [12]
Add some hollow fibre.
Rnd 22: dec х 6 times [6]
Cut off yarn. Do not close off the loops of the last round just yet, you will do it later!

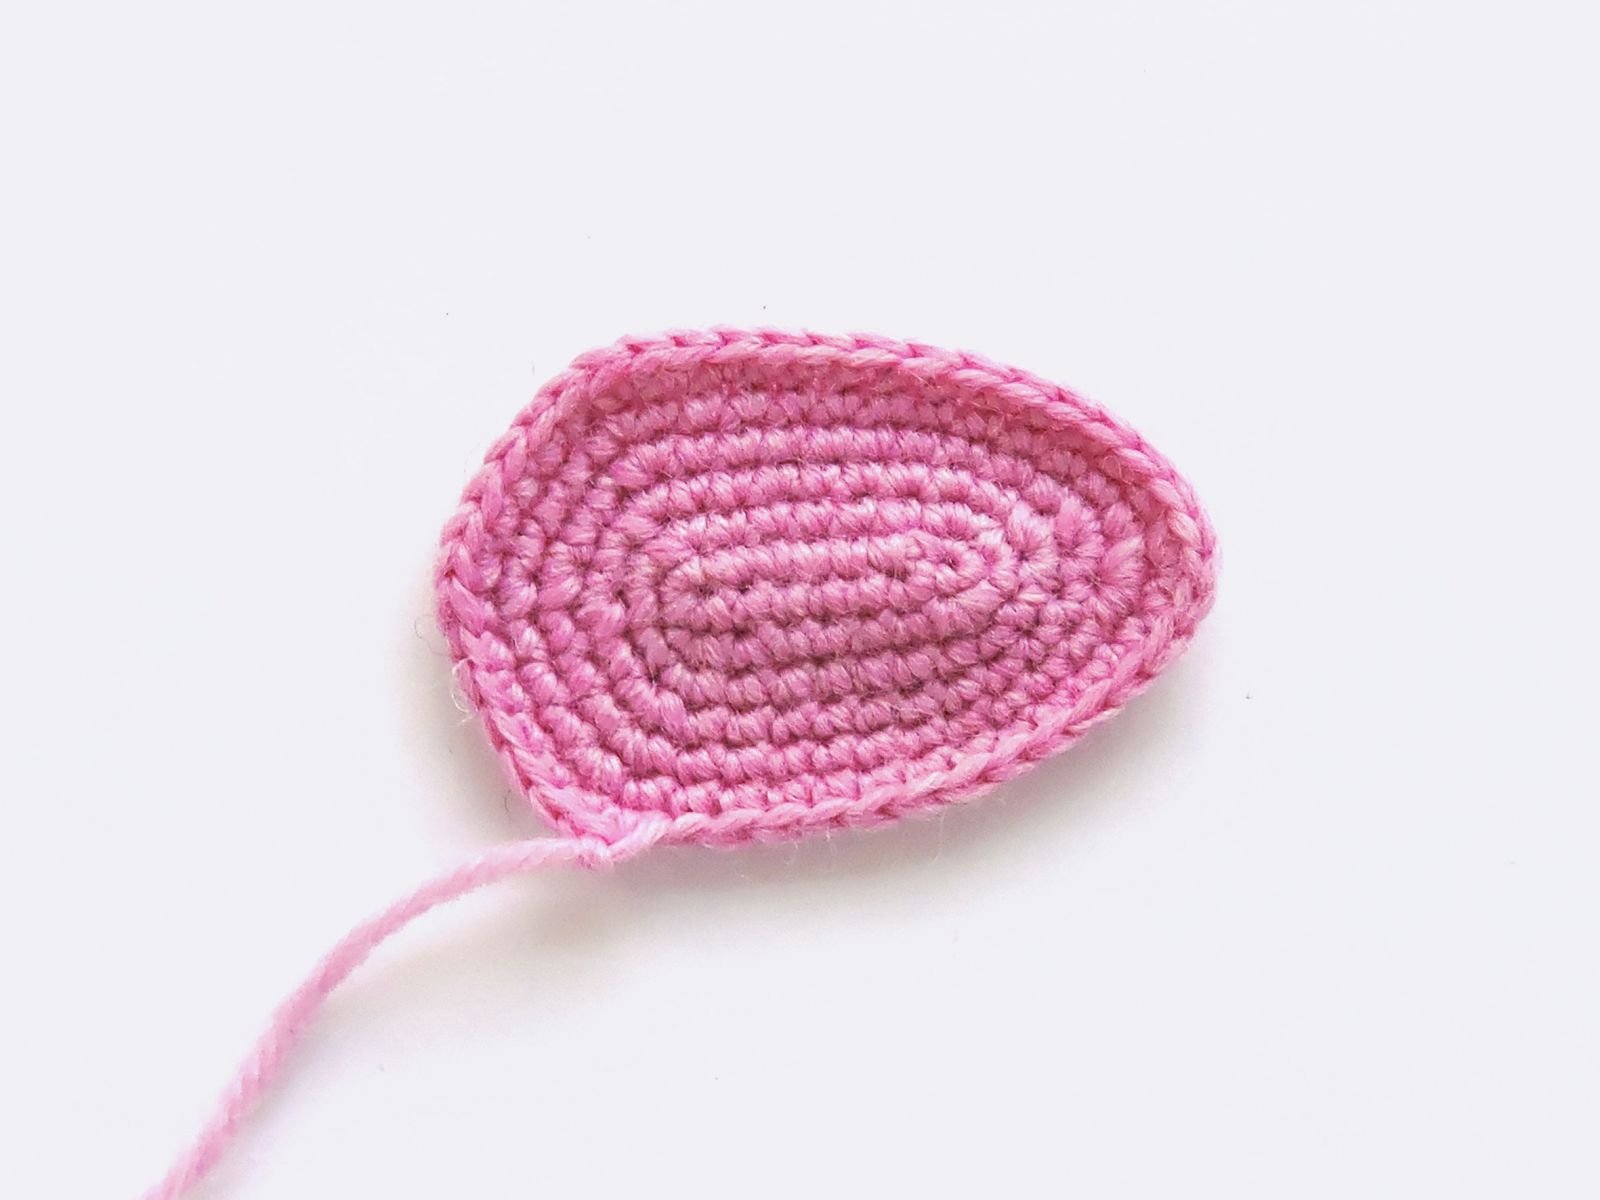
Tummy pad
Complimentary colour yarn (color C)
Rnd 1: 8 ch, starting from 2nd ch from hook: 6 sc, 3 sc in the last stitch, continue along the other side of chain: 5 sc, inc [16]
Rnd 2: inc, 5 sc, inc х 3 times, 5 sc, inc х 2 times [22]
Rnd 3: 1 sc, inc, 8 sc, 3 sc in 1 loop, 7 sc, (1 sc, inc) х 2 times [27]
Rnd 4: (1 sc, inc, 1 sc), 9 sc, 3 sc in 1 loop, 8 sc, (1 sc, inc, 1 sc) х 2 times [32]
Rnd 5: 3 sc, inc, 9 sc, 3 sc in 1 loop, 10 sc, (3 sc, inc) х 2 times [37]
Rnd 6: (2 sc, inc, 2 sc), 11 sc, 3 sc in 1 loop, 10 sc, (2 sc, inc, 2 inc) х 2 times [42]
Rnd 7 incomplete: 5 sc, 1 sl st
Bind off, cut off any excess yarn.
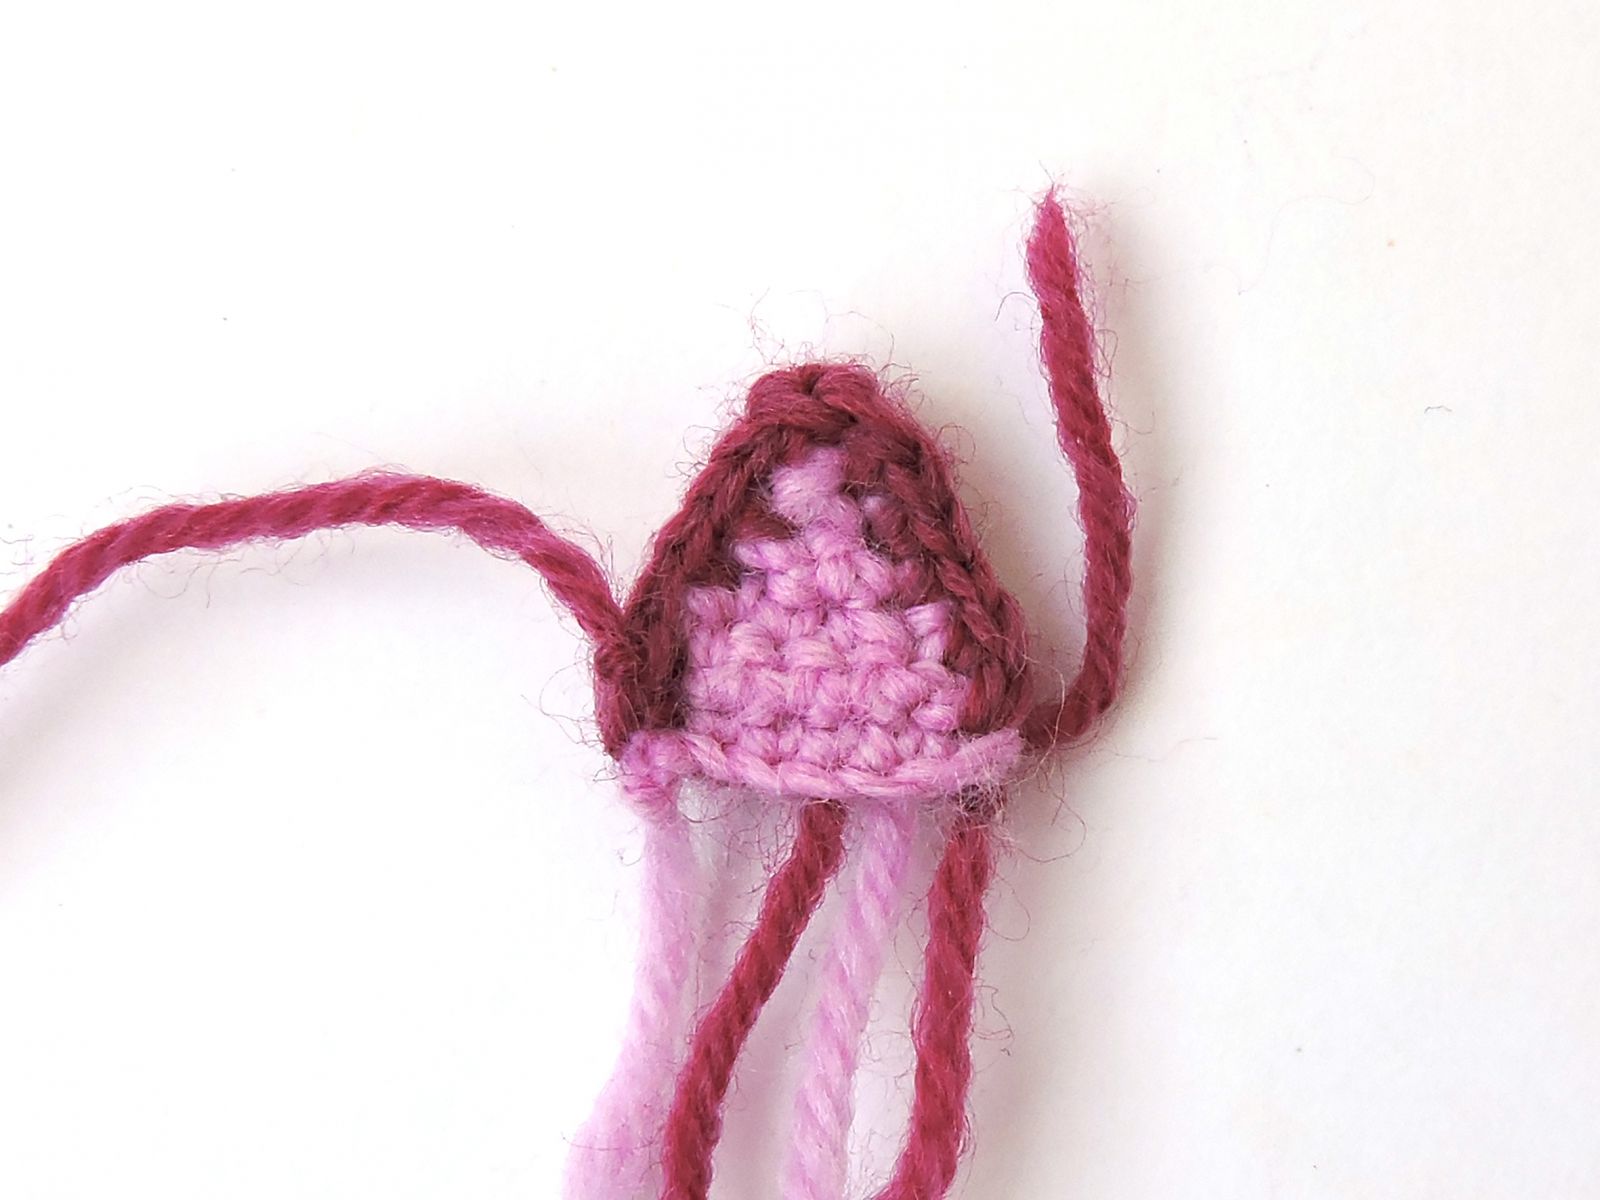
Muzzle
Complimentary color yarn (color C)
Rnd 1: 5 ch, starting from 2nd ch from hook: 3 sc, 3 sc in the last stitch, continue along the other side of chain: 2 sc, inc [10]
Rnd 2: inc, 2 sc, inc х 3 times, 2 sc, inc х 2 times [16]
Rnd 3 – 4: 16 sc
Fasten off, cut off. Add some hollow fibre. Pull off the middle with a thread.
Lower lip
Complimentary color yarn (color C)
Rnd 1: 6 sc in a Magic Ring
Rnd 2: (1 sc, inc) х 3 times [9]
Rnd 3: 9 sc
Bind off, cut off any excess yarn.
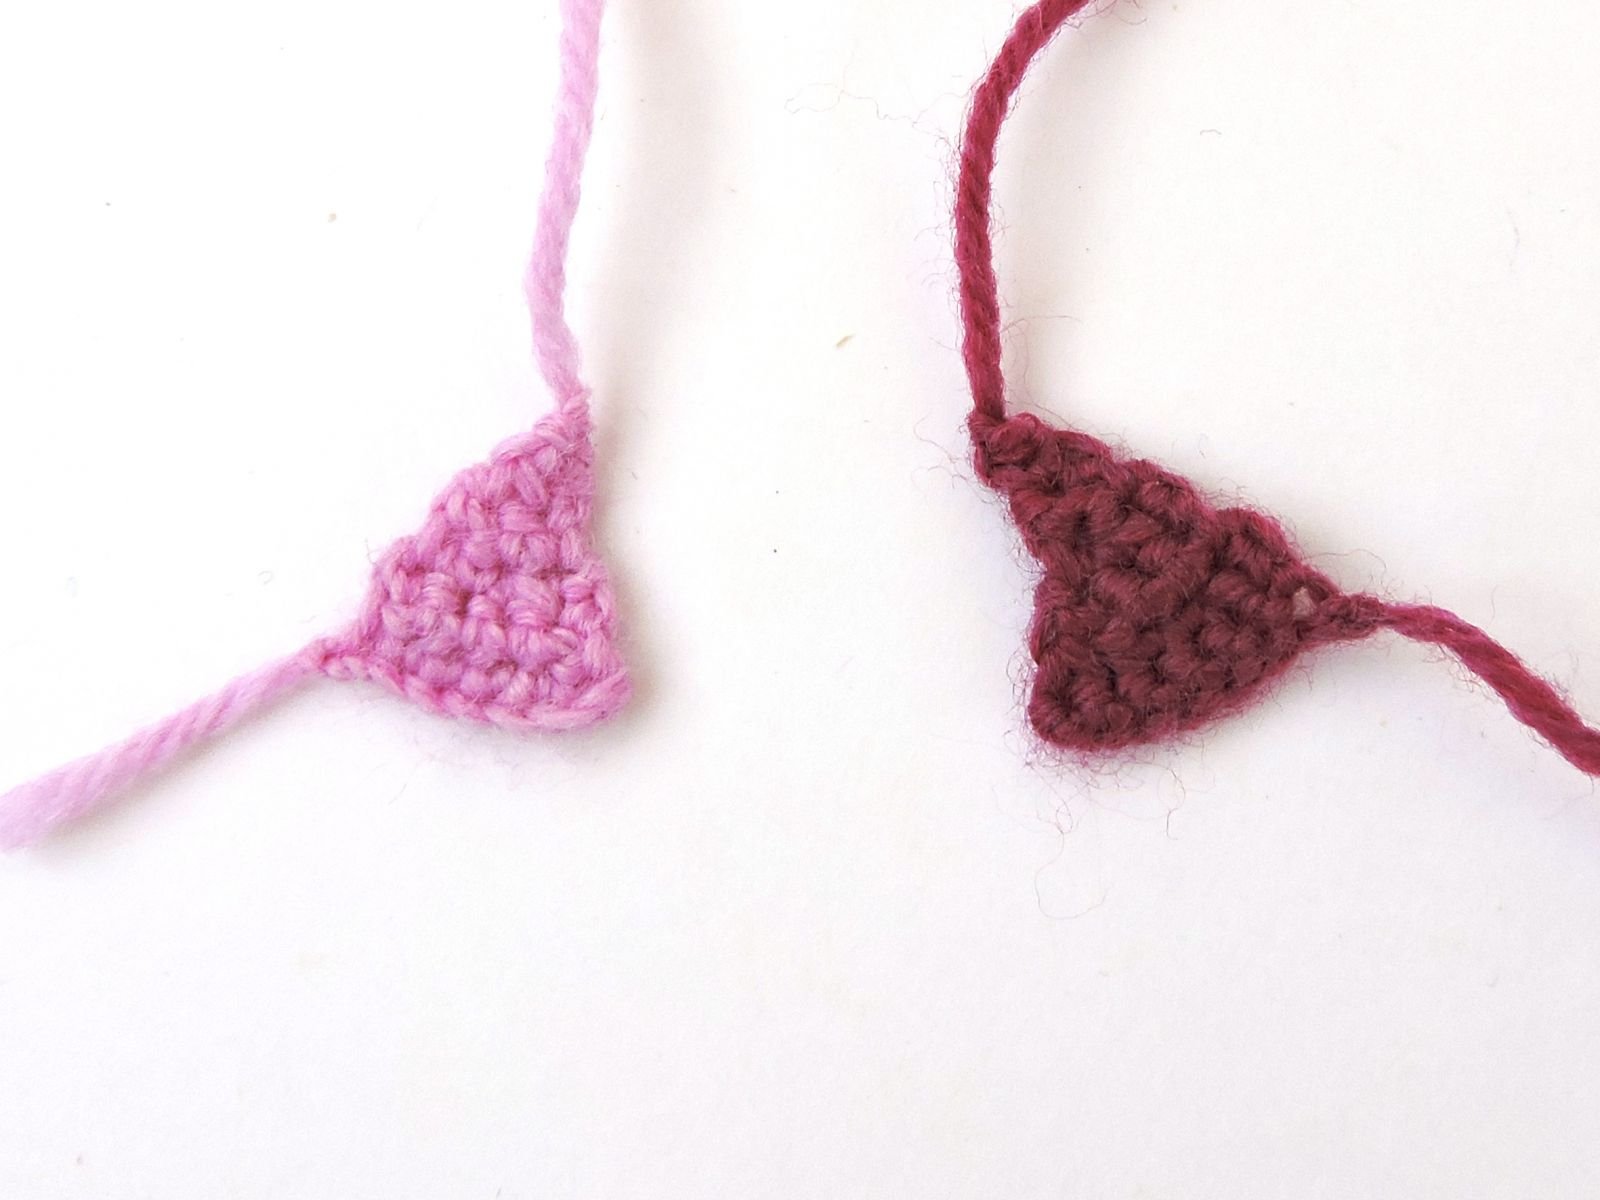
The bridge of the nose
Complimentary color yarn (color C)
Rnd 1: 7 ch, starting from 3rd ch from hook: 1 dc, 1 hdc, 1 sc, in the last stitch: 1 sc, 2 ch, 1 sc, continue: 1 sc, 1 hdc, 2 dc in 1 loop
Bind off, cut off any excess yarn.
Ear (make 4)
Crochet 2 parts with main color yarn and 2 parts with complimentary color yarn.
Row 1: 7 ch, starting from 2nd ch from hook: 6 sc, ch, turn [6]
Row 2: dec, 2 sc, dec, ch, turn [4]
Row 3: dec, 2 sc, ch, turn [3]
Row 4: dec, 1 sc, ch, turn [2]
Row 5: dec [1]
Join ears for each pair together and work sc around the edge (use main color yarn).
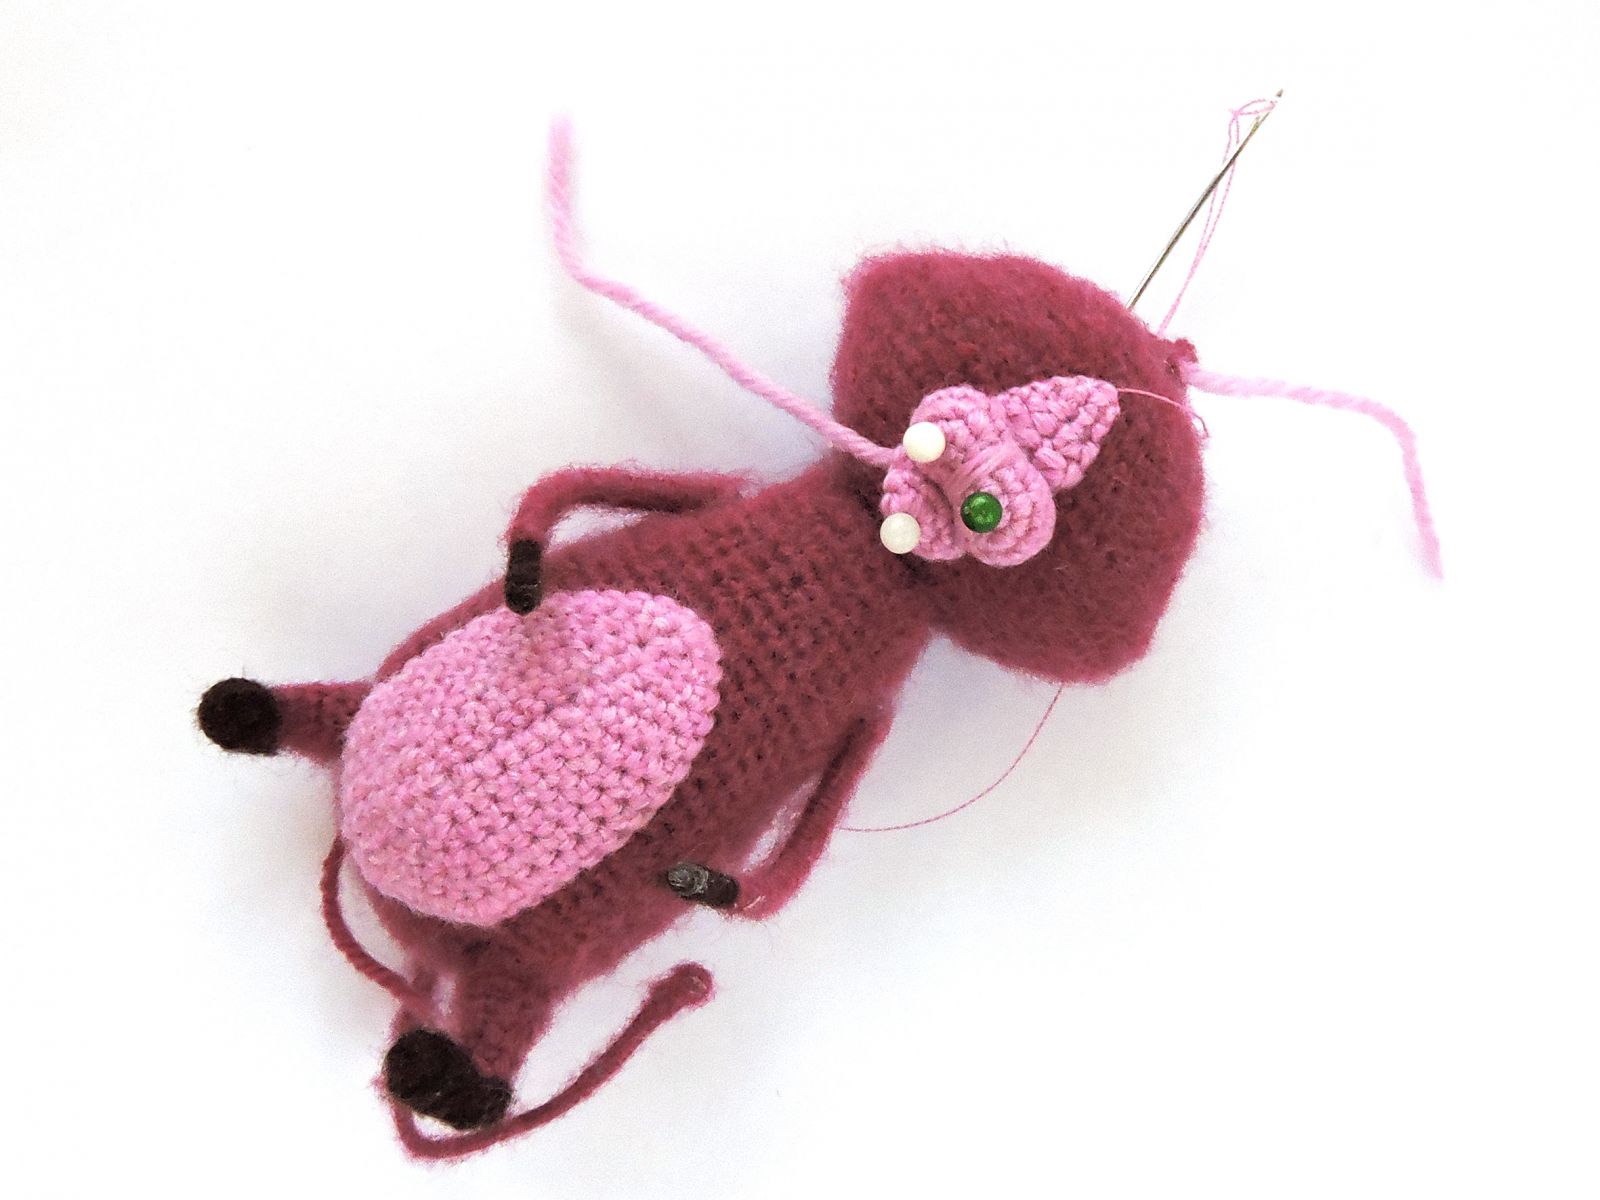
Sew the pad to the tummy with a blind stitch. Attach the bridge of the nose, muzzle and lower lip to the head and sew them on. Attach the ears to the head and sew them on.

Find the points for sculpting as follows. See the pictures for guidance.
Point 0 is on the top of the head
Points 1 & 2; 3 & 4 - on the sides of the bridge of the nose. Distance between points 1 & 2, (3 & 4) – 3 sc
Point 5 - in the middle of the neck from behind.
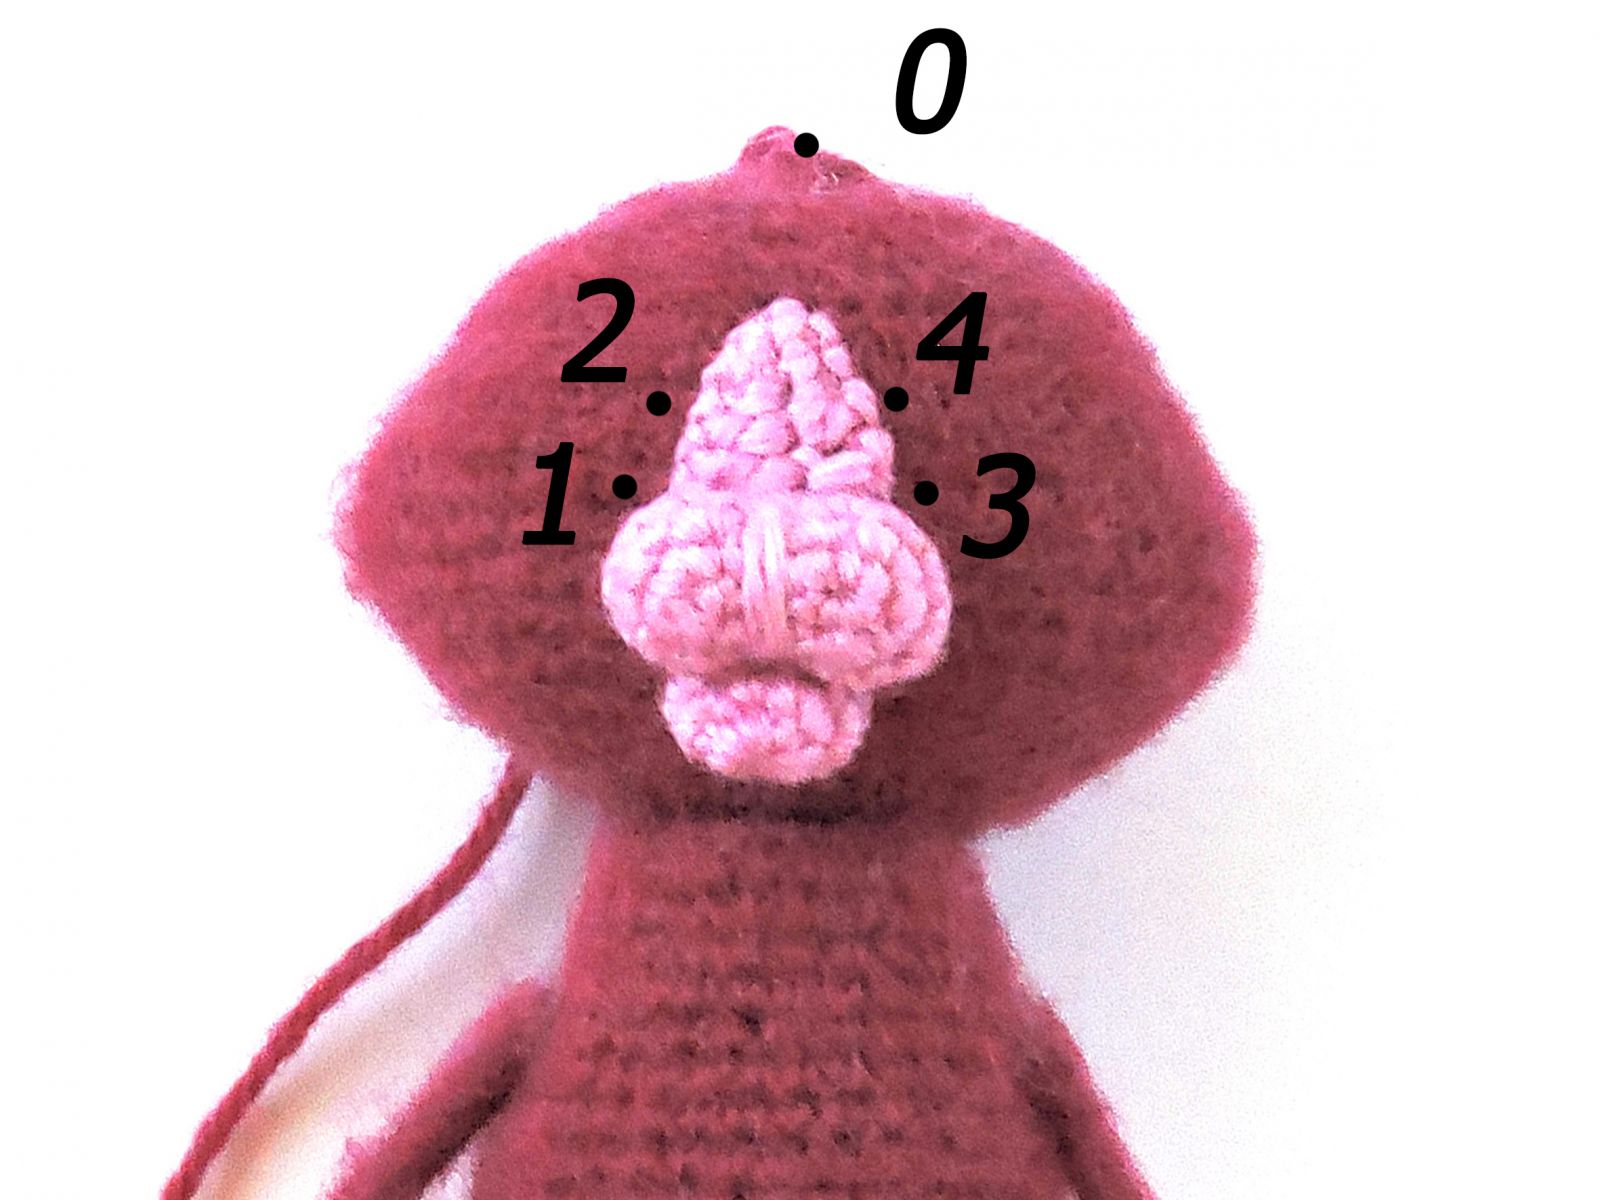

Prepare a long needle for sculpting and a strong thread, make a knot.
Insert the needle in the opening in the head (point 0), hide the knot in the hollow fibre, take the needle out in spot 5 on the neck. Make a very tiny stitch to fasten the thread.
Insert the needle out in point 5, take the needle out in point 1 (thread runs inside the head). Insert the needle in point 2 (thread runs over the work), take it out in point 5. Tighten the thread, help with the fingers to keep it in place. Make a short stitch and a knot. Repeat the tightening once more.
Repeat sculpting for the left eye socket. Points #5-3-4-5.
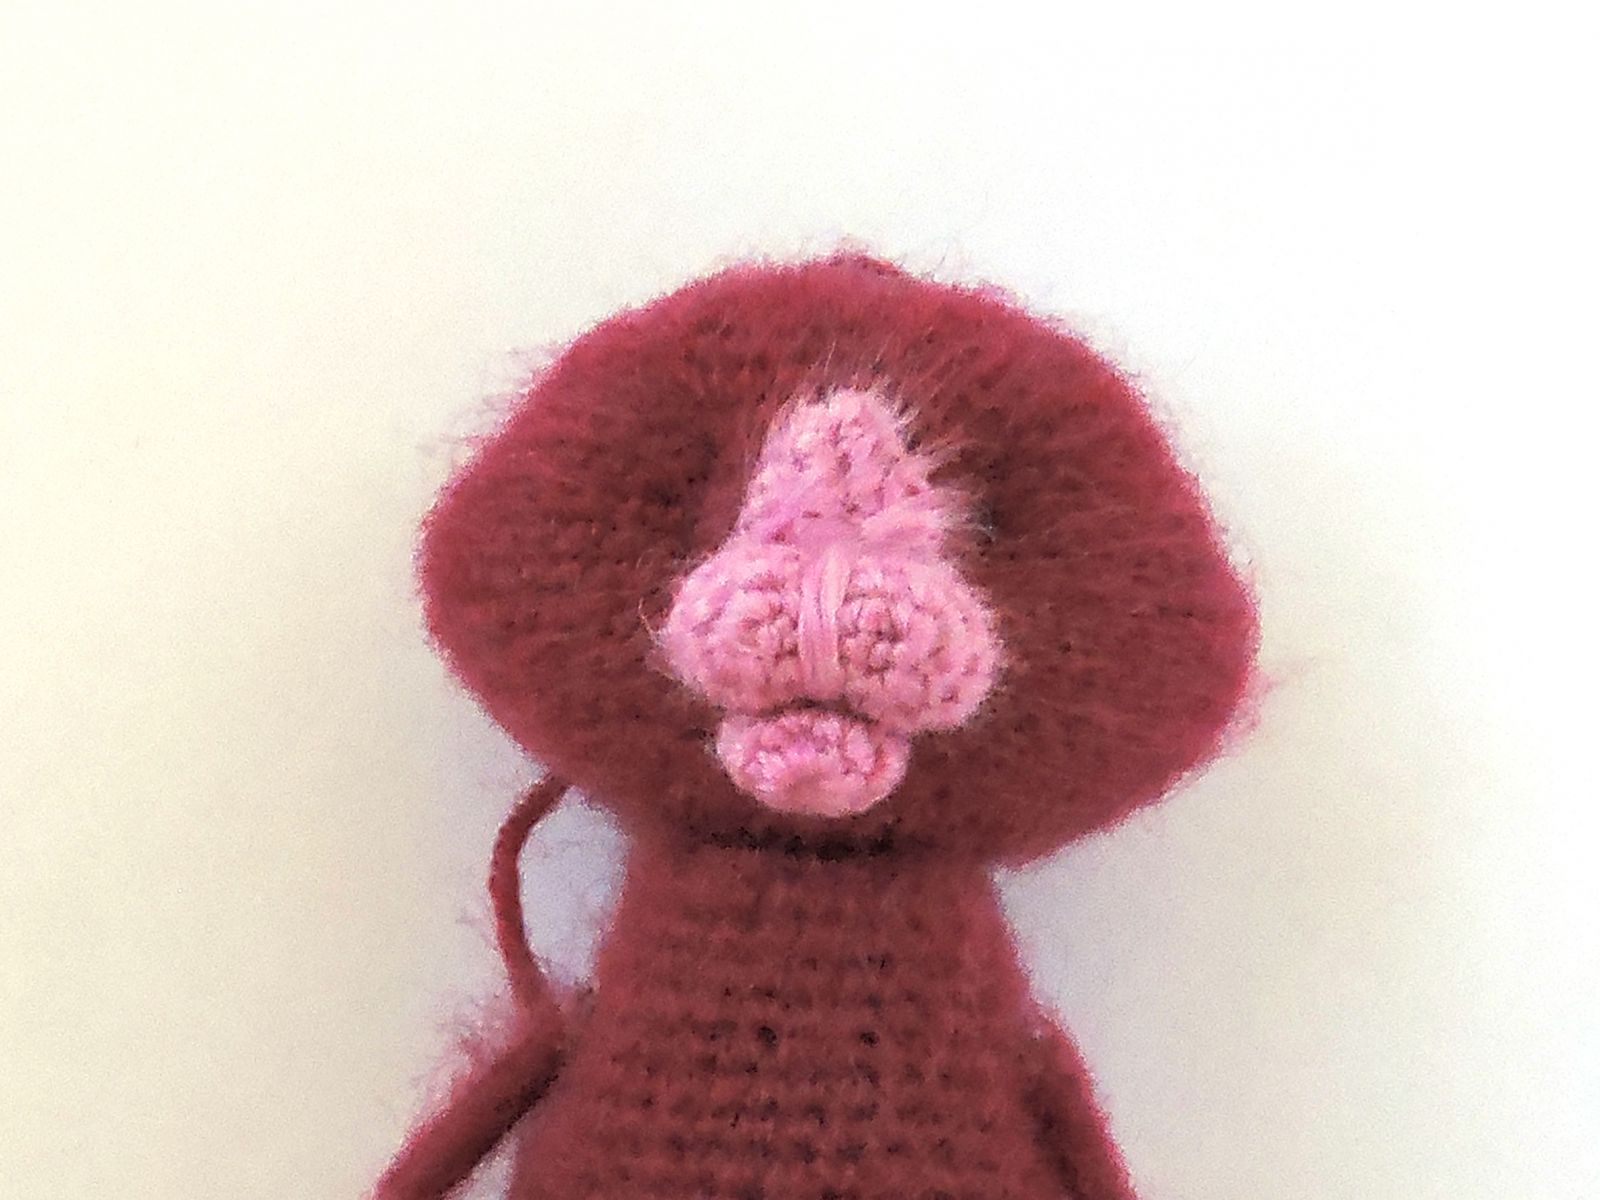
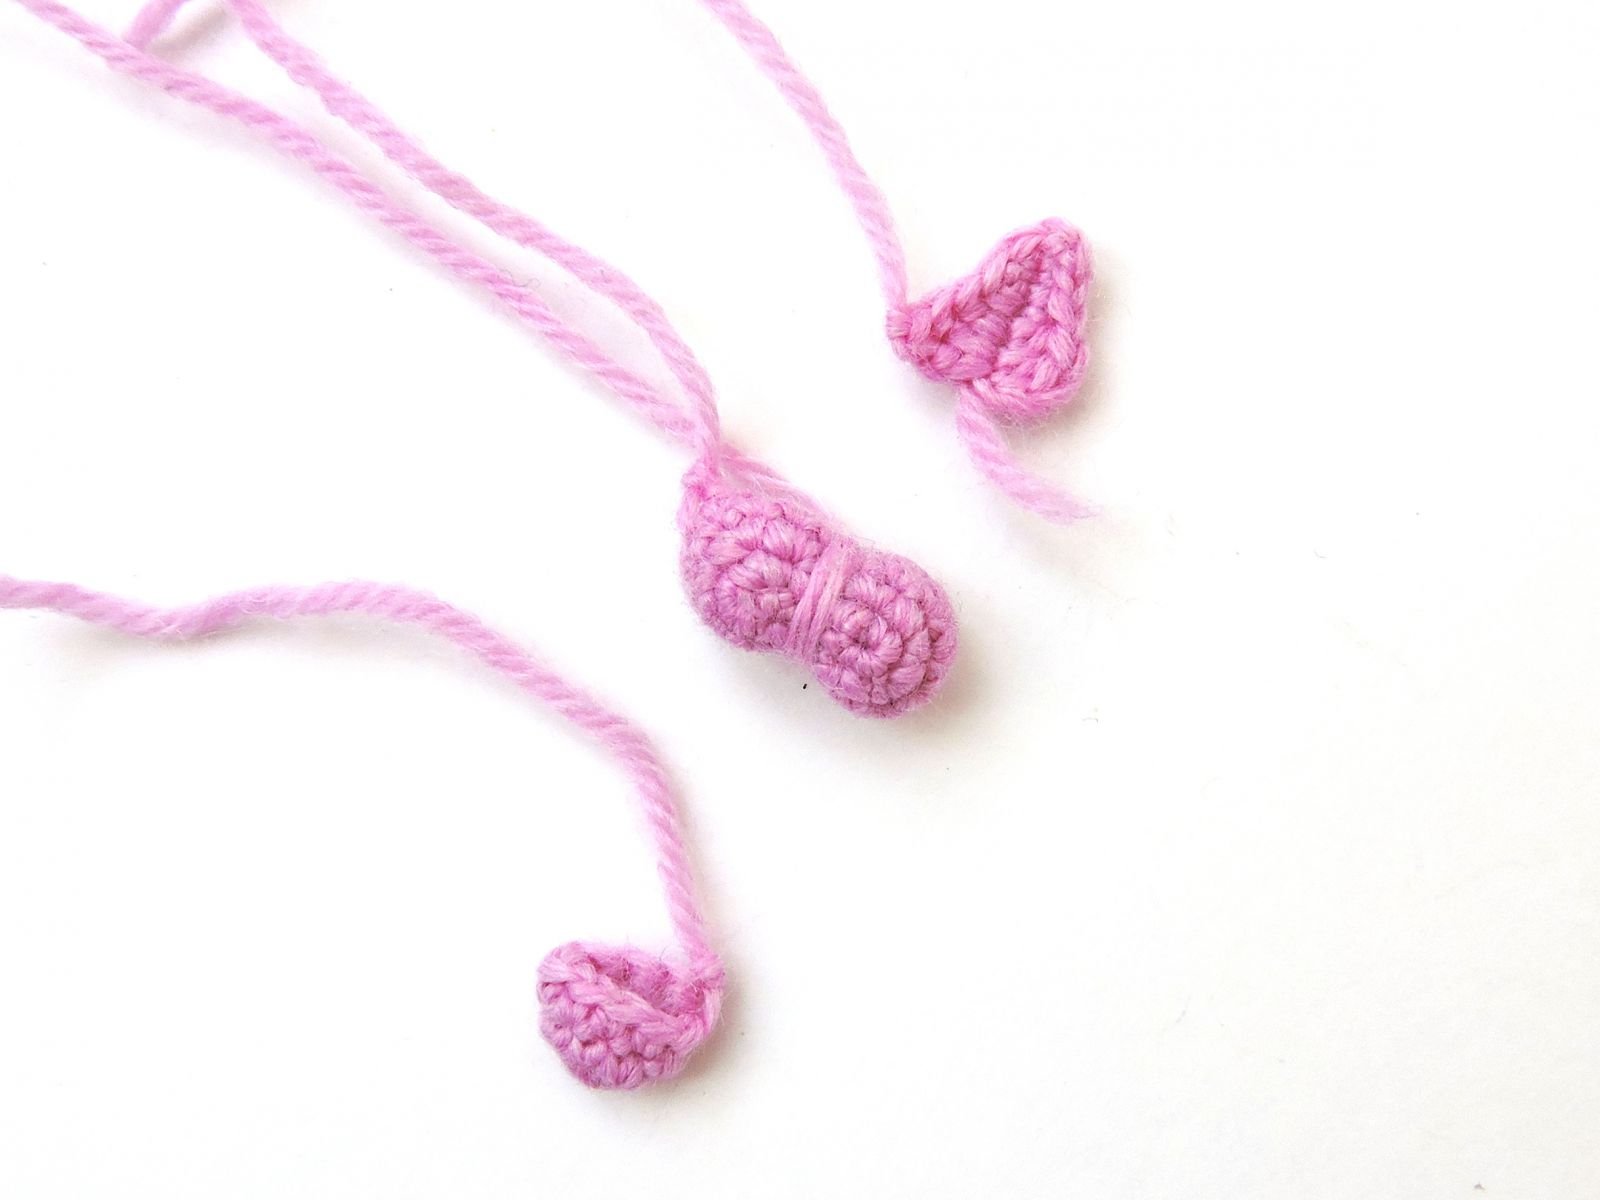
Nose
Complimentary color yarn (color B).
Rnd 1: 6 sc in a Magic Ring
Rnd 2: 6 sc
Pull off the loops. Cut the thread, hide the end.
Sew the nose on.
Glue the eyes. Make a mustache from a fishing line.
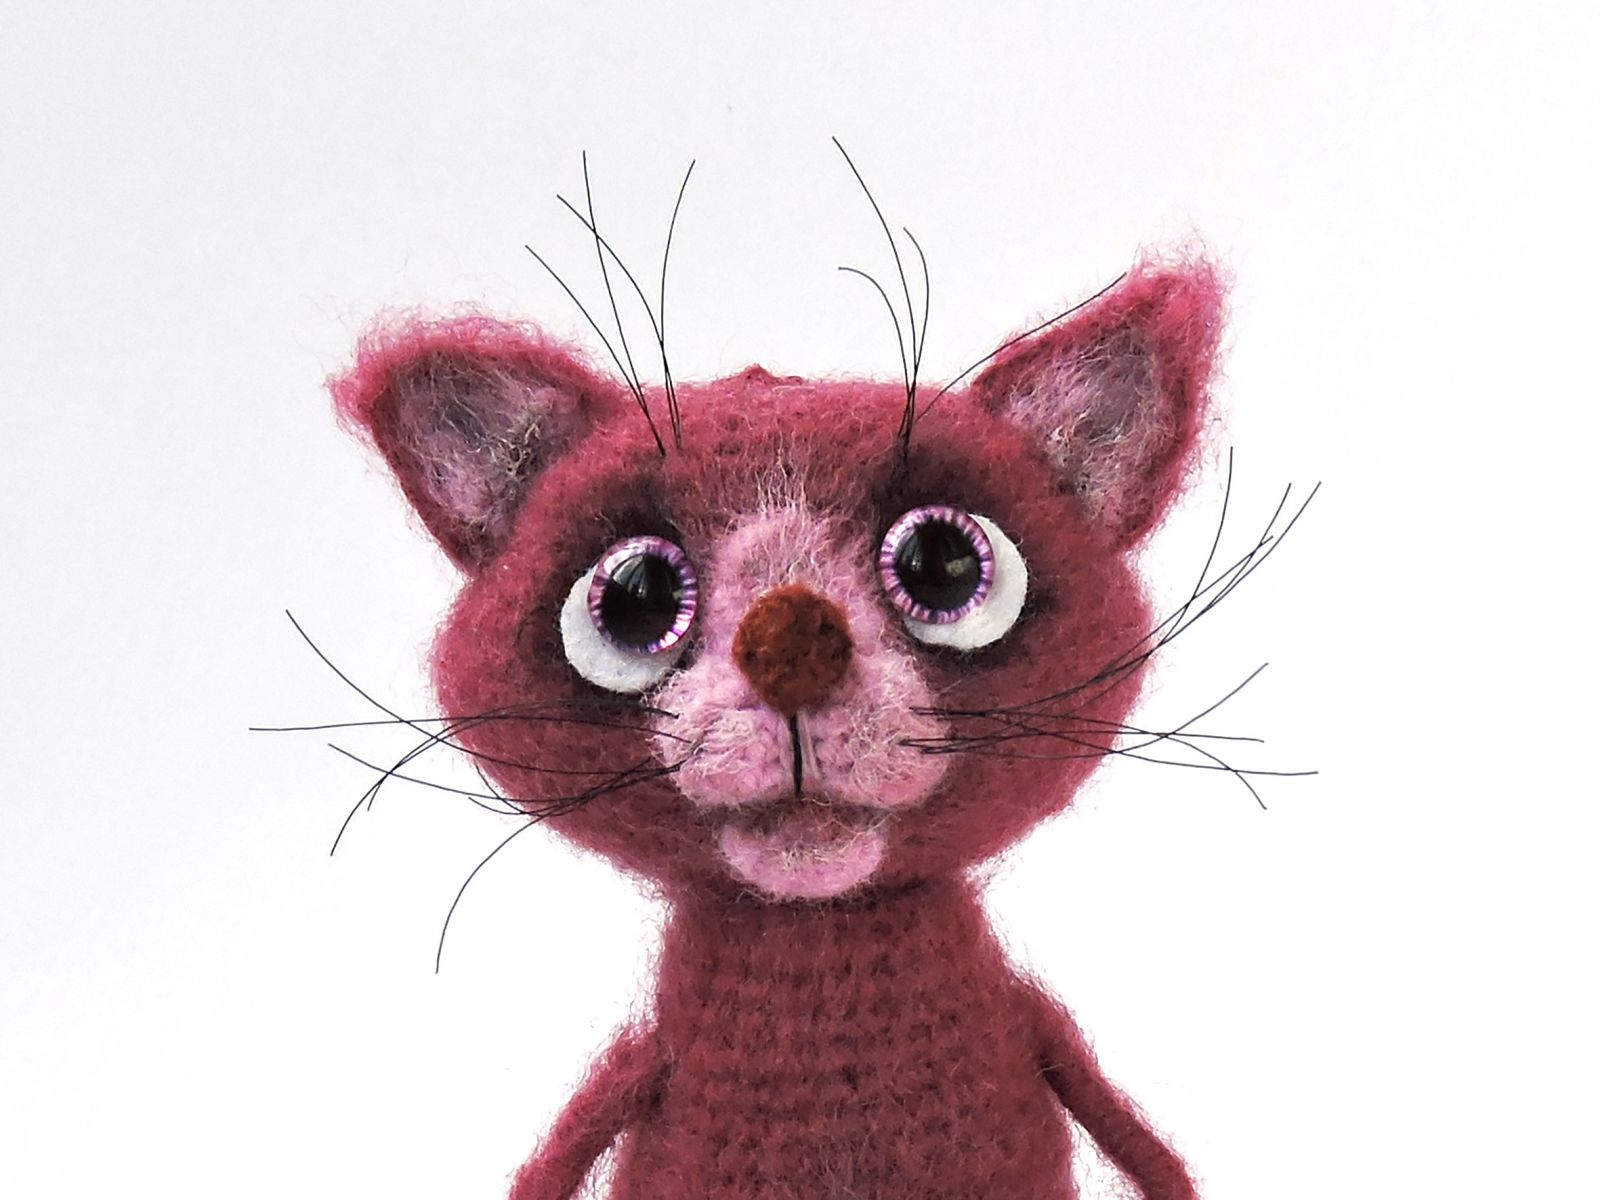
The cat is completed!


