Forum Categories
Quick to Target
Browse Categories
Community & Help

Problem: Neckline too large

5953 Posts Recent Started
Tuesday, January 10, 2023 at 4:41 PM
Hello everyone,

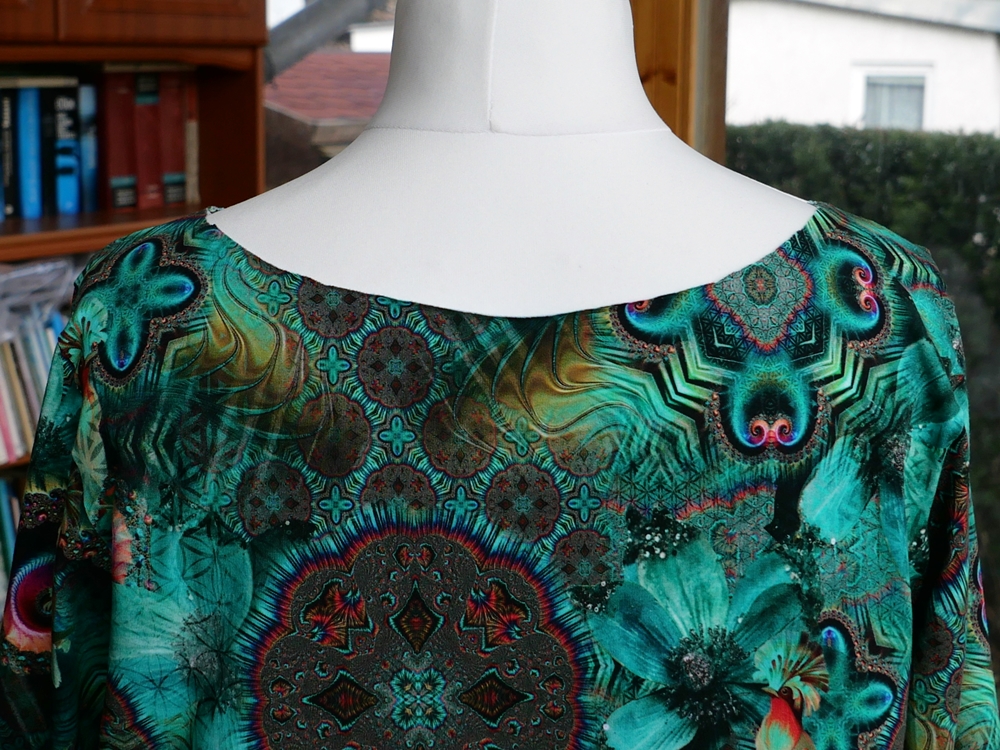
I’m currently sewing myself a mini dress with wide sleeves from a gorgeous, boldly colorful jersey fabric. I got the pattern from a magazine. I carefully traced everything in my size, cut it out, and sewed it together. When I tried it on at the end, unfortunately I realized that the neckline is much too wide. I only noticed that afterward when trying it on. The shirt slips sideways off my shoulders, and it’s also much too open at the top in the back. Basically, there are 5 cm of fabric missing all the way around.

Now I’m faced with the task of making the neckline narrower by binding it with a different fabric. For that I got some black stretchy jersey. Black appears in the shirt, so it works in that respect. The binding should be 5 cm wide all the way around and lie flat. To pick up the black again, I might also sew a belt from it, lightly reinforced with fusible interfacing so that it doesn’t look like a cord, but also has a bit of surface area.

Does anyone have an idea how I can approach the neckline issue?

Thank you very much for your support.

Best regards, Ina


5090 Posts Recent Started
Tuesday, January 10, 2023 at 5:04 PM
Ina, measure the circumference of the neckline in cm, then cut a strip about 11 wide—you’ll need to fold the strip in half, leaving a 1 cm seam allowance—which will give you the 5 cm you’re missing at the top. I’d cut the neckline a little shorter than the measured length—that way, it’ll fit snugly afterward and won’t create those “Danube waves” around your neck. That’s how I fix necklines on shirts and such that turned out too wide, because I don’t like it when the neckline is too loose either.

Best regards, Inge

5953 Posts Recent Started
Tuesday, January 10, 2023 at 5:12 PM
Thanks, Inge.

And how should I handle the front at the tip? I don’t want it to overlap. Do you sew it on like a round cuff and then gather the excess fabric at the tip with the wrong sides together? I’d then sew the resulting excess fabric from the tip back together. Well, that’s definitely going to look weird. And right at the neckline—that’s where everyone looks. I definitely don’t want any wrinkles or ripples.

I don’t dare try it :-(

5090 Posts Recent Started
Tuesday, January 10, 2023 at 5:19 PM
Hold on, Ina—I’ll look through my patterns on my desktop computer; there should be something there on how to sew a V-neck.

Best regards, Inge

5090 Posts Recent Started
Tuesday, January 10, 2023 at 5:42 PM
First of all, I took these pictures about 15 years ago; back then I wasn’t as good at photography as I am today :-)
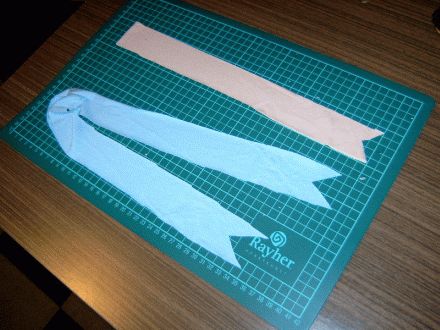
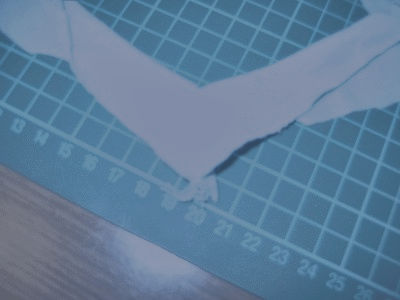
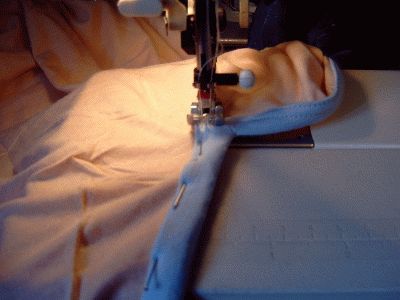
In Picture 1, this is what the strips should look like
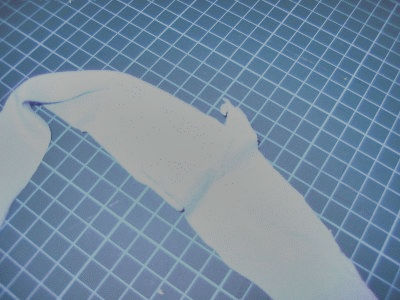
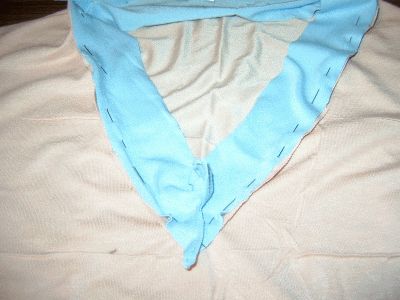
Picture 2 unfortunately can’t be seen any better. Place the two *pointed ends* right sides together and sew close to the edge, making sure that the needle stays in the fabric at the bottom of the V.
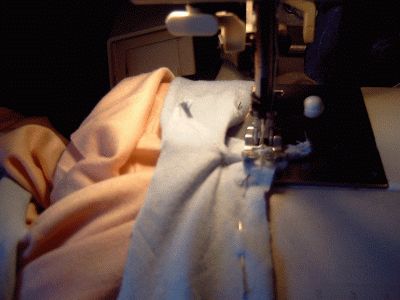
Picture 3 is unfortunately just as bad as Picture 2 :-(
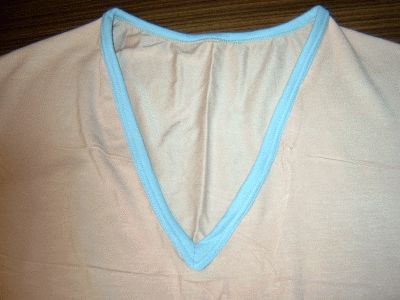
This is what the collar should look like once it has been sewn together
Picture 4: pin it onto the sewing piece; you can clearly see how it should look. Here I pinned wrong side to right side and then turned the collar to the outside
Picture 5: sew it on
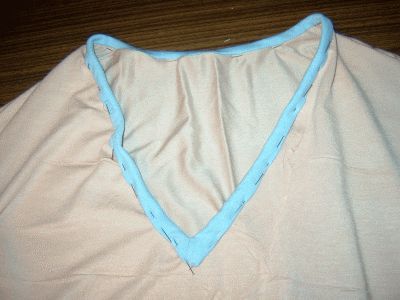
Picture 6: pin the part folded to the outside in place
Picture 7: topstitch
Picture 8: finished V-neckline
 
My suggestion: practice on a scrap piece first, because it does take a bit of practice

Good luck and best regards, Inge

So, I had to edit a few pictures first,


5953 Posts Recent Started
Tuesday, January 10, 2023 at 6:48 PM
Oh Inge, you’re a sweetheart. Thank you so much for your help. I think picture 1 is the most important one for me. So the ends need to look like that to form a point. Everything else will probably be a bit “freestyle.” I’ll get to work on it tomorrow. I’m sure I’ll have to ask you again.

Have a lovely evening.
Best regards, Ina

899 Posts Recent Started
Thursday, January 12, 2023 at 5:14 PM
I would sew a color-coordinated crocheted granny triangle into the front,
one that is very airy and made with a thin, shiny yarn.
That could look great.

3933 Posts Recent Started
Thursday, January 12, 2023 at 8:49 PM
Back in my youth—that is, just the day before yesterday—it was once fashionable to secure those large necklines with thin ribbons. Sewn on the left and right, halfway up toward the shoulder, they were then tied at the front into a little bow on the décolletage. It actually always looked quite pretty.

5953 Posts Recent Started
Friday, January 13, 2023 at 7:20 PM
Thank you very much, Petra and Veronika, for your tips and ideas. I could have imagined both of them working well, but in the end my ambition to manage a reasonably decent fabric neckline was stronger.

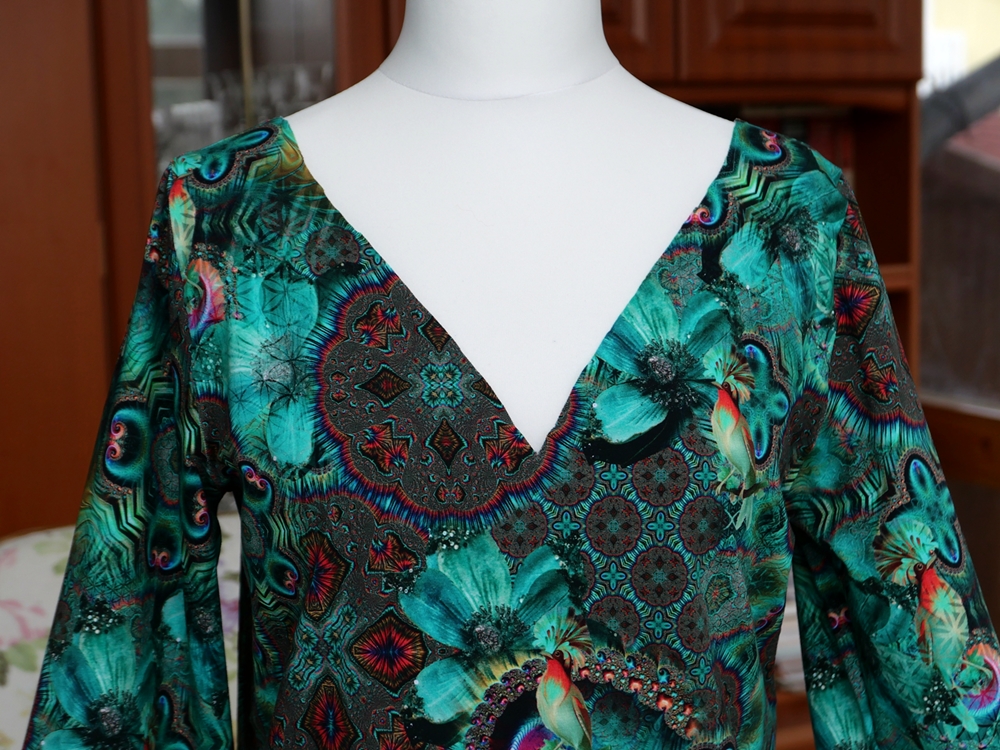
Today I can show you what I made. And because maybe someone (or I) might need this someday, here are a few step-by-step photos. It was my first V-neckline, after all, and I’m not that good with cuffs/bands anyway. If I did something wrong here, please tell me. I can only learn from it. I’m also grateful for tips and advice. This is how I did it:

1. I measured the neck circumference.

2. To be on the safe side, I ironed a piece of interfacing behind the V-neckline and cut it to a point. But maybe that was a mistake and that’s why the fold appeared later? I was afraid the point would tear while sewing it in, because it gets pulled quite a bit while sewing.
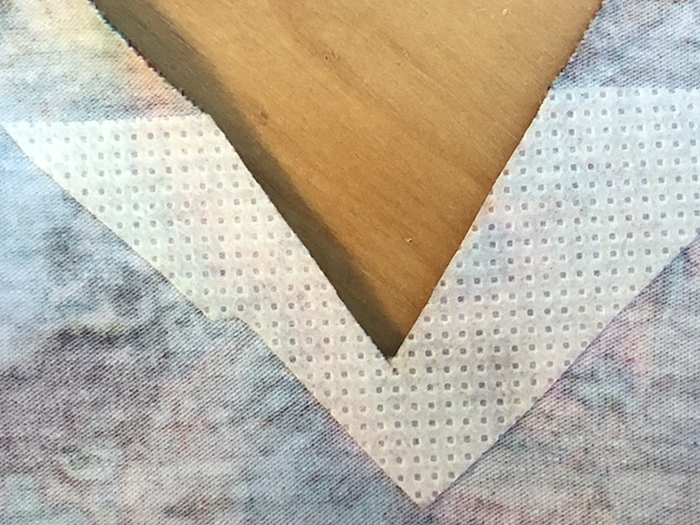


2. I cut out a black jersey strip. Since jersey is stretchy and I wanted a neckline that would lie flat, I multiplied the neck circumference by 0.8 (+ seam allowance). Because I wanted my neckline to be 4 cm wide later, I measured 10 cm in width (= 1 cm seam allowance).

3. I placed the folded band into the neckline so that the fabric fold was at the top. Then I traced the side edges with tailor’s chalk.
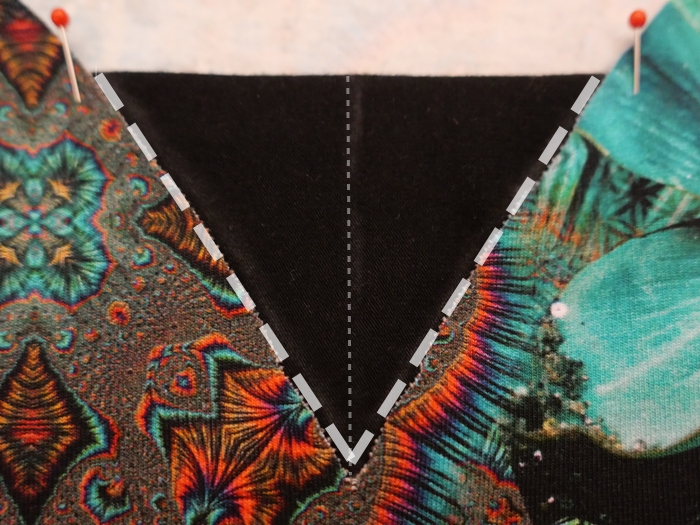


4. Then I sewed the triangle once (regular stitch).
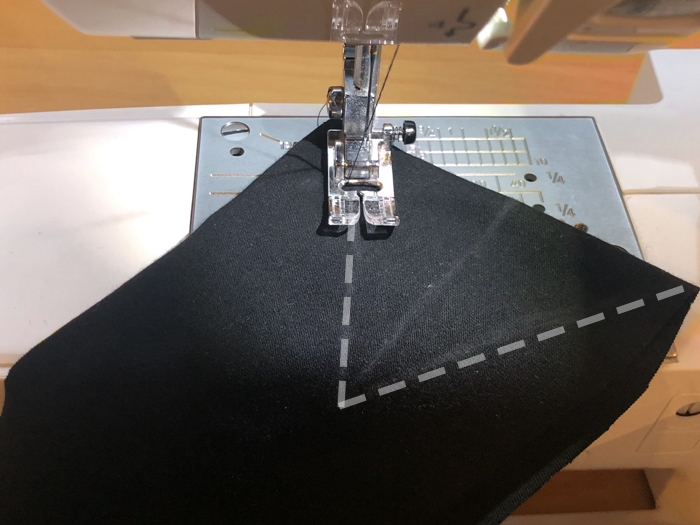


5. Now I cut out the triangle close to the edge, leaving 0.5 cm of fabric next to the seam.
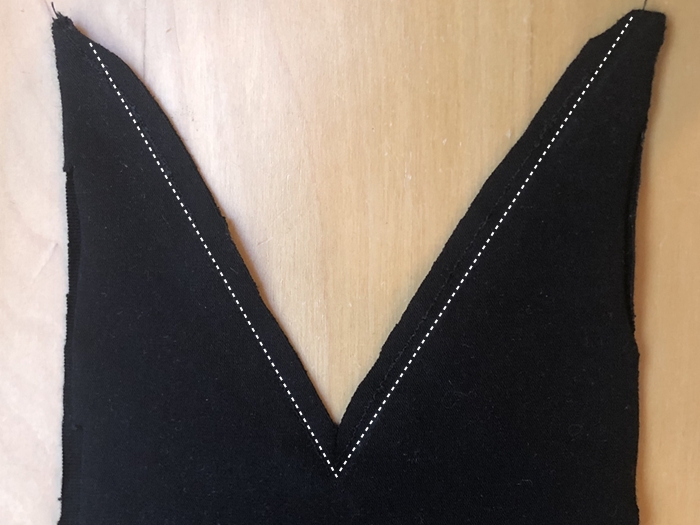


6. If you now fold the whole thing lengthwise, you have a perfect point that matches exactly the angle of the neckline you measured beforehand. Trim the edge neatly afterward. And press the whole thing once with steam.


7. Now you have to sew in the insert. That’s not so easy. You start with a tiny seam at the point. Then you sew the point down on the right and left for about 2 cm each. After that, just like with a normal neckband, you clip the band to the neckline with fabric clips and sew all the way around.
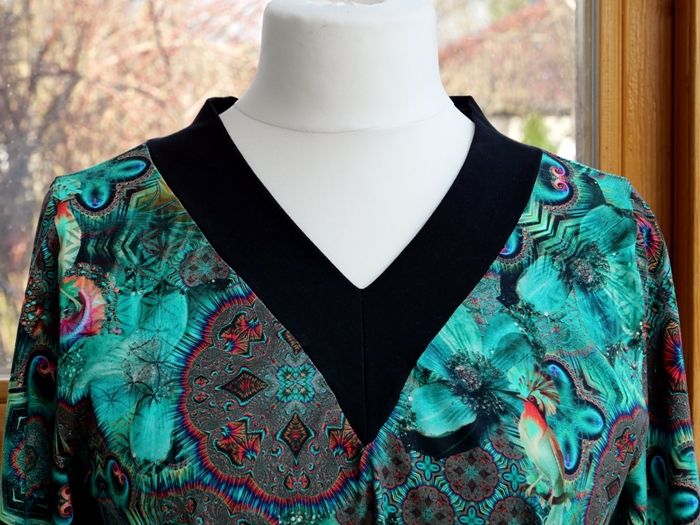
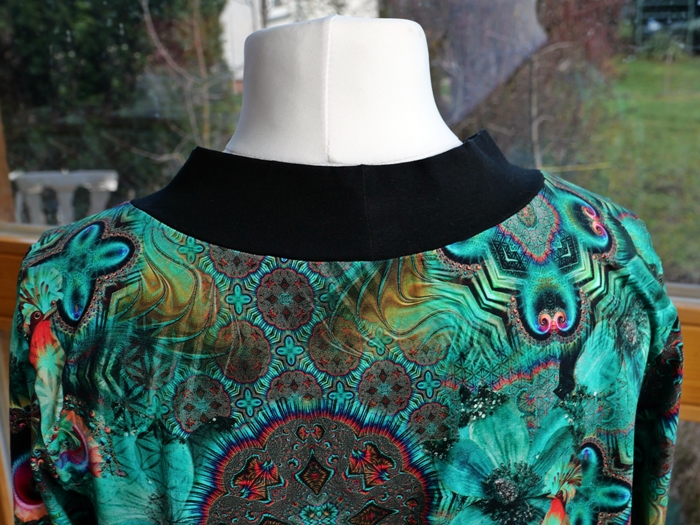


8. Now the seam allowances are trimmed back a bit. At the end, everything is pressed with a damp cloth. You can see that I have a fold at the bottom of the point. Well, I don’t know how I could have prevented it. That was the end of my seam, after all. Maybe I should have sewn from the point to the back of the neck each time and not all the way around in one go. Or next time I need to sew the front of the V-neckline in place at the start about 5 cm to the right and left ... Well, maybe it will be better next time.
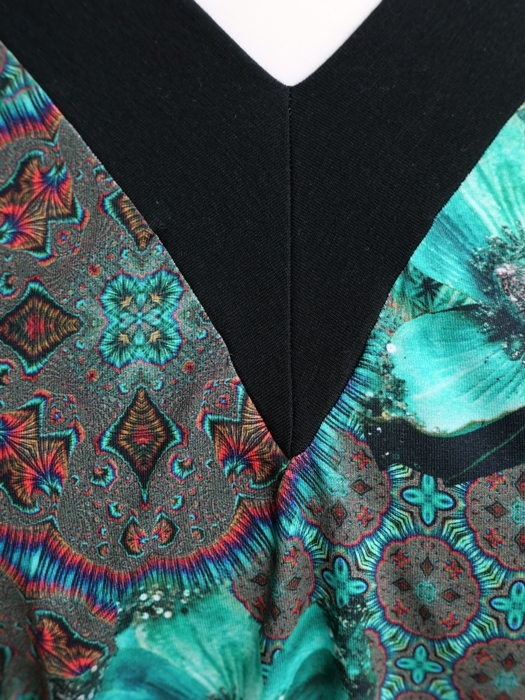


9. And because I still had some solid black fabric left, I also sewed a tie belt. I like wearing belts and thought the colorful fabric could take a wide black tie belt like this, and a very comfortable one at that. I reinforced the front section on the inside with interfacing.
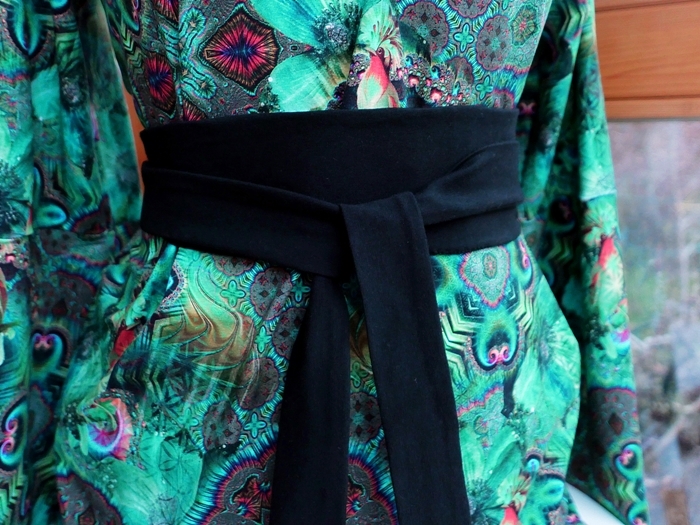


The belt also makes the fold at the V-neckline less noticeable.
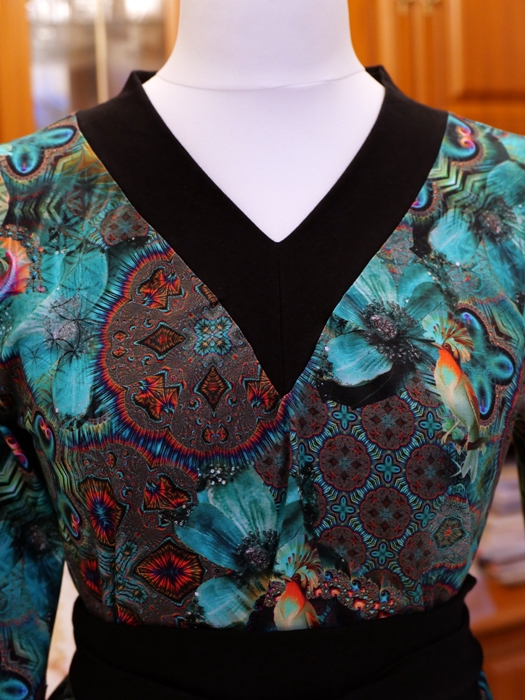


And this weekend I’ll shorten the sleeves to my arm length. Then I’ll show you the finished product of my efforts.

Warm regards from Ina


5090 Posts Recent Started
Friday, January 13, 2023 at 7:30 PM
WOW, Ina, you did such an AWESOME job—big KUDOS!!!

LGInge

5953 Posts Recent Started
Friday, January 13, 2023 at 8:12 PM
Oh, I’m so happy to hear your praise, dear Inge. But I’m glad you’re not too hard on me. Yes, it wasn’t that easy—especially the beginning of sewing it in (a bit fiddly)... and the fold at the bottom—well, it’s just there now. I think if the insert hadn’t been so wide, it would have been easier to manage. But now I actually like it quite a bit—black with a V-neck really makes you look taller :-)) Without the black trim and the black belt, it would be a bit too “colorful” on its own.

Best regards

3933 Posts Recent Started
Friday, January 13, 2023 at 8:38 PM
That looks really great!

1164 Posts Recent Started
Saturday, January 14, 2023 at 9:25 AM
Great job, Ina

977 Posts Recent Started
Saturday, January 14, 2023 at 1:13 PM
Wow, that’s great, Ina. I think the black really makes the dress stand out even more!

5090 Posts Recent Started
Saturday, January 14, 2023 at 2:54 PM
Ina, it’s not for nothing that tailoring is a profession requiring 3–3½ years of training. You’re a beginner and this is your first time doing this—do you have any idea how many attempts it took me to get it to look like this? You’re tackling this the right way, with enthusiasm, and making progress little by little.
There are still things I won’t tackle even today—that’s when my daughter has to step in. She learned it differently than I did (I’m an industrial seamstress), namely in the skilled trade. So be proud of what you’re doing, because it looks good.
If you have any questions, just ask—I’ll help as best I can

Best regards, Inge

2595 Posts Recent Started
Saturday, January 14, 2023 at 3:40 PM
I agree with Steffi. The black neckline and the belt make it look even better.

5953 Posts Recent Started
Saturday, January 14, 2023 at 4:28 PM
Oh, I really appreciate all your comments :-)

Yes, Inge, that’s true. It’s not for nothing that it’s a real apprenticeship—a true craft requiring a lot of knowledge and skills. It’s great that you can discuss this with your daughter. It’s wonderful that you’ve passed on your passion for sewing to her.

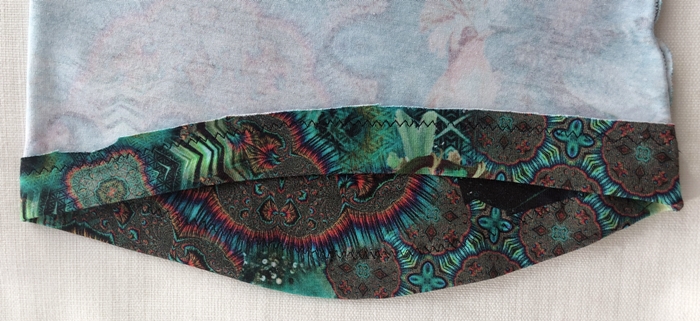
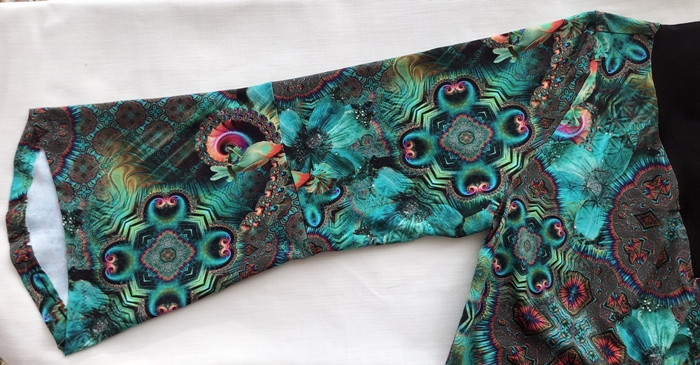
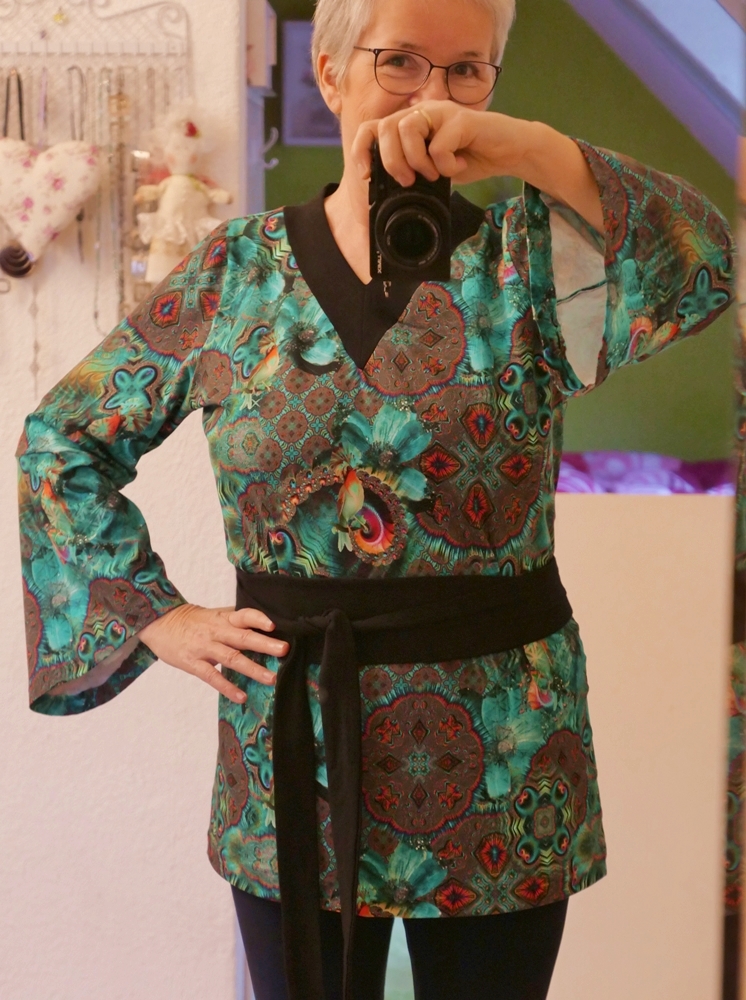
Today I finished my tunic. I just had to hem the sleeves. It’s a good thing I did the neckline first—that brought the sleeve length up quite a bit. Since a straight hem wasn’t “fancy” enough for me, I pinned them so that the sleeve is longer in the back than in the front. Each sleeve has a “little train,” so to speak.


And now, to wrap things up, here’s a photo of me wearing it.

As a final step, I’ll adjust the paper pattern to the new measurements. I’ll definitely sew this tunic again using a different fabric. You can also wear it without a belt

Best regards, Ina


5090 Posts Recent Started
Saturday, January 14, 2023 at 4:59 PM
You look chic, and that tunic suits you perfectly, Ina. Your sleeve design is great—I also like it when things are a little different from the norm :-)

Hugs, Inge

9968 Posts Recent Started
Saturday, January 14, 2023 at 6:21 PM
Wow, it’s beautiful, Ina! Great work! And that tunic looks absolutely fantastic on you!

1164 Posts Recent Started
Saturday, January 14, 2023 at 8:23 PM
That looks so perfect, Ina.
You can be really proud of it, and the belt gives the tunic an extra special touch.

2595 Posts Recent Started
Sunday, January 15, 2023 at 1:49 PM
That’s really a beautiful piece of work you’ve done. I think we’ll be seeing many more great sewing projects from you.

Write Reply

Please register or Log in!

Latest comments

63 actual comments last by WollwunderPetra
93 actual comments last by SabinesFadenspiel
53 actual comments last by Silvia1967
5 actual comments last by Operator
92 actual comments last by Moderator
19 actual comments last by Libelle11
2 actual comments last by veronika-t15
3 actual comments last by veronika-t15
21 actual comments last by Libelle11
68 actual comments last by Moderator

Popular patterns

Top patterns from Natalija from the Crochet category!
Top patterns from Millionbells from the Crochet category!
Top patterns from stricken-im-trend from the Crochet category!
Top patterns from MorbenDesign from the Crochet category!
Top patterns from stricken-im-trend from the Knitting category!
Top patterns from elke-eder from the Crochet category!
Top patterns from made-by-anja from the Crochet category!
Top patterns from Melknits from the Knitting category!
Top patterns from stricken-im-trend from the Crochet category!
More top patterns

Free patterns

Top patterns from MorbenDesign from the category!
Top patterns from jennysideenreich from the category!
Top patterns from MorbenDesign from the category!
Top patterns from Hobbii from the category!
Top patterns from MorbenDesign from the category!
Top patterns from Hobbii from the category!
Top patterns from Miralay from the category!
Top patterns from Hobbii from the category!
Top patterns from MorbenDesign from the category!
Top patterns from Dianas-kleiner-Haekelshop from the category!
Top patterns from Hobbii from the category!
Top patterns from NataliSkill from the category!
Top patterns from KuemaTutorials from the category!
Top patterns from Hobbii from the category!
Top patterns from christina-lemberger from the category!
Top patterns from ternuraamigurumi from the category!
Top patterns from Hobbii from the category!
Top patterns from ternuraamigurumi from the category!
Top patterns from martina-supova from the category!
Top patterns from Hobbii from the category!
Top patterns from KleinesFeines from the category!
Top patterns from MorbenDesign from the category!
More free patterns

Win shopping credit every month!

42 prizes / total value €300: 30×€5, 10×€10, 2×€25 – simply activate the newsletter. No purchase necessary. Unsubscribe at any time. Prizes are awarded as Crazypatterns shopping credit. Learn more