
Are you looking for a handmade gift idea for men or would you like to crochet something practical for your desk? Then this crocheted phone stand might be just right for you.
Whether you're watching videos, following a recipe while cooking or simply sitting at your desk – with this phone stand, you always have your smartphone in view. At the same time, it's a nice project for in between, which is finished quite quickly, especially when using thicker yarn.
The best thing about it: We crochet the entire phone stand in one piece, without any sewing. The two-coloured diagonal pattern also makes it a nice little eye-catcher.
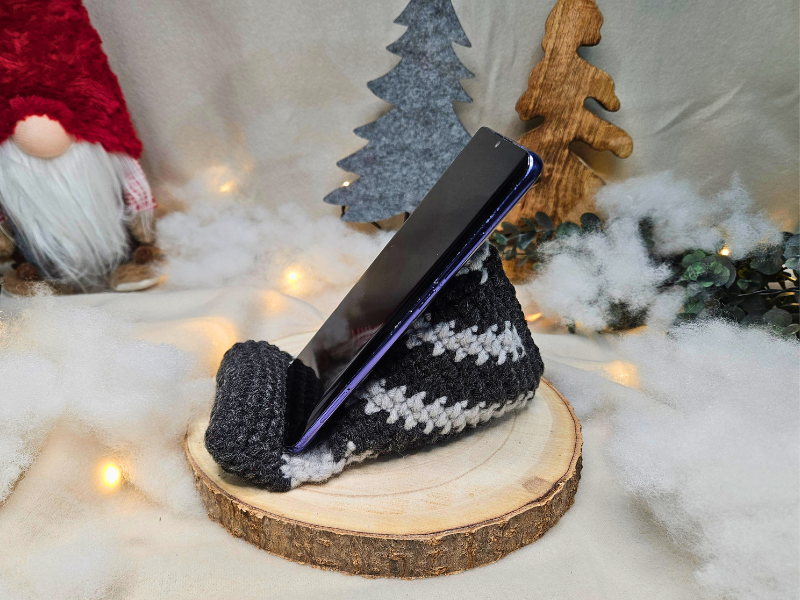
Materials for the Crocheted Phone Stand
I used the following materials for my phone stand:
-
TRUE Style Downhill (70% acrylic, 30% wool, 60 m / 50 g) in dark grey and light grey
-
5 mm crochet hook
-
Rice or another material for adding weight
-
An old nylon stocking (if needed)
-
Stuffing
-
Stitch marker
-
Scissors
-
Yarn needle for weaving in the ends
You can also crochet the phone stand with a different yarn. Cotton yarn, for example, is also suitable. The only important thing is that you choose a suitable crochet hook and crochet as tightly as possible so that the phone stand keeps its shape later.
Size and Gauge
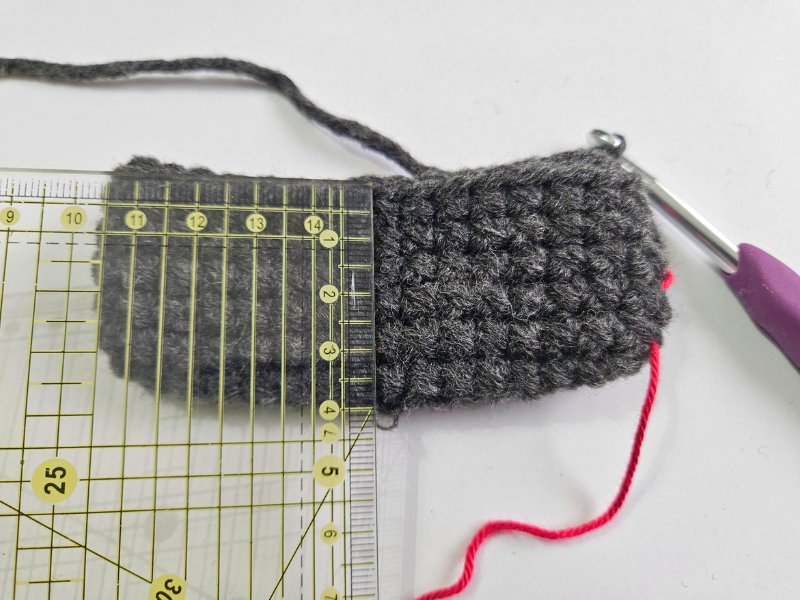
My phone stand is approximately 10.5 cm wide. The front support is 4 cm high, the connecting section is about 2 cm deep and the back support is approximately 10 cm long.
The stitch counts in this pattern refer to the yarn I used. If you are crocheting with a different yarn, you can simply follow the measurements in centimetres and adjust the number of stitches or rows accordingly.
For the two-coloured diagonal pattern, we need a stitch count that is divisible by 8. Since we will later crochet along both sides of our foundation chain, the number of chains should be divisible by 4 for our construction.
Abbreviations Used
-
ch = chain
-
sc = single crochet
-
st = stitch
-
rnd = round
-
row = row
-
FLO = front loop only
We work mainly in spiral rounds. This means that the rounds are not closed with a slip stitch. Only the short connecting section is crocheted in rows.
1. Crocheting the Front Support
We start with dark grey.
Foundation chain: Ch 16 + 1 turning chain.
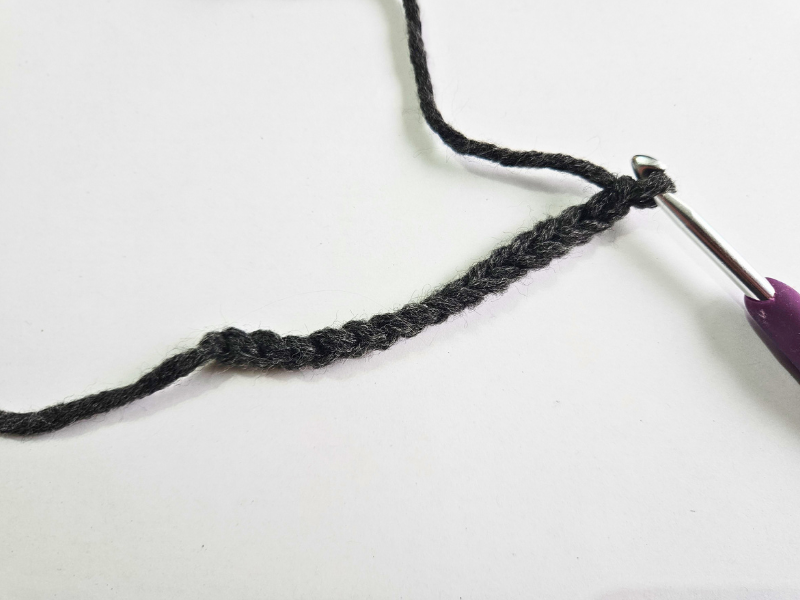
Rnd 1: Starting in the second ch from the hook, crochet 16 sc. Then turn the foundation chain and work another 16 sc along the opposite side. (32 sts)
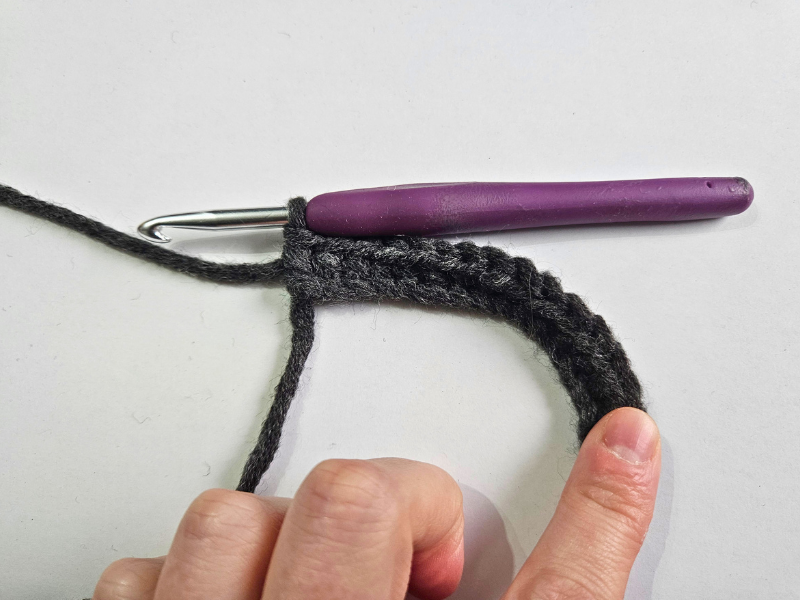
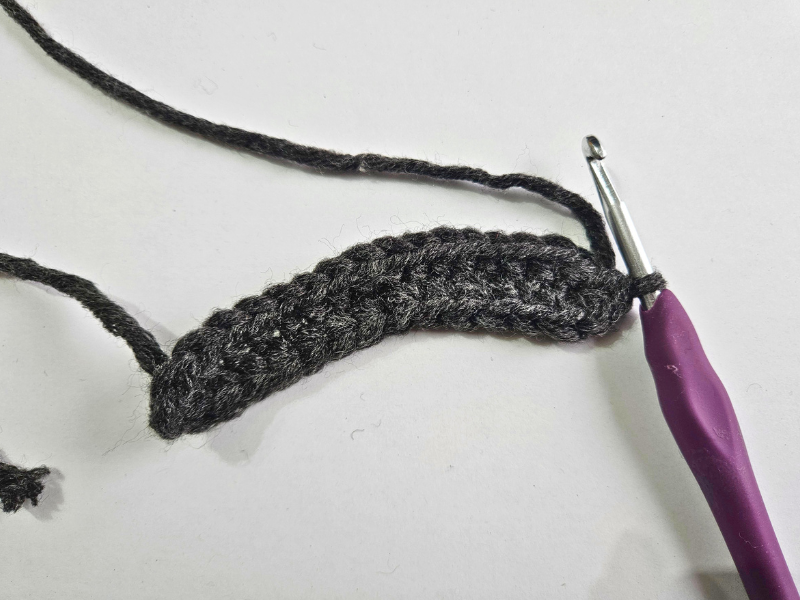
We have now crocheted once around the entire foundation chain. My work is now approximately 10.5 cm wide.
If you use a different yarn, adjust the number of chains so that you get a width of approximately 8–11 cm. Make sure that the later stitch count is divisible by 8.
Rnd 2 and following: Crochet 1 sc in each st. (32 sts)
Continue crocheting in spiral rounds until your piece is approximately 4 cm high.
Filling and Closing the Front Support
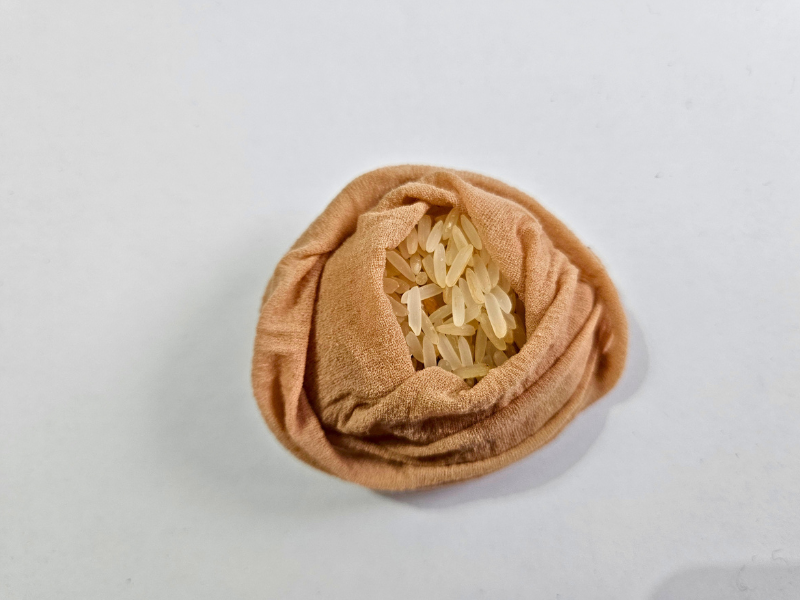
Now we fill our front support. You can use rice, dried cherry stones or small, smooth stones, for example.
If your stitches are very tight, you can put the rice directly into the piece, as long as the grains cannot fall through the stitches. Since I am using fairly thick yarn, I put the rice into an old nylon stocking and closed it. This way, nothing can fall out.
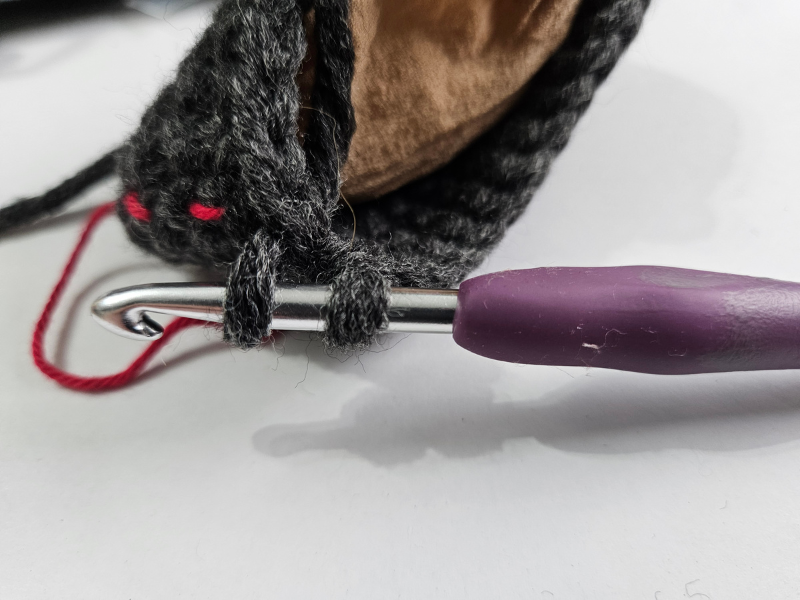
Change to light grey in the last stitch of the final spiral round. To do this, crochet the single crochet up to the last step. Then take the light grey yarn and pull it through the two loops on your crochet hook.
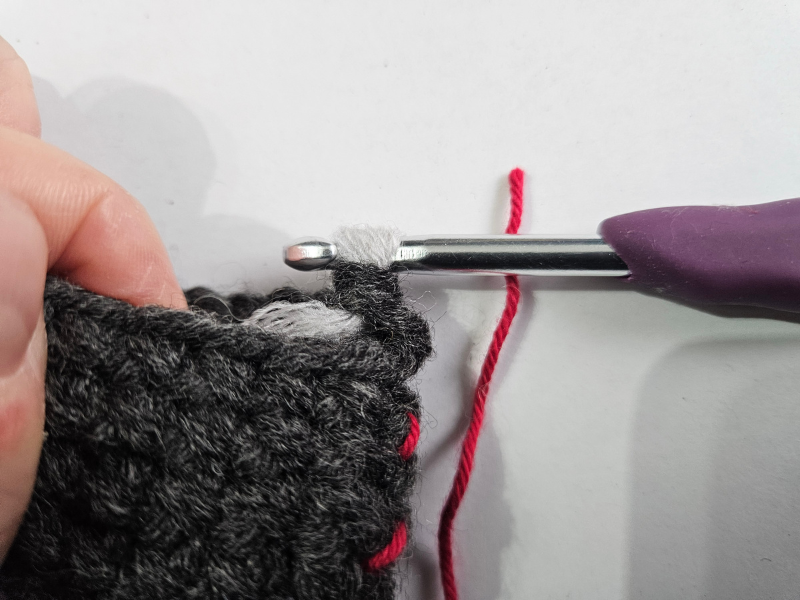
Now press the upper opening flat so that one stitch at the front and one at the back lie on top of each other.
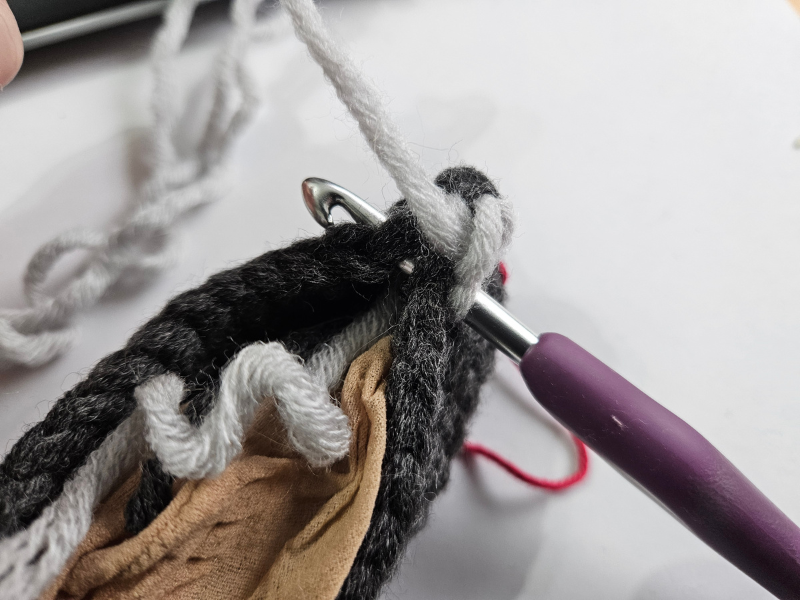
Crochet 16 sc in light grey through both layers to close the front support.
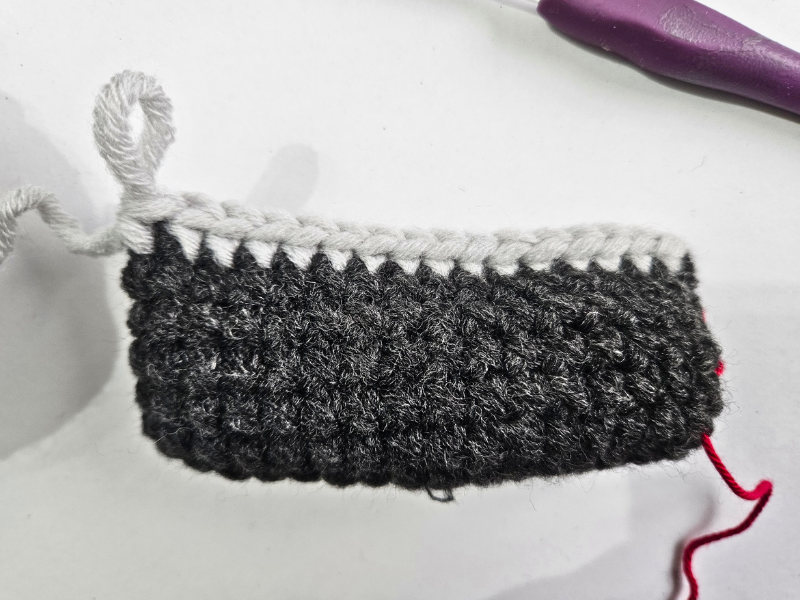
After you have crocheted the first 3 sc, you can cut the dark grey yarn, knot it together with the starting end of the light grey yarn and hide both yarn ends inside the front support.
Leave the light grey working yarn attached, because we will continue crocheting with it.
2. Crocheting the Connecting Section
The connecting section will later form the small surface on which our smartphone rests.
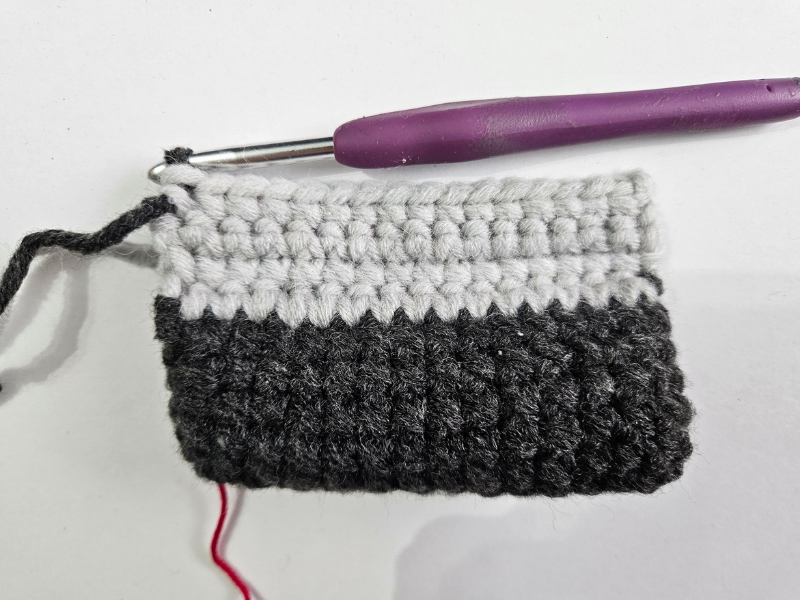
After the closing row, we crochet 3 more rows with 16 sc each in light grey. After each row, turn the work with one chain.
Together with the closing row, this creates a light grey section approximately 2 cm deep.
If you use a different yarn, crochet more or fewer rows until you reach this depth.
In the last stitch of the third additional row, we change back to dark grey. Now we can start with the back support.
3. Starting the Back Support
The back part of our phone stand will be filled later and forms the backrest for the smartphone.
For this, we work in spiral rounds again. Just as we did at the beginning, we crochet along both sides of the connecting section so that a closed tube is formed.
Important: In this first round, we only crochet into the front loop.
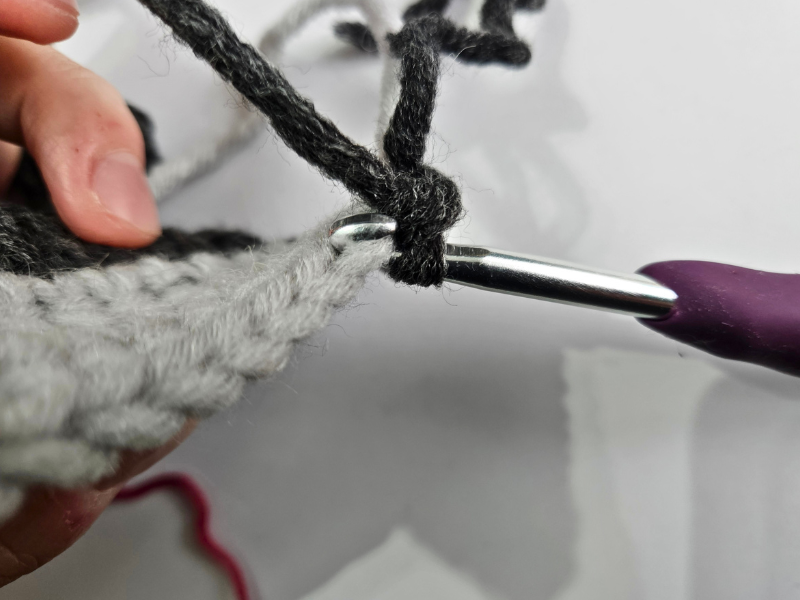
We crochet 16 sc on each side and then have a total of 32 stitches again.
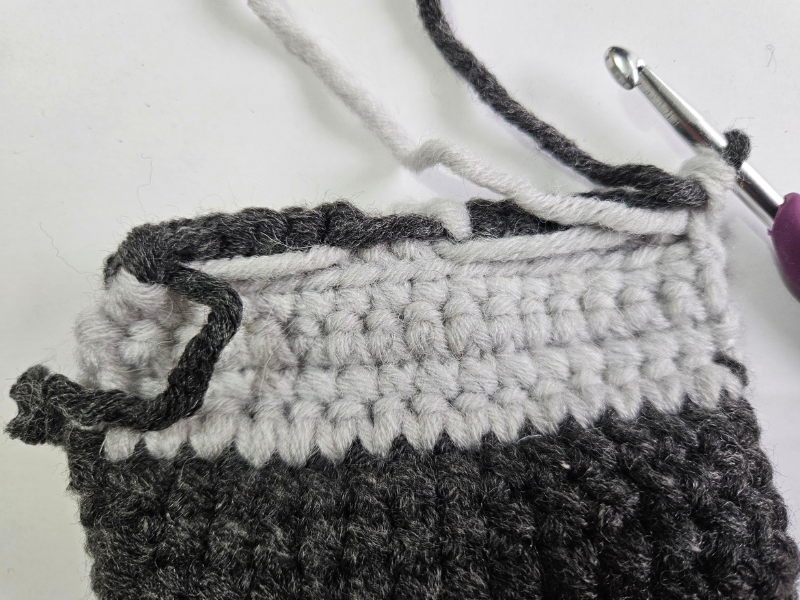
At the same time, we already start with our two-coloured pattern. This first round is therefore a little more difficult because we have to pay attention to both the colour changes and the transition to spiral rounds.
4. Crocheting the Two-Coloured Diagonal Pattern
For our pattern, we use dark grey as the main colour and light grey as the contrasting colour.
The pattern repeat consists of:
5 sc in dark grey, 3 sc in light grey
With our 32 stitches, this pattern repeat is worked four times in one round.
To make the stripes run diagonally, we shift the colour changes by one stitch in each round. This gradually creates a diagonal stripe pattern.
How the Colour Change Works
When you want to change colour, crochet the last single crochet in the previous colour up to the final step.
Then take the yarn of the new colour and pull it through the two loops on your crochet hook. The next stitch is then crocheted completely in the new colour.
Leave the yarn that you are not using hanging on the back of your work. We do not crochet over it, but pick it up again at the next colour change.
Make sure that the yarn strands are neither too tight nor too loose. If they are too tight, the crocheted piece may pull together.
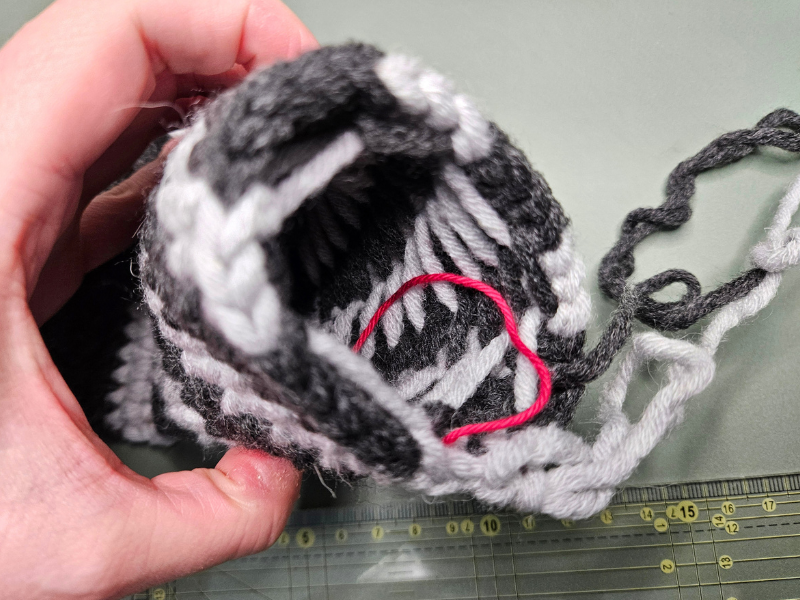
From the second round onwards, we crochet through both loops again as usual.
The Diagonal Pattern – Round by Round
Rnd 1: (5 sc in dark grey, 3 sc in light grey) × 4 (32 sts)
Rnd 2: 4 sc in dark grey, (3 sc in light grey, 5 sc in dark grey) × 3, 3 sc in light grey, 1 sc in dark grey (32 sts)
Rnd 3: 3 sc in dark grey, (3 sc in light grey, 5 sc in dark grey) × 3, 3 sc in light grey, 2 sc in dark grey (32 sts)
Rnd 4: 2 sc in dark grey, (3 sc in light grey, 5 sc in dark grey) × 3, 3 sc in light grey, 3 sc in dark grey (32 sts)
Rnd 5: 1 sc in dark grey, (3 sc in light grey, 5 sc in dark grey) × 3, 3 sc in light grey, 4 sc in dark grey (32 sts)
Rnd 6: (3 sc in light grey, 5 sc in dark grey) × 4 (32 sts)
Rnd 7: 2 sc in light grey, (5 sc in dark grey, 3 sc in light grey) × 3, 5 sc in dark grey, 1 sc in light grey (32 sts)
Rnd 8: 1 sc in light grey, (5 sc in dark grey, 3 sc in light grey) × 3, 5 sc in dark grey, 2 sc in light grey (32 sts)
Then repeat rounds 1–8.
The light grey stripes move one stitch to the side in each round. So it is completely correct that you sometimes crochet fewer than five dark grey stitches at the beginning of a round. The remaining part of the stripe is at the end of the same round.
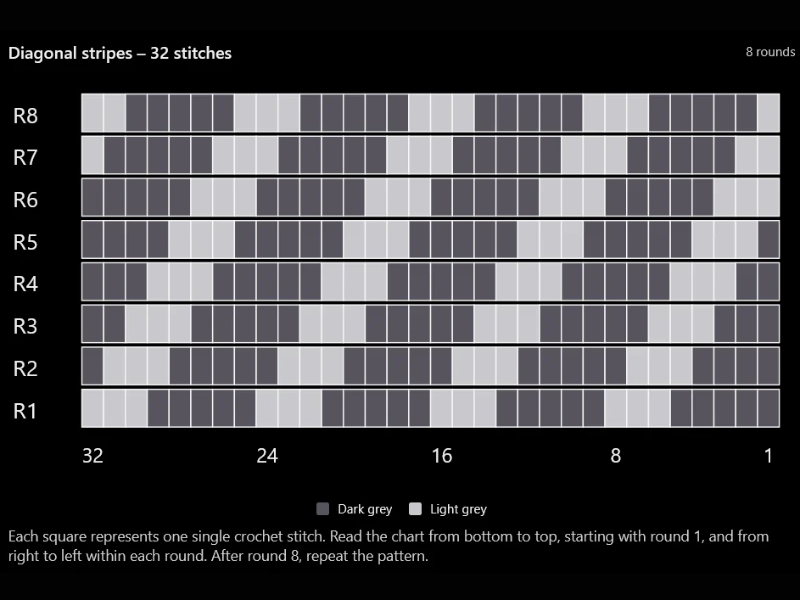
If you find the written rounds a little confusing, you can also use the chart as a guide. Each square represents one single crochet stitch.
How Long Should the Back Support Be?
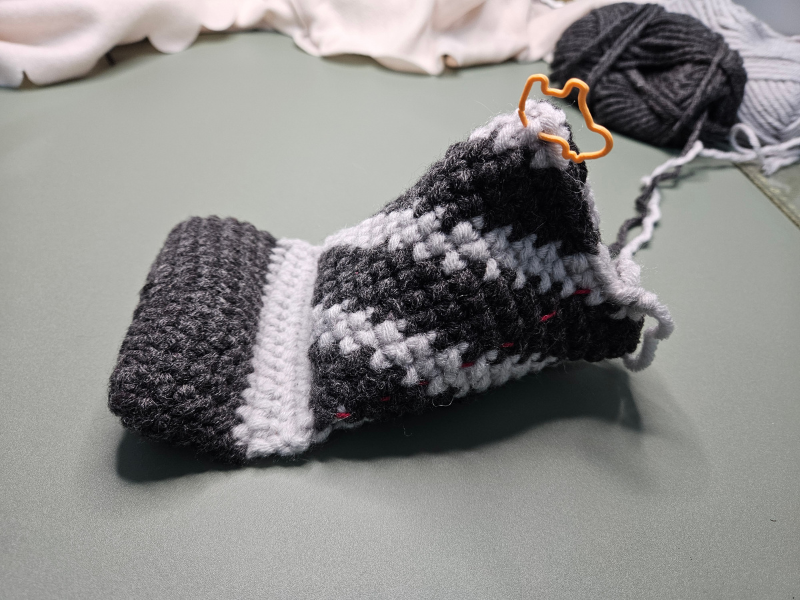
Continue crocheting the pattern until your back support is approximately 10 cm long.
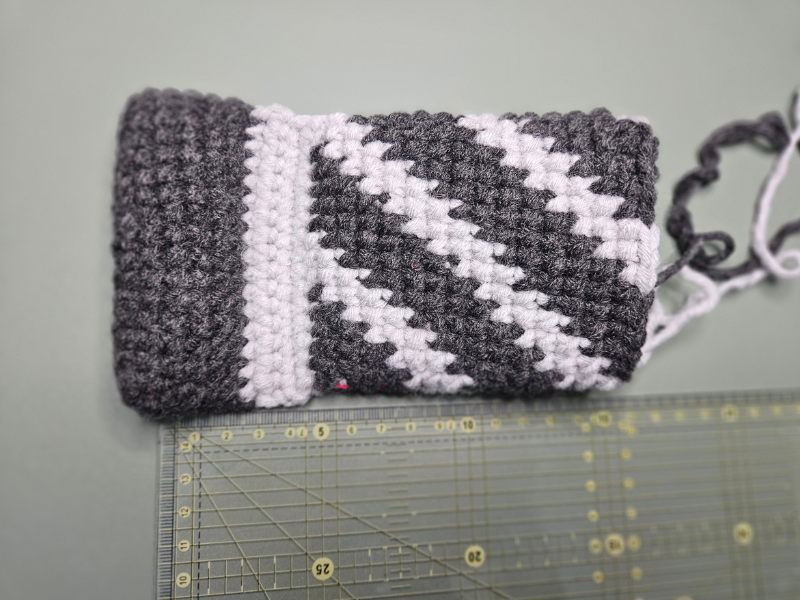
The length is a guideline. Depending on which yarn you use and how tightly you crochet, it may make sense to stop a little earlier or later.
A longer back support can lead to a flatter angle later. You can therefore already try standing up the phone stand in between and check whether you like the shape.
5. Filling and Closing the Phone Stand
When the back support has reached the desired length, we first lay our phone stand flat in front of us.
Position it as it should stand later and mark the middle stitch on the upper edge with a stitch marker.
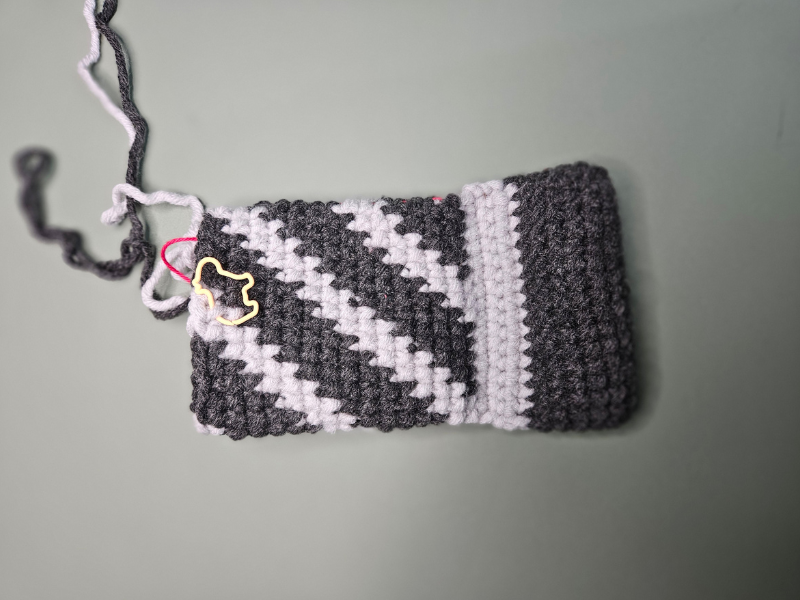
Then continue crocheting in the previous pattern until you reach the marked stitch. This way, we make sure that our closing seam is in the right place later.
Now we fill the back support.
First, put in some material to add weight. I used rice again, which I put into an old nylon stocking.
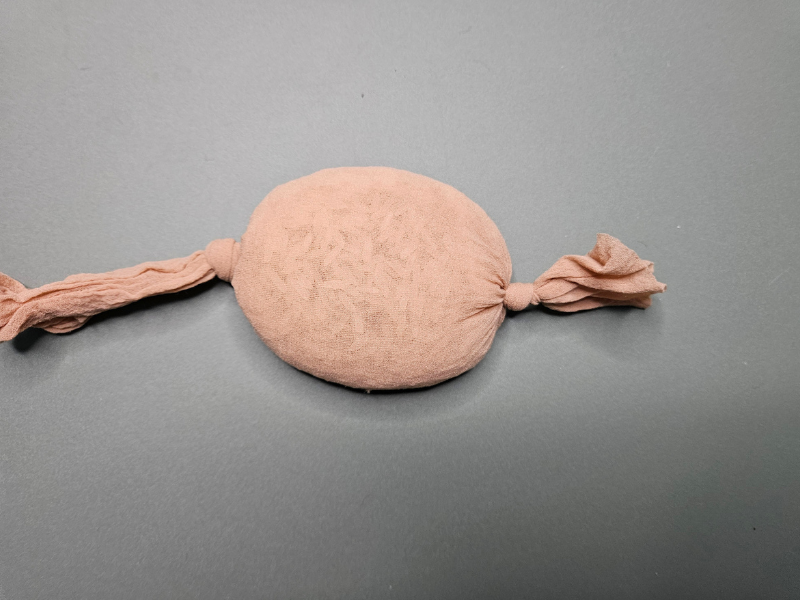
Then add some stuffing. Distribute the filling so that the phone stand gets its shape and a stable backrest is formed.
Now press the upper opening flat. There should be 16 stitches opposite each other.
Crochet 16 sc through both layers to close the back support.
Before you close the last stitches, you can add a little more stuffing if needed. Make sure that the phone stand is filled sufficiently, but not too tightly.
Finally, cut the yarn, pull it through the last stitch and weave in the end.
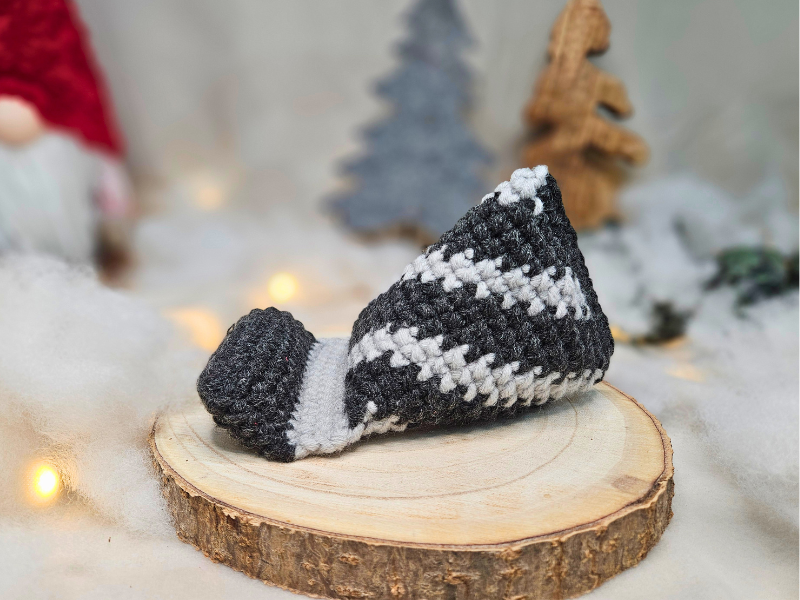
Your Crocheted Phone Stand Is Finished!
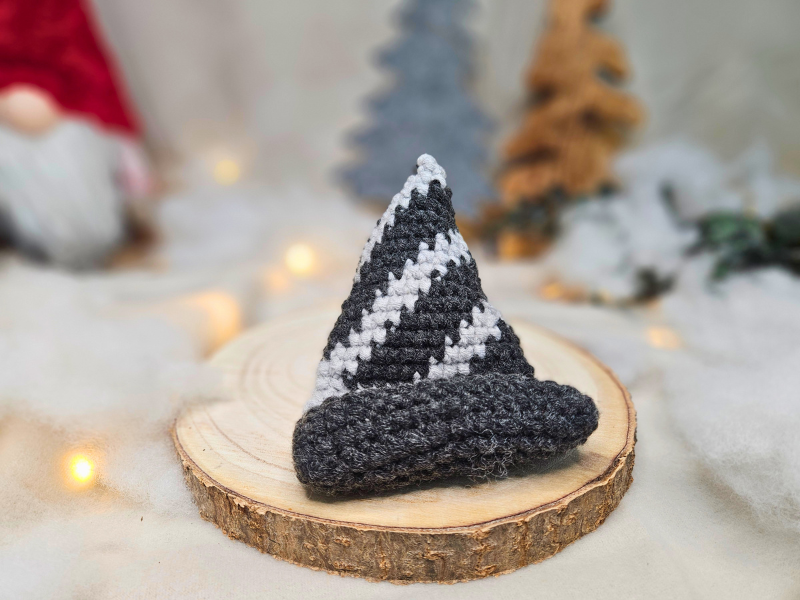
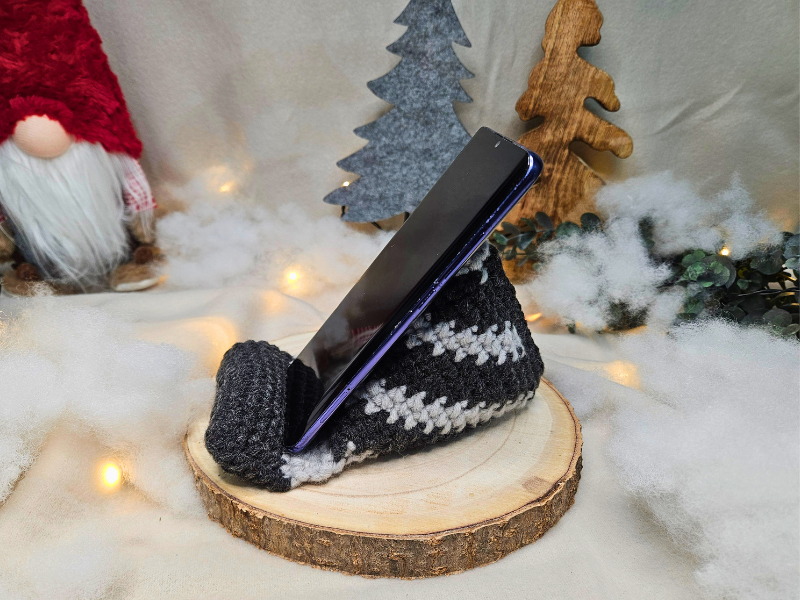
Now you can put your smartphone into the finished phone stand and try out whether it sits securely.
I think the phone stand is not only practical for your own desk, but also a nice handmade gift idea. Especially if you want to crochet something for a man, this might be a suitable alternative to the usual hats or scarves.
With thicker yarn, it is also finished relatively quickly and is therefore a good little project for in between.
I hope you enjoyed the pattern and have fun crocheting it.
If you have any questions or would like to add something from your own experience, feel free to write in the comments – I'm always happy to hear from you.


