Hello everyone!
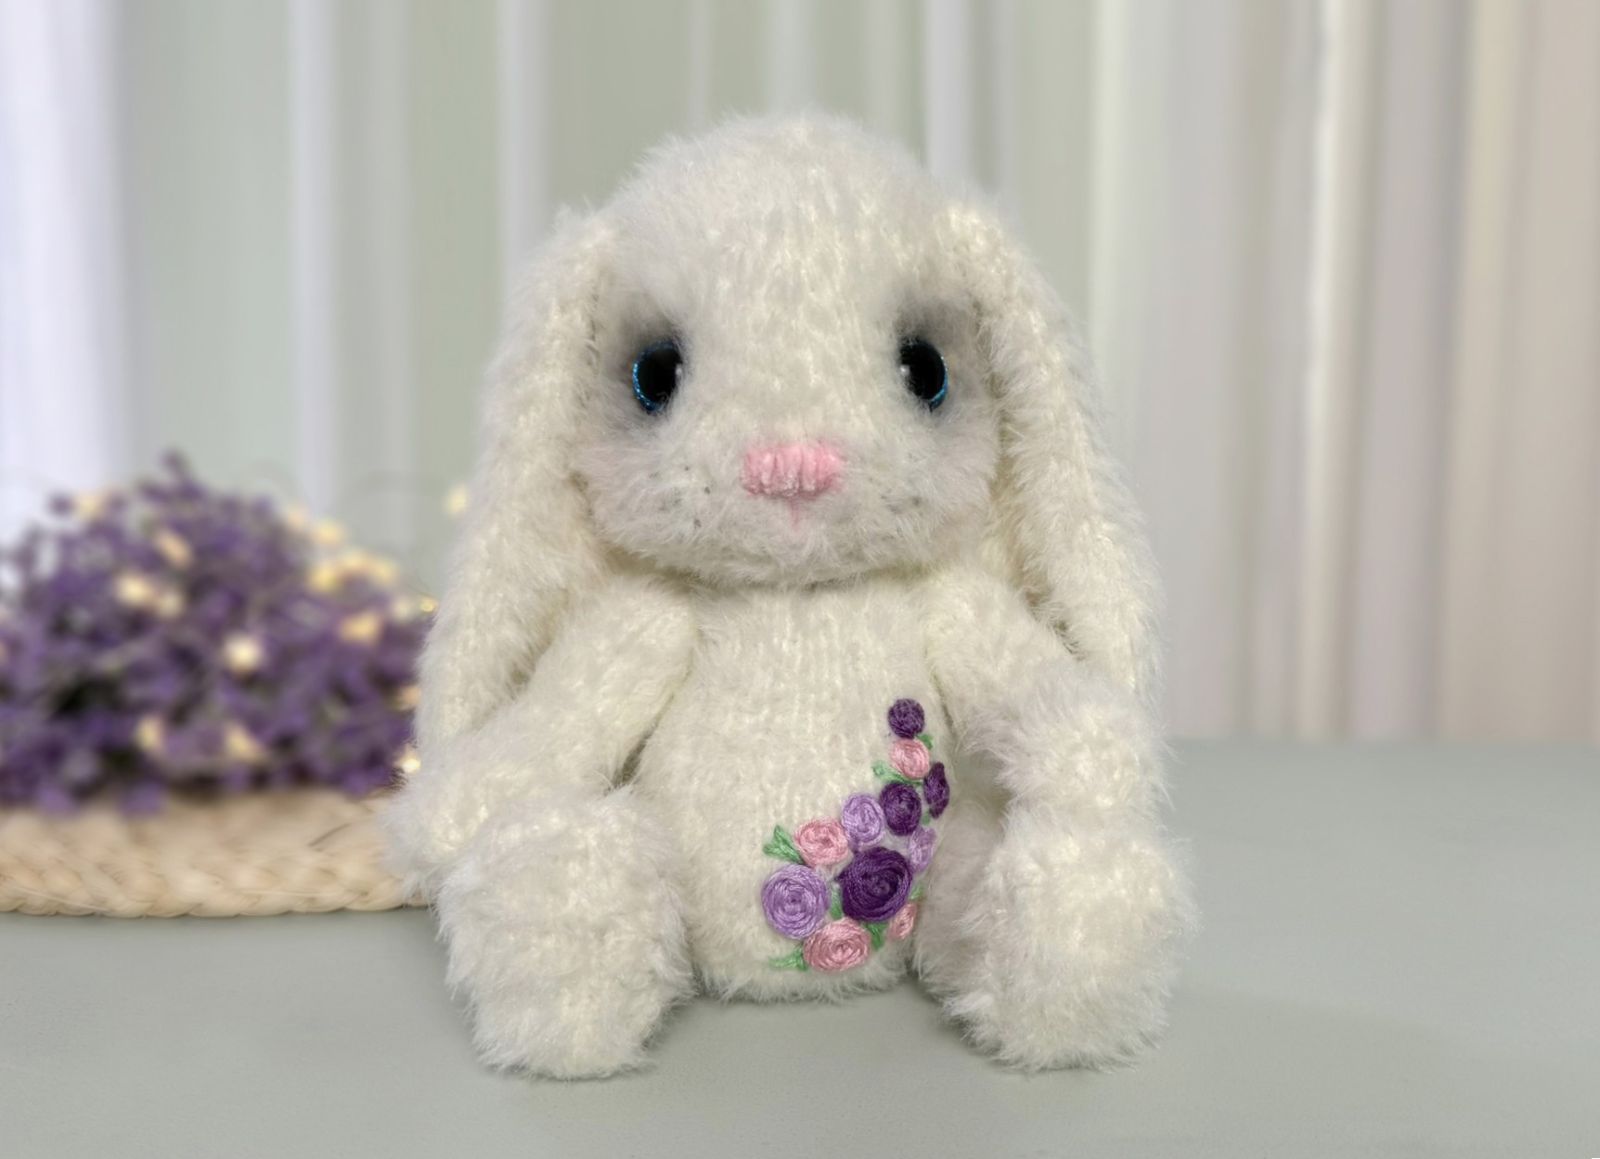
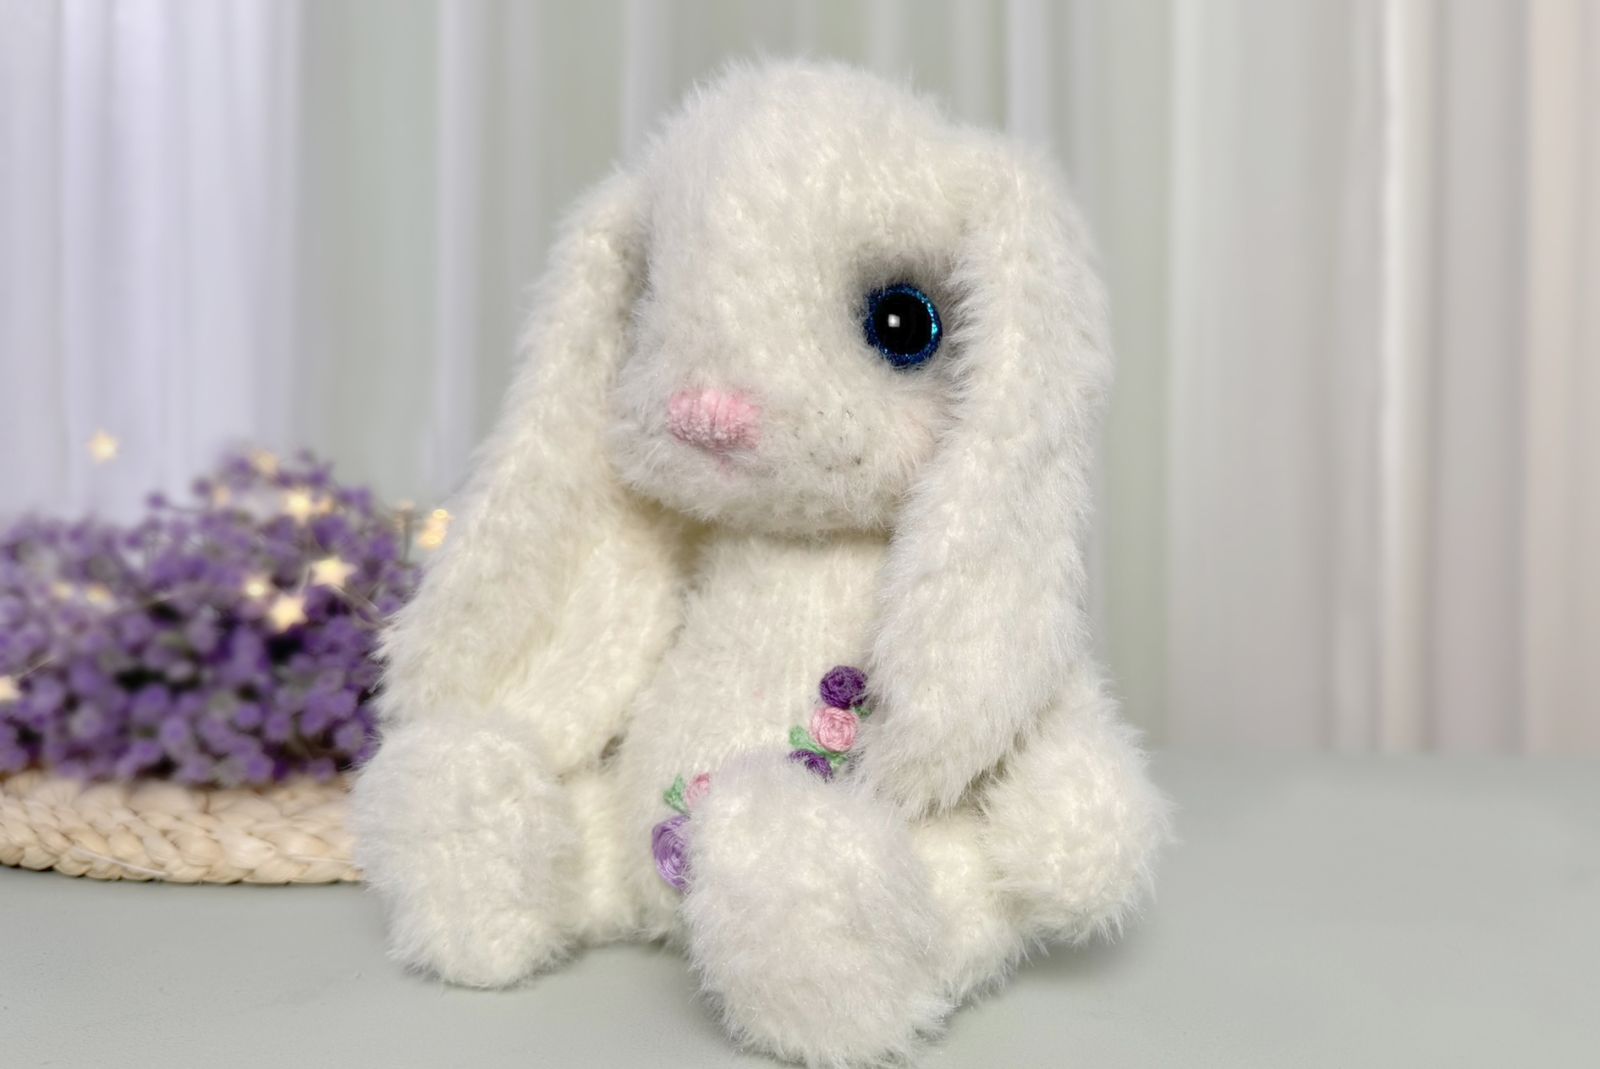
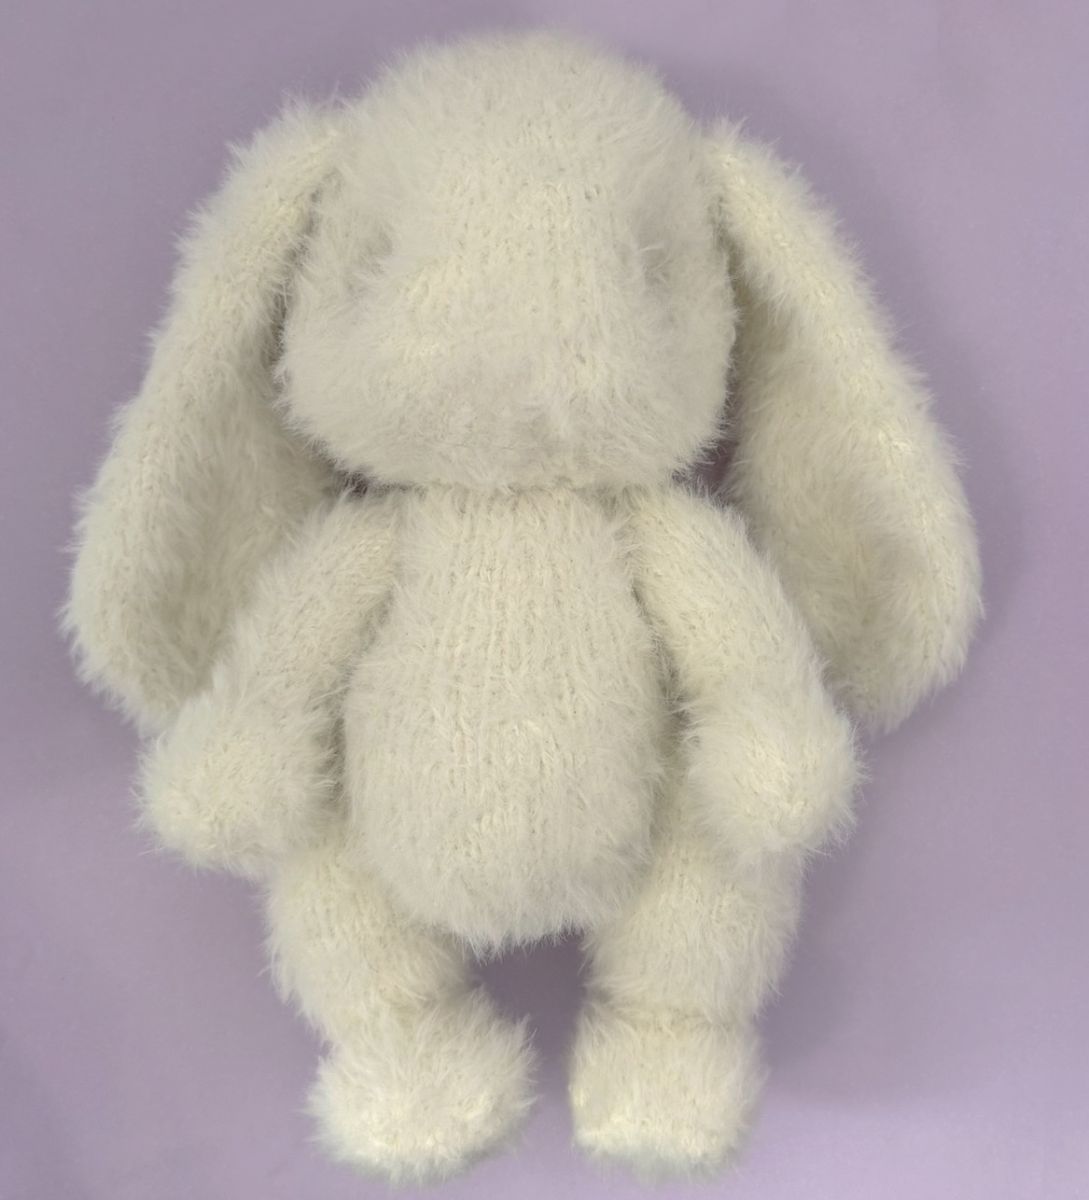
The cuddly, wise bunny – a knitting project you'll fall in love with!
This adorable bunny is knitted from soft wool and brings warmth and charm to any home. Measuring approximately 30 cm, it's the perfect companion – whether for cuddling, gifting, or simply cherishing. Please note that the final size may vary slightly depending on the yarn thickness used and your individual knitting style.
Design your bunny to match your personal style:
- Wool: Fluffy as a cloud or smooth as silk – choose what you love.
- Knitting needles: Select the size and type that suit your comfort and technique.
- Eyes: Whether safety eyes, buttons, or embroidered details – the choice is yours.
Each bunny becomes a one-of-a-kind creation – knitted with heart and shaped by imagination. Whether you're a beginner or a seasoned knitter, this project invites you to explore, experiment, and enjoy a result as unique as you are.
Materials:
✓ Knitting yarn white 100 gr Leami Brush for Plush (160 m/ 100g).
✓ Knitting needles No.2,5
Please note that wool consumption can vary depending on the knitting style – those who knit loosely usually need a little more yarn than those who knit more tightly.
✓ Fiberfill, Eyes 20 mm, 1 extra long sewing needle, pastel chalk gray.
Abbreviations:
CH – Chain(s)
inc – increase
dec – decrease
X dec – X- times decrease
X inc – X- times increase
ST – Stitch
P – purl
K– knit (garter stitch)
Knitting Instructions for all Pieces
All parts are crafted entirely with two knitting needles.
Follow these steps:
First Row - Purl Stitches Begin by knitting the first row entirely in purl stitches. These will form the back side of your project, creating a neat texture.
Second Row - Knit Stitches In the second row, knit every stitch. This will produce a smooth, even front for your piece.
Repeating the Pattern Continue alternating between purl stitches in the odd-numbered rows and knit stitches in the even-numbered rows:
- Odd-numbered rows (e.g., 1st, 3rd, 5th): Work in purl stitches.
- Even-numbered rows (e.g., 2nd, 4th, 6th): Work in knit stitches.
This straightforward pattern of alternating knit and purl rows is ideal for beginners, offering an easy yet satisfying introduction to the craft.
If you're knitting with three or four needles to avoid joining and creating a seam, this is certainly possible. In this case, all purl stitches are worked as knit stitches
Body
Cast on 6 stitches (ch) onto the knitting needle. Make sure the stitches are evenly stretched while knitting to ensure your knitted piece is nice and even.
1. 6 P (6)
2. 6 K inc. (12)
3. 12 P (12)
4. (1 K, 1 K inc)x 6 (18)
5. 18 P (18)
6. (2 K, 1 K inc)x 6 (24)
7. 24 P (24)
8. (3 K, 1 K inc)x 6 (30)
9. 30 P
10. 10 K, 10 K inc, 10 K (40)
11. 40 P
12. 10 K, (1 K, 1 inc)x 10, 10 K (50)
13. 50 P
14. 50 K
15. 50 P
16. 50 K
17. 50 P
18. 50 K
19. 50 P
20. 50 K
21. 50 P
22. 15 K, (1 dec, 2 K)х 5, 15 K (45)
23. 45 P
24. 15 K, (1 dec, 1 K)х 5, 15 K (40)
25. 40 P
26. 14 K, (1 dec, 1 K)х 4, 14 K (36)
27. 36 P
28. 36 K
29. 36 P
30. (1 dec, 4 K)х 6 (30)
31. 30 P
32. (1 dec, 3 K)х 6 (24)
33. 24 P
34. 24 K
35. 24 P
36. 24 K
37. 24 P
38. 24 K
39. 24 P
40. (1 dec, 2 K)х 6 (18)
41. 18 P
42. (1 dec, 1 K)х 6 (12)
43. 12 P
44. 6 dec
Finally, bind off the remaining stitches to complete the knitting.
Next, carefully sew the body together using a wool needle and matching yarn. Take your time to make even, delicate stitches, ensuring the seam looks tidy and blends seamlessly into the overall design. I highly recommend using soft, fluffy yarn for this step. Not only does it create a wonderfully cozy texture, but it also helps the seams fade into the fabric, making them almost invisible. As you sew, gradually fill the body with fiberfill. This will help the mouse maintain its shape and give it a soft, cuddly feel.
Legs
The leg consists of two parts.
Part 1
Cast on 6 stitches (ch) onto the knitting needle. Make sure the stitches are evenly stretched while knitting to ensure your knitted piece is nice and even.
1. 6 P (6)
2. 6 K inc. (12)
3. 12 P (12)
4. (1 K, 1 K inc)x 6 (18)
5. 18 P (18)
6. (2 K, 1 K inc)x 6 (24)
7. 24 P
Knit a total of 18 rows in stockinette stitch:
On the front side of the work, knit all stitches across the row.
On the back side of the work, purl all stitches across the row.
8. 10. 12. 14. 16. 18. 20. 22. 24 – 24 K
9. 11. 13. 15. 17. 19. 21. 23. 25 - 24 P
Cast off the remaining stitches carefully.
Using a wool needle and the same yarn, sew the legs together. Aim for even, consistent stitches to create a neat and polished seam.
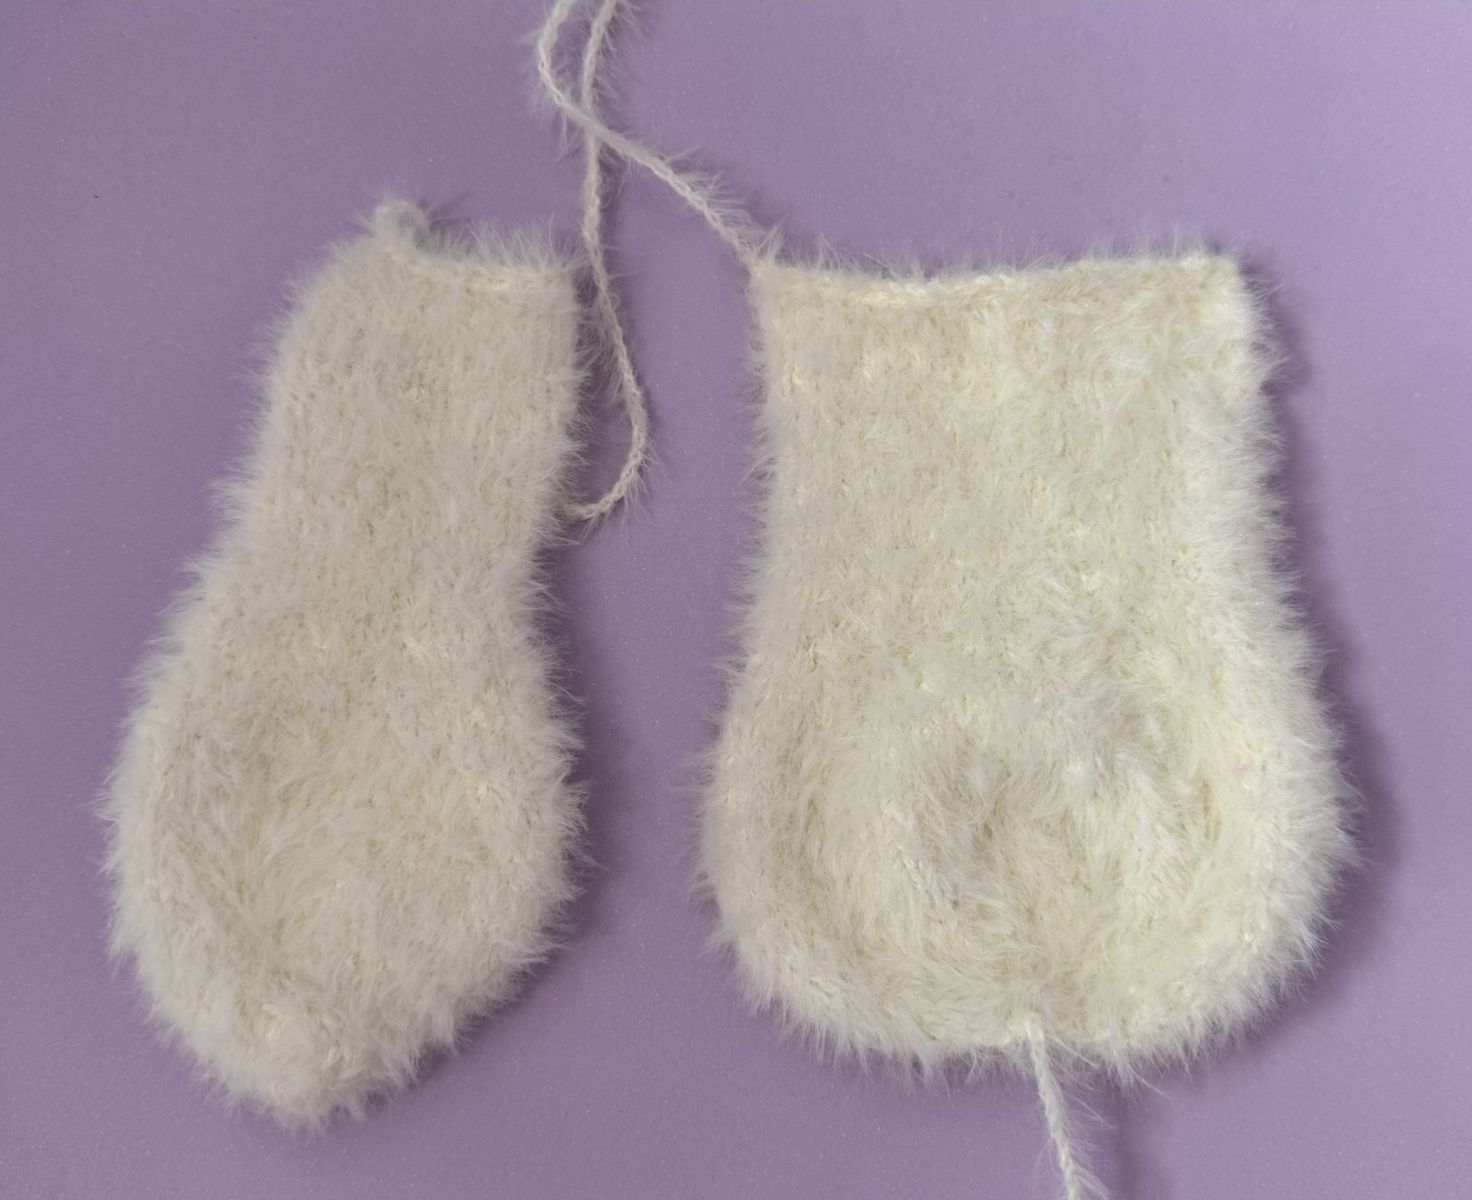
Part 2 (foot)
Cast on 6 stitches (ch) onto the knitting needle.
1. 6 P (6)
2. 6 K inc. (12)
3. 12 P (12)
4. (1 K, 1 K inc)x 6 (18)
5. 18 P (18)
6. (2 K, 1 K inc)x 6 (24)
7. 24 P
8. 24 K
9. 24 P
10. 24 K
11. 24 P
12. 11 K, 1 inc, 11 K, 1 inc (26)
13. 26 P
14. 26 K
15. 26 P
16. 26 K
17. 26 P
18. 26 K
19. 26 P
20. 26 K
21. 26 P
Cast off the remaining stitches. Sew the legs together using a wool needle and the same yarn. Make sure to use even stitches to achieve a neat and beautiful seam.
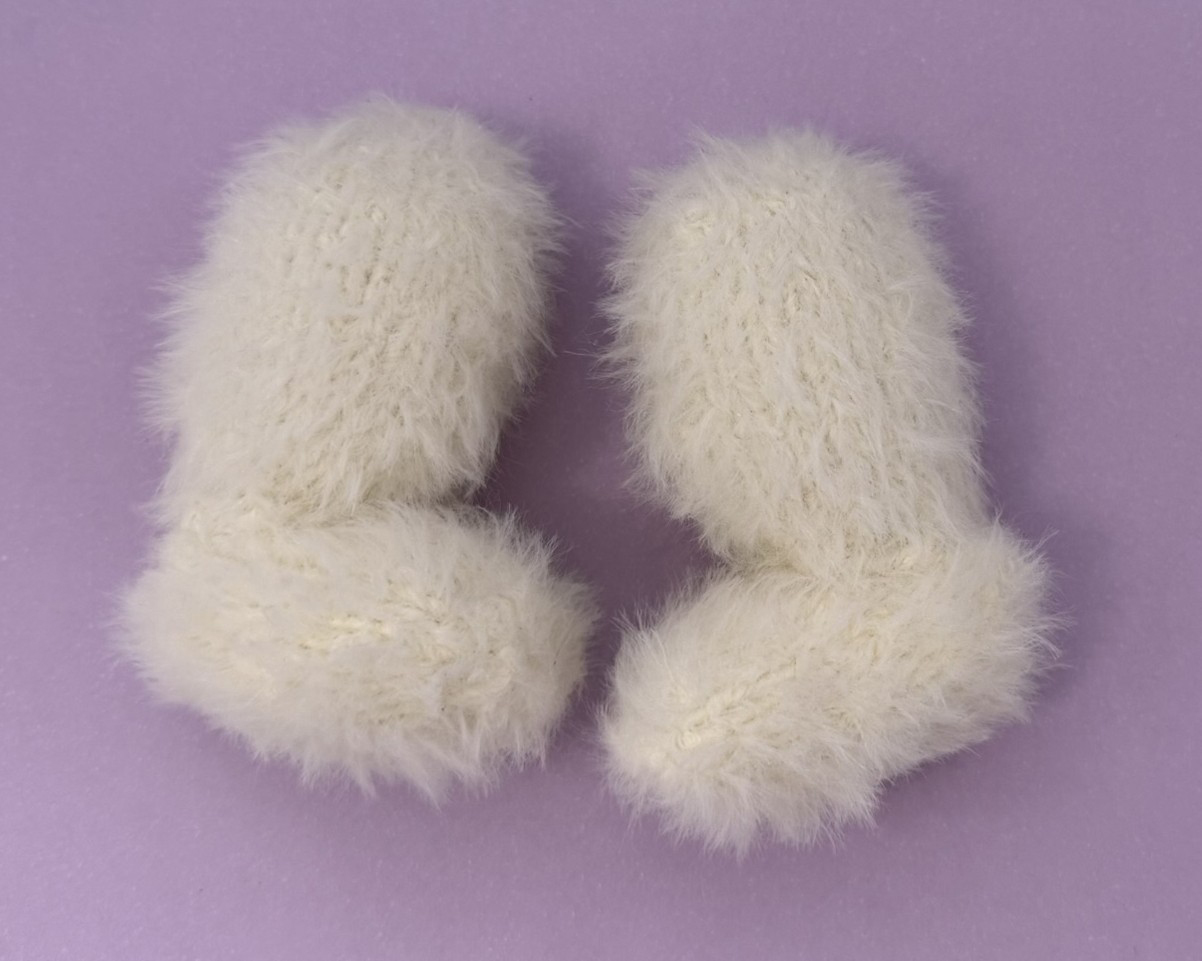
Arms
Cast on 6 stitches (ch) onto the knitting needle.
1. 6 P (6)
2. 6 K inc. (12)
3. 12 P (12)
4. (1 K, 1 K inc)x 6 (18)
5. 18 P
6. 18 K
7. 18 P
8. 18 K
9. 18 P
10. 18 K
11. 18 P
12. 18 K
13. 18 P
14. 18 K
15. 18 P
16. 1 K, 1 dec, 12 K, 1 dec, 1 K (16)
17. 16 P
18. 16 K
19. 16 P
20. 1 K, 1 dec, 10 K, 1 dec, 1 K (14)
21. 14 P
22. 14 K
23. 14 P
24. 1 K, 1 dec, 8 K, 1 dec, 1 K (12)
25. 12 P
26. 1 K, 1 dec, 6 K, 1 dec, 1 K (10)
27. 10 P
28. (1 K, 1 inc)x 5 (15)
29. 15 P
30. (2 K, 1 inc)x 5 (20)
31. 20 P
32. 20 K
33. 20 P
34. (2 K, 1 dec)x 5 (15)
35. 15 P
36. (1 K, 1 dec)x 5 (10)
Cast off the remaining stitches .
Sew the arms together using a wool needle and the same yarn. Maintain even and consistent stitches to ensure a neat and polished seam. Start at the hand, carefully joining these sections first. As you sew, remember to stuff the piece with fiberfill, shaping it evenly for a smooth and well-filled appearance.
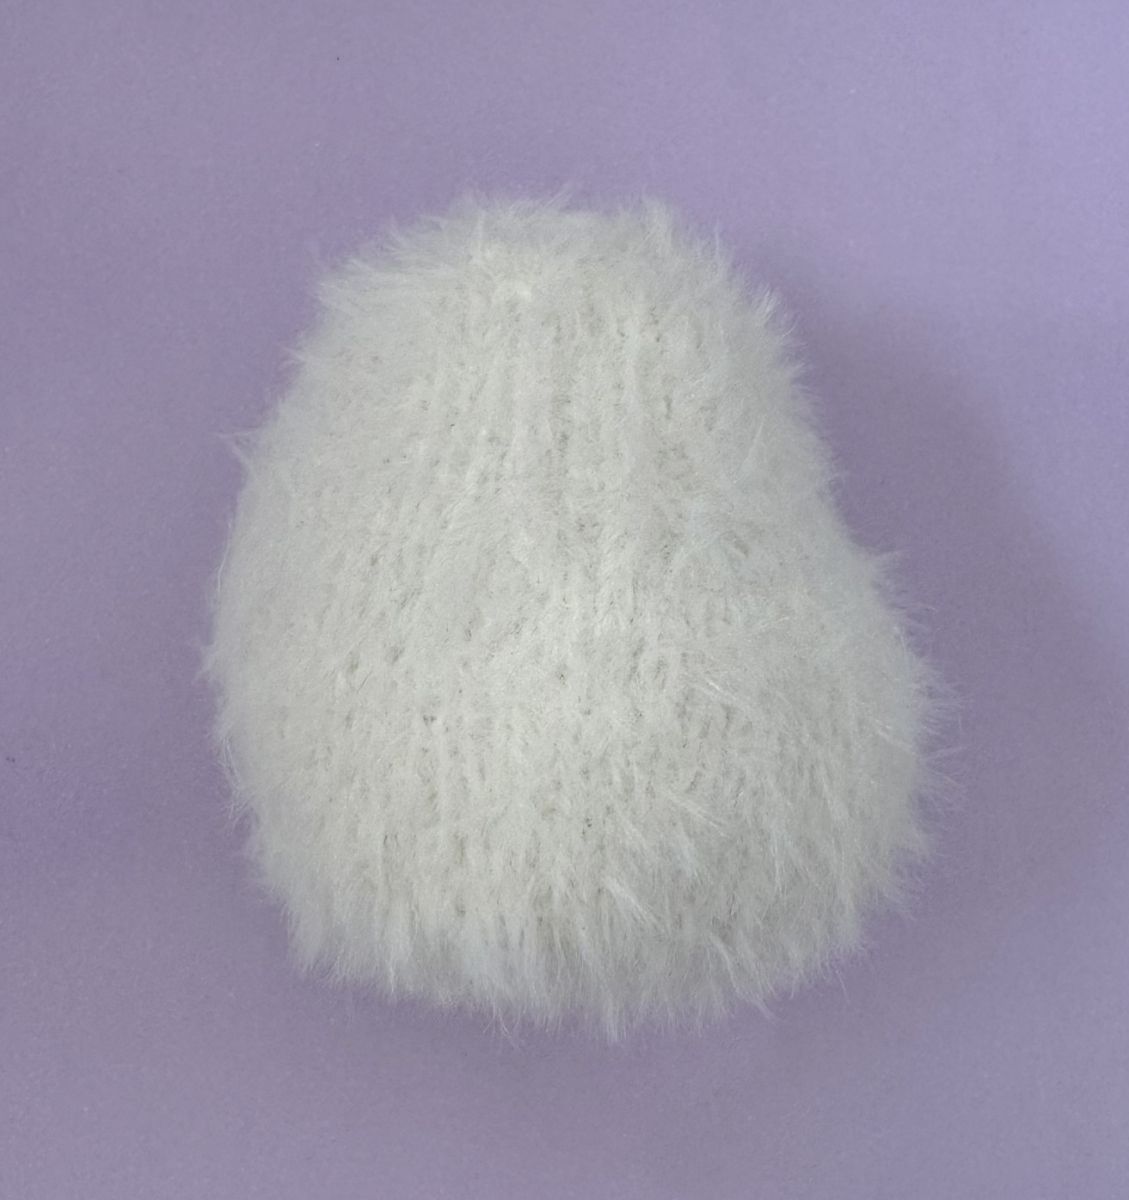
Head
Cast on 6 chain stitches (ch) onto your knitting needle.
Ensure the stitches are evenly tensioned as you knit. This helps create a smooth and symmetrical head shape.
1. 6 P (6)
2. 6 K inc. (12)
3. 12 P
4. (1 K, 1 K inc)x 6 (18)
5. 18 P
6. (2 K, 1 K inc)x 6 (24)
7. 24 P
8. (3 K, 1 K inc)x 6 (30)
9. 30 P
10. (4 K, 1 K inc)x 6 (36)
11. 36 P
12. (5 K, 1 K inc)x 6 (42)
13. 42 P
14. (6 K, 1 K inc)x 6 (48)
15. 50 P
16. (7 K, 1 K inc)x 6 (54)
17. 54 P
18. (8 K, 1 K inc)x 6 (60)
19. 60 P
20. 60 K
21. 60 P
22. 60 K
23. 60 P
24. 60 K
25. 60 P
26. 24 K, insert 1st marker, 12 K , insert 2st marker, 24 K (60)
In this case, the thread marker serves as a guide for positioning the eyes
27. 60 P
28. 60 K
29. 60 P
30. 60 K
31. 60 P
32. 60 k
33. 60 P
34. 25 K, 10 inc, 25 K (70)
35. 70 P
36. 25 K, 1 dec, 16 K, 1 dec, 25 K (68)
37. 68 P
38. 68 K
39. 68 P
40. 68 K
41. 68 P
42. (5 K, 1 dec)х4, 5 K, 2 inc, 5 K (1 dec, 5 K)х4 (62)
43. 62 P
44. (4 K, 1 dec)х5, 2 inc, (1 dec, 4 K)х5 (54)
45. 54 P
46. (3 K, 1 dec)х5, 4 K, (1 dec, 3 K)х5 (44)
47. 44 P
48. (2 K, 1 dec)х4, 12 K, (1 dec, 2 K)х4 (36)
49. 36 P
50. 36 K
51. 36 P
52. (4 K, 1 dec)х6 (30)
53. 30 P
54. (3 K, 1 dec)х6 (24)
55. 24 P
56. (2 K, 1 dec)х6 (18)
57. 18 P
58. (1 K, 1 dec)х6 (12)
59. 12 P
60. 6 dec
Cast off the remaining stitches with care.
Sew the head together neatly using a wool needle and the same yarn. Focus on creating even, consistent stitches to achieve a clean and professional seam.
Stuff the head with fiberfill as you sew, ensuring the stuffing is evenly distributed for a well-shaped appearance.

Deepening the eyelets:
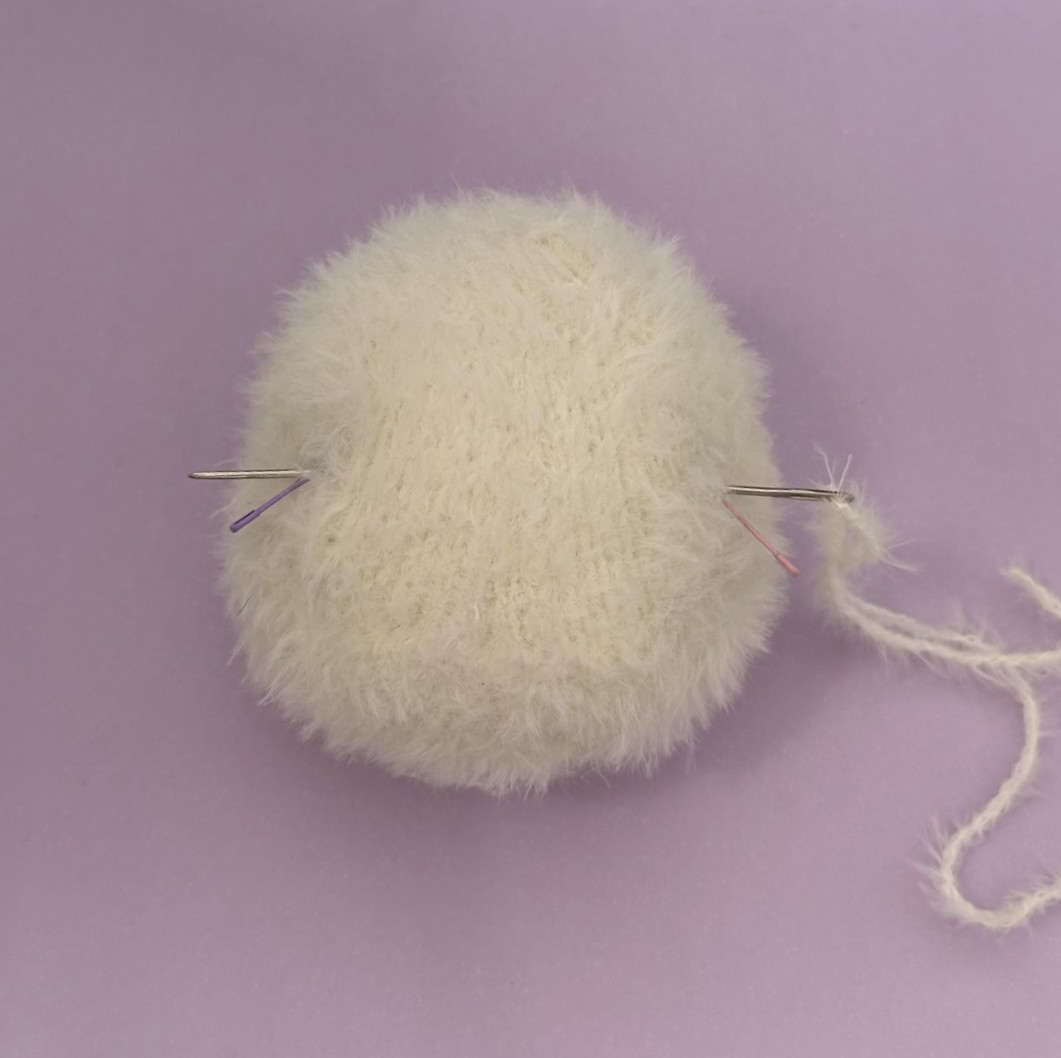
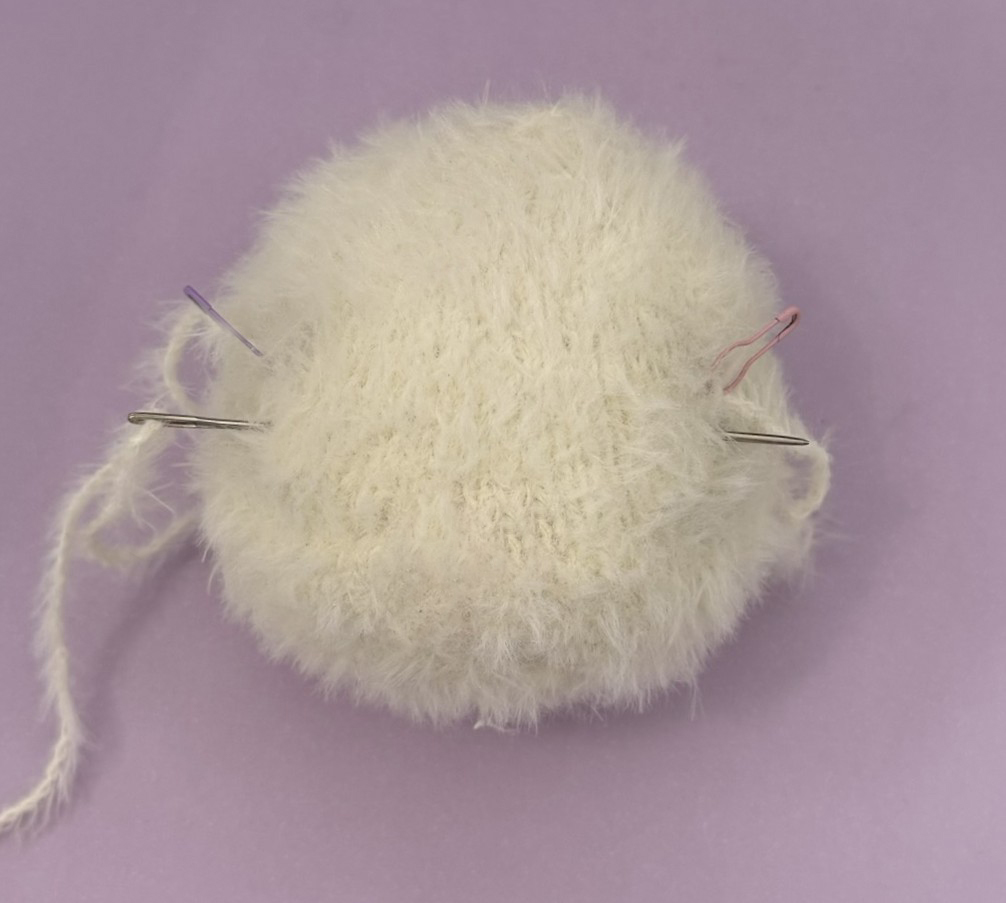
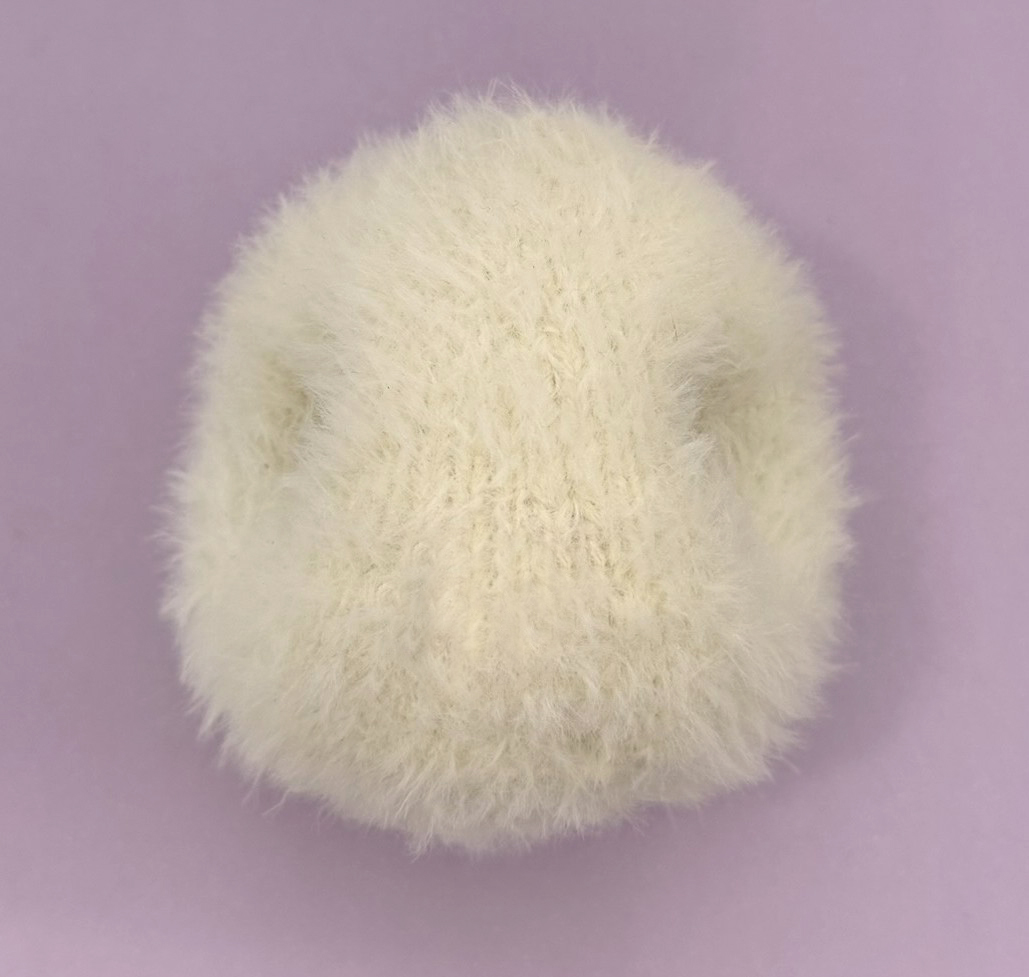
To shape the eye area, first insert the needle at marker 2 and bring it out on the opposite side at marker 1—the intended eye position. Then insert the needle three rows lower and push it through. From there, return to the opposite side, also three rows below marker 1. Carefully pull the thread tight to create the desired indentation, and knot it securely.
The indentations are now complete; continue knitting the ears.
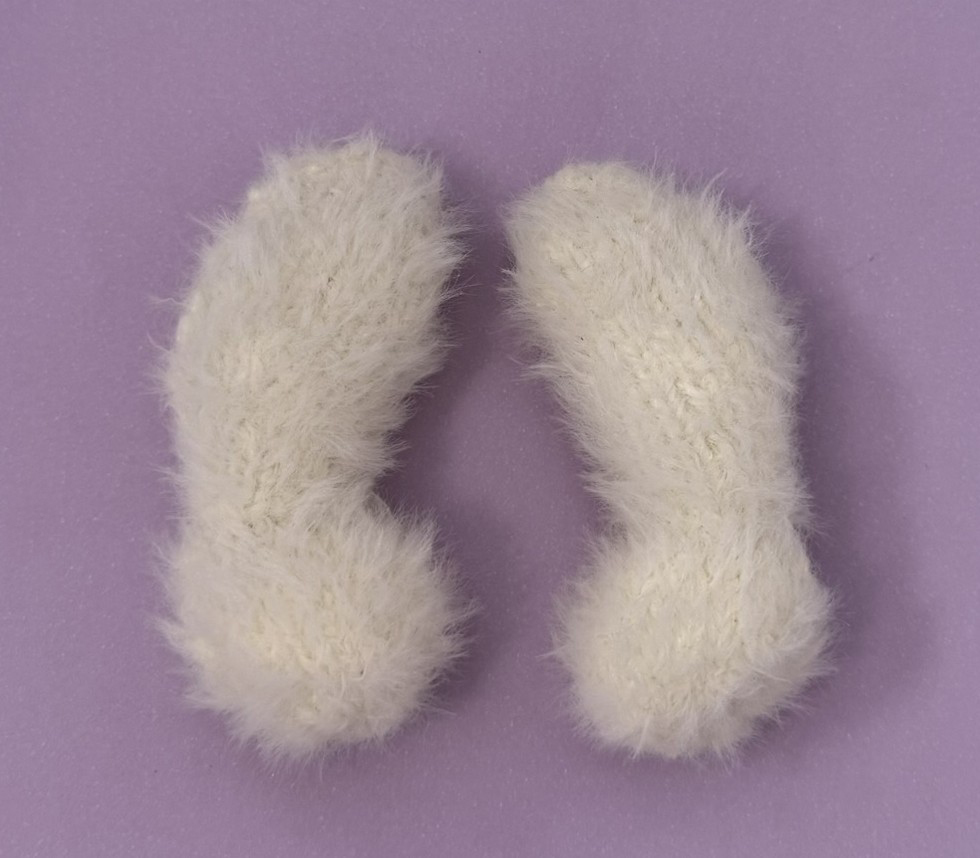
Ears
Cast on 6 chain stitches (ch) onto your knitting needle.
Ensure the stitches are evenly tensioned as you knit. This helps create a smooth and symmetrical ears shape.
1. 6 P (6)
2. 6 K inc. (12)
3. 12 P
4. (1 K, 1 K inc)x 6 (18)
5. 18 P
6. (2 K, 1 K inc)x 6 (24)
7. 24 P
8. (3 K, 1 K inc)x 6 (30)
9. 30 P
10. (4 K, 1 K inc)x 6 (36)
11. 36 P
12. (5 K , 1 Mr inc)x 6 (42)
13. 42 P
14. 42 K
15. 42 P
16. 42 K
17. 42 P
18. 42 K
19. 42 P
20. 19 K, 1 dec, 19 K, 1 dec (40)
21. 40 K
22. 18 K, 1 dec, 18 K, 1 dec (38)
23. 38 K
24. 17 K, 1 dec, 17 K, 1 dec (36)
25. 36 K
26. (4 K, 1 dec)x 6 (30)
27. 30 P
28. 30 K
29. 30 P
30. 30 K
31. 30 P
32. (3 K, 1 dec)x 6 (24)
33. 24 P
34. 24 K
35. 24 P
36. 24 K
37. 24 P
38. 24 K
39. 24 P
40. 24 K
41. 24 P
42. 24 K
43. 24 P
44. 24 K
45. 24 P
Once the ears are complete, bind off the remaining stitches. The ears are not filled with stuffing, as they are meant to stay flat and soft.
Then, position the ears on the left and right sides of the head, making sure they are placed symmetrically. Finally, sew the ears securely in place.
Attaching the Head and Limbs Begin by securing the head to the body. Make sure it’s centered and properly aligned so the bunny’s proportions look balanced and harmonious. Use a strong thread in a matching color, and sew around the base of the head with small, even stitches. This will create a sturdy and discreet connection.
Next, position the arms and legs. Take your time to find the best placement—they should be as symmetrical as possible to ensure the bunny sits or lies evenly. You can use pins to temporarily hold the limbs in place and check the alignment before stitching them on.
For a cohesive finish, it’s best to use the same thread you used to assemble the body. This helps maintain a consistent look throughout your project.
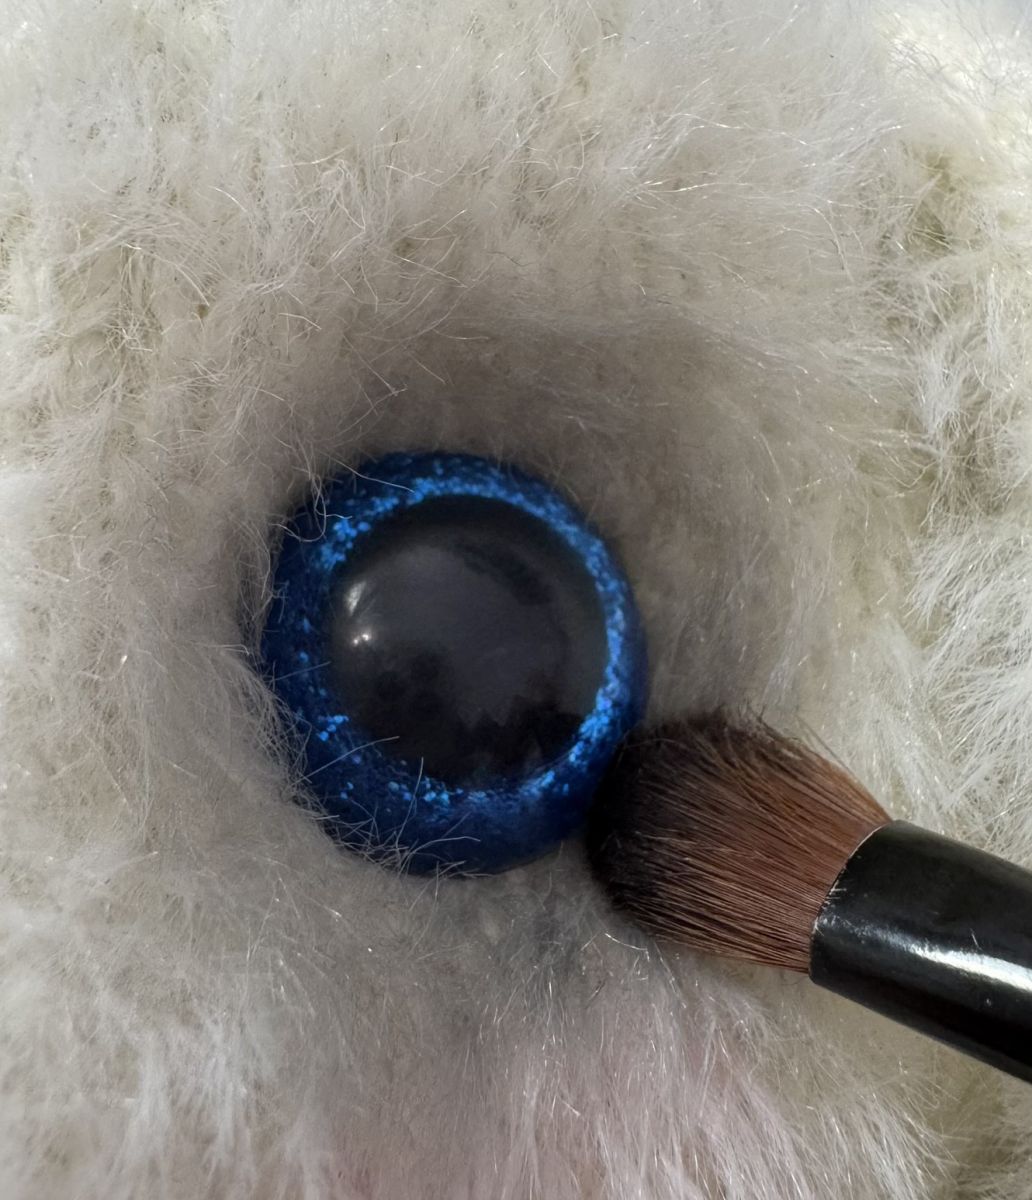
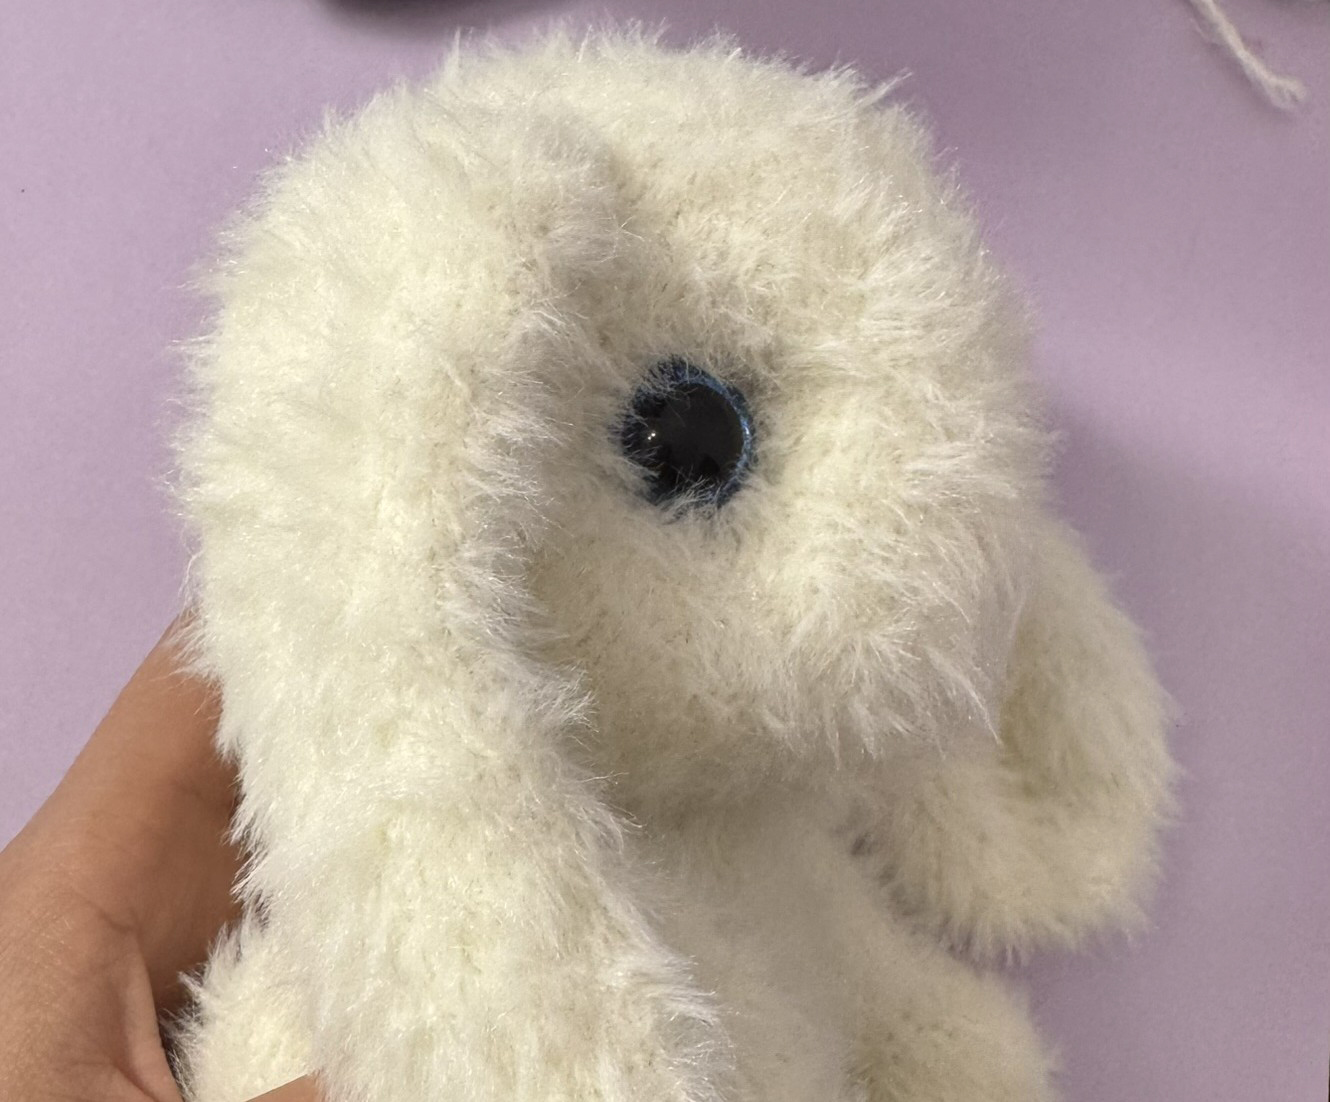
Attaching the Eyes – Handle with Extra Care!
Please take the time to thoroughly check that the eyes are firmly attached and cannot be pulled off or loosened during play. For my bunny, I used standard safety eyes. Since the head was already closed, I chose to secure them with a hot glue gun—not regular craft glue, but strong hot glue that bonds especially well.
I first positioned the eyes where I wanted them—about half a centimeter from the eye indentation, which gave a very balanced and appealing look. Then I applied the hot glue directly to the spot and quickly inserted the eyes through the stitches and glue before it cooled. After about ten minutes, I tested the hold—the eyes were firmly in place, with no wiggle or looseness.
Alternatively, you can use sew-on eyes, which are stitched directly onto the head with thread. In this case as well, make sure they’re tightly secured and won’t come loose—safety is the top priority when making toys for young children.
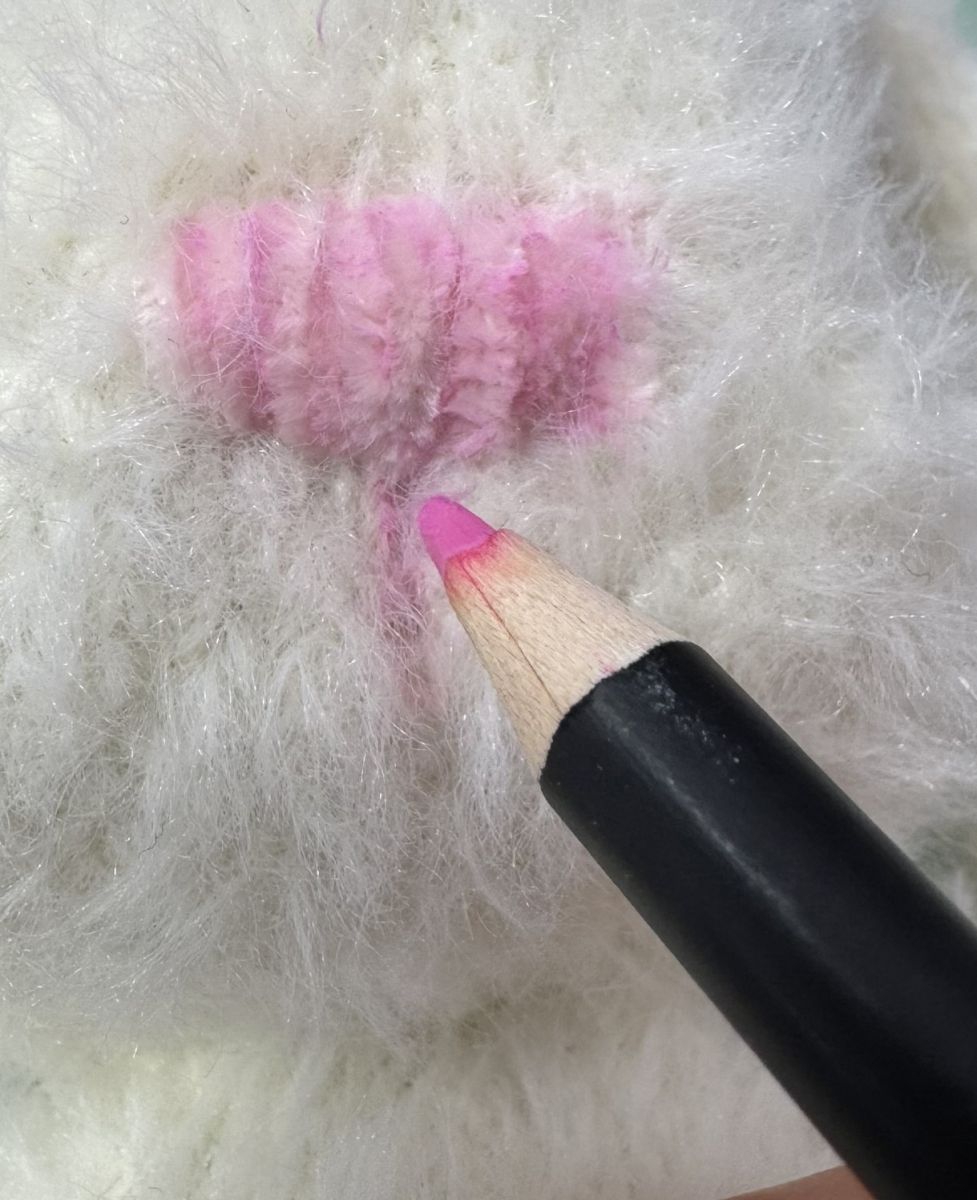
Embroidering the Nose Now it’s time to stitch the nose. For this step, I used light pink yarn. The nose is embroidered in the shape of a small rectangle. To create it, insert the needle from underneath the knitted fabric and bring it up through the surface, working stitch by stitch while gradually shifting sideways with each pass. This technique builds the classic rectangular shape little by little.
Be sure to keep your stitches evenly spaced to maintain a clean, well-defined outline that adds charm to the face.

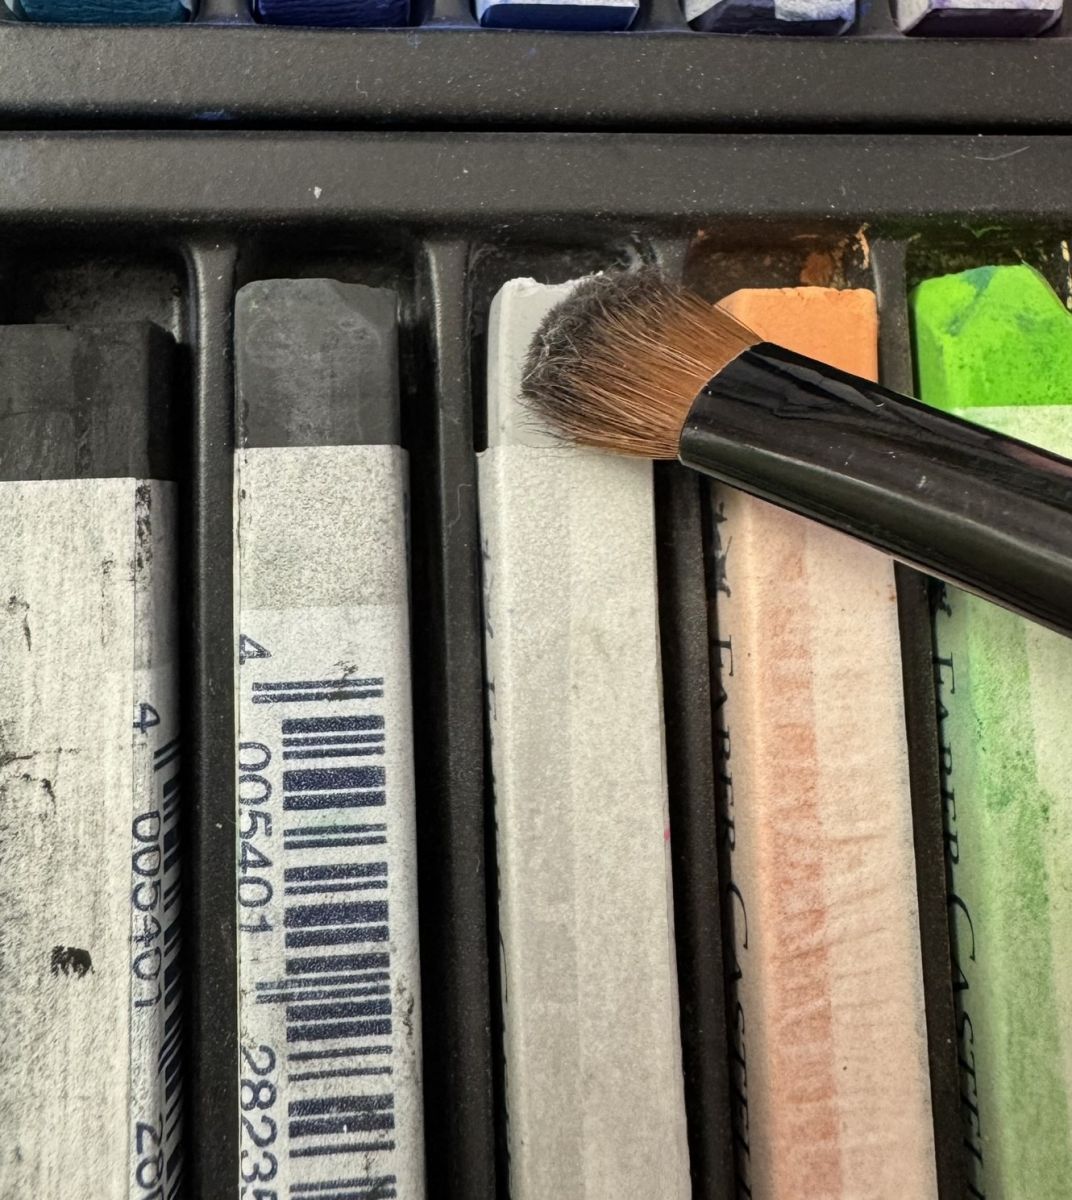
Shade the cheeks: To add a gentle blush, lightly apply a small amount of pink pastel to the cheeks. Since the bunny is made of white yarn, only a tiny bit of color is needed. The aim is to create a soft accent—not to cover the entire area.For best results, begin by rubbing the chalk onto a sheet of paper to release fine pigment particles. Then, use a soft brush to pick up the powder and gently apply it to the desired areas. Work slowly and with light strokes to ensure a subtle, even finish.
Tail
Cast on 6 chain stitches (ch) onto your knitting needle.
Ensure the stitches are evenly tensioned as you knit.
1. 6 P (6)
2. 6 K inc. (12)
3. 12 P
4. (1 K, 1 K inc)x 6 (18)
5. 18 P
6. (2 K, 1 K inc)x 6 (24)
7. 24 P
8. (3 K, 1 K inc)x 6 (30)
9. 30 P
10. 30 K
11. 30 P
12. 30 K
13. 30 P
14. (3 K, 1 K dec)x 6 (24)
Cast off the stitches, sew the sides together, and sew the tail to the back of the butt.
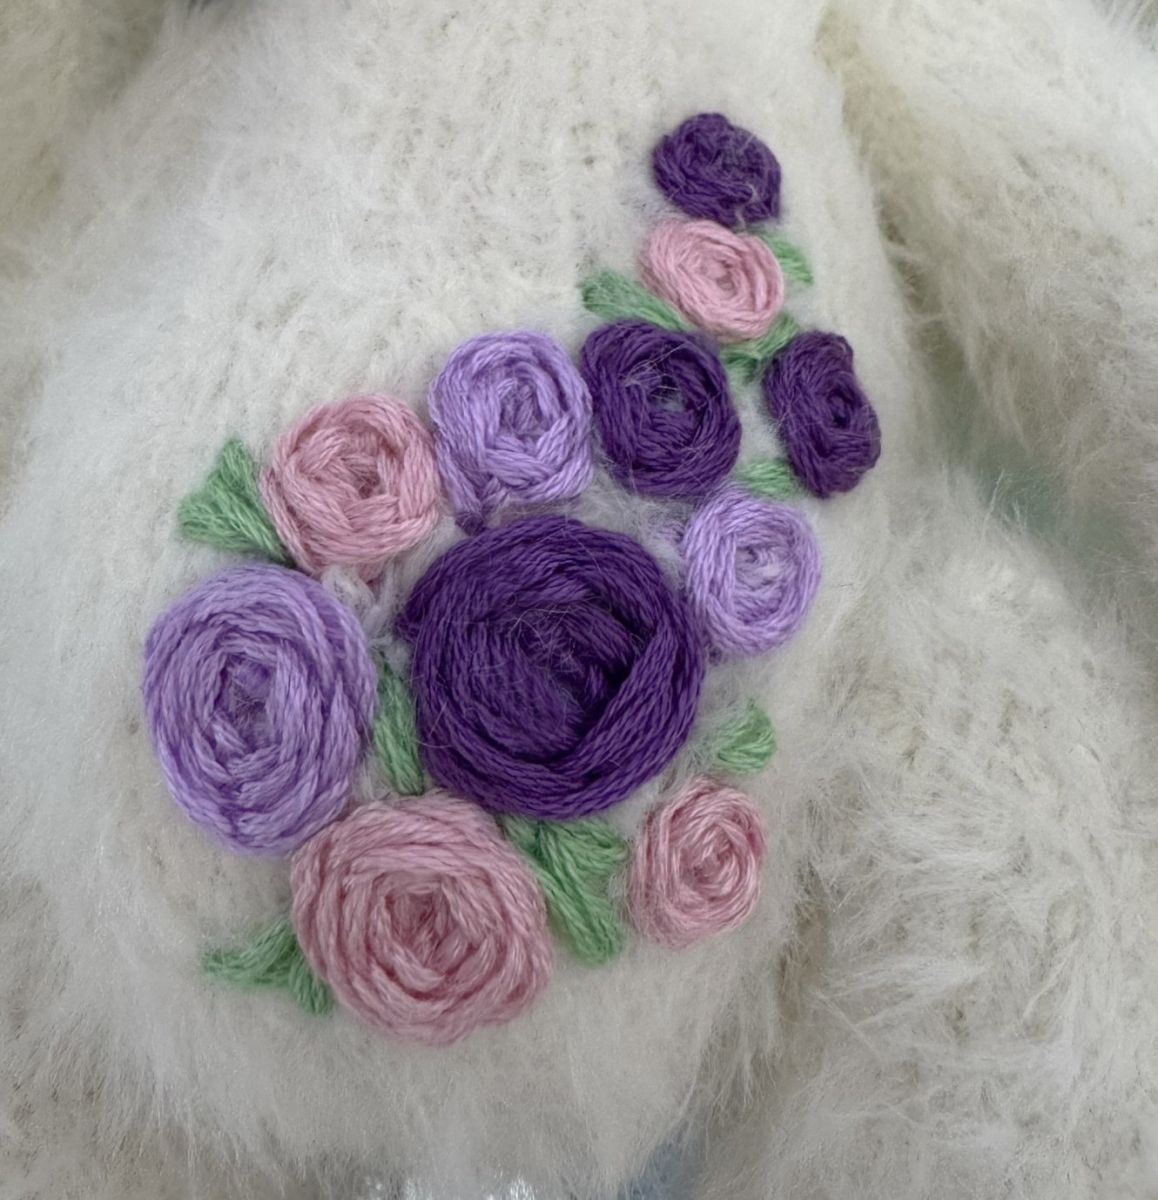
FLOWERS: You can embroider the flowers if you like. I chose purple, pink, and dark purple. The flowers can all look the same or be different sizes. Bigger stitches make bigger flowers. Smaller stitches make smaller flowers.
First, make five straight stitches with the needle. These stitches should spread out from one center point, like a star. After the fifth stitch, start weaving the thread under the stitches. Skip the second stitch, pull the needle under the third stitch. Skip the fourth stitch, pull the needle under the fifth stitch. Keep repeating this pattern—under one stitch, skip the next—until the flower is complete. The thread will wrap around in a spiral and form a rose.
LEAVES: Use a double thread. Bring the needle up from underneath the fabric. Move the needle slightly to the right or left, then go back to the same spot where you started. This creates a leaf shape. You can stitch several leaves next to each other. If you want bigger leaves, make the stitches longer or space them out more.
If you've used the same fluffy yarn throughout, it's a lovely idea to gently brush the finished toy to enhance its softness and give the surface a more even, plush appearance.
A pet brush, especially one designed for cats, works wonderfully for this. With gentle, sweeping motions, you can lightly fluff up the fibers, making the bunny feel even more cuddly and giving it a beautifully soft texture.
Once the rabbit was completely finished, I lightly tinted the eyes and nose. This gave the rabbit a more lively and expressive look. I used a light gray for the eyes and a soft pink that matched well for the nose. You only need a tiny amount of color—a gentle touch is enough to create the desired effect.