
When it gets colder outside, warm mittens are essential for young children. I find mittens particularly practical for toddlers because they are much easier to put on than gloves with individual fingers and keep little hands warm.
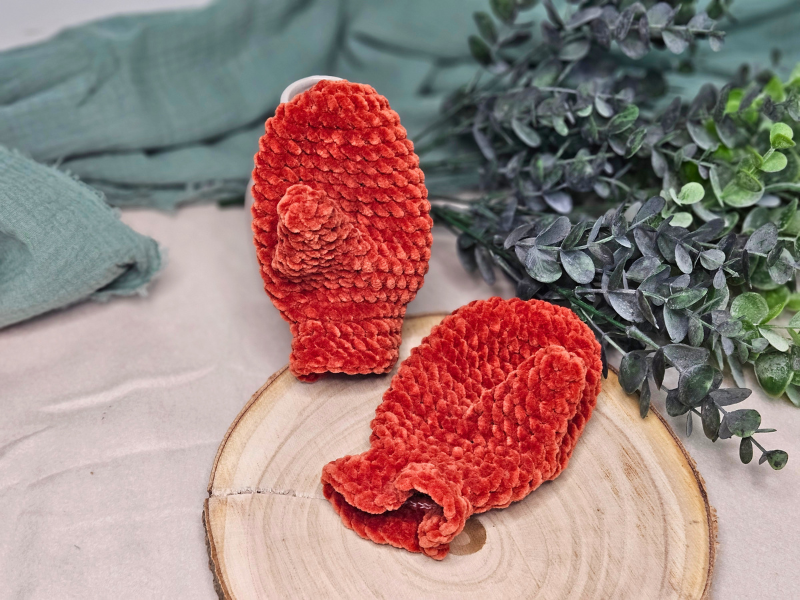
That's why I crocheted a pair of children's mittens using soft chenille yarn. It was important to me that the mittens wouldn't be too stiff, that they would be easy to put on and that they would still fit well around the wrist.
The cuff was a bit of a challenge. Chenille yarn is wonderfully soft, but not particularly elastic. That's why I decided on a slightly different solution: a loosely crocheted cuff that is gathered with elastic thread on the inside.
I tried the finished mittens on my two-year-old daughter, and I'm really happy with the fit.
In this free pattern, I'll show you step by step how to crochet children's mittens in size 2–3 years. You'll also find tables that you can use to adjust the pattern for younger or older children.
Materials for the Children's Mittens
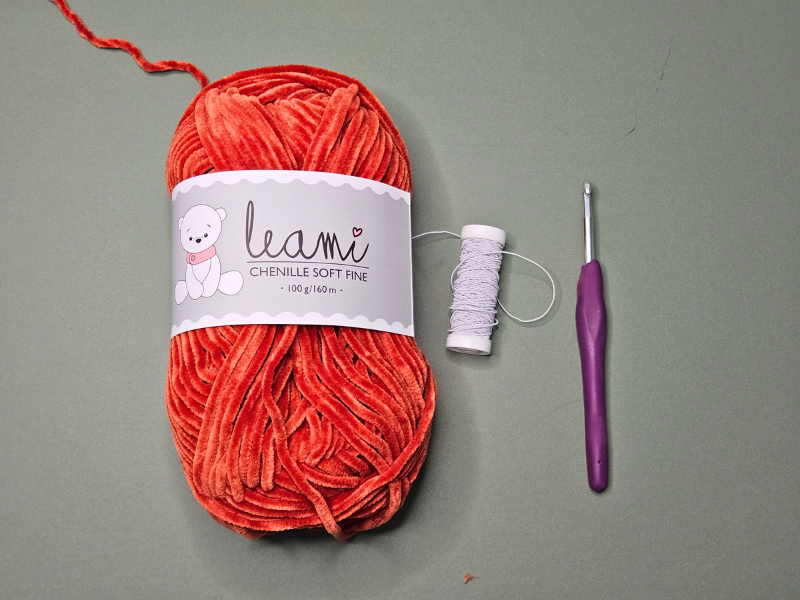
I used the following materials for my mittens:
-
Leami Chenille Soft Fine
-
5.0 mm crochet hook
-
3.0 mm crochet hook for the elastic thread
-
Thin elastic thread
-
Yarn needle
-
Scissors
-
Stitch marker
I deliberately use a 5 mm crochet hook for the mittens. This prevents the stitches from becoming too tight and keeps the mittens soft and flexible.
Abbreviations (US Crochet Terms)
-
ch = chain
-
sc = single crochet
-
sl st = slip stitch
-
st = stitch
-
dec = crochet 2 stitches together (sc2tog)
Important: We crochet the mittens in continuous spiral rounds. This means that the individual rounds are not joined with a slip stitch. It's best to mark the beginning of each round with a stitch marker.
Crocheting Children's Mittens in Different Sizes
The following pattern is designed for children aged approximately 2–3 years. If you would like to crochet the mittens for younger or older children, you can adjust the stitch and round counts accordingly.
The table shows the adjustments for three different age groups.
| 1–2 Years | 2–3 Years | 4–5 Years | |
|---|---|---|---|
| Stitches after round 1 | 8 | 8 | 8 |
| Stitches after round 2 | 16 | 16 | 16 |
| Stitches after round 3 | 22 | 24 | 26 |
| Rounds without increases before the thumb opening | 8 | 9 | 10 |
| Thumb opening (chains and skipped stitches) | 4 | 5 | 6 |
| Rounds after the thumb opening | 3 | 3 | 4 |
| Cuff rounds | 4 | 4 | 4 |
Distribute the increases in round 3 as evenly as possible for the smaller and larger mittens. Then continue crocheting according to the table.
The cuff construction remains the same for all three sizes: Three rounds are crocheted into the front loop only, and the last round is worked through both loops again.
Adjusting the Thumb Size
The number of stitches also changes for the thumb, depending on the size you choose.
| Round | 1–2 Years | 2–3 Years | 4–5 Years |
|---|---|---|---|
| 1 | 10 sc (10) | 12 sc (12) | 14 sc (14) |
| 2 | 3 sc, dec, 3 sc, dec (8) | 4 sc, dec, 4 sc, dec (10) | 5 sc, dec, 5 sc, dec (12) |
| 3 | 8 sc | 10 sc | 12 sc |
| 4 | 2 sc, dec, 2 sc, dec (6) | 3 sc, dec, 3 sc, dec (8) | 4 sc, dec, 4 sc, dec (10) |
| 5 | 6 sc | 8 sc | 10 sc |
| 6 | – | 2 sc, dec, 2 sc, dec (6) | 3 sc, dec, 3 sc, dec (8) |
| 7 | – | 6 sc | 8 sc |
| 8 | – | – | 2 sc, dec, 2 sc, dec (6) |
| 9 | – | – | 6 sc |
The thumb is crocheted according to the same pattern for all sizes: A decrease round is always followed by a normal round of single crochet stitches. The decreases are made on both sides of the thumb. The last round consists of 6 single crochet stitches for all sizes. The thumb opening is then pulled together with the yarn tail and closed.
Crocheting Children's Mittens – Step by Step
We start at the fingertips and work our way towards the wrist. Afterwards, the thumb is crocheted directly onto the opening provided for it.
Finally, we work on the elastic cuff.
The following instructions describe size 2–3 years.
1. Crocheting the Fingertips
We start with a small, rounded tip.
Round 1: Ch 2 and crochet 8 sc into the second ch from the hook. (8 sts)
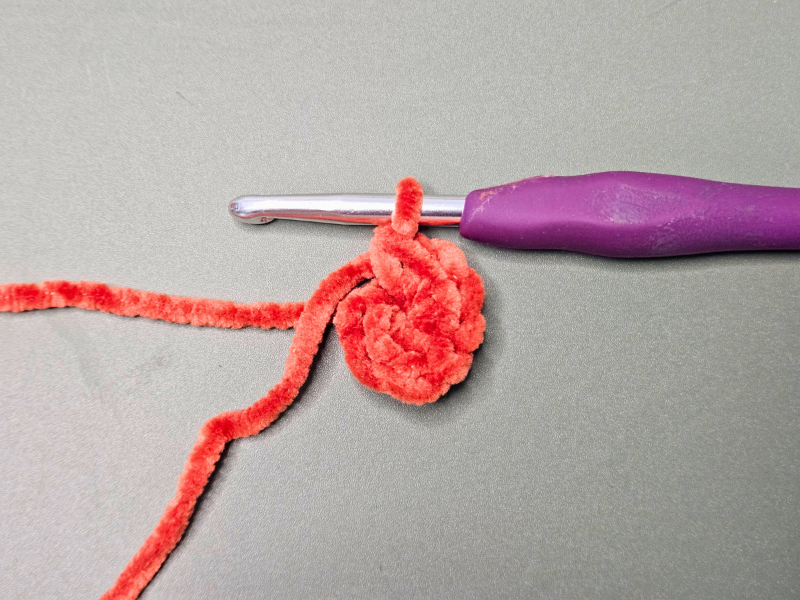
Round 2: Increase in every stitch by crocheting 2 sc into the same stitch each time. (16 sts)
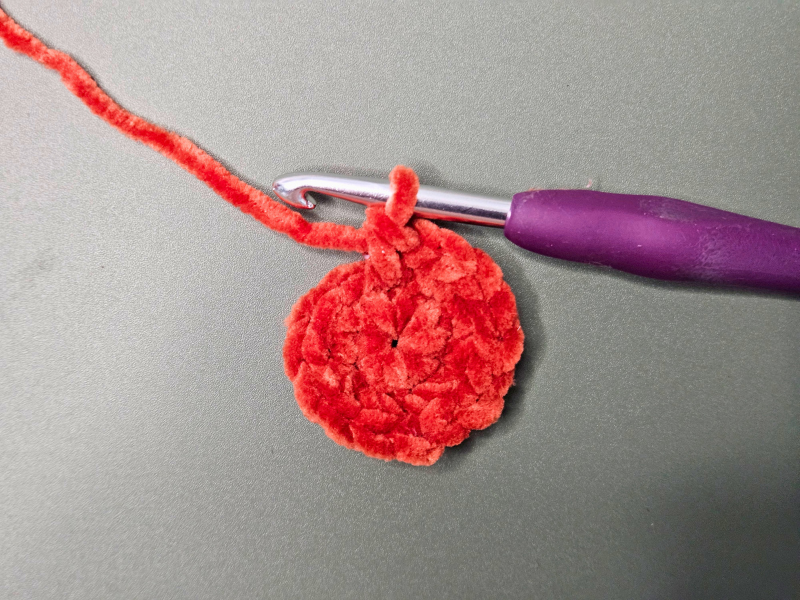
Round 3: Increase in every second stitch. (24 sts)
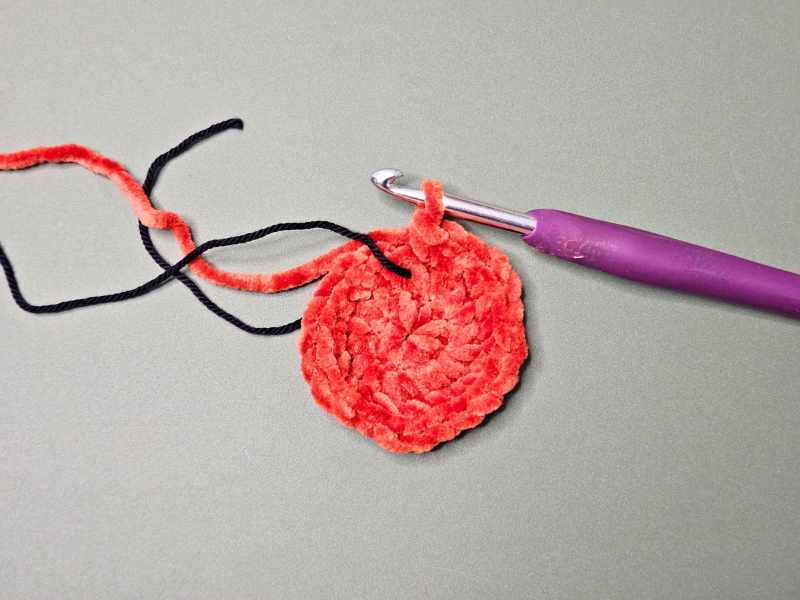
We have now reached the full circumference of our mitten.
2. Crocheting the Hand Section
Now we continue crocheting without any further increases.
Rounds 4–12: Crochet a total of 9 rounds with 24 sc each. (24 sts)
The single crochet stitches create an even and relatively dense stitch pattern. At the same time, the chenille yarn remains soft thanks to the slightly larger crochet hook.
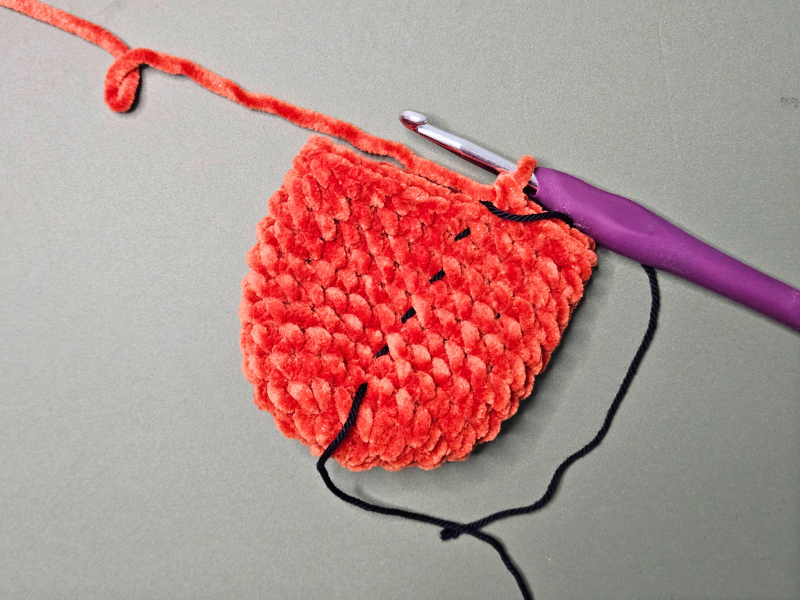
After these nine rounds, we have reached the point where the thumb will later be placed.
3. Making the Thumb Opening
Now we leave a small opening for the thumb. This works quite simply with a chain.
Round 13: Ch 5, skip 5 stitches from the previous round and crochet 19 sc. (24 sts)
The five chains form a small bridge over the skipped stitches. This creates the opening underneath, where we will later crochet the thumb.
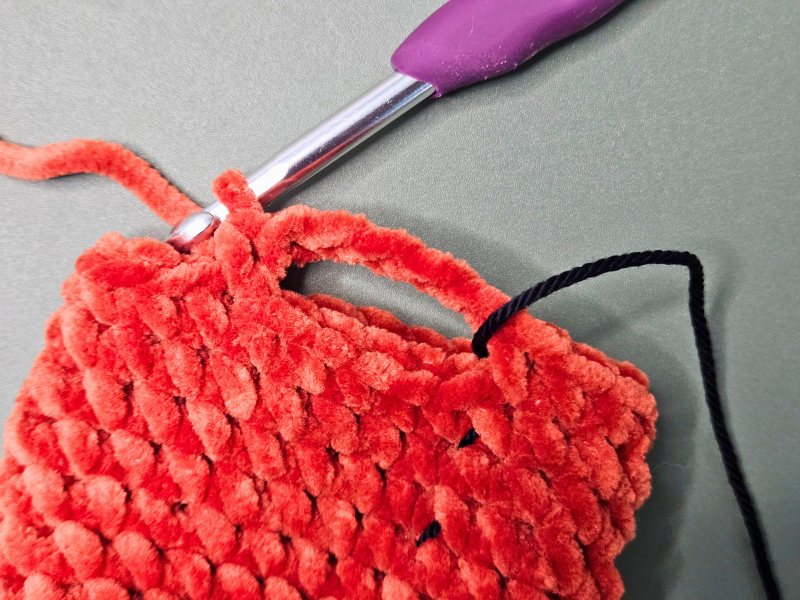
Rounds 14–16: Crochet another 3 rounds with 24 sc each. (24 sts)
In the first of these rounds, you also crochet into the five chains of the thumb bridge.
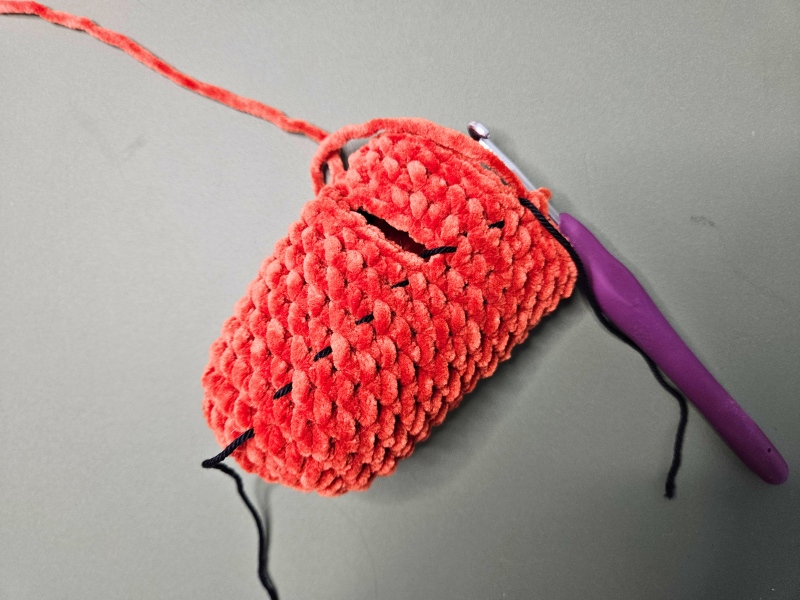
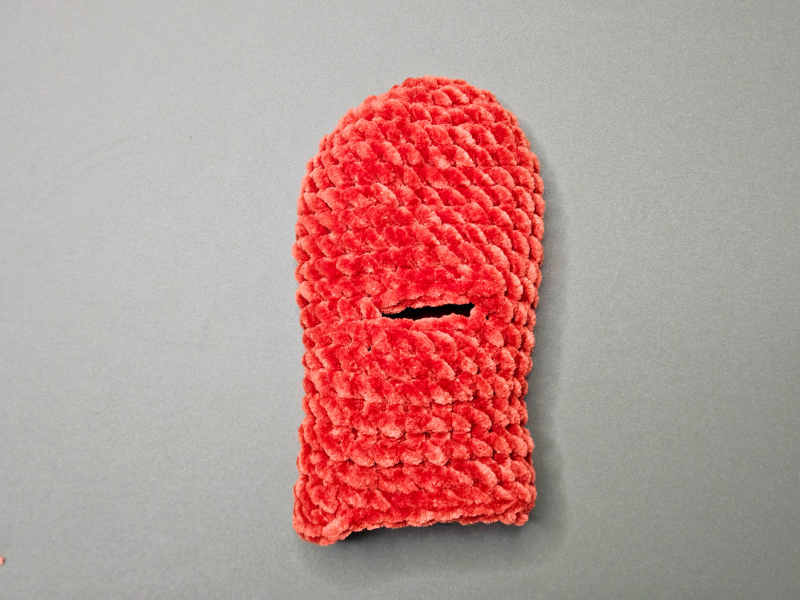
The hand section itself is now finished.
4. Preparing the Cuff
Now we come to a special feature of my mittens.
Normally, you would use post stitches or a separately crocheted ribbed cuff for an elastic cuff. For this model, however, I wanted to keep it as simple as possible.
Instead, we use the stitch loops to work elastic thread into the inside later.
Rounds 17–19: Crochet 3 rounds with 24 sc each. Work into the front loop only. (24 sts)
This leaves the back loop free in each of these rounds.
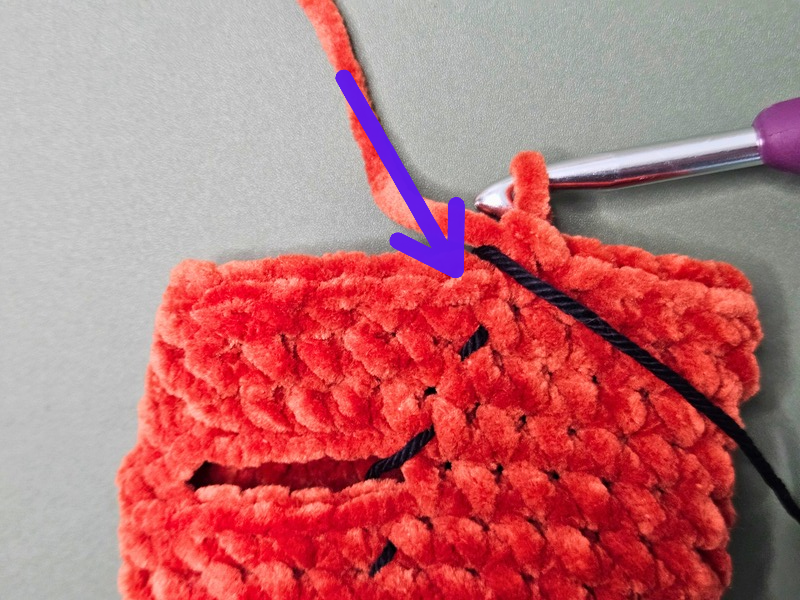
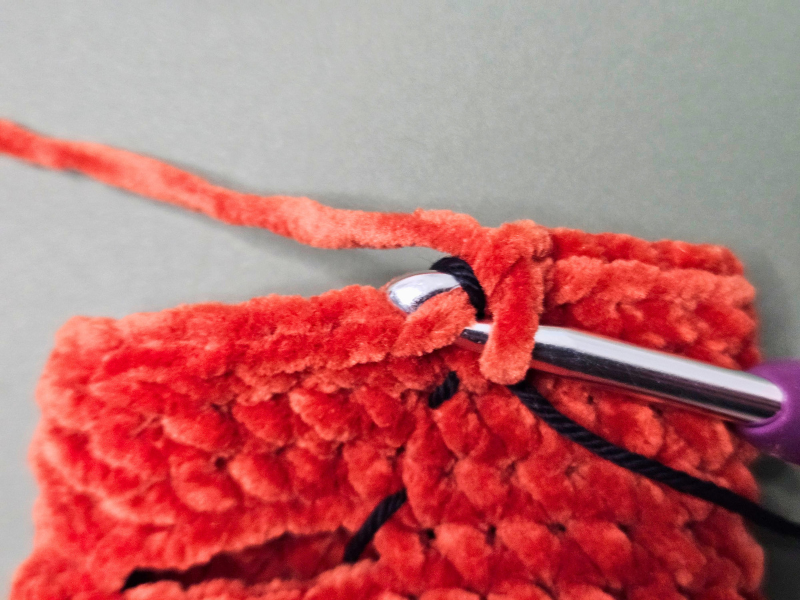
Round 20: Crochet one more round with 24 sc, this time working through both loops as usual. (24 sts)
Finish the last round with a sl st, cut the yarn and weave in the end carefully.
The cuff still looks relatively wide at first. This is intentional, because we will gather it later with the elastic thread.
Crocheting the Thumb
After the main section is finished, we work on the thumb.
To do this, join the yarn at one corner of the thumb opening and crochet 1 ch.
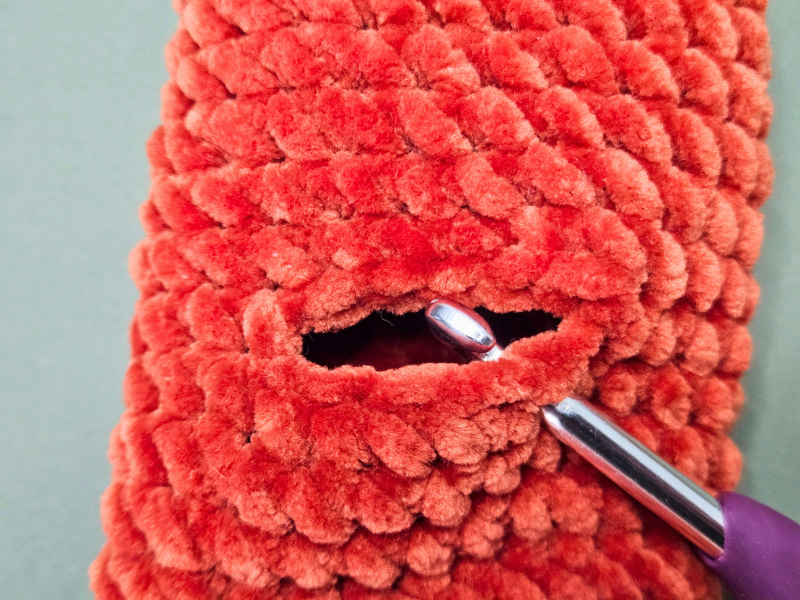
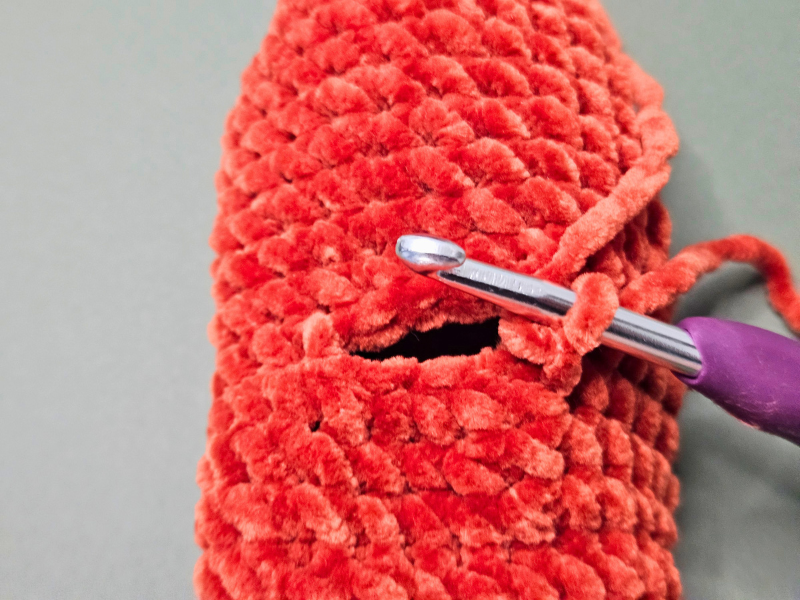
Then work around the entire opening.
Round 1: Crochet 5 sc into the chain bridge, 1 sc into each of the two side corners of the thumb opening and 5 sc into the available stitches on the opposite side. (12 sts)
Pay particular attention to the two corners of the opening. No larger holes should form here.
Round 2: 4 sc, dec, 4 sc, dec. (10 sts)
Round 3: 10 sc. (10 sts)
Round 4: 3 sc, dec, 3 sc, dec. (8 sts)
Round 5: 8 sc. (8 sts)
Round 6: 2 sc, dec, 2 sc, dec. (6 sts)
Round 7: 6 sc. (6 sts)
Finish the round with a sl st and cut the yarn, leaving enough length to weave in the end.
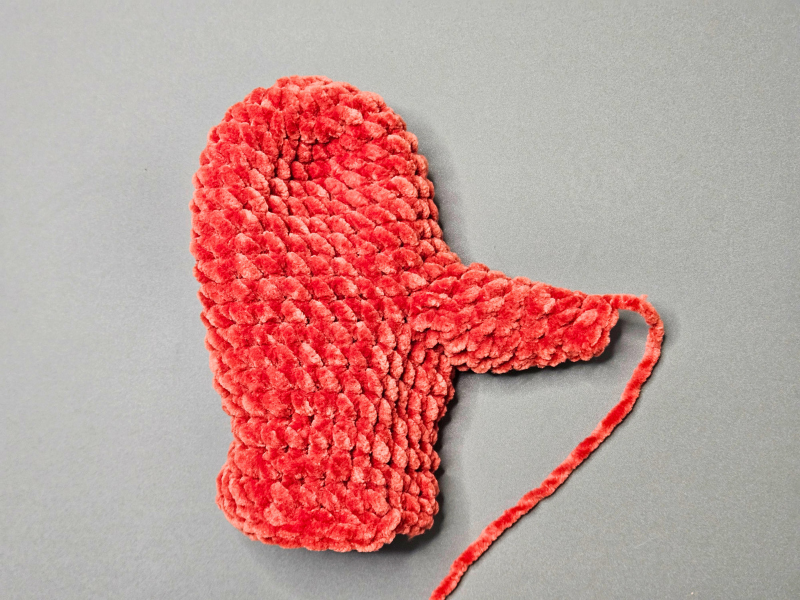
Closing the Thumb Tip
Thread the yarn tail onto a yarn needle and pass it through the front loops of the last six stitches, one after another.
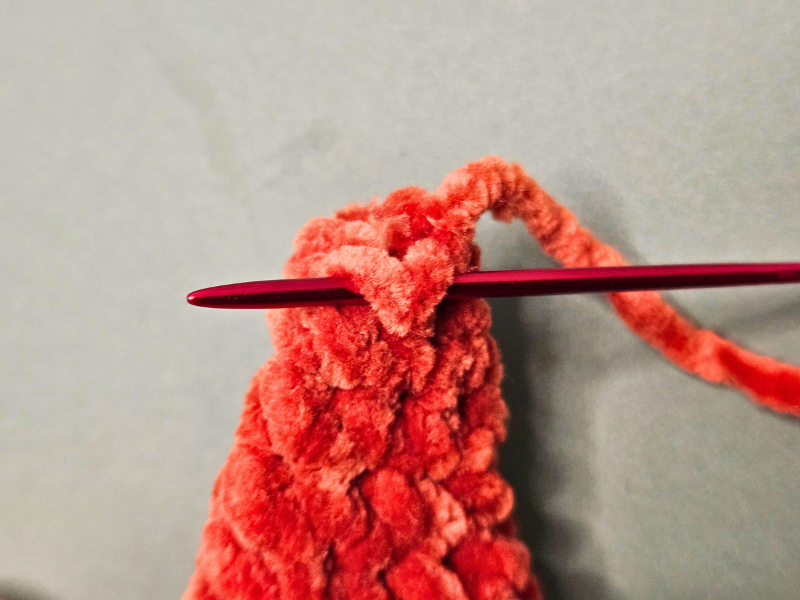
Carefully pull the yarn together until the opening is completely closed. Then weave in the end carefully on the inside of the thumb.
Now you only need to weave in the starting yarn tail that you used to crochet the thumb onto the opening. Use it at the same time to close the small hole at the base of the thumb that may have formed when you started crocheting it.
The thumb is now finished.
Finishing the Elastic Cuff
Now only the elastic cuff is left.
First, turn the mitten inside out. On the inside, you can now see the free back loops of the three prepared cuff rounds.
Take the 3 mm crochet hook and attach the elastic thread to one of the free back loops of the first cuff round.
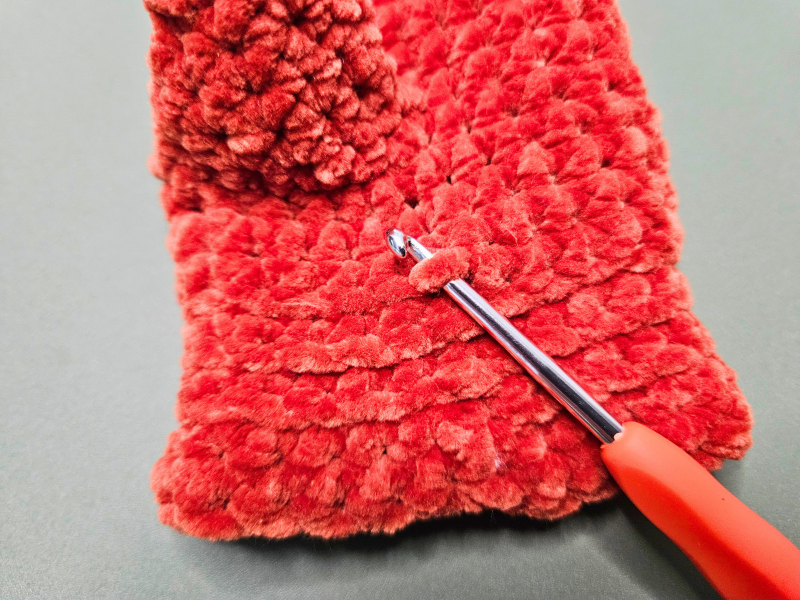
Then crochet slip stitches with the elastic thread through the free back loops all the way around the cuff. Keep the elastic thread under tension while crocheting so that the cuff gathers as you work.
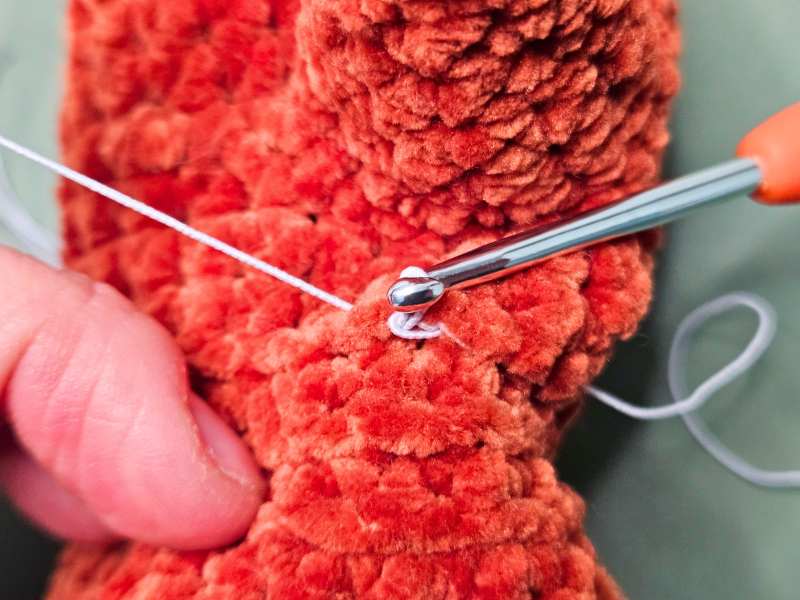
Repeat this in the second cuff round.
For my mittens, I prefer the result with elastic thread in just two rounds. However, this may also depend on the elasticity of the thread used. If the cuff is still too loose, you can also work elastic thread into the third round.
Make sure not to stretch the elastic thread too much. The cuff should gather, but it must still stretch enough for the hand to fit through comfortably.
Secure the ends of the elastic thread carefully on the inside so that no loose loops remain.
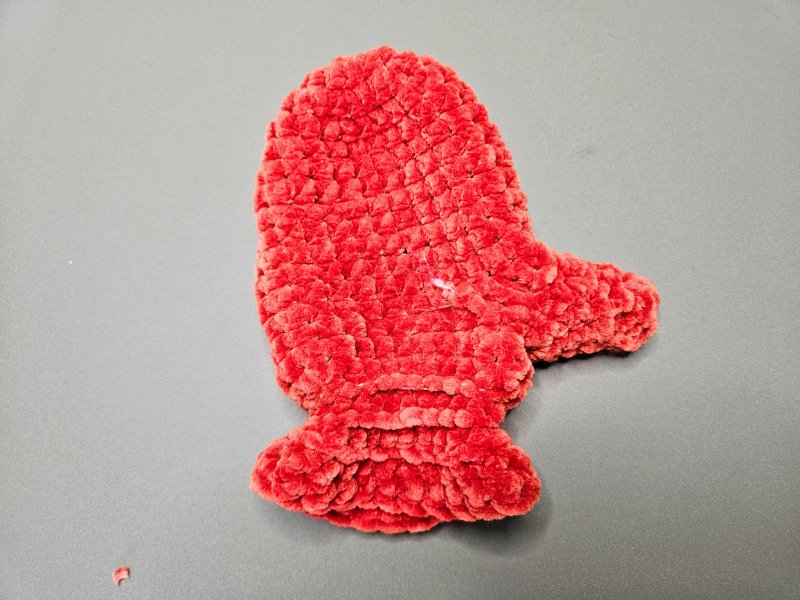
Then turn the mitten right side out again and check the fit.
Crocheting the Second Mitten
Crochet the second mitten following the same pattern.
Make sure that both mittens have the same number of rounds and that the thumb openings are positioned accordingly.
The elastic threads should also be worked in as evenly as possible so that both cuffs fit similarly.
Tips for the Finished Children's Mittens
Why I Use Single Crochet Stitches
For my first attempt, I crocheted the mittens with half double crochet stitches. This also works and is a little faster, but I wasn't really satisfied with the result.
For one thing, I didn't particularly like the surface. The half double crochet stitches created a somewhat bumpy texture that didn't feel as soft and smooth as I had imagined with the fluffy chenille yarn.
The stitch pattern was also relatively loose and had quite a few gaps. I don't think that's ideal for mittens, because they're supposed to protect little hands from cold wind. If the gaps between the stitches are too large, cold air can get through more easily.
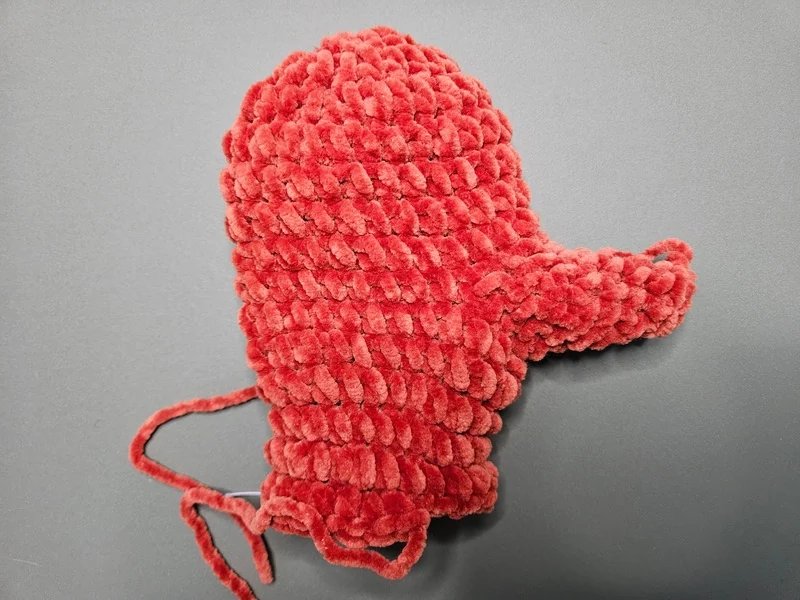
That's why I eventually decided to use single crochet stitches. They create a much denser and more even stitch pattern. The surface also feels smoother and more comfortable.
To prevent the mittens from becoming too stiff, I use a 5 mm crochet hook. This keeps the fabric soft and flexible without creating larger gaps between the stitches.
Why I Add Elastic Thread to the Cuff
For the cuff, I also initially considered whether I could simply crochet the whole thing. After all, there are different ways to create a ribbed texture using single crochet, slip stitches or post stitches.
The problem, however, is that a crocheted cuff doesn't achieve nearly the elasticity I want for children's mittens. Even if I only work slip stitches into one loop of the stitch, the cuff can stretch, but it doesn't pull back together as reliably as a truly elastic cuff.
This is particularly important to me with small children. The mittens should be as easy as possible to put on, but they should still fit well around the wrist afterwards and not constantly slip off.
That's why I decided to work in an additional elastic thread. This makes the cuff gather and return to its original shape after being stretched.
The free back loops make it easy to work the elastic thread into the inside without it being visible from the outside. This preserves the soft appearance of the chenille yarn, while the additional thread provides the necessary elasticity.
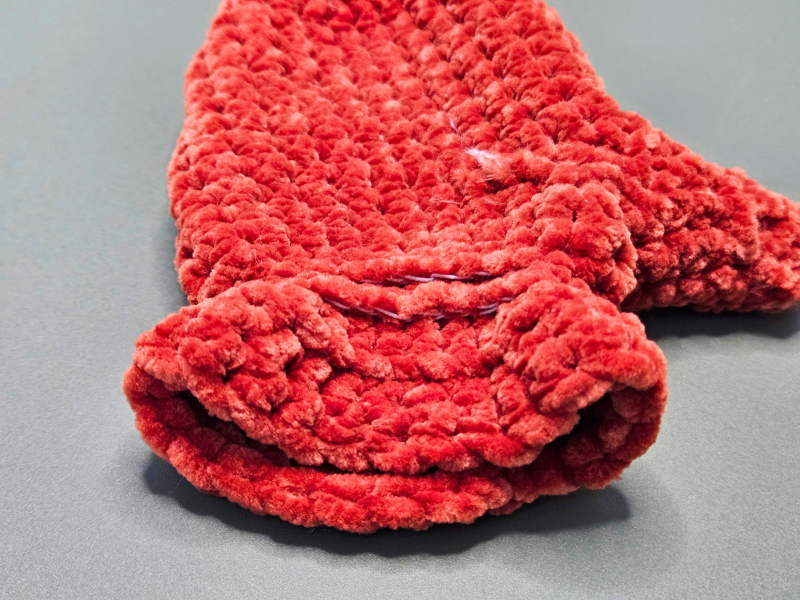
For me, this is a practical combination of soft chenille yarn and the elasticity needed for a well-fitting cuff.
Getting the Right Fit
Of course, children's hands differ in size, even within the same age group.
The pattern is intended for children aged approximately two to three years and was tested on my two-year-old daughter.
It's important that there is enough space for the fingertips, that the thumb fits comfortably into the opening provided and that the cuff can be pulled over the hand without too much resistance.
Also make sure that the elastic thread doesn't dig into the wrist. Especially with small children, comfort should always come first.
Your Crocheted Children's Mittens Are Finished!
And your first pair of children's mittens is finished!
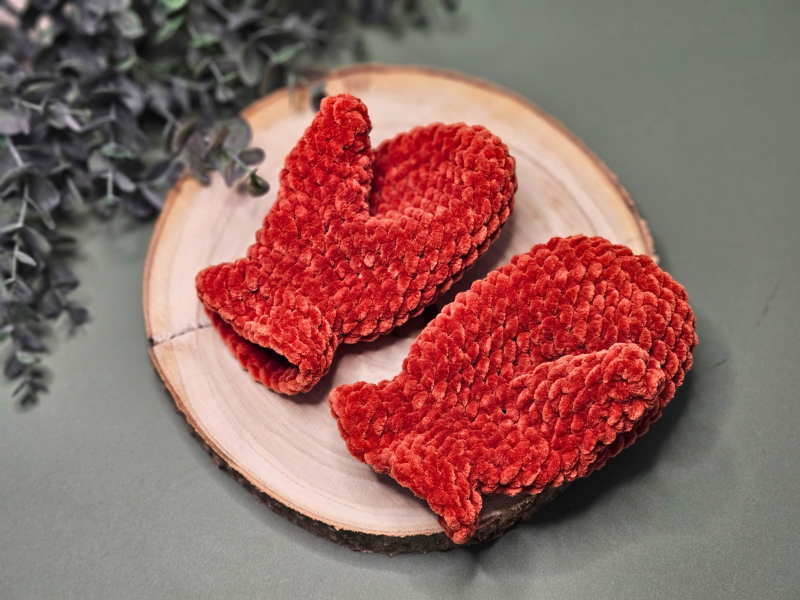
I hope you enjoyed the pattern and have fun crocheting your own mittens.
If you have any questions or would like to add something from your own experience, feel free to write to me in the comments – I'm always happy to hear from you!


