
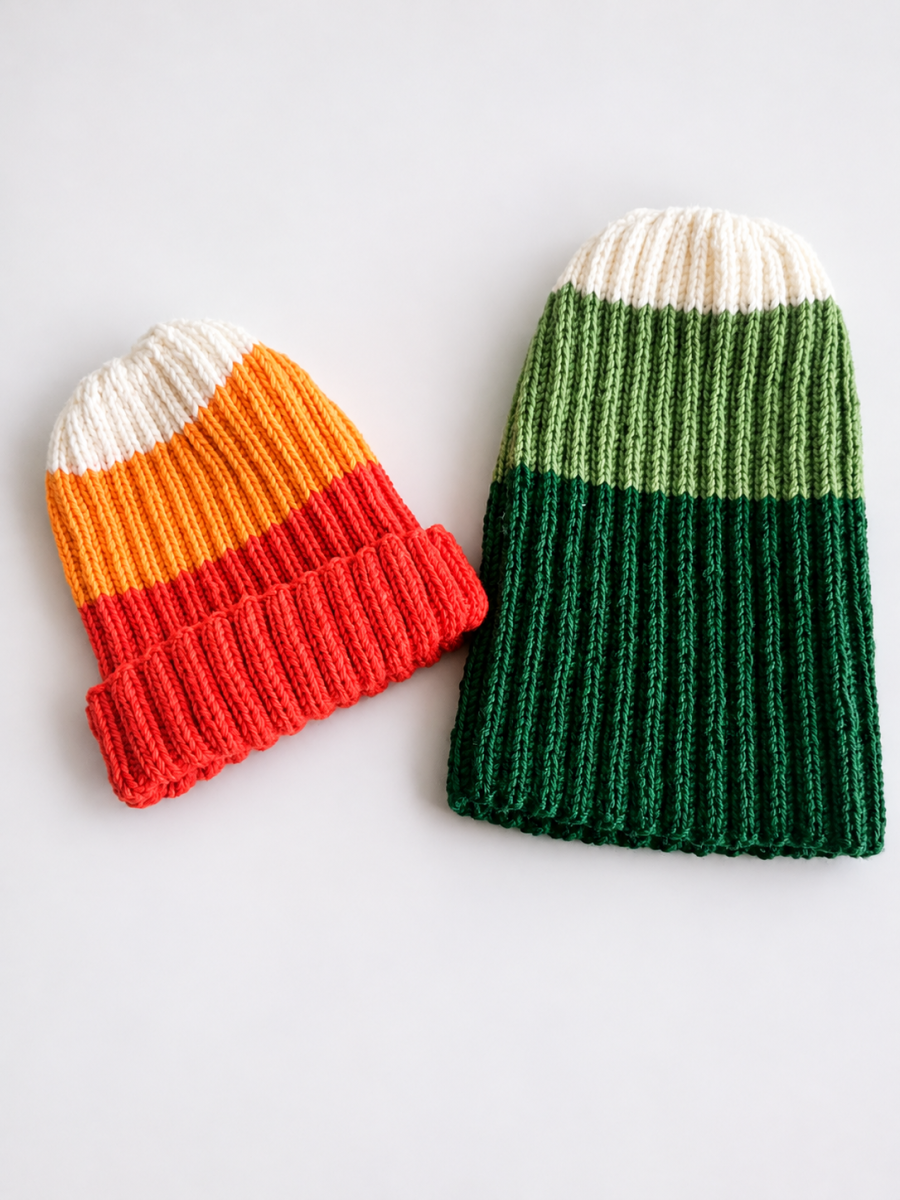
It’s that time of year again when the days get colder, the wind starts blowing around our ears, and it’s time to wrap up warm before heading outside. One of my favourite things to knit for autumn and winter is a cosy hat. They are practical, fun to make and a great way to add a little colour to those grey, chilly days. And since children seem to grow out of everything so quickly, my two boys need new hats again this year!
For children’s hats, I particularly like using merino wool because it’s warm, soft and comfortable to wear. I also prefer natural yarns in general, simply because I’m not a fan of acrylic yarn.
For this pattern, though, you can use whichever yarn you like. I’ll show you how to calculate the measurements for your hat based on your chosen yarn and tension, so you can make it fit just right.
The Stitch Pattern I Used
For this hat, I used a simple 2 × 2 rib stitch, alternating between two knit stitches and two purl stitches. The hat is knitted in the round, which means there are no seams to sew together.
I really like this stitch pattern for children’s hats because it’s stretchy and helps the hat fit snugly without being too tight. It also gives the hat a bit of flexibility as children grow, so they can wear it for longer.
I also like to fold up the brim, as it gives the hat a lovely, cosy look and adds an extra layer of warmth around the ears. Just make sure to knit the hat long enough to allow for the folded brim, so you get a good fit and plenty of warmth on those chilly autumn and winter days.
Standard Hat Measurements
(Circumference × length, all measurements in cm)
Babies and Children
Newborn: 37 × 16.5
1 month: 39 × 1
3 months: 41 × 17.5
5 months: 43 × 18
7 months: 45 × 19
9 months: 47 × 19.5
12 months: 49 × 22
2 years: 51 × 23
3–6 years: 53 × 23.5
7–8 years: 54 × 24
9–14 years: 57 × 25
Adults
XS: 53 × 23.5
S: 55 × 24.5
M: 57 × 25.5
L: 59 × 26.5
XL: 61 × 27.5
XXL: 63 × 28.
These are the measurements I’ve put together as a guide for knitting hats to suit different ages and average head sizes. You can use them as a starting point or simply measure the head circumference of the person you’re knitting for. This allows you to adjust the hat to get the best possible fit.
For my hats, I’ve also allowed for some extra length to create a folded brim. I’ve added 4 cm for all sizes from newborn to 9 months and an extra 6 cm for all larger sizes. These additional centimetres are already included in the measurements given in the table, so you don’t need to add anything extra. This allows enough fabric to fold up the brim and creates a lovely, cosy finish.
Materials and Needles
Since this pattern is quite versatile, the amount of yarn you’ll need depends on the size of the hat you want to knit and the yarn you choose.
I would recommend using circular knitting needles and the magic loop method. Personally, I find this gives a smoother finish and helps avoid the little steps or gaps that can sometimes appear when knitting with four or more double-pointed needles.
When it comes to needle size, start with the size recommended on your yarn label. I personally tend to use needles half a size smaller to create a slightly tighter fabric, which I find works well for knitted hats.
The amount of yarn needed can vary quite a bit depending on the size of the hat and the yarn you use. As a rough guide, you could need anywhere from around 25 g for a small baby hat to around 200 g for a much larger hat or a thicker yarn.
.
The Gauge Swatch (Essential for This Project 😊)
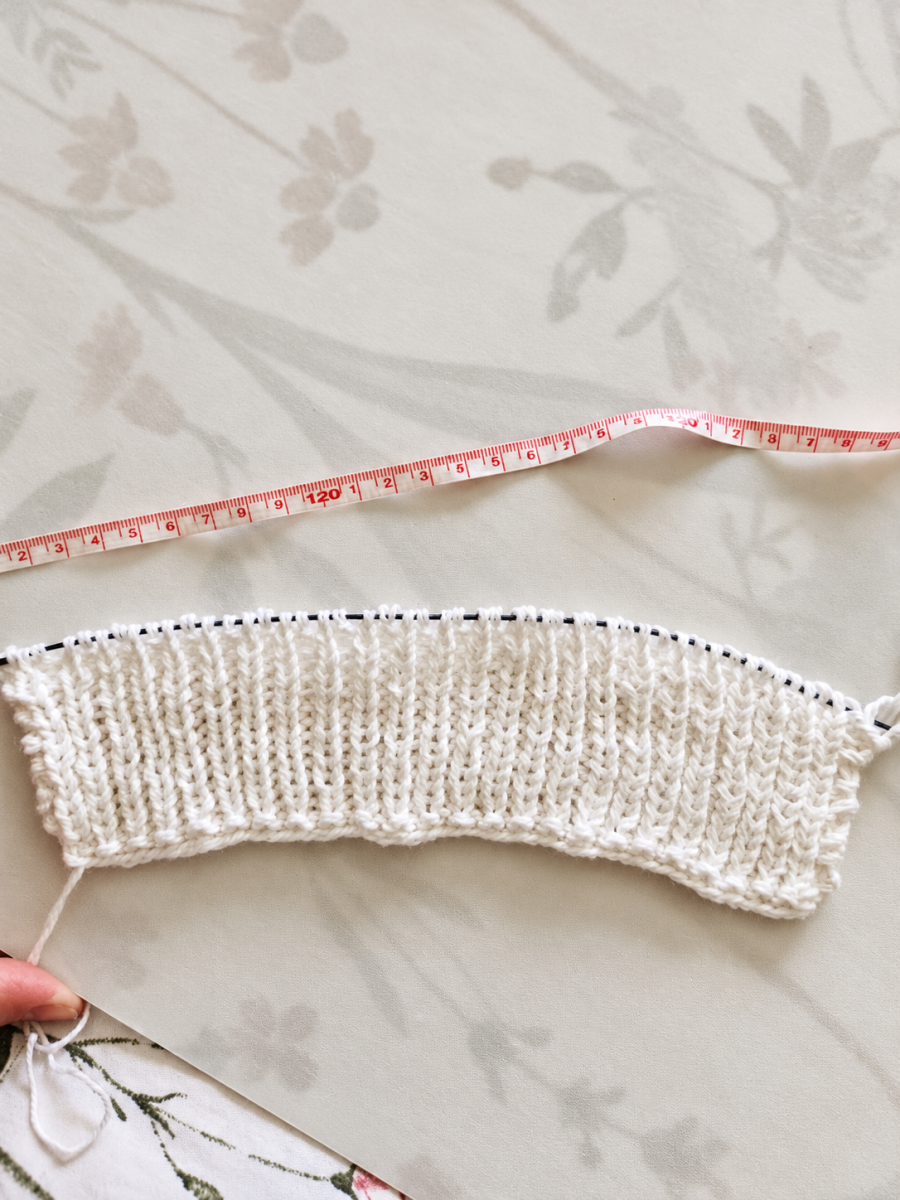
Since we are knitting this hat to our own measurements, a gauge swatch is essential.
For my hat, I am using a fine yarn held double with a 4 mm circular knitting needle. I cast on 50 stitches and knitted for about 5 cm.
I made things a little easier for myself and didn't bother knitting a full-sized gauge swatch. For this hat, the stitch gauge is what matters most, as we need to know how many stitches you get over 10 cm to work out how many stitches to cast on.
Since we are knitting the hat to specific measurements in centimetres rather than following a set number of rows, the row gauge isn't quite as important. So I only knitted my swatch to about 7 cm high, making sure it was wide enough to comfortably count the stitches over 10 cm, while still giving me enough rows to work out my row gauge over 10 cm.
When measuring your swatch, gently stretch it width ways so that it reflects how the fabric will sit when worn. However, don't pull it too tightly, as this could affect your measurements and result in a hat that is too small.
My gauge worked out at 21 stitches and 28 rows.
Calculate the Number of Stitches to Cast On
I knitted two hats, one for an 8-year-old and one for a 3-year-old. Based on my size chart, I chose a head circumference of 55.5 cm for the older child (Hat A), which is slightly larger than the recommended measurement for ages 7 to 8. For my younger child, I used a head circumference of 53 cm (Hat B).
My gauge worked out at 20 stitches per 10 cm, which means I need approximately 2 stitches per centimetre.
So, for Hat A, I need: 55.5 × 2 = 111 stitches
And for Hat B :53 × 2 = 106 stitches
As mentioned earlier, it is important to stretch the gauge swatch slightly when measuring it, just as you would when wearing the hat. Otherwise, you may need to reduce the head circumference by around 10% to 15% before calculating the number of stitches to cast on.
Since we are working in a 2 × 2 rib pattern, the total number of stitches needs to be divisible by 4. I therefore rounded both numbers down to the nearest multiple of 4.
My final stitch counts are:
Hat A: 108 stitches
Hat B: 104 stitches
Before we get started, though, we have to work out how much height to allow for the decrease section. This will tell us how far up we have to knit before starting the decreases.
Calculating the Decreases:
For the decreases, I chose a simple method that takes 8 rounds to complete. Before we start knitting, we need to work out how much height these 8 rounds will add to the hat. This helps us figure out how far up we need to knit before starting the decreases.
Based on my row gauge of 28 rows over 10 cm, the calculation is as follows:
28 rows = 10 cm
1 row = 0.357 cm
8 rows = 2.85 cm
This means I have to start the decreases about 2.85 cm before reaching the desired finished height.
For Hat A, I wanted the finished hat to measure 25 cm, so I started the decreases at around 22 cm.
For Hat B, I was aiming for a finished height of approximately 23.5 cm, so I started the decreases at around 20.5 cm.
And that's it! We now have all the measurements we need to get started on our two hats.
Hat A: For my 8-year-old son
Cast-on: 108 stitches
Finished height: approx. 25 cm
Start decreases at: approx. 22 cm
Hat B: For my 3-year-old son
Cast-on: 104 stitches
Finished height: approx. 23.5 cm
Start decreases at: approx. 20.5 cm
Let's get going with the hat:
Once I had cast on the required number of stitches, I joined them to work in the round.
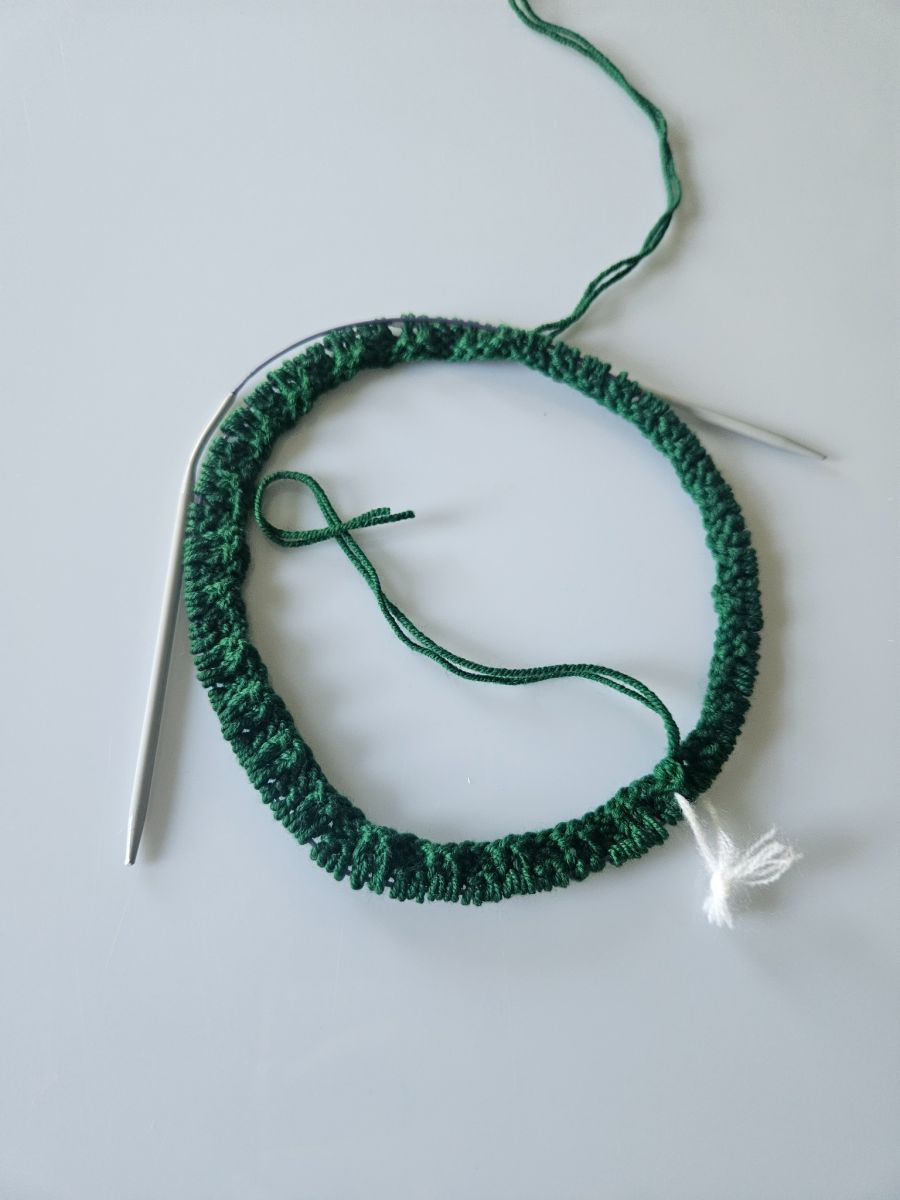
I always prefer knitting my hats in the round, as I find it much easier and more practical. Of course, you can also knit the hat flat and sew it together at the end, but I personally find working in the round a lot less fiddly.
For my hats, I used three different colours. I didn't follow any particular pattern when deciding how wide each colour section should be. I simply changed colours whenever I felt it looked right. So feel free to play around with the colours and choose whatever combinations and stripe widths you like.
I simply keep knitting in the explained stitch pattern until I reach the calculated height. When measuring, make sure to stretch the hat slightly, just as it would stretch when worn. Otherwise, you might find that the finished hat ends up being too short.
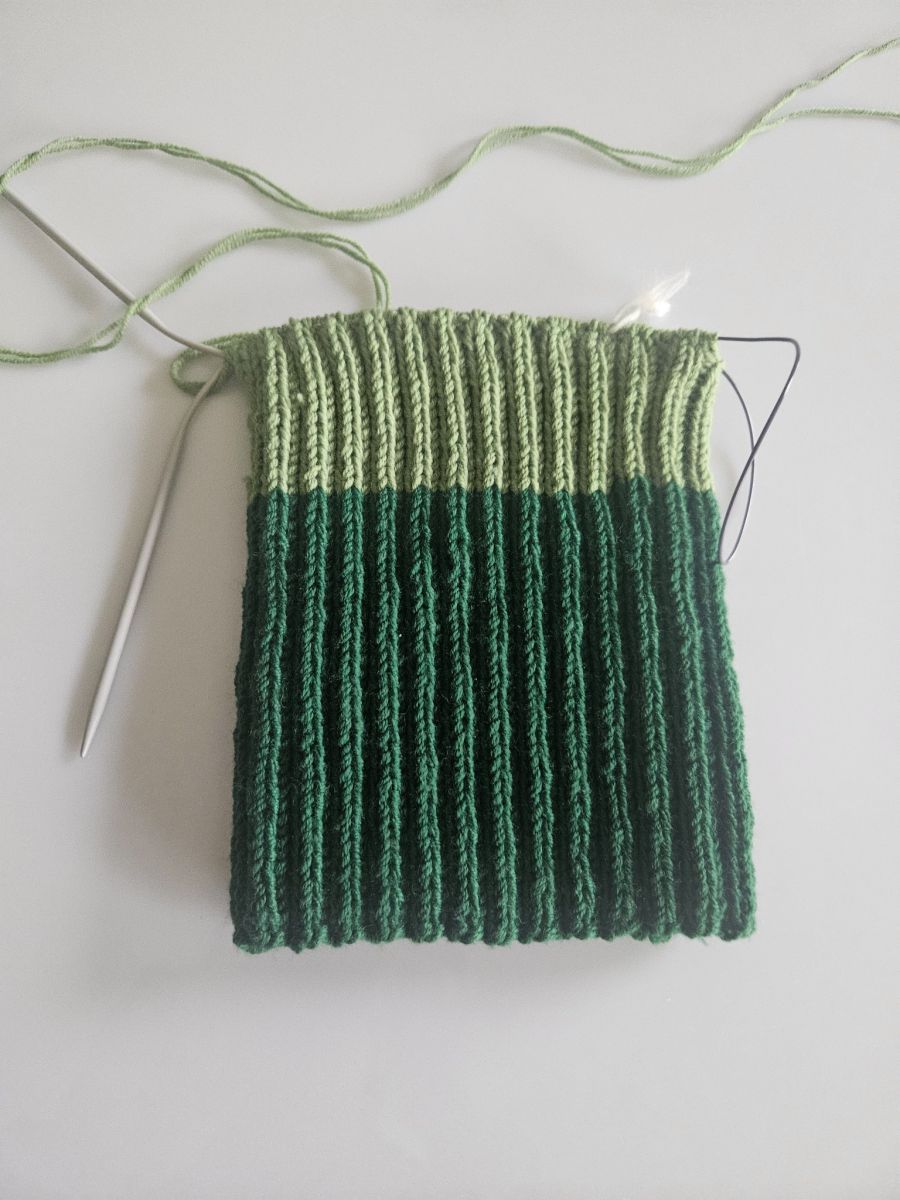
Work the decreases:
Round 1:
Knit 2 stitches, then purl the next 2 stitches together. Repeat this pattern to the end of the round.
Round 2:
Knit 2 stitches, purl 1 stitch. Repeat to the end of the round.
Round 3:
Knit 2 stitches together, then purl 1 stitch. Repeat to the end of the round.
Round 4:
Knit 1 stitch, purl 1 stitch. Repeat to the end of the round.
Round 5:
Knit 2 stitches together, then knit 1 stitch. Repeat to the end of the round.
Round 6:
Knit all stitches.
Round 7:
Knit 2 stitches together, then knit 1 stitch. Repeat to the end of the round.
Round 8:
Knit 2 stitches together, then knit 1 stitch. Repeat to the end of the round.
If you need to decrease further, simply repeat Round 8 until you have the number of stitches you want. Just bear in mind that each additional round will make the hat slightly longer. Since the brim is folded up, though, this shouldn't make much difference.
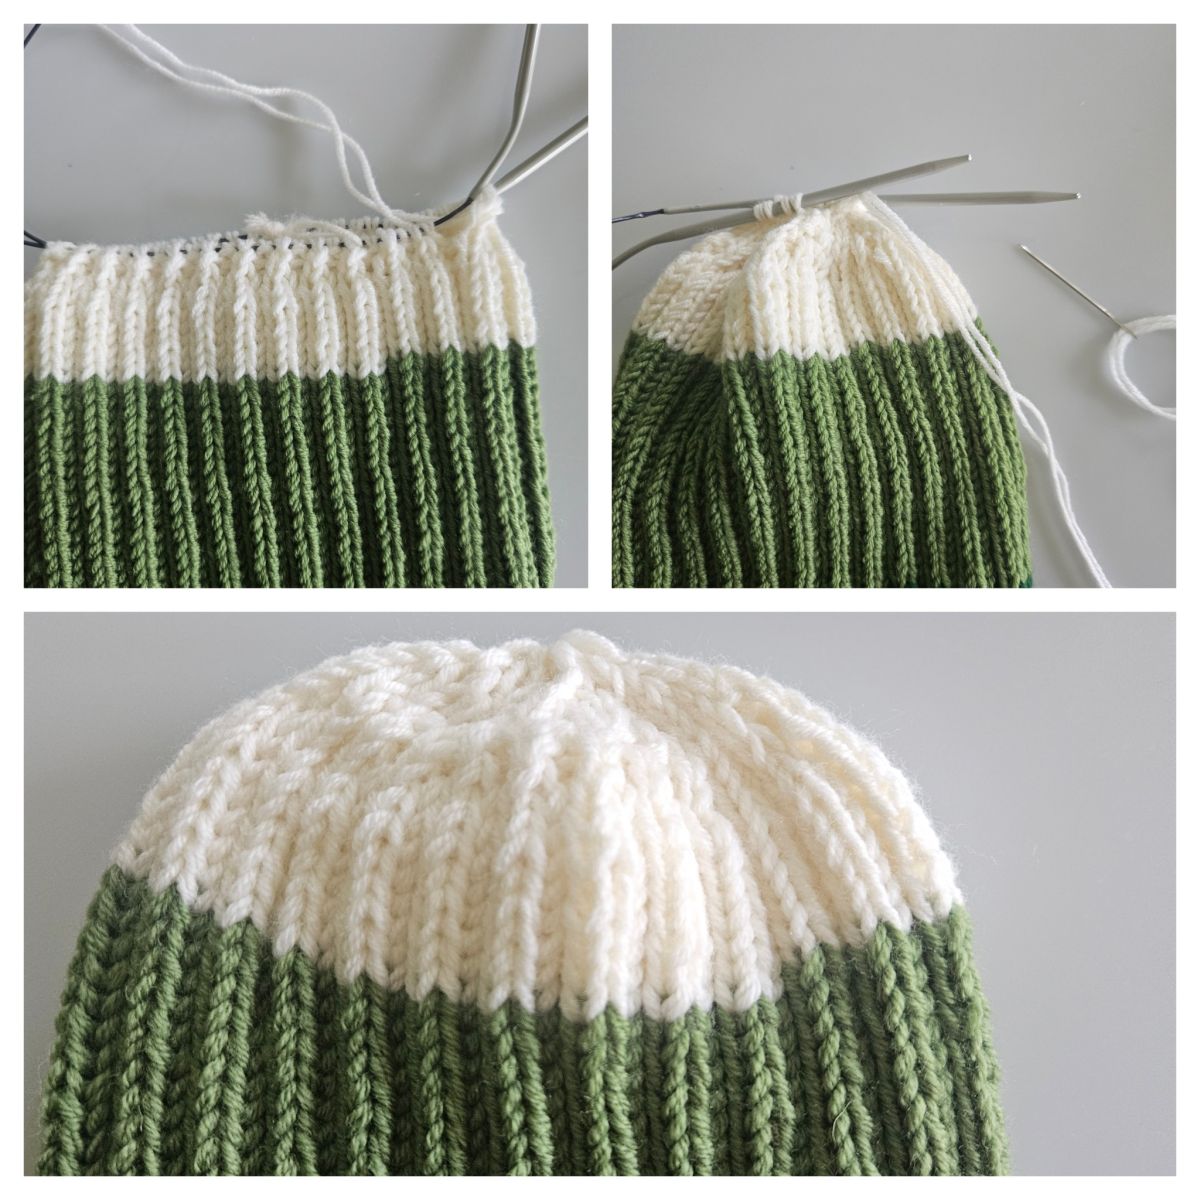
To finish, cut the yarn, leaving a long enough tail to close the top. Thread it onto a yarn needle and pass it through all the remaining stitches. Pull the yarn tight to close the opening, then weave in all the loose ends.
I hope you enjoyed my pattern, If you knit this pattern, I would appreciate a comment how you got along and if you upload a photo of your make on Instagram, please don’t forget to tag and follow me @_lovelyyarns
Categories
Quick to Target
Community & Help


