
.jpg)
Looking for a quick, adorable, and beginner-friendly project for summer? This free pattern guides you step-by-step through creating a princess and her adorable frog companion. They are perfect for imaginative playtime, nursery decor, or a special handmade gift. Also, you can use it as a keychain or bag charms and backpack decorations. Whether you are a beginner looking for a quick project or a seasoned pro needing fun, this crochet duo is just what you need. This pattern uses very basic crochet stitches, such as single crochet stitches and double crochet stitches, and some crochet techniques, like increase and decrease. The pattern is very detailed. It comes with easy-to-follow written instructions and photo tutorial. Scroll down to see the step-by-step written instructions and supplies you’ll need. The best part? The pattern is completely free and excellent for using up leftover yarn from your stash. Grab your hooks, pick your favorite colors, and let’s stitch our very own happily ever after!
SUPPLIES YOU NEED
cotton yarn (Schachenmayr Catania 125m/ 50g) in the following colors: yellow and green for the frog, lavender, yellow and white for the princess, a bit of red, brown, pink, white and black, crochet hook 2,5 mm or the size required by your yarn, polyester fiberfill stuffing, chopstick or something similar to help with stuffing small parts, stitch marker, scissors, yarn needle, safety eyes or two little black beads 3-5 mm.
Feel free to experiment with different yarns. Using different materials and hook size to what is recommended may alter the final appearance of your amigurumi.
SKILL LEVEL
I would classify this free crochet pattern as an advanced beginner. It is necessary to have some experience with amigurumi before creating this project.
FINISHED SIZE
The ready amigurumi is approx. 18 cm and 7 cm, from bottom to top, can be made bigger or smaller depending on the yarn and hook you use.
SKILLS YOU NEED
chain, single crochet, double crochet, half double crochet, slip stitch, increase, decrease, front post double crochet
ABBREVIATIONS
Ch =chain
St = stitch
Sc = single crochet
Sl st = slip stitch
dec = decrease stitch (two single crochets together)
inc = increase stitch (two single crochets in the one stitch)
Dc = double crochet
Hdc = half double crochet
Tc = treble crochet
Rnd = Round
* = repeat the instructions for the times indicated
(...) = at the end of every round total amount of stitches is indicated
TIPS
- Do not join rounds, work in a continuous spiral
- Place a stitch marker or a piece of yarn at the beginning stitch of the round and move it up at the start of each additional round
- This pattern doesn´t include any specific stitch tutorials
- All stitches are worked into both loops, unless stated otherwise in the pattern
- The number of stitches for completion is noted in parentheses at the end of each round
- When filling with polyester stuffing, pull apart each large chunk into many smaller chunks. This ensures an even distribution of firmness within the amigurumi
- Amigurumi can be made in any desired colors
- The pattern is written in English using US crochet terminology
- Work the pattern in the order as shown below, because it is joined together as it is made.
Seamless way of changing color when working in the round
Pick up the new color at the end of the round: inset your hook into the stitch, yarn over the new color and pull through the stitch and the loop on your hook to complete the stitch.
To make a magic ring
- Loop the thread twice around your middle finger
- Put the hook under both loops, pull the yarn under the loops and hook the thread again
- Pull the thread through the new loop. The first crochet stitch is ready!
- Repeat the number of times needed.
- Pull the inner threads to tighten the ring.
INSTRUCTIONS
The amigurumi consists of several parts which you crochet separately and then sew them together.
ARM (2x)
Crochet with white colored yarn.
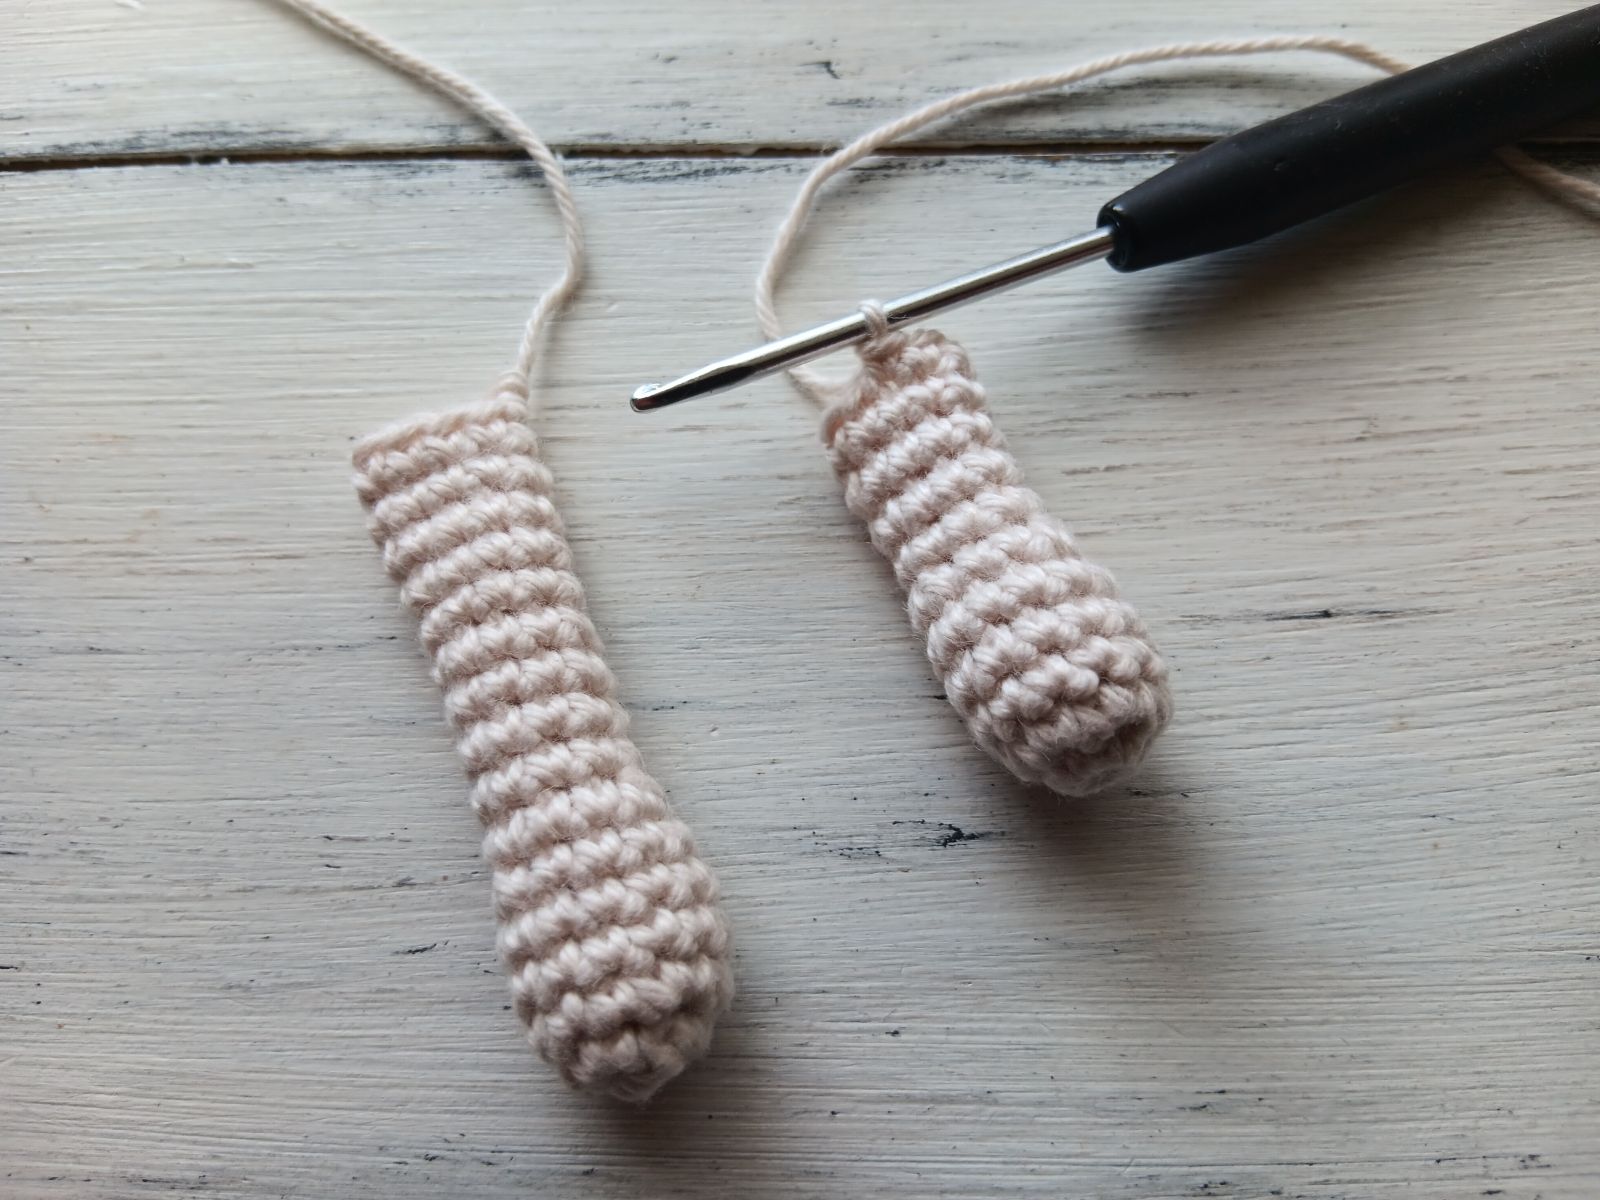
Round 1: 6 single crochets into Magic Ring.
Round 2: increase 6 times (12 stitches)
Rounds 3-5: single crochet in each of next 12 stitches
Round 6: *decrease, single crochet in each of next 2 stitches* (9 stitches)
Stuff slightly.
Rounds 7-16: single crochet in each of next 9 stitches
Bind off. Work the second arm the same way.
BOOTIE (2x)
Use brown colored yarn.
Round 1: 6 single crochets into Magic Ring.
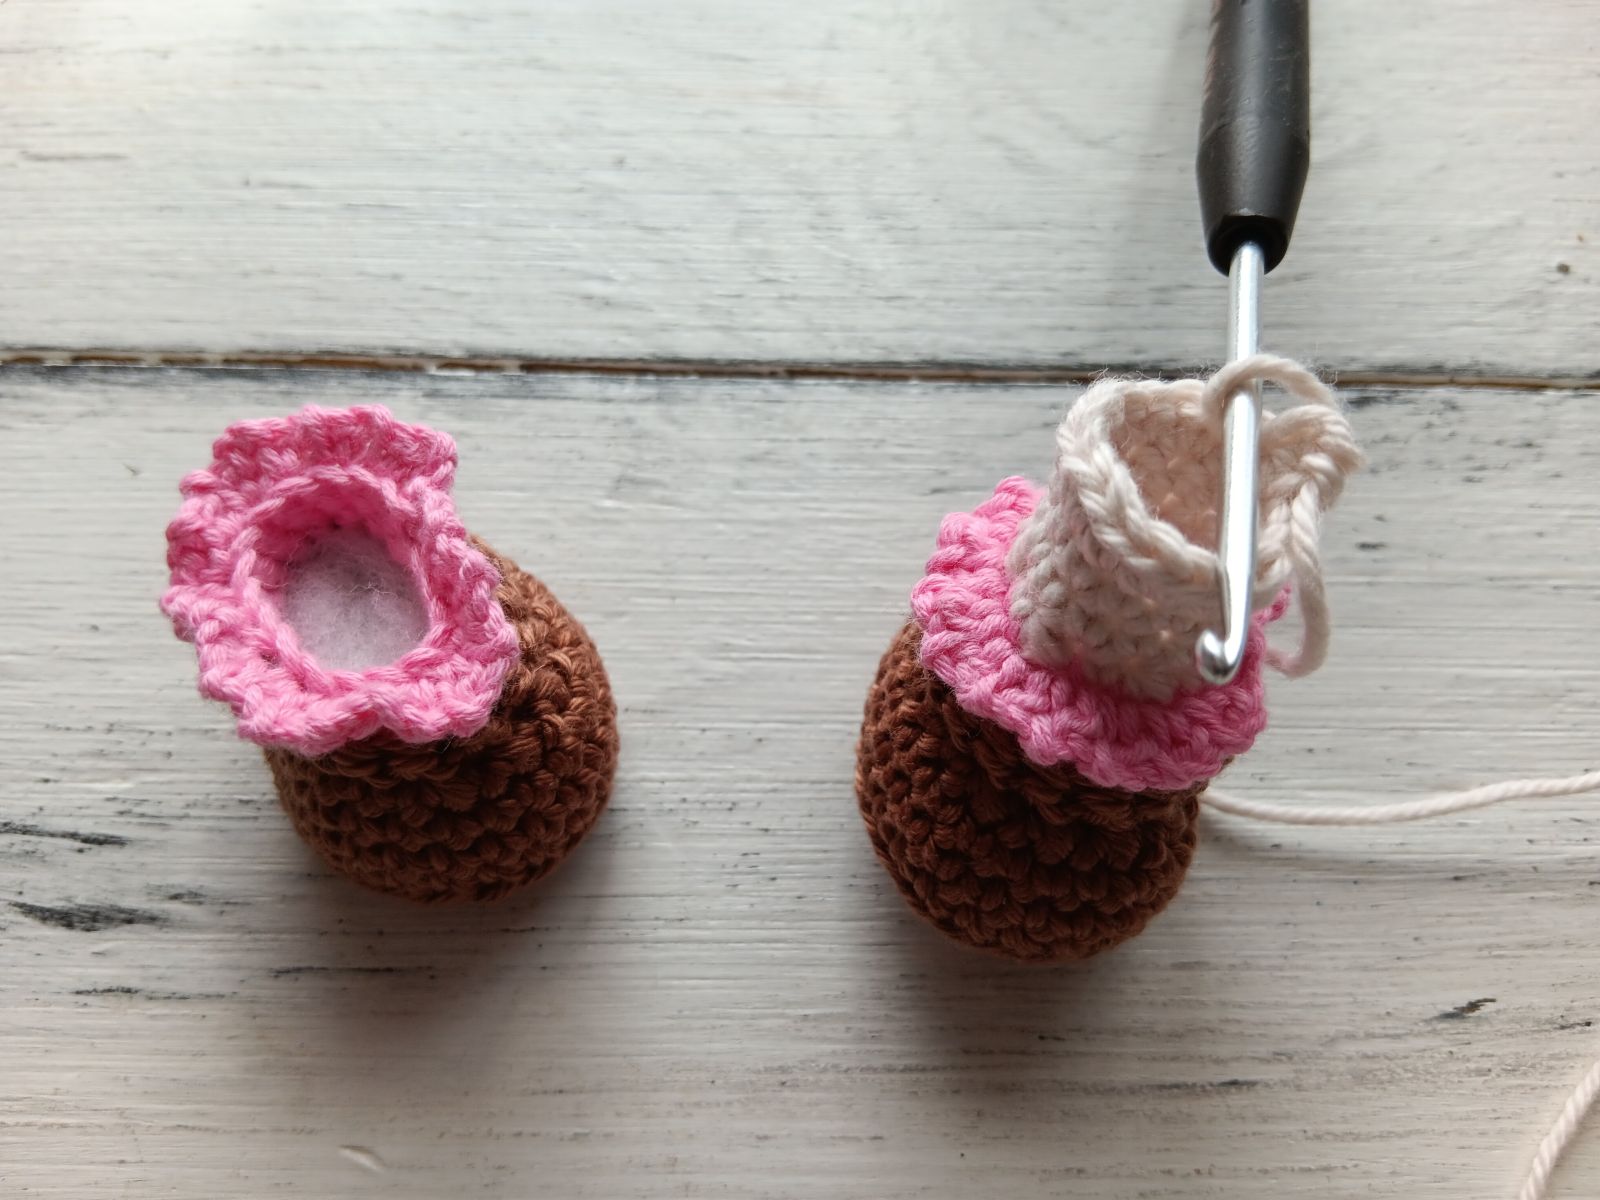
Round 2: increase 6 times (12 stitches)
Round 3: *single crochet in next stitch, increase* (18 stitches)
Round 4: (*single crochet in next stitch, increase* repeat from* to* three times, single crochet in each of next 3 stitches) repeat twice (24 stitches)
Continue crocheting in rounds.
Round 5 (working into the back loop): single crochet in each of next 24 stitches
Round 6-7: single crochet in each of next 24 stitches
Round 8: *decrease* five times, single crochet in each of next 6 stitches, decrease, single crochet in each of next 6 stitches (18 stitches)
Change the yarn color to rose
Round 9 (working into the back loop): single crochet in each of next 18 stitches
Round 10-11: single crochet in each of next 18 stitches
Round 12 (working into the front loop with rose color yarn): * single crochet in the next st, chain 2 stitches*, repeat from* till the end of the round.
Change the yarn to skin color
Continue crocheting in rounds.
Round 13 (working into the back loop): *decrease, single crochet in the next stitch* (12 stitches)
Rounds 14-15: single crochet in each of next 12 stitches
Working into the front loop with brown color yarn: single crochet in each of next stitch till the end of the round.
Bind off. Work on round in single crochet´s around the sole of the bootie if desired.
LEG (2x)
Continue crocheting with skin colored yarn
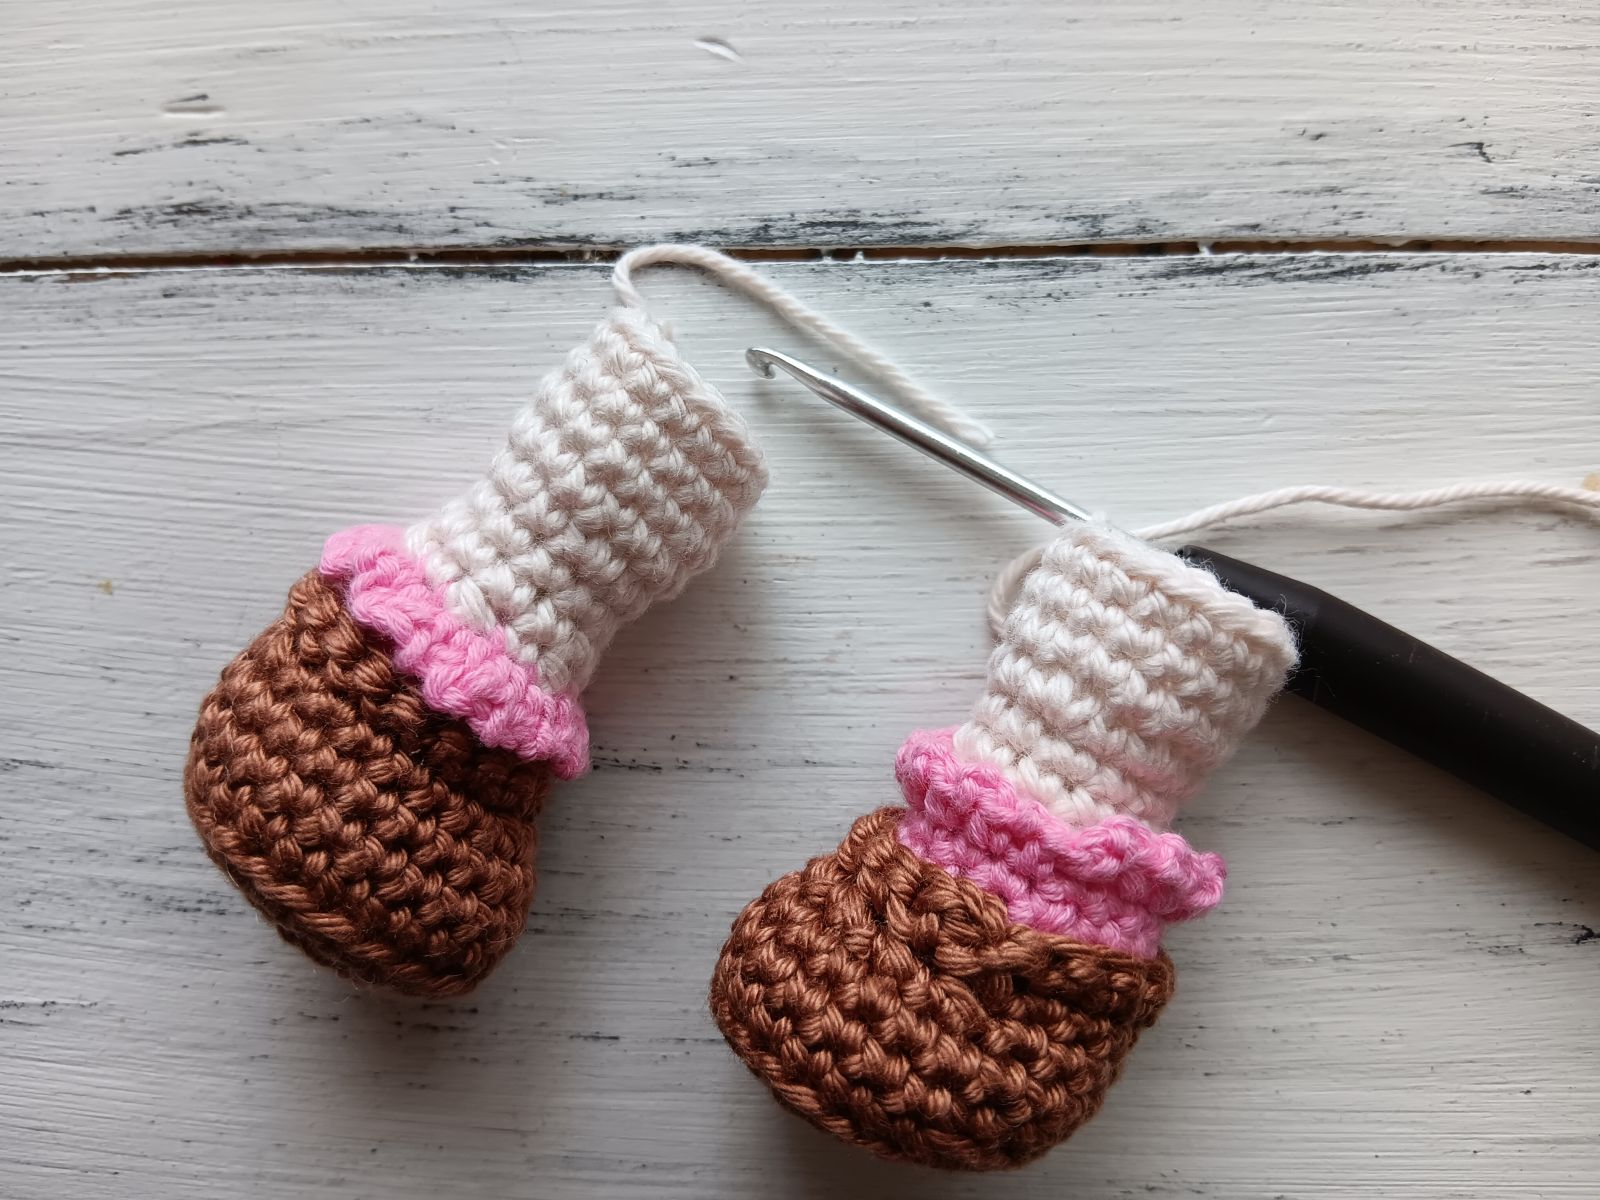
Round 1: *single crochet in next st, increase* (18 stitches)
Rounds 2-5: single crochet in each of next 18 stitches
Stuff firmly. Bind off the first leg. Work the second leg the same way but don´t bind off!
BODY and HEAD
Work a shift stitch every 3-4 round.
SHIFT STITCH
Sometimes during the work of the spiral amigurumi, you need to keep the work symmetrically. As work tends to twist to the right you need to adjust the position of the marker periodically (beginning of the round).
Shift stitch is an extra stitch you work at the end of a round to make your work look symmetrical. If you notice that the marker moves right, you need to work one extra stitch at the end of the round and move marker for one stitch (now 2nd stitch of the round becomes first). This is the shift stitch.
The shift stitch is not included in the round description. To check if it’s time to work shift stitch fold your work in half and check if marker still goes straight or use a yarn that marks a straight line.
You may think this is an increase, but it isn’t. This way you don’t increase or decrease the number of stitches. The stitches count remains the same.
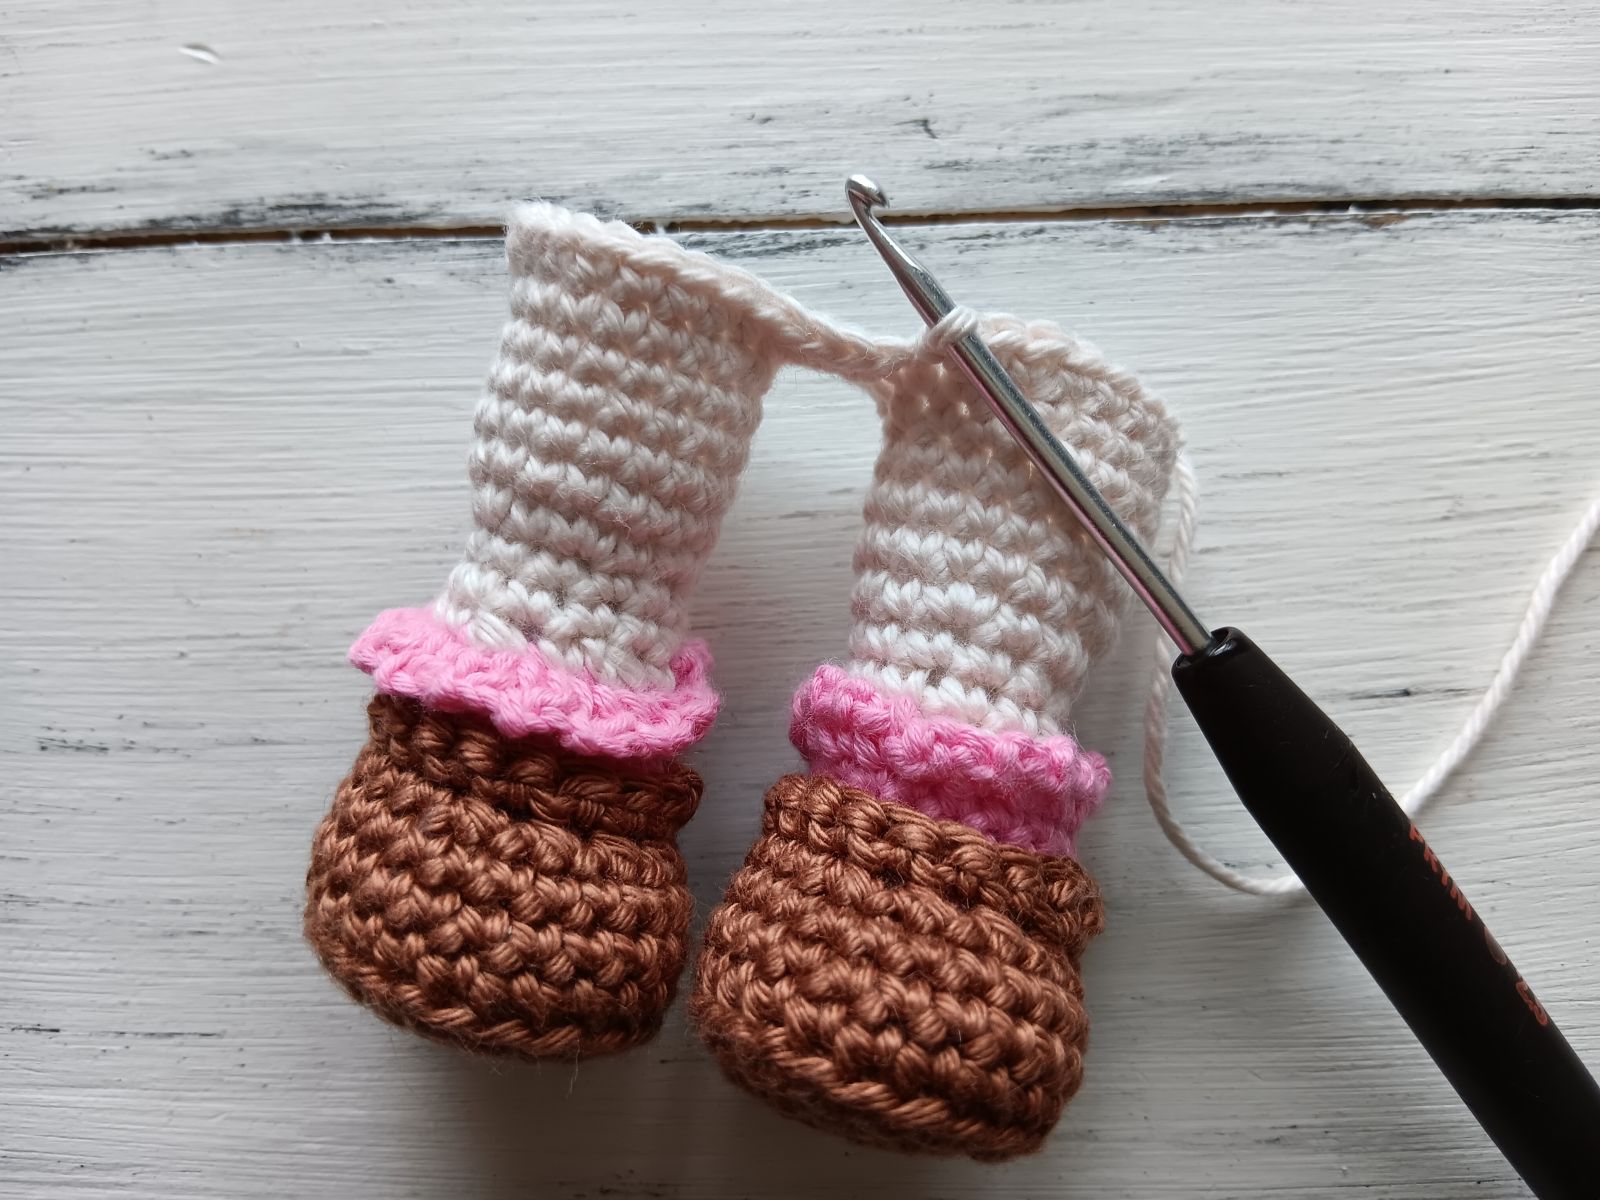
Round 1: chain 3 stitches, work one round over both legs (18 stitches of the first leg, single crochet in each of next 3 stitches, 18 stitches of the second leg)
Round 2: single crochet in each of next 11 stitches, increase, single crochet in each of next 20 stitches, increase, single crochet in each of next 9 stitches (44 stitches)
Round 3: single crochet in each of next 12 stitches, increase, single crochet in the next st, increase, single crochet in each of next 19 stitches, increase, single crochet in the next st, increase, single crochet in each of next 7 stitches (48 stitches)
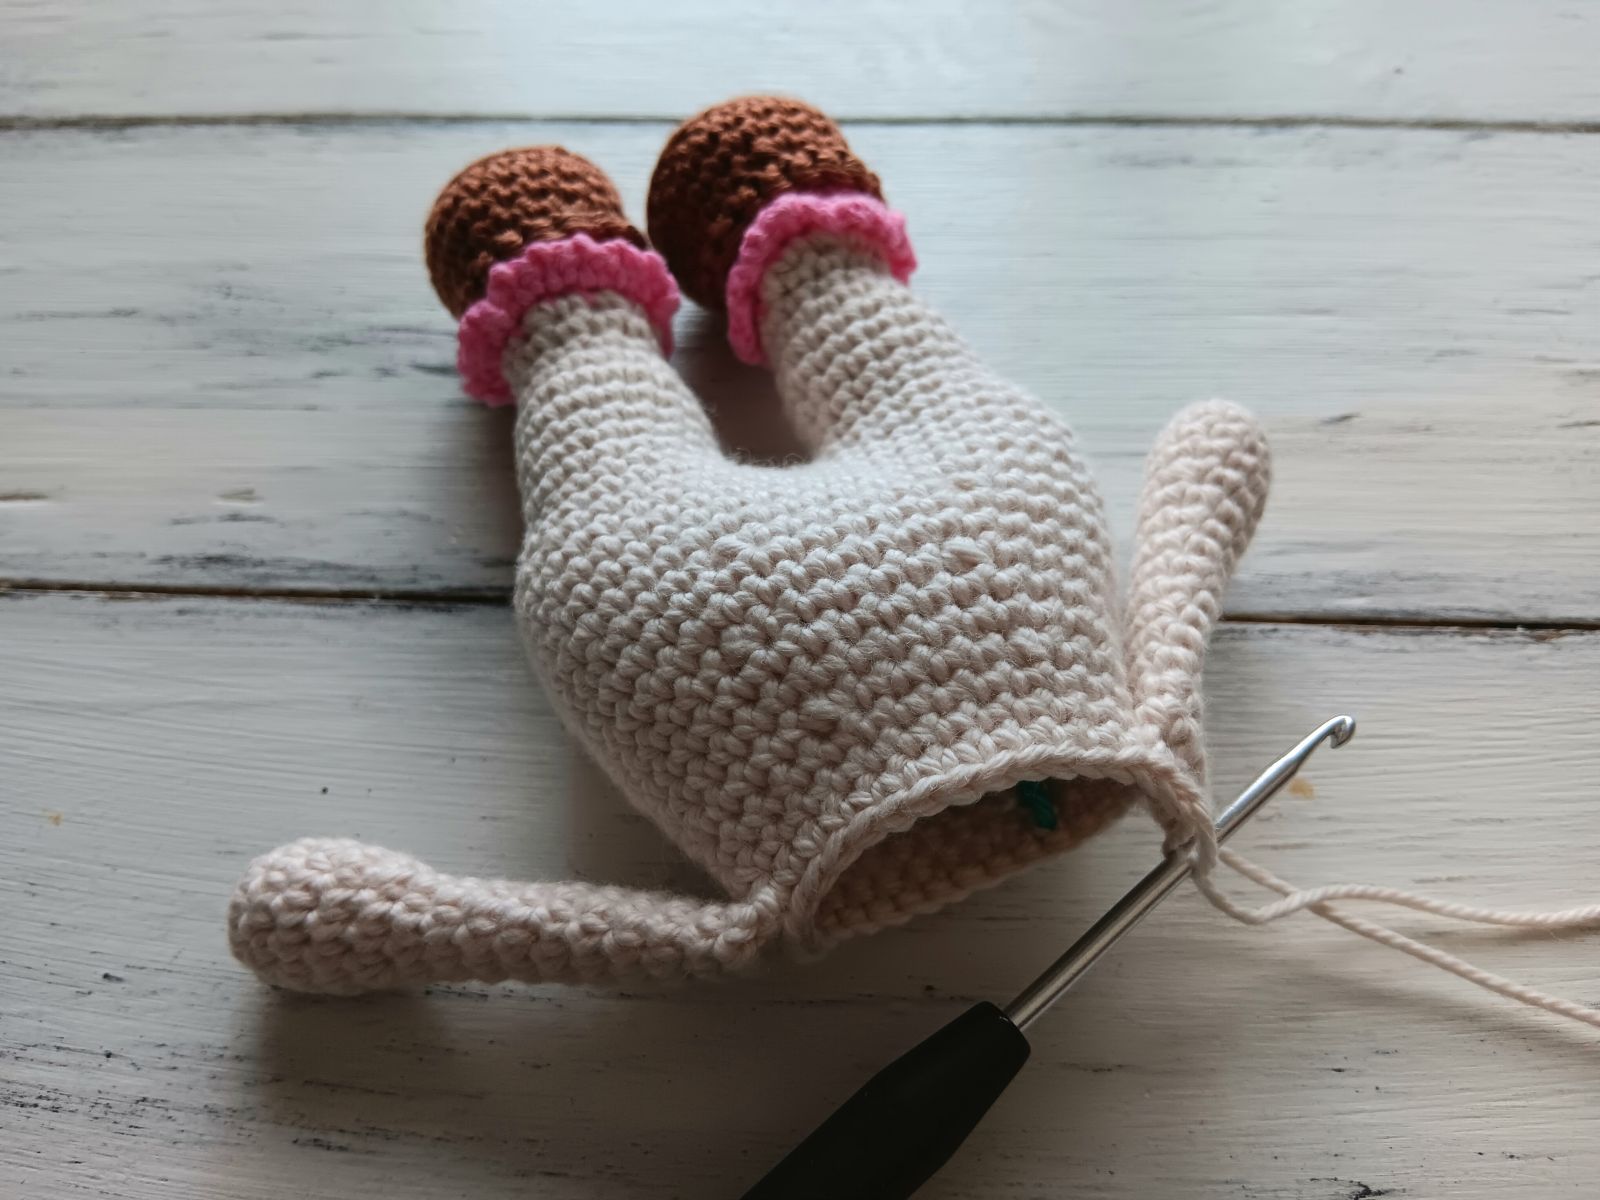
Rounds 4-8: single crochet in each of next 48 stitches
Round 9: *decrease, single crochet in each of next 6 stitches* (42 stitches)
Rounds 10-11: single crochet in each of next 42 stitches
Round 12: *decrease, single crochet in each of next 5 stitches* (36 stitches)
Rounds 13-14: single crochet in each of next 36 stitches
Round 15: *decrease, single crochet in each of next 4 stitches* (30 stitches)
Rounds 16-17: single crochet in each of next 30 stitches
In the next round attach the hands (ensure that the hands are located in the middle and make several shift stitches if needed):
Round 18: single crochet in each of next 8 stitches, 4 single crochet both through hand and body, single crochet in each of next 11 stitches, 4 single crochet both through hand and body, single crochet in each of next 3 stitches.
Round 19: *decrease, single crochet in each of next 3 stitches* (24 stitches)
Round 20: single crochet in each of next 24 stitches
Round 21: *decrease, single crochet in each of next 2 stitches* (18 stitches)
Round 22: *decrease, single crochet in the next stitch* (12 stitches)
Stuff the body firmly. Do not fasten off.
You can crochet the neck longer by adding some more rounds or thiner by decreasing some more stitches.
HEAD
Continue crocheting with skin color yarn
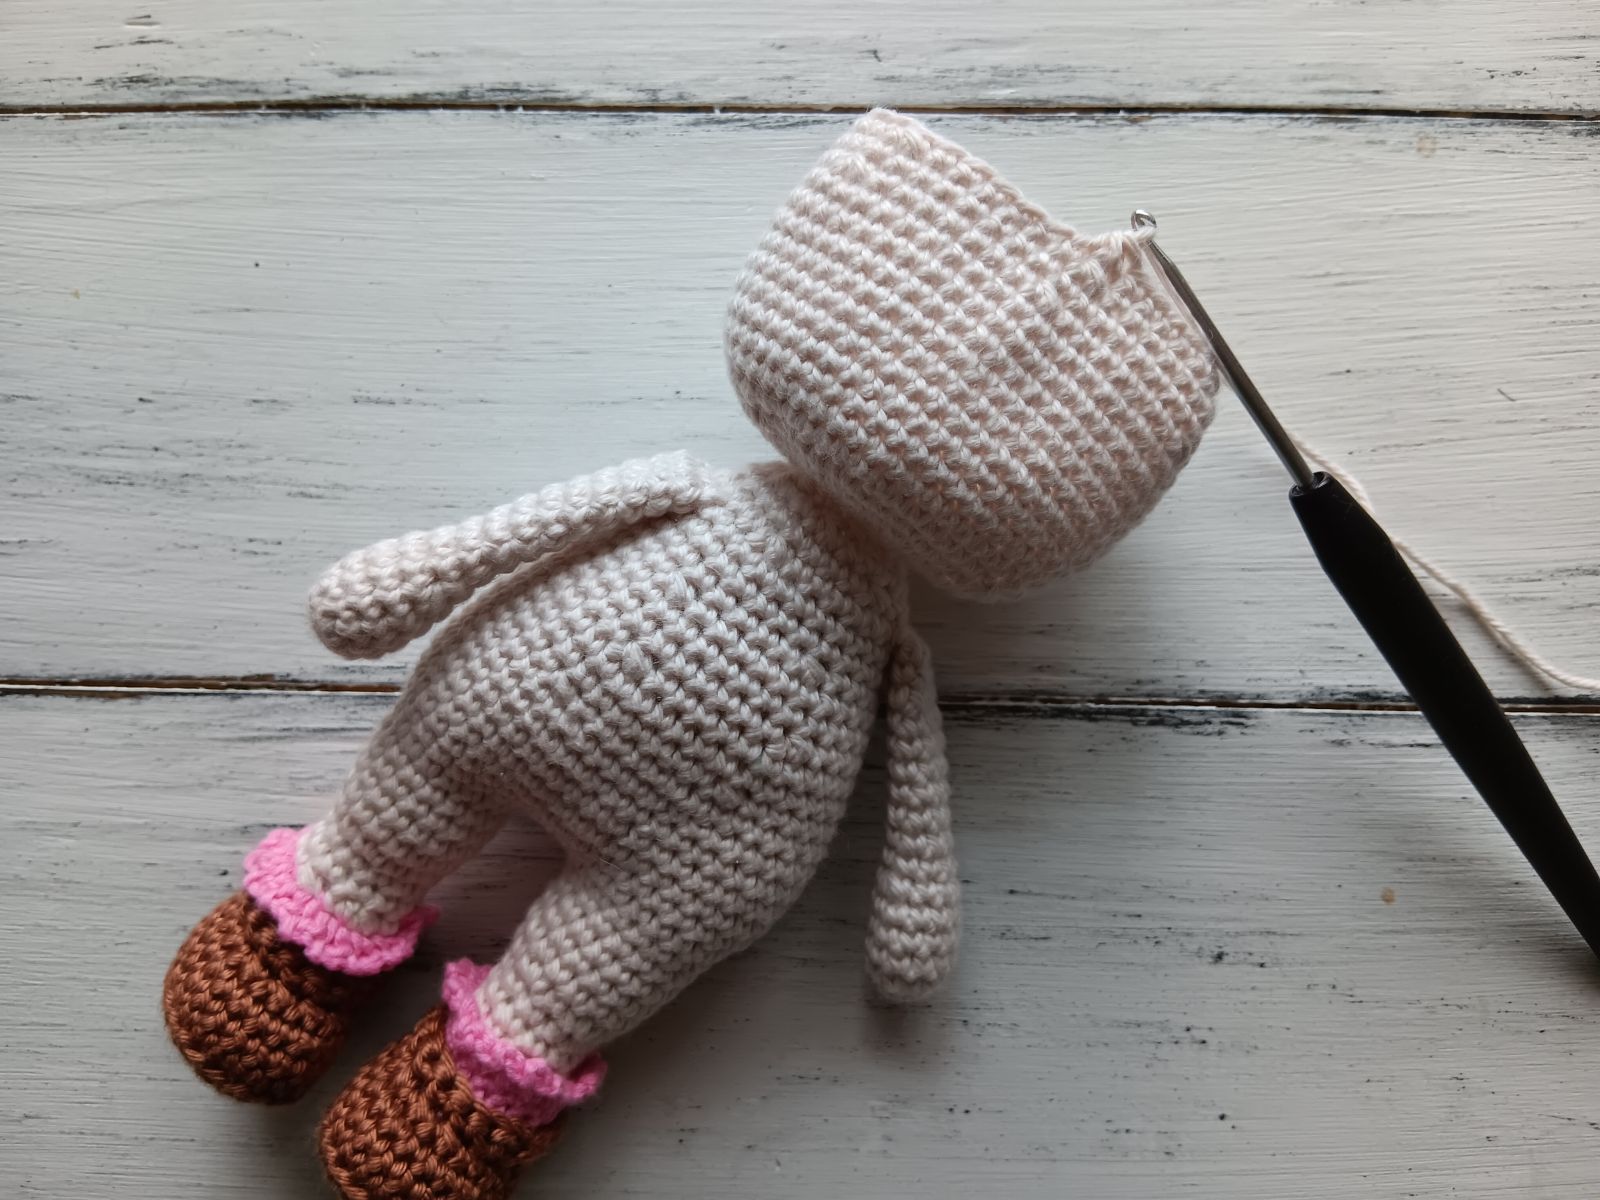
Round 1: increase 6 times (24 stitches)
Round 2: *single crochet in the next stitch, increase* (36 stitches)
Round 3: *single crochet in each of next 2 stitches, increase* (48 stitches)
Round 4: *single crochet in each of next 7 stitches, increase* (54 stitches)
Rounds 5-14: single crochet in each of next 60 stitches
Round 15: *decrease, single crochet in each of next 7 stitches* (48 stitches)
Round 16: single crochet in each of next 48 stitches
Round 17: *decrease, single crochet in each of next 6 stitches* (42 stitches)
Round 18: *decrease, single crochet in each of next 5 stitches* (36 stitches)
Round 19: *decrease, single crochet in each of next 4 stitches* (30 stitches)
Round 20: *decrease, single crochet in each of next 3 stitches* (24 stitches)
Round 21: *decrease, single crochet in each of next 2 stitches* (18 stitches)
Stuff the head firmly.
Round 22: *decrease, single crochet in the next stitch* (12 stitches)
Round 23: *decrease*, repeat 6 times.
Fasten off. Hide yarn ends.
WIG
Make the wig cap first. Keep testing it on your doll´s head until it´s the size you want it.
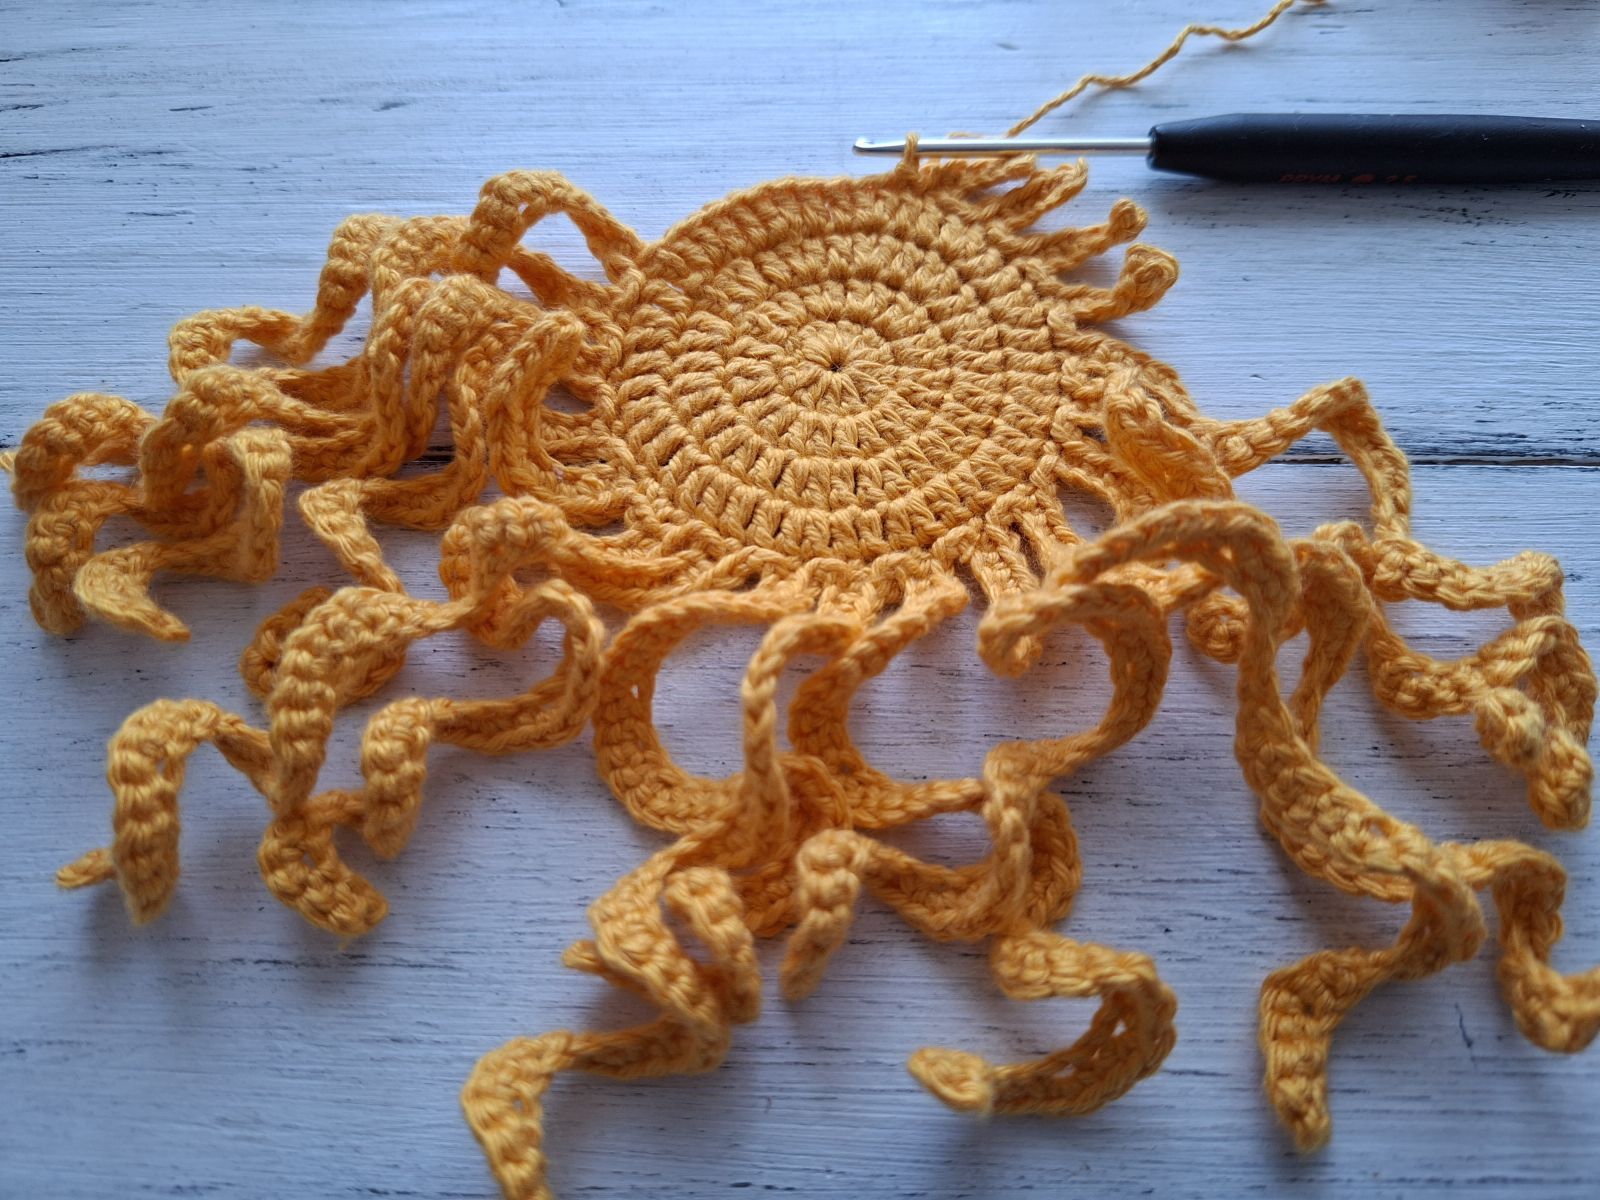
Round 1: 12 double crochets into a Magic Ring
Round 2: chain 3 stitches, double crochet in the same stitch as chain, 2 double crochets in each of next 11 stitches, slip stitch to top of chain 3 (24 stitches)
Round 3: chain 3 stitches, double crochet in the same stitch as chain, double crochet in next stitch, *2 double crochets in the next stitch, double crochet in the next stitch*, repeat from*to* 11 times, slip stitch to top of chain 3 (36 stitches)
Round 4: chain 3 stitches, double crochet in the same stitch as chain, double crochet in next stitch, *2 double crochets in the next stitch, double crochet in each of next 2 stitches*, repeat from*to* 11 times, slip stitch to top of chain 3 (48 stitches)
For the Locks:
*chain 10 stitches, 1 hdc in the third stitch from the hook, (2 hdc in the next stitch, hdc in the next stitch) repeat till the end of the row, slip stitch in each of next 2 stitches*;
*chain 6 stitches, 1 hdc in the third stitch from the hook and each of next 3 stitches, skip the next stitch, slip stitch in each of next 2 stitches, repeat from* to* 7 times.
OR
You can choose the material you will use for doll´s hair. It can be wool, cotton or acrylic yarn. Curly wool locks make great doll hair. Cut the yarn twice as long as the length you want. Put the hook through the loop where you want the hair, grab a strand of your yarn and pull it through. Grab the end of the yarn and pull that through the loop.
ASSEMBLY
Since all the elements of your doll are crocheted, it´s time to sew them together. Use a blunt sewing needle.
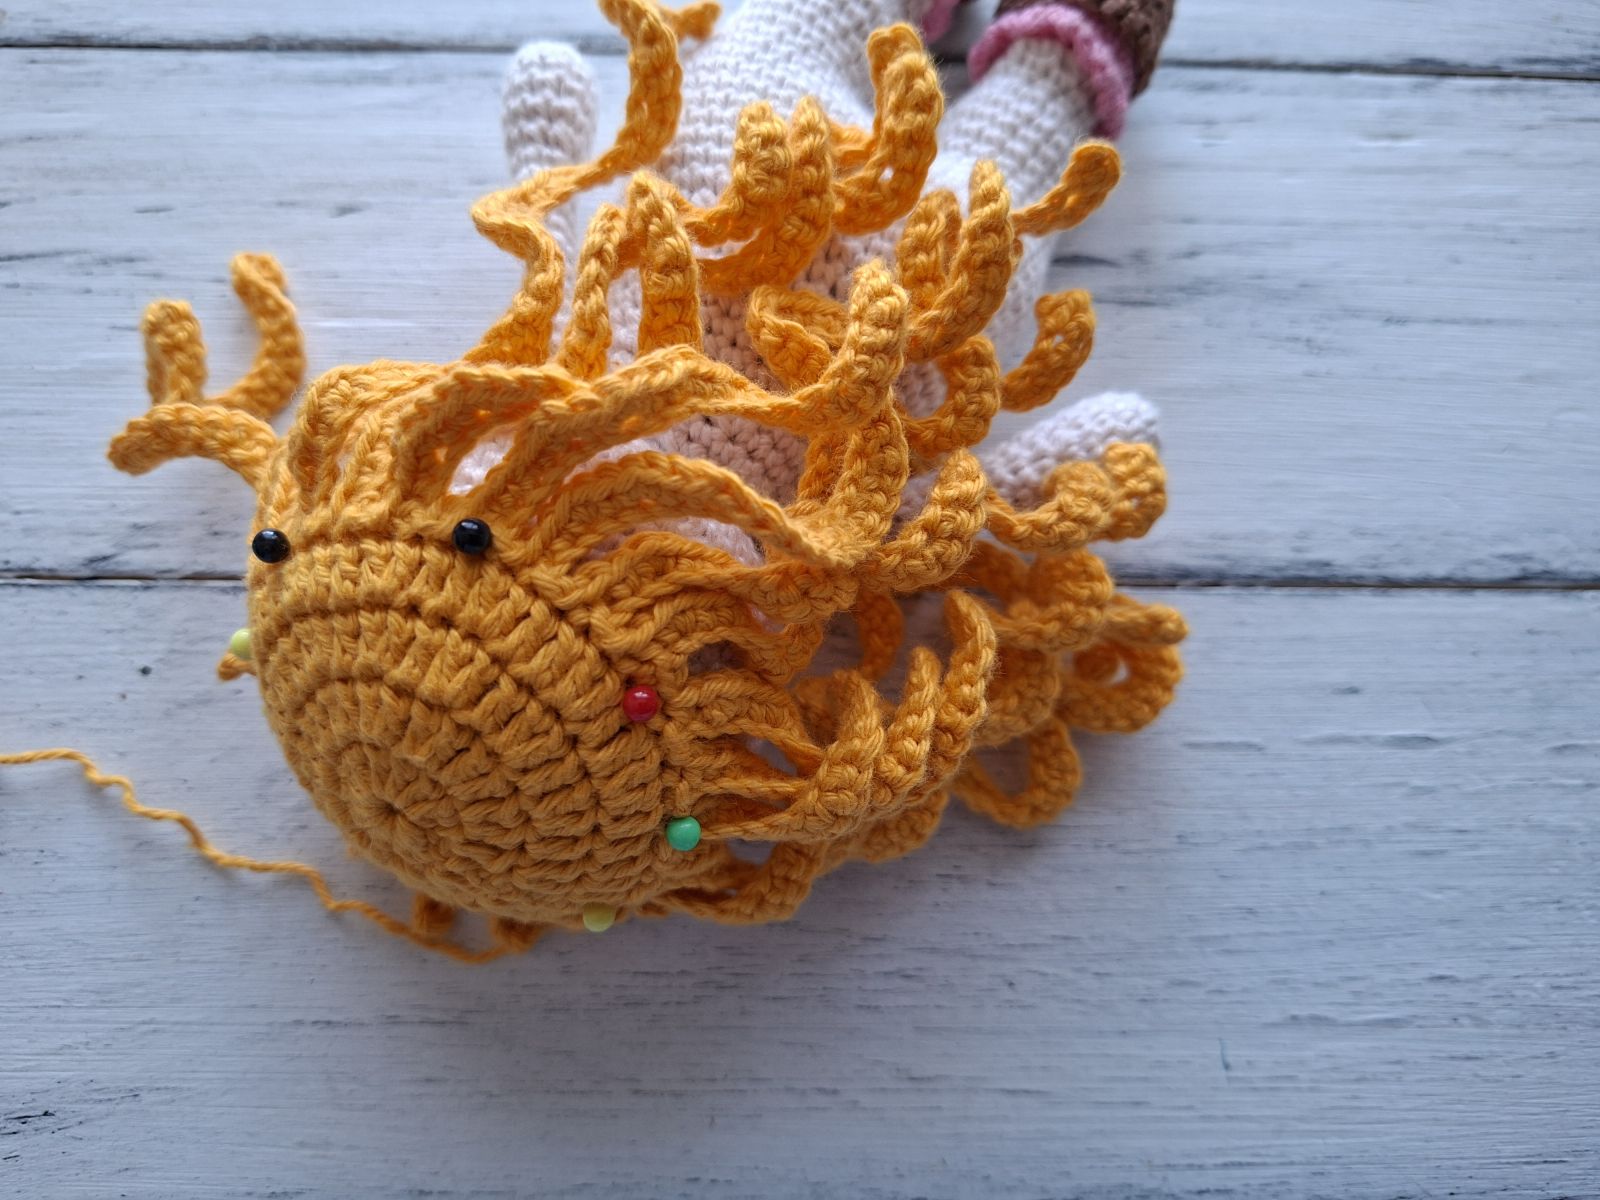
Sew the wig cap on.
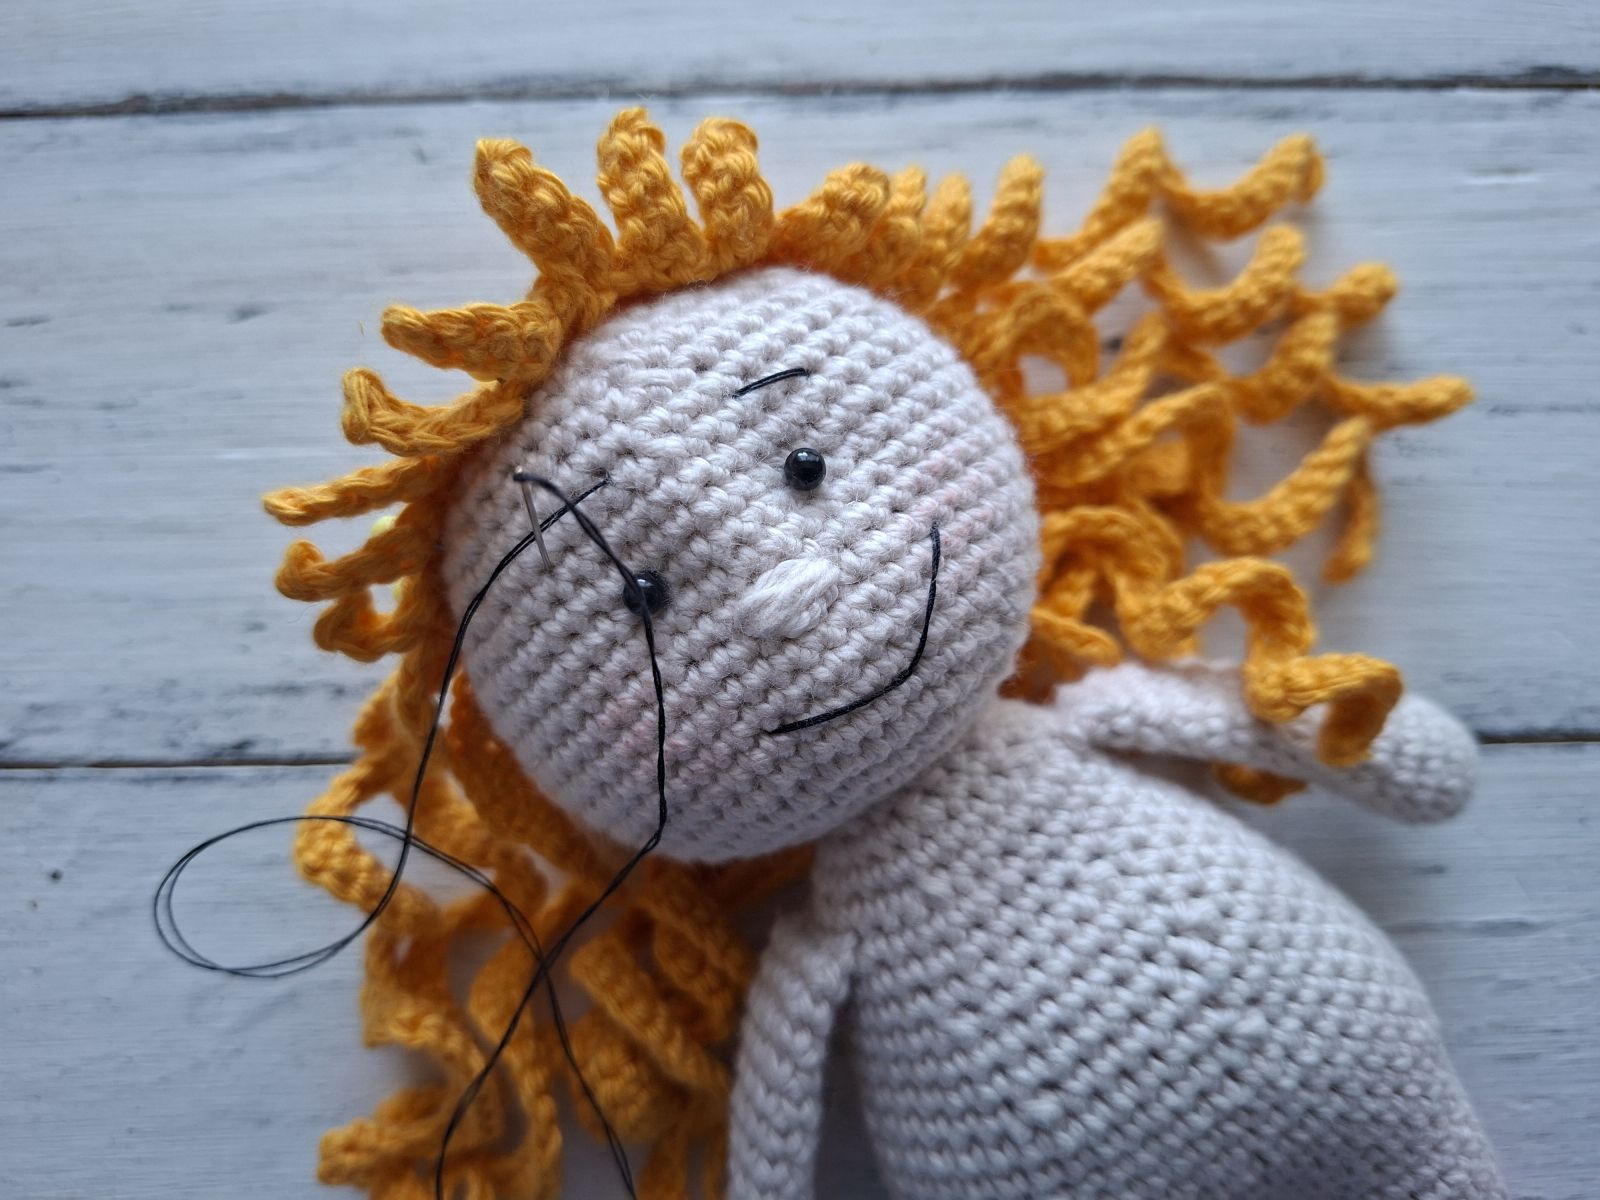
Mark where you want the eyes to be placed with pins and sew them with the distance of 4-6 stitches to the head of the doll. Embroider nose using skin color yarn. Embroider eyebrows with black color yarn if desired. You can also add eyelashes and mouth. Hide the yarn tails inside the head.
DRESS
The dress is worked in a single piece from the top-down. The work begins at the bodice and continues down to legs.
Crochet using lavender or any yarn color of your desire.
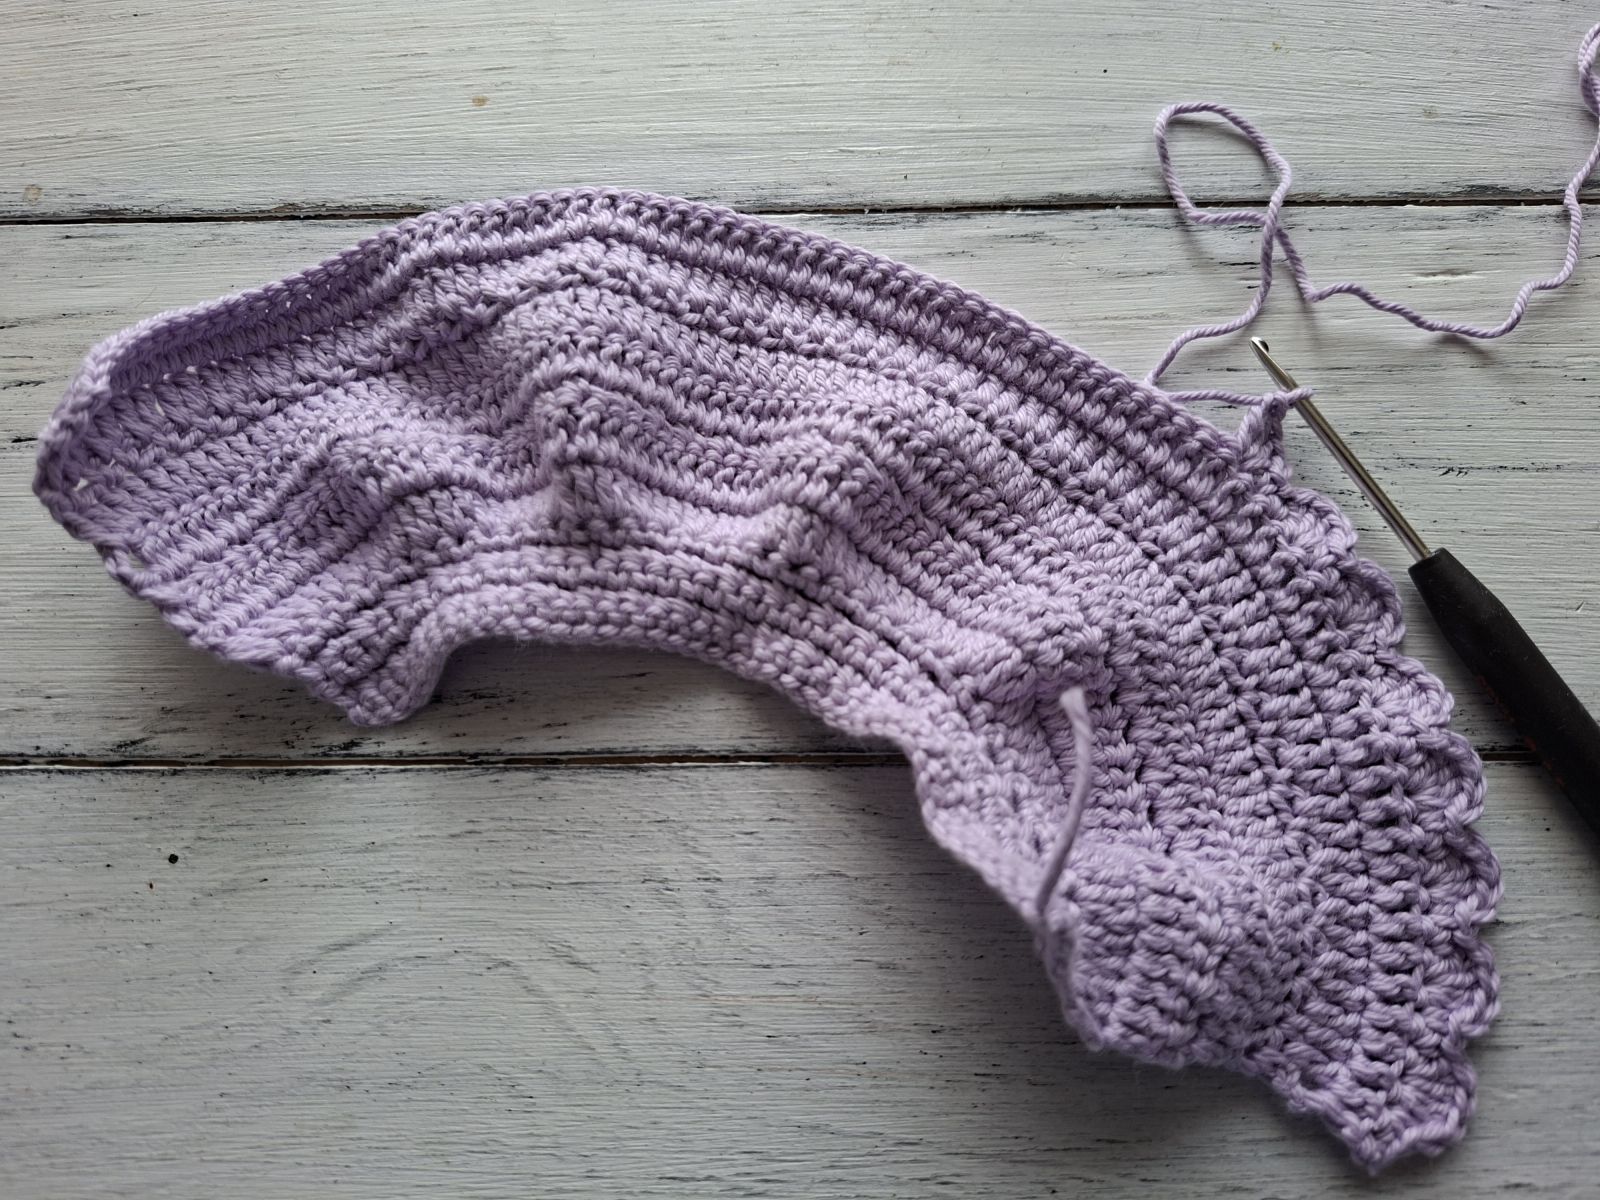
Chain 41 stitches.
Row 1: single crochet into the second stitch from the hook, single crochet in each of next 39 stitches, turn the work.
Row 2: chain 1 stitch, *single crochet in the next stitch, chain 1 stitch, single crochet in the next stitch*, repeat from* till the end of the row, turn the work
Row 3: chain 1 stitch, single crochet in each of next stitches till the end of the row, turn the work.
Row 4: chain 1 stitch, *single crochet in the next stitch, chain 1 stitch, single crochet in the next stitch*, repeat from* till the end of the row, turn the work
Row 5: chain 1 stitch, single crochet in each of next stitches till the end of the round, turn the work.
Row 6: chain 3 stitches (=1 double crochet), 2 double crochets in each of next stitches till the end of the row, turn the work.
Row 7: chain 3 stitches, double crochet in each of next stitches till the end of the round, turn the work.
Row 8: chain 1 stitch, *single crochet in the next stitch, chain 1 stitch, single crochet in the next stitch*, repeat from* till the end of the row, turn the work
Row 9: chain 3 stitches, double crochet in each of next stitches till the end of the round, turn the work.
Row 10 (working into the front loop): chain 3 stitches, double crochet in each of next stitch till the end of the round, turn the work.
Row 11: chain 1 stitch, *single crochet in the next stitch, chain 1 stitch, single crochet in the next stitch*, repeat from* till the end of the row, turn the work
Rows 12-13: chain 3 stitches, double crochet in each of next stitches till the end of the round, turn the work.
Row 14: chain 1 stitch, *single crochet in each of next 2 stitches, 4 double crochets in the next stitch*, repeat from* till the end of the row.
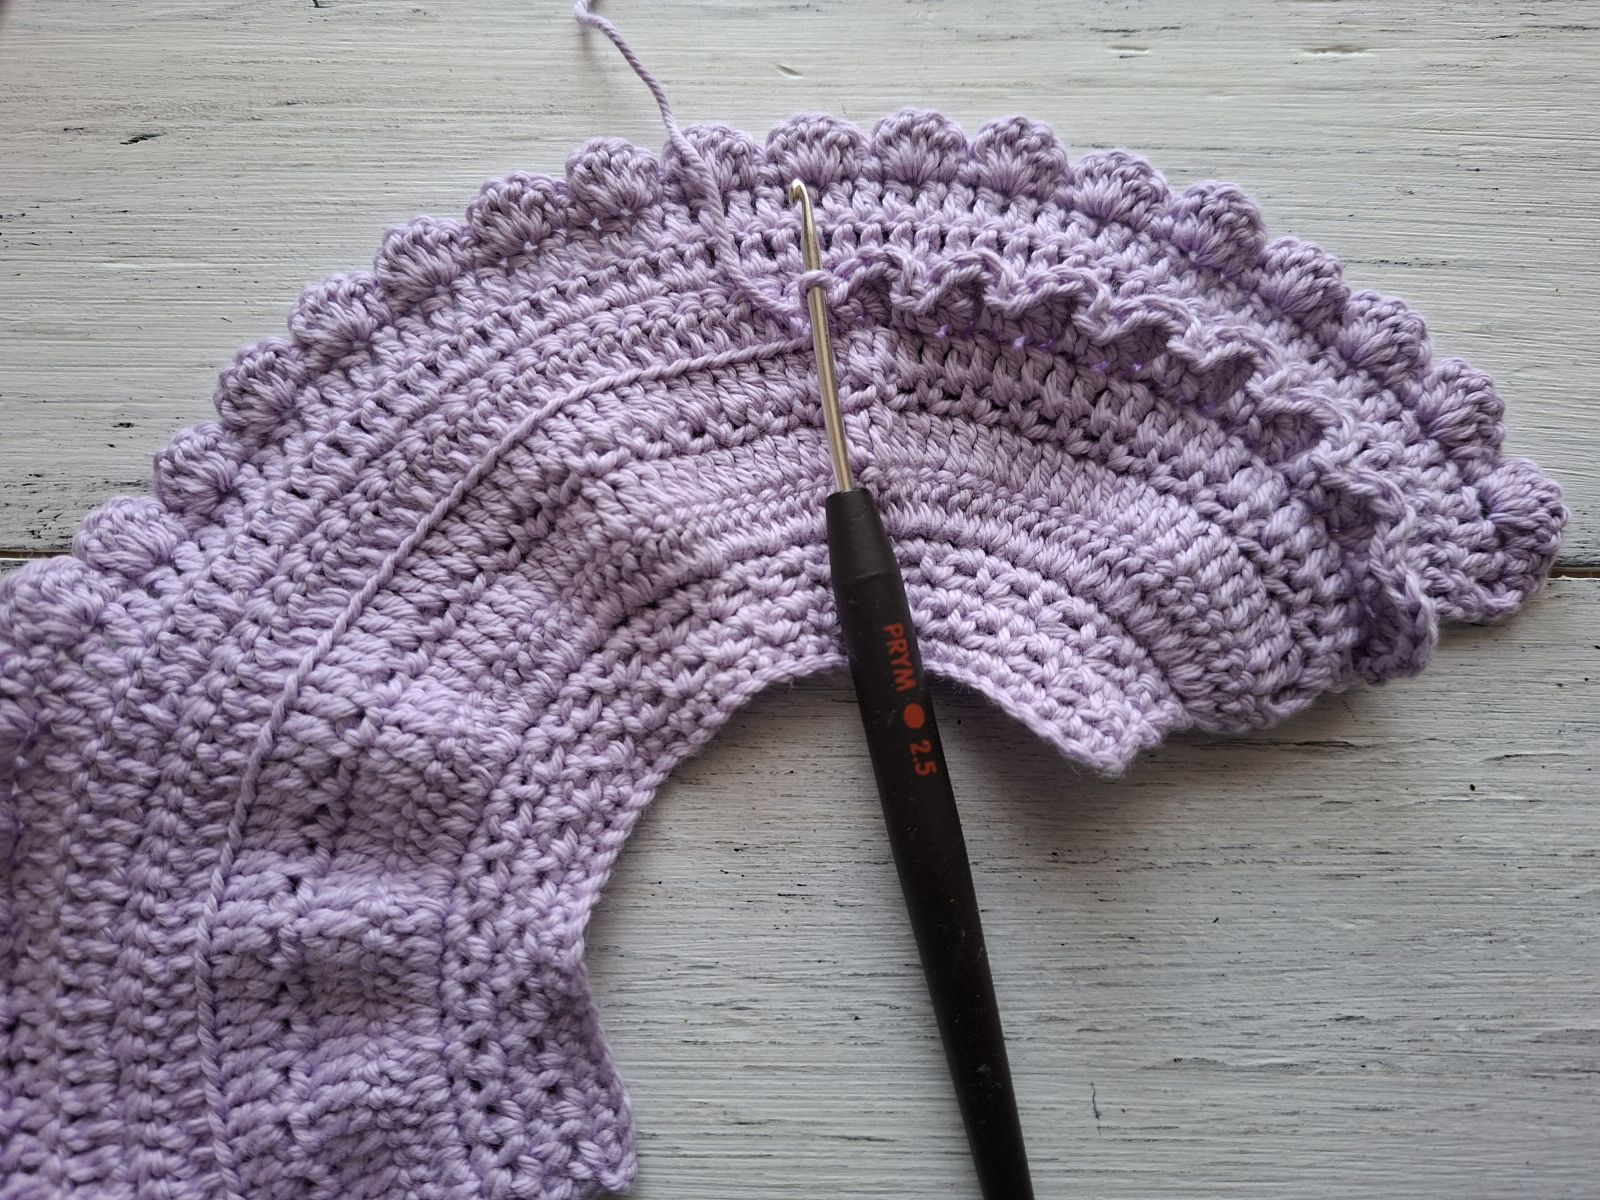
Join yarn to the 10th round of the body. Working into the front loops only:
*single crochet in each of next 2 stitches, 4 double crochets into the next stitch*, repeat from* till the end of the round.
Fasten off. Hide yarn ends.
Work in single crochets all around the dress, making two button loops. Sew two buttons according to the loops. Or attach Velcro fastener.
BODICE TOP and STRAPS
Work with pink yarn.
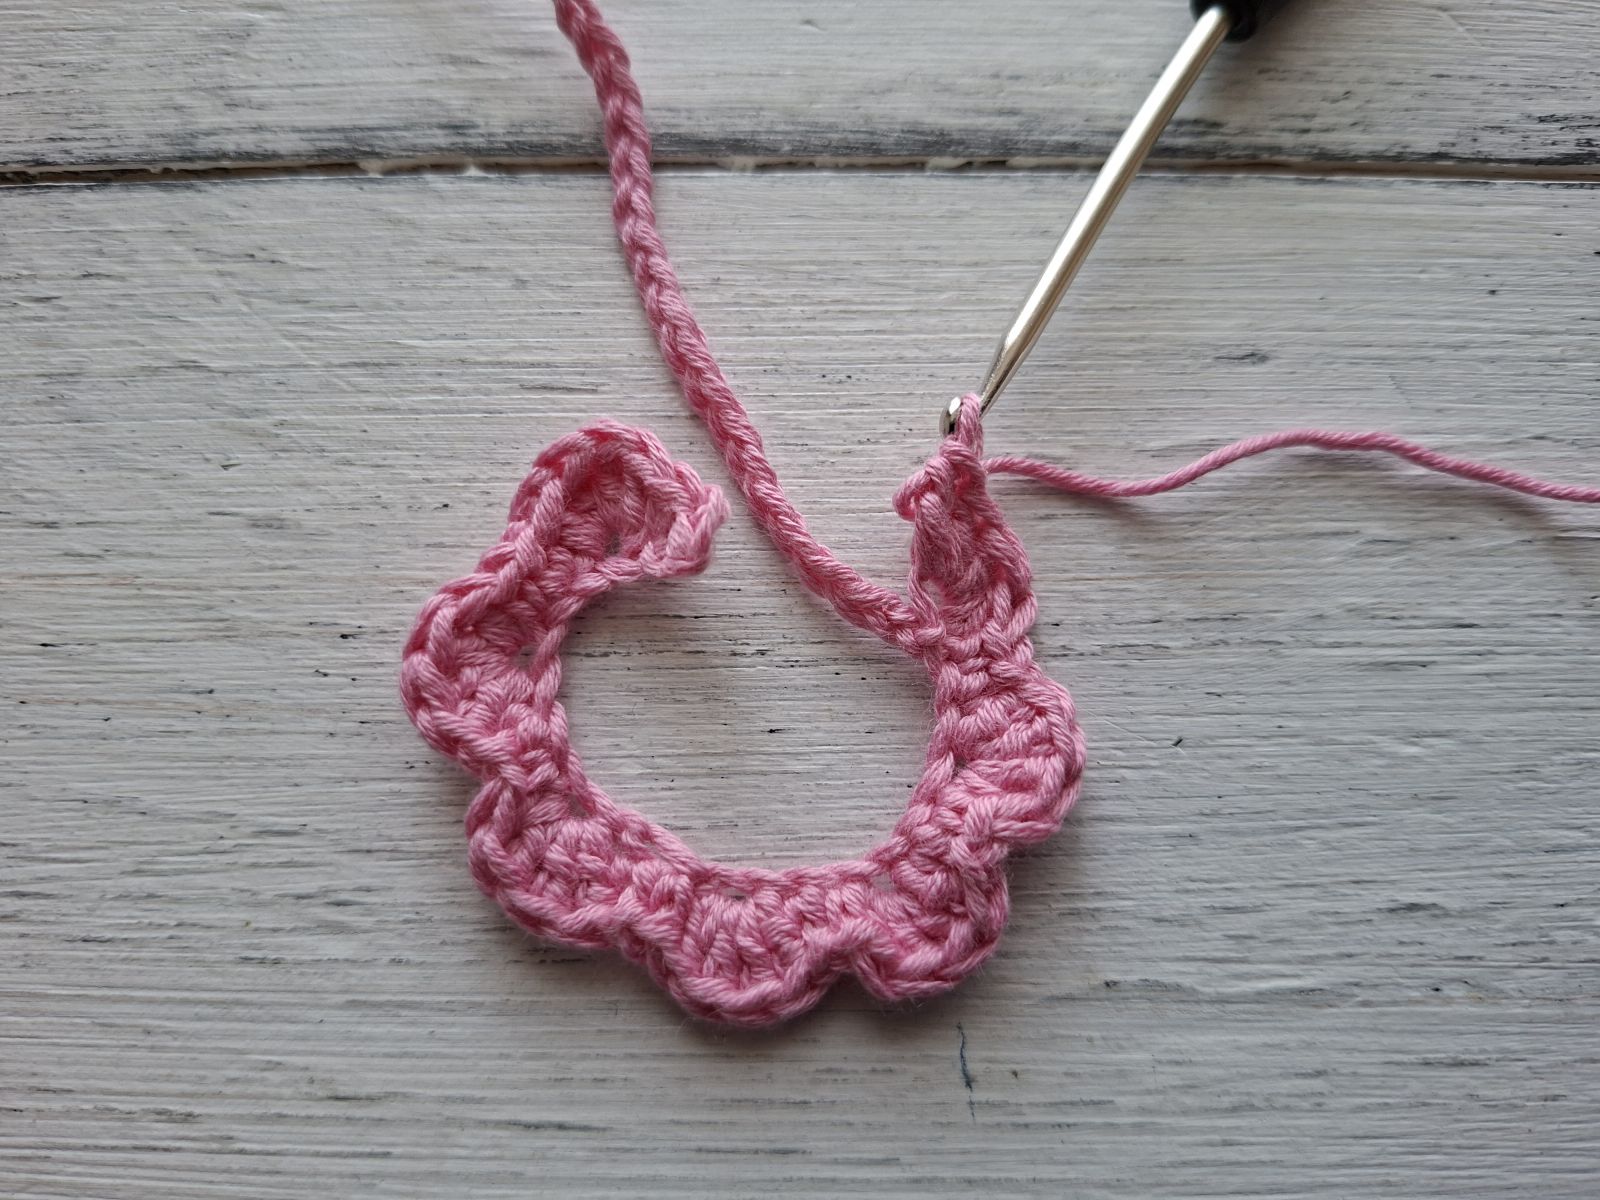
Chain 41 stitches,
*single crochet in each of next 2 stitches, 4 double crochets into the next stitch*, repeat from* till the end of the round.
Fasten off leaving a long tail for sewing.
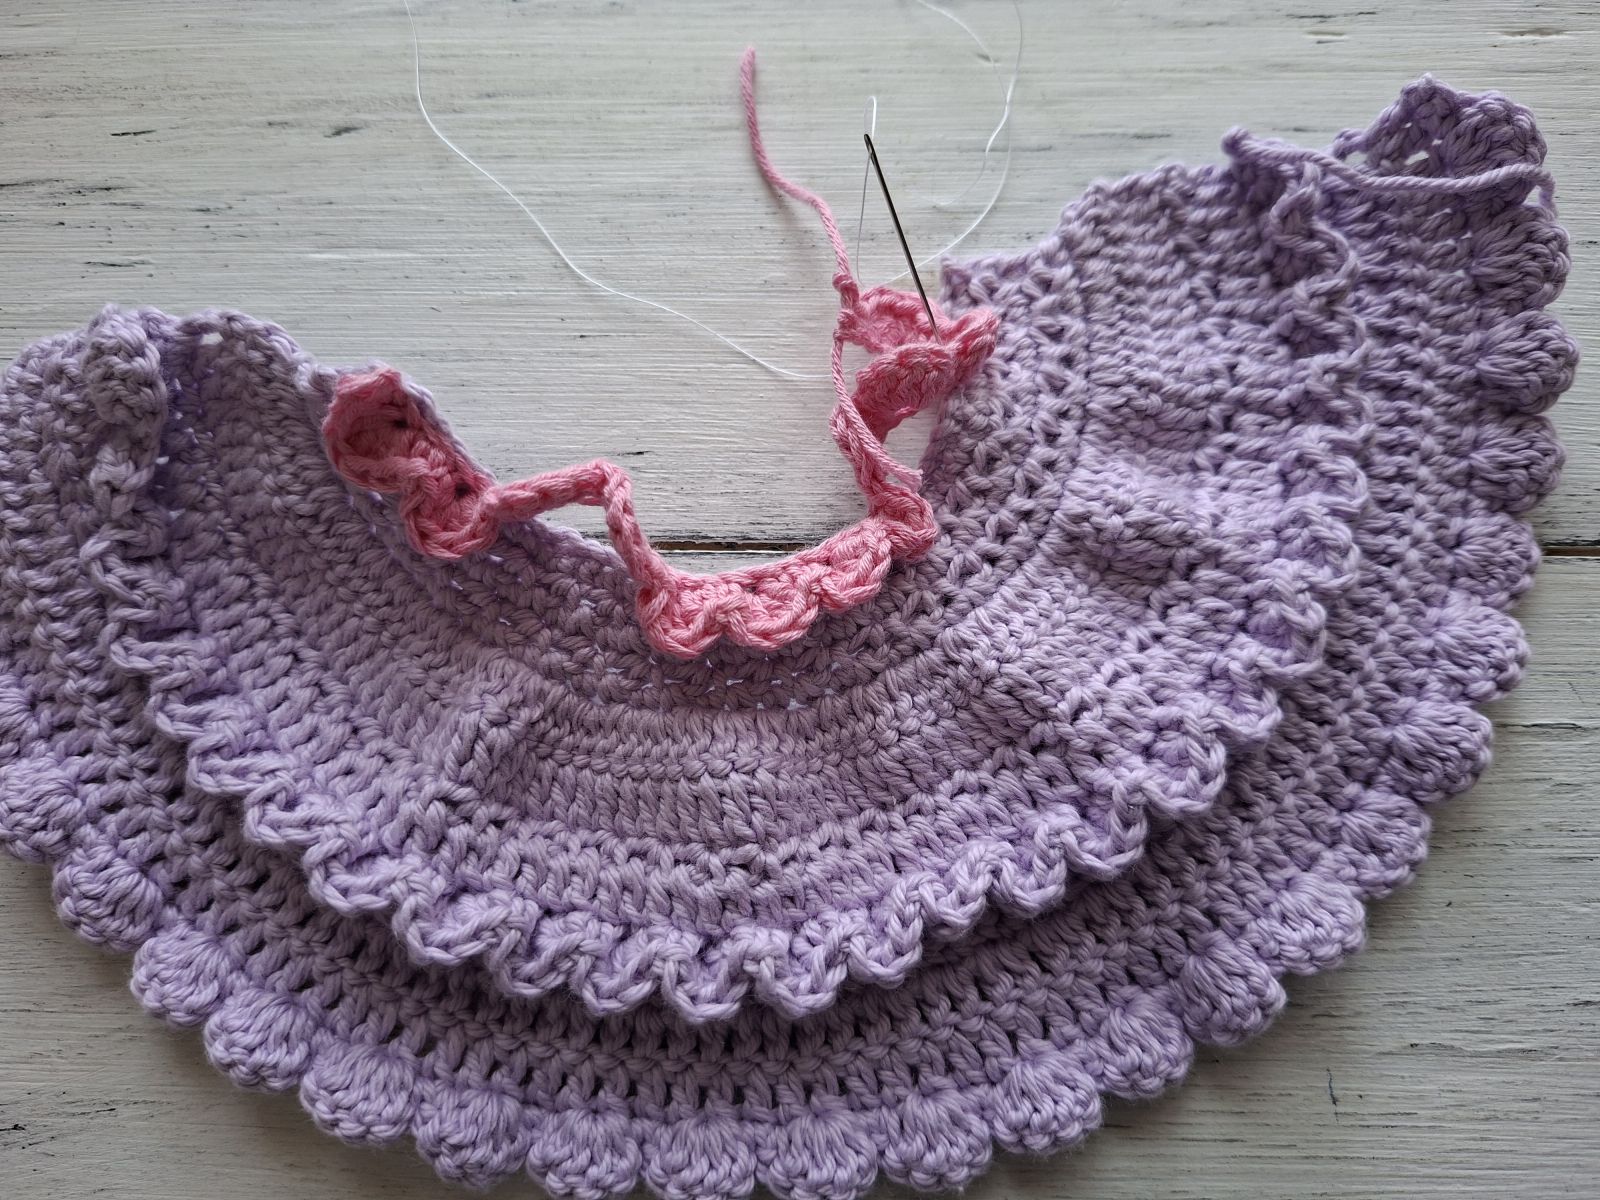
Attach the top of the bodice and straps to the dress: sew 6 stitches, skip the next 8 stitches (sleeve), sew 12 stitches, skip the next 8 stitches (sleeve), sew 6 stitches.
HEADBAND
Crochet with green color yarn.
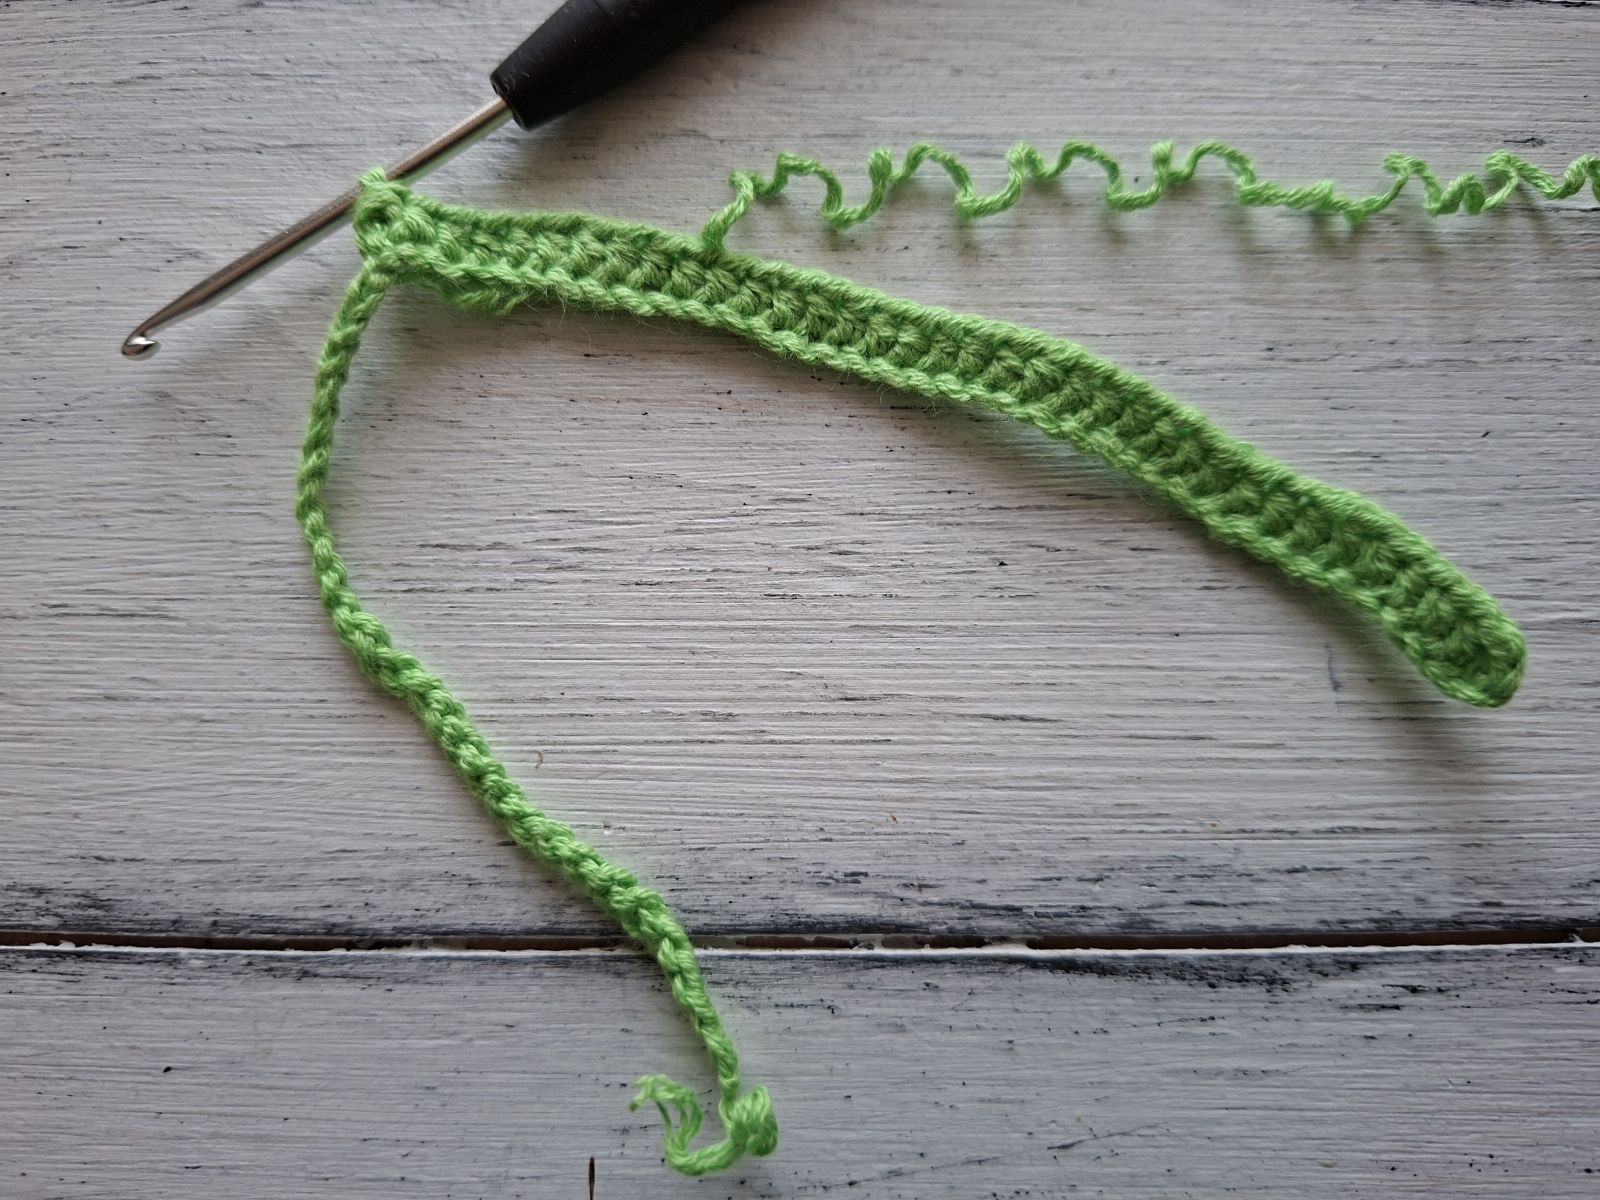
For the headband chain stitches approx. 20 cm, work one row in half double crochet´s. Fasten off leaving a long tail for sewing.
FLOWER
Crochet using any yarn color of your desire.
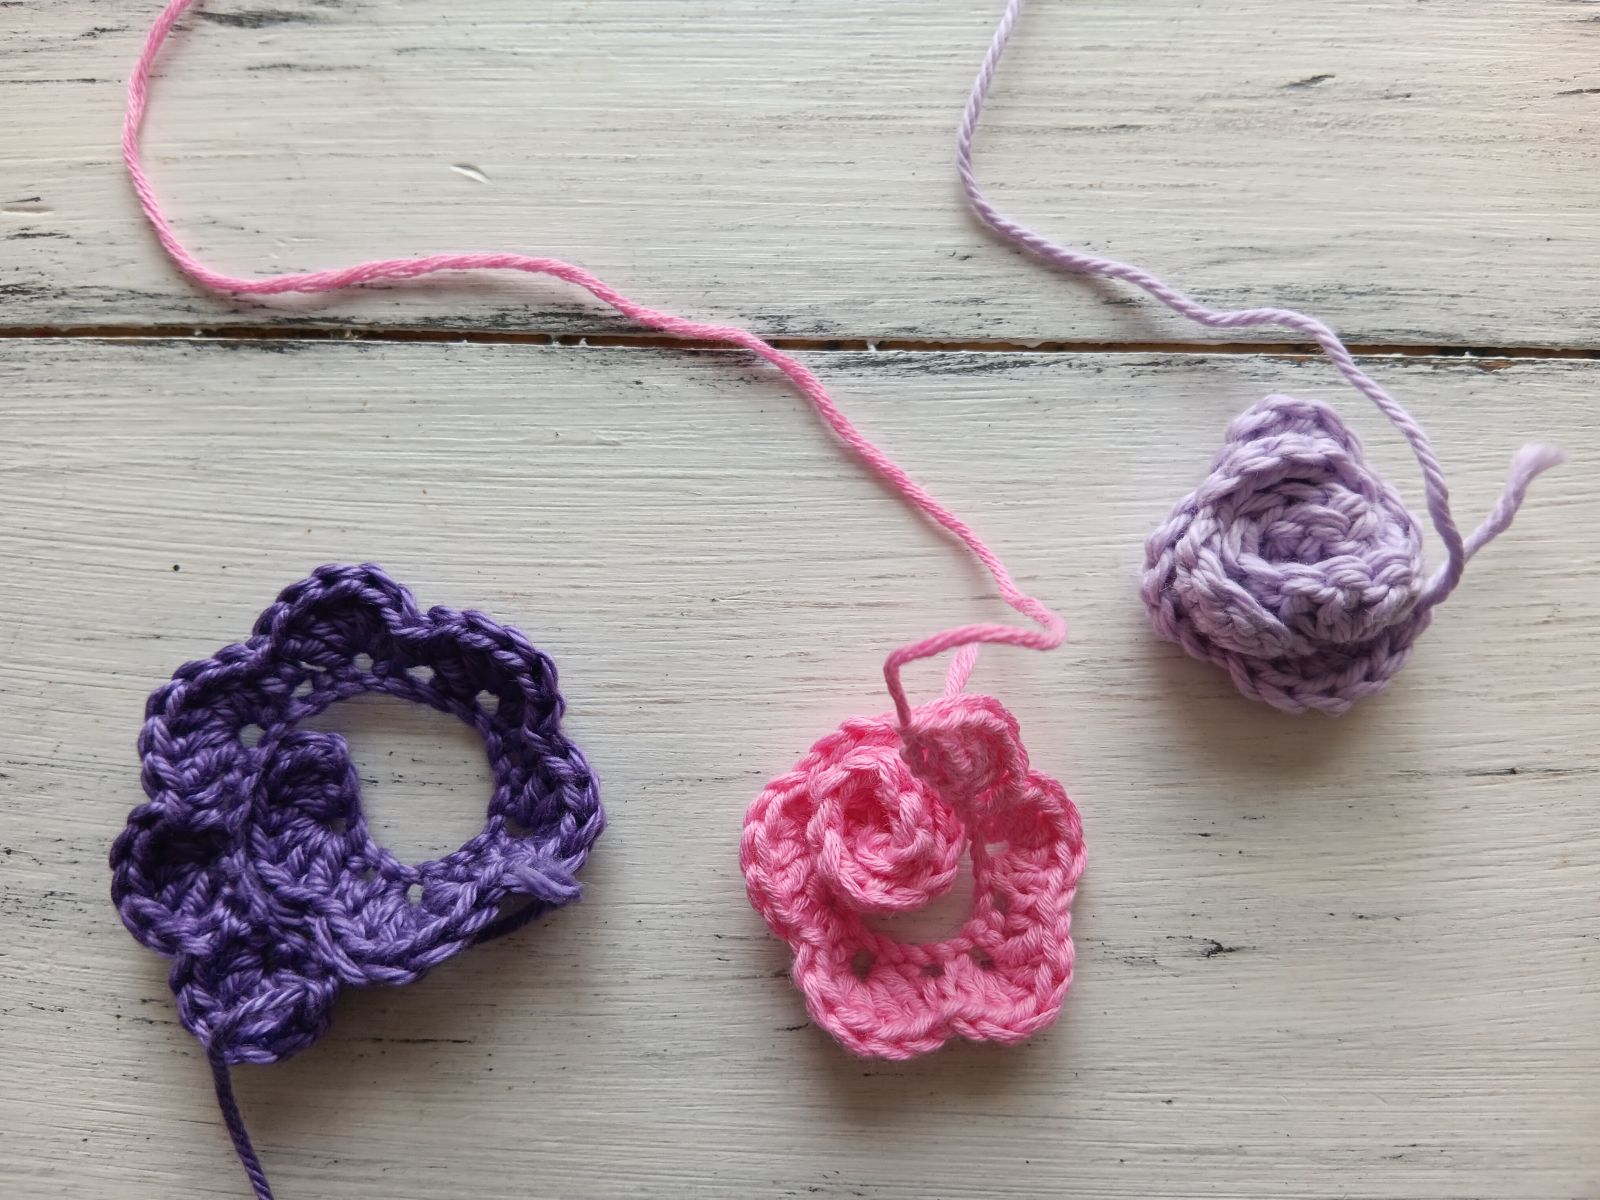
Row 1: chain 34 stitches
Row 2: single crochet in the second stitch from the hook, *skip the next stitch, 5 double crochets in the next stitch, skip the next stitch, single crochet in the next stitch*, repeat from* to*.
Bind off leaving a long tail for sewing.
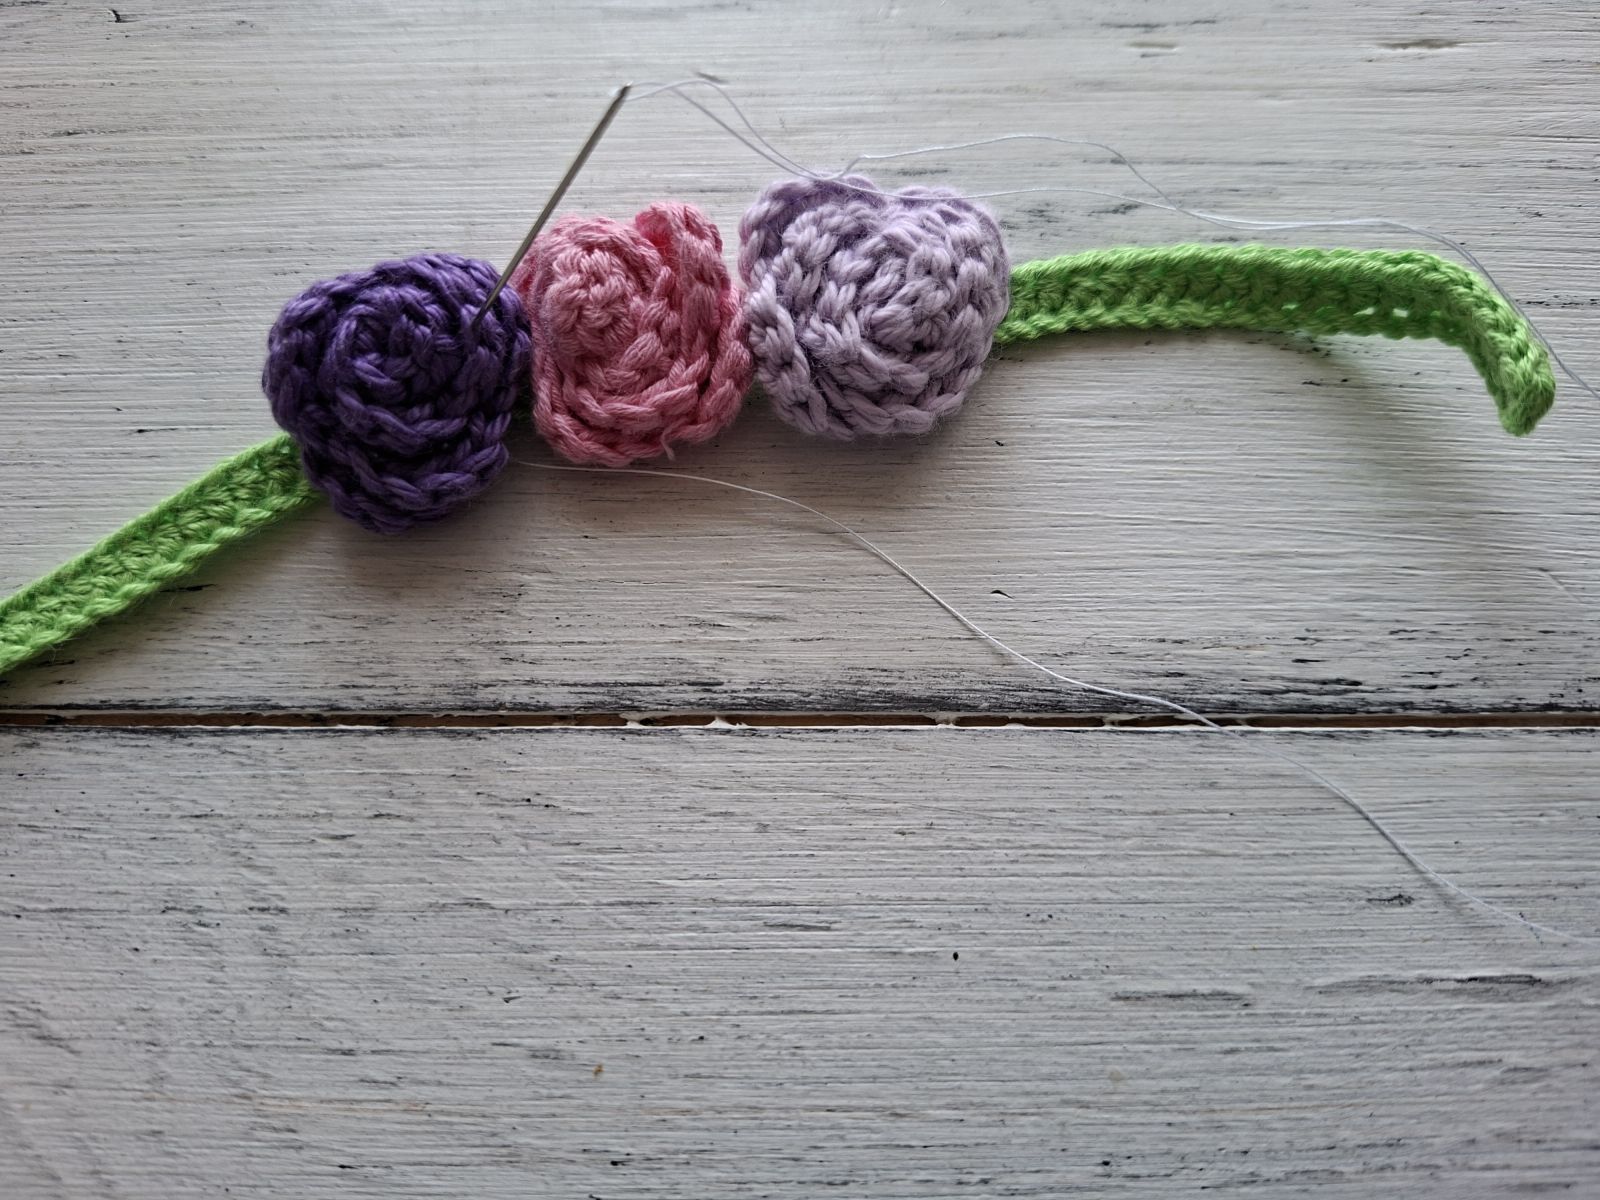
Shape roses and with yarn tails left sew them to the headband.
FROG
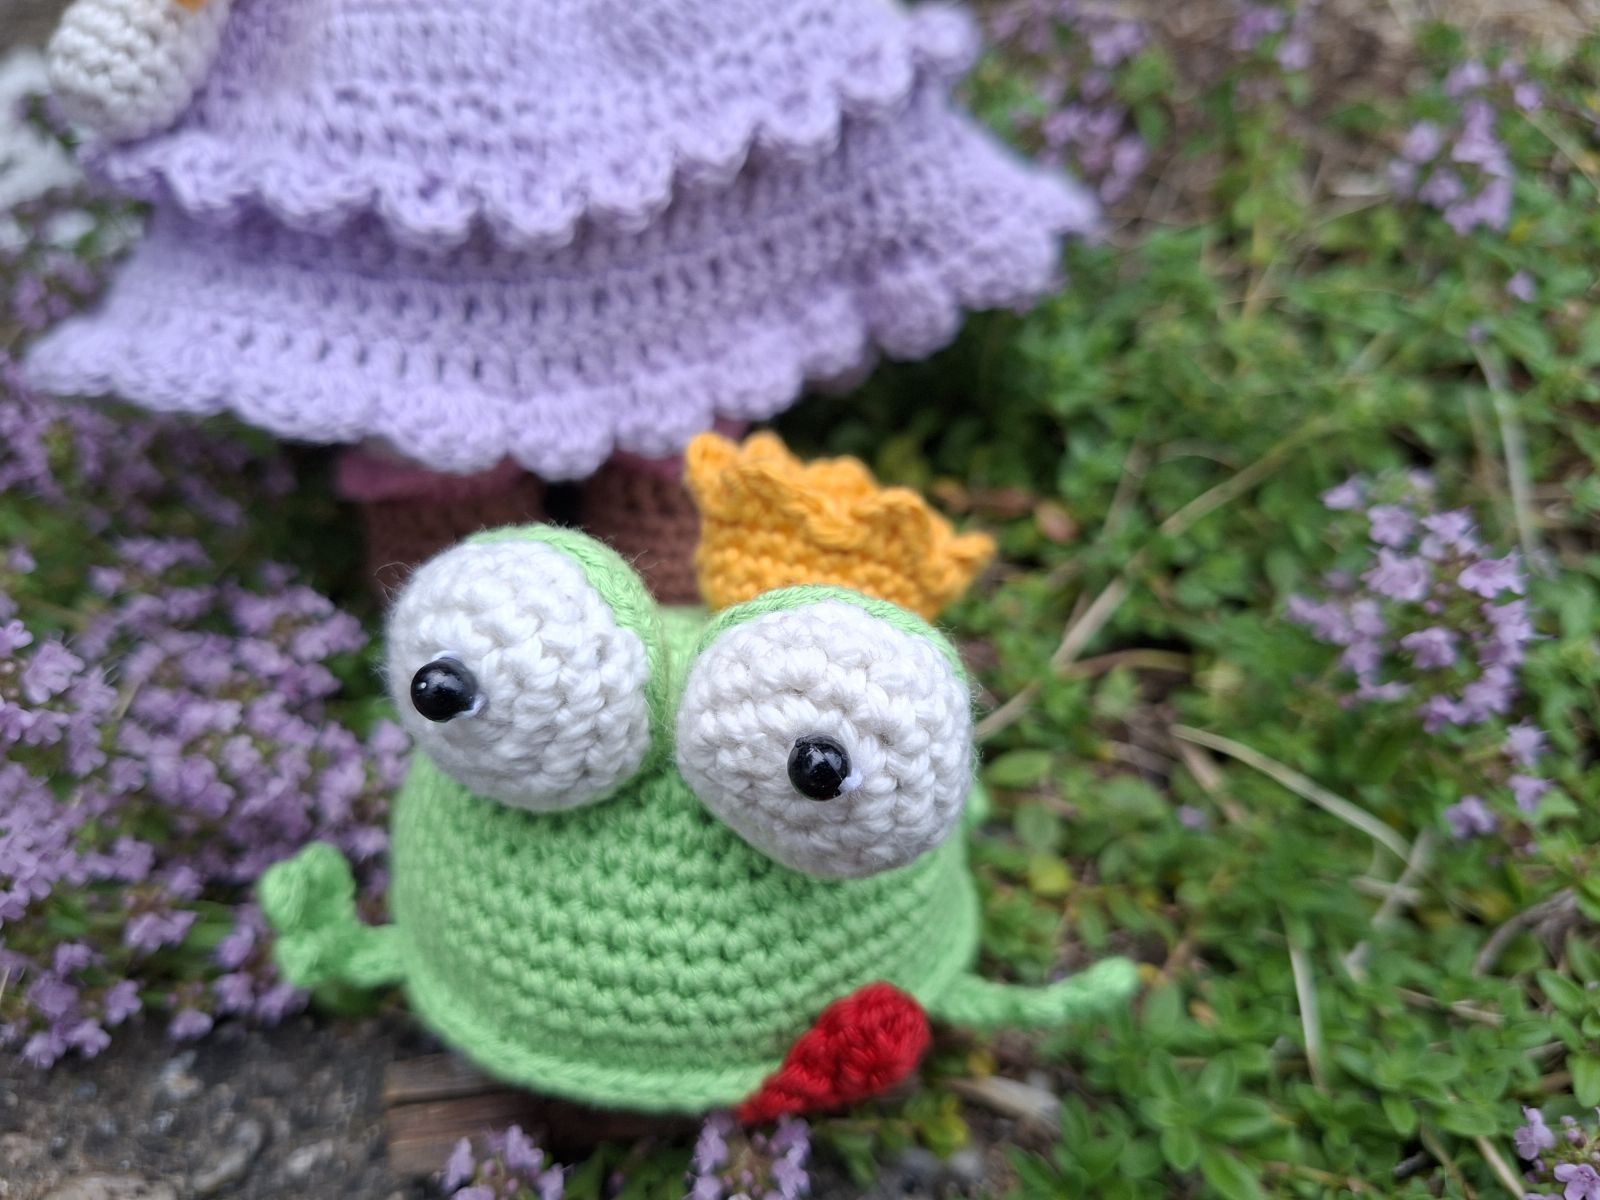
BODY
Start your work using yellow colored yarn and begin with a magic ring.
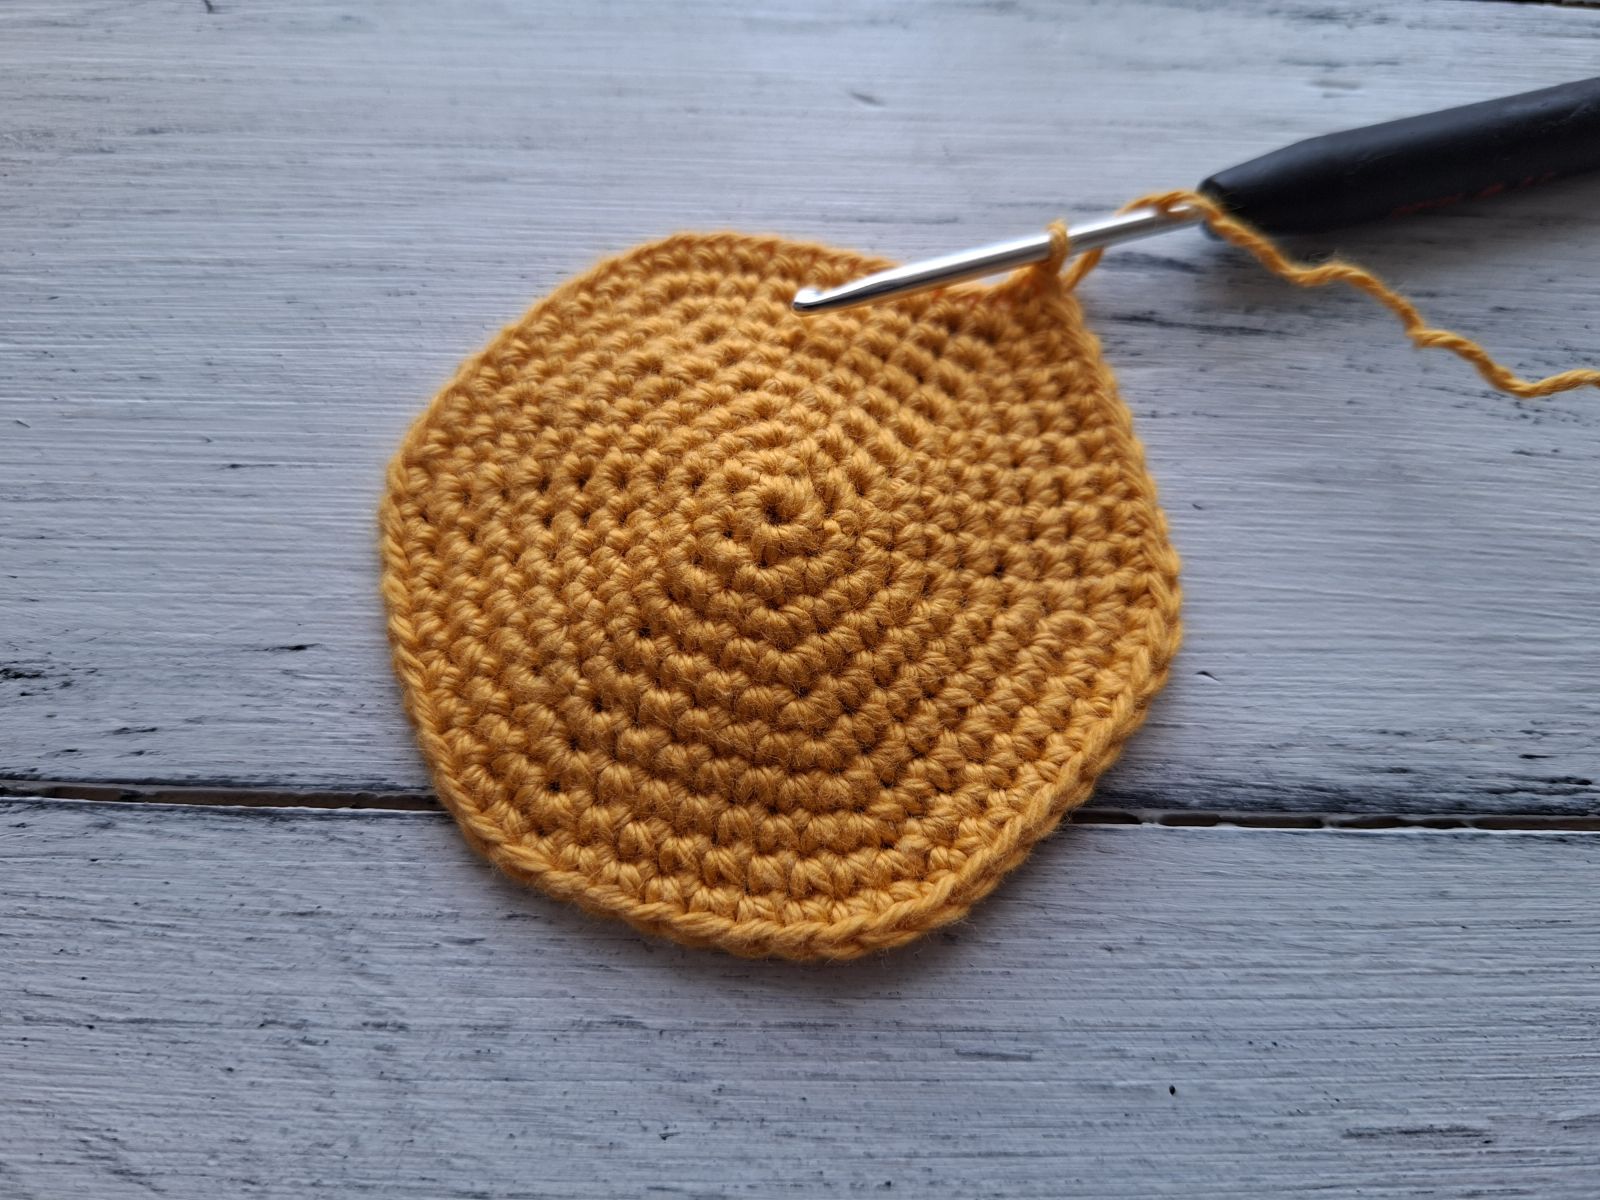
Round 1: 6 single crochets into Magic Ring
Round 2: increase 6 times (12 stitches)
Round 3: *single crochet in the next stitch, increase* (18 stitches)
Round 4: *single crochet in each of next 2 stitches, increase* (24 stitches)
Round 5: *single crochet in each of next 3 stitches, increase* (30 stitches)
Round 6: *single crochet in each of next 4 stitches, increase* (36 stitches)
Round 7: *increase, single crochet in each of next 5 stitches* (42 stitches)
Round 8: *increase, single crochet in each of next 6 stitches* (48 stitches)
Round 9: *increase, single crochet in each of next 7 stitches* (54 stitches)
Round 10: single crochet in each of next 54 stitches
Fasten off, hide all yarn ends.
Crochet with green colored yarn and begin with a magic ring.
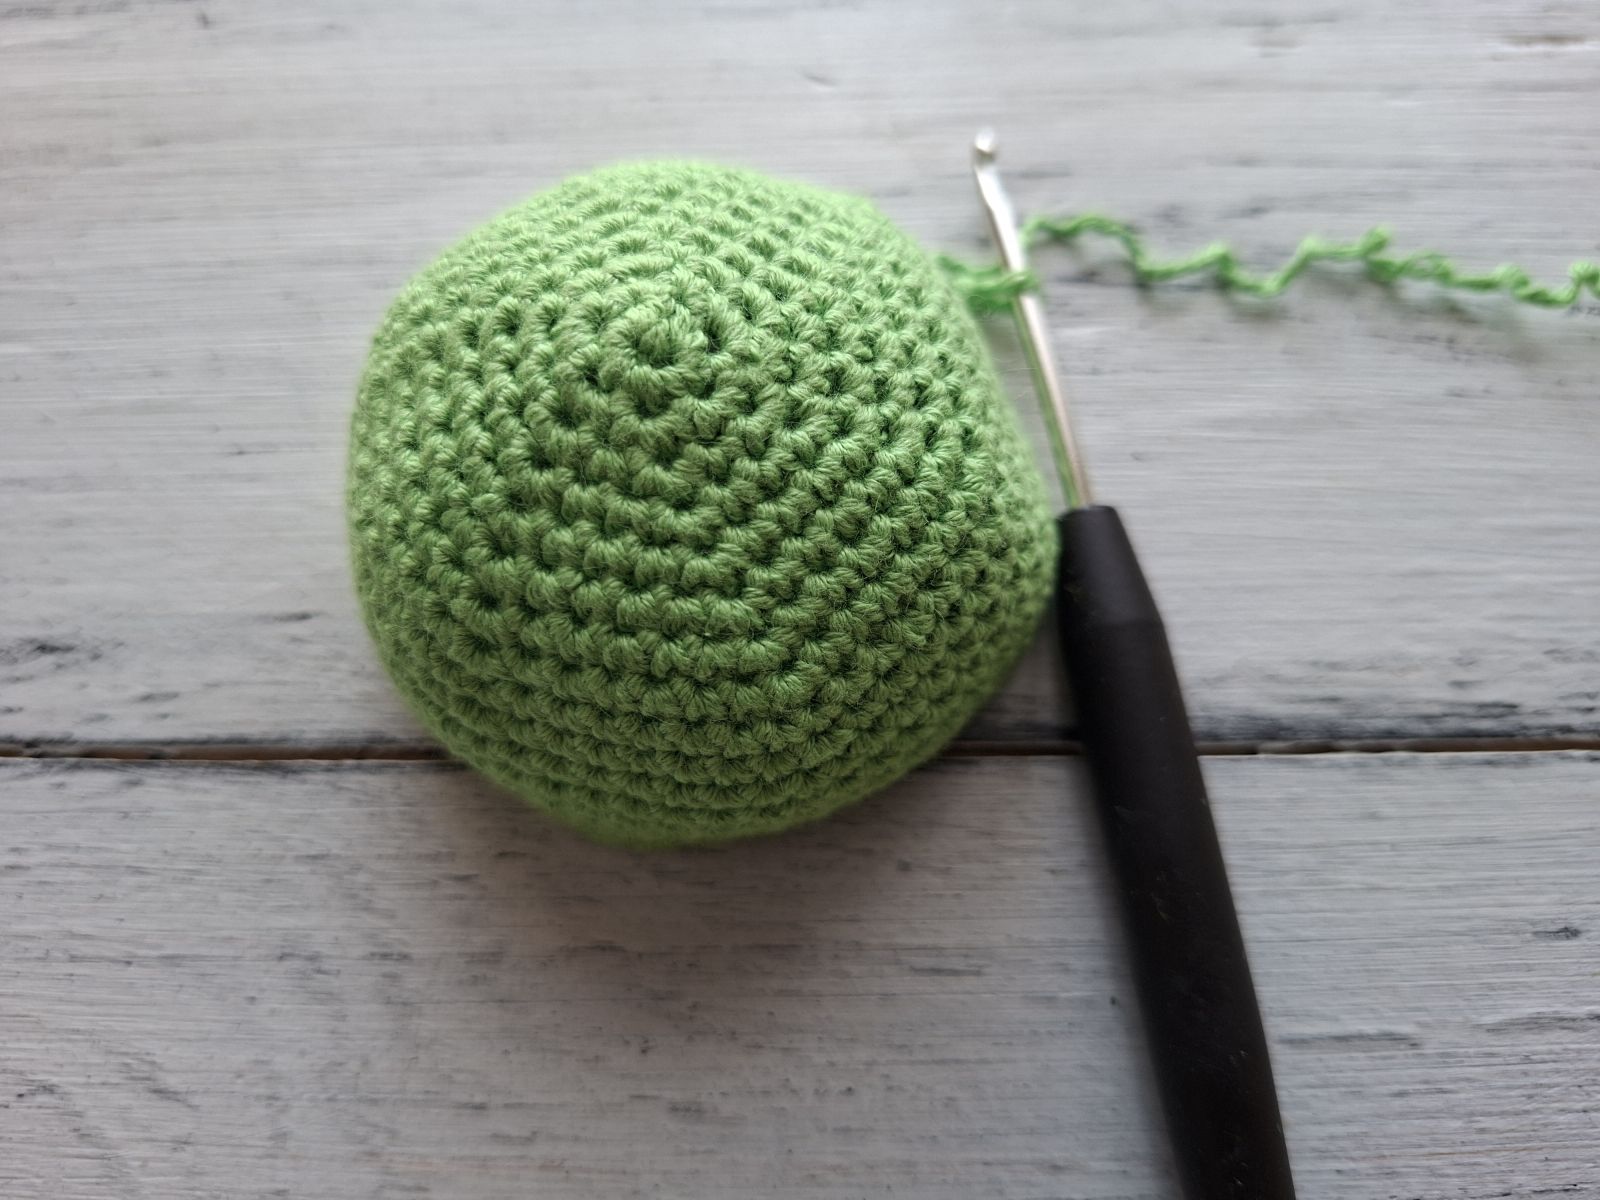
Round 1: 6 single crochets into Magic Ring
Round 2: increase 6 times (12 stitches)
Round 3: *single crochet in the next stitch, increase* (18 stitches)
Round 4: *single crochet in each of next 2 stitches, increase* (24 stitches)
Round 5: *single crochet in each of next 3 stitches, increase* (30 stitches)
Round 6: *single crochet in each of next 4 stitches, increase* (36 stitches)
Round 7: *increase, single crochet in each of next 5 stitches* (42 stitches)
Round 8: *increase, single crochet in each of next 6 stitches* (48 stitches)
Round 9: single crochet in each of next 48 stitches
Round 10: *increase, single crochet in each of next 7 stitches* (54 stitches)
Round 11-14: single crochet in each of next 54 stitches
Fasten off leaving a long tail for sewing.
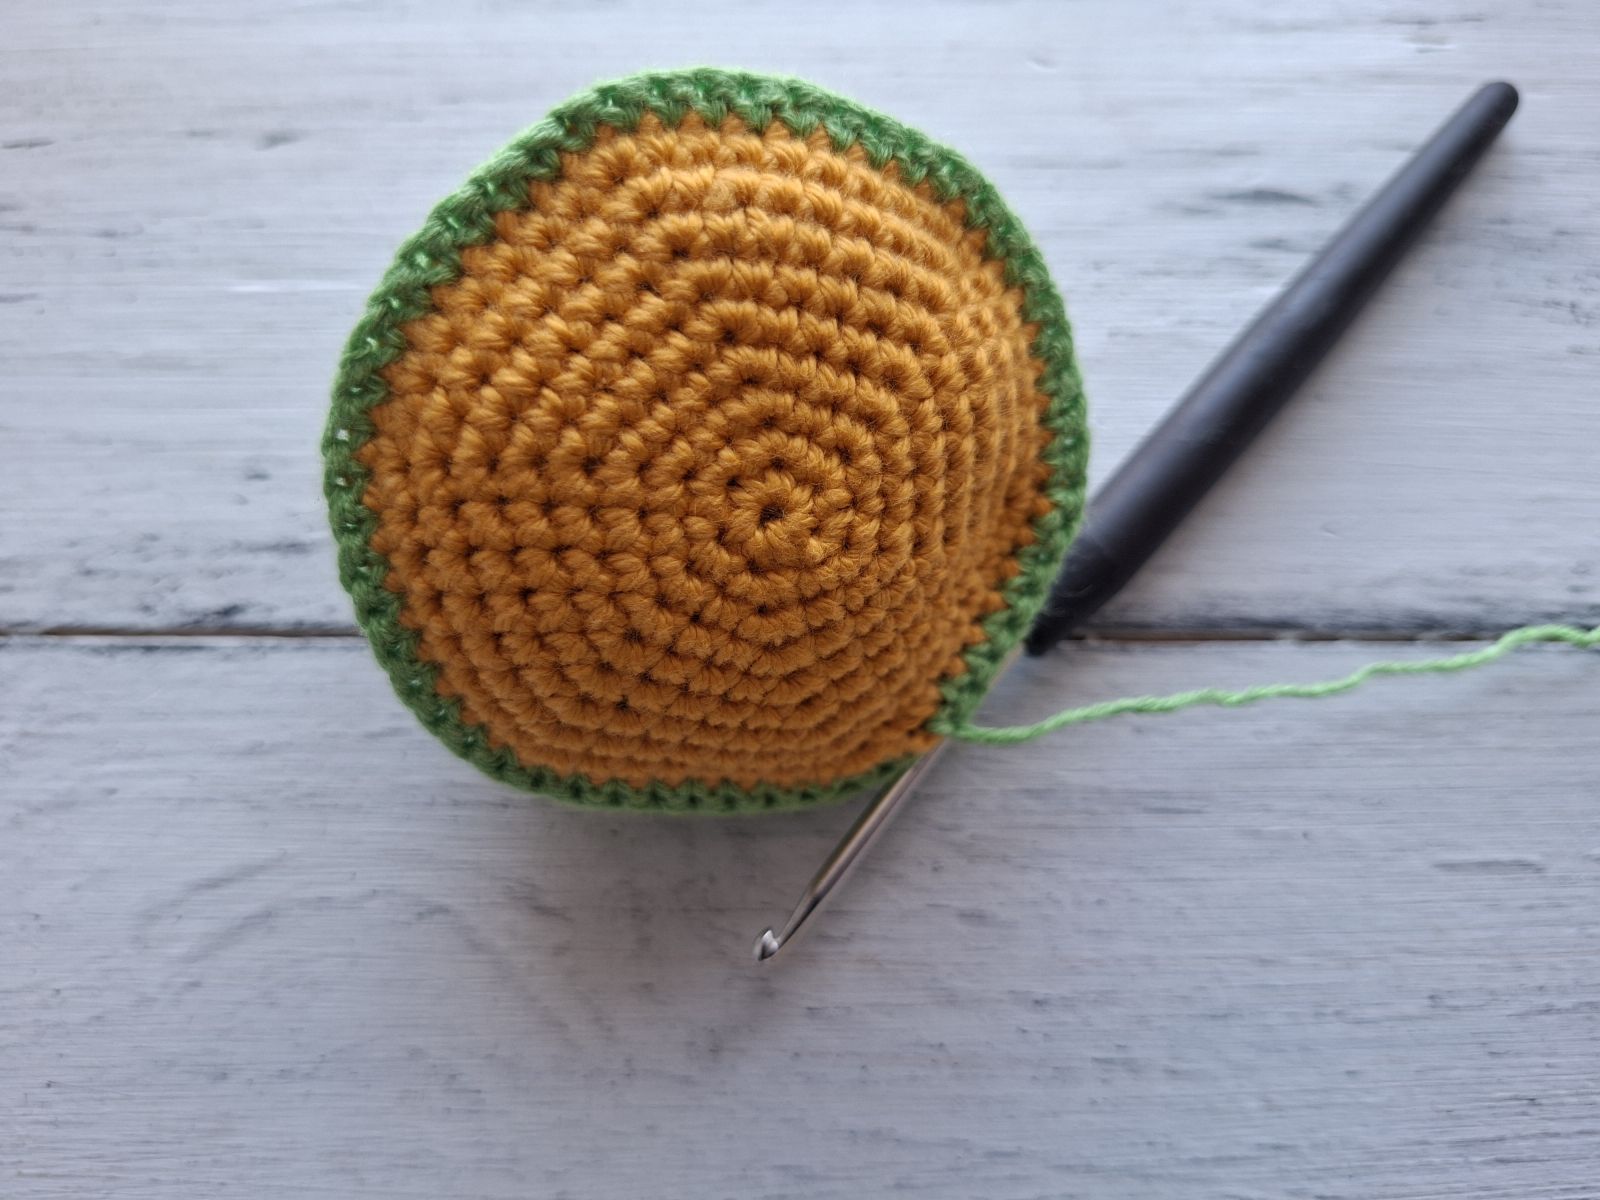
Sew bottom to the upper part of the body using hook and single crochets. Before the hole is closed stuff your frog firmly.
EYE (2x)
Crochet with white colored yarn and begin with a magic ring.
.JPG)
Round 1: 6 single crochets into Magic Ring
Round 2: increase 6 times (12 stitches)
Round 3: *single crochet in the next stitch, increase* (18 stitches)
Rounds 4-5: single crochet in each of next 18 stitches
Round 6: *decrease, single crochet in the next stitch* (12 stitches)
Stuff the eye slightly.
Round 7: *decrease* 6 times.
Fasten off. Work the second eye the same way.
EYELID
Crochet using green colored yarn and begin with a magic ring.
.JPG)
Round 1: 6 single crochets into Magic Ring
Round 2: increase 6 times (12 stitches)
Round 3: *single crochet in the next stitch, increase* (18 stitches)
Rounds 4-6: single crochet in each of next 18 stitches
Fasten off, leaving a long tail for sewing. Work the second eyelid the same way.
LEG (4x)
Crochet using green yarn.
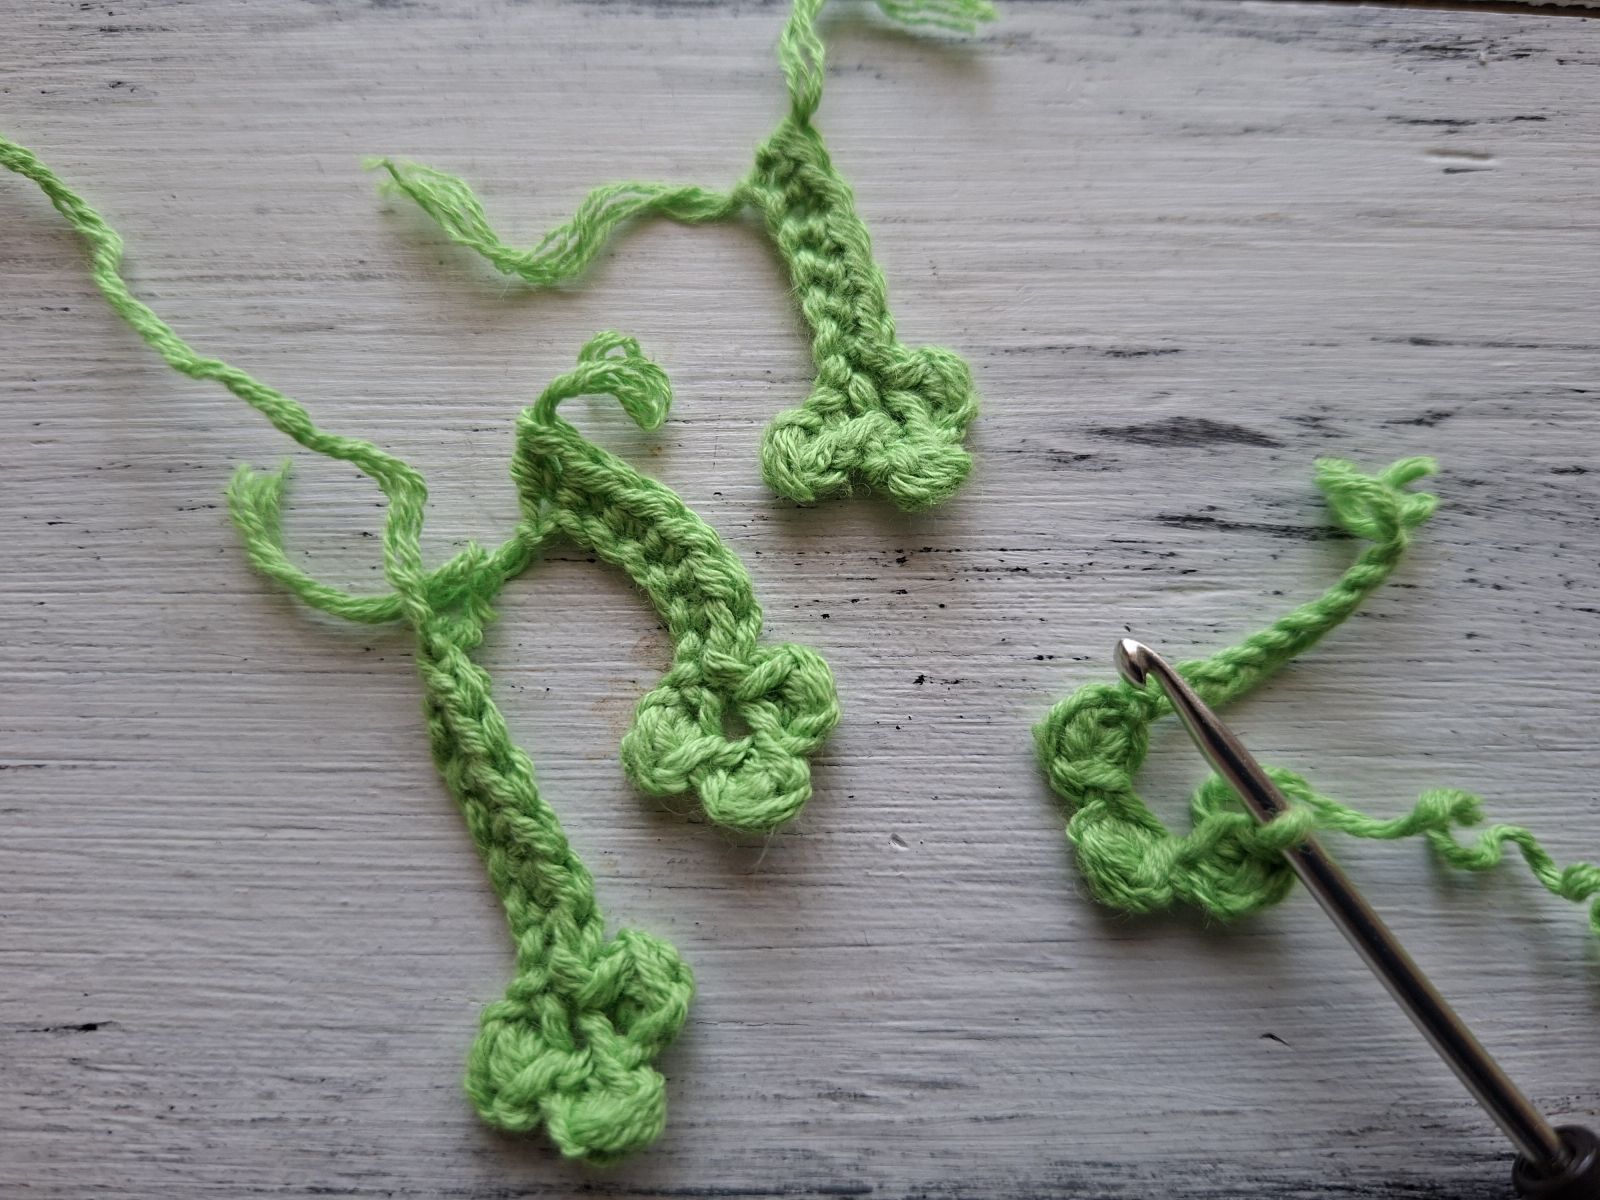
Chain 9 stitches, *double crochets in the second stitch from the hook, slip stitch in the next stitch, chain 2 stitches*, repeat from* 3 times, slip stitch in each of next 6 stitches.
Fasten off leaving a long tail for sewing. Using the same yarn, repeat these actions for 3 more legs.
TONGUE
Crochet with red colored yarn
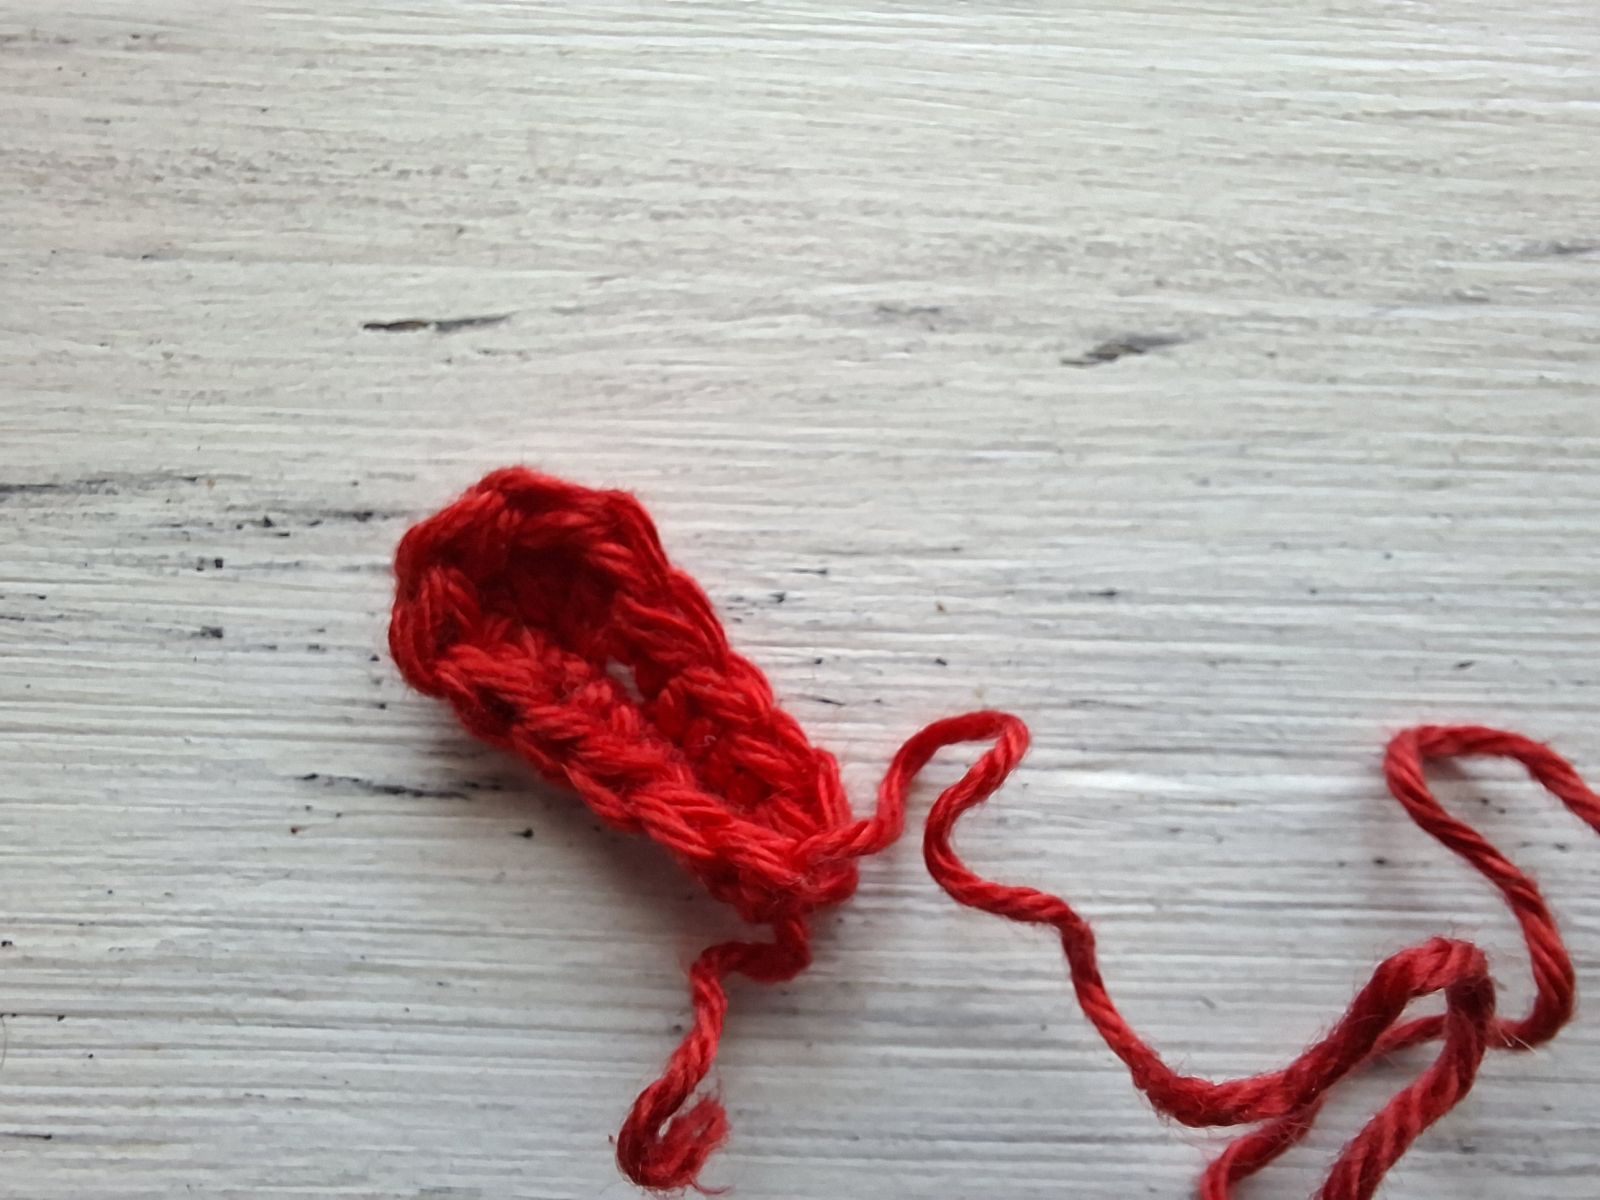
Chain 6 stitches, single crochet in the second stitch from the hook, single crochet in each of next 3 stitches, 5 single crochets in the next stitch, working on the other side of foundation chain: single crochet in each of next 4 stitches.
Fasten off leaving a long tail for sewing.
CROWN
Crochet with yellow colored yarn
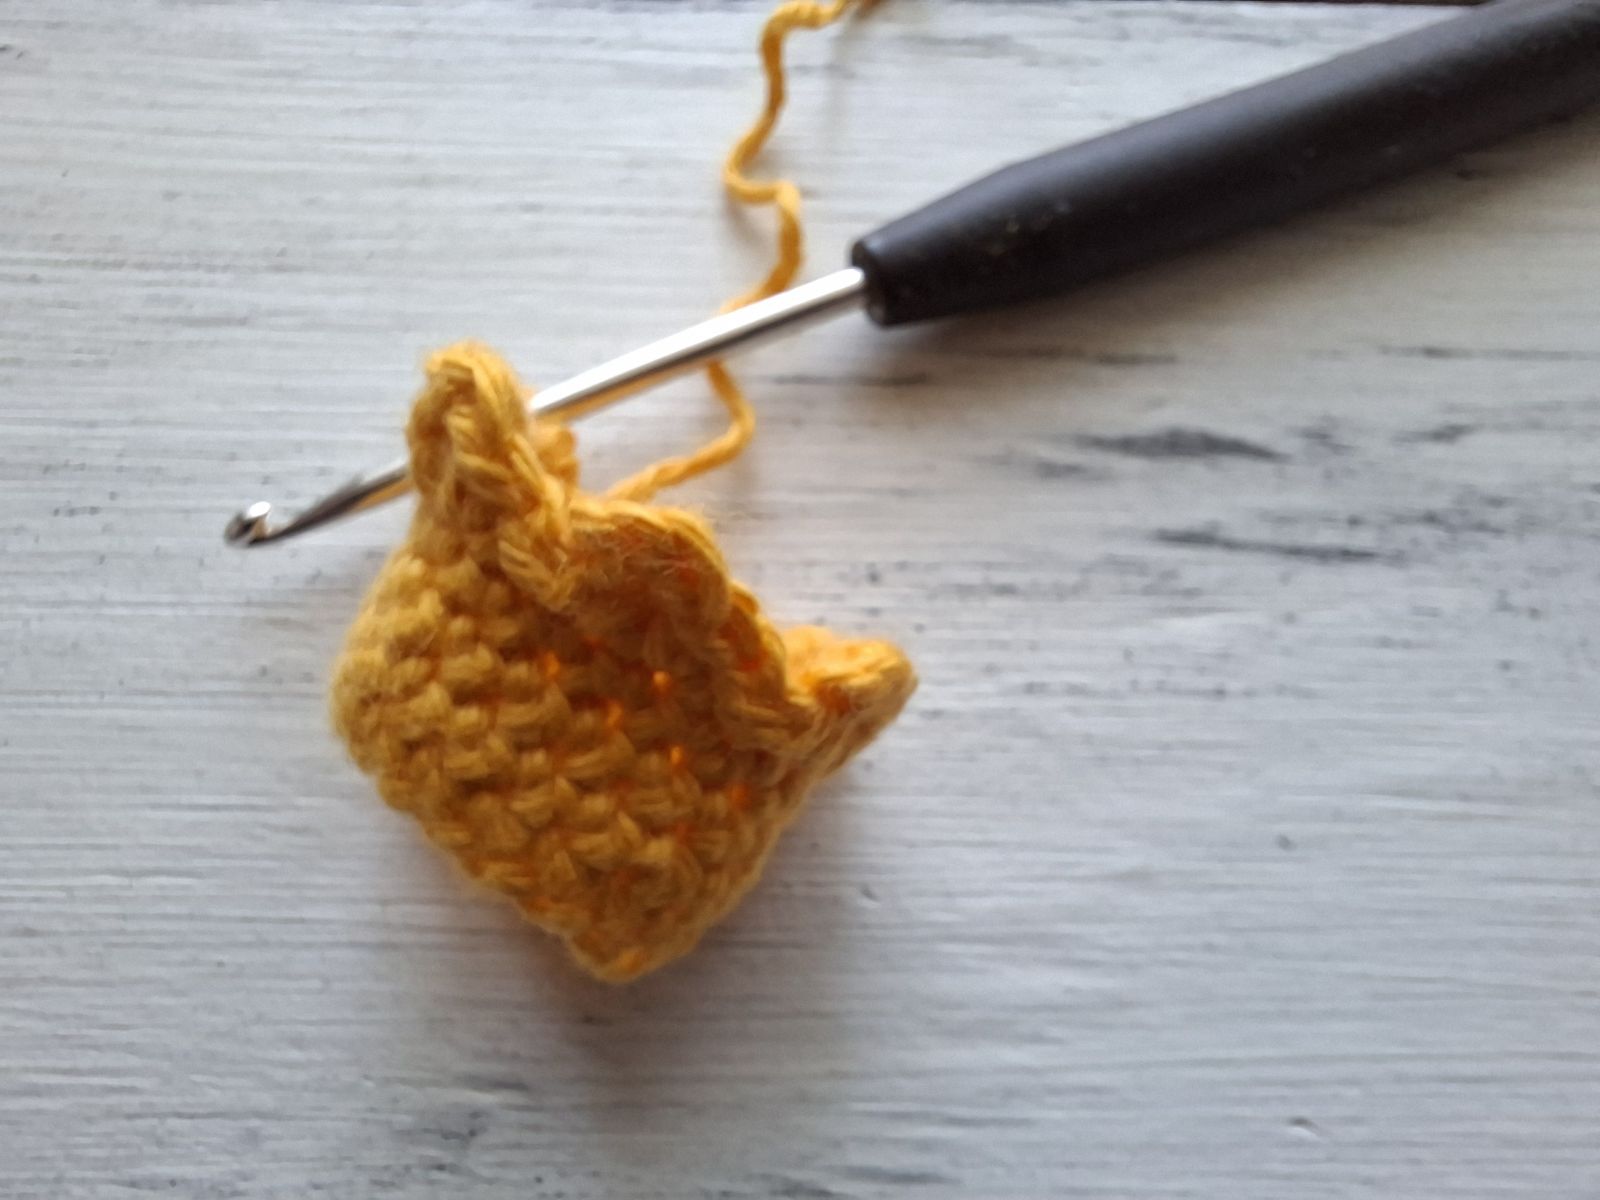
Round 1: chain 18 stitches, join for crocheting in rounds and work 18 single crochets.
Rounds 2-4: single crochet in each of next stitch around. End the last round with a slip stitch.
Round 5: *chain 1 stitch, single crochet in the next stitch, (1 double crochet, chain 2 stitches and slip stitch) in the next stitch, slip stitch in the next stitch*, repeat from* till the end of the round.
Fasten off leaving a long tail for sewing.
ASSEMBLY
Since all the elements of your amigurumi are crocheted, it´s time to sew them together. Use a blunt sewing needle.
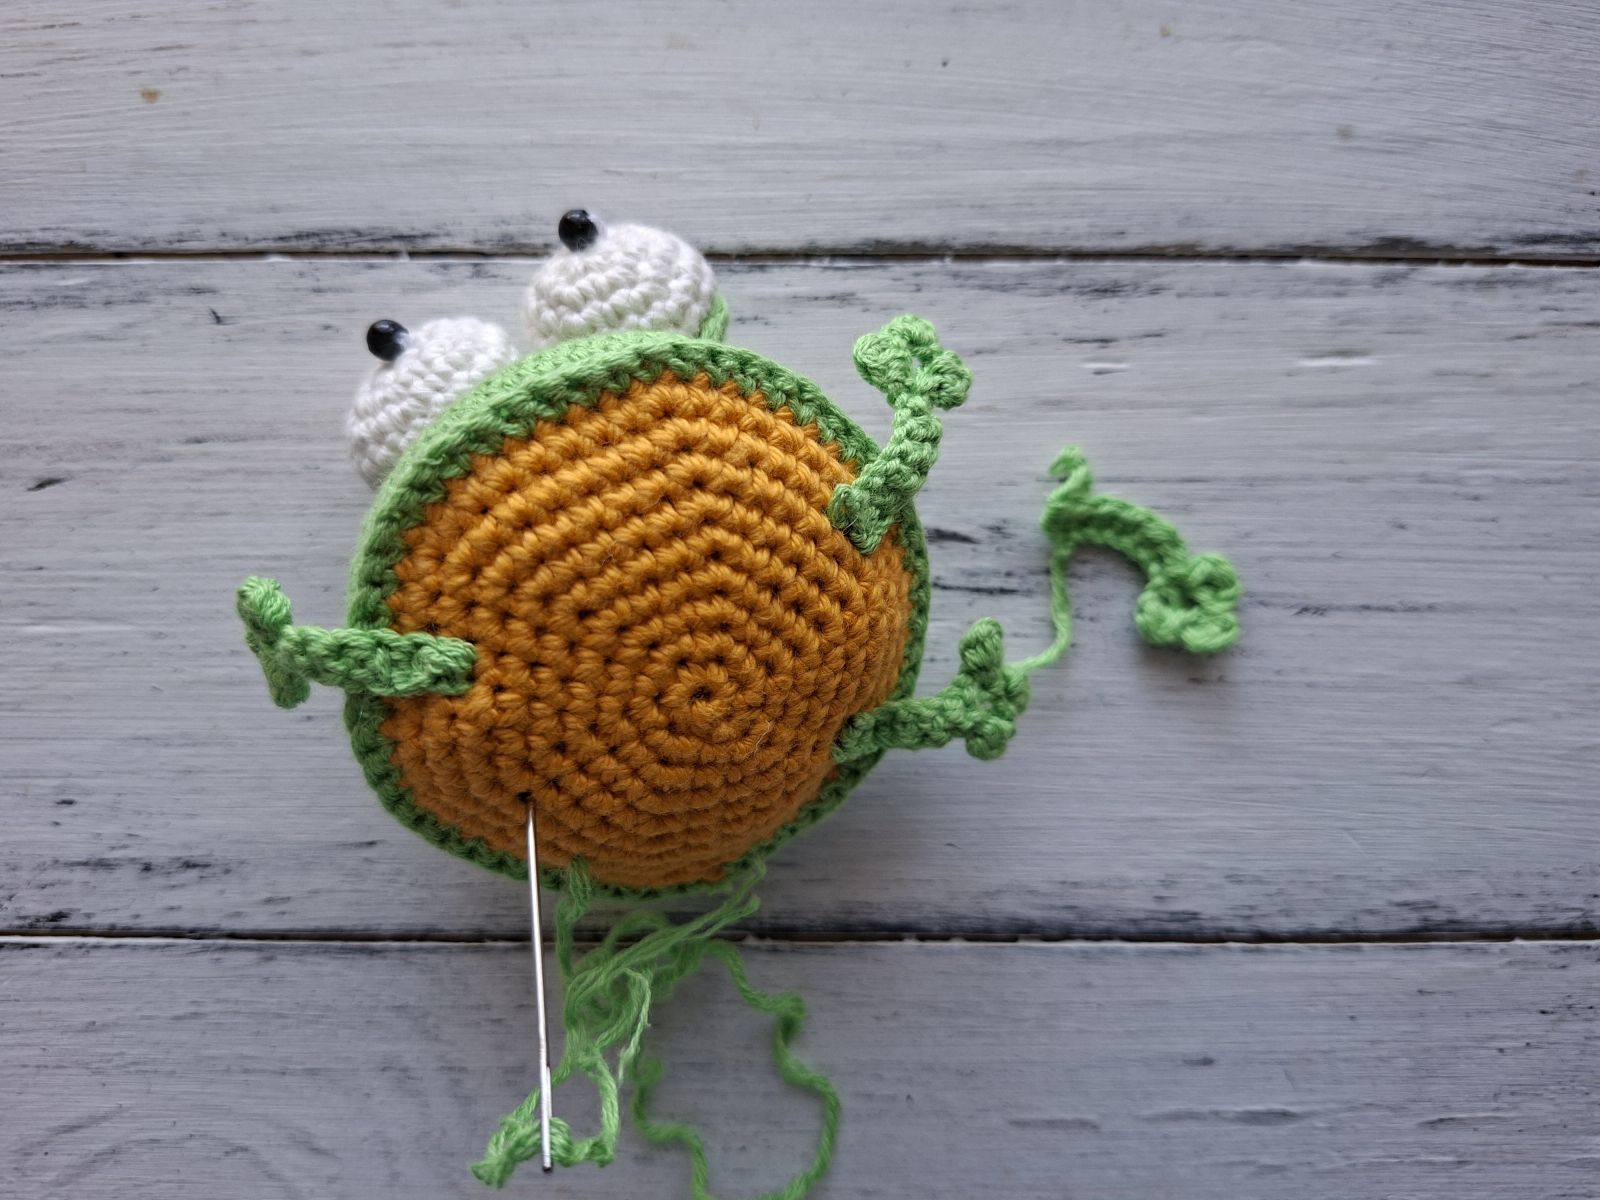
Eyelids are attached to the eyes now. Thread a needle on one of the yarn tails left from the eyelid and sew them to the eyes. Mark where you want the eyes to be with pins, place them in their right place on the head and sew them with yarn ends left to the head of your frog. Using the yarn left sew them to the head of your amigurumi. Be sure to step back and take a look to make sure they are even. Sew black beads to the eyes.
Legs are attached to the body now. Position legs and using the yarn left sew them to the body of the frog. Be sure to step back and take a look to make sure they are even.
(1).jpg)
Attach tongue to the body. Sew the crown on the head.
Ready! Happy crocheting!
I hope you enjoyed crocheting the princess and frog prince and found the pattern helpful. I would love to see your finished amigurumi, so share a picture here or on Instagram by tagging me @tansuluucrafthaus.
If you would like to share this pattern, please link to this page. Also, please credit me when using this pattern by tagging me @tansuluucrafthaus on Instagram. Feel free to contact me with any questions. Thank you for stopping by and have a lovely day!


