Quick to Target
Browse Categories
Community & Help

Crochet pattern for star romper suit Starfish (German/English)

Product description

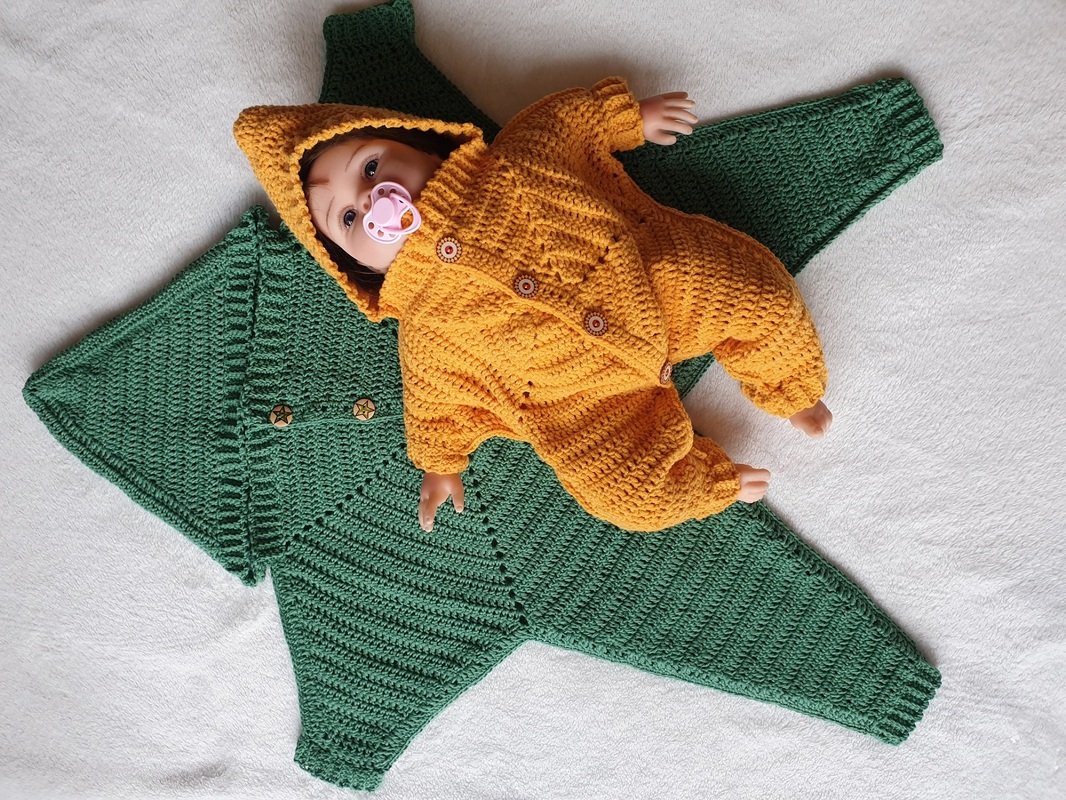
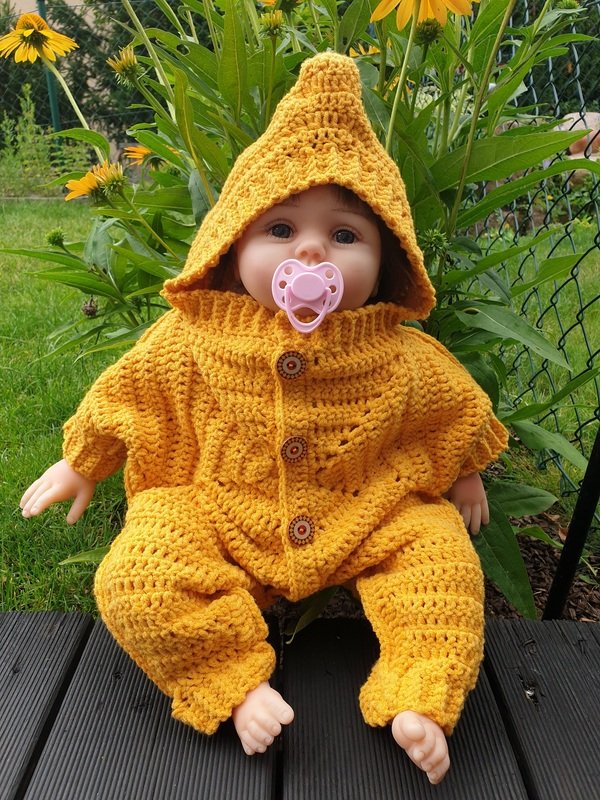
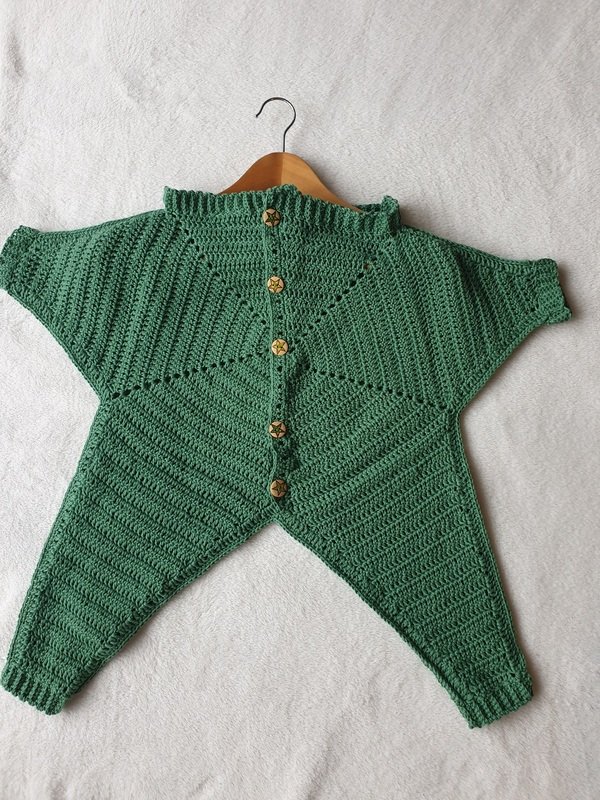
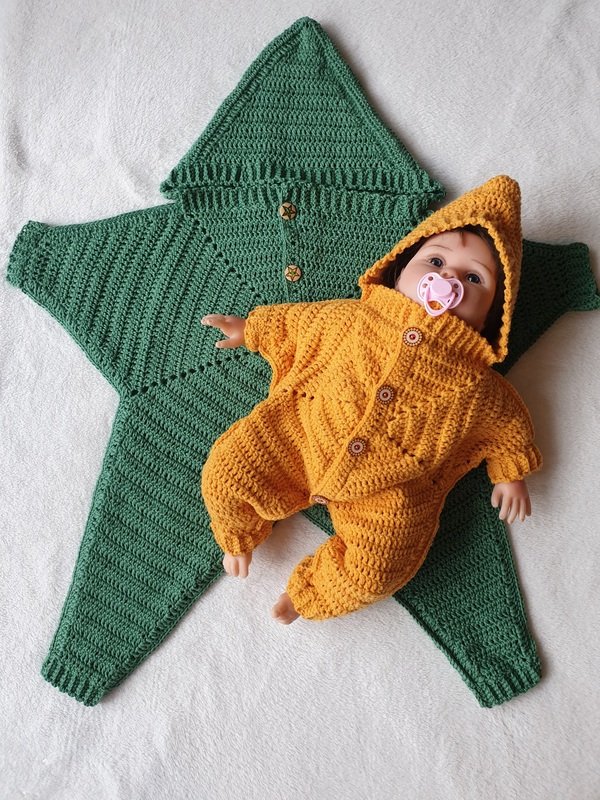
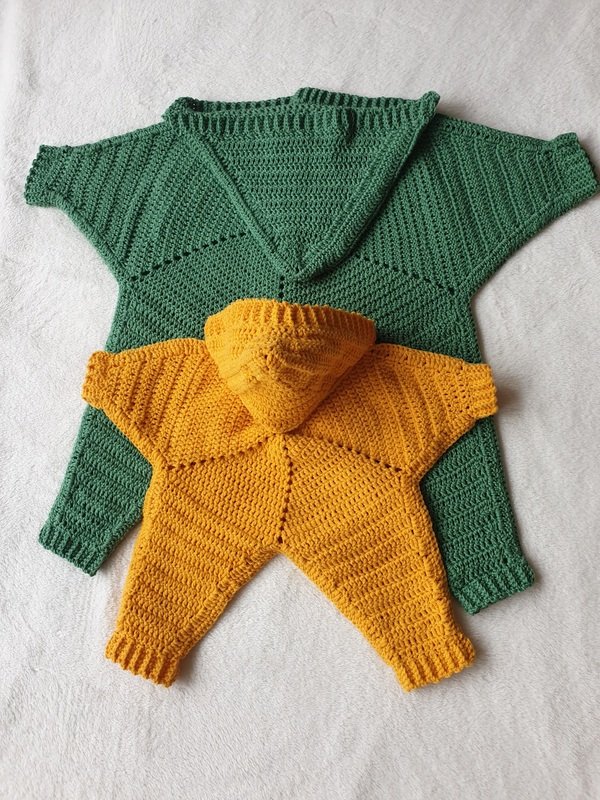
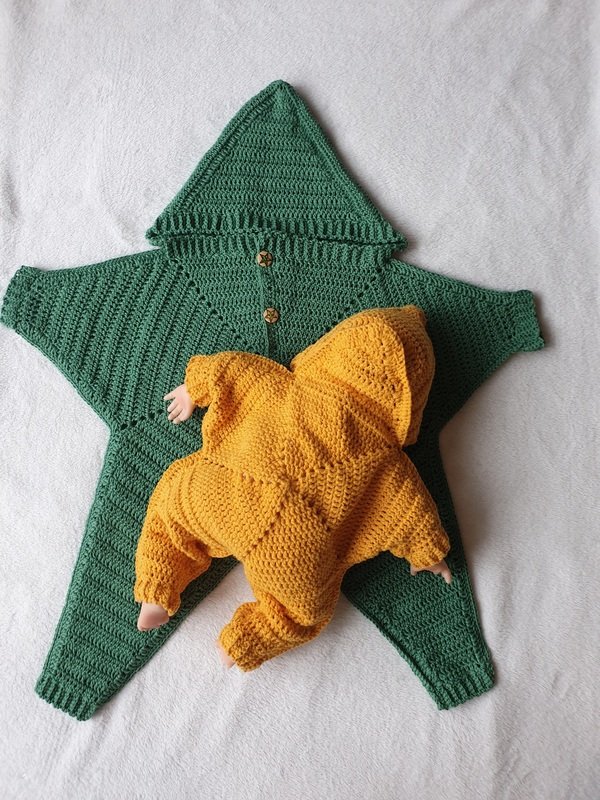
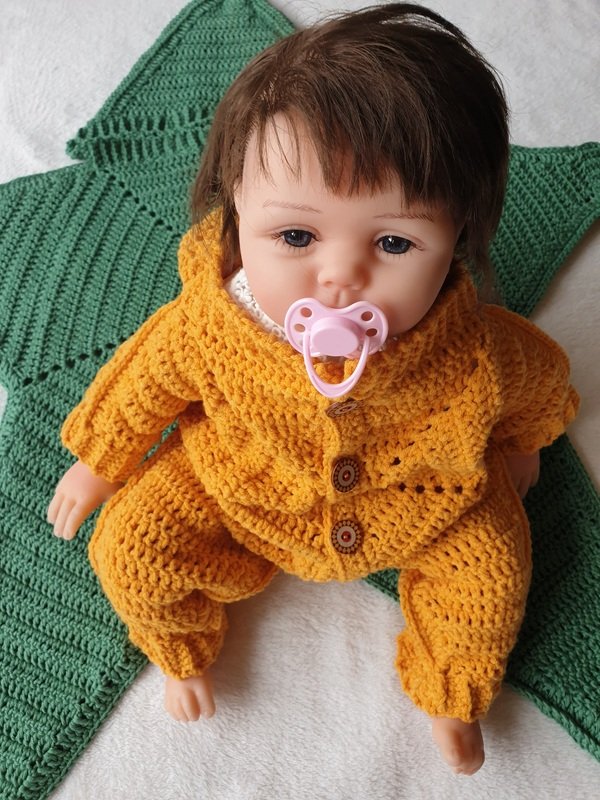
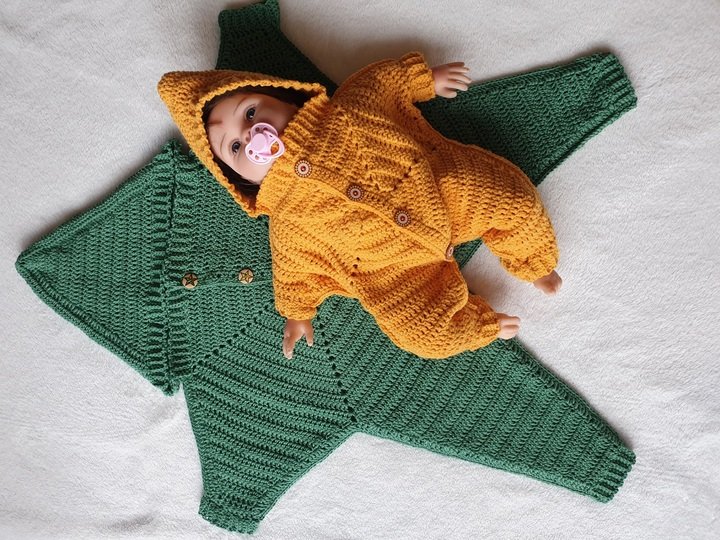
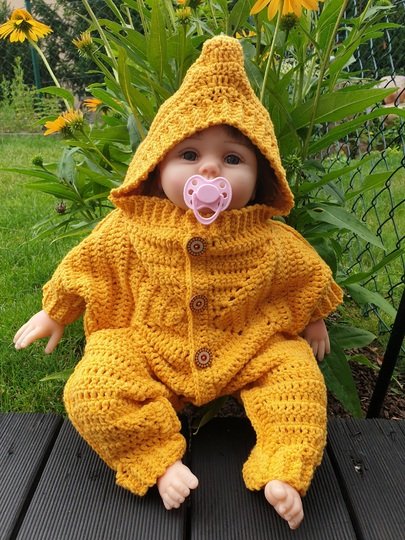
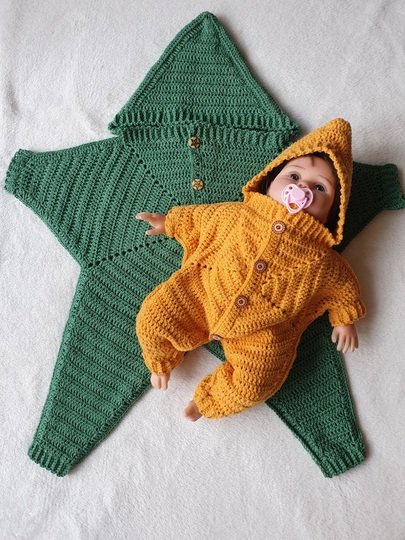
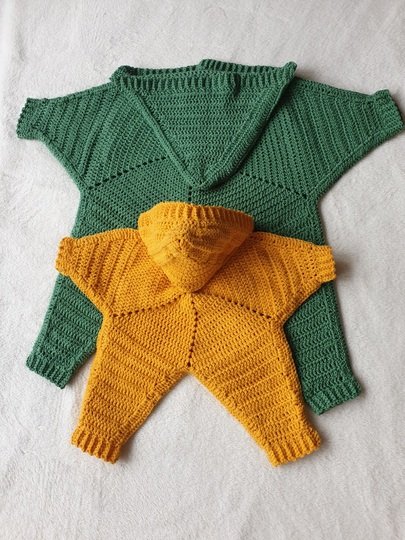
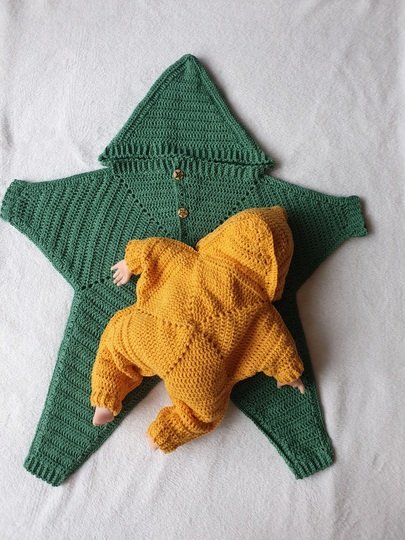
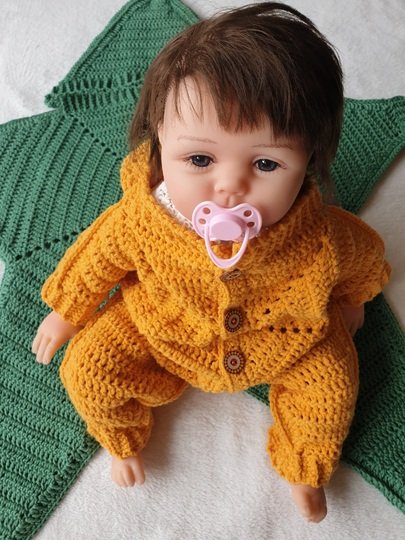
Star-shaped romper suit for babies, toddlers and dolls

I made this model for sizes 0 - 3 months and approx. 12 months.

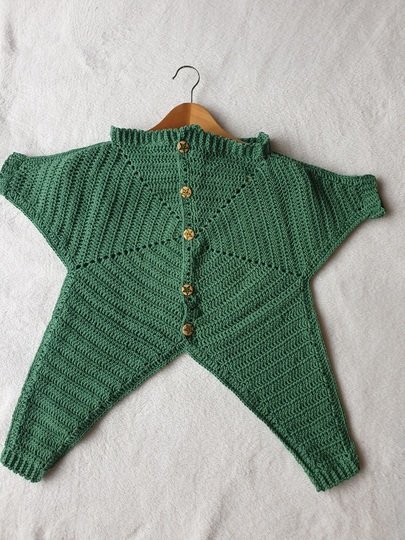
It is adaptable to all sizes as it starts with a 5-corner centre back, the length of which from shoulder to crotch determines the final result. The number of rounds and rows can therefore be easily altered and adapted to the desired size.

This cute romper suit turns every little bundle of joy into a real star.

Skills Required / What You'll Receive

With this crochet pattern (German and English) you will receive 18 pages with detailed descriptions, several crochet patterns and many pictures.

These instructions can also be crocheted by experienced beginners who are familiar with the following stitches:

  • Chain stitch
  • Single crochet
  • Double crochet
  • Slip stitch
  • Magic ring (explained clearly)

A special highlight is the ribbed edging, which is also described with text and pictures.

Size Information

The instructions are written for babies aged 0-3 months and approx. 12 months.

Modifying for other sizes is no problem thanks to the pattern - the centre part, arms and legs can be varied in rounds and rows

Materials List

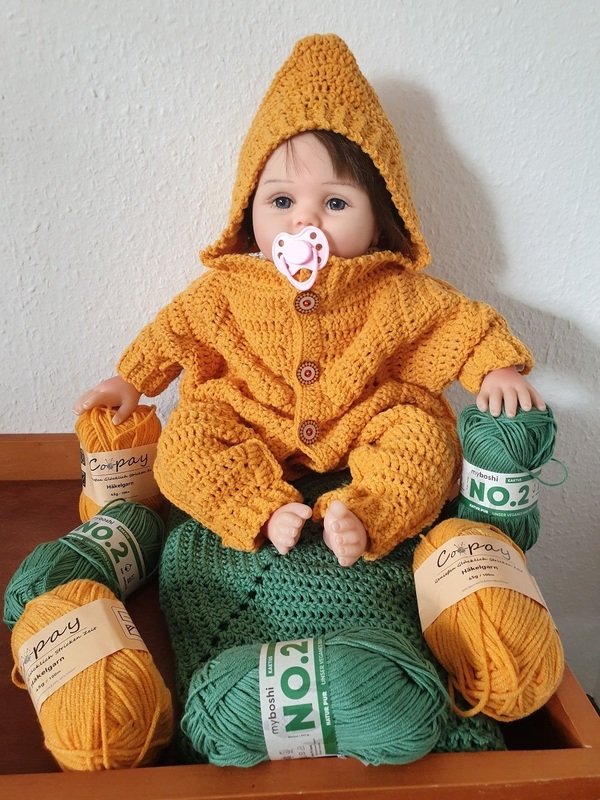
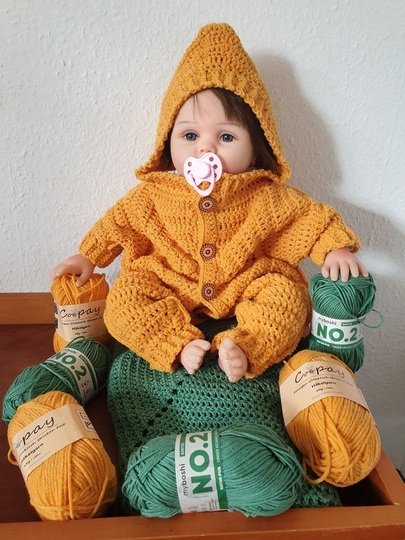
I crocheted the models with the following wool:

Green starfish approx. 12 months:
500 g myboshi NO.2 cactus / crochet hook 4.0 / 18 sts x 8 rows = 10 x 10 cm /
total length tip to foot 85 cm

Yellow star approx. 0 - 3 months:
270 g Coopay turmeric / crochet hook 3.5 / 18 tr x 9 rows = 10 x 10 cm
Total length tip to foot 57 cm

The model can be worked with any wool, the centre section determines the final size.

Of course, you will also need scissors and a thick sewing needle.
Unfortunately, the many threads do not sew themselves.

Copyright©:
Please note the copyrights of Sabine Herlitz-Seiling and Wellness-Edition.
These instructions including pictures and crochet patterns may not be copied, passed on or sold.
Models made according to these instructions may not be offered for sale or sold commercially.
Exceptions - after consultation with me - are possible for charitable or non-profit organisations.
Under the condition with reference to this copyright and the note "handmade according to the pattern of Sabine-Herlitz-Seiling & Wellness-Edition.
Pictures of the reworked models may be published in social media - but also expressly only with this reference and a link to this template.
The copyright applies to all pages, all images and all crochet fonts in these instructions.
© Sabine Herlitz-Seiling and Wellness-Edition. All rights reserved.

Purchase Crochet Pattern

You can download the pattern immediately after receipt of payment.

Author: smartstitches_diy
Languages: English | Deutsch
5.0 out of 5 stars
Price: US $9.14*
With Prepaid-account: US $8.69*
All prices include VAT.

Product description

Star-shaped romper suit for babies, toddlers and dolls

I made this model for sizes 0 - 3 months and approx. 12 months.

It is adaptable to all sizes as it starts with a 5-corner centre back, the length of which from shoulder to crotch determines the final result. The number of rounds and rows can therefore be easily altered and adapted to the desired size.

This cute romper suit turns every little bundle of joy into a real star.

Skills Required / What You'll Receive

With this crochet pattern (German and English) you will receive 18 pages with detailed descriptions, several crochet patterns and many pictures.

These instructions can also be crocheted by experienced beginners who are familiar with the following stitches:

  • Chain stitch
  • Single crochet
  • Double crochet
  • Slip stitch
  • Magic ring (explained clearly)

A special highlight is the ribbed edging, which is also described with text and pictures.

Size Information

The instructions are written for babies aged 0-3 months and approx. 12 months.

Modifying for other sizes is no problem thanks to the pattern - the centre part, arms and legs can be varied in rounds and rows

Materials List

I crocheted the models with the following wool:

Green starfish approx. 12 months:
500 g myboshi NO.2 cactus / crochet hook 4.0 / 18 sts x 8 rows = 10 x 10 cm /
total length tip to foot 85 cm

Yellow star approx. 0 - 3 months:
270 g Coopay turmeric / crochet hook 3.5 / 18 tr x 9 rows = 10 x 10 cm
Total length tip to foot 57 cm

The model can be worked with any wool, the centre section determines the final size.

Of course, you will also need scissors and a thick sewing needle.
Unfortunately, the many threads do not sew themselves.

Copyright©:
Please note the copyrights of Sabine Herlitz-Seiling and Wellness-Edition.
These instructions including pictures and crochet patterns may not be copied, passed on or sold.
Models made according to these instructions may not be offered for sale or sold commercially.
Exceptions - after consultation with me - are possible for charitable or non-profit organisations.
Under the condition with reference to this copyright and the note "handmade according to the pattern of Sabine-Herlitz-Seiling & Wellness-Edition.
Pictures of the reworked models may be published in social media - but also expressly only with this reference and a link to this template.
The copyright applies to all pages, all images and all crochet fonts in these instructions.
© Sabine Herlitz-Seiling and Wellness-Edition. All rights reserved.

Product details
Created
July 28, 2025
Updated
August 26, 2025
File types
PDF
Product views
4,636
Sales
180
Questions & Answers
9
Categories
Crochet » Babies
Crochet » Babies » Overalls

Reviews

Reviews for this product
What Buyers say / 1
5.0/5
Based on 1 Review
The first product reviews are in.

Once there are three product reviews, we'll show the star breakdown here.

1 Review
Mo-Mo
June 29, 2026

süßer Strampler

Die Anleitung ist sehr detailliert, an einigen Stellen für mich etwas unverständlich, aber da ich viel Übung habe, habe ich es hin bekommen. Ich habe die Anleitung allerdings an einigen Stellen modifiziert und abgeändert. Der Strampler ist für geübte sehr schnell zu häkeln und unbedingt eine schöne Überraschung für die Beschenkten.
Was this review helpful?
  • smartstitches_diy smartstitches_diy Author 1 months ago
    Vielen Dank für die großartige Bewertung und das wertvolle Feedback!
    Ich freue mich sehr, dass der Sternstrampler so schnell gehäkelt war und den Beschenkten eine Freude macht.
    Deine Hinweise zu den Beschreibungen nehme ich mir zu Herzen, um meine Anleitungen noch besser zu machen.
    Schön, dass Du das Projekt so kreativ angepasst hast!
    Alles Liebe für Deine nächsten Häkelprojekte.

Ask Question

Questions & Answers (9)

  • 17 days ago
    Ich traue mich nicht an den gelben Stern. Habe schon Verständnisprobleme in der 1. Runde mit den Kettmaschen. Ich sehe gerade dass da noch jemand das gleiche Problem hat.
    Vielleicht kann ich es in der Zeichenschrift besser erkennen.
    • smartstitches_diy Author birgit-nickler
      17 days ago
      Hallo,

      vielen Dank für Deinen Kauf und Dein ehrliches Feedback!
      Bitte hab keine Angst vor dem gelben Stern – das ist kein Hexenwerk, und wir kriegen das jetzt zusammen in einer Minute absolut verständlich und frustfrei an Deiner Nadel gelöst!

      Da Du es in den Kommentaren ja selbst schon richtig gesehen hast, dass Du mit dieser Frage überhaupt nicht alleine bist, antworte ich Dir hier jetzt ganz ausführlich.

      Hoffentlich dient das auch als kleine Hilfe für alle Häkel-Begeisterten, die sich in Zukunft mit genau dem gleichen kleinen Logik-Knoten herumschlagen!

      Die erste Runde liest sich in der Theorie nämlich oft viel komplizierter, als sie sich auf der Couch häkelt.

      So einfach und logisch funktioniert der Runden-Schluss in der Praxis:

      Der Rundenschluss (Die 1. Kettmasche):
      Wenn Du am Ende Deiner Runde angekommen bist, schließt Du die Runde ganz normal zum Kreis, indem Du eine Kettmasche (KM) exakt in die 2. Deiner Anfangs-Luftmaschen setzt.
      Jetzt ist der Kreis geschlossen!

      Die 2. Kettmasche: Wenn Du jetzt auf Deine Nadel schaust, liegen links daneben noch zwei freie Luftmaschen der Vorrunde (die 3. und 4. LM) – das ist der Eck-Bogen, der nach oben wächst.
      Eine KM schließt in die 2. LM, die Startposition der nächsten Runde verschiebt sich nach links, indem wir eine KM um die 1. M des Luftmaschenbogens machen (die 3. LM der 4 Anfangs-LM).

      Schon sitzt Deine Nadel auf Deiner neuen Startposition haargenau rechts im Bogen.
      Aus dieser perfekten Position heraus häkelst Du jetzt einfach Deine 4 Anfangs-Steige-Luftmaschen für die neue Runde hoch.

      Das Gesetz für das logische Wachstum in allen Folgerunden:
      Genau so funktioniert ab jetzt das Schließen JEDER einzelnen Runde im gesamten Mittelteil!
      Von dieser Startposition aus vergrößert sich die Anzahl Deiner Stäbchen in jeder Runde vollkommen logisch und ganz von alleine:

      Du häkelst einfach am Ende des Bogens 1 Stäbchen um die Luftmasche hinzu, behäkelst danach jedes Stäbchen der Vorrunde stur mit einem Stäbchen und vergrößerst diesen Block am Ende wieder, indem Du in den folgenden Eck-Luftmaschenbogen am Anfang ebenfalls 1 Stäbchen um den Bogen herum häkelst.

      Wenn Du Dir die Häkelschrift auf Seite 3 der Anleitung anschaust, siehst Du dort genau an dieser Ecke in jeder Runde zwei dicke schwarze Punkte nebeneinander eingezeichnet.

      Der erste schließt den Kreis, und der zweite wandert um die Luftmasche herum nach links in den Bogen hinein.

      Schnapp Dir ganz entspannt Deine Nadel und probier es einfach mal aus – Du wirst sehen, sobald Du es auf den Fingern hast, macht es sofort „Aha!“ und läuft wie von alleine!

      Ich wünsche Dir und allen zukünftigen Sternen-Häklerinnen unendlich viel Freude beim Nacharbeiten!

      Wenn es an irgendeiner Stelle wieder hakt, schreibt mir einfach eine kurze Nachricht – ich helfe Euch super gerne weiter!

      Herzliche Grüße,

      Sabine
      • birgit-nickler smartstitches_diy
        17 days ago
        Ich danke dir für die ausführliche Anleitung. Muss noch die letzte Babysocke fertig stricken, dann geht es los.
        • smartstitches_diy Author birgit-nickler
          17 days ago
          Sehr gerne!
          Oh wie schön, dann ganz viel Freude beim Fertigstricken der Babysocke!
          Ich wünsche Dir danach einen wunderbaren Start und eine gemütliche Häkelzeit mit Deinem Stern!
          Wenn noch etwas sein sollte, melde Dich jederzeit.

          Herzliche Grüße,
          Sabine
  • 8 months ago
    Grundsätzlich bin ich gut klar gekommen mit Ihrer Beschreibung. Allerdings komme ich beim anhäkeln der Mütze nicht klar. Ich finde sie irgendwie auch sehr groß und auf ihrem Foto sieht es ganz anders aus. Ich habe den grünen Stern gehäkelt und die gleiche Reihenanzahl
    • smartstitches_diy Author manuela-schulz24
      8 months ago
      Ich freue mich, dass die Anleitung soweit gut verständlich war.
      Ich kann jetzt natürlich schwer erklären, warum die Kapuze anders aussieht, als auf dem Foto bzw. bei meinem grünen Modell.
      Können Sie mir vielleicht Bilder per PM schicken, damit wir gemeinsam heraufinden können, wo das Problem liegt? Ich könnte dann im Gegenzug auch detailliertere Bilder "meiner" Kapuze zurückschicken, damit wir vergleichen können.
      • manuela-schulz24 smartstitches_diy
        8 months ago
        Hallo, ja ich schicke Ihnen gerne ein paar Bilder. Ich schaue mal wie ich es hier mache.
  • 1 years ago
    Ich finde die Anleitung echt ziemlich schwer verständlich. Habe gerade angefangen und komme mit der Erklärung für die KM nicht klar.
    • smartstitches_diy Author natalie-sandner
      1 years ago
      Vielen Dank für Dein Feedback. Sehr gerne helfe ich weiter.
      Liegt es an der zweiten KM, die nach Abschluss der Runde in den Anfangs-Luftmaschenbogen gehäkelt wird?

      "In Magic Ring 4 LM / 4 x (2 Stb. + 2 LM) / 2 LM / 1 Stb. häkeln, an Anfangsfaden ziehen, bis sich der Kreis
      komplett schließt, mit KM an 2. Anfangs-LM verbinden,
      1 weitere KM in den Luftmaschenbogen (LMB) zwischen 2. und 3. LM"

      Man beendet die 1. Runde mit einer KM in die 2. der 4 Anfangs-LM.
      Dann folgt eine weitere KM, die unterhalb der 2. und 3. LM angeknüpft wird, um von hier aus dann mit der nächsten Runde fortzufahren. Ja, vielleicht ist "zwischen" missverständlich, die KM kommt unter die beiden verbliebenen 2 LM. An diese 2. KM werden die 4 Anfangs-Steige-LM gehäkelt. Es wiederholt sich dann immer am Ende der Runde. 1 KM in die 2. Steige-LM, 1 KM in den LM-Bogen - unterhalb der beiden (3. und 4.) LM. Bei der Häkelschrift ist das ganz gut mit den jeweils 2 schwarzen Punkten zu erkennen.

      Ich hoffe, meine Erklärung hilft. Für weitere Fragen stehe ich gerne zur Verfügung!

Win shopping credit every month!

42 prizes / total value €300: 30×€5, 10×€10, 2×€25 – simply activate the newsletter. No purchase necessary. Unsubscribe at any time. Prizes are awarded as Crazypatterns shopping credit. Learn more