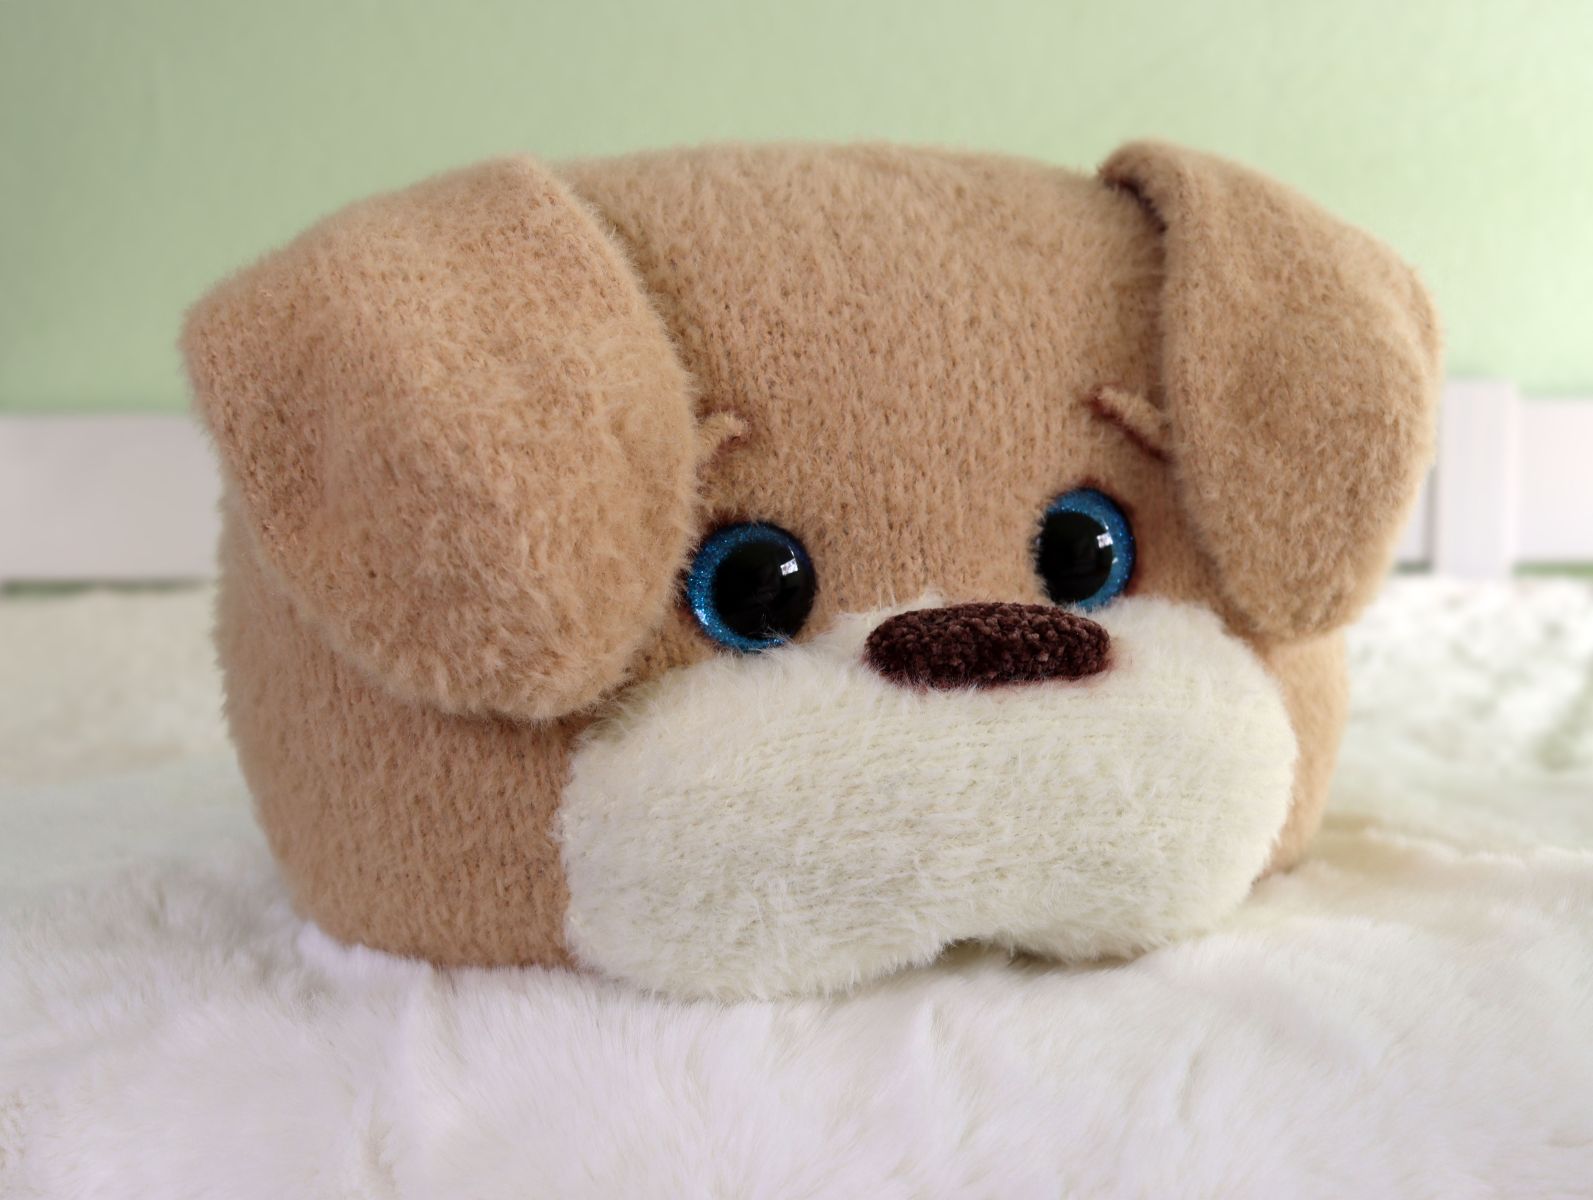
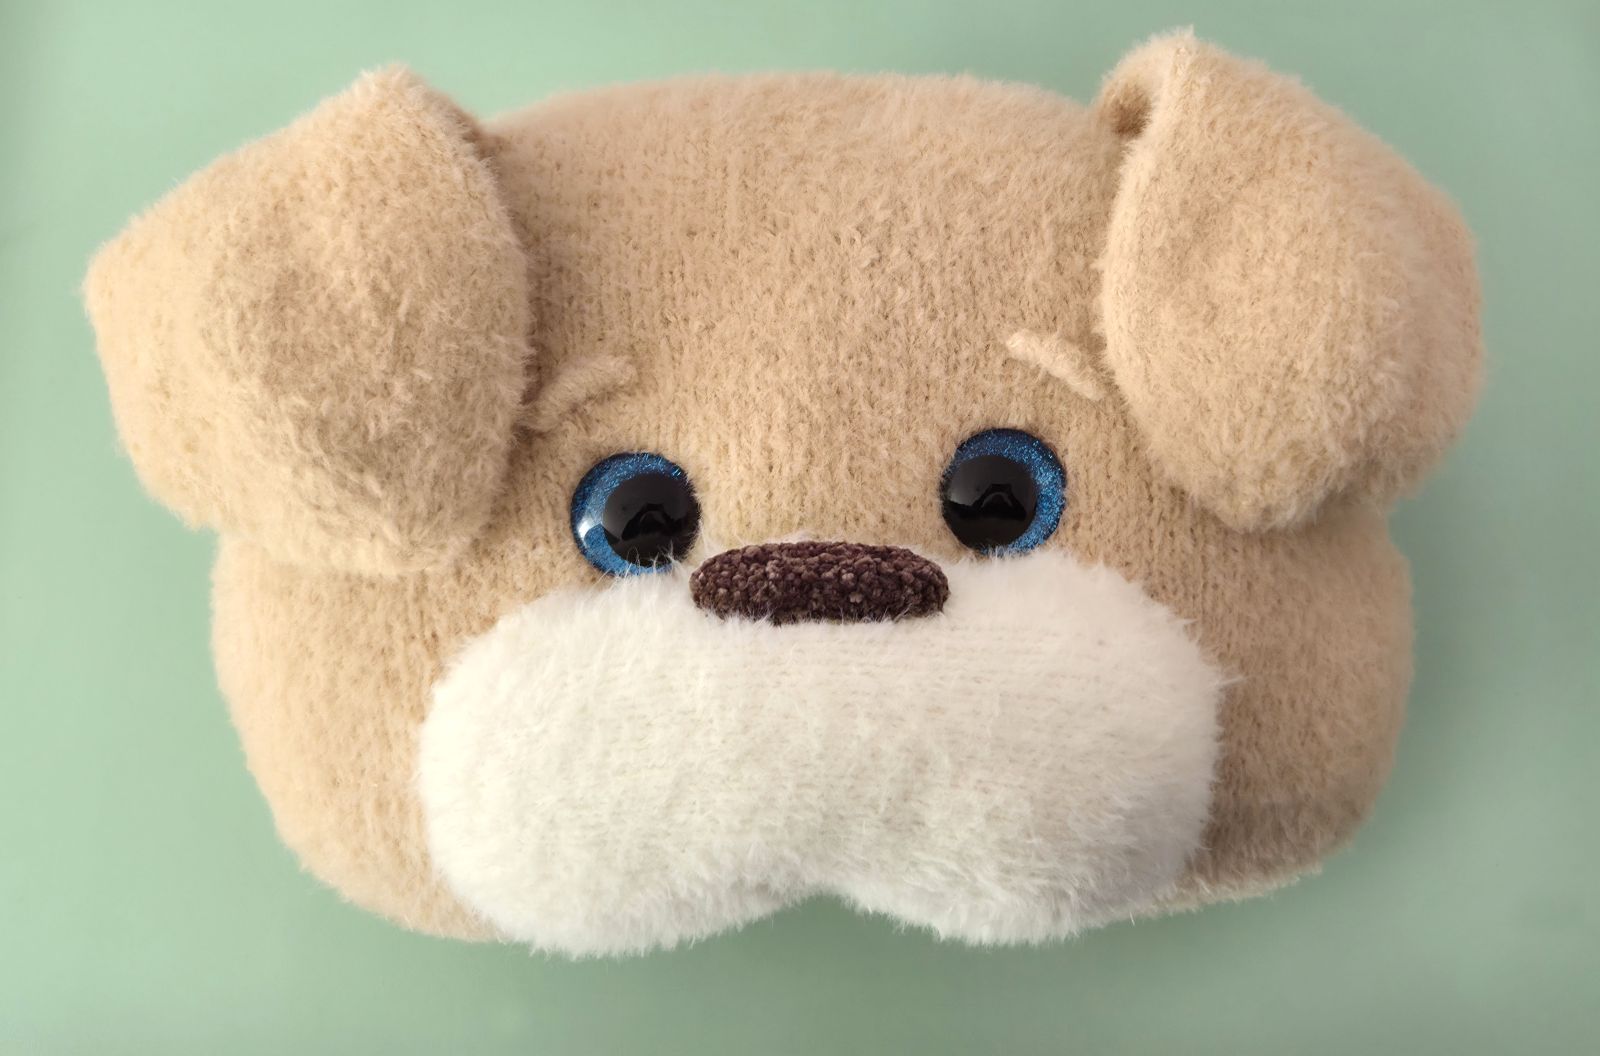
Cuddly Puppy Cushion
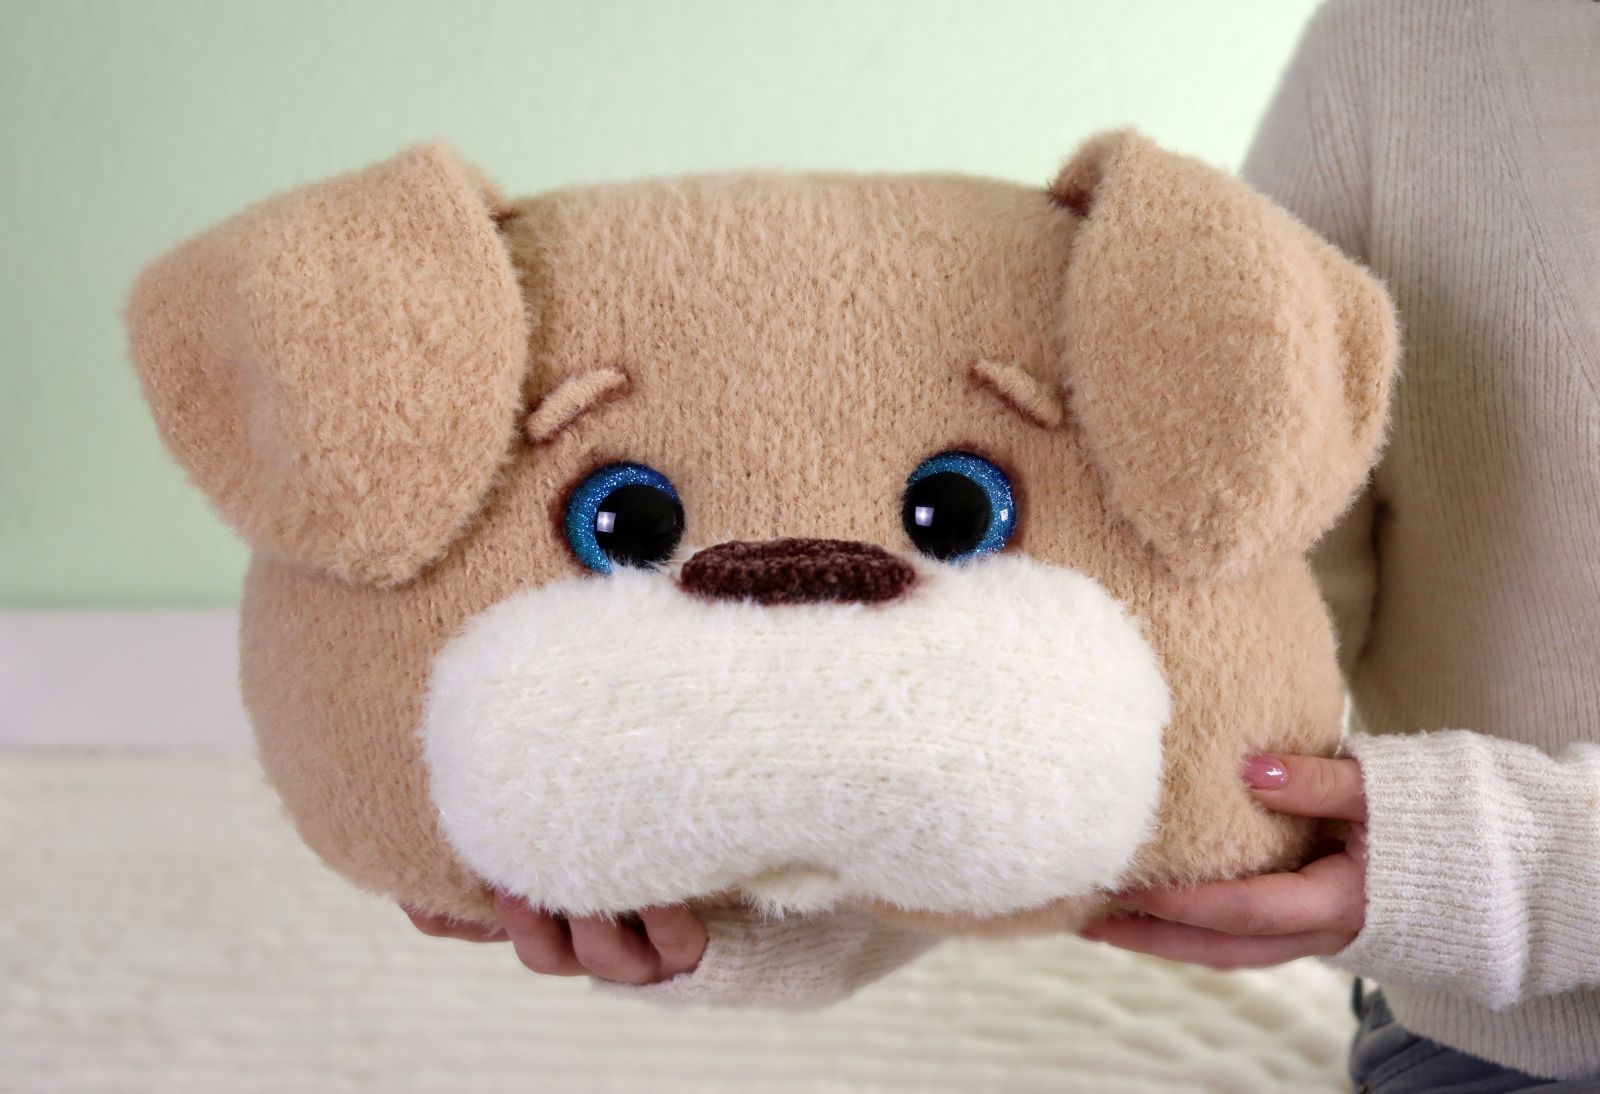
This cuddly puppy cushion is a charming knitting project that’s perfect even for beginners. It’s an irresistibly cute pillow for all dog lovers. Whether as a gift for toddlers or as a cozy decorative piece in a child’s room – this little puppy looks adorable anywhere.
A particularly fluffy yarn was chosen to make him extra soft and snuggly. Of course, the yarn can be adjusted to suit personal preference:
- Chenille yarn gives the puppy a velvety, plush‑like surface.
- Cotton yarn creates a clearer, more defined texture and gives a slightly neater look.
Size: approx. 35 cm long and 26 cm high.
Knitting Instructions:
All parts are crafted entirely with two knitting needles.
Follow these steps:
First Row - Purl Stitches Begin by knitting the first row entirely in purl stitches. These will form the back side of your project, creating a neat texture.
Second Row - Knit Stitches In the second row, knit every stitch. This will produce a smooth, even front for your piece.
Repeating the Pattern Continue alternating between purl stitches in the odd-numbered rows and knit stitches in the even-numbered rows:
- Odd-numbered rows (e.g., 1st, 3rd, 5th): Work in purl stitches.
- Even-numbered rows (e.g., 2nd, 4th, 6th): Work in knit stitches.
This straightforward pattern of alternating knit and purl rows is ideal for beginners, offering an easy yet satisfying introduction to the craft.
You will need:
✓ Yarn for the head and ears : Brown, 120 g of Leami Brush for Plush (160 m / 100 g)
Yarn for the muzzle: White, 35 g of Leami Brush for Plush (160 m / 100 g)
Yarn fort he Nose: Chenille Yarn Ricorumi Nilli Nilli
✓ Knitting needles: 3.5 mm
Please note that yarn usage may vary depending on your knitting style — if you knit loosely, you will generally need a bit more yarn than someone who knits tightly.
✓ Safety eyes 35 mm
✓ Stuffing, stitch holders or a scrap piece of yarn, tapestry needle.
Abbreviations:
CH – Chain(s)
inc – increase
dec – decrease
X dec – X- times decrease
X inc – X- times increase
ST – Stitch
P – purl
K– knit (garter stitch)
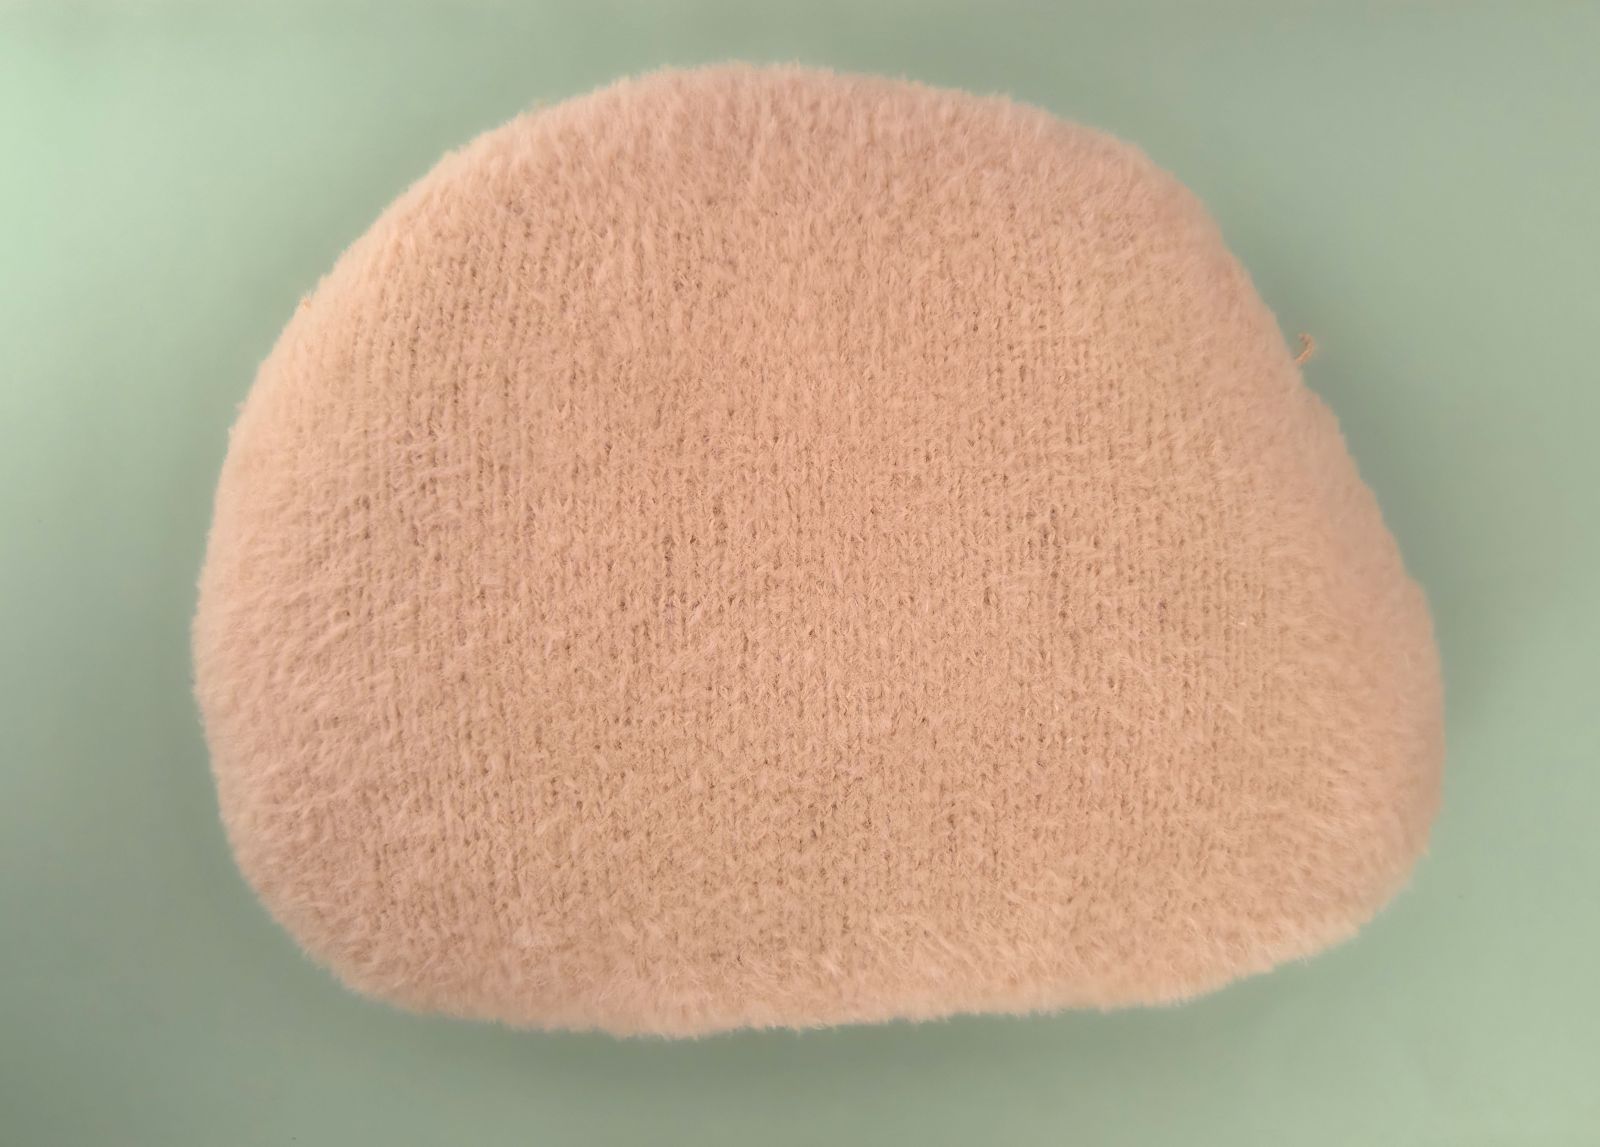
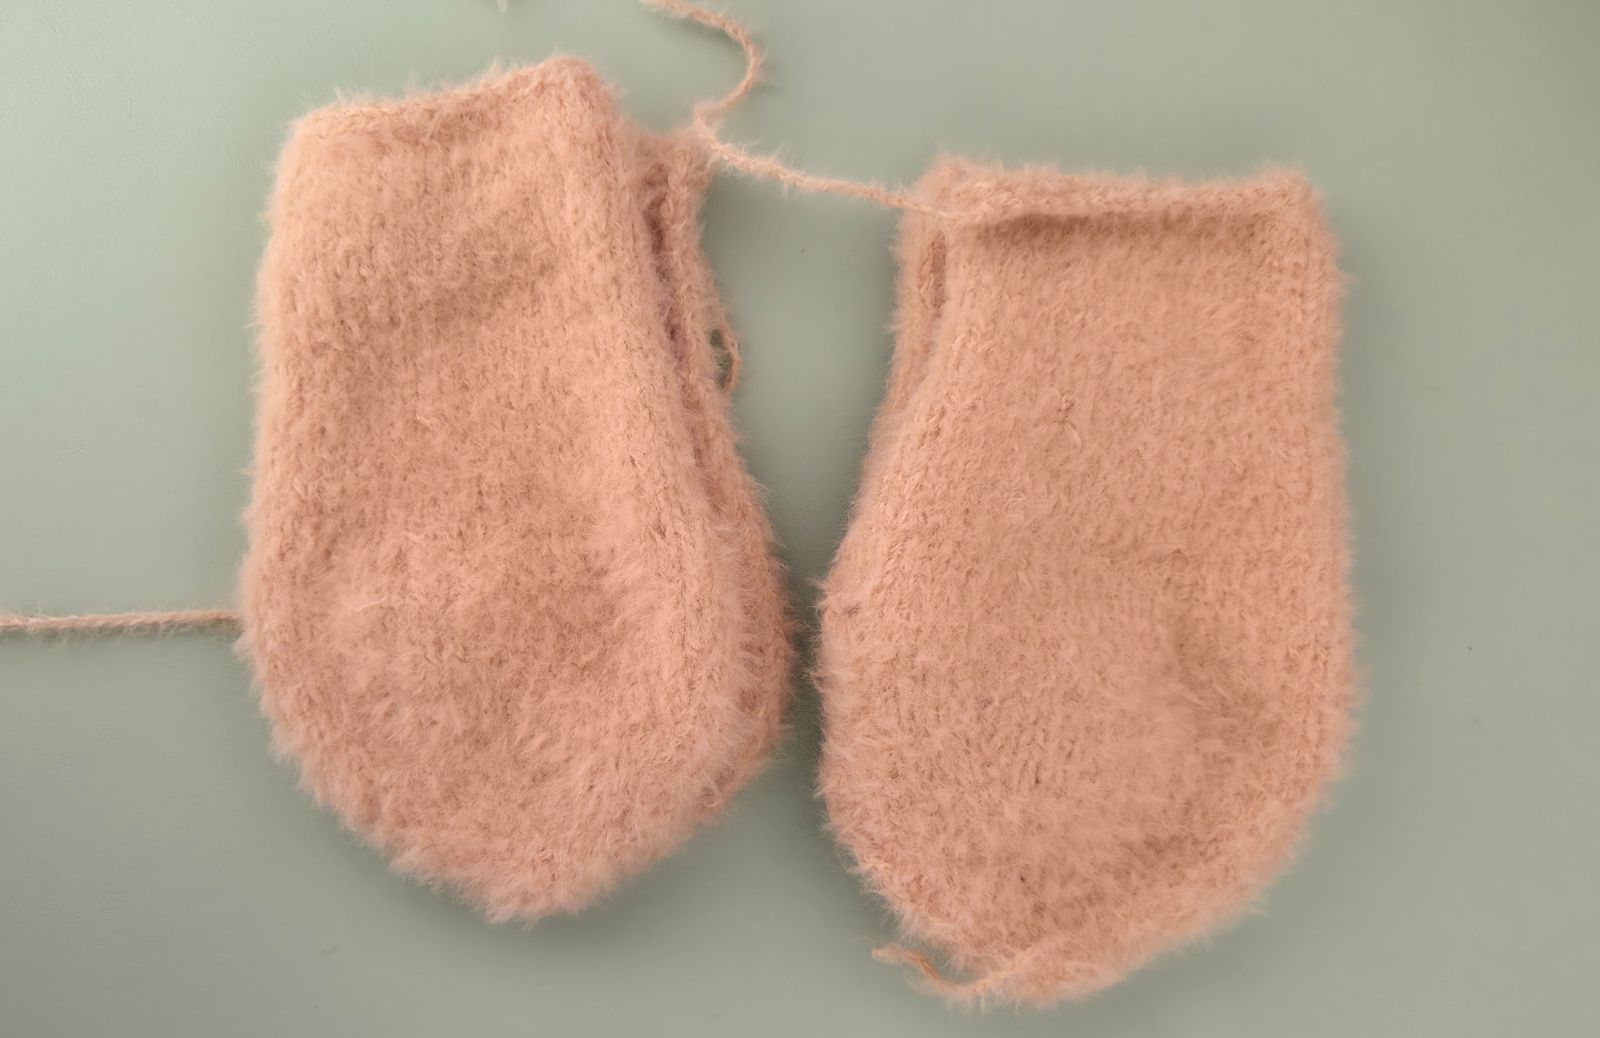
Head (brown)
Cast on 52 stitches (ch) onto the knitting needle. Make sure the stitches are evenly stretched while knitting to ensure your knitted piece is nice and even.
1. 52 P
2. 3 K, 1 inc, 44 K, 1 inc, 3 K (56)
3. 54 P
4. 3 K, 1 inc, 46 K, 1 inc, 3 K (56)
5. 56 P
6. 3 K, 1 inc, 48 K, 1 inc, 3 K (58)
7. 58 P
8. 3 K, 1 inc, 50 K, 1 inc, 3 K (60)
9. 60 P
10. 3 K, 1 inc, 52 K, 1 inc, 3 K (62)
11. 62 P
12. 1 K, 1 inc, 1 K, 1 inc, 54 K, 1 inc, 1 K, 1 inc, 1 K (66)
13. 66 P
14. 66 K
15. 66 P
16. 1 K, 1 inc, 1 K, 1 inc, 58 K, 1 inc, 1 K, 1 inc, 1 K (70)
17. 70 P
18. 70 K
19. 70 P
20. 1 K, 1 inc, 1 K, 1 inc, 62 K, 1 inc, 1 K, 1 inc, 1 K (74)
21. 74 P
22. 74 K
23. 74 P
24. 1 K, 1 inc, 1 K, 1 inc, 66 K, 1 inc, 1 K, 1 inc, 1 K (78)
Knit a total of 47 rows in stockinette stitch:
On the front side of the work, knit all stitches across the row.
On the back side of the work, purl all stitches across the row.
25. 27. 29. 31. 33. 35. 37. 39. 41. 43. 45. 47. 49. 51. 53. 55. 57. 59. 61. 63. 65. 67. 69. 71.– 78 P
26. 28. 30. 32. 34. 36. 38. 40. 42. 44. 46. 48. 50. 52. 54. 56. 58. 60. 62. 64. 66. 68. 70.– 78 K
72. 1 K, 1 dec, 1 K, 1 dec, 66 K, 1 dec, 1 K, 1 dec, 1 K (74)
73. 74 P
74. 1 K, 1 dec, 1 K, 1 dec, 62 K, 1 dec, 1 K, 1 dec, 1 K (70)
75. 70 P
76. 3 K, 1 dec, 60 K, 1 dec, 3 K (68)
77. 68 P
78. 1 K, 1 dec, 1 K, 1 dec, 1 K, 1 dec, 50 K, 1 dec ,1 K, 1 dec, 1 K, 1 dec, 1 K (62)
79. 62 P
80. 1 K, 1 dec, 1 K, 1 dec, 1 K, 1 dec, 44 K, 1 dec ,1 K, 1 dec, 1 K, 1 dec, 1 K (56)
81. 56 P
82. 56 K
83. 56 P
84. 1 K, 1 inc, 1 K, 1 inc, 1 K, 1 inc, 44 K, 1 inc ,1 K, 1 inc, 1 K, 1 inc, 1 K (62)
85. 62 P
86. 1 K, 1 inc, 1 K, 1 inc, 1 K, 1 inc, 50 K, 1 inc ,1 K, 1 inc, 1 K, 1 inc, 1 K (68)
87. 68 P
88. 3 K, 1 inc, 60 K, 1 inc, 3 K (70)
89. 70 P
90. 1 K, 1 inc, 1 K, 1 inc, 62 K, 1 inc, 1 K, 1 inc, 1 K (74)
91. 75 P
92. 1 K, 1 inc, 1 K, 1 inc, 66 K, 1 inc, 1 K, 1 inc, 1 K (78)
Knit a total of 47 rows in stockinette stitch:
On the front side of the work, knit all stitches across the row.
On the back side of the work, purl all stitches across the row.
93. 95. 97. 99. 101. 103. 105. 107. 109. 111. 113. 115. 117. 119. 121. 123. 125. 127. 129. 131. 133. 135. 137. 139. – 78 P
94. 96. 98. 100. 102. 104. 106. 108. 110. 112. 114. 116. 118. 120. 122. 124. 126. 128. 130. 132. 134. 136. 138. - 78 K
140. 1 K, 1 dec, 1 K, 1 dec, 66 K, 1 dec, 1 K, 1 dec, 1 K (74)
141. 74 P
142. 74 K
143. 74 P
144. 1 K, 1 dec, 1 K, 1 dec, 62 K, 1 dec, 1 K, 1 dec, 1 K (70)
145. 70 P
146. 70 K
147. 70 P
148. 1 K, 1 dec, 1 K, 1 dec, 58 K, 1 dec, 1 K, 1 dec, 1 K (66)
149. 66 P
150. 66 K
151. 66 P
152. 1 K, 1 dec, 1 K, 1 dec, 54 K, 1 dec, 1 K, 1 dec, 1 K (62)
153. 62 P
154. 3 K, 1 dec, 52 K, 1 dec, 3 K (60)
155. 60 P
156. 3 K, 1 dec, 50 K, 1 dec, 3 K (58)
157. 58 P
158. 3 K, 1 dec, 48 K, 1 dec, 3 K (56)
159. 56 P
160. 3 K, 1 dec, 46 K, 1 dec, 3 K (54)
161. 54 P
162. 3 K, 1 dec, 44 K, 1 dec, 3 K (52)
163. 52 P
Finally, cast off the remaining stitches. Cut the yarn and secure the end.

Next, sew the head (cushion) together. Begin by sewing the pillow piece closed, then fill it with fiberfill until it is soft and evenly shaped.
When sewing, leave a small opening so the eyes can be attached from the inside.
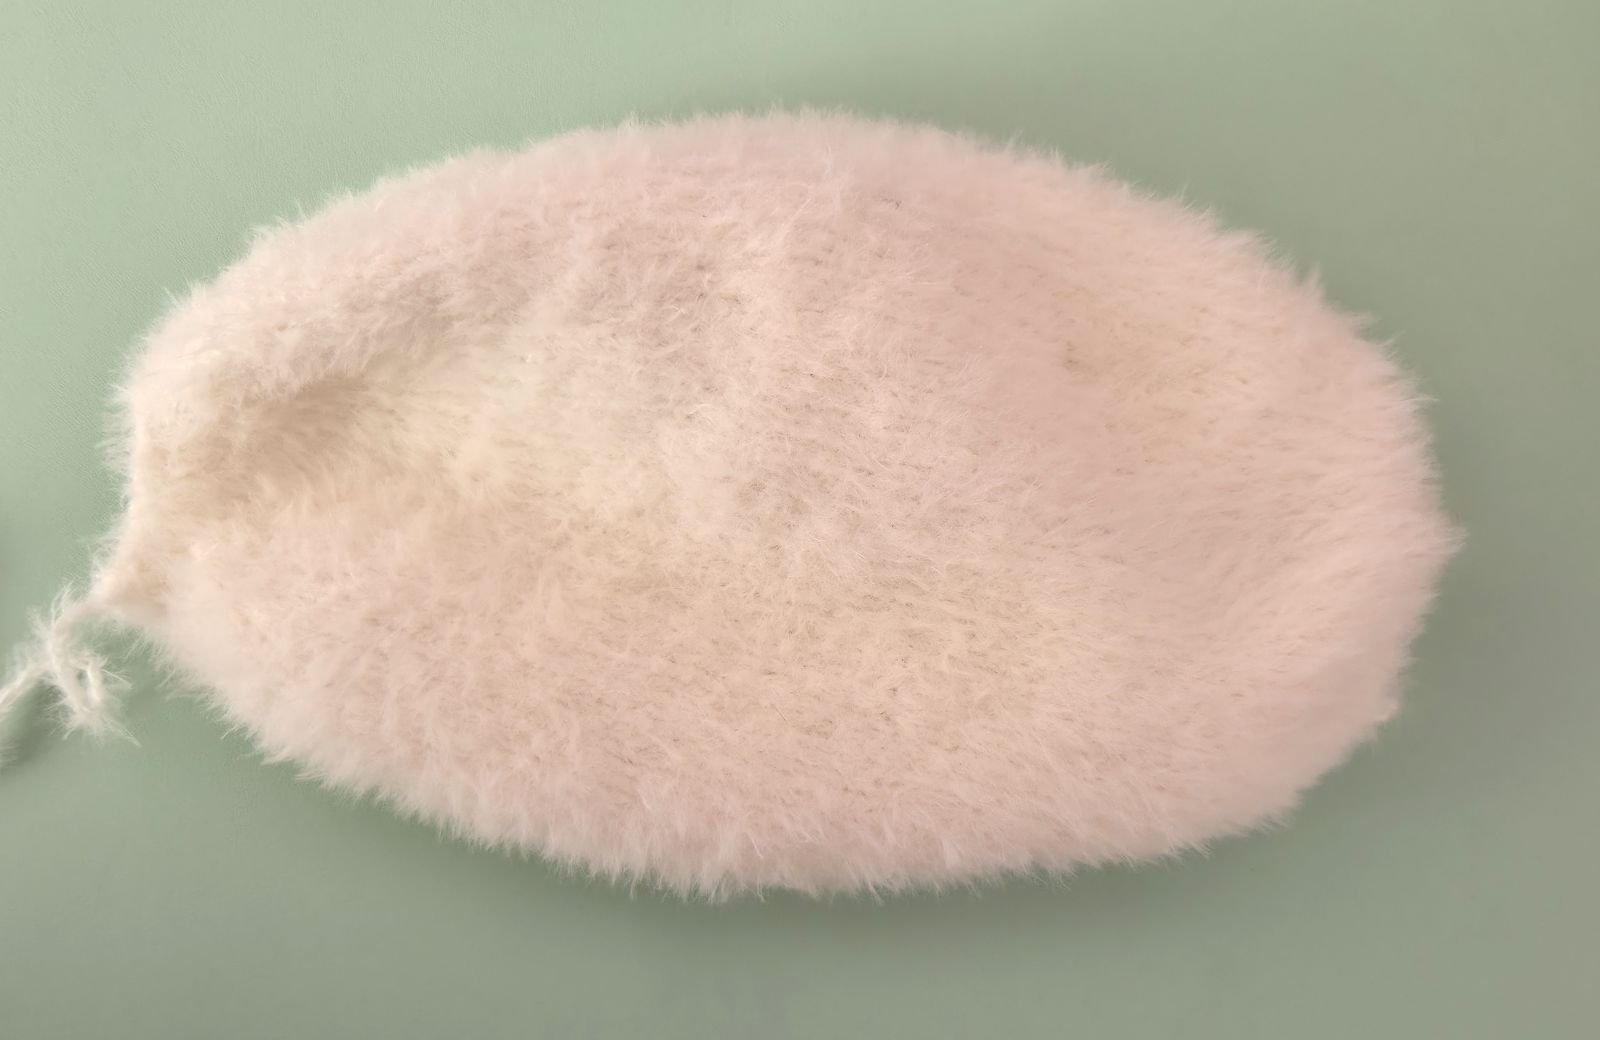
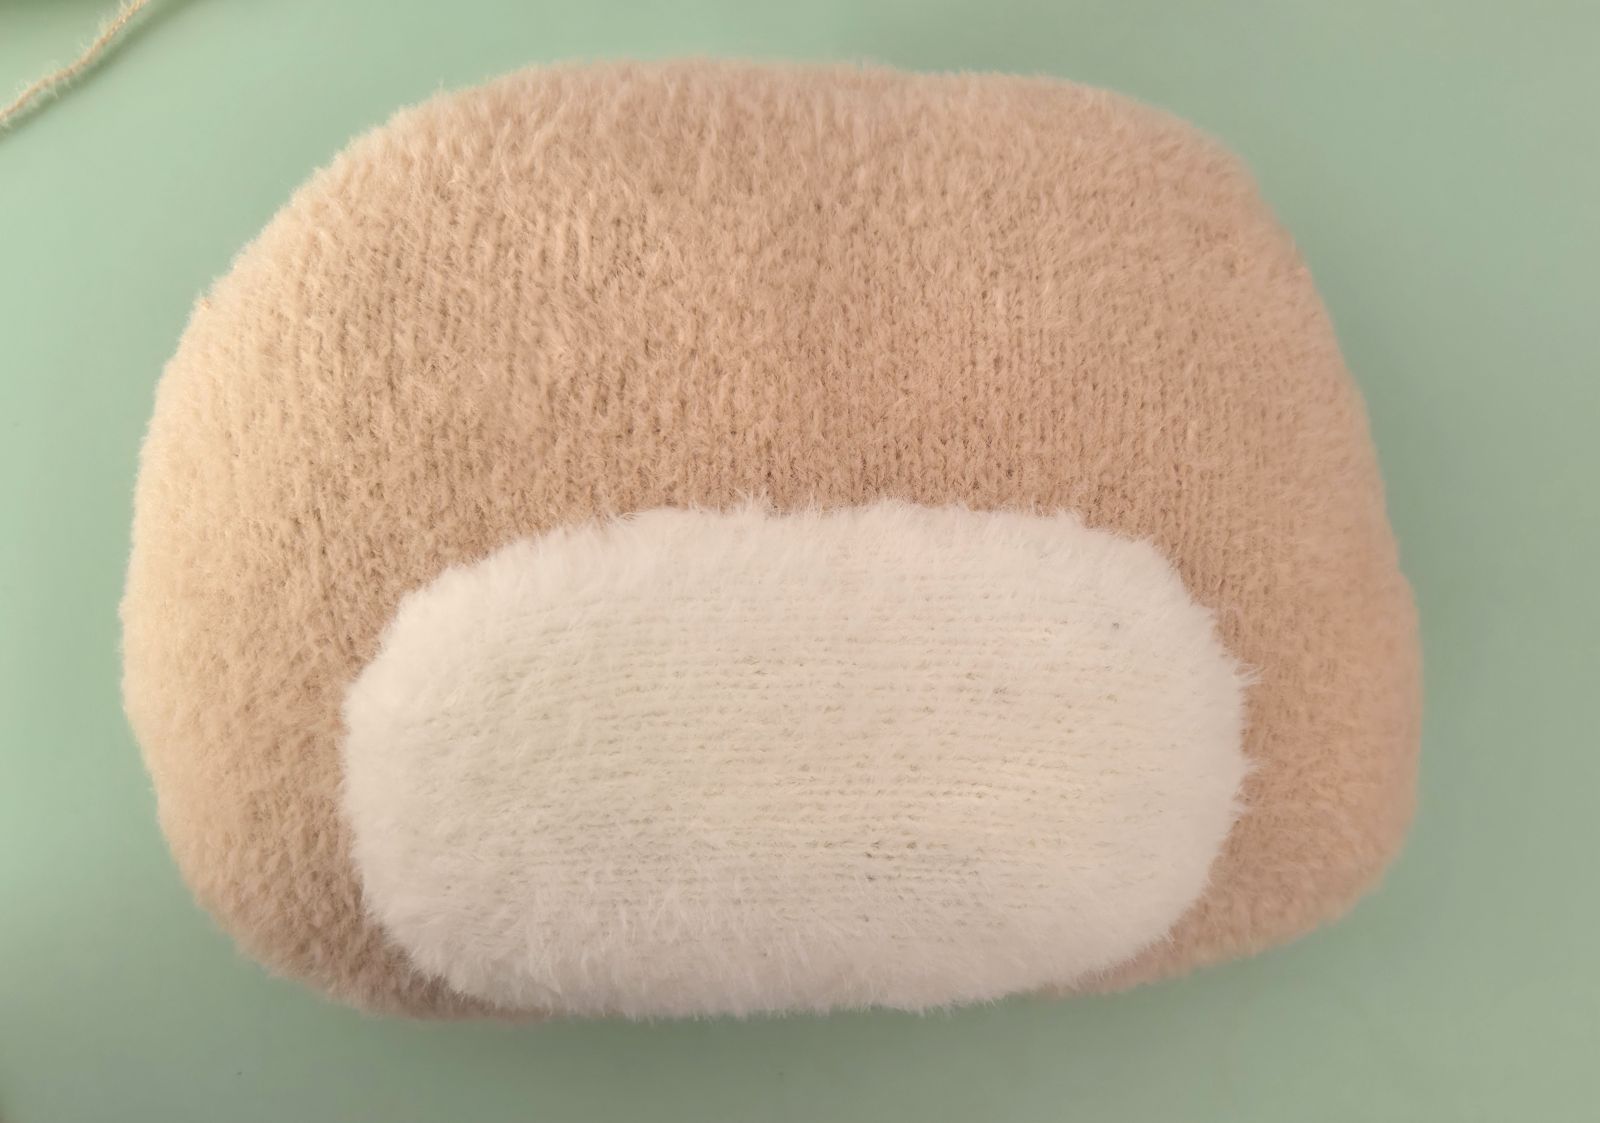
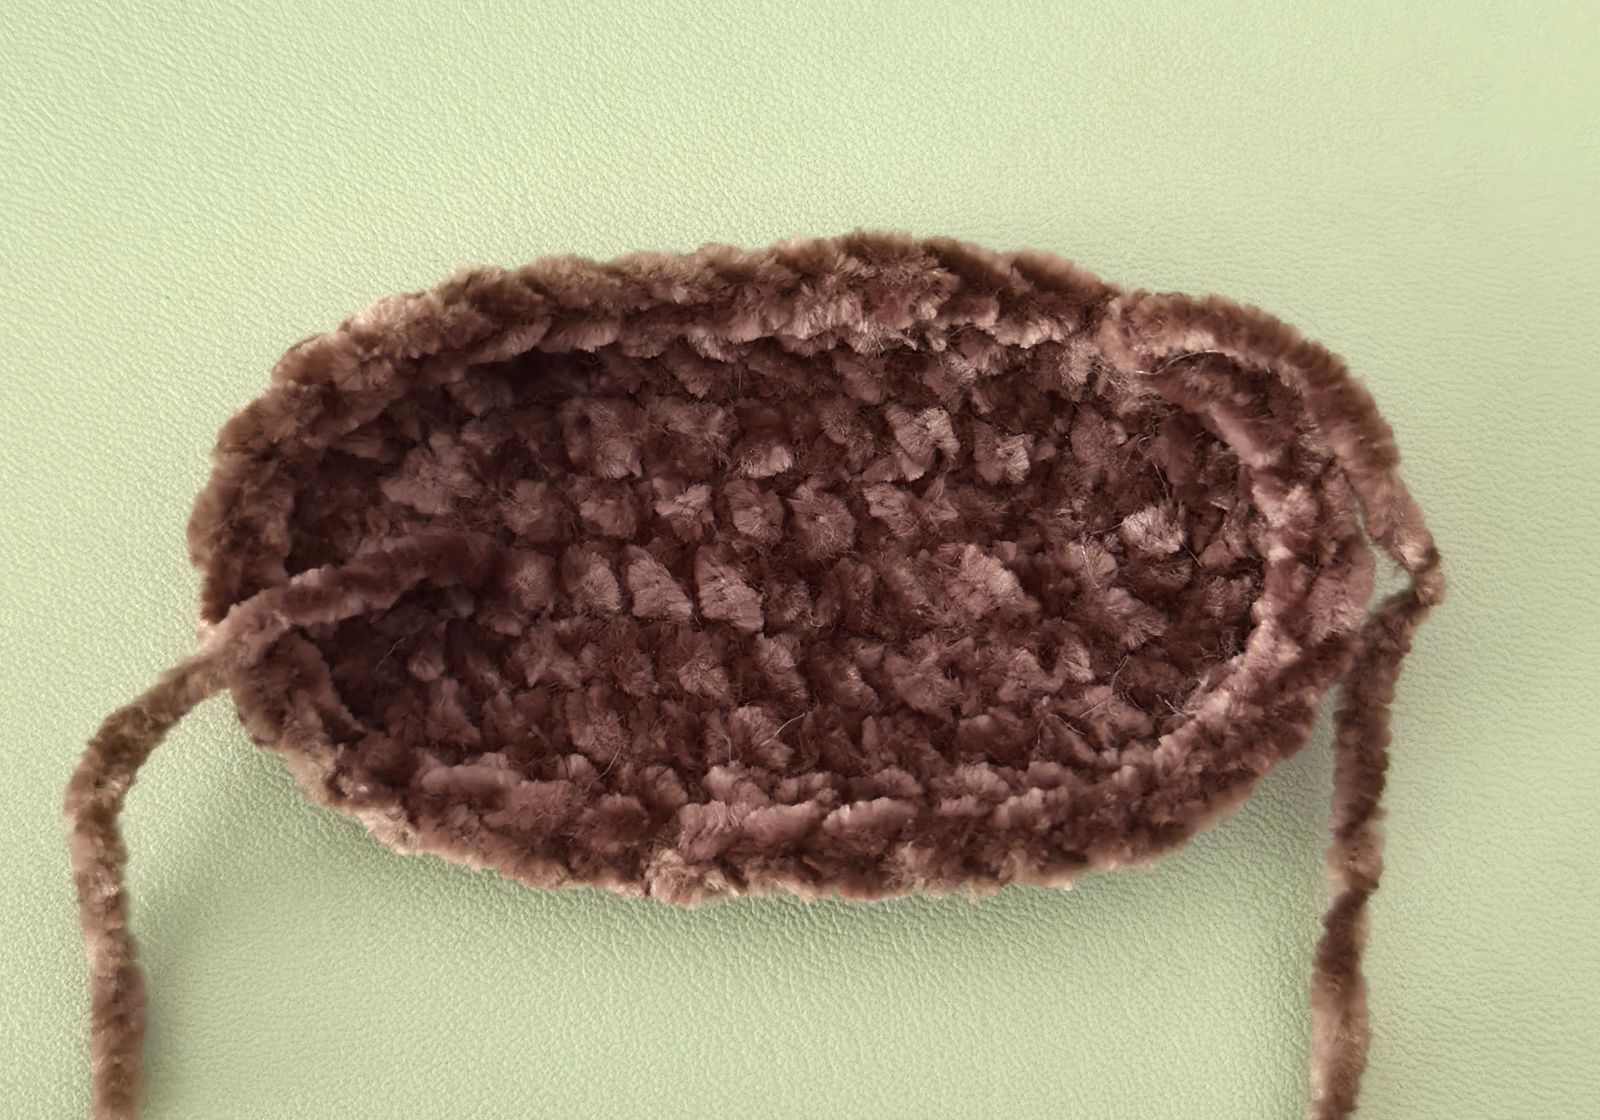
Muzzle (white)
Cast on 8 stitches (ch) onto the knitting needle. Make sure the stitches are evenly stretched while knitting to ensure your knitted piece is nice and even.
1. 8 P
2. 8 K inc (16)
3. 16 P
4. (1 K, 1 inc) x 8 (24)
5. 24 P
6. (2 K, 1 inc) x 8 (32)
7. 32 P
8. 32 K
9. 32 P
10. (3 K, 1 inc) x 8 (40)
Knit a total of 49 rows in stockinette stitch:
On the front side of the work, knit all stitches across the row.
On the back side of the work, purl all stitches across the row.
11. 13. 15. 17. 19. 21. 23. 25. 27. 29. 31. 33. 35. 37. 39. 41. 43. 45. 47. 49. 51. 53. 55. 57. 59 – 40 P
12. 14.16. 18. 20. 22. 24. 26. 28. 30. 32. 34. 36. 38. 40. 42. 44. 46. 48. 50. 52. 54. 56. 58 – 40 K
60. (3 K, 1 dec) x 8 (32)
61. 32 P
62. 32 K
63. 32 P
64. (2 K, 1 dec) x 8 (24)
65. 24 P
66. (1 K, 1 dec) x 8 (16)
67. 16 P
68. 8 dec
69. 8 P
Finally, cast off the remaining stitches. Cut the yarn and secure the end.
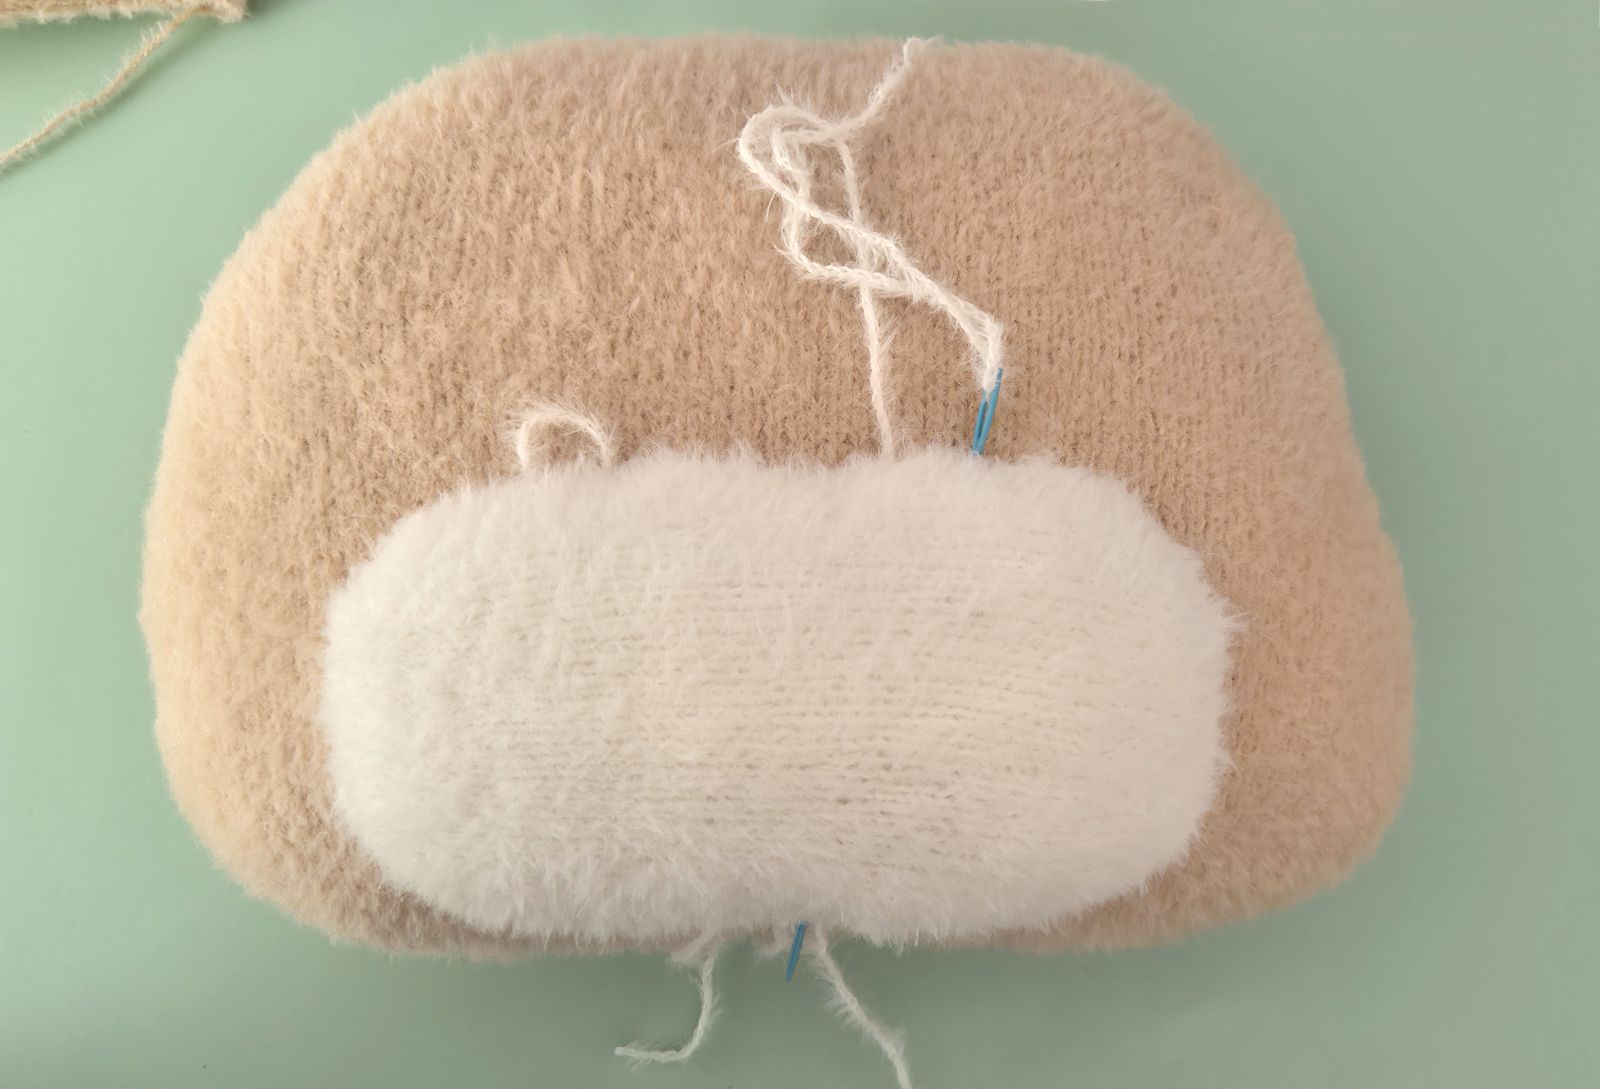
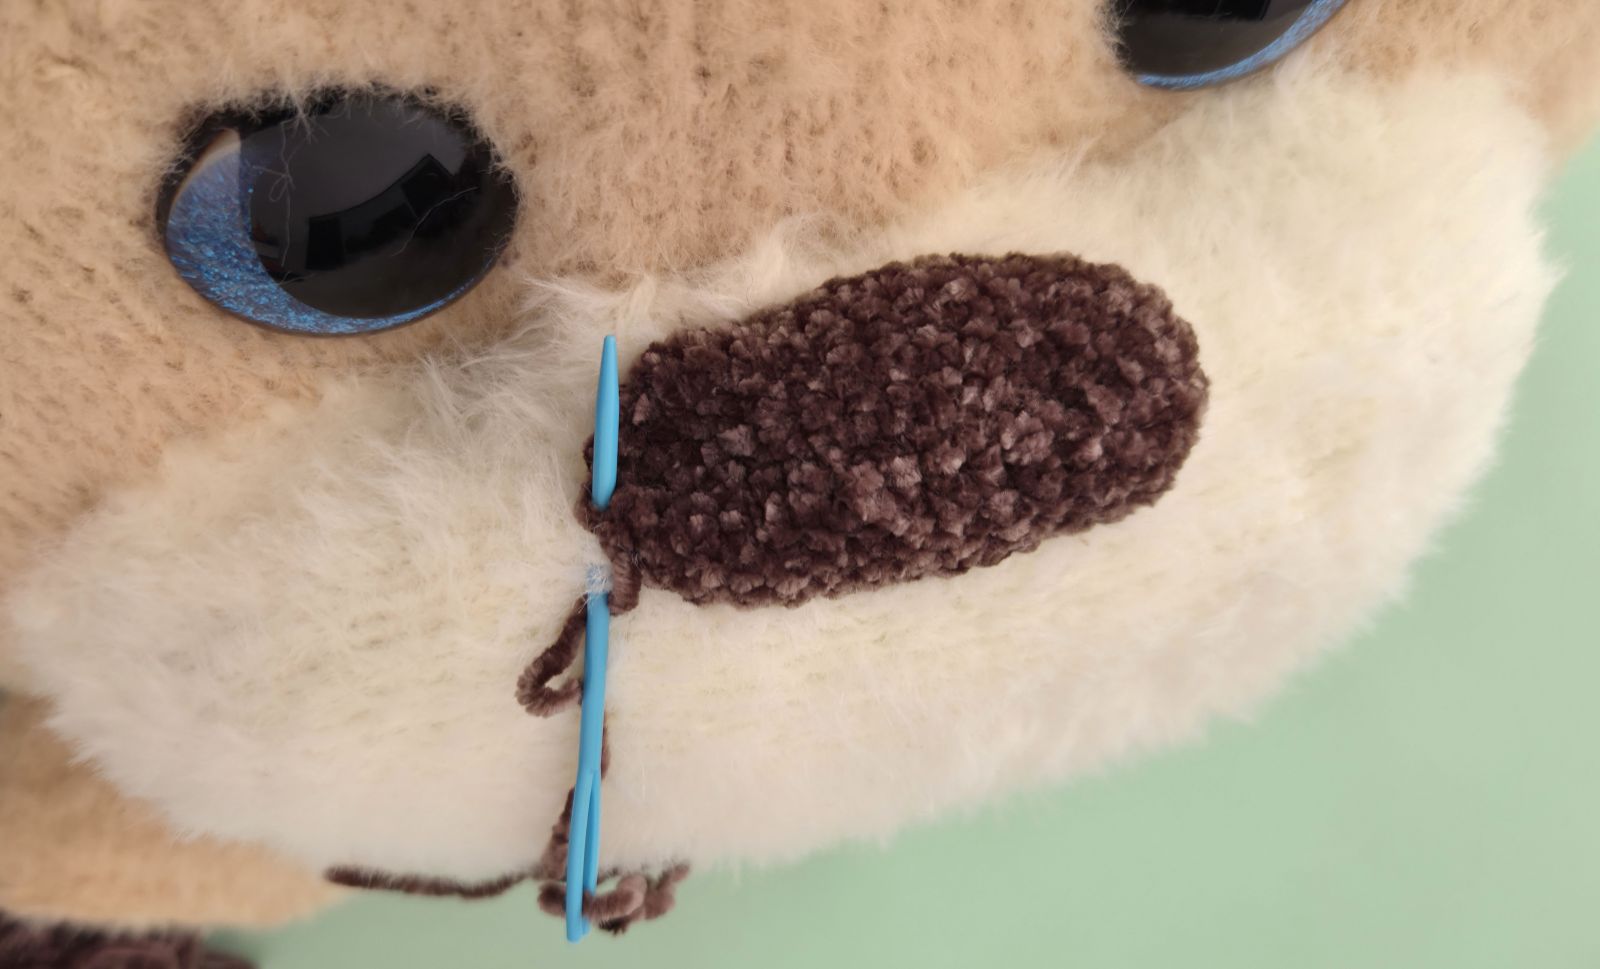
The muzzle is sewn to the lower part of the head and evenly stuffed as you sew. Since knitted fabric stretches quite easily, it’s important to ensure that the muzzle keeps a proportional, well‑shaped form during this step.
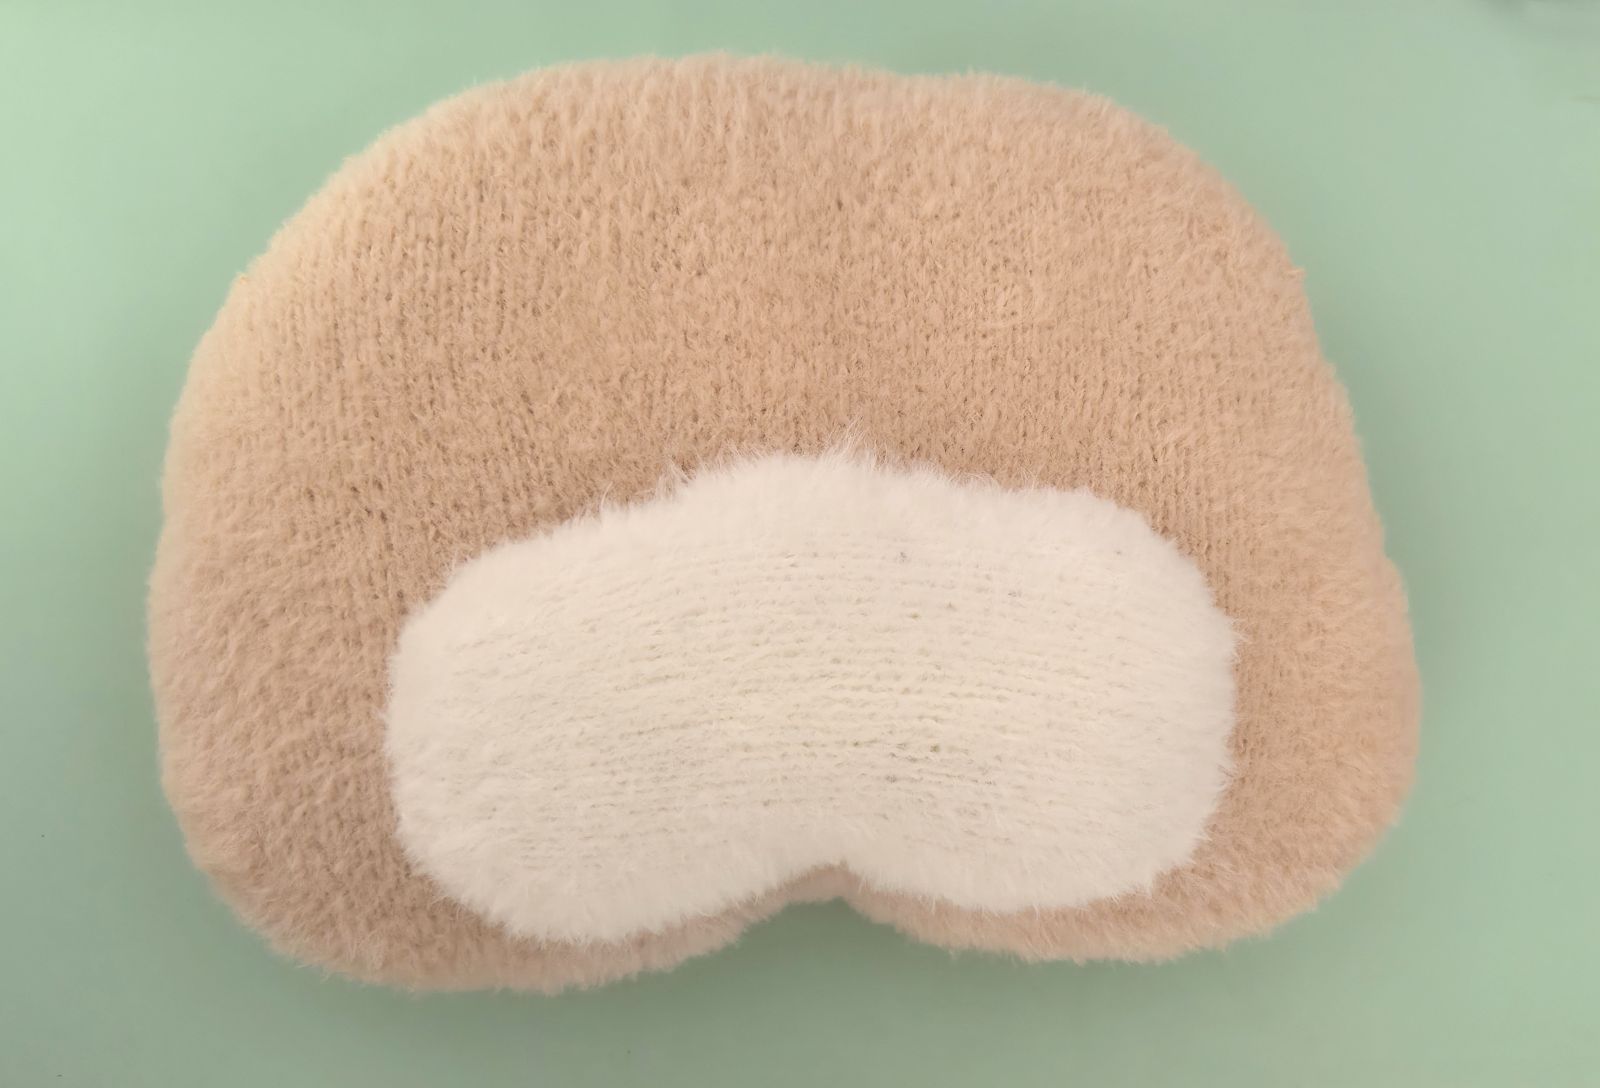
The exact placement of the muzzle can be adjusted to create different expressions. It may sit slightly higher, lower, or a bit off‑center – feel free to experiment. The final position depends entirely on the character and personality you want the puppy to have.
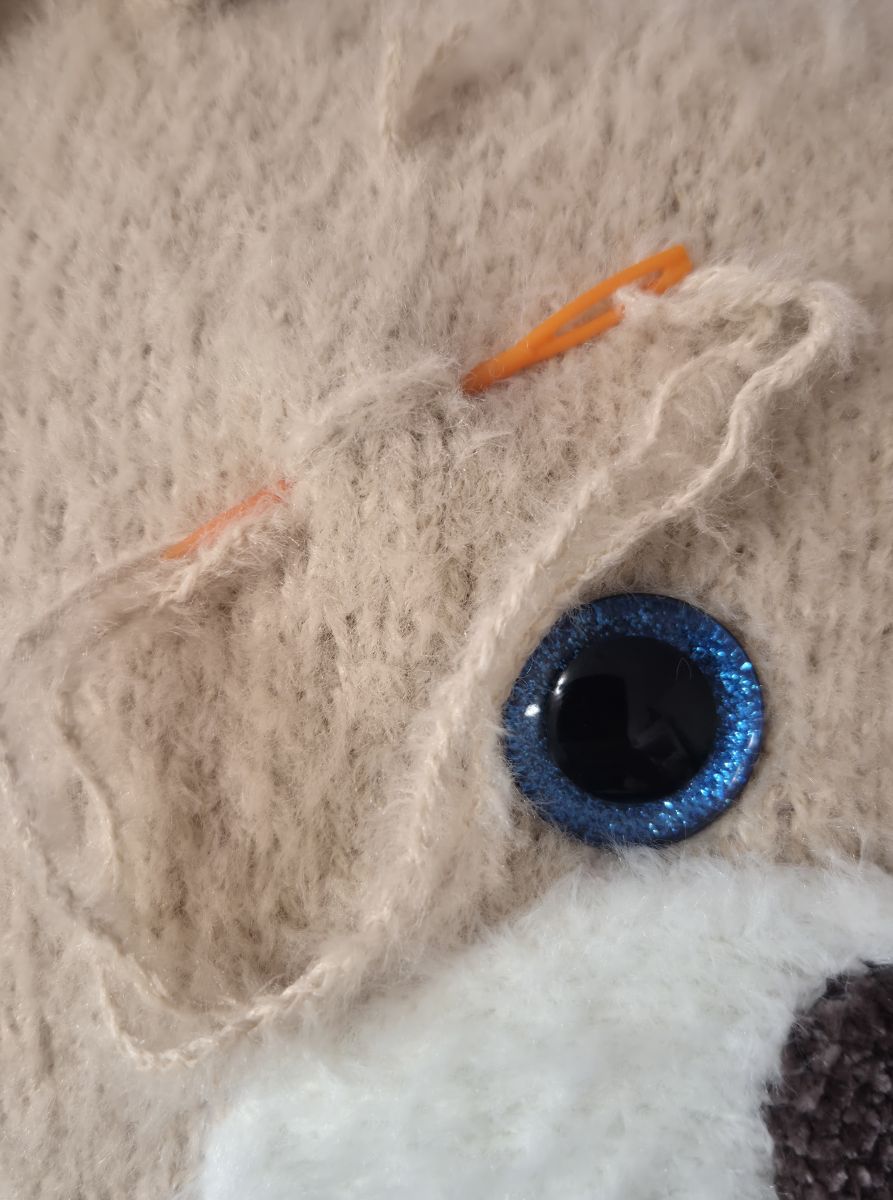
Now we’ll shape the mouth area. The point where the mouth will be formed is located at the bottom center of the muzzle. At the top, where the muzzle is sewn to the head, the positions for the eyes are created – one on the right and one on the left. The spacing should remain even and proportional, so please pay attention to this. For better understanding, it’s helpful to refer to the pictures.
For the right eye, insert the needle at the bottom center of the muzzle and bring it out at the top where the right eye will be placed. Then insert the needle about 1 cm to the side and guide it back down to the center of the muzzle.
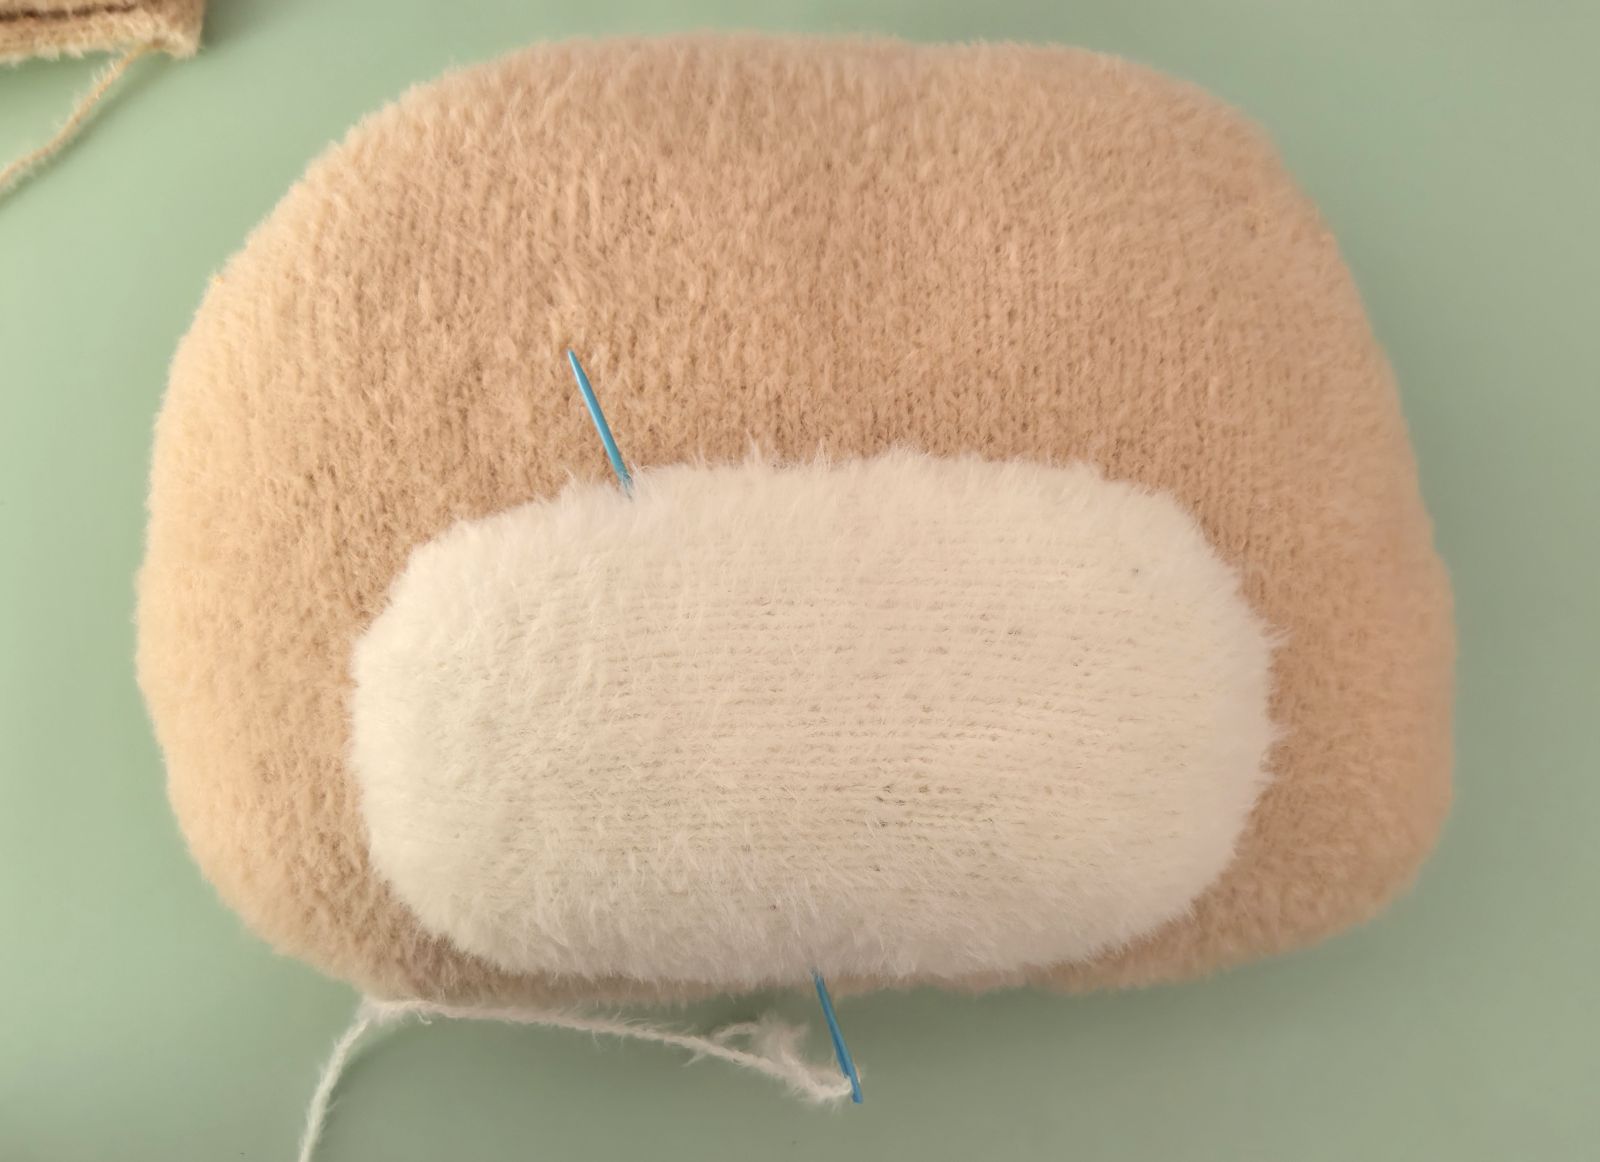
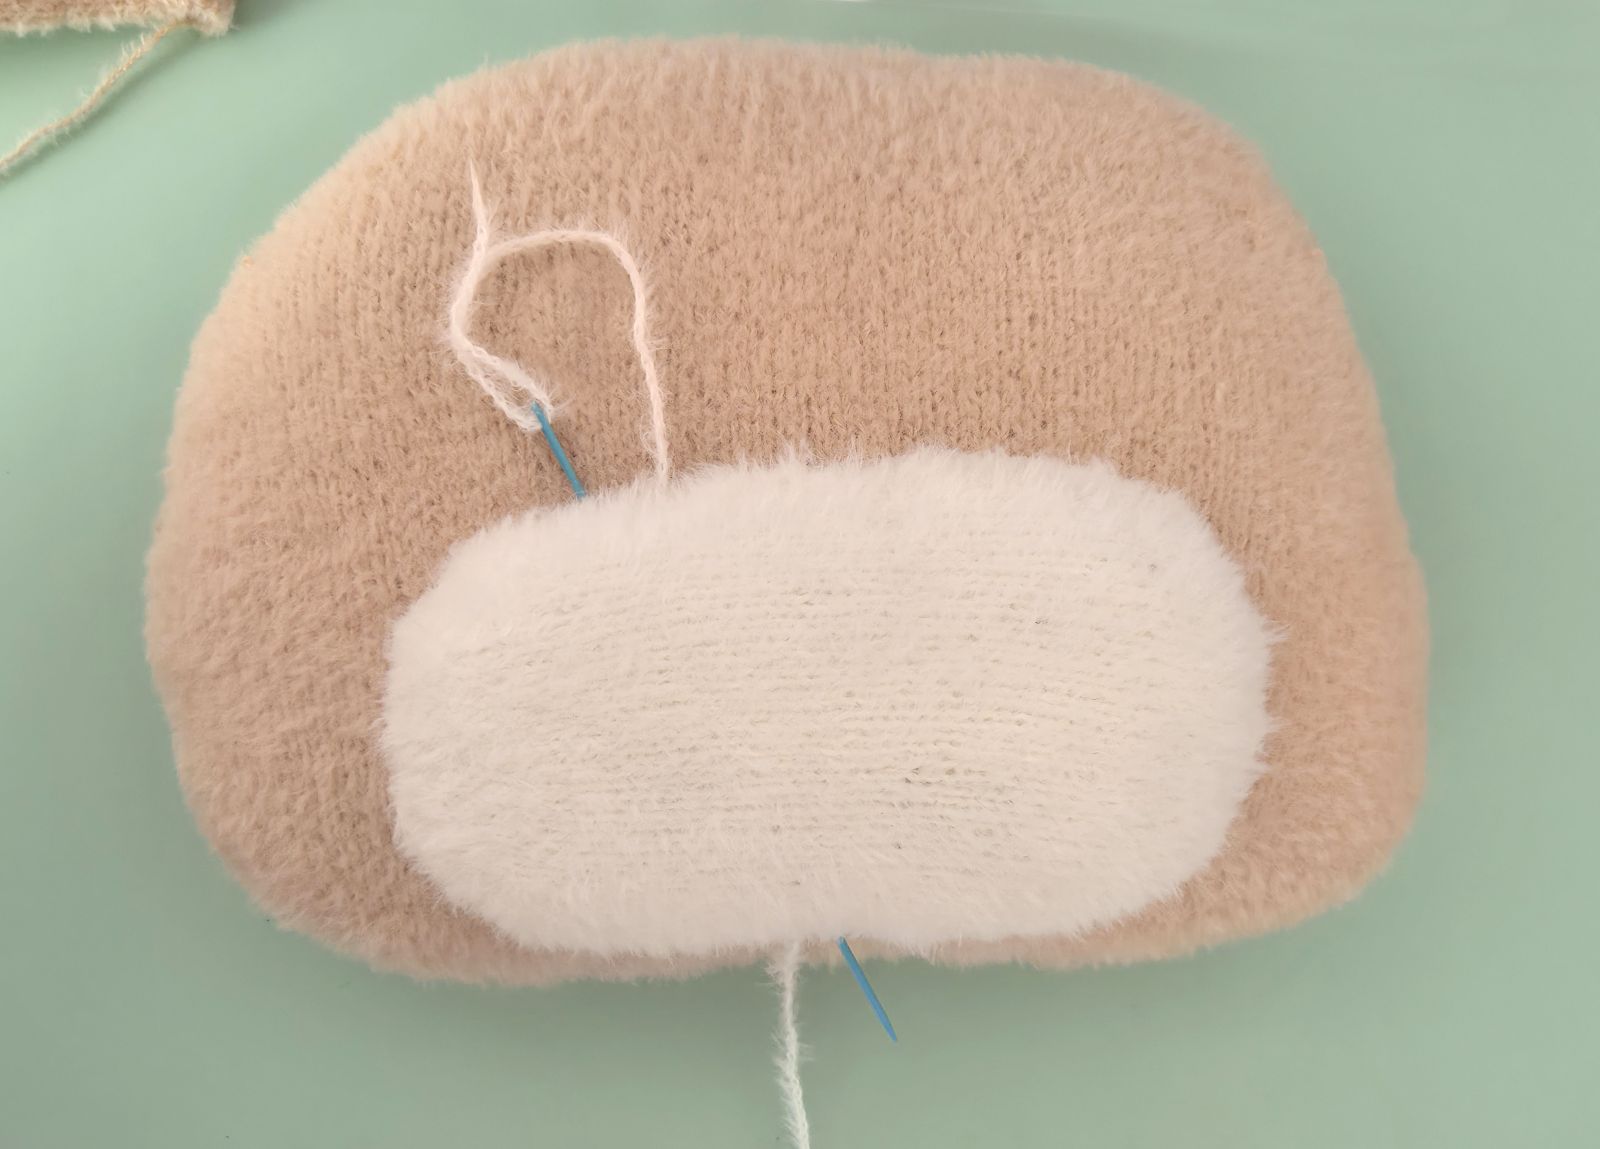
Repeat the same process for the left eye: insert the needle at the bottom center, bring it out next to the left eye position, move about 1 cm to the side, insert again, and guide the needle back down to the bottom center of the muzzle.
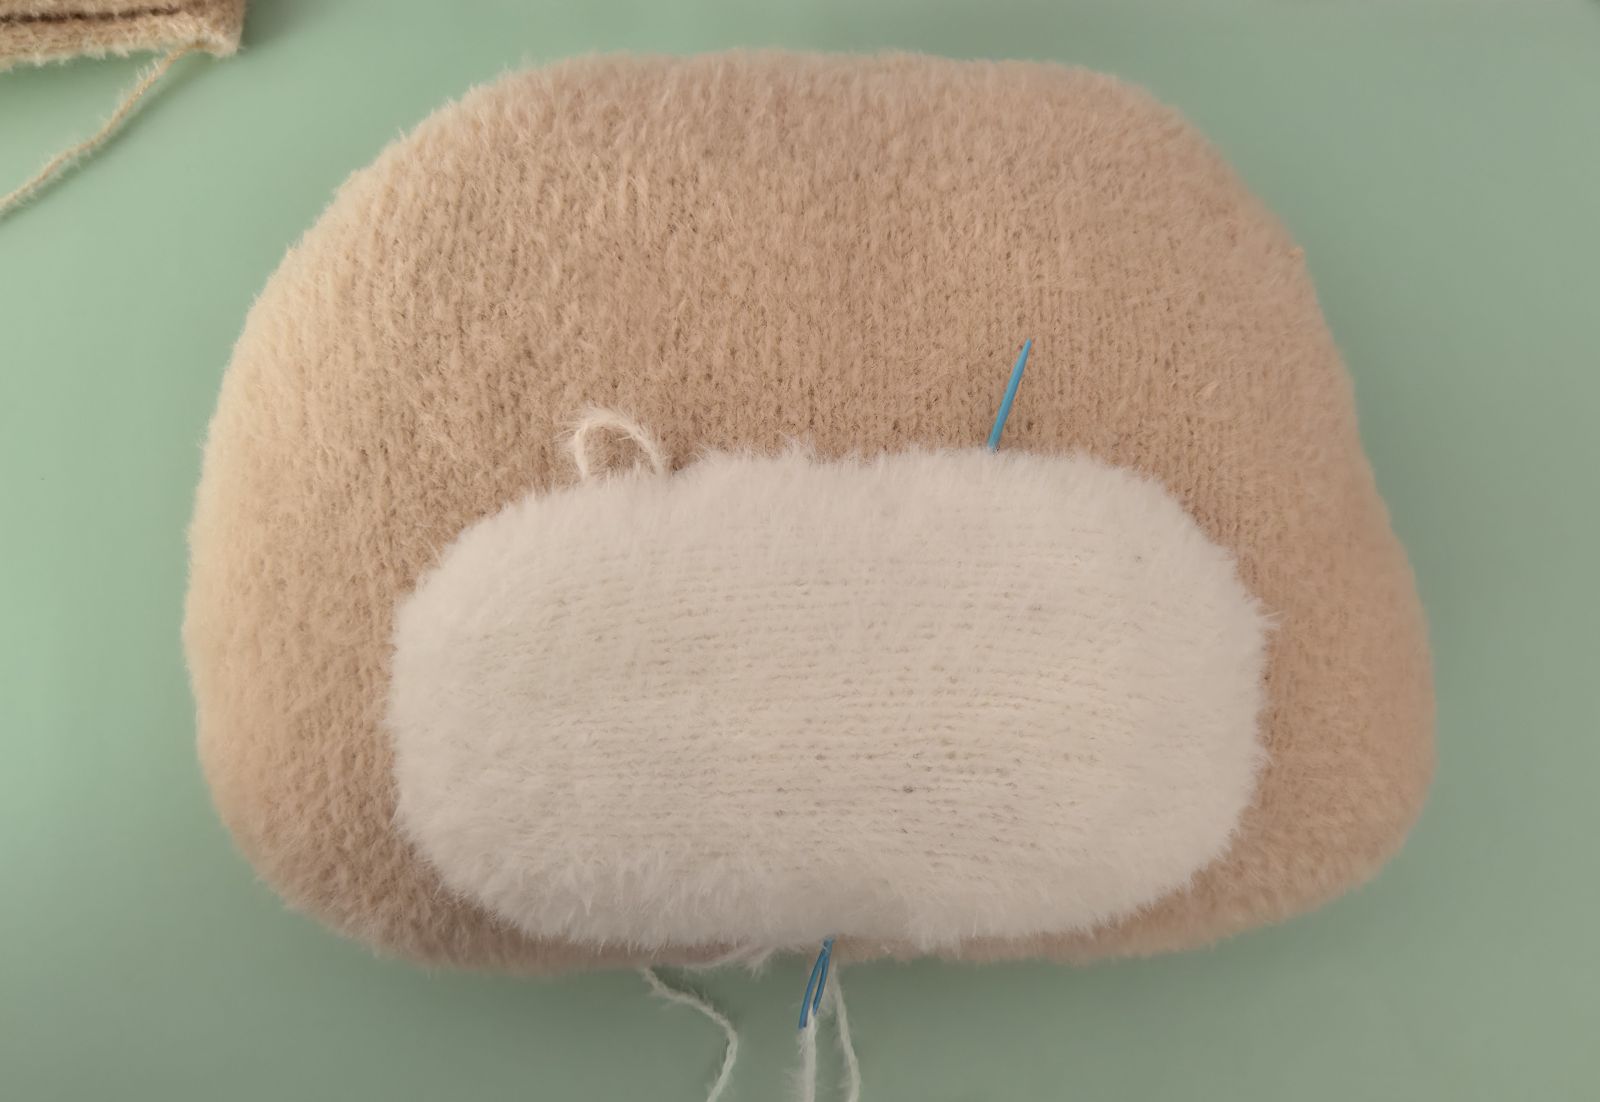
Gently tighten all threads, knot them securely, and hide them inside the head.
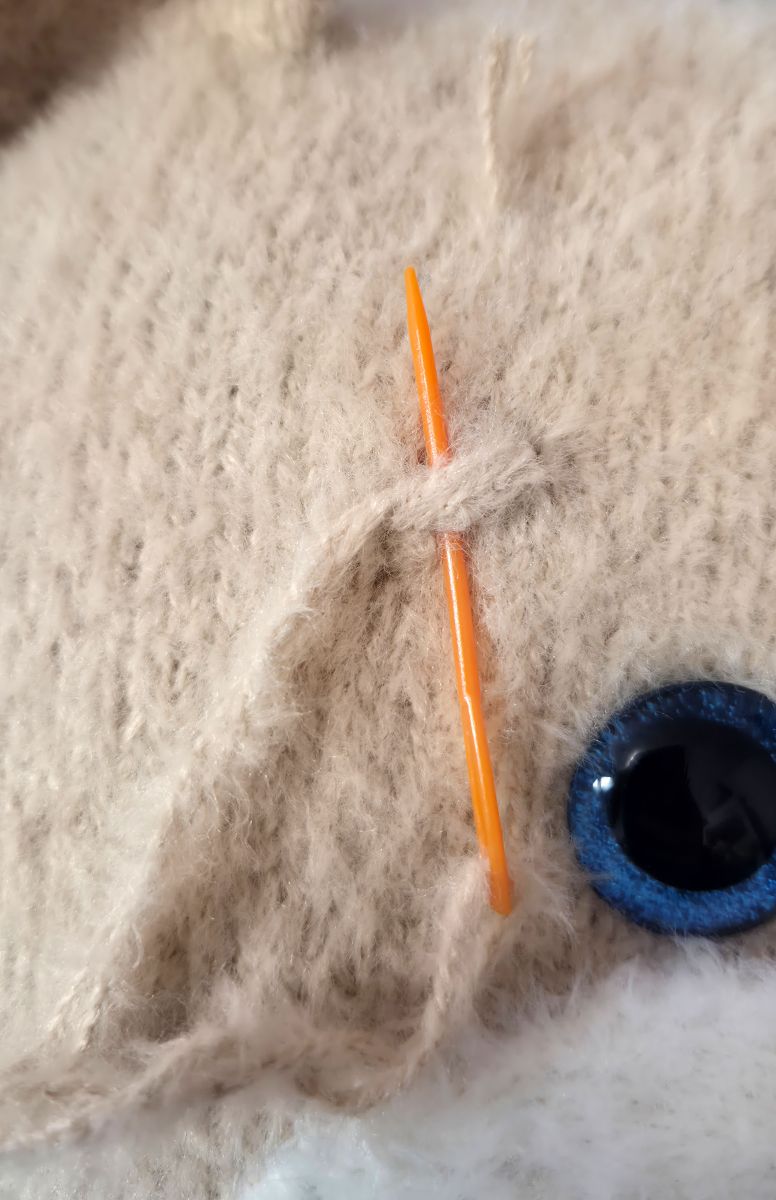
Afterwards, continue shaping the mouth until the desired look is achieved. The mouth should now appear slightly curved, and the mouth opening at the bottom should be clearly visible.
Eyes
For this pillow, safety eyes with a small rim were used. A particularly nice feature of these eyes is that they naturally sink into the knitted fabric once attached. This effect is created by the semi‑circular safety clip on the inside, which allows the eyes to settle slightly into the material while also holding them very securely in place.
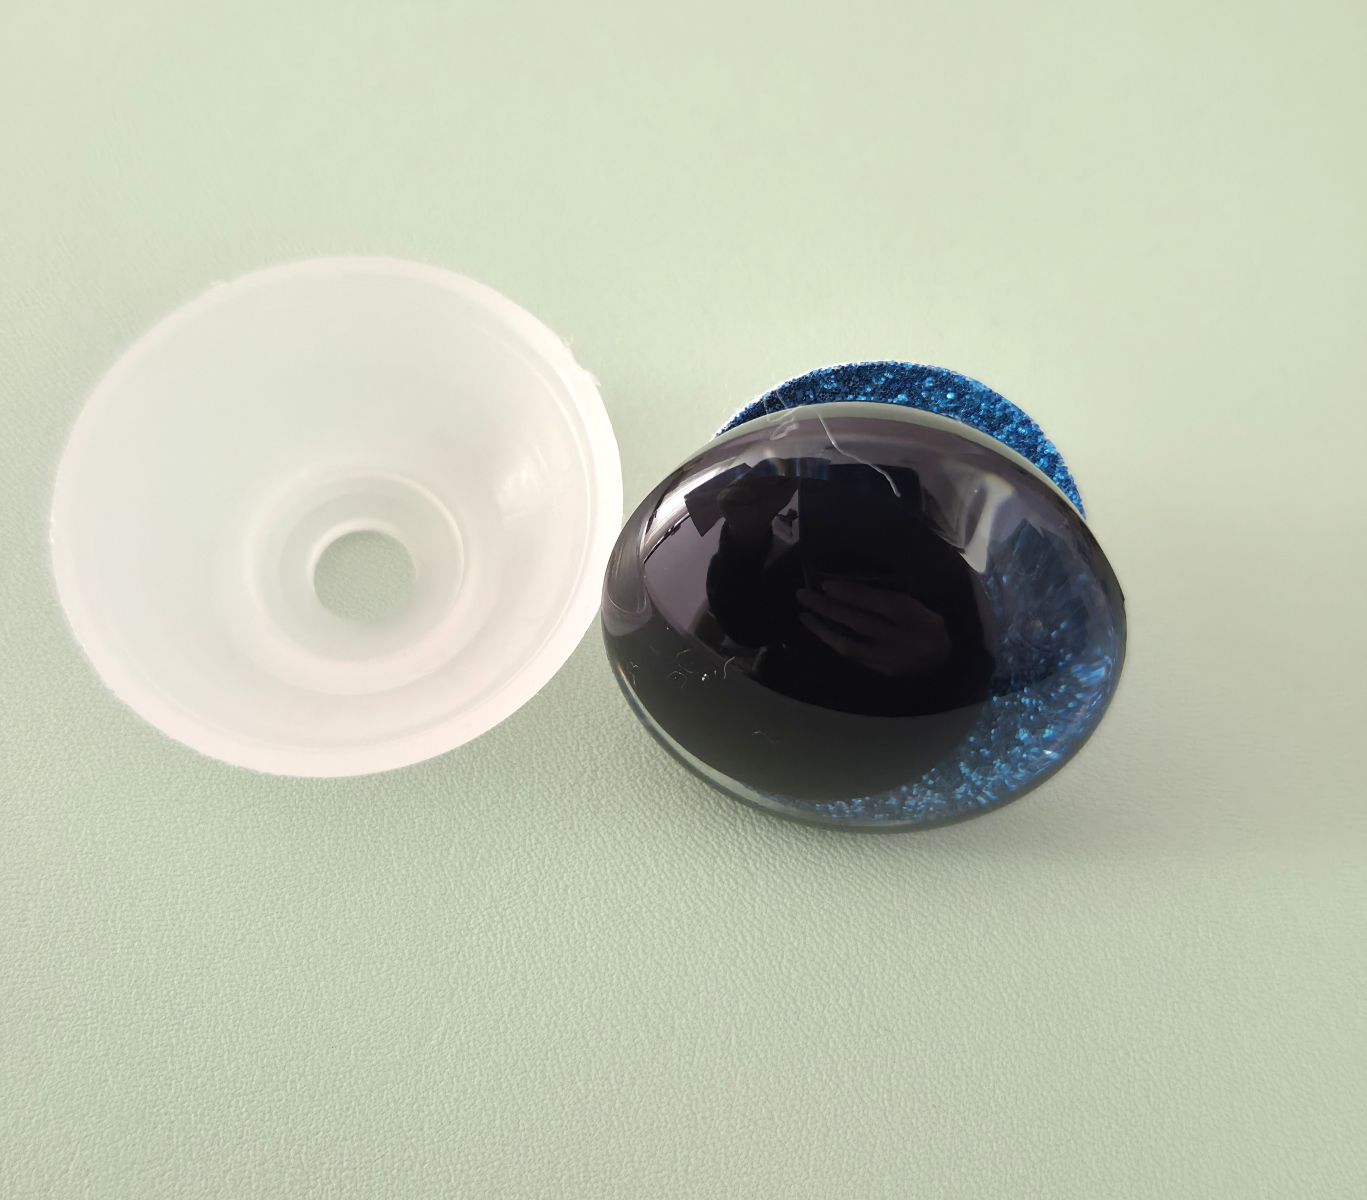
The safety eyes are carefully inserted through the stitches at the chosen eye positions and then fastened from the inside with the matching safety clip.
After attaching them, it is essential to check thoroughly that the eyes are firmly secured and cannot be pulled or loosened during play.
Alternatively, sew‑in eyes can be used. These are stitched directly onto the pillow with yarn – ideally from the inside as well. Here, too, it is important to ensure that the eyes are sewn on absolutely securely, especially if the pillow is intended for small children. Loose small parts can pose a choking hazard, so the responsibility for safe attachment lies entirely with the person making the pillow.
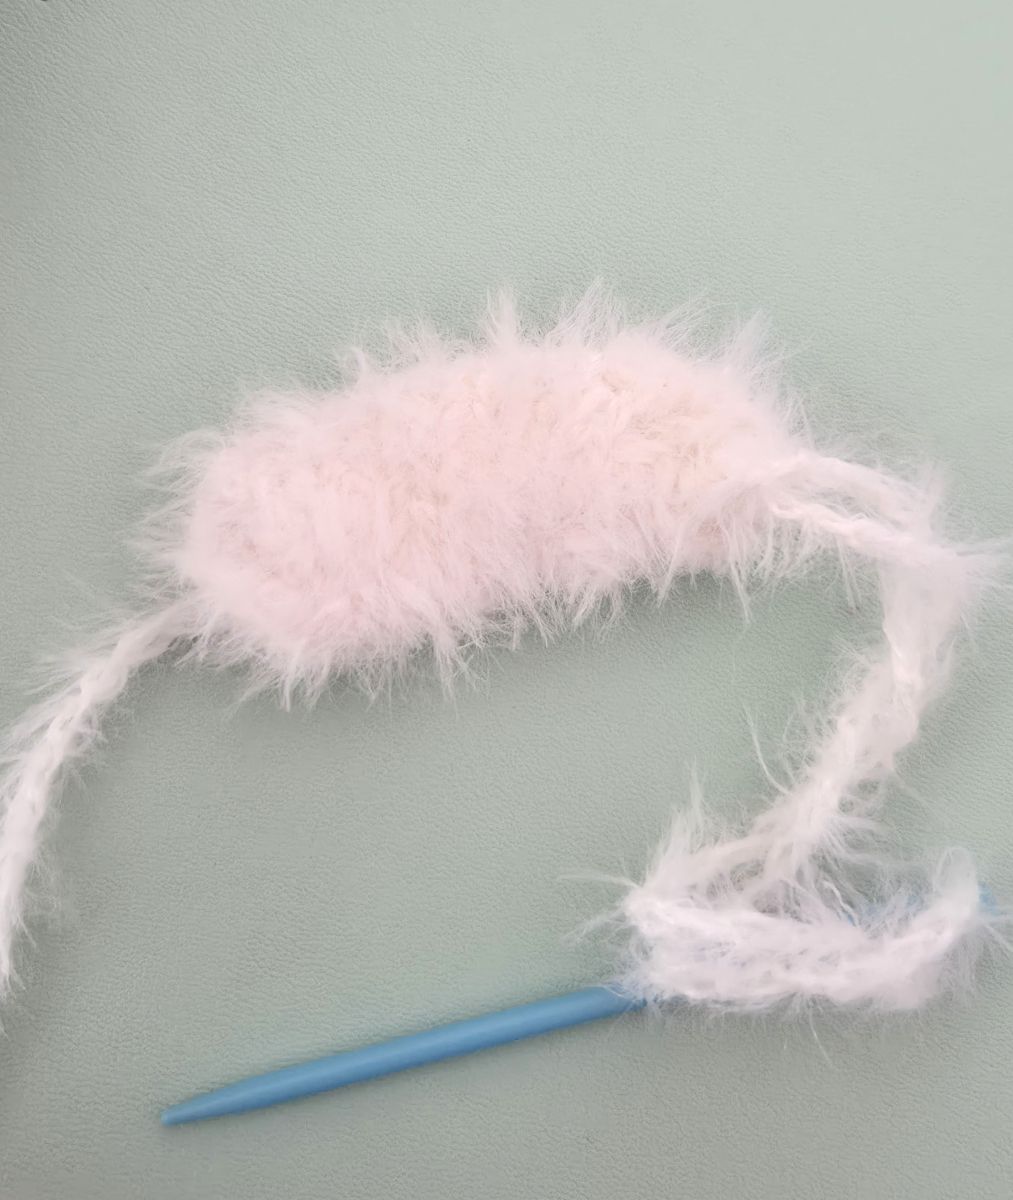
Another option is to crochet the eyes. Numerous tutorials in different styles can be found on YouTube.
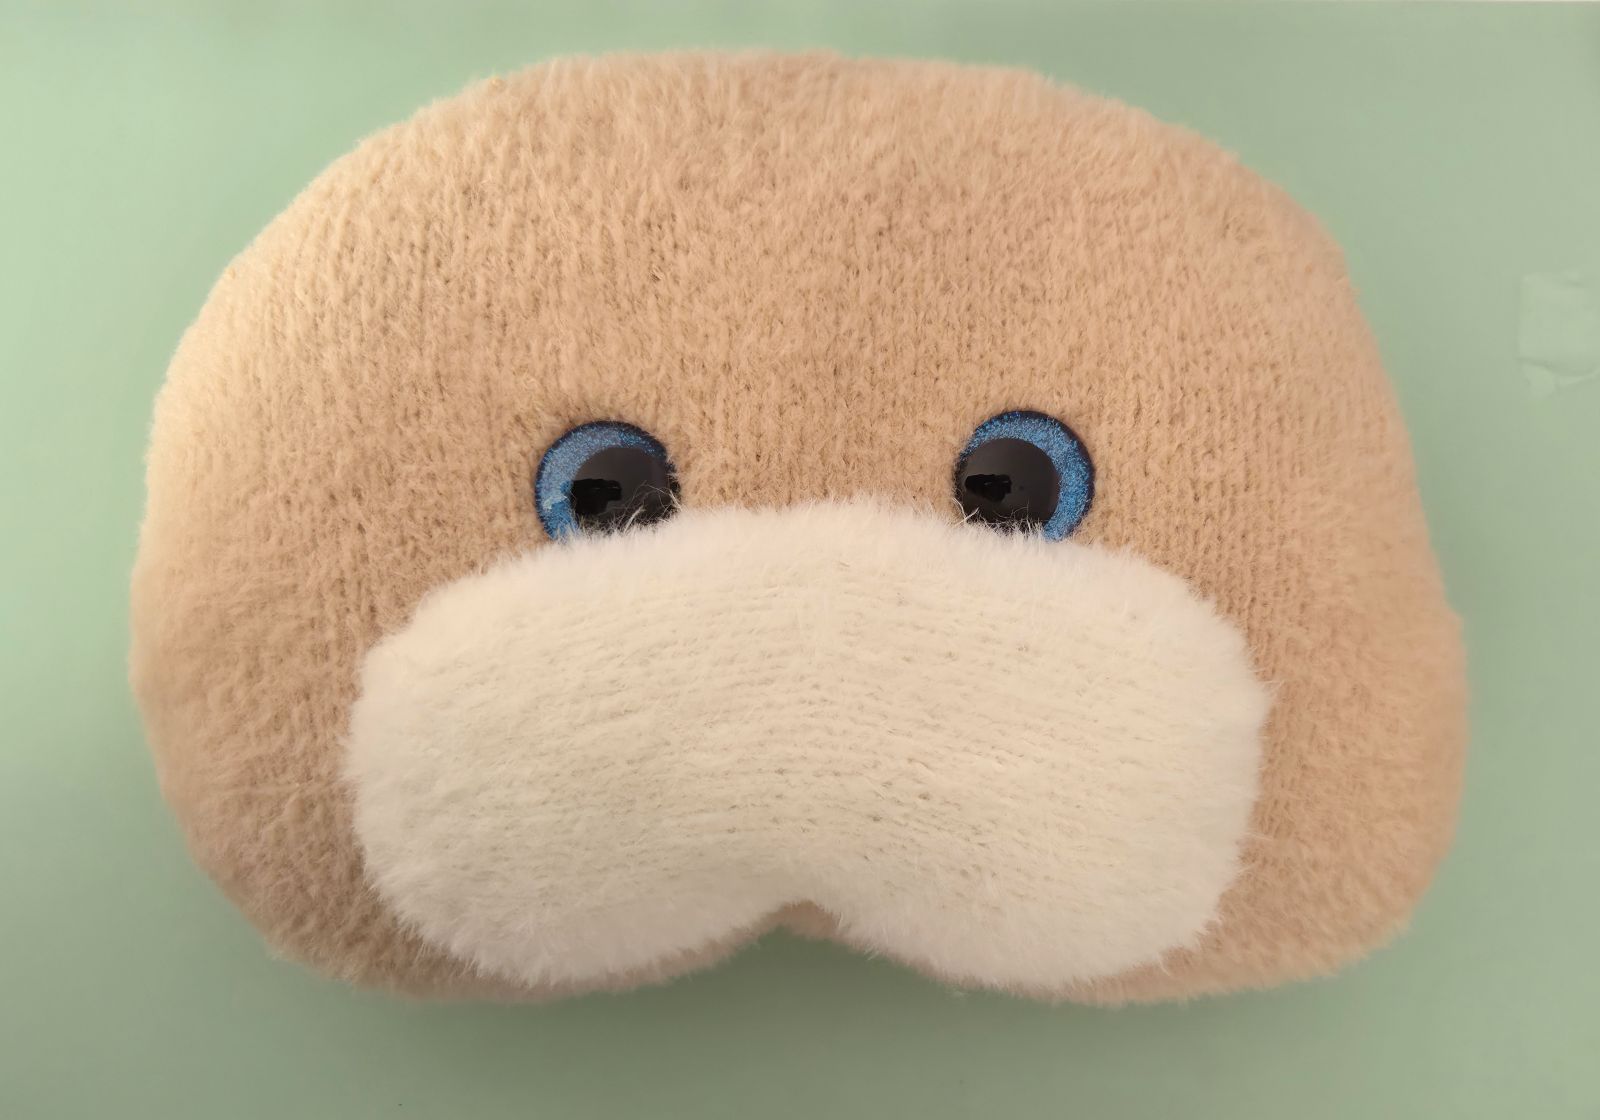
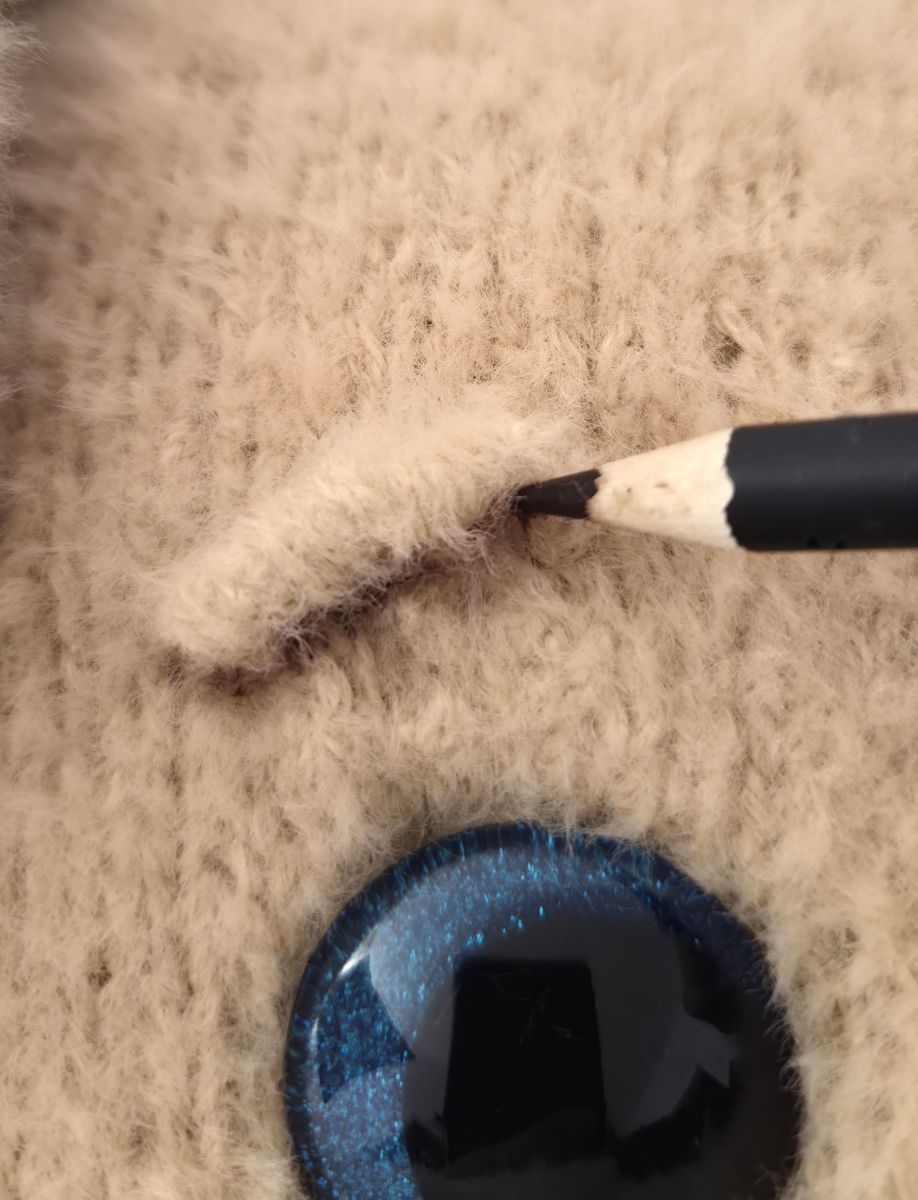
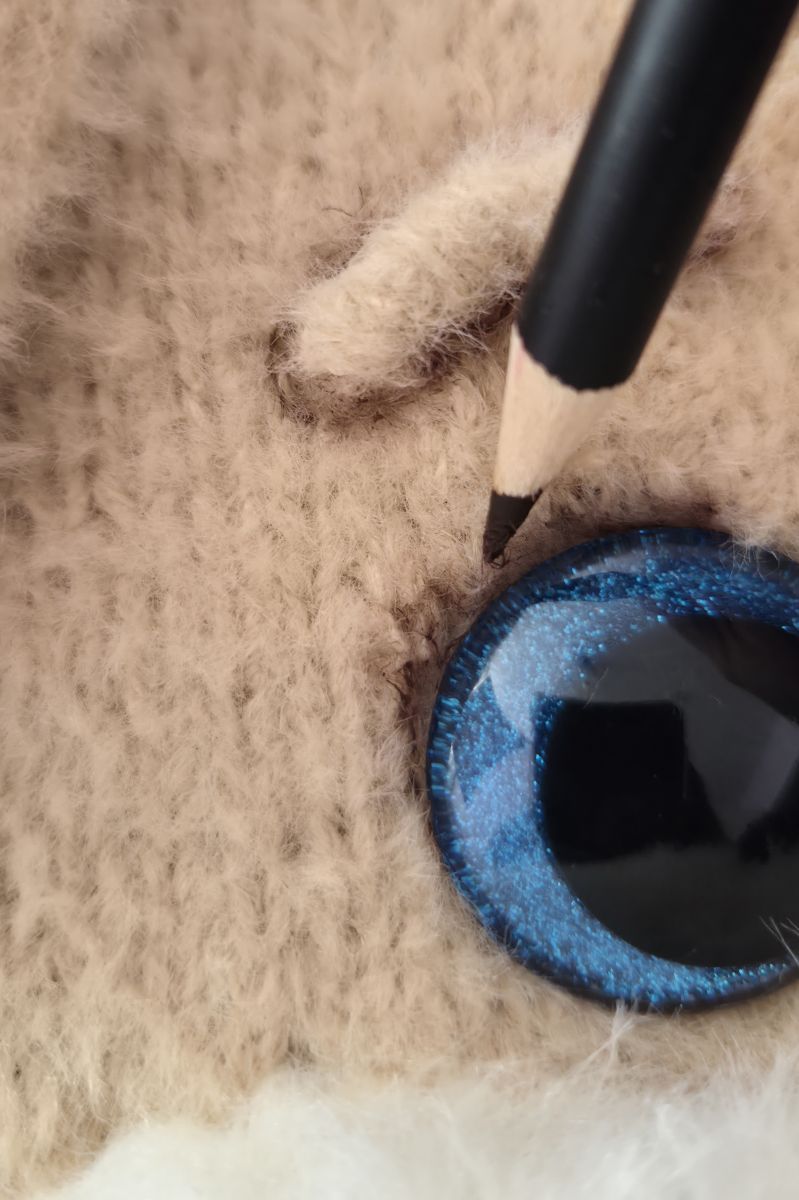
To create the eyebrow shape, proceed as follows:
First, using the same yarn as for the cushion, make a few stitches at the desired position above the eye. These stitches should follow a gentle curve that reflects the shape you want the eyebrow to have. Repeat this several times along the same line until a clearly visible, slightly denser base is formed.
Next, embroider around these foundation stitches. To do this, insert and pull the yarn through close to the existing line, enclosing the stitches and softly rounding the edges. This creates a small, closed eyebrow shape with a neat, defined contour.
The images shown are taken from another tutorial and are intended solely to illustrate the technique.
I crocheted the nose. However, the instructions also include a knitted version for anyone who prefers not to crochet or is unable to do so.
Nose (crocheted, 2.5 mm crochet hook)
Chain 9, from the second chain from the hook crochet around the whole chain
1. 7 sc, 3 sc in one, further crochet along the other side of the chain 7 sc, 3 sc in one (20)
2. 7 fm, 3 mal inc, 7 fm, 3 mal inc (26)
3. 7 fm, (1 fm, 1 fm inc)х3, 7 fm, (1 fm, 1fm inc)х3 (32)
4. 32 fm
Secure the thread and leave it to be sewn on.
Nose (knitted, 3.5 mm knitting needles)
Cast on 12 stitches (ch) onto the knitting needle. Make sure the stitches are evenly stretched while knitting to ensure your knitted piece is nice and even.
1. 12 P (12)
2. 1 K, 1 inc, 8 K, 1 inc, 1 K (14)
3. 14 P
4. 1 K, 1 inc, 10 K, 1 inc, 1 K (16)
5. 16 P
6. 16 K
7. 16 P
8. 16 K
9. 16 P
10. 16 K
11. 16 P
12. 1 K, 1 dec, 10 K, 1 dec, 1 K (14)
13. 14 P
14. 1 K, 1 dec, 8 K, 1 dec, 1 K (12)
15. 12 P
Finally, cast off the remaining stitches. Cut the yarn and secure the end.
Attach the nose to the center of the muzzle. You can experiment a little with the placement and adjust it to achieve the expression you prefer. Once the nose is securely attached, continue by knitting the ears.
Ears
Cast on 6 stitches (ch) onto the knitting needle. Make sure the stitches are evenly stretched while knitting to ensure your knitted piece is nice and even.
1. 6 P
2. 6 K inc. (12)
3. 12 P (12)
4. (1 K, 1 inc) x 6 (18)
5. 18 P
6. (2 K, 1 inc) x 6 (24)
7. 24 P
8. (3 K, 1 inc) x 6 (30)
9. 30 P
10. (4 K, 1 inc) x 6 (36)
11. 36 P
12. (5 K, 1 inc) x 6 (42)
13. 42 P
14. (6 K, 1 inc) x 6 (48)
15. 48 P
16. (7 K, 1 inc) x 6 (54)
Knit a total of 9 rows in stockinette stitch:
On the front side of the work, knit all stitches across the row.
On the back side of the work, purl all stitches across the row.
17. 19. 21. 23. 25. - 54 P
18. 20. 22. 24. - 54 K
26. (7 K, 1 dec) x 6 (48)
Knit a total of 7 rows in stockinette stitch:
On the front side of the work, knit all stitches across the row.
On the back side of the work, purl all stitches across the row.
27. 29. 31. 33. - 48 P
28. 30. 32. - 48 K
34. (6 K, 1 dec) x 6 (42)
Knit a total of 17 rows in stockinette stitch:
On the front side of the work, knit all stitches across the row.
On the back side of the work, purl all stitches across the row.
35. 37. 39. 40. 43. 45. 47. 49. 51. - 42 P
36. 38. 40. 42. 44. 46. 48. 50. - 42 K
Finally, cast off the remaining stitches. Cut the yarn and leave a tail for sewing.
Sew the ears onto the top of the head. You can experiment with the placement if you like – the ears can be attached lying down or standing up, depending on the expression you want to create.
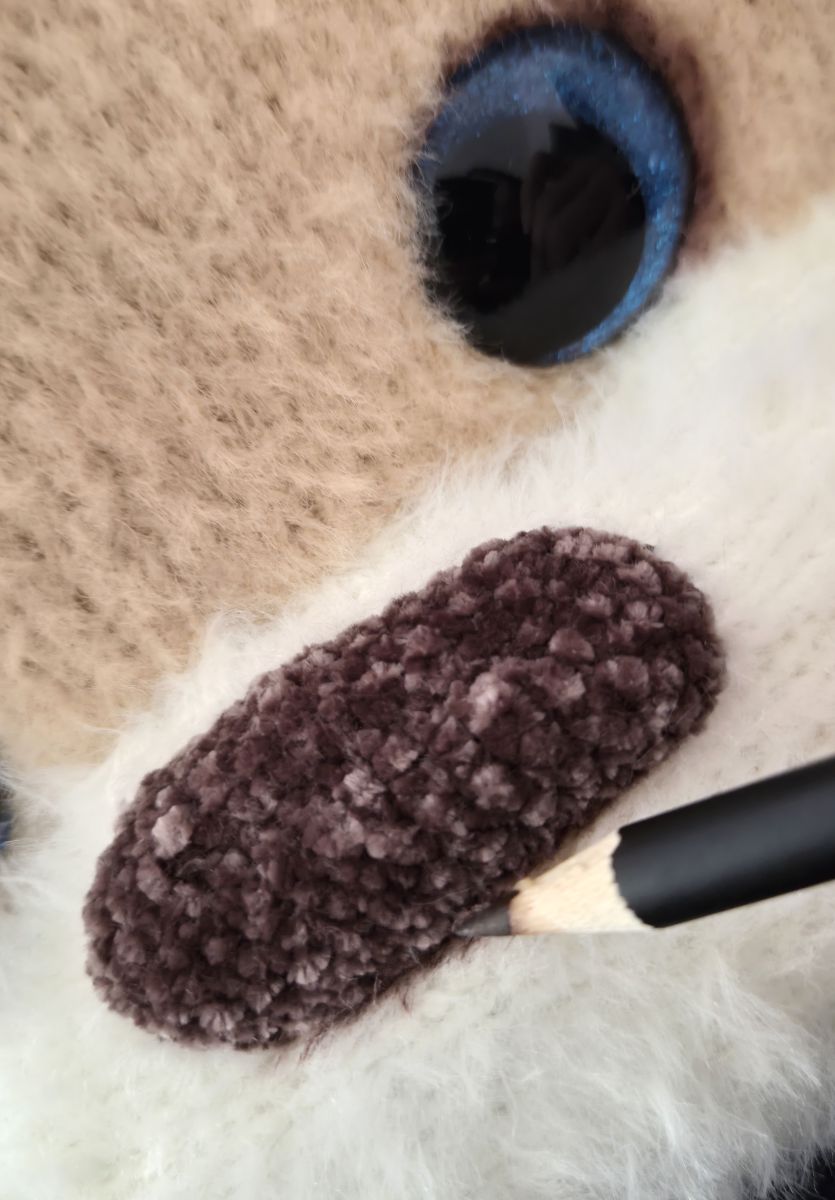
Emphasize the eyes and eyebrows
Once the cushion is completely sewn together, a few small details can add extra expression and character.
The eyebrows and the area around the eyes can be gently highlighted. Colored pencils with soft leads work especially well for this. With a few light strokes, the dog gains a lively and friendly look.
These small accents give the face a particularly expressive and charming appearance.
Finally, I decided to add some detail to the lower lip to give the mouth a fuller look.
Cast on 9 stitches (ch) onto your knitting needle. Make sure the stitches are evenly spaced so your piece turns out neat and even.
-
9 P
-
9 K
-
9 P
-
9 K
-
9 P
To finish, cast off all remaining stitches. Cut the yarn, leaving a long tail for sewing. Sew the lower lip to the bottom edge of the mouth area.
To finish, the cushion was carefully brushed with a special grooming brush. Work gently around the eyes and nose to avoid damaging any details.
The cushion is now complete!