Valentine’s Day is a lovely occasion to give a small handmade gift with a personal touch. This crochet cat keychain with a heart is a charming DIY project and makes a thoughtful present for cat lovers. Whether for a partner, a friend, or as a decorative accessory on your own keyring, this small amigurumi is versatile and timeless.
The free crochet pattern is suitable even for beginner crocheters, as it is clearly structured and explained step by step. Thanks to its compact size, the keychain works up fairly quickly and is an ideal project for short crochet sessions or as an introduction to small amigurumi projects.
All parts are crocheted separately and then assembled. This results in a sturdy keychain with a clean shape that is well suited for everyday use and makes a lovely small gift beyond Valentine’s Day.
Tips & Tricks
To achieve a neat and even result, it helps to keep a few basic tips in mind while crocheting. Especially with small amigurumi projects like this cat keychain, attention to detail makes a noticeable difference.
- It is recommended to mark the beginning or end of a round using a stitch marker or a contrasting piece of yarn. This makes it easier to keep track of your rounds, particularly since most parts are worked in continuous rounds.
- Unless stated otherwise, all pieces are crocheted in spiral rounds. The rounds are not closed with a slip stitch but are worked continuously, resulting in a smooth surface without visible seams.
- All single crochet stitches are worked through both loops. This creates a firm and even fabric, which is important for a keychain that will be handled frequently.
- Color changes (CC) are worked in the last single crochet before the color change by pulling through the new color on the final yarn over.
- Using the recommended yarn and a 2.5 mm crochet hook, the finished cat keychain measures approximately 6 cm (excluding the loop). The final size may vary depending on your personal tension or if different yarn or hook sizes are used. Substituting materials is absolutely possible, but it will affect the size and overall appearance of the finished piece.
- Try to crochet with tight, even stitches to prevent stuffing from showing through and to help the amigurumi keep its shape. When assembling the individual parts, it can be helpful to pin them in place first to ensure correct and symmetrical positioning before sewing.
Materials
Only a small amount of materials is required to crochet the cat keychain with a heart, and many of them can easily be taken from leftover yarn. The following list refers to the recommended version of the pattern.
Required materials:
-
2.5 mm crochet hook
-
Fiberfill stuffing for the head, heart, and paws
-
Cotton yarn with a yardage of approx. 125 m / 50 g
(e.g. Schachenmayr Catania or a similar yarn) in the following colors:-
Red, approx. 5g (heart)
-
Light grey, approx. 5g (main color cat)
-
Dark grey, leftovers (tabby markings)
-
White, leftovers (snout)
-
-
Embroidery floss for stitched details, approx. 25 cm each:
-
White (eyes)
-
Black (eyes)
-
Pink (nose)
-
-
Blunt yarn needle for sewing parts together
-
Scissors
-
Stitch marker (optional, but recommended)
-
Pins (optional, for positioning parts before sewing)
Optionally, prepare a key ring or clasp to attach the finished crochet cat keychain.
Abbreviations
The following abbreviations are used throughout this pattern. Unless stated otherwise, they follow standard crochet terminology. Please note: this pattern is written in US terms.
| Rnd | - | round |
| St | - | stitch |
| ch | - | chain |
| sl st | - | slip stitch |
| sc | - | single crochet |
| MR | - | magic ring |
| CC | - | color change |
| inc | - | increase (2 single crochets in the same stitch) |
| dec | - | decrease (invisible decrease, worked through the front loops only) |
| [...] xn | - | Repeat the instructions in brackets n times |
Instructions
Heart
The heart is crocheted from bottom to top. The exact stitch instructions for each round are given using the abbreviations listed above and are worked round by round.
| Rnd 1: | 6 sc in MR | (6) |
| Rnd 2: | [sc, inc] x3 | (9) |
| Rnd 3: | [inc, 2 sc] x3 | (12) |
| Rnd 4: | [3 sc, inc] x3 | (15) |
| Rnd 5: | [2 sc, inc, 2 sc] x3 | (18) |
| Rnd 6: | [sc, inc, 4 sc] x3 | (21) |
| Rnd 7: | [inc, 6 sc] x3 | (24) |
| Rnd 8: | [3 sc, inc] x6 | (30) |
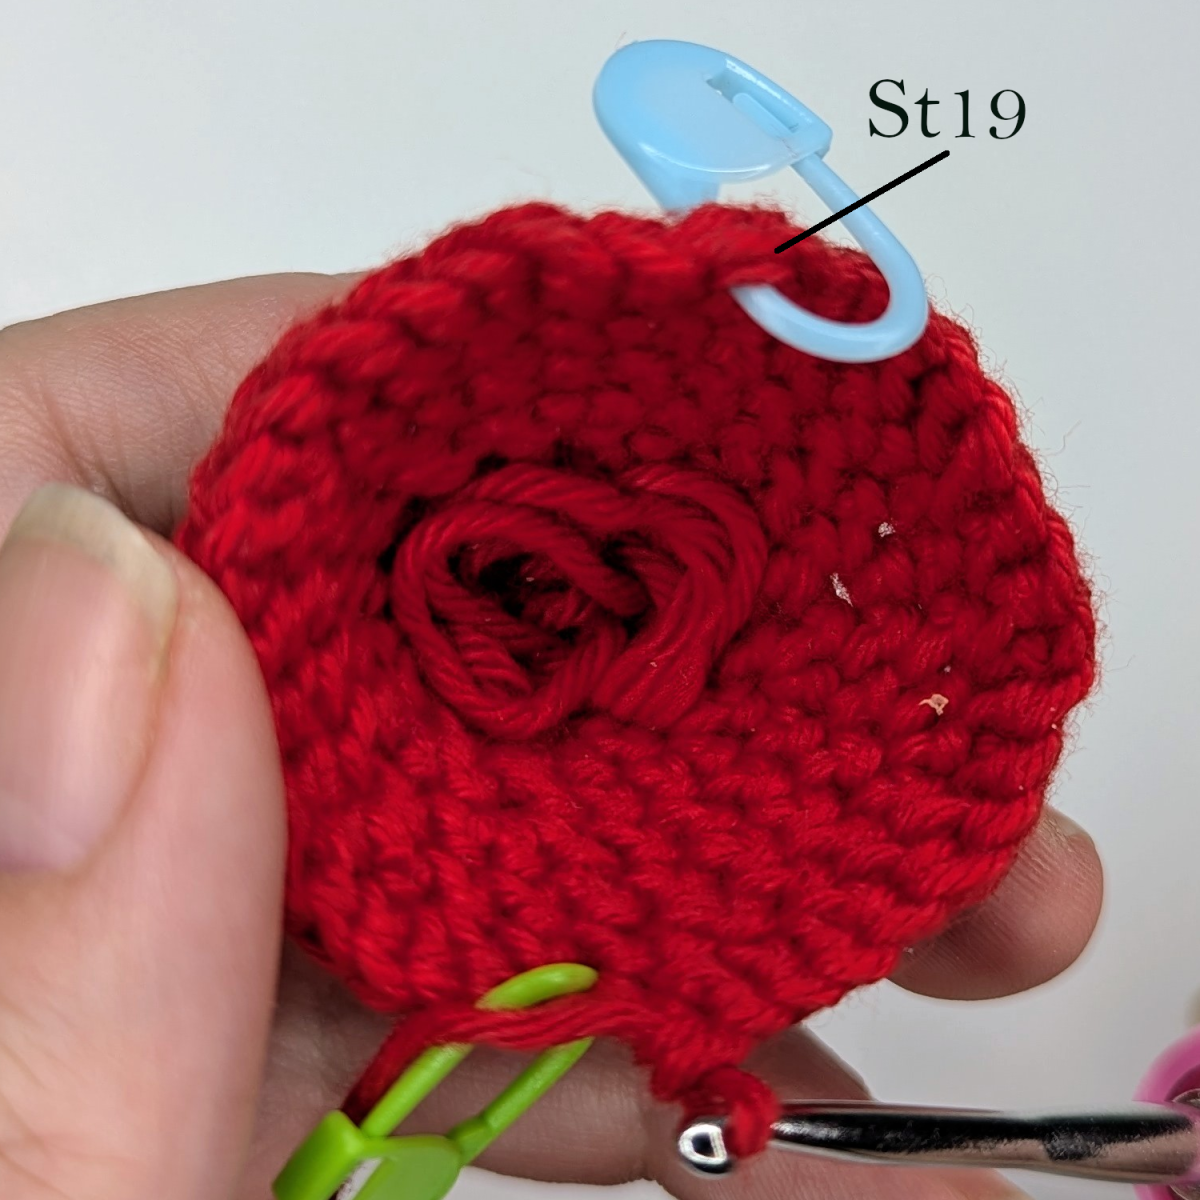
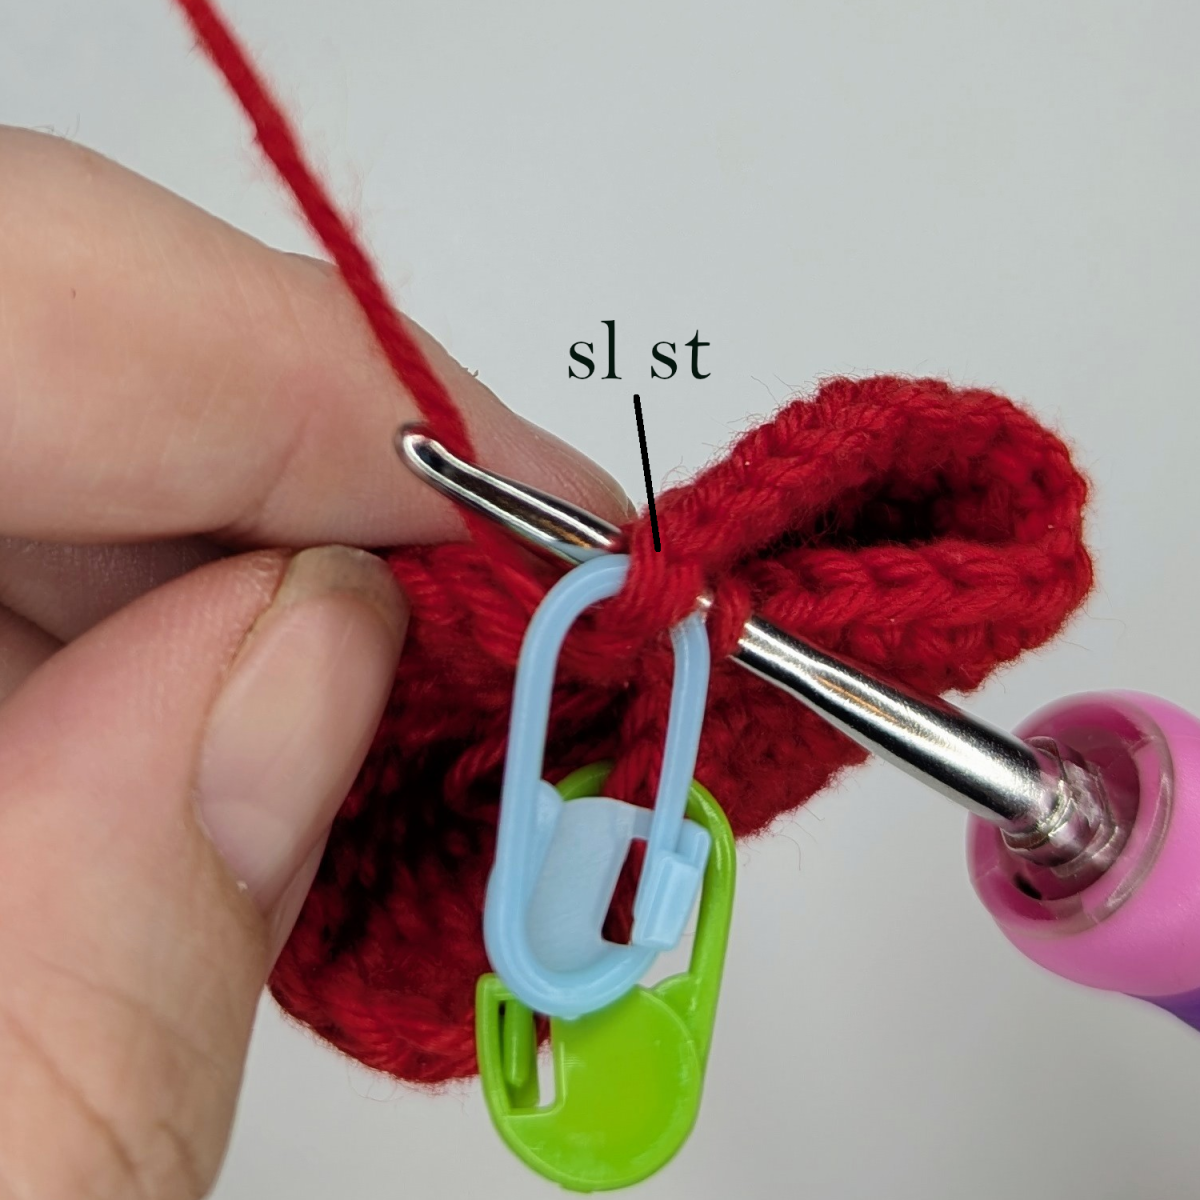
After completing round 9, stitch 19 must be marked using a stitch marker. This marker serves as an important reference point for the following steps.
| Rnd 9: | [2 sc, inc, 2 sc] x6 | (36) |
From this point on, only one half of the heart is worked at a time. Before starting the next round, begin by working a slip stitch (sl st) into the marked 19th stitch of round 9. This correctly positions the starting point for the next section.
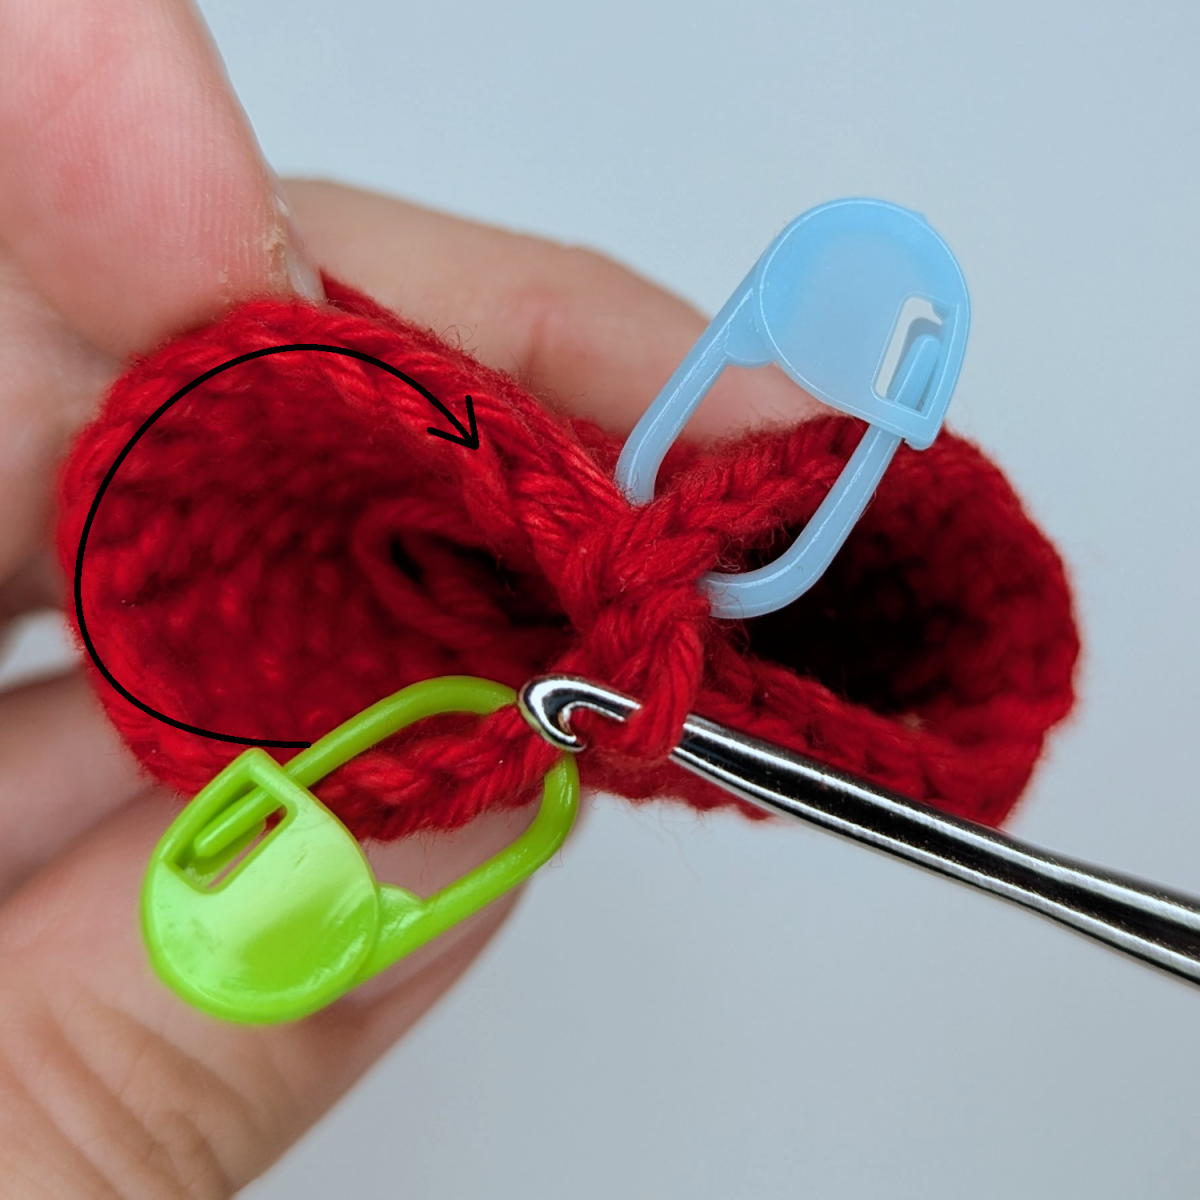
Next, the first heart curve is crocheted according to the pattern instructions:
| Rnd 10: | 18 sc | (18) |
| Rnd 11: | [dec, sc] x6 | (12) |
| Rnd 12: | 6 dec | (6) |
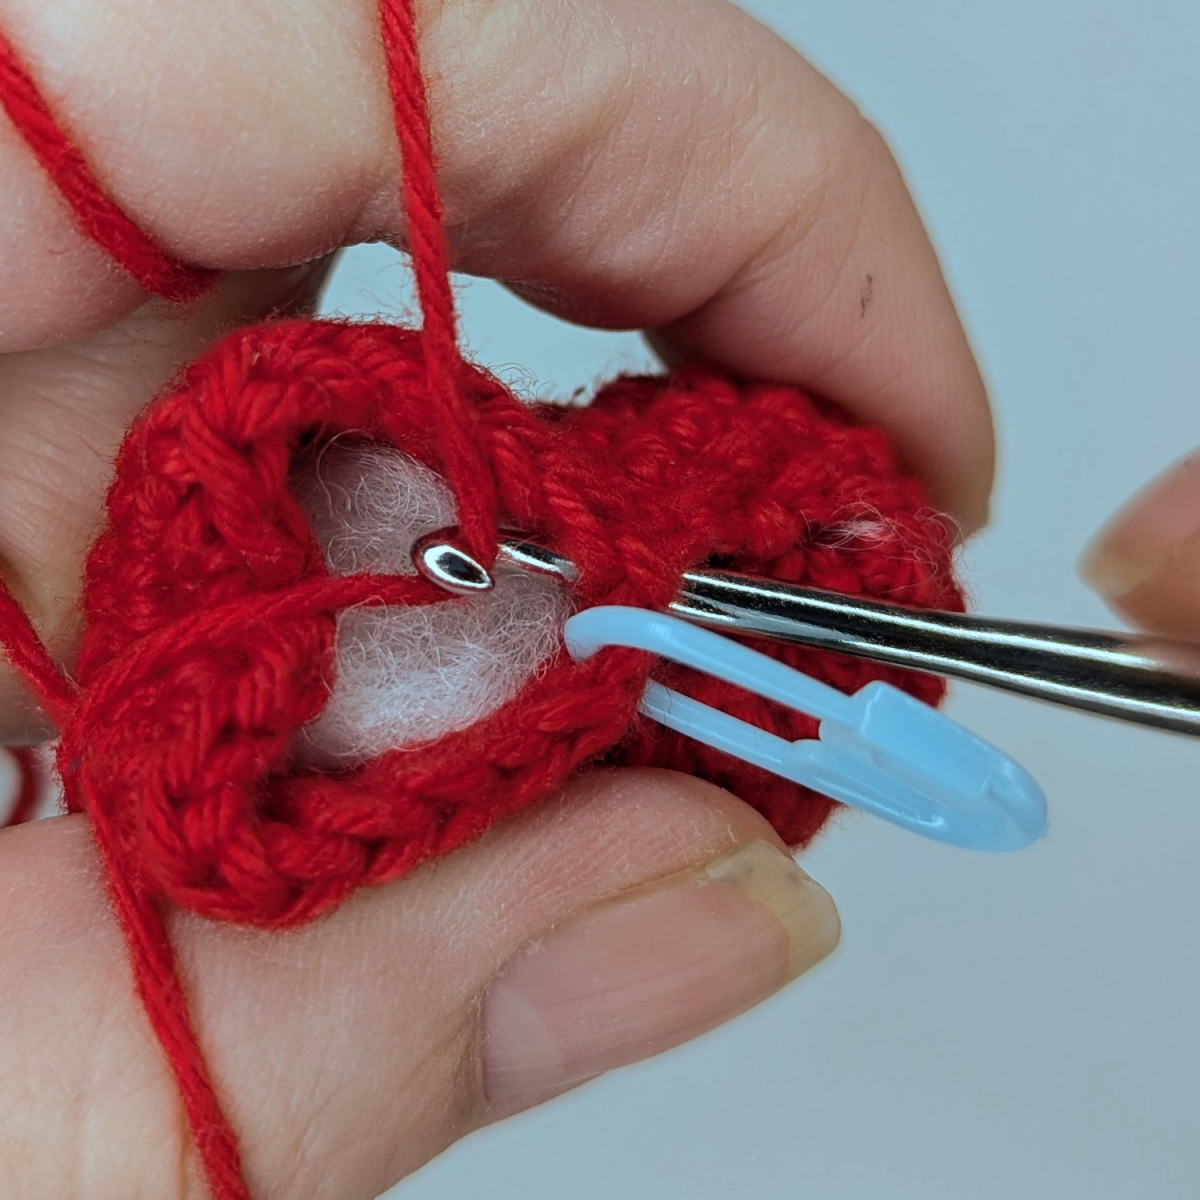
Once completed, the yarn is pulled through the last 6 stitches to close the curve neatly. Cut the yarn, fasten off, and weave in the ends securely. At this stage, the heart can already be stuffed with fiberfill as much as possible.
To create the second heart curve, attach a new yarn strand at the center of the heart:
Crochet the second heart curve following the same instructions as for the first one:
| Rnd 1: | 18 sc | (18) |
| Rnd 2: | [dec, sc] x6 | (12) |
Now you have to stuff the heart completely before crocheting the next round.
| Rnd 3: | 6 dec | (6) |
Finish it in the same way, fasten off, weave in the yarn ends, and complete the heart.
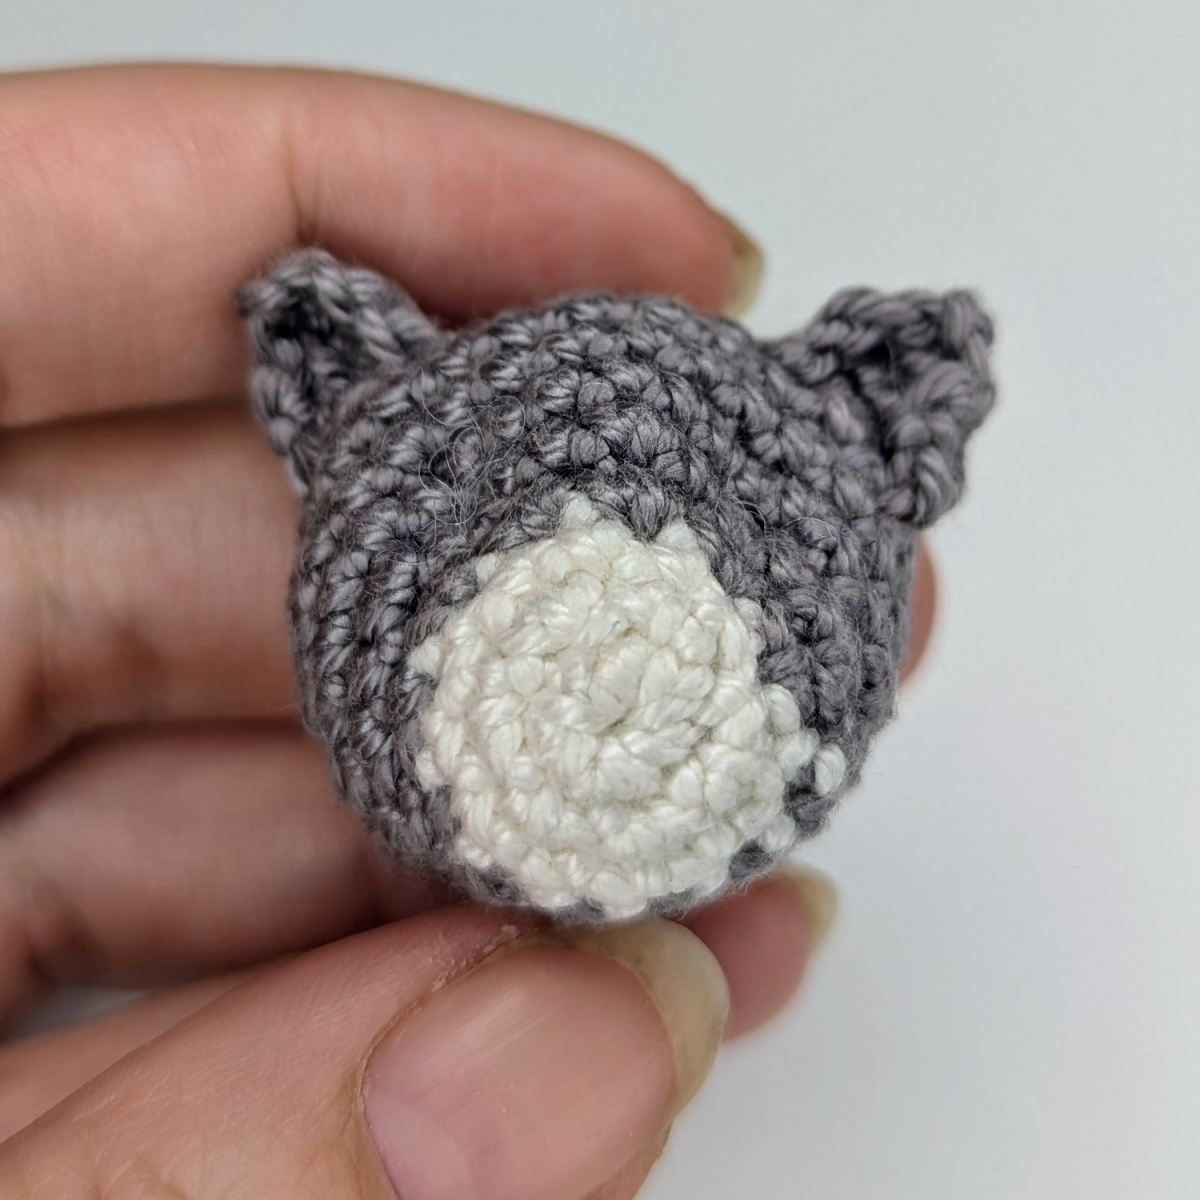
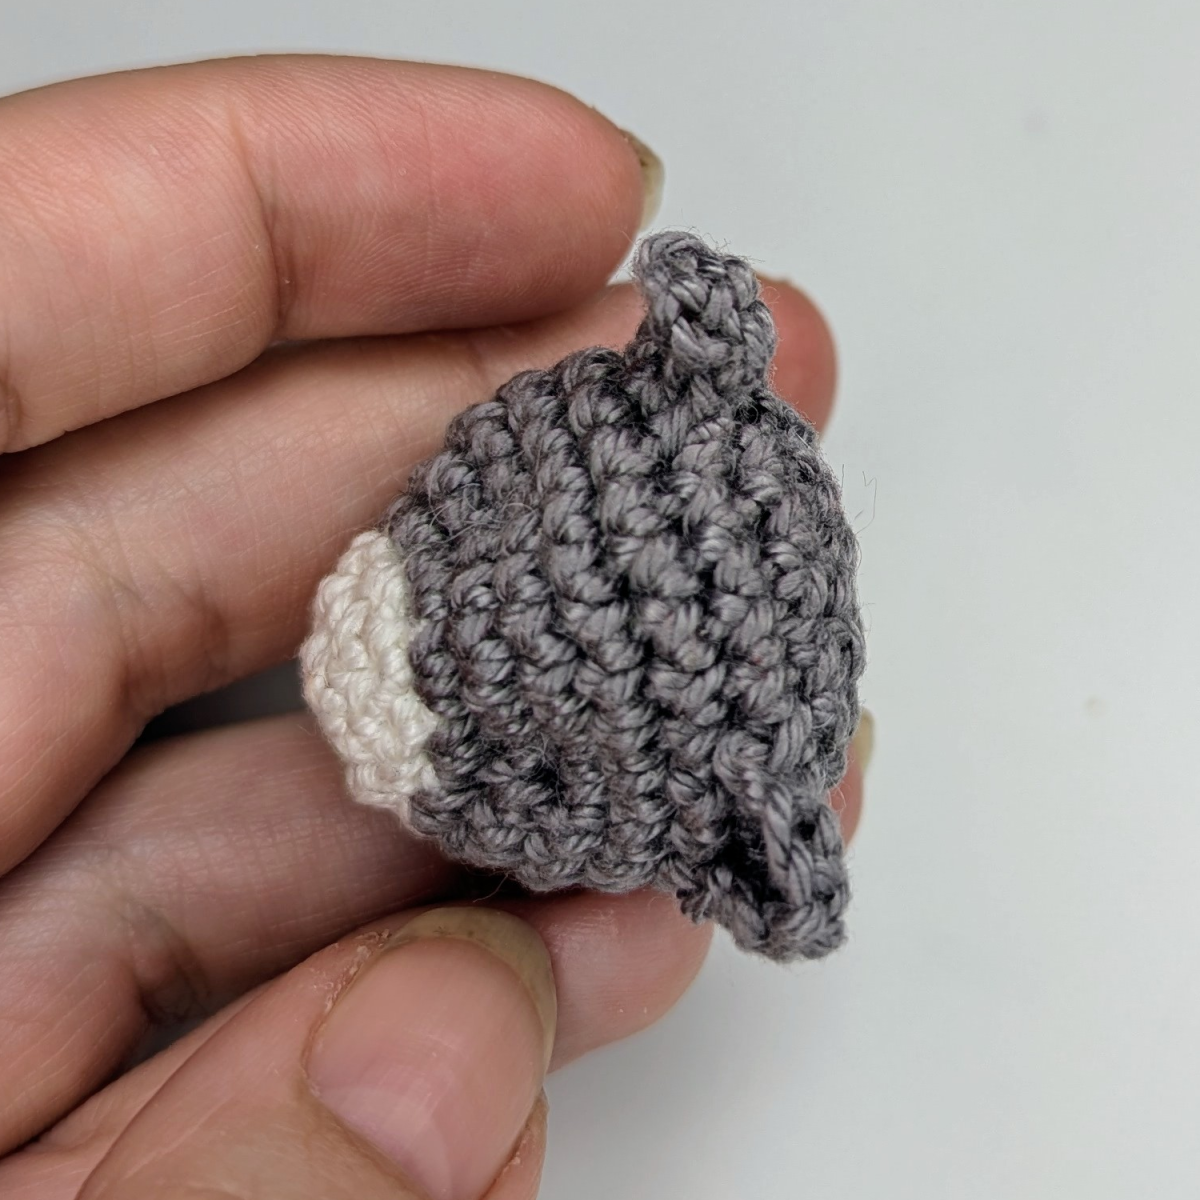
Head
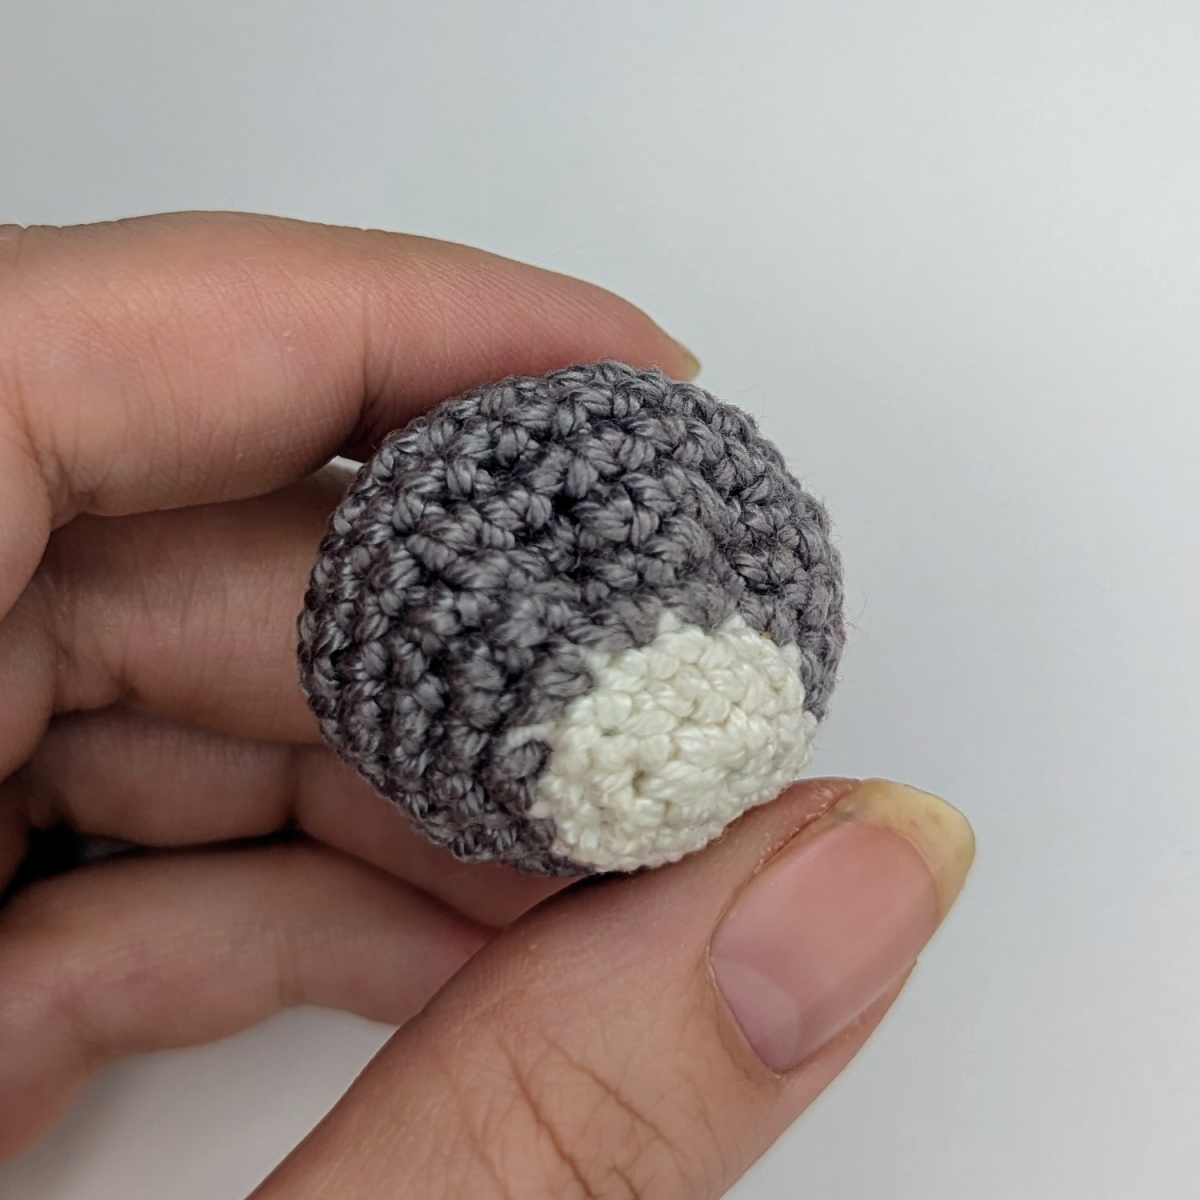
The head is crocheted starting at the muzzle and worked in continuous spiral rounds. Begin using white yarn.
| Rnd 1: | 6 sc in MR | (6) |
| Rnd 2: | 6 inc | (12) |
| Rnd 3: | 12 sc | (12) |
After the initial three rounds, a color change (CC) is made to the main color of the cat, in this case light grey. As noted in the tips & tricks section, the color change is worked in the last stitch before switching colors.
| Rnd 4: | 6 inc, 6 sc | (18) |
| Rnd 5: | [sc, inc] x6, 6 sc | (24) |
| Rnd 6 - 9: | 24 sc | (24) |
| Rnd 10: | [dec, 2 sc] x6 | (18) |
| Rnd 11: | [sc, dec] x6 | (12) |
Now the head is stuffed with fiberfill. Make sure to stuff evenly so the head keeps its shape without becoming too firm.
| Rnd 12: | 6 dec | (6) |
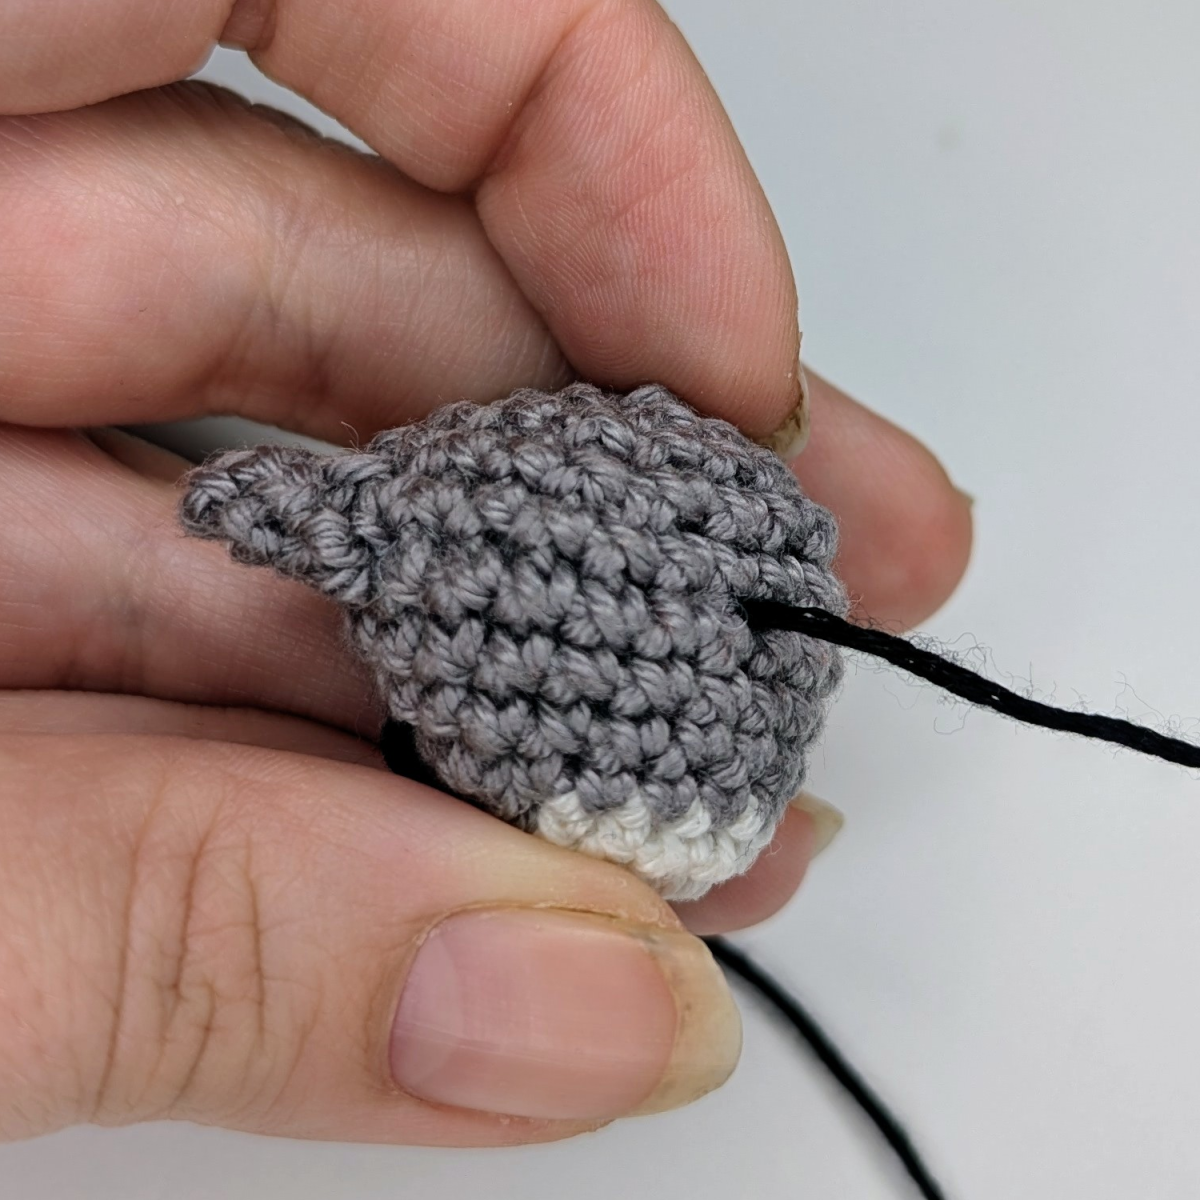
After completing the last round, cut the yarn and fasten off. Leave the yarn tail long enough, as it will be used next to shape the eye sockets.
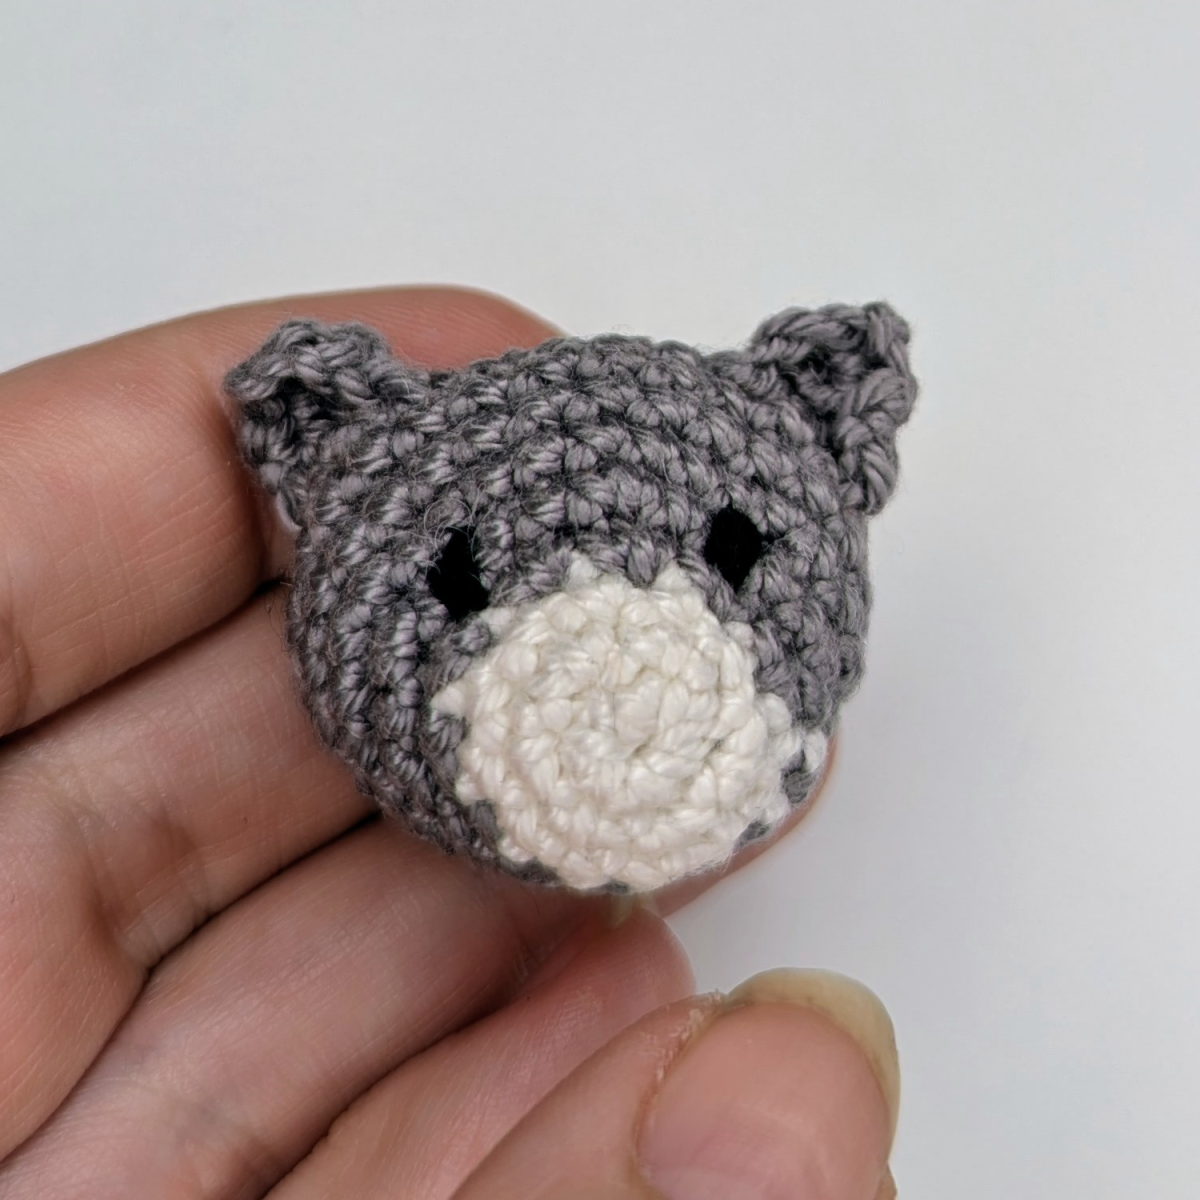
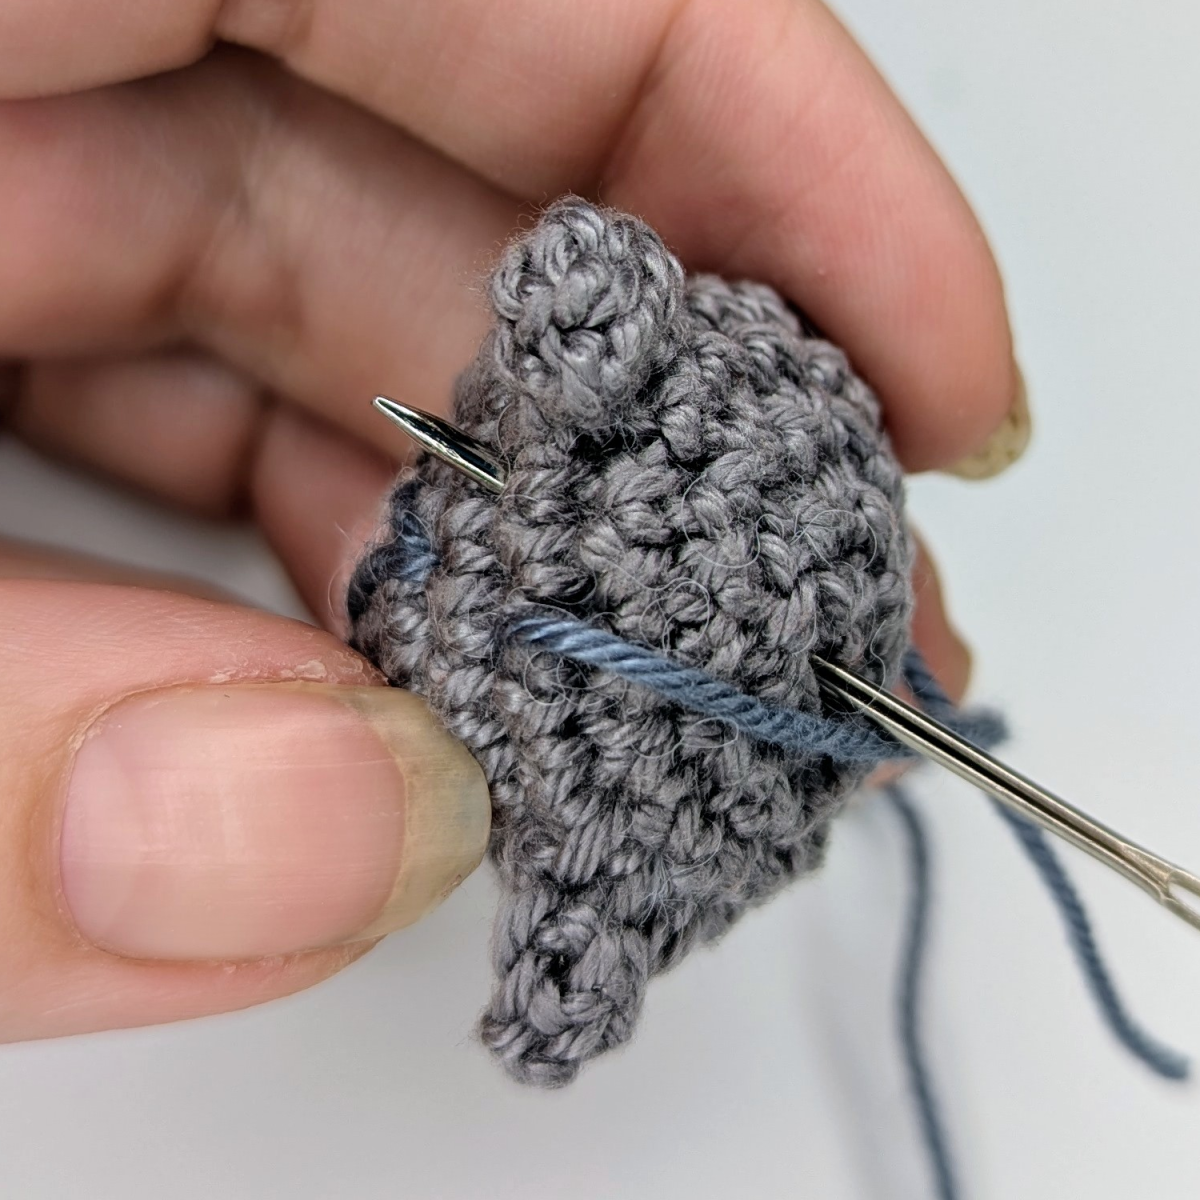
Shaping the Eye Sockets
To create the eye indentations, thread the remaining yarn onto a needle and guide it from the back of the head to the front, emerging at the position where one of the eyes will later be embroidered. The correct placement can be marked beforehand using pins. Insert the needle again one stitch further out and pull it downwards, exiting at the bottom of the head. Apply slightly more tension to create a visible eye socket.Guide the same yarn to the position of the second eye and repeat the process in the same way.

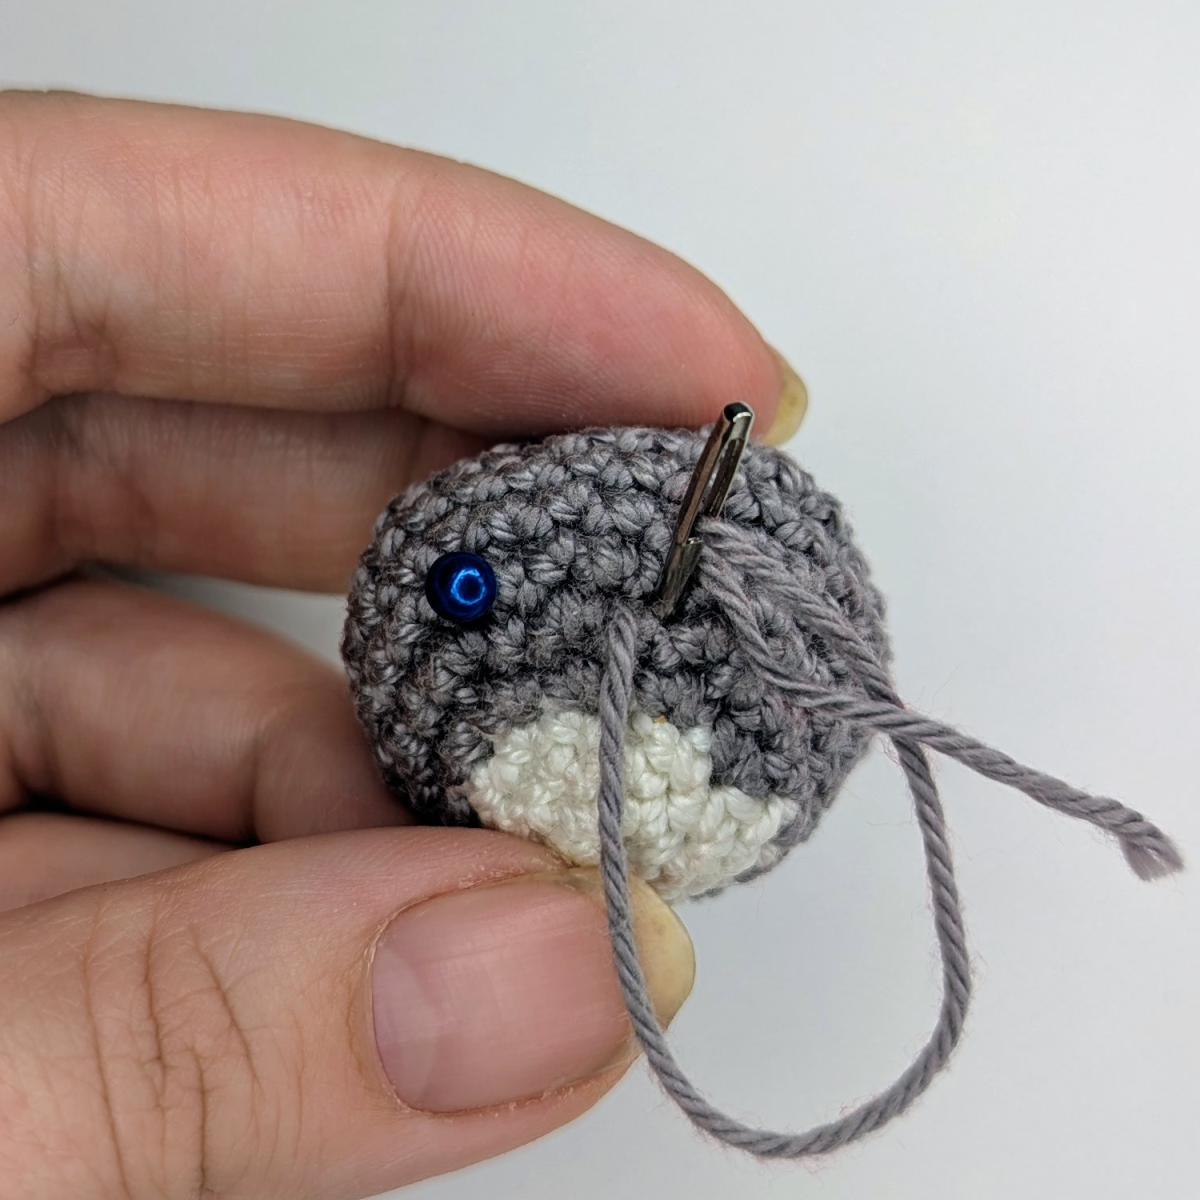
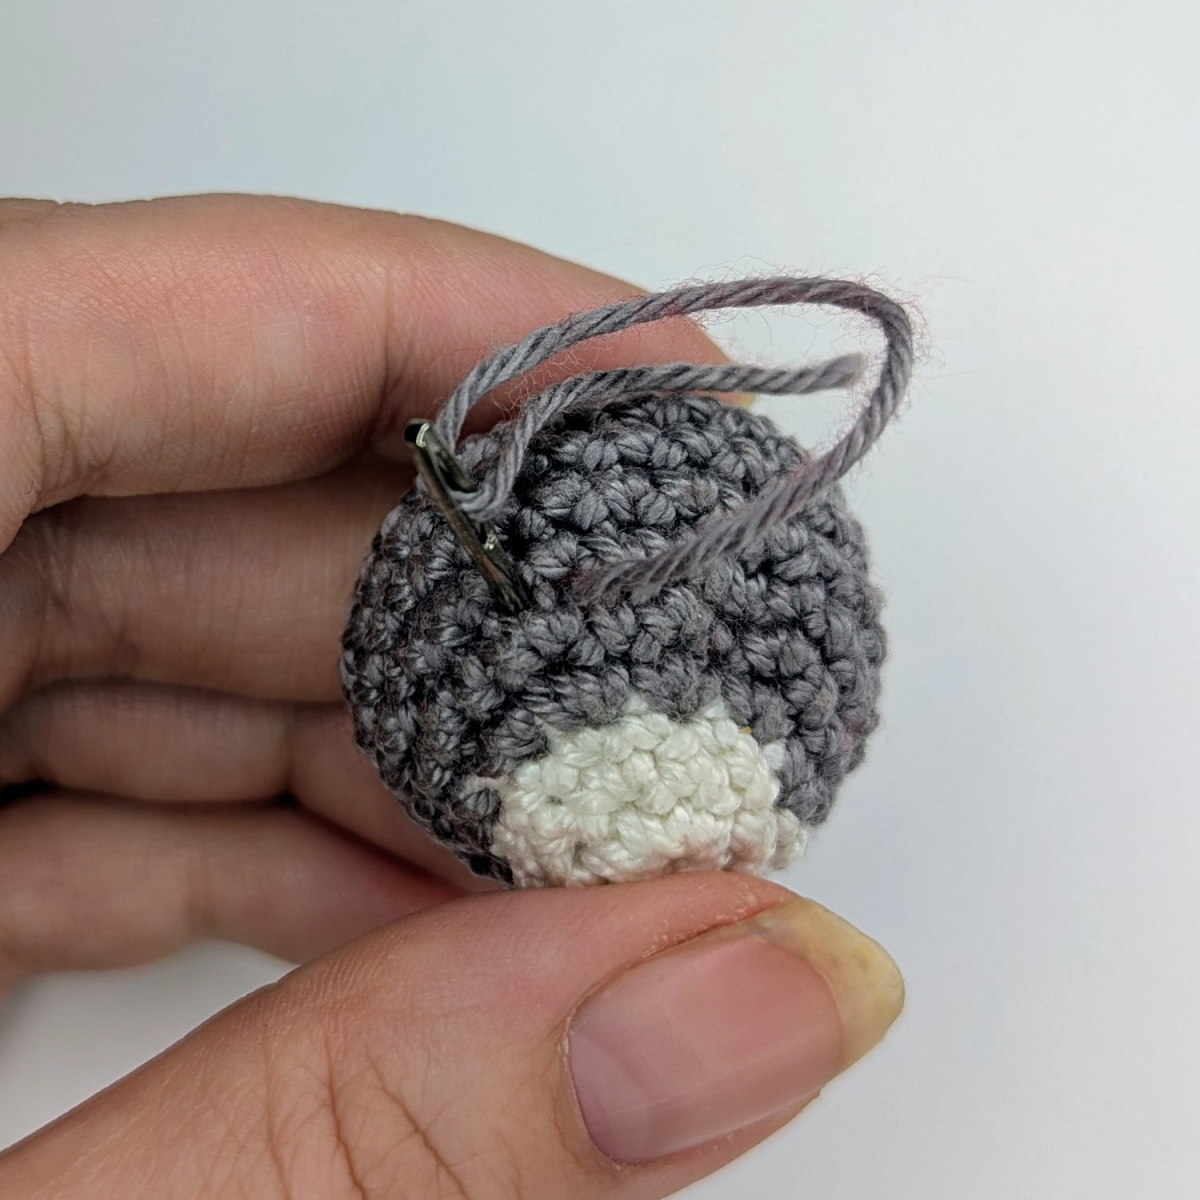
Once both eye indentations are formed, secure and weave in the yarn neatly.
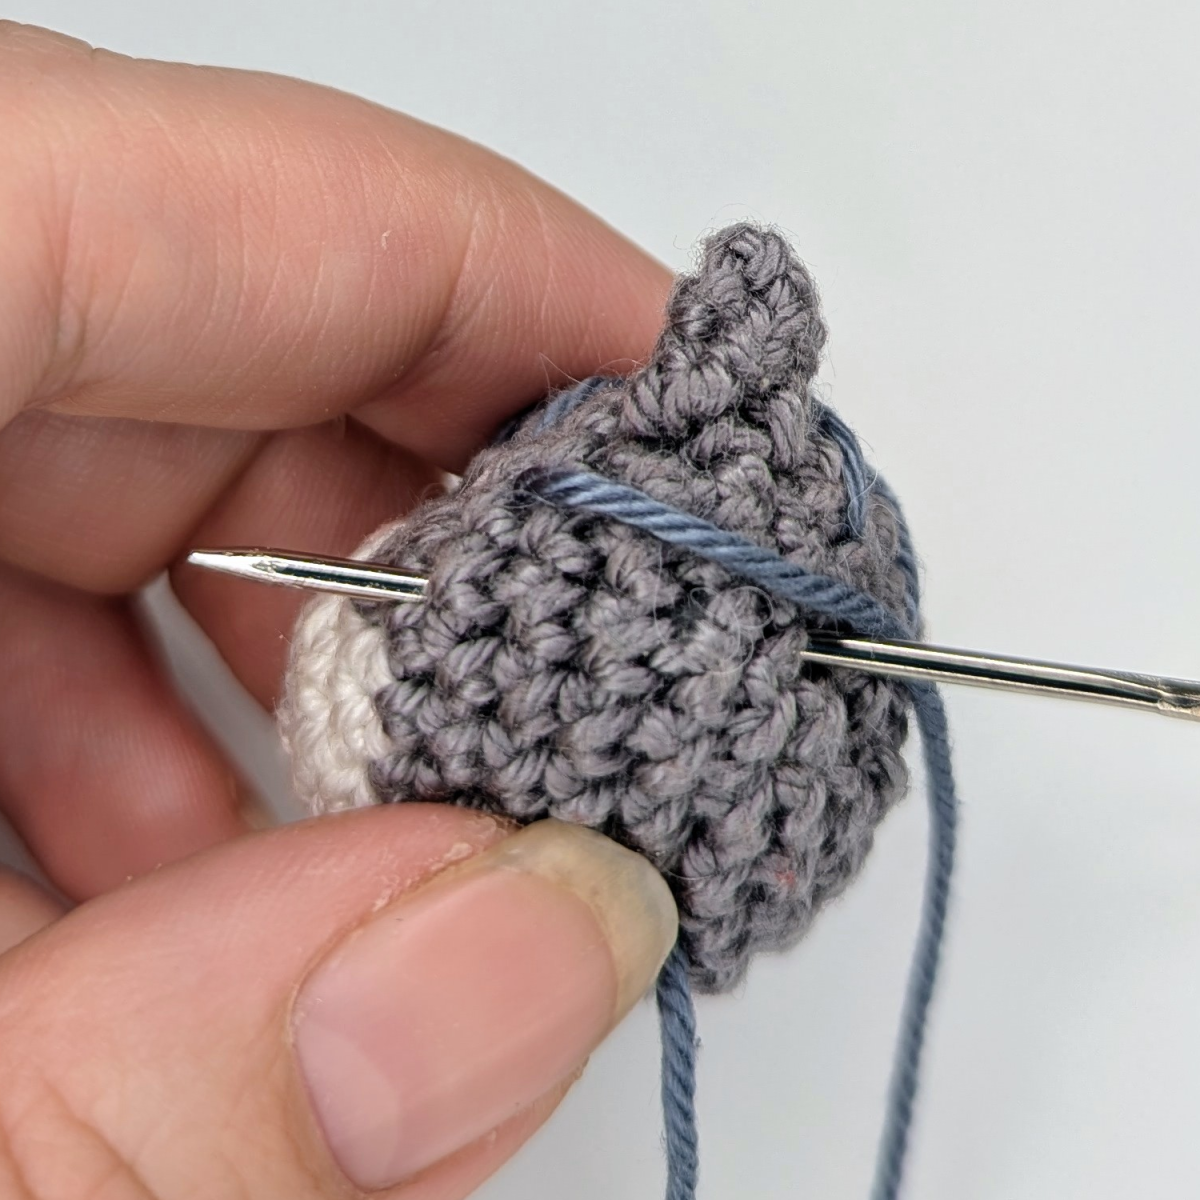
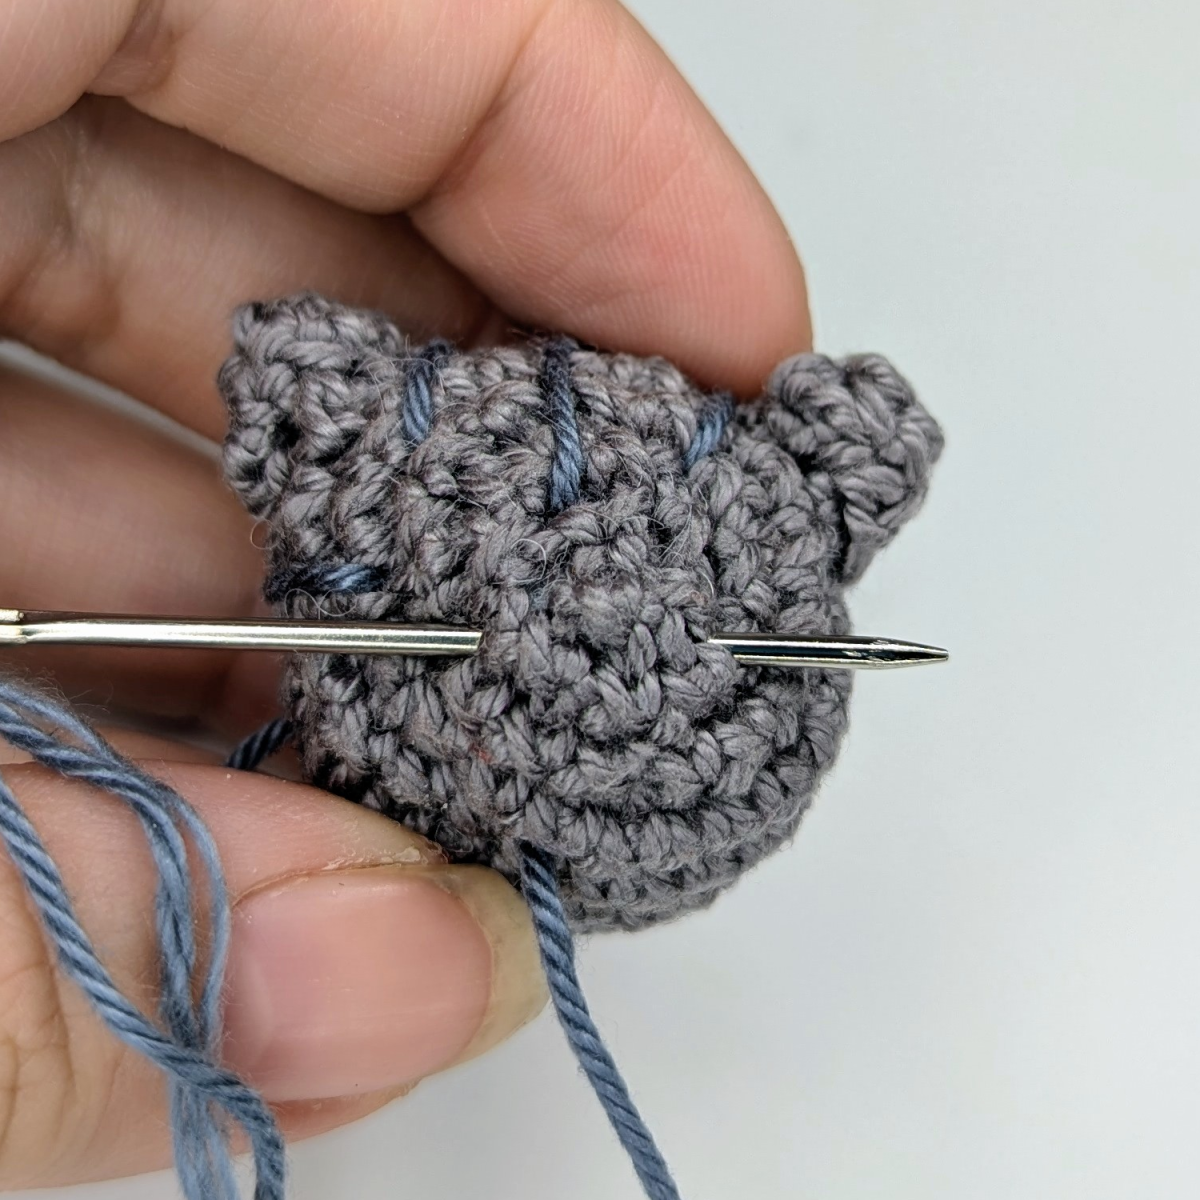
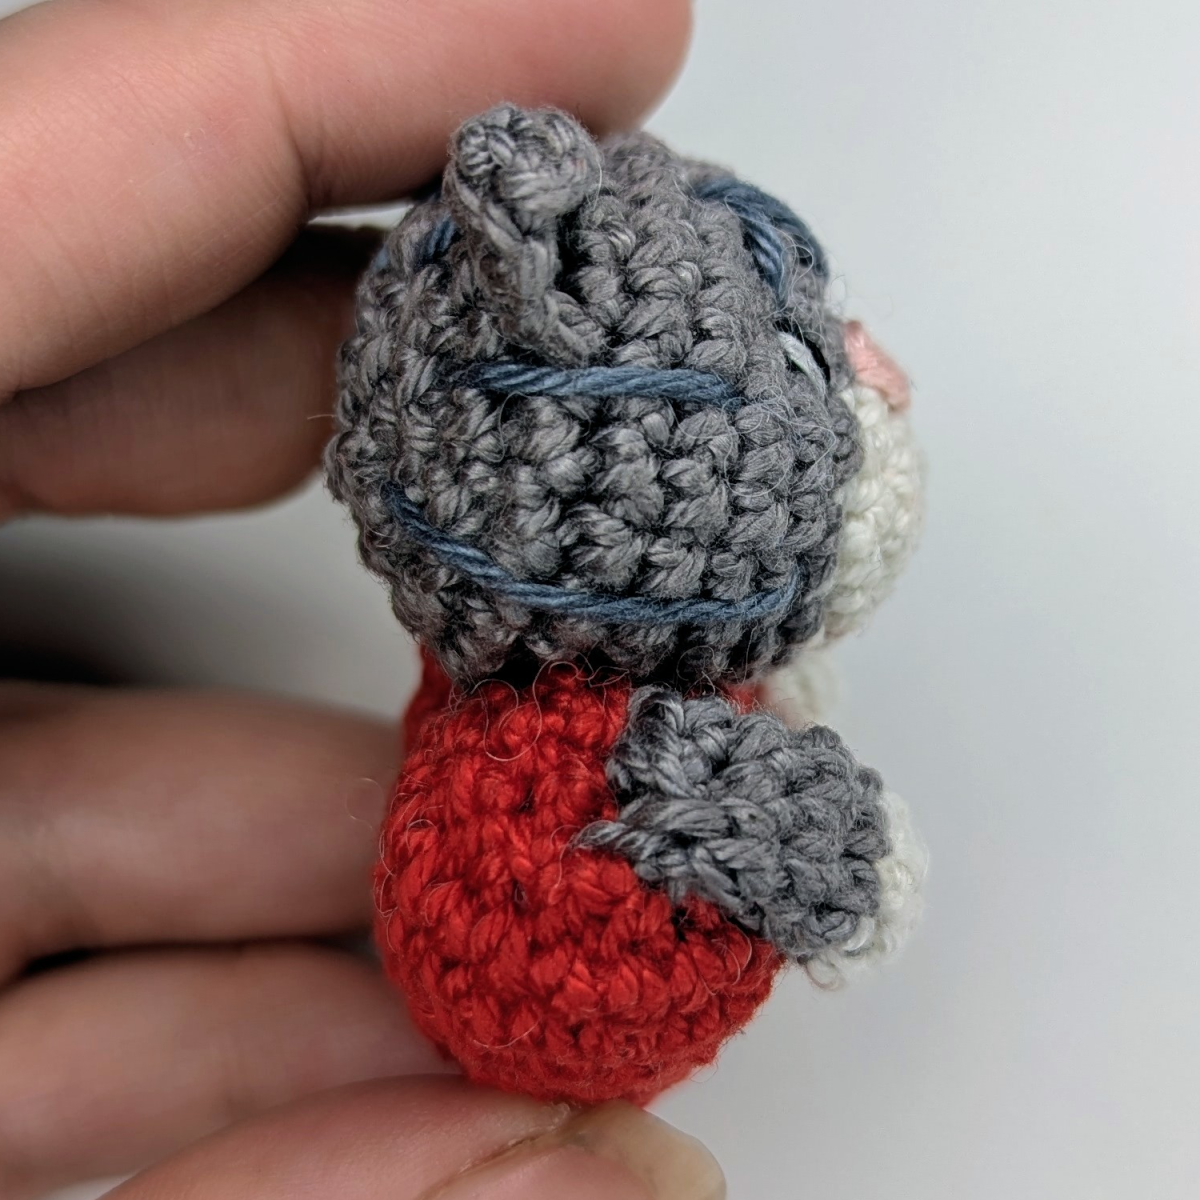
Ears (2x)
The ears are crocheted in rows.
| Rnd 1: | ch 3 | (3) |
| Rnd 2: | ch 1, 3 sc | (3) |
| Rnd 3: | ch 1, dec, sc | (2) |
| Rnd 4: | ch 1, dec | (1) |
After completing the final row, fasten off, leaving the yarn tail long enough to sew the ears directly onto the head.
When attaching the ears, make sure that the bottom edge of each ear is the side where the starting and ending yarn tails are located. This helps with secure attachment and proper positioning on the head.
To achieve the characteristic shape of cat ears, gently fold the two side edges inward. This creates a natural, slightly curved ear shape. The exact placement and angle can be adjusted beforehand using pins (see photos).
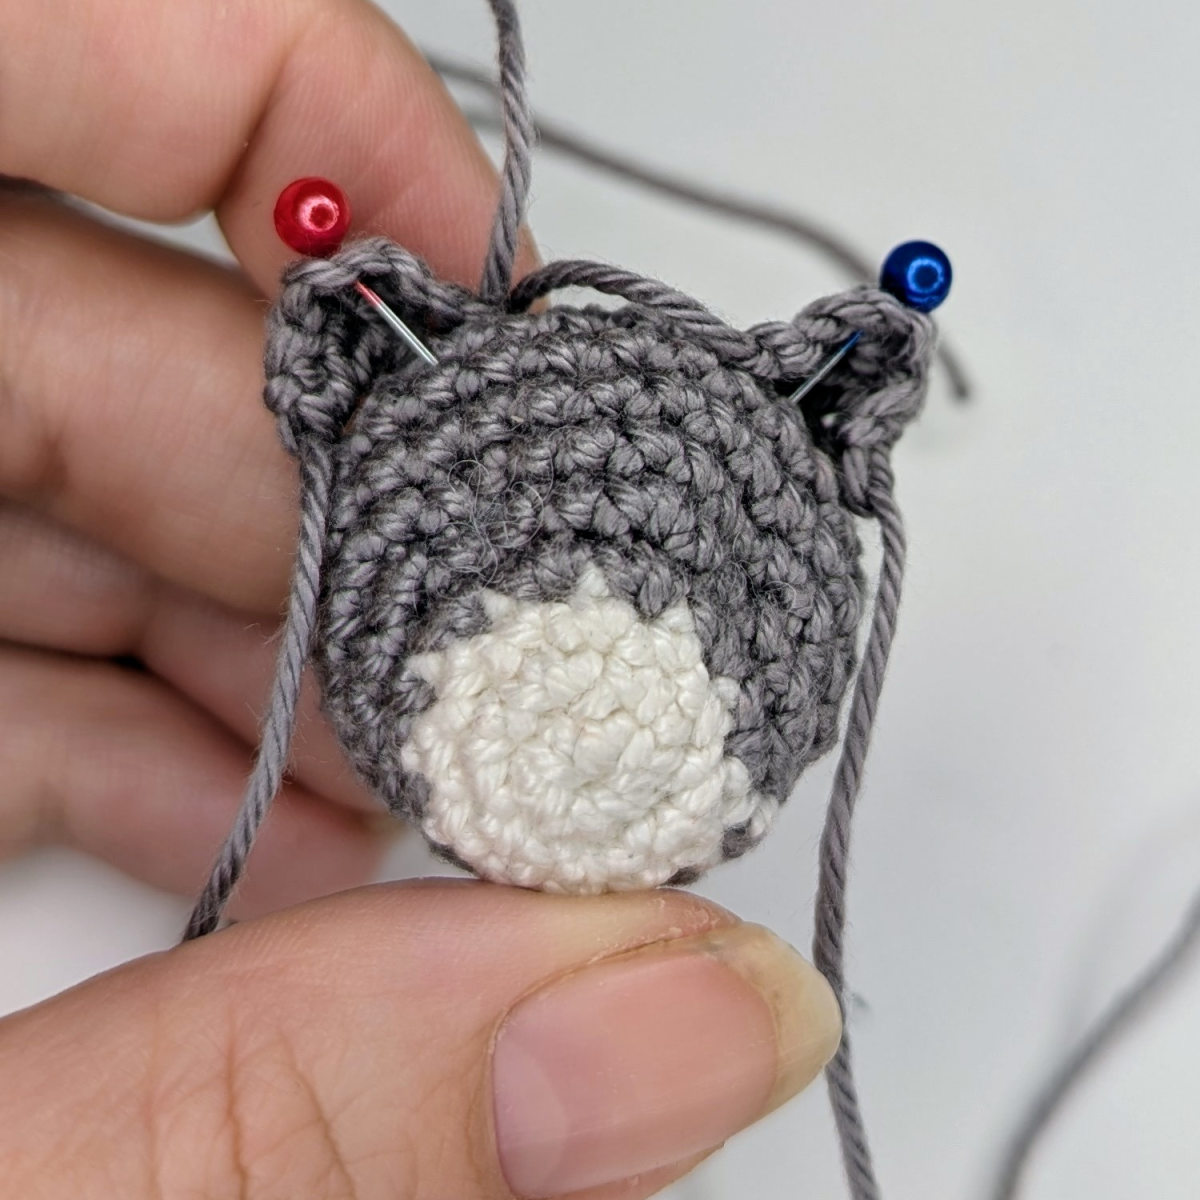
Once positioned correctly, sew the ears firmly onto the head. Finally, weave in both the starting and ending yarn tails inside the head, ensuring that no loose ends are visible from the outside.
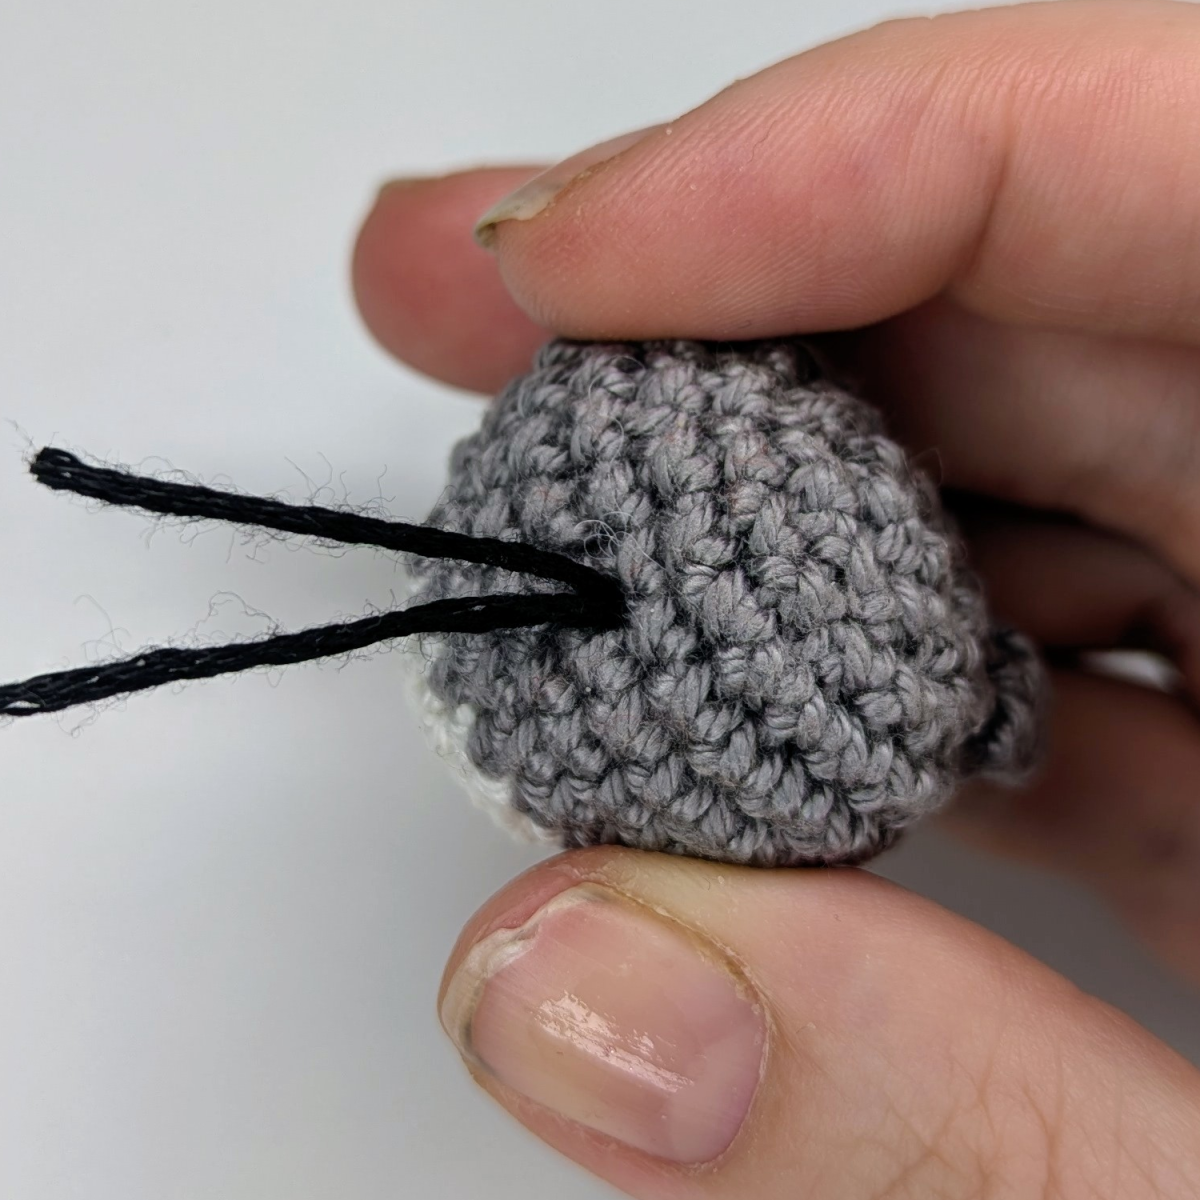
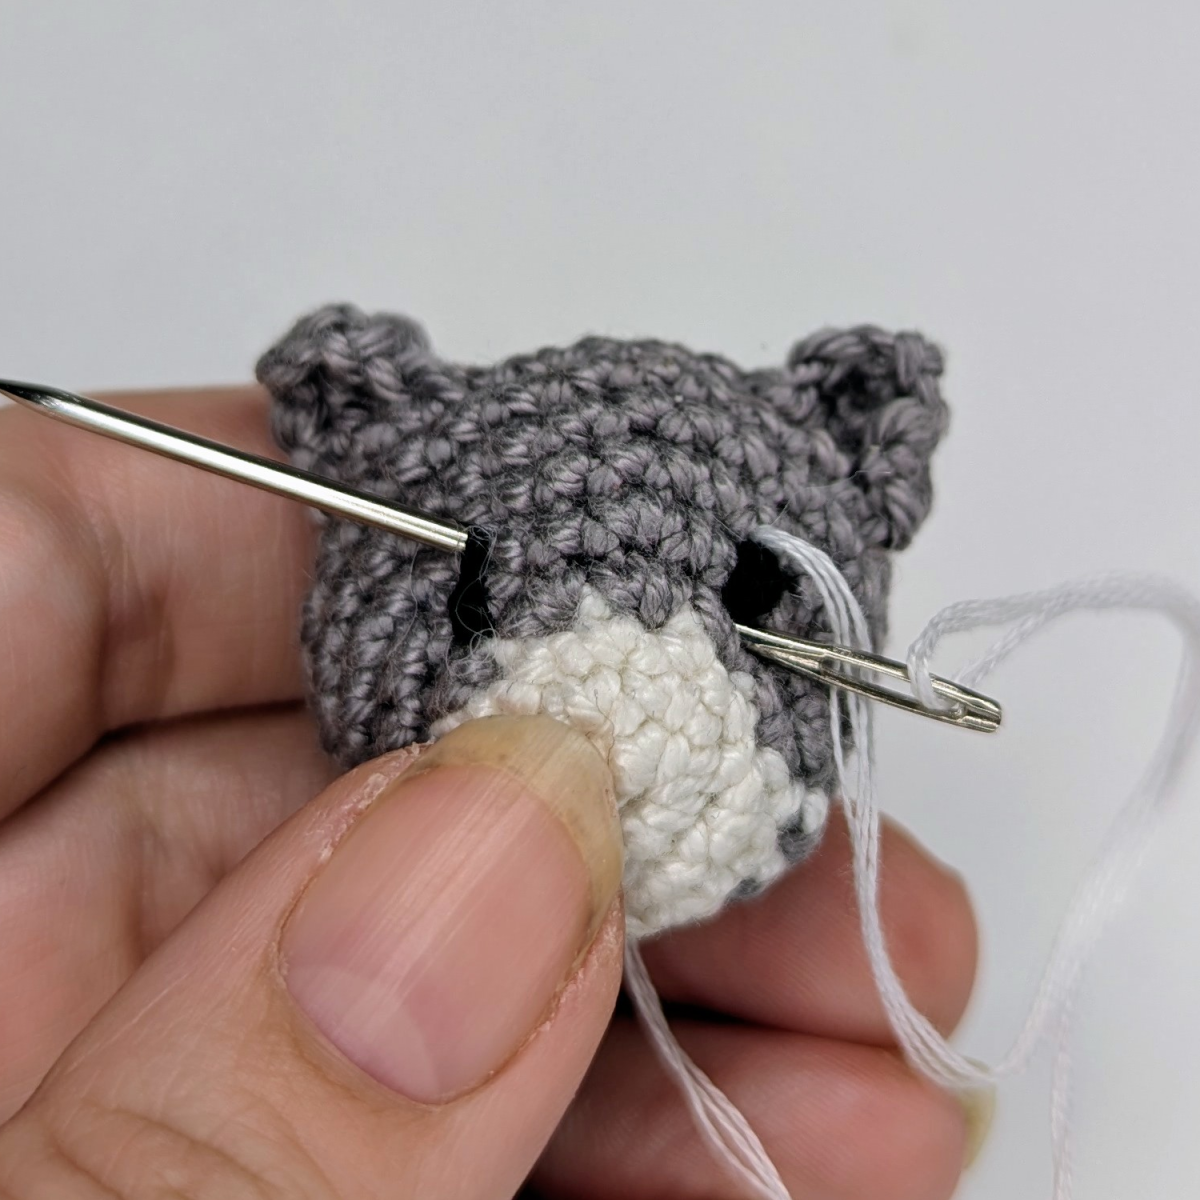
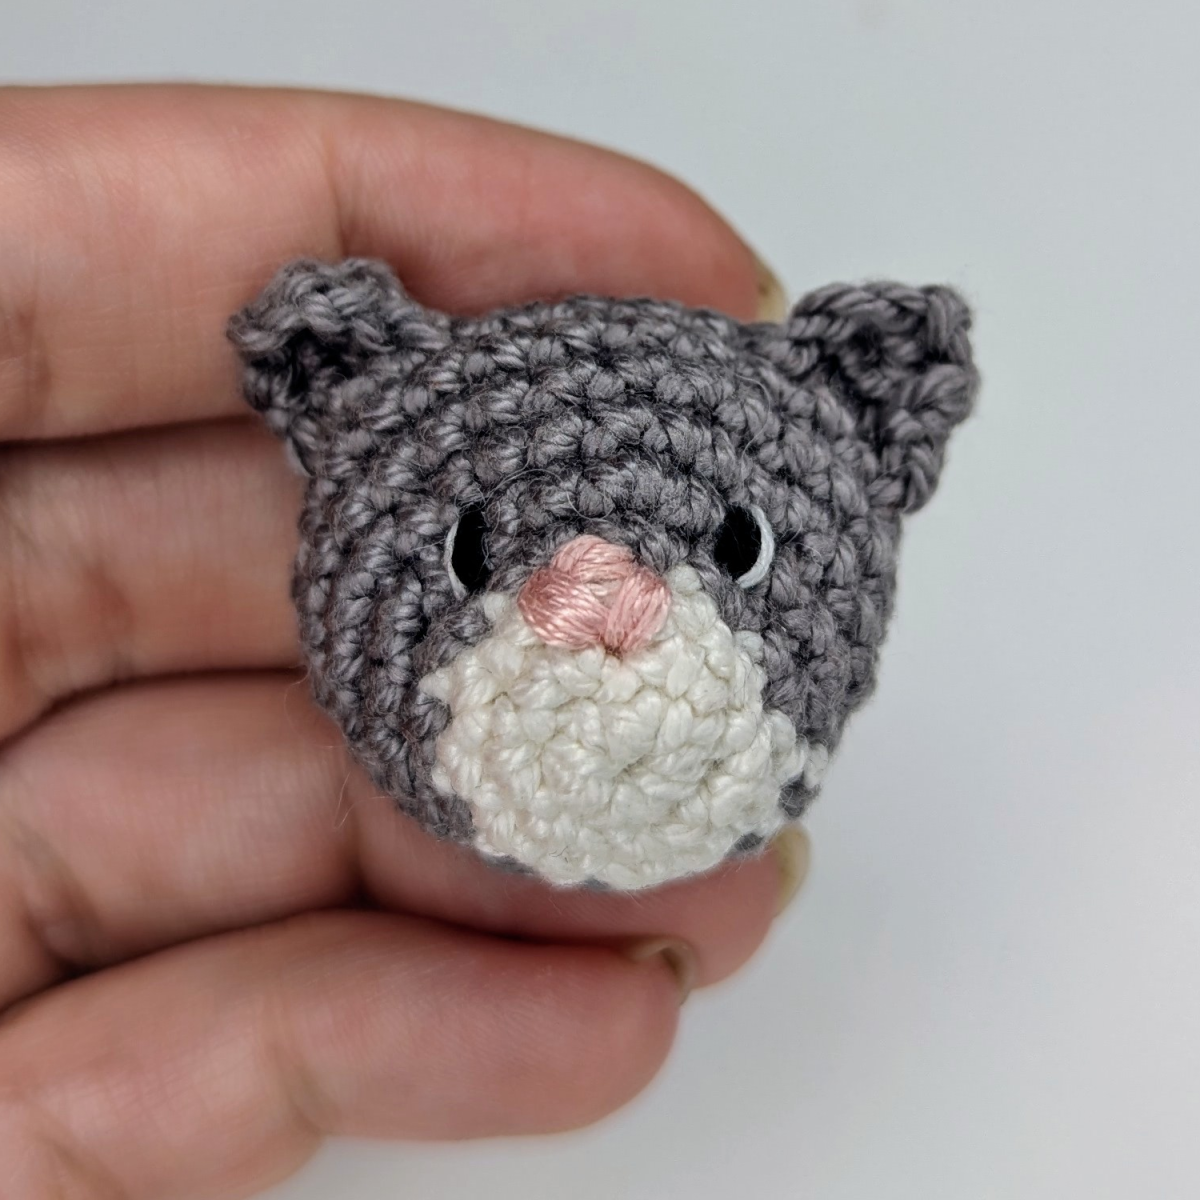
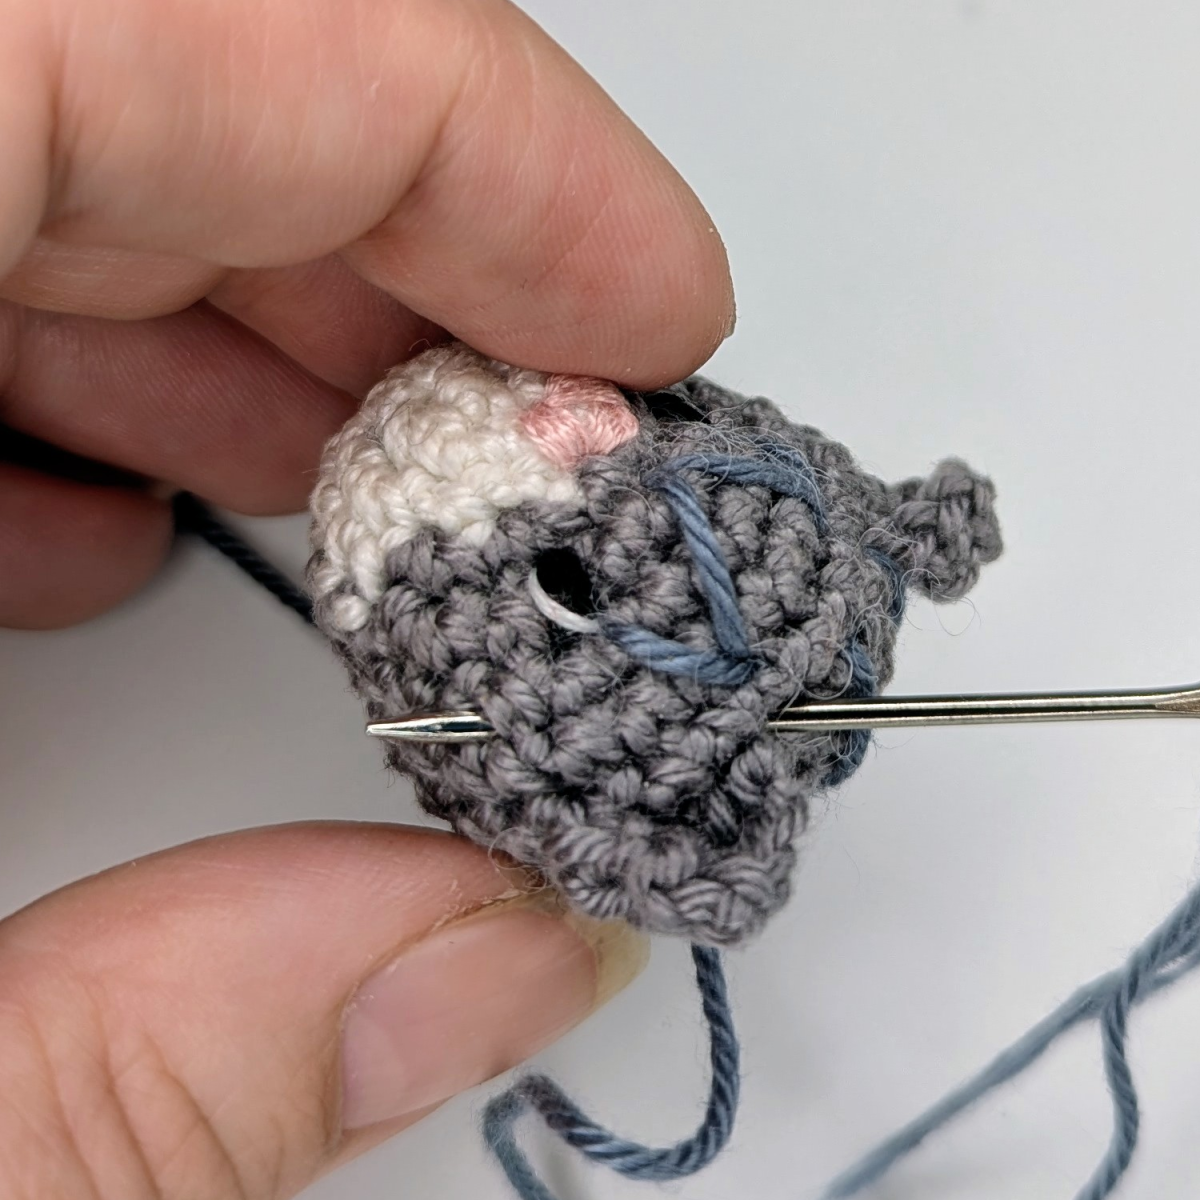
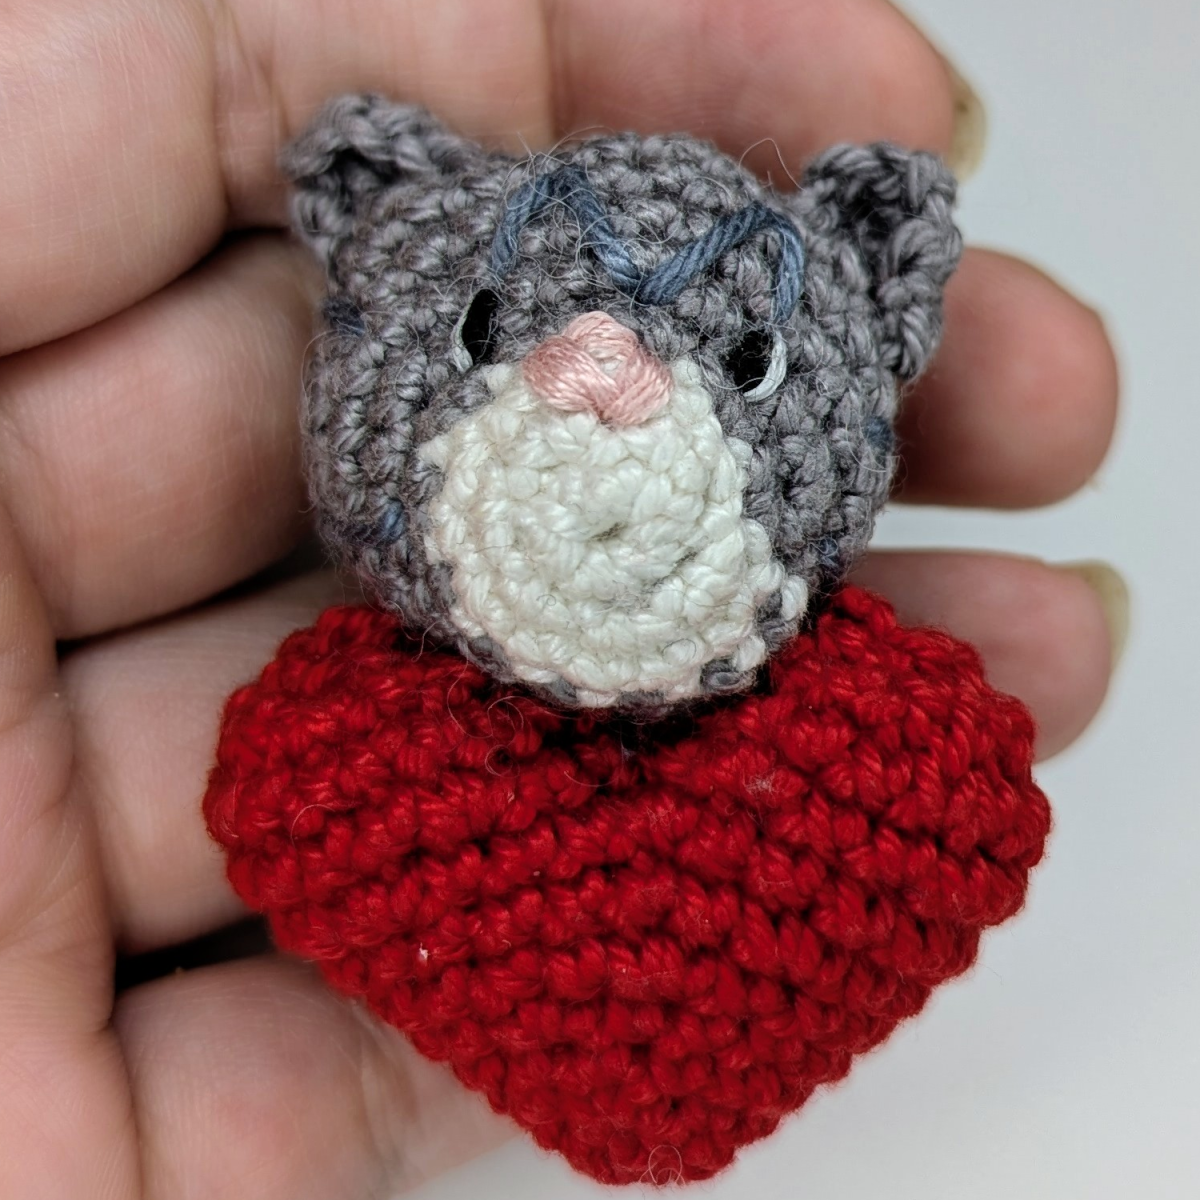
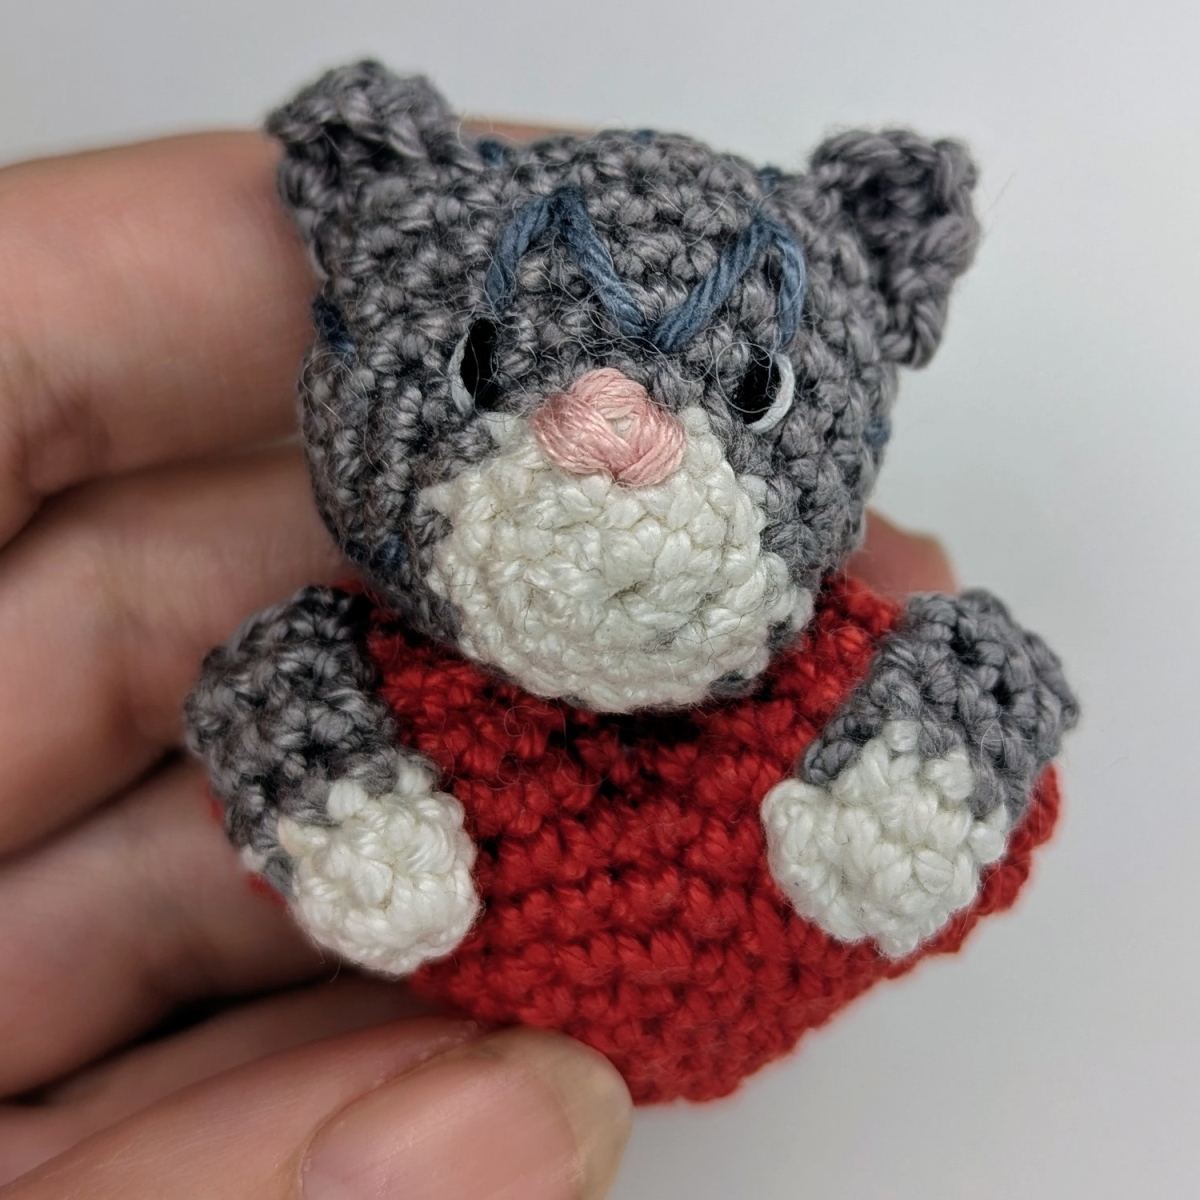
Eyes
Start by inserting the black embroidery floss at the bottom of the head, leaving a short tail visible on the outside so the threads can be knotted and saved later.
At the position of the first eye, stitch the black floss three times from top to bottom, creating an even eye shape.
On the final stitch, guide the yarn directly to the second eye and embroider it in the same way.


After finishing the second eye, bring the black yarn back out at the entry point underneath the head. Tie the beginning and ending yarn tails together securely, then hide the knot inside the head.
Next, use the white embroidery floss. Insert the yarn again at the bottom of the head, leaving a short tail visible. Bring the white yarn out just above the black part of the eye and insert it again below, guiding the yarn along the outer edge of the eye to create the white highlight.
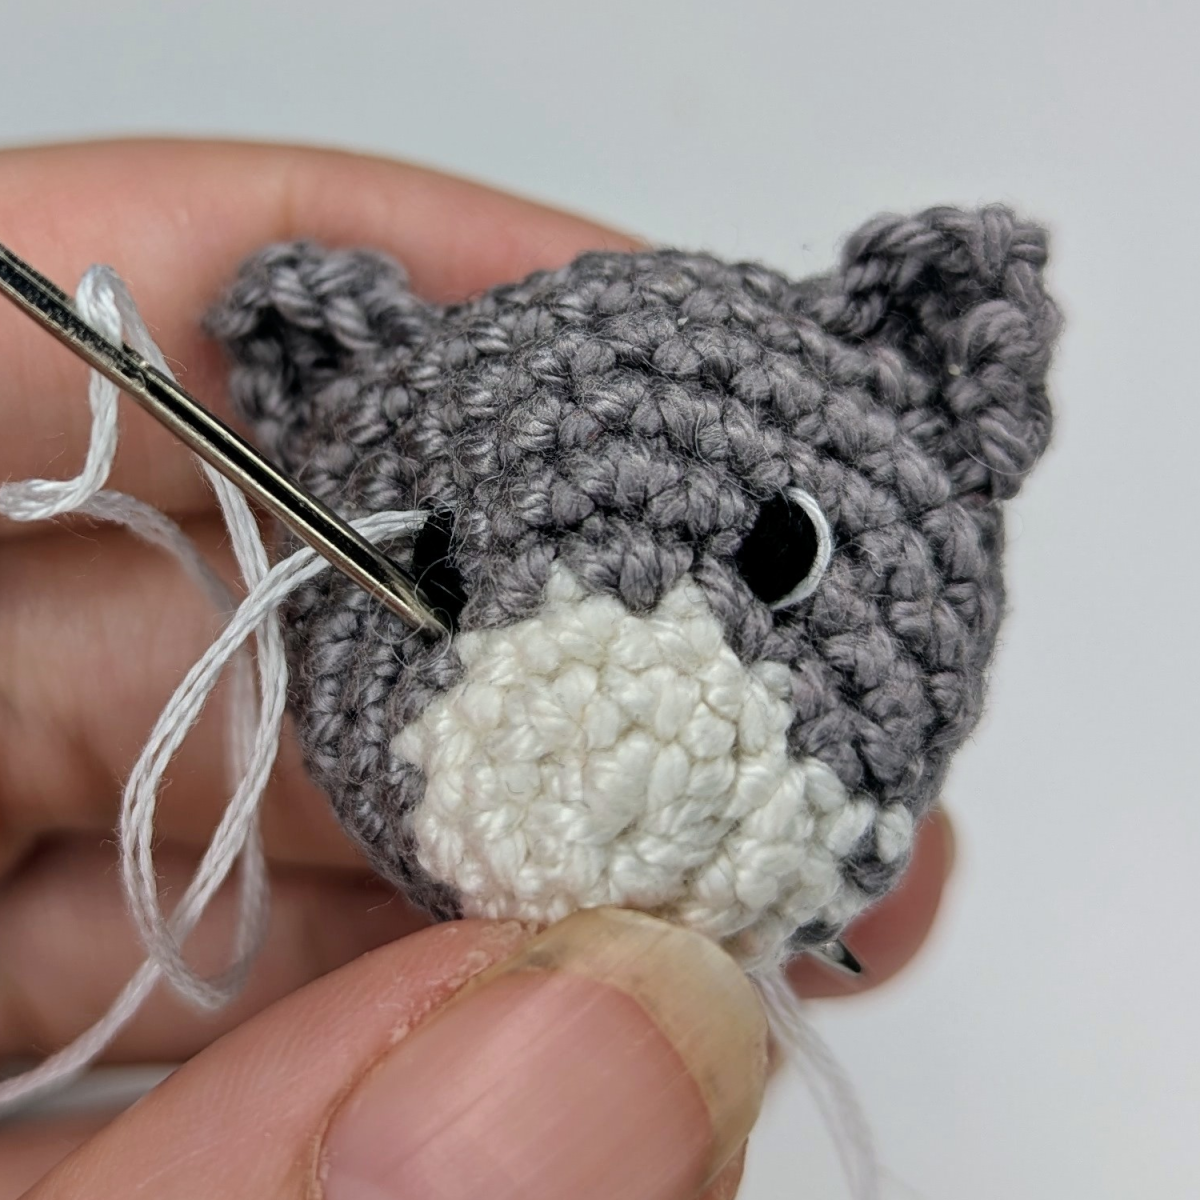
Repeat the same steps for the second eye. Then guide the yarn back to the underside of the head, knot it together with the starting tail, and weave it neatly inside the head.
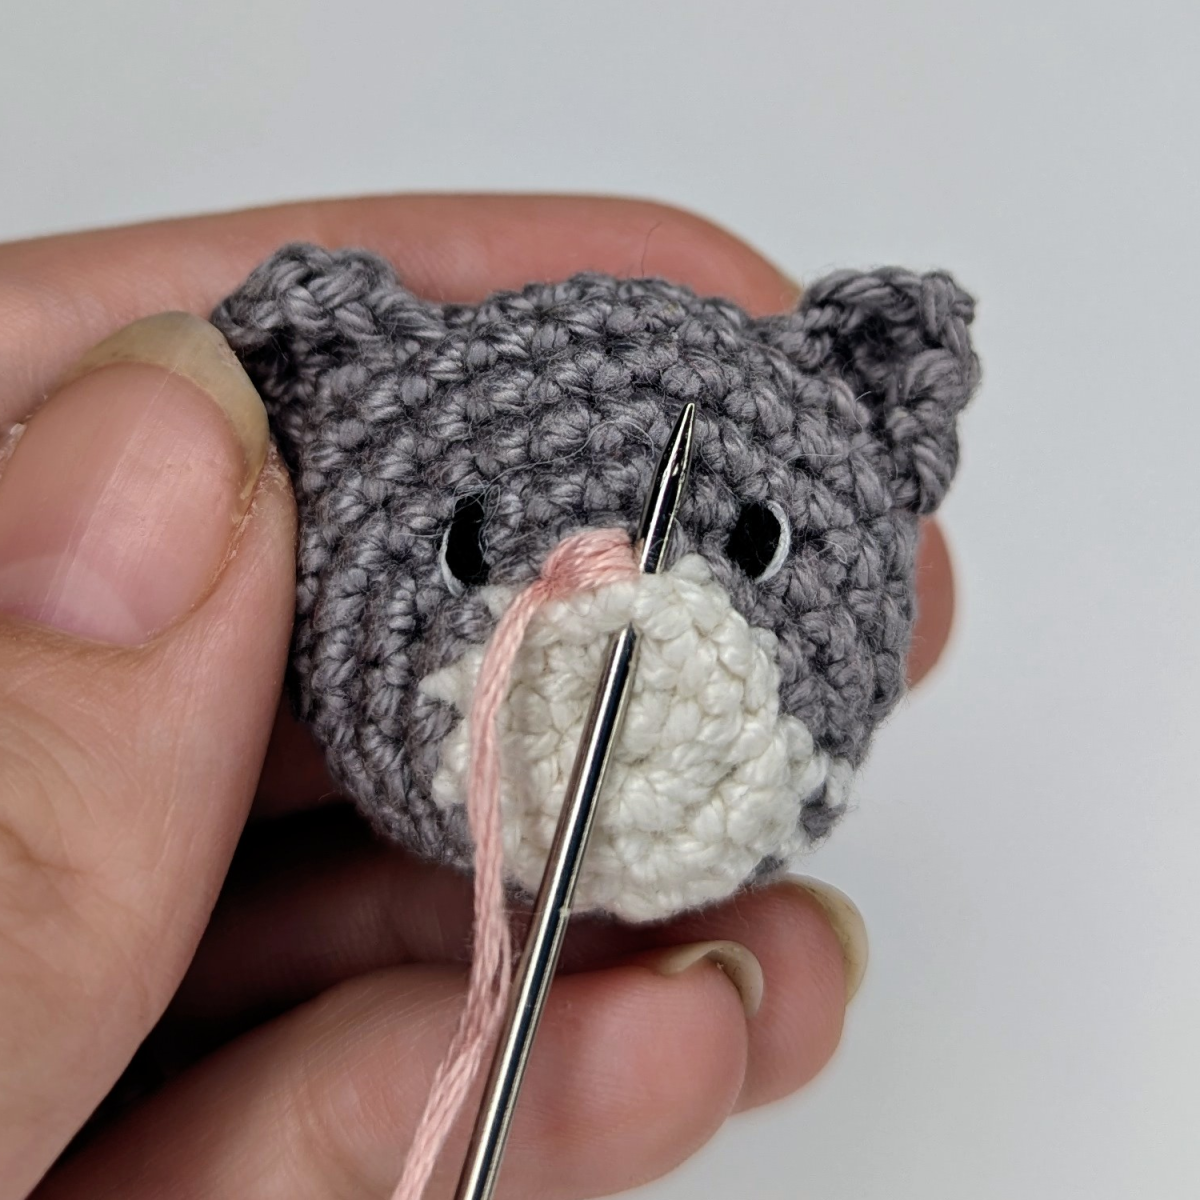
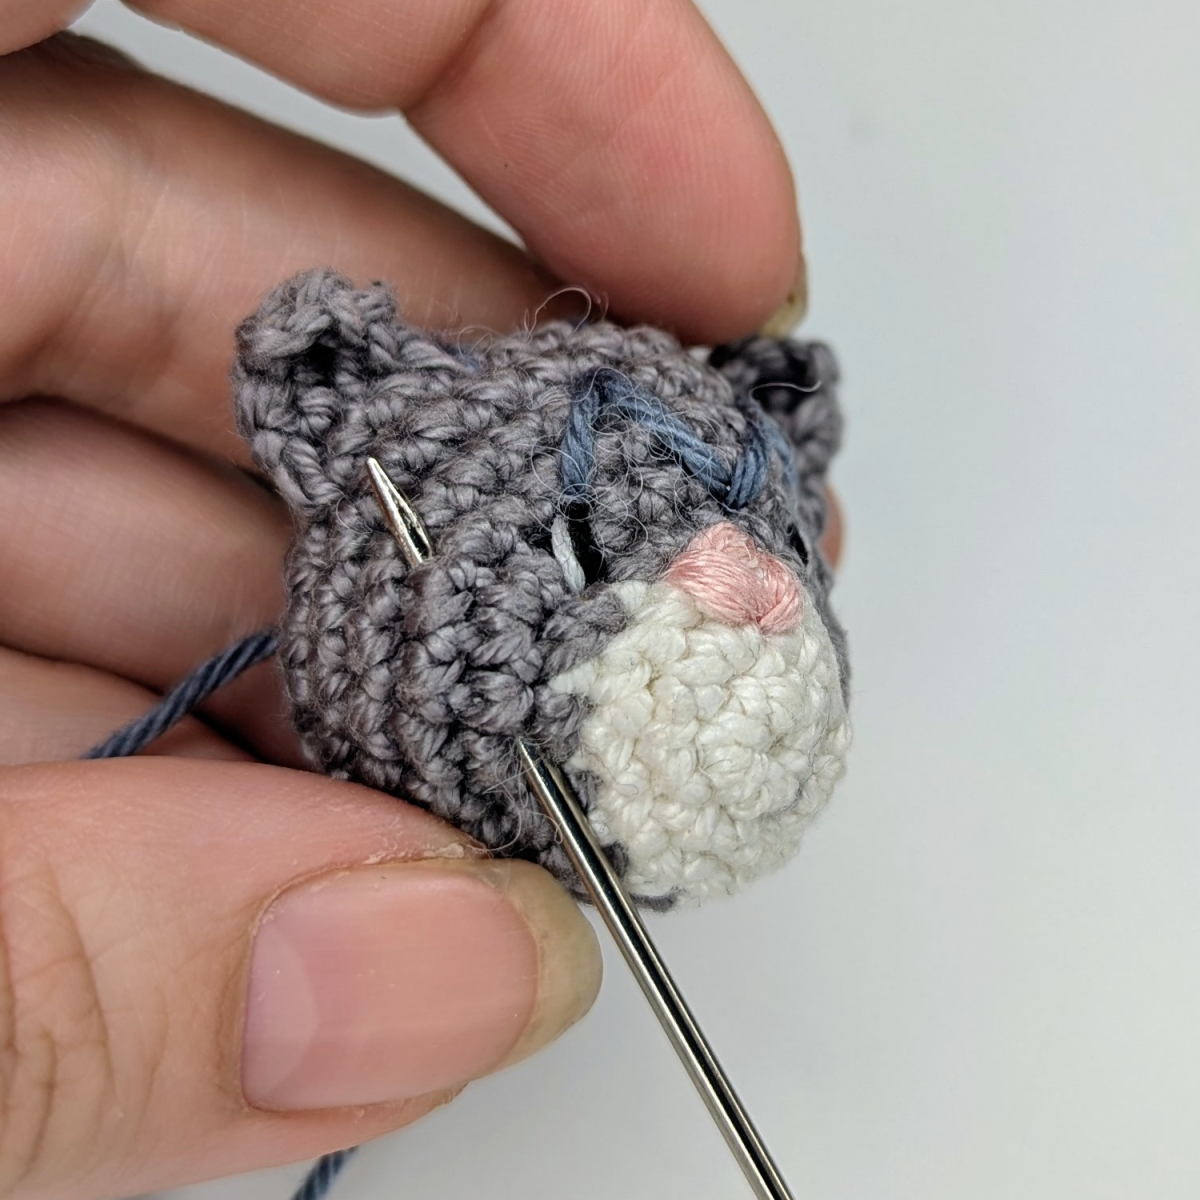
Nose
The nose is embroidered using pink embroidery floss. Insert the yarn at the bottom of the head, leaving a short tail visible so the threads can be tied together later.
First, embroider the top part of the nose with several stitches (approx. 4–5 stitches) worked from left to right. This creates an even, slightly rounded upper edge.

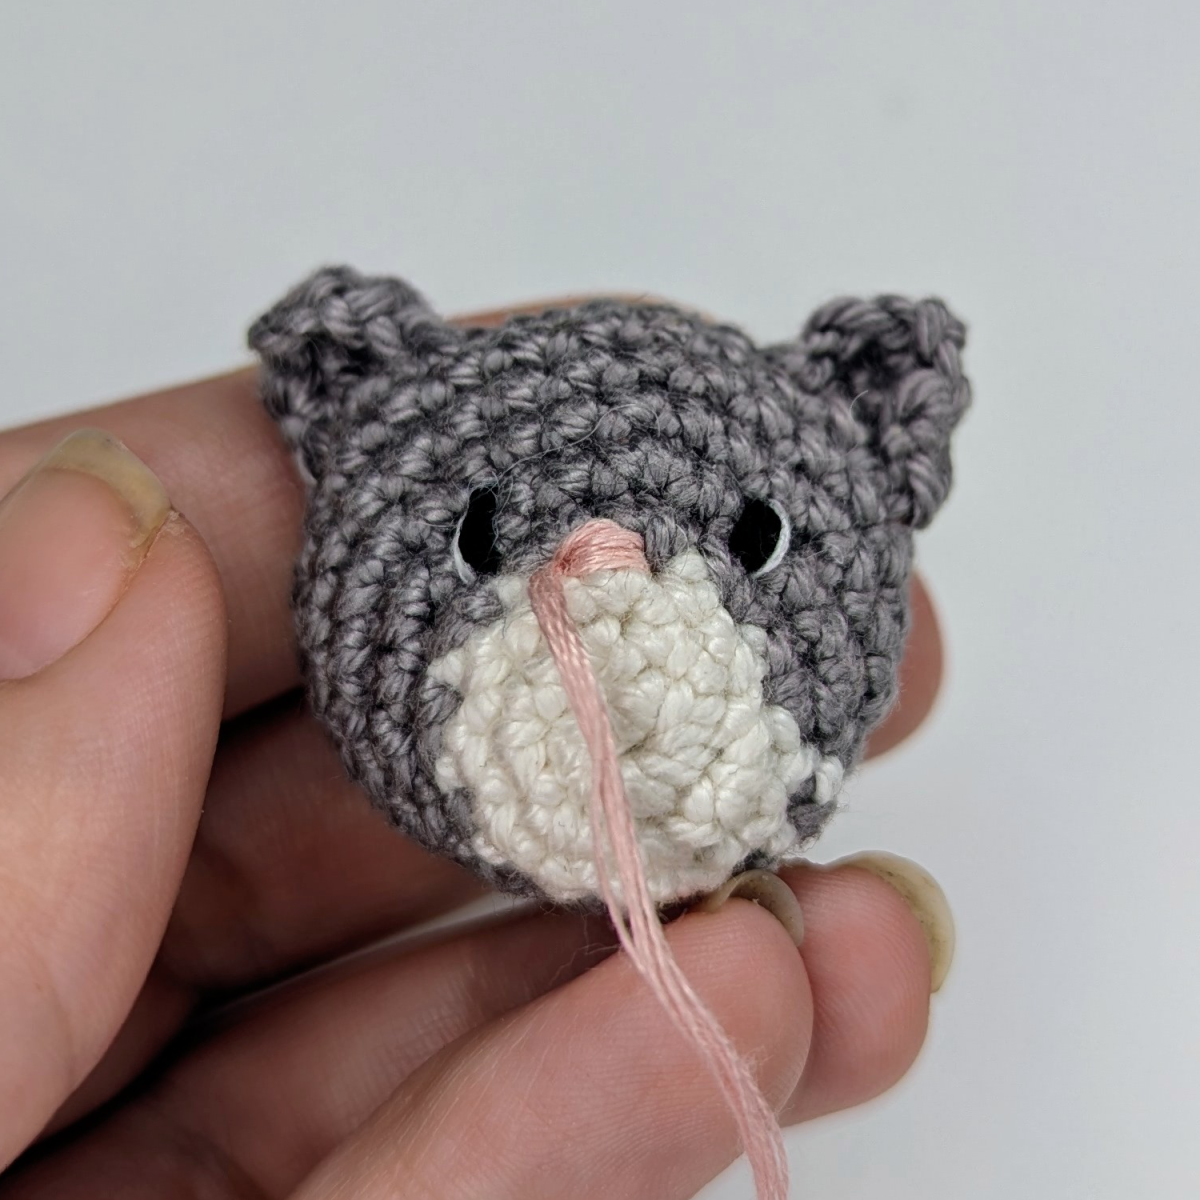
Next, stitch the left and right sides of the nose using multiple stitches arranged in a triangular shape. Work from the top edge downward to form the characteristic small cat nose.
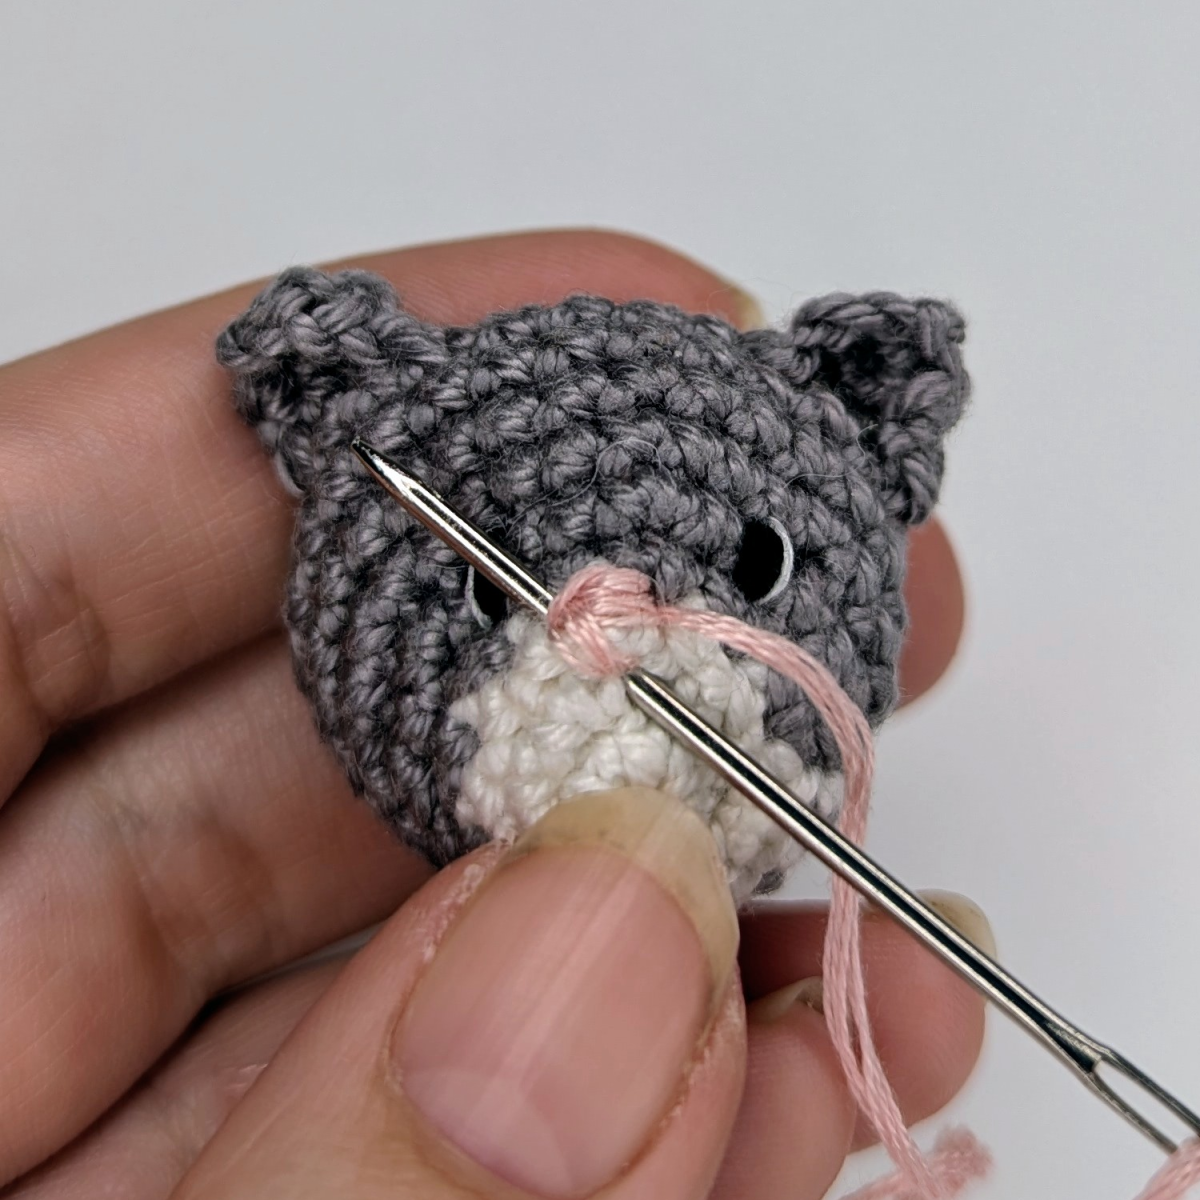
Once the nose is complete, guide the yarn back to the underside of the head, tie it securely to the starting tail, and hide the yarn ends neatly inside the head.
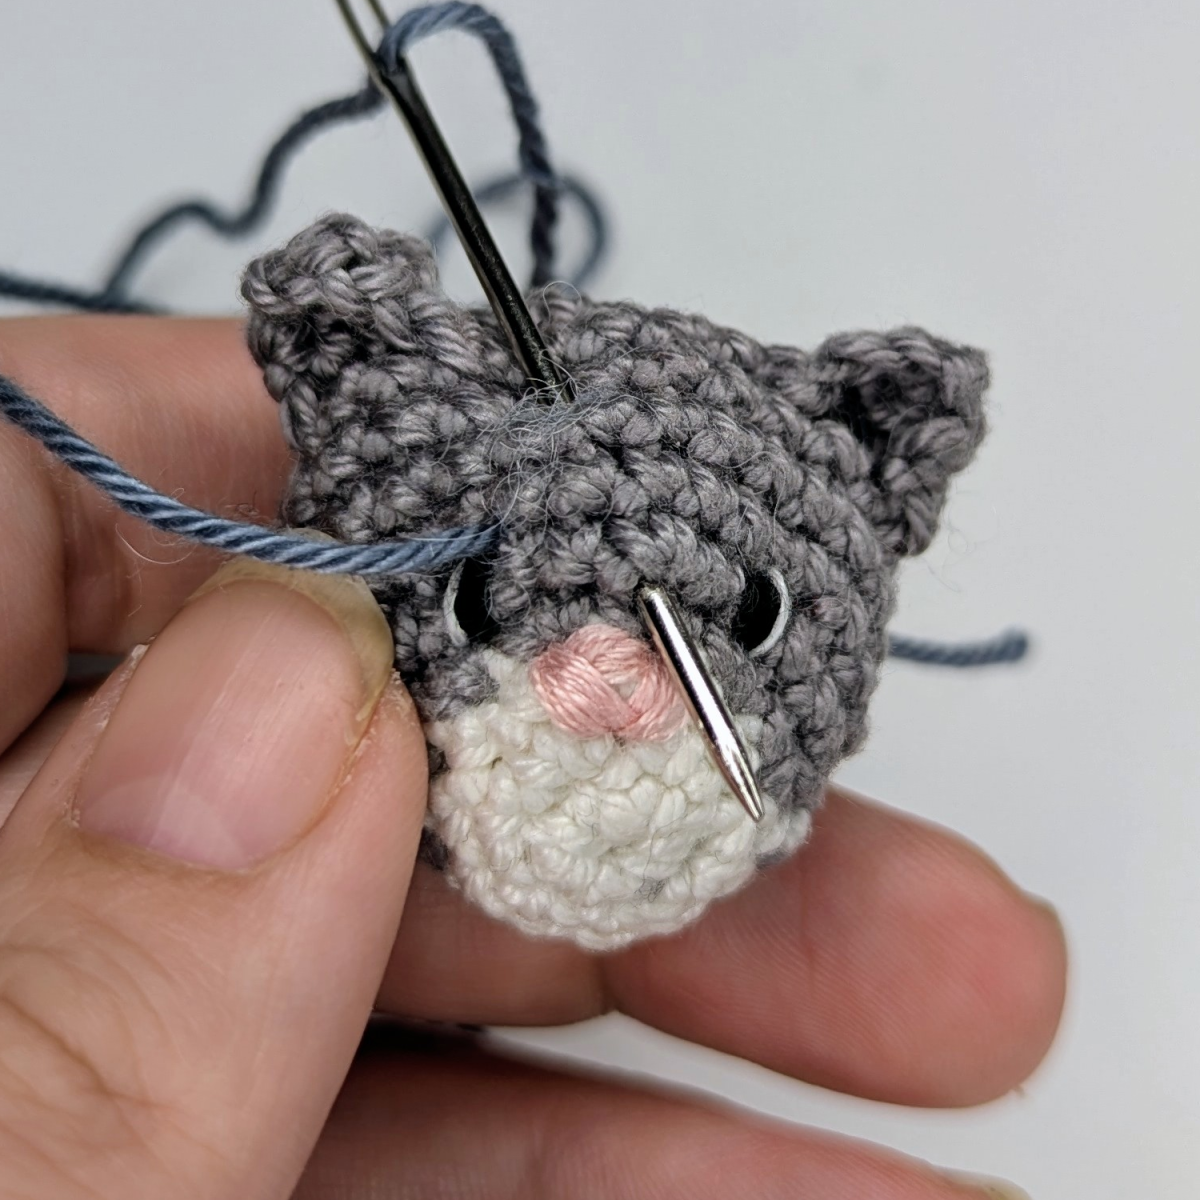
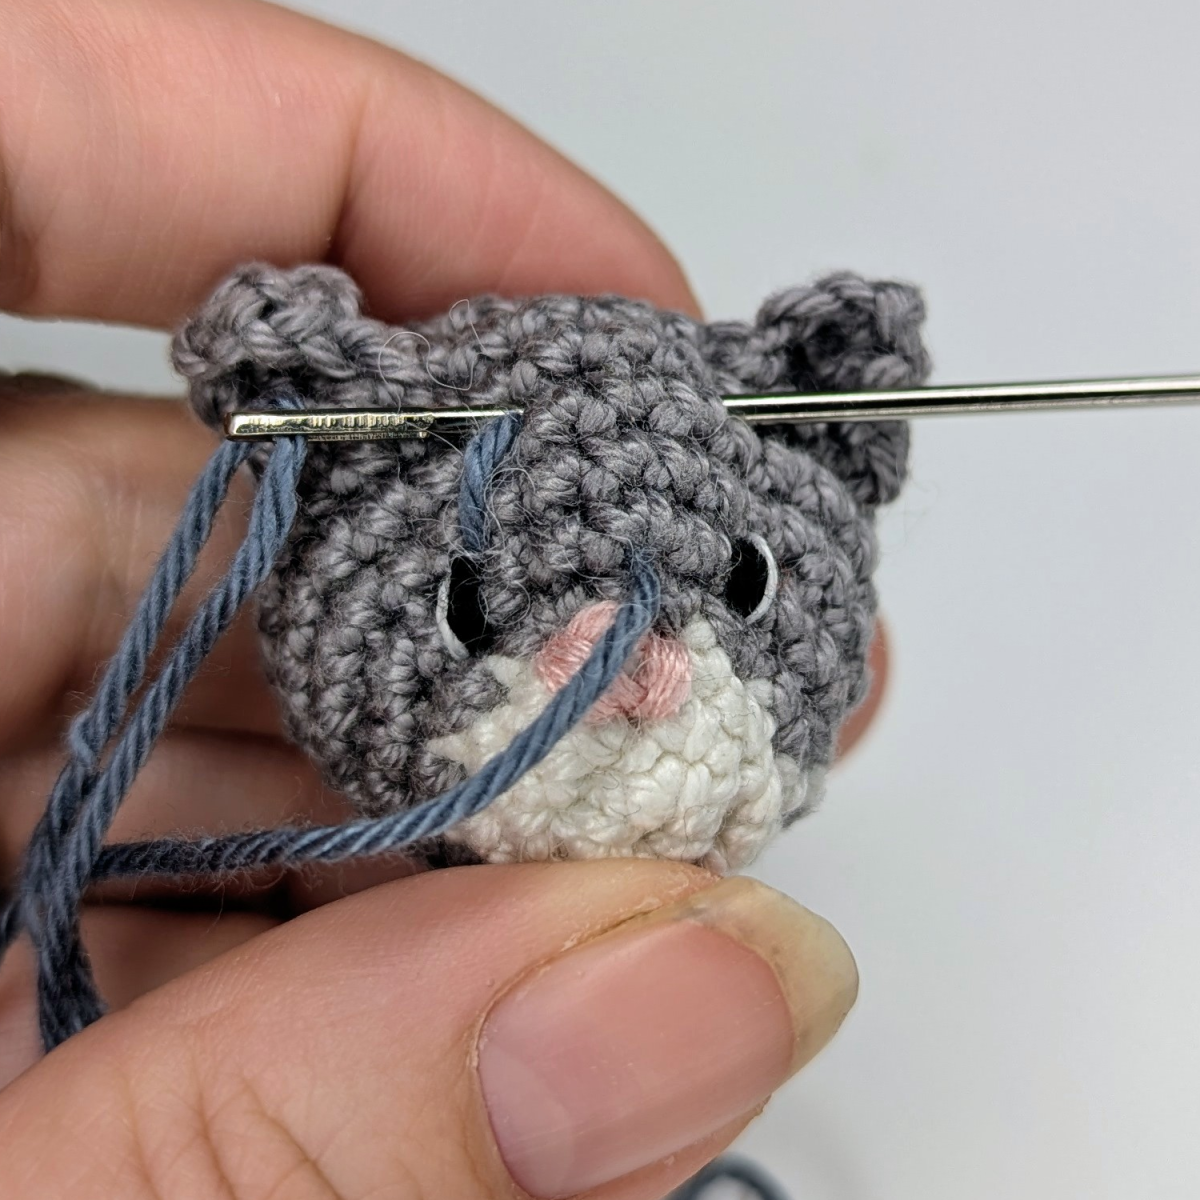
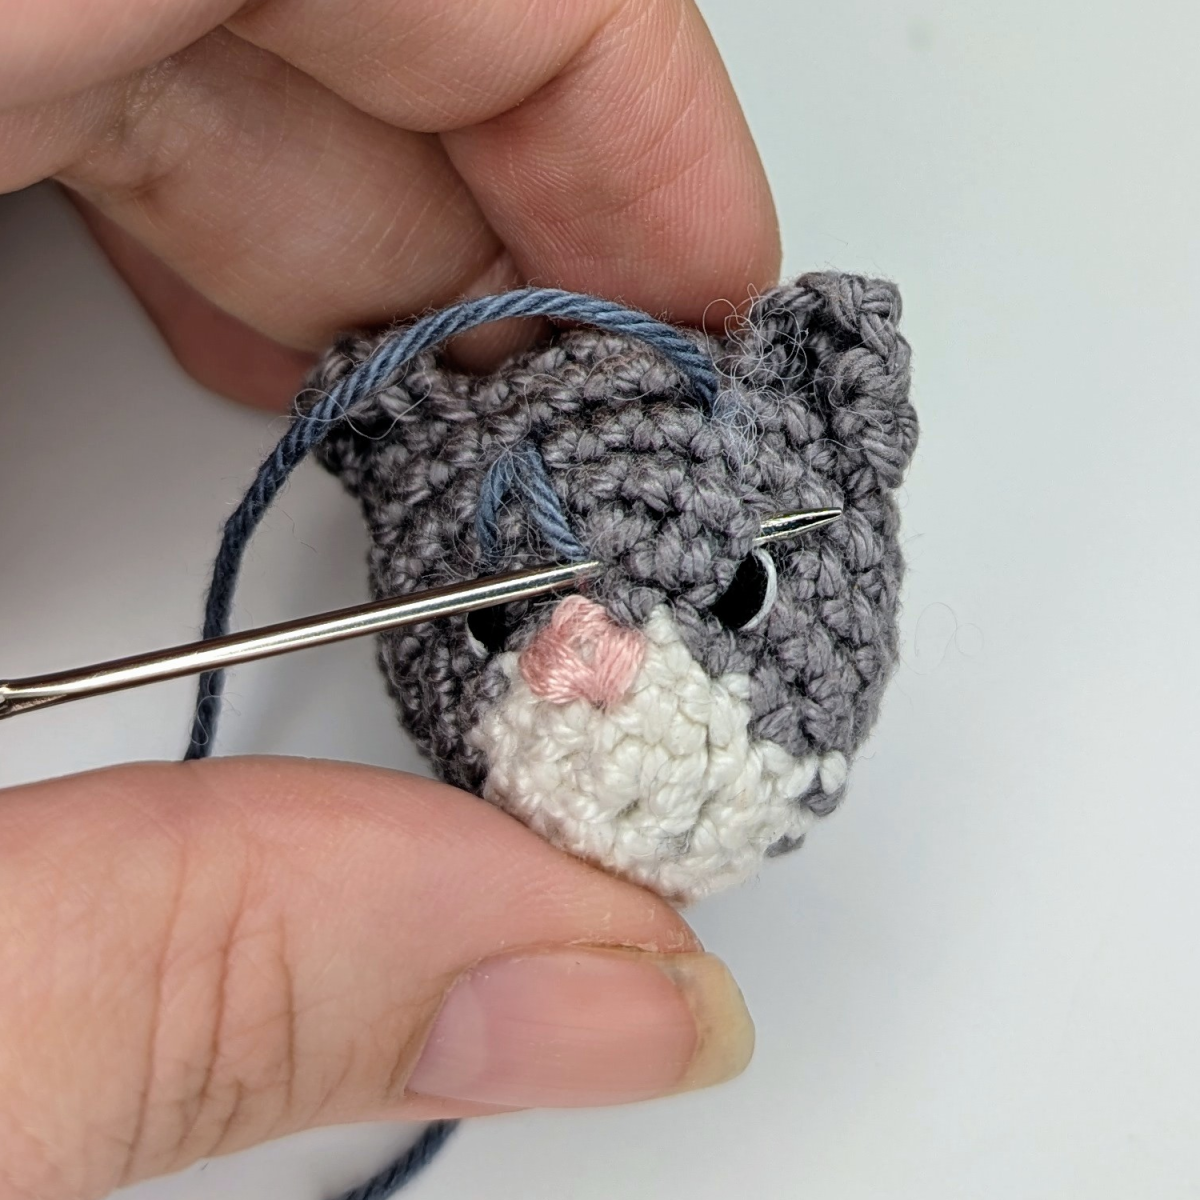
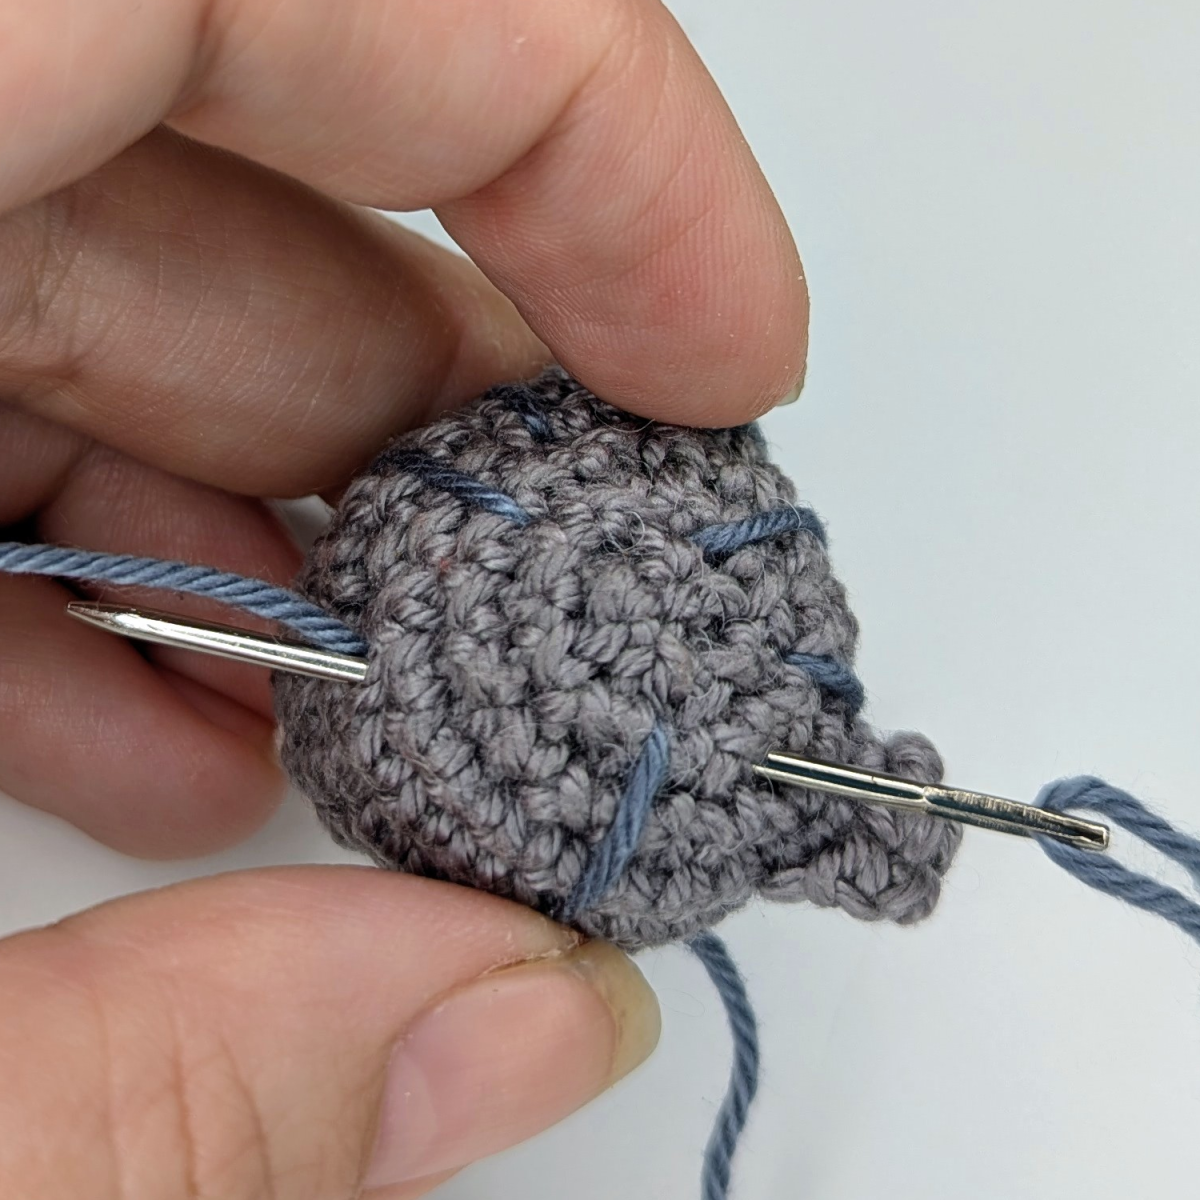
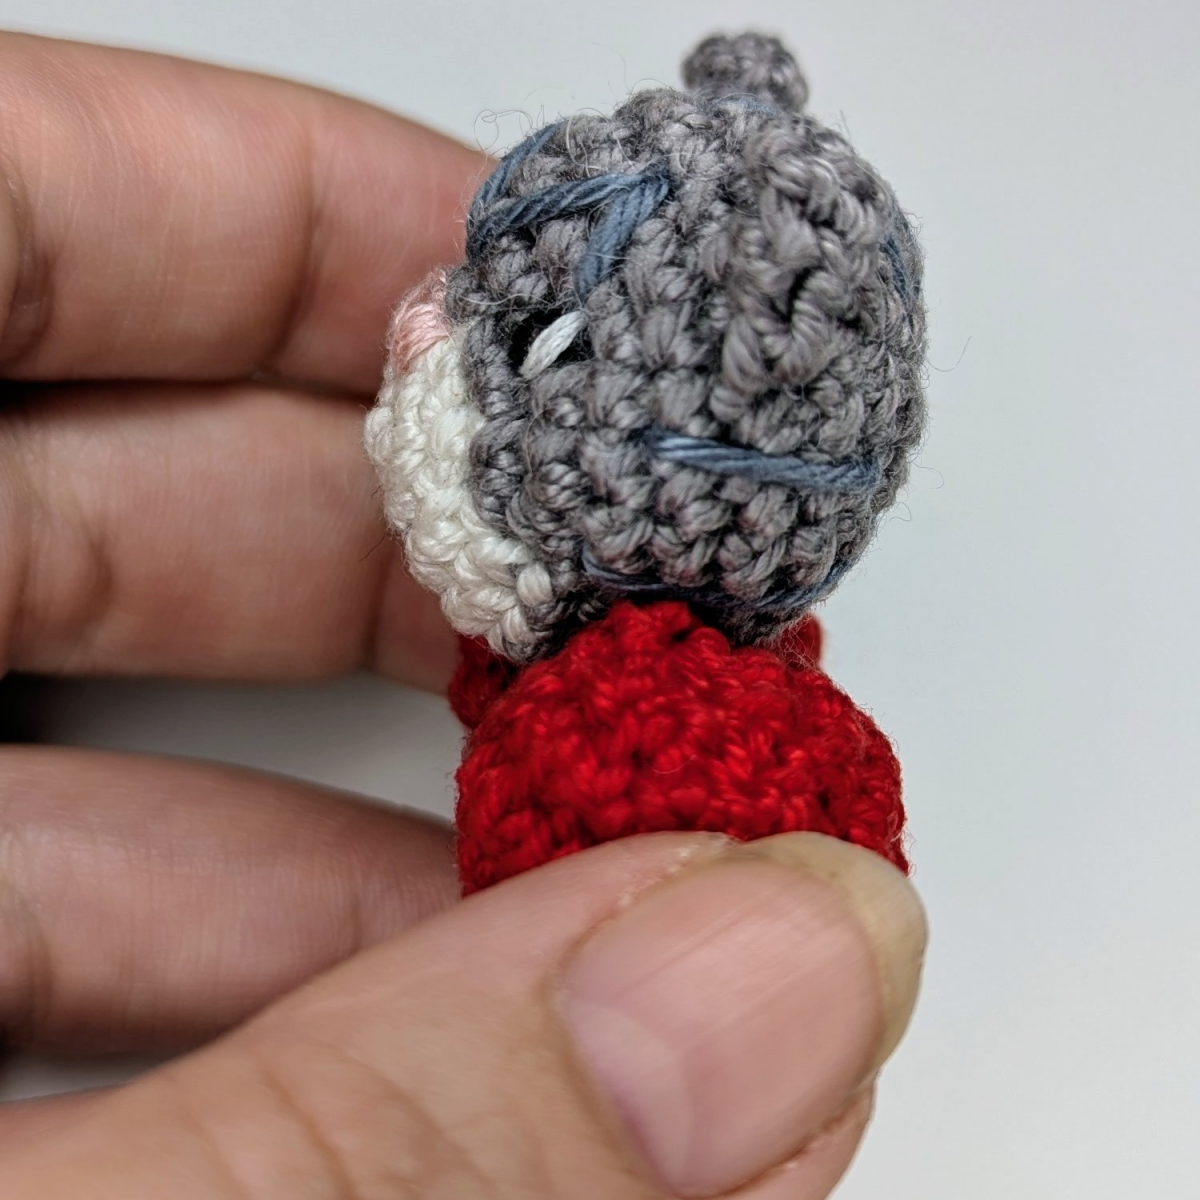
Tabby Markings
The tabby markings are embroidered using dark grey cotton yarn. The beginning and end of the embroidery are worked in the same way as for the eyes and nose: Insert the yarn at the bottom of the head, leave a short tail visible for knotting, and secure and hide the yarn ends inside the head once finished.
The exact placement of the stitches is shown in the photos and can be adjusted slightly to suit your preference.
First, stitch an M-shaped line above the eyes:
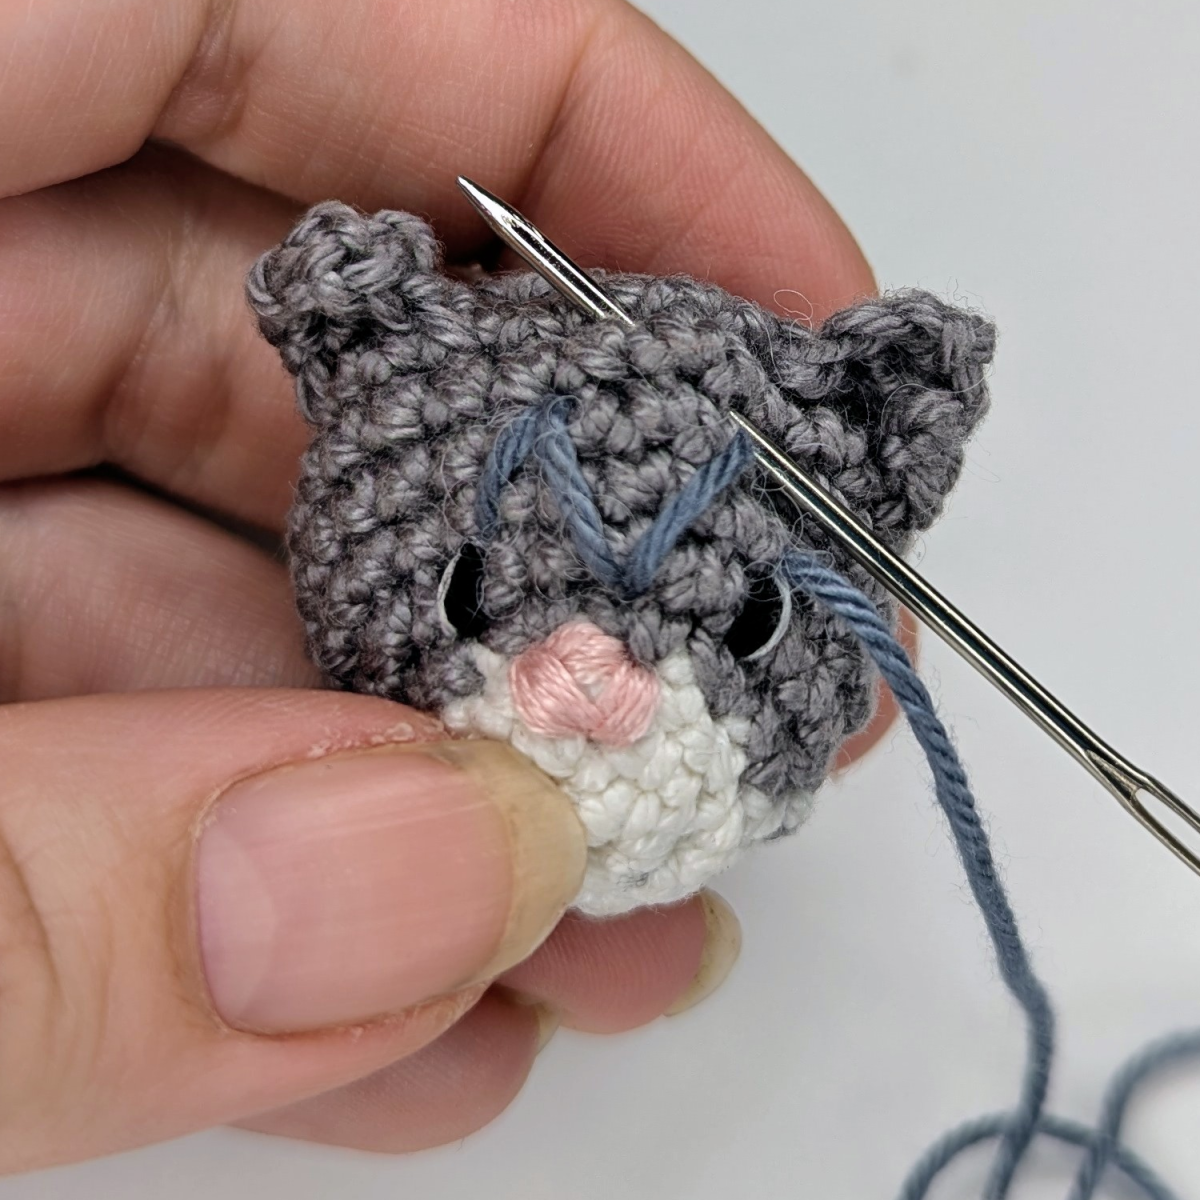
Next, add three short vertical lines at the top of the head:
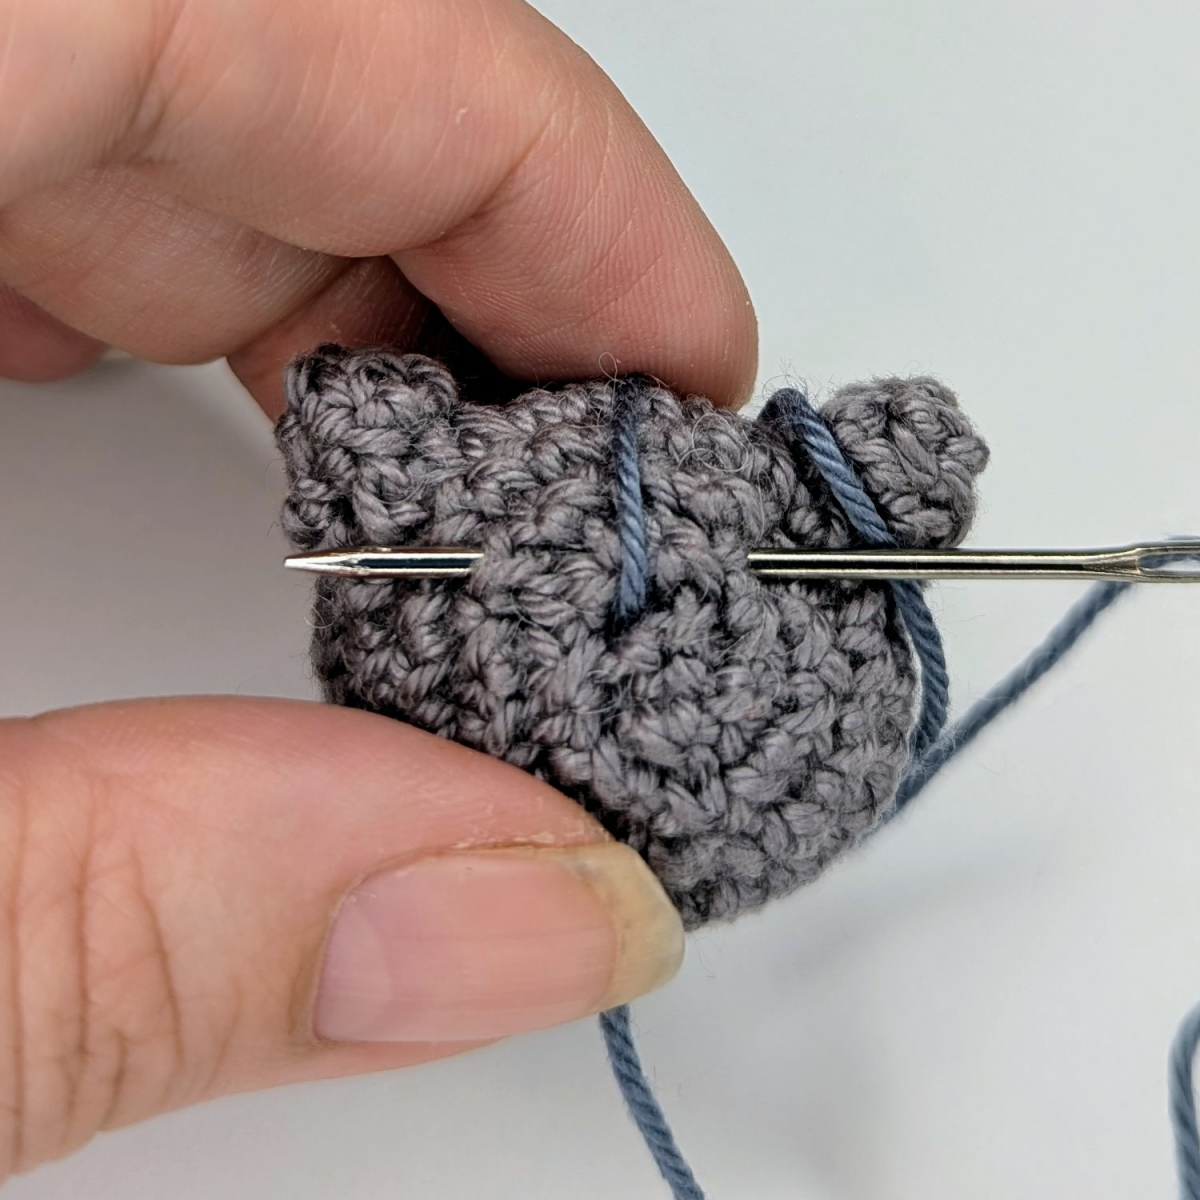
Finally, embroider two horizontal lines on each side of the head:
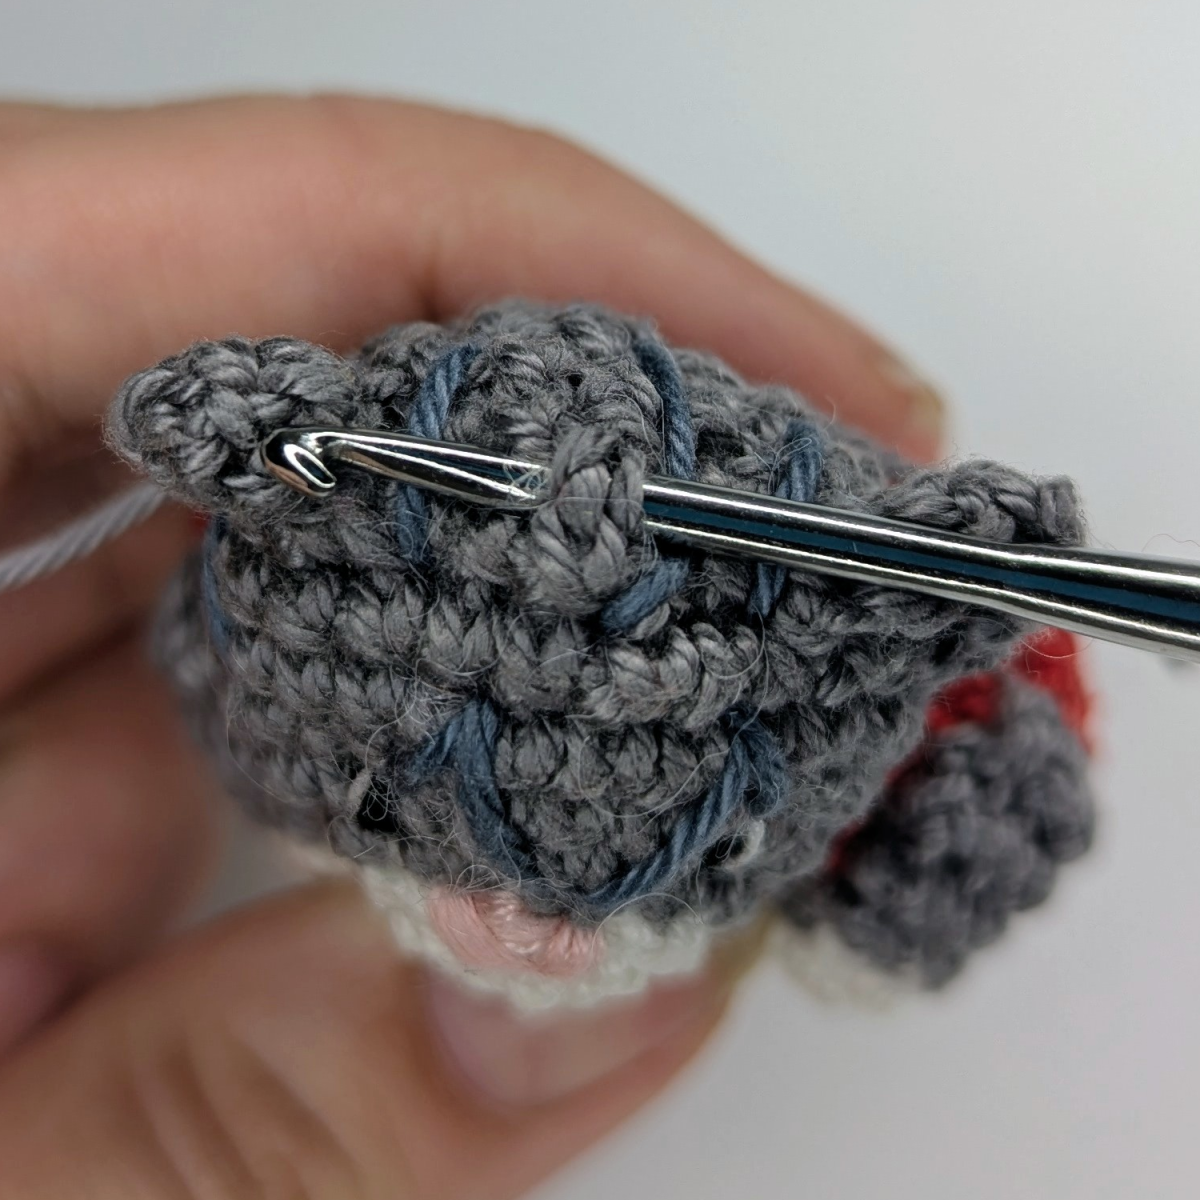
Attaching the Head to the Heart
First, position the head on the heart and secure it in place using pins. Make sure the head is centered and aligned evenly.
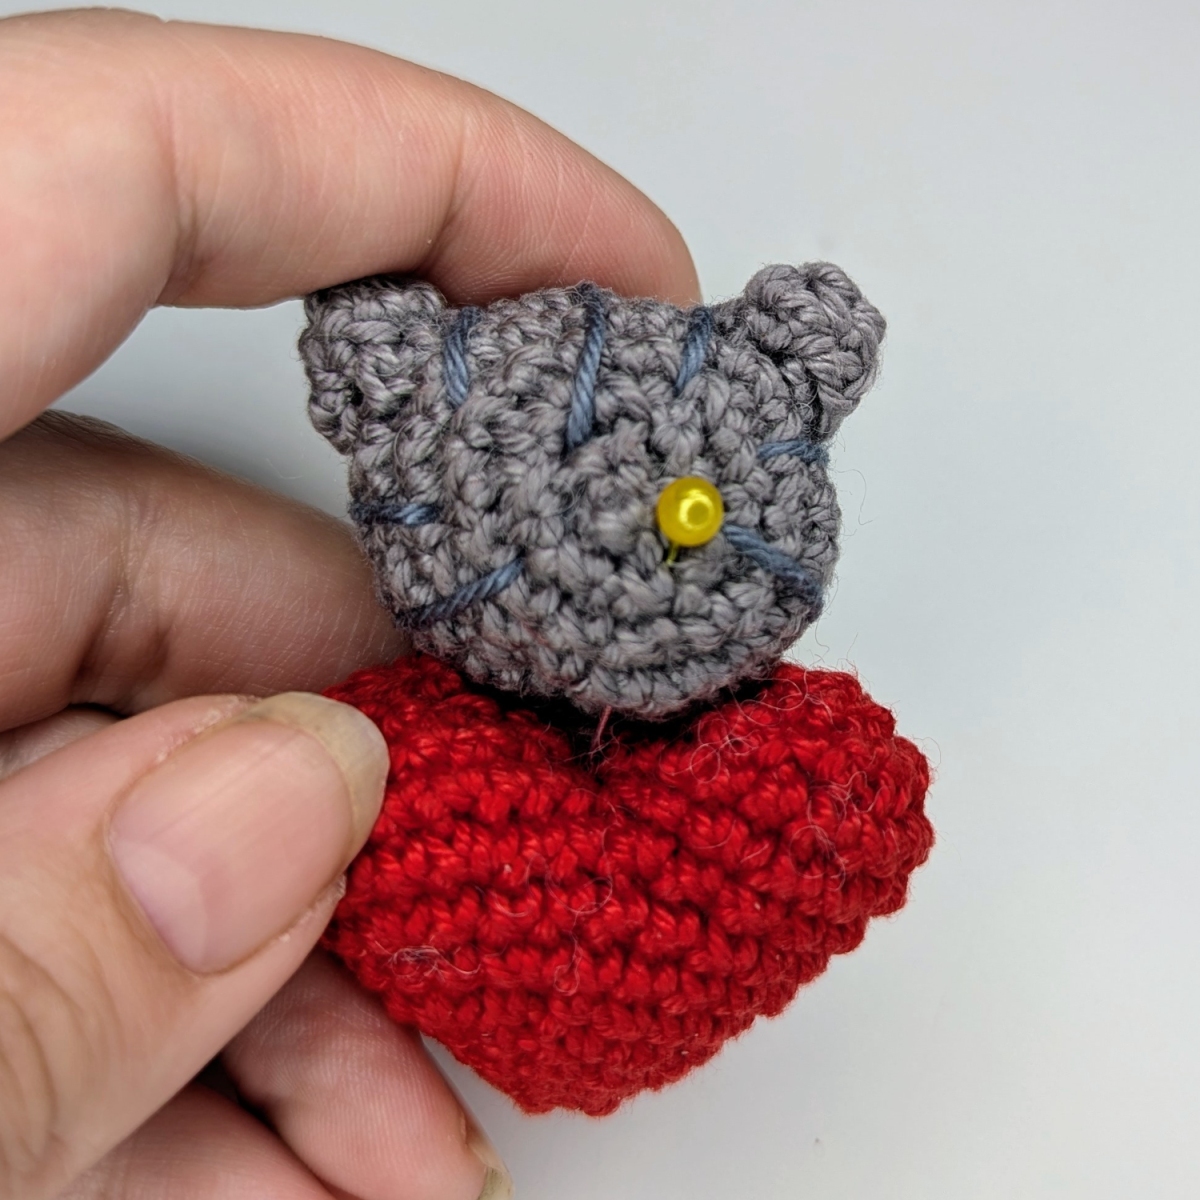
Next, sew the head firmly onto the heart using a new strand of grey cotton yarn. Use small, even stitches to ensure a strong attachment and a neat appearance. Once the head is securely attached, weave in the yarn ends neatly inside the crochet piece.
Paws (2x)
The paws are crocheted in continuous spiral rounds. Begin using white yarn.
| Rnd 1: | 6 sc in MR | (6) |
| Rnd 2: | 6 sc | (6) |
After the first rounds, make a color change (CC) to light grey, worked in the last stitch before the color change as described earlier.
| Rnd 3 - 6: | 6 sc | (6) |
Once the paws are finished, cut the yarn and fasten off. The paws can be gently shaped if needed. Next, sew the paws onto the heart.

First, secure them in place with pins, then attach them evenly and firmly to the heart. Finally, weave in all yarn ends neatly inside the crochet piece.
Crocheting the Loop
To create the loop, attach the yarn at the top center of the head. Then ch 20. At the end of the chain, secure the loop with a slip stitch (sl st) back at the center of the head, forming a closed loop.
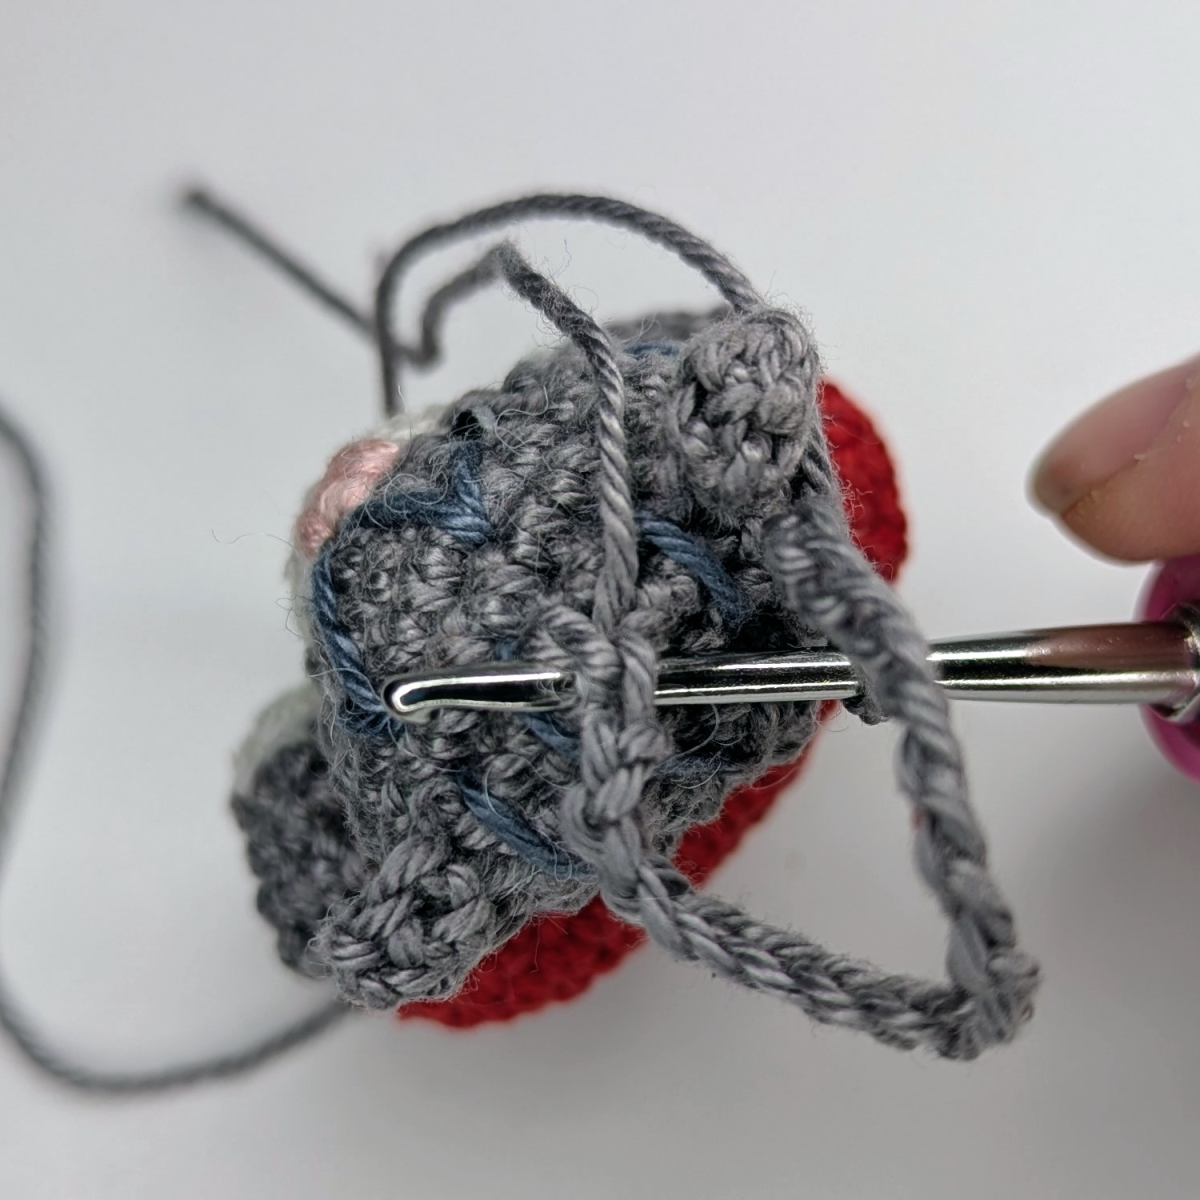
Finally, secure the starting and ending yarn tails, weave them in neatly, and hide them inside the crochet piece. The cat keychain is now complete.
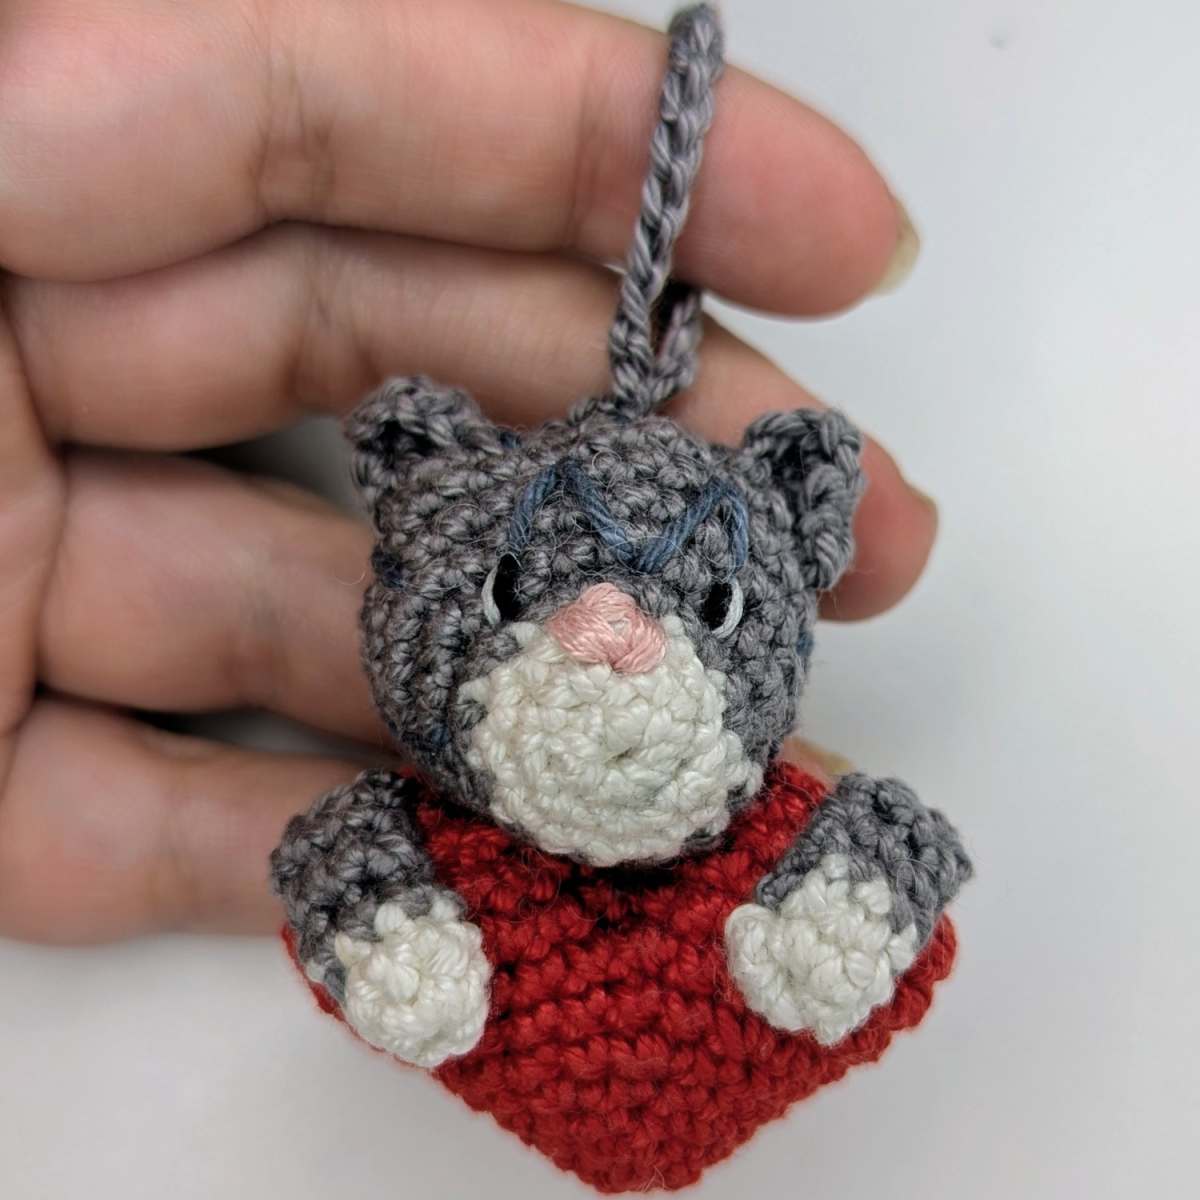
Enjoy crocheting this little cat keychain with a heart. Whether made as a gift or for your own keys, a small amount of yarn and time is all it takes to create a charming handmade accessory. Happy crocheting! 🧶💛


