Fluffy Christmas Gnome
.jpg)
This fluffy Christmas gnome is knitted with Himalaya Dolphin Baby yarn. Without legs, it measures about 30 cm; with legs, around 40 cm.
It’s especially easy to knit – perfect for beginners. There’s no complicated pattern: just knit and purl stitches on two needles, then sewn together.
Soft and cuddly, this gnome is perfect for the Christmas season and brings joy whether placed in the living room or the children’s room.
Knitting Instructions for all Pieces
All parts are crafted entirely with two knitting needles.
Follow these steps:
First Row - Purl Stitches Begin by knitting the first row entirely in purl stitches. These will form the back side of your project, creating a neat texture.
Second Row - Knit Stitches In the second row, knit every stitch. This will produce a smooth, even front for your piece.
Repeating the Pattern Continue alternating between purl stitches in the odd-numbered rows and knit stitches in the even-numbered rows:
- Odd-numbered rows (e.g., 1st, 3rd, 5th): Work in purl stitches.
- Even-numbered rows (e.g., 2nd, 4th, 6th): Work in knit stitches.
This straightforward pattern of alternating knit and purl rows is ideal for beginners, offering an easy yet satisfying introduction to the craft.
If you're knitting with three or four needles to avoid joining and creating a seam, this is certainly possible. In this case, all purl stitches are worked as knit stitches
Materials:
-Yarn Himalaya Dolphin Baby or YarnArt Dolce 120m/100 gr
Gray- 70 gr. Red- 130 gr. White- 30 gr. Green- 20. Gr
Nose- Boheme Velvet yarn- 15 gr.
- Knitting needles 4 mm, 3,5 mm and 2, 5 mm for the Nose
Please note that wool consumption can vary depending on the knitting style – those who knit loosely usually need a little more yarn than those who knit more tightly. You can choose the wool and knitting needles entirely according to your taste and experience.
- Fiberfill, 1 extra long sewing needle.
Abbreviations:
CH – Chain(s)
inc – increase
dec – decrease
X dec – X- times decrease
X inc – X- times increase
ST – Stitch
P – purl
K– knit (garter stitch)
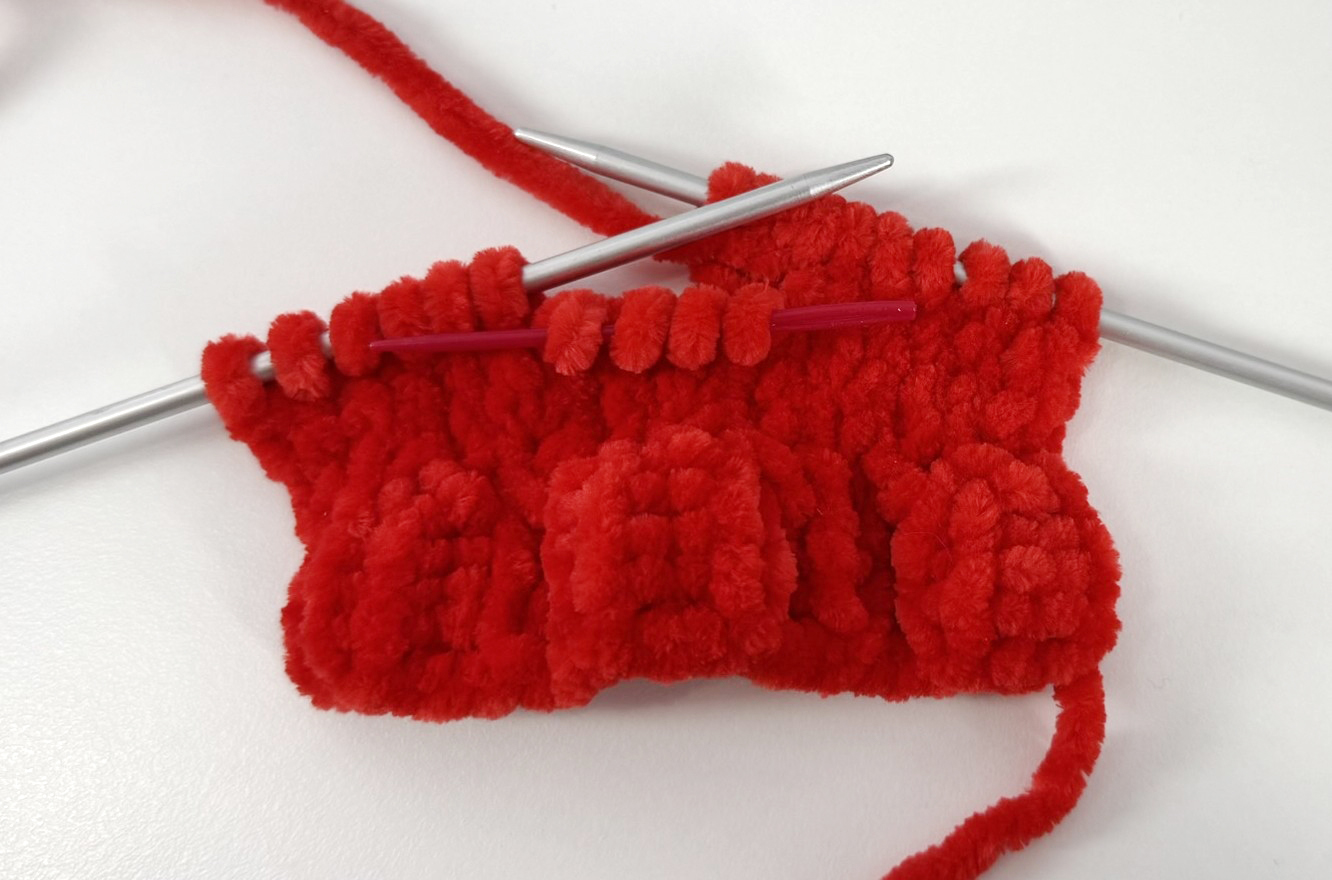
Body (gray, Knitting needles 4)
Cast on 6 stitches (ch) onto the knitting needle. Make sure the stitches are evenly stretched while knitting to ensure your knitted piece is nice and even.
1. 6 P (6)
2. 6 K inc. (12)
3. 12 P (12)
4. (1 K, 1 inc) x 6 (18)
5. 18 P
6. (2 K, 1 inc) x 6 (24)
7. 24 P
8. (3 K, 1 inc) x 6 (30)
9. 30 P
10. (4 K, 1 inc) x 6 (36)
11. 36 P
12. (5 K, 1 inc) x 6 (42)
13. 42 P
14. (6 K, 1 inc) x 6 (48)
15. 48 P
16. (7 K, 1 inc) x 6 (54)
Knit a total of 11 rows in stockinette stitch:
On the front side of the work, knit all stitches across the row.
On the back side of the work, purl all stitches across the row.
17. 19. 21. 23. 25. 27. - 54 P
18. 20. 22. 24. 26. - 54 K
28. (7 K, 1 dec) x 6 (48)
29. 48 P
30. (6 K, 1 dec) x 6 (42)
31. 33. 35 - 42 P
32. 34. - 42 K
36. (5 K, 1 dec) х 6 (36)
37. 36 P
38. (4 K, 1 dec) х 6 (30)
39. 41. 43. 45. 47. – 30 P
40. 42. 44. 46. - 30 K
48. (3 K, 1 dec) x 6 (24)
49. 24 P
50. (2 K, 1 dec) x 6 (18)
51. 18 P
52. (1 K, 1 dec) x 6 (12)
53. 12 P
54. 6 dec
Finally, cast off the remaining stitches.
Next, sew the body together with gray yarn. Use even, fine stitches so the seam looks neat and blends seamlessly into the overall design. As you sew, gradually stuff the body with fiberfill.
.jpg)
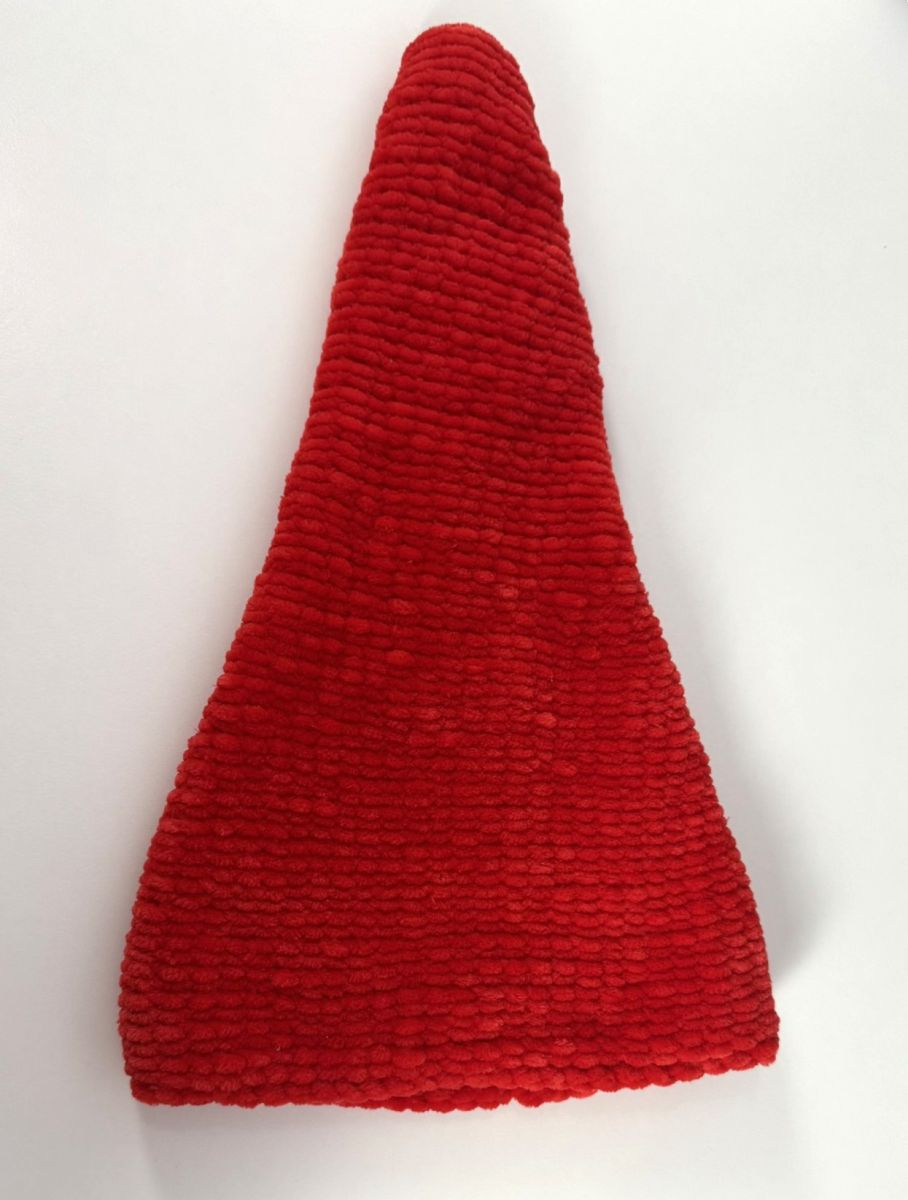
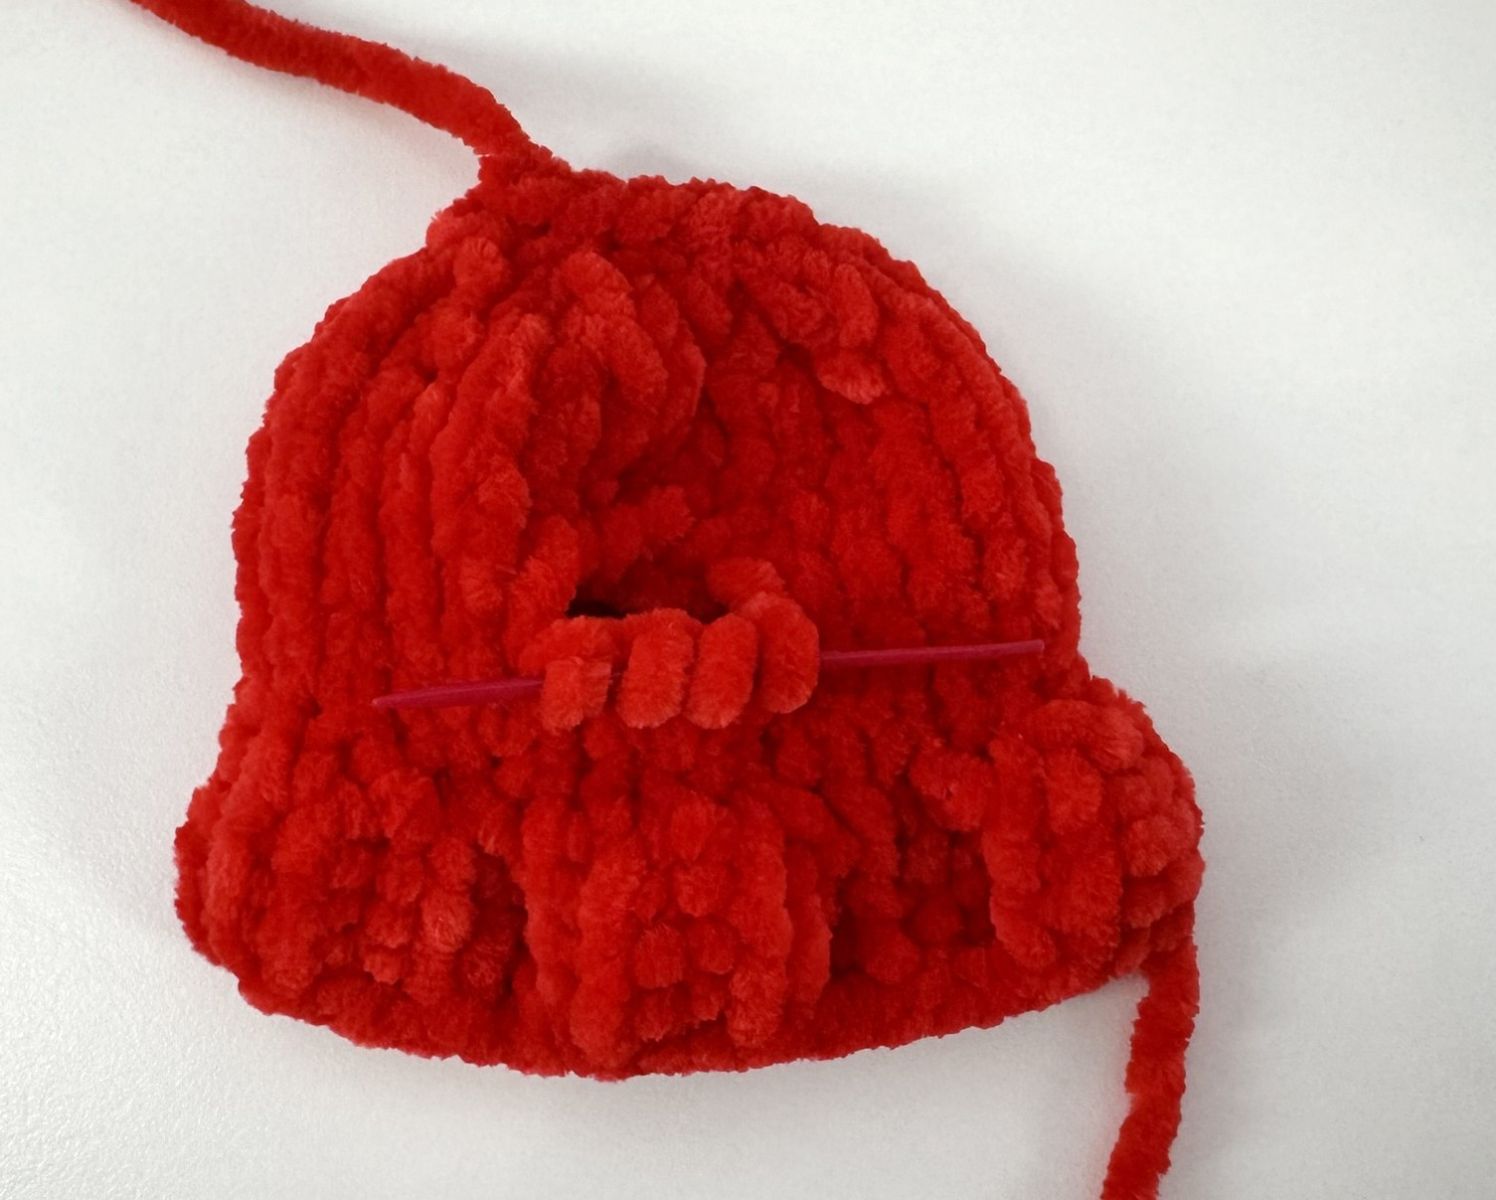
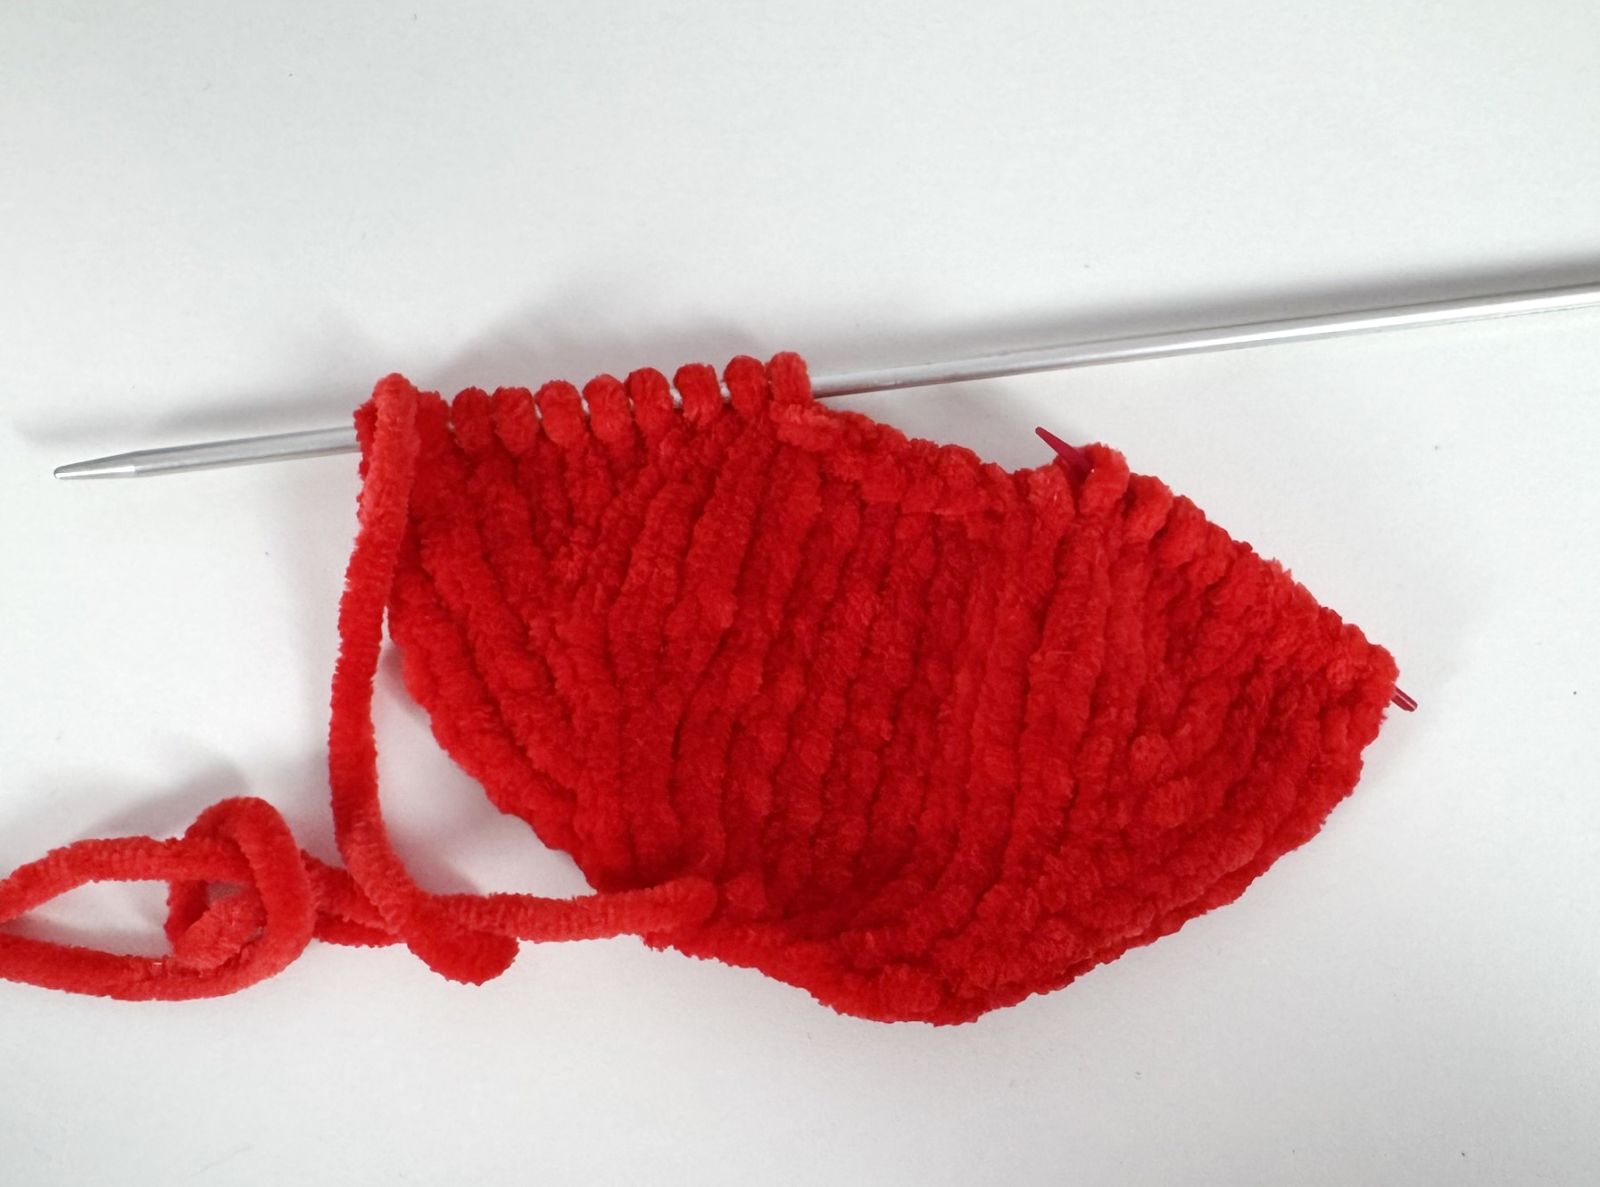
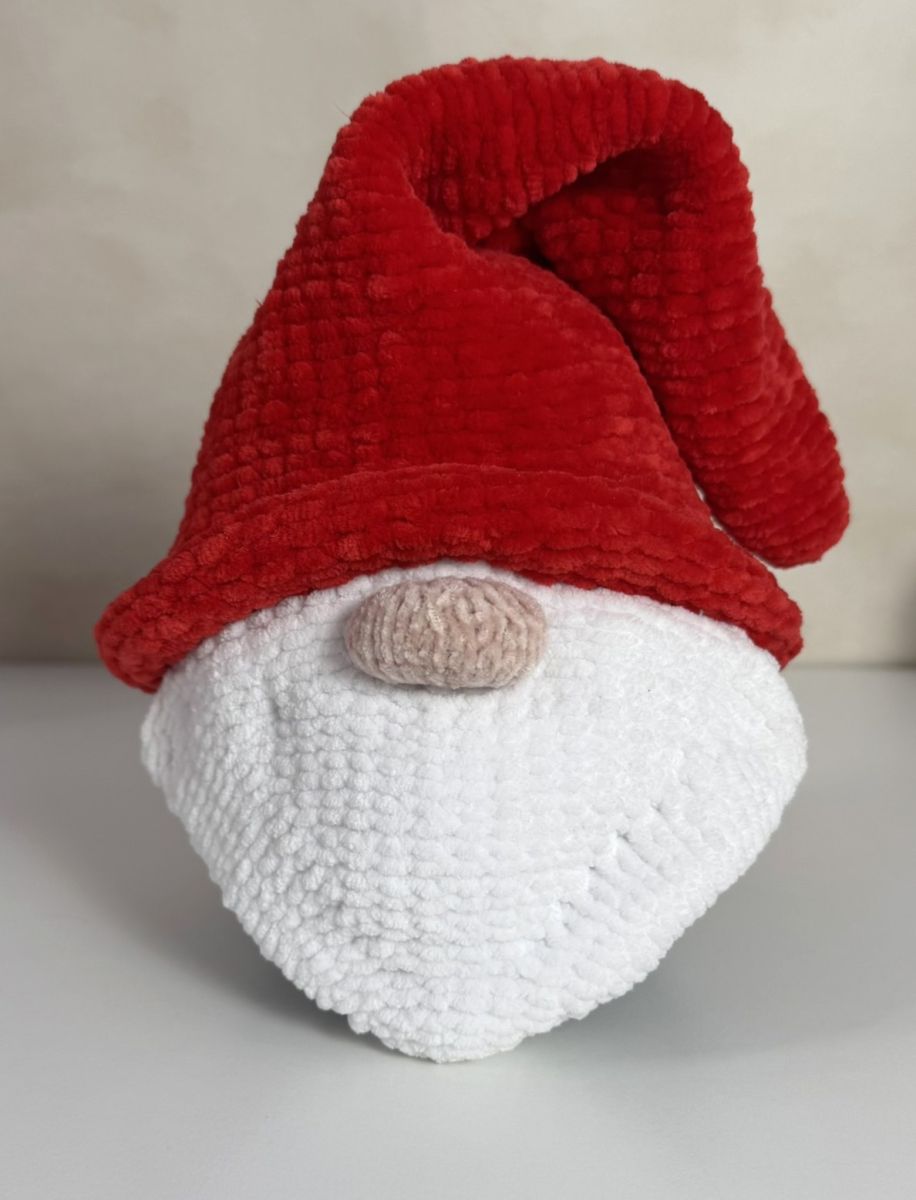
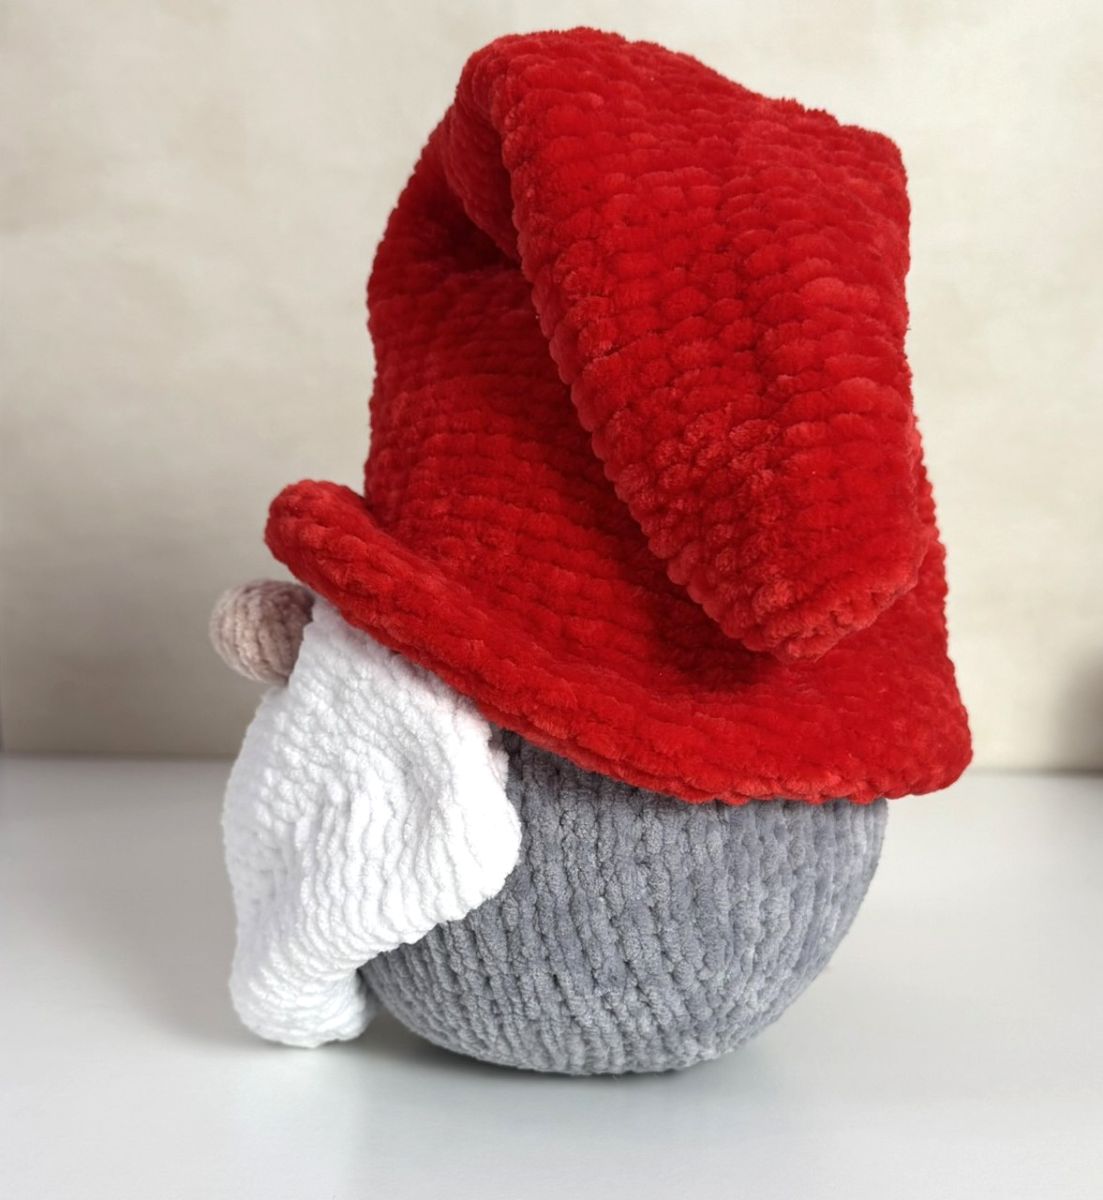
Hat (red, 4 mm knitting needles)
Cast on 6 stitches (ch) onto the knitting needle. Make sure the stitches are evenly stretched while knitting to ensure your knitted piece is nice and even.
1. 6 P (6)
2. 6 K inc. (12)
3. 5. -12 P (12)
4. -12 K
6. 1 K, 1 inc, 8 K, 1 inc, 1 K (14)
7. 14 P
8. 2 K, 1 inc, 8 K, 1 inc, 2 K (16)
9. 16 P
10. 2 K, 1 inc, 10 K, 1 inc, 2 K (18)
11. 18 P
12. 3 K, 1 inc, 10 K, 1 inc, 3 K (20)
13. 20 P
14. 3 K, 1 inc, 12 K, 1 inc, 3 K (22)
15. 22 P
16. 4 K, 1 inc, 12 K, 1 inc, 4 K (24)
17. 24 P
18. 3 K, 1 inc, 16 K, 1 inc, 3 K (26)
Knit a total of 11 rows in stockinette stitch:
On the front side of the work, knit all stitches across the row.
On the back side of the work, purl all stitches across the row.
19. 21. 23. 25.27. 29. -26 P
20. 22. 24. 26. 28 -26 K
30. 3 K, 1 inc, 18 K, 1 inc, 3 K (28)
31. 28 P
32. 4 K, 1 inc, 18 K, 1 inc, 4 K (30)
33. 30 P
34. 5 K, 1 inc, 18 K, 1 inc, 5 K (32)
35. 37. -32 P
36. 32 K
38. 5 K, 1 inc, 20 K, 1 inc, 5 K (34)
39. 34 P
40. 5 K, 1 inc , 22 K, 1 inc, 5 K (36)
41. 36 P
42. 5 K, 1 inc, 24 K, 1 inc, 5 K (38)
43. 38 P
44. 5 K, 1 inc, 26 K, 1 inc, 5 K (40)
45. 40 P
46. 6 K, 1 inc, 26 K,1 inc, 6 K (42)
47. 42 P
48. 6 K, 1 inc, 28 K,1 inc, 6 K (44)
49. 44 P
50. 6 K, 1 inc, 30 K,1 inc, 6 K (46)
51. 46 P
52. 6 K, 1 inc, 32 K,1 inc, 6 K (48)
53. 48 P
54. 6 K, 1 inc, 34 K,1 inc, 6 K (50)
55. 50 P
56. 6 K, 1 inc, 36 K,1 inc, 6 K (52)
Knit a total of 19 rows in stockinette stitch:
On the front side of the work, knit all stitches across the row.
On the back side of the work, purl all stitches across the row.
57. 59. 61. 63. 65. 67. 69. 71. 73. 75 -54 P
58. 60. 62. 64. 66. 68. 70. 72. 74 -54 K
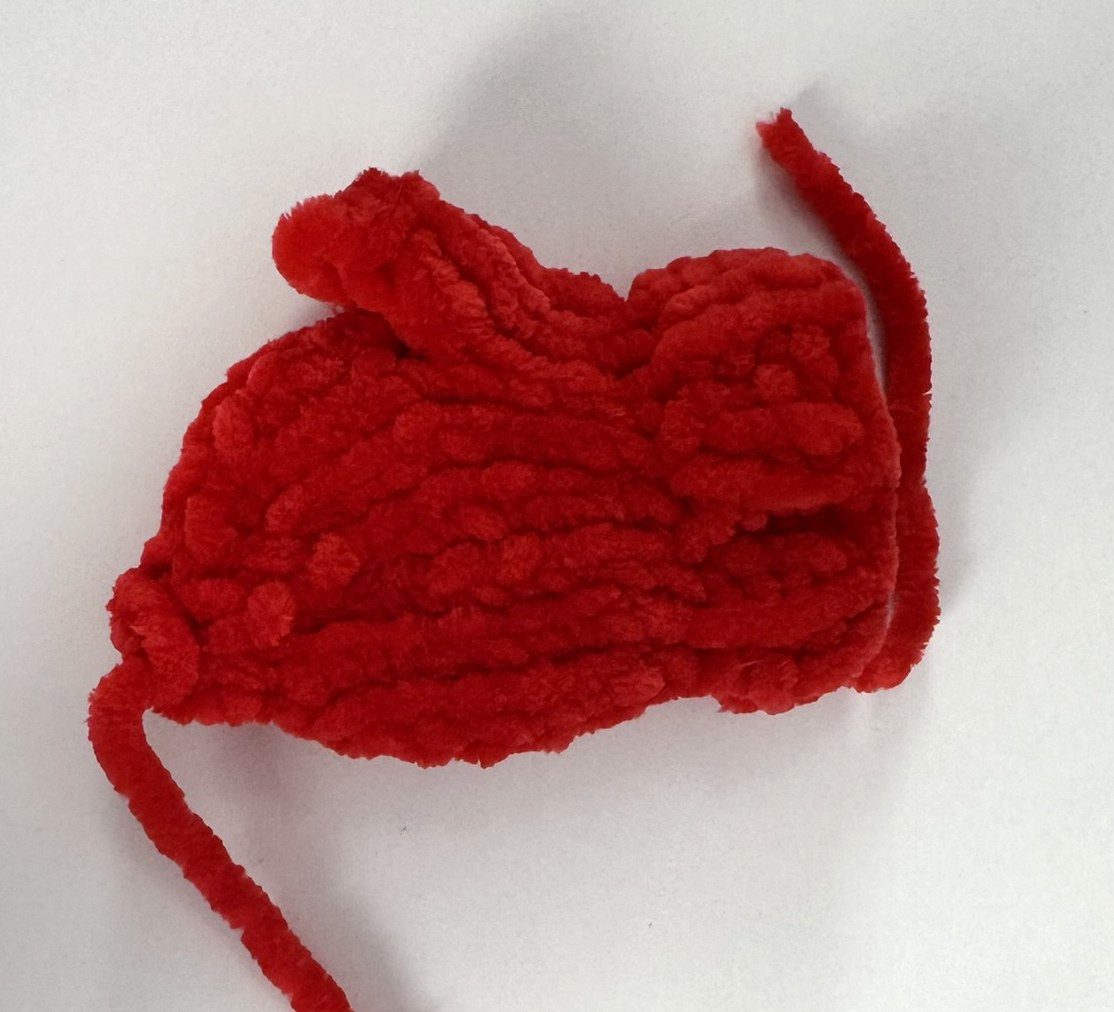
Cast off the remaining stitches and sew the hat together.
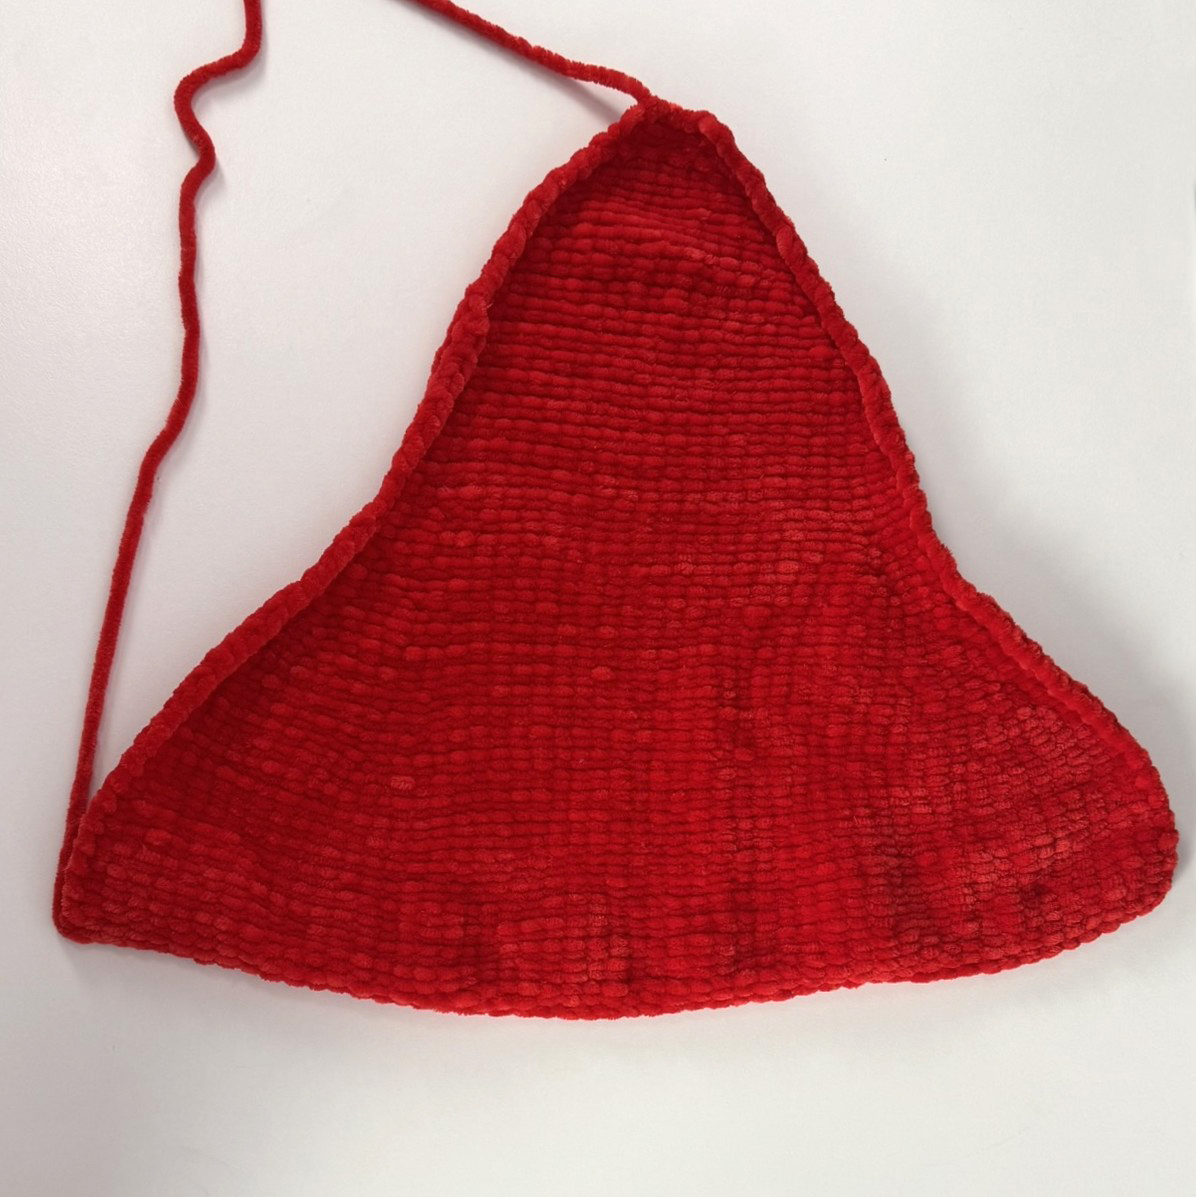
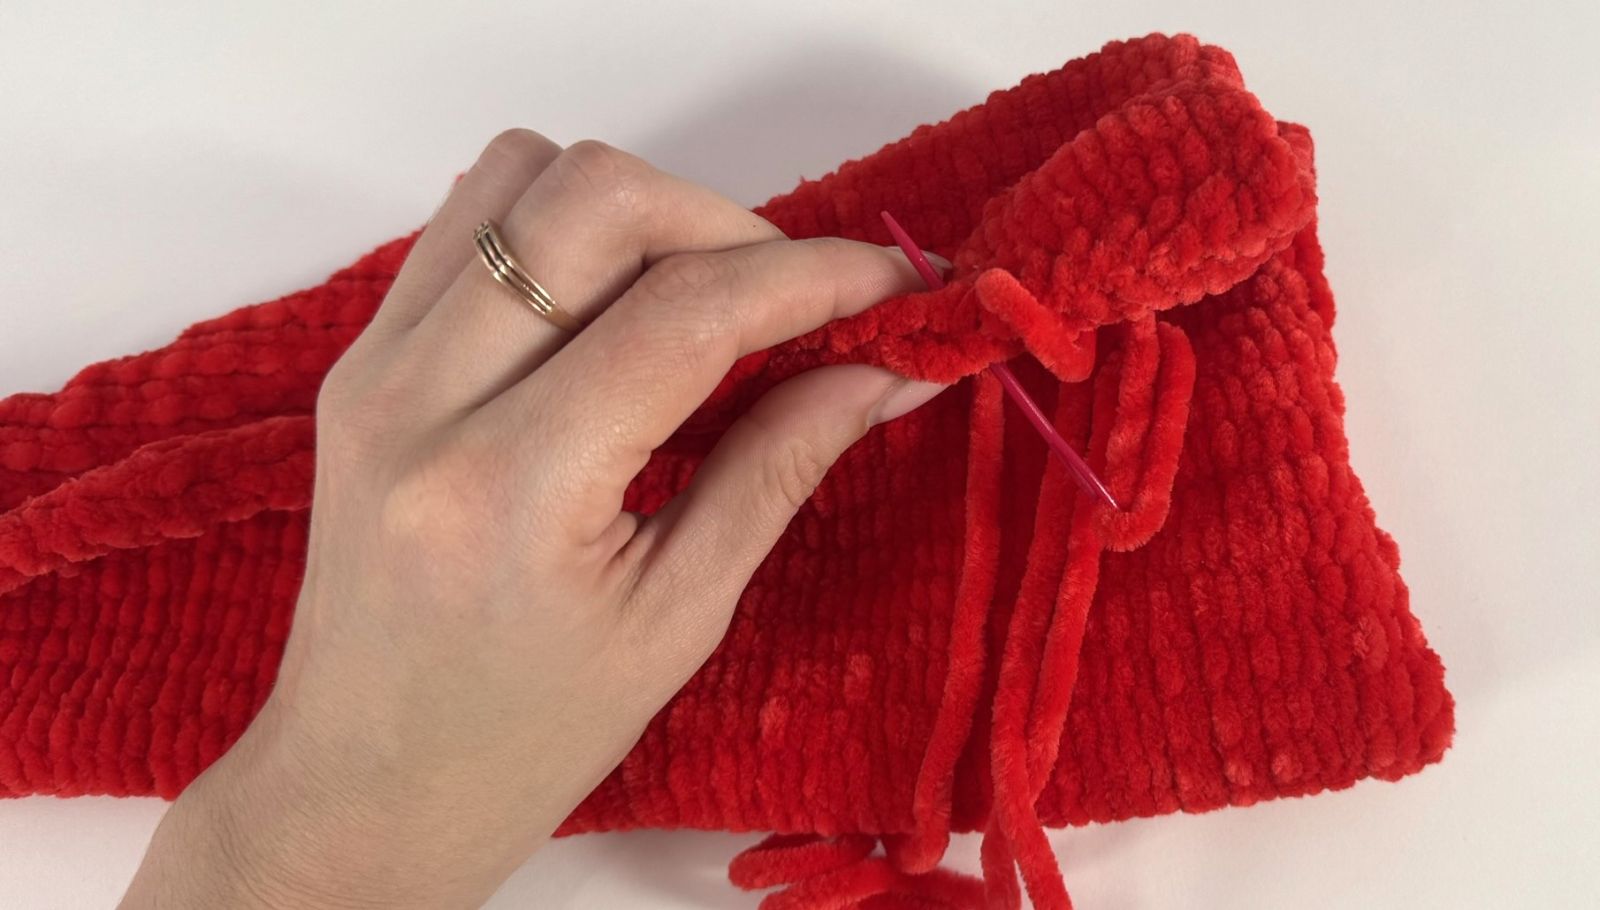
I chose to turn the hat inside out rather than leaving the right side facing out. Of course, you can decide which look you prefer—whether with the wrong side or the right side showing.
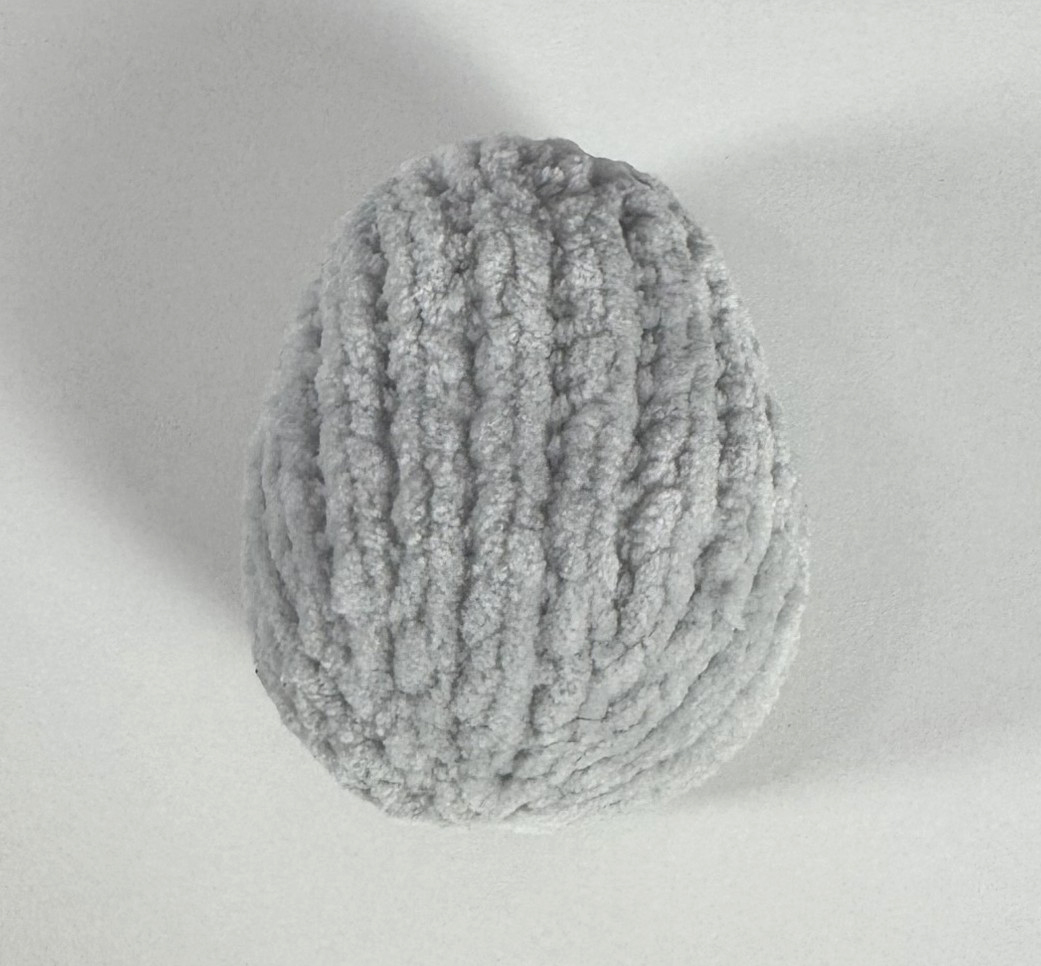
Pom-pom
A pom-pom for a hat can be made in the classic way by wrapping yarn around a piece of cardboard and then cutting the threads. There are plenty of tutorials for this method available online. For my gnome, however, I chose to knit the pom-pom instead, since it is meant for a child’s room and needs to be especially secure and sturdy.
Cast on 6 stitches (ch) onto the knitting needle. Make sure the stitches are evenly stretched while knitting to ensure your knitted piece is nice and even.
1. 6 P (6)
2. 6 K inc. (12)
3. 12 P (12)
4. (1 K, 1 inc) x 6 (18)
5. 18 P
6. 18 K
7. 18 P
8. 18 K
9. 18 P
10. (1 K, 1 dec) x 6 (12)
11. 12 P
12. 6 dec
Finally, the remaining stitches are cast off. The pom-pom is then sewn together and stuffed.
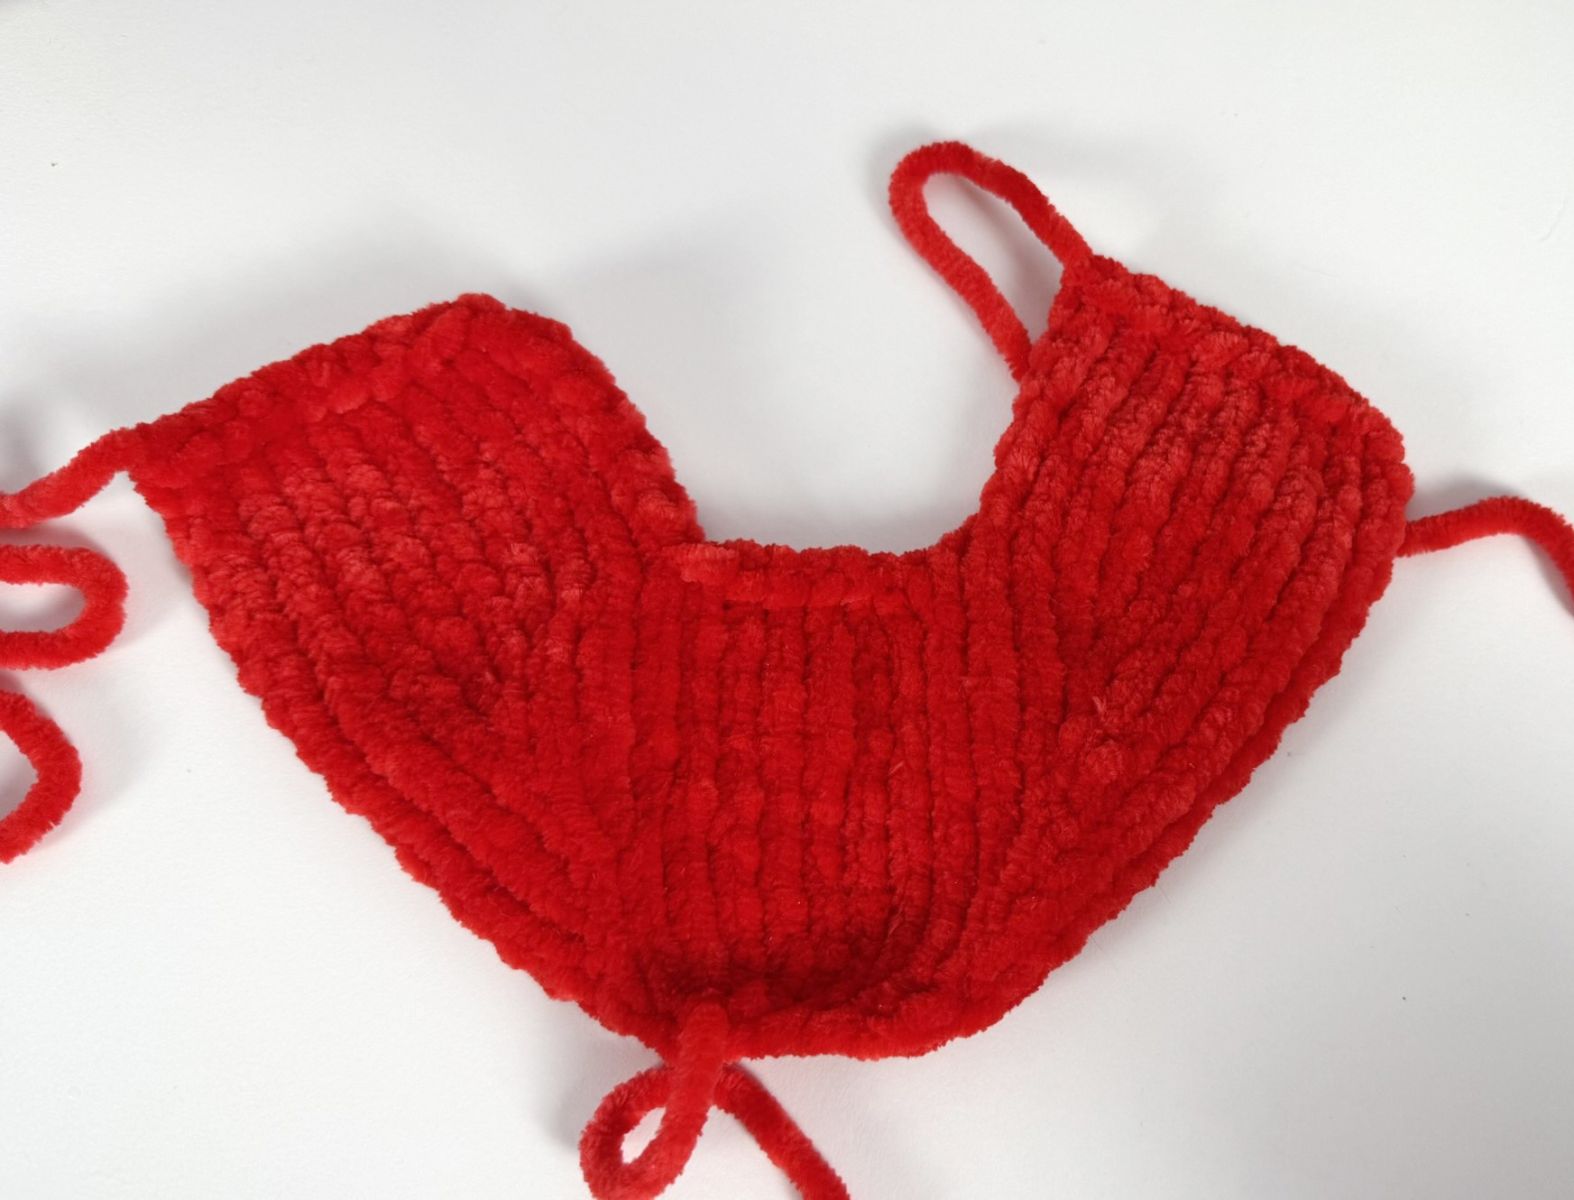
Beard (white, 3.5 mm knitting needles)
Cast on 3 stitches (ch) onto the knitting needle.
1. 3 P (3)
2. 3 K inc. (6)
3. 6 P
4. 1 K, 1 inc, 2 K, 1 inc, 1 K (8)
5. 8 P
6. 1 K, 1 inc, 4 K, 1 inc, 1 K (10)
7. 10 P
8. 2 K, 1 inc, 4 K, 1 inc, 2 K (12)
9. 12 P
10. 1 K, 1 inc, 8 K, 1 inc, 1 K (14)
11. 14 P
12. 2 K, 1 inc, 8 K, 1 inc, 2 K (16)
13. 16 P
14. 2 K, 1 inc, 10 K, 1 inc, 2 K (18)
15. 18 P
16. 3 K, 1 inc, 10 K, 1 inc, 3 K (20)
17. 20 P
18. 3 K, 1 inc, 12 K, 1 inc, 3 K (22)
19. 22 P
20. 4 K, 1 inc, 12 K, 1 inc, 4 K (24)
21. 24 P
22. 4 K, 1 inc, 14 K, 1 inc, 4 K (26)
23. 26 P
24. 4 K, 1 inc, 16 K, 1 inc, 4 K (28)
25. 28 P
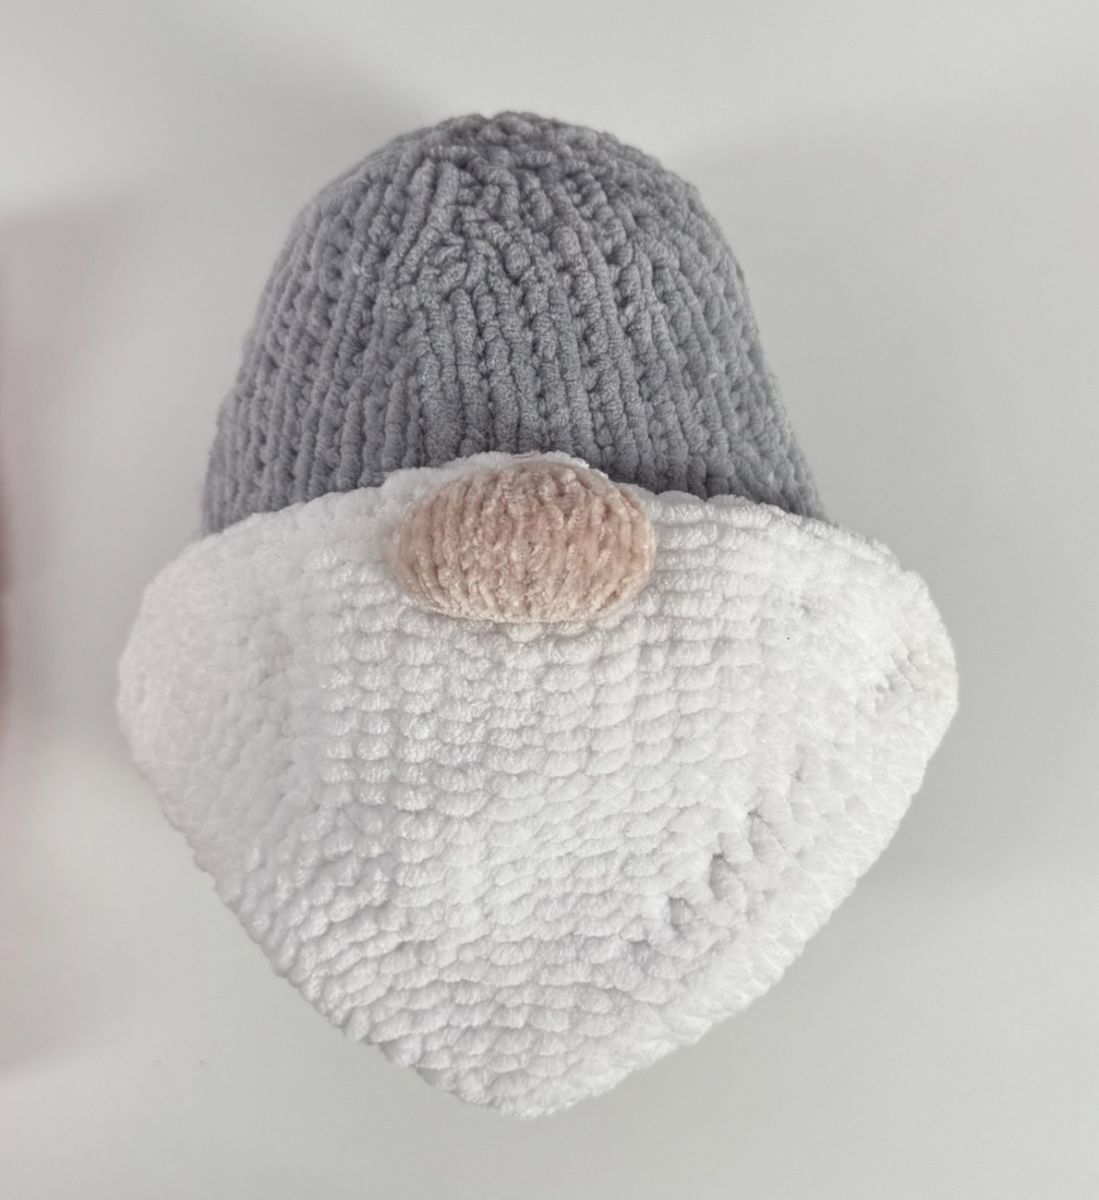
Knit a small opening in rounds 26 and 27. Later, when sewing the pieces together, insert the nose into this opening. This placement makes the gnome look more balanced and harmonious than simply sewing the nose onto the beard or above it.
26. 12 K, cast off 4 stitches, then knit another 12 stitches.
27. 12 P, cast on 4 stitches, knit 12 more stitches
28. 28 K
29. 28 P
30. 28 K
31. 28 P
In rounds 32 and 33, knit a small opening, as the beard is worked on both sides. This creates a suitable spot on each side where the nose can later be inserted.
32. 12 K, cast off 4 stitches, then knit another 12 stitches.
33. 12 P, cast on 4 stitches, knit 12 more stitches.
34. 28 K
35. 28 P
36. 4 K, 1 dec, 16 K, 1 dec, 4 K (26)
37. 26 P
38. 4 K, 1 dec, 14 K, 1 dec, 4 K (24)
39. 24 P
40. 4 K, 1 dec, 12 K, 1 dec, 4 K (22)
41. 22 P
42. 4 K, 1 dec, 10 K, 1 dec, 4 K (20)
43. 20 P
44. 4 K, 1 dec, 8 K, 1 dec, 4 K (18)
45. 18 P
46. 4 K, 1 dec, 6 K, 1 dec, 4 K (16)
47. 16 P
48. 4 K, 1 dec, 4 K, 1 dec, 4 K (14)
49. 14 P
50. 4 K, 1 dec, 2 K, 1 dec, 4 K (12)
51. 12 P
52. 2 K, 1 dec, 4 K, 1 dec, 2 K (10)
53. 10 P
54. 2 K, 1 dec, 2 K, 1 dec, 2 K (8)
55. 8 P
56. 1 K, 1 dec, 2 K, 1 dec, 1 K (6)
57. 6 P
58. 3 dec (3)
59. 3 P
Fold the beard in half, aligning the openings on both sides. Sew them together neatly without stuffing.
Finally, cut the thread and tuck it invisibly inside.
(1).jpg)
.jpg)
Nose: knitted with 2.5 mm needles using Boheme Velvet yarn.
Cast on 6 stitches (ch) onto the knitting needle.
1. 6 P (6)
2. 1 K inc, 4 K, 1 K inc (8)
3. 8 P
4. 1 K inc, 6 K, 1 K inc (8)
5. 10 P
6. 1 K inc, 8 K, 1 K inc (12)
7. 12 P
8. 1 K inc, 10 K, 1 K inc (14)
9. 14 P
10. 14 K
11. 14 P
12. 14 K
13. 14 P
14. 1 dec, 10 K, 1 dec (12)
15. 12 P
16. 1 dec, 8 K, 1 dec (10)
17. 10 P
18. 1 dec, 6 K, 1 dec (8)
19. 8 P
Cast off the remaining stitches carefully.
(1).jpg)
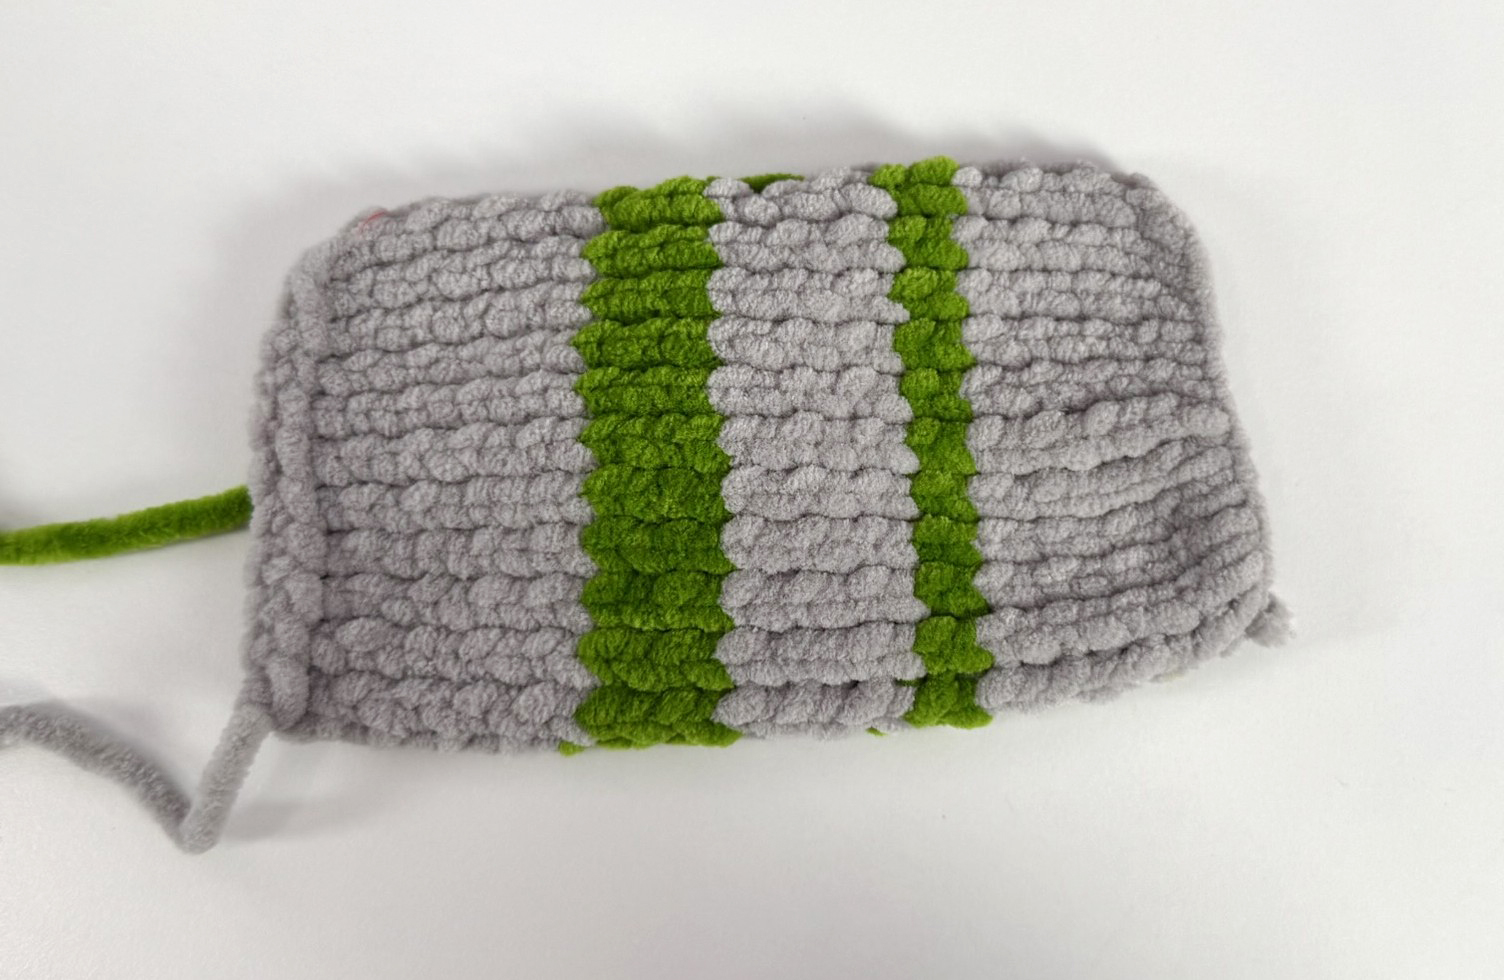
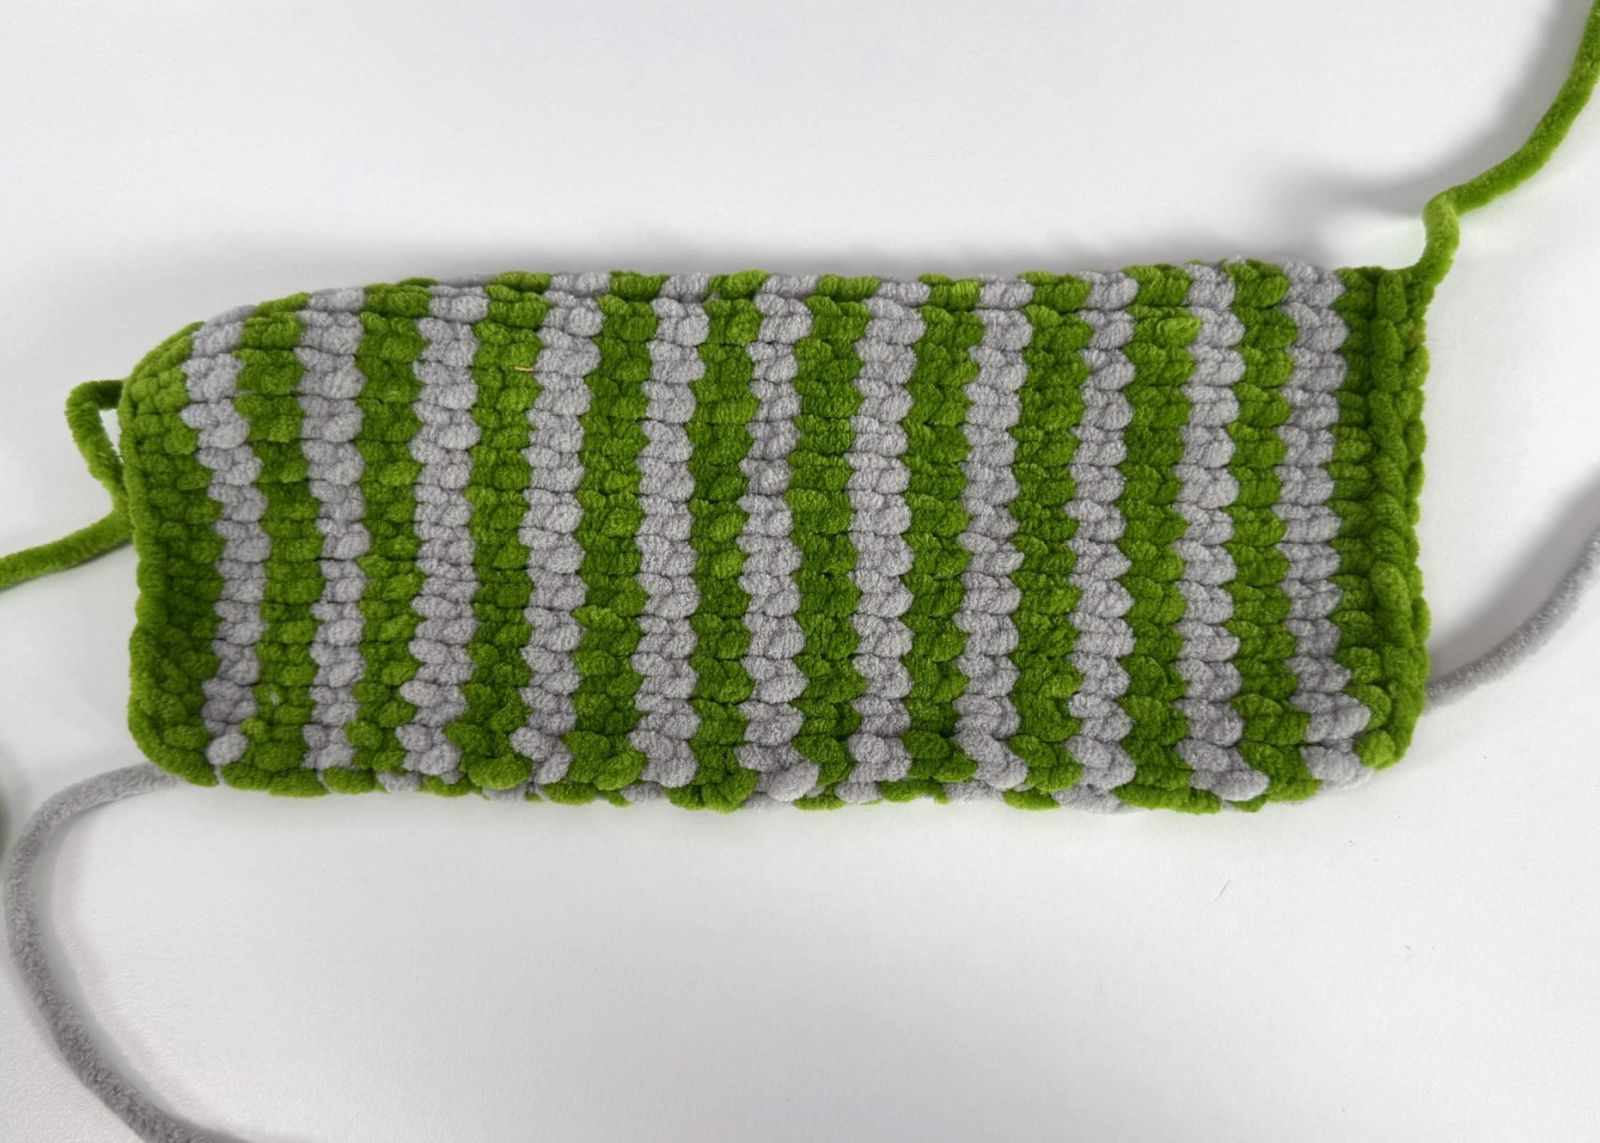
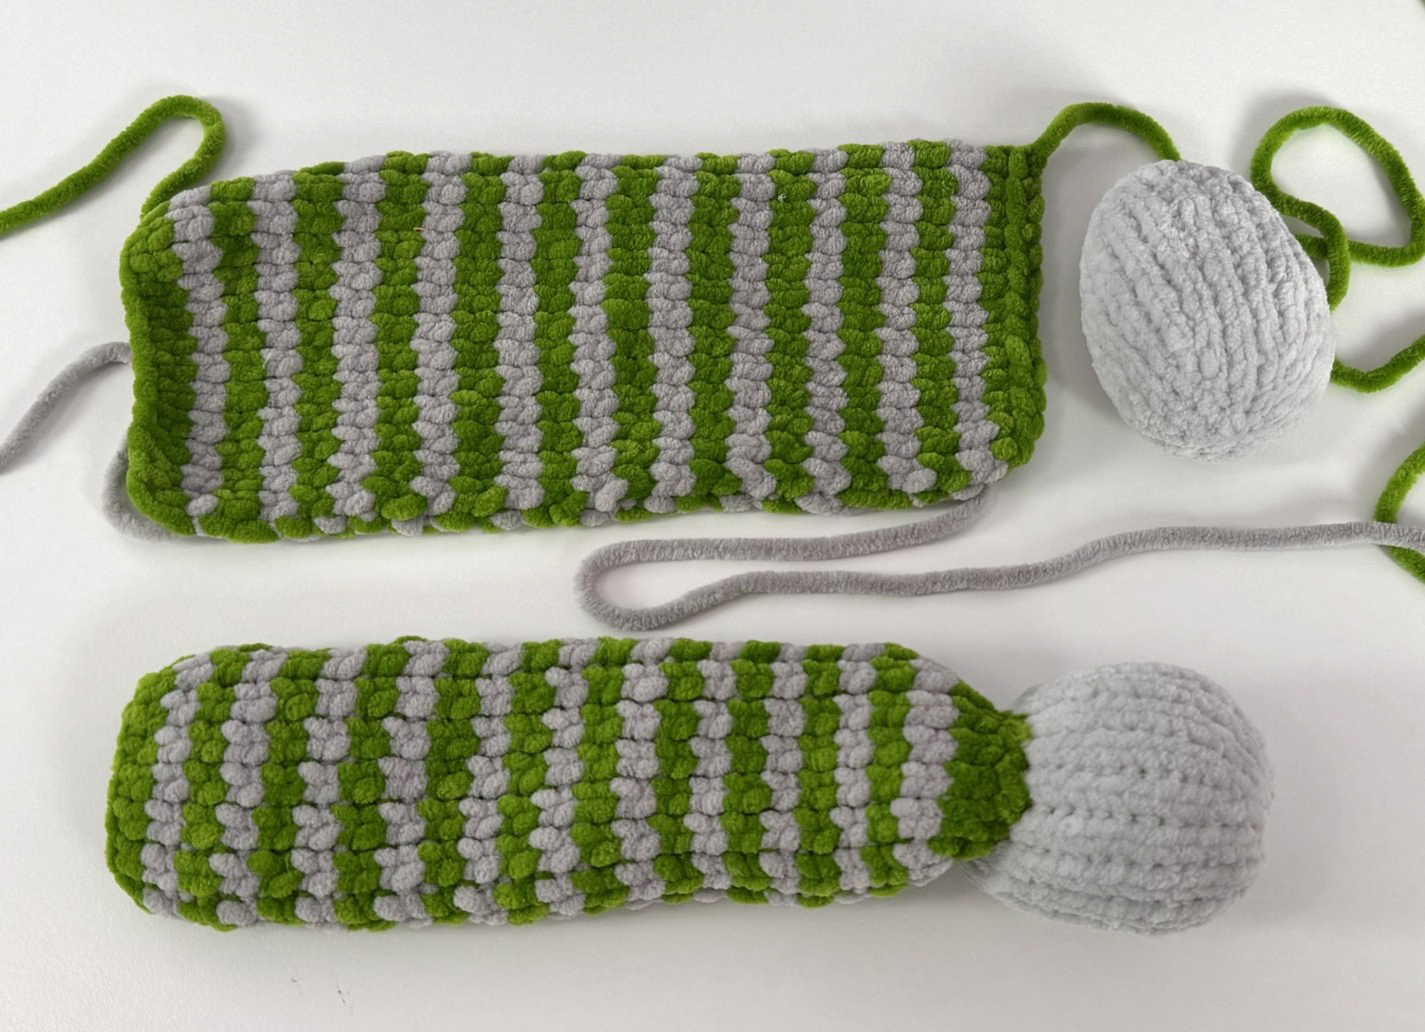
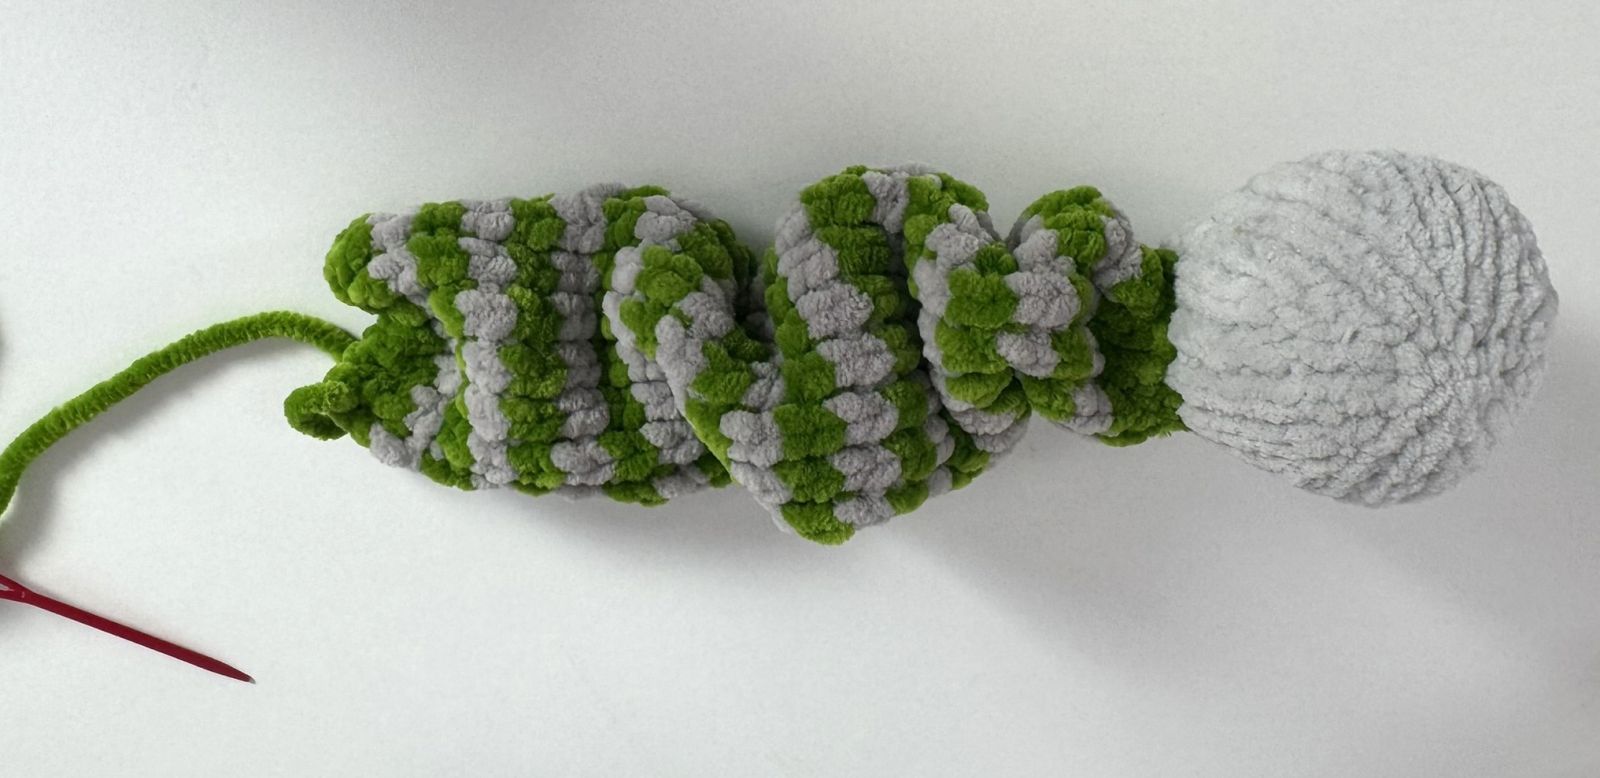
Arms (Gray and Green, knitted with 4 mm needles using)
Cast on 12 stitches (ch) onto the knitting needle.
1. 12 P
2. 12 K
3. 12 P
4. 12 K
5. 12 P
6. 12 K
7. 12 P
Color change green
8. 12 K
9. 12 P
Color change gray
10. 12 K
11. 12 P
12. 12 K
13. 12 P
14. 12 K
15. 12 P
Color change green
16. 12 K
17. 12 P
18. 12 K
19. 12 P
Color change gray
20. 12 K
21. 12 P
22. 12 K
23. 12 P
24. 12 K
25. 12 P
26. 12 K
27. 12 P
28. 12 K
29. 12 P
Cast off the remaining stitches. Fold the piece in half and sew it together using two strands of yarn—gray for the stripes and green for the green sections. Do not stuff the arms. Cut the yarn and weave in the ends invisibly.
.JPEG)
Hands - Knit mittens (red, 4 mm knitting needles)
Begin with a rib pattern.
Cast on 12 stitches onto your knitting needle. Keep the stitches evenly stretched while knitting so the piece will turn out neat and even.
1. (1 K, 2 P ) x 7
2. (2 K, 1 P ) x 7
3. (1 K, 2 P ) x 7
4. (2 K, 1 P ) x 7
5. 10 K dec, 1 K (11)
6. 11 P
7. ( 1 K, 1 inc)x 5, 1 K (16)
8. 16 P
9. 16 K
10. 16 P
11. 6 K, Transfer the next 4 stitches to the auxiliary needle for the thumb, cast on 3 ch, 6 K (16)
12. 16 P
13. 16 K
14. 16 P
15. 16 K
16. 16 P
17. 1 K, ( 1 K, 1 dec)x 5 (11)
18. 11 P
19. 5 dec, 1 fm (5)
20. 6 P
Cast off the remaining stitches.
Thumb: Slip 6 stitches from the auxiliary needle.
1. 6 K
2. 6 P
3. 6 K
4. 6 P Cast off. Sew the thumbs together first, then knit the mittens.
Fold the mittens in half with the wrong sides facing out and sew them together. Do not stuff the hand. Insert the arm into the mitten up to the green stripe and sew it closed. Finished!
.JPEG)
.JPEG)
Legs (grey and green, 4 mm knitting needles)
Green: Cast on 16 stitches onto your knitting needle.
1. 16 P
Color change gray
2. 16 K
3. 16 P
Color change green
4. 16 K
5. 16 P
Color change gray
6. 16 K
7. 16 P
Color change green
8. 16 K
9. 16 P
Color change gray
10. 16 K
11. 16 P
Color change green
12. 16 K
13. 16 P
Color change gray
14. 16 K
15. 16 P
Color change green
16. 16 K
17. 16 P
Color change gray
18. 16 K
19. 16 P
Color change green
20. 16 K
21. 16 P
Color change gray
22. 16 K
23. 16 P
Color change green
24. 16 K
25. 16 P
Color change gray
26. 16 K
27. 16 P
Color change green
28. 16 K
29. 16 P
Color change gray
30. 16 K
31. 16 P
Color change green
32. 16 K
33. 16 P
Color change gray
34. 16 K
35. 16 P
Color change green
36. 16 K
37. 16 P
Color change gray
38. 16 K
39. 16 P
Color change green
40. 16 K
41. 16 P
Color change gray
42. 16 K
43. 16 P
Color change green
44. 16 K
45. 16 P
Cast off the remaining stitches. Fold the piece in half and sew it together with two strands of yarn—gray for the stripes and green for the green sections. Leave the legs unstuffed. Finally, cut the yarn and weave in the ends invisibly.
Lower part of the leg (foot) (gray, knitting needles 3.5 mm)
Cast on 6 stitches (ch) onto the knitting needle. Make sure the stitches are evenly stretched while knitting to ensure your knitted piece is nice and even.
1. 6 P (6)
2. 6 K inc. (12)
3. 12 P (12)
4. (1 K, 1 K inc)x 6 (18)
5. 18 P (18)
6. 8 K, 1 K inc, 8 K, 1 K inc (20)
Knit a total of 9 rows in stockinette stitch:
On the front side of the work, knit all stitches across the row.
On the back side of the work, purl all stitches across the row.
7. 9. 11. 13. 15.– 20P
8. 10. 12. 14. – 20 K
16. 8 K, 1 dec, 8 K, 1 dec (18)
17. 18 P
18. (1 K, 1 dec)x 6 (12)
19. 12 P
20. 6 dec
21. 6 P
Cast off the remaining stitches. Fold the piece in half and sew it together, stuffing as needed. Cut the yarn and weave in the ends.
Sew the foot to the leg.
Shoes (starting from the toe)
Cast on 6 stitches (ch) onto the knitting needle.
1. 6 P (6)
2. 6 K inc. (12)
3. 5. -12 P (12)
4. -12 K
6. 1 K, 1 inc, 8 K, 1 inc, 1 K (14)
7. 14 P
8. 2 K, 1 inc, 8 K, 1 inc, 2 K (16)
9. 16 P
10. 2 K, 1 inc, 10 K, 1 inc, 2 K (18)
11. 18 P
12. 3 K, 1 inc, 10 K, 1 inc, 3 K (20)
13. 20 P
14. 3 K, 1 inc, 12 K, 1 inc, 3 K (22)
15. 22 P
16. 4 K, 1 inc, 12 K, 1 inc, 4 K (24)
17. 24 P
18. 4 K, 1 inc, 14 K, 1 inc, 4 K (26)
19. 26 P
20. Knit 10 stitches, cast of the next 6 stitches, then knit the last 10 stitches.
The 6 stitches in the middle are cast off to create an opening, making the shoes easier to put on. Continue working with the remaining stitches on the needle. Place the first 10 stitches onto a spare needle and continue knitting with the last 10 stitches.
1. 10 P
2. 10 K
3. 10 P
4. 10 K
5. 10 P
6. 10 K
7. 10 P
8. 10 K
9. 10 P
Cast off the remaining stitches. Pick up the 10 remaining stitches from the auxiliary needle and continue knitting the second part of the shoe.
.JPEG)
1. 10 P
2. 10 K
3. 10 P
4. 10 K
5. 10 P
6. 10 K
7. 10 P
8. 10 K
9. 10 P
Fold the shoes with both sides facing each other and sew along the edges.
.JPEG)
.JPEG)
All pieces are now ready; the final step is assembly.
First, attach the beard to the head. Insert the nose into the opening and sew it in place.
Sew the legs to the bottom, then attach the arms at beard level.
Finally, put on the hat and sew it securely. Optionally, embroider snowflakes on top for decoration.
.JPG)


