Free Crochet Pattern Christmas Stocking
Free Crochet Pattern for Christmas Stocking. With this pattern, you can crochet your own Christmas stocking and create a unique gift for friends and family. Whether as a decoration for the Christmas tree or as a small gift for children, these stockings are sure to be a highlight of the Christmas season.
You can fill the stocking with all the things that are dear to you: sweets that invite you to snack, small gifts that bring joy, or simply a few loving words that touch the heart. The stocking becomes a small treasure that makes the Christmas season even more magical.
Tips for the Perfect Christmas Stocking
- Read the pattern carefully before starting to ensure you understand all the steps.
- Choose the right yarn: A soft, easy-to-crochet yarn is ideal.
- Crochet slowly and carefully to avoid mistakes.
- Experiment with different colors to give your stocking a unique look.
- Pay attention to the size: Adjust the stocking to fit the desired gift or decoration.
- Embellishments like buttons, glitter, or embroidery make your stocking even more unique.
- Crochet with love: That's the most important tip! With love and care, your stocking will be a real showstopper.
Material:
I crocheted my Christmas stocking from chenille yarn, but any other yarn is also suitable. Chenille yarn can be a bit tricky to crochet because it's so soft and fluffy. Please note that the size of the stocking may vary depending on the yarn weight - a thick yarn will result in a larger stocking, a thin yarn in a smaller one. My stocking is approximately 21 x 21 cm in size and has enough space for sweets or small gifts. The needle size should be adjusted according to the yarn weight.
Materials needed for completion:
- Sewing needle
- Scissors
- Safety eyes or doll eyes (approx. 10-12mm)
Abbreviations:
ch - chain stitch
sc - single crochet
sl st - slip stitch
dc - double crochet
inc. - increase
dec. - decrease
()x - repeat the instructions in brackets x times
Stocking
- Ch 6 into the magic ring and join with a sl st.
- Rnd 1: 2 sc in each st (12)
- Rnd 2: *2 sc in next st, sc in next st; rep from * around (18)
- Rnd 3: *2 sc in next st, sc in next 2 sts; rep from * around (24)
- Rnd 4: *2 sc in next st, sc in next 3 sts; rep from * around (30)
- Rnd 5: *2 sc in next st, sc in next 4 sts; rep from * around (36)
- Rnd 6: *2 sc in next st, sc in next 5 sts; rep from * around (42)
- Rnd 7: *2 sc in next st, sc in next 6 sts; rep from * around (48)
- Rnd 8: *2 sc in next st, sc in next 7 sts; rep from * around (54)
- Rnd 9: Sc in each st around.
.jpg)
- Rnd 10: Ch 3, dc in each st around, join with a sl st.
- Rnd 11: Ch 1, sc in each st around, join with a sl st.
- Repeat Rnds 10 and 11 four more times.
.jpg)
- Work in rows, turning at the end of each row.
- Row 1: Ch 3, dc in each of next 38 sts, turn. Leave 16 sts in the middle unworked.
.jpg)
- Row 2: Ch 1, sc in each st across, turn.
- Row 3: Ch 3, dc in each st across, turn.
- Repeat Rows 2 and 3 five more times.
- Sew or crochet the two ends together to form the shape of a boot or a stocking.
.jpg)
Now work in rounds again.
First, single crochet around the entire piece.
- Rnd 1: Ch 3, dc in each st around, join with a sl st.
- Rnd 2: Ch 1, sc in each st around, join with a sl st.
.jpg)
Repeat Rnds 1 and 2 five more times.
.jpg)
Change color, and repeat Rnds 1 and 2 five more times. Fasten off and weave in ends. Done.
.jpg)
Reindeer
For the reindeer, I used a thinner yarn (Katia Velvet).
- Rnd 1: Ch 13, 3 sc in 2nd ch from hook, sc in next 10 sts, 3 sc in last st, (work on the other side of the foundation chain) sc in next 10 sts, join with a sl st. (26)
- Rnd 2: Ch 1, 2 sc in each of next 3 sts, sc in next 10 sts, 2 sc in each of next 3 sts, sc in next 10 sts, join with a sl st. (32)
.jpg)
- Rnd 3: Ch 1, (2 sc in next st, sc in next st) x 3, sc in next 10 sts, (2 sc in next st, sc in next st) x 3, sc in next 10 sts, join with a sl st. (38)
- Rnd 4: Sc in each st around (38)
Repeat Rnd 4 twelve more times.
- Rnd 16: Dec 1, sc in next 34 sts, dec 1. (36)
- Rnd 17: (Sc in next 4 sts, dec 1) x 6 (30)
- Rnd 18: (Sc in next 3 sts, dec 1) x 6 (24)
- Rnd 19: (Sc in next 2 sts, dec 1) x 6 (18)
- Rnd 20: (Sc in next 2 sts, inc 1) x 6 (24)
- Rnd 21: Sc in each st around.
- Rnd 22: (Sc in next 3 sts, inc 1) x 6 (30)
- Rnd 23: Sc in each st around, fasten off and weave in ends.
.jpg)
Antlers x2
Ch 13, sc in 2nd ch from hook and next 4 sts, ch 4, sc in 2nd ch from hook and each st across. Fasten off and weave in ends.
.jpg)
Ears
Ch 6 into magic ring, join with a sl st.
- Rnd 1: 2 sc in each st around (12)
- Rnds 2-4: Sc in each st around (12)
- Rnd 5: Dec 6 times (6)
Fasten off and weave in ends.
.jpg)
Mouth
- Rnd 1: Ch 7, 3 sc in 2nd ch from hook, sc in next 4 sts, 3 sc in last st, (work on the other side of the foundation chain) sc in next 4 sts, join with a sl st. (14)
- Rnd 2: Ch 1, 2 sc in each of next 3 sts, sc in next 4 sts, 2 sc in each of next 3 sts, sc in next 4 sts, join with a sl st. (18)
- Rnd 3: Ch 1, (2 sc in next st, sc in next st) x 3, sc in next 4 sts, (2 sc in next st, sc in next st) x 3, sc in next 4 sts, join with a sl st. (24)
.jpg)
Scarf
- Row 1: Ch 56, sc in 2nd ch from hook and in each st across, turn.
- Rows 2 and 3: Ch 1, sc in each st across, turn.
- Fasten off and weave in ends.
.jpg)
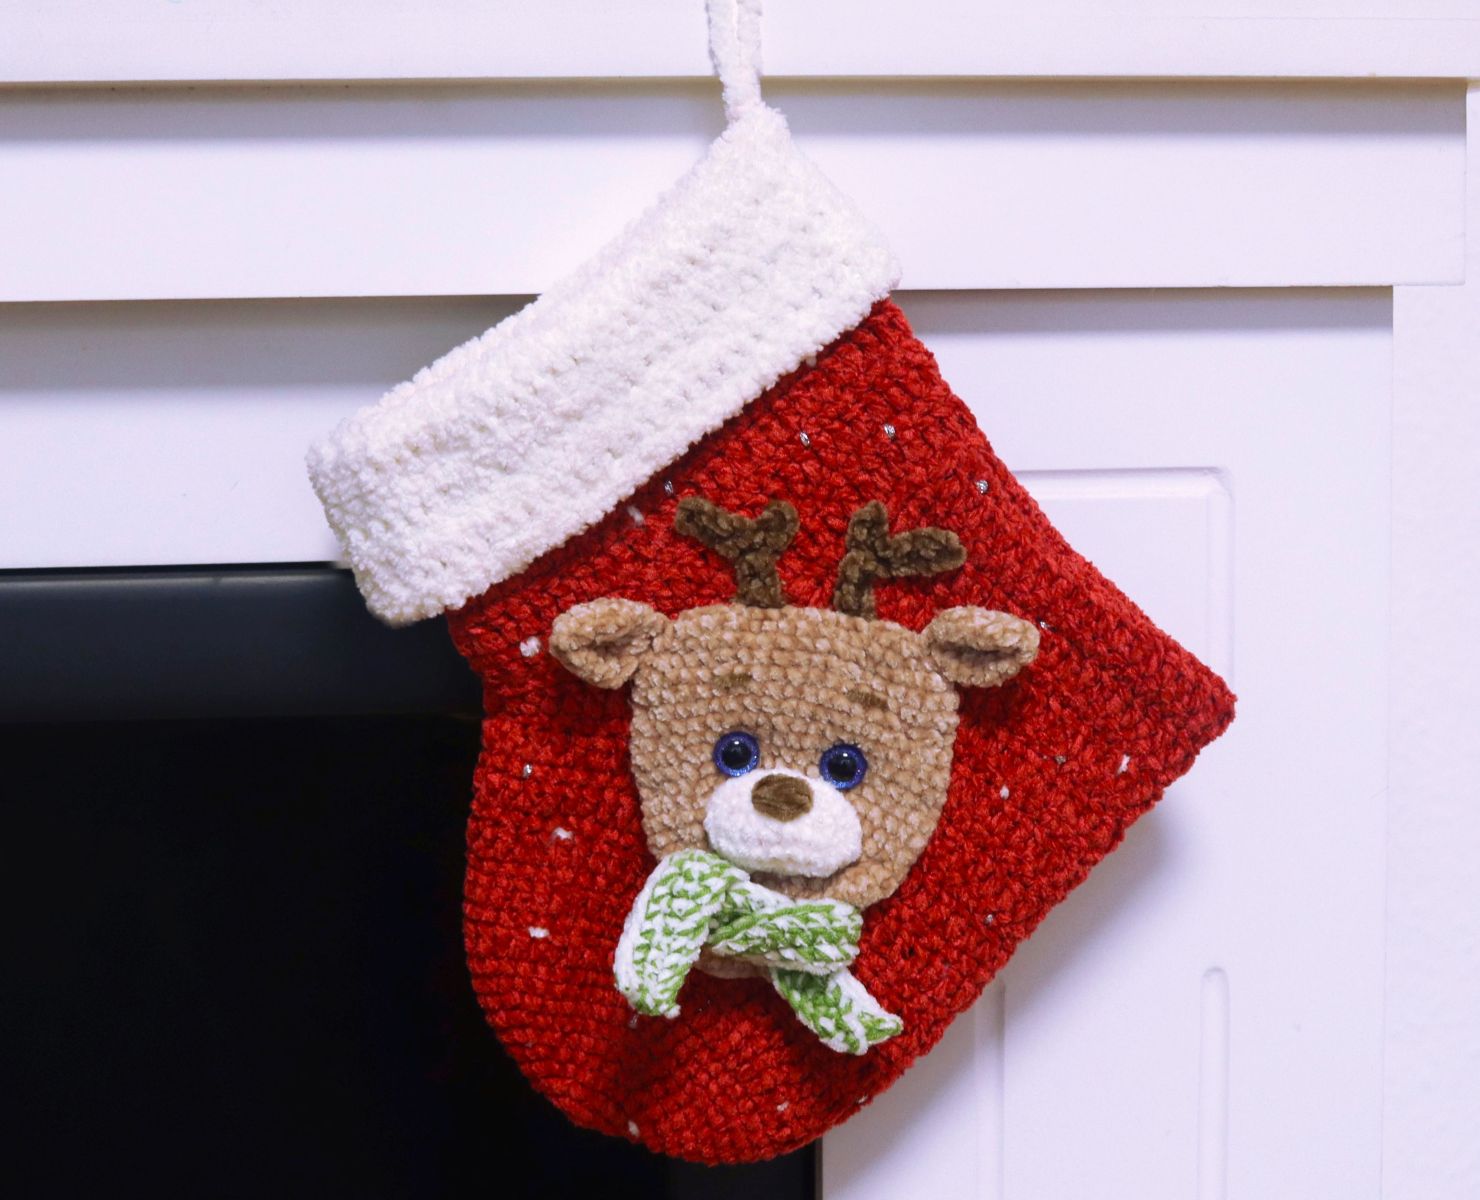
The Christmas stocking is completed as follows:
- Sew the ears to both sides, left and right, between rounds 1 and 3.
- Place the antlers in the middle at the top and sew them on.
- Sew the mouth between rounds 12 and 14.
- Embroider the nose in the middle between rounds 1 and 2.
- Attach the eyes with safety washers or a few drops of glue. They are placed between rounds 10 and 11.
- Embroider the eyebrows between rounds 5 and 6.
- Knot the scarf between rounds 19 and 20 and secure it with a sewing needle.
- Attach the appliqué to the stocking itself and you're done!
.jpg)
Congratulations! You have now completed your unique Christmas stocking!
I hope you had fun crocheting and are proud of your work. Your Christmas stocking is now ready to be used as a decoration for your Christmas tree or as a gift for loved friends and family.
I'm very excited to see pictures of your finished stocking! Please share them with me if you'd like. I love seeing the results of my patterns and am always impressed by the creativity and talent of my crochet friends.
If you have any questions or need help with another project, I'm here for you. I wish you and your loved ones a Merry Christmas and a happy new year!
Thank you for crocheting with me and I hope to see you again soon for a new project!


