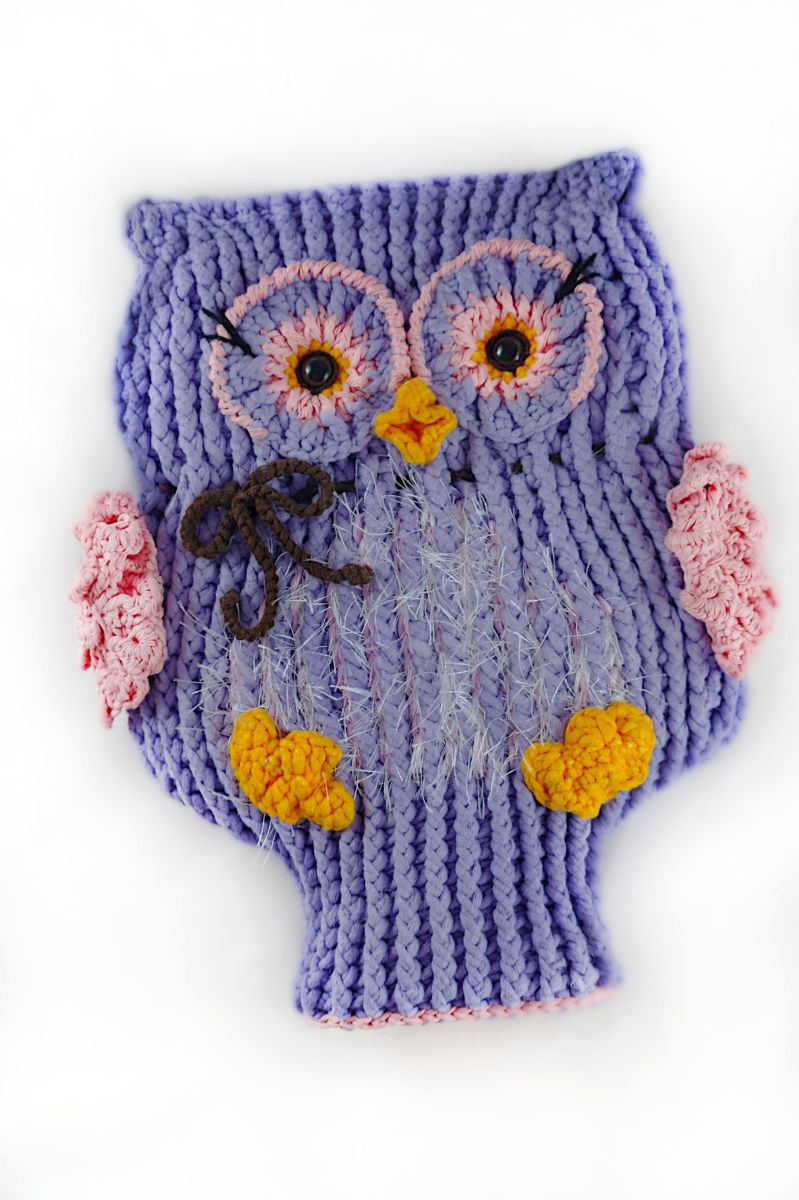
Cozy Owl Hot Water Bottle.
As the cold season sets in, we all crave a little extra warmth. A crocheted hot water bottle cover is just the thing! This little owl is especially soft and cuddly—perfect for snuggling up during cozy moments.
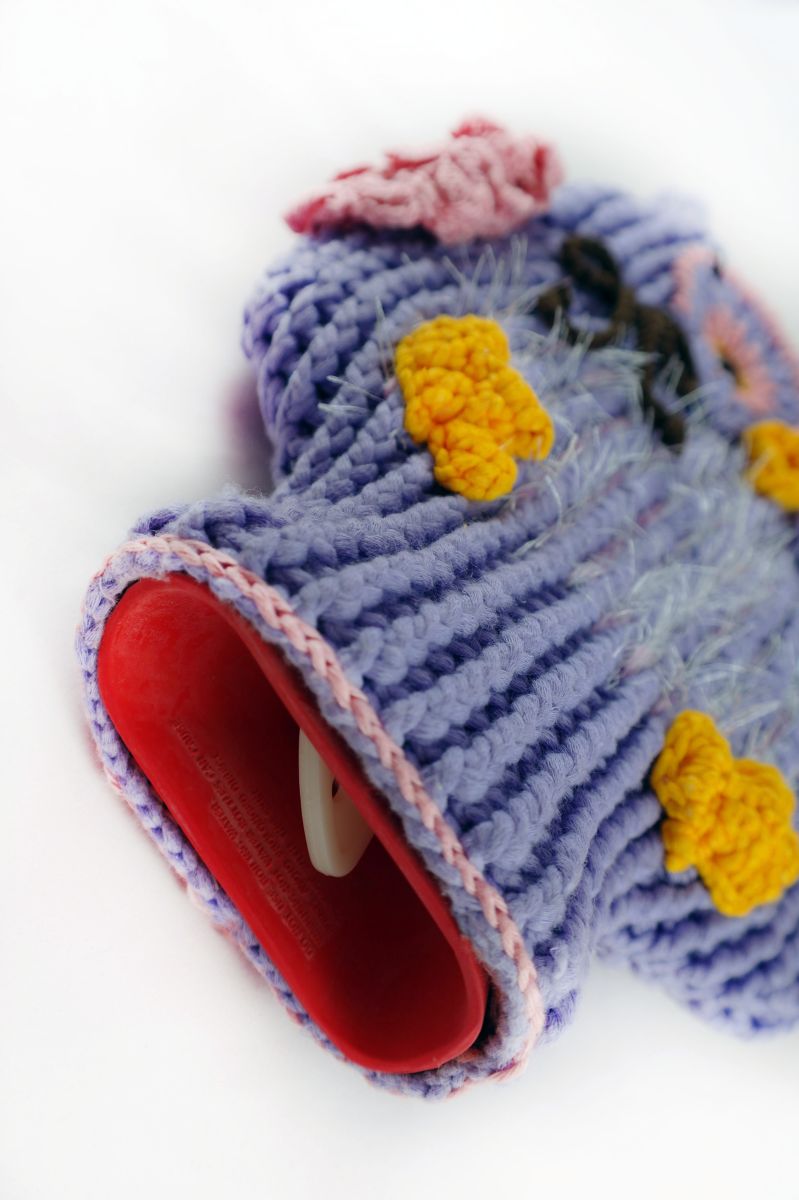
I chose relief stitches for the crochet pattern because they stretch beautifully, much like jersey fabric. This makes it easy to fold the empty bottle, tuck it into the cover, and then fill it with warm water.
Size
Width approx 18-20 cm
Height approx 28-30 cm
Materials:
Crochet yarn 95 m / 50 gr
COCON Softgarn from Lana Alzetta
Purple- 150 gr.
Yellow 20 gr.
Pink cotton 30 gr. 125 m/ 50 gr
Crochet Hook 3,25 mm US D UK 10.
Safety Eyes 10- 12 mm.
1 extra long sewing needle
Abbreviations (US):
SC – single crochet
CH – Chain(s)
inc – increase
dec – decrease
3 SC in 1 – 3 SC in same ST
3 SC tog – 3 SC together (3 SC closed to 1 Stitch)
X dec – X times decrease
X inc – X times increase
(---)x – in brackets x-times repeat
slst – slip stitch
Fpdc – front post double crochet
DC – double crochet
Bpdc – back post double croche
Bag (purple)
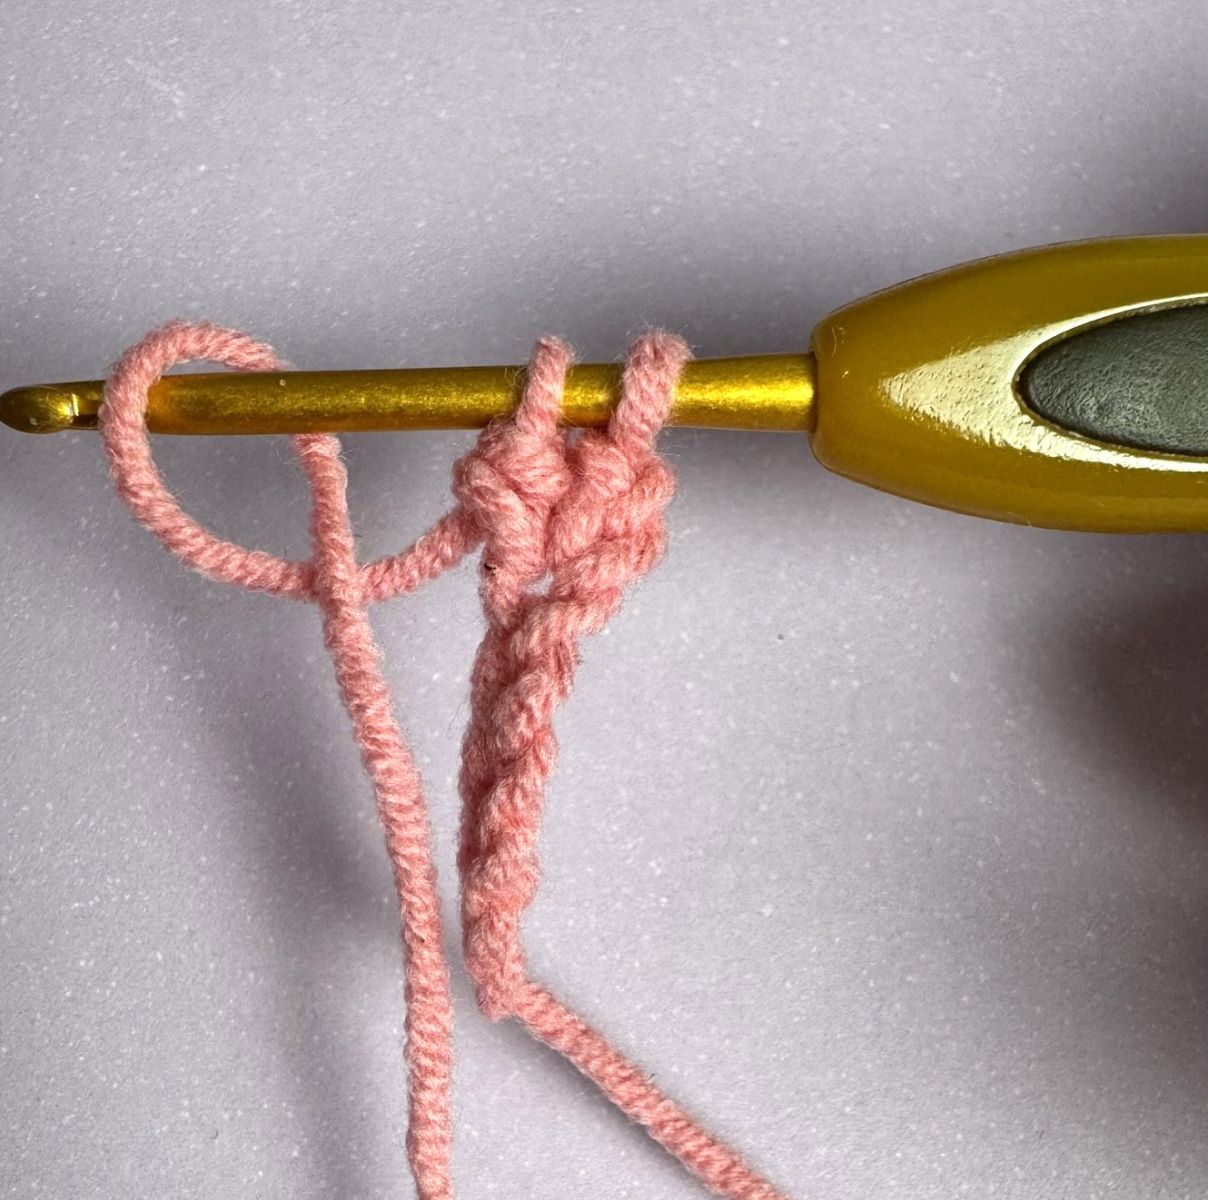
You work in rounds. Every round starts with 3 CH and finishes with 1 sl st.
Chain 29.
1. From the 3rd CH from the hook crochet 25 DC, 7 DC in 1 CH, 25 DC, 7 DC in 1 CH, finish with slst (64)
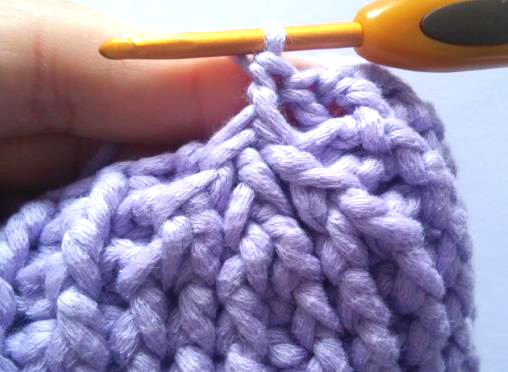
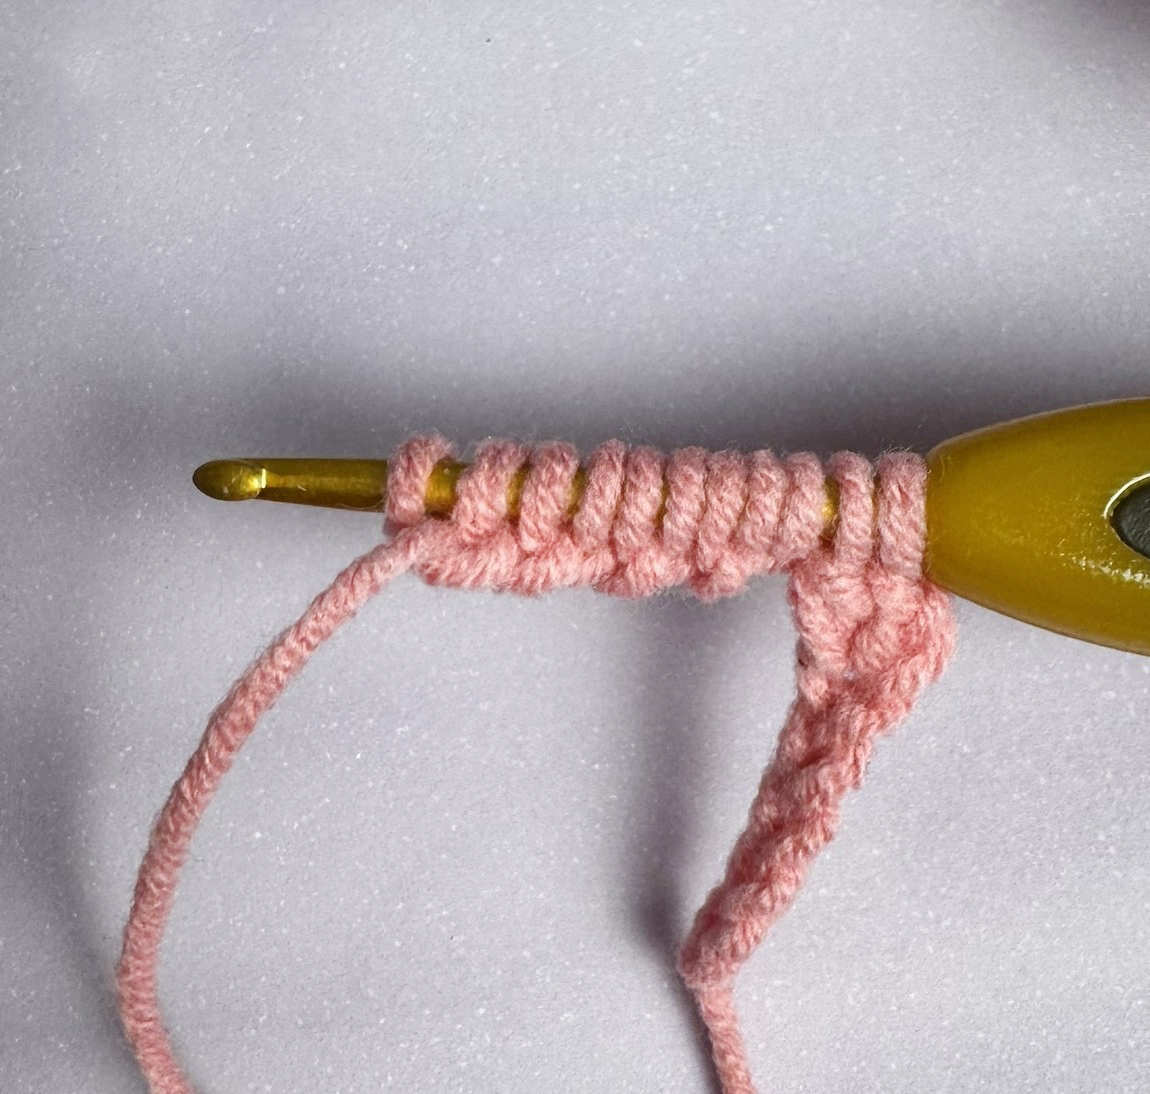
2. Then we alternate FP dc (front post dc) with BP dc (back post dc).
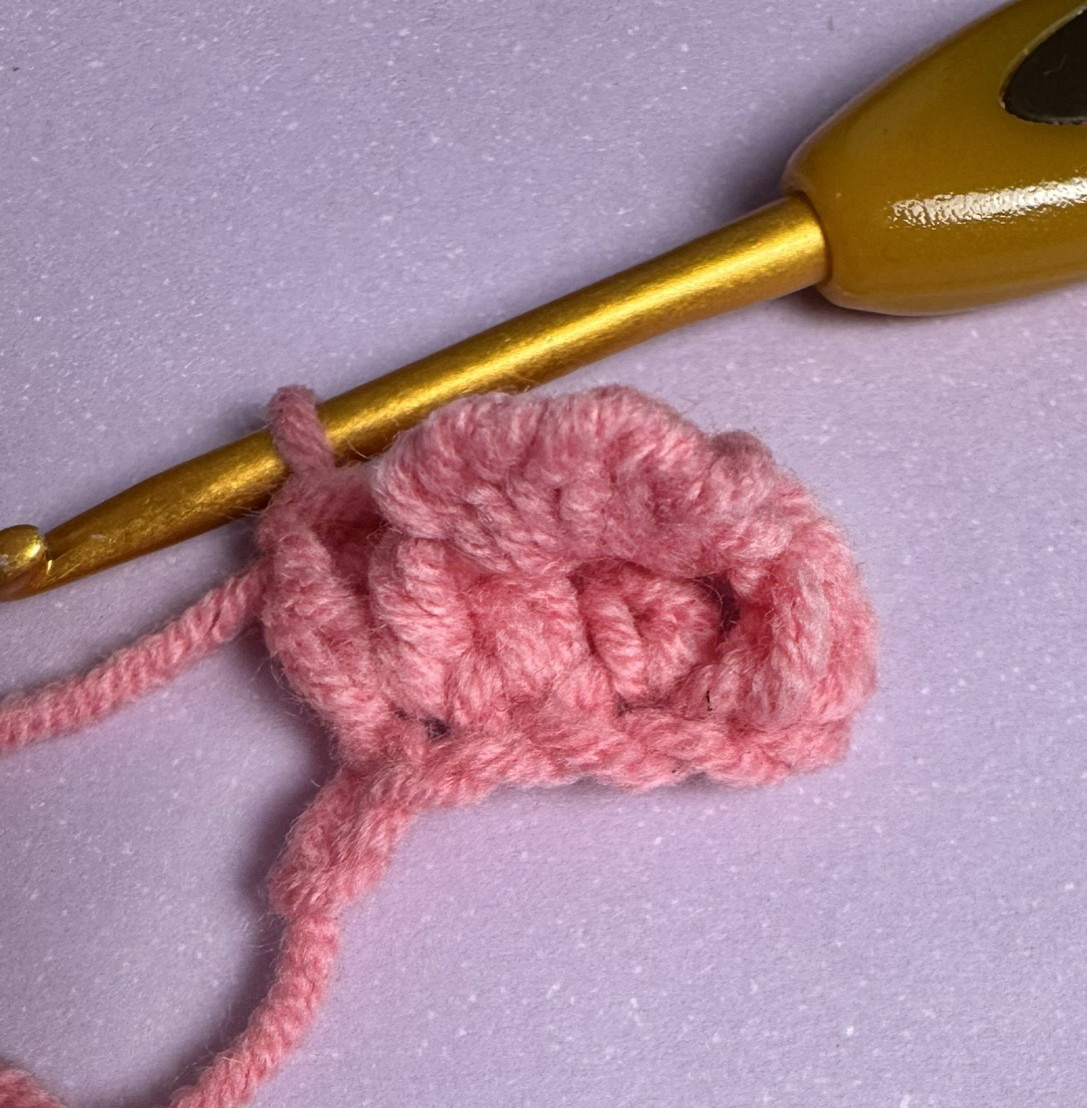
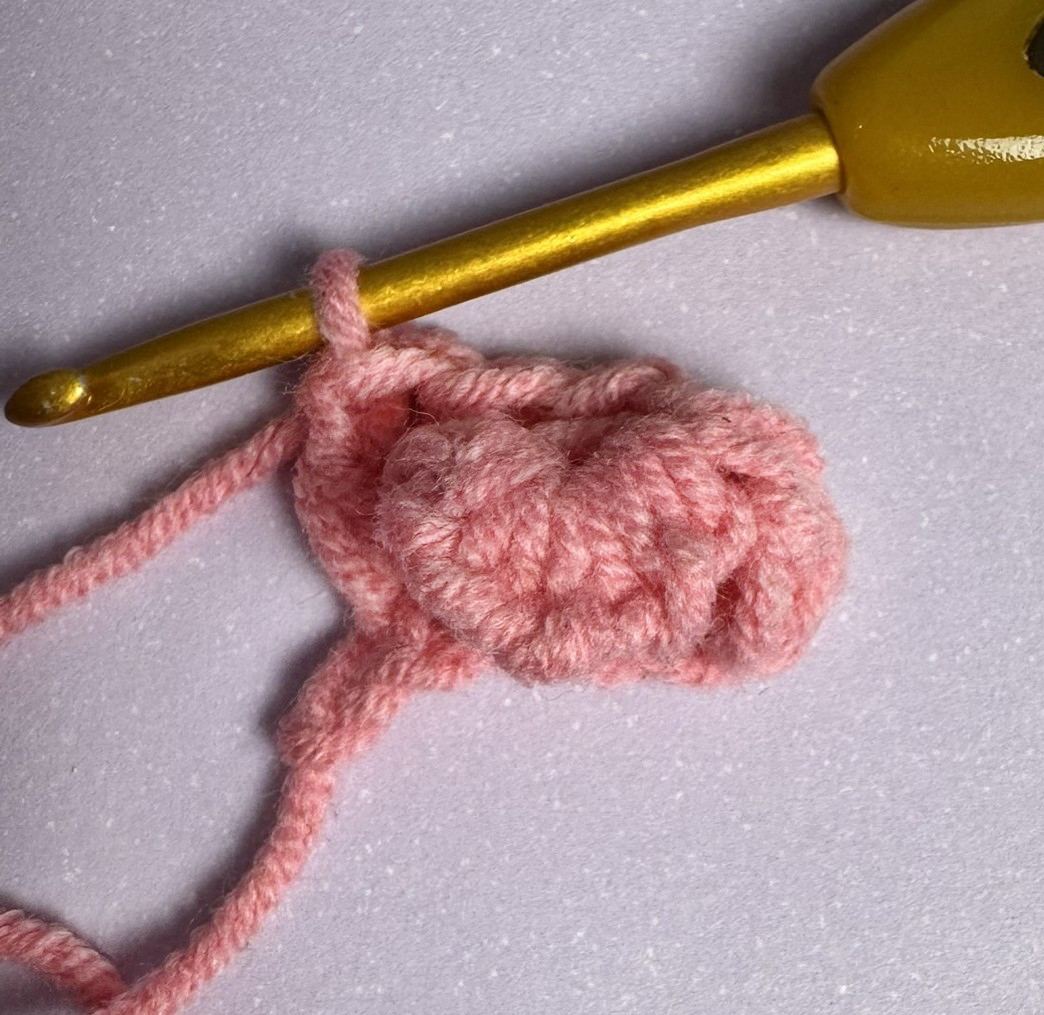
Crochet 25 post dc (starting with the Bp dc and then alternating it with FP dc). After that (crochet 2FP dc from the dc of the previous row) - repeat 7 times. It is like you increase but with FPdc, so by the end you’ll have 14 FPdc. See the picture below.
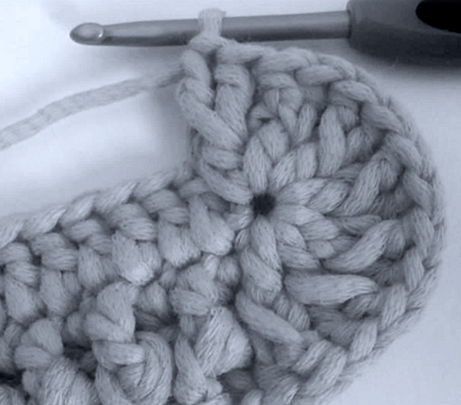
Crochet 25 post dc (starting with the Bp dc and then alternating it with FP dc). After that (crochet 2FP dc from the dc of the previous row) - repeat 7 times. (78)
.png)
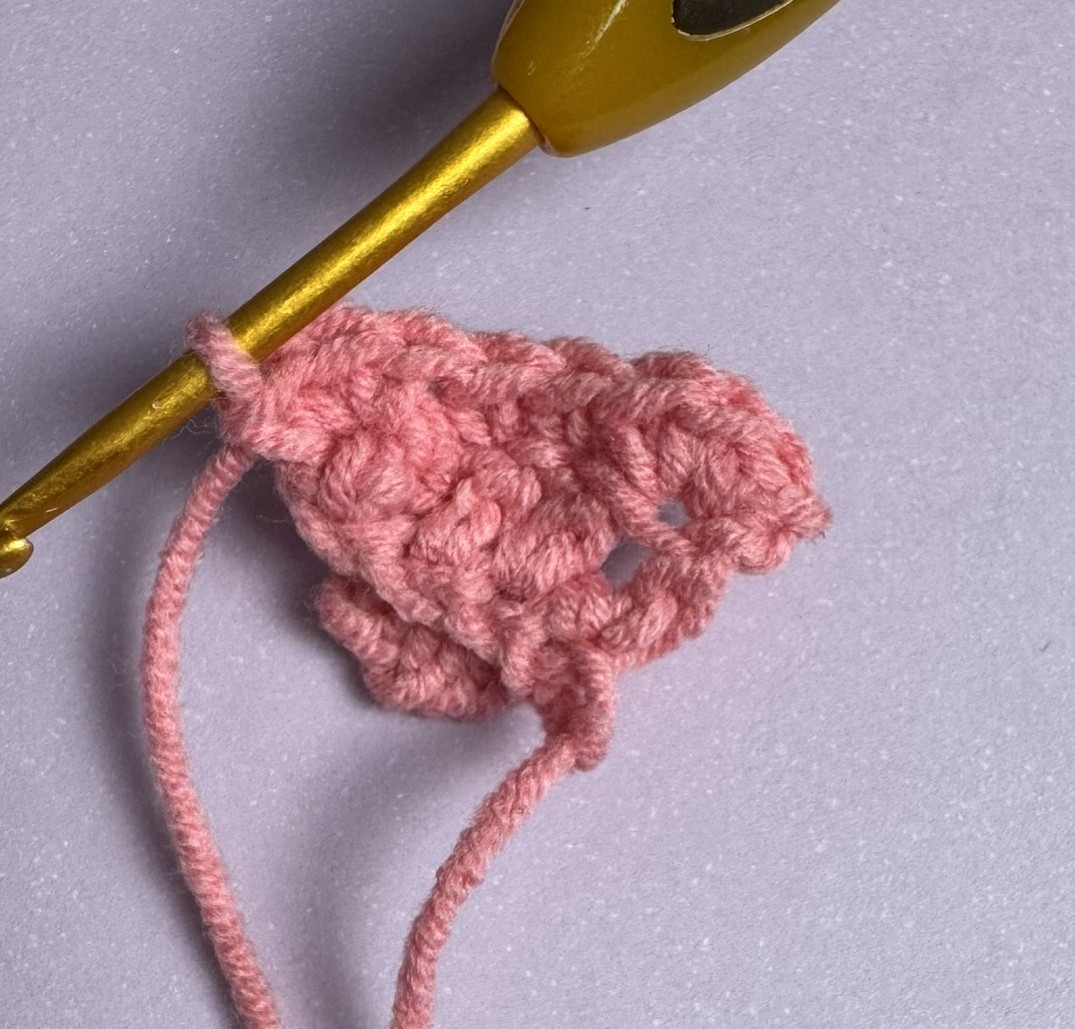
3. Crochet 25 post dc (starting with the Bp dc and then alternating it with FP dc). After that ( 2FP dc from the dc of the previous row, FPdc) - repeat 7 times. Crochet 25 post dc (starting with the Bp dc and then alternating it with FP dc). After that ( 2FP dc from the dc of the previous row, FPdc) - repeat 7 times. (92)
.png)
.png)
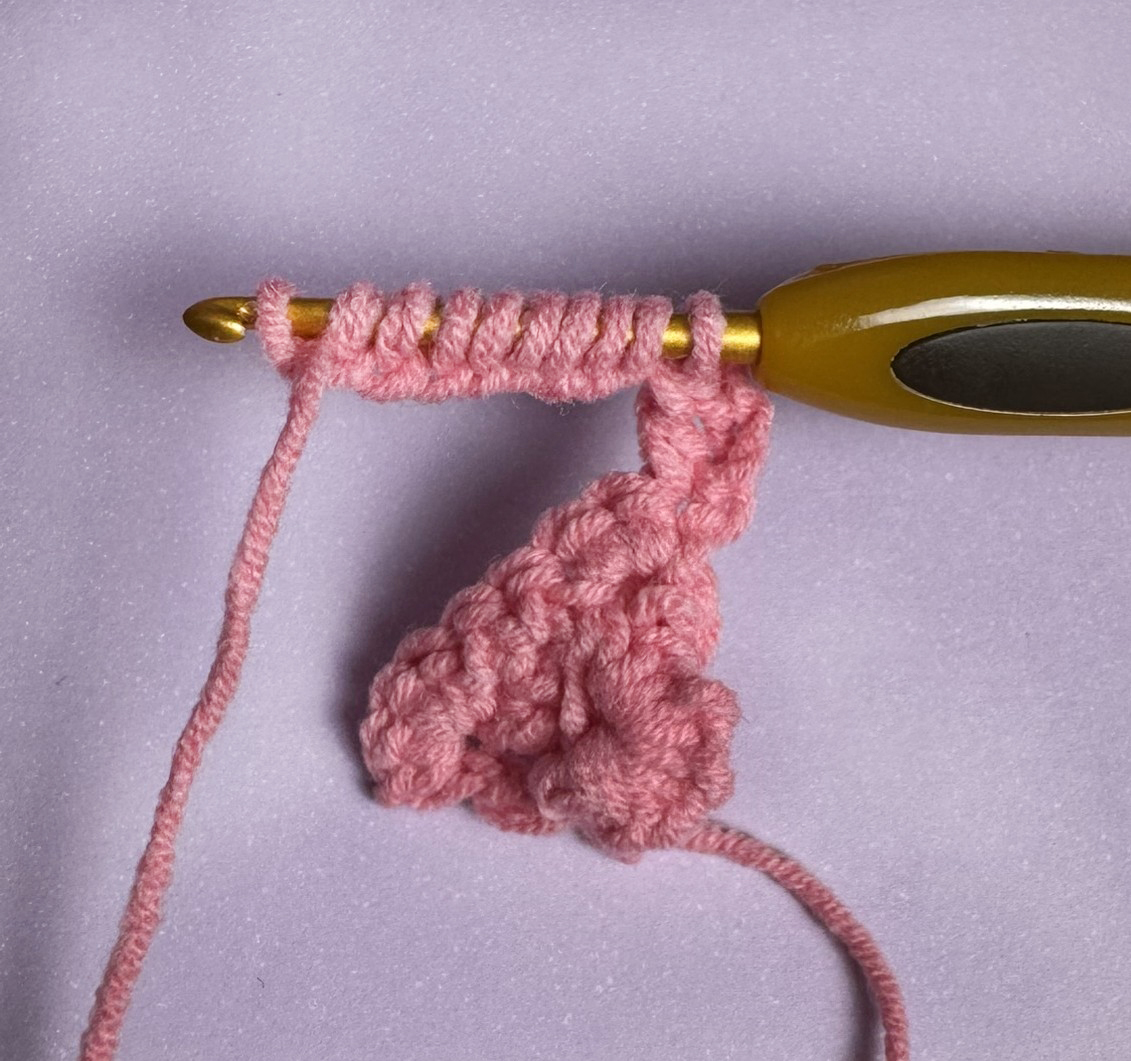
4- 29. Crochet 92 post dc (starting with the Bp dc and then alternating it with FP dc).
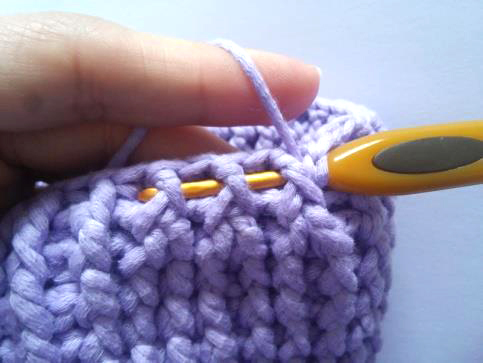
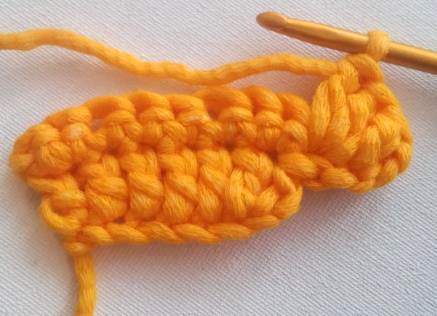
30. Crochet 29 post dc (starting with the Bp dc and then alternating it with FP dc), (2 FPdc tog, skip 1BPdc between them , crochet 1 BP dc.- for better understanding see the picture below)x 3,
Crochet 34 post dc, (2 FPdc tog, skip 1 BPdc between them , crochet 1 BP dc.- for better understanding see the picture below)x 3, Crochet 5 post dc (80)
31. Crochet 80 post dc (starting with the Bp dc and then alternating it with FP dc).
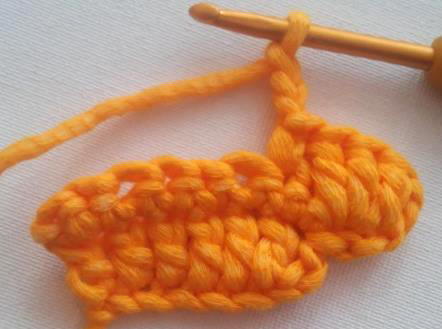
32. Crochet 29 post dc (starting with the Bp dc and then alternating it with FP dc), 3 FPdc tog, skip 2 BPdc between them,
Crochet 35 post dc (starting with the Bp dc and then alternating it with FP dc), 3 FPdc tog, skip 2 BPdc between them, crochet 6 post dc (72)
33. Crochet 27 post dc (starting with the Bp dc and then alternating it with FP dc),
3 FPdc tog, skip 2 BPdc between them, Crochet 31 post dc, 3 FPdc tog, skip 2 BPdc between them, crochet 4 post dc (64)
34. Crochet 25 post dc (starting with the Bp dc and then alternating it with FP dc),
3 FPdc tog, skip 2 BPdc between them, Crochet 27 post dc, 3 FPdc tog, skip 2 BPdc between them, crochet 2 post dc (56)
35. Crochet 23 post dc (starting with the Bp dc and then alternating it with FP dc),
3 FPdc tog, skip 2 BPdc between them, Crochet 23 post dc, 3 FPdc tog, skip 2 BPdc between them (48)
(48)
36- 45. Crochet 48 post dc (starting with the Bp dc and then alternating it with FP dc).
Fasten off, cut the thread.
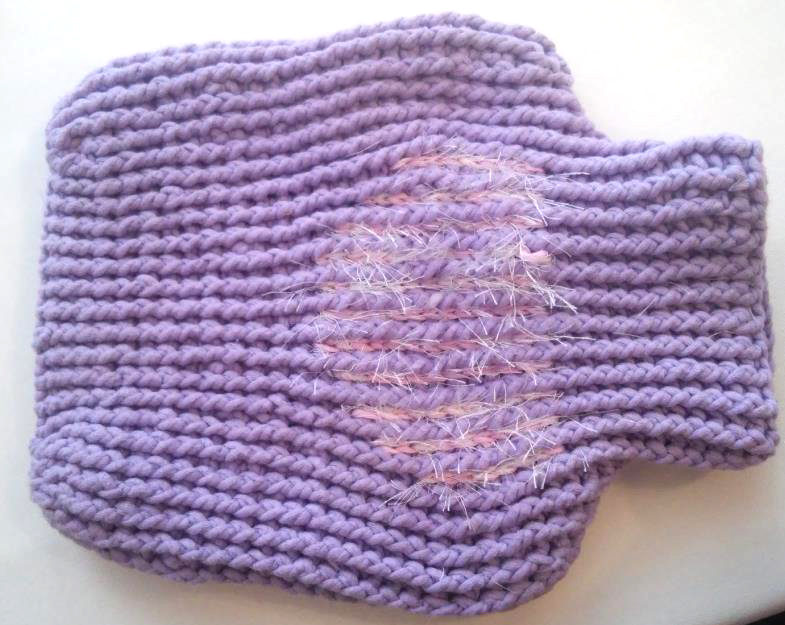
Crocheting the Belly
The belly is crocheted using slip stitches (sl sts). I used white Fresen yarn combined with pink cotton yarn, working with two strands held together. Of course, you can choose whichever color you prefer for the belly—whether it's fluffy wool or simple cotton, it's entirely up to you.
To crochet, insert the hook through the bag, yarn over, and pull the yarn through the loop. This creates the stripes, stitch by stitch.
.jpeg)
.jpeg)
.jpeg)
Foot (yellow)
Crochet 9 ch, starting in the 3 chain from the hook
1. 7 Dc, Turn the work
2. 1 inc, 5 Dc, 1 inc (9) Turn the work
3. ( 3 ch, 3 Dc in 1 stitch of the previous row, skip 1 stitch, 1 sc)x 3 times
Fasten off leaving a long thread for sewing.
Carefully sew the feet on at the bottom, behind the belly strip, and secure the thread well.
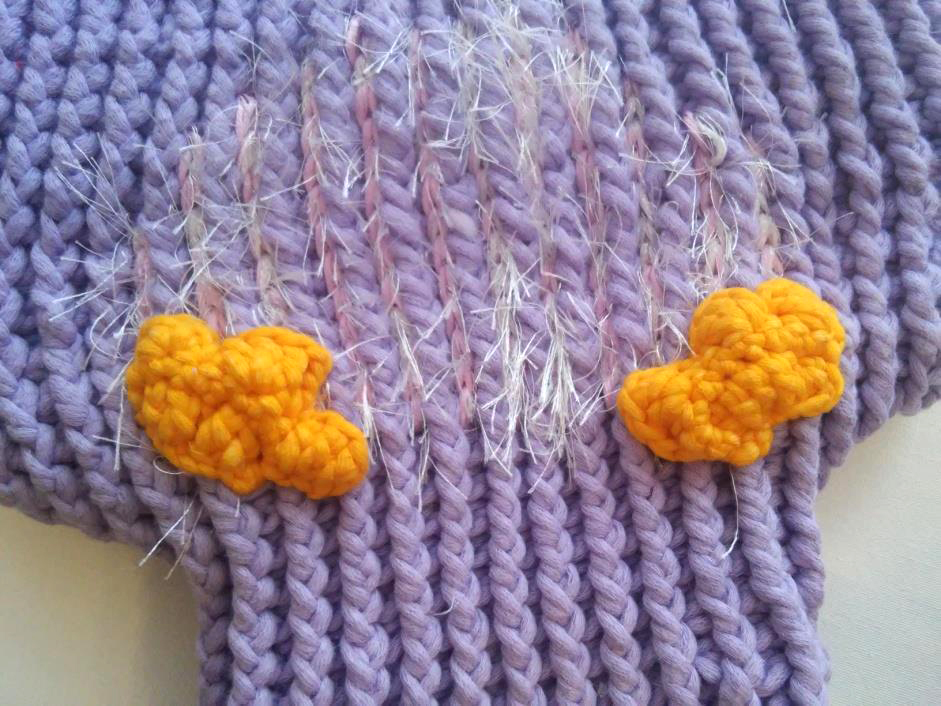
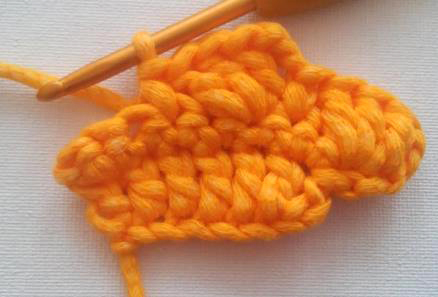
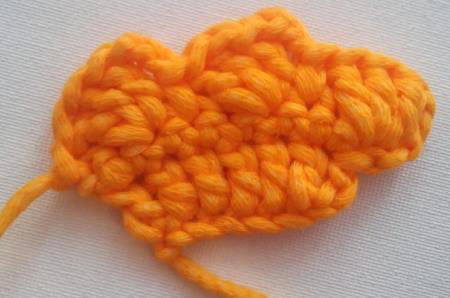
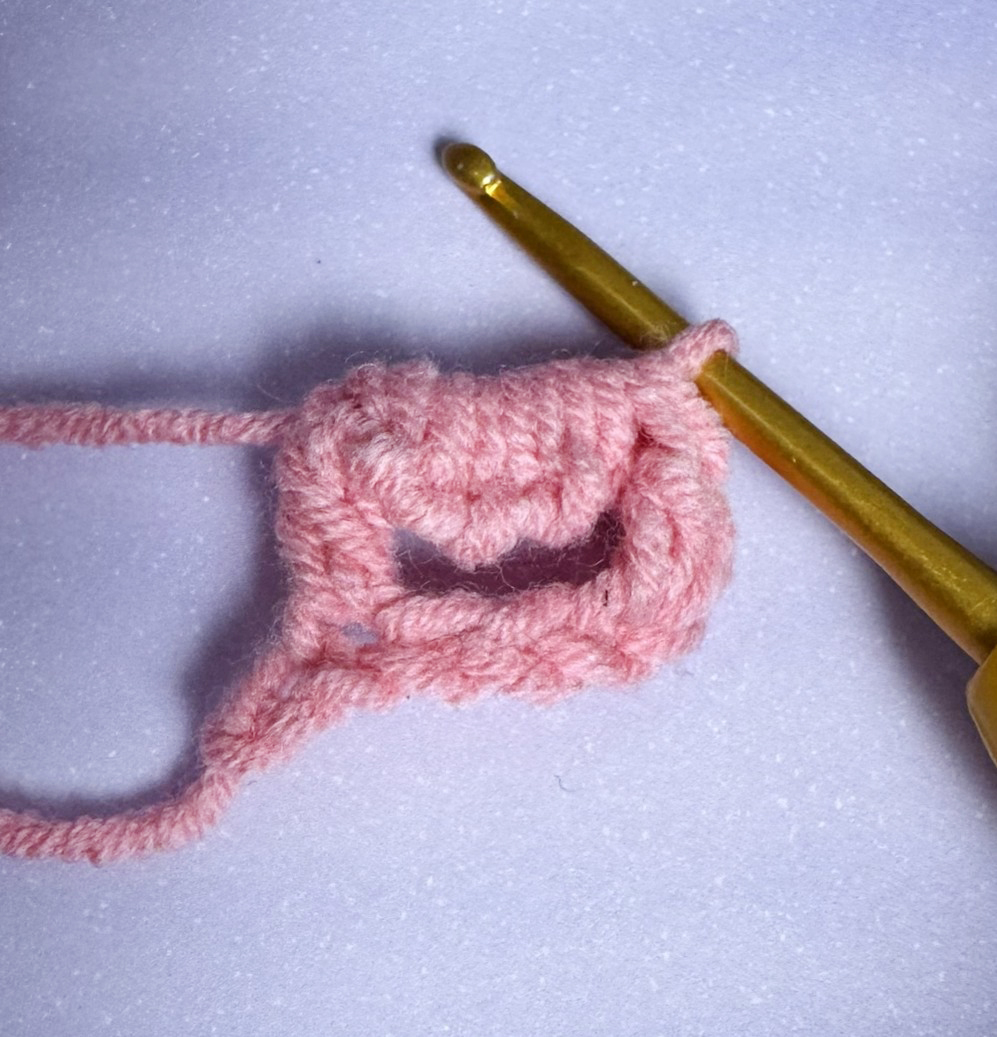
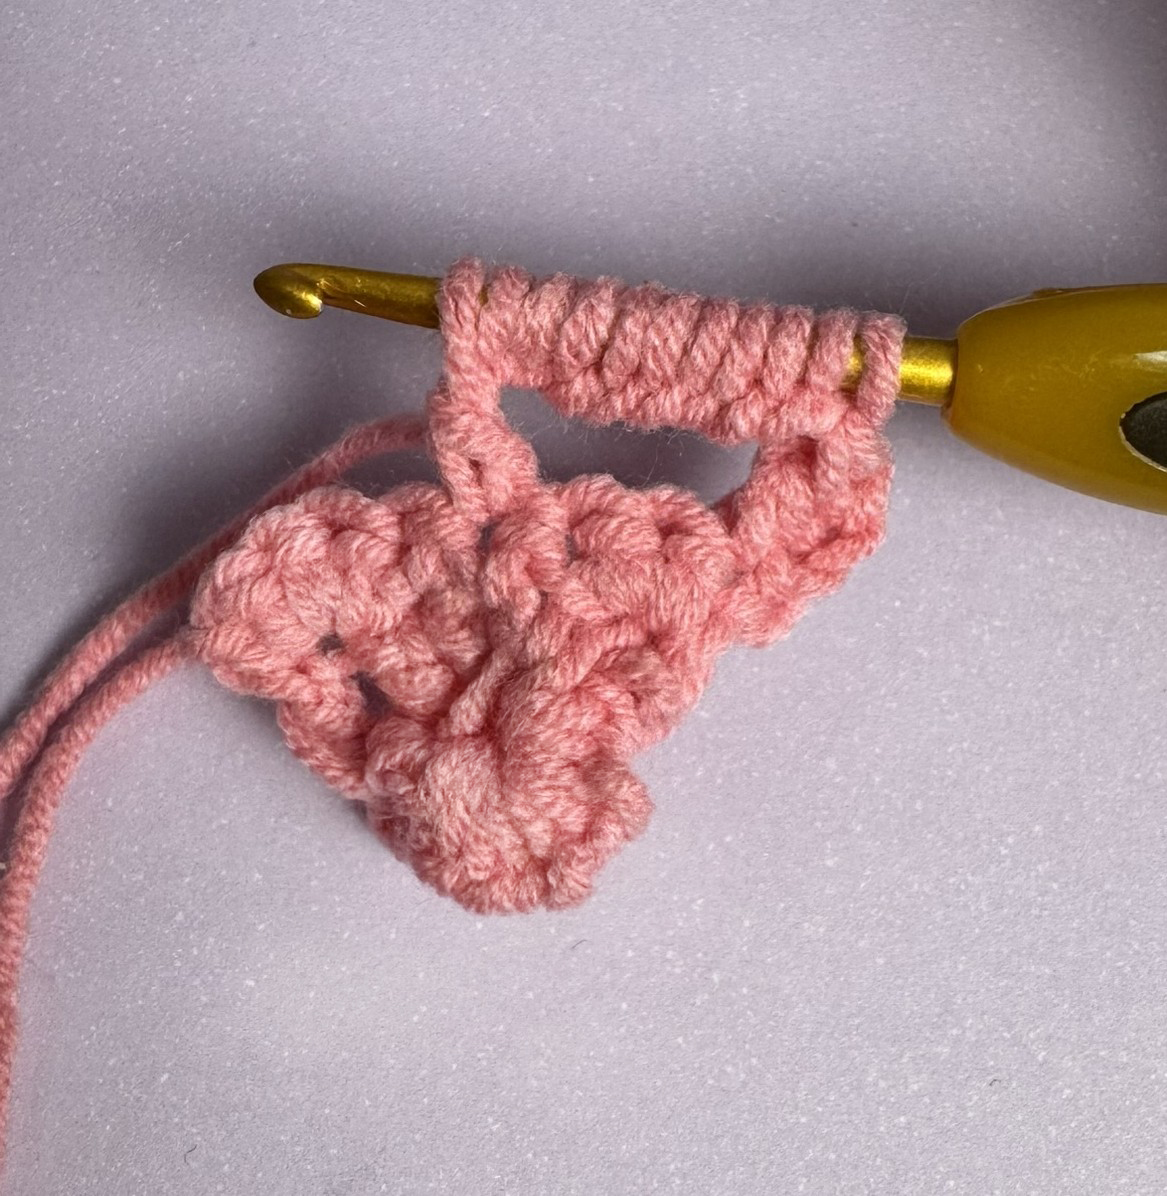
Wings (make 2)
Chain 7,
1. Starting in the 3rd chain from the hook: 1 DC, chain 9, following the pattern and the pictures to understand the stitch pattern used:
*Make loop out of yarn, hook in and pull through.
Skip 2 chains, in the 3rd CH crochet 1 DC,
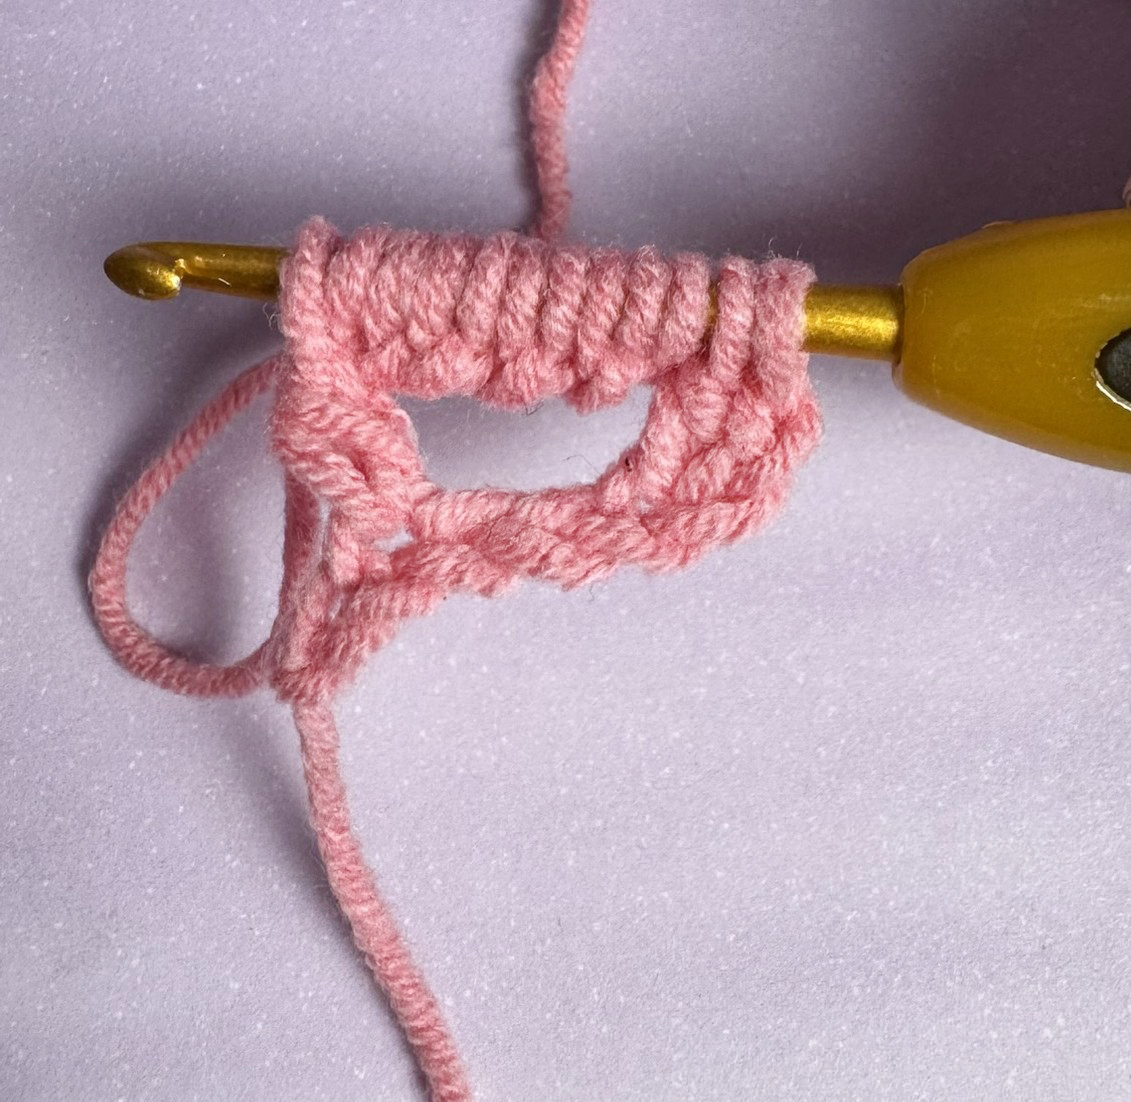
Yarn over and go through all the loops on the hook – see the picture. Yarn over and pull through the loop.
Go back to the 2 skipped CH, and crochet 2 DC in each CH,
1 DC in the 3rd CH (we have crocheted into that stitch already and we add now 1 more DC. If you look at the picture you can see what I mean.)
2. Turn the work, 1 CH, 3 sc in 1, 2 sc, skip 2 ST, 3 sc in 1. (8)
3. 3 CH, (1 DC, 9 Loops over the hook, skip 2 ST, in the 3rd ST crochet 1 DC. Yarn over and pull through all loops on the hook. Yarn over and go through all loops. Go back to the 2 skipped ST and crochet 2 DC in the first skipped ST, and 1 DC in the next ST) - repeat 3 times. 3. 3 CH, (1 DC, 9 Loops over the hook, skip 2 ST, in 3rd ST 1 DC. Yarn over and pull thru all loops on the hook. Yarn over and thru all loops. Back to the 2 skipped ST and work 2 DC in this skipped ST, 1 DC in next ST) repeat again 1 times.

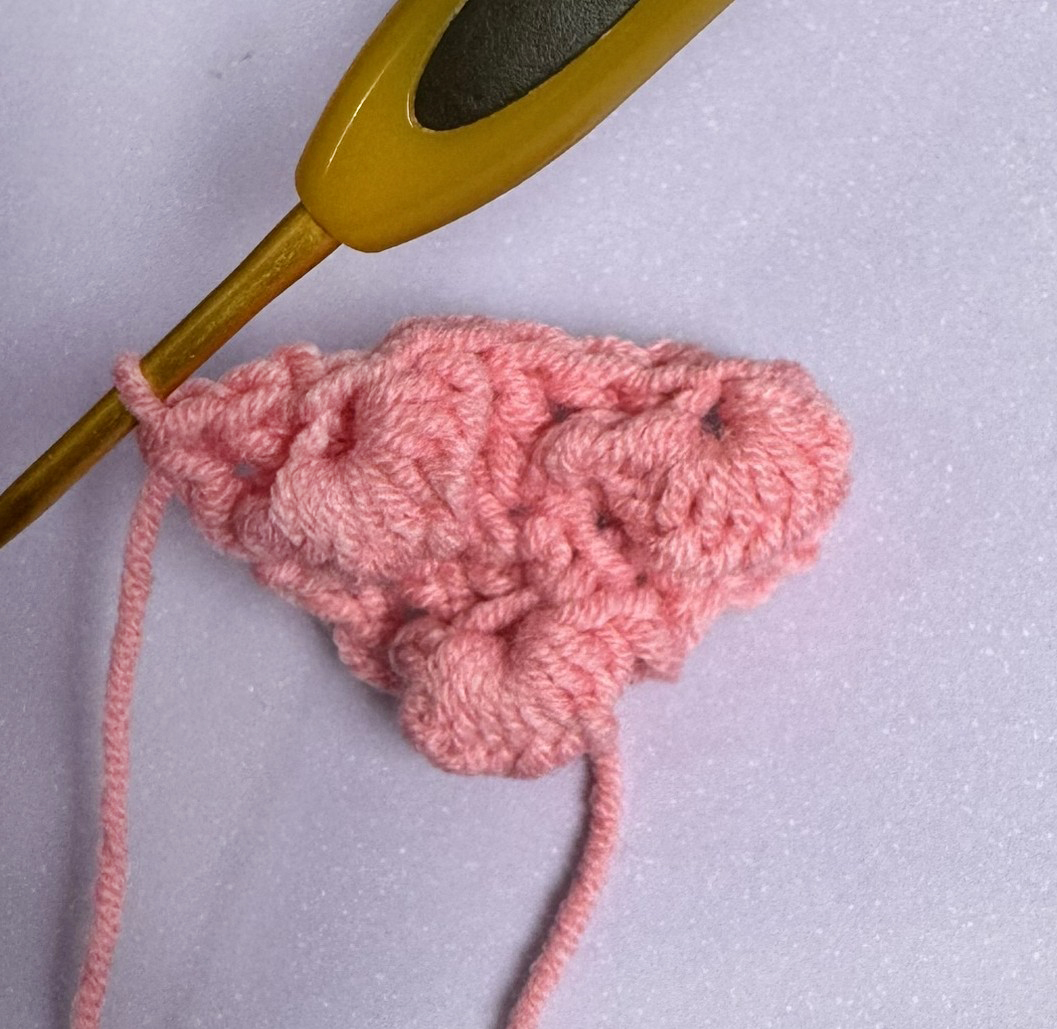
4. Turn the work, 1 CH, 3 sc in 1, 1 sc, skip 2 ST , 4 sc, skip 2 ST, 1 sc, 3 sc in 1 (12)
5. Turn the work, 3 CH, (1 DC, 9 Loops over the hook, skip 2 ST, in the 3rd ST crochet 1 DC. Yarn over and pull through all loops on the hook. Yarn over and go through all loops. Go back to the 2 skipped ST and crochet 2 DC in the first skipped ST, and 1 DC in the next ST) - repeat 3 times.
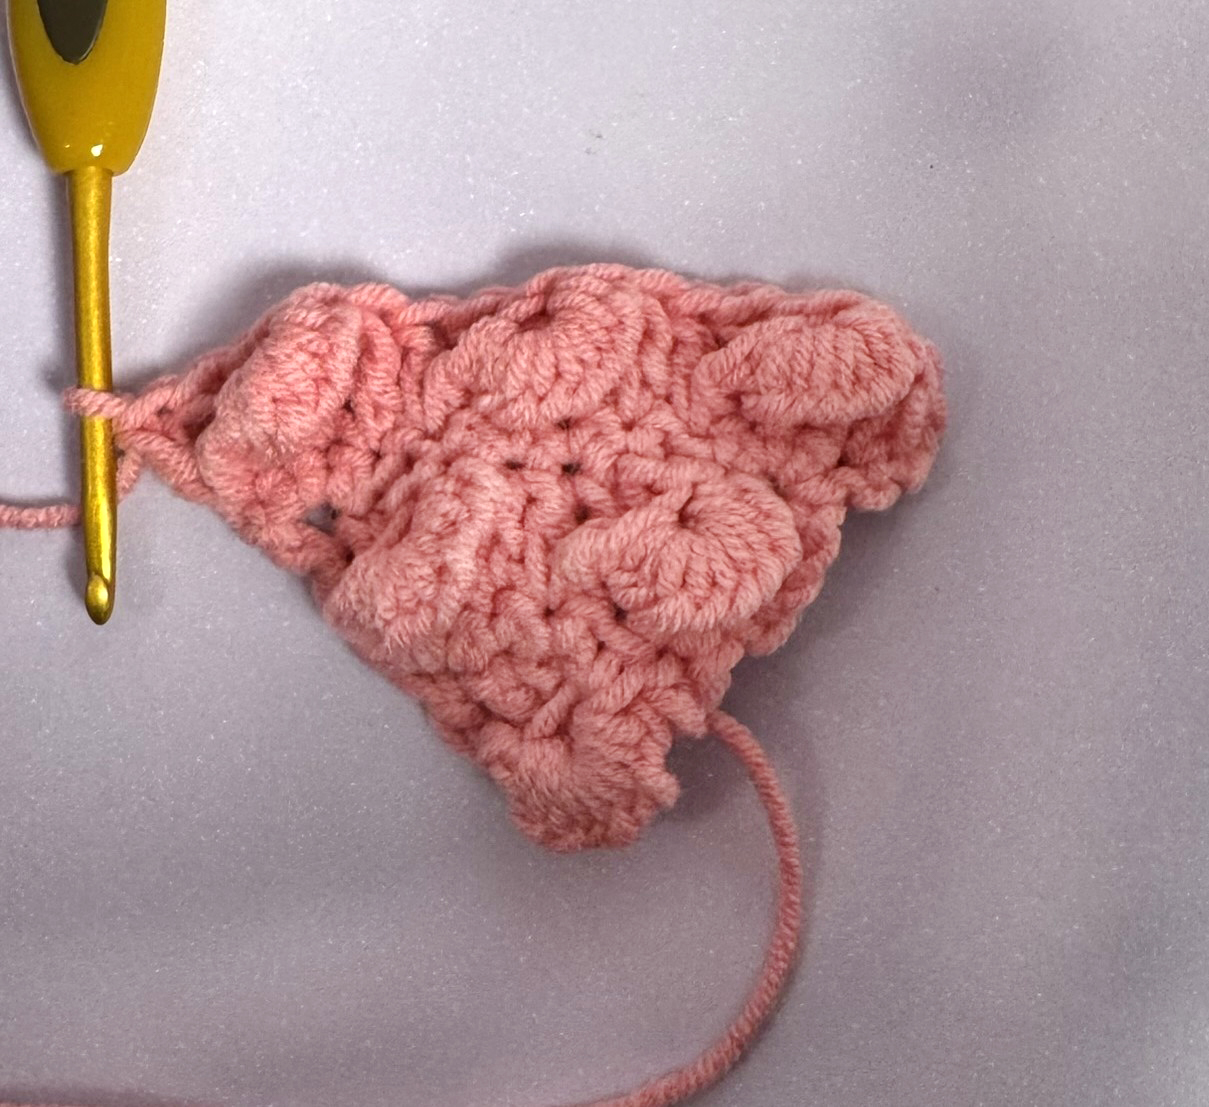
6. Turn the work, 1 CH, 2 sc, skip 2 ST , 4 sc, skip 2 ST, 4 sc, skip 2 ST, 2 sc (12)
7. Turn the work, 3 CH, (1 DC, 9 Loops over the hook, skip 2 ST, in the 3rd ST crochet 1 DC. Yarn over and pull through all loops on the hook. Yarn over and go through all loops. Go back to the 2 skipped ST and crochet 2 DC in the first skipped ST, and 1 DC in the next ST) - repeat 3 times. 3. 3 CH, (1 DC, 9 Loops over the hook, skip 2 ST, in 3rd ST 1 DC. Yarn over and pull thru all loops on the hook. Yarn over and thru all loops. Back to the 2 skipped ST and work 2 DC in this skipped ST, 1 DC in next ST) repeat 2 times.
8. Turn the work, 1 CH, 2 sc, skip 2 ST , 4 sc, skip 2 ST, 4 sc, skip 2 ST, 2 sc (12)
9. Turn the work, 3 CH, (1 DC, 9 Loops over the hook, skip 2 ST, in the 3rd ST crochet 1 DC. Yarn over and pull through all loops on the hook. Yarn over and go through all loops. Go back to the 2 skipped ST and crochet 2 DC in the first skipped ST, and 1 DC in the next ST) - repeat 3 times. 3. 3 CH, (1 DC, 9 Loops over the hook, skip 2 ST, in 3rd ST 1 DC. Yarn over and pull thru all loops on the hook. Yarn over and thru all loops. Back to the 2 skipped ST and work 2 DC in this skipped ST, 1 DC in next ST) repeat 2 times.
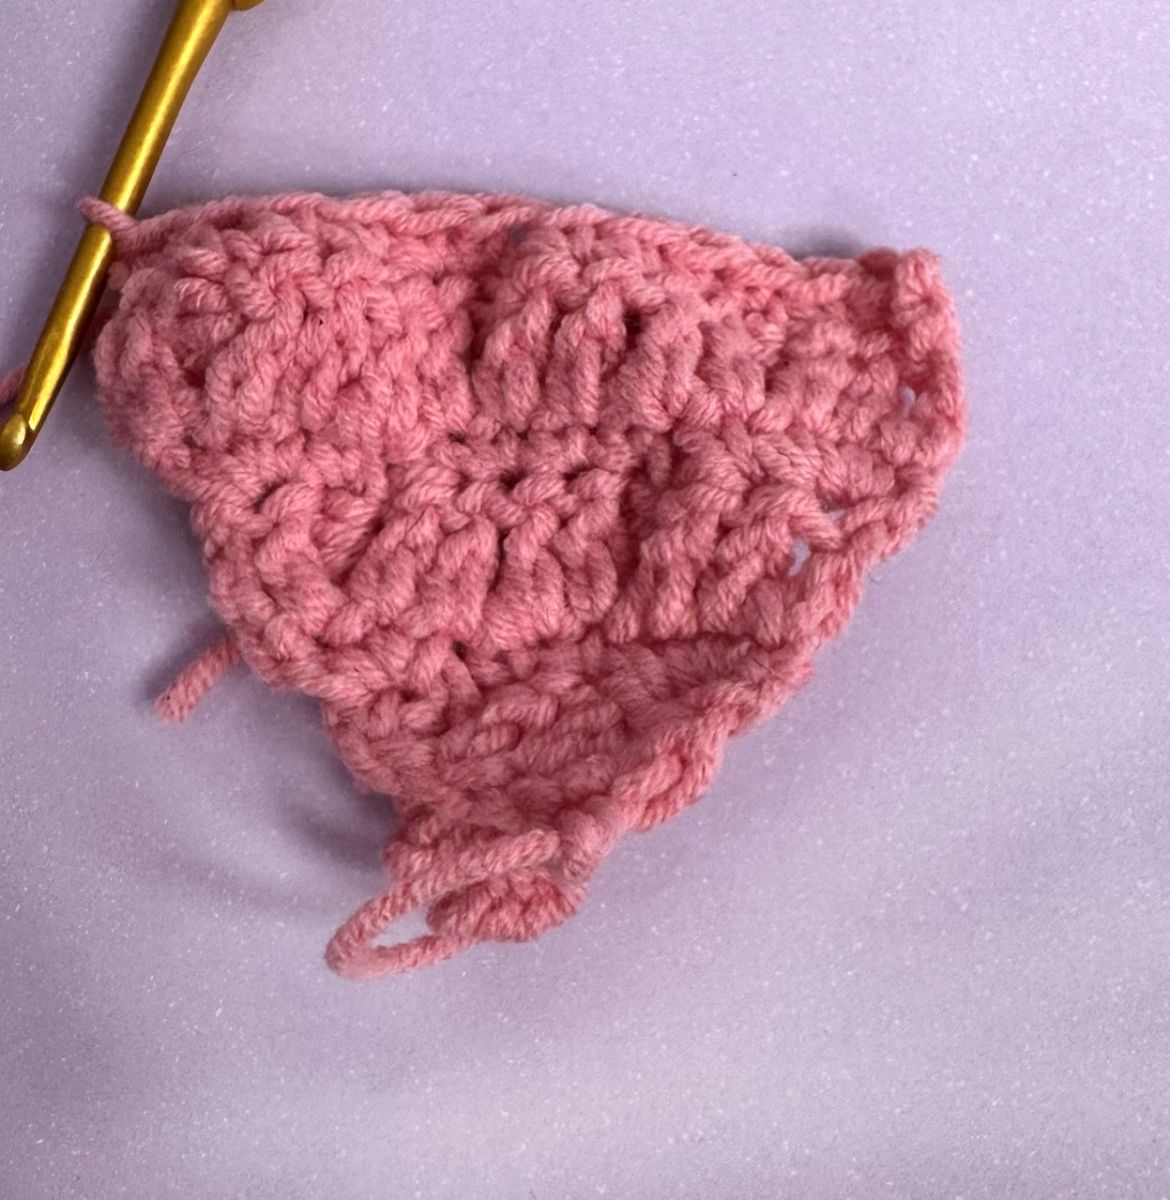
Fasten off leaving a long thread for sewing.


Sew the wings to the right and left sides of the bag in the 14th row and secure the thread well.
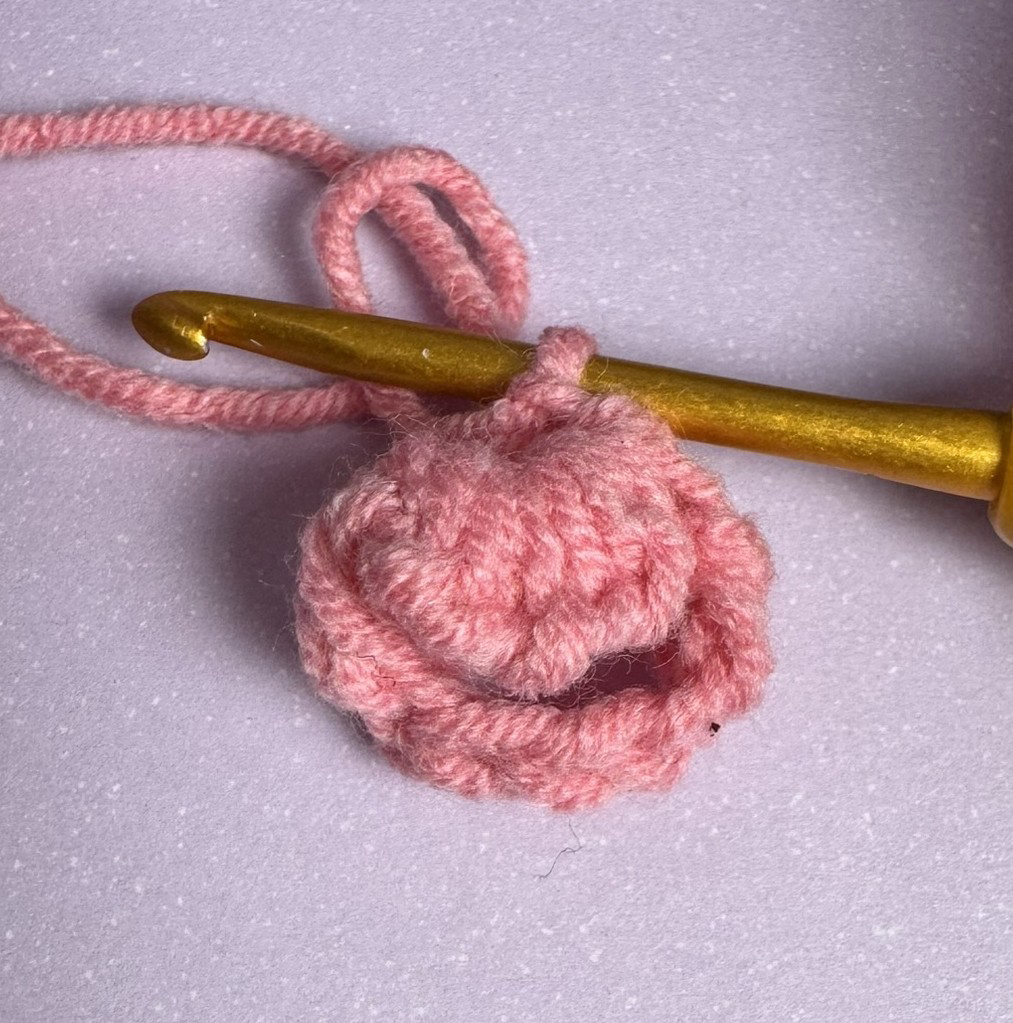
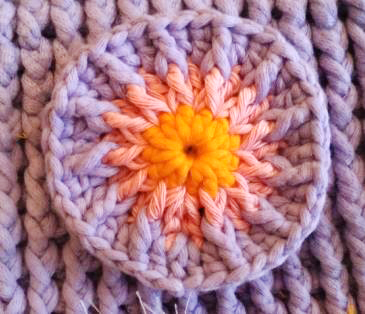
Eyes
Yellow 1. 12 DC in a ring, close the ring with slst
Color change pink 2. 3 CH, 3 CH, (1 FPdc, 1 DC)x12 times, slst (24)
Color change Purple 3. 3 CH, (1 FPdc, 1 DC inc)x12 times, slst (36)
Crochet with crab stitches.
Fasten off leaving a long thread for sewing.
The beak
Crochet 2 ch,
1. starting in 2nd: 3 SC in 1 , turn the work
2. 1 CH, 3 SC, turn the work
3. 1 CH, 1 SC inc, 1 SC, 1 SC inc, turn the work (5)
4. 1 CH, 5 SC, turn the work
5. 1 CH, 1 SC inc, 3 SC, 1 SC inc, turn the work (7)
6. 1 CH, 7 SC, turn the work
7. 1 CH, 2 SC dec, 3 SC, 2 SC dec, turn the work (5)
8. 1 CH, 5 SC, turn the work
9. 1 CH, 2 SC dec, 1 SC, 2 SC dec, turn the work (3)
10. 3 SC
Crochet 3 ST together
Fasten off leaving a long thread for sewing.

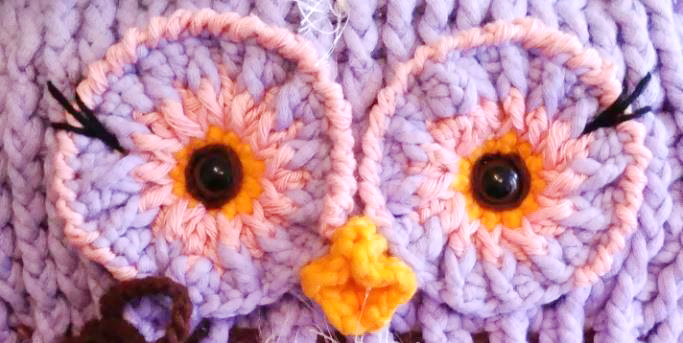
Back to the Eyes
For the eyes, I used safety eyes and inserted them through the center of the stitches. They are securely fastened from the back. Alternatively, you can sew on button eyes or crochet your own—just use whatever materials you have at home and prefer.
You can also sew the eyes on from the back with ease. Once they're securely in place, attach them to the bag. Feel free to experiment with the positioning—place them wherever you think looks best. I positioned mine very close together at the top center of the bag.
Make sure to sew the eyes on carefully so they stay firmly attached. To give the owl a more expressive look, I embroidered small eyelashes using black thread. This adds a sweet and loving touch to its face.
Once the eyes are in place, sew the beak directly below, right between the eyes. Refer to the image below for guidance.
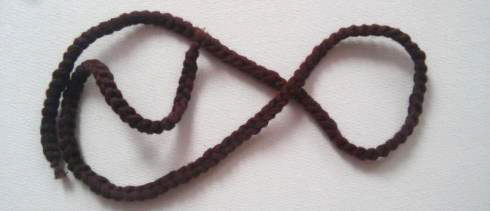
If you'd like, you can add a few decorative touches to your owl. Simply crochet strings of your desired length using chain stitches (ch). Attach them between the belly and the head—around the 14th row. Then pull the strings together and tie them into a neat, pretty knot.
For the ears: Using a needle, thread yarn through the stitches at both top corners of the bag—right and left. Gently pull the yarn tight and tie a secure knot. This creates the cute little ears.

Ready!


