☀️ Summer brings sunshine, icy fingers, barefoot walks in the garden—and lots of tousled hair in your face. Especially when everything happens at once in family life—packing lunchboxes, searching for your favorite dress, quickly applying sunscreen—it's so valuable to have little helpers that make the day easier.
These scrunchies are exactly that: small everyday heroes that not only tame braids but also add color to life. They are quick to crochet, require not much material—and simply make you feel good when wearing them. Whether for yourself or your child, as a small gift or spontaneous summer project: you can create a lot of joy with little effort.
Scrunchies—in other words, soft hair ties with fabric or crochet edges—are not only practical but also super quick to make yourself. In this blog post, I’ll show you two simple crochet variations that perfectly match my hairbands, which will soon be available in the shop.
And the best part? If you have leftover yarn from your last hairband, you can turn a few stitches into scrunchies that match perfectly—ideal for a matching family picnic look or just to add a little “we belong together” feeling during the next visit to the playground.
What I also find especially wonderful: you can reuse old, discolored, or dirty hairbands that no longer have removable stains—and give them a new life with just a few stitches. From something everyday, a little heart project emerges that becomes completely personal.
You don’t need large chunks of time or special yarn. Maybe you still have a small leftover from your last crochet project? Then go ahead—within a few minutes, you’ll create a cheerful scrunchie that’s perfect for your summer outfit—or for your daughter’s.
And you know what? It doesn’t have to be perfect. It’s not about counting perfect stitches but about creating a moment for yourself—between laundry, dinner, and bedtime stories. A moment in which you craft something with your hands that accompanies you in everyday life. 💛
Crochet Two Simple Scrunchies
🧶 What You Need:
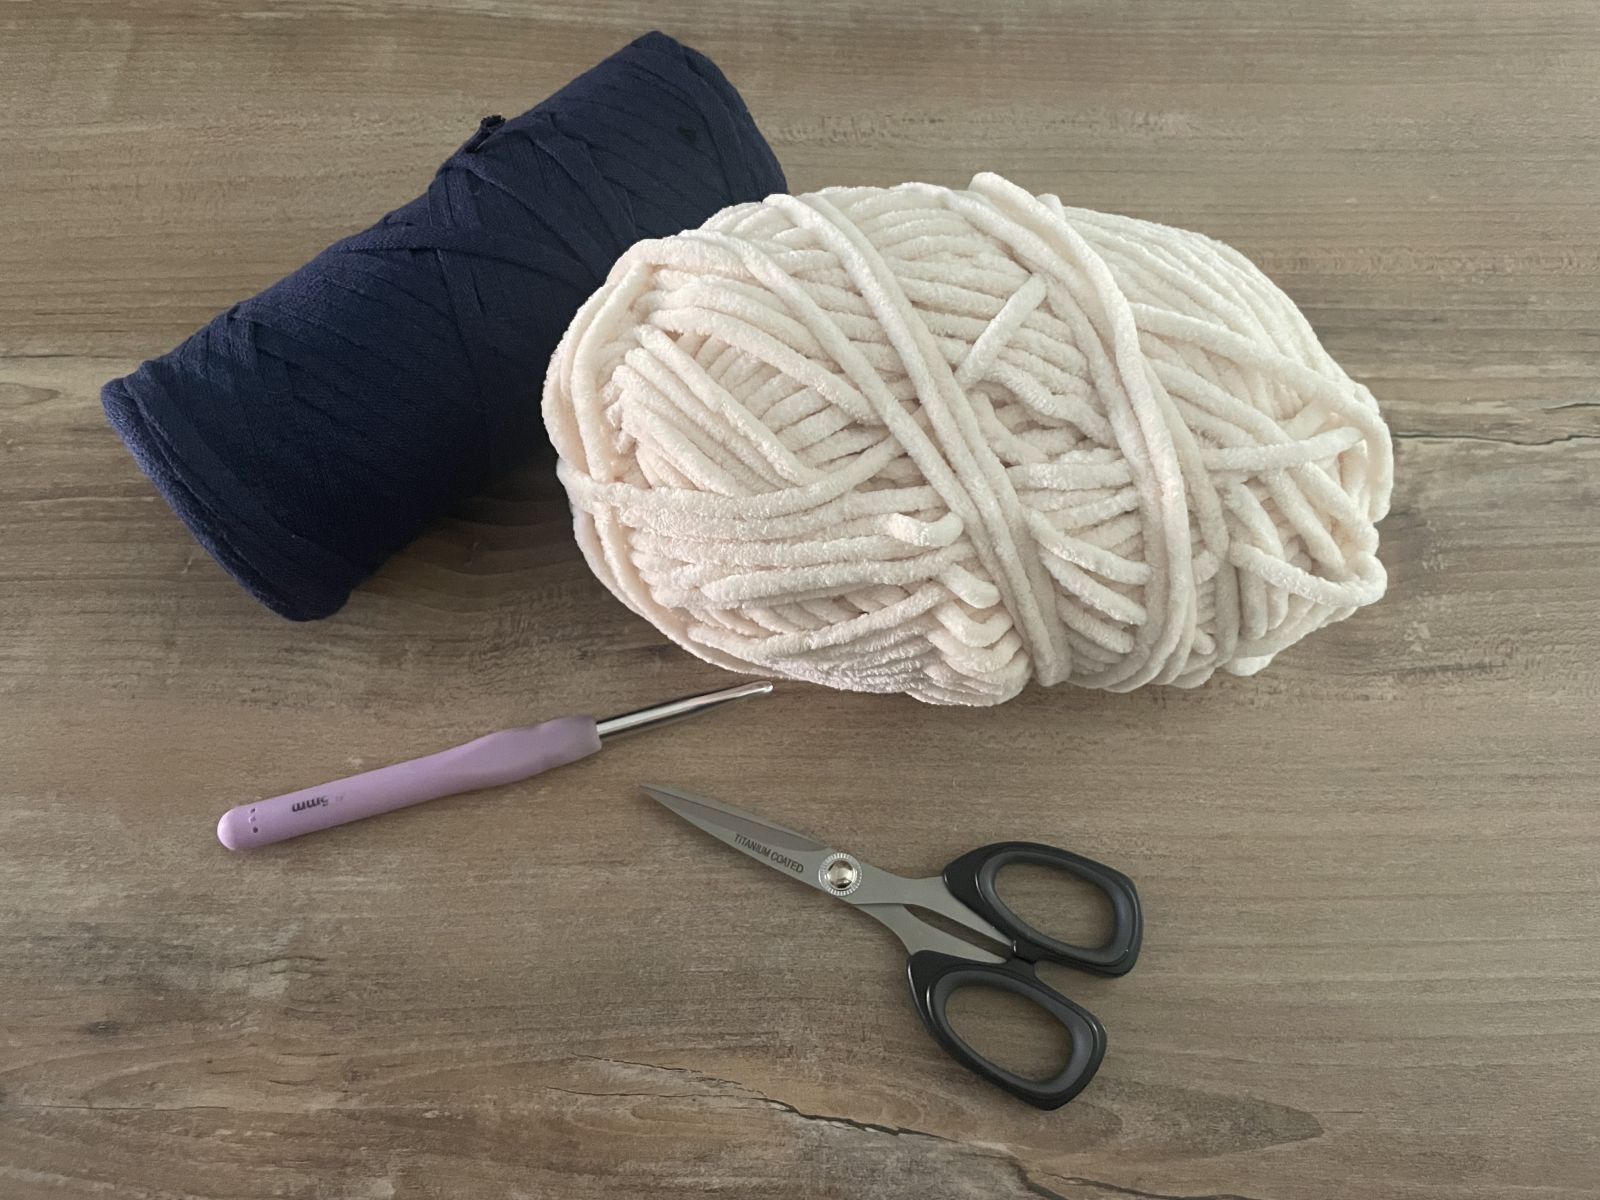
- A Few Yarn Remnants (Chenille yarn works just as well as cotton or ribbon yarn, so feel free to choose your favorite yarn or just use leftover scraps). I combined chenille yarn with ribbon yarn in my suggestions—those who know me know I love experimenting with different types of yarn.
- A crochet hook that matches your yarn
- A hair elastic
- Scissors
- Yarn needle for weaving in ends
🧶 Here is how to do it:
We will use the following stitches:
- Chain stitch: Pull the loop through the hook
- Slip stitch: Insert the hook into a stitch, pull the yarn through, and then pull it through the loop on the hook
- Single crochet: Insert the hook into a stitch, pull the yarn through, then yarn over and pull through both loops on the hook
- Half double crochet: Yarn over, insert the hook into the next stitch, pull the yarn through, then yarn over and pull through all three loops on the hook
- Double crochet: Yarn over, insert the hook into the next stitch, pull the yarn through (three loops on hook), yarn over, pull through the first two loops, yarn over again, then pull through the last two loops
Option 1 – Simple & Everyday Wear
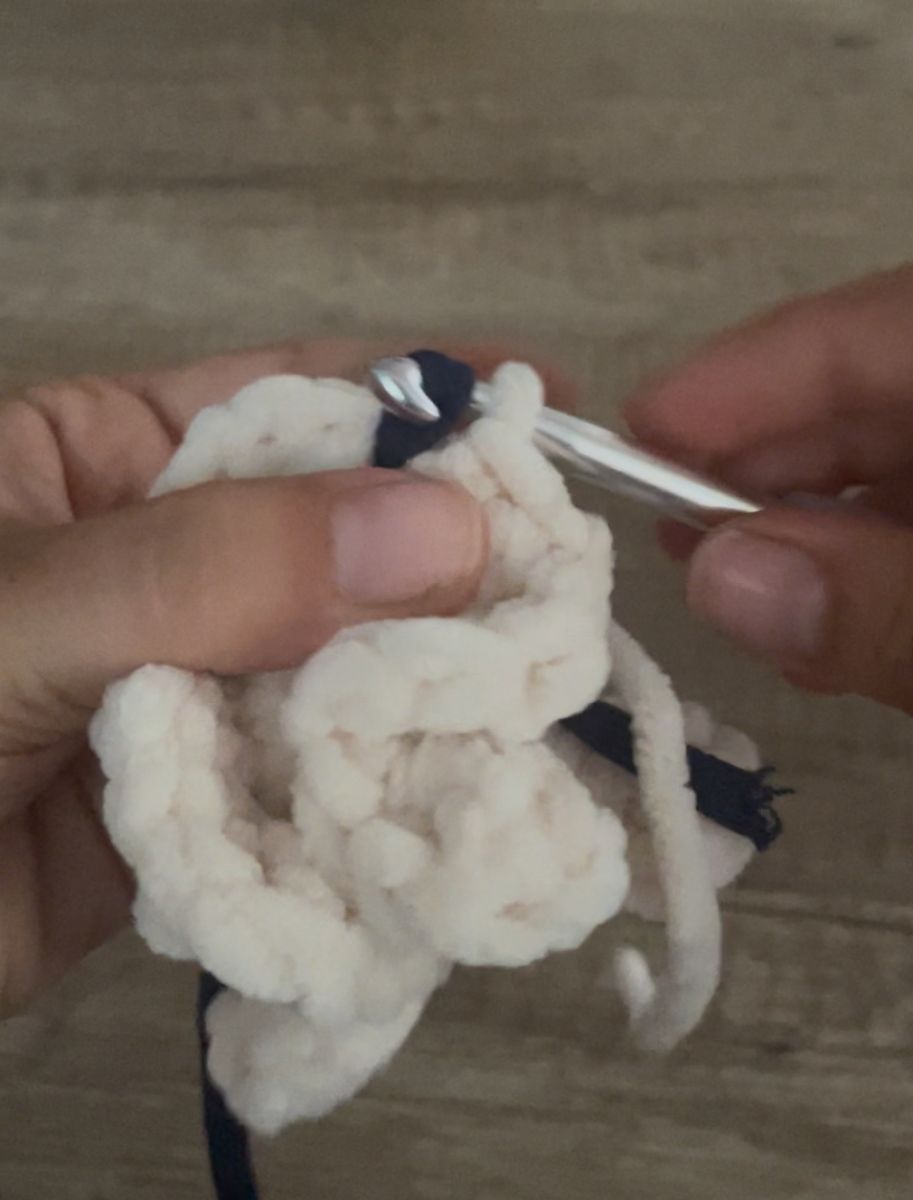
1. Crochet Single Crochets Around a Hair Elastic
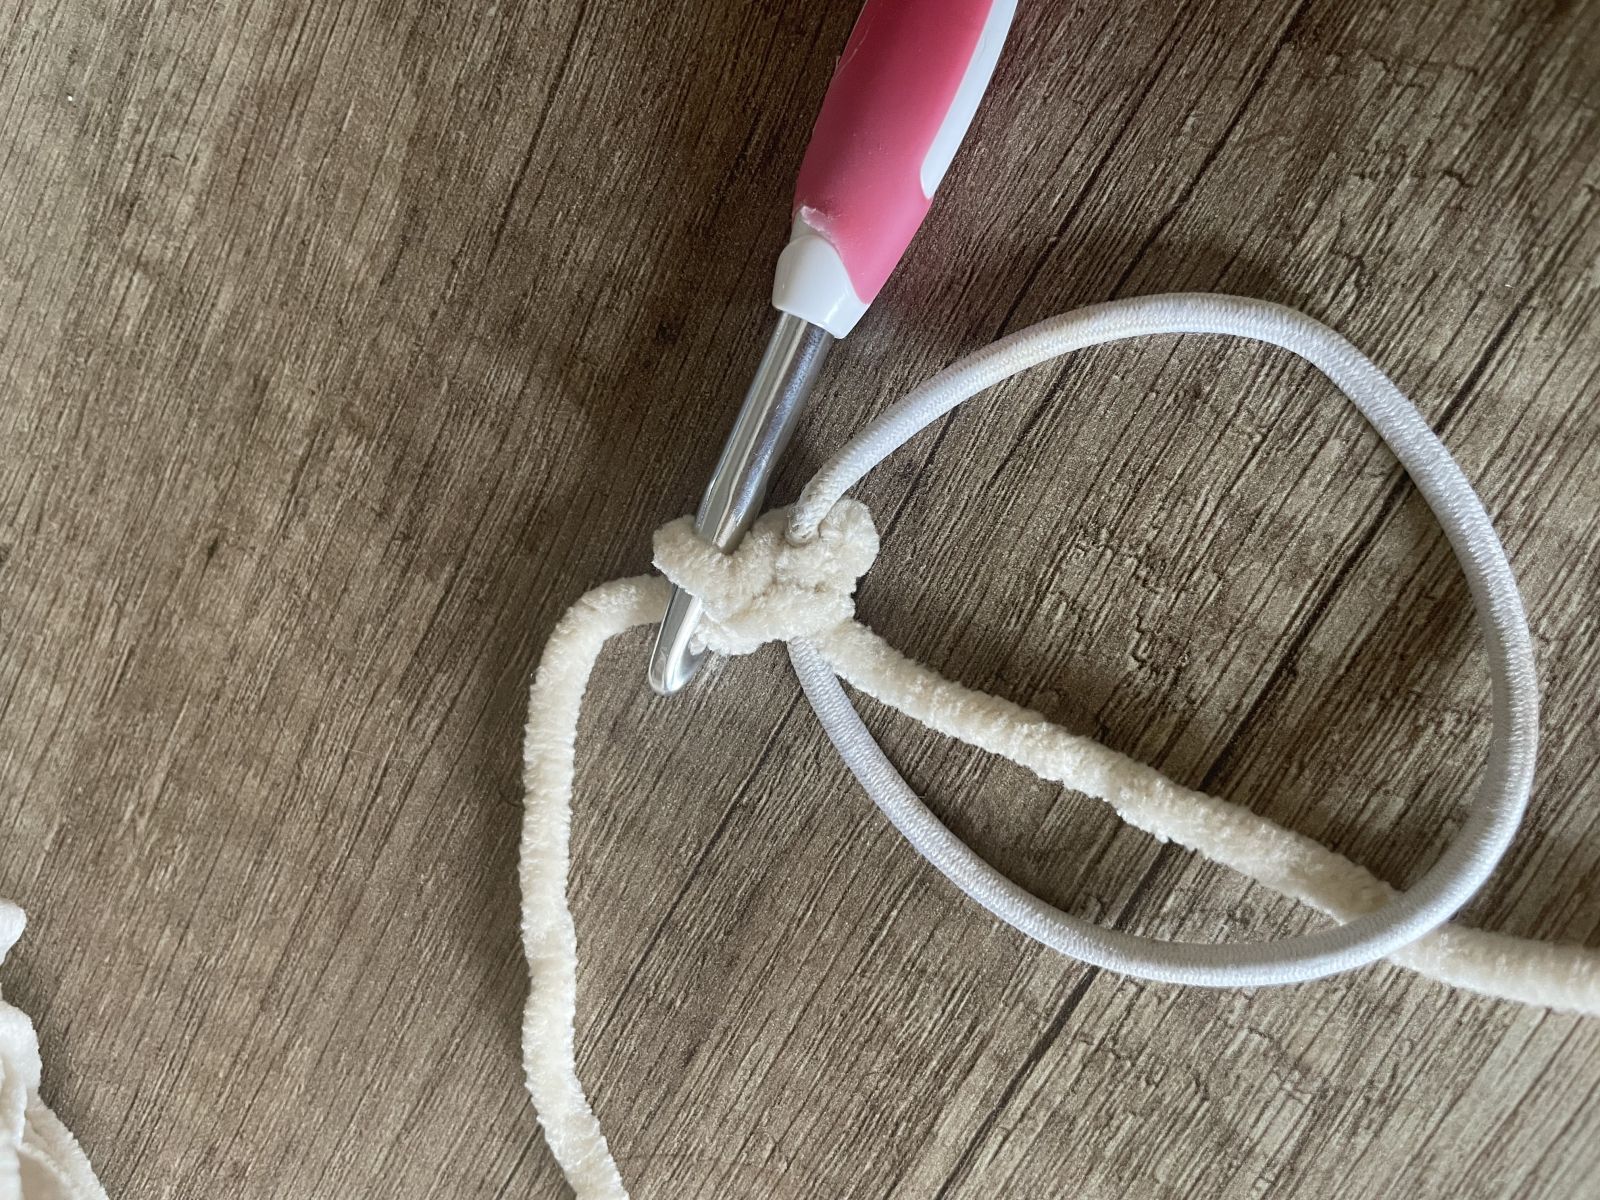
Make sure to crochet the yarn directly into the elastic band, so you don’t have to sew in the ends later. This saves time and effort.
To do this, yarn must be carried along the elastic band as you crochet, and the stitches should be worked around both the elastic and the yarn:

Round 1: knot the round with a slip.

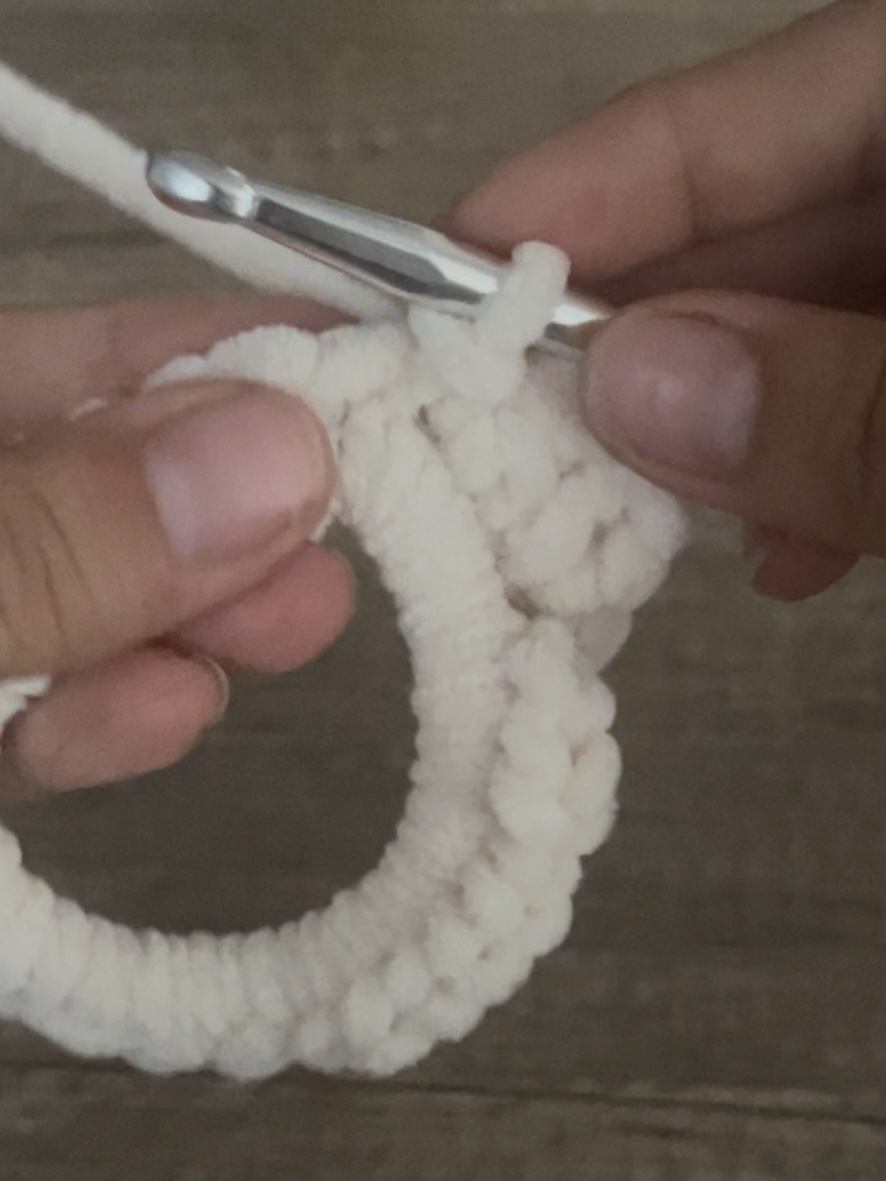
Round 2: Crochet one round of half double crochets or double crochets over the entire elastic.

Weave in the End – Done
If you want a slightly wavier look, just make a small adjustment:
Round 1: Attach the yarn at any point on the hair elastic and crochet single crochets evenly around the elastic, as tightly as possible.
Round 2: Crochet two to three double crochets or half double crochets into each stitch to create a ruffle.
Finally, close the round with a slip stitch and weave in the end.
✨ Tip:
If you're crocheting our hairbands at the same time, use leftover yarn from your hairband project—this way, you'll create a matching set! Scrunchies make a lovely small gift, are great for kids, and are very popular in everyday wear.
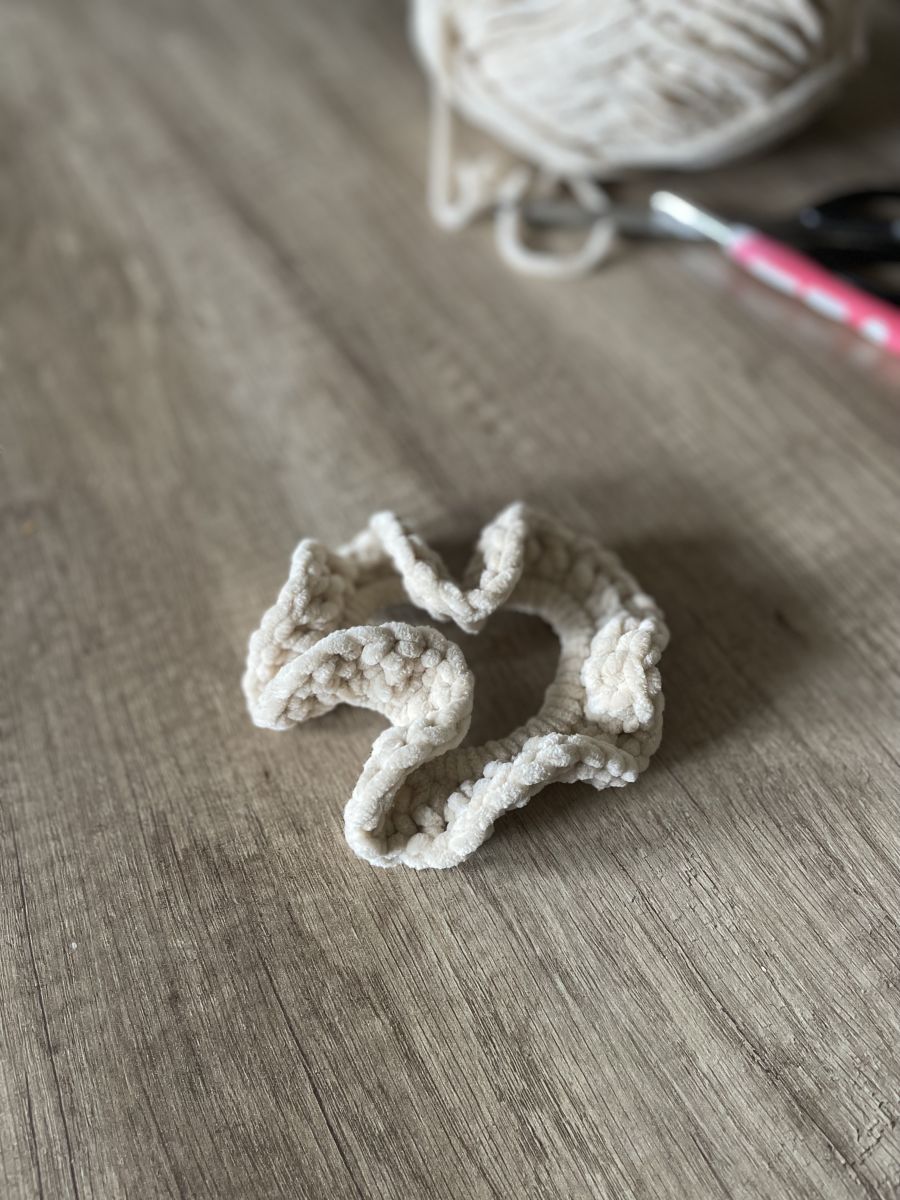
Option 2 - Scrunchie with crocheted Wave edges

For those looking for something special but still simple, the second option is perfect.
This scrunchie combines basic stitches with a striking wavy edge. It looks more voluminous than the classic and can be worked in ton-sur-ton or with color changes.
- Round 1: Attach the yarn at any point on the hair elastic and crochet single crochets around it as tightly as possible.
The round with a slip stitch (sl st) to close.
Round 2 – Wavy Pattern:
Now the effect begins!
Repeat the following steps until the end of the round:
Work into one stitch: one slip stitch, one single crochet
Into the next stitch: one half double crochet, one double crochet
Into the next stitch: one double crochet, one half double crochet
Into the next stitch: one single crochet, one slip stitch
This creates a gentle wave. If you'd like more volume, you can crochet four stitches into each stitch instead of two.
🎀 Color Tip:
If you add a splash of color or contrast around the waves, the scrunchie becomes even more interesting and unique — and at the same time, you can coordinate it with your outfit or incorporate your children's favorite colors, without making it completely monochrome.
Once you're finished, everything is made with love.
📌 Subscribe to 'Mit Liebe verbunden' (Connected with Love) so you never miss a wonderful idea for your family life.
➕Combine?
In the shop, you’ll find matching patterns for hairbands in floral, boho, or bow styles — perfect for mama-and-child sets or small gift sets.
📌Discover now: Shop


