
Materials:
- Yarn, (acrylic or cotton) of your choice. The yarn colour is at your discretion. Grey, silver, or blue will do. Additional yarn of a contrasting colour.
- A small amount of white colour yarn
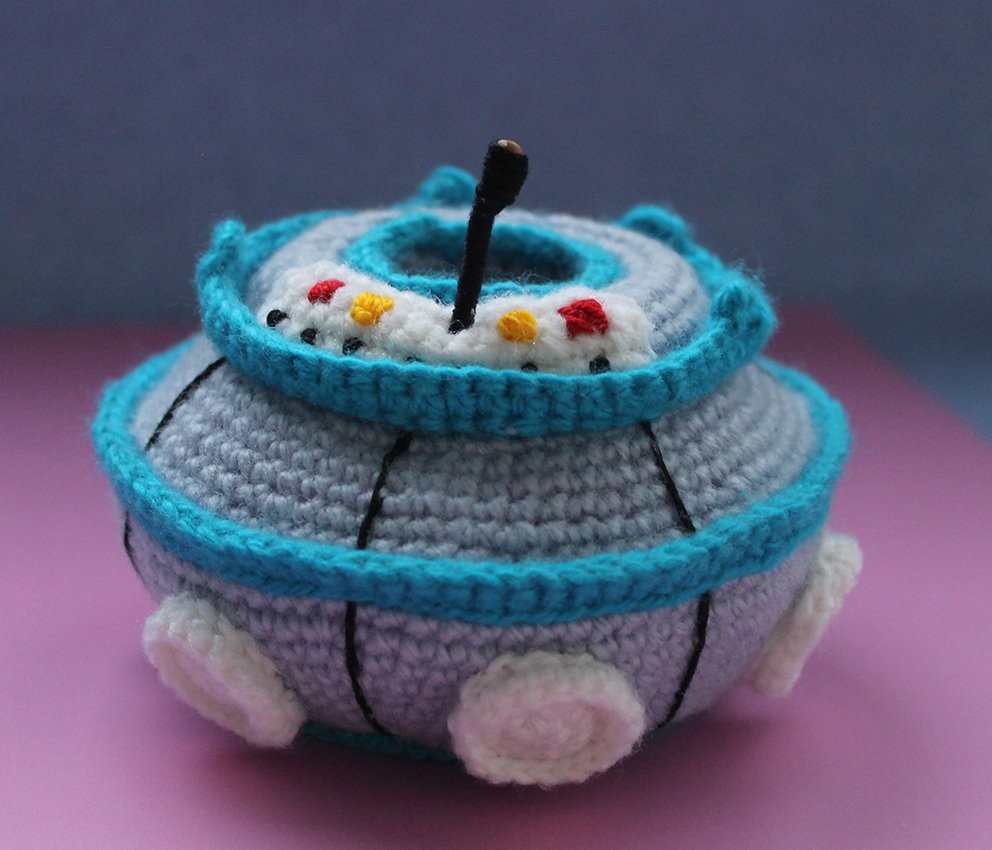
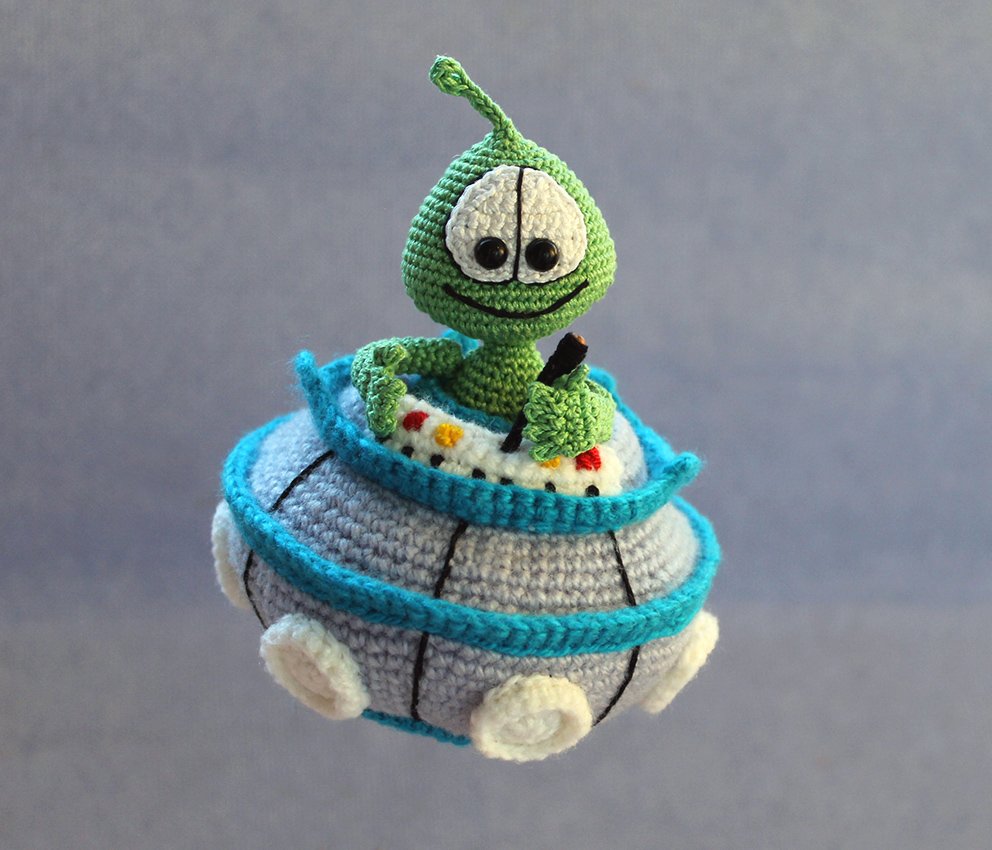
I used grey and blue colour acrylic yarn, 250 m/100 g. The size of my flying saucer is 10 cm in diameter, its height is 6 cm + 9 cm for the transparent part. The size is suitable for a small alien such as this one, pattern at the link https://www.crazypatterns.net/en/blog/1937/little-martian .JPG)
- A crochet hook, I used 1,5 mm crochet hook
- Hollow fibre for stuffing
- A piece of wire approx. 15cm long
- Transparent glue
- A sewing needle, matching sewing threads
- Black, red, yellow colour embroidery yarn/thread
4 buttons 1 cm in diam.
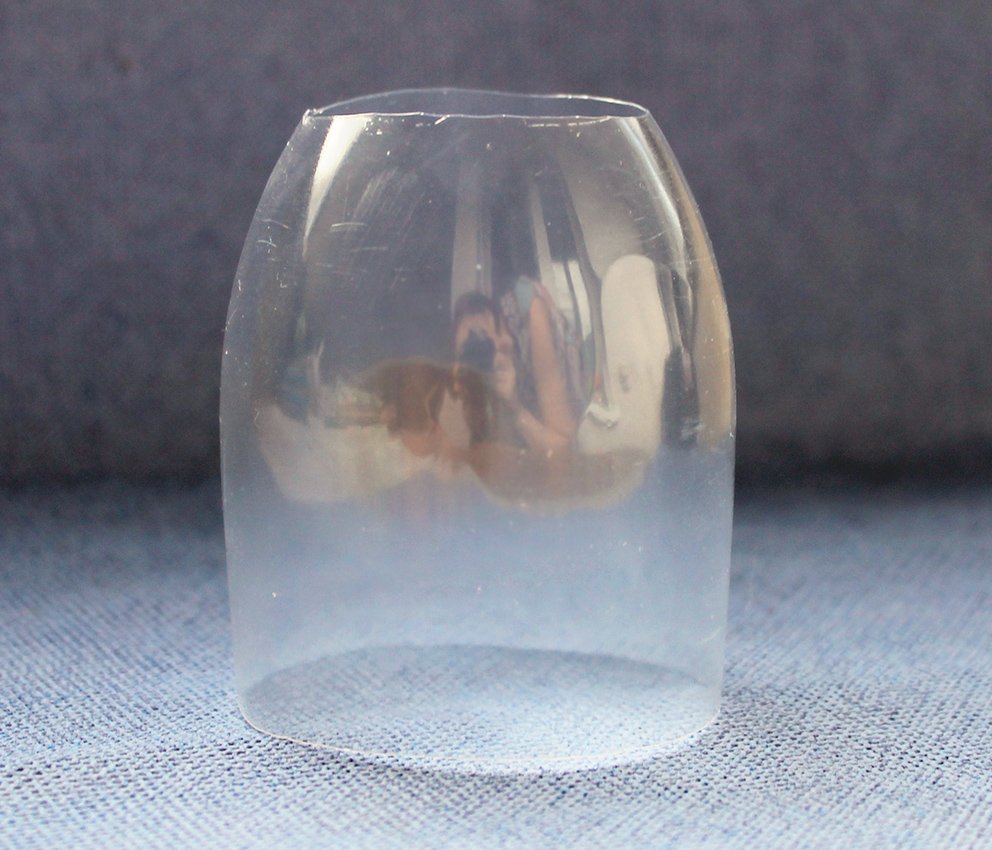
A plastic bottle of the appropriate shape (I used 0.5ltrs volume bottle) or a plastic cup
Abbreviations:
ch – chain
sl st – slip stitch
sc – single crochet
inc – increase (2 sc in 1 st)
dec – decrease (single crochet two stitches together)
(...) x N times – repeat instructions in brackets N times
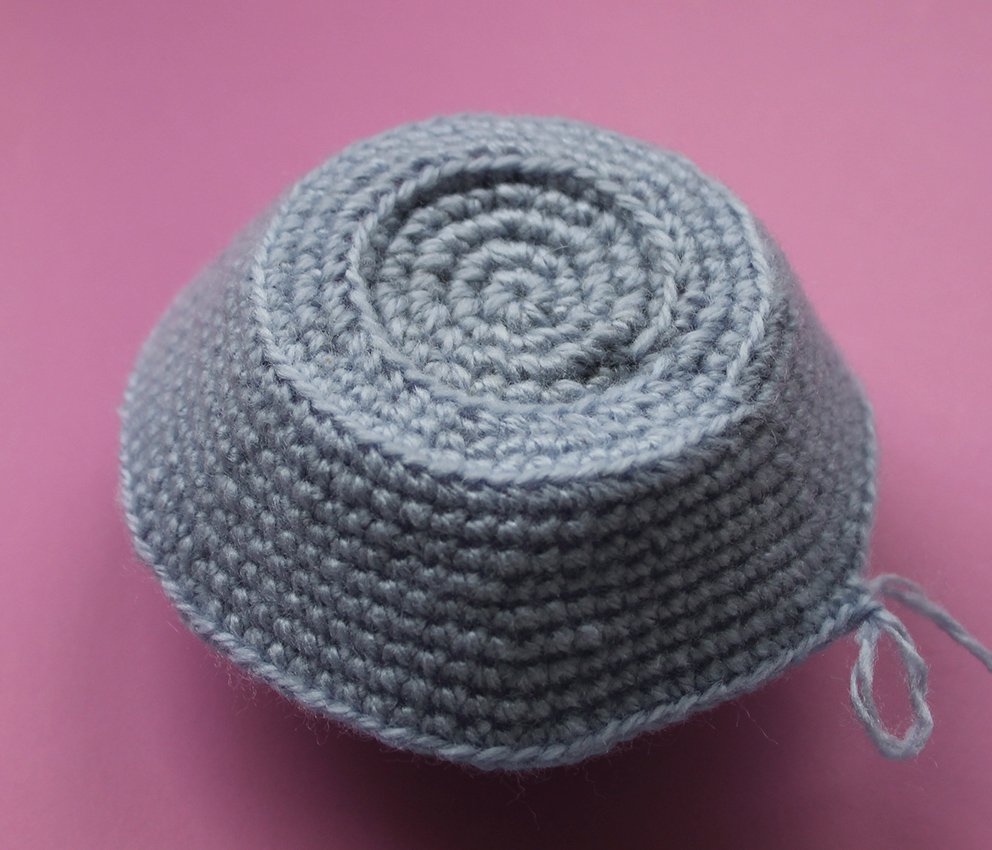
Inner part – cabin
Crochet with the main color
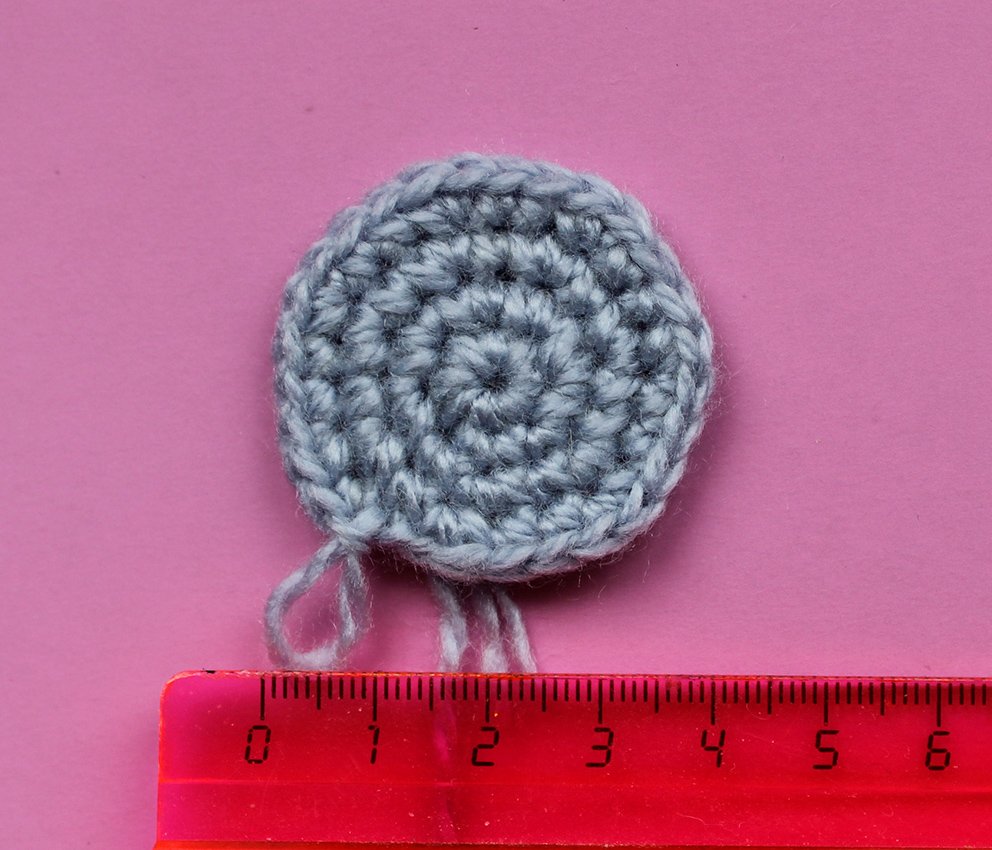
1) 7 sc in a Magic Ring
2) 7 inc (14)
3) (1 sc, inc)х 7 times (21)
4) (1 sc, inc, 1 sc)х 7 times (28)
5) Work 28 sc into the back loops only
.JPG)
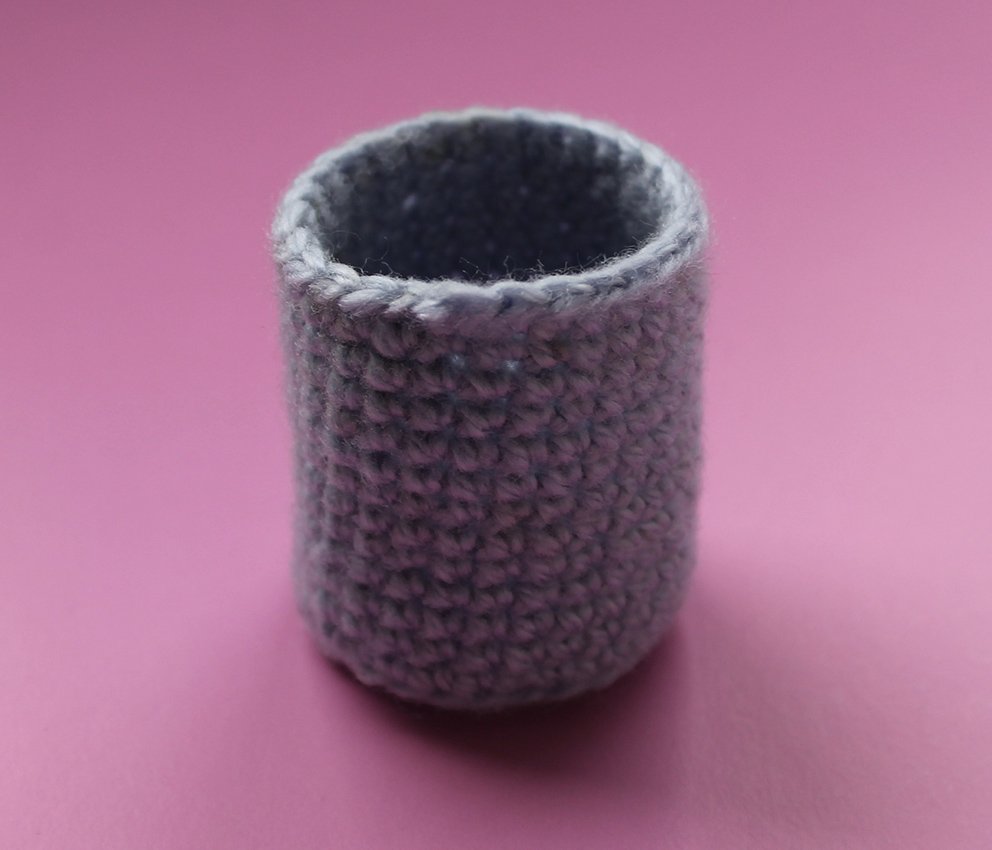
6-16) 28 sc
17) 26 sc, 2 sl st (28)
Fasten off, cut off.
Outer part (bottom)
Join the thread behind the front loops of Rnd 5.
1) (3 sc, inc)х 7 times (35)
2) into the back loops only: (2 sc, inc, 2 sc)х 7 times (42)
3) (inc, 5 sc)х 7 times (49)
4) (3 sc, inc, 3 sc)х 7 times (56)
5) into the back loops only: 56 sc
6) (13 sc, inc)х 4 times (60)
7) (9 sc, inc)х 6 times (66)
8) 66 sc
9) (10 sc, inc)х 6 times (72)
10) 72 sc
11) (inc, 11 sc)х 6 times (78)
12) 78 sc
13) (inc, 12 sc)х 6 times (84)
14) 84 sc
.JPG)
Change to the contrasting colour yarn
15) 84 sl st
Fasten off, cut off.

Turn the part. Join in the contrasting colour yarn behind the front loops of Rnd 2. Work 35 sc. Fasten off, cut off.
Join in the contrast colour yarn behind the front loops of Rnd 5. Work 56 sc. Fasten off, cut off.
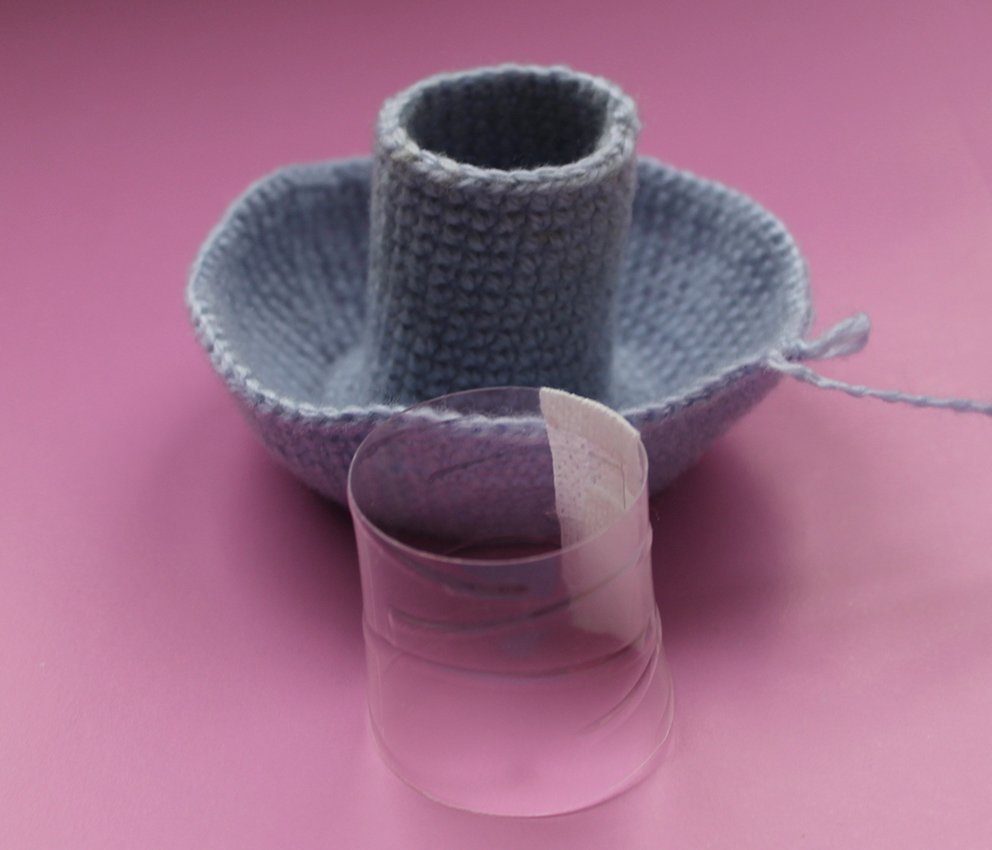
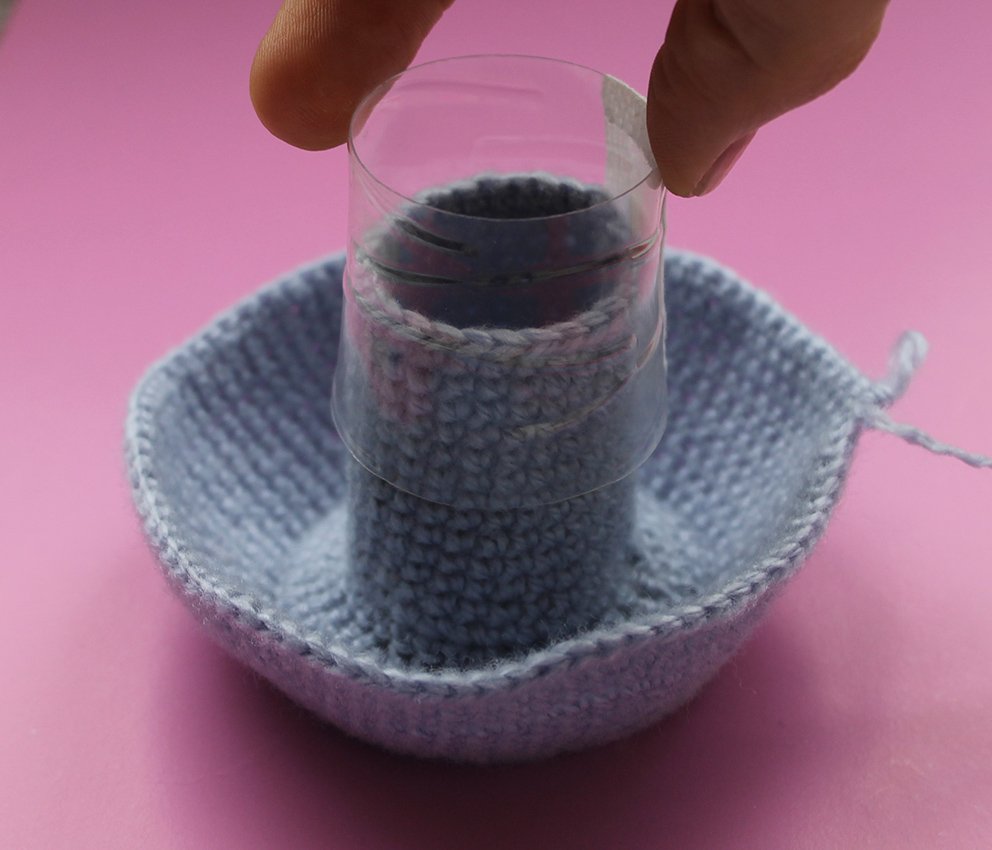
Take a plastic bottle and cut out a rectangle to strengthen the cabin. The rectangle should equal to the height of the cabin minus 0.5cm. The length of the rectangle should equal to the circumference of the cabin plus 0.5cm.
Roll the part, fasten the edges with some self-adhesive fabric tape. Put it over the cabin, see photos for guidance.
Outer part (top)
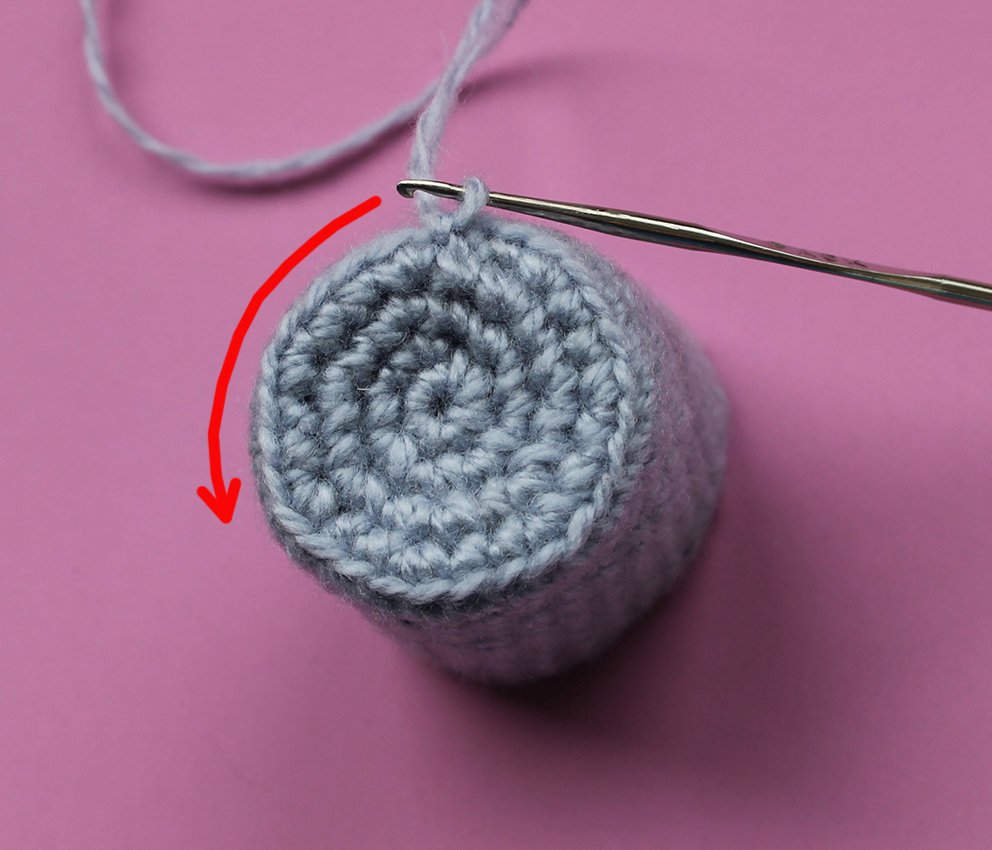
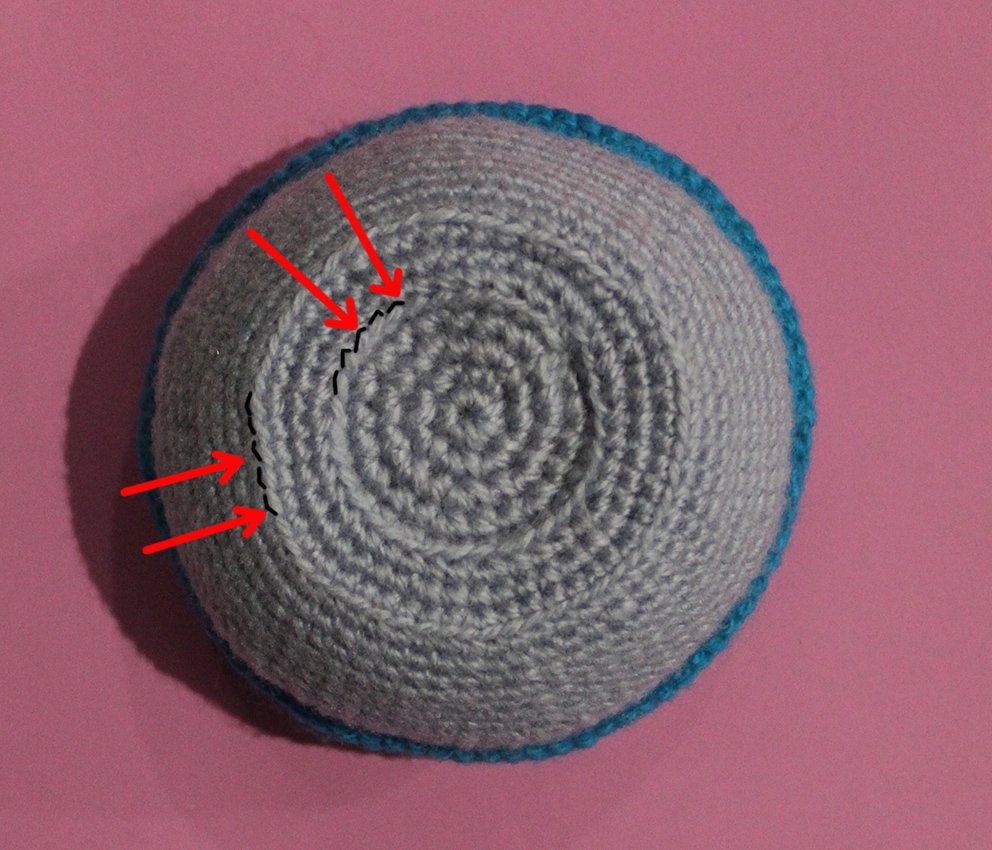
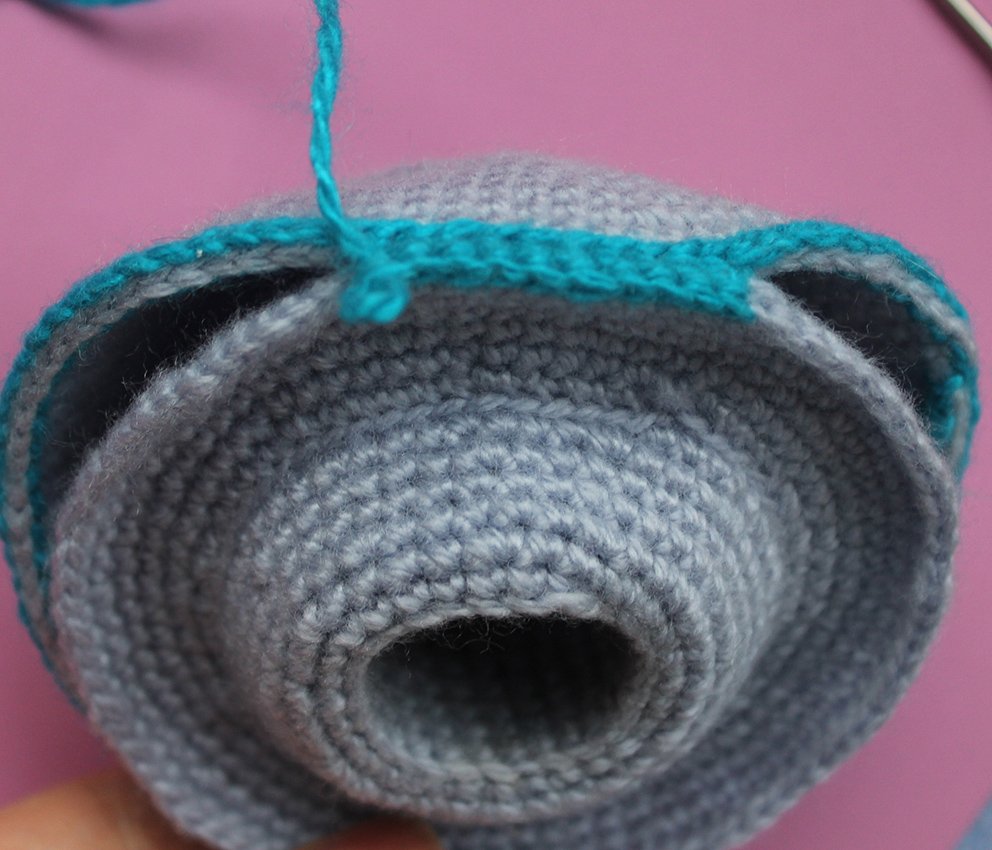
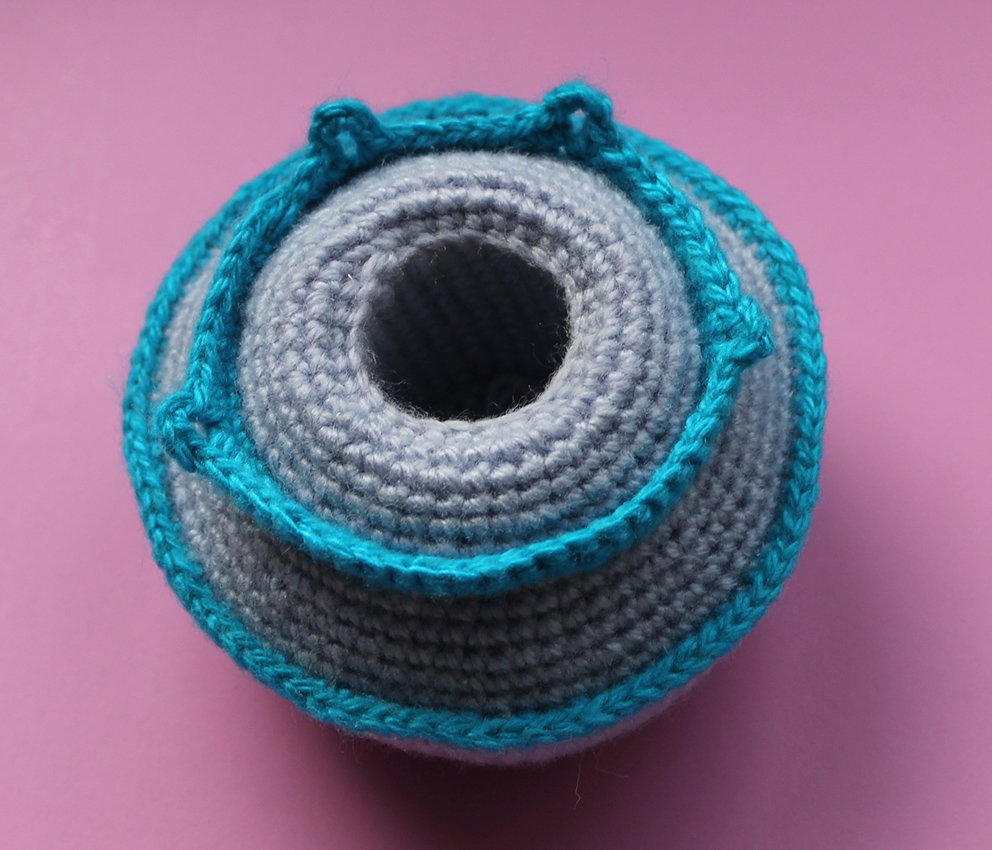
Attach the yarn to the Rnd 17 of the cabin. Crocheting direction is marked with an arrow on the photo.
.JPG)
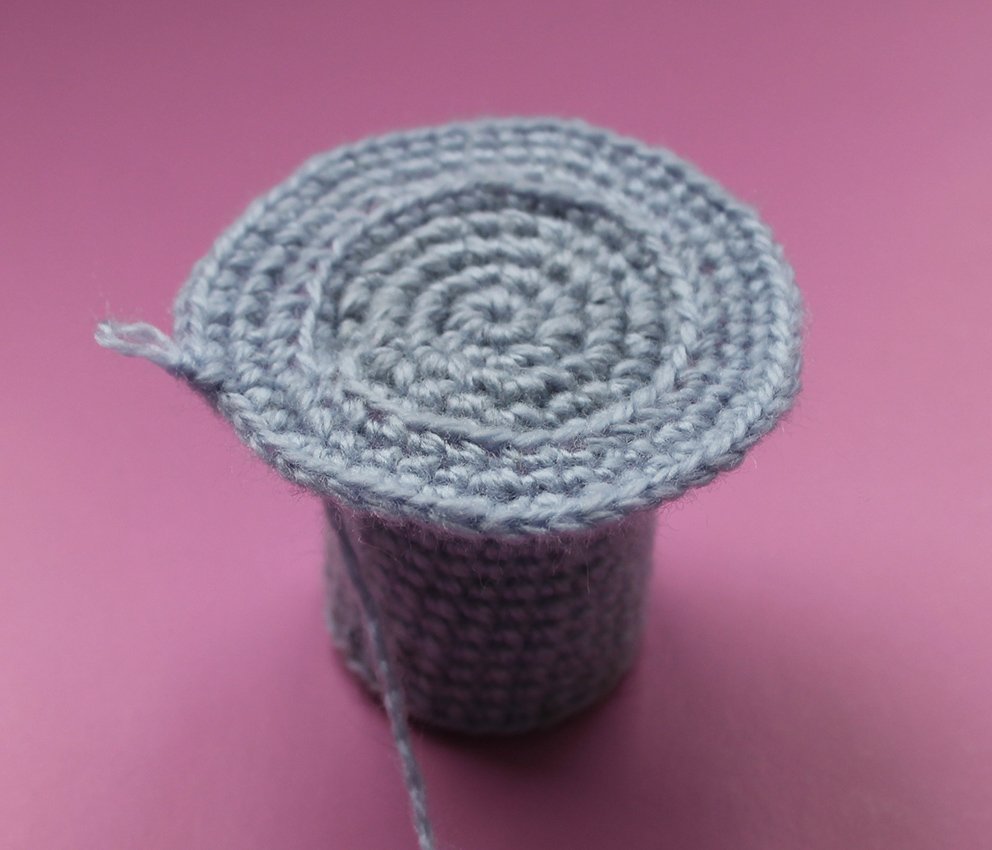
1) (13 sc, inc)х 2 times (30)
2) (2 sc, inc, 2 sc)х 6 times (36)
3) (inc, 5 sc)х 6 times (42)
4) 42 sc
5) (3 sc, inc, 3 sc)х 6 times (48)
6) (inc, 7 sc)х 6 times (54)
7) Work 54 sl st into the back loops only
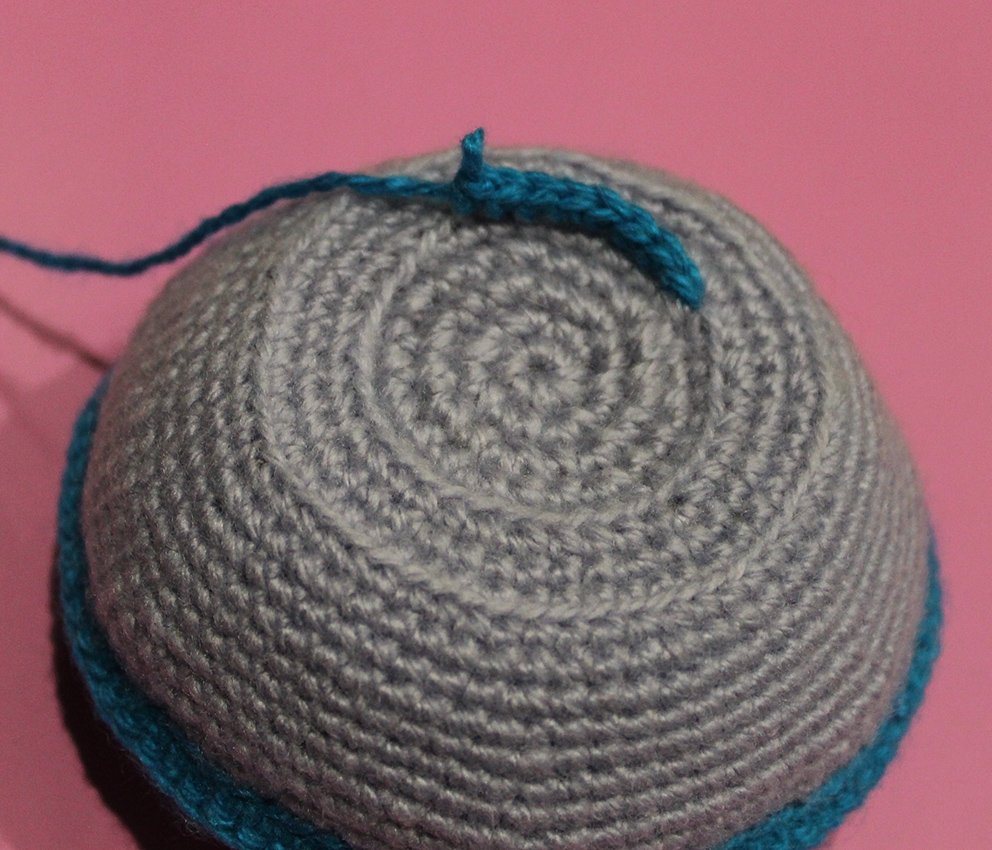
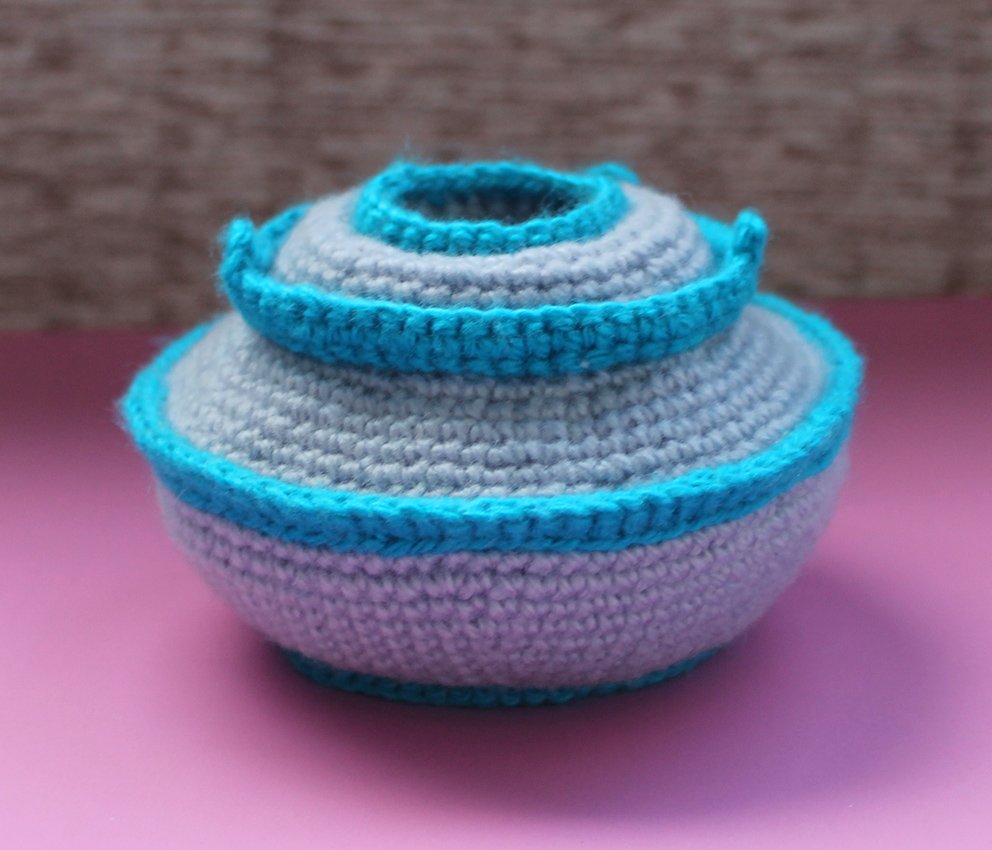
Prepare a bottle of a suitable size and shape. Cut off 9-10cm. Attach it to Rnd 7, both parts should have an equal diameter. If the diameter of the bottle is slightly smaller it’s not an issue, after you’ve finished a round you may tighten it with a thread. Do it after you’ve stuffed it with some hollow fibre as shown on the photo.
.JPG)
8) (5 sc, inc)х 9 times (63)
9) 63 sc
10) (3 sc, inc, 3 sc)х 9 times (72)
11) 72 sc
12) (7 sc, inc)х 9 times (81)
13) (13 sc, inc, 13 sc)х 3 times (84)
Change to the contrasting colour yarn.

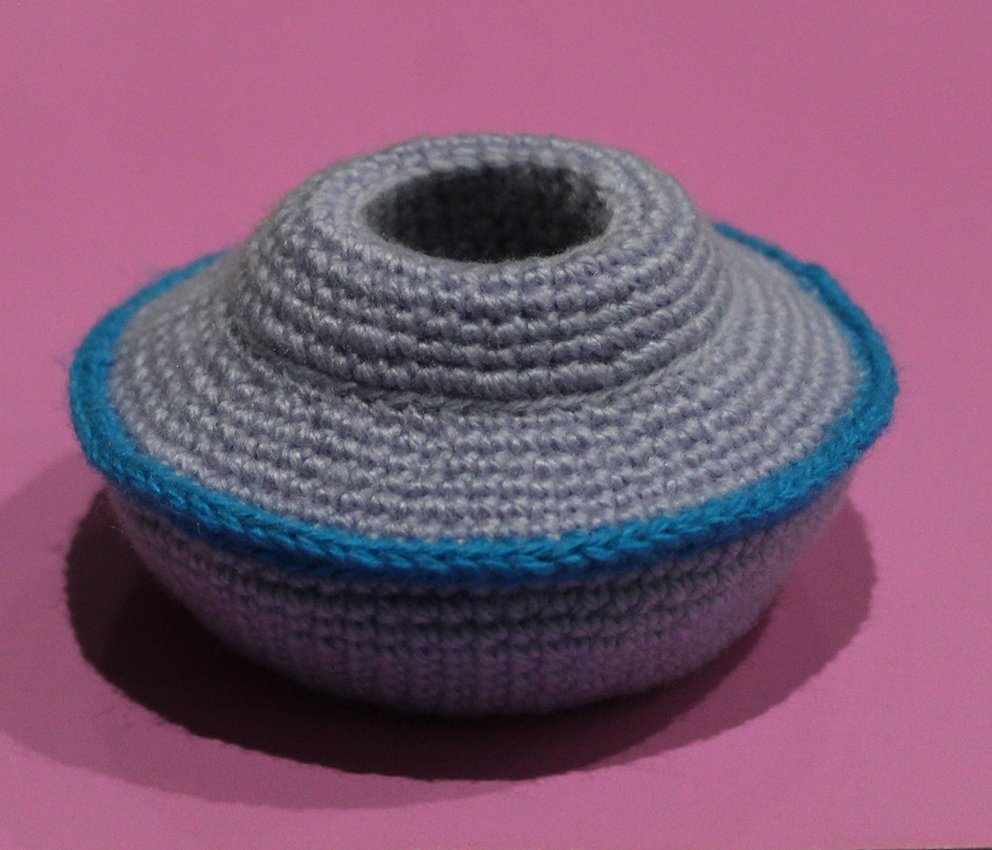
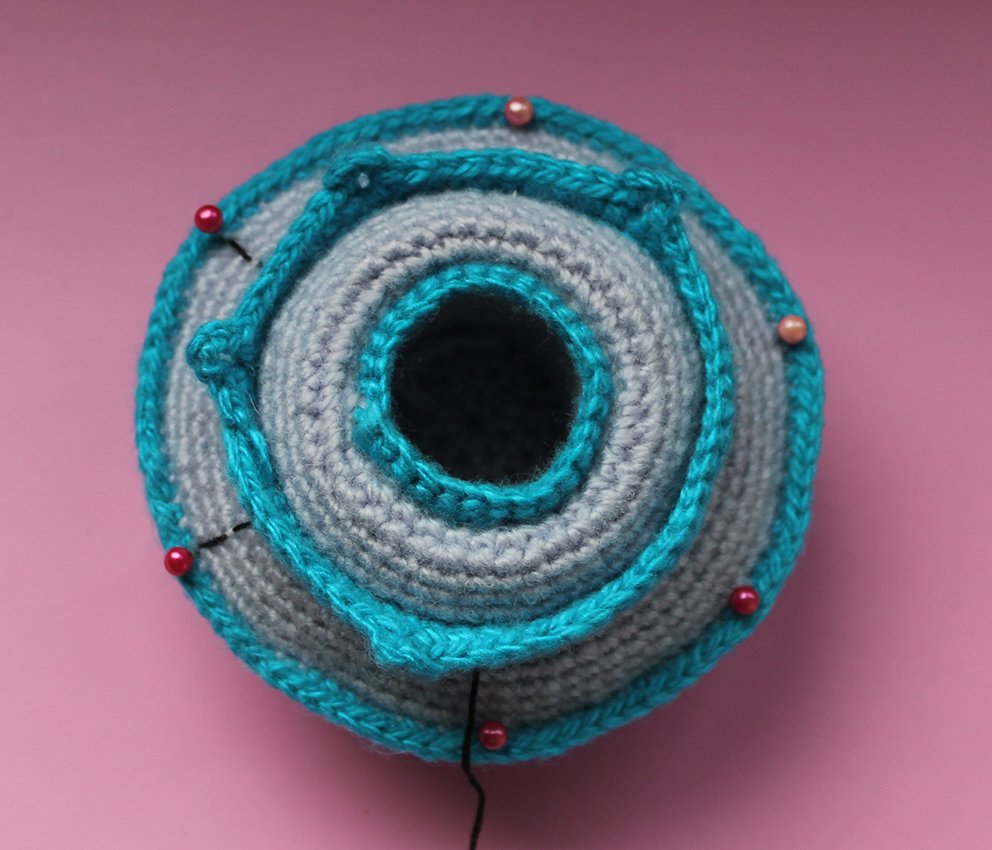
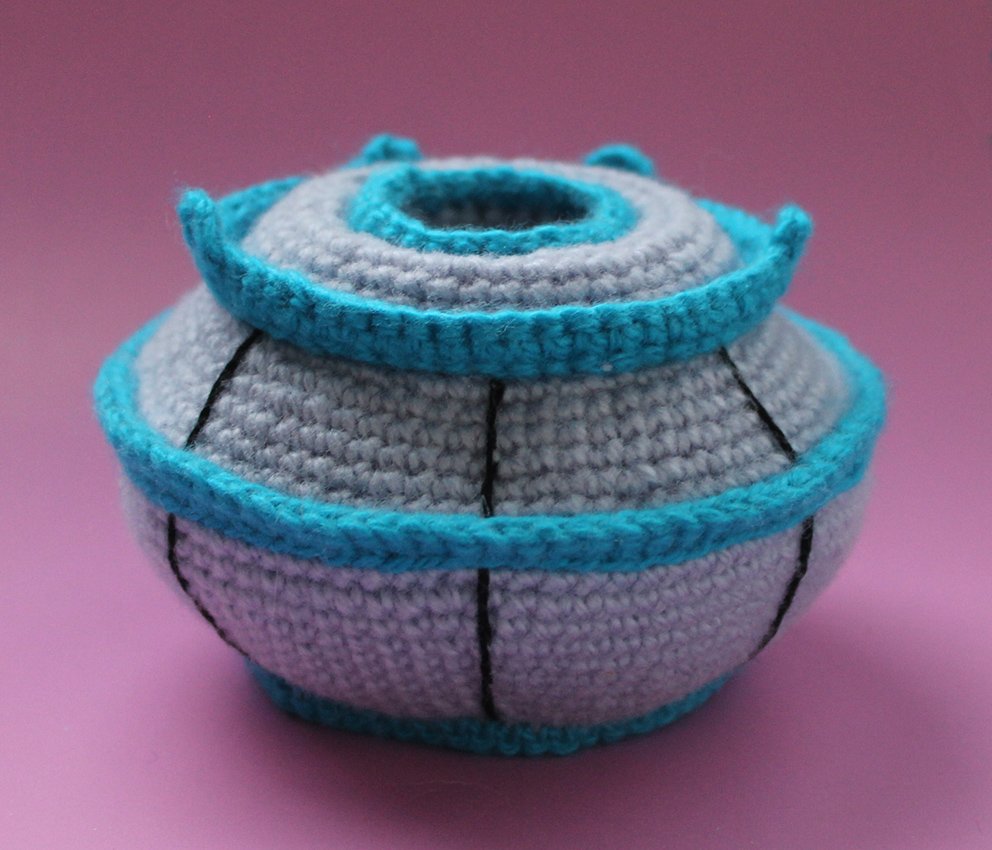
Join the top and bottom parts together:
14) work 84 sc together with the front loops of the last Rnd of the flying saucer’s bottom part.
Stuff as you go. It’s important to properly spread the hollow firbe. See the photo for guidance.
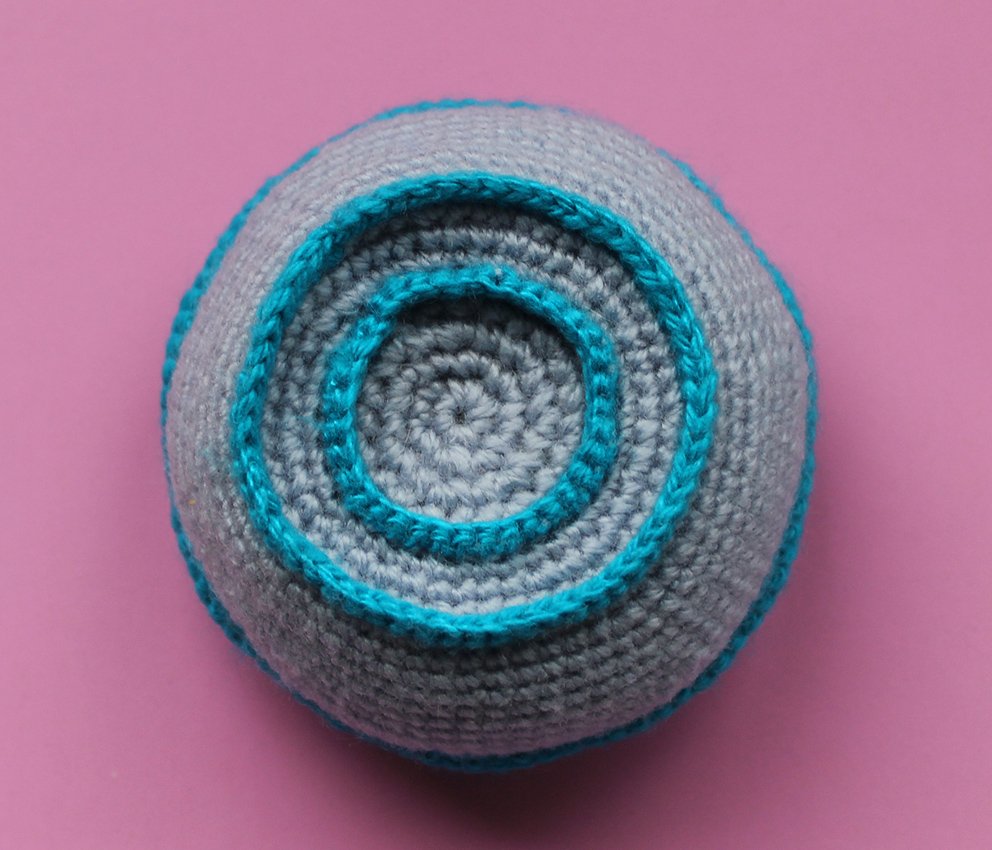
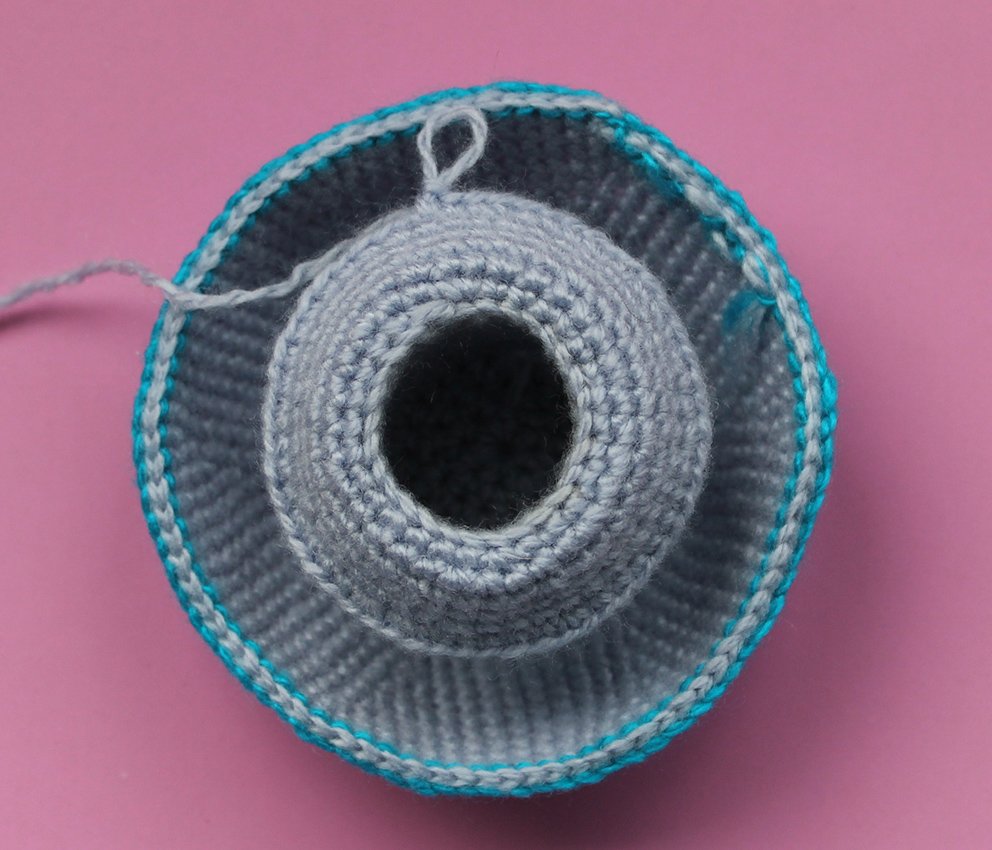
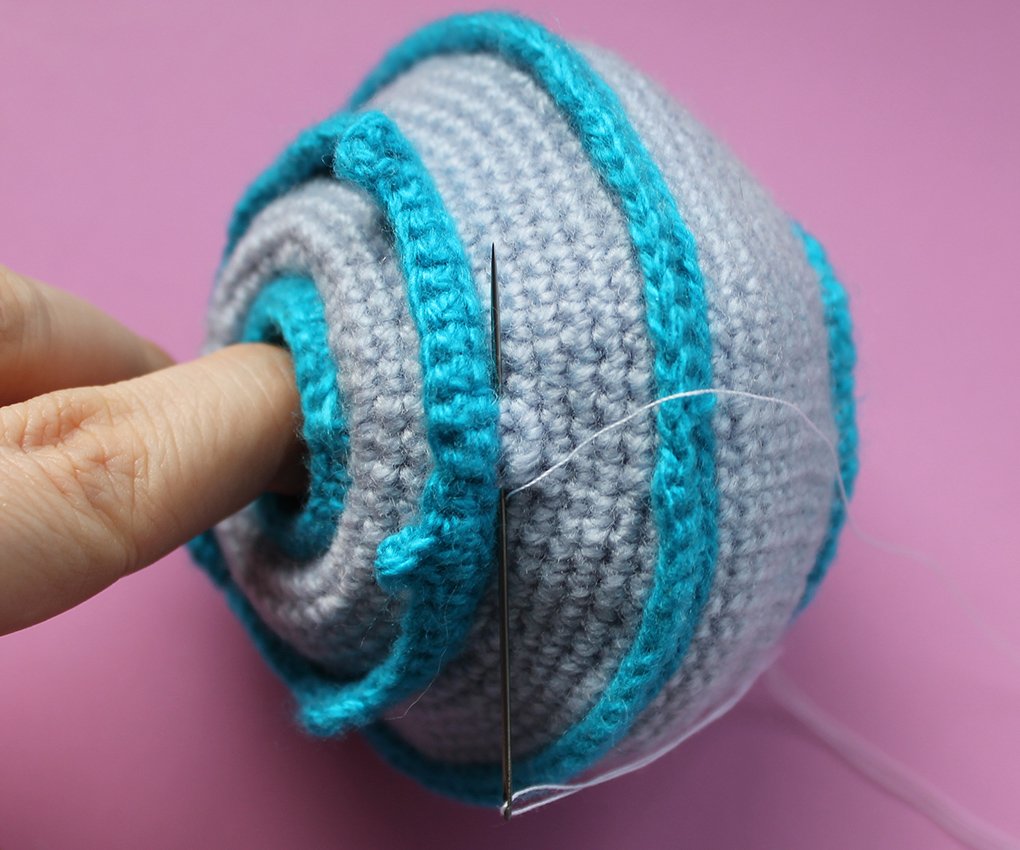
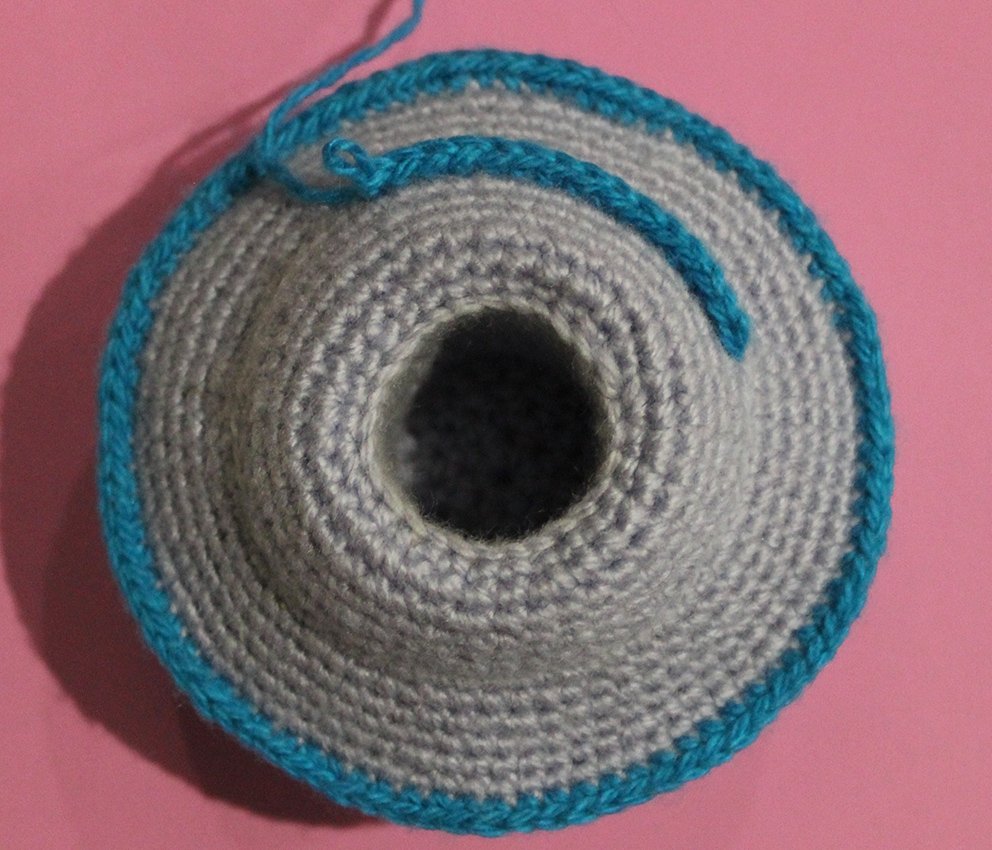
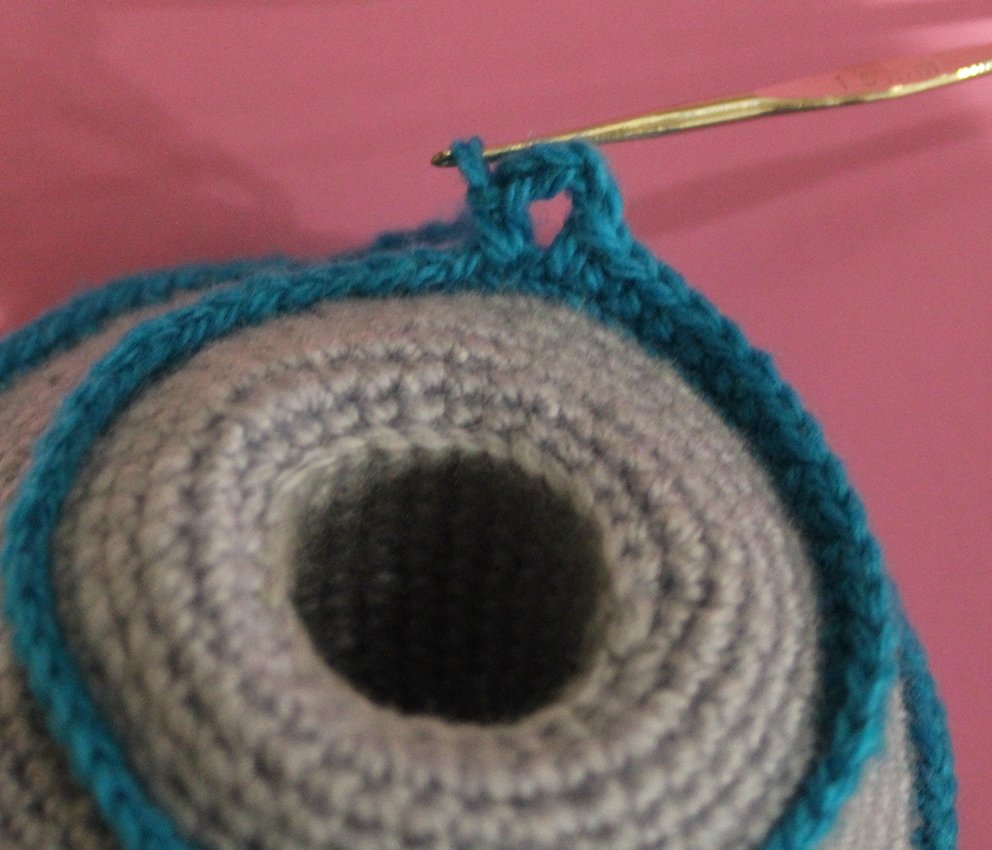
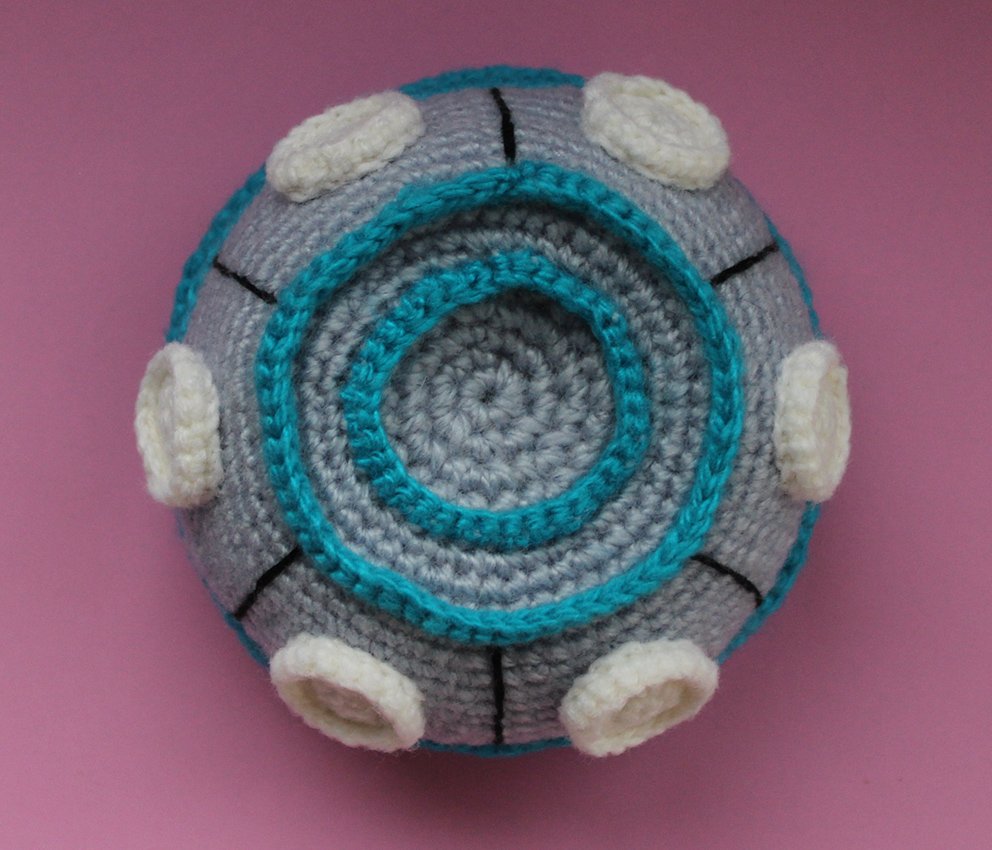
Attach the contrasting colour yarn to Rnd 1 of the top part, work 28 sc. Fasten off, cut off. Attach the contrasting colour yarn to the half loops of Rnd 7 of the top part, work:
1) 54 sc, join in 1st and the last loops with the sl st.
2) 1 ch, 10 sc, 4 ch, 24 sc, 4 ch, 11 sc, 4 ch, 8 sc, 4 ch, 1 sc
Cut off. Bind off. Hide the end of the yarn inside. These loops are for the buttons.
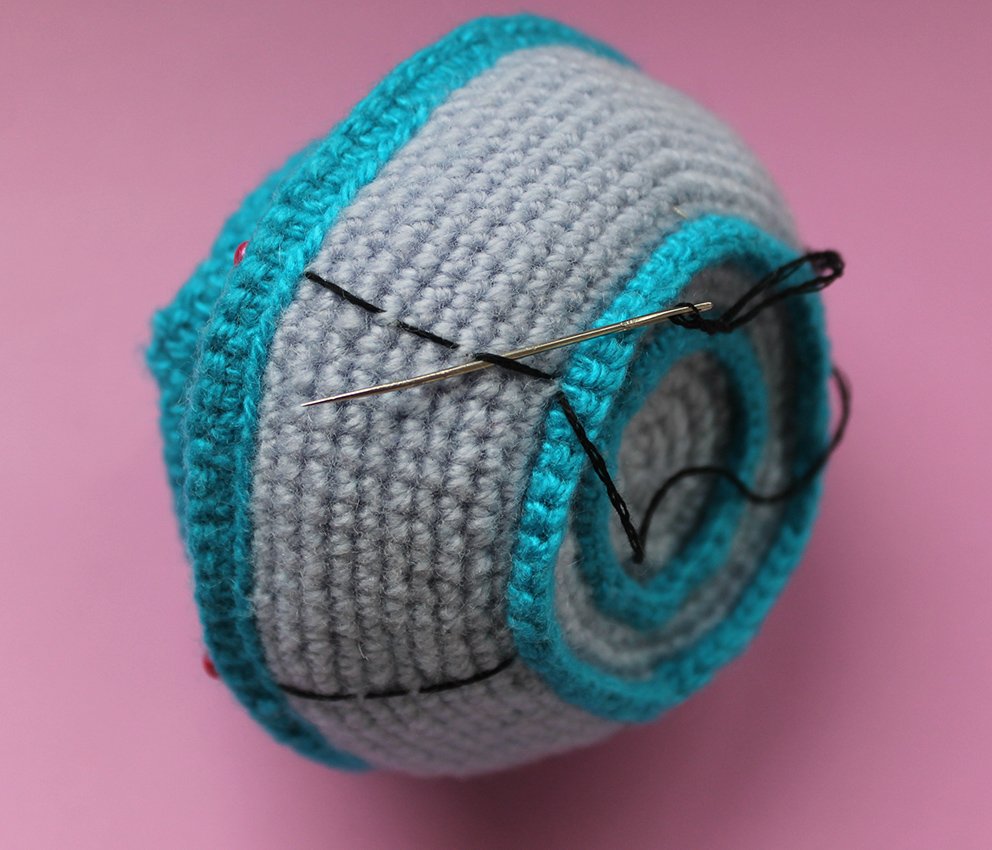
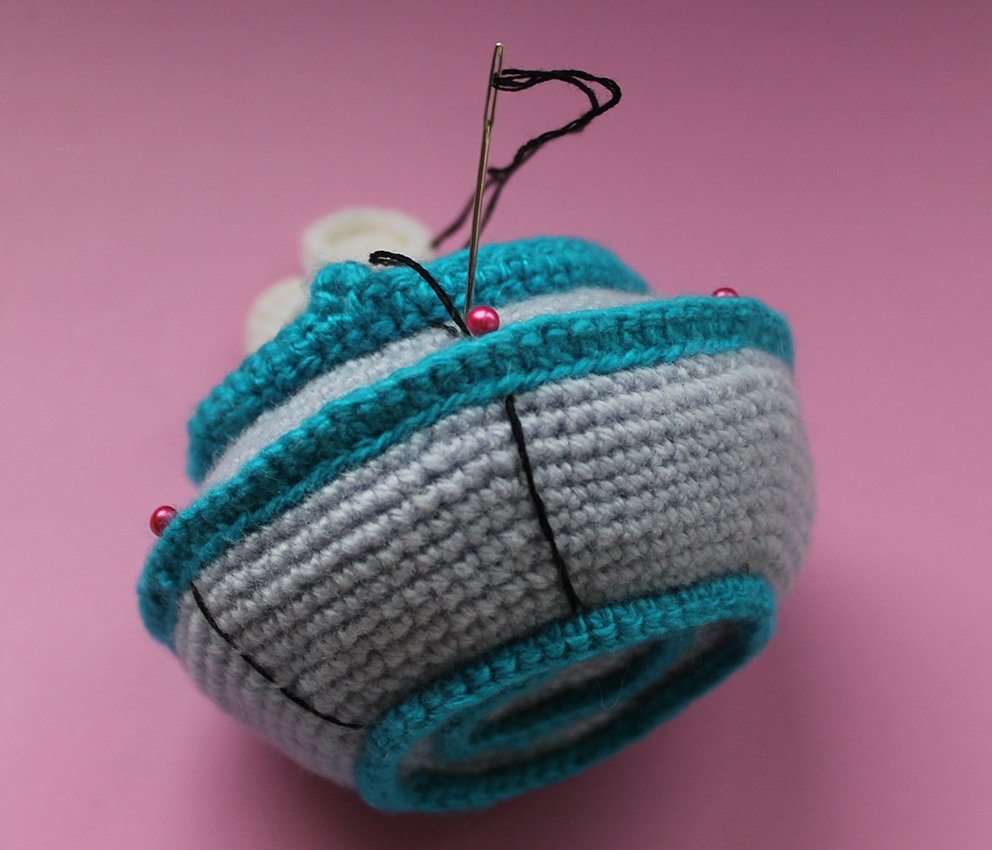
Divide the circle into 6 parts with some dressmaking pins. Embroider the segments on the flying saucer with black colour yarn/thread.
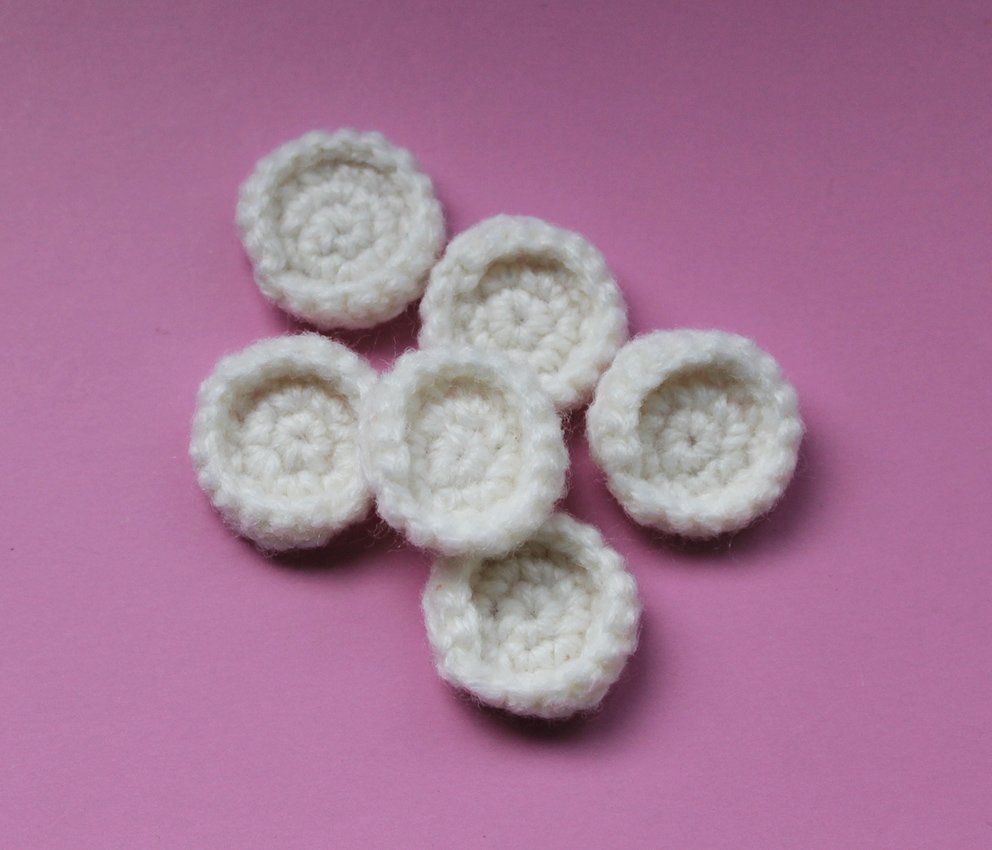
Porthole (make 6)
Work with white colour yarn.
1) 6 sc in a Magic Ring
2) 6 inc (12)
3) (inc, 1 sc)х 6 times (18)
4) Work 18 sc into the front loops only
Fasten off, cut off.
Attach the portholes one to each sector and sew them on.
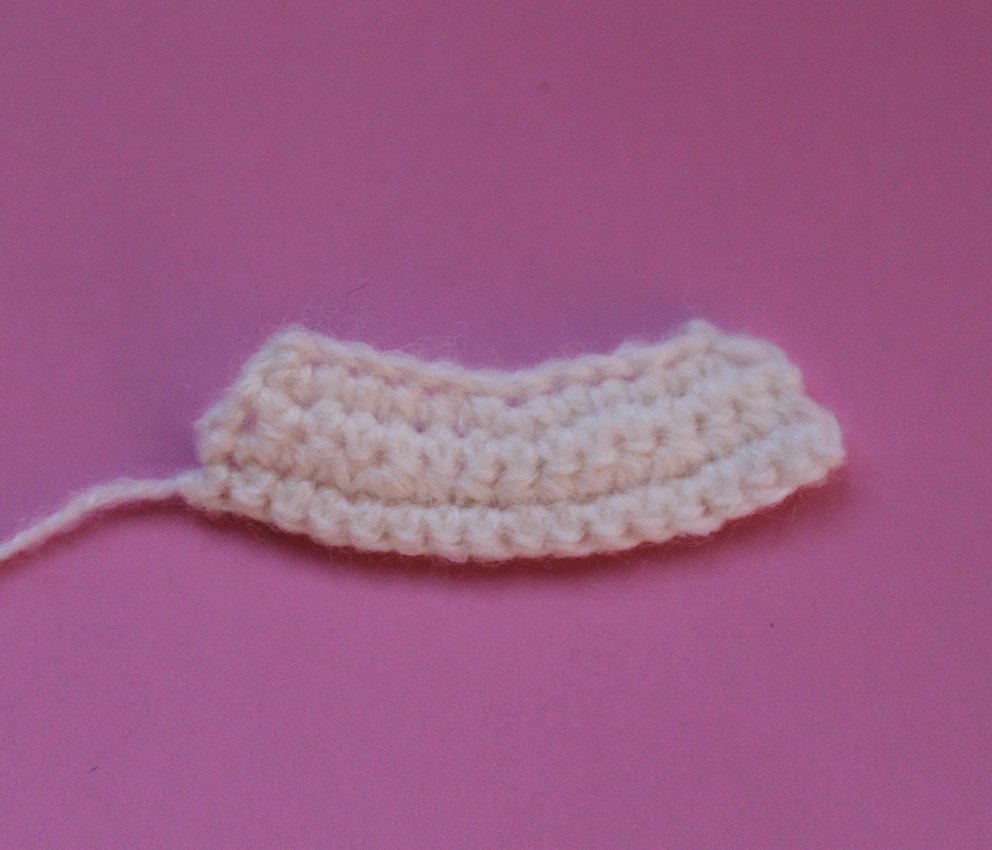
Dashboard
Work with white colour yarn.
Ch 12
1) starting from 2nd ch from hook: (inc, 4 sc)х 2 times, inc, ch, turn (14)
2) 14 sc, ch, turn (14)
3) (4 sc, inc)х 2 times, 4 sc, ch, turn (16)
4) 16 sc
Fasten off, cut off.
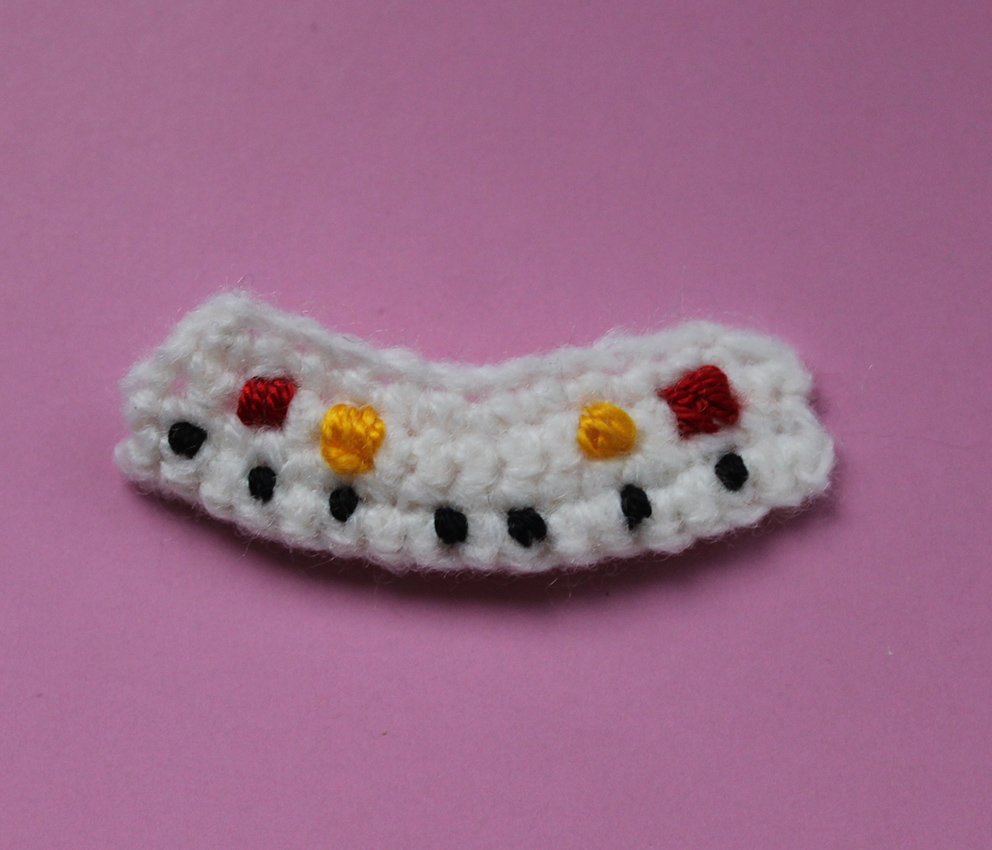
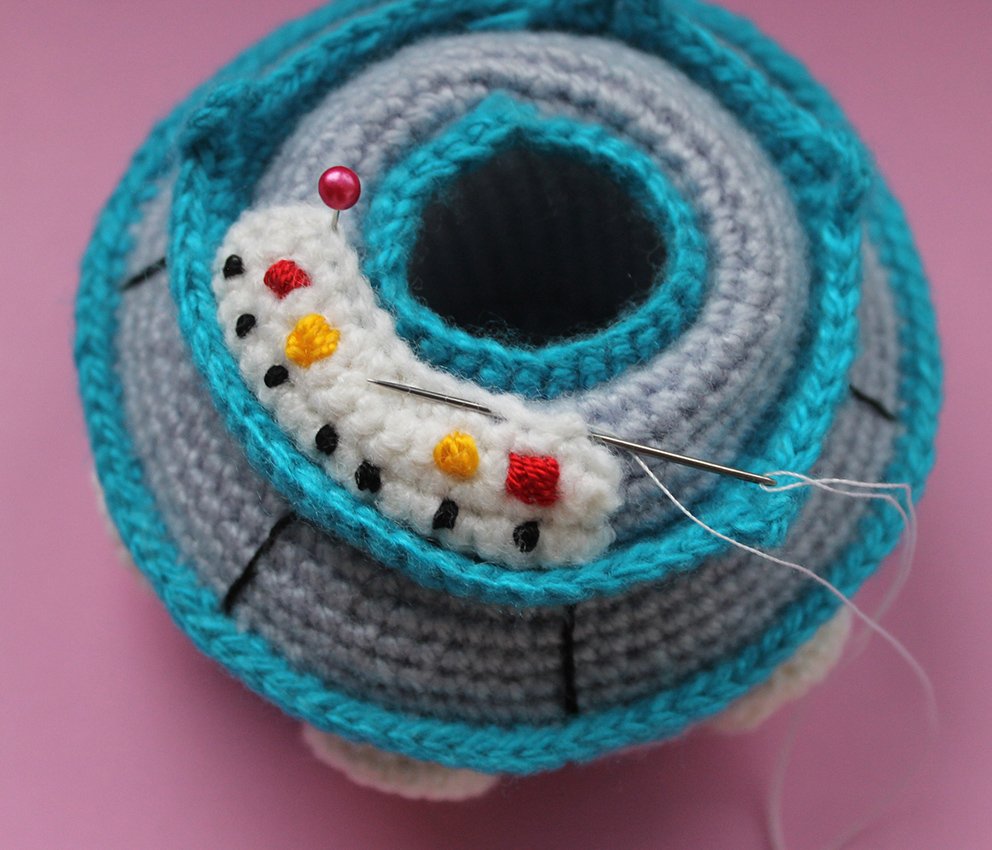
Embroider a few buttons on the dashboard with red, yellow and black yarns/treads. Sew it on.
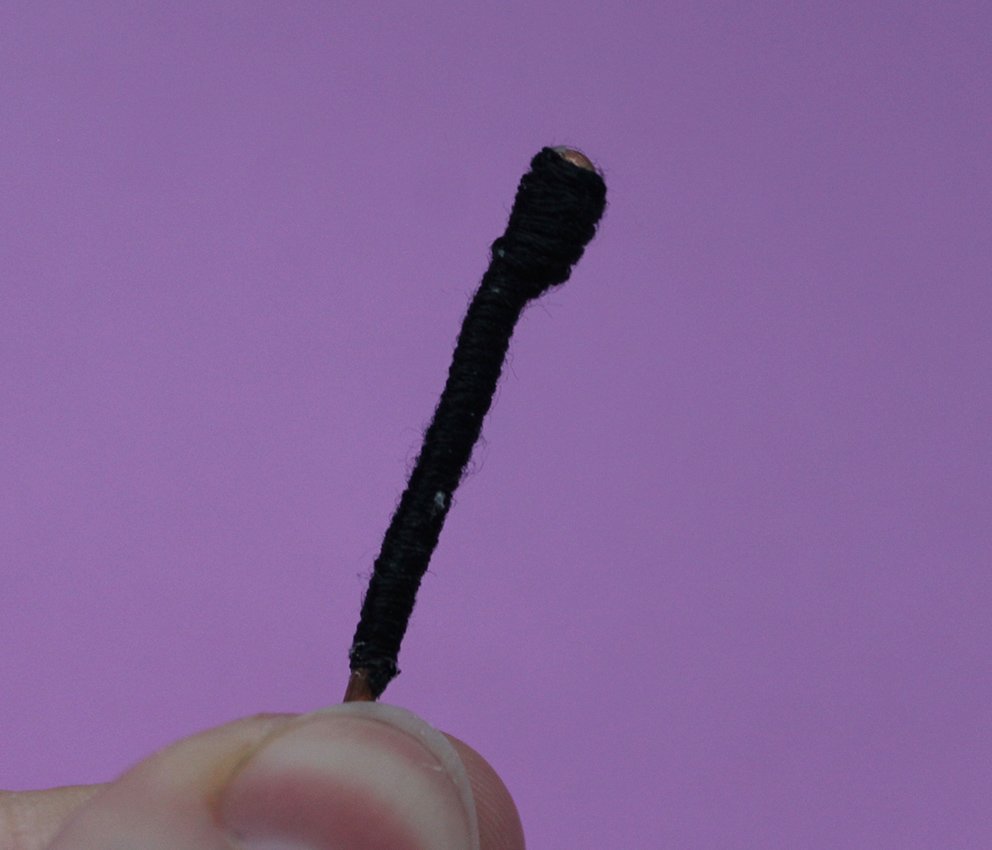
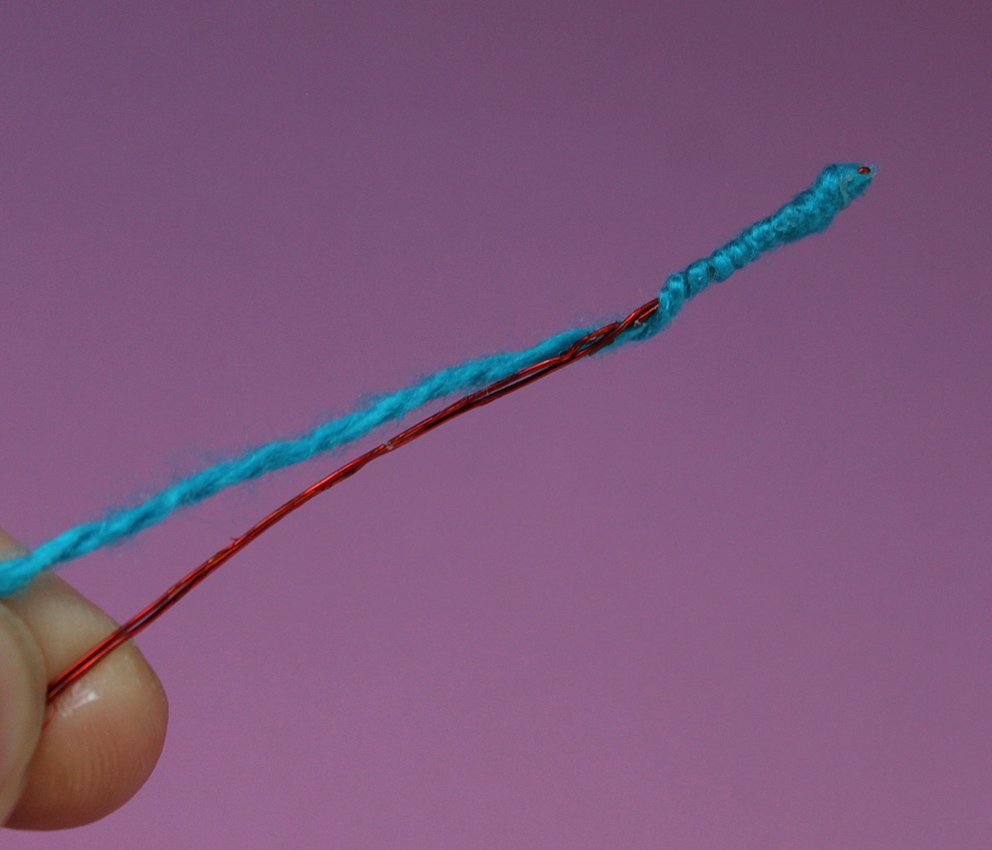
Control lever
Prepare a piece of wire, about 4 cm long. Bend the end with the help of pliers. Apply some glue onto the wire and wrap black yarn around it. Leave to dry. Insert it in the dashboard.

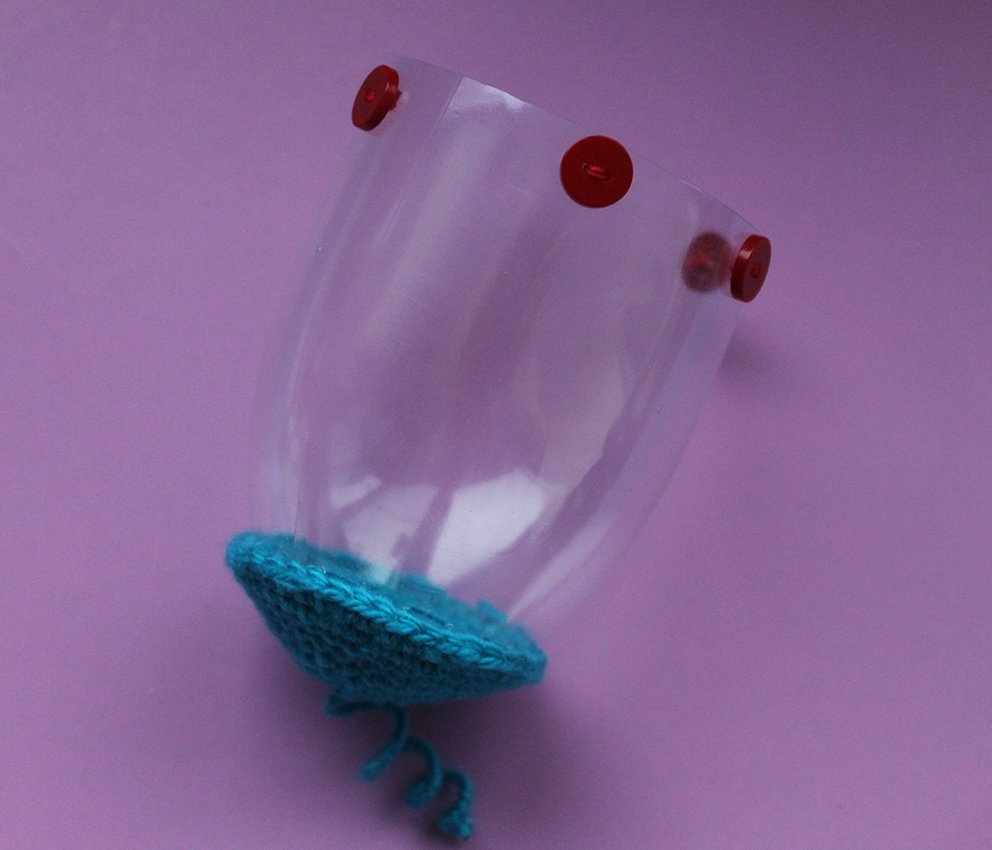
Transparent part of the cabin
I used a part of the plastic bottle (9cm long), I cut off the bottom and top parts from it. I decorated the opening in the top part with a crocheted hatch. You may substitute it for a plastic cup.
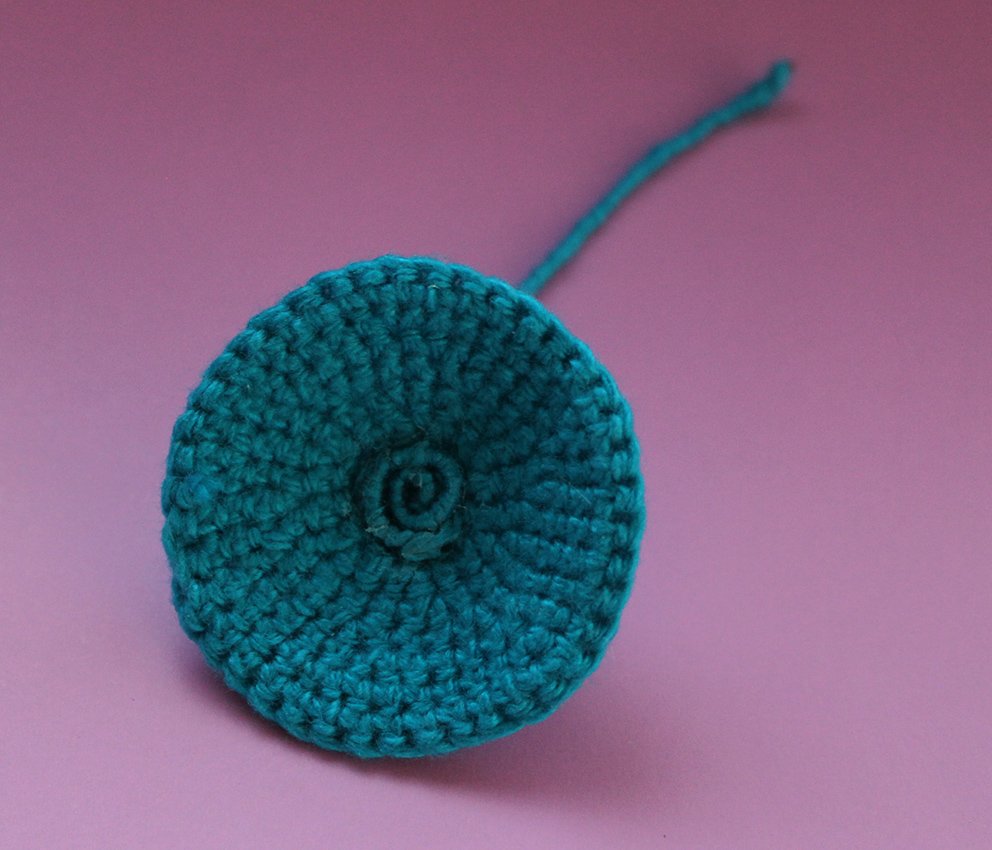
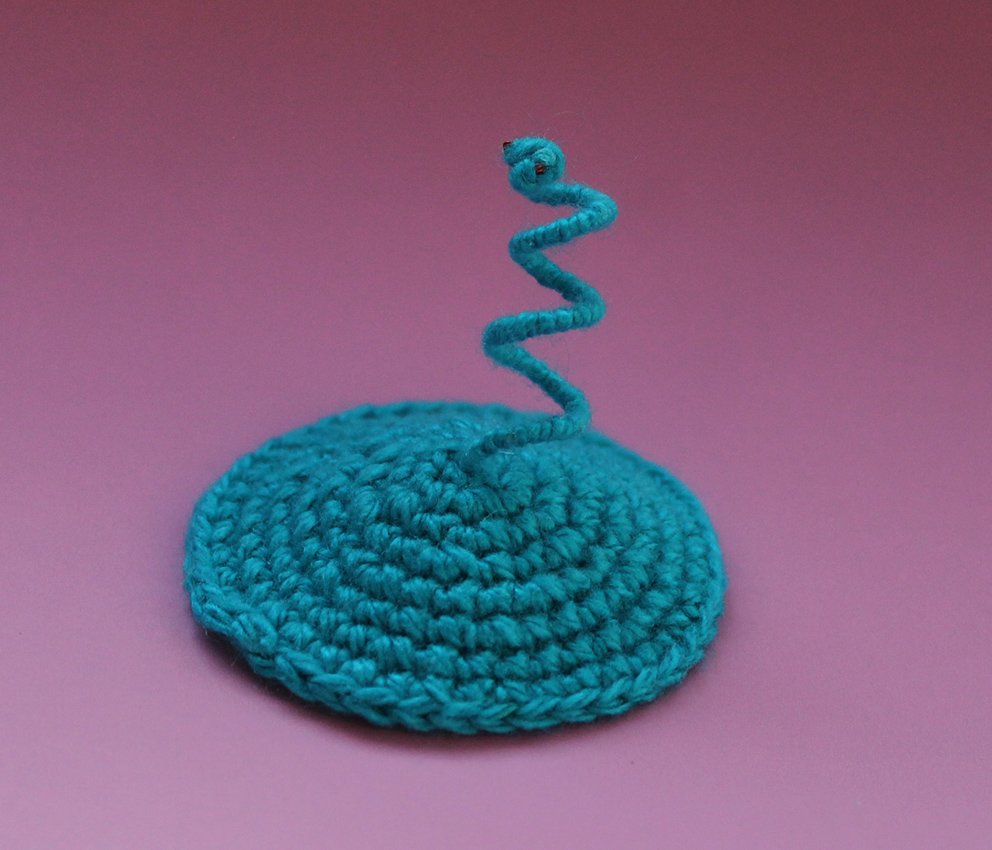
Hatch
Work with a contrasting colour yarn
1) 6 sc in a Magic Ring
2) 6 inc (12)
3) (inc, 1 sc)х 6 times (18)
4) (1 sc, inc, 1 sc)х 6 times (24)
5) (inc, 3 sc)х 6 times (30)
6) (2 sc, inc, 2 sc)х 6 times (36)
7) (inc, 5 sc)х 6 times (42)
8) 42 sc
Fasten off, cut off.

Decorate the hatch with a spring. Prepare a piece of wire, about 10 cm long. Apply some glue onto the wire and wrap yarn around it. Leave to dry. Insert the spring into the centre of the hatch, fasten it on the inside.
Wrap the outer part around a pencil and stretch it a little.
.JPG)
Glue or sew the hatch to the bottle. To ease the process pierce some holes around the edge of the bottle with a sewing needle.
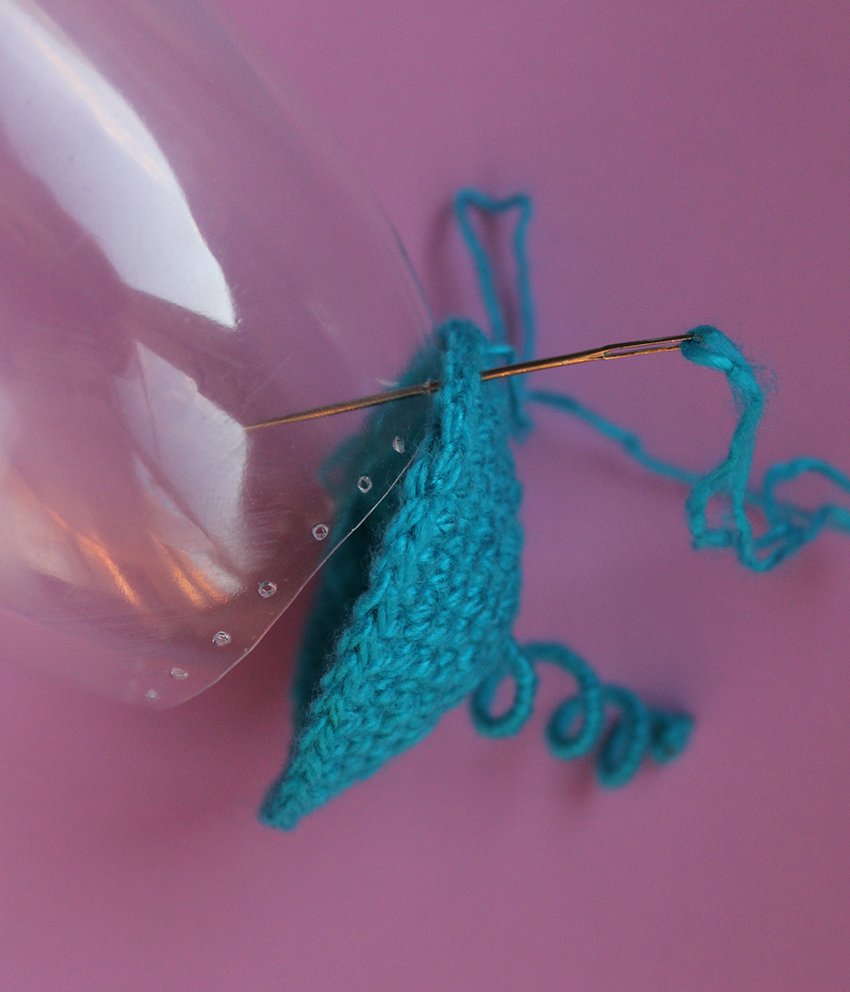
.JPG)
Attach and sew the buttons to the bottom part in line with the button holes and fasten them.
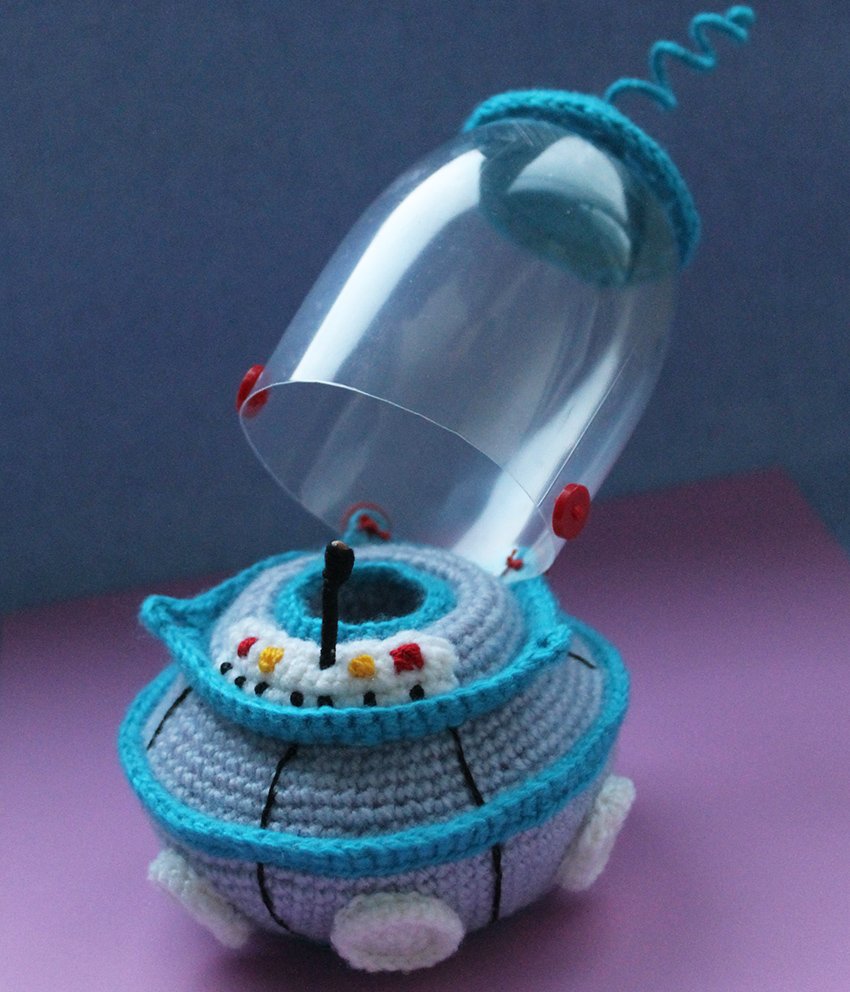
The flying saucer is complete! Place your little Martian inside the space ship. Everything is ready for a space flight!


yours is 11cm tall mine is 14cm.
She is different. For a spaceship, I took yarn 2 times thicker.