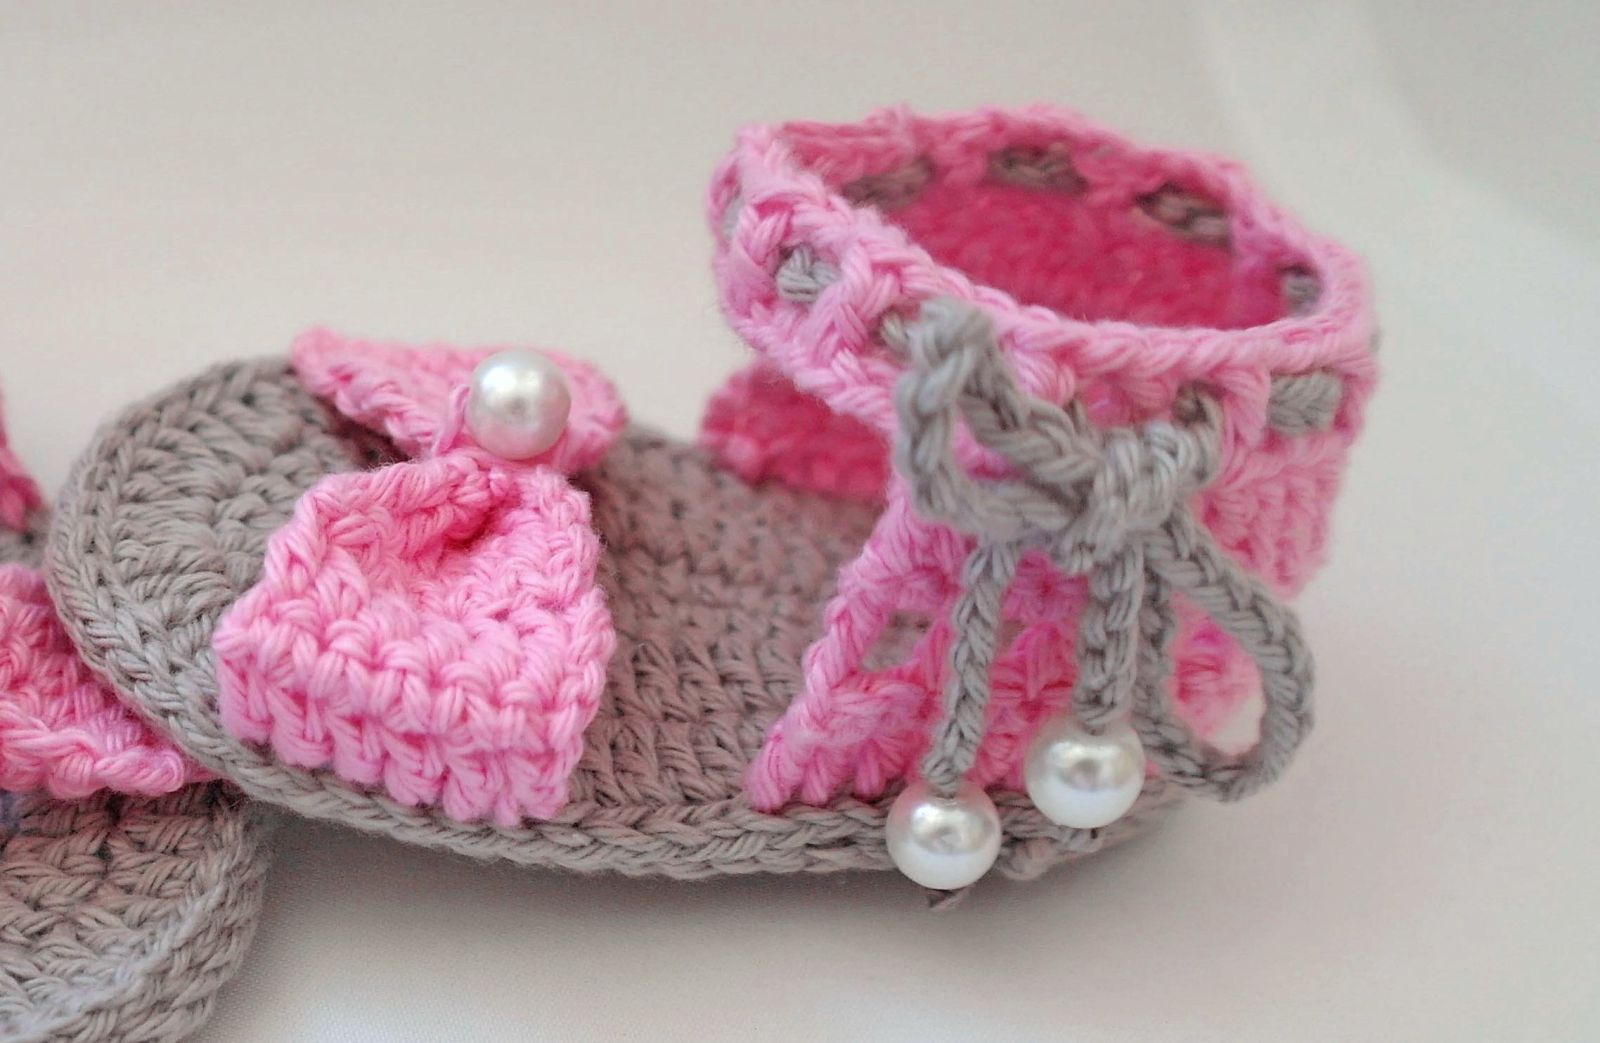
Crochet Pattern: Summer Baby Shoes
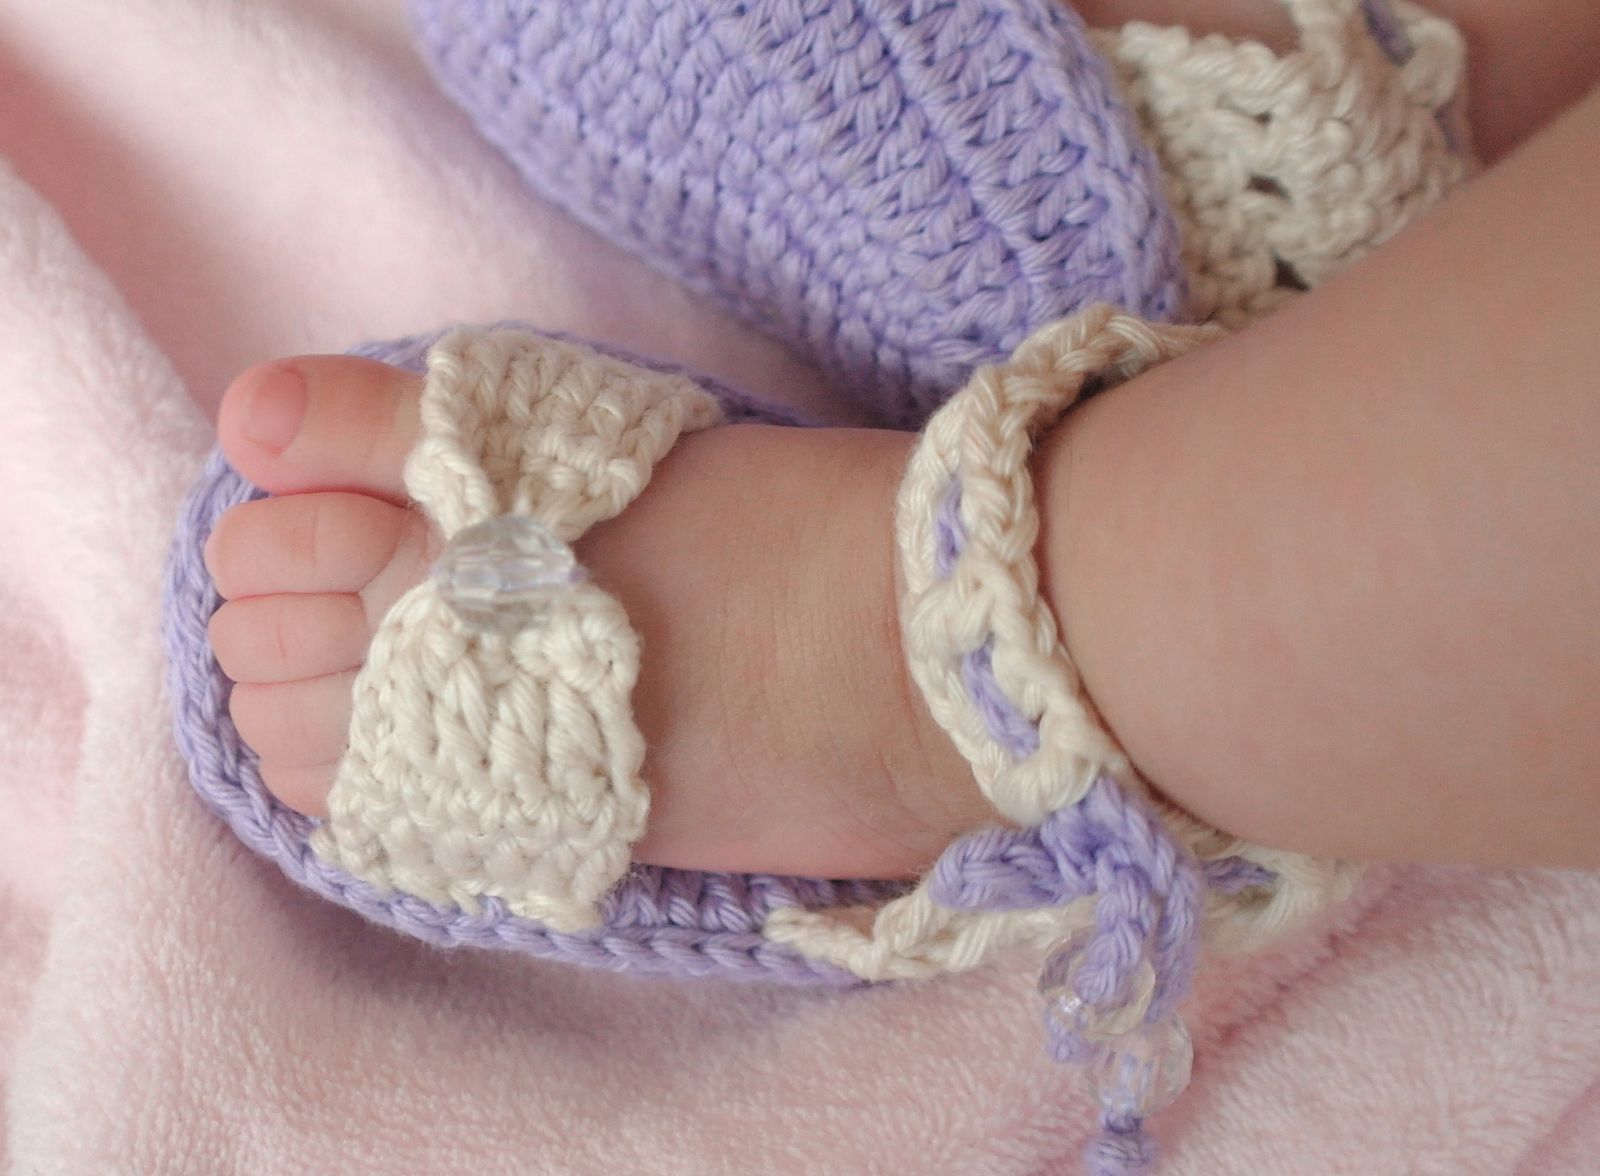
With this crochet pattern, you can make cute and comfortable summer baby shoes. The instructions are explained step by step and are suitable for both beginners and experienced crocheters.
Important Note About Size
The shoes in this pattern have a sole length of approximately 9–10 cm (3.5–4 inches), which usually fits babies aged 3–6 months. Please note that every baby grows differently, so the age recommendation is only a general guide.
For other sizes, I recommend using a standard baby shoe size chart. For the best fit, measure the baby's foot length before you start crocheting.
You will need:
- 2.5 mm crochet hook
- Cotton yarn in various colors (50g/125m)
- Sewing needle, buttons
Abbreviations:
sc – single crochet
ch – chain
inc – increase, crochet two stitches in one
dec – decrease, crochet two stitches together
3 sc in 1 – crochet 3 sc in 1 stitch of the previous row
X dec – X-times decrease
X inc – X-times increase
(---)x – repeat those in brackets Х times
sl st – slip stitch
hdc - half double crochet
dc - double crochet
Begin with the soles. Since each baby shoe is made with two soles joined together, you will need to crochet four soles in total for one pair of shoes.
Soles
Crochet 15 ch, from the 2 loop from the hook
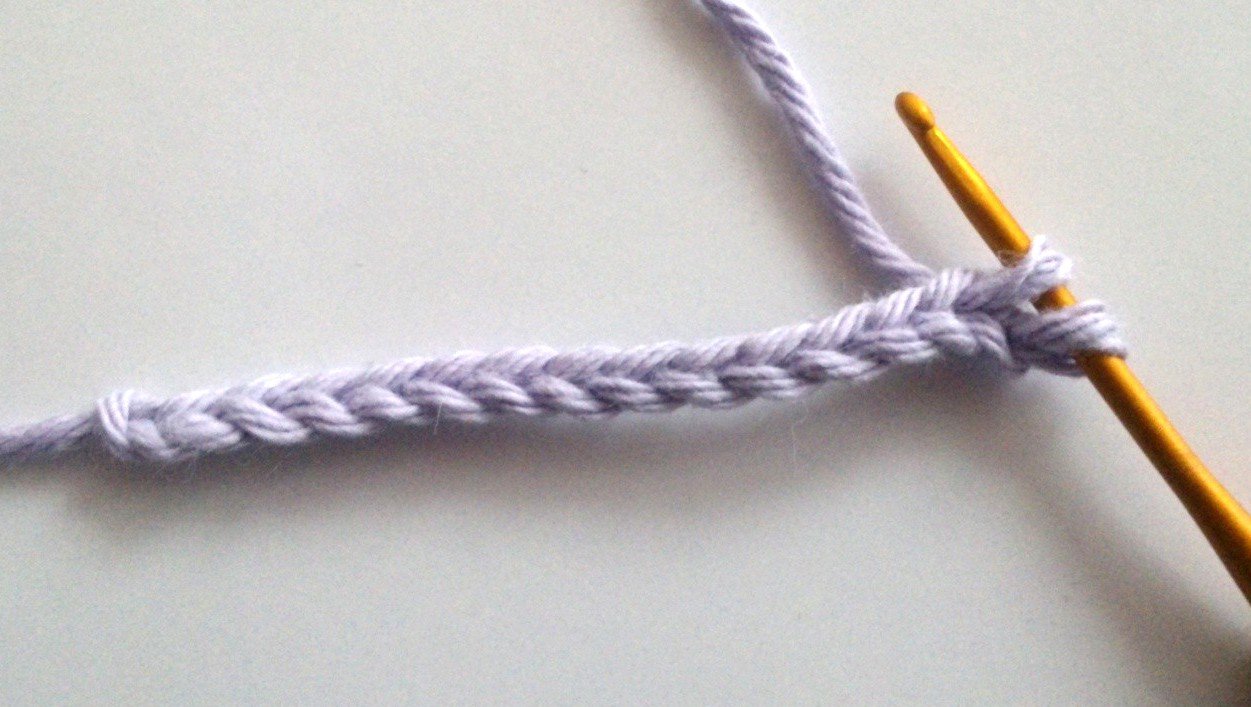
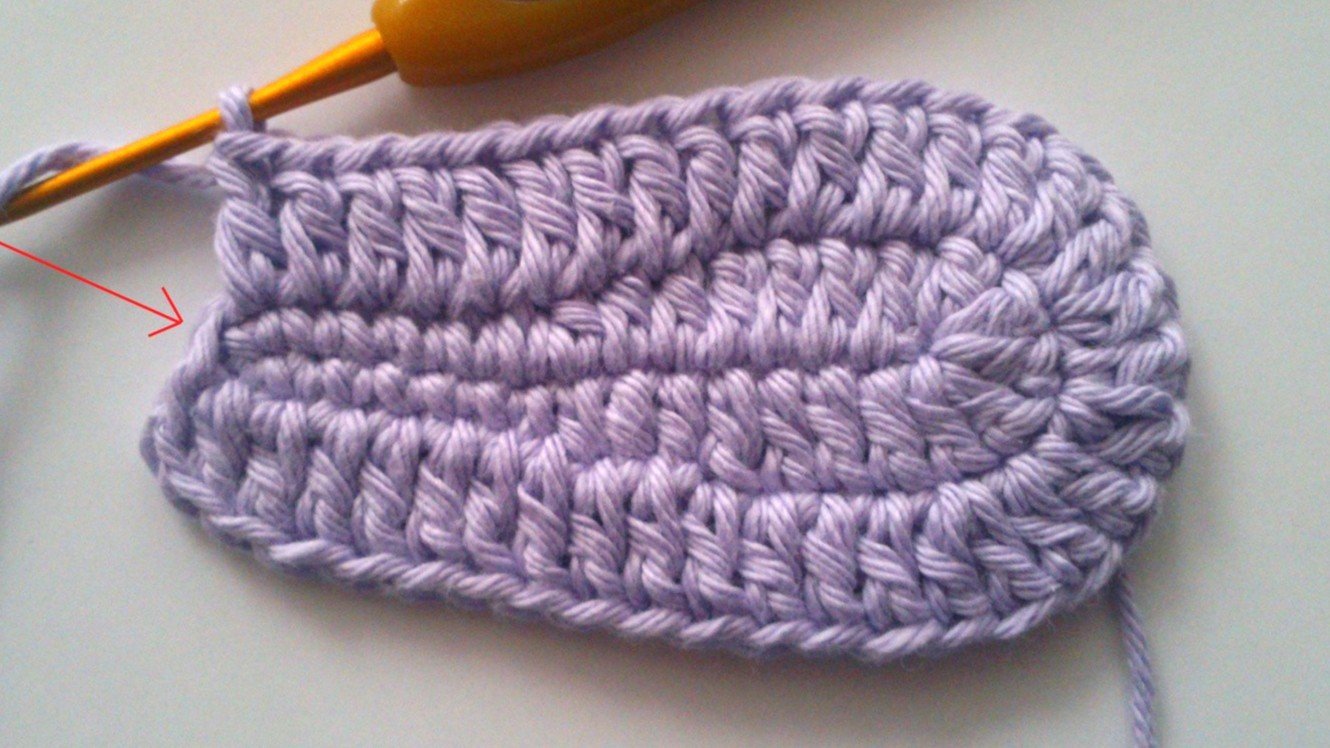
1 R: 6 sc, 3 hdc, 3 dc, 4 dc in 1 ch, further crochet along the other side of the chain 4 dc, 3 hdc, 6 sc, finish with 1 sl st (31)
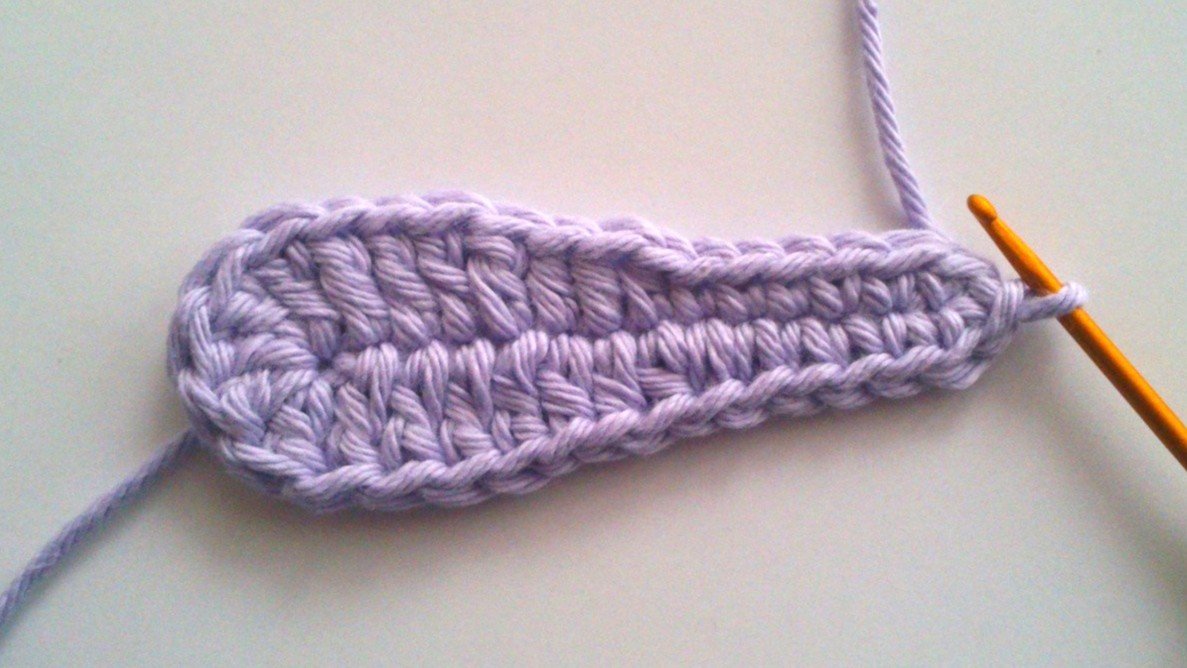
2 R: Ch 3, 13 dc, 5 dc inc, 13 dc, 3 dc into 1 st of the previous round, finish with 1 sl st (39)
Please see the photo below for a better understanding.
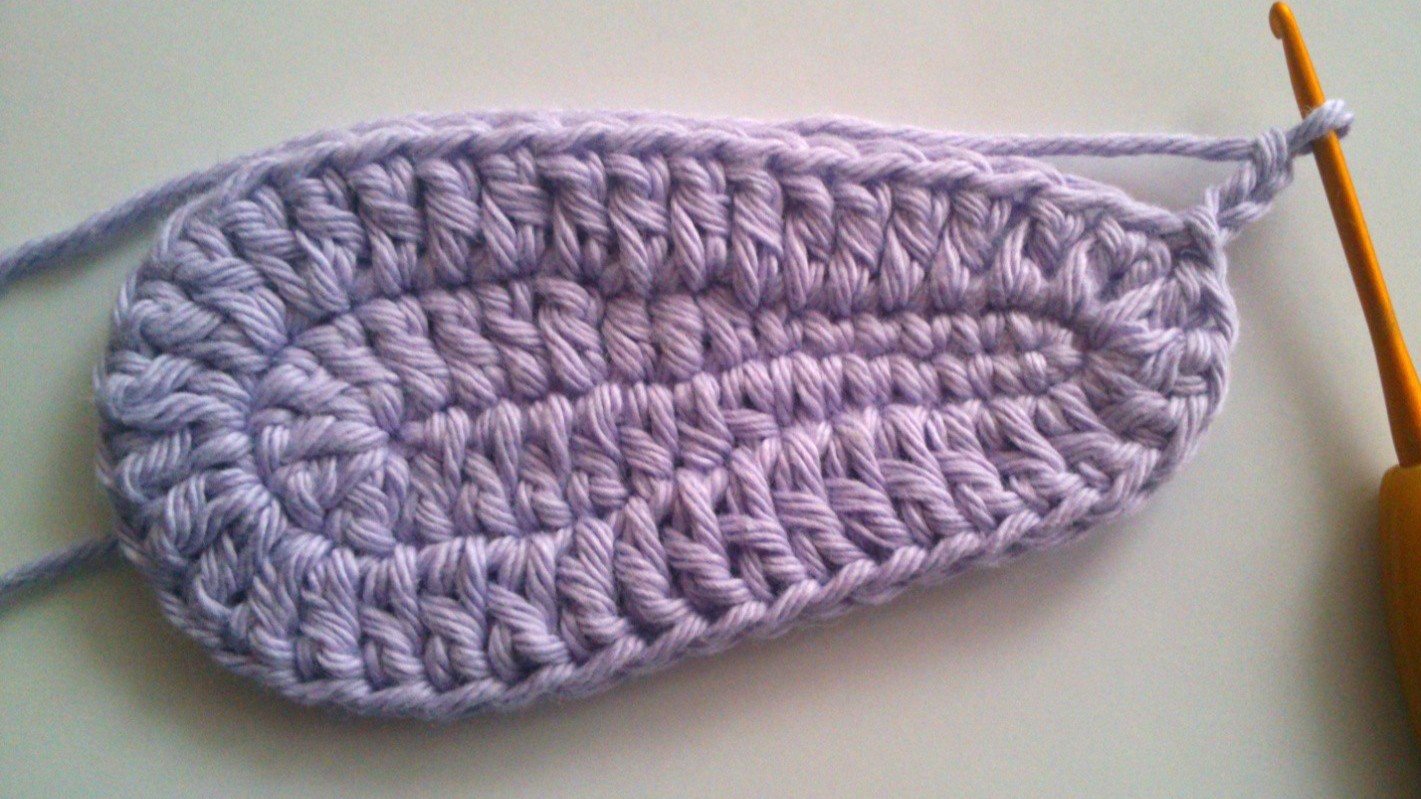
3 R: Ch 3, 13 dc, (1 dc inc, 1 dc) x5, 13 dc, 3 dc inc, finish with 1 sl st (47)
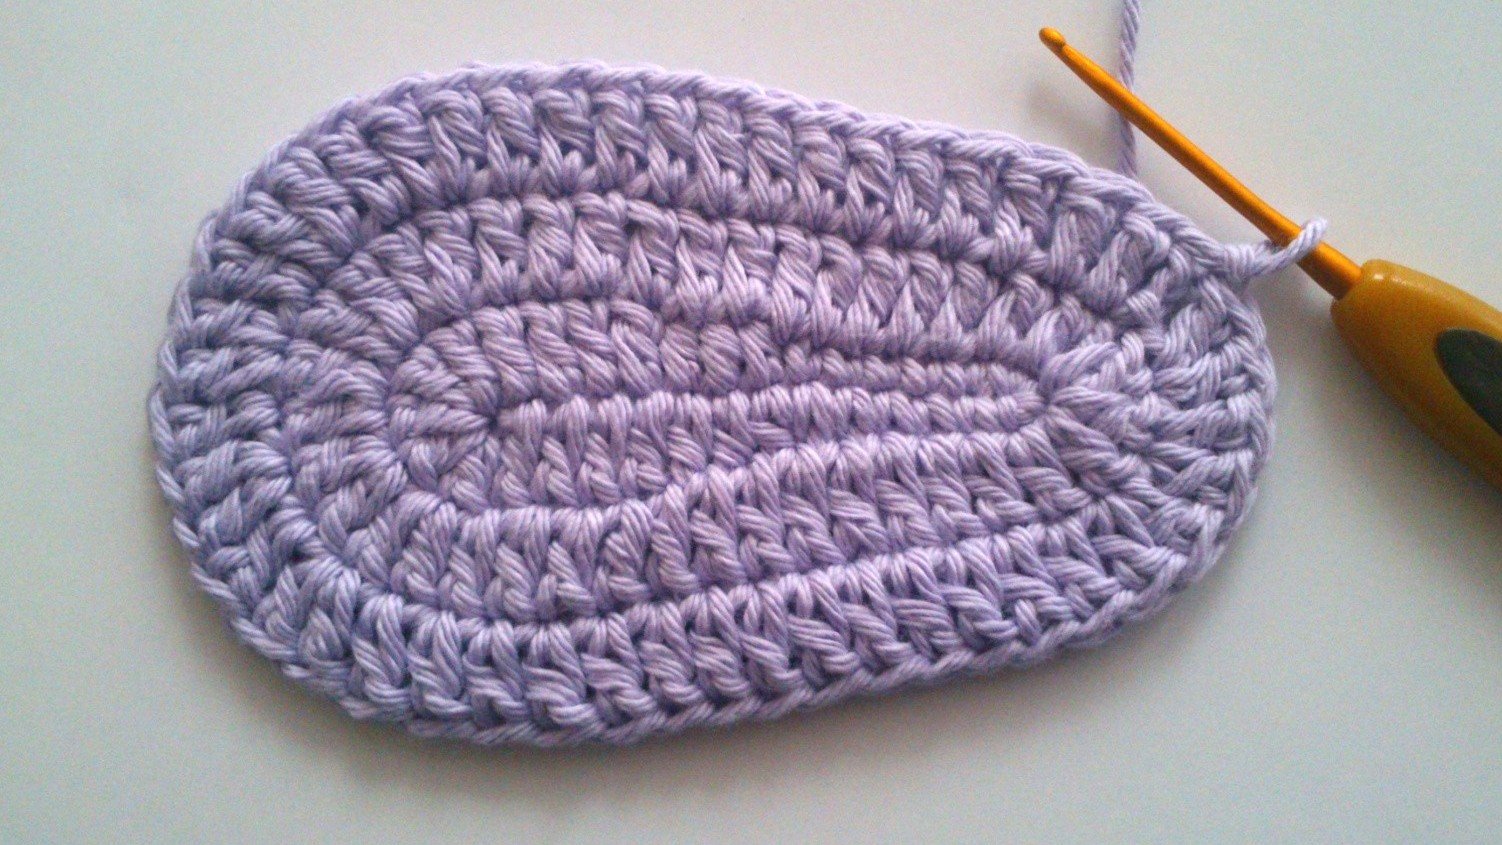
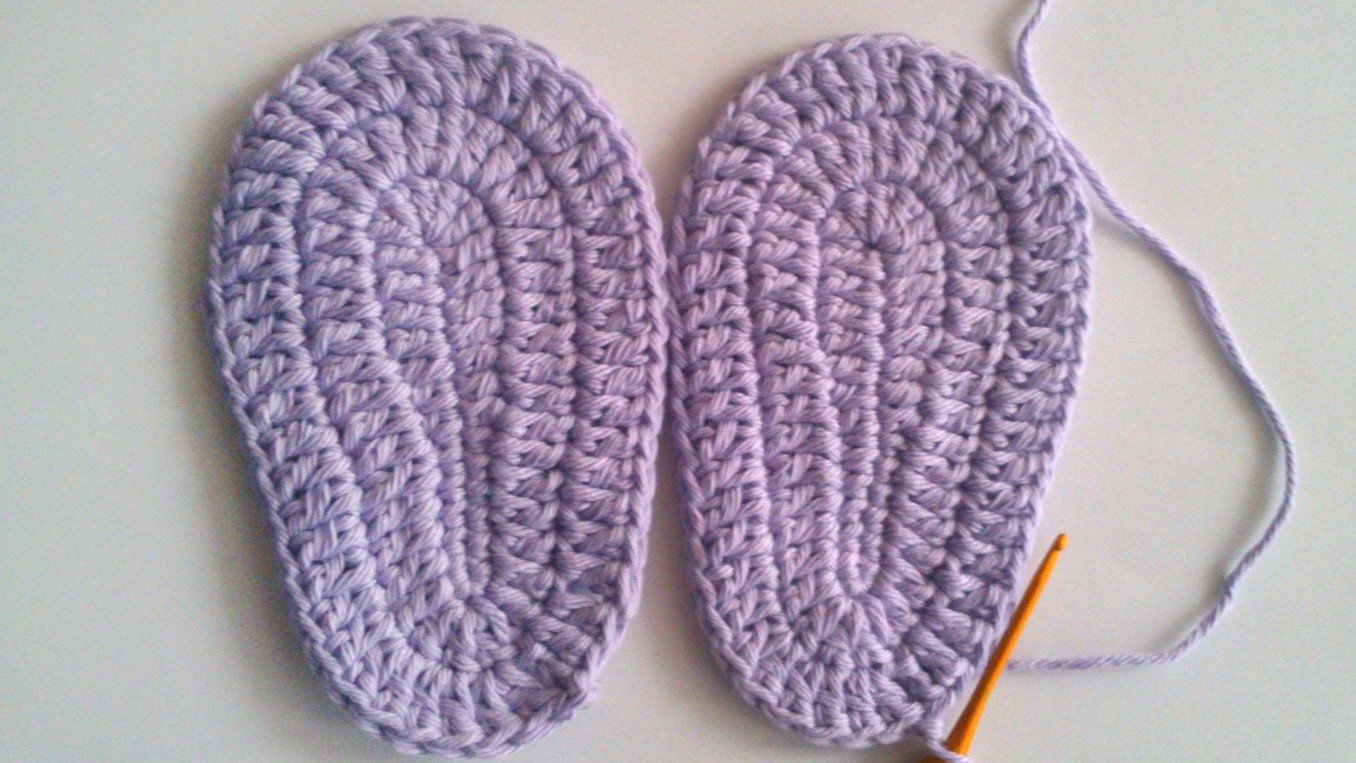
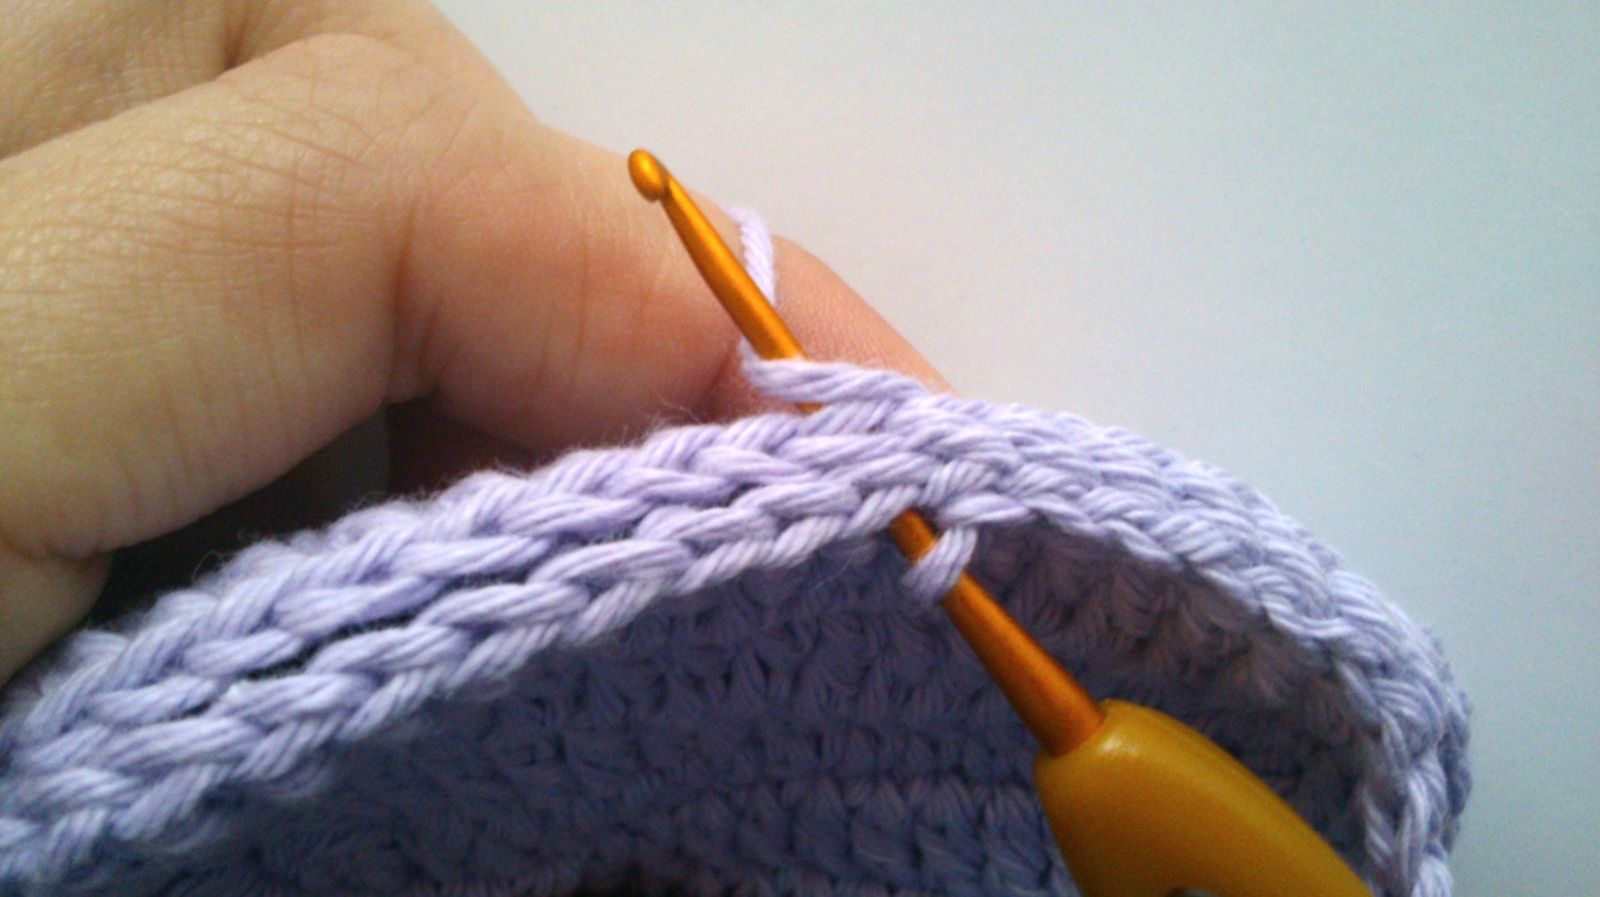
Once the soles are finished, place them together and join them using slip stitches. To do this, insert your crochet hook through both soles at the same time and pull the yarn through. Continue joining the soles all the way around. Please refer to the photos for a clear view of how the soles are assembled.
Fasten and secure the thread, hiding it between the two soles.
Toe of the Shoe
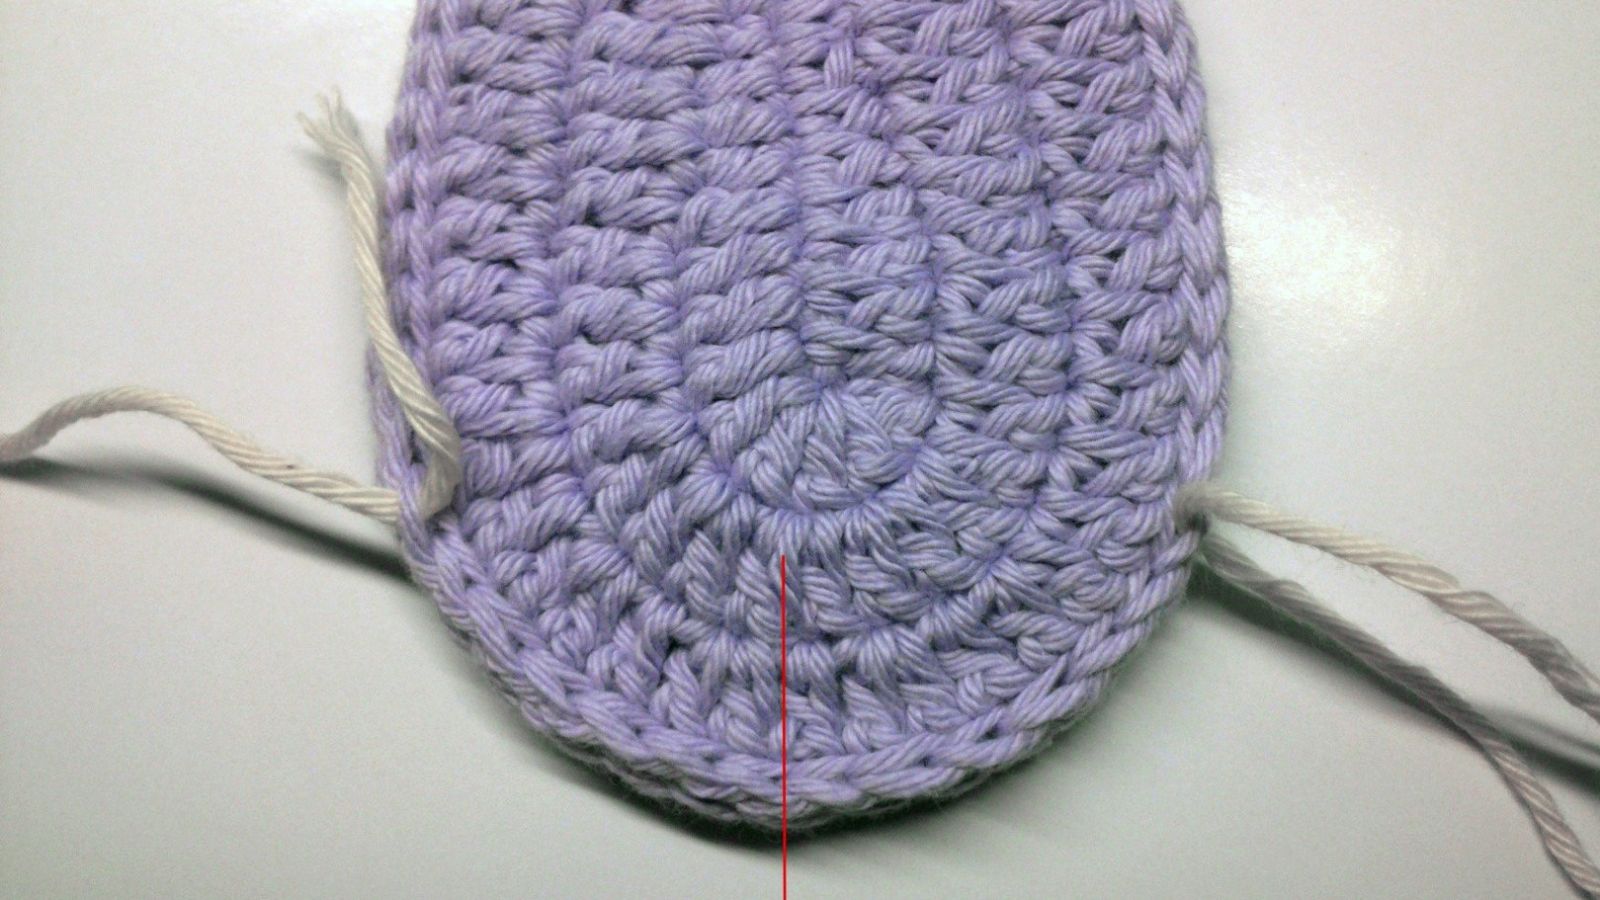
Hold the sole with the toe pointing towards you. Locate the center stitch at the front of the sole and mark it with a stitch marker.
From the center stitch, count 7 stitches to the left and place a second stitch marker. Return to the center stitch, then count 7 stitches to the right and place a third stitch marker.
You should now have three stitch markers in place: one in the center, one on the left, and one on the right. These markers will help you position the toe section evenly and symmetrically.
Begin crocheting the toe of the shoe at the left-hand stitch marker and follow the pattern instructions from there.
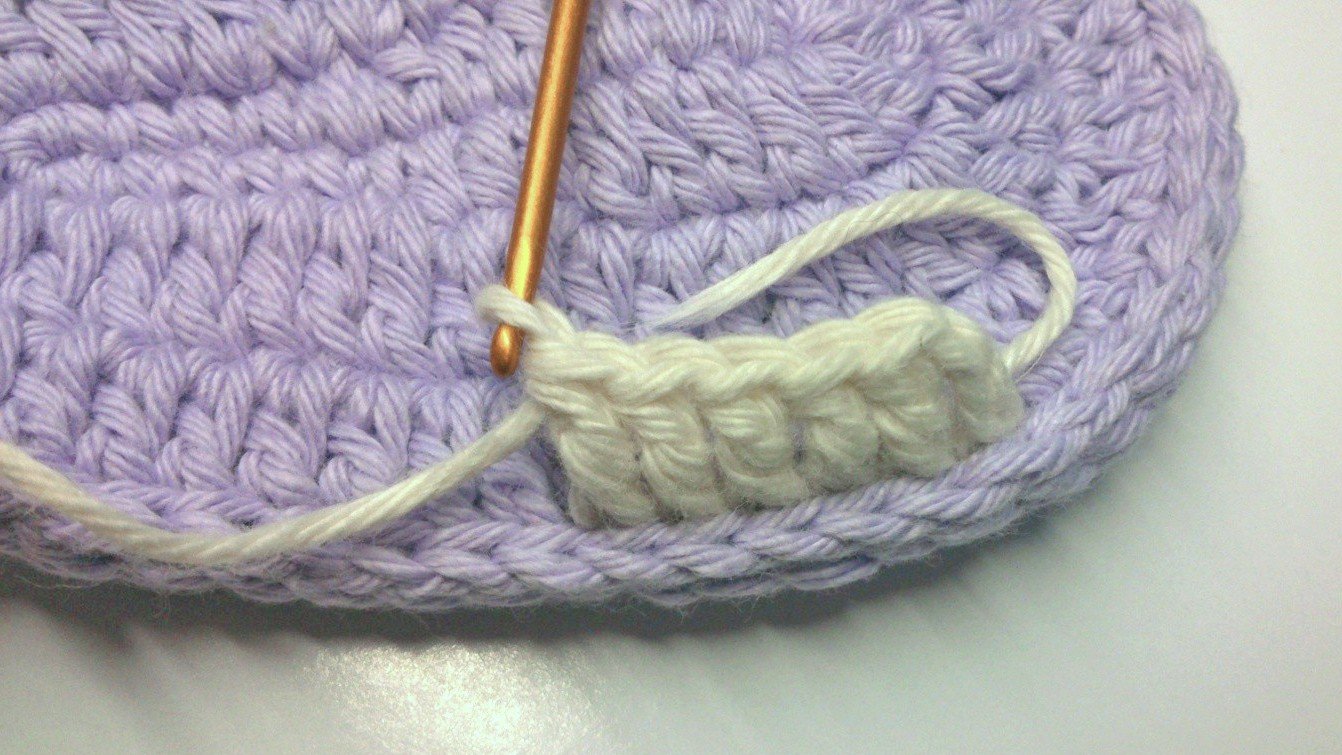
1 R: Insert your hook into the upper edge of the sole at the left-hand stitch marker. Chain 3, then work 5 double crochet (dc) stitches. Turn your work.
Take a look at the photo below to see exactly where to insert the hook and how the first row of the toe section should look.
2 R: Ch 1, 5 sc, turn the work
3 R: Ch 3, 5 dc, turn the work
4 R: Ch 1, 5 sc, turn the work
5 R: Ch 3, 5 dc, turn the work
6 R: Ch 1, 5 sc, turn the work
7 Re: Ch 3, 5 dc, turn the work
8 R: Ch 1, 5 sc, turn the work
9 R: Ch 3, 5 dc, Fasten off the yarn.
Next, sew the crocheted strip to the opposite side of the sole, using the right-hand stitch marker as a guide. Make sure the strip is positioned straight and that both sides are as even and parallel as possible. Once you are satisfied with the placement, secure the yarn and weave in the end, hiding it neatly between the two soles.
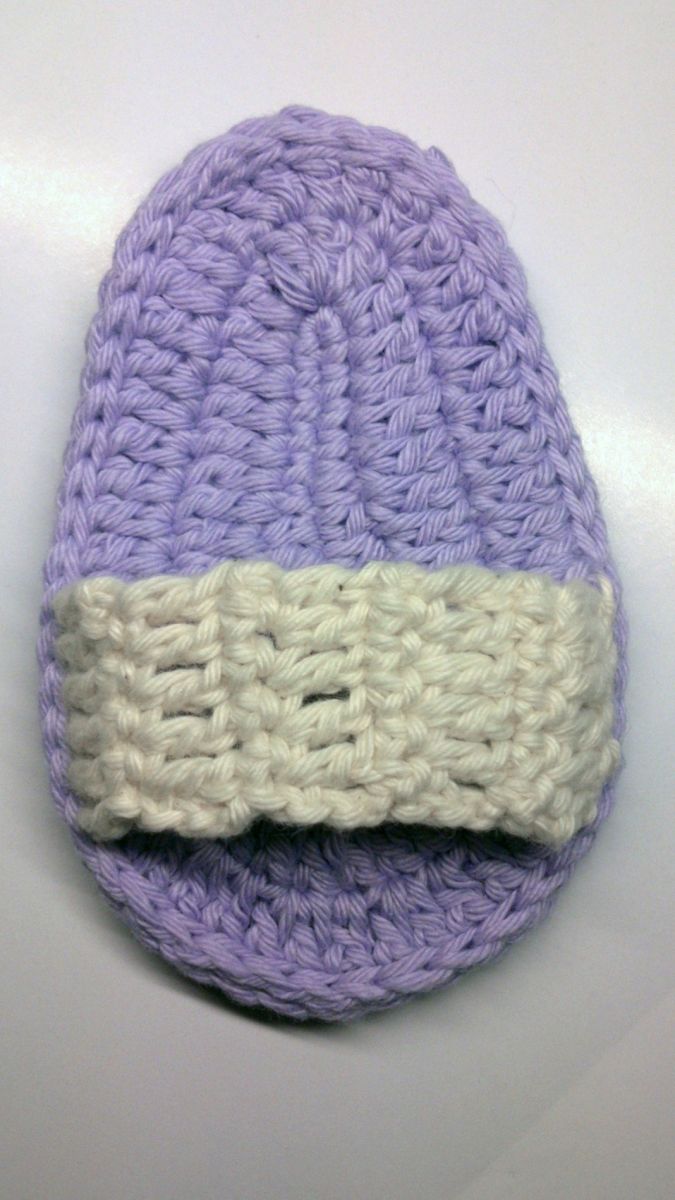
Heel
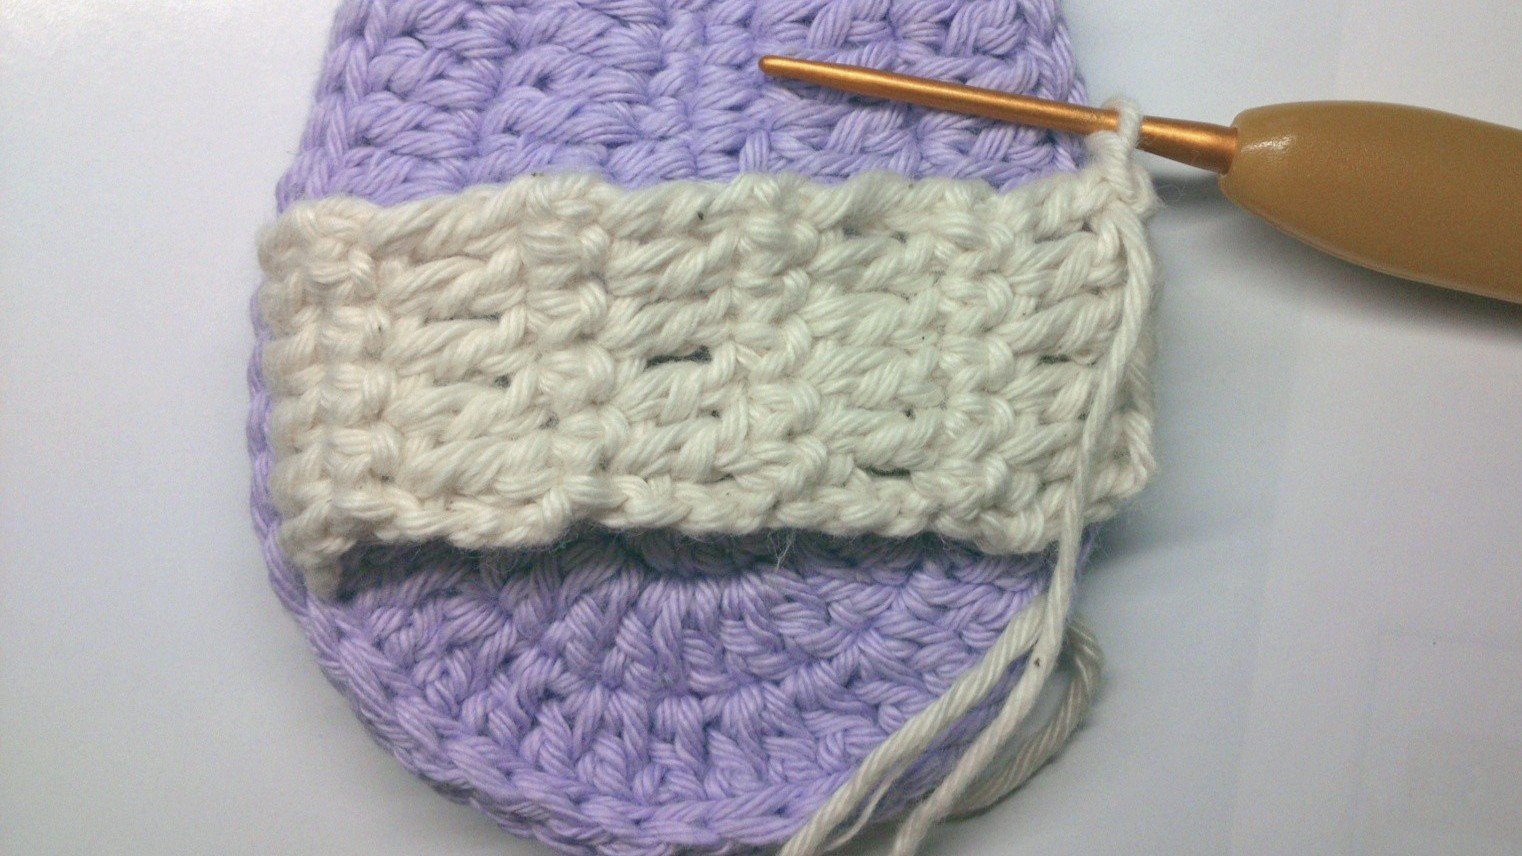
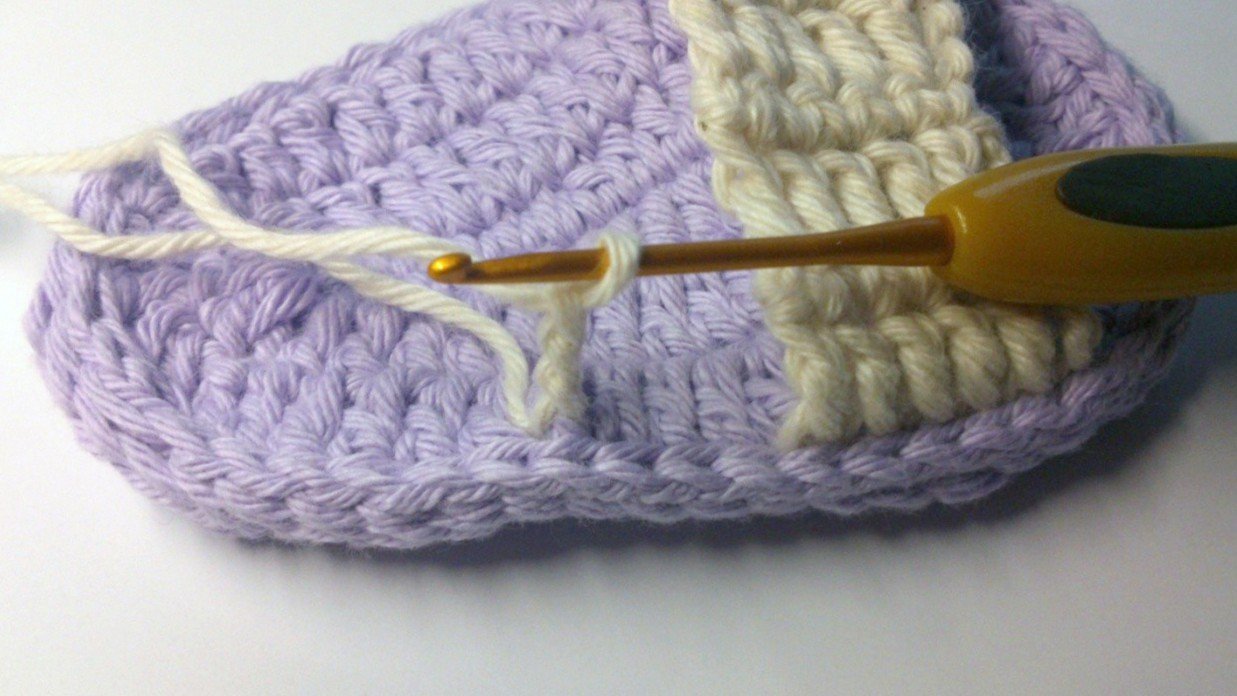
1 R: Count 3 stitches away from the strip that has already been attached. Insert your crochet hook into the 4th stitch along the upper part of the sole and pull the yarn through. Ch 3, then work 18 dc along the sole. Take a look at the photo below, it will help you see more clearly where to begin crocheting.
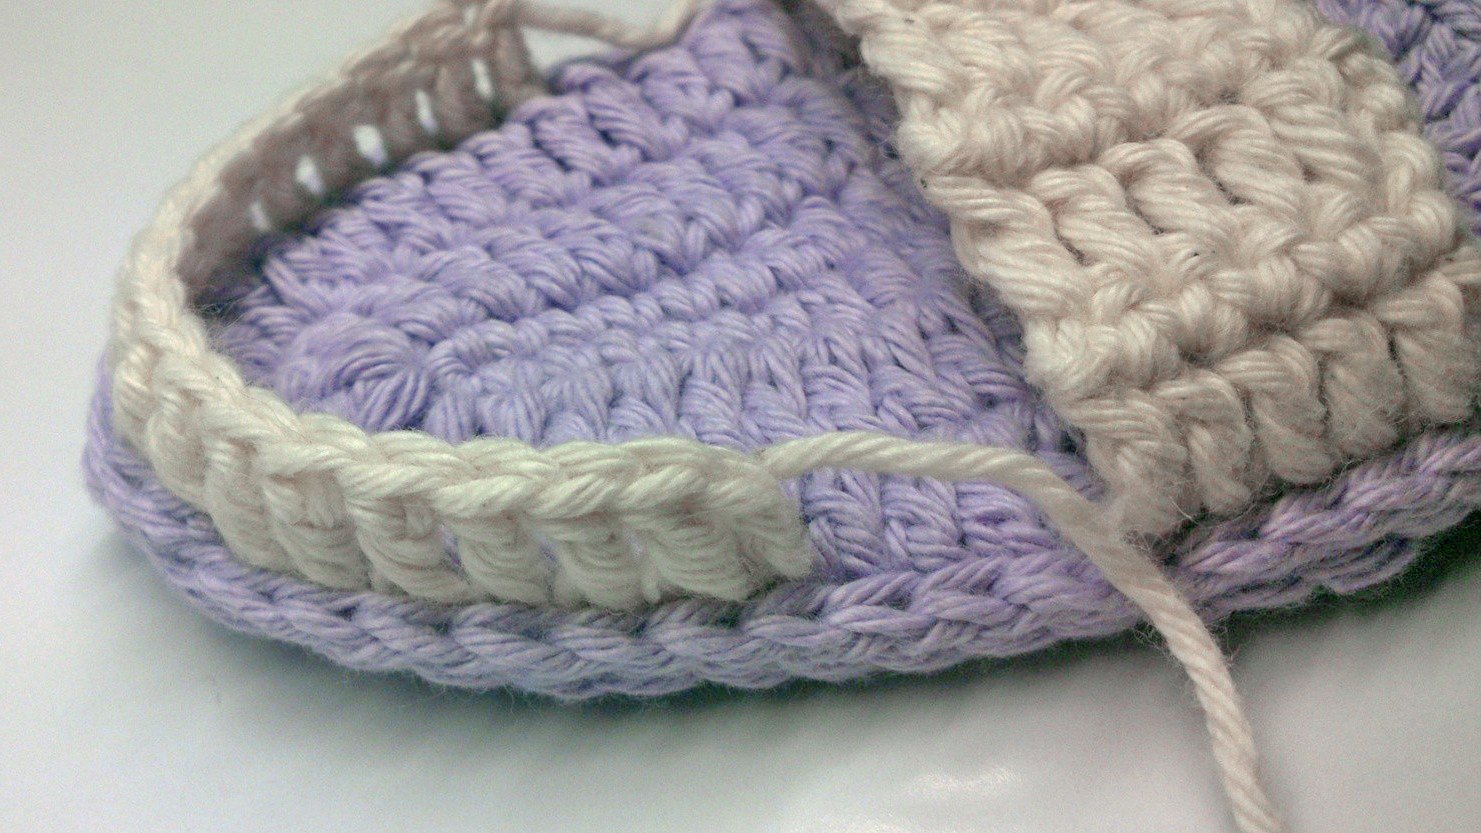
2 R: turn the work, Ch 1, 18 sc
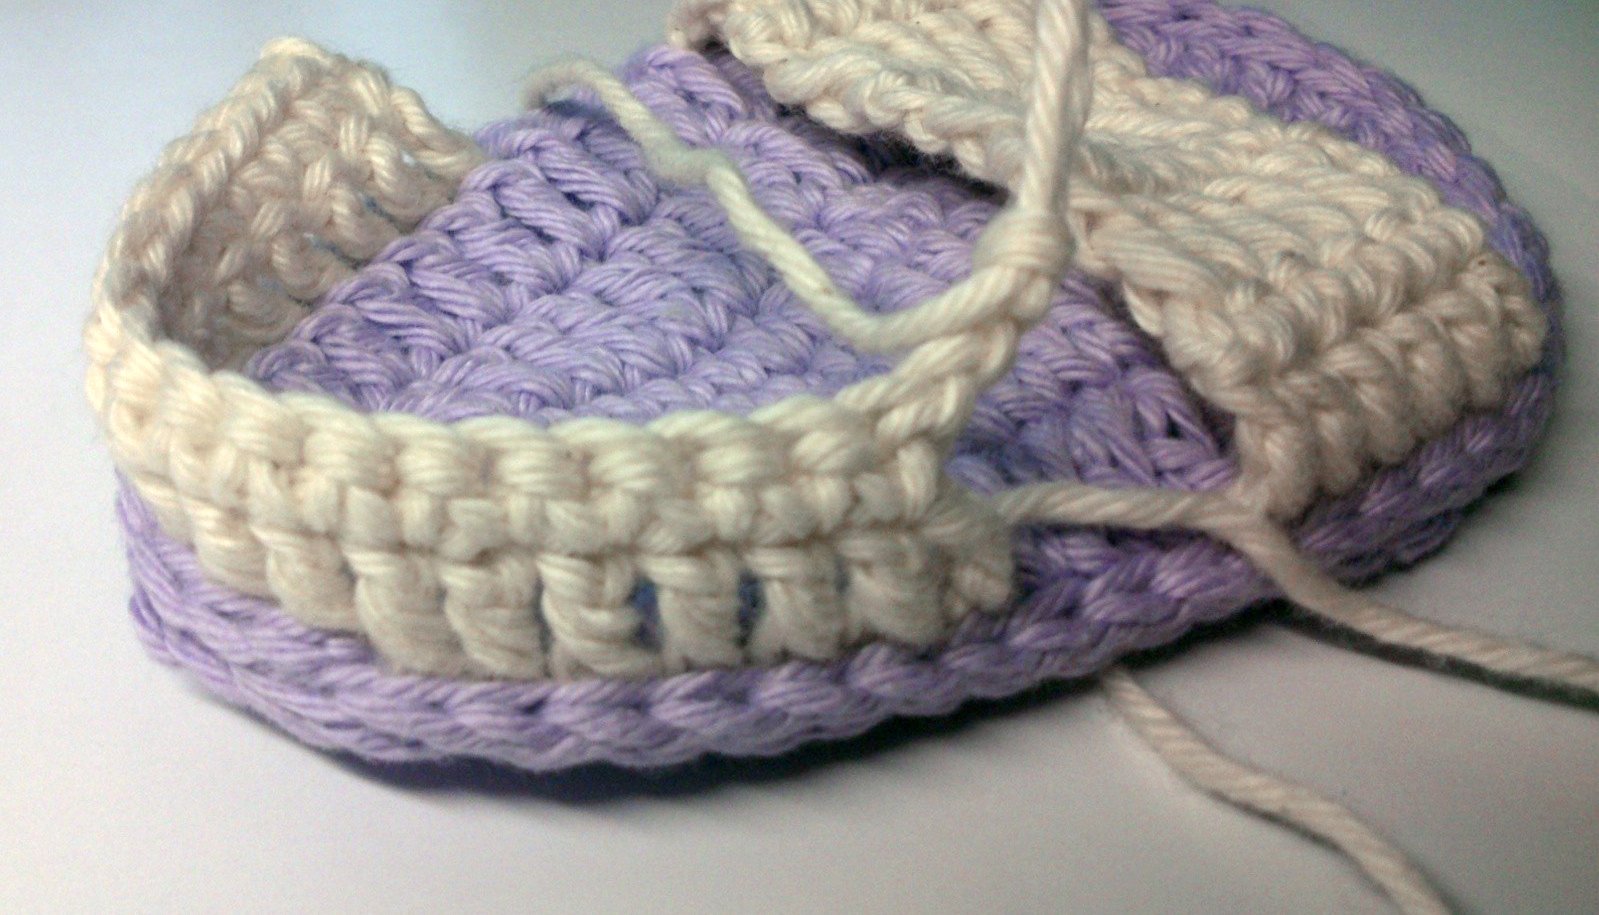
3 R: turn the work, Ch 4, (Skip 1 single crochet, work 1 double crochet, chain 1) – repeat from * to the end of the row. The chain stitches create small spaces between the double crochets, giving the pattern a light, airy, and decorative openwork look.
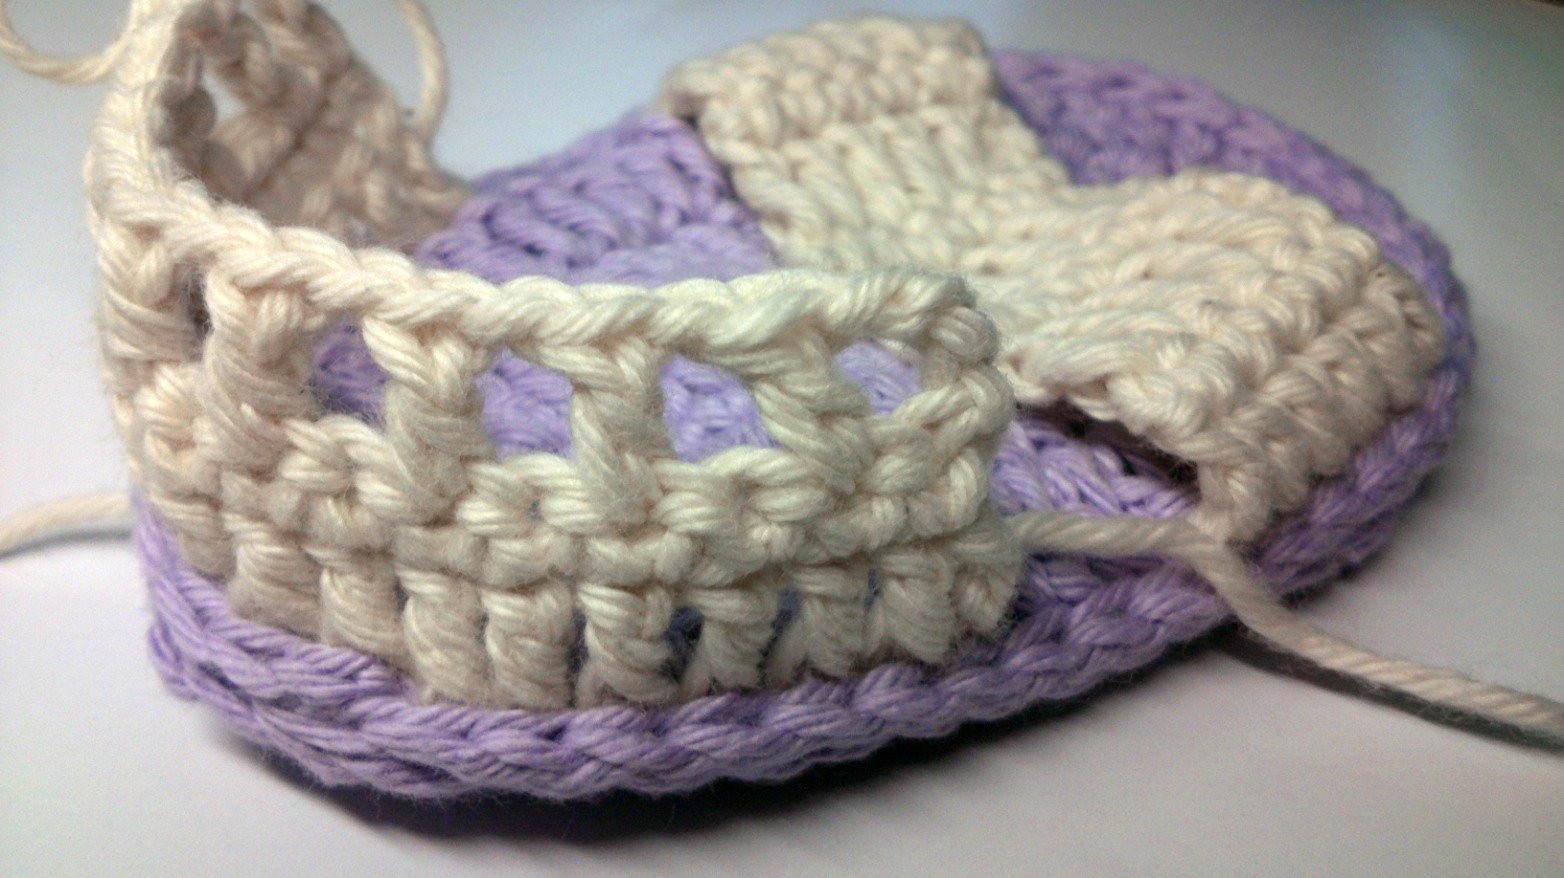
4 R: turn the work, Ch 1, 18 sc.
5 R: turn the work, Ch 3, work 18 double crochet stitches, then chain 18. Attach the chain to the opposite side of the shoe with a slip stitch.
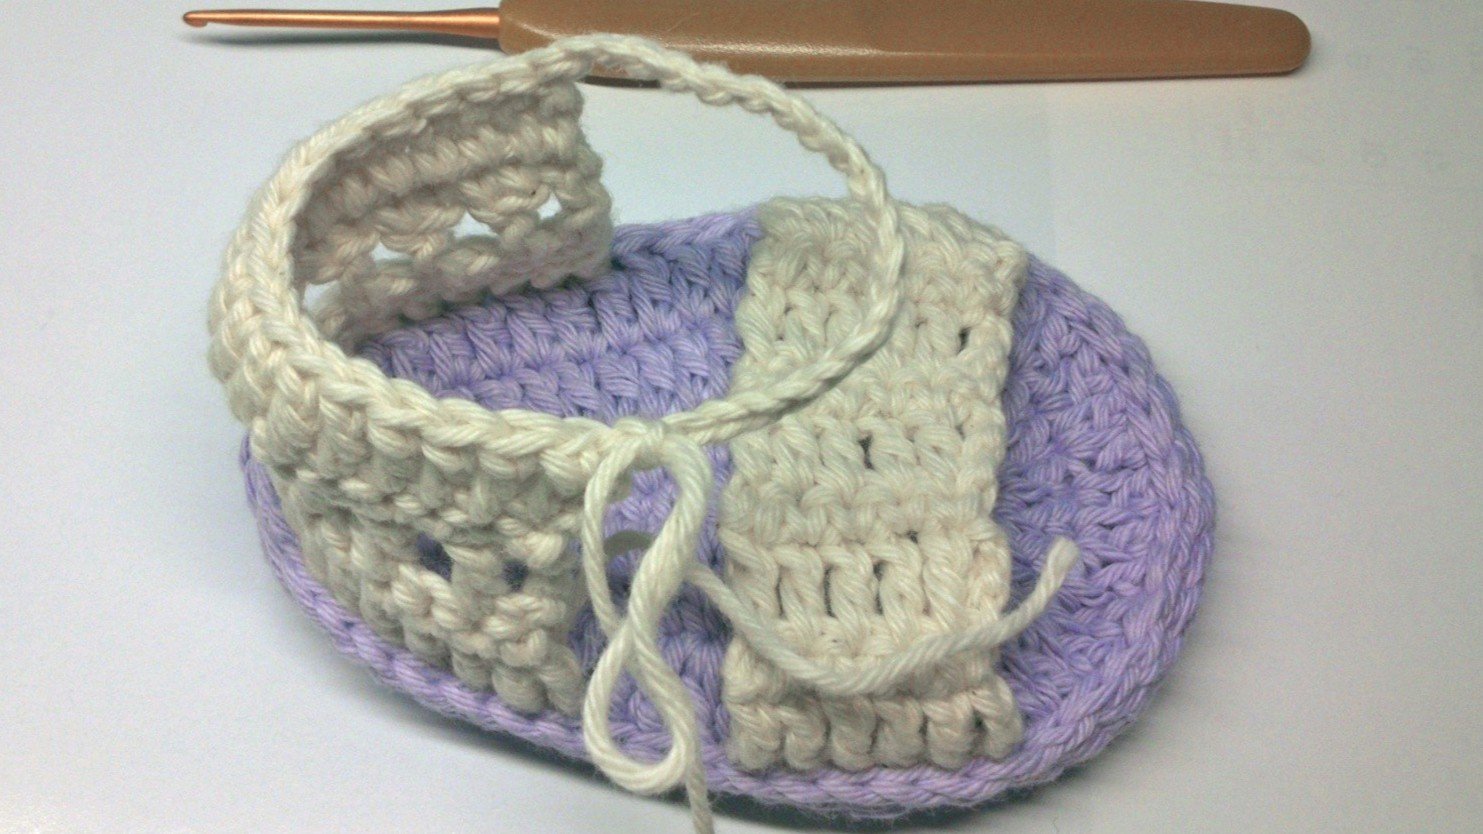
6 R: turn the work, Ch 4. Then work (skip 1 sc, 1 dc, chain 1) around the entire shoe. Repeat from * to the end of the round. Join with a slip stitch to the beginning of the round.
The chain stitches create small decorative openings between the double crochets, giving the shoe a light and airy lace-like appearance.
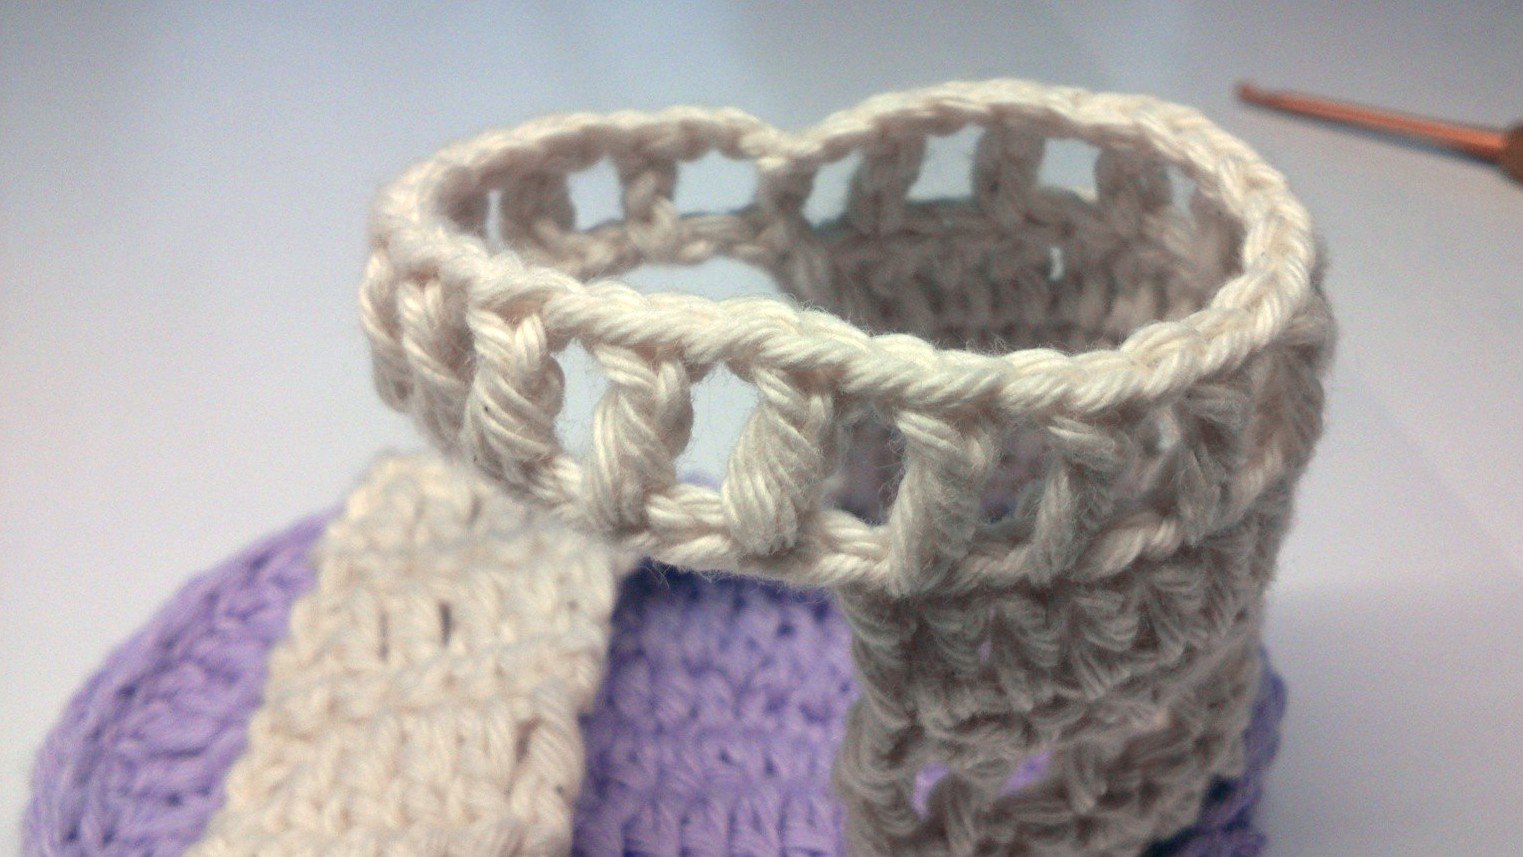
Crochet a chain of 80 stitches and thread it through the designated openings in the shoe to create the lace.
Important Safety Note
In the photos, you may notice that I decorated the lace and the toe of the shoe with small beads. However, I strongly recommend avoiding beads or other small embellishments when making shoes for babies. Small parts can become loose and may present a choking hazard if swallowed.
If you decide to use beads, make sure they are attached very securely and inspect them regularly for any signs of loosening. Please note that even securely attached embellishments cannot guarantee complete safety.
You are responsible for ensuring that all materials and decorations used are suitable and safe for the intended child. Always check the finished shoes before use and supervise babies while wearing them.