
.JPG)
Every stylish doll needs a go-to handbag to complete her look, and this quick, beginner-friendly project is the perfect addition to any doll's wardrobe. Whether you are dressing up an 12-inch doll, a fashion doll, or your favorite amigurumi, this pattern is super fun to make and customizable in all your favorite colors! This detailed pattern will show you how to create a charming, miniature handbag designed specifically for dolls and toys. Written in standard US crochet terms, this pattern features step-by-step instructions that are easy to follow for crocheters of all skill levels. This tiny handbag pattern is the perfect afternoon project for beginners and seasoned makers alike. So, let’s get started with this free crochet pattern and stitch together the cutest little accessory your dolls will ever wear!
SUPPLIES YOU NEED
Here is what you will need for this project: ca 20 gr Schachenmayr Catania 125m/50g in any color you choose, for this project you will need one size hook only - crochet hook C, scissors, tapestry needle, stitch markers, beads and satin band.
SKILL LEVEL
I would classify this free crochet pattern as an advanced beginner. It is necessary to have some experience with crocheting before creating this project.
SIZE
The ready hat fits 12-14 inches doll, can be made bigger or smaller depending on the yarn and hook you use.
SKILLS YOU NEED
chain, single crochet, double crochet, half double crochet, slip stitch, increase, decrease
ABBREVIATIONS
Ch =chain
St = stitch
Sc = single crochet
Sl st = slip stitch
dec = decrease stitch (two single crochets together)
inc = increase stitch (two single crochets in the one stitch)
Dc = double crochet
Hdc = half double crochet
Tc = triple crochet
Rnd = Round
MC = Magic Ring
RS = Right side
* = repeat the instructions for the times indicated
(...) = total amount of stitches
TIPS
- Do not join rounds, work in a continuous spiral.
- Use a stitch marker or piece of yarn to keep track of the last stitch in each round
- All stitches are worked into both loops, unless stated otherwise in the pattern.
- When filling with polyester stuffing, pull apart each large chunk into many smaller chunks. This ensures an even distribution of firmness within the amigurumi
- Booties can be made in any desired colors.
V-STITCH
To complete each V-stitch, work (double crochet, chain 1, double crochet) in the same space or stitch:
Round 1: In the fourth chain from the hook work 2 double crochets, skip the next chain space, *2 double crochets in the next chain space, then skip the next chain space*, repeat * across the round.
Round 2: Work 2 double crochets in between each pair of double crochets from the row below. Insert your hook into the space between them. Repeat across the whole round.
In this pattern V-stitches are worked either: into V-stitches of the previous round (that is, into chain-1 space between 2 double crochets) or into space between two V-stitches of the previous round (that is, into space prior to next V-stitch).
INSTRUCTIONS
BOTTOM
.JPG)
Round 1: 6 single crochets into Magic Ring
Round 2: increase 6 times (12 stitches)
Round 3: *single crochet in the next stitch, increase* (18 stitches)
Round 4: *single crochet in each of next 2 stitches, increase* (24 stitches)
Round 5: *single crochet in each of next 3 stitches, increase* (30 stitches)
Round 6: *single crochet in each of next 4 stitches, increase* (36 stitches)
Round 7: *single crochet in each of next 5 stitches, increase* (42 stitches)
Round 8: *single crochet in each of next 6 stitches, increase* (48 stitches)
Round 9 (working into the back loop): single crochet in each of next 48 stitches, slip stitch.
Do not fasten off.
Front Post Double Crochet:
Yarn over and insert your hook from front to back and then from back to front again between the posts of the stitches. The hook should now be positioned horizontally behind the double crochet that you’re working around. Yarn over and draw the yarn around the post of the stitch. You now have 3 loops on the hook. Yarn over and draw the yarn through the 2 loops on the hook, twice. One front post double crochet is complete.
BAG
.JPG)
Round 10: chain 3 stitches, *skip next 2 stitches, (3 double crochets, chain 1 stitch, 3 double crochets) in next stitch, skip next 2 stitches, 1 fpdc in next stitch*, repeat from * to* till the end of rnd.
Rounds 11-13: chain 3 stitches, *(3 double crochets, chain 1 stitch, 3 double crochets) in next chain-1 space, 1 fpdc into the fpdc of the previous round*, repeat from * to* till the end of rnd.
.JPG)
Round 14: chain 3 stitches, double crochet in each of next 2 stitches, skip next stitch, *double crochet in each of next 3 stitches, skip next stitch*, repeat from * to* till the end of rnd.
Rounds 15-16: double crochet in each of next stitch around. Fasten off. Hide all yarn ends.
ASSEMBLY
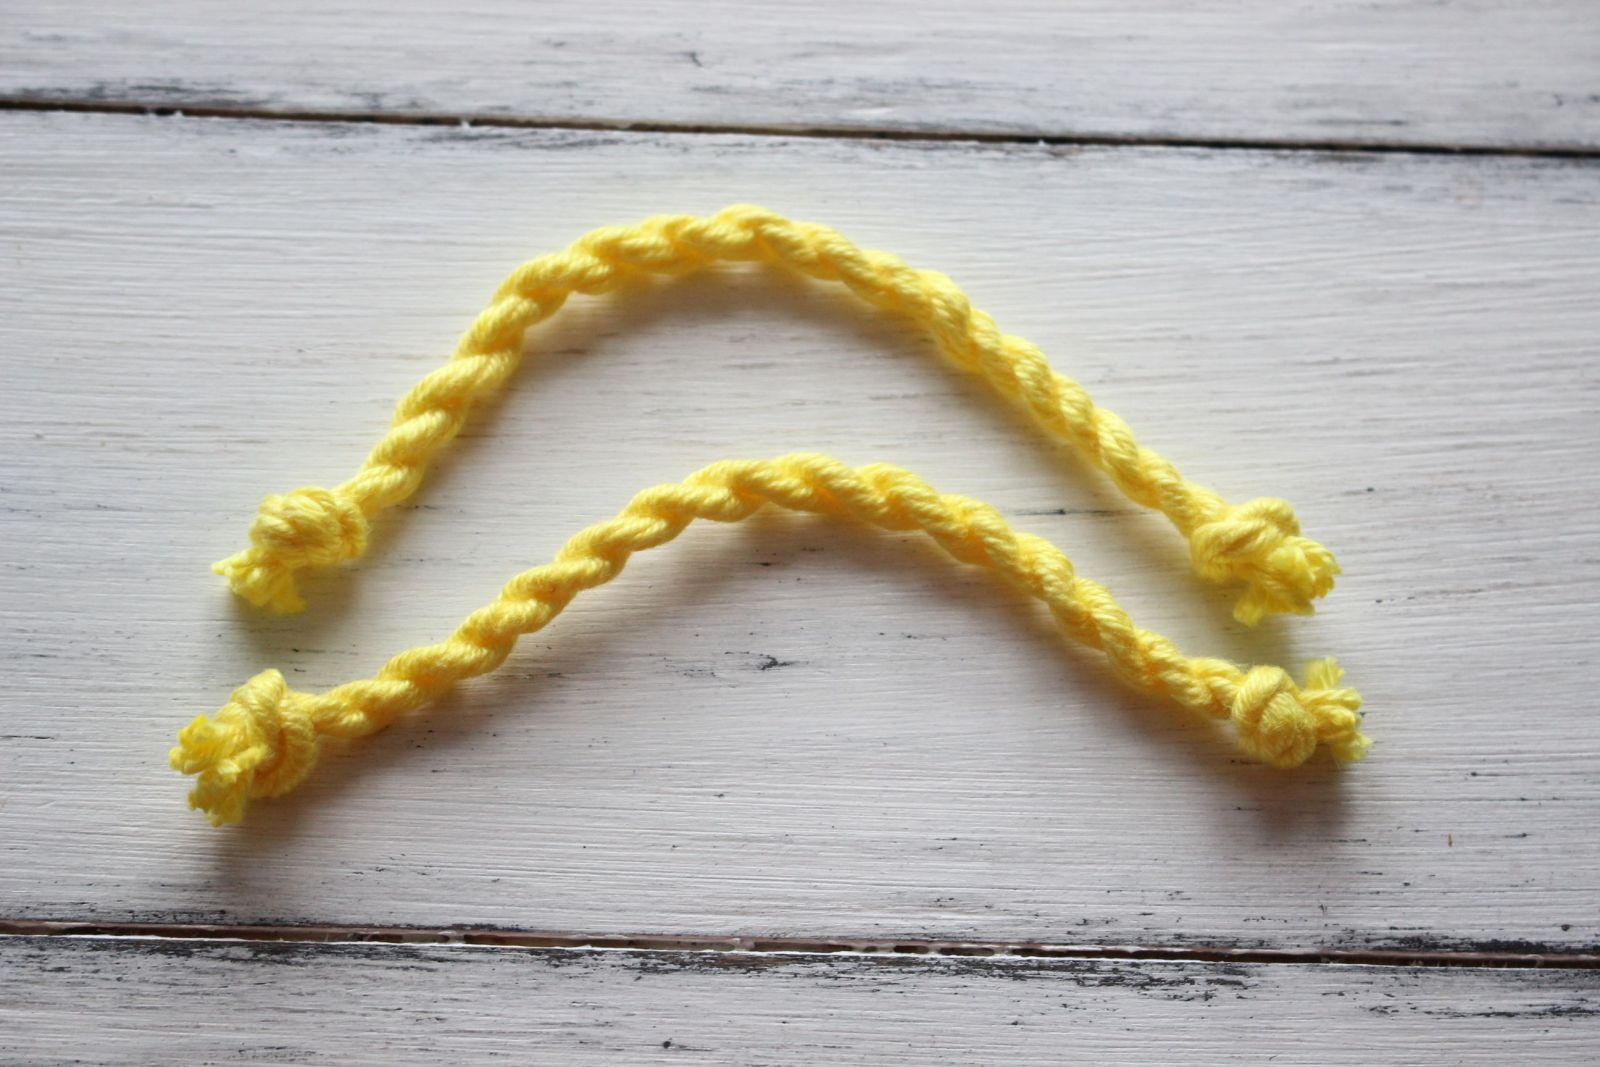
For the straps make a twisted cord ca 10-12 cm long:
Cut several strands of your chosen yarn 4 times longer than needed, as the twisting process shrinks the cord significantly. Knot the strands together at each end. Hook one of the knots onto a stationary object (like a door handle). Take the knot at the opposite end and insert a pencil through one end. Grab threads between your fingers and twist the pen like a propellor. Twist a lot, being careful not to let the twisty part to not get in knots. Fold yarn in half and let the two ends twist around themselves. Make a knot at both ends to keep it from untwisting.
.JPG)
Sew straps to the bag. Weave in ribbon through spaces between dc´s.
.JPG)
I hope you enjoyed crocheting the purse and found the pattern helpful. I would love to see your finished creations, so share a picture here or on Instagram by tagging me @tansuluucrafthaus. Feel free to sell the finished item in smal amounts created with this free crochet pattern but please provide pattern credit back to me when posting online.
Please write in comments about what you would like to see next and what topics you are interested in. It´ll give me great ideas for future projects.
Happy crocheting! Feel free to contact me with any questions. Thank you for stopping by and have a lovely day!


