
The Cuddly Bunny
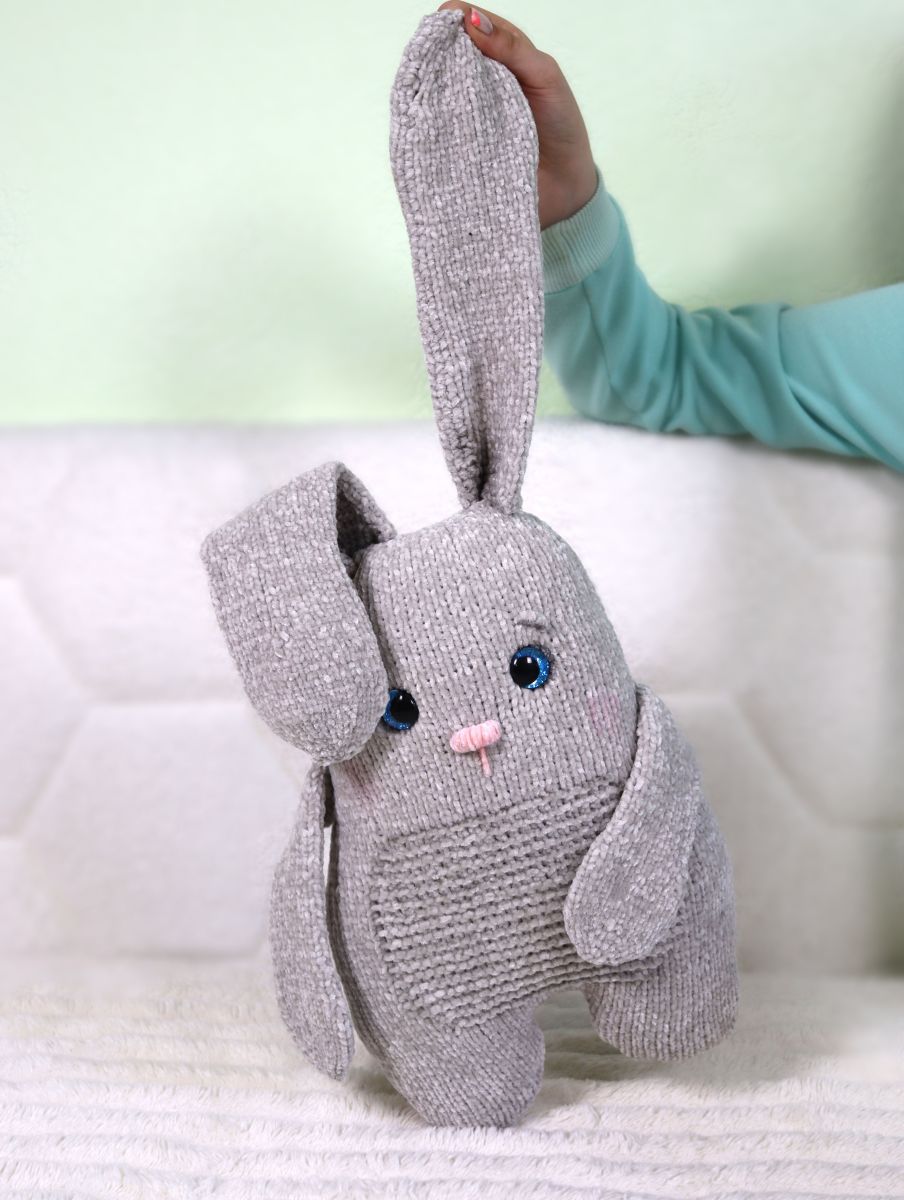
This bunny is a sweet and comforting companion for anyone who loves soft, snuggly plush toys. Its flat, pillow like shape gives it an extra cozy feel, making it perfect for cuddling or as a charming decorative accent in a child’s room. The finished bunny measures approximately 30 cm, but its size can easily be adjusted by choosing a different yarn weight:
- Using thick chenille yarn creates a larger, extra soft cuddle buddy, ideal as a gift for young children or for anyone who enjoys flat, pillow like plush toys.
- Using thinner yarn results in a proportionally smaller, more compact bunny.
Thanks to its flat shape, the bunny stays lightweight, soft, and pleasantly flexible, allowing it to rest comfortably against the body, almost like a small pillow with ears.
Knitting Instructions:
All parts are crafted entirely with two knitting needles.
Follow these steps:
First Row - Purl Stitches Begin by knitting the first row entirely in purl stitches. These will form the back side of your project, creating a neat texture.
Second Row - Knit Stitches In the second row, knit every stitch. This will produce a smooth, even front for your piece.
Repeating the Pattern Continue alternating between purl stitches in the odd-numbered rows and knit stitches in the even-numbered rows:
- Odd-numbered rows (e.g., 1st, 3rd, 5th): Work in purl stitches.
- Even-numbered rows (e.g., 2nd, 4th, 6th): Work in knit stitches.
This straightforward pattern of alternating knit and purl rows is ideal for beginners, offering an easy yet satisfying introduction to the craft.
Materials:
For the bunny I used Katia Velvet Fine and knitted all parts with double‑stranded yarn.
- Katia Velvet Fine: 50 g / 160 m
- Knitting needles 2,5 mm.
- Safety eyes 14 mm.
- Stuffing, tapestry needle, Fabric marker.
Abbreviations:
Ch – Chain(s)
inc – increase
dec – decrease
X dec – X- times decrease
X inc – X- times increase
P – purl
K– knit (garter stitch)
Body
Cast on 12 stitches (ch) onto the knitting needle. Make sure the stitches are evenly stretched while knitting to ensure your knitted piece is nice and even.
1. 12 P
2. (1 K, 1 inc)x 6 (18)
3. 18 P (18)
4. (2 K, 1 inc)x 6 (24)
5. 24 P (24)
6. 1 K, 1 inc, 20 K, 1 inc, 1 K (26)
7. 26 P
8. 1 K, 1 inc, 22 K, 1 inc, 1 K (28)
9. 28 P
10. 1 K, 1 inc, 24 K, 1 inc, 1 K (30)
11. 30 P
12. 1 K, 1 inc, 26 K, 1 inc, 1 K (32)
13. 32 P
14. 32 K
15. 32 P
16. 1 K, 1 inc, 28 K, 1 inc, 1 K (34)
17. 34 P
18. 1 K, 1 inc, 30 K, 1 inc, 1 K (36)
Knit a total of 19 rows in stockinette stitch:
On the front side of the work, knit all stitches across the row.
On the back side of the work, purl all stitches across the row.
19. 21. 23. 25. 27. 29. 31. 33. 35. 37. -36 P
20. 22. 24. 26. 28. 30. 32. 34. 36. – 36 K
38. 1 K, 1 inc, 32 K, 1 inc, 1 K (38)
39. 38 P
40. 1 K, 1 inc, 34 K, 1 inc, 1 K (40)
Knit a total of 11 rows in stockinette stitch:
On the front side of the work, knit all stitches across the row.
On the back side of the work, purl all stitches across the row.
41. 43. 45. 47. 49. 51. – 40 P
42. 44. 46. 48. 50. – 40 K
52. 1 K, 1 inc, 36 K, 1 inc, 1 K (42)
53. 42 P
54. 42 K
55. 42 P
56. 1 K, 1 inc, 38 K, 1 inc, 1 K (44)
57. 44 P
58. 44 K
59. 44 P
60. 1 K, 1 inc, 40 K, 1 inc, 1 K (46)
Knit a total of 29 rows in stockinette stitch:
On the front side of the work, knit all stitches across the row.
On the back side of the work, purl all stitches across the row.
61. 63. 65. 67. 69. 71. 73. 75. 77. 79. 81. 83. 85. 87. 89. - 46 P
62. 64. 66. 68. 70. 72. 74. 76. 78. 80. 82. 84. 86. 88. – 46 K
90. 21 K, Bind off 4 stitches in the middle, 21 K
Next, continue working on the legs: first knit the first leg, then proceed with the second. If desired, you can place the first 21 stitches of the second leg onto a spare needle.
After that, continue knitting the rest of the leg as instructed.
.jpg)
1. 21 P
2. 21 K
3. 21 P
4. 21 K
5. 21 P
6. 19 K, 1 dec (20)
7. 20 P
8. 18 K, 1 dec (19)
9. 19 P
10. 17 K, 1 dec (18)
11. 18 P
12. 18 K
13. 18 P
14. 1 dec, 14 K, 1 dec (16)
15. 16 P
16. 1 dec, 12 K, 1 dec (14)
17. 14 P
18. 1 inc, 12 K, 1 inc (16)
19. 16 P
20. 1 inc, 14, 1 inc (18)
21. 18 P
22. 18 K
23. 18 P
24. 17 K, 1 inc (19)
25. 19 P
26. 18 K, 1 inc (20)
27. 20 P
28. 19 K, 1 inc (21)
29. 21 P
The stitches are not bound off; the yarn is cut and secured. Next, return to the second leg, reattach the working yarn, and continue knitting the second leg as described below1. 21 P
2. 21 K
3. 21 P
4. 21 K
5. 21 P
6. 1 dec , 19 K (20)
7. 20 P
8. 1 dec, 18 K (19)
9. 19 P
10. 1 dec, 17 K (18)
11. 18 P
12. 18 K
13. 18 P
14. 1 dec, 14 K, 1 dec (16)
15. 16 P
16. 1 dec, 12 K, 1 dec (14)
17. 14 P
18. 1 inc, 12 K, 1 inc (16)
19. 16 P
20. 1 inc, 14, 1 inc (18)
21. 18 P
22. 18 K
23. 18 P
24. 17 K, 1 inc (19)
25. 19 P
26. 18 K, 1 inc (20)
27. 20 P
28. 19 K, 1 inc (21)
29. 21 P
Next, the legs are joined back to the body. First, knit 21 stitches in stockinette stitch along the first leg. Then cast on 4 stitches. Position the second leg and knit 21 stitches in stockinette stitch along that one as well.
You now have a total of 46 stitches on the needle again.
Knit a total of 10 rows in stockinette stitch:
On the front side of the work, knit all stitches across the row.
On the back side of the work, purl all stitches across the row.
1. 3. 5. 7. 9.– 46 P
2. 4. 6. 8. 10. – 46 K
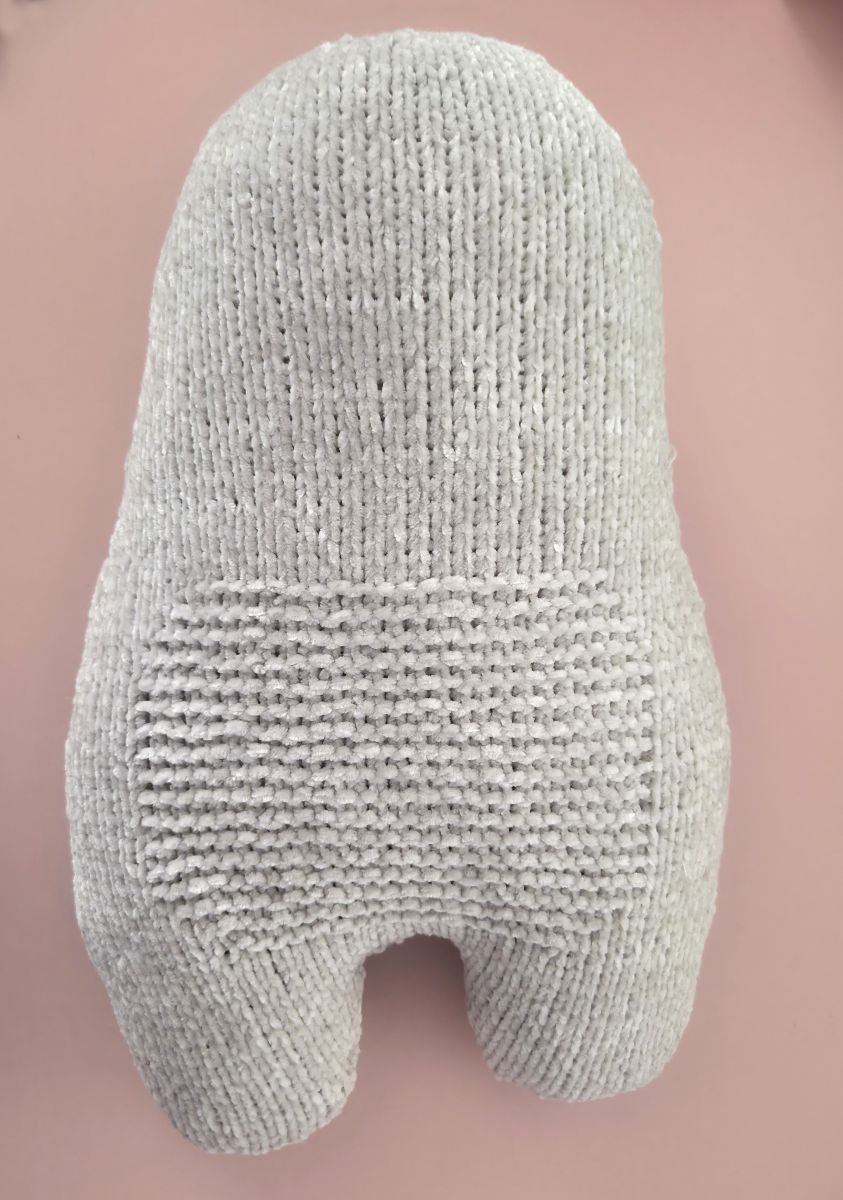
From round 11 onwards, knit and purl stitches are alternated to create a lovely, textured pattern for the belly.
11. 13 P, 20 K, 13 P (46)
12. 46 K
13. 12 P, 22 K, 12 P (46)
14. 46 K
15. 11 P, 24 K, 11 P (46)
16. 46 K
17. 10 P, 26 K, 10 P (46)
18. 46 K
19. 10 P, 26 K, 10 P (46)
20. 46 K
21. 10 P, 26 K, 10 P (46)
22. 46 K
23. 10 P, 26 K, 10 P (46)
24. 46 K
25. 10 P, 26 K, 10 P (46)
26. 46 K
27. 10 P, 26 K, 10 P (46)
28. 46 K
29. 10 P, 26 K, 10 P (46)
30. 46 K
31. 10 P, 26 K, 10 P (46)
32. 1 K, 1 dec, 40 K, 1 dec, 1 K (44)
33. 9 P, 26 K, 9 P
34. 1 K, 1 dec, 38 K, 1 dec, 1 K (42)
35. 8 P, 26 K, 8 P (42)
36. 42 K
37. 8 P, 26 K, 8 P (42)
38. 42 K
39. 9 P, 24 K, 9 P (42)
40. 42 K
41. 10 P, 22 K, 10 P (42)
42. 42 K
43. 11 P, 20 K, 11 P (42)
44. 1 K, 1 dec, 36 K, 1 dec, 1 K (40)
45. 47. 49. – 40 P
46. 48. – 40 K
50. 1 K, 1 dec, 34 K, 1 dec, 1 K (38)
51. 38 P
52. 1 K, 1 dec, 32 K, 1 dec, 1 K (36)
Knit a total of 21 rows in stockinette stitch:
On the front side of the work, knit all stitches across the row.
On the back side of the work, purl all stitches across the row.
53. 55. 57. 59. 61. 63. 65. 67. 69. 71. 73 - 36 P
54. 56. 58. 60. 62. 64. 66. 68. 70. 72. – 36 K
74. 1 K, 1 dec, 30 K, 1 dec, 1 K (34)
75. 34 P
76. 1 K, 1 dec, 28 K, 1 dec, 1 K (32)
77. 32 P
78. 32 K
79. 32 P
80. 1 K, 1 dec, 26 K, 1 dec, 1 K (30)
81. 30 P
82. 1 K, 1 dec, 24 K, 1 dec, 1 K (28)
83. 28 P
84. 1 K, 1 dec, 22 K, 1 dec, 1 K (26)
85. 34 P
86. 1 K, 1 dec, 20 K, 1 dec, 1 K (24)
87. 24 P
88. (2 K, 1 dec)x6 (18)
89. 18 P
90. (1 K, 1 dec)x6 (12)
94. 12 P
To finish, bind off the remaining stitches. Then sew the body together using the same yarn, making sure the seam stays neat and even. Begin at the area between the legs and work your way upward.
As you sew, gradually add small amounts of fiberfill to create an even shape. Use only a little stuffing, as the rabbit is meant to remain flat and pillow‑like. To achieve this shape, the body was knitted in two separate pieces.
Leave a small opening at the top of the head so the safety eyes can be inserted later.
Tail
Cast on 6 stitches (ch) onto the knitting needle. Make sure the stitches are evenly stretched while knitting to ensure your knitted piece is nice and even.
1. 6 P
2. 6 inc (12)
3. 12 P
4. (1 K, 1 K inc)x 6 (18)
5. 18 P
6. (2 K, 1 K inc)x 6 (24)
7. 24 P
8. 24 K
9. 24 P
10. 24 K
11. 24 P
12. (2 K, 1 dec)x 6 (18)
13. 18 P
Bind off the remaining stitches and sew the sides together. Then attach the tail to the back at the bottom, adding a little stuffing as you sew to give it a rounded shape.
Hands
Cast on 6 stitches (ch) onto the knitting needle. Make sure the stitches are evenly stretched while knitting to ensure your knitted piece is nice and even.
1. 6 P
2. 6 inc (12)
3. 12 P
4. (1 K, 1 K inc)x 6 (18)
5. 18 P
6. 4 K, 1 inc, 3 K, 1 inc, 4 K, 1 inc, 3 K, 1 inc (22)
7. 22 P
8. 22 K
9. 22 P
10. 1 inc, 20 K, 1 inc (24)
11. 24 P
12. 24 K
13. 24 P
14. 1 dec, 10 K, 1 dec, 10 K (22)
15. 22 P
16. 22 K
17. 22 P
18. 1 dec, 9 K, 1 dec, 9 K (20)
19. 20 P
20. 1 dec, 8 K, 1 dec, 8 K (18)
21. 18 P
Knit a total of 20 rows in stockinette stitch:
On the front side of the work, knit all stitches across the row.
On the back side of the work, purl all stitches across the row.
23. 21. 23. 25. 27. 29. 31. 33. 35. 37. – 18 P
22. 24. 26. 28. 30. 32. 34. 36. 38. 40. – 18 K
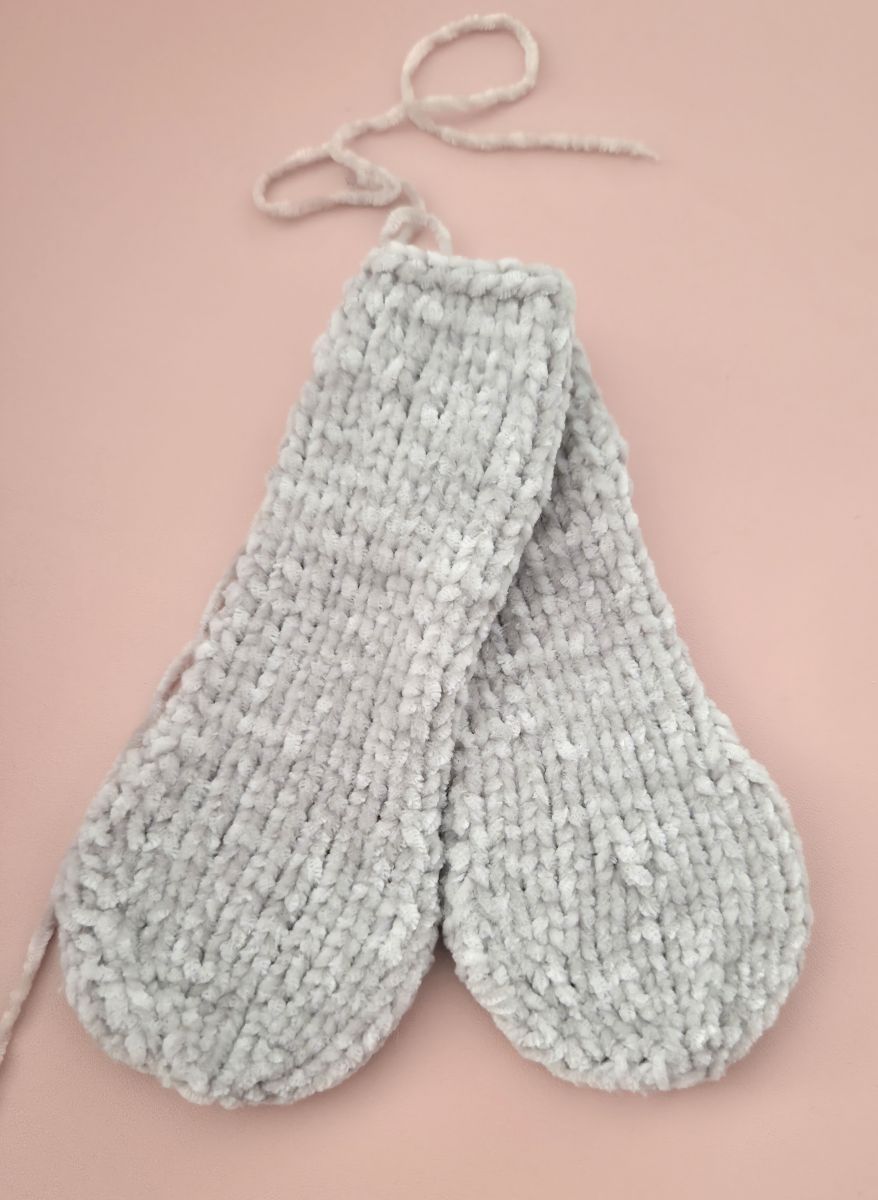
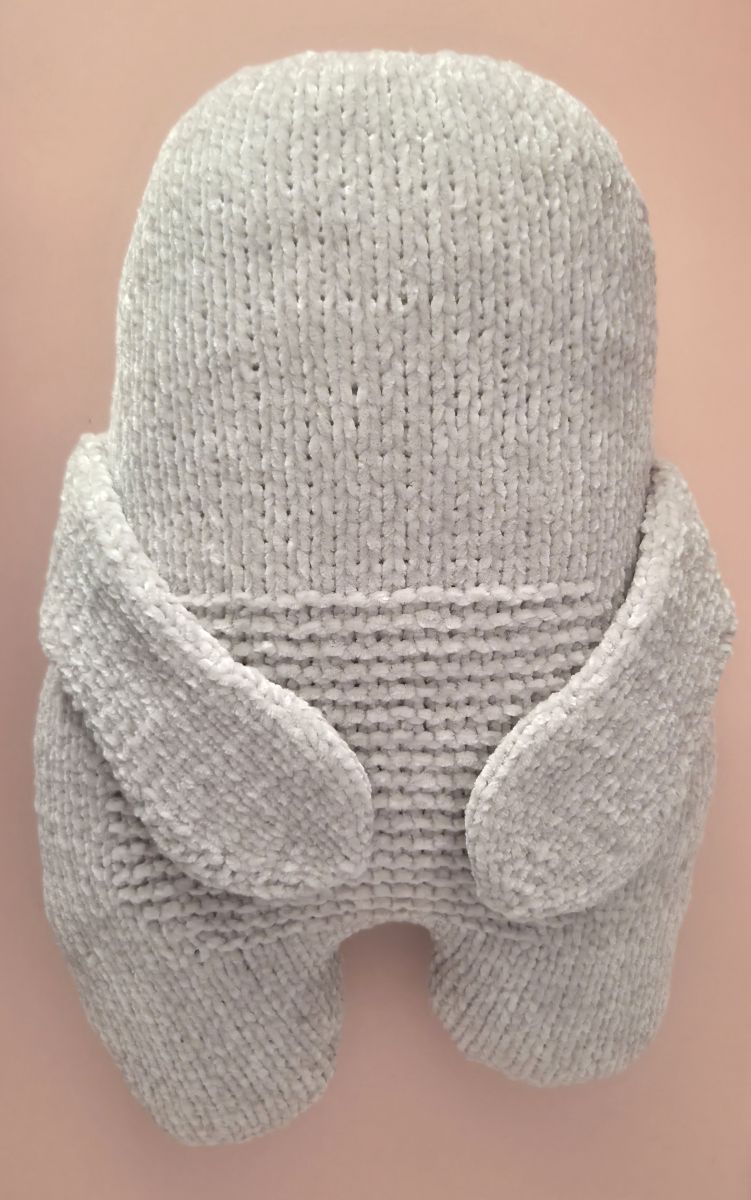
Finally, bind off the remaining stitches. Then place the hands together and sew them along the edge using the same yarn. The hands are not stuffed.
After that, sew them onto the body, one on the left and one on the right, positioned along the body seam.
Ears
Cast on 6 stitches (ch) onto the knitting needle. Make sure the stitches are evenly stretched while knitting to ensure your knitted piece is nice and even.
1. 6 P
2. 6 inc (12)
3. 12 P
4. (1 K, 1 K inc)x 6 (18)
5. 18 P
6. 18 K
7. 18 P
8. (2 K, 1 K inc)x 6 (24)
9. 24 P
10. (3 K, 1 K inc)x 6 (30)
11. 30 P
12. 30 K
13. 30 P
14. 30 K
15. 30 P
16. 30 K
17. 30 P
18. 30 K
19. 30 P
20. 30 K
21. 30 P
22. 30 K
23. 30 P
24. 13 K, 1 dec, 13 K, 1 dec (28)
25. 28 P
26. 12 K, 1 dec, 12 K, 1 dec (26)
27. 26 P
28. 11 K, 1 dec, 11 K, 1 dec (24)
Knit a total of 39 rows in stockinette stitch:
On the front side of the work, knit all stitches across the row.
On the back side of the work, purl all stitches across the row.
29. 24 P
30. 24 K
31. 24 P
32. 24 K
33. 24 P
34. 24 K
35. 24 P
36. 24 K
37. 24 P
38. 24 K
39. 24 P
40. 24 K
41. 24 P
42. 24 K
43. 24 P
44. 24 K
45. 24 P
46. 24 K
47. 24 P
48. 24 K
49. 24 P
50. 24 K
51. 24 P
52. 24 K
53. 24 P
54. 24 K
55. 24 P
56. 24 K
57. 24 P
58. 24 K
59. 24 P
60. 24 K
61. 24 P
62. 24 K
63. 24 P
64. 24 K
65. 24 P
66. 24 K
67. 24 P
Finally, bind off the remaining stitches. Then fold the ears in half and sew them together along the edge using the same yarn. Do not add any stuffing.
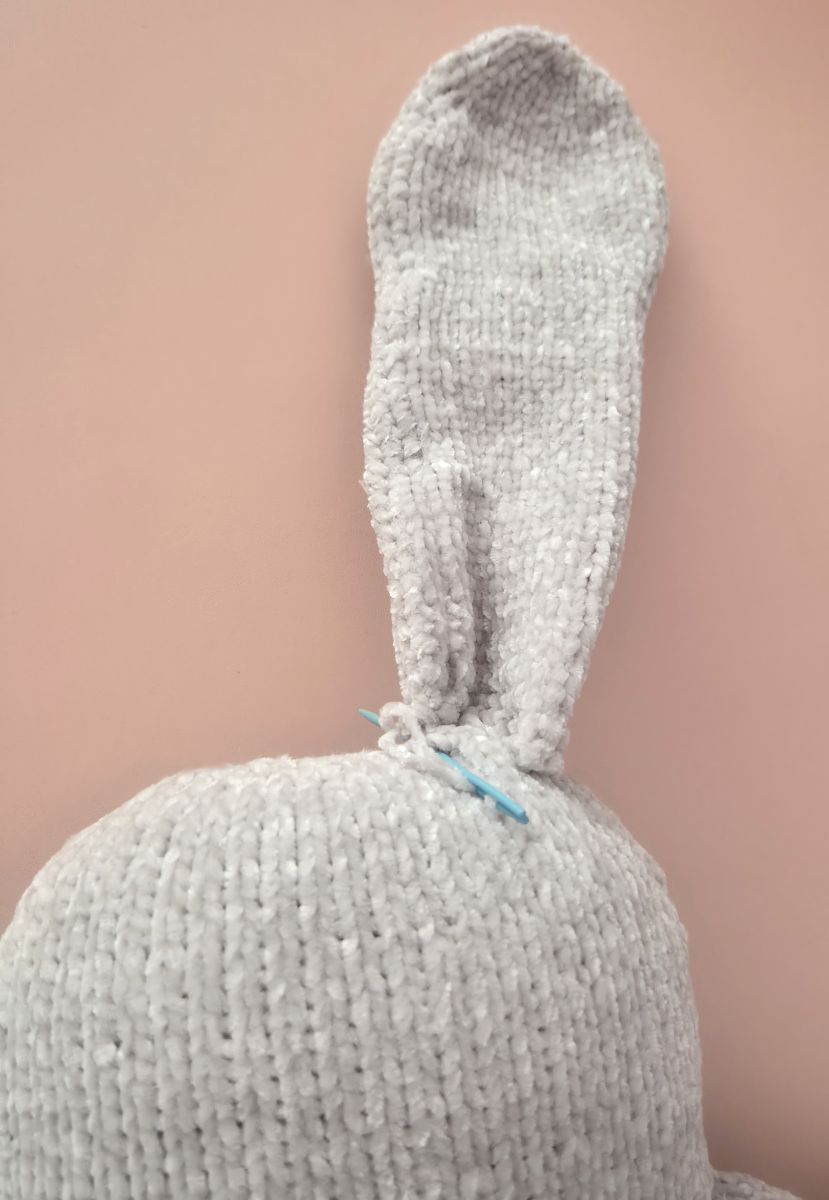
After that, sew the ears onto the head, one on the left and one on the right.
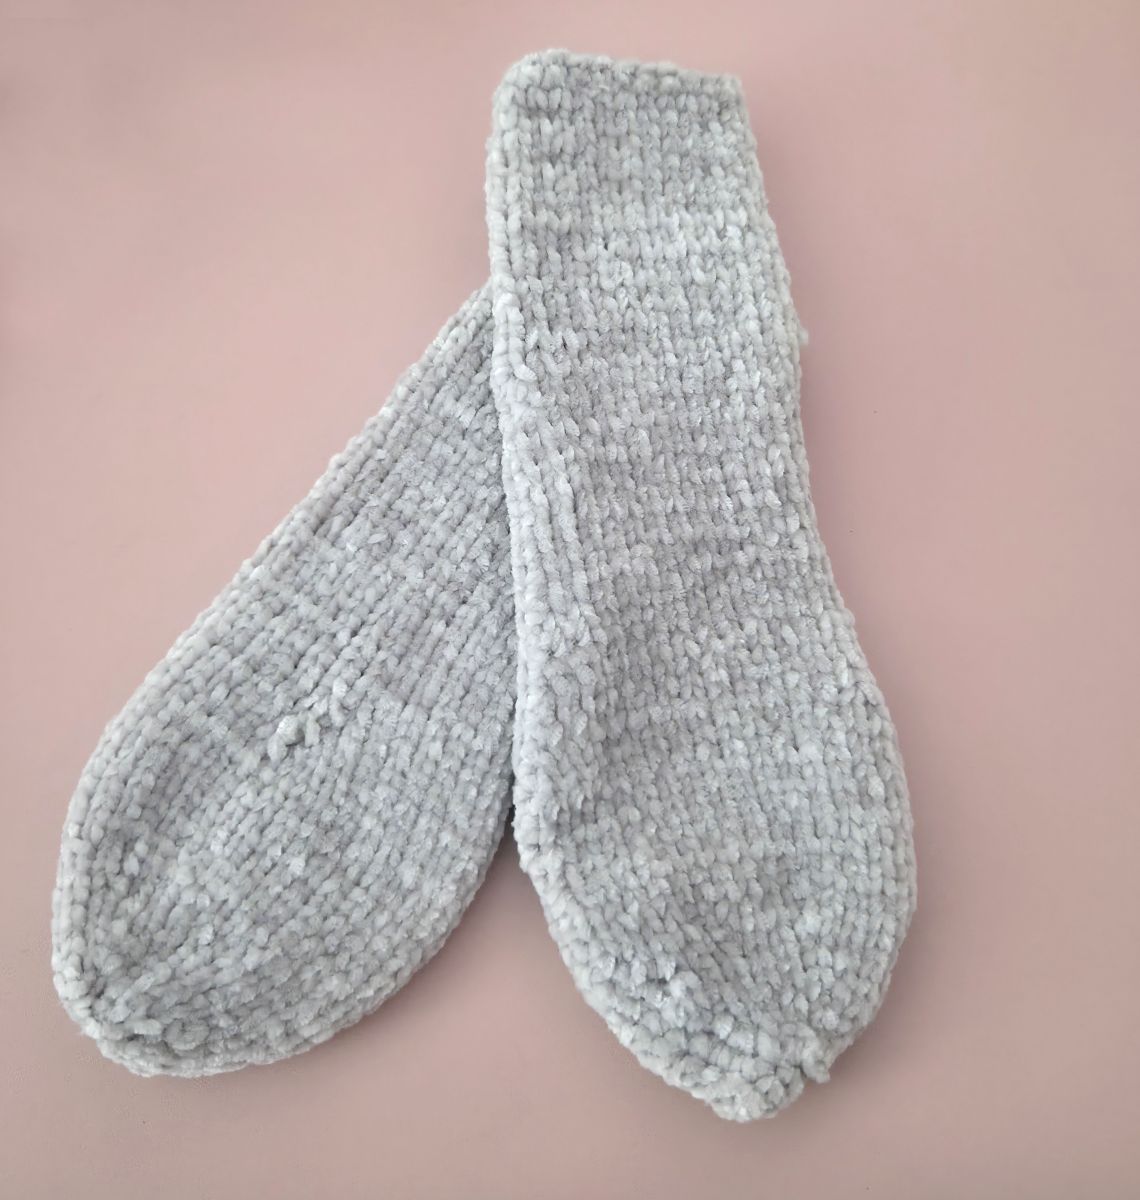
For the rabbit, I used safety eyes with a wide rim. This type of eye has the advantage that, once attached, it sits deeply and securely within the knitted fabric. This effect is created by the reinforced outer rim and the domed backing piece on the inside, which gently pulls the eye into the material so there is no need to create a depression beforehand.
You can place the eyes wherever you prefer. They often look especially harmonious when positioned slightly lower, roughly halfway between the top of the head and the belly. Different placements will give the rabbit different facial expressions, so it’s worth experimenting a little. If you don’t have suitable safety eyes available, you can embroider closed eyes instead, giving the rabbit a calm, sleeping expression.
After attaching the eyes, it is essential to check that they are securely fastened and cannot come loose through pulling or play. Loose eyes can pose a safety risk for children, so particular care is required here.
Embroider the eyebrows by first working a few straight stitches. Then fold the ends of these stitches over and secure them to form a neat, well‑defined shape. Finally, fasten the yarn securely so the eyebrows remain firmly in place.
The Nose
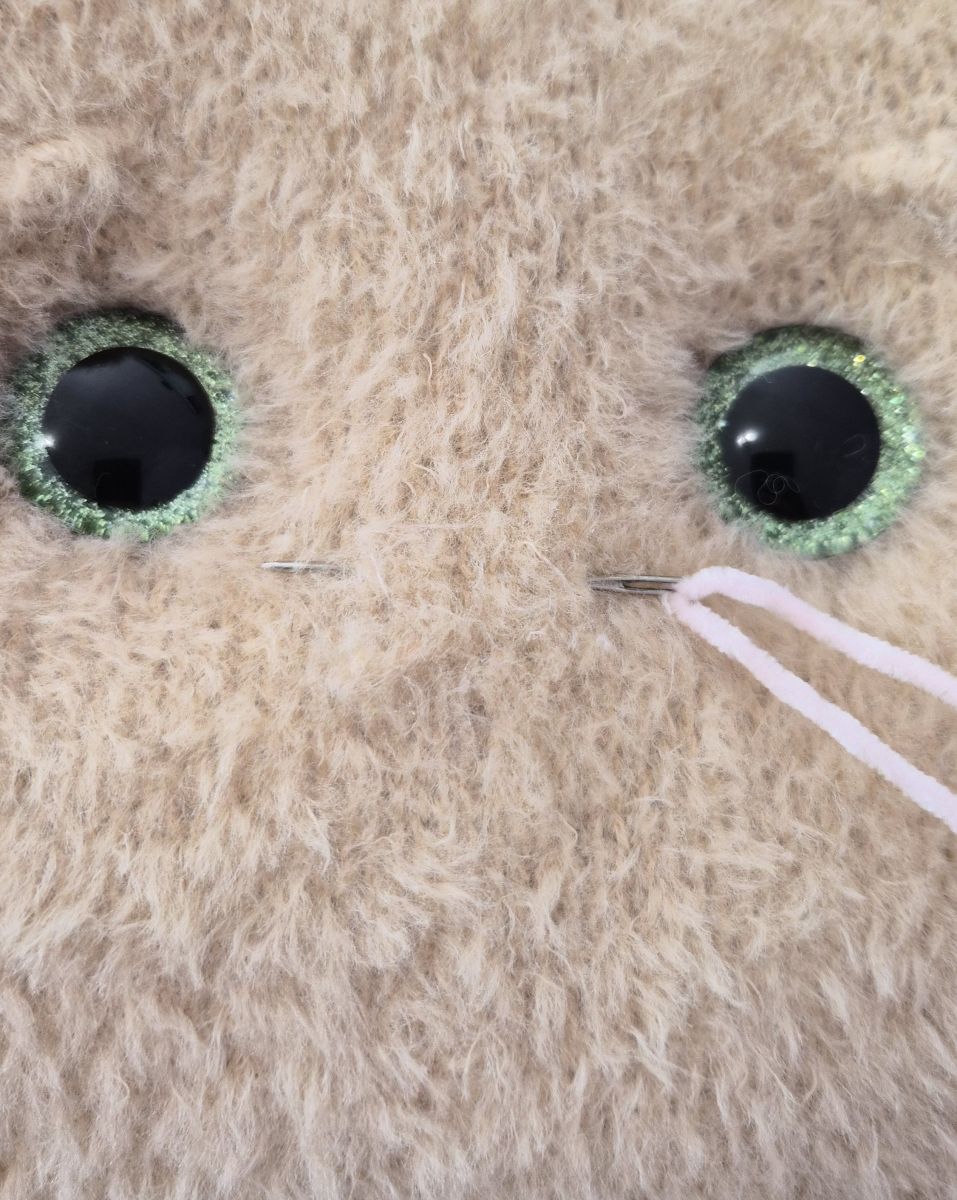
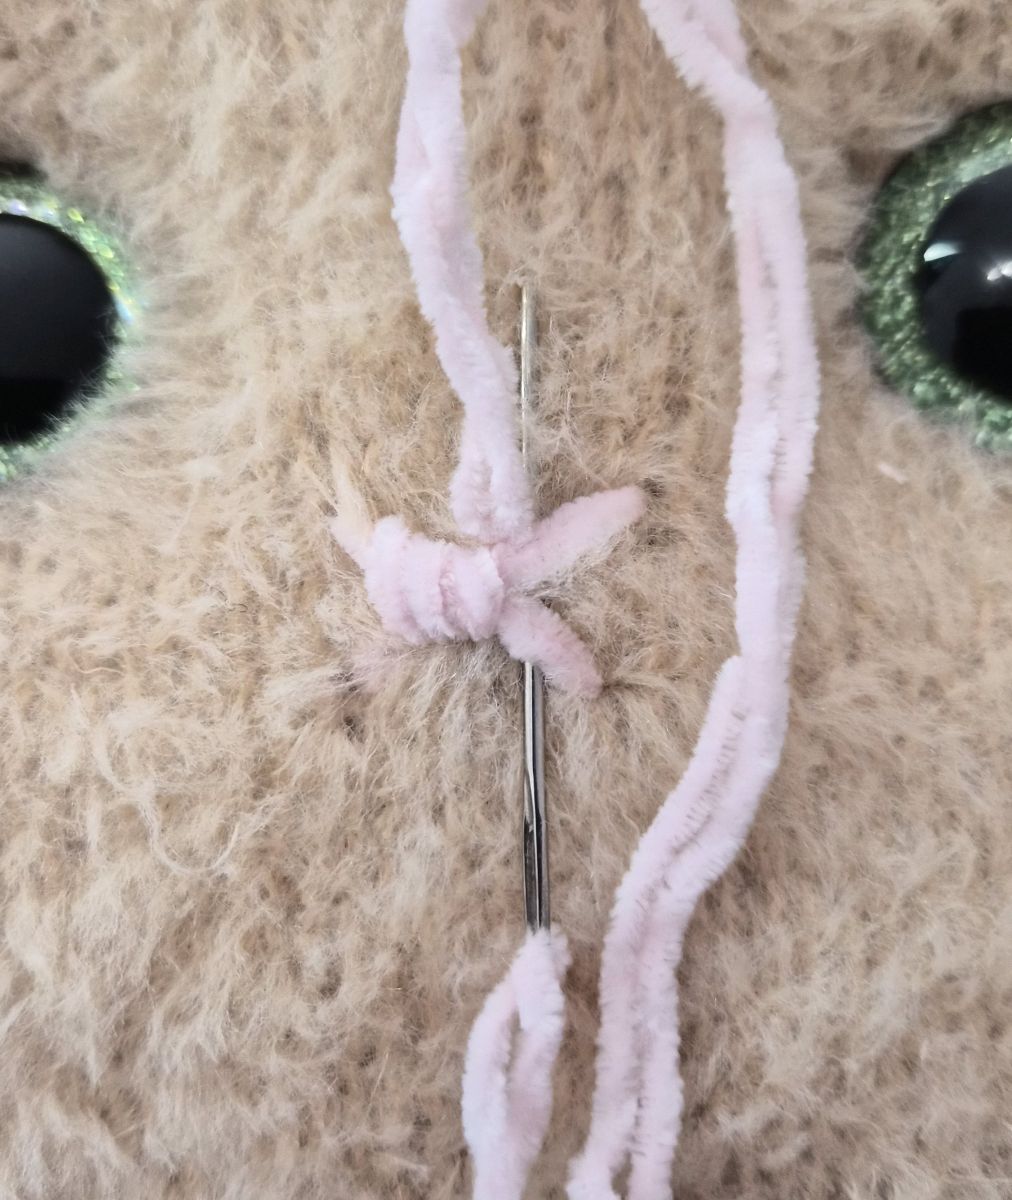
For the nose, I used light pink chenille yarn. It is embroidered as a small rectangle. To do this, begin by making two parallel stitches. Then stitch repeatedly back and forth over them, gradually building up the characteristic rectangular shape. Make sure to place the stitches evenly, so the outline stays neat and the nose develops a clean, well‑defined form.
.jpg)
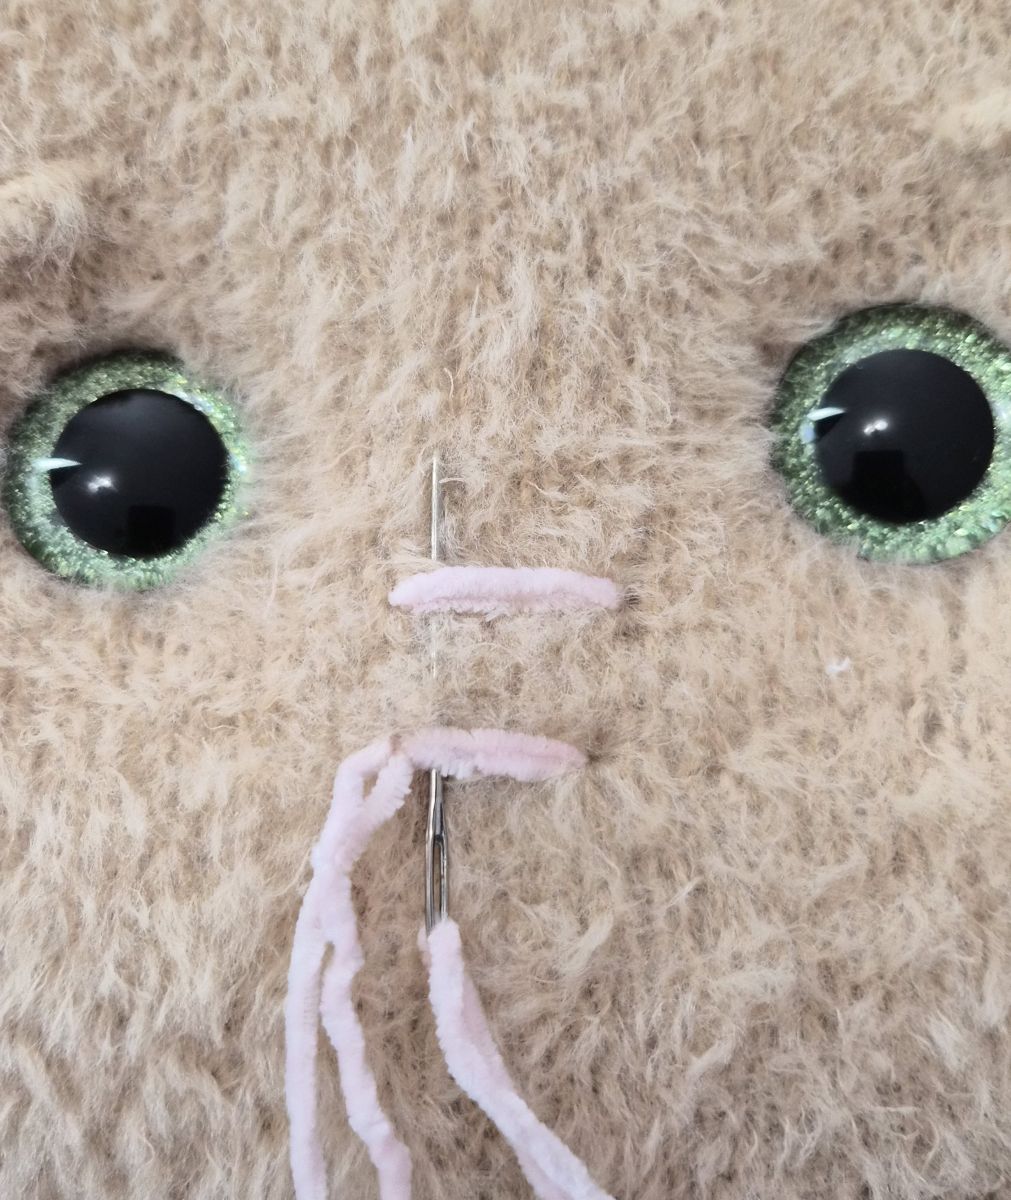
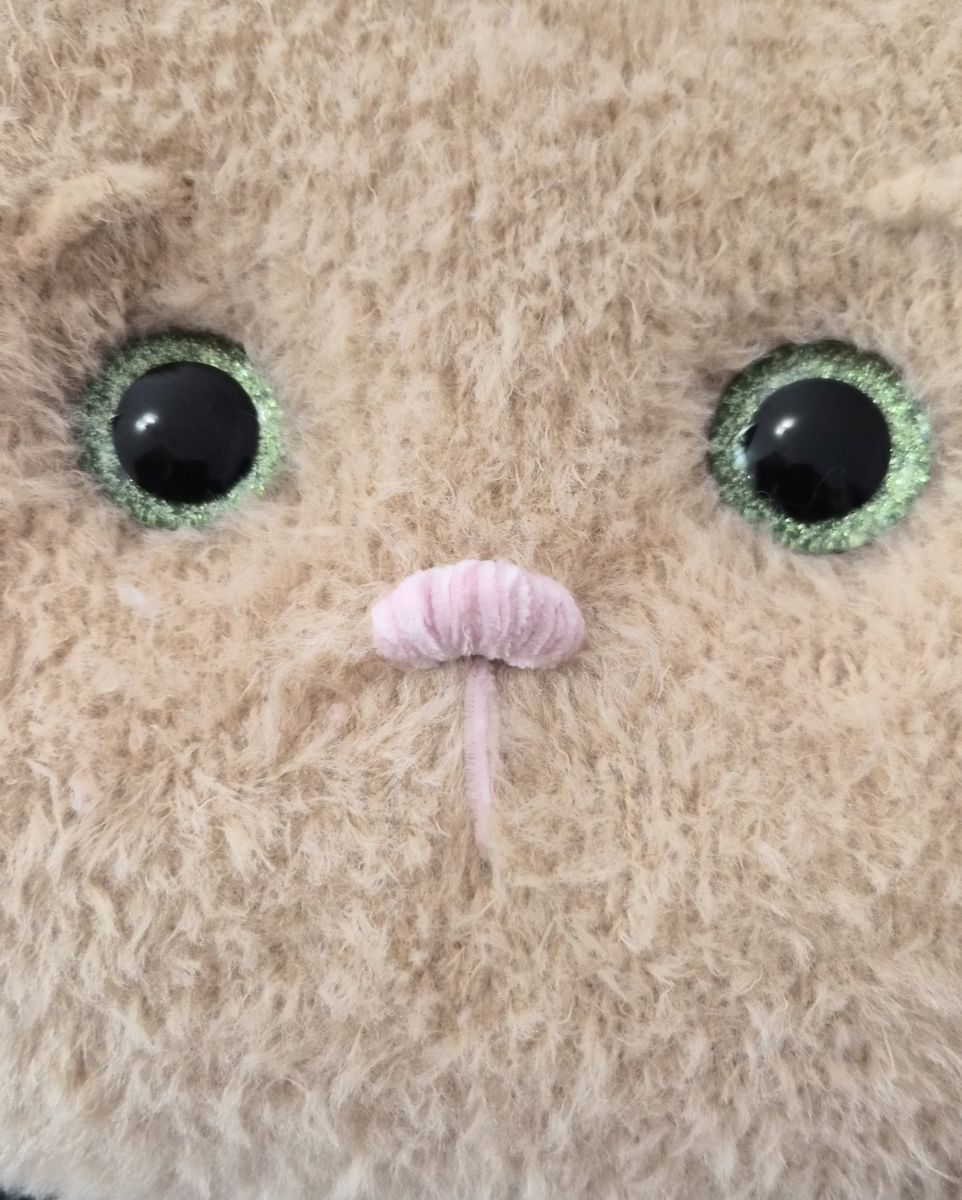
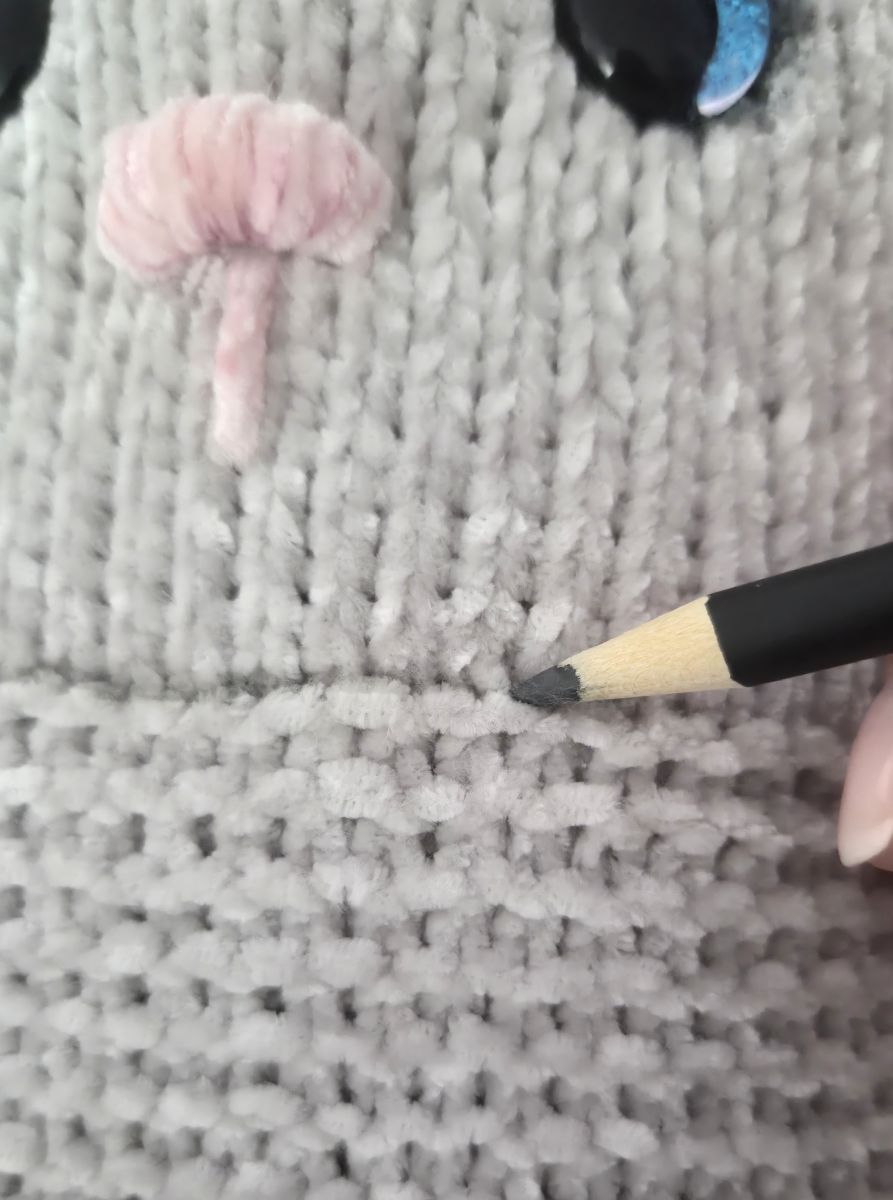
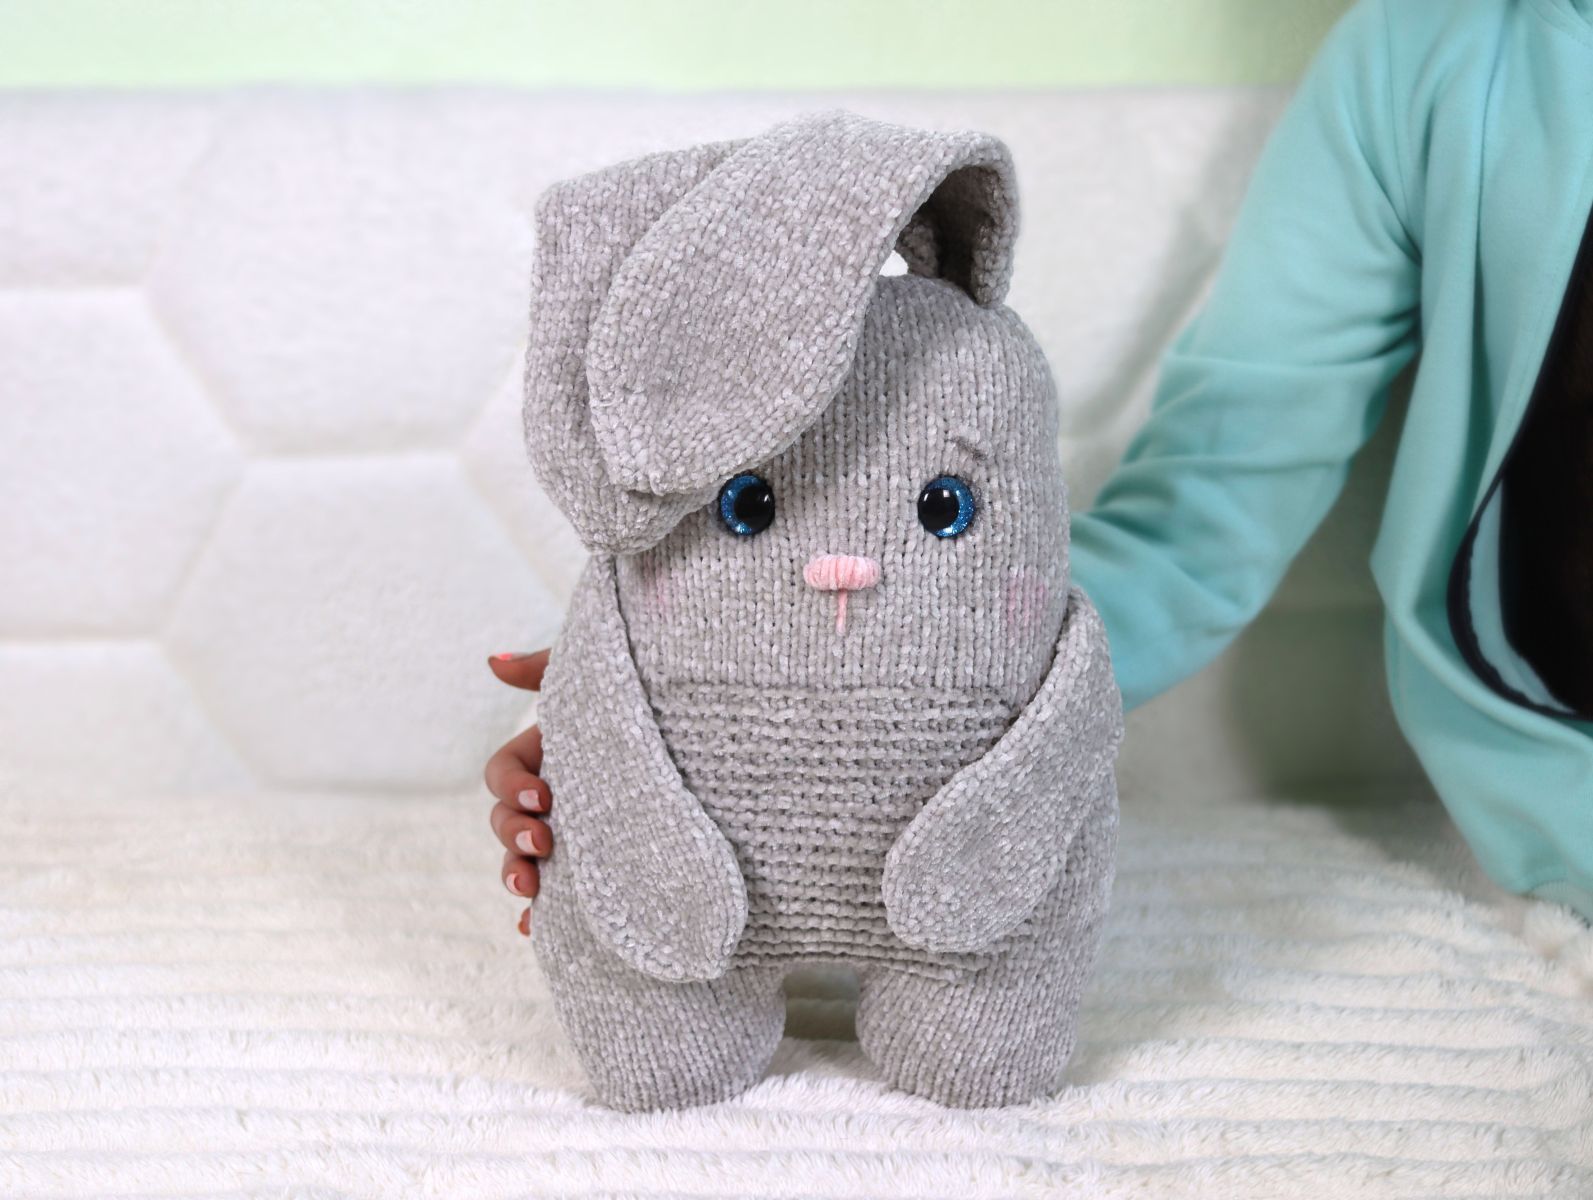
To add a bit more expression to the face, I applied subtle shading around the eyes using a waterproof fabric marker. I also lightly emphasized the eyebrows, giving the facial expression a softer and more lifelike appearance. Afterward, I used a pink colored pencil to gently tint the cheeks.
.JPG)


