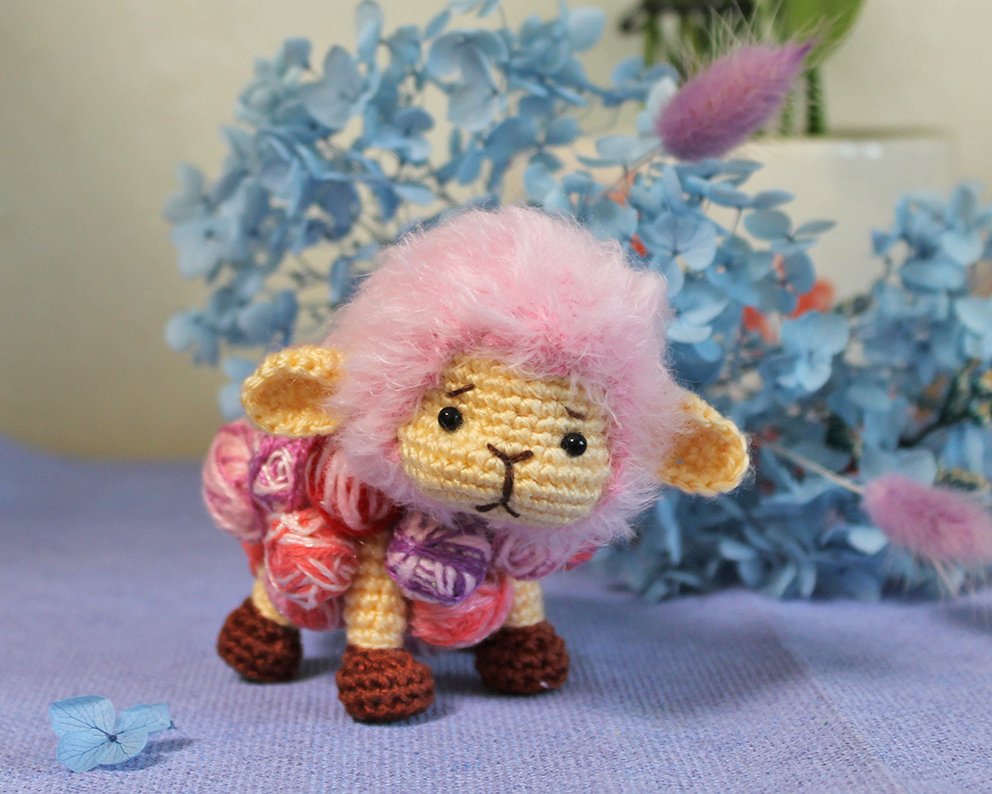
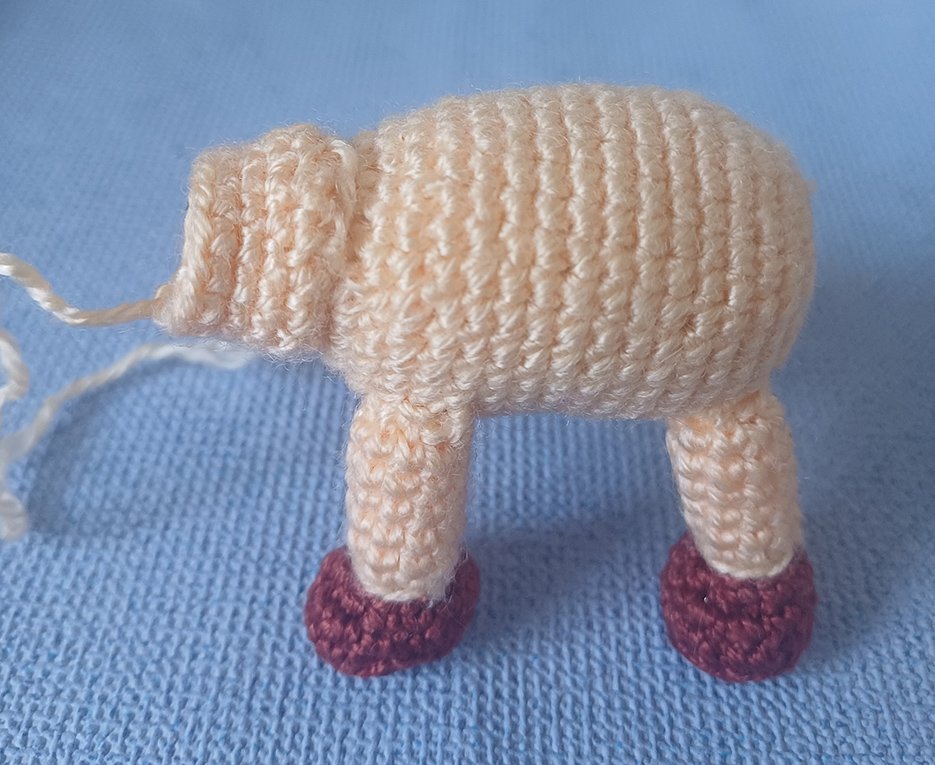
A sheep made of balls of yarn
I bring to your attention a crochet pattern of a pretty sheep in a fur coat made of balls of yarn.
This pattern does not contain any crochet tutorials, you should have already mastered the basics of crocheting.
Skill Level - Intermediate. All the details are simple and crochet fast. The number of detailed photos in this pattern will help even a beginner to connect this cute toy.
The size of the sheep will depend on the yarn you use. The thicker the yarn the bigger the toy you will get. My sheep is 10 cm high.
To create it, you will need:
For head and body: Yarn of your choice. Cotton, acrylic, wool will do. Colors: beige or light brown, dark brown. I used acrylic, 400 m/ 100 g.
For a wig: textured yarn of a suitable color. You can choose fluffy yarn, boucle yarn, thick plush yarn. I used 200m/100g fluffy yarn. Please pay attention to yarn thickness. The yarn to make the wig should be twice as thick.
For a sheep's fur coat, remnants of yarn of different colors will be required. Choose matching colors. I chose different shades of pink, red, and purple.
- A piece of foil or paper napkins
- All purpose clear transparent glue, (I used a hot glue gun)
- Long dressmaker pins (I have pins 3.5 cm long) see the photo below.
- The crochet hooks in two sizes for your yarn. I used No.1.25 and No. 1.5
- A sewing needle, matching sewing threads
- Hollow fibre for stuffing
- 2 black beads for eyes or ready - made eyes, I used 3 mm beads
- For embroidery: a few threads of brown
Abbreviations:
ch – chain
sl st – slip stitch
sc – single crochet
inc – increase (2 sc in 1 st)
dec – decrease (single crochet two stitches together)
(...) x N times – repeat instructions in brackets N times
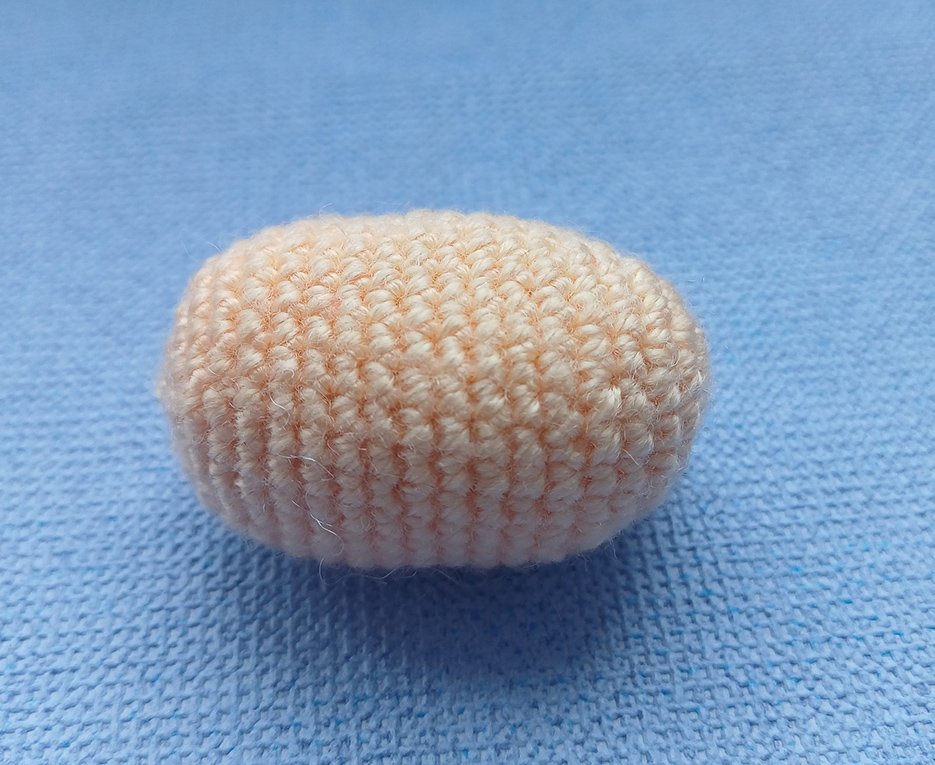
Body
Crochet with beige colour yarn. Stuff as you go.
Rnd 1. 6 sc in a Magic Ring
Rnd 2. 6 inc = 12
Rnd 3. (1 sc, 1 inc) х 6 times = 18
Rnd 4. (2 sc, 1 inc) х 6 times = 24
Rnd 5. 24 sc
Rnd 6. (3 sc, 1 inc) х 6 times = 30
Rnd 7-16 (6 rounds). 30 sc
Rnd 17. (3 sc, 1 dec) х 6 times = 24
Rnd 18. 24 sc
Rnd 19. (2 sc, 1 dec) х 6 times = 18
Rnd 20. (1 sc, 1 dec) х 6 times = 12
Rnd 21. 6 dec = 6
Add some hollow fibre.
Pull off the loops. Cut the thread, hide the end.
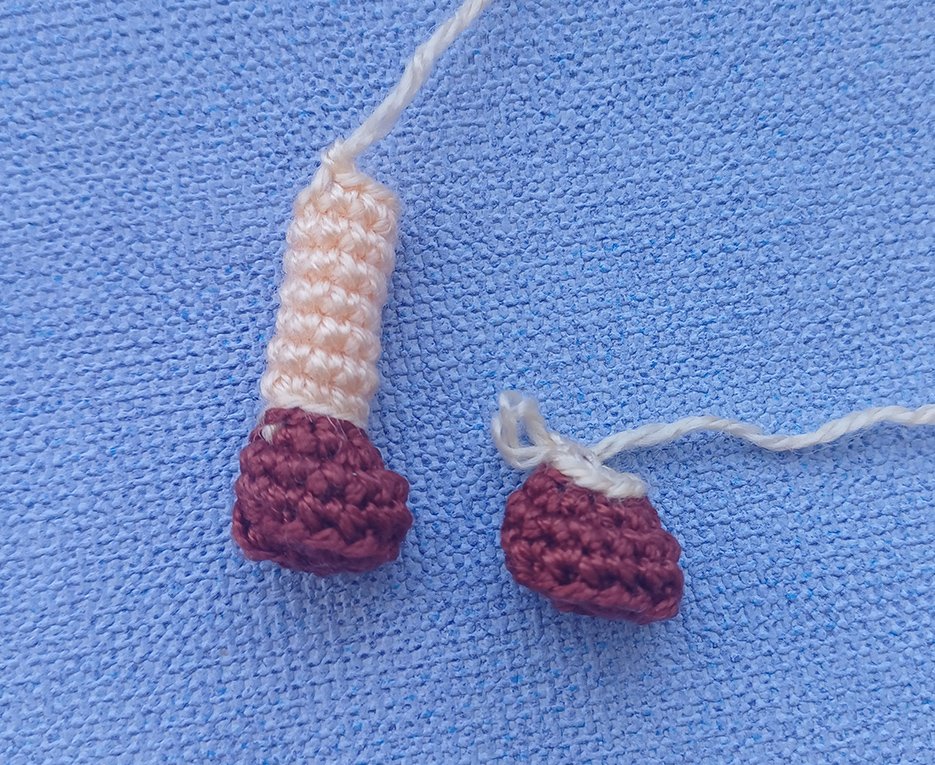
Rear leg (make 2)
Start with brown colour yarn.
Rnd 1. 7 sc in a Magic Ring
Rnd 2. 7 inc = 14
Work 2 sl st, transfer your place marker here.
Rnd 3. into the back loops only: 14 sc
Rnd 4. 14 sc
Rnd 5. 2 sc, 5 dec, 2 sc = 9
Change to beige yarn
Rnd 6. into the back loops only: 9 сс
Rnd 7. into the back loops only: 9 sc
Rnd 8-13 (6 rounds) 9 sc
Fasten off, cut the thread, leaving approx. 20 cm long tail for sewing. Add some hollow fibre.
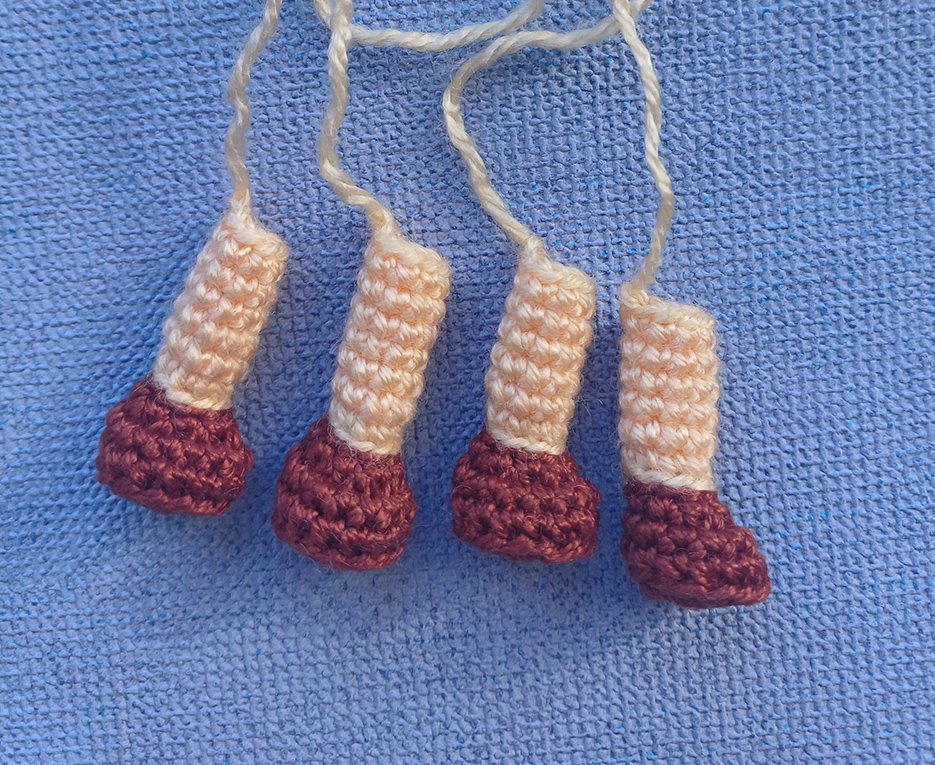
Front leg (make 2)
Start with brown colour yarn.
Rnd 1. 7 sc in a Magic Ring
Rnd 2. 7 inc = 14
Work 2 sl st, transfer your place marker here
Rnd 3. into the back loops only: 14 sc
Rnd 4. 14 sc
Rnd 5. 2 sc, 5 dec, 2 sc = 9
Change to beige yarn
Rnd 6. into the back loops only: 9 сс
Rnd 7. into the back loops only: 9 sc
Rnd 8-14 (7 rounds) 9 sc
Fasten off, cut the thread, leaving approx. 20 cm long tail for sewing. Add some hollow fibre.
Sew the legs to the body.
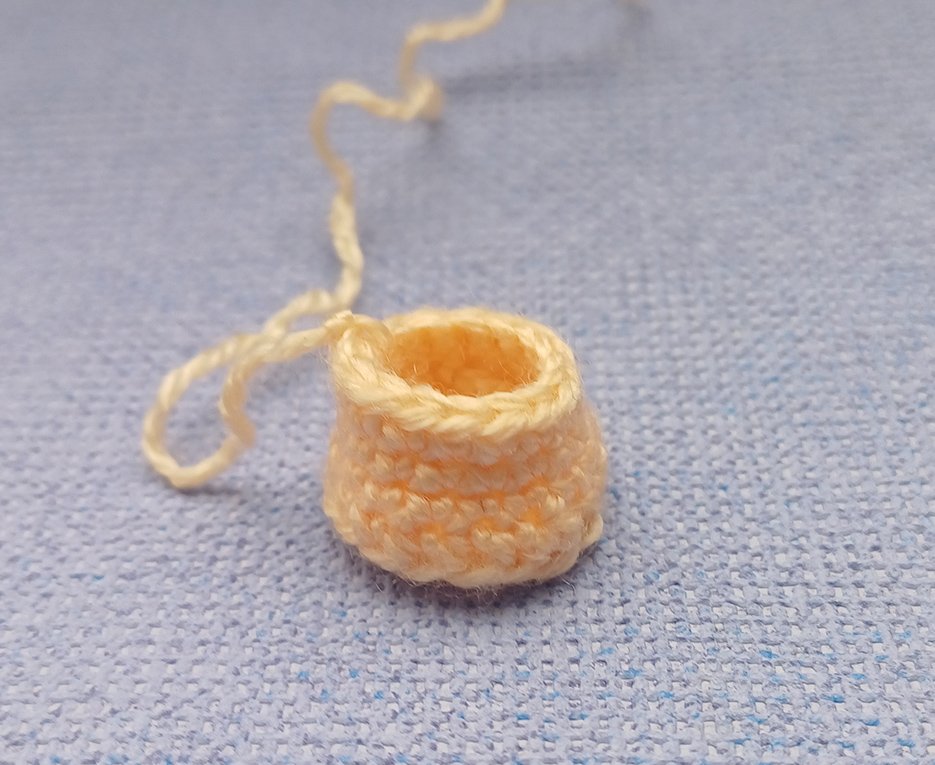
Neck
Crochet with beige colour yarn.
Rnd 1. 6 sc in a Magic Ring
Rnd 2. 6 inc = 12
Rnd 3. (1 inc, 1 sc) х 6 times = 18
Rnd 4. into the back loops only 18 sc
Rnd 5. (7 sc, 1 dec) х 2 times = 16
Rnd 6-7 (2 rounds). 16 sc
Fasten off, cut the thread, leaving approx. 20 cm long tail for sewing.
Sew the neck to the body. Add a small amount of hollow fibre.
Head
Crochet with beige colour yarn. Stuff as you go.
Rnd 1. 6 sc in a Magic Ring
Rnd 2. 6 inc = 12
Rnd 3. (1 sc, 1 inc) х 6 times = 18
Rnd 4. (2 sc, 1 inc) х 6 times = 24
Rnd 5. (3 sc, 1 inc) х 6 times = 30
Rnd 6-10 (5 rounds). 30 sc
In the 10th rnd, mark the 16th loop with an additional marker - this is the middle of the muzzle.
Rnd 11. 8 sc, (1 inc, 1 sc) х 7 times, 1 inc, 7 sc = 38
Rnd 12-13 (2 rounds). 38 sc
Rnd 14. 2 sc, 1 dec, 30 sc, 1 dec, 2 sc = 36
Rnd 15-16 (2 rounds). 36 sc
Rnd 17. (2 sc, 1 dec) х 9 times = 27
Rnd 18. (1 sc, 1 dec) х 9 times = 18
Rnd 19. 9 dec = 9
Add some hollow fibre.
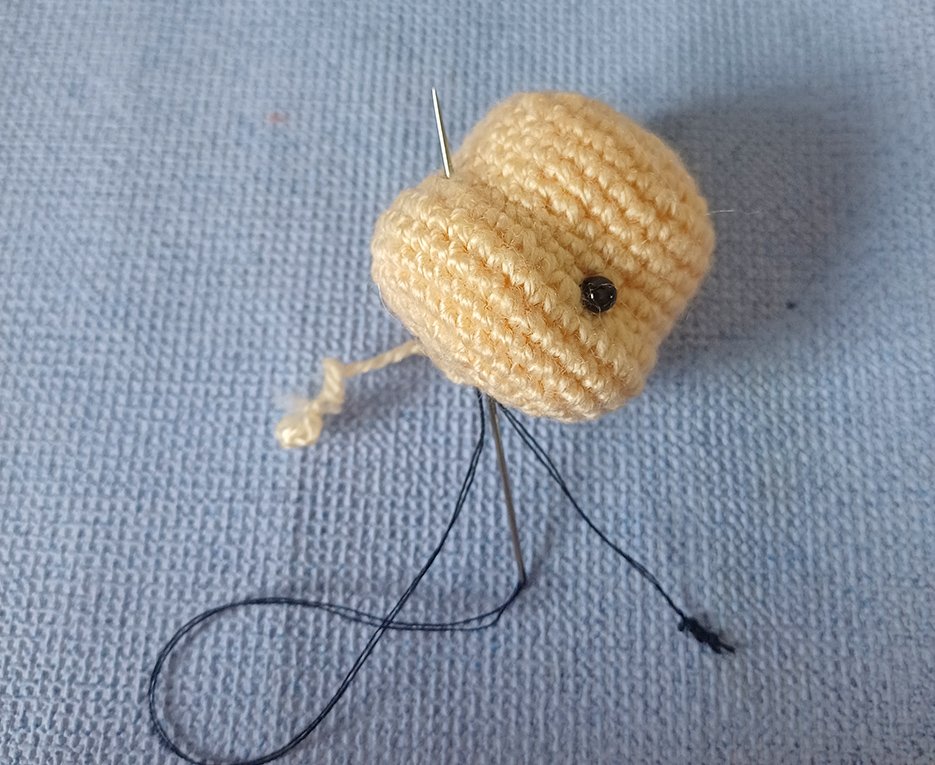
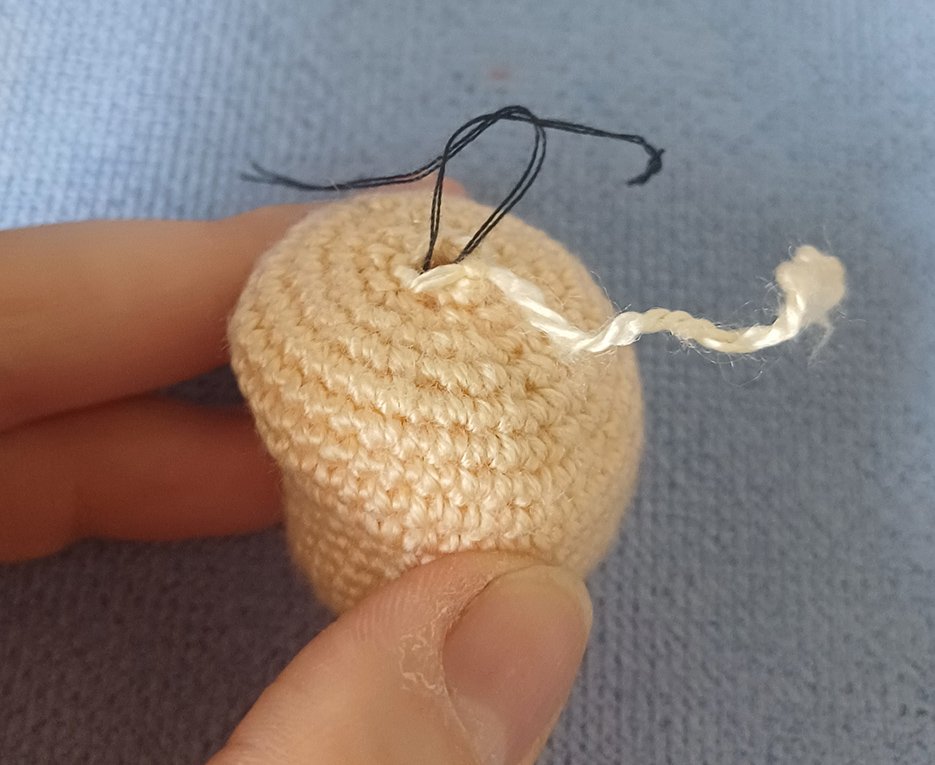
Do not close off the loops of the last round just yet, you will do it later. You will do embroidery and decorate the face first and then hide yarn ends inside!
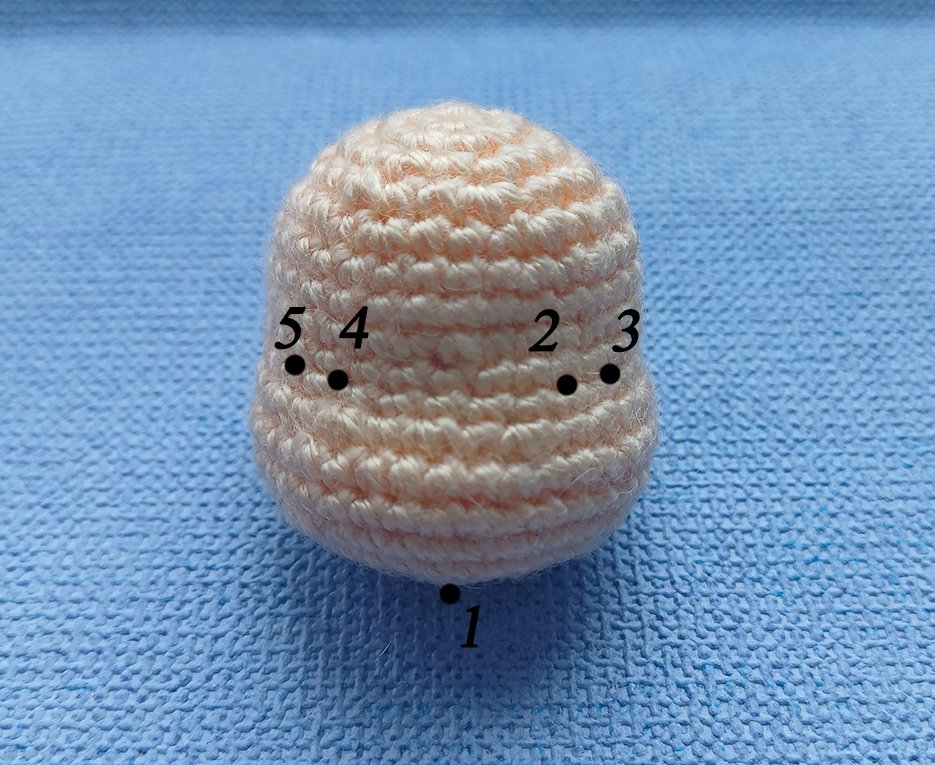
From the additional marker count three stitches to the left and mark point #2. Count two more stitches from point #2 and mark point #3. Mark points #4 &5 on the right side (same as you did for points #2&3). Point #1 is an opening in the head.
Prepare a long needle and a strong thread. Insert the needle into the opening (point #1), leave a tail for further operation, take the needle out in point #2. Insert the bead onto the needle. Insert the needle in point #3, take the needle out in point #1. Tighten the thread and make a knot.
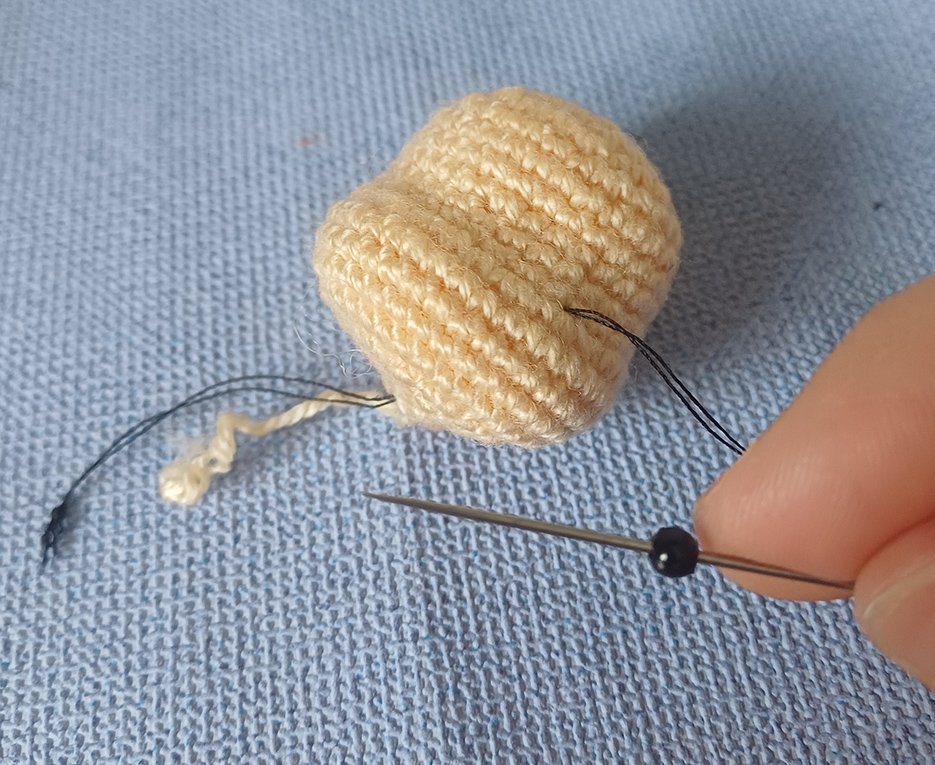
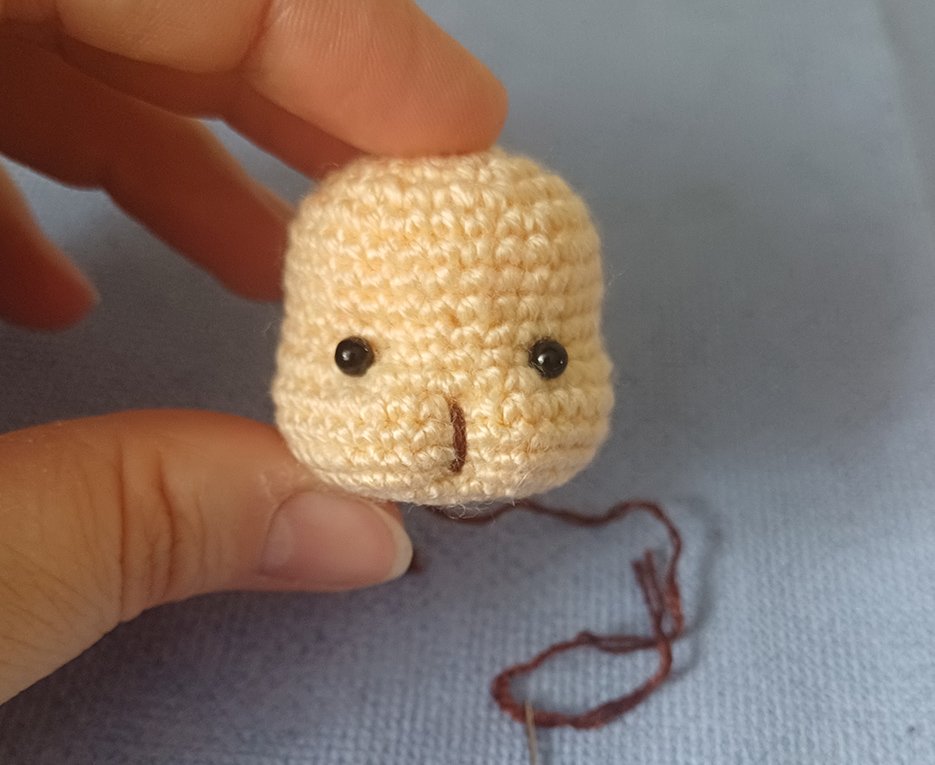
Repeat for the right eye. Points #1-4-5-1. Tighten the thread, help with the fingers to keep it in place and make a knot. Hide the thread in the opening of the head.
Embroider a brown line on the muzzle. Tighten the thread, repeat the tightening once more. Use brown yarn to embroider the nose and mouth (see photo). Embroider the eyelids.
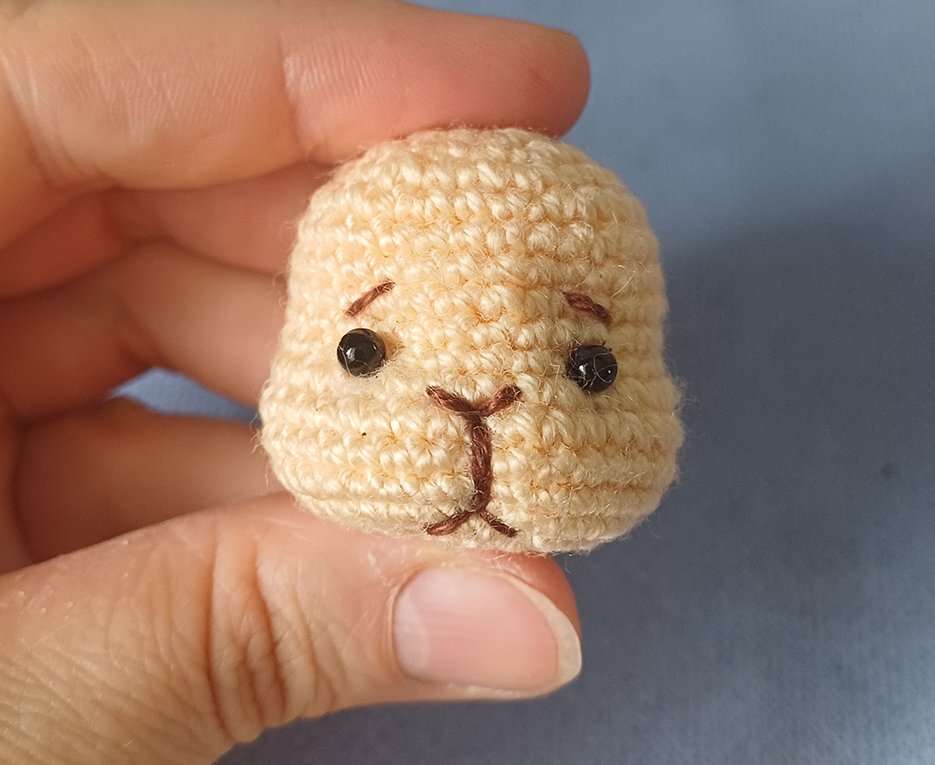
Insert the needle in the opening on the head to hide the ends. Do not forget to pull the loops on the head once you have finished to embroider.
Sew the head to the neck.

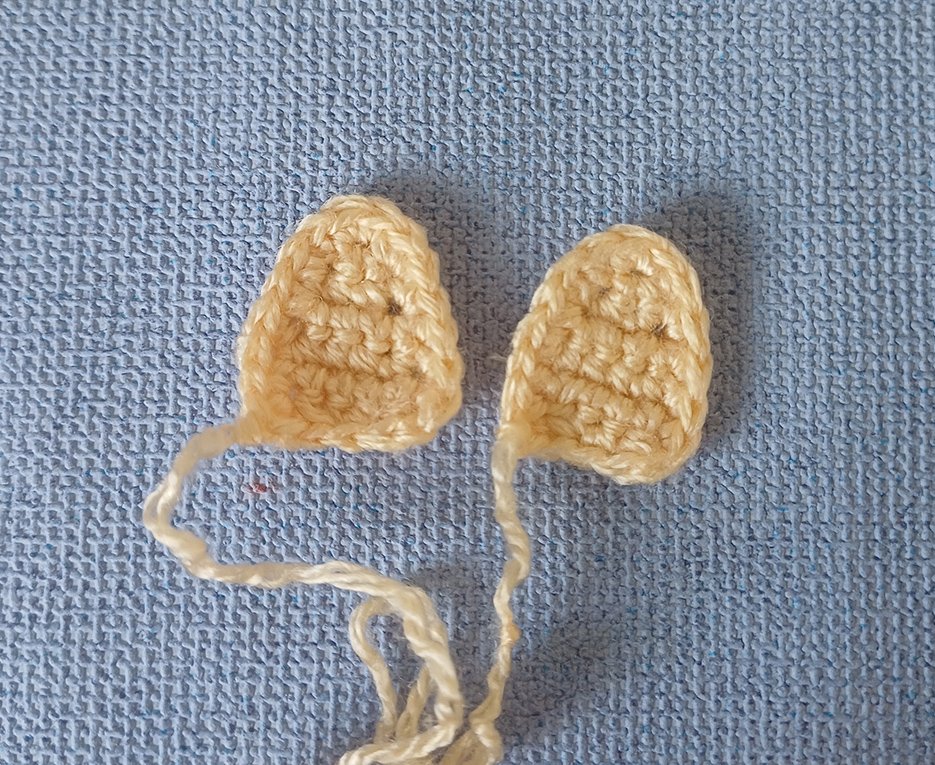
Ear (make 2)
Crochet with beige colour yarn.
Rnd 1. 3 sc in a Magic Ring, 1 ch, turn = 3
Rnd 2. 3 sc, 1 ch, turn = 3
Rnd 3. 1 inc, 1 sc, 1 inc, 1 ch, turn = 5
Rnd 4-5 (2 rounds). 5 sc, 1 ch, turn = 5
Rnd 6. 1 dec, 1 sc, 1 dec, 1 вп = 3
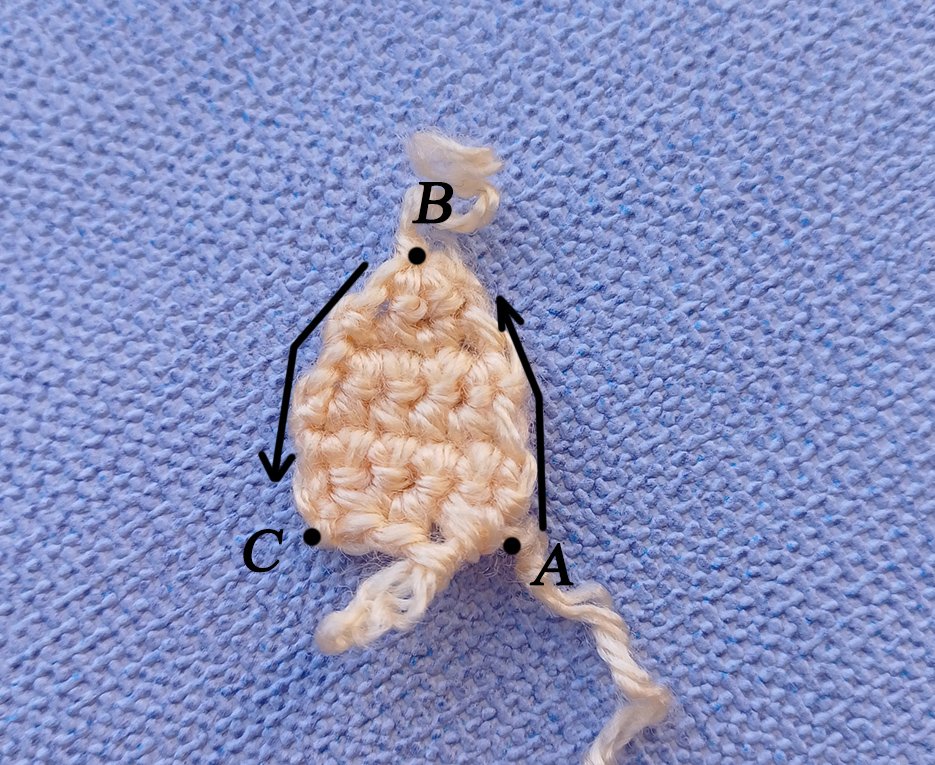
Do not turn!
Rnd 7. crochet from A to B: 7 sc, continue 2 sc into point B, crochet from B to C: 7 sc = 16
Fasten off, cut the thread, leaving approx. 20 cm long tail for sewing.
Wig, head pad
Crochet with textured yarn. As you crochet, try on the piece over your head.
For the wig, I used a fluffy 200m/100g pink color yarn. Please pay attention to yarn thickness. The yarn to make the wig should be twice as thick. You will also need a larger crochet hook.
Work 14 ch
Row 1. starting from 2nd ch from hook: 1 inc, 5 sc, 1 inc, 5 sc, 1 inc, 1 ch, turn = 16
Row 2. 16 sc, 1 ch, turn = 16
Row 3. 5 sc, 1 inc, 4 sc, 1 inc, 5 sc, 1 ch, turn = 18
Row 4. (3 sc, 1 inc) х 2 times, 2 sc, (1 inc, 3 sc) х 2 times, 1 ch, turn = 22
Row 5. 22 sc, 1 ch, turn = 22
Row 6. 1 sc, 1 dec, 16 sc, 1 dec, 1 sc, 1 ch, turn = 20
Row 7. 4 sc, 1 dec, 8 sc, 1 dec, 4 sc, 1 ch, turn = 18
Row 8-9 (2 rows). 18 sc, 1 ch, turn = 18
Row 10. 4 sc, (1 dec, 2 sc) х 2 times, 1 dec, 4 sc, 1 ch, turn = 15
Row 11. 3 sc, (1 dec, 1 sc) х 3 times, 3 sc, work 6 ch, join in 1st and the last loops with the sc = 12+ 6 ch

Continue in rounds.
Rnd 12. 12 sc, continue along the chain: 6 sc = 18
Rnd 13. (1 dec, 1 sc) х 6 times = 12
Rnd 14. 6 dec = 6
Pull off the loops. Cut the thread, hide the end.
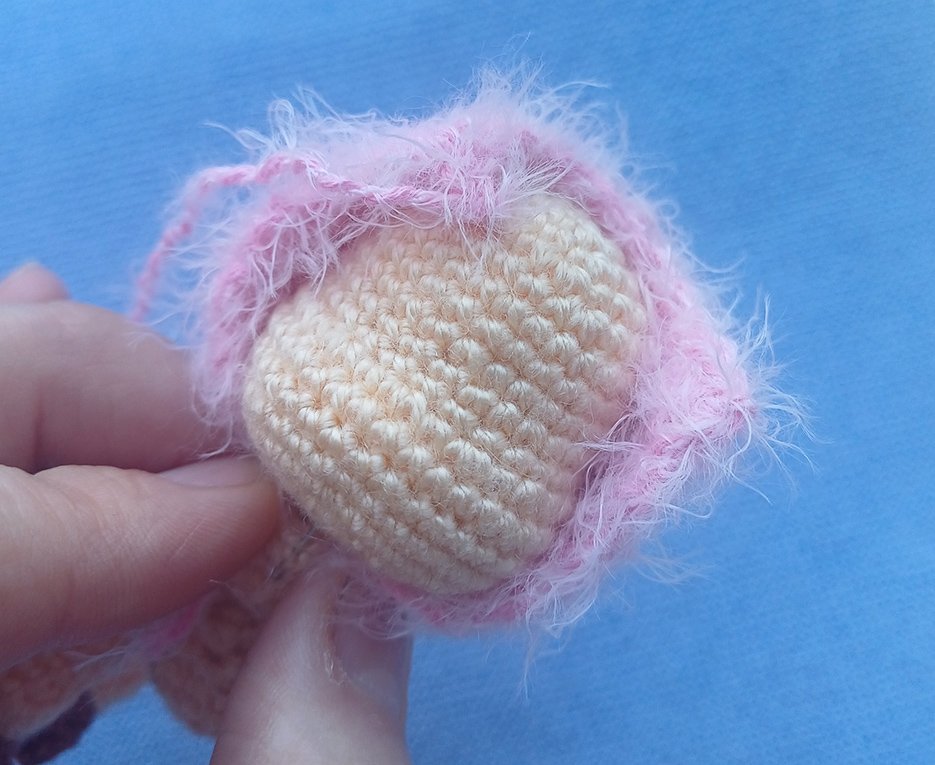
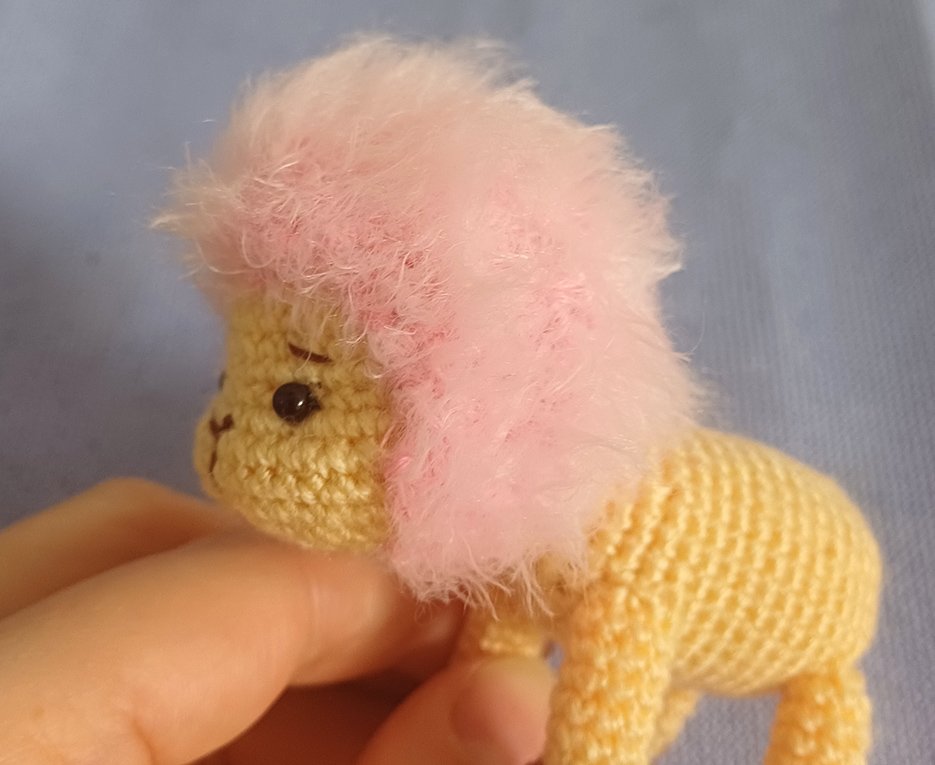
Sew the wig to the head, covering the neck. Add some hollow fibre between the wig and the head.
Fold the ears like an auricle, attach them to the wig with some dressmaking pins. Sew the ears on.

A sheep's coat made from yarn balls
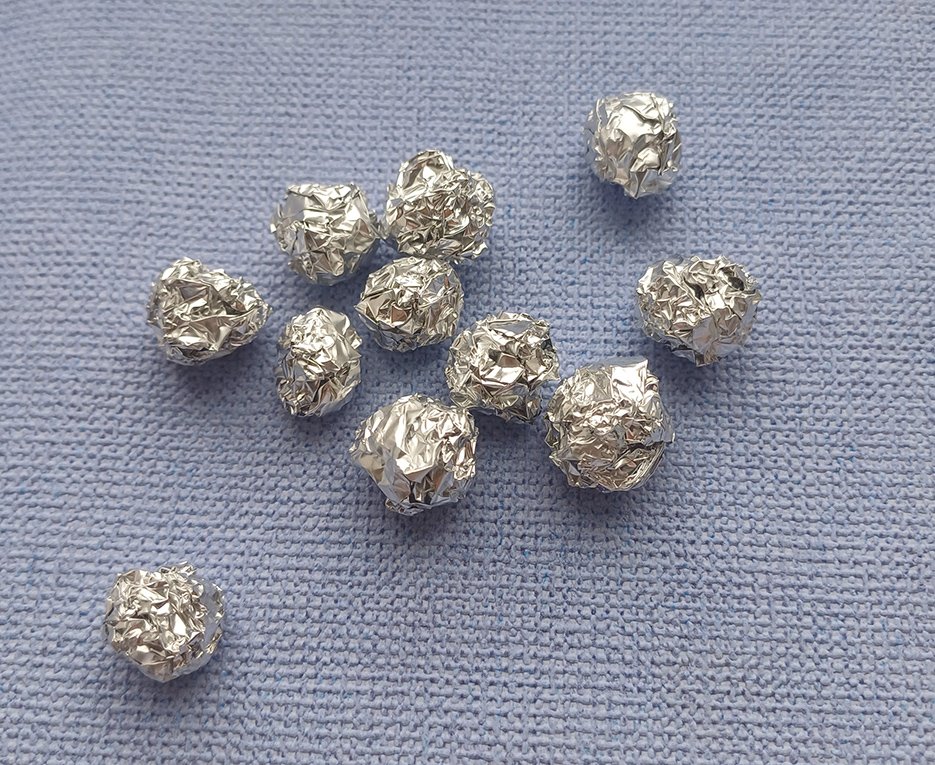
For the base for the balls, prepare foil or paper napkins. Tear them into small strips, then crumple them into a ball about 1-1.5 cm in diameter.
Match the yarn colors. You can use leftover yarn as well.
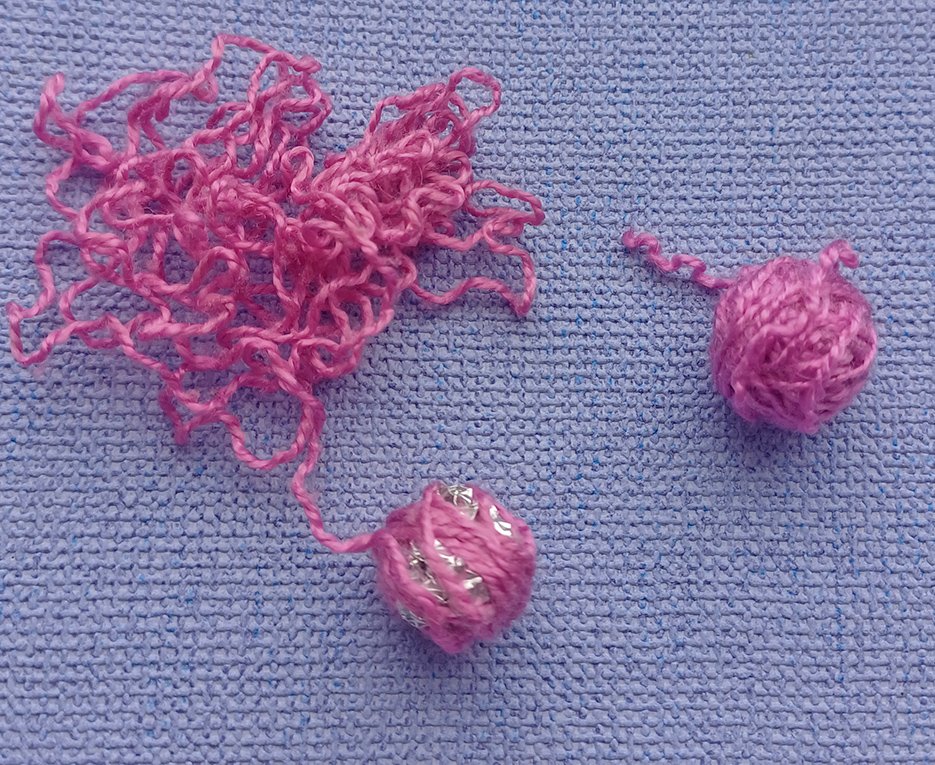
Secure the first turn of yarn with glue. Start by making some horizontal turns and ensure they lie next to each other. Then wind the yarn in different directions. Cut the yarn and glue the end to secure it.
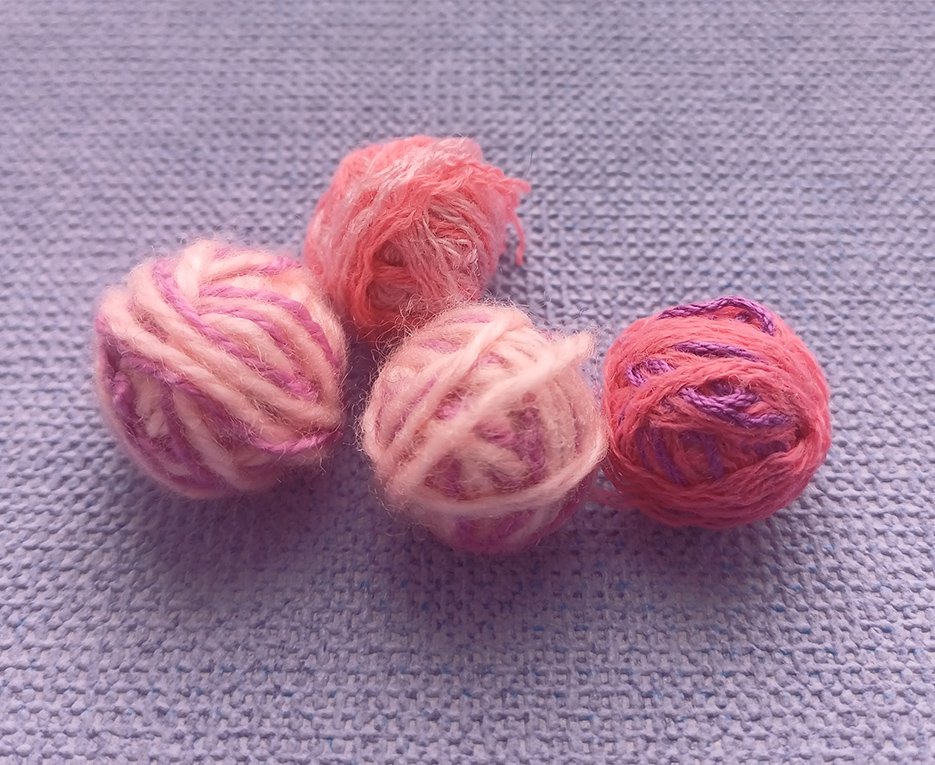
The diameter of your balls will depend on the thickness of the yarn you choose. The entire inner ball of foil should be hidden under the layers of yarn. I made small balls, about 2–2.5 cm in diameter. Balls that are too large will be more difficult to place on the sheep’s body.
You can make single-colored balls of yarn. You can also use two colors at the same time, which will give you melange-colored balls. I liked the second option more.
I needed to wind 28 balls of yarn.
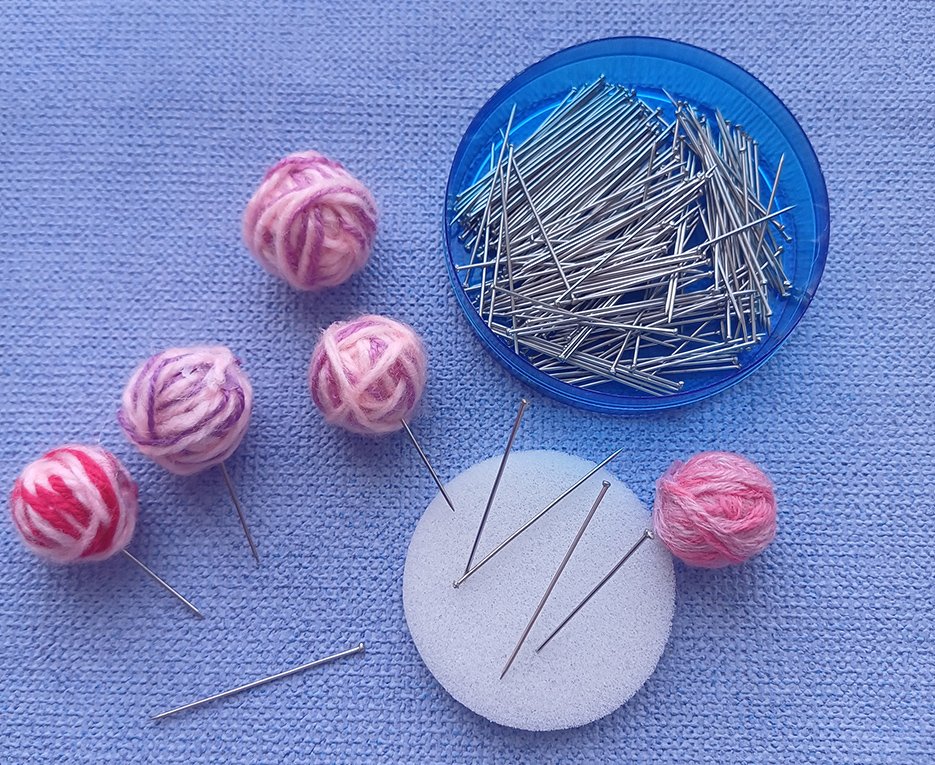
Use long dressmaker pins. Pierce the balls with pins. Then insert the balls into the sheep's body. The advantage of this method is that you can always pull out a pin and reposition the ball.

Another option is to use transparent glue to fix the balls of yarn. In this case, changing the balls of yarn positions becomes harder after the glue dries.
Place the balls of yarn next to each other, covering the entire surface of the sheep's body.
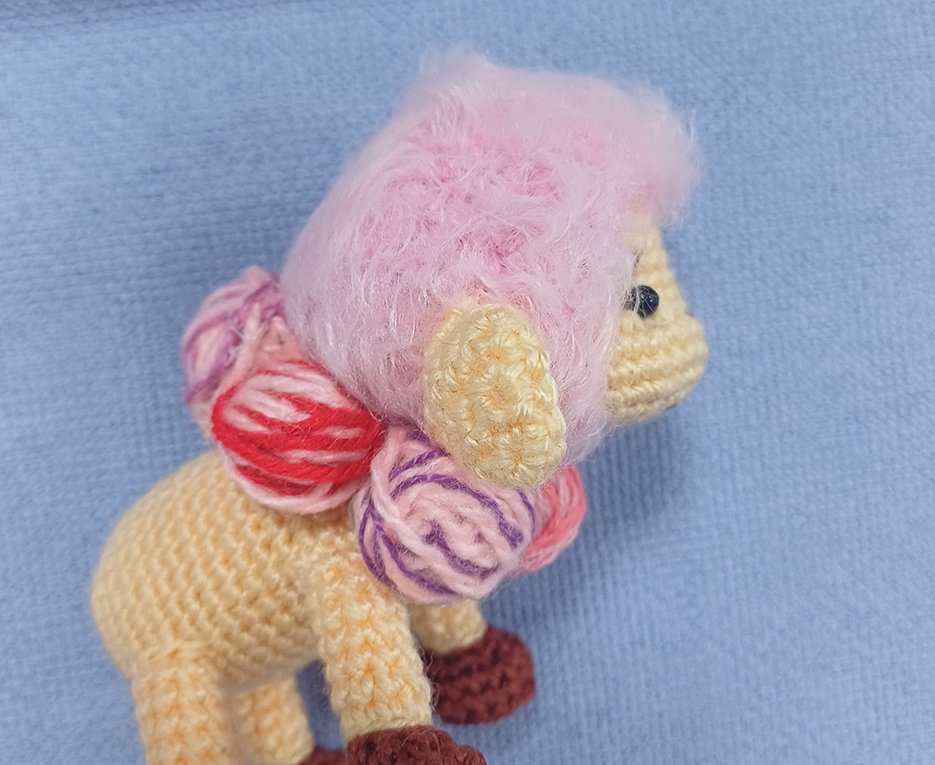
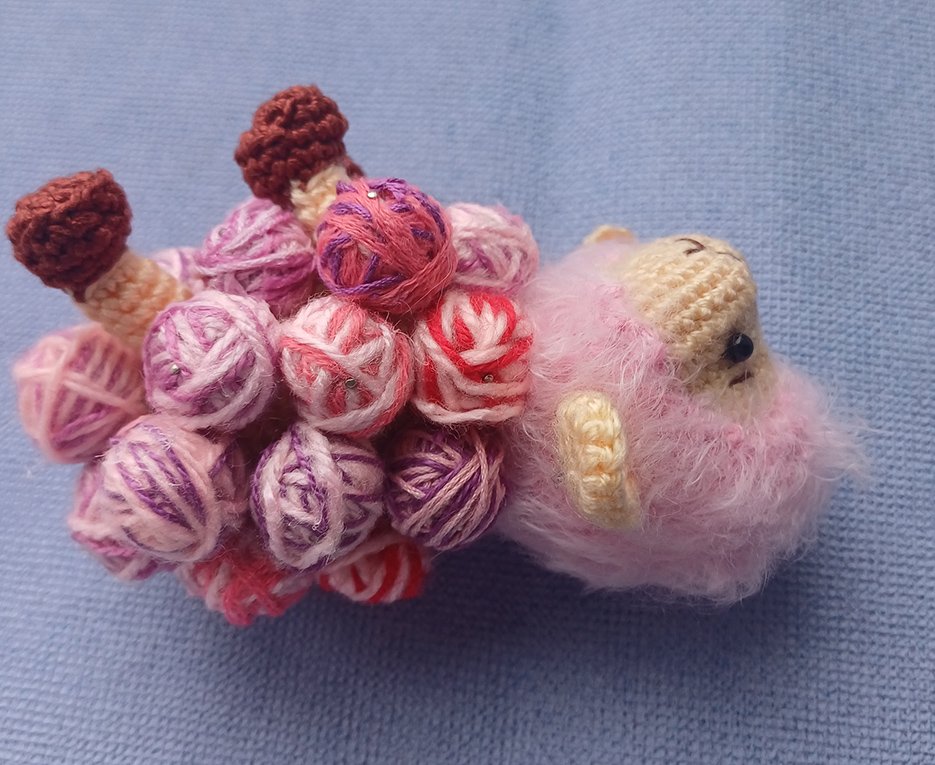
The sheep is ready!

.JPG)


