Free Crochet pattern for Ella the Owl
Do you finally want to use up your leftover yarn and complete a simple and quick crochet project?
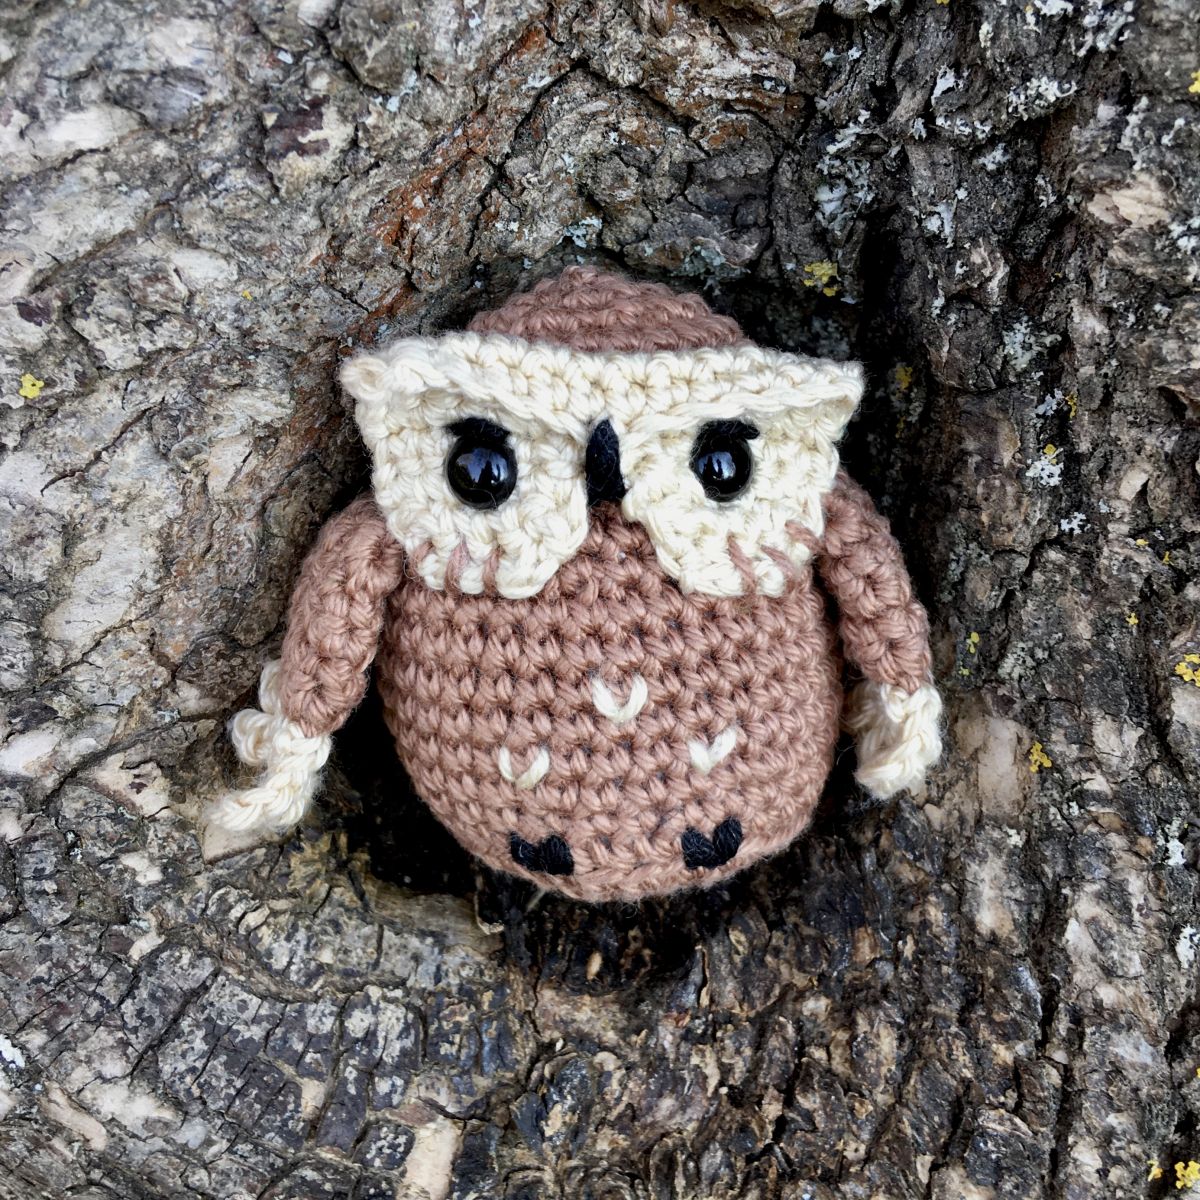
The crochet pattern for Ella the Owl is ideal for crocheters of all skill levels, from beginners to advanced crocheters. This adorable little owl makes a wonderful gift or present any time of year.
The following step-by-step instructions will guide you through the entire crocheting process. With detailed explanations and clear pictures, crocheting this little owl will be a pleasure.
The cuddly owl Ella can be crocheted with a variety of yarns in all sorts of colors and sizes, allowing you to unleash your creativity.
Below, I'll explain how to crochet your own little owl.
---
The pattern for "Ella the Owl" is only approved for private use. It may not be sold, resubmitted, reproduced, published, translated into other languages, exchanged with other intotructions, or modified as your own intotructions or sold.
The sale of the finished toy, which was created with the help of these pattern, is allowed with the name of the designer (Gutherz - Doreen Goedhart). The seller must add this notice to the item description and the product being sold.
Thank you very much and have fun crocheting!
---
This pattern is suitable for: beginners and advanced knitters (depending on the choice of yarn).
Abbreviations: (You should master this basic knowledge.)
Rnd = continuous round
Row = row
MR = magic ring
sc = single crochet
ch = chain (stitch)
slst = slip stitch
inc = increase (2 sc in 1 stitch)
dec = decrease
BLO = back loop only
hdc = half double crochet
tr = treble (crochet)
tch = turning chain
CC = Color change
(…) x? = everything within the brackets is repeated as many times as specified after the x
{…} = everything intoide the bracket is crocheted into one stitch
At the beginning you will find the number of the respective round/row.
The number of stitches in the completed round/row is in the brackets at the end.
Required material:
Crochet hook:
NS 2 mm (If you use a different needle size and/or yarn, the size of the finished owl, as well as the position of the wings, may change.)
Yarn:
Cotton yarn brown, beige and remnants in black (50 g/125 m, e.g. Schachenmayr “Catania”)
Eyes:
Safety eyes in 7 mm
Additional:
Scissors, needle for embroidery and sewing, stuffing, stitch marker
PATTERN:
The finished owl, using the specified materials, will be approximately 8 cm high.
Ella's body is crocheted from the bottom up in spiral rounds. Her face, wings, and tail feathers are crocheted in rows. After each row, a turning chain is crocheted, which is not counted as a stitch and is skipped in the next row.
Tail feathers starting in brown:
1. Row: 6 ch, 1 tch (6)
2.-4. Row: 6 sc, 1 tch (3 rows) (6)
5. Row: CC to beige: 6 sc, 1 tch (6)
6. Row: 1 hdc x2, 2 ch, 2 tr, 2 ch, 1 sc, 1 ch, 1 hdc, 1 slst into the same stitch of the hdc.
Cut the thread, pull it through the last loop, tighten, and sew in the end. Sew in all the threads!
(1).jpg)
Wings beginning in brown (2x):
Leave a long starting thread of about 30 cm.
1. Row: 6 sc in MR, 1 tch (6)
2. Row: (1 sc, inc) x3, 1 tch (9)
3. Row: (2 sc, inc) x3, 1 tch (12)
4. Row: (3 sc, inc) x3, 1 tch (15)
5. Row: (4 sc, inc) x3, CC to beige: 1 tch (18)
6. Row: In this row, the feathers are crocheted. Fold the semicircle in half and crochet it together as follows:
3 sc, 2 ch, 1 sc, 3 ch, 1 sc, 4 ch, 1 sc, 5 ch, 1 sc, 6 ch, 1 sc, 7 ch, 1 slst
Cut the thread, pull it through the last loop, tighten and sew it in place.
.jpg)
.jpg)
.jpg)
Insert your crochet hook through the beginning magic ring and pull up the starting yarn.
Now crochet the opening closed with 5 single crochet stitches. Weave in the end yarn.
.jpg)
.jpg)
.jpg)
Face in beige:
1. Row: 12 ch, 1 tch (12)
2.-6. Row: 12 sc, 1 tch (5 rows) (12)
7. Row: 6 sc, 1 tch (6)
8. Row: dec, 2 sc, dec, 1 tch (4)
9. Row: dec x2 (2)
Cut the thread, pull it through the last loop, tighten and sew it in place.
.jpg)
.jpg)
10. Row: In round 7, re-pin in the 7th stitch: 6 sc, 1 tch (6)
11. Row: dec, 2 sc, dec, 1 tch (4)
12. Row: dec x2 (2)
Cut the thread, pull it through the last loop, tighten, and sew in the end. Sew in the beginning thread as well.
.jpg)
.jpg)
Now insert the eyes in the center between rows 5 and 6, with a distance of 3 visible sc. Do not attach the locking disc yet.
Beak in black:
Using a needle and black yarn, insert the needle from back to front, centering the stitch between the eyes. Then, insert the needle through the center of the chain stitches formed at the beginning of the face. Bring the yarn from back to front, completely around the face, and bring the needle back through the stitch between the eyes. Repeat this 3-4 times.
Cut the yarn, knot the beginning and end threads on the back of the face, and weave in the ends.
.jpg)
.jpg)
.jpg)
.jpg)
Body in brown:
1. Rnd: 6 sc into MR (6)
2. Rnd: inc x6 (12)
3. Rnd: (1 sc, inc) x6 (18)
4. Rnd: (2 sc, inc) x6 (24)
5. Rnd: 1 sc, inc, (3 sc, inc) x5, 2 sc (30)
6. Rnd: This round will be crocheted entirely in BLO: crochet the tail into the body with 6 sc, 24 sc (30)
.jpg)
7. Rnd: 30 sc (30)
8. Rnd: (4 sc, inc) x6 (36)
9.-13. Rnd: 36 sc (5 rounds) (36)
14. Rnd: (4 sc, dec) x6 (30)
15. Rnd: 9 sc, crochet the left wing with 5 sc into the body, 10 sc, crochet the right wing with 5 sc into the body, 1 sc (30)
16.-18. Rnd: 30 sc (3 rounds) (30)
.jpg)
.jpg)
Now attach the face to the body by inserting the stitches for the eyes between rounds 16 and 17, so that the face sits centered between the wings. There will be 6 single crochet stitches between the insertion points. Now you can attach the locking discs.
19. Rnd: (3 sc, dec) x6 (24)
20. Rnd: 24 sc (24)
Stuff firmly and continuously with fiberfill.
21. Rnd: (2 sc, dec) x6 (18)
22. Rnd: (1 sc, dec) x6 (12)
23. Rnd: dec x6 (6)
Cut the thread, thread it through the front loops of the last 6 stitches with a needle, pull tight, knot and sew in.
Finish:
Now embroider the eyelids with black yarn. Also embroider the claws in black. These are worked over round 6 and the front loop of round 5, approximately 3 repeats per toe. Place two toes next to each other with a gap of 3 stitches between them.
Using brown yarn, attach the face to the body with 3 stitches on each side. With beige yarn, you can embroider 3 or more small hearts in a "V" shape onto your owl's chest.
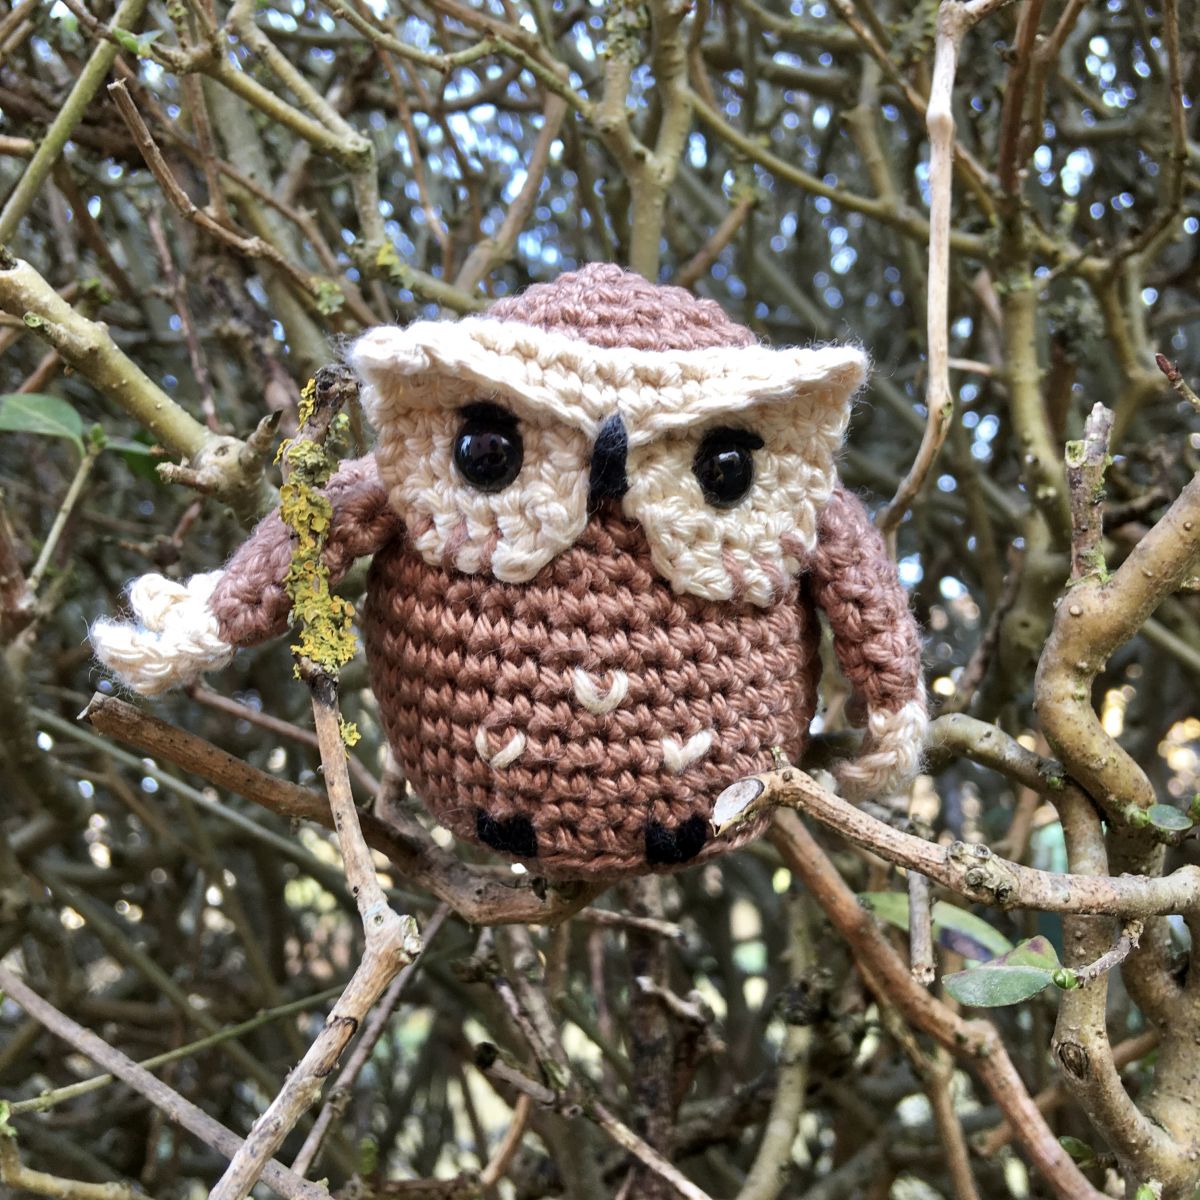
Your Ella the Owl is ready!
I hope you had lots of fun crocheting.
You can find more crochet patterns on my blog here and, of course, in my shop (@gutherzdesign). I look forward to your visit!