
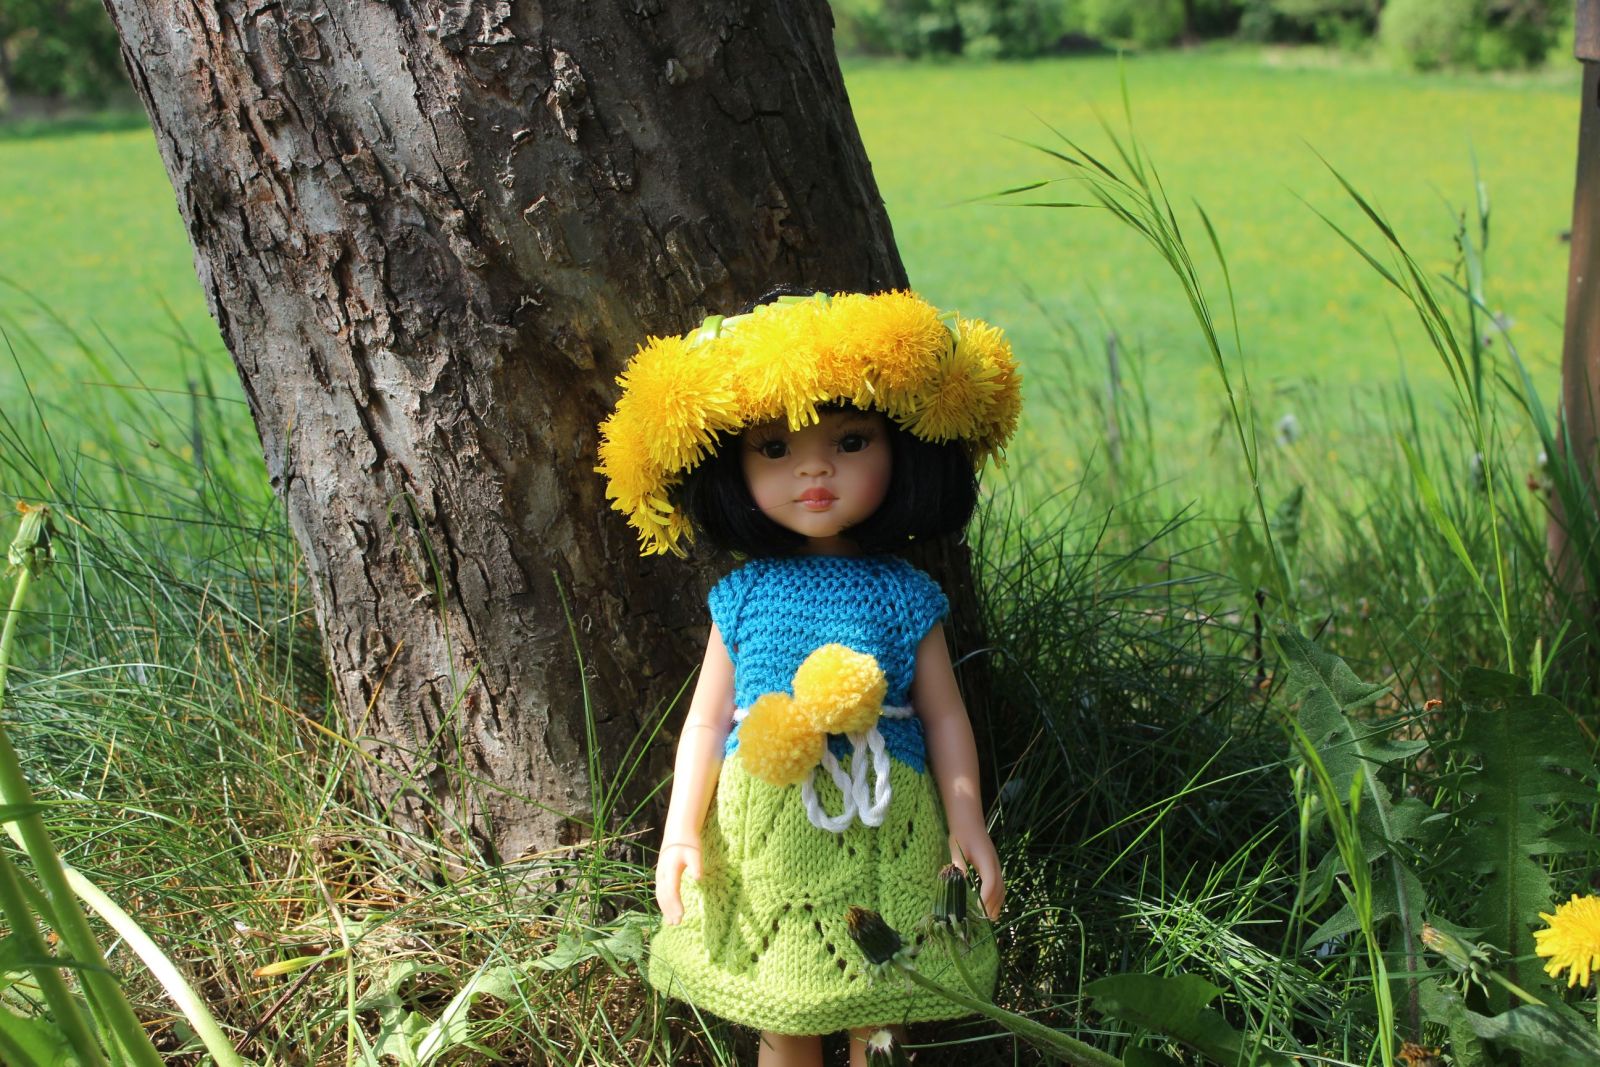
Is there anything better than seeing a child's eyes light up during playtime? I’m happy to share this beautiful and free knitting pattern with you today. An adorable dress for your 12-inch doll. This knit dress makes a great gift for any little girl who loves dressing her doll up! With this hand-knitted doll dress, you will create a true highlight for the doll wardrobe in no time. This sweet dress for dolls is knitted in a single piece from the top-down. Has a back Velcro fastening. An ideal gift for the little dolls´ owners! The pattern is very detailed. It comes with easy-to-follow written instructions and photo tutorial. The photo tutorial contains many helpful step-by-step pictures to make the project as easy-to-follow as possible. With just basic skills like knitting and purling, you will create a beautiful unique piece row by row. It is easy and fun to make and you’ll need just a little bit of yarn! The easiest dress is the one that’s knit flat and uses just the knit and purl stitches. So, grab your needles and some yarn, and let’s get started!
MATERIALS
ca 30 Schachenmayr Catania 50g/136 yrd, DK (11 wpi), circular and double pointed needles 3 mm, Velcro fastener.
SKILL LEVEL
Intermediate
This is an intermediate level knitting pattern and the techniques involved are knitting, purling, increases, K2tog and K3tog decreases, making an i-cord and reading from a chart, and working both flat and in the round.
SIZE
12-14-inch doll
GAUGE
26 stitches = 4 inches in stockinette stitch
ABBREVIATIONS
ks =knit stitch
ps =purl stitch
k2tog =knit two stitches together
yo =yarn over
sl1 =slip one stitch
psso =pass the slipped stitch over
R = row
Rnd = round
SK = (SLIP KNIT) slip the first stitch as if to knit, knit the second stitch, pass the slipped stitch over.
EDGE STITCHES
Slip the first stitch and purl the last stitch of every row.
GARTER STITCH
Knit every row. Working in the round, purl one round and knit one round.
STOCKING (STOCKINETTE) STITCH
Stockinette stitch is a basic knitting stitch pattern that creates a smooth, even fabric. It is made by knitting alternating rows of knit and purl stitches. Stockinette stitch works with any number of stitches per row, and you can use it on patterns that call for an odd or an even number of stitches. There are two ways to knit stockinette stitch: flat and in the round.
Row 1: Knit all stitches.
Row 2: Purl all stitches.
Repeat rows one and two until your piece measures the desired length.
Working in the rounds simply knit every round until your piece measures the desired length.
KNIT 3 STITCHES TOGETHER
Knitting three stitches together are double decreases techniques in knitting. You reduce three stitches to one.
- Insert your right needle into all three stitches at once, just like a standard knit stitch.
- Wrap the yarn over the needle counterclockwise.
- Pull the yarn through all three stitches and slide them off the left needle.
A k3tog is made.
INSTRUCTIONS
This pattern is really easy to follow; no matter if the only stitches you know are knit and purl. And there are many possibilities to customize it by adding new color for the top, using another stitch or knit in a different color.
This dress is worked from the top to bottom in rows.
NECKLINE
.JPG)
Cast on 32 stitches including edge stitches. Knit 3 rows in garter stitch.
RAGLAN
.JPG)
From here increasing starts. In every second-row yarn over before and after raglan stitches:
Row 1: ES, 3 garter stitches, 4 garter stitches (back), yarn over, 1 knit stitch (raglan stitch), yarn over, 2 garter stitches (sleeve), yarn over, 1 knit stitch (raglan stitch), yarn over, 8 garter stitches (front), yarn over, 1 knit stitch (raglan stitches), yarn over, 2 garter stitches (sleeve), yarn over, 1 knit stitch (raglan stitches), yarn over, 4 garter stitches (back), 3 garter stitches, ES, turn.
Row 2: knit stitches exactly as they appear on needle (knit yo, purl raglan stitches), turn the work.
Row 3: ES, 3 garter stitches, 5 garter stitches, yarn over, 1 knit stitch, yarn over, 4 garter stitches, yarn over, 1 knit stitch, yarn over, 10 garter stitches, yarn over, 1 knit stitch, yarn over, 4 garter stitches, yarn over, 1 knit stitch, yarn over, 5 garter stitches, 3 garter stitches, ES, turn.
Row 4: knit stitches exactly as they appear on needle (knit yo, purl raglan stitches), turn.
Row 5: ES, 3 garter stitches, 6 garter stitches, yarn over, 1 knit stitch, yarn over, 6 garter stitches, yarn over, 1 knit stitch, yarn over, 12 garter stitches, yarn over, 1 knit stitch, yarn over, 6 garter stitches, yarn over, 1 knit stitch, yarn over, 6 garter stitches, 3 garter stitches, ES, turn.
Row 6: knit stitches exactly as they appear on needle, turn.
Row 7: ES, 3 garter stitches, 7 garter stitches, yarn over, 1 knit stitch, yarn over, 8 garter stitches, yarn over, 1 knit stitch, yarn over, 14 garter stitches, yarn over, 1 knit stitch, yarn over, 8 garter stitches, yarn over, 1 knit stitch, yarn over, 7 garter stitches, 3 garter stitches, ES, turn.
Row 8: knit stitches exactly as they appear on needle, turn.
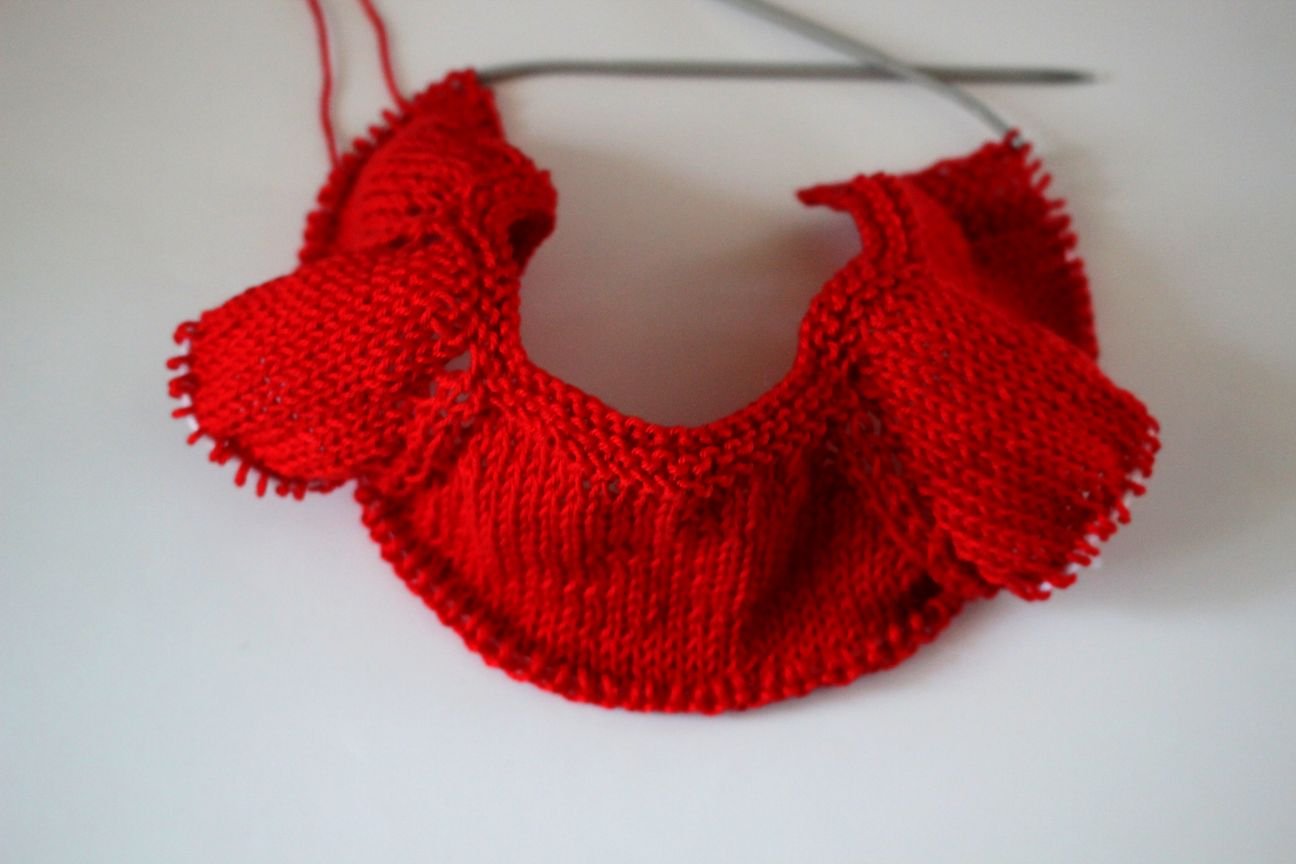
Row 9: ES, 3 garter stitches, 8 garter stitches, yarn over, 1 knit stitch, cast off 10 stitches, 1 knit stitch, yarn over, 16 garter stitches, yarn over, 1 knit stitch, cast off 10 stitches, 1 knit stitch, yarn over, 8 garter stitches, 3 garter stitches, ES, turn.
Row 10: ES, 3 garter stitches, 8 garter stitches, yarn over, 1 knit stitch, 1 purl stitch, cast on 6 stitches, 1 purl stitch, 1 knit stitch, 16 garter stitches, 1 knit stitch, 1 purl stitch, cast on 6 stitches, 1 purl stitch, 1 knit stitch, 8 garter stitches, 3 garter stitches, ES, turn.
Row 11: ES, 3 garter stitches, 9 garter stitches, yarn over, 1 knit stitch, 6 garter stitches, 1 knit stitch, yarn over, 18 garter stitches, yarn over, 1 knit stitch, 6 garter stitches, 1 knit stitch, yarn over, 9 garter stitches, 3 garter stitches, ES, turn.
Row 12: knit stitches exactly as they appear on needle, turn.
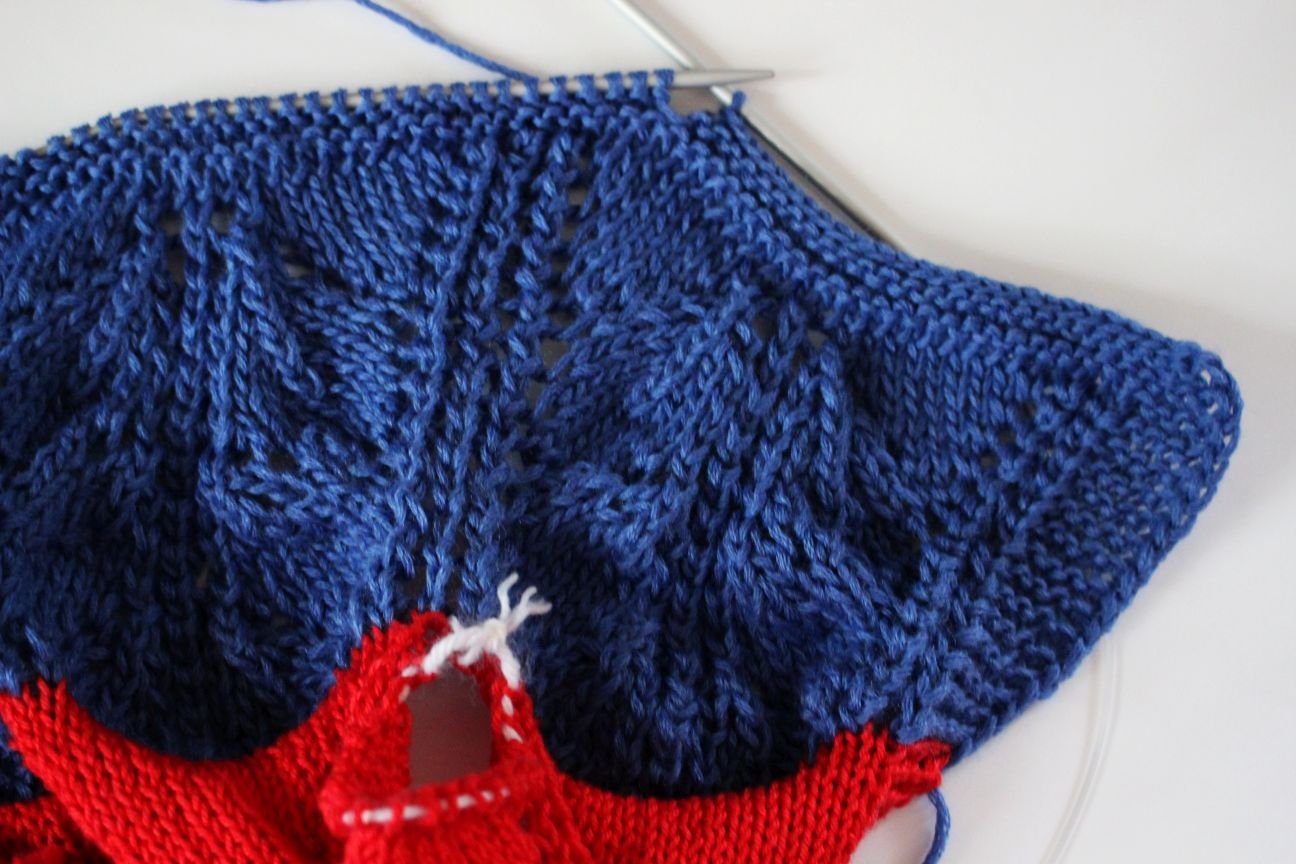
Work 9 rows in garter stitch. In the last row increase evenly 19 stitches (= 83 stitches), turn the work
SKIRT
Change the yarn color
.JPG)
Purl one row.
Knit rows 1-12 of the pattern using the chart below twice. Start and end every row with 3 garter stitches.
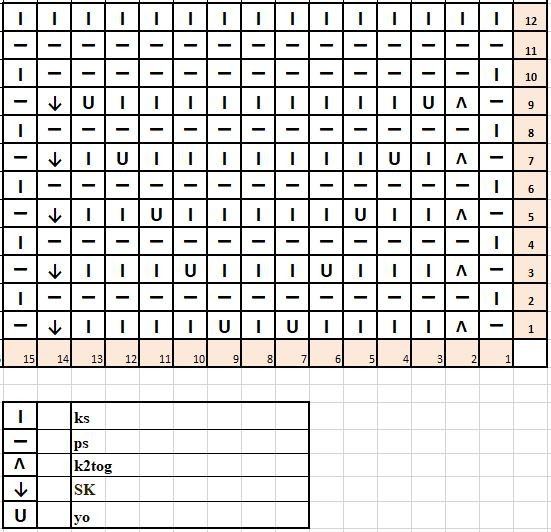
PATTERN
Row 1: purl 1 stitch, yarn over, knit 2 stitches together, knit 4 stitches, yarn over, knit 1 stitch, yarn over, knit 4 stitches, slip knit, purl 1 stitch, turn the work.
Row 2: work stitches exactly as they appear on the needle (knit ks, purl ps, purl yo).
Row 3: purl 1 stitch, knit 2 stitches together, knit 3 stitches, yarn over, knit 3 stitches, yarn over, knit 3 stitches, slip knit, purl 1 stitch, turn the work.
Row 4: work stitches exactly as they appear on the needle (knit ks, purl ps, purl yo).
Row 5: purl 1 stitch, knit 2 stitches together, knit 2 stitches, yarn over, knit 5 stitches, yarn over, knit 2 stitches, slip knit, purl 1 stitch, turn the work.
Row 6: work stitches exactly as they appear on the needle (knit ks, purl ps, purl yo).
Row 7: purl 1 stitch, knit 2 stitches together, knit 1 stitch, yarn over, knit 7 stitches, yarn over, knit 1 stitch, slip knit, purl 1 stitch, turn the work.
Row 8: work stitches exactly as they appear on the needle (knit ks, purl ps, purl yo).
Row 9: purl 1 stitch, knit 2 stitches together, yarn over, knit 9 stitches, yarn over, slip knit, purl 1 stitch, turn the work.
Row 10: work stitches exactly as they appear on the needle (knit ks, purl ps, purl yo).
Row 11: purl all stitches, turn the work.
Row 12: knit all stitches, turn the work.
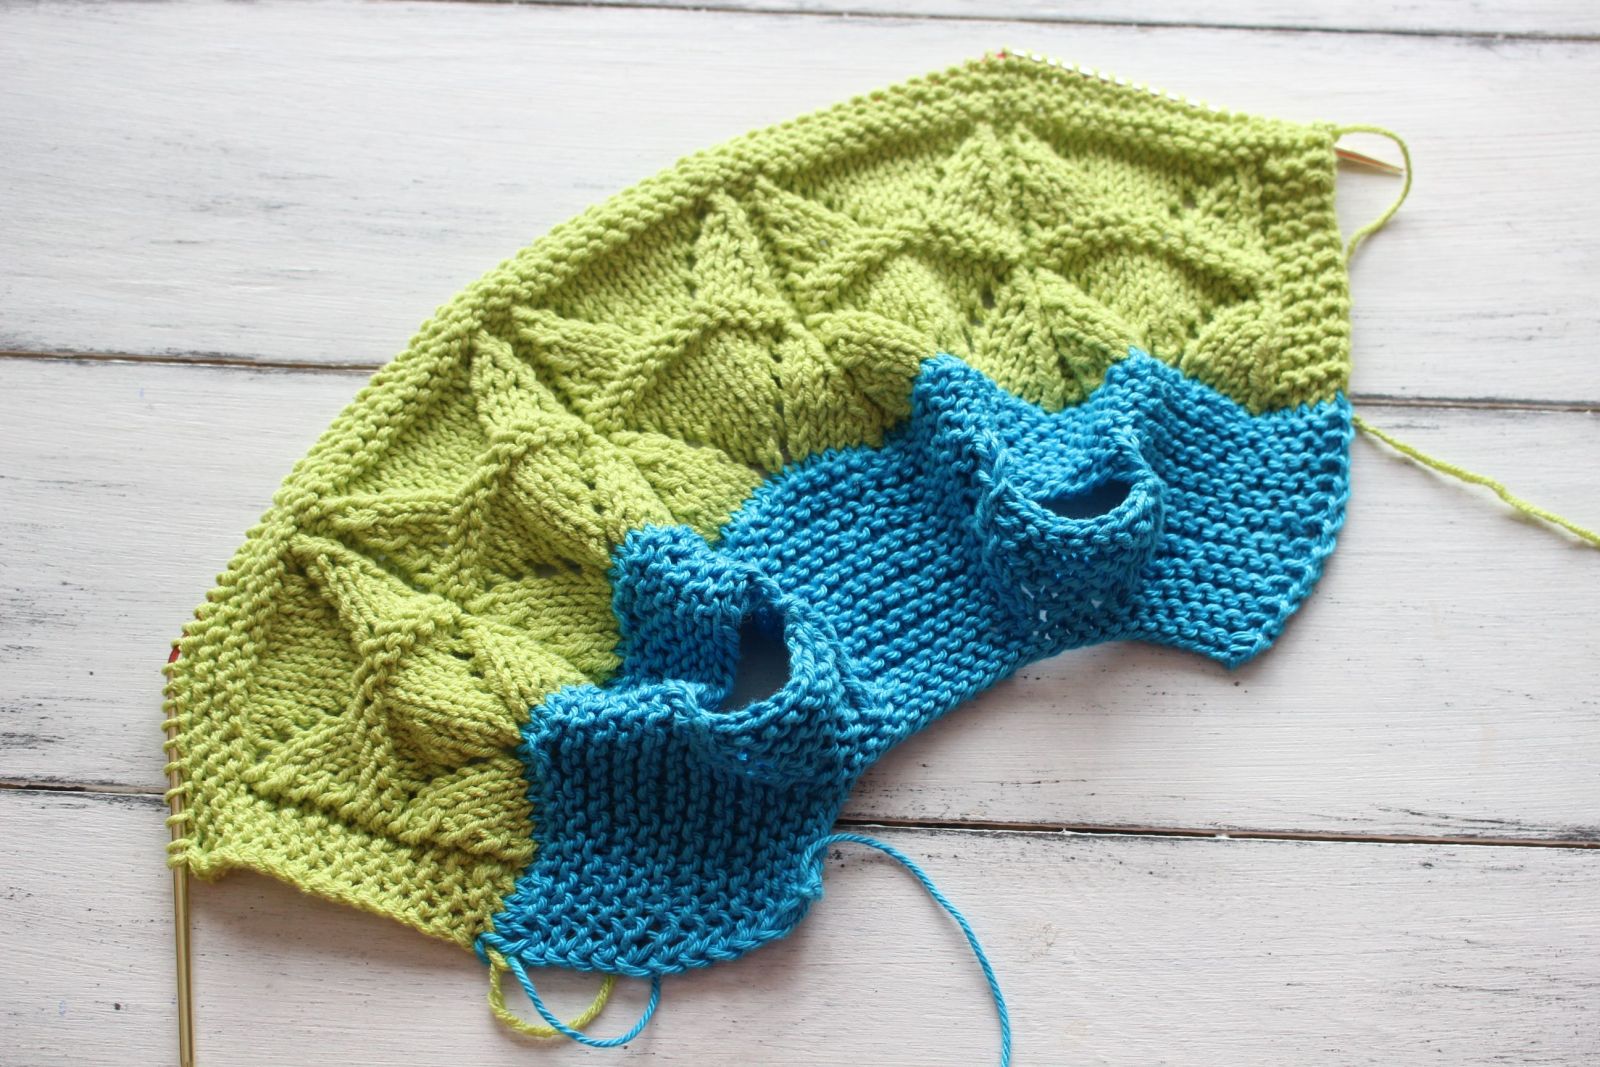
Work 4 rows in garter stitches. Fasten off all stitches.
ASSEMBLY
.JPG)
Sew on fastener.
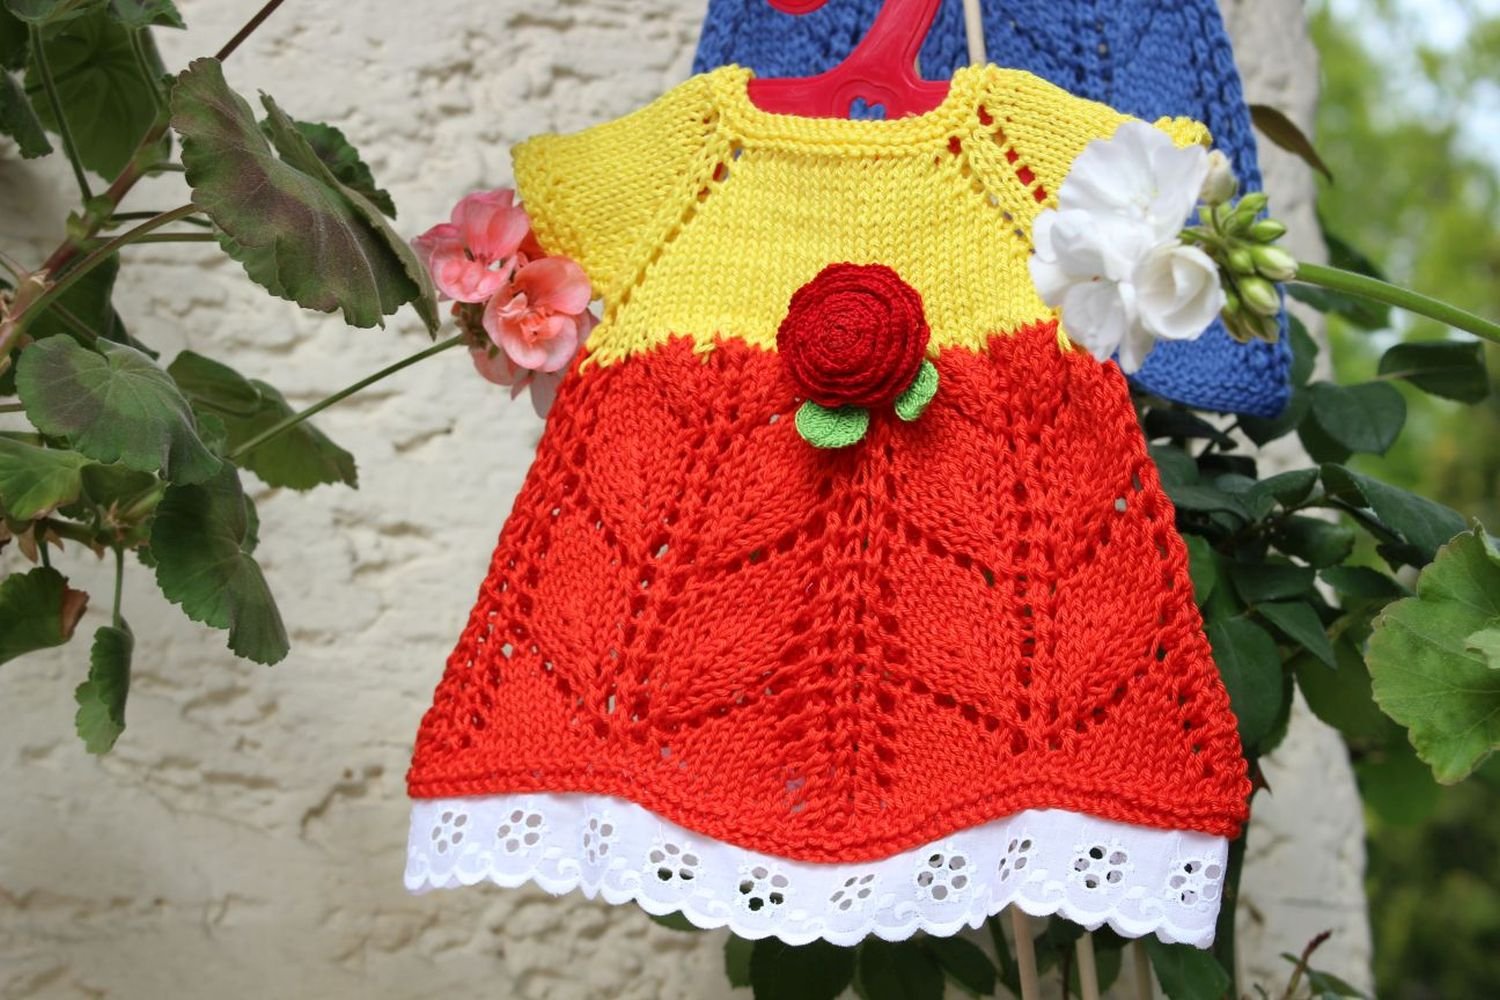
Make a twisted cord:
Cut several strands of your chosen yarn 4 times longer than needed, as the twisting process shrinks the cord significantly. Knot the strands together at each end. Hook one of the knots onto a stationary object (like a door handle). Take the knot at the opposite end and insert a pencil through one end. Grab threads between your fingers and twist the pen like a propellor. Twist a lot, being careful not to let the twisty part to not get in knots. Fold yarn in half and let the two ends twist around themselves. Make a knot at both ends to keep it from untwisting.
Now make 2 yellow pompoms and attach them to the twisted cord.
Happy knitting!
I hope you enjoyed knitting the dress and found the pattern helpful. I would love to see your finished work, so share a picture here or on Instagram by tagging me @tansuluucrafthaus.
If you would like to share this pattern, please link to this page. Also, please credit me when using this pattern by tagging me @tansuluucrafthaus on Instagram.
Looking for more inspiration? Explore all of our free knitting and crochet pattern. Feel free to contact me with any questions. Thank you for stopping by and have a lovely day!


