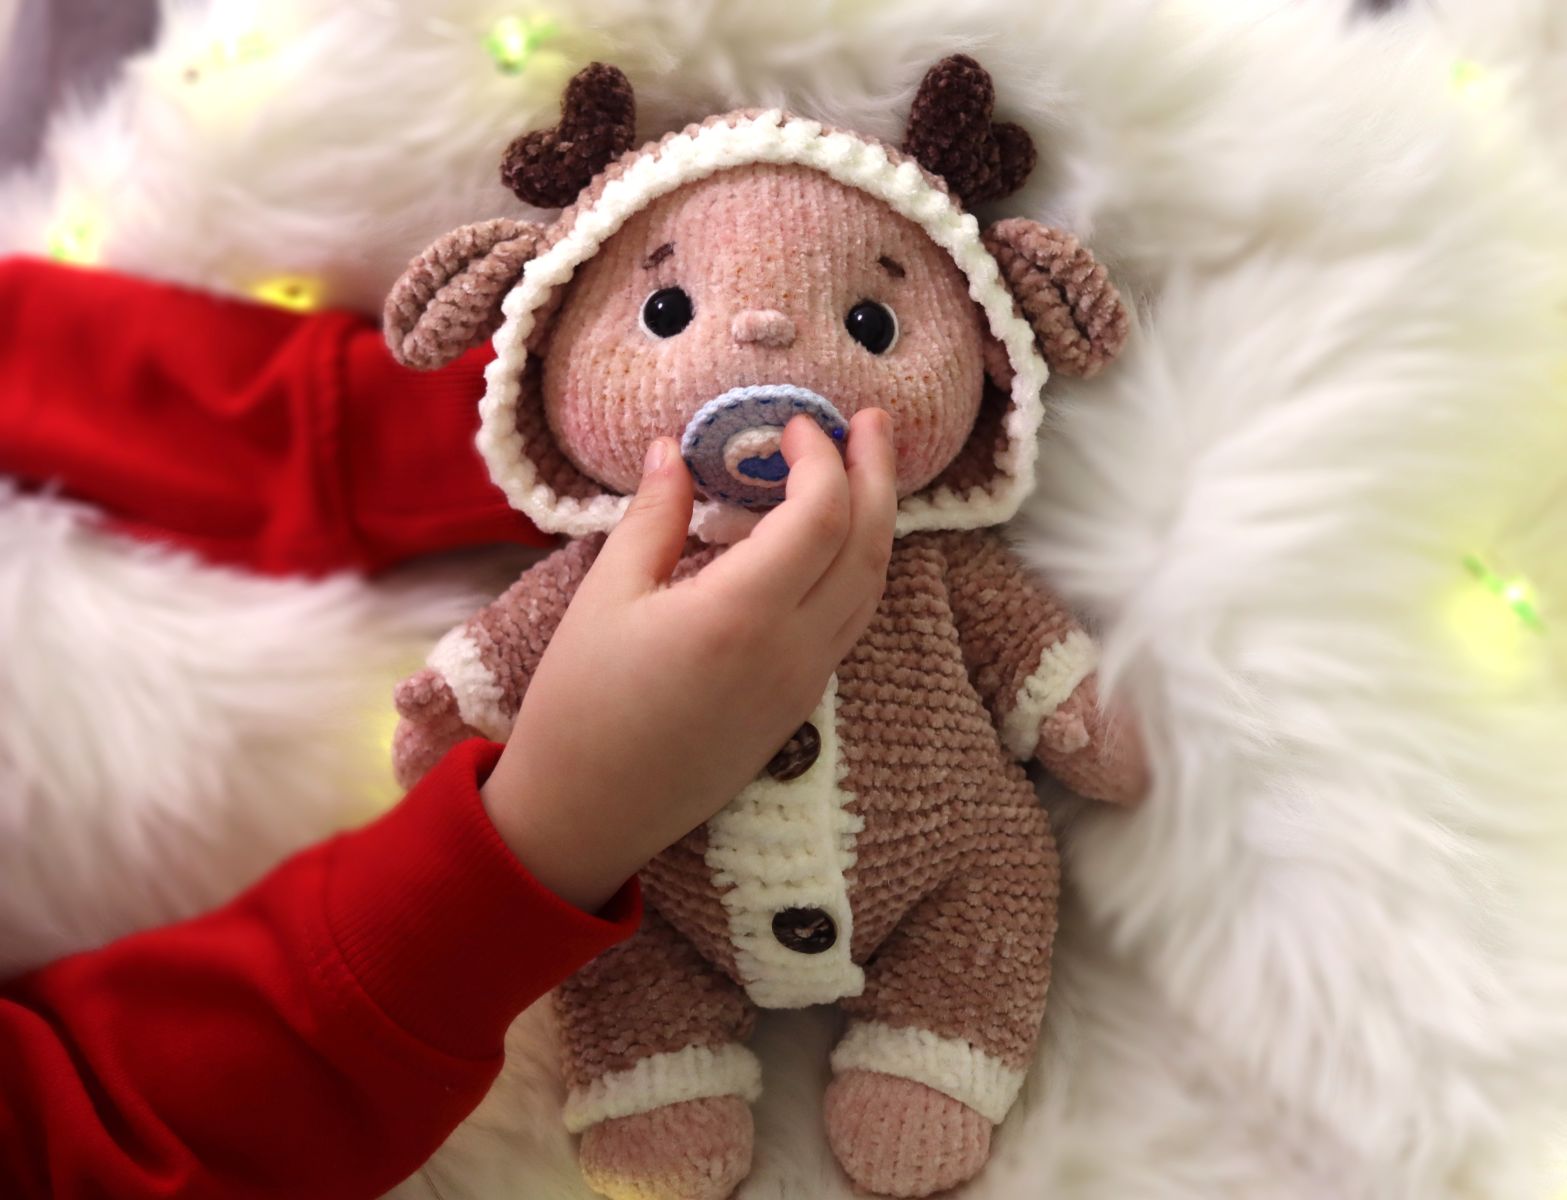
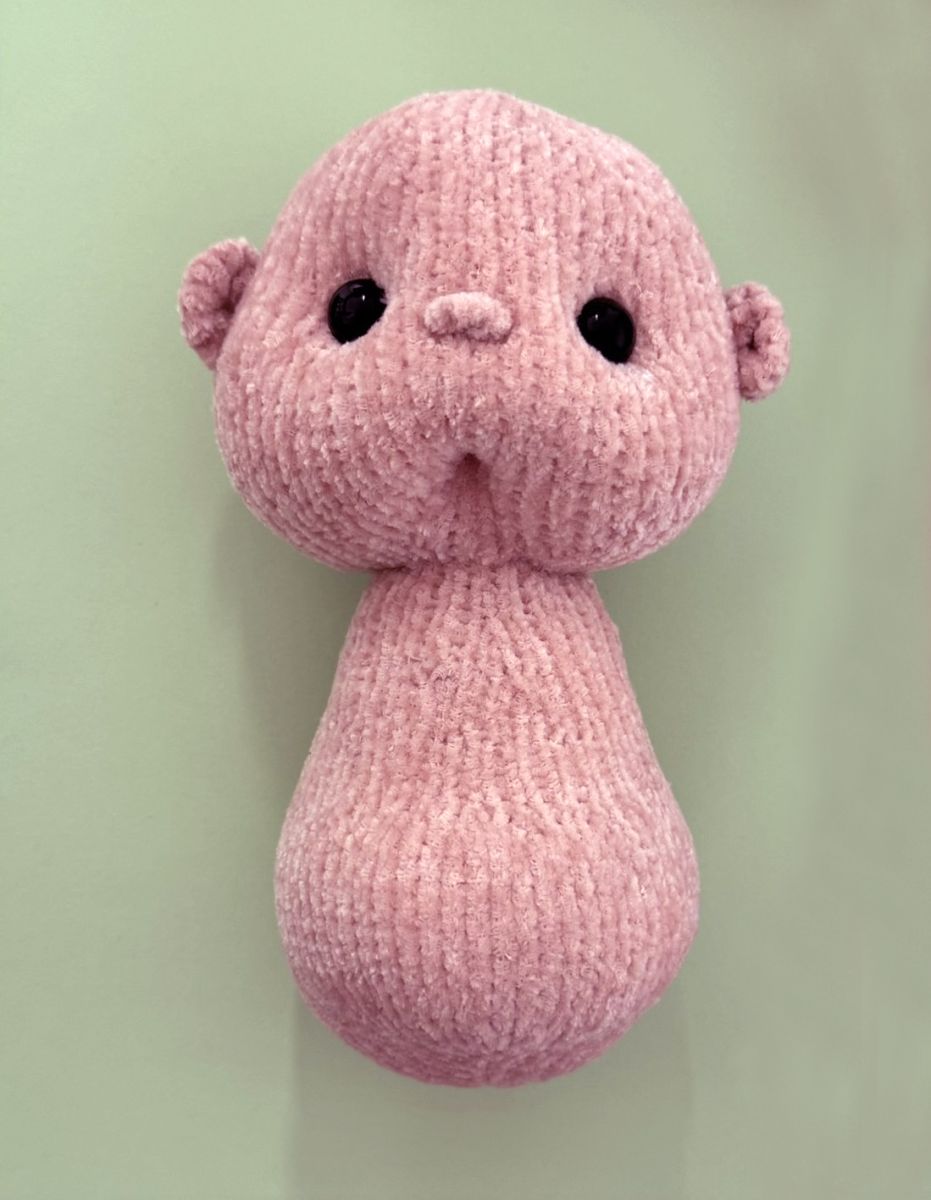
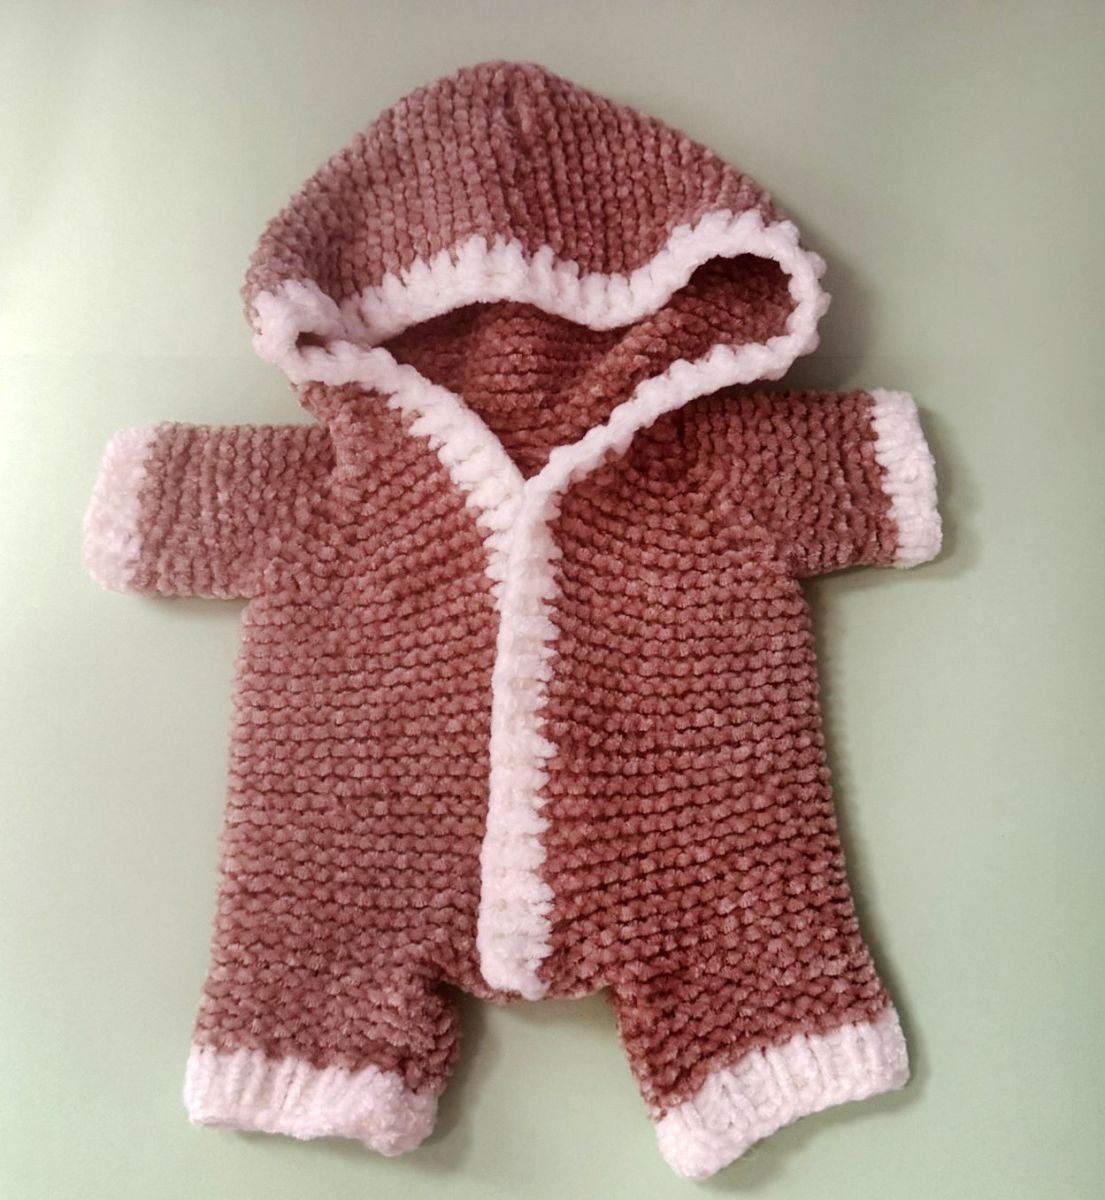
A fluffy little baby in a cozy deer.
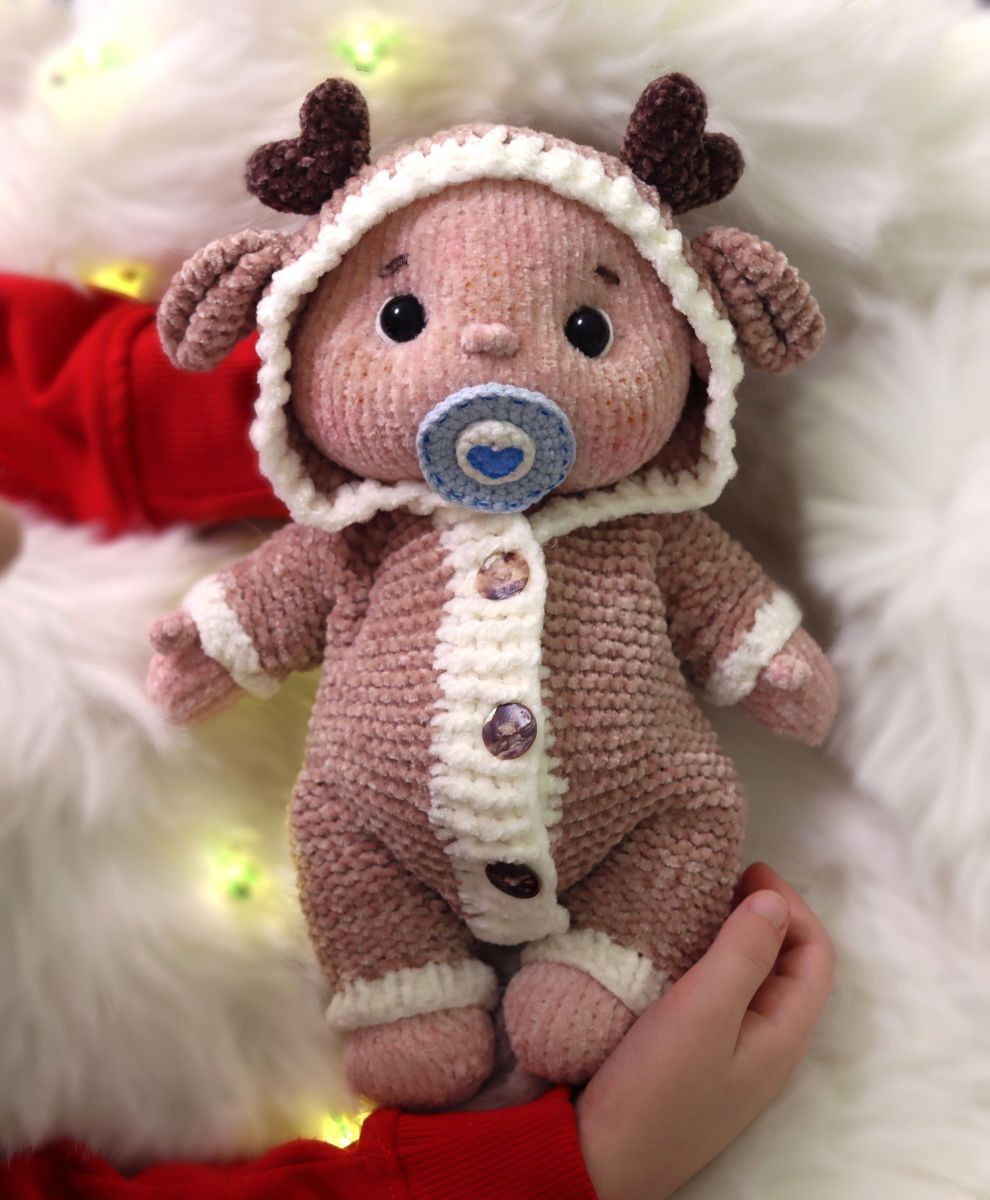
This fluffy little baby in its cozy deer onesie makes a charming nursery decoration or a delightful Christmas gift for doll lovers.
The onesie is removable, and the baby itself is very easy to knit. It’s worked without joints — all the pieces are simply sewn together. For the eyes, you only need two buttons, which are stitched on.
This version doesn’t include fingers. If you’d like to knit a baby with fingers, you can find another tutorial on my blog. That design is more suitable for experienced knitters, as not only the hands but other parts are worked differently.
The model shown here is a particularly simple version that can be recreated with little effort, making it perfect for beginners or anyone looking for a quick, satisfying project.
Knitting Instructions for all Pieces
All parts are crafted entirely with two knitting needles.
Follow these steps:
First Row - Purl Stitches Begin by knitting the first row entirely in purl stitches. These will form the back side of your project, creating a neat texture.
Second Row - Knit Stitches In the second row, knit every stitch. This will produce a smooth, even front for your piece.
Repeating the Pattern Continue alternating between purl stitches in the odd-numbered rows and knit stitches in the even-numbered rows:
- Odd-numbered rows (e.g., 1st, 3rd, 5th): Work in purl stitches.
- Even-numbered rows (e.g., 2nd, 4th, 6th): Work in knit stitches.
This straightforward pattern of alternating knit and purl rows is ideal for beginners, offering an easy yet satisfying introduction to the craft.
If you're knitting with three or four needles to avoid joining and creating a seam, this is certainly possible. In this case, all purl stitches are worked as knit stitches
Materials:
Yarn for Baby- Boheme Velvet yarn- 35 gr.
40g Katia Velvet fine yarn, dark brown, for the overall.
Knitting needles: 2.5 mm for the doll, 3 mm for the clothes.
Crochet hooks: 2 mm and 3 mm
Sew eyes: 10-12 mm
Fiberfill, 1 extra long sewing needle, pastel chalk, cable needles or thread.
Abbreviations:
CH – Chain(s)
inc – increase
dec – decrease
X dec – X- times decrease
X inc – X- times increase
ST – Stitch
P – purl
K– knit (garter stitch)
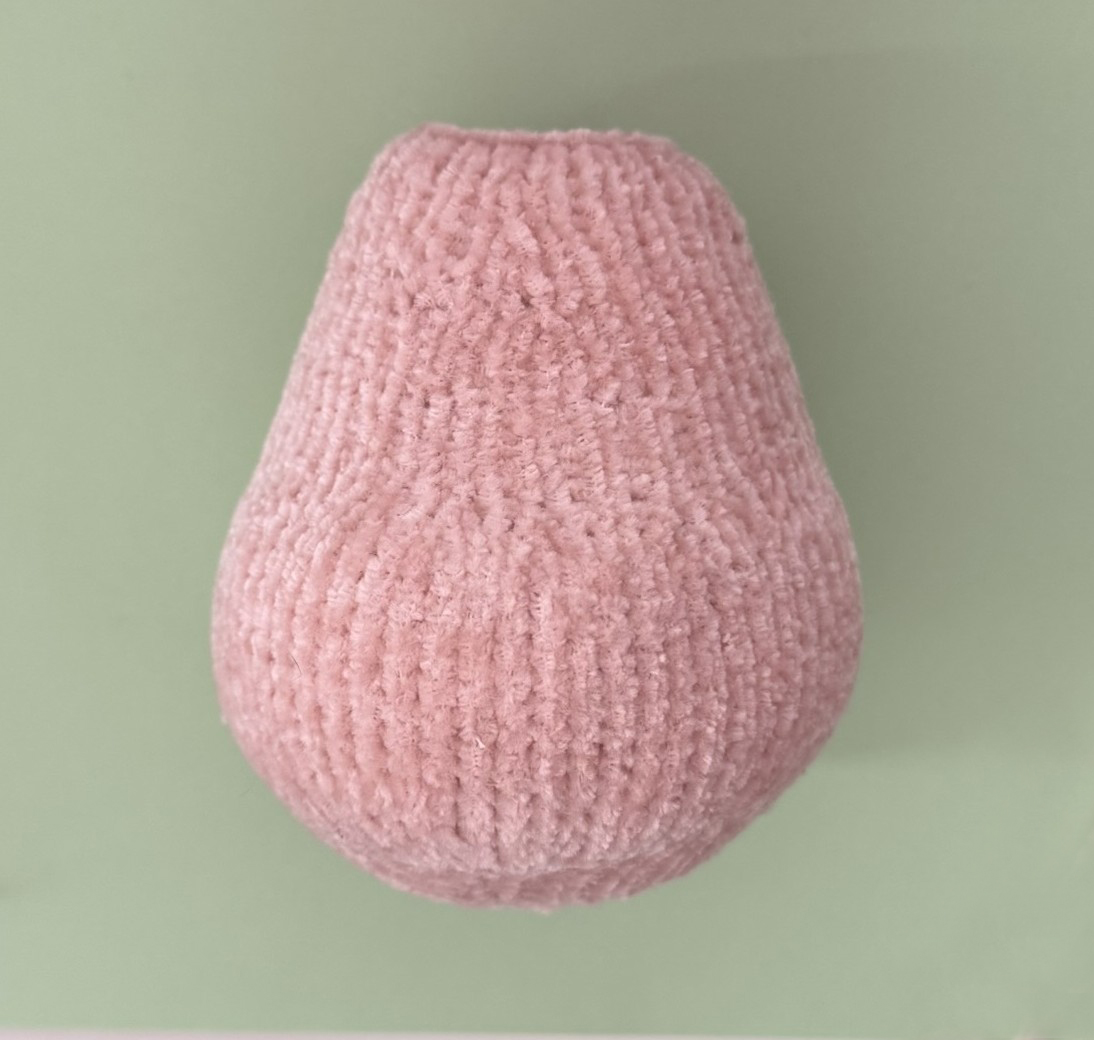
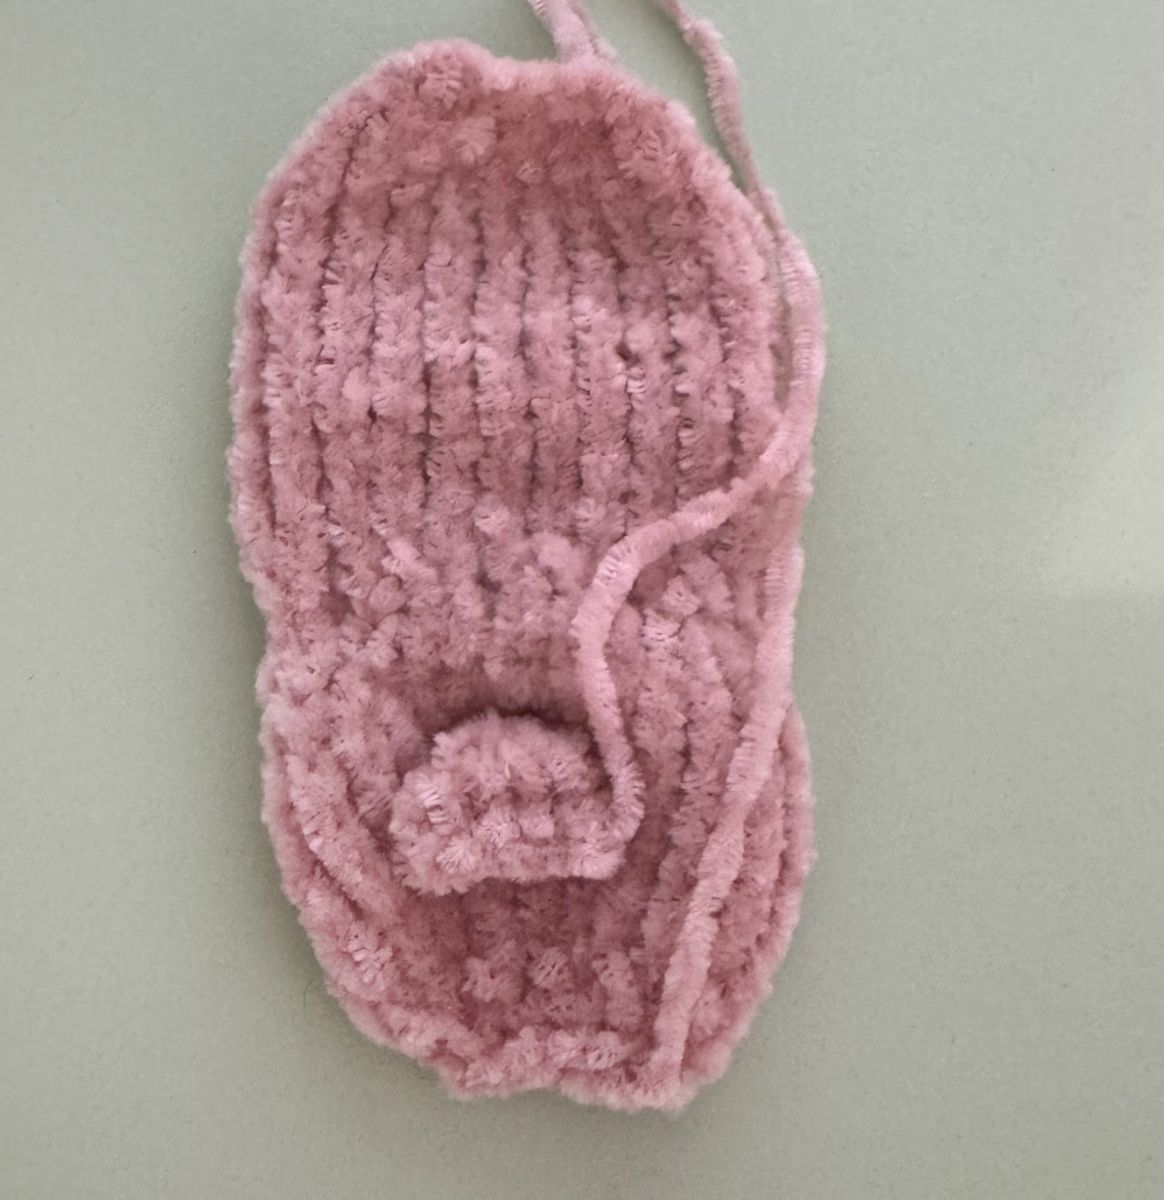
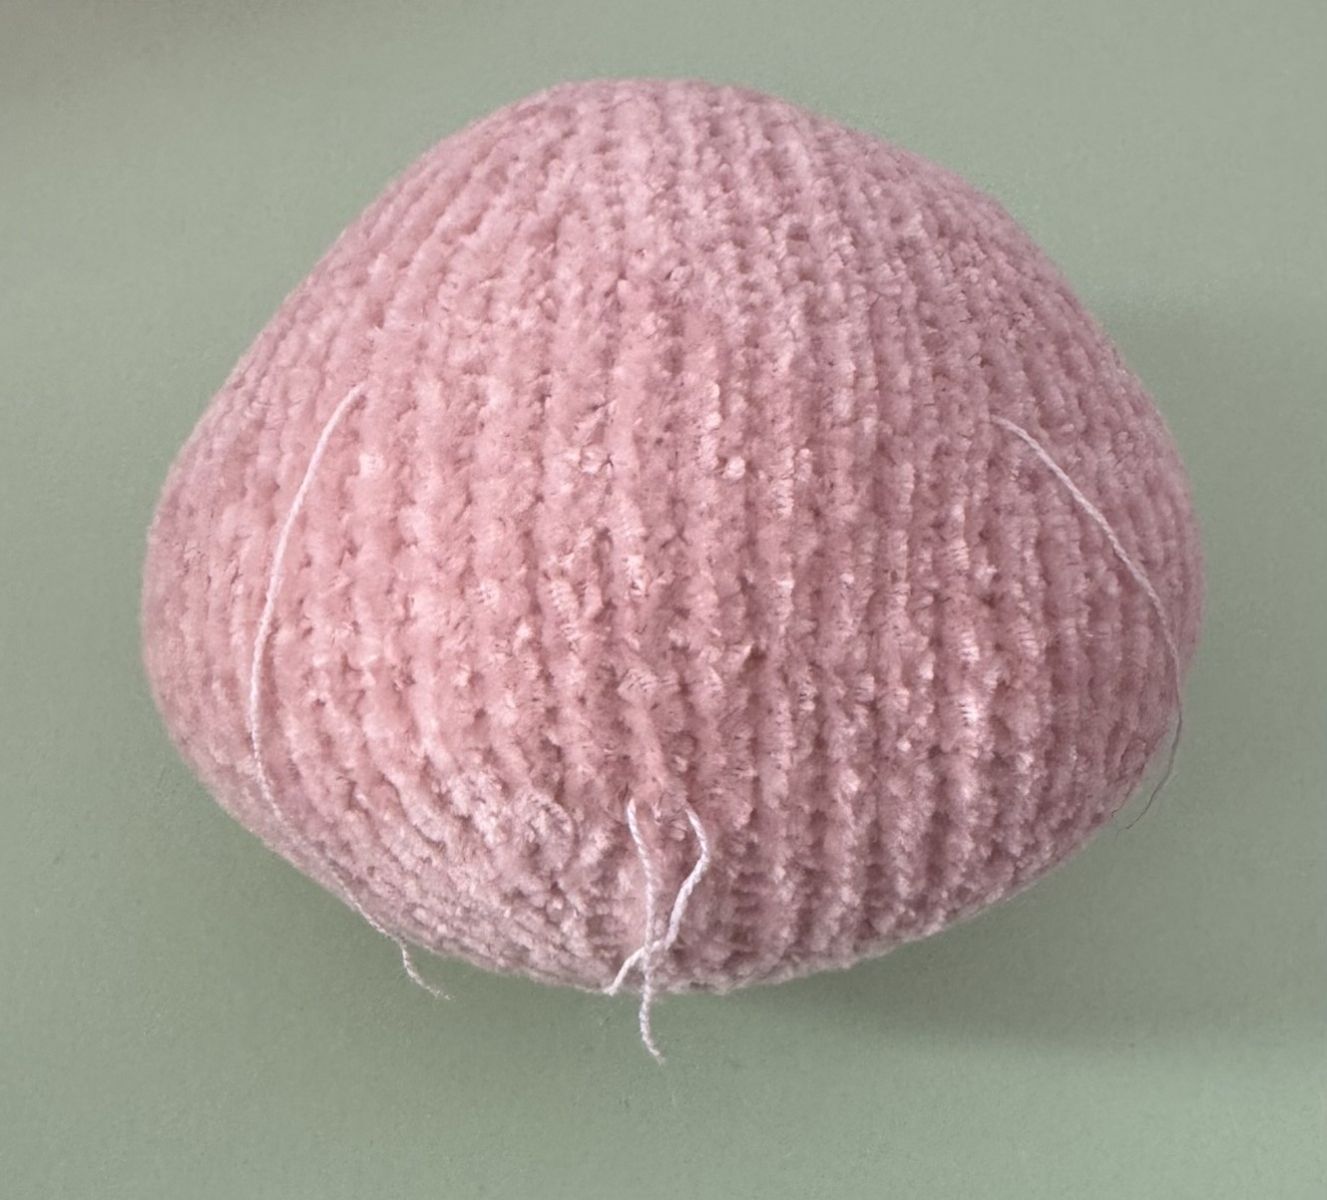
Body
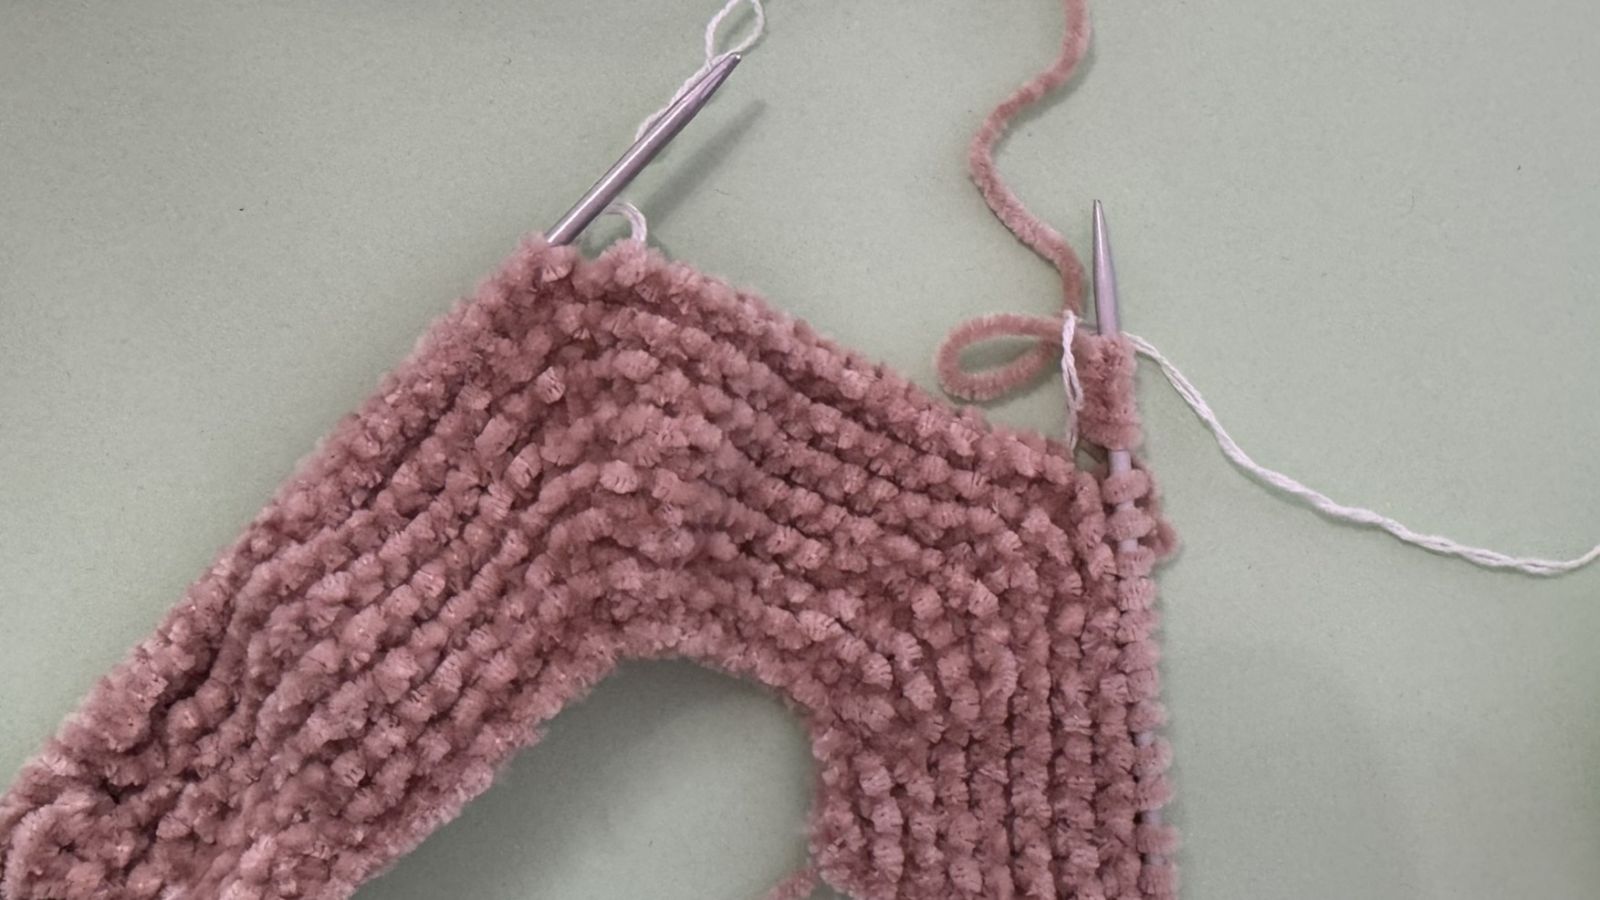
Cast on 6 stitches (ch) onto the knitting needle. Make sure the stitches are evenly stretched while knitting to ensure your knitted piece is nice and even.
1. 6 P (6)
2. 6 K inc. (12)
3. 12 P (12)
4. (1 K, 1 K inc)x 6 (18)
5. 18 P (18)
6. (2 K, 1 K inc)x 6 (24)
7. 24 P (24)
8. (3 K, 1 K inc)x 6 (30)
9. 30 P (30)
10. (4 K, 1 K inc)x 6 (36)
11. 36 P (36)
12. (5 K, 1 K inc)x 6 (42)
13. 42 P (42)
14. (6 K, 1 K inc)x 6 (48)
15,17. 48 P (48)
16. 48 K (48)
18. ( 7 K, 1 K inc)x 6 (54)
19, 21, 23, 25. - 54 P (54)
20, 22, 24. - 54 K (54)
26. 21 K, (1 K, 1 K inc)x 6, 21 K (60)
27. 60 P (60)
28. 30, 32, 34, -60 K (60)
29. 31, 33,35 – 60 P (60)
36. 24 K, 6 mal dec, 24 K (54)
37. 54 P (54)
38. (7 K, 1 dec)x 6 (48)
39. 48 P (48)
40. (6 K, 1 dec)x 6 (42)
41. 42 P (42)
42. (5 K, 1 dec)x 6 (36)
43. 36 P (36)
44. 36 K (36)
45. 36 P (36)
46. 36 K (36)
47. 36 P (36)
48. (4 K, 1 dec)x 6 (30)
49. 30 P (30)
50. 30 K (30)
51. 30 P (30)
52. (3 K, 1 dec)x 6 (24)
53. 24 P (24)
54. 24 K (24)
55. 24 P (24)
56. 24 K (24)
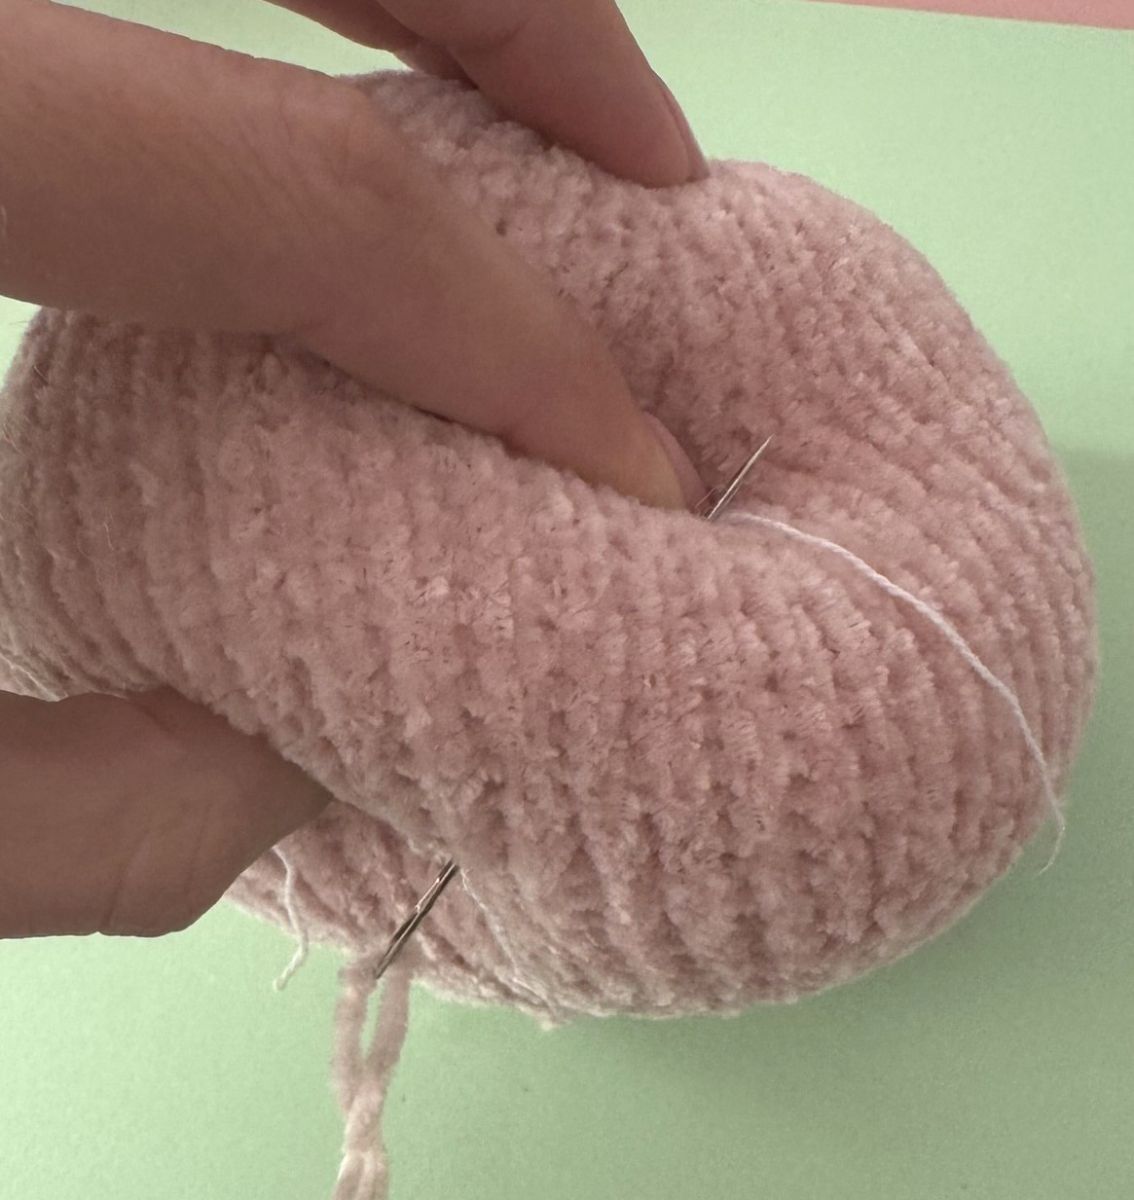
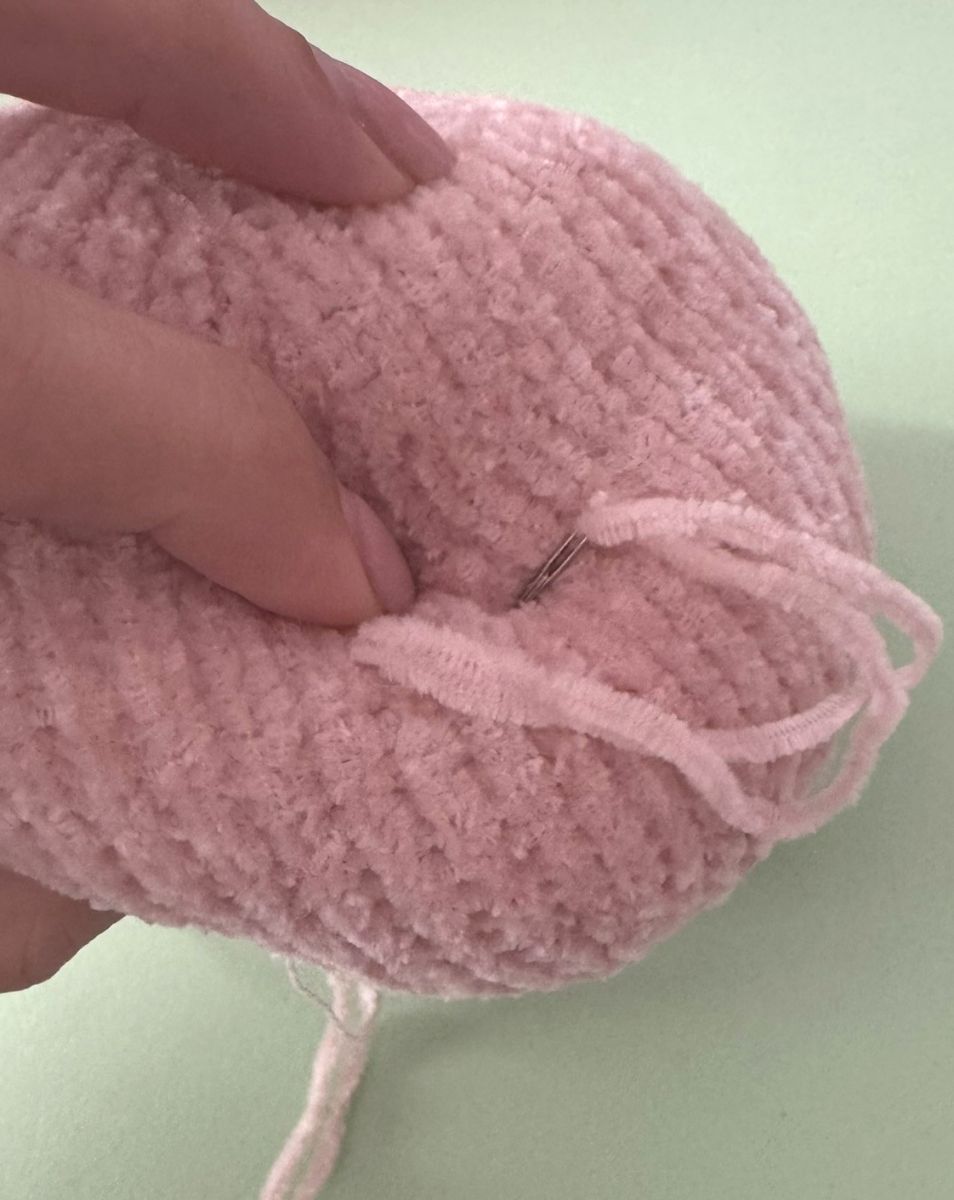
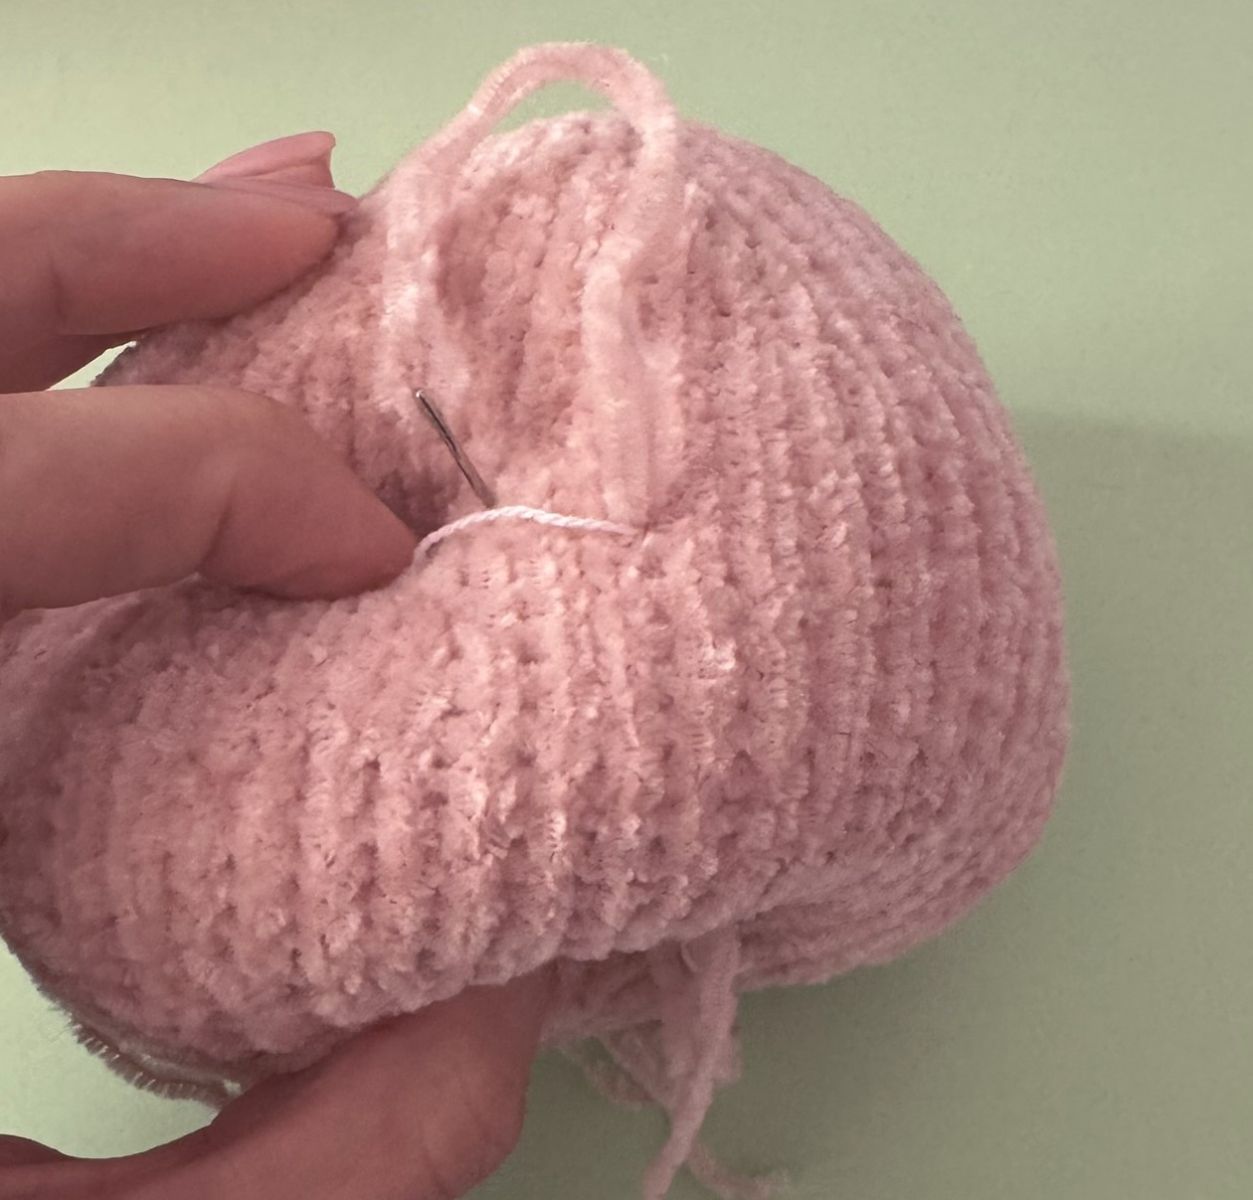
Finally, cast off the remaining 24 stitches. Using the yarn, sew the body pieces together, keeping your stitches neat so the seam looks tidy. As you sew, gradually stuff the body with fiberfill to ensure an even shape.
.JPEG)
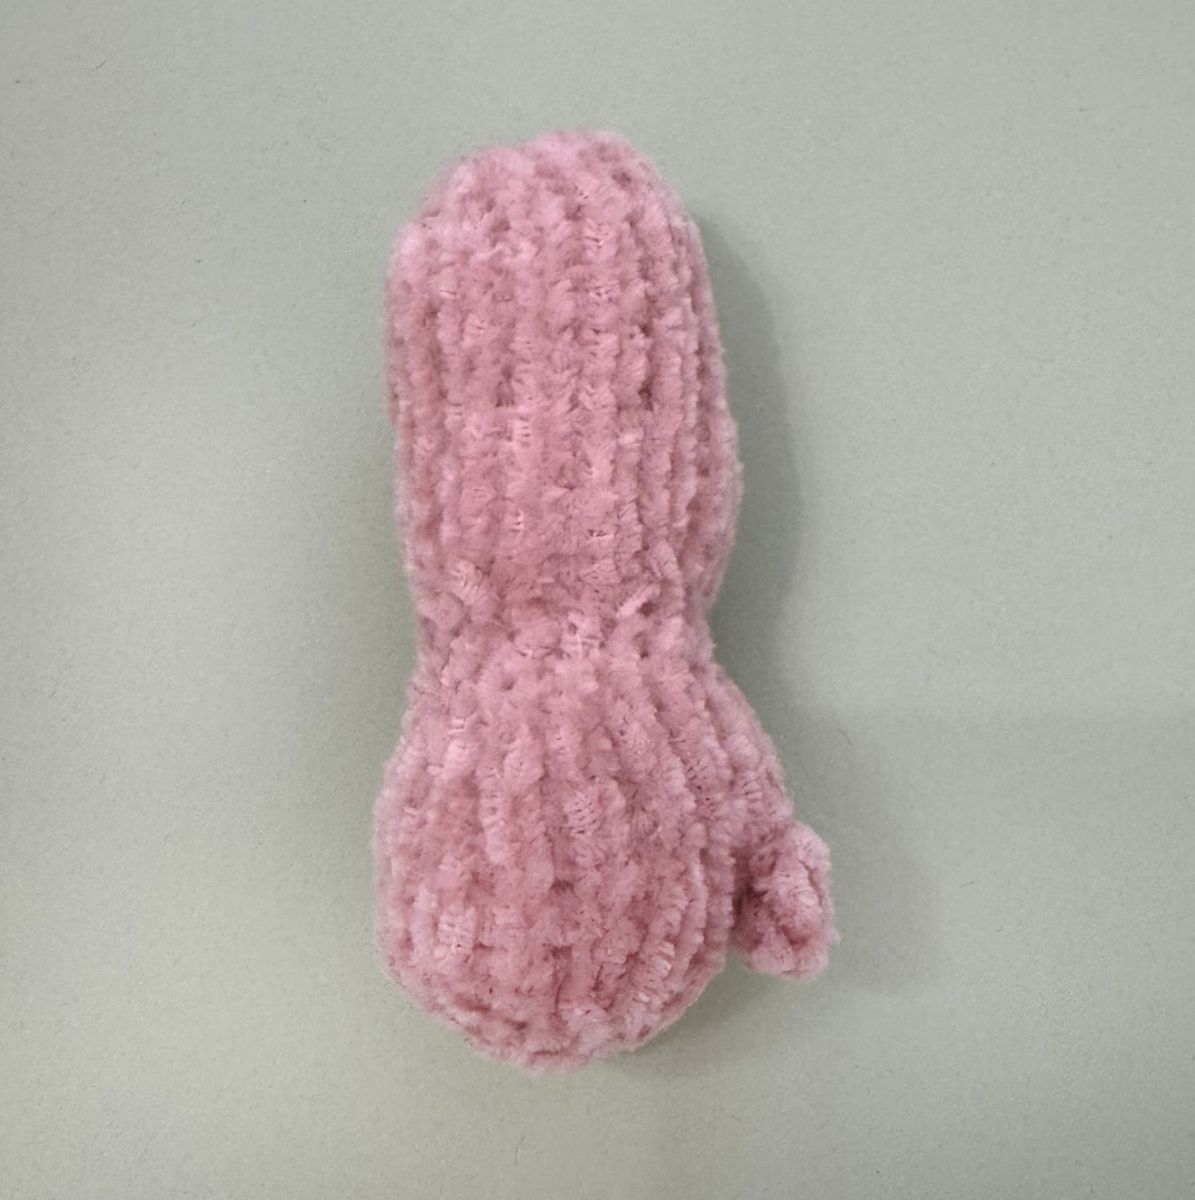
Arms
Cast on 6 stitches (ch) onto the knitting needle.
1. 6 P
2. 6 K inc (12)
3. 6 P
4. 1 K, 1 inc, 8 K, 1 inc, 1 K (14)
5. 14 P
6. 14 K
7. 14 P
8. 14 K
9. 14 P
10. 14 K
11. 14 P
12. 14 K
13. 14 P
14. 14 K
15. 14 P
16. 14 K
17. 14 P
18. 14 K
19. 14 P
20. 1 K, (1 dec, 1 K)x 4, 1 K (10)
21. 10 P
22. 1 K, (1 inc , 1 K)x 4, 1 K (14)
23. 14 P
24. 1 K, (1 inc , 2 K)x 4, 1 K (18)
25. 18 P
26. 18 K
27. 18 P
28. 18 K
29. 18 P
30. 7 K, Transfer the next 4 stitches to the auxiliary needle for the thumb, 7 K (14)

31. 14 P
32. 14 K
33. 14 P
34. 14 K
35. 14 P
36 . 7 dec
Cast off the remaining stitches.
Thumb: Take 4 stitches from the holding needle, then add 2 more. Knit the thumb using these 6 stitches.
6 K
6 P
6 K
Cast off the remaining stitches and sew the ends together.
Using a tapestry needle and the same yarn, sew the arms together. Work with even stitches to create a neat, attractive seam.
Begin sewing at the thumb and hand, then continue along the arm.
As you sew, gradually stuff the piece with fiberfill to give it shape and firmness.
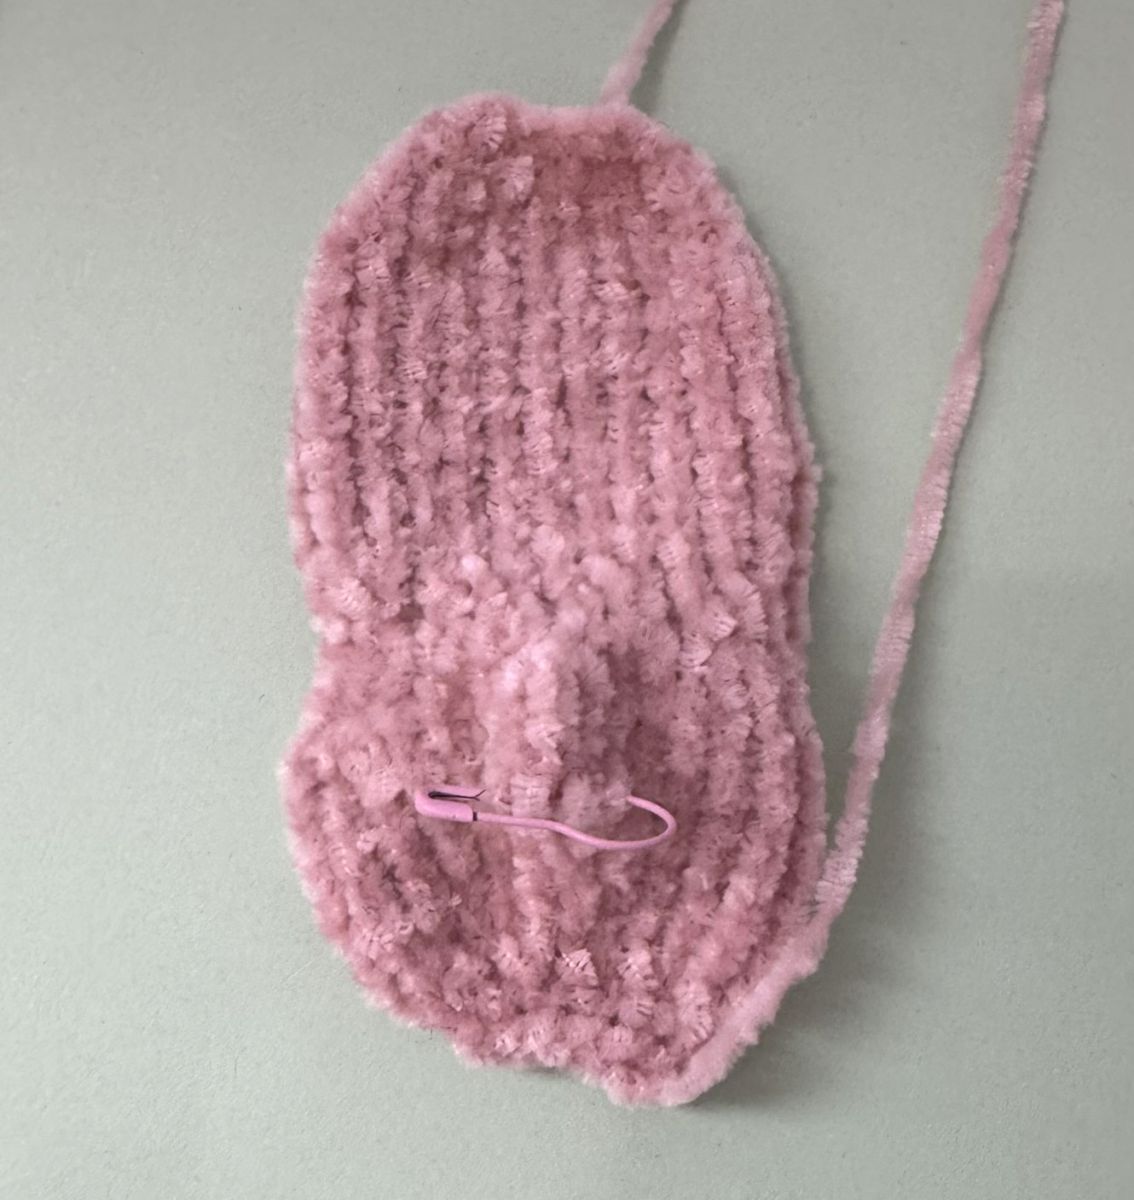
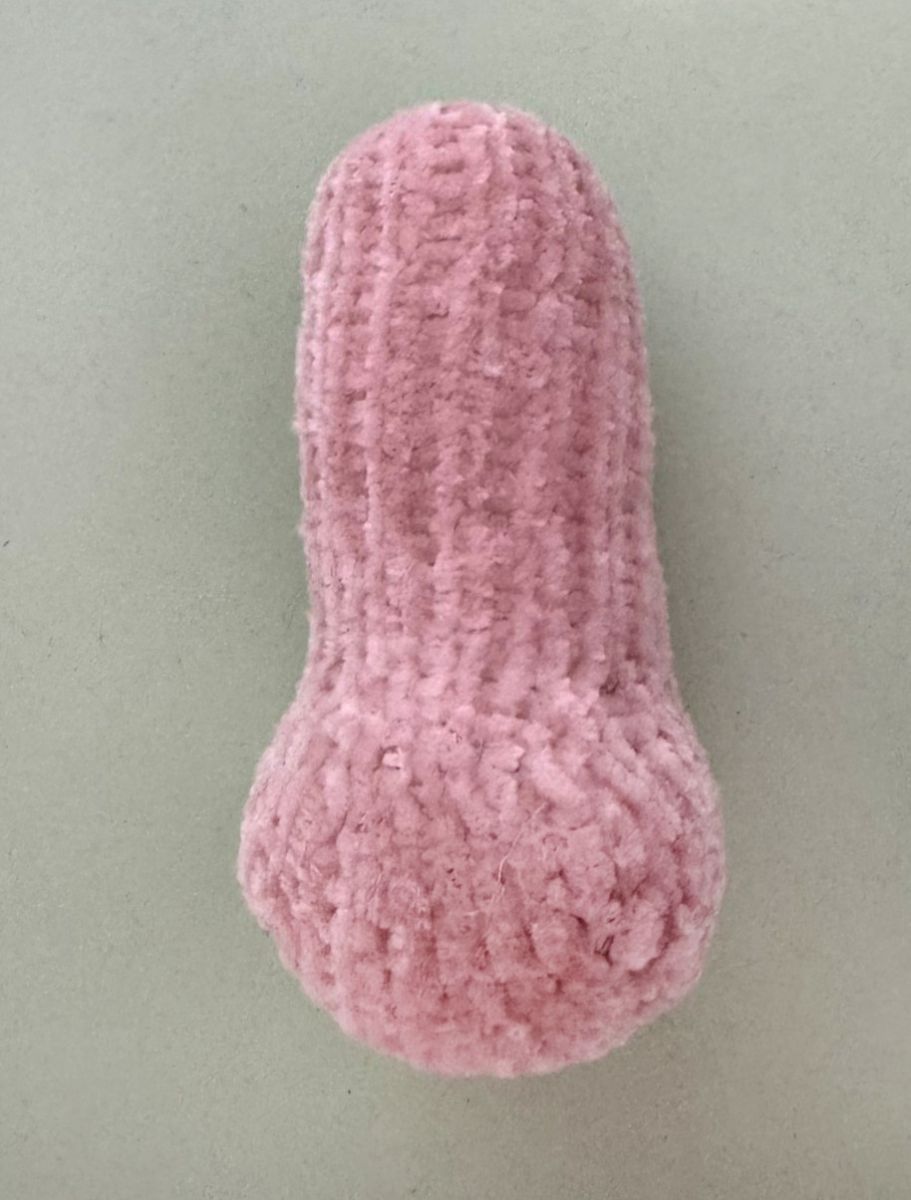
Legs Knit from the bottom up.
Cast on 4 CH
1. 4 P (4)
2. 1 K inc, 2 K, 1 K inc (6)
3. 5 P (6)
4. 1 K inc, 4 K, 1 K inc (8)
5, 7, 9, 11, 13. - 8 P (8)
6, 8, 10, 12, 14. - 8 K (8)
To the existing 8 st cast on additional 12 ch work the 8 st P – then add another 12 ch (32)
.jpg)
.jpg)
16. 32 K (32)
17. 32 P (32)
18. 32 K (32)
19. 32 P (32)
.jpg)
20. 6 K, 10 dec, 6 K (22)
21. 22 P (22)
22. 1 dec, 4 K, 2 dec, 2 K, 2 dec, 4 K, 1 dec (16)
23, 25, 27, 29. 16P (16)
24, 26, 28. 16K (16)
30. 1 K, 1 dec, 10 K, 1 dec, 1 K (14)
31, 33, 35, 37, 39, 41, 43, 45, 47. 12P (14)
32, 34, 36, 38, 40, 42, 44, 46. 12K (14)
48. 7 times dec (7)
Fasten off, sew together and start stuffing while knitting.
.jpg)
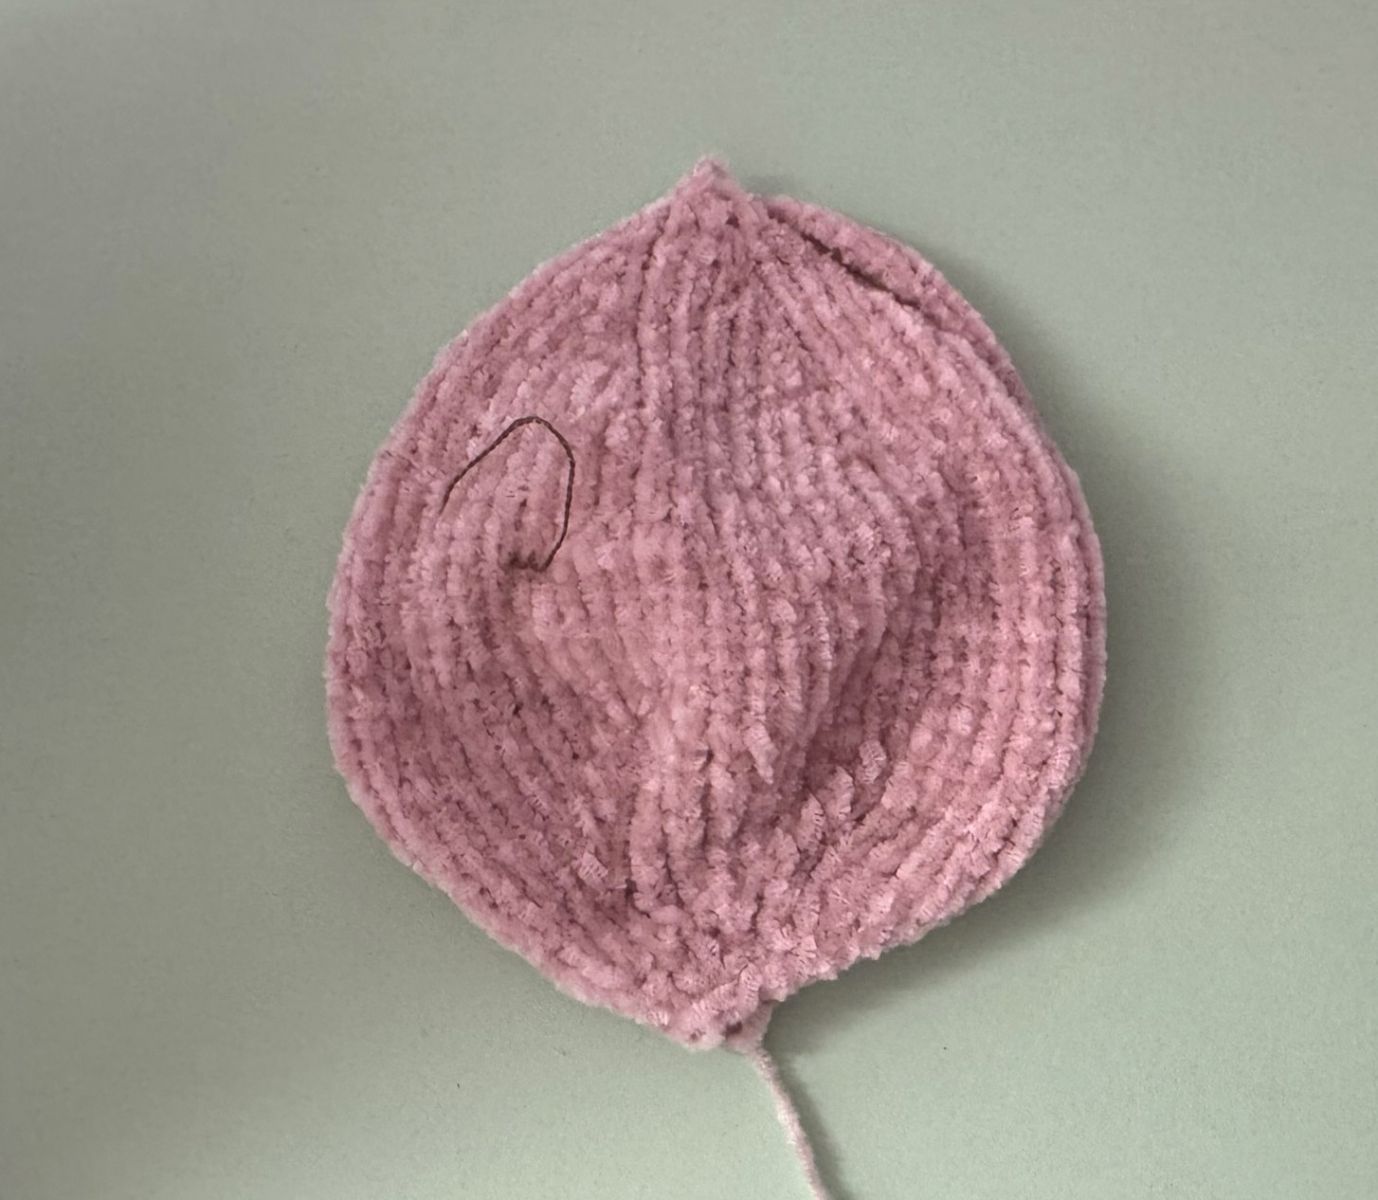
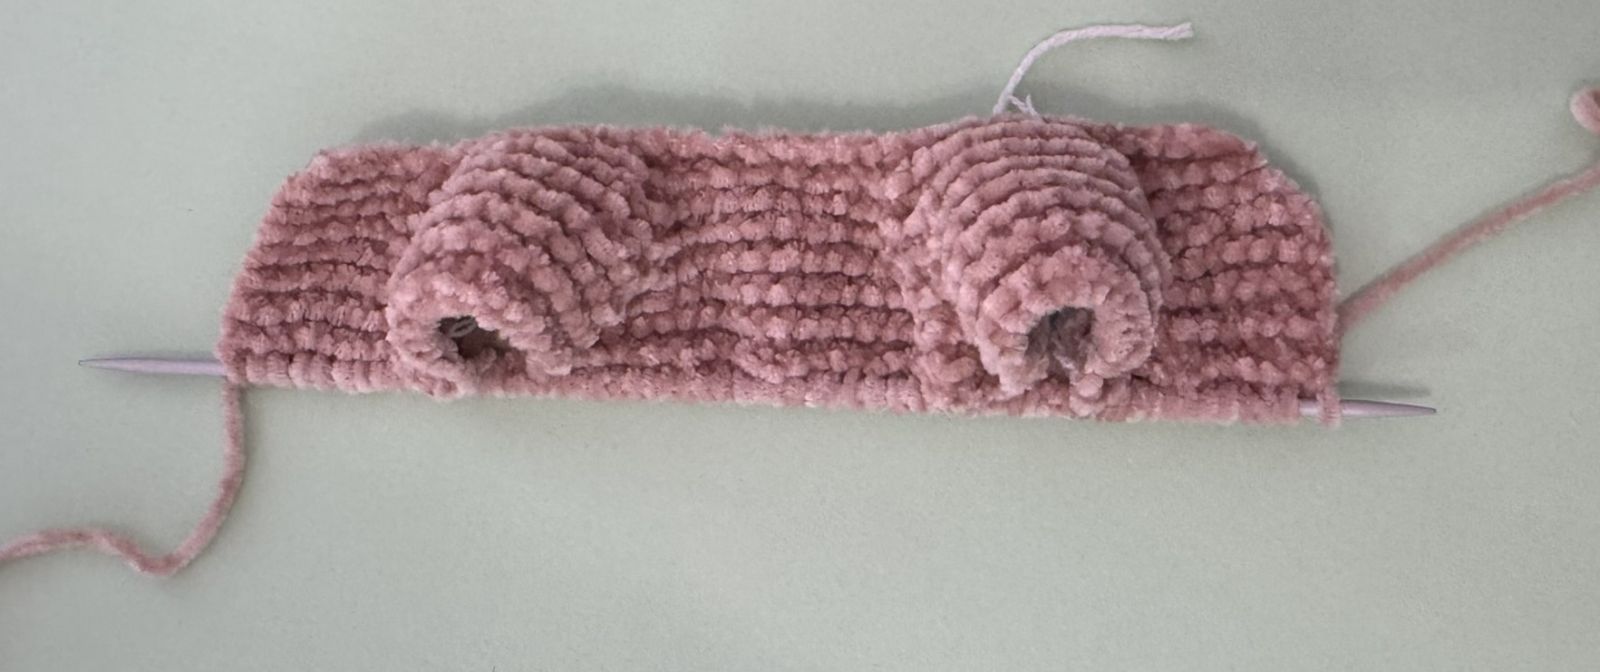
Head
Cast on 6 stitches (ch) onto the knitting needle. Make sure the stitches are evenly stretched while knitting to ensure your knitted piece is nice and even.
1. 6 P (6)
2. 6 K inc. (12)
3. 12 P (12)
4. (1 K, 1 K inc)x 6 (18)
5. 18 P (18)
6. (2 K, 1 K inc)x6 (24)
7. 24 P (24)
8. (3 K, 1 K inc)x 6 (30)
9. 30 P (30)
10. (4 K, 1 K inc)x 6 (36)
11. 36 P (36)
12. (5 K, 1 K inc)x 6 (42)
13. 42 P (42)
14. (6 K, 1 K inc)x 6 (48)
15,17. 48 P (48)
16. 48 K (48)
18.(7 K, 1 K inc)x 6 (54)
19, 21, 23, 25. - 54 P (54)
20, 22, 24, - 54 K (54)
26. 16 K, (1 inc, 1 K)x3, Place an additional marker 1, 10 K, Place an additional marker 2, (1 inc, 1 K)x3, 16 K (60)
27, 29, 31, 33, 35,– 60 P
28, 30, 32, 34,– 60 K
36. 16 K, (1 dec, 1 K)x3, 5 K, Place an additional marker 3, 5 K, (1 dec, 1 K)x3, 16 K (54)
37. 54 P (54)
38. (7 K, 1 dec)x 6 (48)
39. 48 P (48)
40. (6 K, 1 dec)x 6 (42)
41. 42 P (42)
42. (5 K, 1 dec)x6 (36)
43. 36 P (36)
44. (4 K, 1 dec)x 6 (30)
45. 30 P (30)
46. (3 K, 1 dec)x 6 (24)
47. 24 P (24)
48. (2 K, 1 dec)x 6 (18)
49. 18 P (18)
50. (1 K, 1 dec)x 6 (12)
51. 12 P
52. 6 dec (6)
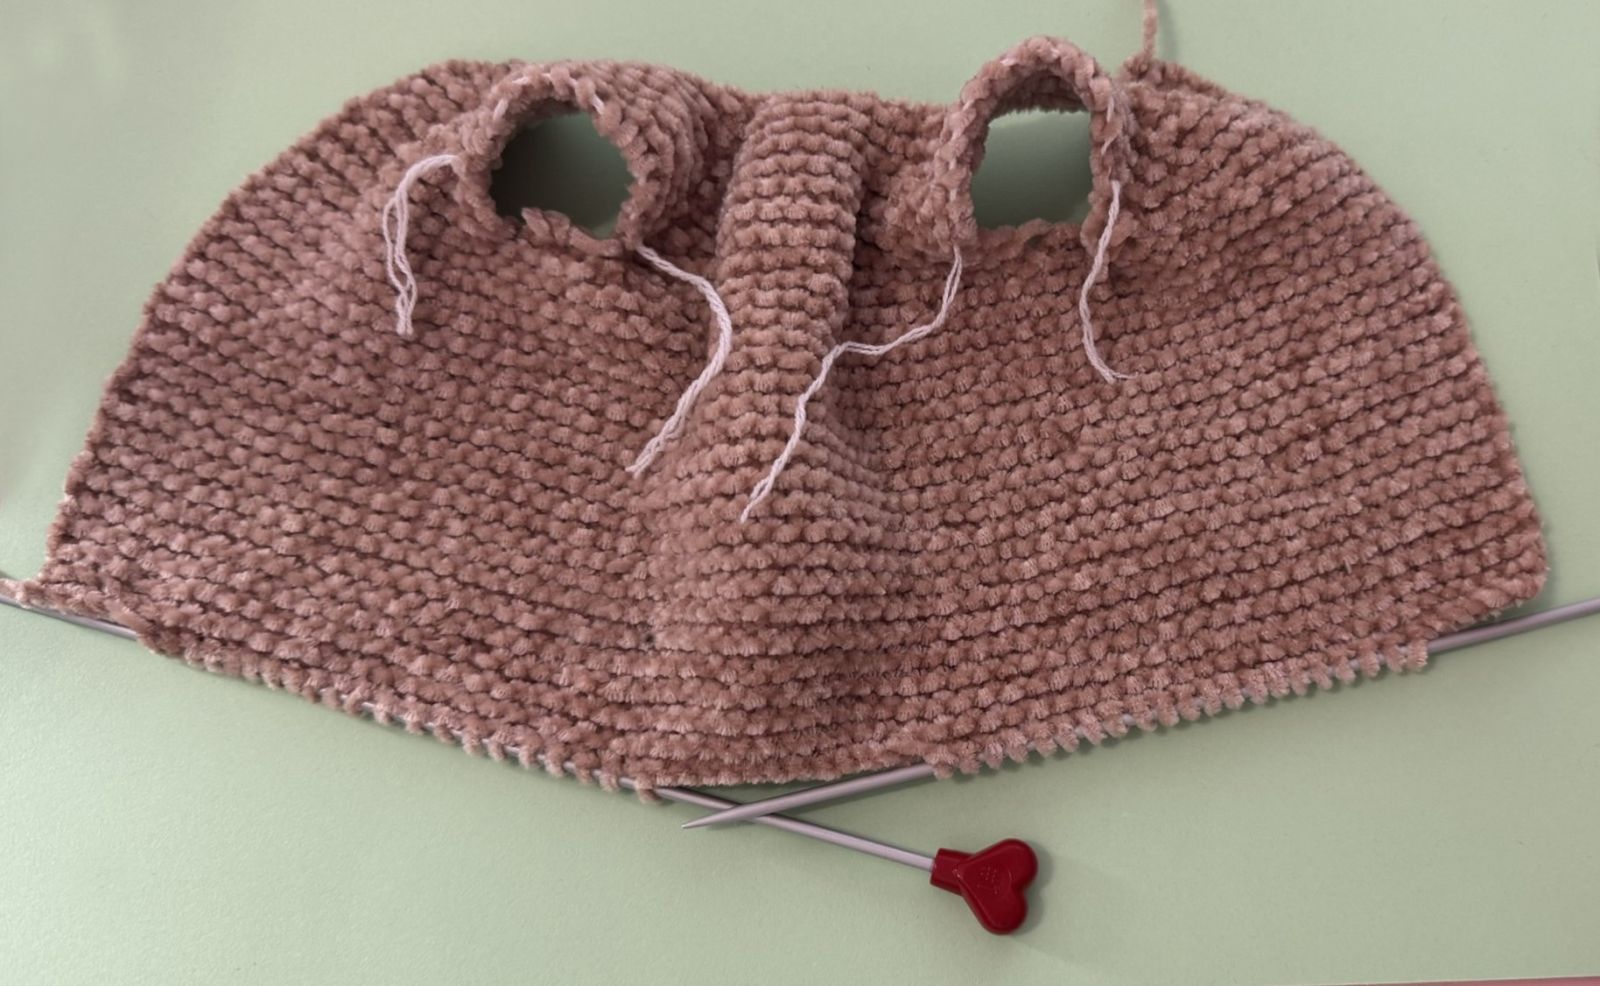
Finally, cast off the remaining stitches. Sew the head together. Make sure your stitches are neat so the seam looks tidy. Stuff the head with fiberfill as you sew.
Assembly
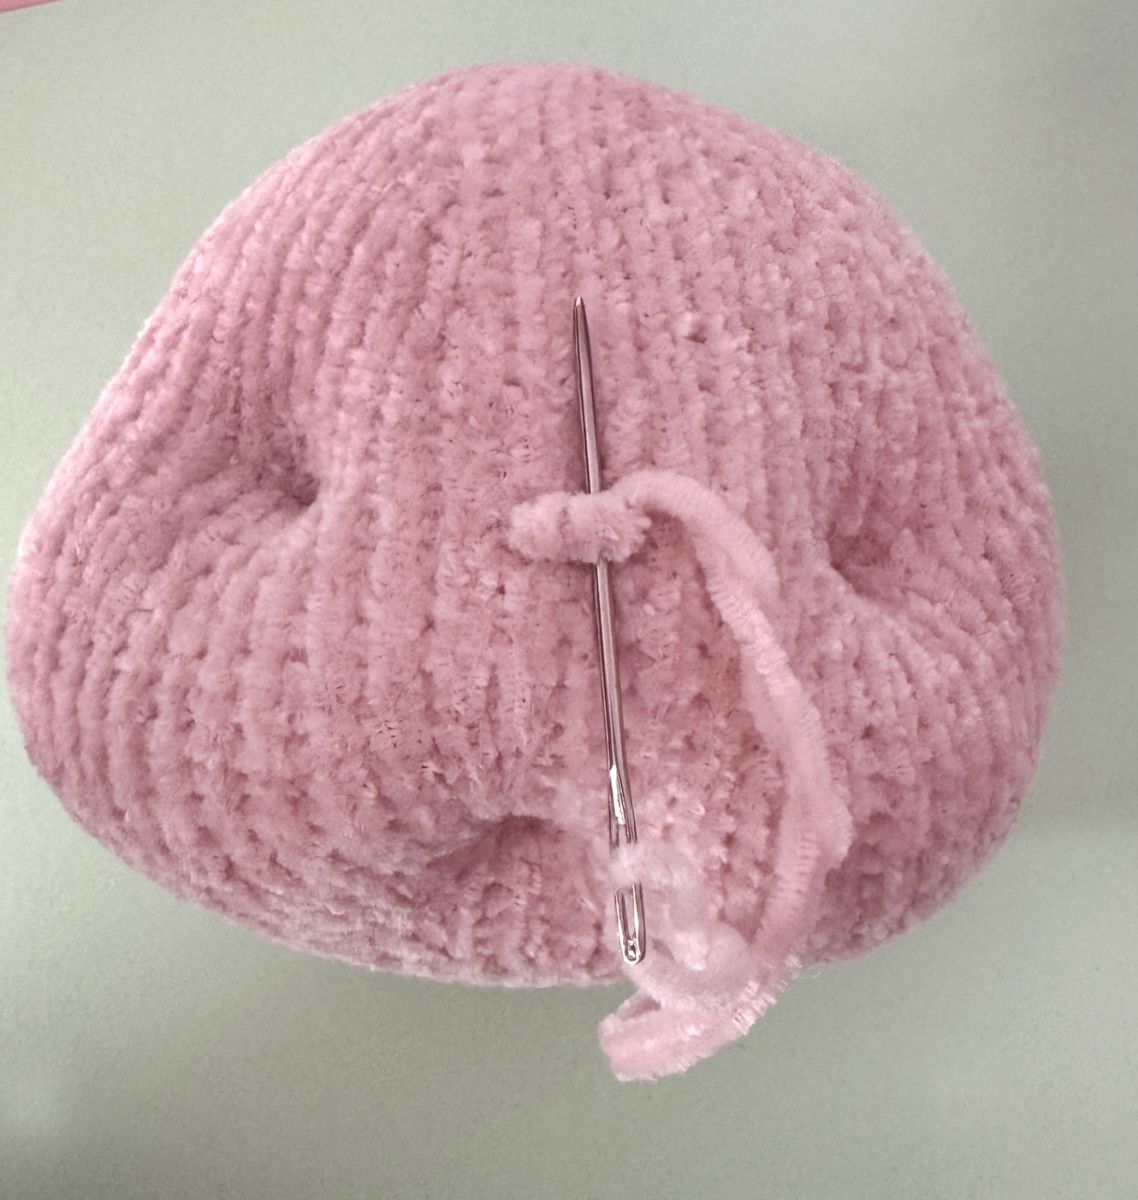
For the eyes, begin by deepening the eye areas and the mouth.
I placed two markers in row 26, which serve as guides for sewing on the eyes.
To make the first eye, insert the needle at the bottom next to marker 3 in row 36 and bring it out at the top at marker 1 in row 26. Count out 3 stitches
to the right, insert the needle and go back into the 36th round to the 3st marker, but similarly
stepping 1 stitch right. Pull the yarn tightly, knot it, and hide the end.
The second eye is made in the same way, this time using marker 2 as a guide. Insert the needle at the bottom next to marker 3 and bring it out at marker 2 in row 26. Count out 3 stitches to the left, insert the needle and go back into the 36th round to the 3st marker, but similarly stepping 1 stitch right. Pull the yarn tightly, knot it, and hide the end.
Pull the yarn tightly, knot it, and hide the end. Please refer to the pictures for a clearer understanding.


Embroider the nose by making two or three stitches across the center of the face.
Wrap these base stitches all the way around to form a small raised area, and keep wrapping until the nose reaches the desired size and shape.

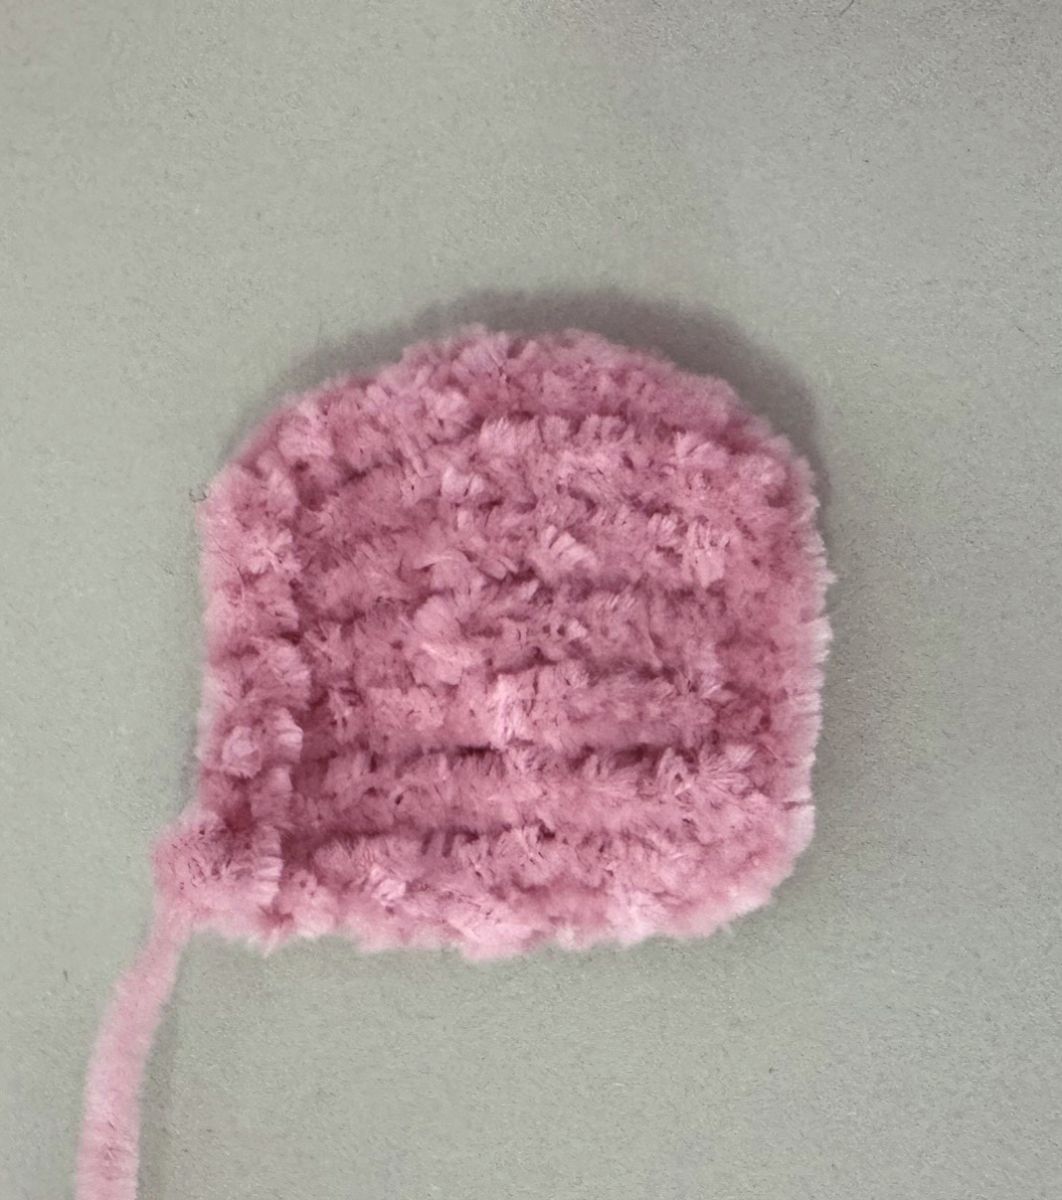
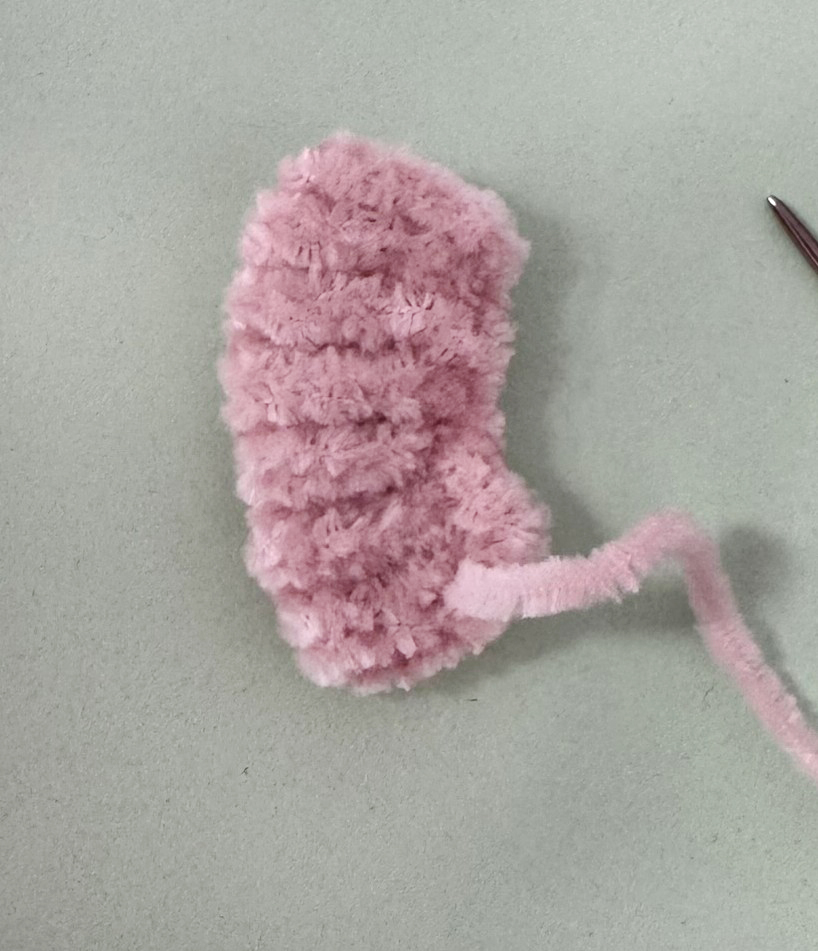
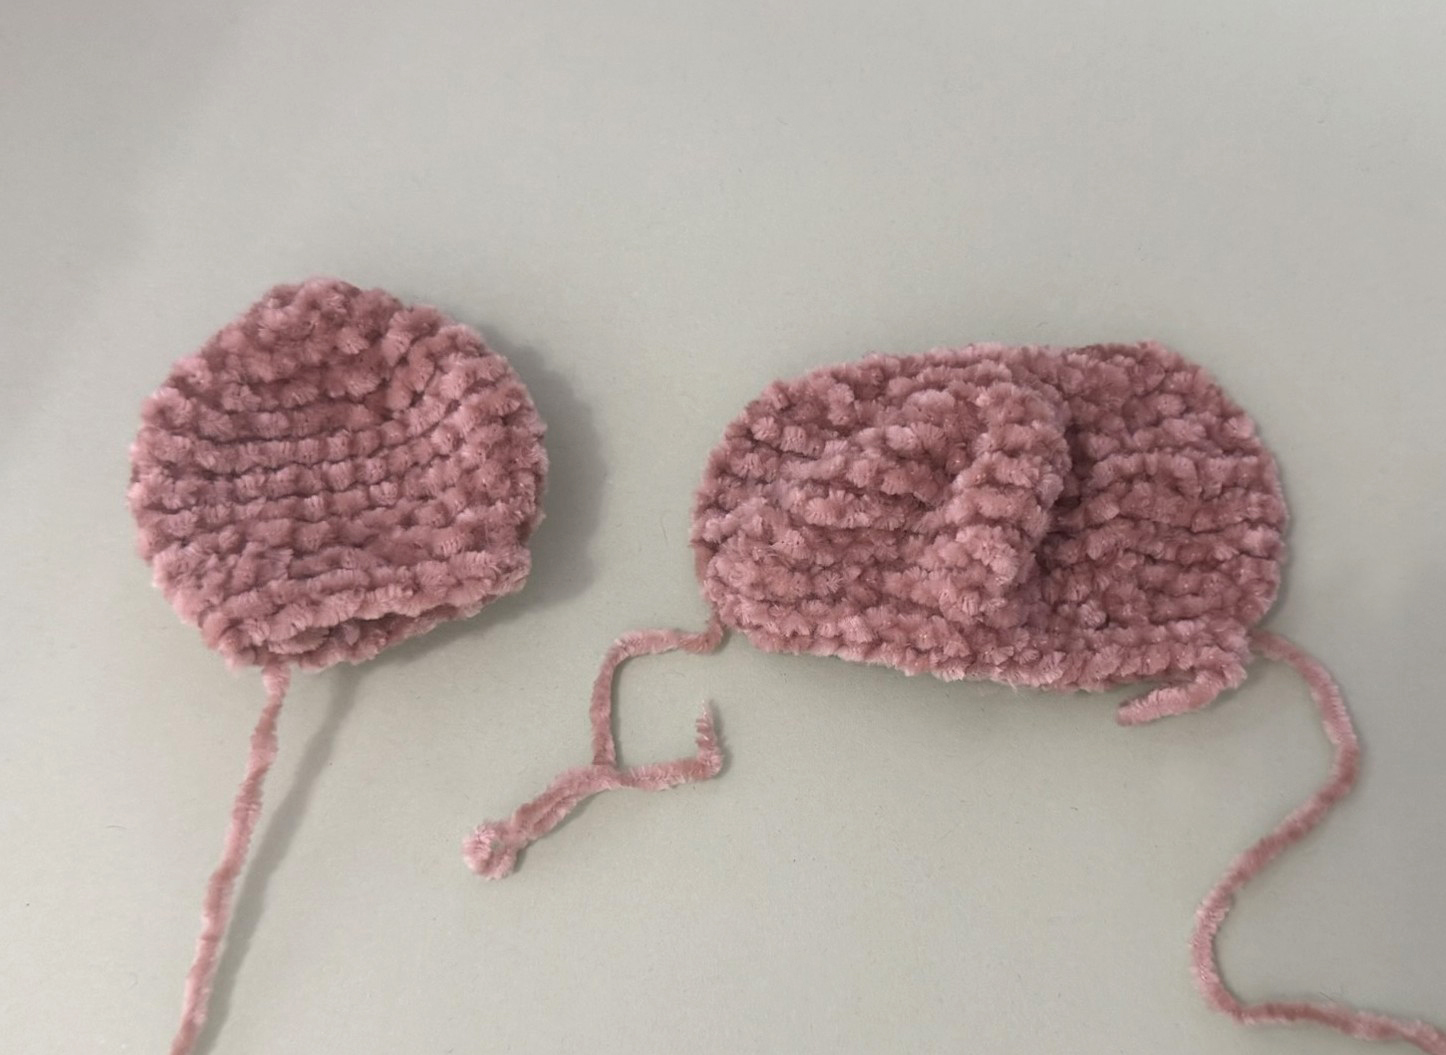
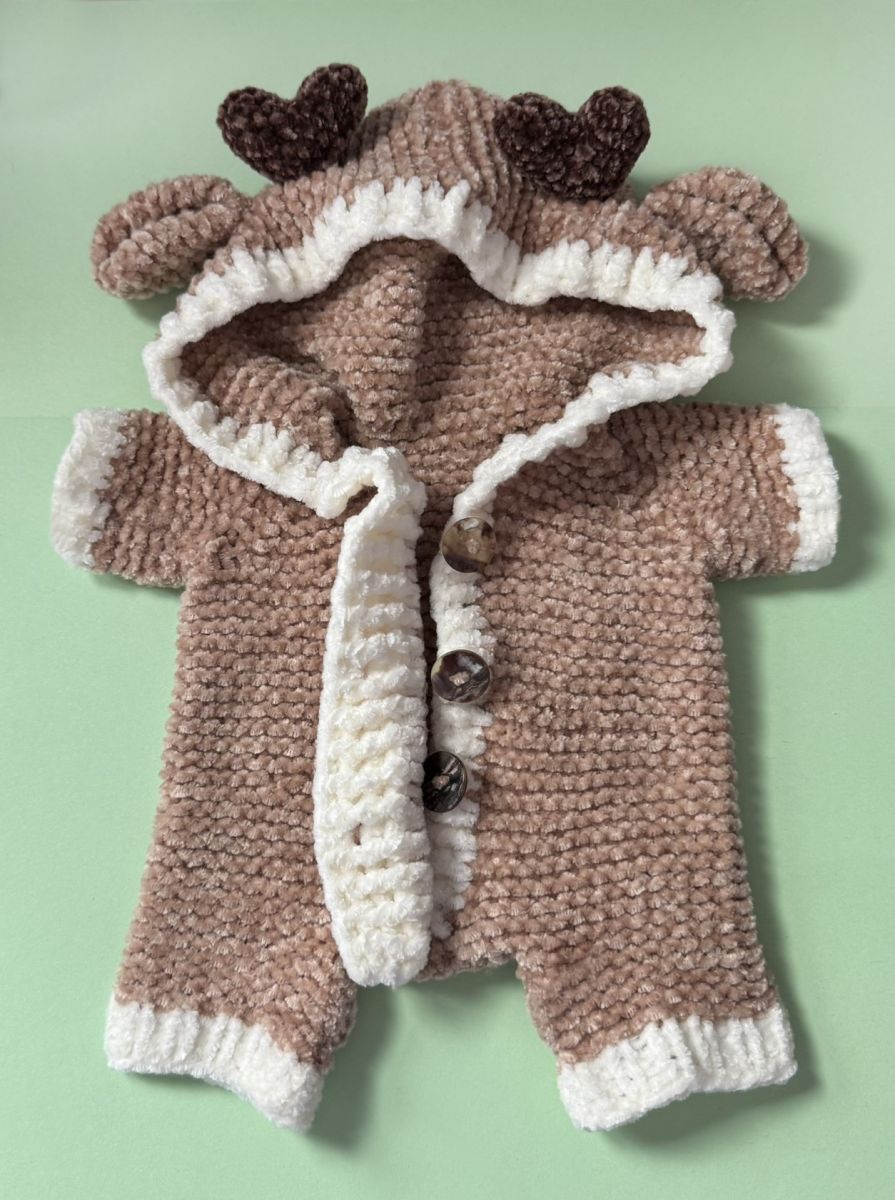
Ears
Cast 8 ch,
1, 3, 5, 7, 9.11 - 8 P
2, 4, 6, 8. 10 - 8 K
Cast off, sew two sides together, then pull tight. Sew to the head.
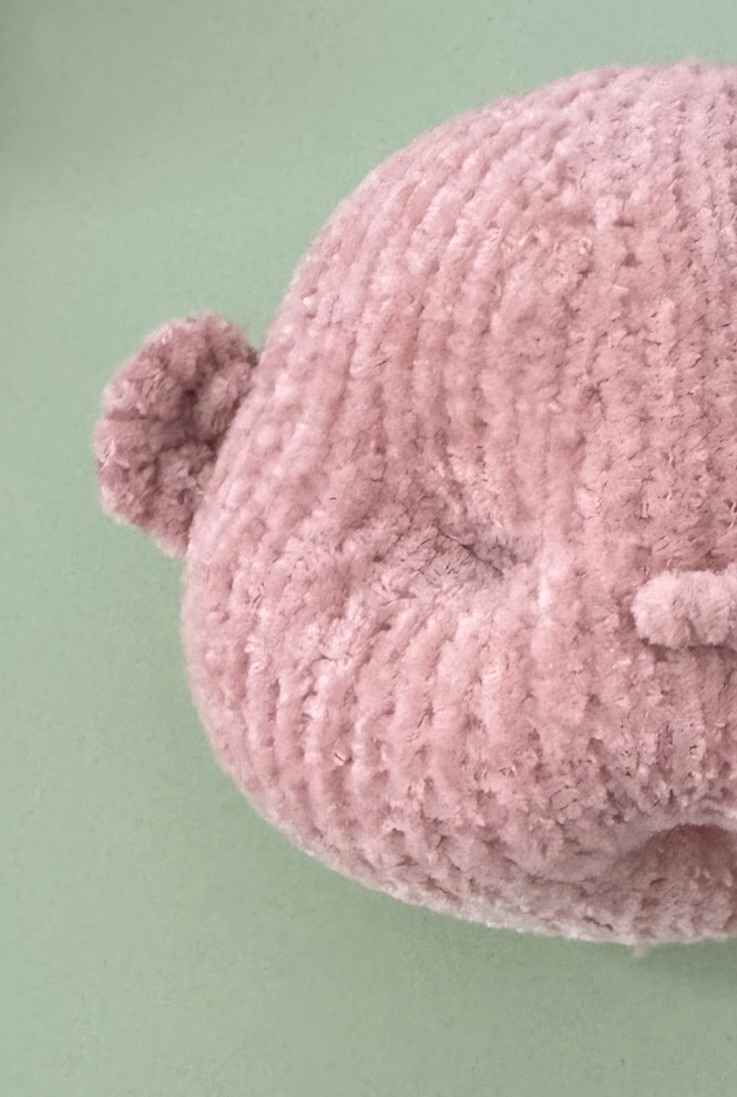
Sew the eyes on securely, taking care that they are firmly fastened. Please note that for small children the eyes must be attached with particular care, as loose parts can pose a risk of swallowing. The responsibility for safe attachment lies entirely with you.

After the eyes have been sewn on securely, embroider small white highlights with white thread. A few rows higher, stitch the eyebrows with brown yarn. To give the face a lively expression, lightly shade the cheeks and nose area with pastel chalk. You can also add tiny freckles with a textile marker. In this way, the baby immediately looks more vivid and gains a loving, expressive character.

Sew the head all around onto the body, stuffing gradually with fiberfill as you go. At the end, fasten the thread securely and hide it. Finally, sew the legs and arms firmly to the body.
For the deer overall, try it on occasionally to check the fit.
The overalls are worked in a different pattern: you knit row after row exclusively in knit stitches. I especially like that this texture contrasts with the baby’s pattern, giving the finished figure more variety and its own unique character.
Reglan from top:
Cast on 32 CH,
1. 5 K, ( 3 K in one stitch), 5 K, ( 3 K in one stitch) , 8 K, ( 3 K in one stitch), 5 K, ( 3 K in one stitch) , 5 K
2. 40 K
3. 5 K, ( 1 inc , 1 K, 1 inc), 5 K, ( 1 inc , 1 K, 1 inc), 8 K, ( 1 inc , 1 K, 1 inc), 5 K, ( 1 inc , 1 K, 1 inc), 5 K
4. 48 K
5. 6 K, ( 1 inc , 1 K, 1 inc), 7 K, ( 1 inc , 1 K, 1 inc), 10 K, ( 1 inc , 1 K, 1 inc), 7K, ( 1 inc , 1 K, 1 inc), 6 K,
6. 56 K
7. 7 K, ( 1 inc , 1 K, 1 inc), 9 K, ( 1 inc , 1 K, 1 inc), 12 K, ( 1 inc , 1 K, 1 inc) 9 K, ( 1 inc , 1 K, 1 inc), 7 K
8. 64 K
9. 8 K, ( 1 inc , 1 K, 1 inc), 11 K, ( 1 inc , 1 K, 1 inc), 14 K ( 1 inc , 1 K, 1 inc), 11 K, ( 1 inc , 1 K, 1 inc), 8 K
10. 72 K
11. 9 K, ( 1 inc , 1 K, 1 inc), 13 K, ( 1 inc , 1 K, 1 inc), 16 K, ( 1 inc , 1 K, 1 inc), 13 K, ( 1 inc, 1 K, 1 inc), 9 K
12. 80 K
13. 10 K, ( 1 inc , 1 K, 1 inc), 15 K, ( 1 inc , 1 K, 1 inc), 18 K, ( 1 inc , 1 K, 1 inc), 15 K, ( 1 inc , 1 K, 1 inc), 10 K
14. 88 K
15. 14 K, 16 st on to a cable thread ( Sleeve), cast 5 ch, 28 K , 16 st on to a cable thread ( Sleeve), cast 5 ch, 14 K (42)
16. 66 K
Knit 44 rows – that is, only knit stitches on the front and back.
17. 18. 19. 20. 21. 22. 23. 24. 25. 26. 27. 28. 29. 30. 31. 32. 33. 34. 35. 36. 37. 38. 39. 40. 41. 42. 43. 44. 45. 46. 47. 48. 49. 50. 51. 52. 53. 54. 55. 56. 57. 58. 59. 60.- 66 K (If necessary, knit more rows.)
61. Cast off 6 stitches, knitt 21 stitches, cast off 12 stitches, continue knitt 21 stitches and cast off the last 6 stitches. Secure the yarn, cut it.Turn the work.
Slip 21 stitches for one leg onto a spare thread or stitch holder and continue working the second leg.
Rejoin the yarn and knit only the 21 stitches for the leg.
1. 2. 3. 4. 5. 6. 7. 8. 9. 10. - 21 K
Color change white
1. (1 K, 1 P ), 1 K x10
2. 1 P, (1 K, 1 P )x10
3. (1 K, 1 P ), 1 K x10
4. 1 P, (1 K, 1 P )x10
5. (1 K, 1 P ), 1 K x10
6. 1 P, (1 K, 1 P )x10
Cast off, cut the yarn, and secure the end.
Then return to the 21 remaining stitches.
Transfer these stitches onto a knitting needle, rejoin the yarn, and work across the 24 stitches to form the second leg.
1. 2. 3. 4. 5. 6. 7. 8. 9. 10. - 21 K
Color change white
1. (1 K, 1 P ), 1 K x10
2. 1 P, (1 K, 1 P )x10
3. (1 K, 1 P ), 1 K x10
4. 1 P, (1 K, 1 P )x10
5. (1 K, 1 P ), 1 K x10
6. 1 P, (1 K, 1 P )x10
Cast off, cut the yarn, and secure the end.
Sew together.
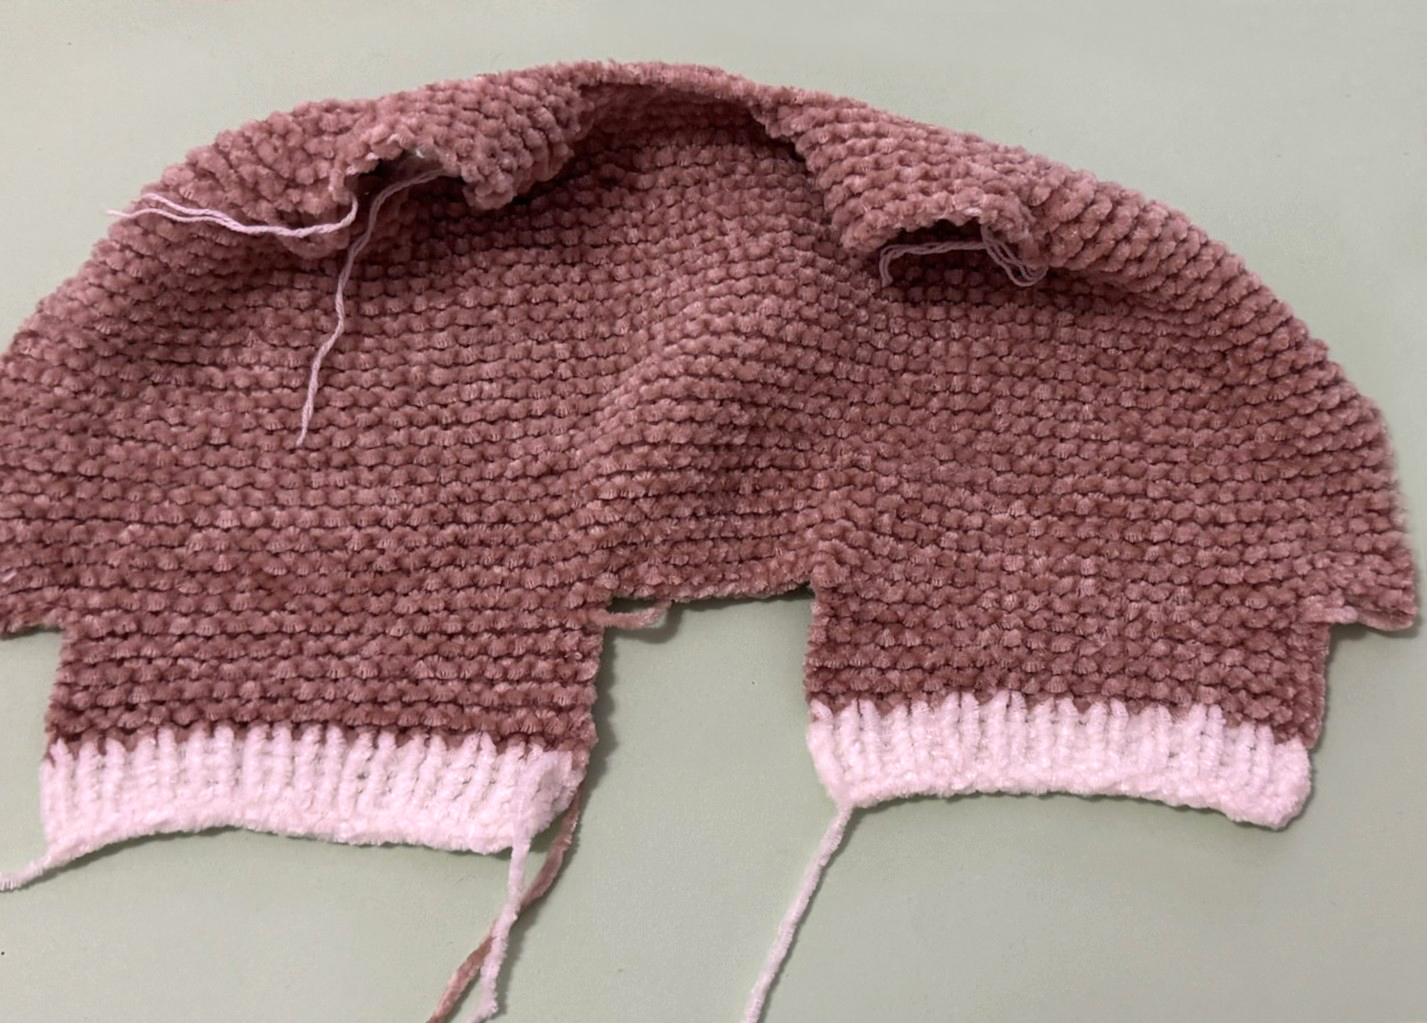
Sleeves
Distribute 16 stiches on a knitting needle, cast 5ch
1. 2. 3. 4. 5. 6. 7. 8. 9. 10.- 21 K
Color change white
1. (1 K, 1 P ), 1 K x10
2. 1 P, (1 K, 1 P )x10
3. 1 K, (1 K, 1 P )x10
4. 1 P, (1 K, 1 P )x10
5. 1 K, (1 K, 1 P )x10
Cast off, cut the yarn, and secure the end.
Work the second sleeve in the same way.
When finished, fasten the yarn securely and weave in the ends.
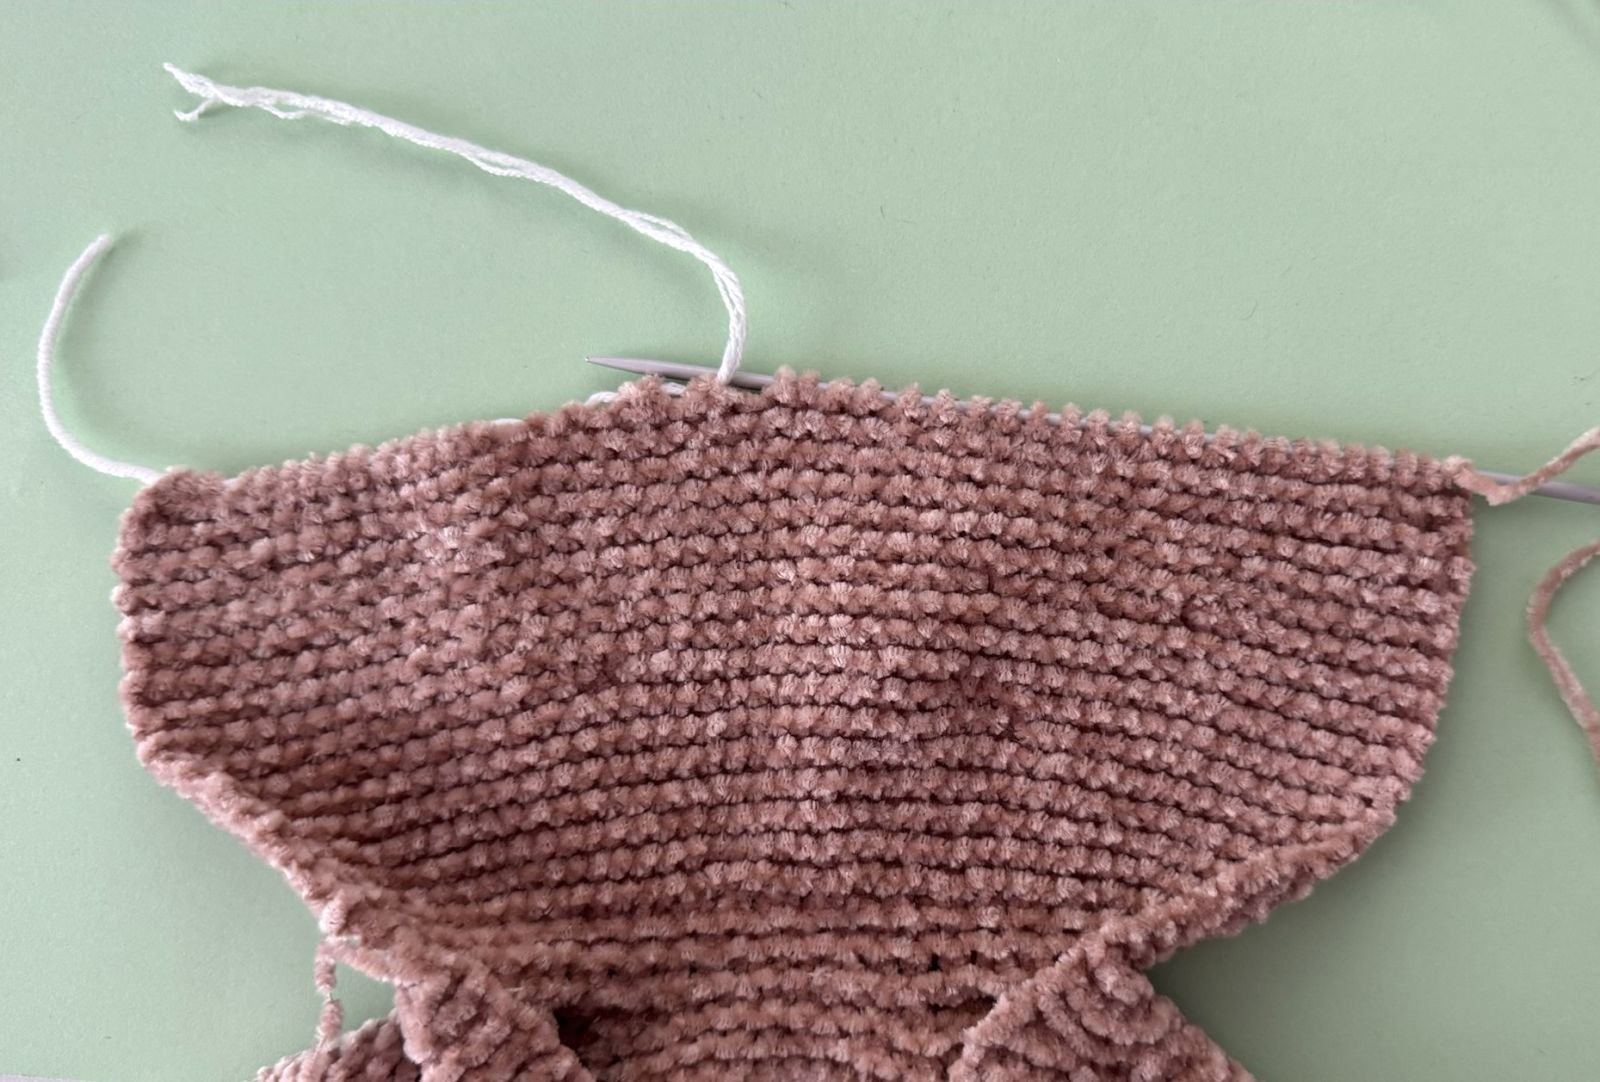
Hood
Distribute 32 sts at the top of a knitting needle,
1. 32 K
2. 32 K
3. 32 K
4. 2 K , (1 K, 2 K inc)x 14, 2 K (46)
Knit 32 rows – that is, only knit stitches on the front and back.
5. 6. 7. 8. 9. 10. 11. 12. 13. 14. 15. 16. 17. 18. 19. 20. 21. 22.23. 24. 25. 26. 27. 28. 29. 30. 31. 32. 33. 34. 35. 36. – 46 K
Divide the hood into two equal halves. Work the first half in rows until it is complete, then knit the second half in the same way.
37. 23 K, Turn the work
38. 23 K, Turn the work
39. 21 K, 1 dec, Turn the work
40. 22 K, Turn the work
41. 22 K, Turn the work
42. 22 K, Turn the work
43. 20 K, 1 dec, Turn the work
44. 21 K, Turn the work
45. 19 K, 1 dec, Turn the work
46. 20 K, Turn the work
47. 18 K, 1 dec, Turn the work
48. 19 K, Turn the work
49. 17 K, 1 dec, Turn the work
50. 18 K, Turn the work
51. 16 K, 1 dec, Turn the work
52. 17 K, Turn the work
53. 15 K, 1 dec, Turn the work
54. 16 K, Turn the work
55. 14 K, 1 dec, Turn the work
56. 15 K, Cast off.
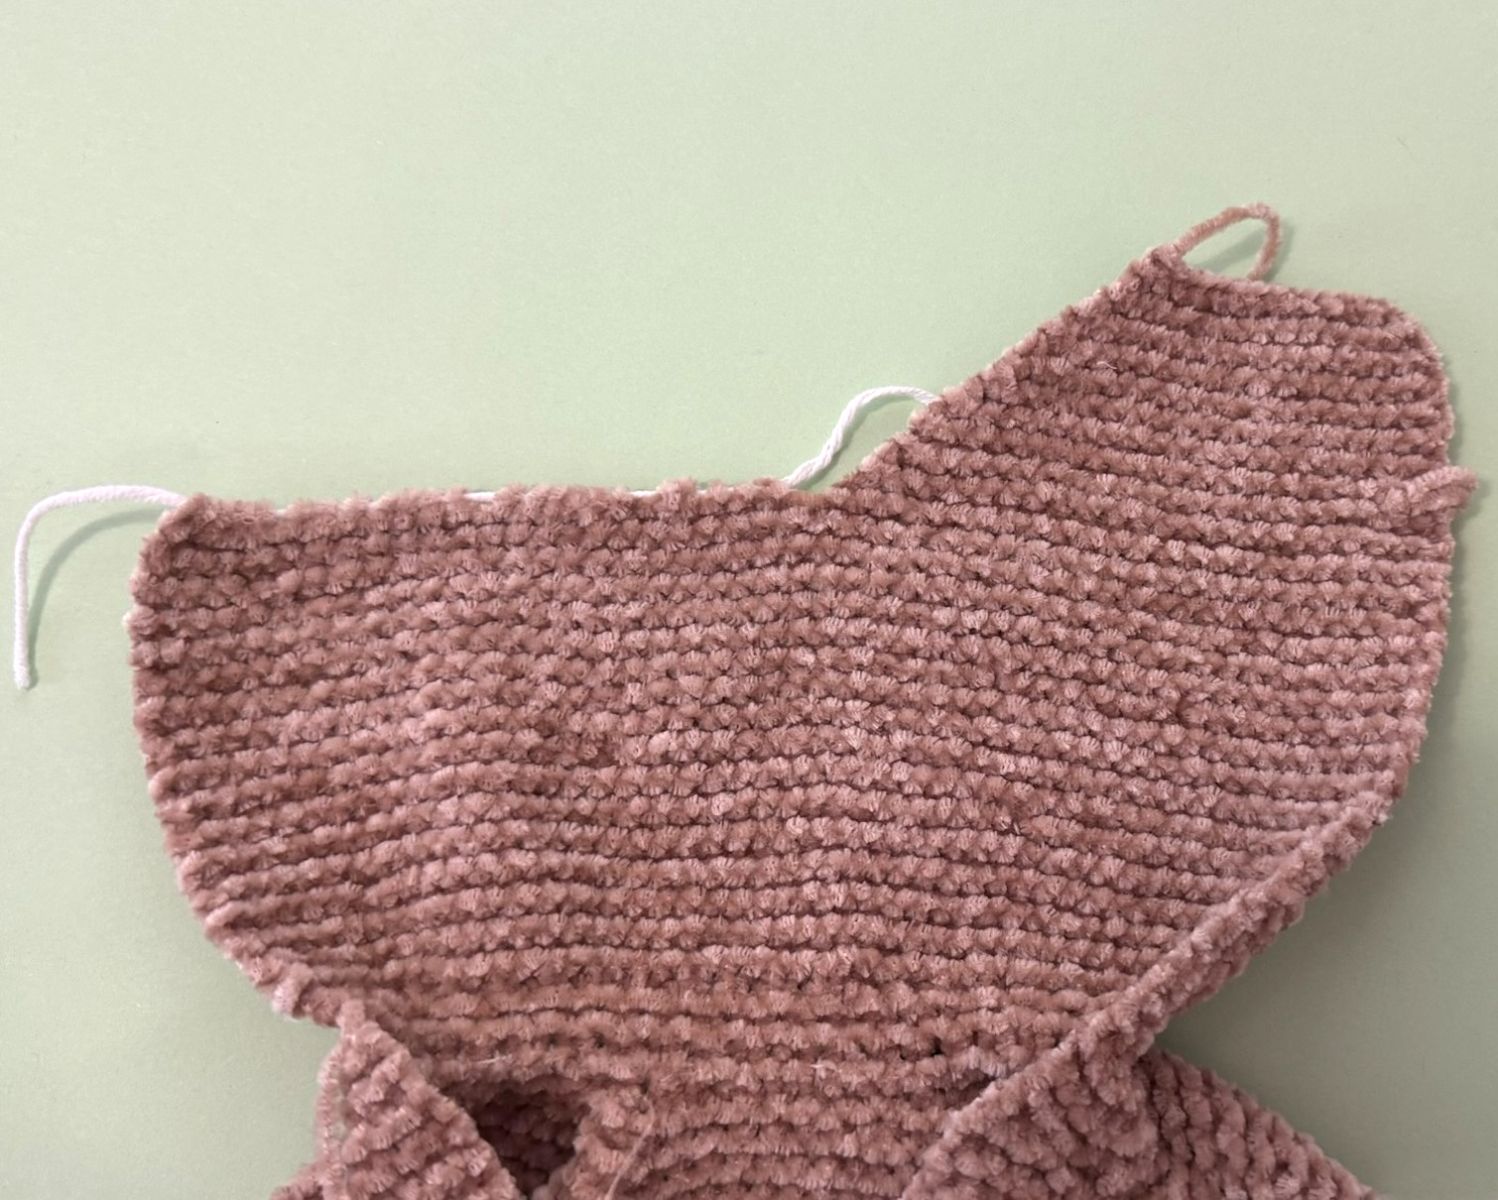
The second half is worked in a slightly different way.
37. 23 K, Turn the work
38. 21 K, 1 dec, Turn the work
39. 22 K, Turn the work
40. 22 K, Turn the work
41. 22 K, Turn the work
42. 20 K, 1 dec, Turn the work
43. 21 K, Turn the work
44. 19 K, 1 dec, Turn the work
45. 20 K, Turn the work
46. 18 K, 1 dec, Turn the work
47. 19 K, Turn the work
48. 17 K, 1 dec, Turn the work
59. 18 K, Turn the work
50. 16 K, 1 dec, Turn the work
51. 17 K, Turn the work
52. 15 K, 1 dec, Turn the work
53. 16 K, Turn the work
54. 14 K, 1 dec, Turn the work
55. 15 K, Turn the work
56. 15 K, Cast off.
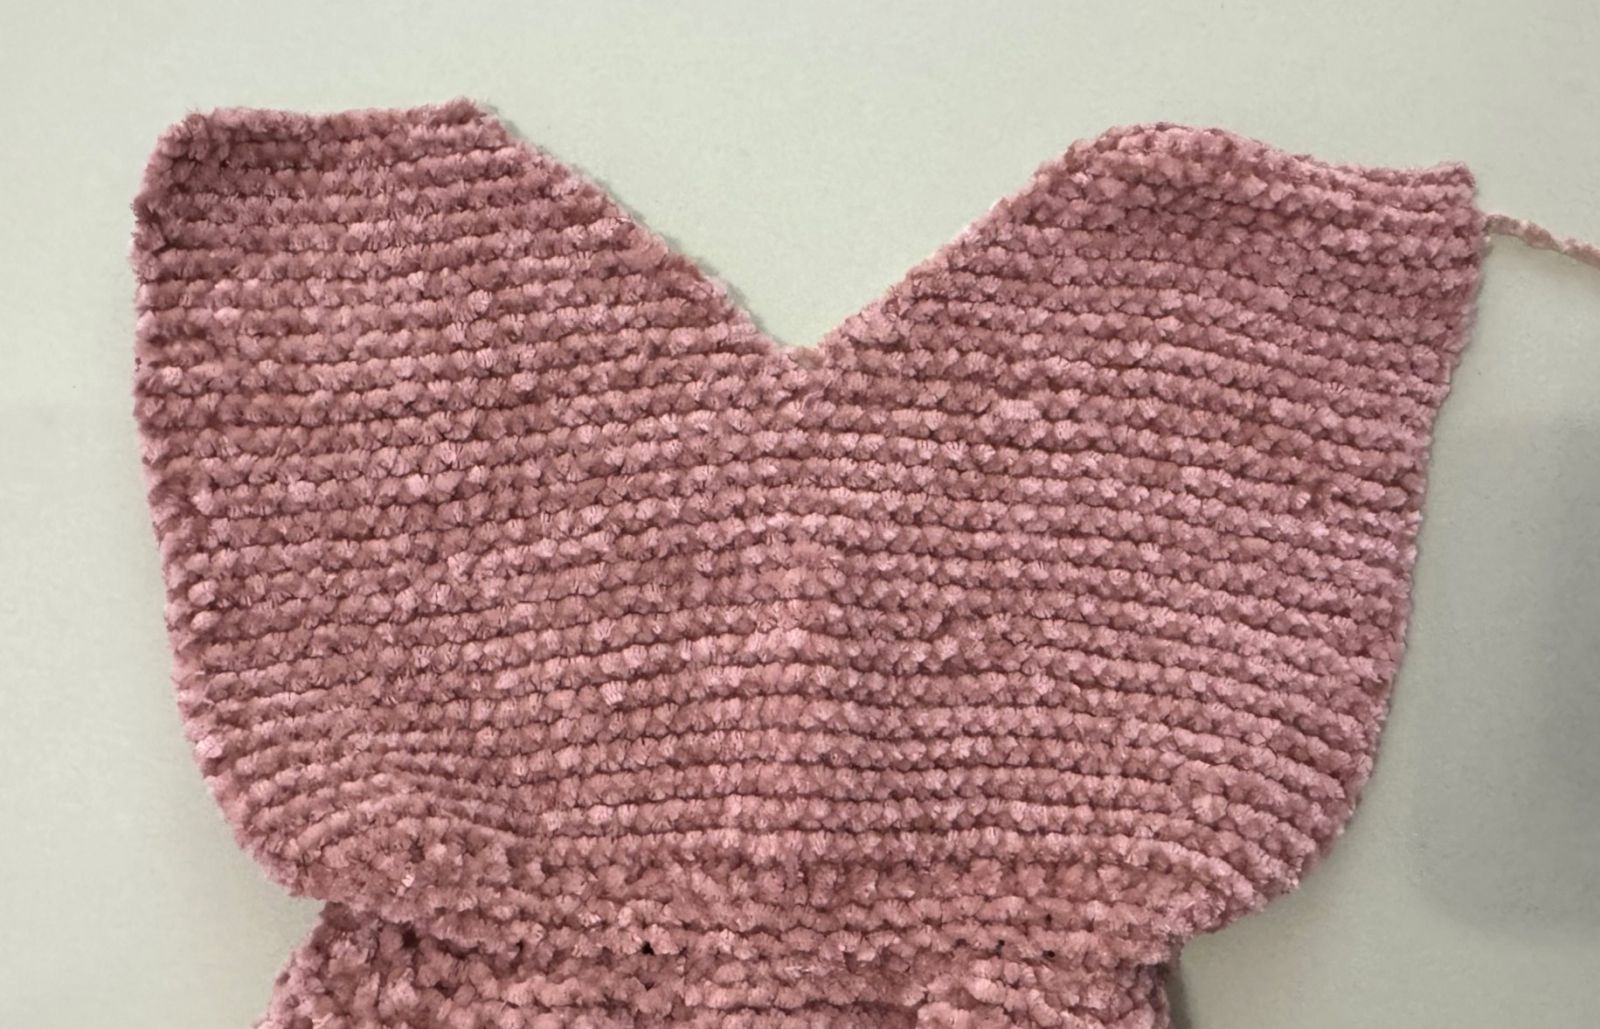
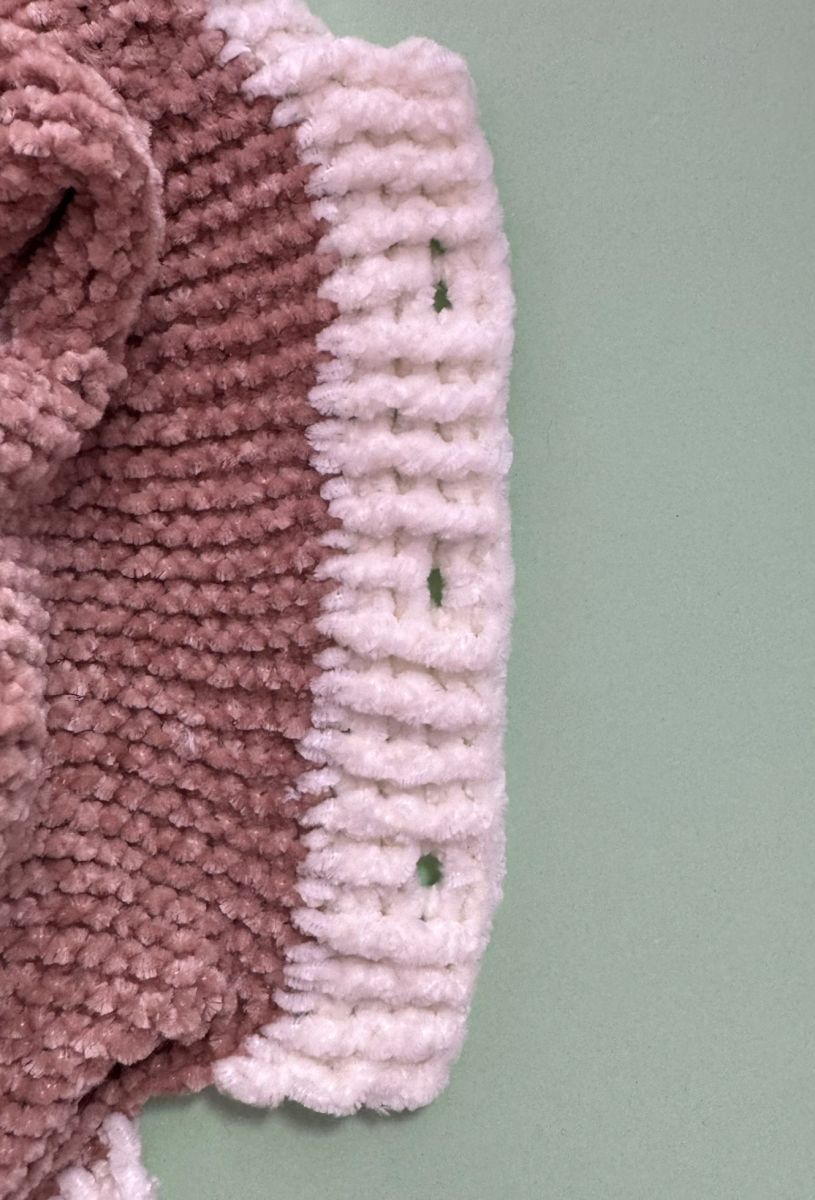
Sew the two halves together. Then crochet around the overalls with white yarn and a crochet hook. Begin by crocheting around the overalls and the hood with double crochet stitches. Start at the bottom and work to the opposite side. Do not join the edge there, but turn the work and crochet one more row, this time using front post double crochet stitches. Alternate between front post and back post double crochet stitches.
First crochet around the overalls, then around the hood, and finally around the overalls once more. Secure the yarn end well at the bottom.
On one side, work the buttonholes. Chain three, then crochet eight post double crochet stitches, alternating one front post and one back post stitch. Skip one chain stitch and one front post stitch. Crochet nine post double crochet stitches, again alternating with one back post and one front post stitch. Skip one chain stitch and one front post stitch. Crochet another nine stitches, alternating between back and front post stitches. Skip one chain stitch and one front post stitch, then crochet seven stitches, alternating back and front post stitches. Turn the work, chain three, and crochet back across the row with front post double crochet stitches. Finally, fasten off.
Ears
Cast on 6 stitches (ch) onto the knitting needle.
1. 6 P (6)
2. 6 K inc. (12)
3. 12 K (12)
4. (1 K, 1 K inc)x 6 (18)
5. 18 K (18)
6. (2 K, 1 K inc)x 6 (24)
7. 24 K (24)
8. (3 K, 1 K inc)x 6 (30)
9. 30 K
10. 30 K
11. 30 K
12. 30 K
13. 30 K
14. 30 K
15. 30 K
16. (3 K, 1 dec)x 6 (24)
17. 25 K
18. (2 K, 1 dec)x 6 (18)
19. 18 K
Cast off, leaving a long thread for sewing. Sew to the hood.
I crocheted the antlers using a size 3 crochet hook (dark brown yarn).
HORNS
First crochet two details:
1 detail: 8 sc in the magic ring.
1-2. 8 sc
Fasten off and cut the yarn.
2 detail:
8 sc in the magic ring.
1-3. 8 sc
Apply the first detail to the second one, crochet 3 sc grasping the both details simultaneously
connecting them with each other. Then crochet round a circle along the left 10 sc.
Then crochet 2 more rows of 10 sc.
Leave the thread enough for sewing.

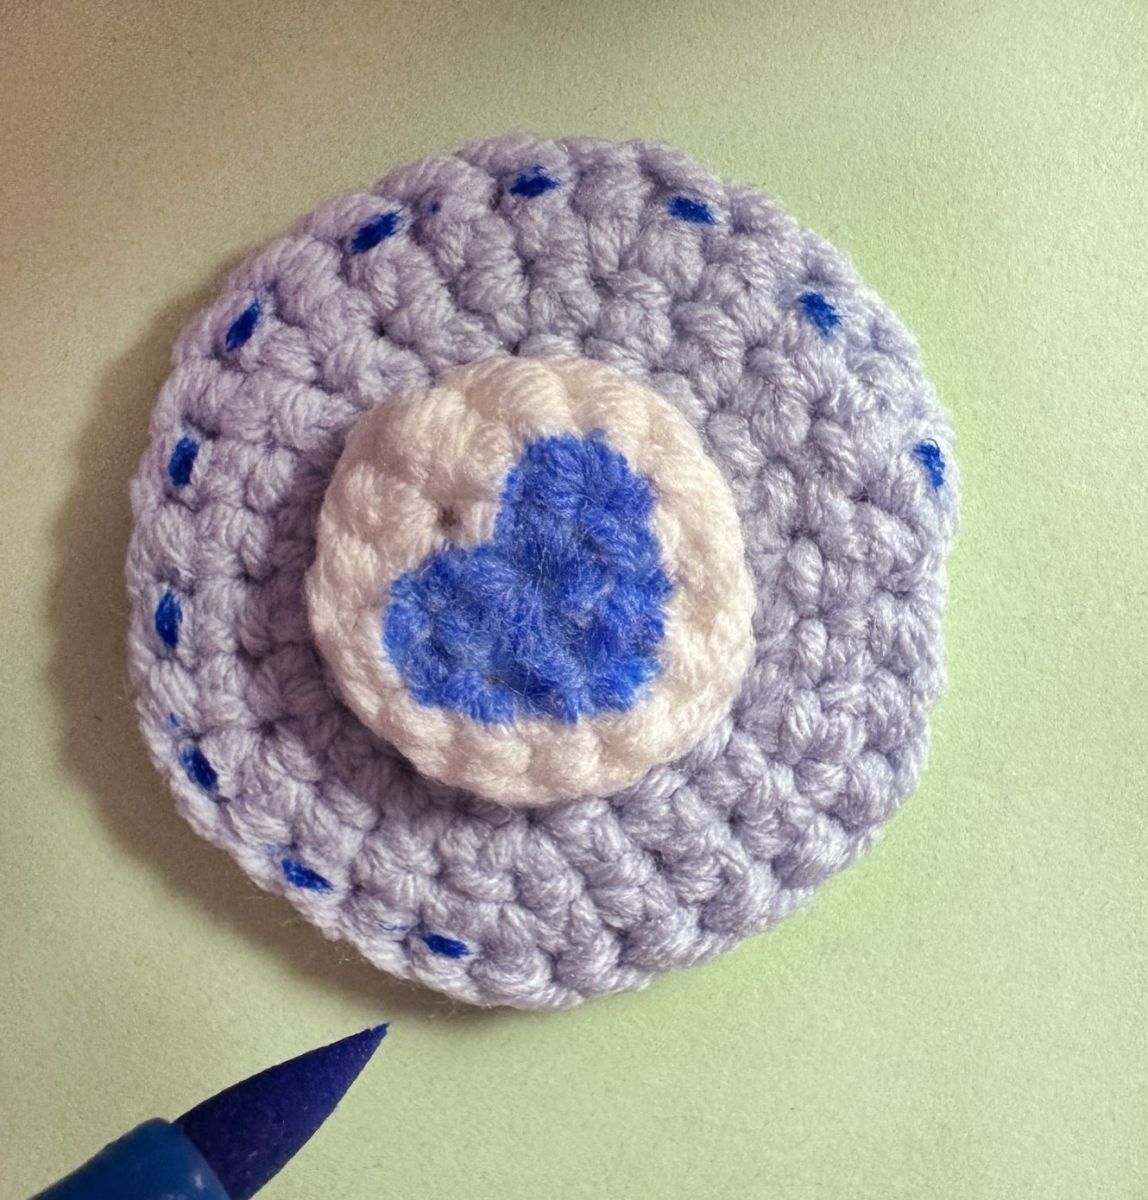
I crocheted the pacifier using a size 2 crochet hook.
Blue
6 sc in the magic ring.
1. 6 inc (12)
2. (1 sc, 1 inc)х6 (18)
3. (2 sc, 1 inc)х6 (24)
4. (3 sc, 1 inc)х6 (30)
Crochet slip stitches all the way around the edge of the circle. When you reach the end, secure the yarn firmly and cut it off.
White 2 ps. crochet
6 sc in the magic ring.
1. 6 inc (12)
Fold the pieces together and join them with slip stitches.
Place the white and blue pieces on top of each other, positioning the white piece exactly in the middle. To add a decorative touch, I drew dotted lines and a small heart on the white piece using a fabric marker.

Ready!