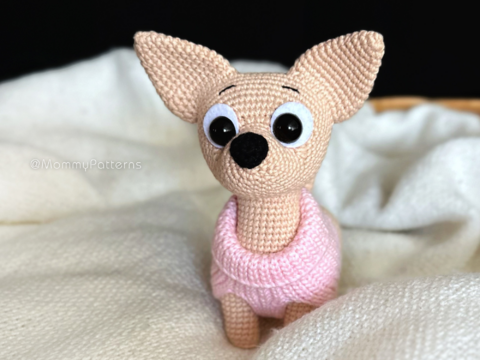
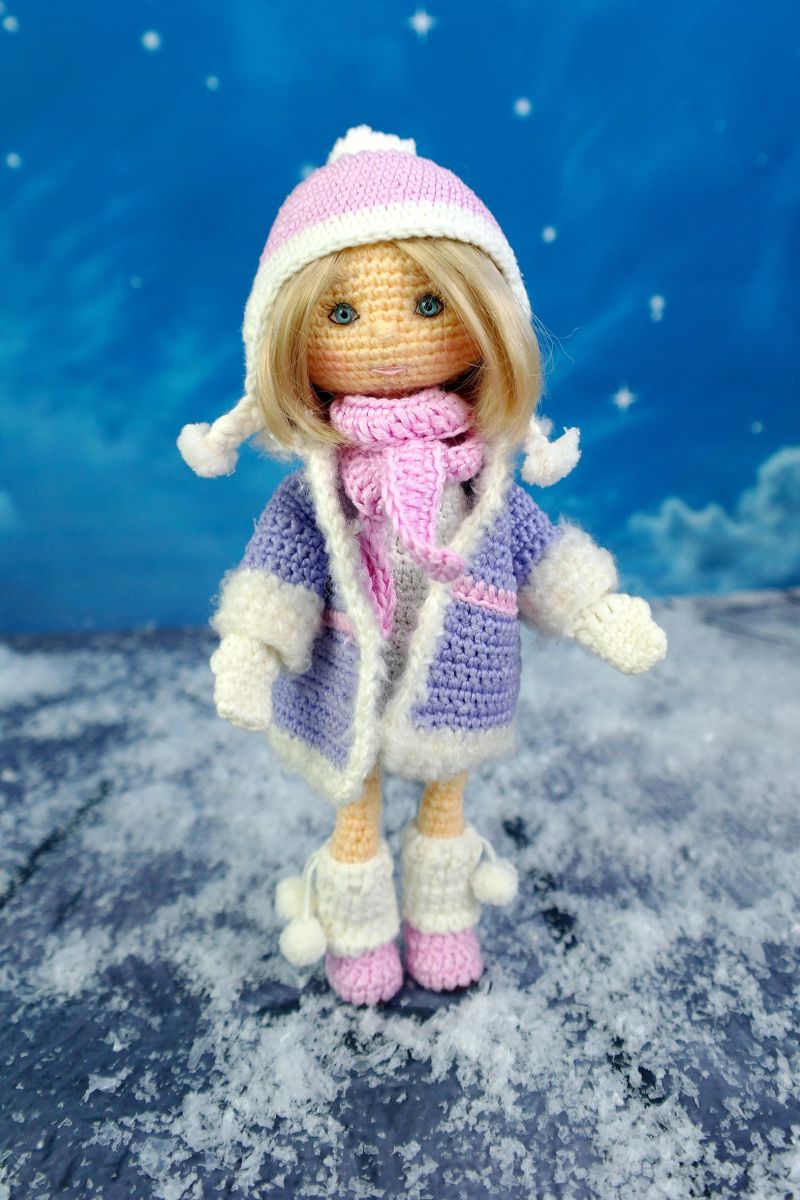
Small Crocheted Doll – Crochet pattern
Hello everyone! Today I’d love to share a tutorial for a small crocheted doll. It’s a quick and enjoyable project—perfect as a heartfelt gift or a charming addition to your handmade collection.
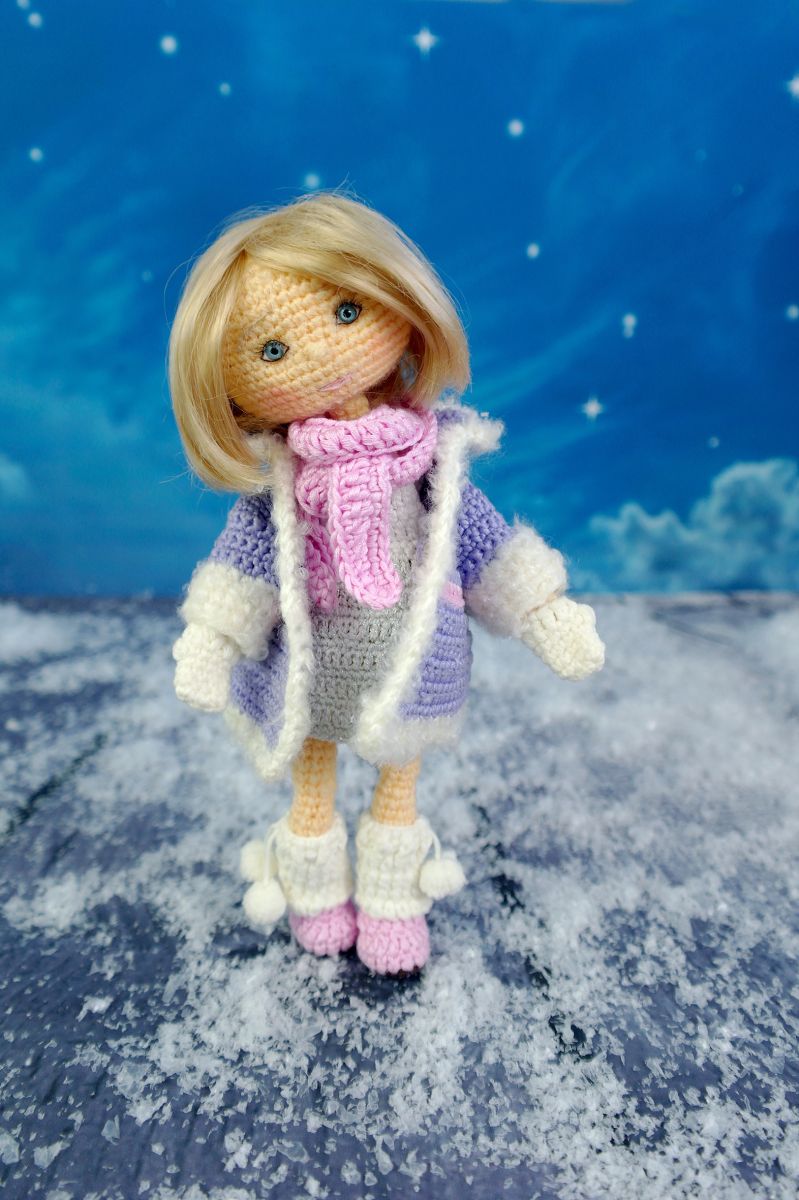
The doll’s clothes are fully removable. I used cotton yarn for the clothing—unfortunately, I no longer remember the exact brand. The yarn is slightly thicker than the one I used for the doll itself, but they’re quite similar in weight. I used the same crochet hook for both the doll and the clothes.
Since everyone crochets with a different tension—some tighter, some looser—I recommend trying the clothes on the doll as you go and adjusting the pattern if needed. This ensures a perfect fit.
The finished doll is approximately 25 cm (10 inches) tall, though the final size may vary depending on the yarn you use. If you’d like, you can incorporate wire into the doll’s body. I added wire to the torso and neck so I could stabilize the head. You can also insert wire into the arms and legs, allowing the doll to be posed in different positions.
💖 Happy Crocheting!
Materials:
50 gr Yarn for doll's YarnArt Jeans (160m /50g)
Yarn for clothes cotton (140m /50g).
Crochet hook 1.2 mm
Fiberfill
Hair tresses 50cm
Eyes 5 mm, felt, eyelashes, pastel crayons.
Glue (for example, UHU)
Long needle for tightenings (tapestry needle)
Abbreviations:
sc – single crochet
ch – chain
dec – decrease
inc – increase
dc– double crochet
hdc- half double crochet
3 sctog – crochet 3 sc together
3 sc in one – crochet 3 sc in one
loop
(...)х times – repeat (х) times
When crocheting dolls I always use a smaller hook than is suggested on the yarn band. For example,
if it is recommended to use a 3 mm hook I use a 1.5 mm hook. It keeps the stitches tight and prevents
the stuffing from showing through holes in the fabric. The doll will also be more accurate.
1. All details are crocheted in spiral rounds. This means that the round will NOT be finished with a slst.
2. Use a stitch marker. A small thread (other colour than your working yarn) helps you count the
rounds. Just place it at the start of a round on top of your working thread.
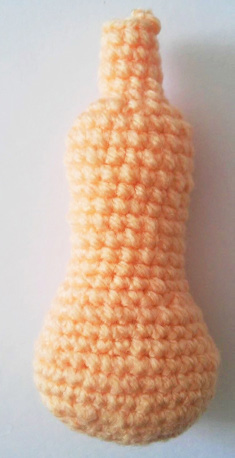
Head
1. 6 sc in the magic ring
2. 6 inc (12)
3. (1 sc, 1 inc)х6 (18)
4. (2 sc, 1 inc)х6 (24)
5. (3 sc, 1 inc)х6 (30)
6. (4 sc, 1 inc)х6 (36)
7. (5 sc, 1 inc)х6 (42)
8. (6 sc, 1 inc)х6 (48)
9. (7 sc, 1 inc)х6 (54)
10-18. 54 sc
19. (7 sc, 1dec)x6 (48)
20. (6 sc, 1dec)x6 (42)
21. (5 sc, 1dec)x6 (36)
22. (4 sc, 1dec)x6 (30)
23. (3 sc, 1dec)x6 (24) stuff the head.
24. (2 sc, 1dec)x6 (18)
25. (1 sc, 1dec)x6 (12)
26. 6 dec
Tighten the remaining stitches, fasten off, cut the thread.
.jpg)
.png)
Body
Crochet 6 ch, starting in the second chain from the hook
1. 4 sc, 3 sc in 1, crocheting along the other side of the chain to create an oval 4 sc, 3 sc in 1 (14)
2. 4 sc, 3 inc, 4 sc, 3 inc (20)
3. 4 sc, (1 sc, 1 inc)х3, 4 sc, (1 sc, 1 inc)х3 (26)
4. 4 sc, (2 sc, 1 inc)х3, 4 sc, (2 sc, 1 inc)х3 (32)
5- 7. 32 sc
8. 4 sc, (2 sc, 1 dec)х3, 4 sc, (2 sc, 1 dec)х3 (26)
9-10. 26 sc
11. 4 sc, (1 sc, 1 dec)х3, 4 sc, (1 sc, 1 dec)х3 (20)
12-21. 20 sc
22. (2 sc, 1 dec)x5 (15) stuff the body.
23. (1 sc, 1 dec)x5 (10)
24-27. 10 sc
Fasten off leaving a long thread for sewing.
Legs
Foot
Crochet 5 ch, starting in the second chain from the hook
1. 3 sc, 3 sc in 1, crocheting along the other side of the chain to create an oval 3 sc, 3 sc in 1 (12)
2- 4. 12 sc
5. 4 sc, 1 dec, 4 sc, 1 dec. (10)
6. 1 sc, chain 3 and skip 3 stitches of the previous row, 6 sc (10)
.jpg)
.jpg)
7. 5 dec. Pull and fasten off, cut the thread (heel).
.jpg)
Now we crochet on the foot upward. We've left a small hole in row 6 - now crochet 8sc on those stitches.
1- 2. 8 sc
.jpg)
.jpg)
3. (3 sc, 1 inc)x2 (10)
4- 12. 10 sc
13. (3 sc, 1dec)x2 (8)
14. 8 sc, stuff
15. (3 sc, 1 inc)x2 (10)
16. 10 sc
17. (4 sc, 1 inc)x2 (12)
18- 28. 12 sc, stuff
29. 6 dec
Tighten the remaining stitches, fasten off, cut the thread.
.jpg)
Hands
Crochet 3 ch, starting in the second chain from the hook
1. 1 sc, 3 sc in 1, crocheting along the other side of the chain to create an oval 1 sc, 3 sc in 1 (8)
2-3. 8 sc
4. 1 sc, 3 dc in one stitch (= cluster dc) - that'll be a finger, 6 sc (8)
.png)
.jpg)
5. 2 sc, 1 dec, 2 sc, 1 dec (6)
6- 8. 6 sc
9. 2 sc, 1 inc, 2 sc, 1 inc (8)
10- 14. 8 sc stuff
15. 2 sc, 1 dec, 2 sc, 1 dec (6)
16. 6 sc
17. 2 sc, 1 inc, 2 sc, 1 inc (8)
18- 23. 8 sc, stuff
25. 4 dec
Tighten the remaining stitches, fasten off, cut the thread.
.jpg)
Wire Installation and Assembly Instructions
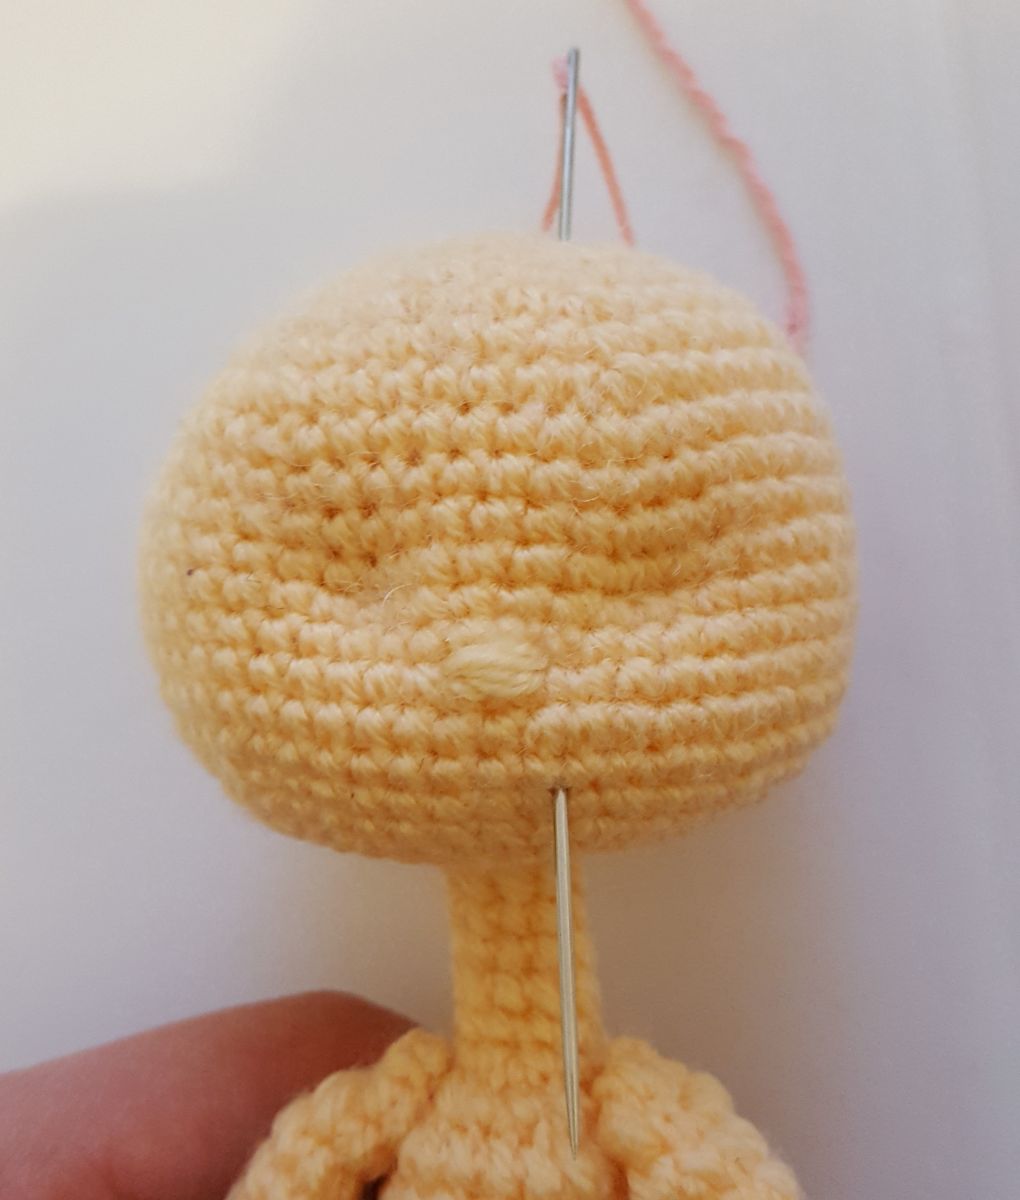
Wire was used to ensure that the head sits securely and can be moved in different directions. It provides internal support and allows for flexible positioning. The wire was carefully wrapped with adhesive tape to prevent slippage and to cover any sharp edges. Once prepared, the wire was inserted into the neck, as shown in the illustration. Its length was chosen to ensure it extends far enough to reach into the head. The head was then carefully positioned and aligned. Finally, all parts were sewn together to ensure a stable connection without any wobbling.
.jpg)
.jpg)
.jpg)
Attaching the Limbs
Legs: Sew between rounds 4 and 5.
Arms: Sew between rounds 22 and 23.
Eye Placement and Indentation
Whether or not to create recesses for the eyes is up to personal preference. If you are using black eyes that need to be sewn on, recesses are not necessary.
To position the eyes: Starting from the crown, mark the desired positions between rounds 13 and 14. Leave a space of approximately five stitches between the two eyes.
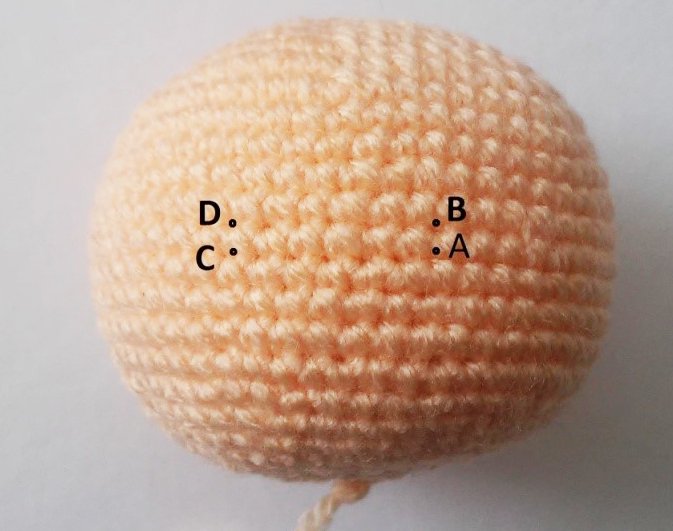
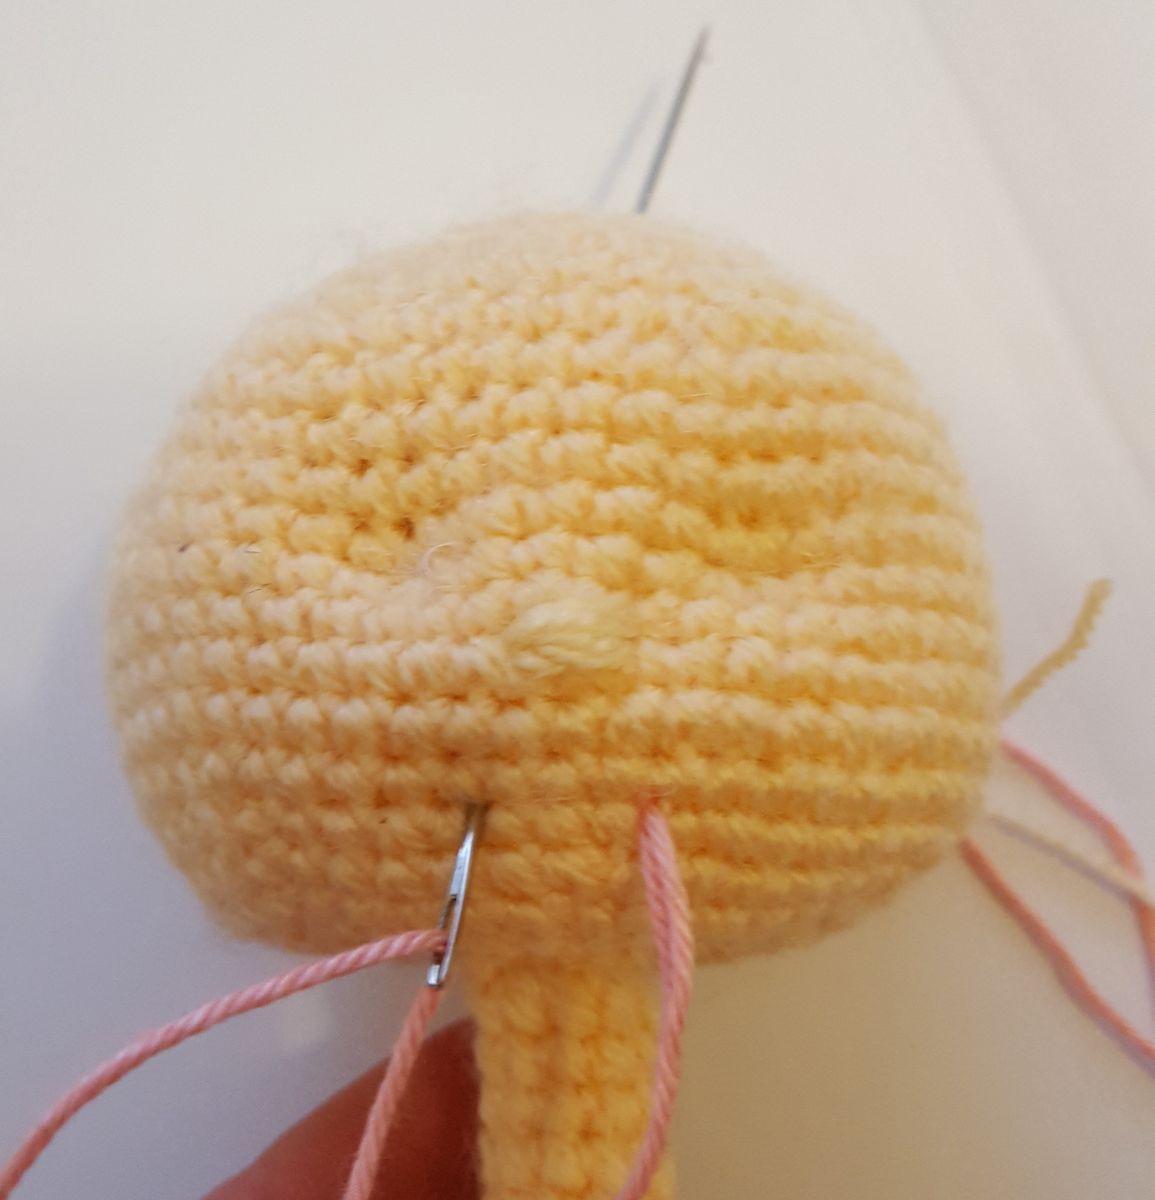
Insert the needle at the bottom of the head, right next to the neck, and bring it out at the marked eye position (point A). Insert the needle again two stitches to the right (point B), and guide it back down to the neck. Pull the thread tight and tie a knot — this creates the desired indentation.
Repeat the same process for the other eye, using points C and D on the opposite side. This ensures both eyes are evenly placed and securely framed on the face.
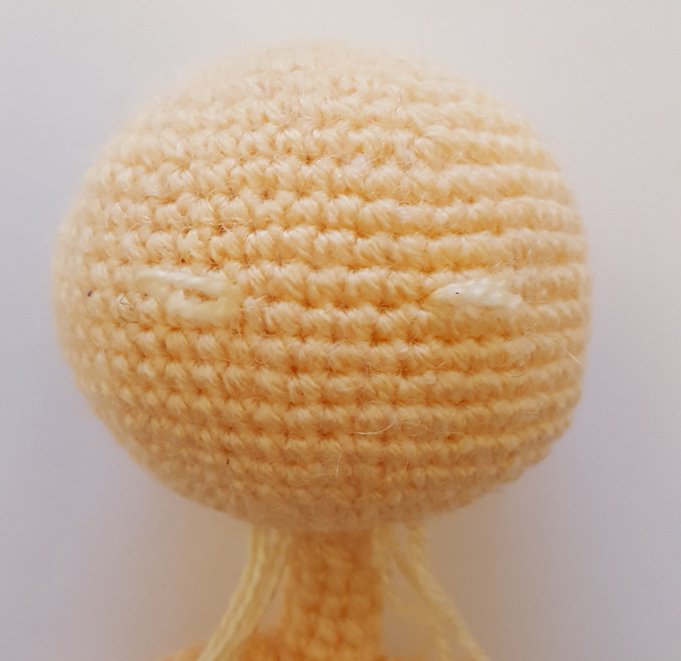
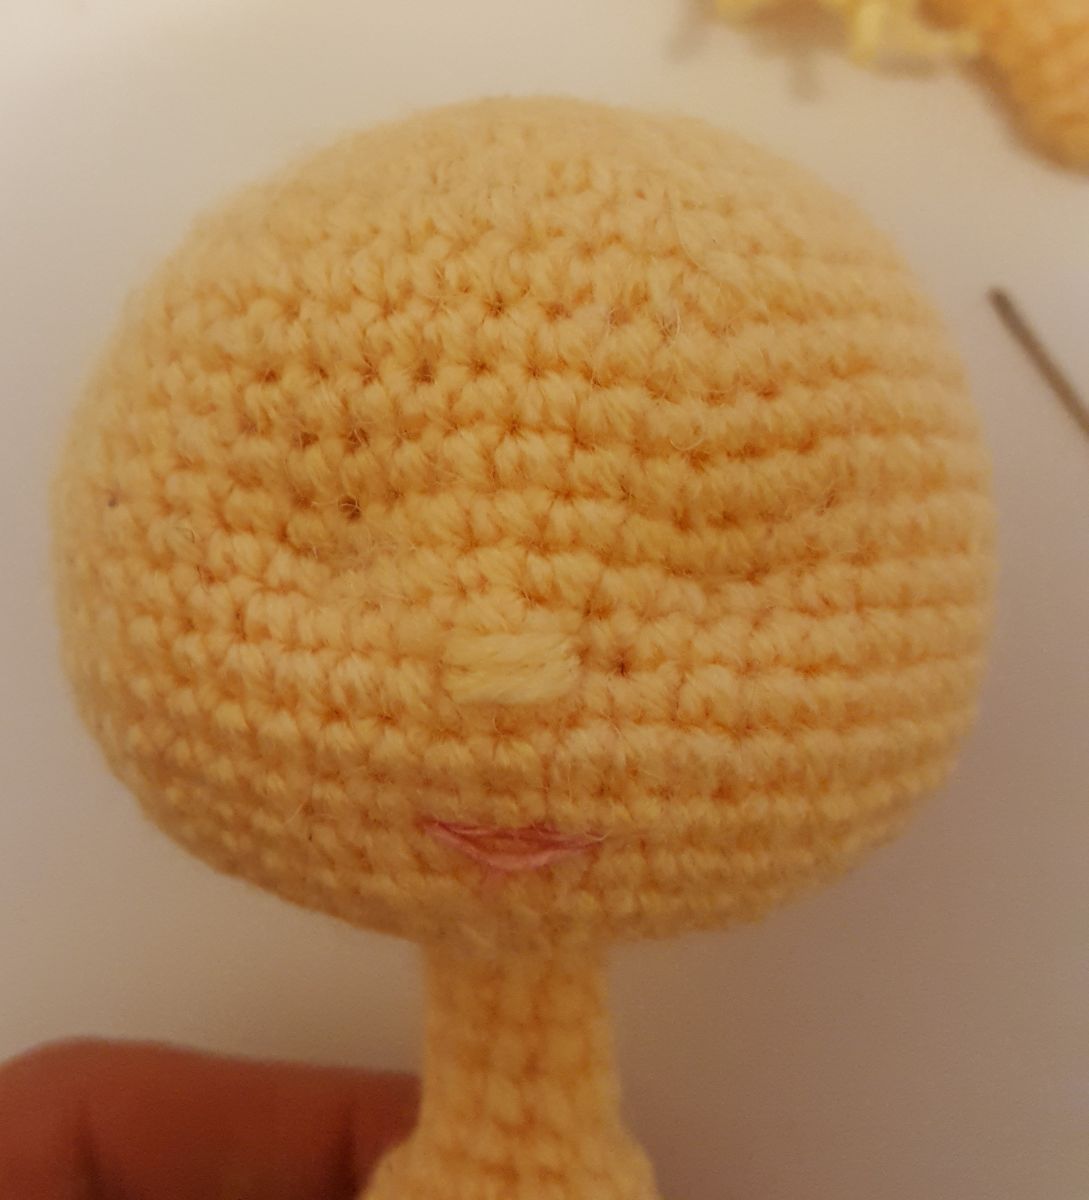
Sewing on the Nose
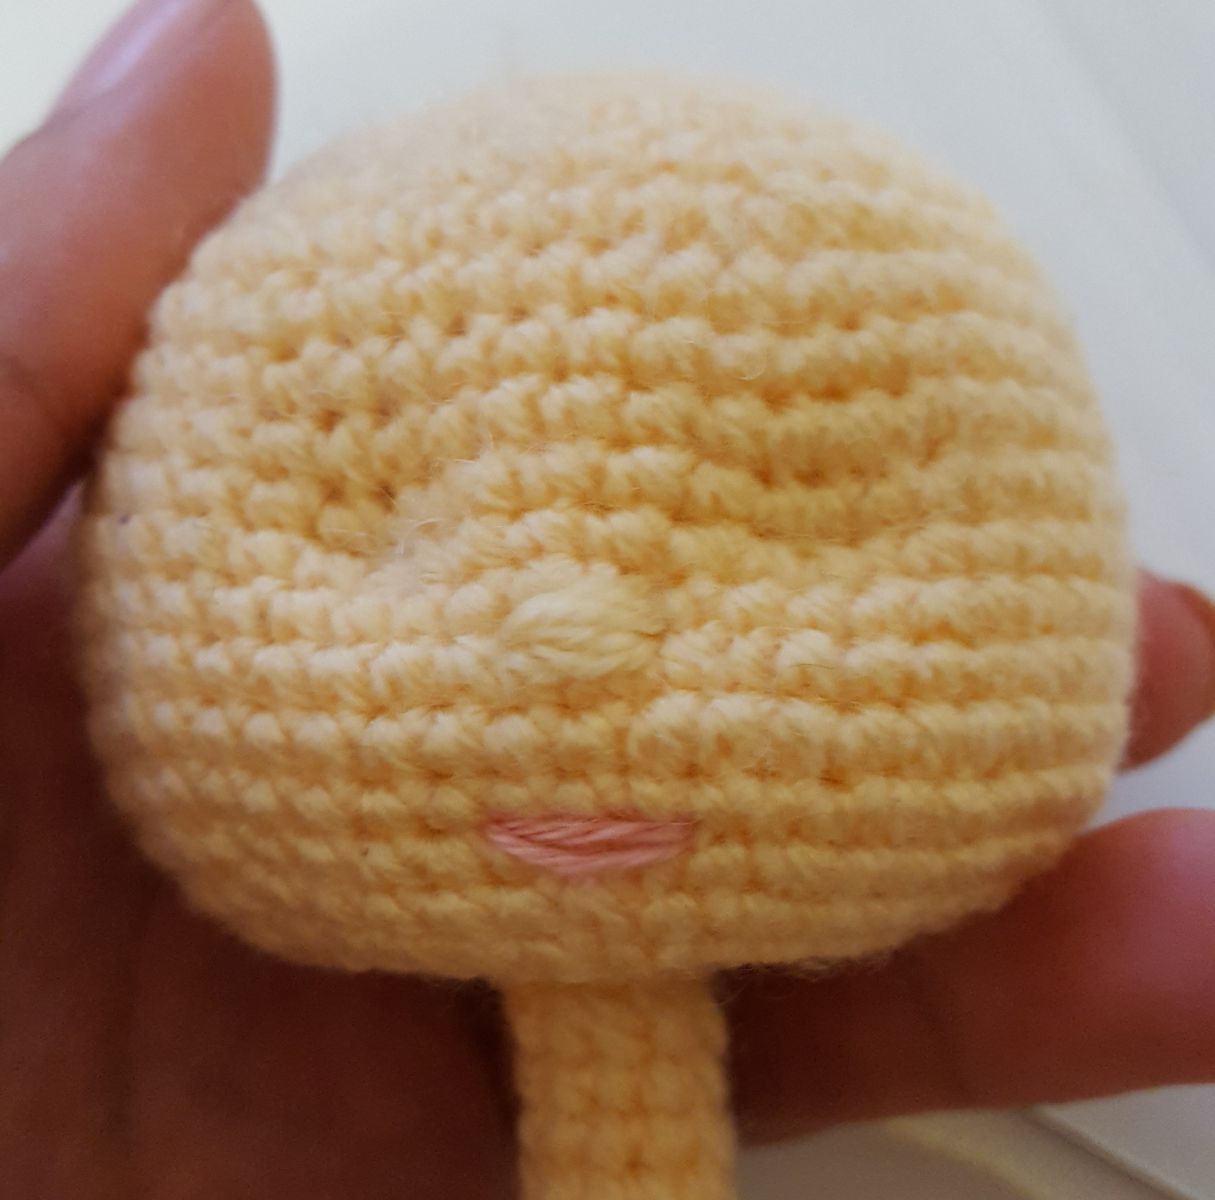
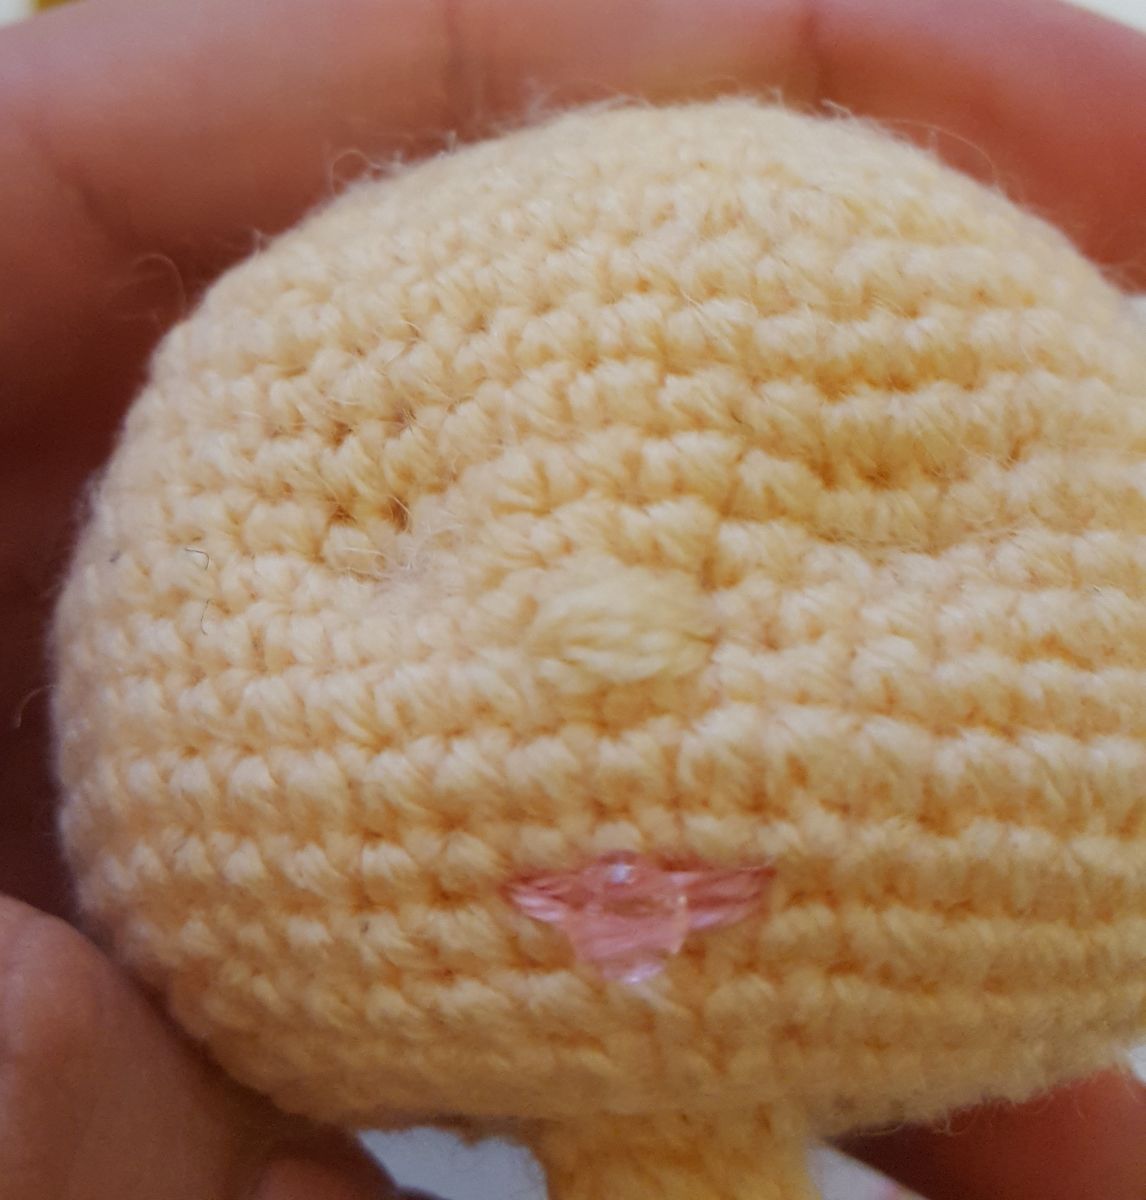
The nose is attached between the 15th and 16th rounds of the head. Choose a thread that either matches the color of the face or provides a deliberate contrast. Using an embroidery needle, stitch a small, simple shape—such as a short horizontal line or a tiny bow. The size and shape of the nose can be customized depending on the desired expression. Secure the thread firmly at the end to prevent it from loosening.
Embroidering the Mouth
Use a double thread to make the embroidery line appear more prominent. Start by inserting the needle at the top of the head, roughly at the crown. Guide it through the inside of the head and bring it out at the desired mouth position in the 19th round. From there, move three stitches to the left and insert the needle again. Then bring the needle back up and exit at the crown. Gently pull the thread tight—just enough to shape the mouth without distorting the fabric. Tie a knot and secure it with a small amount of craft glue. Important: Do not use superglue, as it can damage the material or cause it to harden.
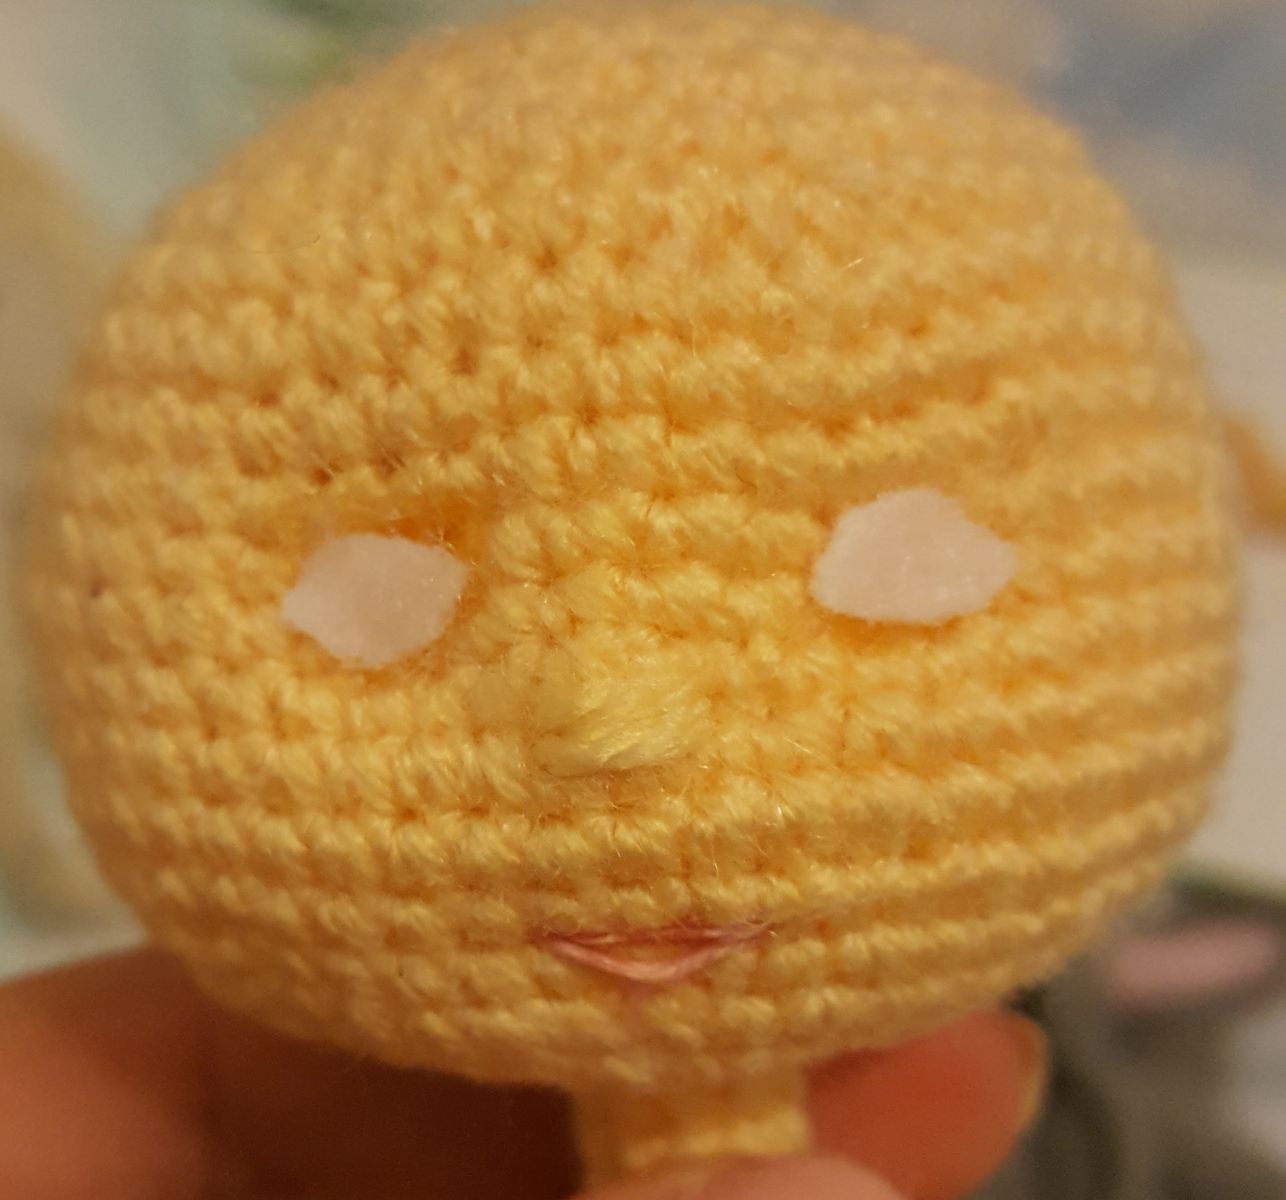
Gluing on the Eyes
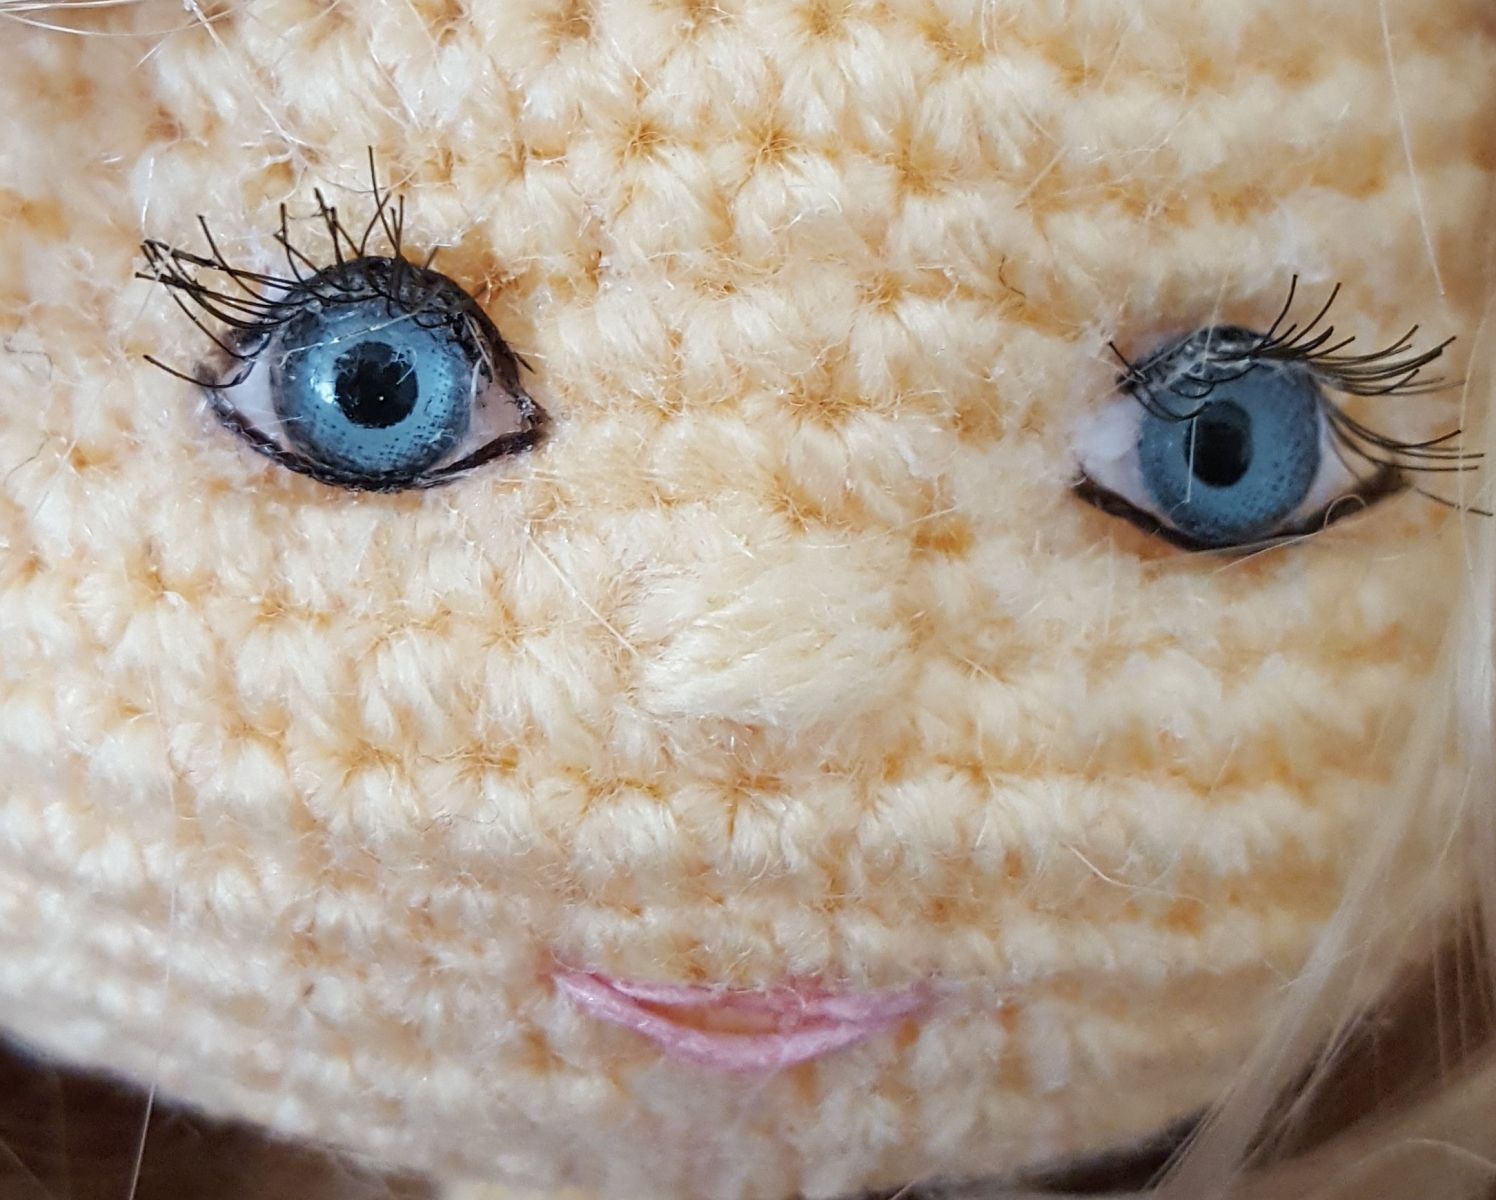
Cut out small circles of felt and glue them onto the face. Then glue on the doll’s eyes, followed by the eyelashes.
Safety Note for Small Children
Please be cautious—this method is not suitable for small children due to the risk of swallowing. Do not use glued-on pupils or false eyelashes for dolls intended for young children. In such cases, we recommend sewing on the eyes or using special safety eyes that can be securely attached. Note: You are solely responsible for the safety of each handmade doll and the methods you choose.
.jpg)
.jpg)
.jpg)
Attaching the Hair
To attach the hair, you’ll need superglue and hair strips. Start at the bottom of the head: apply a small amount of glue and press on the first strip of hair. Continue working your way up in a spiral, placing each strip closely next to the previous one. This creates a smooth, even surface of hair up to the crown. Alternatively, the hair strips can be sewn on. In this method, also begin at the bottom and attach the strips with small, even stitches as you work upward. Both methods can be combined if desired. Diagrams or sketches can be helpful for visual guidance.
.jpg)
.jpg)
Hair for a Crocheted Doll – Options & Tips
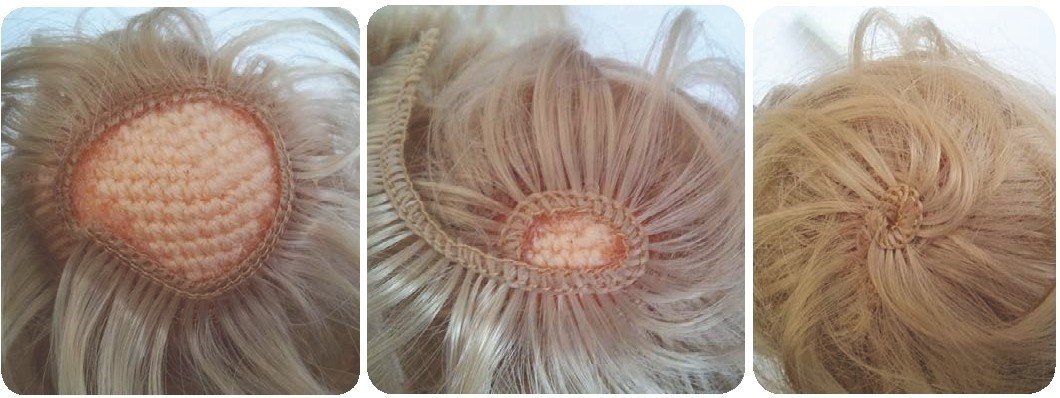
You can style a crocheted doll’s hair in many creative ways—by crocheting it directly, embroidering it, or attaching strands using the loop method (also known as the "Lark’s Head Knot"). Your imagination is the limit, and there are countless techniques to make doll hair look vibrant and unique.
The Loop Method – Step by Step This popular and beginner-friendly technique involves threading yarn strands into the doll’s head:
-
Cut the yarn: Measure and cut the yarn to your desired length. Since each strand will be folded in half, it’s best to cut a bit longer and trim later if needed.
-
Fold the yarn: Fold each strand in half to form a loop.
-
Attach the strand: Using a crochet hook or blunt needle, insert it into the desired spot on the doll’s head, pull the loop through, and pass the two loose ends through the loop. Gently tighten to secure the strand.
-
Work in rows: Start at the base of the head and work your way upward in rows. This creates a natural-looking hair flow.
-
Style the hair: Once all strands are attached, you can trim, braid, or style the hair into pigtails, ponytails, or any look you like.
I crocheted my doll for an eight-year-old girl who requested colorful hair stripes. I used different shades of yarn and placed them strategically to create bright accents—giving the doll a fun and personalized look.
For a tidy finish, wrap the yarn around a ruler before cutting to ensure all strands are the same length. This helps create a beautifully even hairstyle.
Clothes (Try it on all the time, so that it fit)
Jacket
Raglan:
Crochet 29 ch, starting in the second chain from the hook
1. 4 sc, 1 inc, 4 sc, 1 inc, 8 sc, 1 inc, 4 sc, 1 inc, 4 sc (32) Turn the work
.jpg)
2. 4 sc, 2 inc, 4 sc, 2 inc, 8 sc, 2 inc, 4 sc, 2 inc, 4 sc (40) Turn the work
3. 5 sc, 2 inc, 6 sc, 2 inc, 10 sc, 2 inc, 6 sc, 2 inc, 5 sc (48) Turn the work
4. 6 sc, 2 inc, 8sc, 2 inc, 12 sc, 2 inc, 8 sc, 2 inc, 6 sc (56) Turn the work
5. 7 sc, 2 inc, 10 sc, 2 inc, 14 sc, 2 inc, 10 sc, 2 inc, 7 sc (64) Turn the work
6. 10 sc, Cast on 2 ch and skip 13 sc (sleeve),18 sc, Cast on 2 ch and skip 13 sc (sleeve), 10 sc (42) Turn the work
7. 1 sc, Crochet 3 ch and skip 3 stitches of the previous round, 38 sc (42) Turn the work
.jpeg)
8. 42 sc Turn the work
9. 42 sc Turn the work
10. 42 sc Turn the work
11. 1 sc, Crochet 3 ch and skip 3 stitches of the previous round, 38 sc (42) Turn the work
12. (1 sc, 1 inc)x19, 3 sc, 1 inc. (62) Turn the work
.jpeg)
13. 62 sc Turn the work
14. Cast on 2 ch and crochet 62 hdc with pink color.
15. Take purple color and start again from the beginning, DO NOT TURN WORK, crochet 58 sc in the back loop, crochet 3 ch and skip the 3 stitches of the previous round, 1 sc inc (63) Turn the work
.jpeg)
16. 62 sc, 1 inc. (64) Turn the work
17. 64 sc Turn the work
18. 64 sc Turn the work
19. 60 sc, crochet 3 ch and skip 3 stitches of the previous round, 1 sc (64) Turn the work
20. 64 sc Turn the work
21. 64 sc Turn the work
22. 64 sc Turn the work
23. 64 sc Turn the work
24. 64 sc Turn the work
Cut the thread, secure it and sew it.
.jpeg)
Sleeves
1. At the sleeve opening, crochet 13 stitches plus 2 ch (15 sc), Turn the work
2. 15 sc Turn the work
3. 7 sc, 1 inc, 7 sc (16) Turn the work
4. 16 sc Turn the work
5. 16 sc Turn the work
6. 16 sc Turn the work
7. 16 sc Turn the work
.jpeg)
8- 10. Take white and crochet 3 more rows
If you like, you can add two more rows to the coat using white yarn. For the collar, crochet 28 single crochets (sc) along the top edge. Turn your work and crochet three additional rows. Then, crochet around the entire coat with white to create a clean border.
Finally, sew on the buttons.
.jpeg)
Shoes
Crochet the sole with brown.
Cast on 7 ch,
1. Starting from the 3rd ch from the hook, work 3 dc, 5 dc in 1, 3 dc, 5 dc in 1 (16)
2. pink color 2 ch, crochet 16 dc.
3. 2 ch, 2 Dc, 3 dec, 8 Dc (13)
.jpeg)
4. 2 ch, 13 Dc
5. 1 ch, 13 sc
.jpeg)
Part 2 white.
Cast on 10 ch and close into a circle.
1. 2 ch, 10 dc, and finish with a sl st.
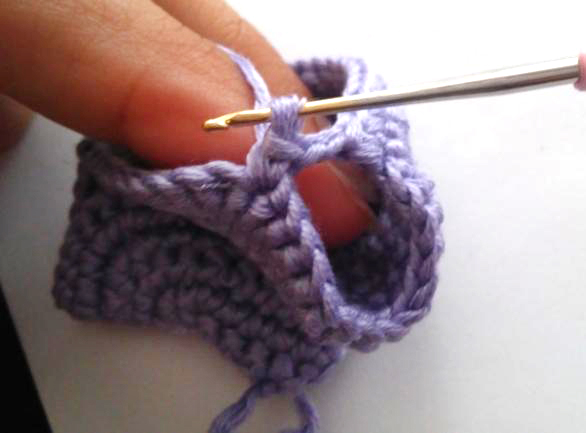
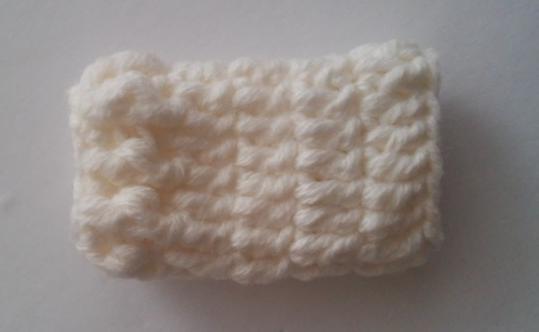
2. 2 ch, 10 double crochets, alternating between the front and back stitches (10), finish with a sl st.
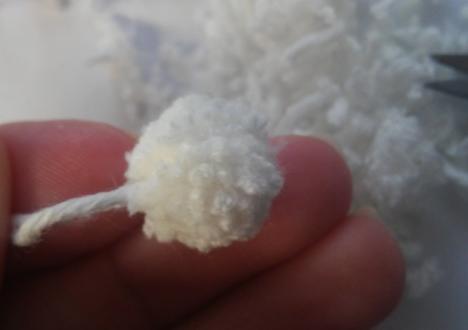
3-6. 2 ch, 10 dc, finish with a sl st. Make pompoms and cut off.
.jpeg)
Cap
1. 12 Dc in the magic ring
2. 12 inc (24)
3. (1 Dc, 1 inc)x12 (36)
4. (2 Dc, 1 inc)x12 (48)
5-11. 48 sc
12-13. white color 48 sc
.jpeg)
.jpeg)
For ear flaps
From the beginning of the round (back), work 5 sc to the left.
1. 12 sc , Turn the work
.jpeg)
2. 1 dec, 8 sc, 1 dec (10) Turn the work
3. 1 dec, 6 sc, 1 dec (8) Turn the work
4. 1 dec, 4 sc, 1 dec (6) Turn the work
5. 1 dec, 2 sc, 1 dec (4) Turn the work
6. 4 sc together
.jpeg)
From the beginning of the round (back), work 17 sc to the right.
1. Crochet 12 sc, leaving 10 sc free between the ear flaps (back). Turn the work.
2. 1 dec, 8 sc, 1dec (10) Turn the work
3. 1 dec, 6 sc, 1 dec (8) Turn the work
4. 1 dec, 4 sc, 1 dec (6) Turn the work
5. 1 dec, 2sc, 1 dec (4) Turn the work
Crochet the hat with a crochet hook. Pull the threads through the ear flaps and knot them. Cut to the desired length. Make a pompom and sew it on.
.jpeg)
.jpeg)
Gloves (2 times)
Cast on 5 ch,
1. from the 2nd ch from the hook, 2 sc, 3 sc in 1 ch, 2 sc, 3 sc in 1 ch
2-4. 10 sc
5. 3 sc, 3 hdc in 1 stitch of the previous round, 6 sc
6. 3 ch, 10 hdc. Secure the thread
Dress
Cast on 26 chains (ch).
1. Starting from the 2nd ch from the hook, crochet 25 slip stitches (sl st). Turn the work. 2. Chain 1, crochet 25 slip stitches. Turn the work. Continue crocheting slip stitch rows until the piece can wrap around the body.
Then, crochet 44 single crochets (sc) along the side. Turn the work.
1. Chain 3, 1 double crochet (dc), then crochet 2 dc into one stitch from the previous row, followed by 1 dc. Repeat this pattern until the end of the row. (66 stitches)
2–3. Crochet 66 dc in each row.
Take a yarn thread and lace it like a corset.
Scarf
Cast on 100 chains. Starting from the 3rd ch from the hook, crochet 98 double crochets.
Panties (use filet yarn)
Cast on 43 chains.
1. Starting from the 3rd ch from the hook, crochet 40 double crochets. Turn.
2. Crochet 6 slip stitches, 2 half double crochets (hdc), 5 double crochets, 2 hdc. (9 stitches)
3. 1 decrease (dec), 2 hdc, 1 dc, 2 hdc, 1 dec. (7 stitches)
4. 1 dec, 3 hdc, 1 dec. (5 stitches)
5. 1 dec, 1 hdc, 1 dec. (3 stitches)
6-7. Crochet 3 hdc.
8. Crochet 3 hdc together. (1 stitch)
Cast on 5 chains and join to the back. Secure the thread.
The doll is finished!