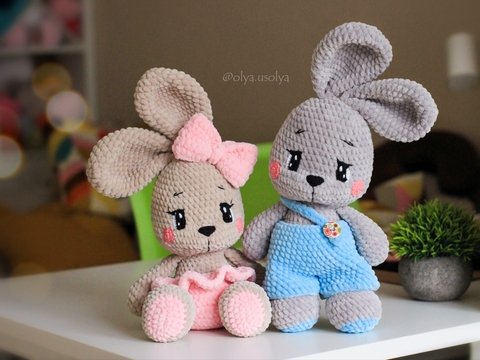
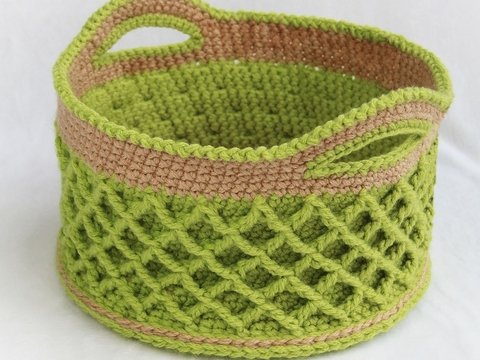
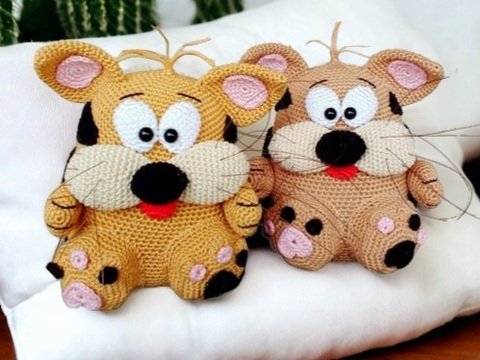
With these crochet instructions, you can crochet or knit an unusual decorative cachepot. It's perfect for all kinds of little things - be it keys in the hallway, sweets on the table or perhaps flowers because it's already summer in your head.
I have designed it in two versions so that you can choose between knitting and crocheting. So you can decide for yourself which technique suits you better and which result you like more.
You can find the knitting pattern below, directly after the crochet pattern.
.jpg)
You will need the following materials to crochet:
– cotton yarn 50 gr/240 m (approximately 30 grams)
– Crochet hook 1.5 mm (important, the size should match the yarn so that the stitches are even).
– Needle, scissors, wire 1 mm in diameter, glue.
– Plastic bottle or bottle base: I used a 1.5 liter bottle for my project - it was perfect for my wool. If you are using a different wool, crochet the cachepot first and then check which bottle size fits best.
Abbreviations:
ch – chain
sc – single crochet
inc – increase
dec – decrease, two single crochets together
Head
1. Crochet 6 sc in a ring
2. 6 inc = 12 sc
3. ( 1 sc , 1 inc ) х 6 = 18 sc
4. ( 2 sc , 1 inc ) х 6 = 24 sc
5. ( 3 sc , 1 inc ) х 6 = 30 sc
6. ( 4 sc , 1 inc ) х 6 = 36 sc
7. ( 5 sc , 1 inc ) х 6 = 42 sc
8. ( 6 sc , 1 inc ) х 6 = 48 sc
9. ( 7 sc , 1 inc ) х 6 = 54 sc
10. ( 8 sc , 1 inc ) х 6 = 60 sc
11. ( 9 sc , 1 inc ) х 6 = 66 sc
12. ( 10 sc , 1 inc ) х 6 = 72 sc
13. ( 11 sc , 1 inc ) х 6 = 78 sc
14. ( 12 sc , 1 inc ) х 6 = 84 sc
15. ( 13 sc , 1 inc ) х 6 = 90 sc
16. ( 14 sc , 1 inc ) х 6 = 96 sc
17. ( 15 sc , 1 inc ) х 6 = 102 sc
18. ( 16 sc , 1 inc ) х 6 = 108 sc
19 – 45 = 108 sc
46. (16 sc , 1 dec ) х 6 = 102 sc
Bind off. To cut off a thread.
I used a bottle with a diameter of 9 cm and shortened it by about 6 cm in height. Make sure that your plastic part matches the crocheted section perfectly – both should fit snugly together. The final round with decreases ensures that the edge of the plastic part is securely fixed.
Arms (2 parts)
1. Crochet 6 sc in a ring
2. 6 inc = 12 sc
3. ( 1 sc , 1 inc ) х 6 = 18 sc
4-32. 18 sc
Bind off. To cut off a thread. To leave the small end of thread for further operation. Do not stuff.
Legs (2 parts)
9 ch
1. starting from the 2nd ch from the hook 7 sc , 3 sc in 1, then change to the other side of the chain of chain stitches 7 sc , 3 sc in 1 = 20 sc
2. 17 sc , 3 inc = 23 sc
3. 17 sc , ( 1 inc, 1 sc ) х 3 = 26 sc
4. 17 sc , ( 1 inc, 2 sc ) х 3 = 29 sc
5, 6. 29 sc
7. 17 sc , ( 1 dec, 2 sc ) х 3 = 26 sc
8. 17 sc , 6 dec = 20 sc
9 – 31. 20 sc
Bind off. To cut off a thread. To leave the small end of thread for further operation.
Body
1. Crochet 6 sc in a ring
2. 6 inc = 12 sc
3. ( 1 sc , 1 inc ) х 6 = 18 sc
4. ( 2 sc , 1 inc ) х 6 = 24 sc
5. ( 3 sc , 1 inc ) х 6 = 30 sc
6. ( 4 sc , 1 inc ) х 6 = 36 sc
7. ( 5 sc , 1 inc ) х 6 = 42 sc
8. ( 6 sc , 1 inc ) х 6 = 48 sc
9. ( 7 sc , 1 inc ) х 6 = 54 sc
10. ( 8 sc , 1 inc ) х 6 = 60 sc
Attach the legs: Now crochet the legs to the body. When attaching them, make sure that the place for the «toes» at the end is correctly aligned. When crocheting together, please check each foot carefully so that the toes are pointing forwards. Look at the photo for orientation.
11. 15 sc , 10 sc stitches together with the first leg,
take the second leg and insert it into the work crochet 10 sc together with the second leg, 25 sc = 60 sc
To make sure the doll can sit comfortably, take a look at the photo showing the correct position of the attached legs.
Creating the frame: We use two pieces of wire, each about 32 cm long. At one end, we form a small loop and place it inside the feet. Then, a bit of stuffing is added.
The next round is crocheted into the remaining stitches of both legs and the body.
12. 60 sc
13 – 16 = 60 sc
The increases are then made on the sides.
17. 6 sc, 1 dec, 24 sc, 1 dec, 26 sc = 58 sc
18. 5 sc, 1 dec, 23 sc, 1 dec, 26 sc = 56 sc
19. 5 sc, 1 dec, 22 sc, 1 dec, 25 sc = 54 sc
20. ( 1 dec, 7 sc ) х 6 = 48 sc
21 - 35. 48 sc
36. ( 1 dec, 6 sc ) х 6 = 42 sc
37 – 39. 42 sc
Round 40 – Attaching the arms:
Important note about arm placement: Make sure the arms stay in the correct position. Since everyone crochets differently – some tighter, others looser – the starting round may shift slightly to the right or left.
Be sure the arms are properly aligned so they are positioned symmetrically – on the right and left, like on a doll. Look at the pictures for orientation to make sure that everything fits exactly.
First crochet 8 sc together with the first arm, crochet 14 sc on the back of the body,
crochet 8 sc together with the second arm, crochet 12 sc on the front of the body = 42 sc
41. Now continue crocheting in a large round: 10 sc on the remaining stitches of the arm, 14 sc on the back, 10 sc on the remaining stitches of the arm, 12 sc on the front of the body = 46 sc
Insert framework into the arms: Place the free end of the wire on the arm and bend to form a suitable loop. Secure with adhesive plaster, then carefully insert into the arm and pad with filling material.
Repeat the same procedure for both arms.
42. 1 dec, 8 sc on the remaining stitches of the arm, 1 dec, 12 sc on the back, 1 dec, 8 sc on the remaining stitches of the arm, 1 dec, 10 sc on the front of the body = 42 sc
The pins in the photo show where to make the decreases.
Gradually fill the body with filling material as you crochet.
Now add the framework for the neck. Cut a new piece of wire about 18 cm long. Attach it to the main framework with adhesive tape, as shown in the photo. Leave most of the length outside.
43. 42 sc
44. ( 1 dec, 5 sc ) х 6 = 36
45. 36 sc
46. ( 1 dec, 4 sc ) х 6 = 30 sc
47. ( 1 dec, 3 sc ) х 6 = 24 sc
48 – 53. 24 sc
Bind off. To cut off a thread. To leave the small end of thread for further operation.
.JPG)
Now attach the head. Insert the wire through the center of the head piece. Twist it into a spiral – as shown in the photo. Then insert the plastic piece, which will press down and secure the wire. You can also add some glue for extra hold. Finally, sew the neck to the head.
You can add a few decorations to the doll – for example, a bow or little butterflies.
Now it can be used in many different ways! Whether filled with sweets or as an original container for a pretty bouquet of flowers - it always adds a special touch. And if the thought “Don't forget your keys!” is constantly running through your mind, it will gladly take on the role of reliable doorkeeper.
KNITTED CACHEPOT
When knitting, I used only two needles and sewed the pieces together at the end. That’s why my odd-numbered rows are knit stitches and the even-numbered rows are purl stitches. However, if you prefer to knit with three or four needles, then knit all the pieces entirely in knit stitches.
You will need the following materials to knitting:
– cotton yarn 50 gr/240 m (approximately 30 grams)
– spokes 2
– Needle, scissors, wire 1 mm in diameter, glue.
– Plastic bottle or bottle base: I used a 1.5 liter bottle for my project - it was perfect for my wool. If you are using a different wool, knitting the cachepot first and then check which bottle size fits best. I wanted to design this doll with slightly different proportions – with a smaller head.
Abbreviations:
CO – cast on
K – knit
P – purl
inc – increase
dec – decrease
Head
Cast on 70 stitches onto one knitting needle.
1. 70 K
2. 70 P
3. 70 K
4. 70 P
5. 70 K
6. 70 P
7. 70 K
8. 70 P
8. 70 K
10. 70 P
11. 70 K
12. 70 P
13. 70 K
14. 70 P
15. 70 K
16. 70 P
17. 70 K
18. 70 P
19. 70 K
20. 70 P
21. 70 K
22. 70 P
23. 70 K
24. 70 P
25. 70 K
26. 70 P
27. ( 5 K , 1 dec ) х 10 = 60 K
28. 60 P
29. ( 4 K , 1 dec ) х 10 = 50 K
30. 50 P
31. 50 K
32. 50 P
33. ( 3 K , 1 dec ) х 10 = 40 K
34. 40 P
35. ( 2 K , 1 dec ) х 10 = 30 K
36. 30 P
37. 30 K
38. 30 P
39. ( 1 K , 1 dec ) х 10 = 20 K
40. 20 P
41. 10 dec = 10 K
42. 10 P
Carefully fasten off the remaining stitches, fasten the thread securely and then cut. Sew the head together.
I used a bottle with a diameter of 7 cm and cut off about 5 cm in height. Make sure that your plastic part fits well with the knitted section. Both parts should fit tightly together.
Arms (2 parts)
Cast on 20 stitches onto one knitting needle.
1. 20 K
2. 20 P
3. 20 K
4. 20 P
5. 20 K
6. 20 P
7. 20 K
8. 20 P
8. 20 K
10. 20 P
11. 20 K
12. 20 P
13. 20 K
14. 20 P
15. 20 K
16. 20 P
17. 20 K
18. 20 P
19. 20 K
20. 20 P
21. 20 K
22. 20 P
23. 20 K
24. 20 P
25. 20 K
26. 20 P
27. 20 K
28. 20 P
29. 20 K
30. 20 P
31. 20 K
32. 20 P
33. 20 K
34. 20 P
35. ( 3 K , 1 dec ) х 4 =16 K
36. 16 P
37. ( 2 K , 1 dec ) х 4 = 12 K
38. 12 P
39. 12 K
40. 12 P
41. 6 dec = 6 K
42. 6 P
Binding off and sewing together: After binding off, fold the sides of the arms together and carefully sew them along the right and left sides to ensure a stable and even finish.
Legs (2 parts)
Cast on 26 stitches onto one knitting needle.
1. 26 K
2. 26 P
3. 26 K
4. 26 P
5. 26 K
6. 26 P
7. 26 K
8. 26 P
8. 26 K
10. 26 P
11. 10 K , 3 dec, 10 K = 23 K
12. 23 P
13. 9 K , 3 dec, 8 K = 20 K
14. 20 P
15. 20 K
16. 20 P
17. 20 K
18. 20 P
19. 20 K
20. 20 P
21. 20 K
22. 20 P
23. 20 K
24. 20 P
25. 20 K
26. 20 P
27. 20 K
28. 20 P
29. 20 K
30. 20 P
31. 20 K
32. 20 P
33. 20 K
34. 20 P
35. 20 K
36. 20 P
37. 20 K
38. 20 P
39. 20 K
40. 20 P
Binding off and sewing together: After binding off, fold the sides of the legs together and carefully sew them along the right and left sides to ensure a stable and even finish.
Body
Cast on 18 stitches onto one knitting needle.
1. 18 K
2. 18 P
3. 18 K
4. 18 P
5. 18 K
6. 18 P
7. 18 K
8. 18 P
8. 18 K
10. 18 P
11. 18 inc = 36 K
12. 36 P
13 ( 1 K , 1 inc ) х 18 = 54 K
14. 54 P
15. 54 K
16. 54 P
17. 54 K
18. 54 P
19. 54 K
20. 54 P
21. 54 K
22. 54 P
23. 54 K
24. 54 P
25. 54 K
26. 54 P
27. 54 K
28. 54 P
29. 54 K
30. 54 P
31. 54 K
32. 54 P
33. 54 K
34. 54 P
35. 54 K
36. 54 P
37. 54 K
38. 54 P
39. 54 K
40. 54 P
41. 54 K
42. 54 P
43. 54 K
44. 54 P
45. 54 K
46. 54 P
47. ( 7 K , 1 dec ) х 6 = 48 K
48. 48 P
49. ( 6 K , 1 dec ) х 6 = 42 K
50. 42 P
51. ( 5 K , 1 dec ) х 6 = 36 K
52. 36 P
53. ( 4 K , 1 dec ) х 6 = 30 K
54. 30 P
55. ( 3 K , 1 dec ) х 6 = 24 K
56. 24 P
57. ( 2 K , 1 dec ) х 6 = 18 K
58. 18 P
59. ( 1 K , 1 dec ) х 6 = 12 K
60. 12 P
61. 6 dec = 6 K
62. 6 P
Binding off and sewing together: After binding off, fold the sides of the body together and carefully sew them along the right and left sides to ensure a stable and even finish.
Now the doll is assembled with the wire frame. To do this, prepare the frame using two pieces of wire, each about 32 cm long. At one end, form a small loop, secure it with medical tape, and place it inside the feet. Then carefully guide the wire between the stitches of the body – in the spots where the legs will be attached. Pull the wire through the body so that the other end comes out at the designated positions for the arms, near the neck. At this end, form another loop after measuring the arm length. Secure it with medical tape and attach the arm pieces. Fill the legs, arms, and body with stuffing. Finally, position and sew the arms and legs in place.
Now we add the frame for the neck. Take a new piece of wire about 18 cm long. Next, attach the head: insert the wire through the center of the head piece. Twist it into a spiral – as shown in the photo. Then insert the plastic piece, which presses down and secures the wire in place. You can also secure everything with glue or sew it to the plastic piece. Finally, sew the neck to the head.
Delicate threads with small beads are perfect for this doll – they give it a fine, elegant touch.
I’m excited to see your unique doll creations and to find out what you’ve filled them with! Every little detail makes them special – get inspired and share your ideas!
.jpg)
.JPG)
.JPG)
.JPG)
.JPG)
.JPG)
.JPG)
.JPG)
.JPG)
.JPG)
.JPG)
.JPG)
.JPG)
.JPG)
.JPG)
.JPG)
.JPG)
.JPG)
.JPG)
.JPG)
.JPG)
.JPG)
.JPG)
.JPG)
.JPG)
.JPG)
.JPG)
.JPG)
.JPG)
.JPG)
.JPG)
.JPG)
.JPG)
.JPG)
.JPG)
.JPG)
.JPG)
.JPG)
.JPG)
.JPG)
.JPG)
.JPG)
.JPG)
.JPG)
.JPG)
.JPG)
.JPG)
.JPG)
.JPG)
.JPG)


